


Editor’s note: If you’re unfamiliar with what a hamon is, read this article first.
A hamon is made using completely traditional methods. The description provided here is intended to explain the method and details as used by world-renowned Japanese swordsmith Yoshindo Yoshihara, though there are variations in the details of the technique as used by other swordsmiths.
Basically, the swordsmith coats the edge region where the hamon will be with a thin clay layer. He then coats the upper part of the blade with a thicker clay layer above where the hamon will be. A series of clay strips (ashi) are placed across the entire width of the blade from the top surface down to the edge, and the clay ashi determine where the ashi—the extensions that run perpendicular to the sword’s lengthwise direction—will form in the hamon. The boundary line between the two clay types, along with the ashi, will completely define the resulting hamon.
However, the final results also will depend on the steel, the temperature the blade is heated to during the yaki-ire process—which the smith judges by eye—the clay pattern on the blade, and the swordsmith’s skill and experience.
Making Hamon: The Steel

Japanese swordsmiths use steel called tama-hagane. It is the traditional Japanese steel used for swords and tools since iron and steelmaking was introduced to Japan. A very important property of tama-hagane is its composition. It is almost pure iron and carbon, with very little traces of any other element.
The tama-hagane is forged out and folded over on itself an average of 12 times, though the exact number of times it is folded and worked depends on its carbon content and how it behaves during the forging process. The finished material usually will have a visible grain pattern on its surface—if it is polished properly— and a carbon content of about .6 to .7 percent, which is considered optimal for a traditional Japanese sword.
These properties are important considerations in making a hamon. The traditional method used to make the hamon was developed while working with this type of steel, and, thus, the steel composition is an essential element in making a traditional Japanese-style hamon.
During the early part of the 20th century, the Japanese military establishment wanted all officers to carry a traditional Japanese blade. However, it was impossible to make a sufficient number of swords using fully traditional methods. Consequently, many swords were made for military personnel using non-traditional methods. The primary labor-saving consideration was the use of modern—that is, early 20th-century—steel. Generally, the steel was salvaged from railroad tracks thus, the steel composition is an essential element in making a traditional Japanese-style hamon.
During the early part of the 20th century, the Japanese military establishment wanted all officers to carry a traditional Japanese blade. However, it was impossible to make a sufficient number of swords using fully traditional methods. Consequently, many swords were made for military personnel using non-traditional methods. The primary labor-saving consideration was the use of modern—that is, early 20th-century—steel. Generally, the steel was salvaged from railroad tracks and other structures, and most of it had been fabricated in the late-19th and early 20th centuries.
The steel was forged to shape and then a hamon was formed using traditional methods. Though traditional methods were used to make the hamon for the military swords, and hamon are clearly present, they usually do not appear to be quite the same as hamon made on swords formed from tama-hagane. The hamon are often not as bright as on traditional swords, and there are not many hataraki, or complex details, visible in such hamon. It is probably because the composition of the steel used in the “modern” blades is not the same as the composition of tamahagane.
This means that forming a traditional, complex-appearing hamon in modern steels may not be as simple as just carefully applying traditional procedures.
The Japanese method of making a hamon was developed over a 500-year period specifically to use with Japanese tama-hagane steel.
Tsuchioki: Applying The Clay
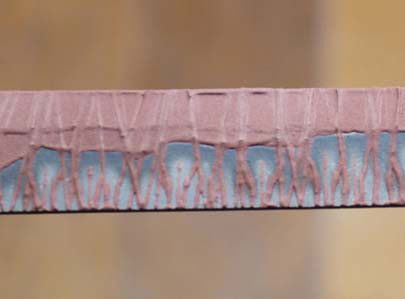
off, leaving a very thin, minimal layer on the hamon area. Note the ridge at the top of the clay layer. This will be the boundary of the hamon.
After forging, the blade is filed to shape, and the edge is left about .16 to .2 inch thick. If the blade has a sharp edge, it will likely crack during the yaki-ire process. If the edge is too thick during yaki-ire, the final pattern visible on the sharpened edge could be different from what was visible on the outside of the much wider edge during yaki-ire.
When the blade is ready to have the hamon made, it is cleaned again by polishing with the coarsest polishing stones, usually about 200 grit. Rough scratches from a coarse stone make it easier for the clay to adhere to the sword. After this polishing step, there is no contact between bare skin or fingers and the blade’s surface, because oil from bare skin can prevent clay from adhering strongly to the blade. From this stage until after yaki-ire, only the tang of the blade is handled.
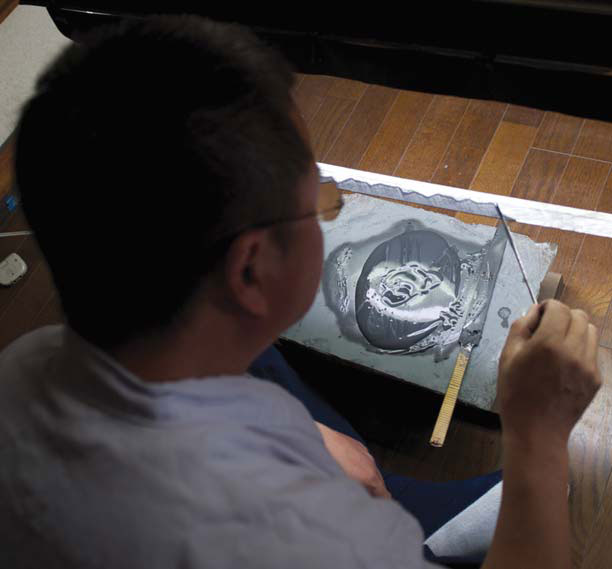
The process of placing a thermal clay layer on the blade to form the hamon is called tsuchioki.
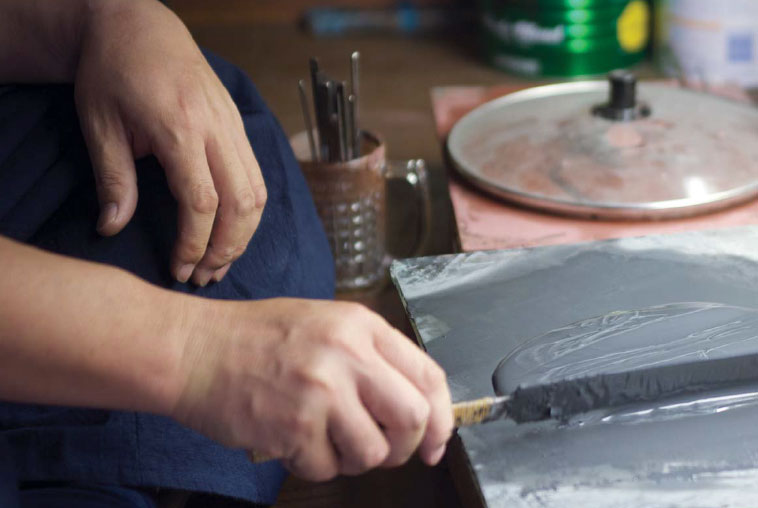
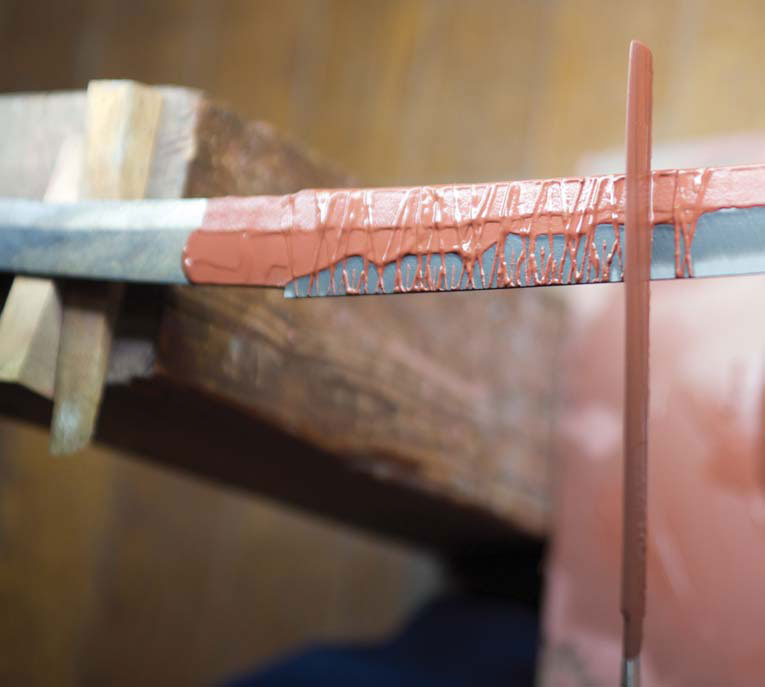
Several types of clay can be used. Yoshindo generally uses two types. To cover the edge region, he uses a black clay. It is composed of approximately equal part ground charcoal, clay and ground stone (omura-to or omura stone, a rough limestone used to shape new swords). The clay is spread over the hamon area and then scraped off to leave a thin, uniform layer. The hamon actually cools faster if covered with the clay than if left uncoated. This is because of the fine ground stone in the clay. The fine stone particles produce a rough surface and greatly increase the surface area and cooling rate over the hamon region.
Yoshindo uses a second clay to cover the upper part of the blade above the hamon which is not to be hardened, and also to form the clay ashi to define and form the hamon pattern’s details. The second clay contains ground charcoal, clay and kanahada—finely ground red iron oxide—and this clay has more effective thermal properties. Kanahada is the fine red iron scale that forms on iron or steel surfaces after the metal has been heated to a red or brighter color and allowed to cool. The scale is collected and ground into a fine red powder.
The quantities of the ingredients are approximately equal.
However, many swordsmiths use their own proprietary formulas and may use other ingredients, too. Yoshindo says the clay component is very important—he uses clay made for ceramic work—and the most vital consideration is that the clay must adhere very tightly to the sword.
Before the thermal clay preparations are used, the clay mixtures are worked slowly with water and a spatula until they form a thick, uniform paste. They are applied with a spatula to the blade. The technique requires some practice. Spreading the black clay over the hamon area is relatively straightforward. The second step is to spread the red clay over the upper part of the blade where the hamon will stop.
black clay.
Usually, a ridge is formed with the black clay at the top of the hamon area. The ridge is also the limit of the area where the red clay will be placed. The ridge is reinforced with the red clay and marks the contour that will form the top of the hamon. More red clay is then spread on the upper part of the blade and pushed down toward the hamon to the ridge formed earlier with the black clay.
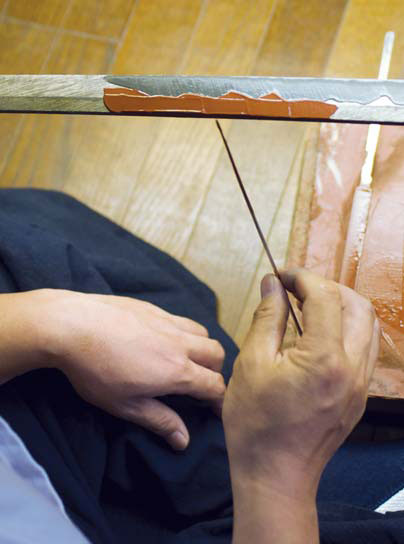
Once the black and red clays are in position, the ashi are placed on the blade.
Yoshindo uses the edge of a spatula for the procedure. The edge of the spatula is placed into the clay, and then the spatula edge is rolled across the width of the blade from the edge to the back (mune) in one stroke. The ashi can be perpendicular to the blade’s lengthwise axis. This will result in visible ashi in the final hamon that will be perpendicular to the hamon boundary.
The ashi can be very thin or thick and will contribute to the final appearance of the hamon. If the ashi are placed close together, the final result can be regular loops or waves, or gunome. To form choji-shaped loops (where the top of the loop is wider than the bottom), the alternate ashi are slanted in different directions across the hamon.

Even when a correct clay pattern is placed on the blade, the blade’s temperature at quenching is very important. If the blade is heated to the correct temperature and the ashi are designed to produce a choji hamon, the results should be satisfactory.
However, a set of ashi intended to produce a choji hamon could result in a gunome hamon if the temperature is too high. This means many factors must be correct to obtain the desired results, including the steel composition, the clay composition and placement, and the temperature of the sword when quenched.
Yaki-Ire: Heating and Quenching to Form the Hamon

photo)
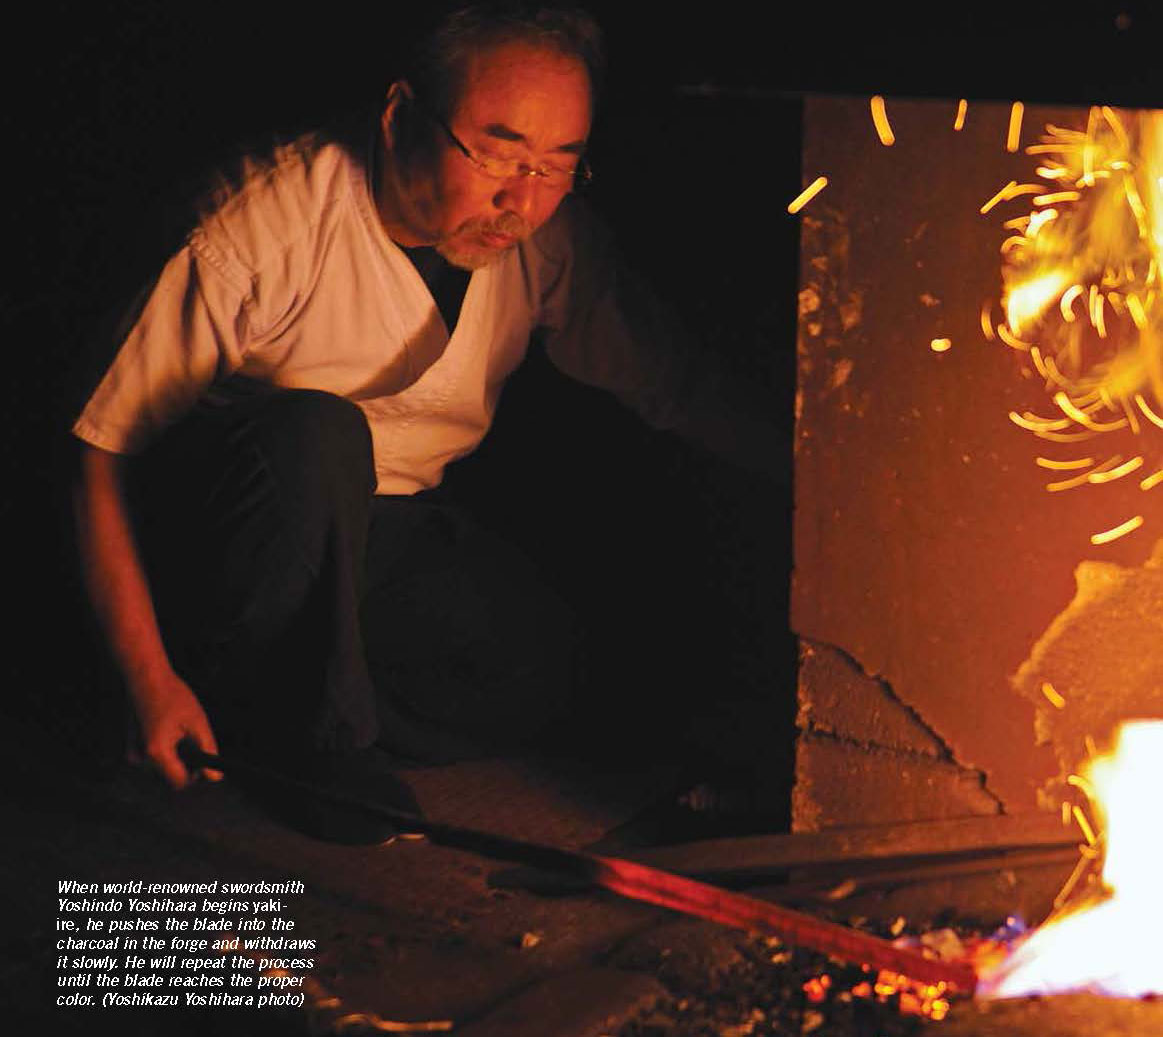
Heating and then quenching the blade in water in a process called yaki-ire forms the hamon. When the clay is dry and the blade is ready for yaki-ire, the blade is heated slowly in the forge. The charcoal used at this step is cut into very small, fine pieces, each about the size of a sugar cube. The charcoal must be of the pine variety.
Pine charcoal is very light and less dense than oak or hardwood charcoal. When cut into small-sized pieces, it can produce a very hot fire and rapidly heat the blade.
Another important detail is that the small, soft charcoal pieces will not damage or scrape off the blade’s clay coating while the blade is continuously pushed through the fi re in the forge to heat it.
World-famous Japanese swordsmith Yoshindo Yoshihara begins the yaki-ire process by pushing the blade into the forge slowly with the edge up, and then slowly pulls it out.
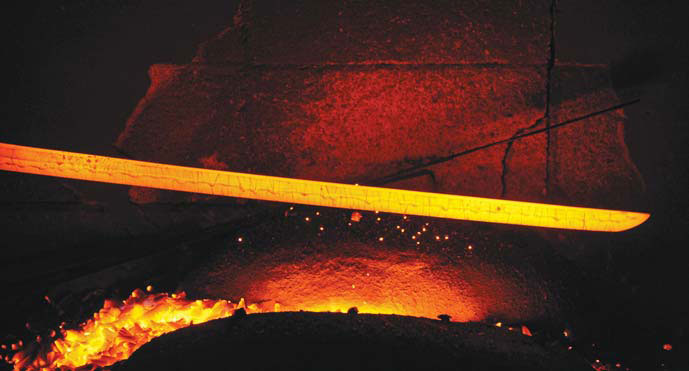
When the blade reaches a bright orange to yellow color, it is rotated and pushed into the forge with the edge down. Yoshindo will continue until the edge is visibly hotter and brighter than the body of the blade.
When the blade is ready, the edge will be brighter and hotter than the body, the clay boundary on the blade defining the hamon will be visible, the blade will be uniformly heated along its entire length, and the temperature (as judged by the color) will be correct. At this point, Yoshindo will pull the blade out of the forge and plunge it into a tank of water.
After the blade is removed from the water, it is inspected to be sure the clay coating has remained intact, and that the blade has experienced no severe flexing or bending. The final step is to anneal the blade because it will be too hard and brittle after the yaki-ire step.
The annealing step is called yaki modoshi. Yoshindo pushes the blade through the forge until it reaches a temperature of about 170° Celsius (338°F). Yoshindo can judge this from when the clay becomes dry and from other visual clues.
After yaki modoshi, the clay is removed and the blade is cleaned up rapidly with a grinding wheel under a water jet to prevent the blade from overheating.
The hamon easily can be seen at this stage after pouring a solution of 5 percent nitric acid over the blade. If the blade passes this inspection, the polishing process will begin.
Blade Stresses
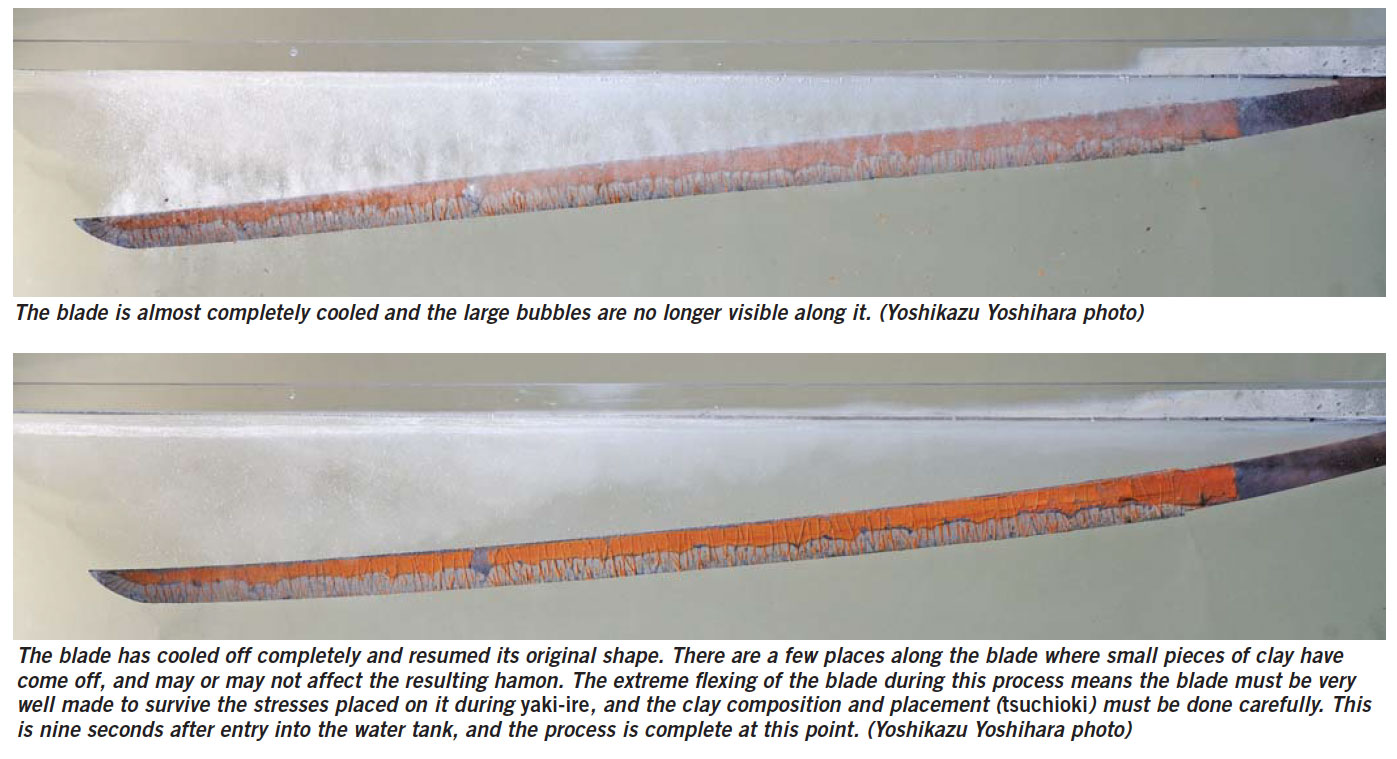
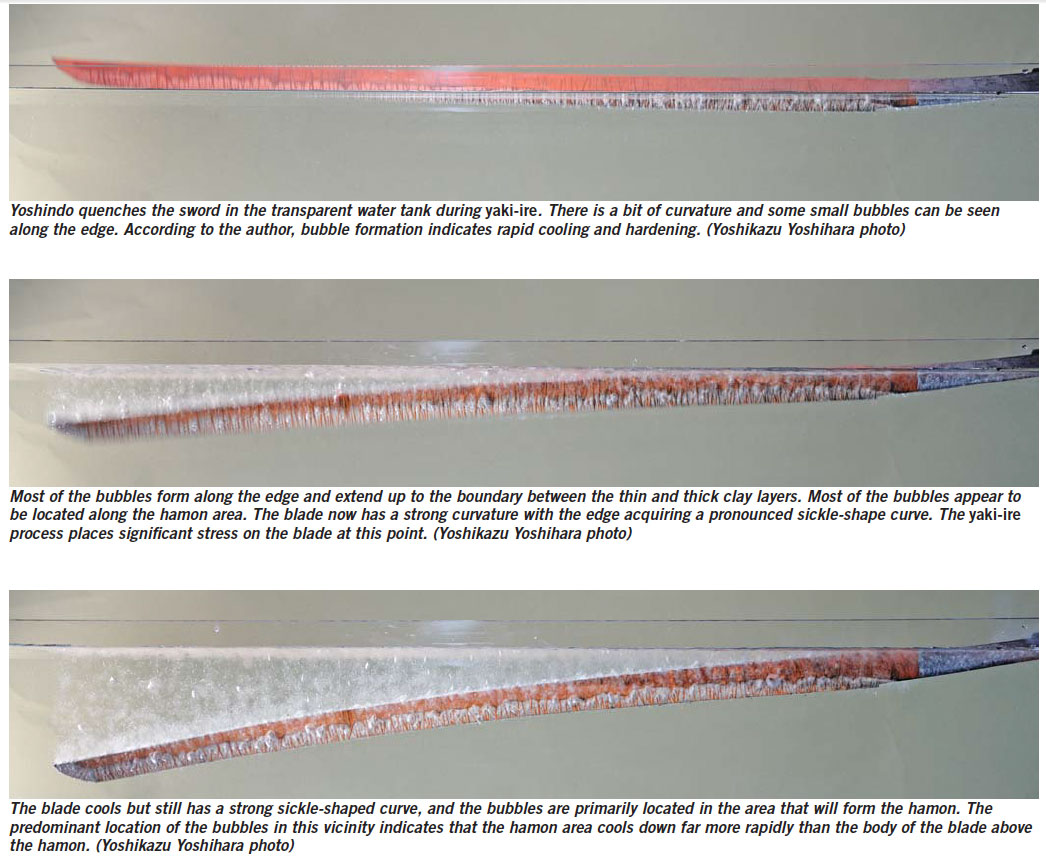
The accompanying photos taken of a transparent water tank built by Yoshindo and his son Yoshikazu shows how the blade behaves during yaki-ire.
When the blade enters the water, it is nearly straight. Shortly thereafter, the blade curves towards the edge. As the blade cools, it reverses the curvature and curves toward the back surface. Thus, a blade flexes twice during the quenching process: first strongly toward the edge, and then strongly toward the back.
At the end of the quenching process it may be nearly straight or have some degree of curvature toward the back surface. The degree of curvature remaining after yaki-ire may be fairly uniform or variable and almost random. The final curvature is produced by hammering and local heating to produce the precise curvature the swordsmith wants.
Hadaka-Yaki: Making a Hamon Without Clay
A hamon can be formed without using a clay layer, and one of the most famous schools of swordmaking, the Ichimonji School in Bizen circa the 13th century, used this method. The blade is prepared in the same way as described above, but no clay is placed on it. The blade is heated in the forge as before, first with the edge up, then with the edge down. When the edge is visibly hotter than the blade’s body, it is plunged into a tank of water.
The edge should be approximately 800°-850°C (1,472°-1,562°F), and the body of the blade should be approximately 750°C (1,382°F) or lower.
If the blade is prepared properly and heated correctly, an interesting hamon will form. This type of hamon can have abundant ashi and a gunome or choji hamon with plentiful hataraki.
However, the swordsmith will have no control over the final hamon form, and the hamon will vary with each hadaka-yaki attempt. Using a thermal clay coating allows an experienced swordsmith almost complete control over the final hamon, so most swordsmiths use clay today, though some swordsmiths do use hadaka-yaki to form the hamon.
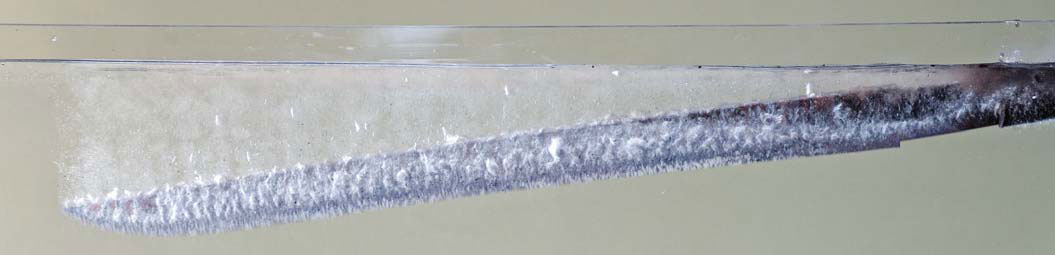
An accompanying photo shows hadaka-yaki (with no clay on the blade). The blade is a large hira zukuri tanto, so the extent of flexing is not as great as that seen with the katana or long sword. However, the pattern of cooling along the blade and bubble formation and distribution are clearly different for hadaka-yaki than for traditional yaki-ire. Far more bubbles form all over the sides of the blade with hadaka-yaki.
For yaki-ire, bubble formation is concentrated along the edge of the blade. Since bubble formation indicates rapid cooling and hardening, the cooling patterns and hamon will be different with the two methods.
Evaluating a Hamon
A hamon must meet certain criteria to be considered good or functional on a Japanese sword blade. There must be no nioi-gire or gaps in the nioi line defining the hamon. The nioi should form an even, wide and clear belt along the length of the sword. The hamon boundary (the habuchi), whatever its shape and style, should be clear and strong everywhere along the blade. There should be some hataraki or ashi, and a clear, recognizable pattern. The hamon on the point should be well formed and clearly visible. The hamon should form a good composition with and complement the blade so that the entire presentation forms an aesthetic whole.
It takes a considerable amount of experience and effort to make a properly formed and aesthetically complementary hamon on a Japanese sword blade.
It often takes years of experience before a young Japanese swordsmith can consistently make good hamon.
Learn More About Working with Steel
 NEXT STEP: Download Your Free KNIFE GUIDE Issue of BLADE Magazine
BLADE’s annual Knife Guide Issue features the newest knives and sharpeners, plus knife and axe reviews, knife sheaths, kit knives and a Knife Industry Directory.Get your FREE digital PDF instant download of the annual Knife Guide. No, really! We will email it to you right now when you subscribe to the BLADE email newsletter.


