
By Wally Hayes
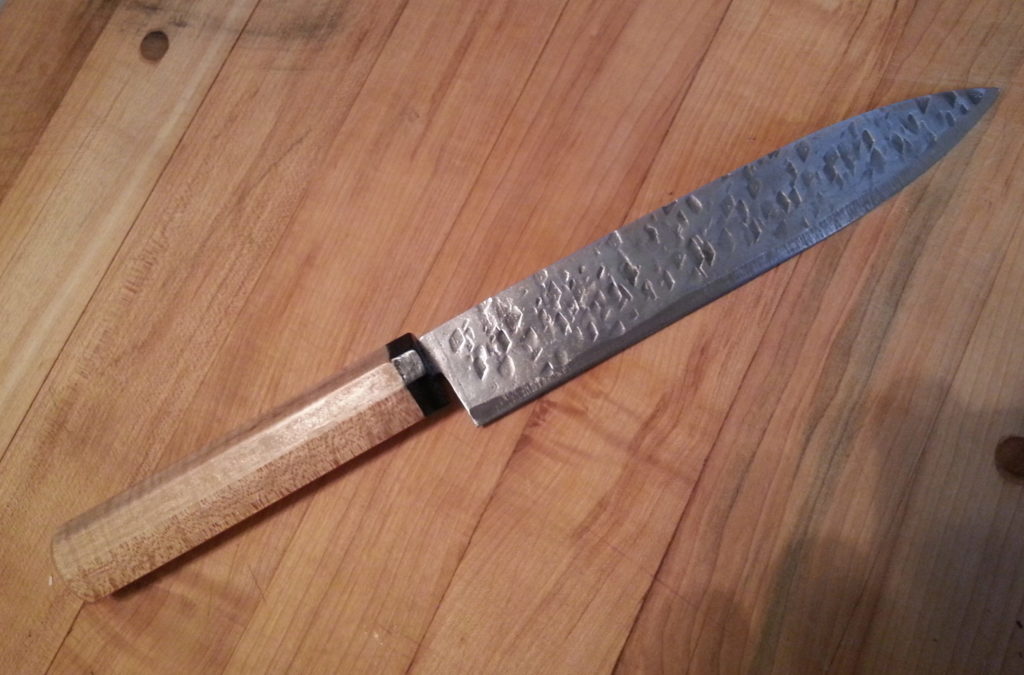
Sushi knives are light, thin, very sharp and a blast to make. Here’s how I make them from start to finish.


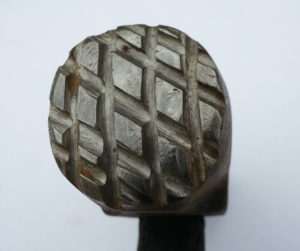
For blade material I use 90-thousandths-inch thick 15N20 carbon steel from New Jersey Steel Baron. First, I cut the blade to shape, around 7 inches long. The tang is about 4 inches. I take one of my old hammers and cut a cross hatch into the face using a side grinder with a cut-off wheel.
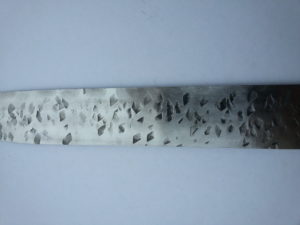
Then I heat up the blade in my forge and hammer a textured finish into the steel. This takes about five heats and is lots of fun! I put dents into both sides of the blade and then make sure it is straight. The reason for the texturing on the surface of the steel is to create air pockets so food does not stick to the blade.
If you want to push the forging experience, forge in the bevel on one side for your edge. Use a regular hammer. It will be a chisel-ground blade, so don’t hit the edge with your texturing hammer. Hammer an eighth of an inch back from the edge.
NORMALIZING
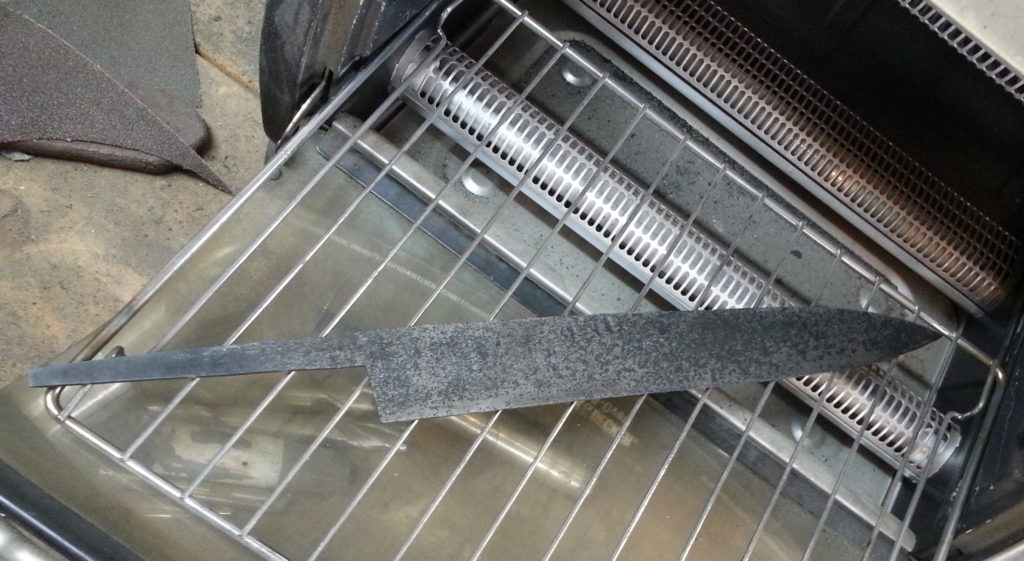
The next step is to normalize the blade. Heat it to critical temperature—a steel blade reaches critical temperature when a magnet does not stick to it—then let it air cool. After you heat the blade to critical temperature, quench it in warm Fensoil or Parker Oil, both of which are fast-quench oils made for heat treating steel. Vegetable oil also will work.
Clean the blade after it cools and place it in a toaster oven heated to 375°F for one hour. Look at the blade and see if it is straight. If it is bowed, secure it to a scrap piece of steel with a metal clamp and press the warp out, then return it all clamped up to the toaster oven. Temper it for another hour. This works really well.

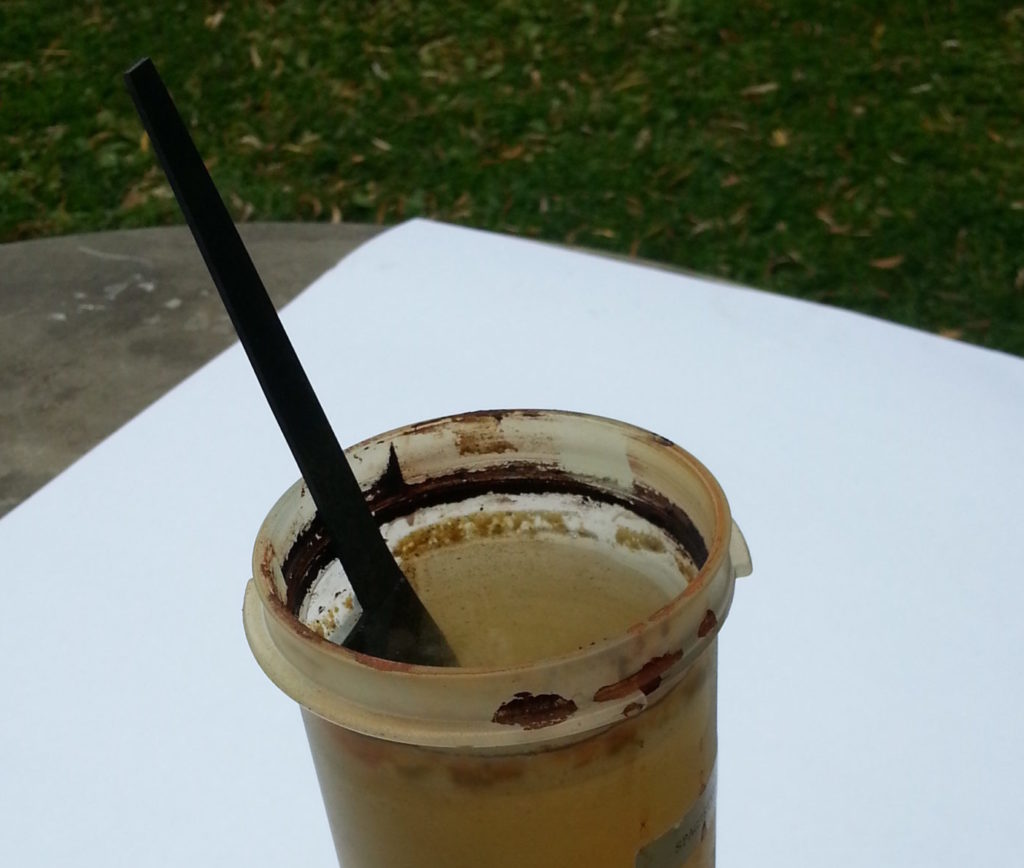
To remove all scale and the black from the blade, place it in a plastic container with vinegar for one day. Rinse with water and baking soda and wash the blade. Scrub it with a paper towel. From there I use a little wire-wheel brush on my drill press to brush off everything and make it all silver and bright. Next I sand the blade on a medium Scotch-Brite™ belt to round the top edges and smooth out the blade surface.

This is the time to grind in your edge. Don’t get the blade too hot during grinding or you may remove the hardness. When the blade gets hot, dunk it in water to cool it. I chisel grind it on the right side so I can get paper-thin cuts with it.
The HANDLE
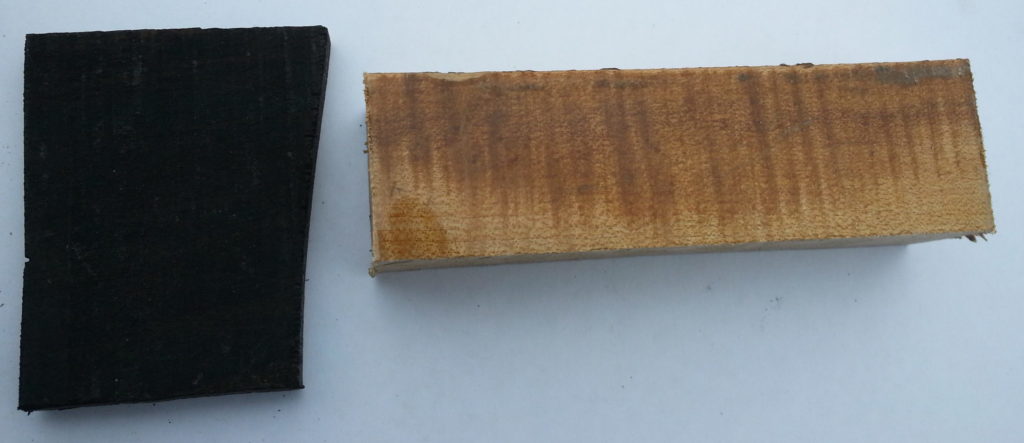
Time to make the handle. Use whatever material you like. I like cocobolo and ebony best as they are very easy to finish. I used maple and ebony for the handle of the knife for this project.
I make the handle in two parts. The front spacer is ebony about a half-inch thick. Sand the sides and ends of the blocks of wood on a disc sander. Disc sanders seem to work better than belt sanders to get a flat surface. Use a 1/16-inch drill bit to drill the front spacer and then use a small saw to open it up to fit the tang. The longer handle section can be drilled out and fitted easily. I grind down a drywall saw to fit into the hole to make a slot—this works great. Use epoxy to glue the parts together.

When the glue dries, I sand the handle into an octagon shape and then hand sand it to 600 grit.

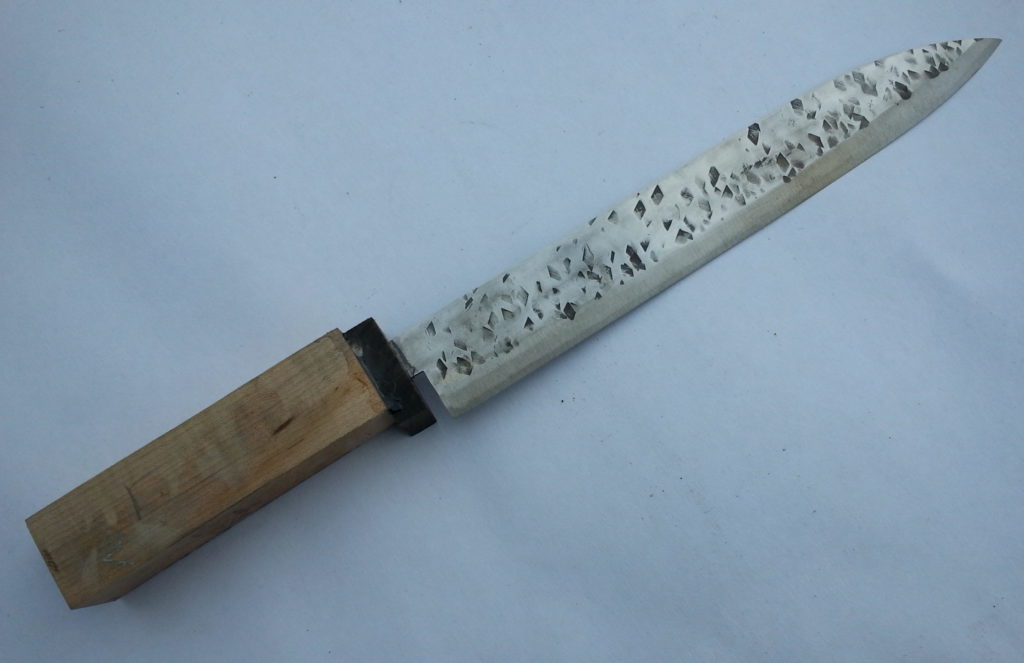
For the maple handle I used many coats of Krazy® Glue for the finish. I paint the coats on then sand and buff. Cocobolo can be finished on a fine Scotch-Brite belt and then buffed and oiled. I use a food-friendly oil like walnut oil. To sharpen the blade use a 7,000-grit Japanese water stone.
Try this project—you’ll like it. It is really a fun knife to make.

BLADE’s annual Knife Guide Issue features the newest knives and sharpeners, plus knife and axe reviews, knife sheaths, kit knives and a Knife Industry Directory.
Get your FREE digital PDF instant download of the annual Knife Guide. No, really! We will email it to you right now when you subscribe to the BLADE email newsletter.
Click Here to Subscribe and get your free digital 2024 Knife Guide!