


Elevate your survival skills with these bushcraft tips!
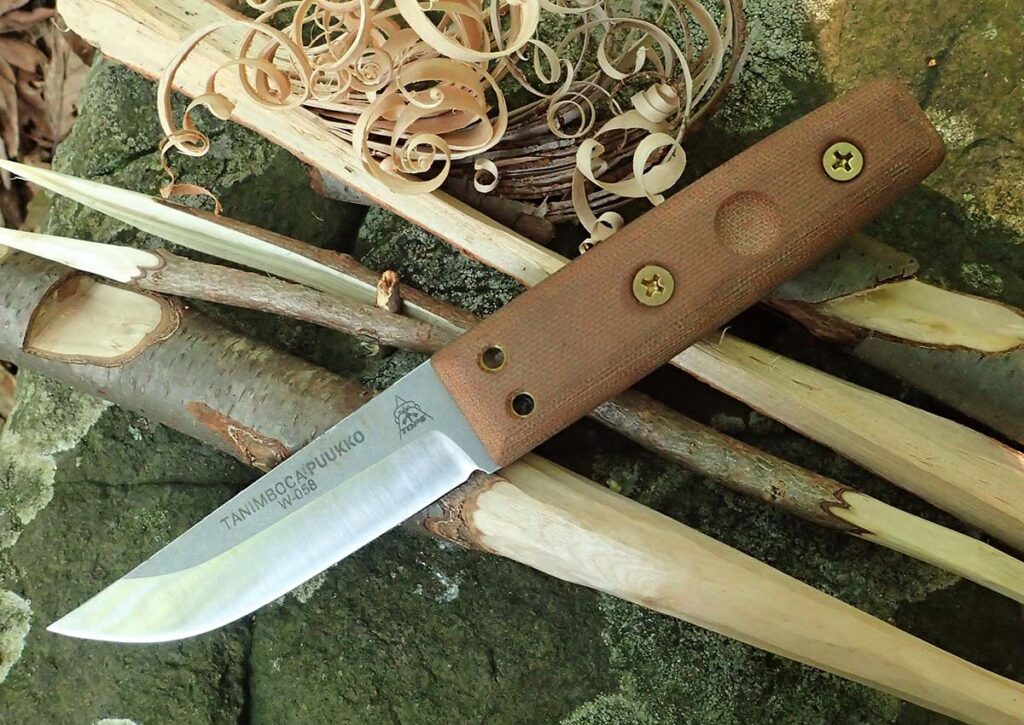
A good bushcraft knife is characterized by its manageable size and weight, allowing for comfortable handling and easy resharpening.
Typically, a knife designed for bushcraft and carving tasks lacks spine gimping for the thumb. The cutting edge should have a continuous curvature that extends the entire length of the blade. A general-purpose bushcraft knife should have a blade that matches the width of your palm, with the tip aligned closely to the handle’s centerline. The handle and blade spines should remain on the same line.
The handle should feature an oval cross-section made from such materials as wood, Micarta® or plastic. It should not include finger cutouts that limit your grip, as such restrictions can lead to blisters. The handle length should fit comfortably in your palm. While Scandinavian blade grinds are standard for bushcraft knives, other blade grinds are also acceptable.
To quote Mors Kochanski, Canadian bushcraft and wilderness survival instructor and author of Bushcraft: Outdoor Skills and Wilderness Survival, “The knife is the smallest and most portable of all the cutting tools. Light and unobtrusive, the knife is readily available for hundreds of everyday tasks in bush living.”
Knife Safety
Always start with a safety briefing when working with tools, especially those that can cause serious injury. Books and teachings have provided several tips and procedures for knife use and safety. One key concept is the blood circle.
Stretch out your arm with the knife in hand and ensure you can make a complete circle without hitting anyone or anything, including tarps, backpacks, tents and water containers. The blood or death triangle is crucial when sitting and carving. Never use your leg as a backstop or cutting board. When removing large amounts of wood, cut to the side of your body on your dominant knife-hand side or lean forward, resting your forearms and elbows on your knees, keeping your work project and knife out of your blood triangle. Remember the blood circle. Some cuts, like a pull-cut, allow you to cut toward yourself in a controlled, slow manner, but generally cut away from yourself.
Bushcraft Grips And Cuts
- Forehand (Fist) Grip: The forehand grip is the most basic and natural way to hold objects securely. This grip is ideal for power cutting, allowing you to roughly remove a significant amount of material to shape the wood. To use this grip, curl all your fingers around the handle, creating a fist. Avoid placing your thumb on the knife’s spine, an everyday habit. Hold the wood off to the side, with the blade tip pointing slightly upward, and slice from the base of the blade to the tip. Lock your wrist and elbow and use your shoulder to push down as if punching through the floor. The motion resembles shrugging your shoulder. Alternatively, you can adapt this technique by pulling the wood back against the knife using your work hand.
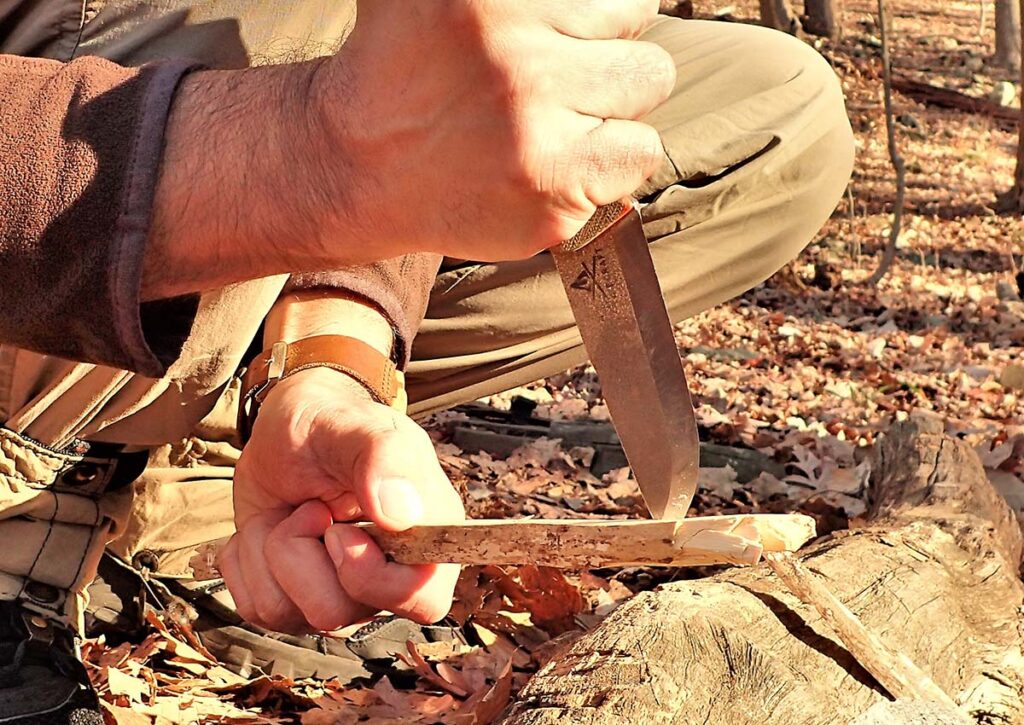
Pro Tip: This is not a jarring-of-the-elbow motion. - Thumb-Assisted Push Cut: This is commonly called a scissor grip cut. When viewed from above, the arrangement of the wood and the knife resembles the operation of scissors. It involves a thumb-assisted push cut, where the non-dominant hand’s thumb helps cut. The blade and wood pivot together like scissors, while the thumb on the non-knife hand presses the back of the knife into the wood. This technique features a short-cutting reach, applies soft-to-medium force, and offers a high degree of control. It is a more refined and detailed version of the chest-lever grip with a thumb-assisted push cut.
- Chest-Lever Grip: The chest-lever grip is a powerful and controlled cutting technique commonly used in bushcrafting, characterized by a typical palm-up grip. To execute this cut, engage your lat muscles and leverage your body for power. Start by turning the knife blade outward to your right (if you’re right-handed) with your palm facing up. Grip the knife firmly, placing your thumb on the handle or side of the blade while your other hand holds the workpiece. Once the blade contacts the area you want to cut, rotate your shoulders forward and pull your hands apart as your shoulders open up, leveraging against your torso. Keep your hands connected to your ribs throughout the process. This technique and the forehand grip allow you to make powerful cuts for removing significant amounts of wood.
- Peel Grip: Also known as a draw grip, apple peeling grip or paring grip, the peel grip facilitates more detailed, finishing cuts rather than powerful ones. Use it to finish the ends of a spoon handle, shape the top of the spoon bowl, chamfer a tent stake or trim wood to achieve a flat surface. To execute the peel grip, hold the knife in a reverse position with the blade facing you. Place your fingers on the back of the knife handle, positioning your thumb on the back end of the workpiece while your other hand clasps the work. Keep your knife-hand thumb out of the blade’s path as you close your hand into a loose fist, allowing for a slow, controlled cut. Author’s note: This grip is helpful for precise carving and finishing the edges of items.
Bushcraft Techniques
After addressing the basic grips, it’s time to learn a few helpful knife techniques commonly employed in bushcraft. Practice them at a comfortable pace and avoid rushing.
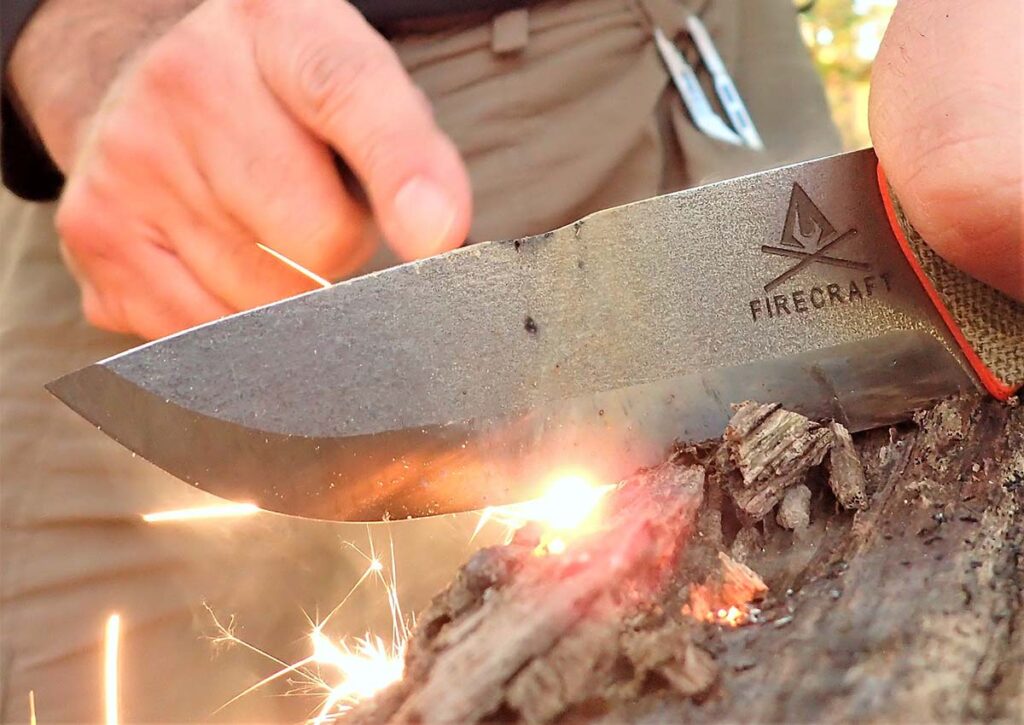
- Bushcraft Batonning: A knife alone often lacks the weight needed for effective chopping. However, striking the blade’s spine with a heavy object can produce strong cuts. A sturdy, comfortably held stick serves as a baton to help cut down and limb small trees, making various cutting tasks much more straightforward. You can quickly cut through branches and small saplings using a knife and a baton. Bushcraft batonning describes using a baton for controlled cross-grain cuts, creating V-notches and splitting wood no wider than your wrist. Using a baton for limbing branches generally proves faster and safer than using an axe.
- Beaver Chew: To cut a green or dry branch to the desired size, use the beaver chew technique, which leaves a somewhat rounded end for pounding into the ground. Make a series of cuts (nicks) around the stick. Thicker sticks require more time, so repeat this process several times, cutting deeper with each pass. Once the cut is halfway or two-thirds through the stick, you can break it off and trim the end.
- Tension Cutting Saplings: To take down small green trees up to wrist size in thickness, first apply tension by bending the tree while holding it firmly with one hand. Start your cut at a 45-degree angle at the bend point, where the stress is most significant. There’s no need for a sawing motion; instead, use a gentle rocking back and forth with the blade to slice through the fibers under tension. Be careful during the crucial last part of the cut, as you need to restrain the tree from falling prematurely, which would require extra work to finish the cut. If done correctly, this process should take no more than 10 seconds.
To section long saplings, step on the top to hold it and bend it over your thigh or hip. Cut the bend to ensure avoid cutting yourself during the follow-through.
Pro Feather Sticks
Creating tinder by shaving very thin pieces and kindling from deadwood is known as making a feather or fuzz stick. You can use various techniques but here’s the most basic approach.
Start with a forehand grip and resist the urge to place your thumb on the spine of your knife. Using gimping or a gimping grip applies uneven pressure, which often causes feathers to detach from the stick. When you reduce green wood for carving projects, think ahead and keep the shavings for fire making, regardless of their thickness. Thinly shaved greenwood dries quickly. Try to make them as thin as possible or save larger shavings to use as kindling. Emphasizing multi-use and maximizing the utility of everything you work on and cut truly embodies bushcrafting!
Try Stick It!
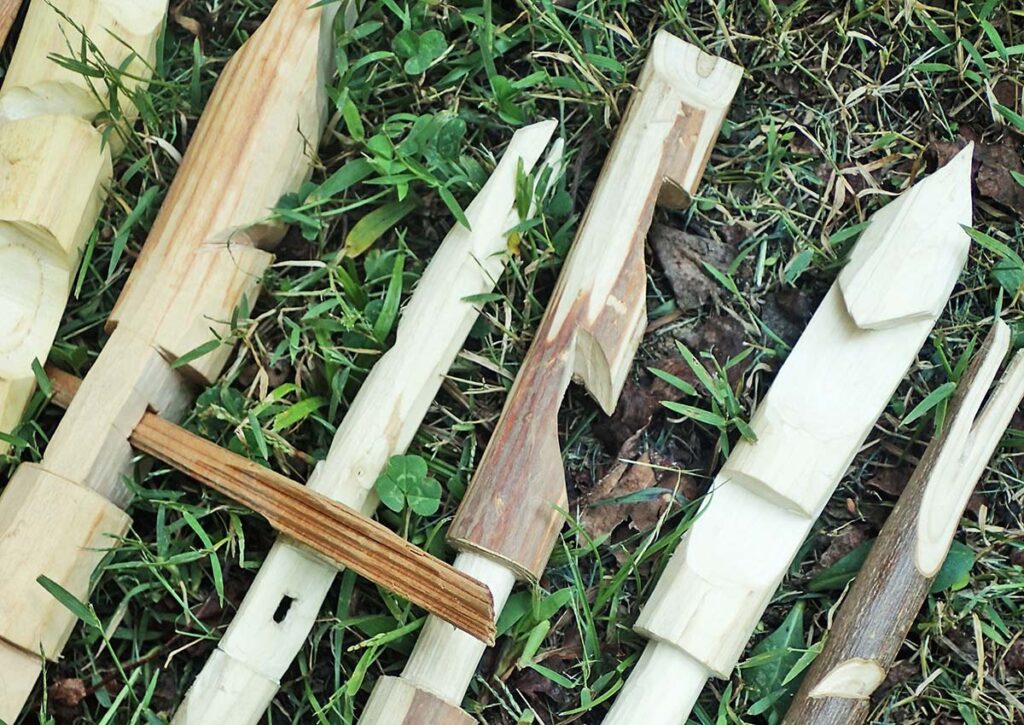
The Try Stick, made famous by wilderness educator, survival instructor and author Mors Kochanski, is a tool designed for practicing and showcasing knife skills in wood carving. While some notches are functional and often used to create items such as tent pegs, pot hangers and digging sticks, many notches on a Try Stick are more decorative and less commonly utilized. You can incorporate around 17 different types of notches on a Try Stick, but including as many as possible is typical. There’s no required number of notches to create; a Try Stick focuses on knife handling and safe practice.
Try Stick Notch types include:
- Round Notch
- Pot Hook
- Saddle Notch
- Square Notch
- Mitred Lapped Notch
- Jogged and Wedge Splice
- Dovetail Pin and Socket
- Dovetail Notch
- “V” Notch
- Spear Notch
- Knife Tip Mortice
- Diameter Reduction
- Knife Edge
- Split
- Bow Notch
- Latch Notch
- Bark Stripping
- Whistle Project
Check Out More Outdoor Knives:
- NESSMUK KNIFE: OPTIONS IN THE ALL-AMERICAN OUTDOOR KNIFE
- BEST TOMAHAWKS: OUR TOP HAWKS FOR BACKWOODS TO BATTLEFIELDS
- BEST BUSHCRAFT KNIFE: WHEN STEEL MEETS THE WOODS
- BEST EDC FIXED BLADE KNIFE: A CUT ABOVE THE REST
- BEST CAMP KNIVES: OUTDOORS DO-ALLS
 NEXT STEP: Download Your Free KNIFE GUIDE Issue of BLADE Magazine
BLADE’s annual Knife Guide Issue features the newest knives and sharpeners, plus knife and axe reviews, knife sheaths, kit knives and a Knife Industry Directory.Get your FREE digital PDF instant download of the annual Knife Guide. No, really! We will email it to you right now when you subscribe to the BLADE email newsletter.


