


Dellana tells how she created and makes the Dellana Dots opening assist system—without a lathe.
Editor’s note: Full-time knifemaker Dellana created her Dellana Dots blade-opening assist system in 1994. The system consists of one or more elements raised above the surface of the blade to provide a gripping surface when opening a folding knife. Dellana Dots can be made using different techniques depending on your skill set. They can be any shape, from round to geometric to even gem set. There can be any number or shape of the Dots. Dellana most frequently makes them as round beads. In this tutorial, she shows how she does it.
Dellana Dots were invented for the same reason many things have been invented—a desperate need to solve a problem!
In 1994 I was a very new knifemaker studying under the mentorship of the great ABS master smith, Jim Schmidt. I was working on my second lockback folding knife, one of my own design. All was going well until I realized that the blade sat too far into the knife when closed because of the thickness of the handle scales. Due to my inexperience, I had not considered the scales’ thickness. It was evident that it would be very difficult for the knife to be opened without effort and annoyance.

What to do?
The obvious solution was the commonly used nail nick, the ditch grooved into the blade for a thumbnail to try to grab ahold of. I have always disliked the functionality—who else has broken or bent back a fingernail when trying to use one?—or the look of nail nicks. One of them would definitely not be visually appealing with the rest of the design of my knife, and that was unacceptable to me. So, I used my 17 years of experience as a goldsmith to figure out an acceptable solution.
I had used raised beads on many of my jewelry designs as decorative elements and thought that a raised bead might give enough surface area for a fingernail to grip—but how was I to attach the bead to the blade’s surface? The soldering that I would normally do would not work in this situation due to the blade needing to be heat treated. I thought that drilling through the blade and riveting might work if I could leave enough of one side of the rivet high enough above the blade surface to get a good grip.
I had never seen anything like it done on a blade before and wondered if there was some unwritten rule against that sort of thing. I decided to take the knife to Jim, explain the problem and my solution, and see what he thought.

Jim was a man of few words and his silence after I explained the issue was a bit nerve wracking for me. After what seemed an interminable amount of time he said, “That’s a great idea and I’m going to steal it. But I’ll call them ‘Dellana Dots.’” And that’s exactly what he did.
And there you have the story of how the Dellana Dots came to be. They have proven to be a popular solution for many makers of folding knives ever since.
Materials & Tools
I most often use an asymmetrical three Dellana Dot system because I find that configuration visually appealing with most of my designs. Here’s how I do it.
First are the materials and tools. You’ll need:
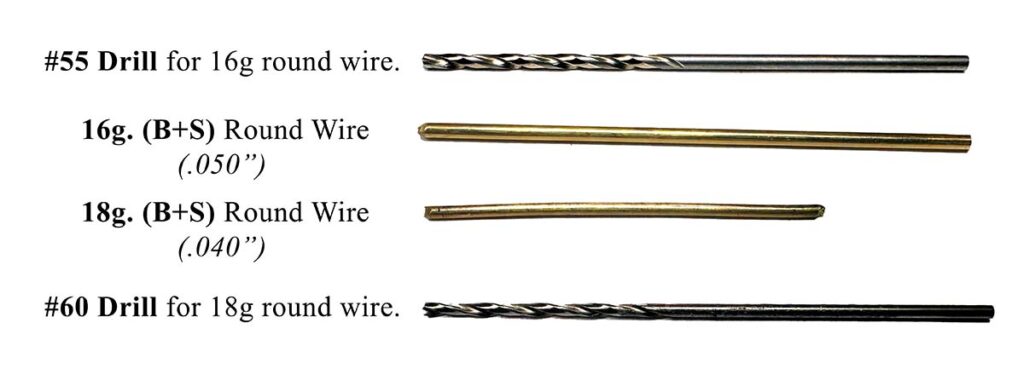
- Pin stock (B&S Gauge): 16g. (.050”) 14k yellow gold round wire and 18g. (.040”) 14k yellow gold round wire.
- Drills: #55 (16 gauge) and #60 (18 gauge).
Getting Started
Pro tip: Preparation is the key to creating anything efficiently and well. The more thorough the prep, the easier, faster and better the final process and end result will be.
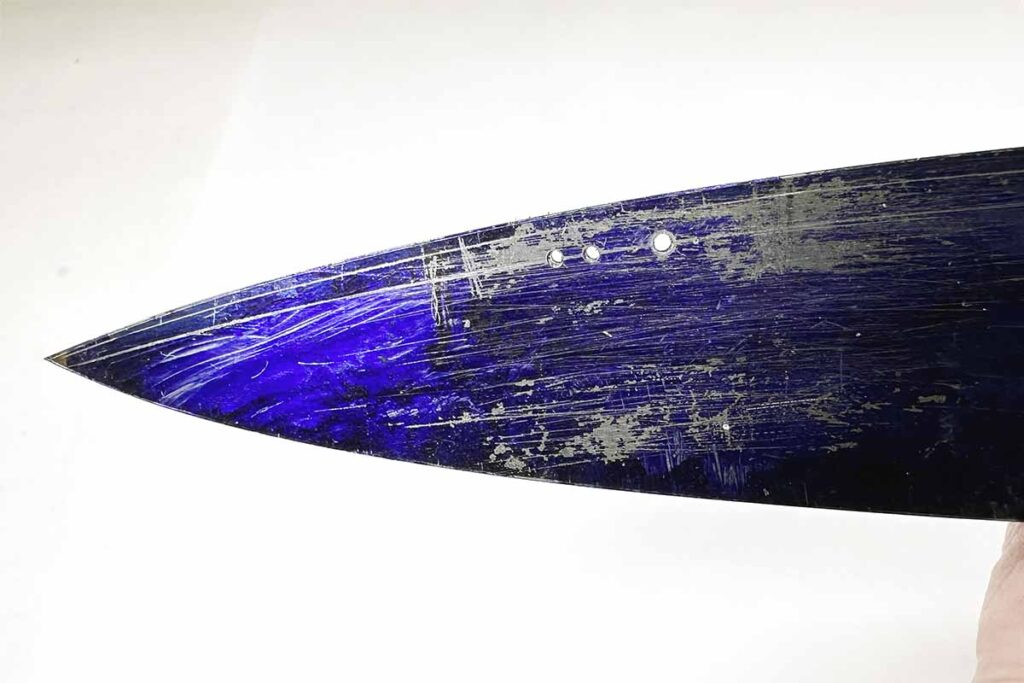
Step 1: Mark and drill the holes for the Dellana Dots’ round wires before grinding the bevels (Images 2 and 3).
Special Note A: If you grind the blade bevels before heat treatment, countersink the holes so the spheres sit down below the surface of the blade to avoid anything catching on them.
Special Note B: If you grind the blade bevels after heat treatment, drill the holes prior to heat treating and use diamond drills (dental burrs) to countersink the holes after grinding.
I countersink the holes on the front side (where the spheres will be) deeper than on the back (riveting) side. This allows the balled end of the wire to sit below the surface of the blade bevel to keep it from snagging on anything.
Step 2: Finish the blade. Make sure the blade is fileworked, etched (if damascus), blued and polished prior to riveting the Dellana Dots in place.
In the conclusion next time, pin stock prep, prepping the blade for riveting, riveting the Dots, and polishing the rivets and Dots.
More On Knifemaking:
- D.I.Y. POWER HAMMER: DO YOU REALLY NEED ONE?
- STAINLESS DAMASCUS: CHALLENGES IN FORGING
- STROPPING: WHAT IT IS AND HOW IT’S ACCOMPLISHED
- DIY ENGRAVING VISE OR BLOCK
 NEXT STEP: Download Your Free KNIFE GUIDE Issue of BLADE Magazine
BLADE’s annual Knife Guide Issue features the newest knives and sharpeners, plus knife and axe reviews, knife sheaths, kit knives and a Knife Industry Directory.Get your FREE digital PDF instant download of the annual Knife Guide. No, really! We will email it to you right now when you subscribe to the BLADE email newsletter.


