


Schwarzer’s blister busters and Terzuola’s effective efficiencies.
Editor’s Note: Jim Hammond has been a full-time knifemaker since 1977 and a member of the Knifemakers Guild since 1978. He was the first maker to work with CRKT and has many well-known designs to his name. This is the first of an ongoing column in which he uncovers the tightly held secrets of master knifemakers.
Welcome to Secrets of the Shop, where we dive deep into specific techniques and tips highlighted in the work of premier makers and knife smiths. While trade secrets often imply guarded formulas, for knifemakers, they are keystone discoveries that hone processes and perfect craftsmanship. This column seeks to turn these unrevealed secrets into shared solutions.
Popping Blisters
A veteran ABS master smith and BLADE® Magazine Cutlery Hall of Fame® member, Steve Schwarzer is probably best known for his pioneering work in the canister method of forging mosaic damascus. He is considered one of the finest instructors and ambassadors of the forged blade and of mosaic damascus, teaching at seminars and hammer-ins on the subjects for decades in Europe, South Africa, the USA and elsewhere.
During welding, a cold shut—a spot of incomplete merging of steel—can produce a trapped-gas bubble known as a blister. The spots where these void occur heat at different rates than the surrounding material and turn black. Often caused by worn and cupped dies, these blisters typically form along the billet’s perimeter.
Steve’s solution to addressing blisters is as follows:
- Release the Gas: Punch a hole directly into the blister.
- Flux and Forge: Drop borax into the hole and use a small rounding hammer to forge the area, pressing air out of the seam to recreate a uniform weld.
- Refinement: Check the surface for flatness. Steve utilizes belt and stone surface grinders to achieve trued flats and maximize uniform contact.
To prevent blisters, Steve welds the edges of a billet before the center using a radiused fullering die. Going this route is less prone to create blisters than a flat die, though more apt to distortion. This technique was vital when Steve and Neil Kamimura created a million-layer billet that was folded rather than stacked, requiring the resolution of numerous small cold shuts.
Mosaic On A Budget
While CNC and EDM equipment can create intricate designs, a more affordable approach involves the sintering process of canister welding damascus, a method originated by Steve and Daryl Meier.
Steve’s canister process is as follows:
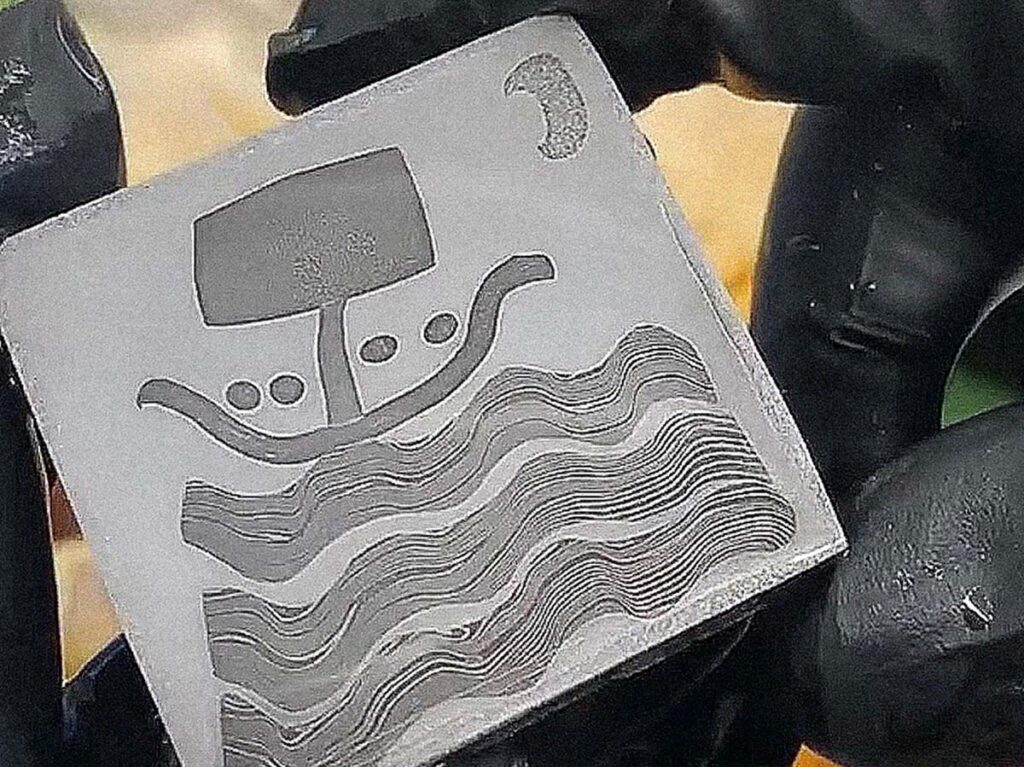
- Composition: A square canister is preferred to maintain the image’s shape using flat dies. Content determines the pattern—solid metals form the primary image, while powder fill creates the background.
- Preparation: Both ends must be welded shut to exclude oxygen.
- Release Agents: To free the billet from the canister, Steve uses white spray paint; the titanium dioxide acts as an immediate release agent, oxidizing upon heating. Other options include White Out and stainless-steel foil.
- Sintering: Steve recommends a soak time of at least 30-plus minutes. Expect a size reduction of roughly 30 percent as micro-spaces between particles collapse.
To expose the end-grain imagery, Steve uses what he calls a “tiling” technique. Band sawing sliced off the billet exposes the faces of the pattern. Then, forge-welding them side-by-side, he maximizes the visual impact across the blade’s surface. Note flat grinds are customary with this process, as deep grinding can distort the integrity of the imagery, especially with twisted materials.
For New Makers
Steve offers two foundational tips for those entering the craft. First bit of advice Schwarzer makes is to, “Avoid unknown materials, even if they’re free.” Without knowing the composition of “mystery steel,” you can never accurately repeat your results. He also suggests makers define their own path, saying, “Don’t chase anybody else’s dreams. Chase your own.”
Cutting Coupons
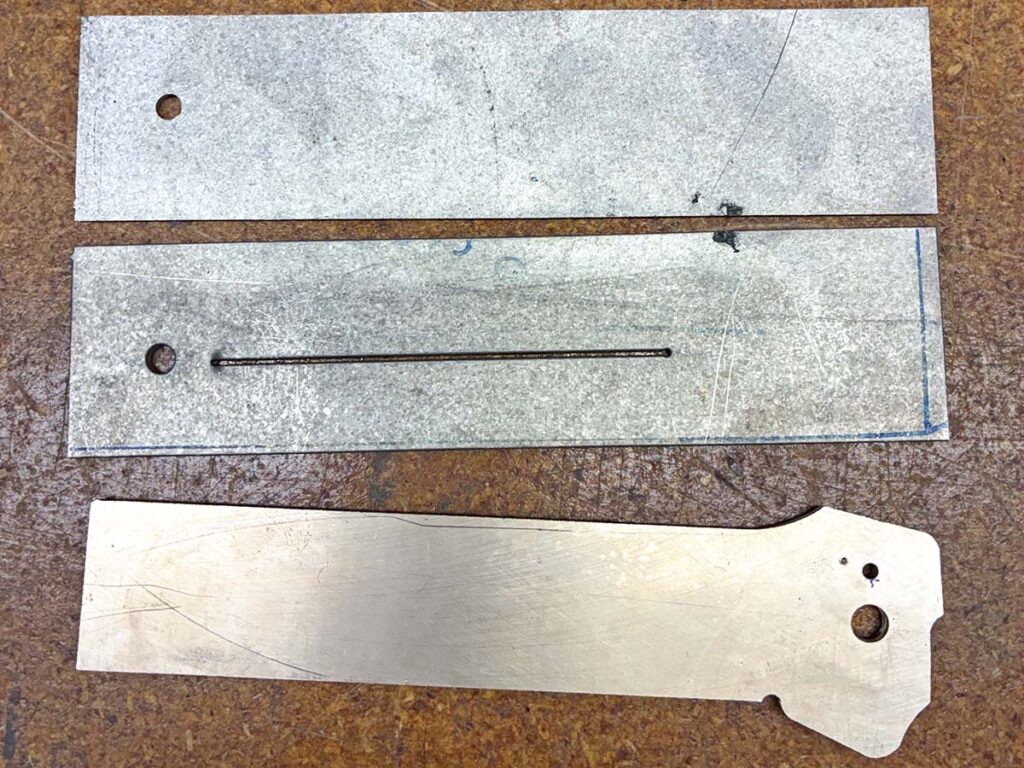
Known as the “Godfather” of the tactical folding knife, Bob Terzuola has been a full-time maker since 1980 and was inducted into the Cutlery Hall of Fame in 2023. His longevity in the craft stems from a blend of old-school design and modernized production efficiency. Terzuola was a pioneer in the mid-’80s, becoming the first maker to utilize laser cutting for components. Today, he uses waterjet cutting to create generic rectangular blade blanks and liner sections, which he calls “coupons.”
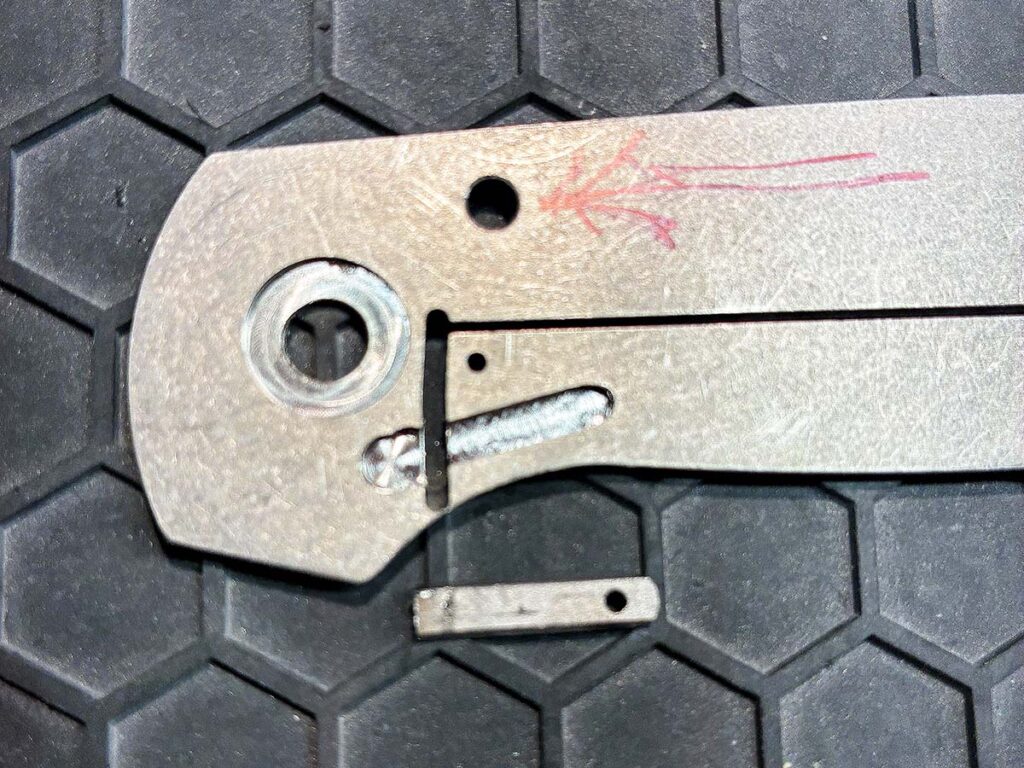
For the blade blanks, Terzuola profiles the rear area with the lock face, thumb ran and pivot/stop pin holes (roughed to 80 percent diameter). The rest remains rectangular, allowing him to incorporate any pattern with minimal grinding. Bob has his CPM 154 stainless steel blanks commercially surface ground to 0.135-inch before heat-treating them himself to HRC 59. For the liners—0.080-inch titanium in our discussion—the coupons are left square, containing only the pivot hole and the horizontal slot for the locking spring arm.
Notably, Terzuola grinds his blades after they are hardened. He argues grinding annealed steel can lead to warping during heat treat and causes the belt to gouge material. Grinding hardened steel, by contrast, is like slicing meat with a razor blade rather than digging dirt from a hole. Despite these modern efficiencies, he said he remains a “pencil-and-paper guy,” eschewing CAD for hand-drawn patterns to maintain design commonality.
Finishing Simplified
Bob’s finishing process for CPM 154 is remarkably lean. He utilizes a 90-durometer smooth-face rubber contact wheel and a simple two-belt sequence. First, he does a rough grind with an 80-grit ceramic belt, then finishes with a 3M Trizact A16 (1,200-grit) belt.
He specifically avoids 60-grit belts, noting that their mesh size is twice as large as 80-grit, creating scratches that are twice as deep and significantly harder to clean up. To ensure blade-lock longevity, he now uses a heat-treated 440-C stainless steel insert in the titanium spring arm. This provides a steel-on-steel lockup, eliminating the wear issues common with titanium.
For New Makers
Terzuola encourages beginners to find their own niche and not get locked into a single model. He emphasizes mastering the fundamentals with hand tools: learn to tap holes, use files and sharpen twist drills. He and I agreed, new makers should also gain proficiency with mills, lathes and surface grinders to be old-school efficient rather than purely CNC-reliant.
Read More:
- Japanese War Swords Part
- Scottish Swords: Cold Steel And CAS Iberia’s Tartan Edge
- Scissor Sword: Scissor Maven Grace Horne’s Prized Collectable
- Master Bladesmiths Showcase Their Best Long Swords


