Home Authors Posts by Travis Fry

Travis Fry

Dagger Design: Mastering Wire Wrapping The Handle

0

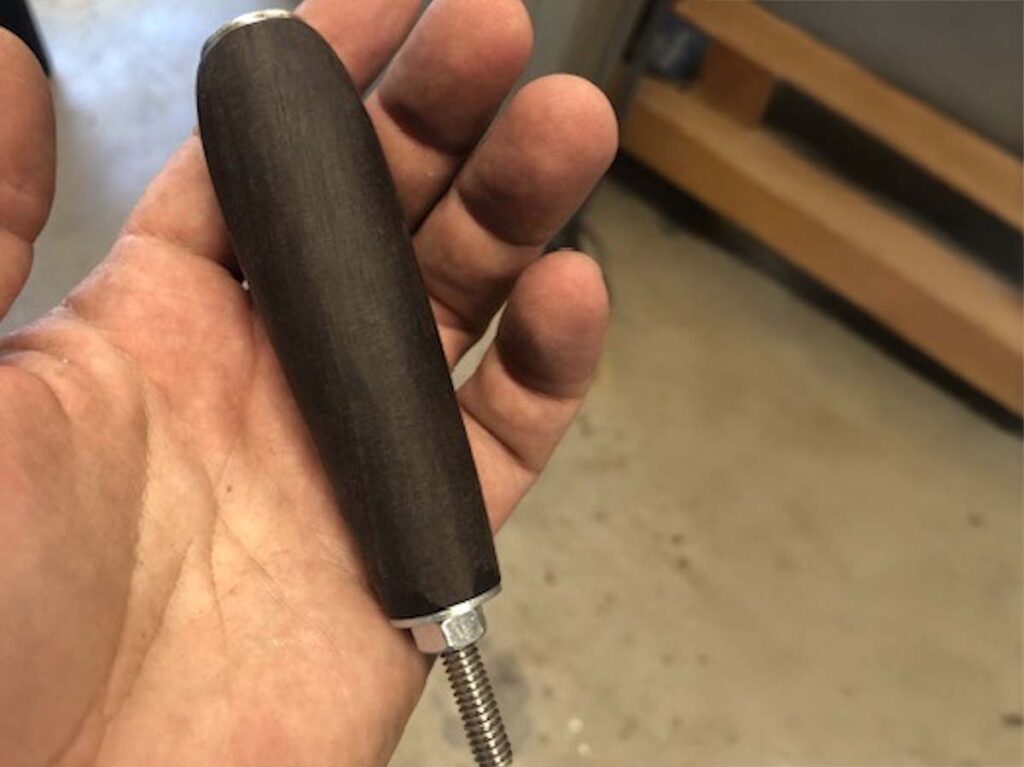
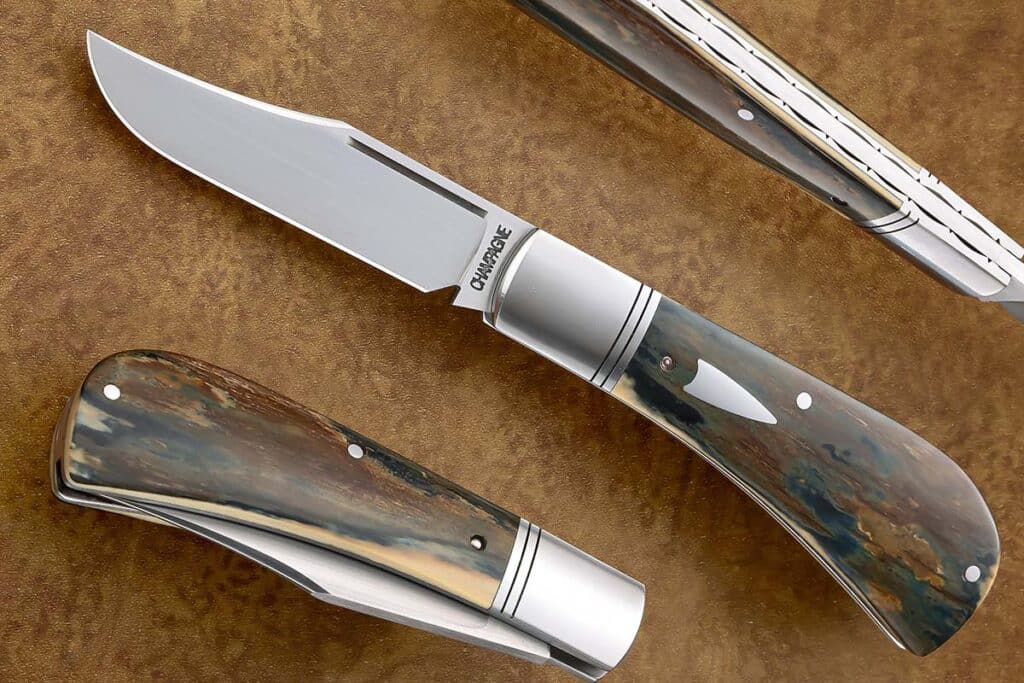
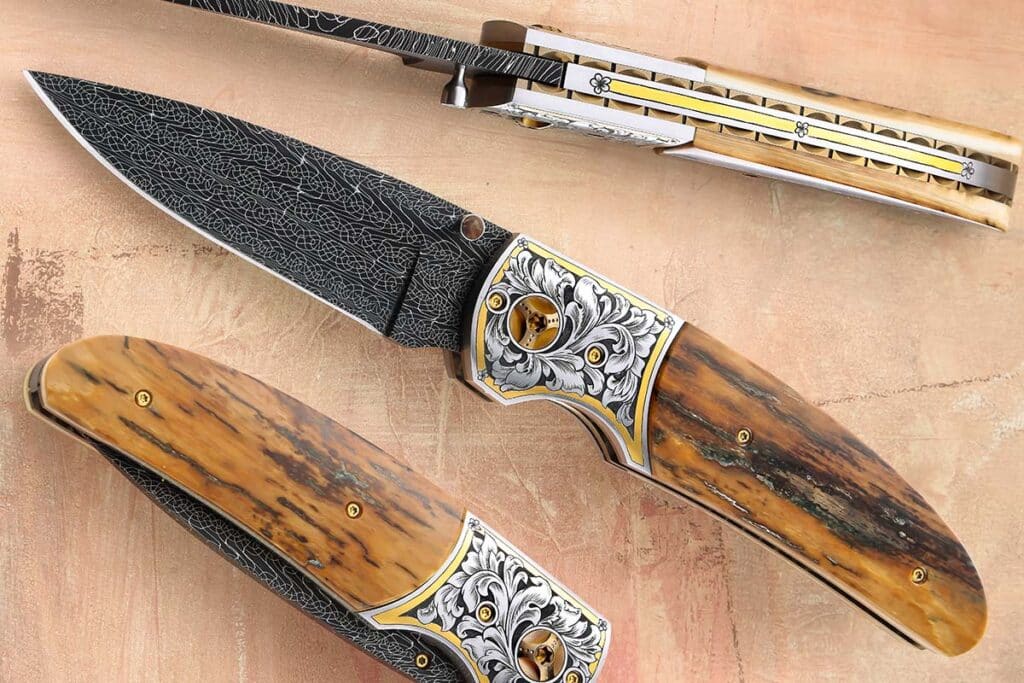
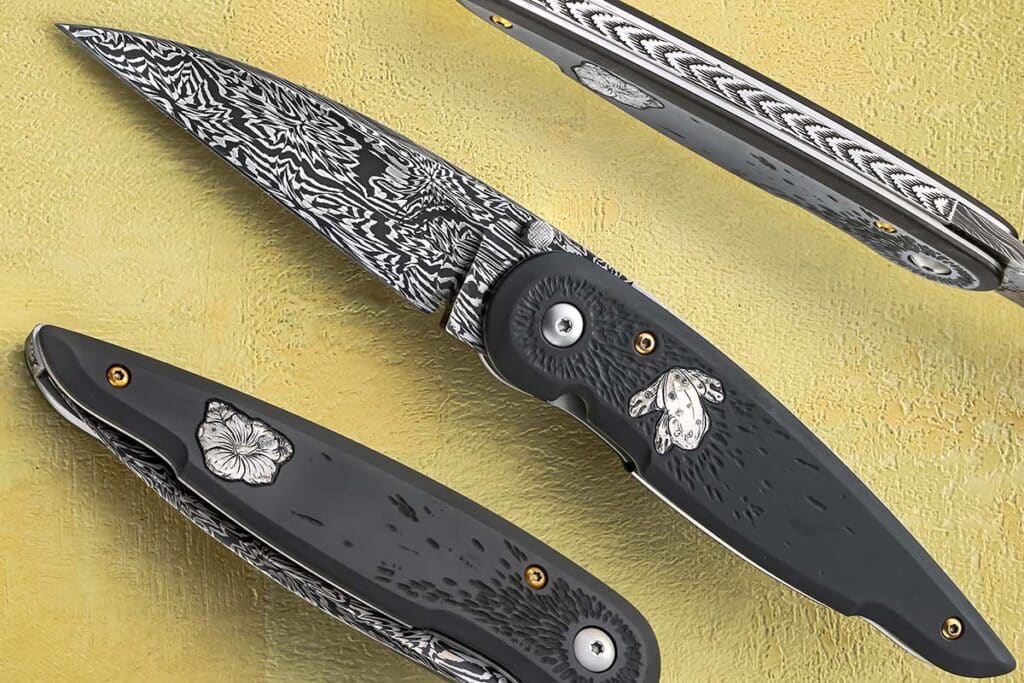
Wire wrapping the handle of a dagger is the finishing touch to the process, but requires a fine touch and patience.

Once the wire grooves and flutes are complete, the entire handle finished to its final state and the tang slot broached, insert the wires and lock them in tightly. As mentioned, 24-gauge wire looks good. If you want to use silver, Argentium or fine silver are both better choices than sterling, which tarnishes more quickly. Twenty-four-karat gold is terribly expensive but is the ultimate in luxury.

If you have Rolls-Royce taste but a Toyota budget, consider gold-filled wire as an alternative to pure gold. It’s brass at the core but at least 20 percent gold by thickness, and consequently much more durable than simple gold electroplate. It usually comes in 14k only. As a reference point, not long ago 12 feet of 24-gauge pure silver wire could be had for a little under $9. The same length of 24k gold in the same size was $1,050. The same length of gold fill was about $20. Save the 24k gold for times when you want to make a statement or your customer pays for the gold in advance.

With a hook chucked in a hand drill, hook the resulting large loop, pull it tight and turn on the drill. Keep the tension constant—as you twist the wire it will pull you toward the vise.

Buy your wire dead-soft from your favorite supplier. You need about 20 percent more wire than twice the combined length of your wire grooves.

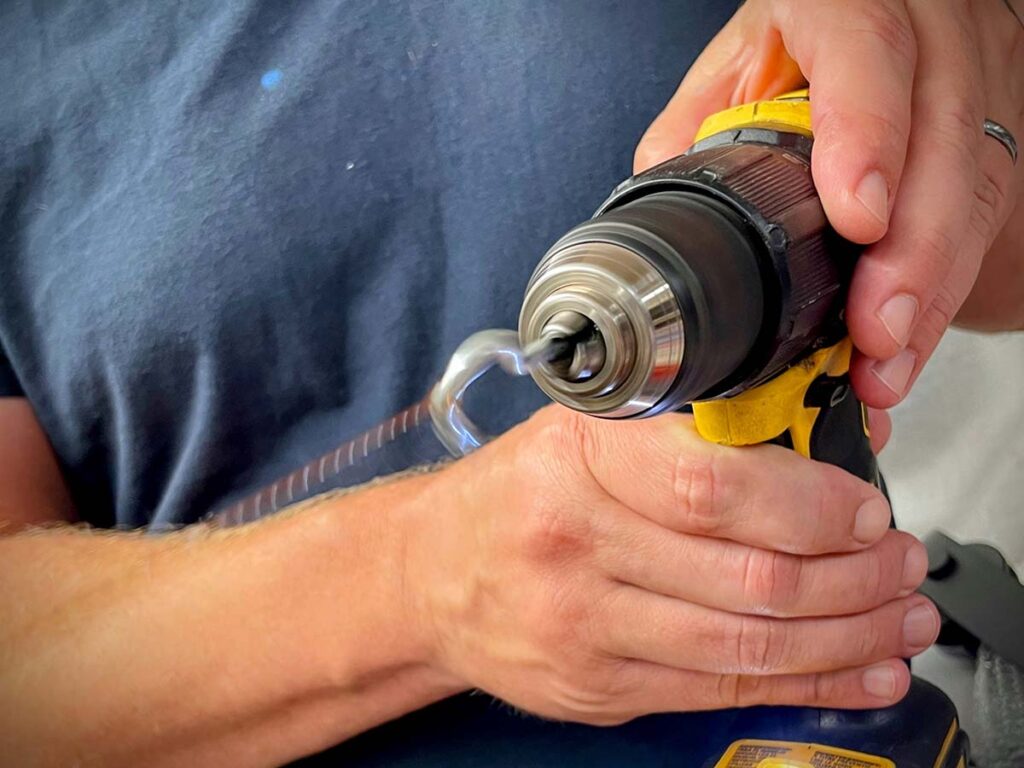
To twist the wire evenly, you must twist all of it at the same time. Clamp the two ends together tightly in a vise. With a hook chucked in a hand drill, hook the resulting large loop, pull it tight and turn on your drill. Keep the tension constant—as you twist it the wire will pull you toward the vise. If it breaks off at the vise, just re-clamp it and continue twisting. There’s no rule about how tightly the wire should be twisted, but tighter twists look better. If you aren’t sure it’s tight enough, twist it some more.

Annealing The Wire

Drill diagonal holes inside your groove, starting halfway between the broached hole and the edge.

The next step isn’t required but will make things easier. Most metals, including gold and silver, work harden. After all of that twisting your wire will be hard and springy, and it’s much easier to install your wires if they’re dead soft.

To soften the wire back to its original state, you must anneal it. To do this, coil it tightly around a 2-inch piece of pipe or something similar, and tie up the coil. Using a propane torch, heat the coil evenly until it glows slightly. One trick to make sure you don’t melt it is to color your wire thoroughly with a Sharpie® marker. When the ink burns off, it’s time to stop.

Don’t forget your essential tools—including your Bob Ross Happy Little Tree Mints.

Pick up the coil and drop it in water to cool it rapidly. It’s now dead-soft again but is likely discolored from oxidation. To remove the discoloration, let the coil sit in warm pickle solution that is available from any jewelry supply vendor. If you don’t want to go to the trouble of pickling, you’re better off dealing with the trouble of work-hardened wire.

Wire Installation

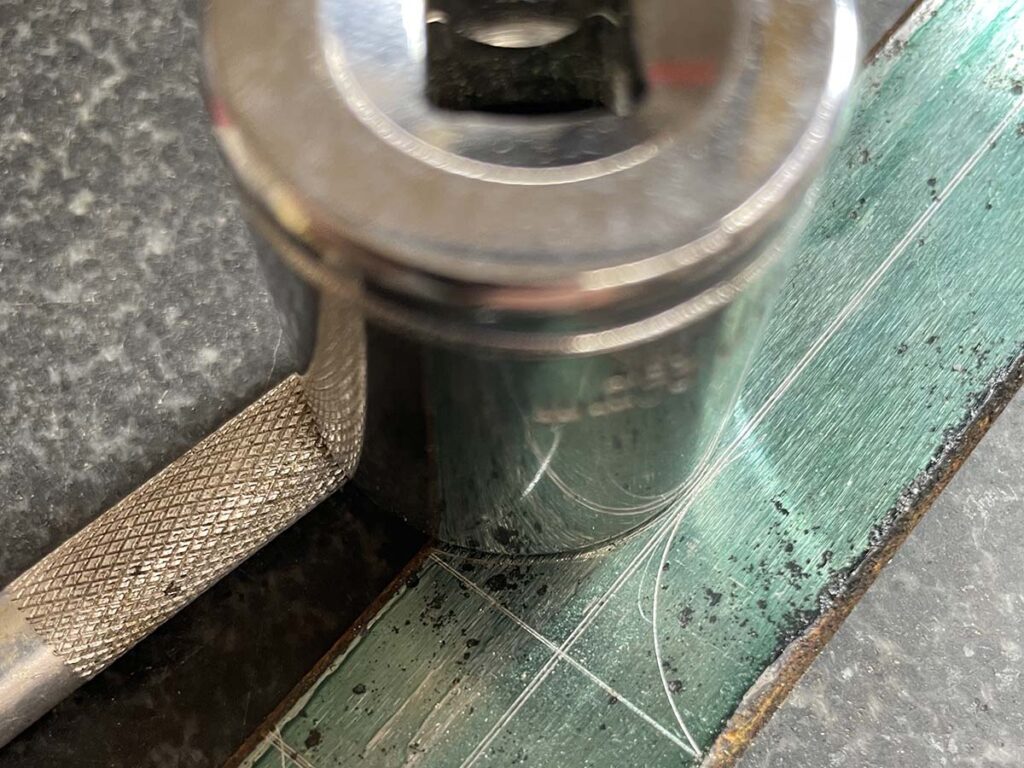
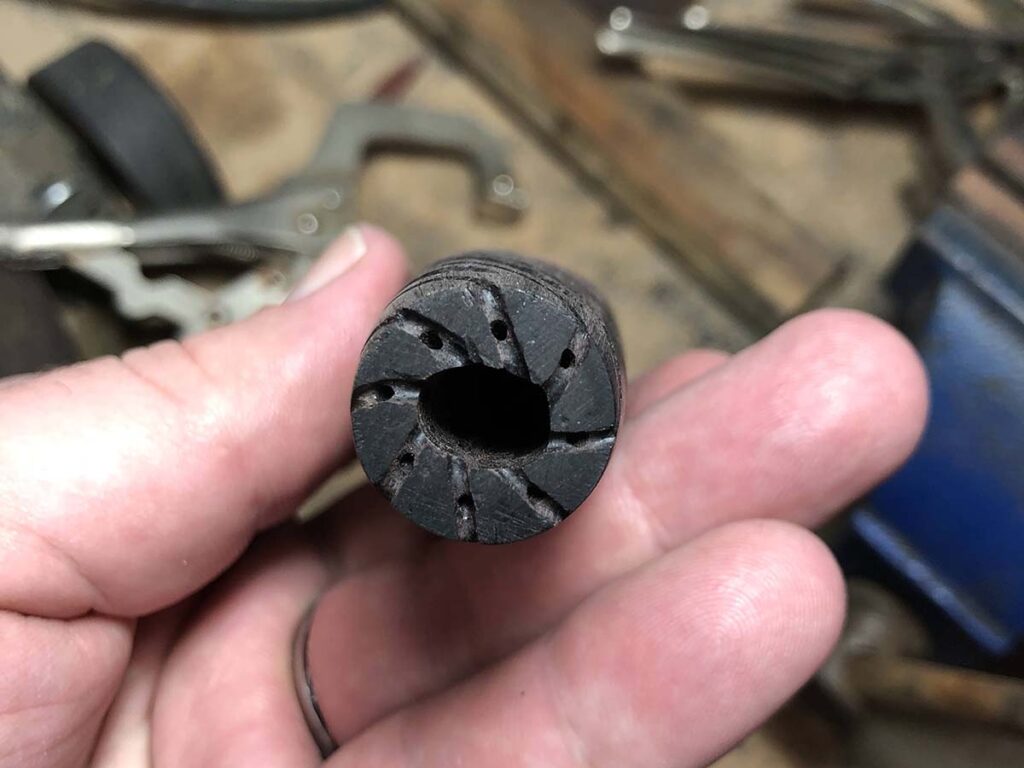
To install the wires, a little bit more work on the handle is necessary. Starting from the end points of your wire grooves, cut new grooves into both ends of your handle for at least half the distance between the outside of the handle and the tang slot. A Dremel or Foredom tool is best for this, but you can use a file also. If you use a file, go ahead and groove all the way to the tang slot—it’ll be easier that way and invisible on the assembled knife. These grooves need to be equal in depth to the diameter of the wire so that the handle will fit tight against the guard or pommel when the wire is installed and the knife is fully assembled. Cutting the line at an angle rather than perpendicular to the circumference will help when you pull things tight later.

Drill diagonal holes inside your groove, starting halfway between the broached hole and the edge. Drill at an angle toward the center so that the hole for the wire exits into the tang slot about a quarter inch from the top and bottom of the handle, in line with the end of your groove. Make the holes slightly larger than your wire diameter.

After the handle is fully assembled and the glue is set up, perform a final finish check. The wires should be tight and fully seated in the grooves.

You’re almost to the fun part. Cut your wires at least an inch longer than the length of the groove to give yourself some extra to work with. To install the wire, thread one end through the hole you just drilled into the tang slot, grab the end with some small pliers, and bend the end back up toward the handle end, locking it in. Though not strictly necessary, you can pin the wire with a toothpick in the hole and a drop of CA Glue or 5-minute epoxy for extra security. This can be cut off and sanded flush later. Pull the wire tight, seating it in your groove, and repeat the process to lock in the other end. This method guarantees that your wires are as tight as they can possibly be. The wires and glue and toothpicks should lay flush with or below the surface of the ends of the handle. Cut off the excess wire inside the tang slot to ensure the wire doesn’t interfere with the final fit-up of your knife.

Finish Check

After the handle is fully assembled and the glue is set up, perform a final finish check. The wires should be tight and fully seated in the grooves. You can lightly buff the wires for extra shine but use a light touch to avoid unintended polishing of the handle. Tarnished wires can easily be brightened up with a Sunshine® Polishing Cloth. Don’t forget to give yourself a pat on the back.

That’s A Wrap

Silver wire wraps the rosewood grip of Duane Bomar’s dagger. The 10-inch blade is a damascus of 1084 carbon and 15N20 nickel-alloy steels. Overall length: 15 inches. (Jocelyn Frasier image)

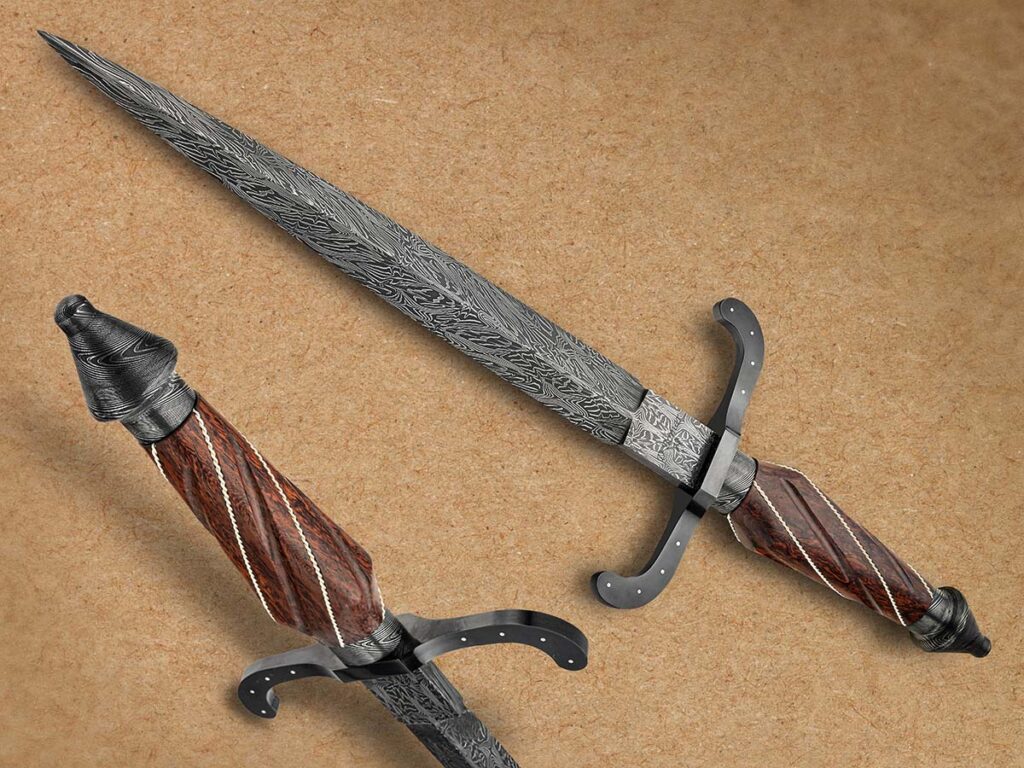
Precision flutes and carefully inlaid twisted wires transform a utilitarian grip into a truly exemplary expression of craftsmanship. By selecting materials that balance luxury and performance, you anchor your design in both history and function. By following the instructions in this series, you’ll be able to master this exemplary style, and use the experience as foundation for future creativity.

Read More On Daggers:

Dagger Design: Getting A Handle On Crafting The Handle

0

Tips on handle materials, shaping/layout, grooves and flutes.

A good knife requires a handle that not only feels right in the hand but also complements the blade’s intent. For daggers especially, few embellishments capture both technical skill and aesthetic elegance like a spiral-fluted handle paired with inlaid twisted wire.

Fluted, wire-inlaid handles trace their lineage to medieval Europe, where 9th-to-12th-century knives were often bound with spirals of wire for both decoration and basic grip enhancement. By the Renaissance, Italian and French artisans had refined this into a sophisticated embellishment. They carved shallow, evenly spaced flutes into hardwoods, stone, ivory or other materials, then inlaid twisted wire into the channels in a demonstration of their mastery of contrasting textures and precise tool control. The grooves not only trimmed handle weight for better balance but also improved the gripping surface so that daggers felt responsive and secure in the hand.

In modern times, this technique remains a key hurdle in the path to attaining the level of master smith from the American Bladesmith Society. Flawless execution of fluting and wire inlay is essential—each flute must be crisply defined and identical in depth and spacing. Each wire strand must be uniformly twisted and fitted without gaps.

When choosing your material for a fluted, wire-wrapped dagger handle, think beyond mere function. You’re going to put in a lot of time on this project, so use something nice.

In the following paragraphs, we’ll walk through choosing handle material, laying out the spirals precisely, and cutting the wire grooves and flutes.

Handle Material

When choosing your material for a fluted, wire-wrapped dagger handle, think beyond mere function. You’re going to put in a lot of time on this project, so use something nice. G-10 and Micarta® are outstanding materials from a purely functional perspective, but they lack the organic warmth and storytelling power found in natural materials. On the other hand, black Richlite and black or ivory-colored paper Micarta can be appealing and affordable substitutes to African blackwood or natural ivories.

Most hardwoods should be stabilized but the various rosewoods, desert ironwood, African blackwood and other similarly hard and dense woods can be used as they are. For collectors seeking rarities, ancient mammoth and walrus ivories are beautiful and carve cleanly, though they can crack if too much heat is allowed during shaping and can expand, contract or crack with changes in humidity. Mammoth ivory can also be difficult to find in large enough sizes without cracks.

Both layout and shaping are made easier if the drilled handle is held between nuts on a long bolt or piece of threaded rod as a fixture.

Consider in advance what type of wire you’ll be using and choose the handle material accordingly. Silver and gold both look great against dark and light materials but consider matching the warmth of the color of gold with warmer-colored materials, and the cooler color of silver with lighter or cooler-colored materials. Think about chatoyance and orient your flutes to highlight the patterns under various types of light. The wires will be the visually dominant part of your completed handle, so the drama and color variation of certain burls and mammoth tooth will be outshone at best and visually distracting at worst.

Costs vary dramatically. Rare hardwoods and ancient ivories carry premium prices and should be ethically sourced. In contrast, G-10 or Micarta balance performance and cost-effectiveness but lack the luxury you’ll want in a signature piece. It’s a good idea to order materials for practice, especially if you’re planning to work with expensive ones. Antler, bone and paper Micarta all work similarly enough to ivory and the harder woods to be valuable for practice. Time spent in practice will not be wasted.

Layout & Shaping

You have carefully chosen the perfect material that fits your well-thought-out, cohesive vision for what impression or statement you want your knife to make, and now it’s time to lay the groundwork for some precision carving. While not strictly essential, it can be helpful to begin by squaring your blank on all faces—accurate squaring guarantees precise drilling and layout alignment for every step. The ends must be square to the tang slot and perfectly parallel to each other to ensure tight fit-up at the end. It will be harder to do this after you’ve shaped the handle, so do it before you start.

Gold and silver are the colors of choice for dagger handle wire wraps. ABS master smith J.W. Randall opts for the gold on the fluted handle of the warmer-colored mammoth ivory core of his art dagger. Overall length: 16 inches. (SharpByCoop image)

First, drill the tang hole. You can use a drill press but a lathe equipped with a four-jaw chuck to hold the squared blank makes it easier to ensure that the hole is dead-center and straight. Both layout and shaping are made easier if the drilled handle is held between nuts on a long bolt or piece of threaded rod as a fixture. With this in mind, it’s useful to drill a clean quarter-inch hole all the way through and save the broaching for the tang until later.

Shaping the handle profile requires some forethought into how it will mate up to the guard and pommel. The simplest transition is to make the ends of the handle and the fittings it meets round, but there are limitless options here. The handle itself doesn’t have to be round, and an oval cross-section makes it easier to index and orient the finished dagger in your hand. Assuming you’ve planned the design thoroughly before starting, shape your handle and sand it up to an even 200-to-300 grit. You’ll have some slips and scratches during the fluting process that you’ll have to sand out later, and your layout lines will be more durable on a rougher surface; there’s no need at this point to polish your handle to its final finish.

The next step is cutting the grooves for your wire, and the most important part of this process is accurate layout. There are a lot of ways to do this, but after trying most of them there is only one that has proven adequate. Luckily, it’s the easiest and the fastest method as well.

The most important part of cutting the grooves for your wire is accurate layout. Though it need not be fancy, a jig of some sort is essential here.

A jig of some sort is essential here, but it doesn’t have to be fancy. Fundamentally, all that is necessary is some means of indexing so that longitudinal lines are evenly spaced, some sort of rest or tool holder allowing the lines to be drawn perfectly straight down the length of your handle, and the ability to rotate your handle to draw evenly spaced lines around the circumference. The number of longitudinal lines is the same as your planned wire count. The number and spacing of circumferential lines around the handle determine your twist rate, and the number of resulting spaces should divide evenly into the wire count.

Once these lines are drawn, connect the corners of your resulting rectangles. Tracing each intersection gives you repeatable spiral guidelines for groove cutting and wire placement. Using a pencil is a good idea, but you can use ink if you’ve verified that it won’t permanently discolor your handle. This is the time for experimentation—you can draw new lines to test new twist rates, but once you start cutting, you’re committed.

Grooves & Flutes

When you’re satisfied with the layout you can begin cutting the wire grooves. With your handle anchored by tightened nuts on a piece of threaded rod, clamp the rod in a vise and start by precisely scoring each guideline with a fine blade in a jeweler’s saw. If you leave the handle slightly loose, you can turn it with one hand while cutting with the other. A blade size of 1/0 is good for this step. Deeper cuts will make the next step easier, so go to the full depth of the blade or slightly beyond. Alternatively, use the corner of a fine triangle file to mark and deepen the lines precisely. In either case, if you have an OptiVisor or, even better, a microscope, this is the time to use it.

With your handle anchored by tightened nuts on a piece of threaded rod, clamp the rod in a vise and start by precisely scoring each guideline with a fine blade in a jeweler’s saw.

Once the line is scored, shape each scored wire groove line with an Olson #4 36 TPI spiral scroll saw blade in a jeweler’s saw. It doesn’t have to be this brand, but since I like my inlaid wire to be made up of two twisted 24g wires, this specific saw blade’s .041-inch diameter is a perfect match for the .040-inch diameter of the combined wire. The resulting half-round groove ensures a very snug fit. Cut carefully until the depth of your grooves reach about half the combined diameter of your twisted wire, in this case approximately 0.020 inch. A single untwisted scrap of your wire can serve as an impromptu depth gauge.

Once all the wire grooves are clean and complete, it’s time to carve the flutes themselves. Lay out flute edges with dividers. Adjust the dividers to the width you need, place one leg in the wire groove, and scribe marks with the other leg to keep the spacing even. Bulk material can be removed with a coarse round file before refining with finer round files to uniform depth and width. It simplifies matters greatly if you plan your groove size to correspond to the diameter of a standard-sized file, though this is not strictly necessary. Ensure all flutes stop at an identical distance from each end of the handle. Each groove ending should be shaped so that every ending is identical—this is the trickiest part.

When filing and finishing flutes, keep the ends identical in length and shape. Any variation will stand out.

If achieving consistent flute endings is the most difficult part, sanding and finishing the grooves is the most tedious. You can start with 220- or 320-grit paper wrapped around a file or rod of the right size. Progress through all the grits until you reach the desired level of finish, ensuring that you remove all scratches from the previous grit before moving to finer paper. Eight-hundred grit leaves a nice matte finish. If you plan to buff your handle to a high gloss, keep sanding up to 1500 or 2000. You can buff out 800-grit scratches, but not without compromising the crispness of the edges of your channels. When the grooves are done, sand the flats between them as well, using a hard backing block to keep the transition between lands and grooves nice and crisp. A lathe makes this last step very fast, but it can be done by hand as well.

With these steps complete, now is the time to broach the handle to fit the tang of your knife.

Read More On Daggers:

Dagger Design: Fundamentals Of Dagger Construction

From maintaining symmetry to adding fullers, we break down the intricate process of making a dagger design into a physical knife.

A dagger is not a kitchen knife in disguise. It is a purpose-built instrument of thrust and that purpose demands precision at every stage of construction. Small errors that might pass unnoticed in a hunter or utility knife compound on the exacting canvas of the dagger. A centerline that begins drifting by a fraction at the ricasso becomes an off-center tip, an uncentered bevel a blade that twists, the result a thrust off target. The difference between success and failure is geometry, and nowhere does geometry matter more than in the making of a dagger.

The process begins with detailed design and planning. The execution begins with precise layout. The central axis is the spine on which the whole piece will rest, and without it symmetry is impossible—the whole blade will stand or fall on getting this right. There are some tricks that will help ensure success.

Dagger Half Template

The Line That Rules Them All. A cleanly scribed centerline on both edge and flats sets the maker up for successful layout. A centering ruler can be a useful tool to check this.

Once you have determined the blade profile, preferably in some physical form like a drawing, make a template so it can be accurately transferred to steel. Here’s the thing, though: you only need half. A template representing only half of the blade profile will allow you to use it for each edge, ensuring perfect symmetry. Include the tang on your profile, not just the blade.

If you’re careful, your half template can be held on your blade stock aligned on a scribed center line and scribed on each side. If you’re less careful, oversize your blade stock and template so you can drill holes for alignment pins in the end of each that is outside the final profile. Using these holes to align the half template for marking each edge is the most precise way to lay out a symmetrical profile. If the stock is oversized, you’ll grind off the alignment holes when grinding the profile.

Planning Plunge Lines

Once you’ve accurately laid the profile out on the blade stock, take the time to scribe in the planned plunge lines on the blade flats and the edge. Sweeping, curved plunges are more visually appealing and careful layout will help ensure that your vision becomes reality. These lines are not decorative. They are the stops, targets if you will, that prevent the grind from slowly creeping toward the ricasso with each grinding pass.

Grinding the Plunges. Gradual, sweeping plunges are much more appealing to the eye than straight ones. Draw them in and grind to the drawing. This is more easily done on a wheel than with a flat platen but can be accomplished either way.

When it comes to grinding these sweeping plunges, hollow grinding on a wheel is easier than flat grinding on a platen—it’s easier to grind a curve with a curve—but by all means use a flat platen if that’s what you have. If you’re already grinding on a wheel, a 1-inch-wide wheel with a 1-inch belt will be an easier path to success than the standard 2-inch wheel and belt.

Sweeping plunges also will result in a thicker edge toward the ricasso. This is fine—you shouldn’t try to sharpen this part as doing so most likely will ruin all your careful design work. Will the unsharpened part of the edge impair the stabbing function? Perhaps, but only a little. Though it pains a serious knife person to admit it, most handmade modern daggers are for show. In most societies stabbing others is frowned on, and if you’re going to all this effort, choosing to focus on aesthetics is a good bet. However, if your dagger will be deployed in combat, ignore the aesthetics, grind sharper plunges and take the edge all the way to the ricasso.

Dagger Grinding And Stock Removal

Grinding and stock removal are the way to go for daggers. This is admittedly a hot take but in a game where winning is determined by symmetry, forging introduces unnecessary variables and distorts the base stock, making accurate layout more complicated—not impossible, just not as easy. There is little to gain by forging unless the steel itself or the situation requires it, or if you simply like doing it that way. If you want a damascus pattern to taper toward the tip, or if you’re making a dagger for American Bladesmith Society testing, by all means forge. It’s an impressive skill set. If you want to make the best dagger possible with an eye toward efficiency, and thereby your profit margins, grind it. Stock removal is the more predictable path, and predictability is the soul of symmetry. Every forged blade is a stock removal blade before it’s completed; don’t get hung up on this unless you have reason to.

Delicacy Of The Dagger Tip

Forged for Continuity. An intricately patterned damascus dagger by Gregory Verizhnikov shows why sometimes forging is worth it—forging through the tip preserves the pattern’s flow.

Where the mass of the ricasso anchors the entire weapon and provides strength at the critical juncture of guard and tang, the tip, by contrast, demands delicacy. Once your profile is carefully ground to shape and you turn to grinding the bevels, grind the tip first. More specifically, grind it at a steeper angle than you plan for the main bevels, and try not to cross the centerline even at that obtuse degree, except at the very end. After that, leave it alone.

Grind the main bevels like you normally would, paying perhaps more attention than usual to your scribed lines, and try to avoid that last inch toward the tip until everything else is pretty much done. This seems a bit odd at first, but consider that the final inch must maintain its thickness in order to be strong enough to pierce effectively without deformation or fracture. If you do it right, you’ll end up with a bevel at the transition. Some makers polish the transition so it remains crisp, while others blend it smooth while polishing. Either way, it should be deliberate. Neglect this and the point will be too thin.

When To Add Fullers

Lay Out Everything. Scribe curved plunge lines on the flats and edge mark exactly where each bevel begins and ends.

Fullers, if they are to be included, should be cut early while the blank still has parallel flats. Attempting them later invites misalignment, or at the least inserts a potentially unnecessary level of difficulty. Better machinists than this writer/dagger enthusiast will likely have little difficulty either way, but life has enough complications of its own without inviting them into play.

Dagger Balance

Balance matters as much as steel. A well-made dagger should balance at or just ahead of the guard, a neutral point where the hand feels neither burdened nor abandoned. This can be tested with nothing more elaborate than a rod beneath the mostly assembled knife, shifting it until it rests level. It’s really just as easy to adjust weight distribution by feel, removing or adding weight to the component parts until it feels right. Don’t forget to consider the added weight of your epoxy. When balance is right, the blade becomes an extension of the wrist, alive and responsive.

Tang & Spacers

How Not to Do It. This dagger blade poorly ground by the author clearly demonstrates that the easy way out usually leads back in. Off-center bevels and an off-center tip are predictable results of poor initial layout.

Even the tang deserves forethought. When profiling the blade blank, leaving the tang longer than necessary provides room for correction and fitting, and a threaded end can serve as both a work-holding aid during construction and a permanent anchor if a pommel or nut will close the assembly.

Spacers, fitted between guard and handle and again between handle and pommel, make alignment easier and allow pins to register each component precisely during glue-up. They’re also relatively easy targets for weight adjustment when working on overall balance. These details are seldom glamorous but are what let the final assembly come together without struggle.

Embellishments

What results from this attention is not decoration but readiness. The embellishments will come later… the fluted handles and twisted wires and all the flourishes that mark the master’s hand. But none of that matters if the design is poor, the execution haphazard, the details unconsidered.

More On Daggers:

Dagger Design: Point For Perfecting Blade Performance

0

In this look at dagger design, we move beyond history and symbolism to the structural realities of geometry and construction. From the curve of the edge to the presence—or deliberate absence—of a fuller, each feature serves the dagger’s singular purpose: to deliver a clean, decisive thrust and to endure long enough to do so again.

Dagger Profile & Point Geometry

A single, shallow fuller lightens the blade without compromising stiffness—proof that subtle geometry changes transform handling. Kelly Vermeer-Vella and Bruce Bump do the honors here.

A dagger’s profile is its outline when viewed from the flat side; its point geometry is the shape of its cross-section near the tip. Mastery in dagger design comes when the two elements merge into a seamless conduit for force, guiding energy from the wielder’s hand into the target.

One guiding principle is to avoid parallel edges along the portion of the blade intended for penetration. On utility knives, parallel edges are excellent for long, slicing cuts, but in a dagger they can create excessive suction and drag during withdrawal. They also represent a missed opportunity to enlarge the wound. A blade with gently convex curves tends to create a wound tract that widens as it penetrates, then releases more easily on the way out. The effect is twofold: the strike inflicts substantial damage on entry, and the blade slips back out with minimal resistance. In a fight where fractions of a second matter, ease of withdrawal could determine whether the wielder stays alive.

The balance point rests just forward of the guard, lending a stab-ready steadiness that rewards control. The author made this balanced dagger.

Cross-sectional design reinforces how a dagger behaves in the hand. The Roman pugio often carried a pronounced central ridge that gave it a triangular cross-section, lending the blade excellent stiffness. Later European daggers frequently adopted a diamond-shaped section that struck a balance between rigidity and lighter mass. In practice, triangular sections feel solid and grounded, with the ridge channeling force straight to the point. Diamond sections distribute the force across four bevels, trimming weight just enough to make the blade a touch quicker, though sometimes at the cost of absolute stiffness.

Experimental archaeology adds nuance to this comparison. Triangular sections resist torsional stress more effectively, while diamond sections tend to slip more cleanly into soft targets. Renaissance arms rooms often contained both forms, chosen with intent: defense versus assassination, battlefield versus court intrigue.

Dagger Ergonomics & Balance

Careful placement of a ricasso notch ensures consistent hand alignment, turning technique into muscle memory. Note the refined handle and ricasso detail on Cutlery Hall-of-Famer Billy Mace Imel’s piece.

Even the finest blade geometry falters without a grip that enables control. Here, ergonomics and balance determine the dagger’s effectiveness.

Early medieval daggers often featured grips as short as 3-to-4 inches. This compact length forced the hand into a firm grasp close to the guard, a practical safety measure when blood, rain or sweat made surfaces treacherous. Fourteenth-century Germanic examples show how a modest flared guard and compact handle could prevent slippage while preserving agility.

Balance points were just as carefully managed. In many 16th-century Italian stilettos, the center of gravity sits just ahead of the guard, giving the weapon a stab-ready steadiness. The narrow, edgeless blade minimizes rotational drag. Highland dirks, by contrast, often used teardrop pommels to counterweight the blade, shifting balance closer to the hand and allowing forceful thrusts whether on horseback or on foot.

A weighted pommel counters blade weight, shifting balance back toward the hand and straightening the thrust on a Renaissance-influenced dagger by the author.

Makers sometimes introduced subtle refinements. A ricasso notch carved two or three centimeters from the guard ensured that the user’s thumb returned to the same anchor point every time. A shallow fuller reduced forward weight, so that an 8-inch stiletto might balance almost identically to a heavier 10-inch combat dagger. These small calibrations transformed the blade from a piece of steel into an extension of muscle and bone.

Dagger Strength Features

There are no gimmicks on Joe Syverson’s minimalist dagger with clean taper—just clear profile, rigid spine and reliable balance. The design reflects simplicity that serves performance.

The dagger’s tip, however slender, must withstand resistance from mail, bone or even poorly placed strikes. European smiths between the 14th and 17th centuries developed several overlapping solutions that remain relevant today. Fuller placement was one of the most important: a carefully cut longitudinal groove reduced weight while preserving stiffness, as seen in 16th-century Venetian stilettos where the fuller often ran from just below the guard almost to the point.

Ricasso thickness was another safeguard. A blade too thin at the base was liable to flex and buckle under pressure, and even worse, a weak ricasso translated into a fragile point once the final bevels were ground. By keeping this area stout, smiths not only gave the blade strength but also provided a tactile zone of unsharpened steel where the thumb or index finger could anchor securely.

Even with an ornate sculpted handle and dramatic damascus, the blade remains an unbroken taper from guard to tip on Henning Wilkinson’s art dagger. Note the lavish surface detail.

Hardening practices added a third layer of reliability. Most European daggers were quenched and tempered uniformly to a Rockwell hardness in the neighborhood of 48-to-52 HRC. A few Italian masters appear to have experimented with clay tempering to leave the ricasso slightly softer, but this might also have been accidental. In any case, the visible temper lines familiar in Japanese blades were rare. What mattered was consistency: a uniform temper that balanced edge retention with toughness made it so the dagger could survive repeated thrusts against armor and bone alike.

Avoid Feature Creep

Next-generation work in this forward-looking piece by Jean-Pierre Potvin proves the old lessons endure: blade geometry is still central even if the rest of the dagger is fantastical.

Through all the refinement, one lesson emerged repeatedly: every extra feature risked undermining the dagger’s true purpose. Serrations, pry tips and decorative piercings might look clever but each introduced problems. Serrations can snag on clothing and tear rather than pierce. Pry tips disrupt the straight thrusting line. Even ornate cut-outs, while attractive, create weak points that could split under stress.

Historical makers knew better. Even the most extravagant Renaissance daggers—with gilded hilts, inlaid gems or etched scrollwork—maintained an unbroken distal taper from guard to tip. Embellishment was typically reserved for the surfaces, not the structure. However adorned, the dagger kept faith with its defining role: the straight, unyielding line of the thrust.

Conclusion

Inventive cross-sections and flawless transitions demonstrate that modern makers can push design without breaking the rules. Elizabeth Loerchner captures the concept in the strong geometry of her experimental modern dagger.

From the Roman pugio to the Renaissance stiletto, the dagger’s identity rests not in ornament but in discipline: geometry over gimmicks, strength over flourish, function over feature creep. Clear profiles, rigid spines and balanced grips remain the hallmarks of a true dagger. These principles are as relevant to the modern craftsman as they were to the smiths of Venice, Florence or Solingen. A dagger’s promise, after all, is measured not by extravagance but by the sharp integrity of its point.

More On Daggers:

Dagger Design: The Geometry of Penetration

Form, function and purpose of daggers–the most stab-ready knives.

Few weapons are as simple in concept yet as demanding to design as the dagger. At first glance, it is merely a blade—sometimes short, sometimes long, usually but not always double edged—yet every aspect of its form has been refined over millennia for one purpose: stabbing. Unlike blades that balance cutting, slicing or chopping, a dagger’s geometry, materials and ergonomics allow no compromises in pursuit of its one purpose.

From early Bronze-Age thrusting knives to the stilettos of the Renaissance, every angle in any dimension maximizes straight-line penetration. Whether for combat or display, understanding this purpose is essential for anyone who wishes to design, craft or appreciate these edged weapons. Even the most ornate ceremonial dagger should appear “stab-ready” at a glance, communicating the implied threat of the utilitarian tool with a statement of status and opulence.

This modern cinquedea by Vince Evans has a blade with a broad, rigid base tapering to an unforgiving point. Fullers down the middle serve to make the blade both lighter and stiffer. Equal parts status symbol and lethal instrument, it embodies the dagger’s refusal to compromise between beauty and purpose.

Dagger Design Points

Every deadly stab starts with three critical design choices that define a dagger’s unwavering purpose. A dagger blade must have sufficient spine thickness and ricasso rigidity to resist excessive bending under thrust load; it should be tapered to an acute but robust point for minimal tip-entry resistance; and it requires flexibility balanced with rigidity so it can reach vital organs, often protected by armor, without breaking.

Early thrusting blades illustrate this principle as far back as the late Bronze Age. A broad base near the guard tapers rapidly to a narrow point, ensuring rigidity at the grip and sharpness at the tip. By the 1st century A.D., the Roman pugio perfected it. With a base often exceeding 5⁄16 inch in thickness and a central ridge tapering to a sharp apex, the pugio shed weight without losing stiffness. In practice, its point could pierce leather, flesh or weak links in chain mail, while its spine endured repeated jabs against shield bosses and bucklers.

Extreme ornament, unconventional design, and opulent materials cannot disguise lethal intent and pure stabbing functionality in Bertie Rietveld’s ornamental dagger.

Yet precision in stabbing demands more than brute strength, it requires avoiding gratuitous cutting‐oriented features in a thrusting design.

Serrations, upswept points, hooked tips, prying points and even bottle openers can be handy on a knife, depending on the task, but all of these undermine the straight-line force a dagger needs and disrupt smooth entry. If you ever find yourself in a situation where stabbing is required, by all means use whatever you’ve got—just don’t complain when your bottle-opener tip gets snagged in an assailant’s clothing. However, if you have the luxury of time and thought to design and make a dagger, strip away anything that doesn’t serve pure penetration. A dagger’s geometry remains laser-focused on stabbing effectiveness.

Lastly, a dagger must balance penetration depth with material limits. A tip too slender might break or bend against bone or metal, while a tip too blunt simply won’t enter. Ancient workers of bronze and iron didn’t have modern labs or spreadsheets, yet somehow found the Goldilocks Zone that balanced reach and resilience. A well-tempered tip is tough enough to survive bone contact without snapping, yet with correct geometry stays stiff enough to slip between armor plates. Only through precise taper and temper can a dagger achieve depth without sacrificing strength.

Even in this highly stylized dagger by Jordan Lamothe, the spine ridge provides the stiffness and rigidity required for uncompromising penetration.

Combat Daggers Vs Art Daggers

From the earliest times, daggers fell into two broad categories: weapons of combat and symbols of prestige.

The combat dagger was stripped to essentials—minimal ornamentation, maximum toughness—while the art or status dagger has always been free to bend the rules of pure function to satisfy aesthetic expression and make statements of personality and prestige. Nonetheless, even the most ornate display piece must exude “stab-readiness” at first glance, a silent promise inherited from its lethal lineage.

The complex damascus pattern and construction style of this dagger by Australia’s Jackson Rumble demonstrates that while he understands the essentials of a dagger, he’s not afraid to push the boundaries of expression without compromising either the stabbing function or his artistic vision.

Surviving examples of Roman pugios from army camps demonstrate the utilitarian design, but gilded pieces from the same era, with elaborate inlays and inscriptions, do not stray far from purpose despite the decoration. All share the same fundamental geometry: a stiff, thick base, reinforced spine and unwavering taper to a sharp, flat-ground point.

The ornamented variants—often gifted as symbols of rank or worn by the wealthy and powerful—could feature ivory grips or gilded fittings without diminishing their stabbing credibility. Regardless of personal status or the knife’s level of ornamentation, no one who saw a pugio drawn in malice would misunderstand the message or the danger. Combat heritage endows art daggers with an unmistakable threat that no amount of embellishment can conceal, though the pugios that did in Julius Caesar probably looked rather nice.

The complex damascus pattern and construction style of this dagger by Australia’s Jackson Rumble demonstrates that while he understands the essentials of a dagger, he’s not afraid to push the boundaries of expression without compromising either the stabbing function or his artistic vision.

Another example is the pesh-kabz, a Persian-born dagger later adopted and lavishly ornamented by Mughal weaponsmiths. Its single-edged blade featured a thick spine and acutely tapered point, designed to pierce heavy mail and laminated armor. As Mughal craftsmanship flourished in Agra and Delhi, artisans added damascened patterns, jeweled pommels and silk-wrapped grips. Yet even a fully jeweled pesh-kabz retained the same reinforced spine and narrow, forward-weighted geometry as its battlefield ancestors. Worn at court in gilded sheaths, these daggers exhibited status while making it clear that underneath the glamor was a blade as deadly as any used in war. Art and combat, then, remain entwined.

The junction of the handle, guard, and blade is where the true masters separate from the merely good—every element is a decision between comfort, control and ornament that fit together with no gaps. (Mike Quesenberry, Best of Show/Best Art Knife, 2011 OKCA Show)

This enduring marriage of lethality and ornamentation sets the stage for a deeper question: what separates an ordinary dagger from one that truly masters its intended purpose? The answer lies not just in history but in the details of profile, geometry, balance and structural refinement—each a mark of a dagger designed to do exactly what it must.

More On Daggers:

Knife Embellishment: When To Do It And When Not To Do It

0

To Bling or Not to Bling?

The best knives and stories are born from some essential reality that grows in the making and telling. For a knife, it is the nature of that reality that determines whether the ornamentations available to the knifemaker either reveal or conceal it. Simply put, some knives benefit from the generous application of various bells and whistles. Others are diminished by any additions beyond their essential form. Most fall somewhere in-between these extremes. But how do you tell the difference?

A Lanny’s Clip slipjoint by Ben Champagne is an example of how even a minimal knife embellishment that sends a clear message about the character of the maker.
A Lanny’s Clip slipjoint by Ben Champagne is an example of how even a minimally embellished knife sends a clear message about the character of the maker.

First, consider that much like the vehicle you drive, the knife you carry or make says something about you. It can shine light on your character, priorities, economic or social status, or simply your tastes. Each knife can reflect something important about the maker, or it can evoke a response from the person that encounters it. As the maker, what story are you trying to tell and to whom are you trying to tell it? Any embellishment should be designed to ensure that that something is exactly the thing you want to say.
A Lanny’s Clip slipjoint (IMAGE 1) by Ben Champagne is an example of how even a minimally embellished knife sends a clear message about the maker’s character. Every detail matters, even the ones that are invisible. Immaculate execution is a statement of its own.

In addition, each type of knife serves an essential purpose. Often the purpose is reflected in the name of the knife’s category—everyday carry (EDC), hunter, fighter, chopper, chef’s, even art knife—or by its shape, history and tradition, as in the case of daggers, machetes and bowies. In each case the design is constrained by the intended use, though with varying degrees of success.

Once you have a clear idea what your knife is for and the impact you want it to have, it is useful to write those down. The process of articulating your purpose in words has a way of clarifying things, and helps you keep a firm grasp on your idea as you move forward with your design. You have a much greater chance of creating an excellent knife if you allow your intent to guide your design decisions.

The mammoth ivory scales, subtle filework and damascus blade of Andy Isaacks’ elegant linerlock highlight the detailed engraving by Alice Carter. Closed length: 4.5 inches.
Image 3: The mammoth ivory scales, subtle filework and damascus blade of Andy Isaacks’ elegant linerlock highlight the detailed engraving by Alice Carter. Closed length: 4.5 inches.

A good next step is a detailed drawing, which will help you think through the details in a coherent manner; it is much easier to work through various design elements, material choices and additional embellishment ideas with a pencil than with steel. Here is your chance to test different ideas, keeping in mind that there will most certainly be deviations from your drawing that occur during the actual making process. Some ideas look good on paper but don’t translate as imagined into a three-dimensional object. The opposite is also true, and embracing the back-and-forth process yields the best results. Producing a cohesive design aligned with both your intended statement and the knife’s function is a process that often continues until the knife is complete.

Making A Knife Embellishment Plan

I don’t always embellish a knife, but when I do, I do it on purpose.

As you have gathered by now, the most valuable embellishment available to the knifemaker is outstanding, intentional design. Consequently, the best knives are those in which embellishments are specific, intentional design choices. Intentionality is essential; if you want to be good at something, you should do it on purpose. If a particular choice of ornament does not contribute to the function, visual impact or the statement you wish to make in a noticeable way, omit it. At the very least, choices of ornamentation should never inhibit the essential purpose of the knife.

Alice Carter’s gold engraving is the center of attention on a linerlock folder by G. Kent Carter. Closed length: 4 inches.

Selecting Type Of Knife Embellishment

When it comes to specific embellishments for a specific knife there are myriad choices at your disposal, but if you spend too much time thinking about it nothing will get done. Here are some ideas that can help you decide.

The first consideration is to determine what it is you’re trying to draw attention to. Certain shapes or lines like the S-curve, diagonal line and flow, and pointy or sharp triangular elements tend to naturally draw the eye. A dominant visual weight, strong contrasts of color or texture, or intentional disruptions in visual flow can also grab attention if used accordingly.

Tanner Couch uses copper to highlight the hardware of the textured black paper Micarta® handle and creative filework that covers only about half the backspring of his shadow pattern rabbit skinner. Closed length: 3.75 inches.

Usually, it is the clever combination of more than one of these elements that makes an arresting visual, and once the attention is firmly grasped the details can reveal themselves. An integral dagger by Wolfgang Loerchner (IMAGE 2) demonstrates how the masterful combination of curves, diagonals and triangles can command notice. Sharp contrasts in texture and color also arrest the eye. Once the attention is captured, it becomes clear that every element of the shape, materials and finish works together to create the essential whole.

The eye is also drawn to areas with more detail. A good rule of thumb is that for it to stand out, the area of sharpest detail should make up about a third of the overall visual composition. By applying this principle, an engraving can be the center of attention, can complement the overall knife design or can distract from it. When engraving is to be the center of attention, other design elements should be allowed to fade into the background. This does not mean that these other details are less important, but a handle with subdued colors and even texture, a satin polished blade, and understated filework will allow the engraving to be the focus.

A boldly patterned damascus blade paired with detailed engraving can overwhelm the eye and keep either element from being visually arresting. Counterintuitively, a finely detailed mosaic damascus blade can present a more neutral visual impact; the details become apparent only when you look closely. A wildly patterned or brightly colored handle material will similarly draw the attention, so use it if the handle material is what you want to visually emphasize.

For example, the mammoth ivory scales, subtle filework and damascus blade of Andy Isaacks’ elegant linerlock folder (IMAGE 3) highlight the detailed engraving by Alice Carter. Every element serves to ensure that the area with most detail draws the eye.

How Not To Embellish A Knife

The understated detail of the Star Crossed Lovers mosaic damascus blade provides a subtle contrast to the artifact walrus ivory handle with inlaid Oregon sunstone set in gold and pure iron guard covered in melted gold on the Behring Sea Artifact Dagger by ABS master smith David Lisch. Overall length: 10 inches.

No discussion about knife embellishment is complete without some reflection on what not to do.

Perhaps most importantly, if you can’t think of a good reason to add a particular type of embellishment, there’s a good chance that you shouldn’t do it. Sometimes it works out but often you waste time and possibly your money by adding elements that lack a clear intent. Similarly, if a knife is intended for hard use, consider what cumulative effects that use will have on your bling, and invest your enhancement efforts accordingly. Where does the value lie?

Despite everything else discussed, it’s worth saying that not every knife needs to be something other than a cutting tool. Indeed, some of the best knives make their statement with simplicity and function. There’s no minimum or maximum amount of embellishment you can add to a knife, but embellishments that aren’t done exceptionally well are worse than none. If you must err, err on the side of simplicity or subtlety. Extravagance can be beautiful but elegance is always understated. Both have a place in the alternatives of intentional design choice.

Is it a shield, modified unwrapped menuki or something else? Whatever the designation, the embellished reptile stands out from the all-black textured handle of an ABS master smith Andrew Meers peg-opening linerlock with a mosaic damascus wharncliffe blade.

Finally, your knives will benefit from embellishments done purposefully to increase impact, but can suffer from ornamentation added with the sole intent of increasing the sale price. Keep an eye on what’s best for the knife rather than simply tossing in expensive ornamentation for the sake of perceived collector or monetary value.

More On Knifemaking:

Advertisement

Must Read Articles

Read this before you make a knife

Knifemaking 101 – Read This Before You Make a Knife

  by Wayne Goddard My experience has taught me that there's nothing like digging in and getting started. I've often said the hardest part of the...
how to forge damascus steel

How to Forge Damascus

Advertisement
Advertisement