1) Select a Sharpener
Invest in a good bench stone. You have the natural ones like the Arkansas stones and the manmade ones such as the Norton India stone. There are also the diamond-bonded stones that many companies produce.
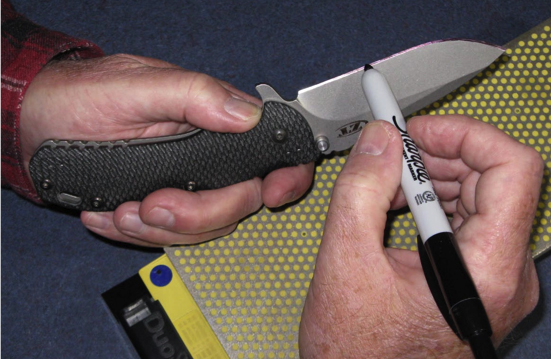
2) Color the Edge
With a black ink permanent marker, color the entire cutting edge or primary bevel on both sides of the blade. The objective is to sharpen off the black ink. After you remove the ink from both sides of the blade, it will be sharp.
3) Adjust Accordingly
Take a few strokes on the stone and then examine the edge bevel. If you see ink toward the top of the bevel, decrease the angle of the blade to the stone. Conversely, if you see ink toward the bottom of the bevel, increase the angle to capture that part.
4) Remove the Ink
After you sharpen the ink from the cutting edge, you will have to remove any stray marker ink. A liquid-based adhesive and paint remover is ideal for the job. Place a few drops on a paper towel and very carefully wipe the cutting edge.
Going Forward
After you get the hang of it, skip the permanent marker step. Congratulations, you’re now a freehand sharpening pro!
 NEXT STEP: Download Your Free KNIFE GUIDE Issue of BLADE Magazine
BLADE’s annual Knife Guide Issue features the newest knives and sharpeners, plus knife and axe reviews, knife sheaths, kit knives and a Knife Industry Directory.Get your FREE digital PDF instant download of the annual Knife Guide. No, really! We will email it to you right now when you subscribe to the BLADE email newsletter.


