Home Authors Posts by Dexter Ewing

Dexter Ewing

Work Sharp Ken Onion Elite Mk2 Review [Hands On]

0

Has Work Sharp improved on its legendary tool?

The Work Sharp Ken Onion Elite has been the standard for powered abrasive belt sharpening for about a decade. And it’s more than earned its place in knife enthusiasts’ sharpening stations. Yet, Onion and Work Sharp were just getting warmed up.

Unveiled at the beginning of 2024, the Ken Onion Elite Mk2 (KOE Mk2) aims to outdo the original in about every way. But does it?

That’s what I aimed to find out when I pulled out a bevy of knives and put the unit through its paces. Is the sharpener more user-friendly? Does it offer more functionality? Can it unseat the legendary Work Sharp Ken Onion Elite?

Let’s find out.

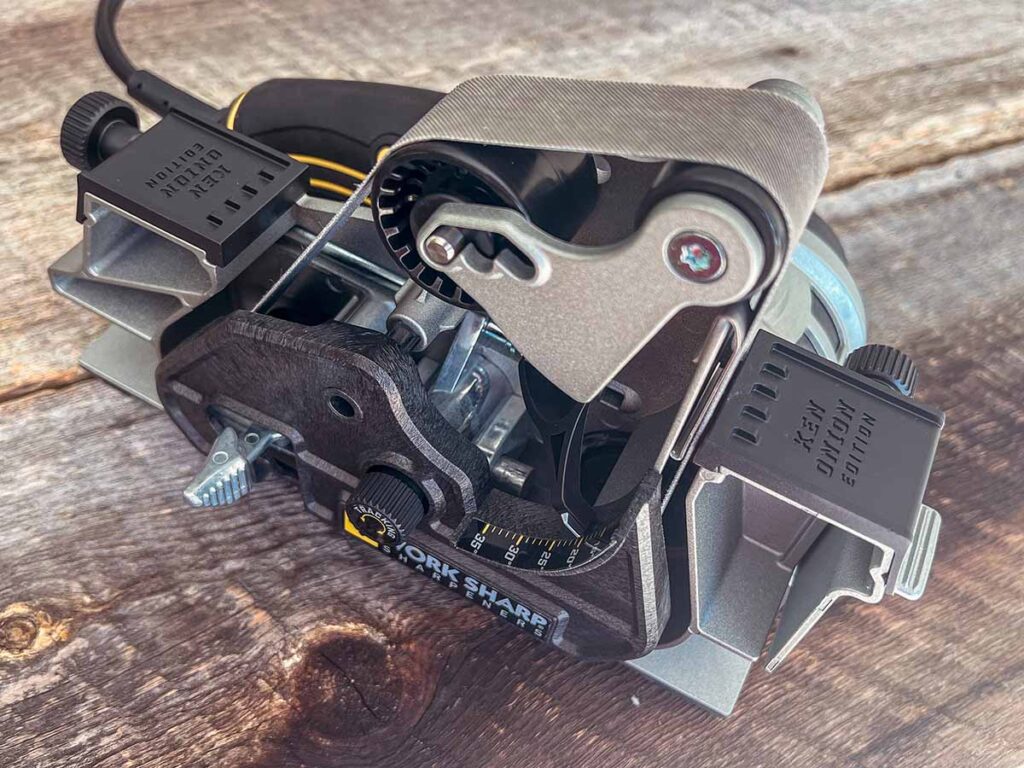
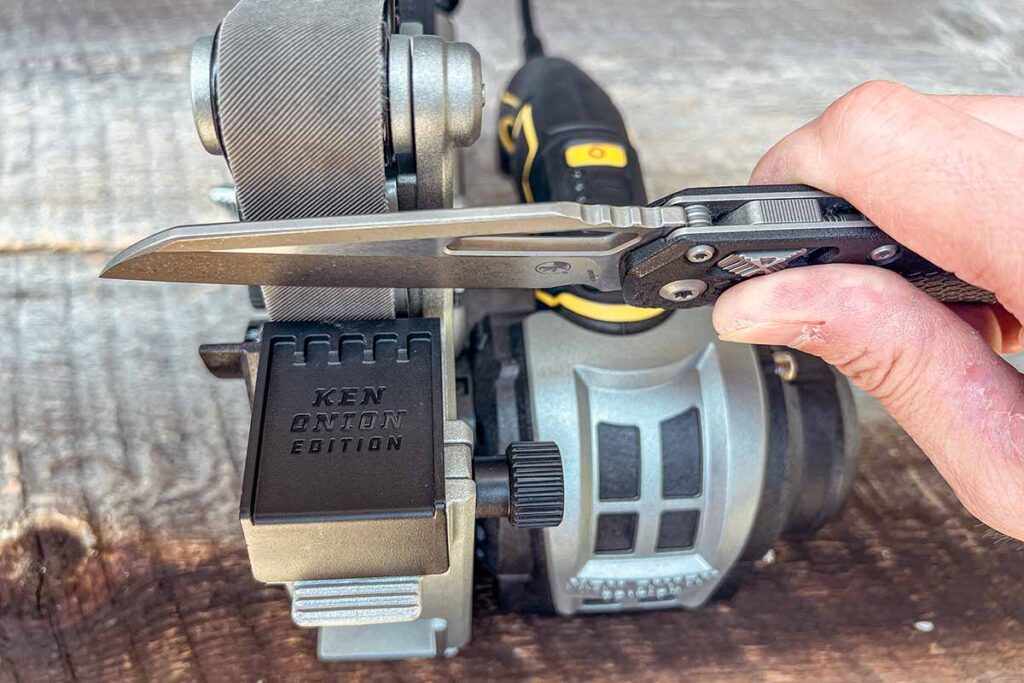
Work Sharp Ken Onion Elite Mk2 Grinding Attachment

Ken Onion WorkSharp MK.2 with grinding head

Work Sharp didn’t veer away from the basic functionality of the Work Sharp Ken Onion Elite in the Mk2. For example, blade grinding attachment still uses the same 1”x18” belts as the original and pretty much functions the same.

Onion and the company, however, have enhanced the operation of the attachment in several ways.

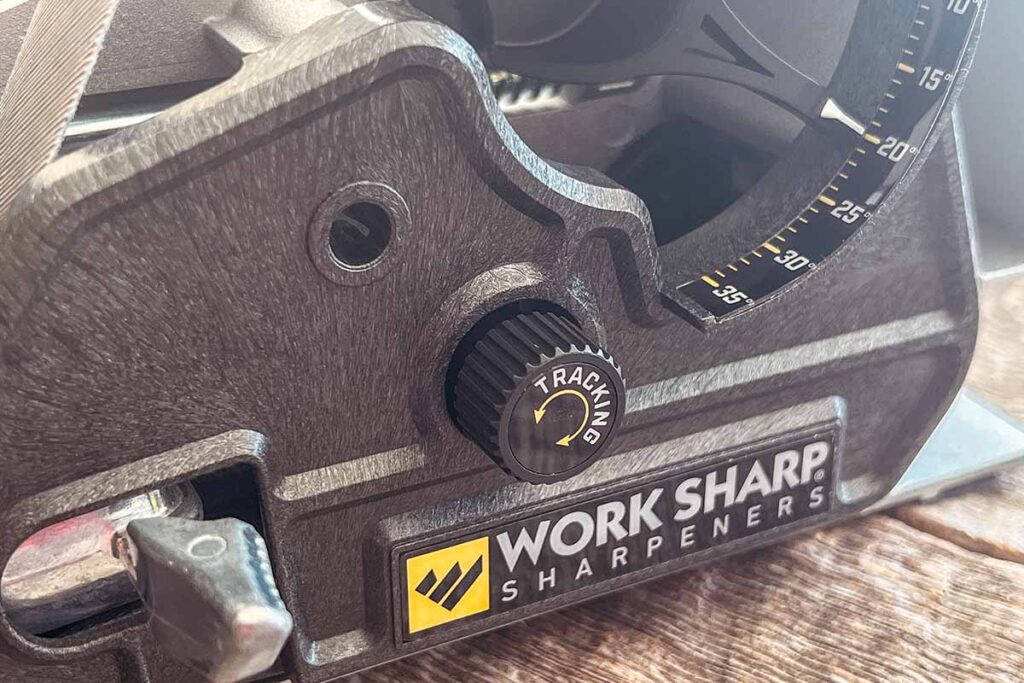
The angle adjustments on the grinding attachment now can be made on the fly and without de-tensioning the belt or even turning the unit off. This is done through a round nob under the plate controls, which raises and lowers the idler wheel. A built-in angle indicator allows you to dial in the exact edge.

The aforementioned idler wheel is also new to the system and can be set for three edge types: conventional V, low-angle convex, and high-angle convex. A major plus, this is achieved without tools or even de-tensioning the belt—though, the power must be off.

Ken Onion WorkSharp MK.2 grinder adjustment

Work sharp has included a belt guard on the new model, gone are the days of the original’s open face. The guard has a port hole that you can place the hub fastener into (so you won’t lose it!) whenever you convert this unit to the standard three-pulley cassette.

Finally, the Mk2 has an adjustable height reference plate on the platen end of the grinding attachment. Quite simply, this allows for finer adjustments at the platen end.

Overall the build, of the new BGA is more substantial than the original, as there is now more weight to it.

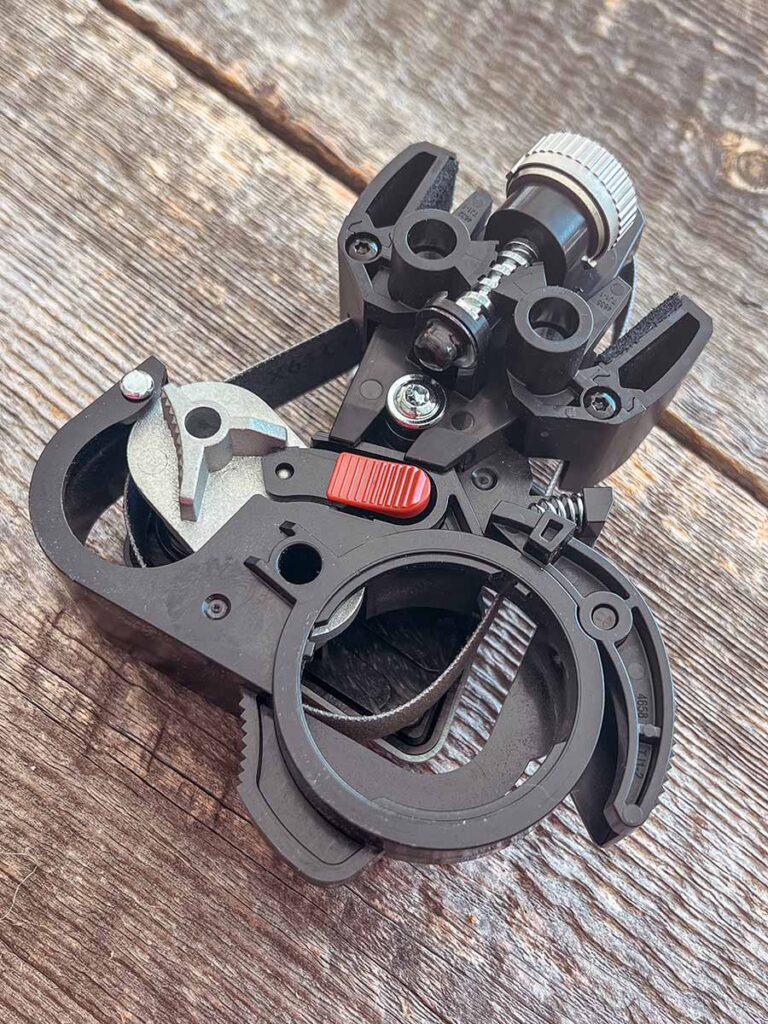
Work Sharp Ken Onion Elite Mk2 Sharpening Head

Ken Onion WorkSharp MK.2 Sharpening Head

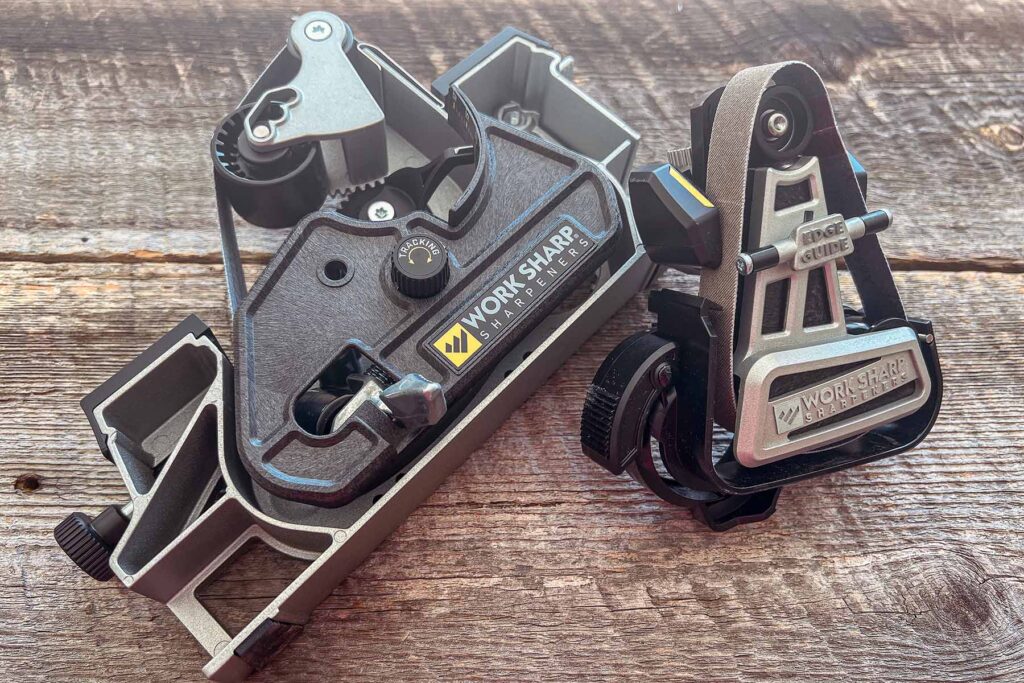
If you prefer to use the standard three-pulley cassette instead of the Blade Grinding Attachment, you can physically swap out the two easily. The power head attaches to either using a simple twist lock connection at the motor housing at the drive shaft.

A nice aspect of the cassette is it includes a scissor guide in addition to a knife guide, which is set at a 65-degree angle. For knives, you use the pull-through method, resting the blade on one of the leather-lined blade rests and pulling the blade through along the belt.

Selecting your edge angle is as easy as turning a dial, similar to the blade grinding attachment. Rotate the knob to the desired edge angle and both blade rests will move in or out simultaneously.

There’s also an included blade rest with plastic rollers that allow you to steady the blade as you pull it through. If you wish to not use these, they simply rotate out of the way and lock into the stowed position.

However, with the cassette, there is no option to adjust for different edge types (standard V, low convex, or high convex). You just get a regular convex edge only, but still razor sharp.

Work Sharp Ken Onion Elite Mk2 Power Head

As for the power head end of things, there are several improvements here. You’ll notice the larger motor housing and inside is a more powerful motor with electronic torque management. The motor senses the load placed on the belt and compensates for it, making this sharpener almost impossible to bog down in use.

The pushbutton speed control with LED light scale shows you at a glance how fast the belt is running. And slowing down or speeding up the belt is as easy as pushing a button.

The Mk2 has a constant on setting—you just squeeze the power trigger and press a button to lock in the setting. Shutting it off is a matter of hitting the stop button or squeezing the power trigger.

The body of the Mk2 has a cast metal overlay that adds rigidity as well as boosts the rough and tumble looks of the tool. Furthermore, the metal overlay makes the unit quieter and dampens vibrations.

Work Sharp Ken Onion Elite Mk2 Testing

Putting the Ken Onion Elite Mk2 to use is a pleasure. However, I’d say, that to step up to a tool of this nature you need to know your manual sharpening skills inside and out—especially when using the grinding attachment. If you don’t know what you’re doing you risk damaging blades or simply spinning your wheels with a sub-par sharpening. Given the guides, the cassette is more forgiving.

I have ten solid years of experience with the original Ken Onion Elite and know the limits of the machine. With this being said, the functionality of the Mk2 is identical to the original and the improvements mentioned make it more user-friendly, improving the overall experience.

Ken Onion WorkSharp MK.2 sharpening with grinding head

I also found the Mk2 is easier to set up and dial in, as well as change angles instantly with the machine powered on. The ability to dial in the edge type (standard V, low convex, and high convex) allows you to tailor the edge format to your specific task for the knife.

Personally, I prefer the high convex, which allows you to cut the edge angle back 2-3 degrees more for enhanced edge sharpness. At the same time, it still retains enough “meat” in the center for lateral strength.

Final Cut

As it goes, the Work Sharp Ken Onion Elite Mk2 doesn’t come cheap with an MSRP of $300. It’s a bit steep for a sharpener. But when you look at what you get, it’s easy to see why it’s still valuable.

While this was primarily designed as a sharpening machine, it’s also a miniature variable speed belt sander that will work on metal, PVC, plastic, and wood. In turn, you receive two machines in one, plus it can handle knives and scissors as well as assist you with projects in your garage or shop. How can you beat that?

Honestly, if you want to take your sharpening game to the next level and beyond, invest in the Ken Onion Elite Mk2 from Work Sharp.

More On Sharpening:

Plain Vs Serrated Knives: Which Is Best For Who

0

School yourself on which edge is best for you and your knife.

Coffee or tea? Pizza or hamburger? Ice cream or cake? Truck or car? Having choices in life is a good thing. You base the choices on such criteria as what you’re in the mood for to eat, how much you can afford for a nice vehicle and more. Likewise, you have tons of choices in knives, including plain, serrated or partially serrated/combo edges.

Most choose plain edges because plain edges provide the most versatile cutting format, regardless of task. They’re also the easiest to sharpen. Some have rougher slicing tasks to do, like cutting rope, cardboard, or webbing or plastic straps. If you undertake such tasks more frequently, a knife with a serrated edge will power through tough and fibrous materials with ease. 

Knowing the intended use for your knife will help you select the proper edge format, so let’s explore the possibilities for plain, serrated and partially serrated edges. Showing typical uses for all three should help you decide which edge format is for you.

CRKT Bugsy

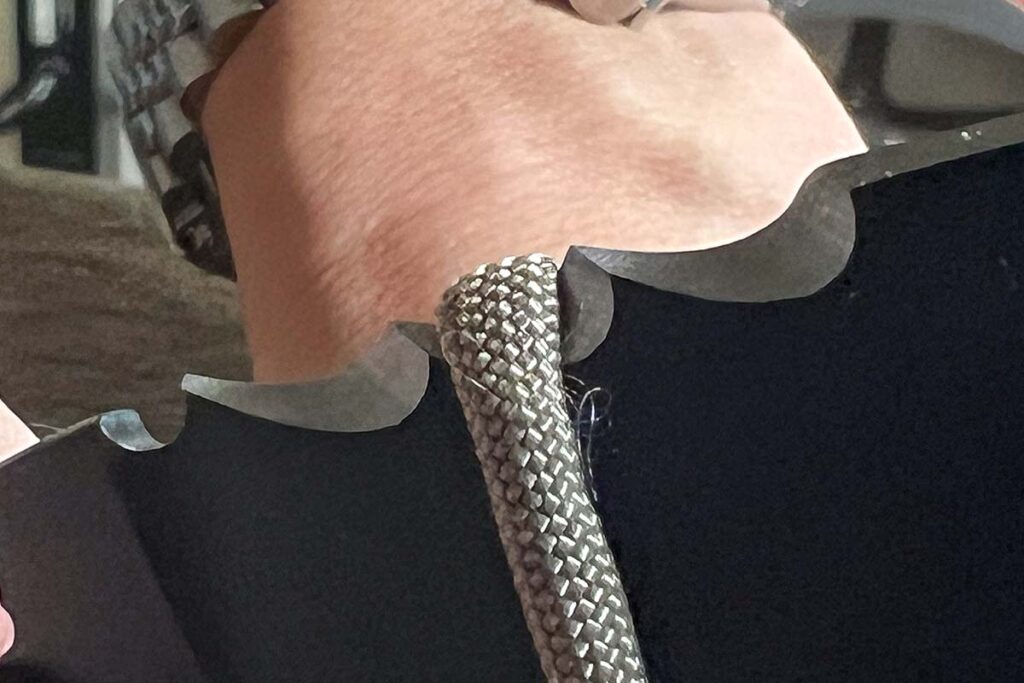
Bugsy’s Veff serrated teeth
Rest whatever you’re cutting inside one of the Bugsy’s Veff serrated teeth and it will help hold the material as well as cut it. 

Kaila Cumings, the three-time contestant on Discovery Channel’s Naked and Afraid reality TV show, designed the CRKT Bugsy. Kaila grew up hunting, fishing and camping with her father, thus starting her lifelong interest in survival skills and tools, including knives. She designed the Bugsy as a compact fixed blade with high utility characteristics and superior ergonomics. 

The 3.7-inch blade enables the knife to execute a variety of tasks related to camping/survival. The modified clip point shape with a defined tip is ideal for scoring, and the gentle sweep of the main bevel gives plenty of belly to facilitate slicing chores such as food prep. The 1095-blade steel provides good edge holding and ease of resharpening in the field. As a result, it is a favorite carbon steel of knife users. The handle’s finger grooves help lock in your grip, and their rounded edges melt into your hand.

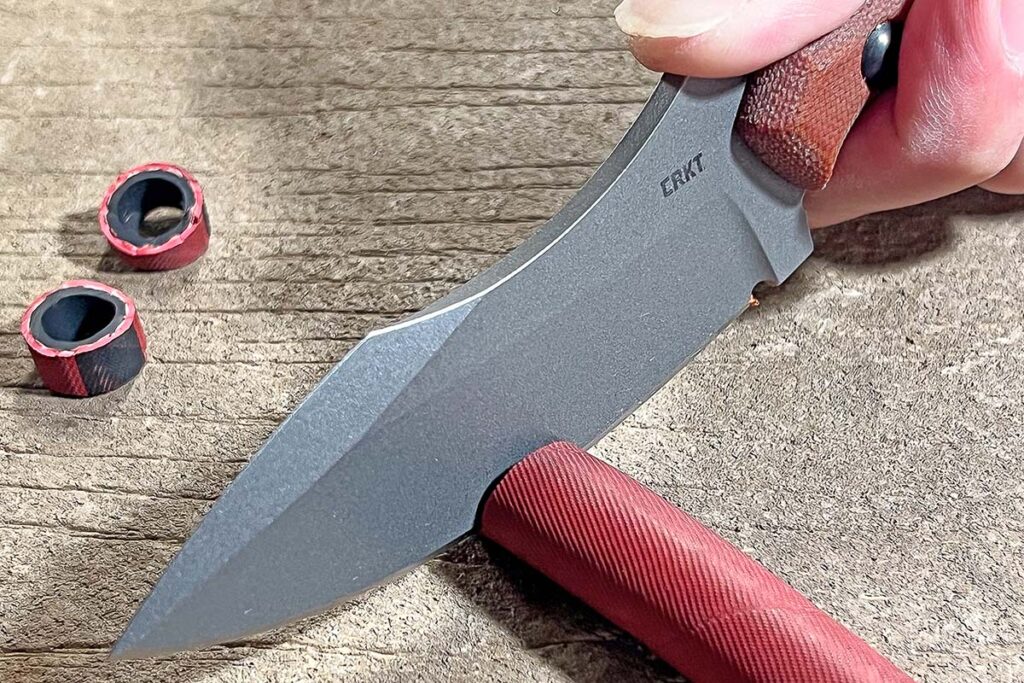
Plain edge Bugsy cutting hose
The plain edge Bugsy works well with utility chores such as cutting rubber hose. The curve of the edge makes for great slicing action.

There are two versions of the Bugsy: a plain edge blade in a gray Cerakote® finish, a tan Micarta® handle and a leather belt sheath, and a partly serrated blade in a black Cerakote finish, a black G-10 handle and a molded Kydex sheath.  The former is outdoor/hunting themed, the latter tactical—same design, two different personalities.

Performance-wise, the Bugsy is an ideal fixed-blade companion in either flavor. It’s just shy of 7.5 inches overall, making it very comfortable for everyday carry. It’s compact enough to carry well yet there is enough blade length to handle most cutting jobs. Both versions have an MSRP of $170 and are made in the USA for CRKT by TOPS Knives.

Spyderco Paramilitary 2

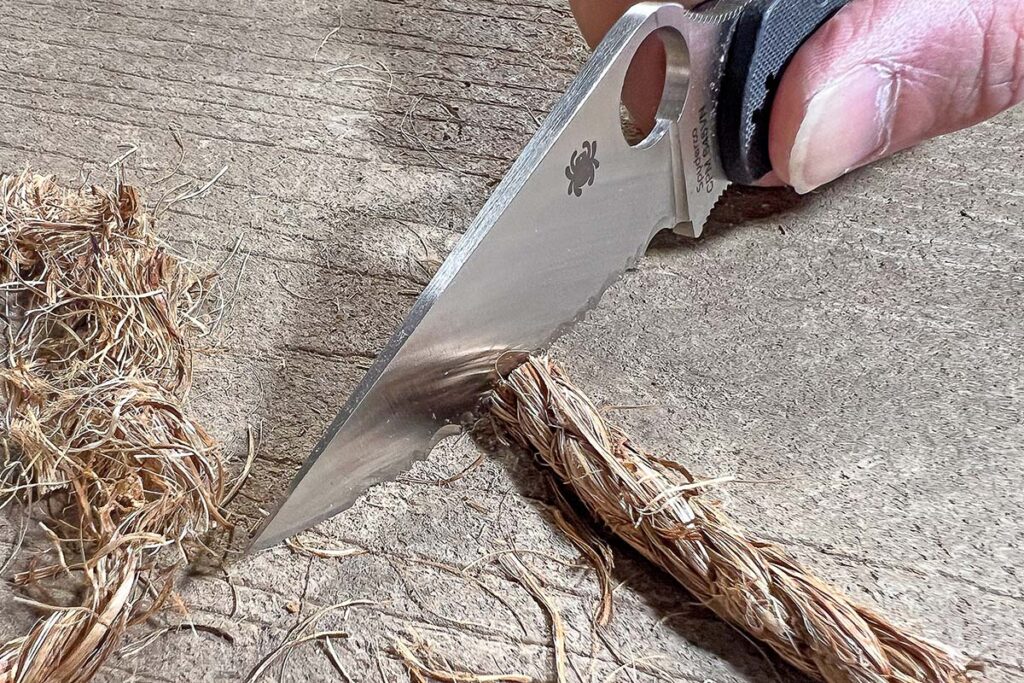
Spyderco Para2 cutting rope
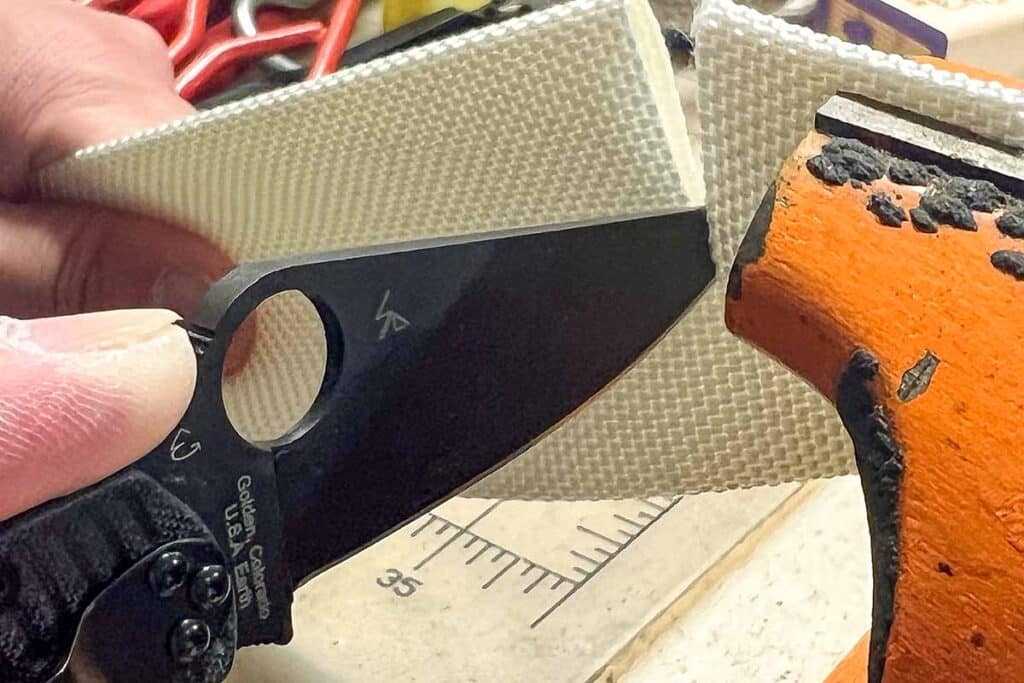
This is where the fully serrated Spyderco Para2 shines. Manila rope is tough to cut and the Para2 handles it without any effort exerted. “If you cut rope regularly,” the author noted, “fully serrated is the way to go.”

The Paramilitary 2, aka Para2, is one of Spyderco’s hottest-selling folders. Taking what works for the company’s full-size Military model and making it a bit more compact and pocketable, the Para2’s design and performance lineage is undeniable. It has a full-flat-ground blade that makes the Military a lean, mean cutting machine. 

There’s also the ultra-strong Compression Lock that secures the blade open, yet is easy to manipulate and close one-handed. The ergonomically shaped G-10 handle sports a nice peel-ply texture that aids in grip retention. The Para2 is built for serious EDC use. The 3.4-inch clip point blade is CPM S45VN high-performance stainless steel for enhanced edge holding. 

The reasons for the Para2’s superior cutting performance are both the full flat grind and the distal taper from tang to blade tip. The resulting progressively thinning down of the blade allows it to sail effortlessly through whatever you’re cutting. The thumb rest and finger choil boast deep traction notches for a nonslip grip, allowing a choke-up grip when more control or pressure is required.

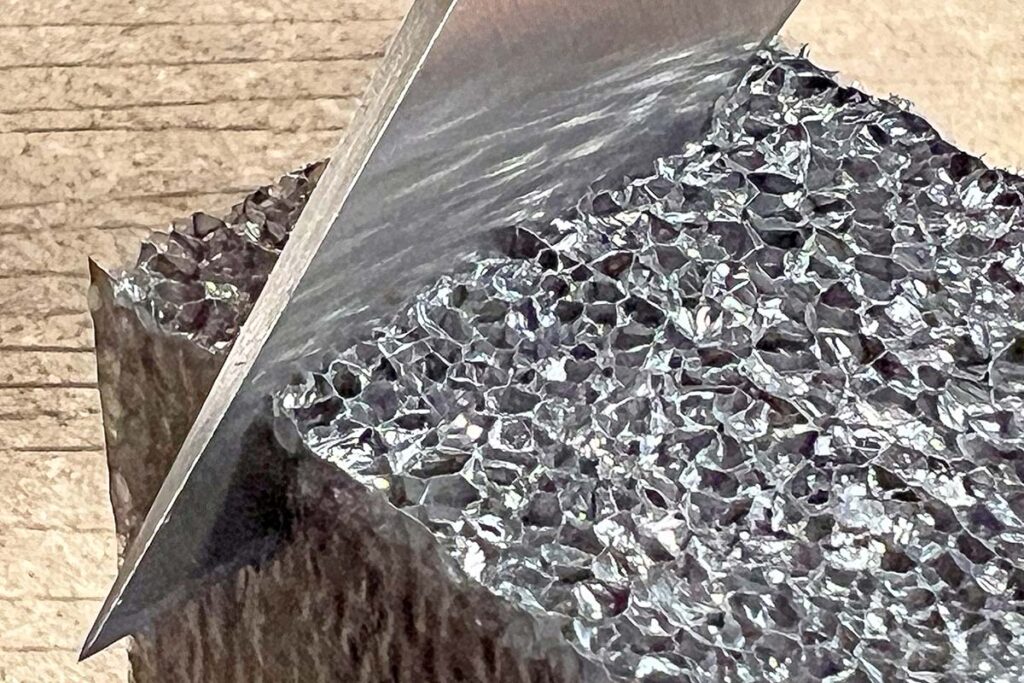
Plain edge Para2 has a slight distal taper
The full-flat-ground blade of the plain edge Para2 has a slight distal taper from tang to tip, which makes it bite hard and sink into the cutting media. It goes through foam block like a laser.

The edges of the G-10 are chamfered to prevent hot spots. An hourglass-shaped steel pocket clip mounts in one of four ways conducive for lefties and righties, as well as blade tip up or tip down. The Para2 carries well in whatever mode you select, making it a popular choice among Spyderco enthusiasts as well as those who fancy a well-made working folder.

Spyderco long has been known for its handle shapes, blending ergonomics with smart, practical design, resulting in a knife comfortable to use for extended periods. The Para2 handle has an integral guard just behind the finger choil. There’s also a generous swell in the grip area to accommodate your fingers comfortably. The butt swells just enough to prevent your hand from sliding rearward. 

With the Para2 you have a choice of a plain or fully serrated edge. Spyderco has long been known for its fully serrated blades, with its serration pattern regarded by many as the best in the industry. The tooth pattern cuts aggressively while still having a smooth action. MSRP for the plain or serrated Para 2 is $265. Country of origin: USA.  

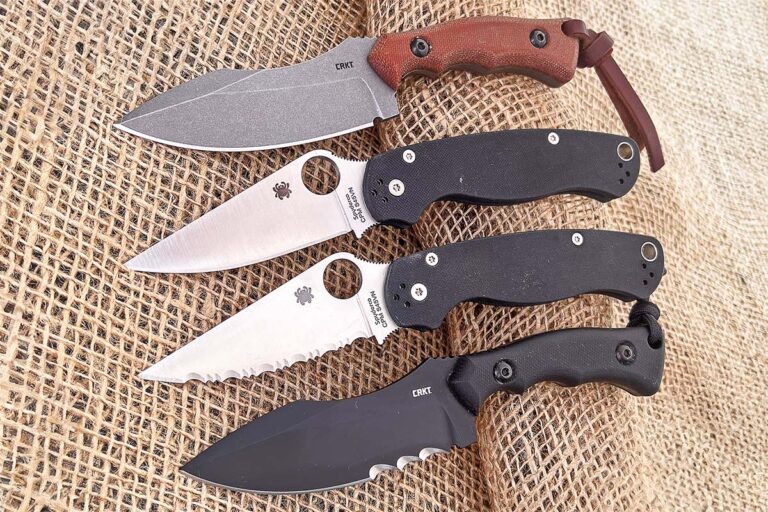
Plain Vs Serrated Knives

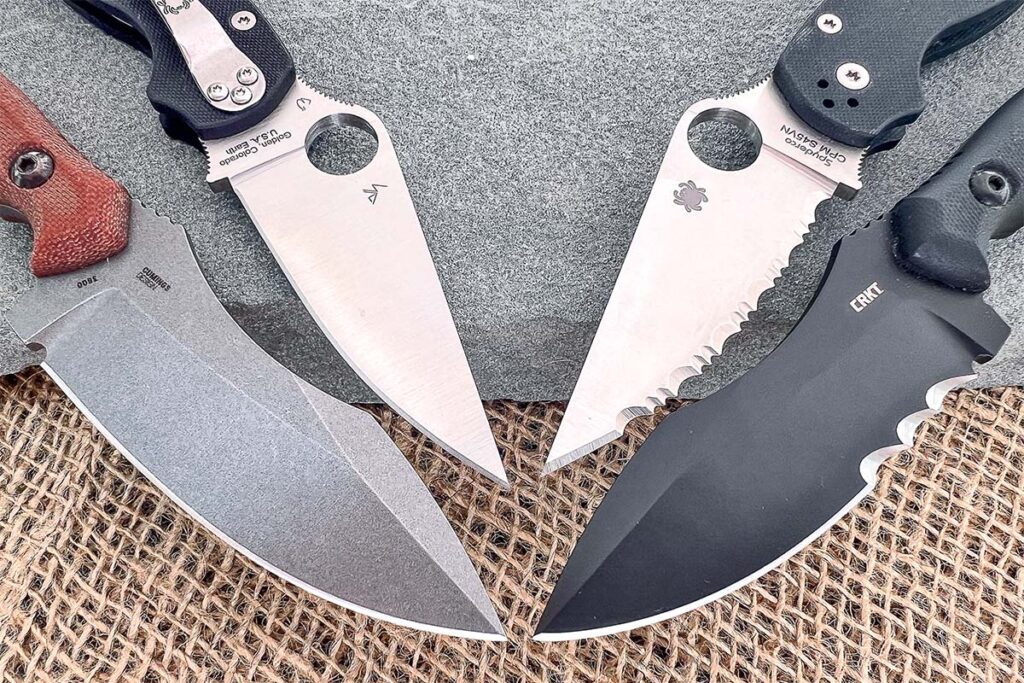
Plain and serrated or partly serrated edge versions of the same knife model, clockwise from bottom left: CRKT Bugsy plain, Spyderco Para2 plain, Para 2 fully serrated and Bugsy partially serrated.

Choose your edge format carefully to best suit most of your cutting needs. Most opt for a plain edge for the previously mentioned reasons. A plain edge does well in a variety of settings, from opening packages to stripping wire, doing light-duty scraping tasks, and even food prep. Ninety percent of cutting tasks are suited to plain edges while roughly 10 percent or so require more muscle.

Plain edge blades are easy to sharpen as well—just be sure to select your sharpener carefully based on steel type. Harder, more-wear-resistant steels like the CPM varieties require diamond sharpeners due to how aggressively diamond abrasives cut. Steels not as hard as the CPM varieties can be addressed with diamonds too, but other types of sharpeners like ceramic are very effective as well. A properly sharpened plain edge blade is all you need for most cutting jobs, big and small.

Remember that if you can reprofile the edge angle, you can decrease it by one or two degrees to get a sharper edge. For instance, most factory edge angles are 22 degrees, average. If you cut the angle back by just two degrees, you will be surprised at how much sharper the edge will be and therefore have more bite.

You need a sharpener specifically designed to address serrations. One is the Spyderco Sharpmaker 204. Set the 204 up to where the “points” of its triangular-shaped hones contact the serrated cutting edge. The points get inside each tooth as well as sharpen the tips of the serrations. There are others out there that address serrations but the best I have found is the 204. Some say serrations are difficult to sharpen but they aren’t if you use the correct sharpener.

Again, choose your edge format carefully to match the intended uses for your knife. You don’t want to cut open boxes or prep food with a serrated blade. You can do such tasks with a serrated blade if it’s the only blade you have, but, if given a choice, such tasks are better suited for a plain edge due to the smoothness of how it cuts.

Plain Vs Serrated Knife Analysis

The plain-edge versions of the Bugsy and Para2 work exceptionally well. The Bugsy’s blade belly makes slicing effortless and has plenty of bite. The Para2’s full flat grind with distal taper allows the blade to effortlessly cleave through tough materials. The excellent edge geometry enables the blade to bite in deep. In fact, the Para2’s blade makes cutting tasks easy and fun to complete, taking the work out of work.

The serrated versions of each knife have their own pluses and minuses. With the partially serrated Bugsy, the Veff serrations are ground at an angle, cutting most effectively on the pull rather than the push cut. The large scalloped teeth also help in cutting paracord, string for weed trimmers, twine, threads and zip tie ends. Just rest whatever you are cutting inside one of the teeth and that will help to hold the material as well as cut it. 

The serrations perform great but I felt that they were ineffective for some cutting work due to their limited length. You must saw back and forth with the blade to make effective use of the serrations, and sometimes that is just not feasible. A fully serrated blade would be nicer to allow for more edge real estate to apply the serrations and make full use of them. However, for what the Veff serrations are, they work well and are aggressive. I would not rely on them a whole lot but, as they say, they’re better than nothing.

There is a reason why Spyderco makes some of the best fully serrated blades on the market. The Para2 fully serrated version is a solid, proven performer. It’s pretty much an ultra-compact folding buzzsaw in your pocket. The two-step serration pattern typical of Spyderco is aggressive in bite and smooth in action. You need not even apply an excessive amount of pressure to make the cut as the serrations enable the blade to power itself through. 

Cutting manila rope is something that is tough on edges. The edge must be very sharp to do it. When I cut rope with the fully serrated Para2, I could immediately feel the edge bite in deep and effectively power its way through. Same for cardboard. The action is a bit rough but still, it gets the job done quickly.

The fully serrated Para2 also does a surprisingly good job cutting vegetables. You would think a plain edge blade would excel with the task and while you’re certainly not wrong in your thinking, you’ll be pleasantly surprised that a fully serrated blade can handle more delicate cutting tasks well, in addition to the tougher ones that require more horsepower.

More Knife Buyer’s Guides:

Magnacut Knives: Top Options With The Super-Steel Blade

See why the hot powder metallurgy steel is all the rage in knives.

You might have heard that CPM MagnaCut is the latest in high-end blade steels. You might have seen that knives with MagnaCut blade steel have been selling fast. Everyone wants MagnaCut! But what exactly is it?

What Is Magnacut Steel?

MagnaCut is the latest super steel offered by Crucible Materials of Syracuse, New York, the same folks who make such high-end blade materials as CPM S30V, S35VN, S45VN, CPM 154, 20CV, 3V and others. Metallurgist Larrin Thomas, winner of the BLADE Magazine 2024 Publisher’s Award, invented MagnaCut. His objective was to create a stainless blade steel whose properties are balanced and that would perform well in the critical areas of edge holding, corrosion resistance and toughness.

With other high-end steels there’s usually a degree of give and take where you might sacrifice a bit of one characteristic to gain more in another. This is something knife folks have endured for so long that they’re used to a certain degree of compromise in order to get a blade steel suitable for their needs. Simply put, MagnaCut could very well be the steel that has all the characteristics knife guys want in a blade material. Basically, it’s their dream steel come to life.

Compared with other CPM steels, MagnaCut has less toughness, though don’t look at that as a bad thing. It’s actually very good in that MagnaCut is easier for a knifemaker to work; that is, it grinds and drills easier. On the knife user end, it means MagnaCut is easier to resharpen than other CPM steels whose toughness rates higher. Still, I recommend using diamond abrasive sharpeners on MagnaCut to obtain the best results.

See now why MagnaCut is all the rage in the knife industry? Just about every major manufacturer is using it and even some custom makers. The switch to MagnaCut can be seen as a way for manufacturers especially to level up the performance of their knives.

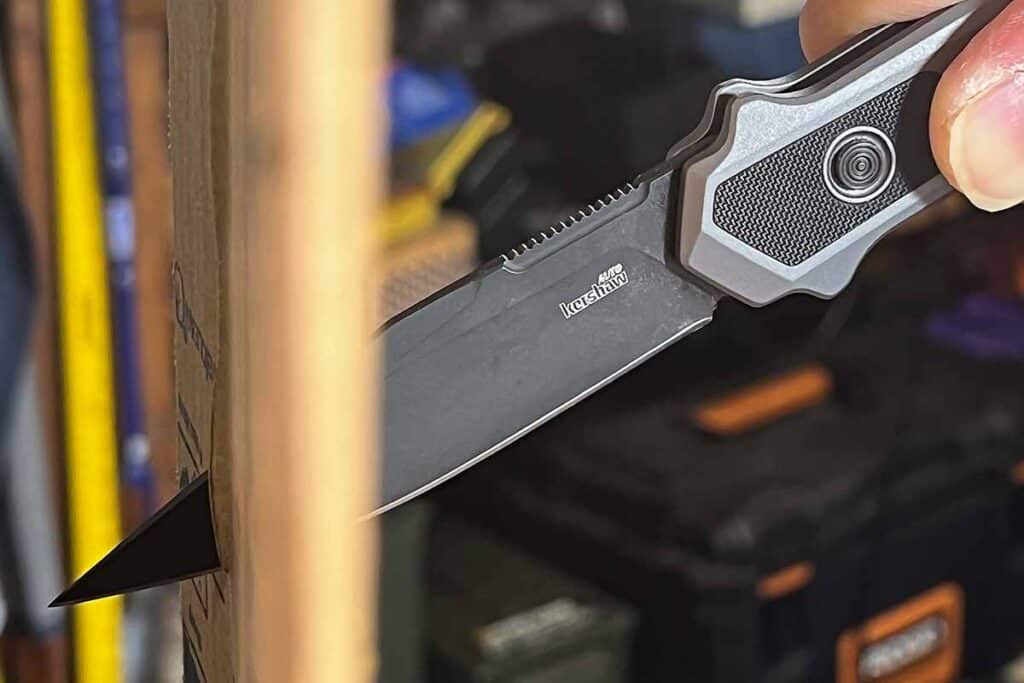
Kershaw Launch 17

Kershaw Launch 17’s clip-point blade in MagnaCut
The Kershaw Launch 17’s clip-point blade in MagnaCut offers great utility for a wide variety of cutting chores. 

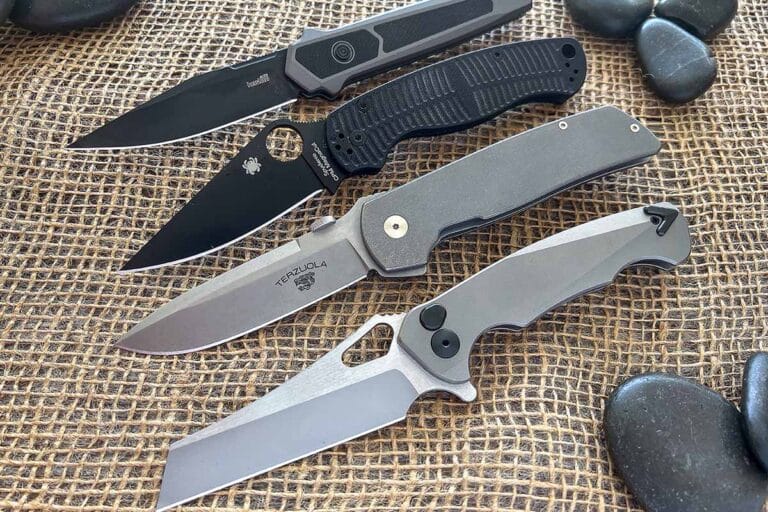
Among the latest factory knives to offer MagnaCut blade steel is the Kershaw Launch 17. The Launch 17 presents a slender carry handle profile with a highly usable 3.5-inch clip-point blade. At 5 inches closed the Launch 17 is on the bigger side of EDC knives, but its svelte handle makes it very comfortable to carry. The flat-ground blade is a great working shape that tackles just about any cutting chore.

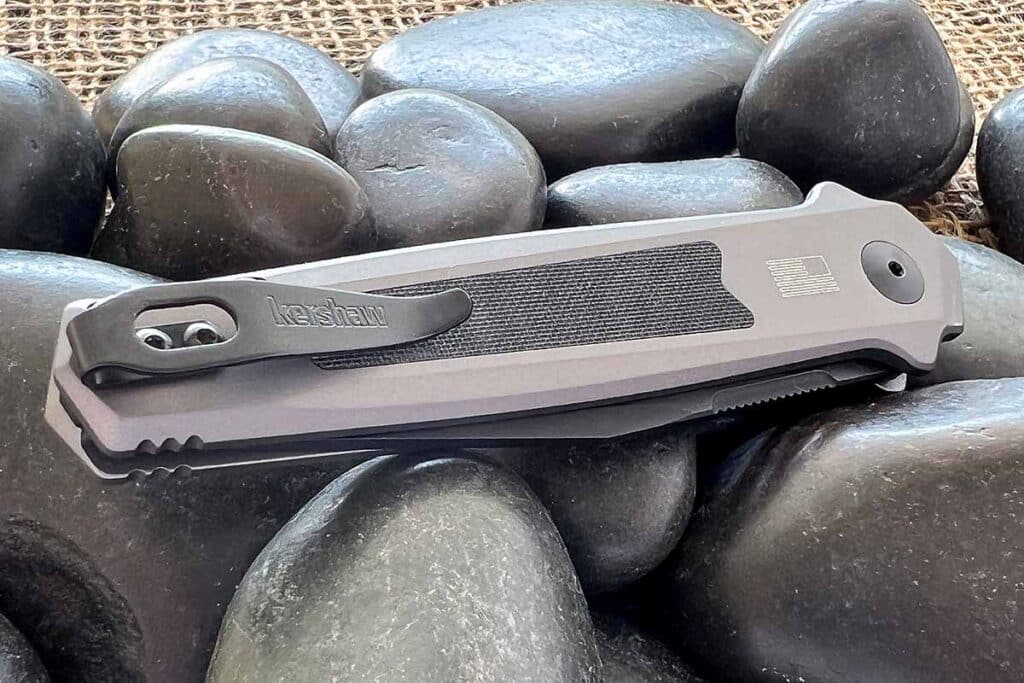
The handle is machined T6 6061 aluminum anodized grey and features textured black G-10 inlays for a neat contrast of color as well as purchase. The grip is symmetrical and an integral double guard keeps your hand in place. The handle is mainly an open-frame construction that allows easy cleaning with compressed air or water, and a clip mounted at the butt provides very deep pocket carry for ultimate concealment.

deep-carry clip of the Kershaw Launch 17
The deep-carry clip of the Kershaw Launch 17 allows the knife to sit very low in the pocket for ultimate understated carry. 

The only downside I see is the placement of the firing button. I want to grab the handle in a way that my thumb falls right into the button. I had to consciously readjust my grip to where I hold the handle a bit further toward the butt so my thumb falls just behind the button. It’s not really a big deal and certainly not what I would call a dealbreaker, but just something to be aware of.

The clip point blade is one of the knife’s key selling points. An excellent shape for general use, it has a defined point for scoring and fine cutting tasks, and there’s plenty of edge real estate to tackle your toughest chores quickly. The opening action is quick yet with very little recoil. The lockup is very tight with zero play. The Launch 17 makes a great EDC auto that’s light both in the pocket and on the wallet. MSRP: $239.99.

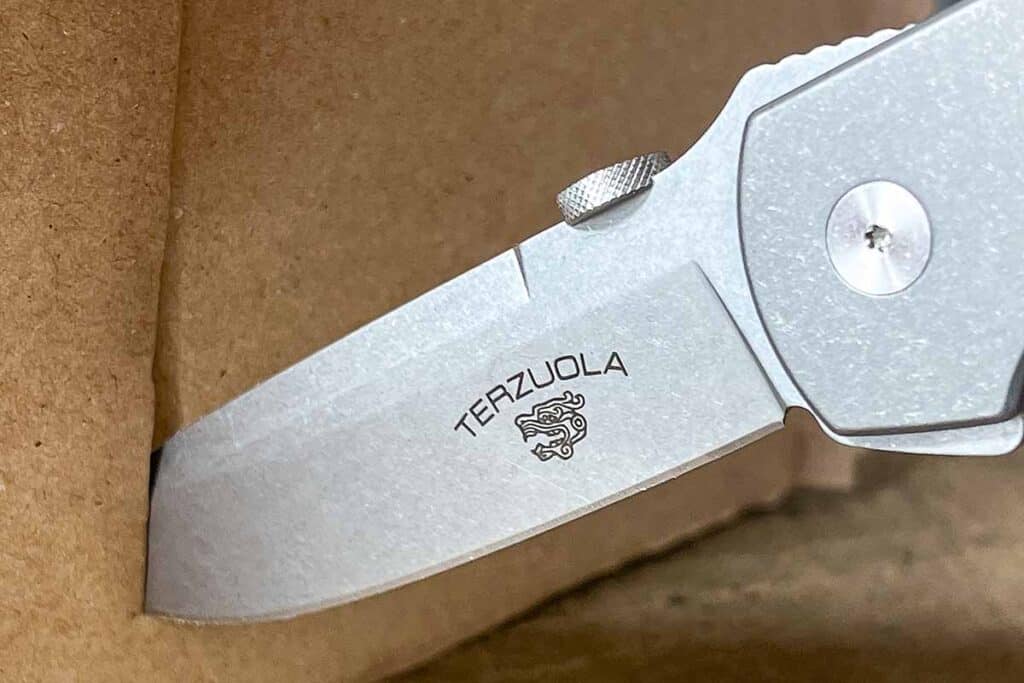
Fox Knives/Terzuola ATCF Original Gangster

ATCF Original Gangster from Fox in MagnaCut blade steel
The ATCF Original Gangster from Fox in MagnaCut blade steel is an homage to Bob Terzuola’s iconic custom ATCF tactical folder. The initial Terzuola ATCF helped define the tactical folder era by incorporating features that are now standard with many folding knives of the genre.  

BLADE Magazine Cutlery Hall-of-Fame® member Bob Terzuola introduced his quintessential custom tactical folder, the ATCF (Advanced Technology Combat Folder), in 1986-87. It is Terzuola’s best-known folder and most imitated design. The original included a host of features that are now standard on any top tactical folder, custom or production, including screw-together construction and a notched thumb ramp for aid in a nonslip grip and applying pressure for power cuts. It also incorporated a checkered thumb disc for ambidextrous blade deployment.

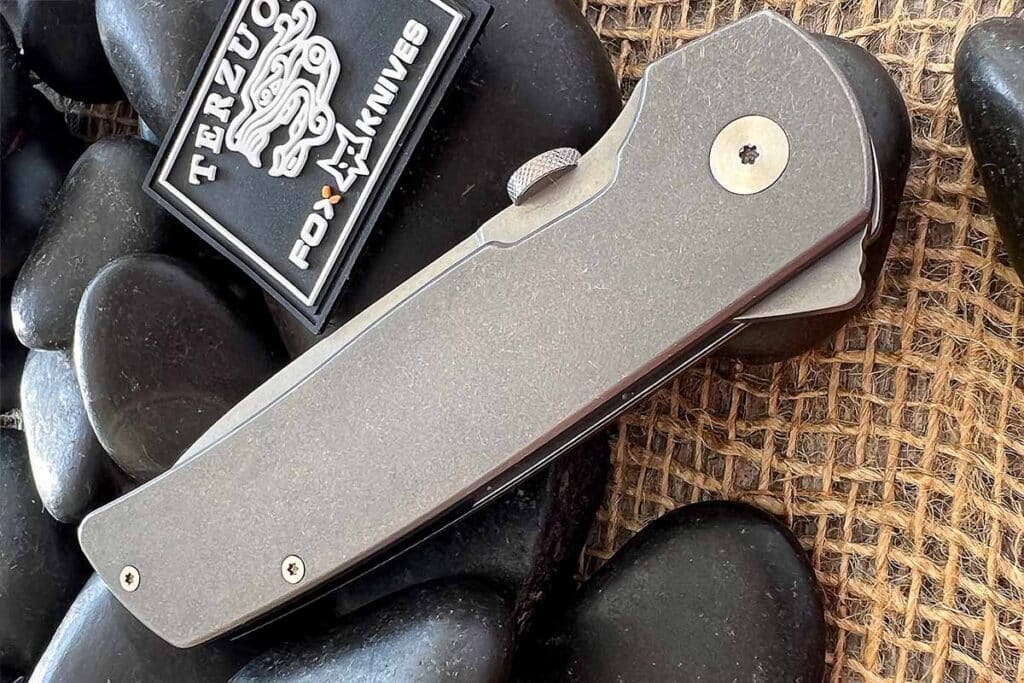
Fox Knives teams with Terzuola to release the ATCF Original Gangster. The knife is built almost exactly the way Terzuola builds his custom version, complete with the aforementioned features as well as MagnaCut. The 3.5-inch modified drop-point blade has a swedge. The addition of a flipper tab ushers the ATCF OG into the modern tactical realm and provides two blade-deployment options: ambidextrous thumb and flipper opening.  The test sample is the SQ-ATC-OG01 with a titanium handle and stonewashed blade. The blade rides on bearings for ultra-smooth action. Like the addition of the flipper, this is also a modern innovation incorporated into the reproduction of the legendary folder.

Fox ATCF Original Gangster features a flipper tab
The Fox ATCF Original Gangster features a flipper tab to aid in quick one-hand deployment. This was not a feature found on Bob Terzuola’s original ATCF design but rather incorporated by Fox as a modern convenience.

With its integral forward guard and slanted butt, the handle is another Terzuola signature design. The titanium scales have a matching stonewash finish and are devoid of any machining—just smooth titanium that’s comfortable in-hand. The lock is the tried-and-true linerlock. The blade-tip-up-carry clip secures via a single T6 Torx head bolt and is held in place inside a machined cavity that captures the clip and prevents it from rotating. Before you complain about the clip not being reversible, remember that the ATCF was introduced at a time when pocket clip folders were still a relatively new concept, much less ambidextrous clip carry. A solid G-10 spacer rounds out the look and leaves most of the handle spine open for easy cleaning. A pin recessed in the butt accepts a lanyard, though standard 550 cord is too thick to fit.

Everything works on the knife, from the integral single guard to the thumb disc for ambidextrous opening. The flipper works well, too. I like the drop-point blade, an all-around favorite of mine for a variety of tasks. It’s highly adaptable, from utility to survival to tactical. The titanium handle has a nice heft and it’s pure function with no additional machining or coloring added. It just works. Country of origin: Italy. MSRP: contact Fox for more information.

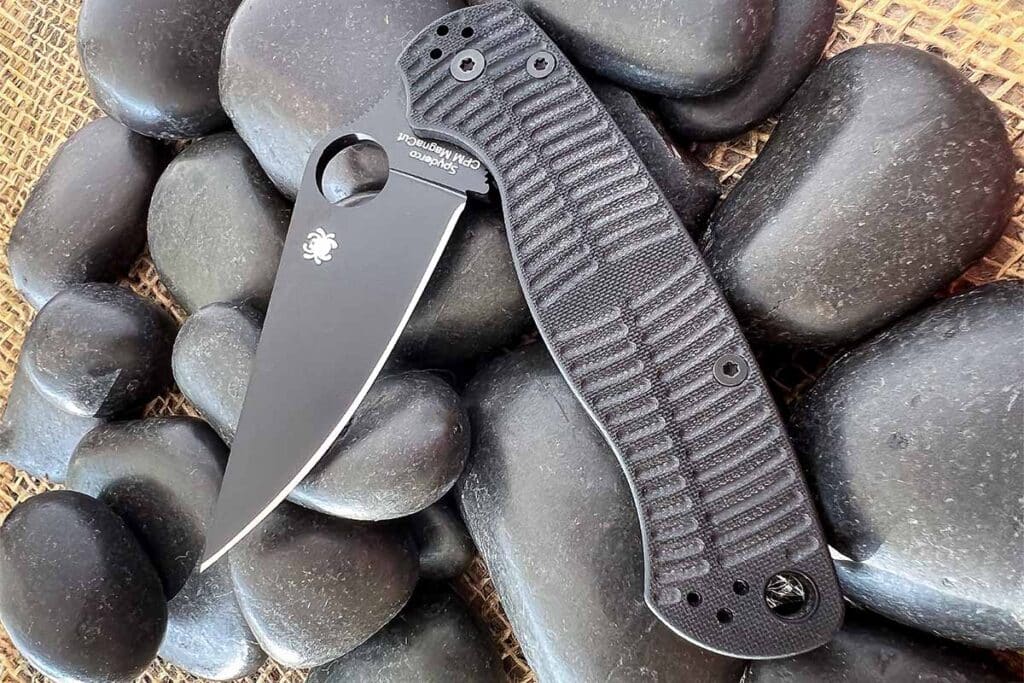
Spyderco’s Para Military2 Salt Black G-10

Spyderco Para2 Salt has a full-flat ground blade of CPM MagnaCut stainless steel
The Spyderco Para2 Salt has a full-flat ground blade of CPM MagnaCut stainless steel with a distal taper that allows the knife to be an extremely effective slicer with aggressive bite, perfect for tough tasks like cutting through fire hose material. It is the BLADE Magazine 2024 Most Innovative American Design.

The BLADE Magazine 2024 Most Innovative American Design, Spyderco’s Para Military2 Salt Black G-10 is in the company’s line of corrosion-resistant knives designed especially for fresh water and saltwater environments. It is basically a regular Para2 with the addition of MagnaCut blade steel and other steel parts such as liners, pocket clip, screws and standoffs covered in a black protective coating to boost corrosion resistance.

The 3.45-inch blade is a great size for a work knife. It’s not too long nor too short. A large blade hole aids in easy thumb opening and works well if you’re wearing work gloves. The blade secures open via Spyderco’s Compression Lock, which is designed to be both strong and easy and comfortable to operate. The blade’s full flat grind allows it to sail through a host of media, and right out of the box is razor sharp and ready to work. That’s one thing about any Spyderco knife—the blade shapes and grinds are optimized for high-performance cutting.  

Para2 Salt’s machined handle grooves offer enhanced traction
The Para2 Salt’s machined handle grooves offer enhanced traction even with wet hands. The texture is a nice extra touch for a working knife.  

The handle surface is machined in a radial groove pattern that distinguishes the knife as a premier member of the Salt Series. Spyderco calls it the Caribbean Bi-Directional Texture pattern and it greatly enhances grip traction, more so than standard peel-ply texturing. An excellent choice when dealing with wet hands, the grooves channel water away for a surer grip. The handle includes four-way pocket-clip mounting, open spine construction and a Compression Lock. Releasing the lock is super easy and can be done with one hand, as well as closing the blade. The way you release it keeps your fingers out of the way of the blade’s rotation path, therefore negating accidental cuts. The Compression Lock is a rock solid design, one of the best locks around.  

The full flat grind coupled with a distal taper of the blade from tang to top make the Para2 Salt a lean cutting machine. It goes through most any material, thick or thin, with ease and little force—a sign of a well-engineered blade. Not only is the blade shape very efficient but the handle design is, too. It fits my average-sized hand very well and instills true user confidence in its comfort and safety. Country of origin: USA. MSRP: $315.

Dead Reckon Ridgeback

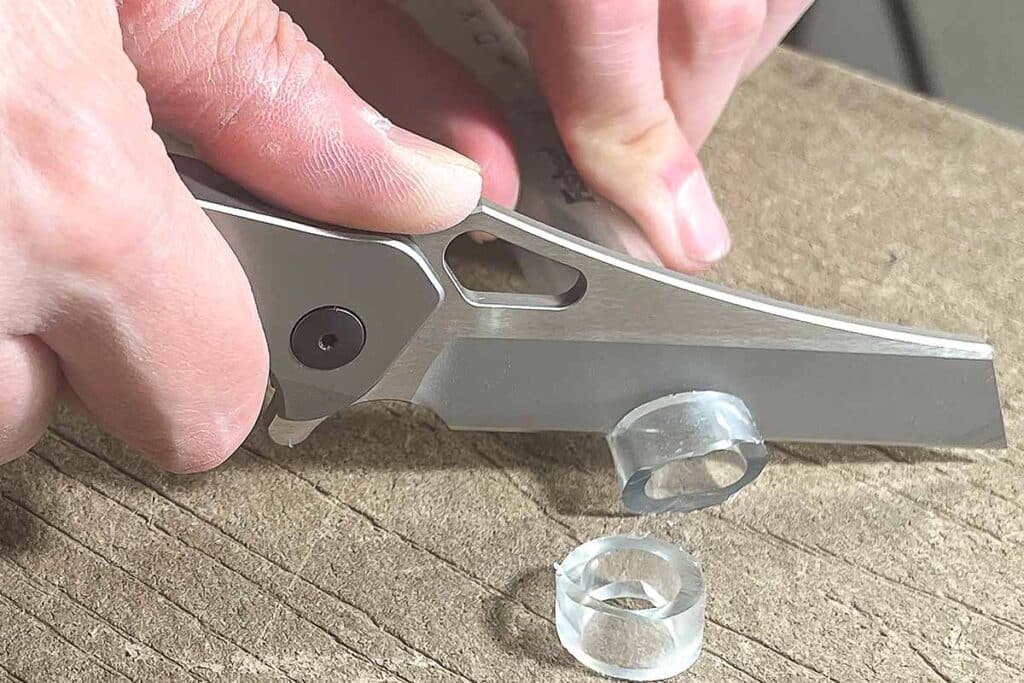
Dead Reckon Ridgeback's canted MagnaCut blade allows for greater knuckle clearance
The Dead Reckon Ridgeback’s canted MagnaCut blade allows for greater knuckle clearance when working on a flat surface.

Dead Reckon is a new knife manufacturer and the Ridgeback folder is its first offering. There’s a lot going on with this folder, from the button lock mechanism, flipper opening and sealed bearings in the pivot to the integral handle. Crafted in the company’s Grove City, Ohio, facility, each knife is precisely and carefully manufactured to high standards that would satisfy the pickiest knife enthusiast.

An example is the Ridgeback in its “wharncleaver” blade and integral titanium handle. The 4.1-inch MagnaCut blade is of a hybrid wharncliffe/cleaver pattern with a distinctive slant nose tip and straight-line cutting edge. The knife offers two methods of opening: flipper tab and oblong blade hole. Whatever method you prefer, the blade operates smoothly thanks to the sealed bearing pivot. Just ahead of the flipper is a cutout for choking up for precise control.

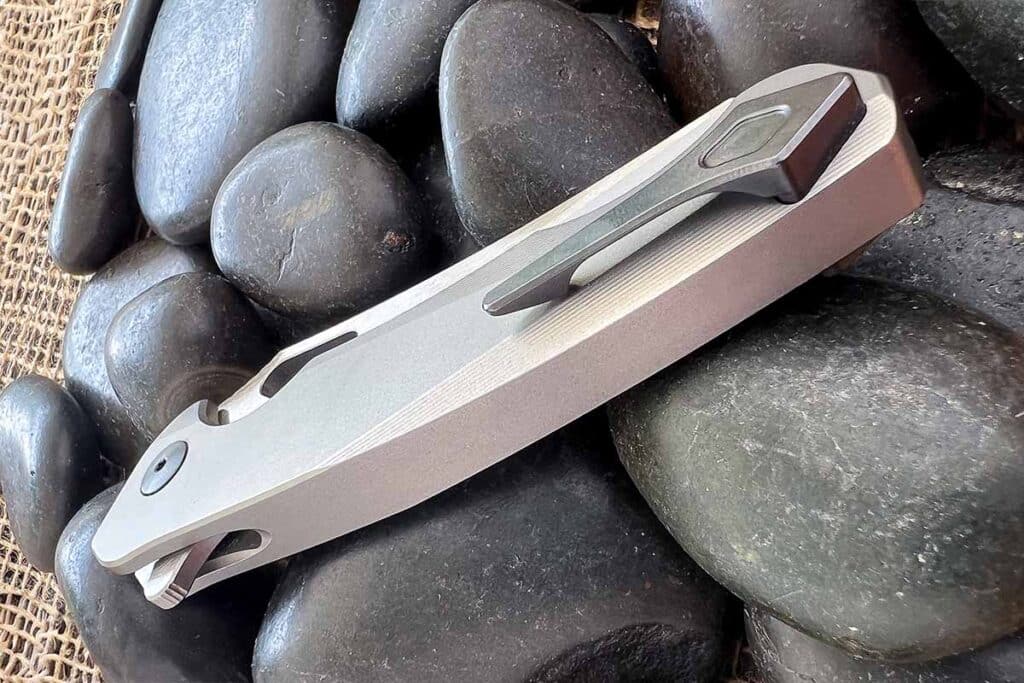
The handle is Grade 5 titanium, which is 6Al/4V titanium alloy. It is of an integral construction, which is difficult to manufacture. Only one other company I know of has pulled this off successfully. The Dead Reckon production staff takes one billet of titanium and machines the channel in the middle where the blade rests in the closed position. It’s all one piece with no assembly screws. It’s a very strong handle design and the lack of screws makes for a very clean appearance. 

On most knives the pocket clip is a stamped and bent piece of steel. Nothing fancy or flashy but utilitarian. The Ridgeback clip is of a milled titanium that sports a very cool-looking geometric shape. It is quite eye catching, not an afterthought but an aspect that adds to overall appearance. The clip is at the right tension to hold the knife to the pocket without it wanting to slip out, while the ability to remove the knife remains fairly easy—the best of both worlds!

one-piece handle construction of the Dead Reckon Ridgebac
The one-piece handle construction of the Dead Reckon Ridgeback allows for a very strong grip but requires considerably more machining time than a standard handle, and therefore is more expensive.  

For a very utility-friendly blade shape, the wharncleaver is it. There’s a lack of a defined blade tip, though there is one of sorts at the front of the cutting edge. Using a gentle pulling motion, you can use it to score materials easily. When cutting full on, the straight-line edge does so smoothly. With multiple grip options and a notched thumb rest, along with the cutout, this knife is easy to adapt to the cutting scenarios at hand.

Want more power? No problem. Use the thumb ramp to place more pressure on the blade. Want more control?  Choke up on the blade using the finger cutout. The canted blade makes the Ridgeback more comfortable to use on a flat surface by offering enhanced knuckle clearance. You might think the appearance is a bit weird but don’t knock it until you try it. Country of origin: USA. MSRP: $475.

Check Out More Buyer’s Guides:

How To Sharpen Recurve Knives

0

We outline how to put an edge back on a recurve knife, both by manual and automated systems.

Editor’s note: In addition to holding down a full-time job, being a BLADE® field editor for many years and conducting several sharpening seminars and BLADE University classes on the subject, the author also runs a sharpening service. All the sharpeners illustrated in the story are in his collection.

Face it—recurve blades are just plain sexy. The way the cutting edge adopts a sinewy figure is unlike most any other blade pattern and definitely catches the eye. 

A fun fact about recurve blades: the cutting edge is always longer than a standard blade of the exact same size. How? If you were to take the recurve edge and straighten it out and compare it with a more conventional blade of the same length, the recurve cutting edge would always be longer. Why? The curves pack in more steel real estate in the same overall blade length. Recurves are practical as well, as the curved part presents itself at an angle to whatever is being cut and therefore slices it more efficiently.
  
While recurves are attractive and functional, some folks tend to steer clear of them because they assume the edges must be difficult to sharpen. It’s the curvature that throws them off. I’m here to tell you that recurves are not hard to sharpen at all if you have the right sharpener. Once you have the right sharpener, the steps you follow are exactly the same as if you were sharpening a standard blade.   

Type Of Recurve Sharpeners

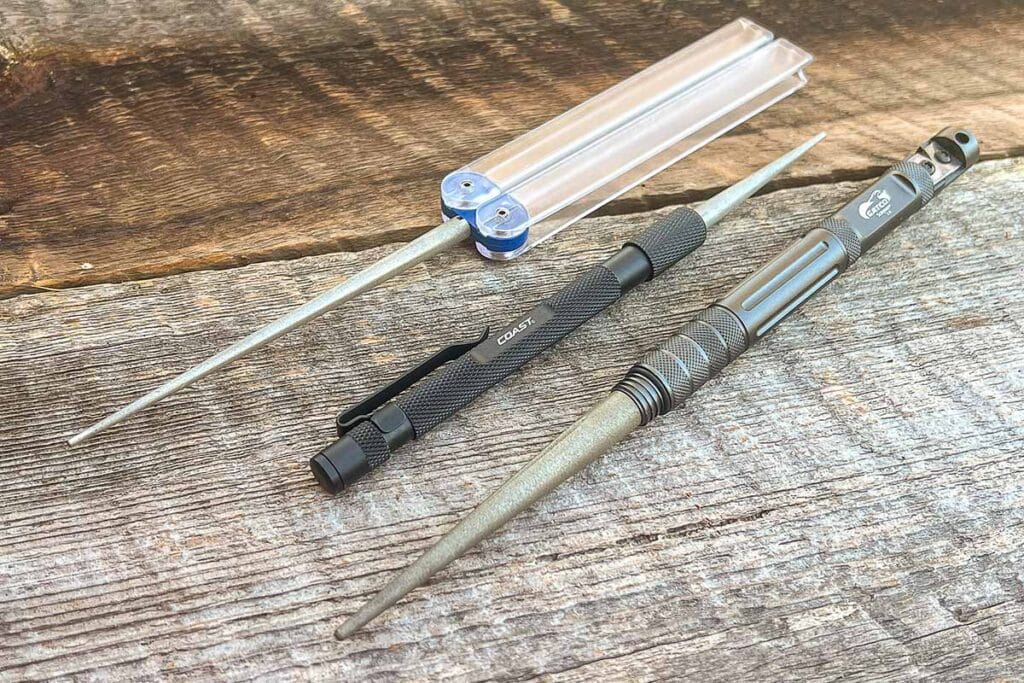
Sharpeners with rounded profiles
These manual sharpeners with rounded profiles not only are good for serrations but are for recurve blades as well. From top: DMT FSKC Diafold Serrations Sharpener Coarse Grit, Coast SP245 and GATCO Scepter 2.0.

What sharpener do you use for recurve blades? There are actually quite a few sharpeners that are best suited. Some you may already have and didn’t know they would do the job. The appropriate sharpener has a round profile, as the round part always makes contact with the cutting edge regardless of how recurved the blade gets. I recommend that the sharpener be diamond coated since diamond works exceptionally well with the harder, more wear-resistant steels popular today such as—though not limited to—the CPMs of S30V, 20CV, S35VN, S45VN and MagnaCut.

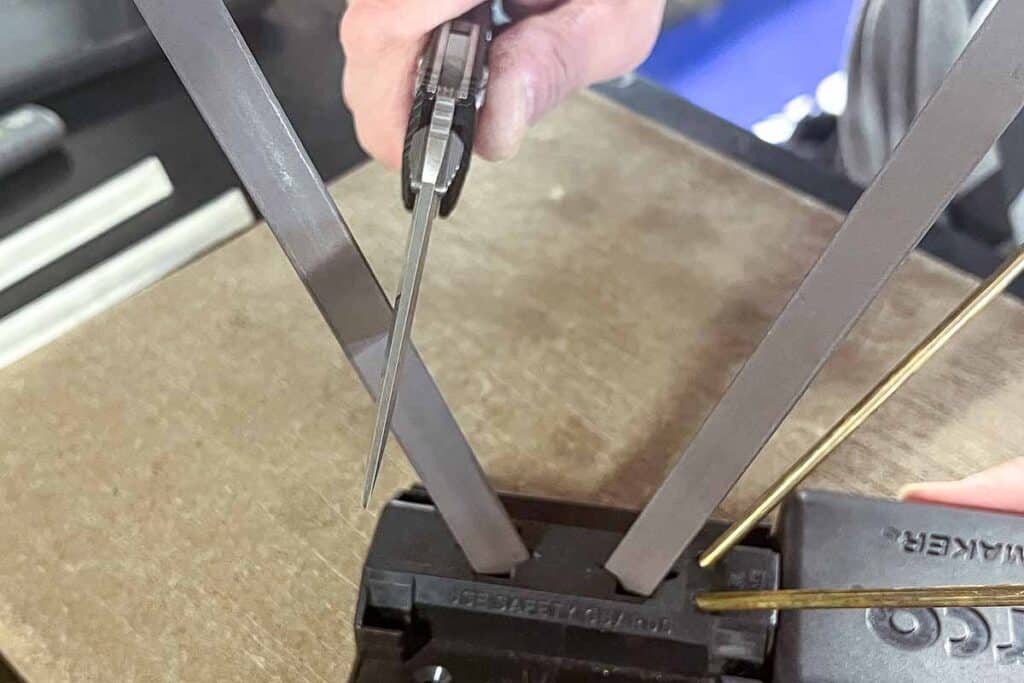
The “V” approach of the Spyderco Tri-Angle Sharpmaker is another effective way to sharpen recurves manually.

In this article, I first show you how to properly sharpen recurve knives using a manual sharpener. The technique is the same regardless of which sharpener you use. Then I demonstrate how I sharpen recurve blades using a powered method. As the editor was so kind to point out, I run a sharpening service on the side as well, and I have years of experience sharpening all sorts of blades. My way is reserved for more advanced and more accomplished sharpening skills only.

How To Sharpen Recurve Knives

Manual Sharpening

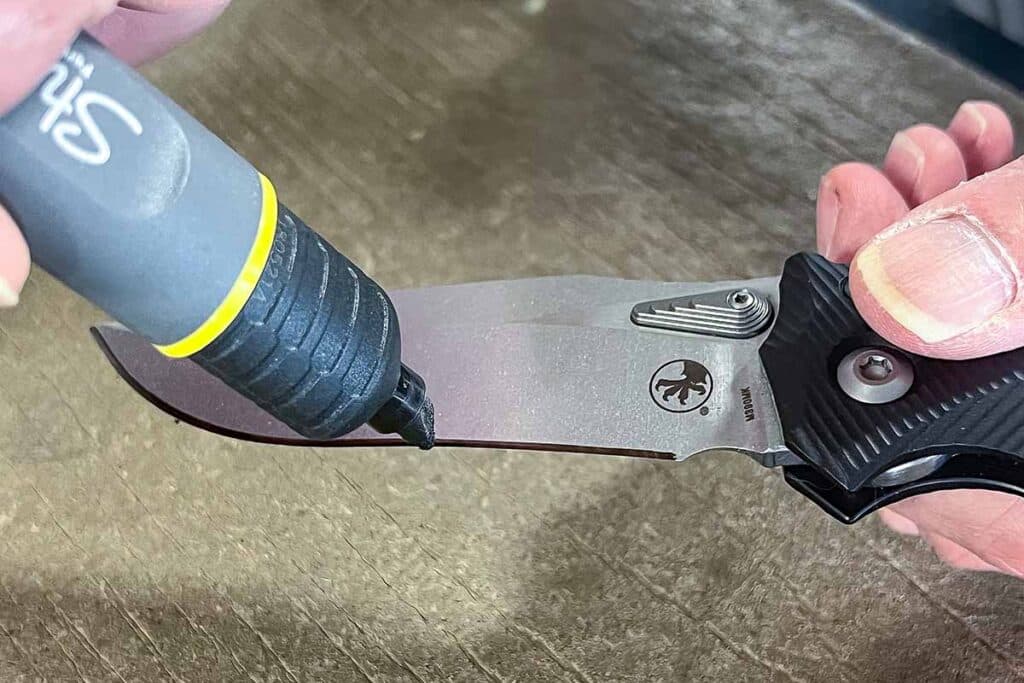
Using a black permanent marker, preferably with a chisel tip, color in the entire length of the cutting edge on both sides of the blade.

Manual Step 1: Using a black permanent marker, preferably with a chisel tip, color in the entire length of the cutting edge on both sides of the blade.

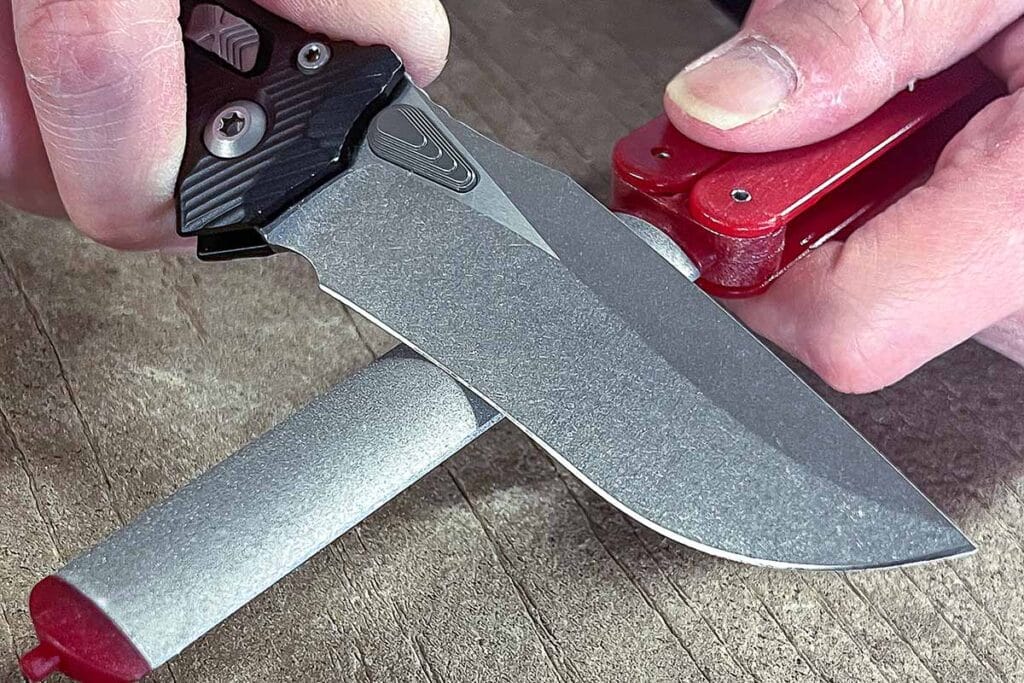
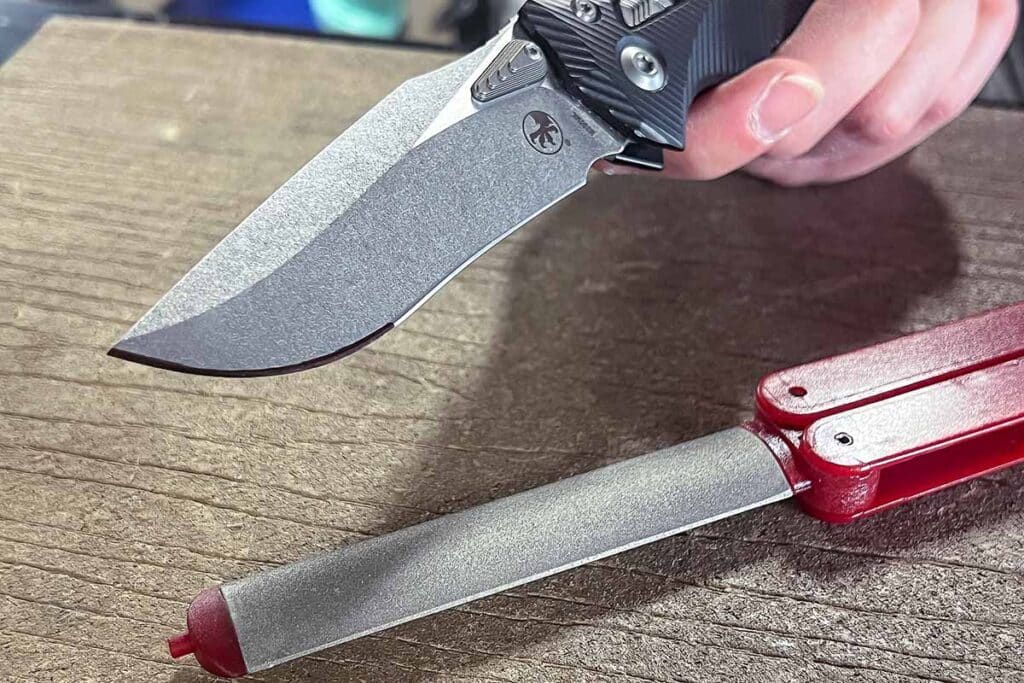
Manual Step 2: Take a round profile sharpener—the author uses the EZE-Lap folding diamond sharpener—and, holding the blade to it at approximately a 20-degree angle, start at the tang and move your way down to the tip in one fluid motion.

A round profile sharpener
Evaluating the blade

Manual Step 3: Stop after a few strokes and look to see where the marker ink remains. This is an indicator of the need to adjust your angle more or adjust it less. And that, my friends, is pretty much how to sharpen recurves. Simple, safe and effective. This is a failproof method.

Automated Sharpening

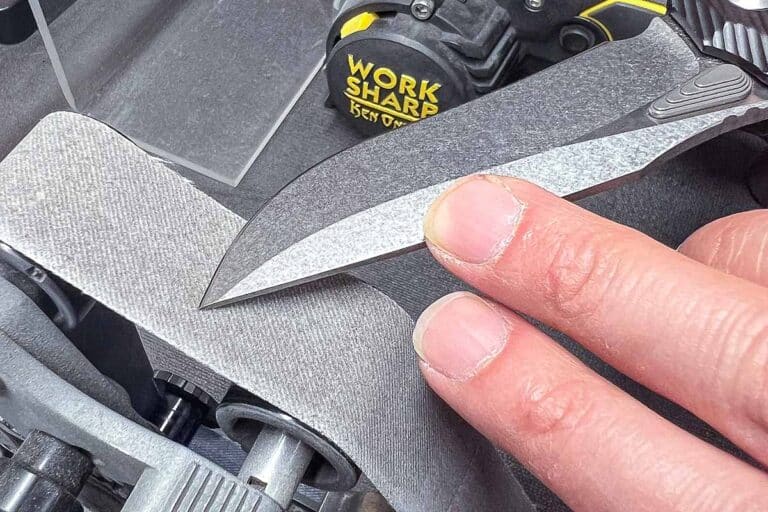
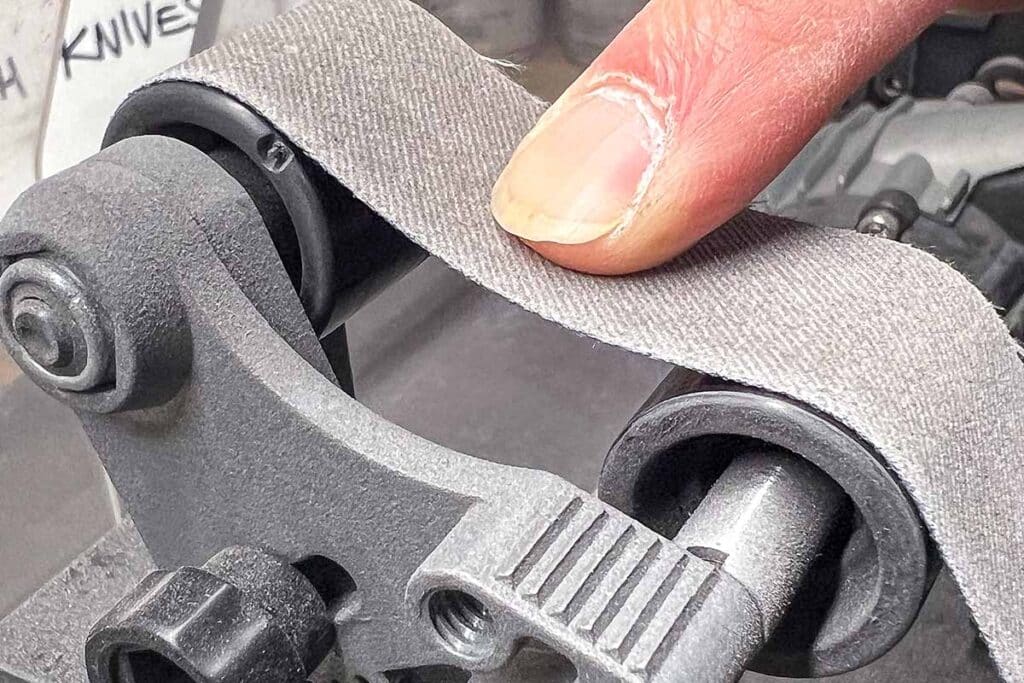
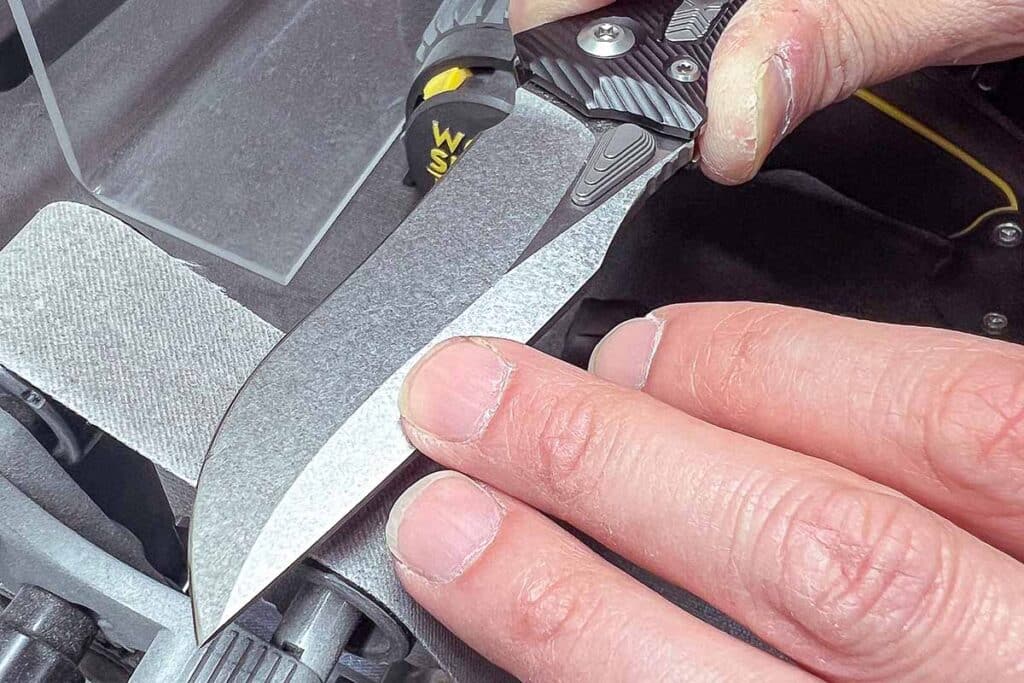
Automated Step 1: The author uses his Ken Onion Elite Sharpener from Work Sharp with the blade grinding attachment to sharpen recurves. The illustrated belt deflection helps the belt to conform to the cutting edge as it curves.

The author uses his Ken Onion Elite Sharpener from Work Sharp
Sharpening the recurve knife on a machine

Automated Step 2: The author sharpens the recurve blade as he would any standard blade by pulling it across the belt from choil to tip on both sides. Use the same motion when sharpening a recurve on a manual sharpener.

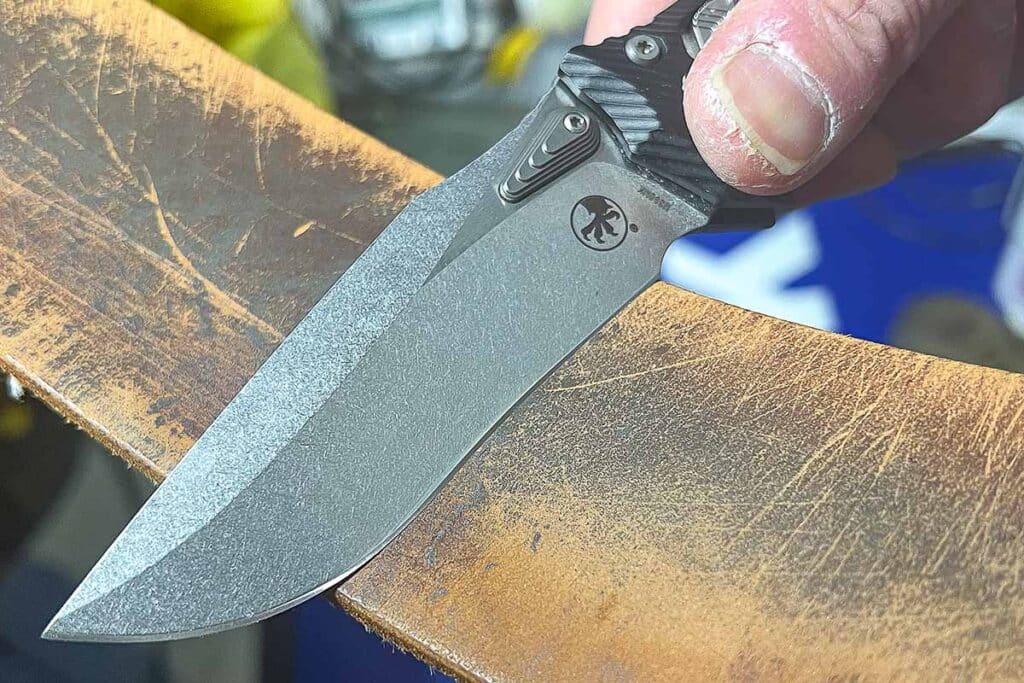
Automated Step 3: After sharpening, the author strops the edge using a leather strop to wipe off any micro burrs that form.

stroping the edge
Giving the recurve a few swipes on knife steel

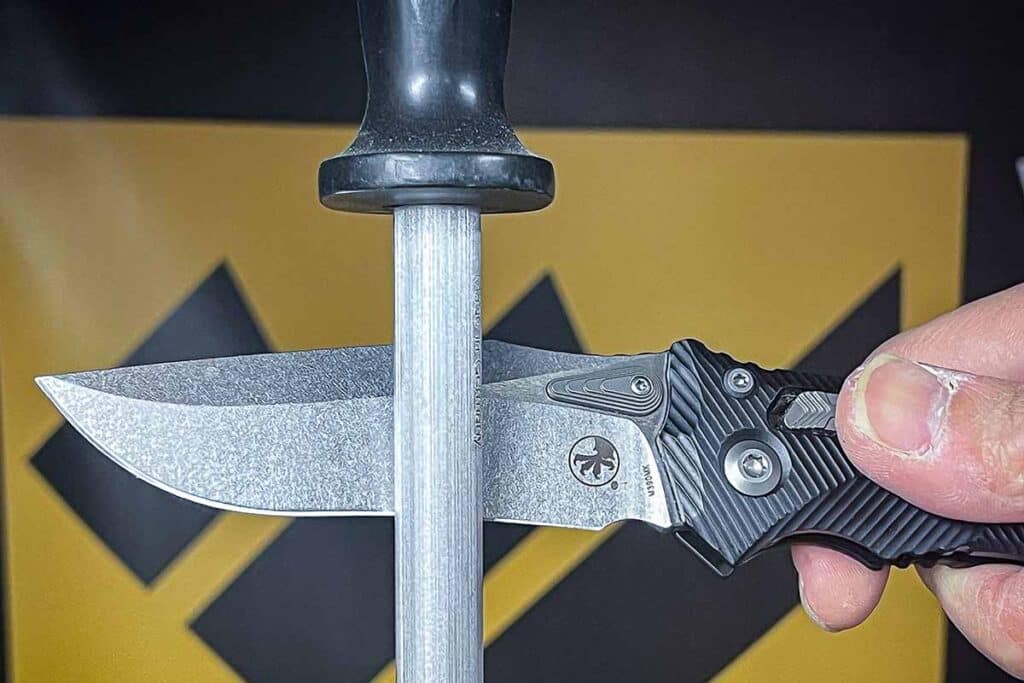
Automated Step 4: After stropping, the author gives the recurve a few swipes on a hanging kitchen knife steel to give the edge extra bite.  

More Sharpening Articles:

Framelock Folders: Top Picks Built For Hard Use

Today’s framelock folders are built tough, stylish and sharp.

Framelocks are popular with folks who put folding knives to rough use. They are built more robust than linerlocks simply because the lockbar is cut out and bent from the steel or titanium frame of the handle. The lockbar is the exact width of the handle scale, whatever thickness that may be. Consequently, compared to the spring of a standard linerlock, there is significantly more material locking the blade open and, thus, greater lock strength.

Hinderer Knives Halftrack

titanium lockbar of the Hinderer Halftrack
At the end of the titanium lockbar of the Hinderer Halftrack is a bolted-in steel block that contacts the tang and reduces wear on, and thus adds longevity to, the lockbar. 

Named for the specialized military vehicle with a tracked propulsion drive system, the Hinderer Knives Halftrack framelock folder is, like its namesake, practically unstoppable. Despite the knife’s compact size, it has the horsepower to muscle through tasks big and small.

Hinderer Knives is known for high-end folding and fixed-blade knives aimed at the tactical market. The Halftrack is a bulldog of a tactical folder and one of Hinderer’s biggest sellers. A scaled-down tactical folder, it’s easy to carry. One thing’s for sure, the Halftrack is stout, with a handle that’s a little over a half-inch thick. The 2.75-inch blade is high-octane CPM S45VN stainless steel. The classic bowie shape has a defined tip for precise cutting. Other blade pattern options are a Spanto—Hinderer’s in-house design of blade grind that results in a very stout spear point—a tanto, wharncliffe and drop point.

The boxy handle frame is stonewashed titanium and the framelock is one of the strongest on the market. At the end of the titanium lockbar is a bolted-in steel block that contacts the tang and reduces wear on, and thus adds longevity to, the lockbar. Not all knife companies incorporate such a feature on their framelocks. A sturdy titanium pocket clip carries the closed knife blade tip up in the pocket. G-10 inlay in several color options on the presentation side sports a nice 3D milling pattern that aids in traction. At 3.85 inches closed, the Halftrack is robustly built without being too bulky.  

The Halftrack blade has an excellent edge
The Halftrack blade has an excellent edge out of the box and is ready to work. The CPM S45VN stainless steel has staying power and holds an edge exceptionally well. As the author noted, it’s a material that can go the distance. 

The blade has an excellent edge out of the box and is ready to work. The S45VN has staying power and holds an edge exceptionally well. It’s a steel that can go the distance. The handle doesn’t seem that comfortable at first but once you work with it you’ll understand the purpose behind the design. The large finger recess forms an integral lower guard that seats your index finger and prevents forward hand movement, while the angled handle butt fits perfectly in the palm of your hand. The boxy shape helps prevent it from being “lost” in your grip while wearing work gloves, too. 

Expect top notch performance all around. The blade sails through just about anything—cardboard, hose, wire, meat and a lot more. It does it all easily. The MSRP of $425 may be somewhat steep but the knife is well worth every dollar. It’s a tough folder that will take abuse and last for years. Country of origin: USA.

Kershaw Helitack

The 3.25-inch clip-point blade of the Helitack is built to excel at utility tasks
The 3.25-inch clip-point blade of the Helitack is built to excel at utility tasks. Such a pattern not only slices very well but also has a defined tip for precise cutting and scoring. 

Named for the U.S. Forest Service helicopter borne firefighters who are flown to combat remote wildfires, the Helitack from Kershaw exhibits the same toughness and resolve that the special breed of firefighters possesses. Like firefighter gear, the Helitack is built tough and carries easily. The 3.26-inch modified clip-point blade of 8Cr13MoV stainless is razor sharp out of the box. (The 8Cr13MoV is the Chinese equivalent of Japanese AUS-8.) The blade deploys via a flipper tab and SpeedSafe assisted opener, and rides on a pair of caged bearings for the ultimate smoothness in opening and closing.

The handle is a stainless steel framelock and sports a chamfer around the edges to soften the grip and make it more comfortable. A reversible clip carries the knife deep in the pocket. The clip easily reverses to the opposite side using a standard T6 Torx driver. A steel lockbar stabilizer is integrated into the pivot on the lock side of the handle. It prevents the lockbar from traveling too far and thus losing tension when locking the blade open. The handle’s slender nature adds to the comfortable carry experience. The lock engages securely with zero play. The blade and handle sport a gray titanium nitride coating that’s handsome and low glare. The hardware is a contrasting black for an overall eye-catching look.  

Kershaw Helitack’s stainless steel framelock
The Kershaw Helitack’s stainless steel framelock sports a chamfer around the edges to soften the grip and make it more comfortable. A reversible clip carries the knife deep in the pocket. 

The 3.25-inch clip-point blade is built to excel at utility tasks. Such a pattern not only slices very well but also has a defined tip for precise cutting and scoring. The hollow grind allows the blade to be thinned out somewhat, giving the edge great bite without compromising strength. The Helitack tackles tougher materials with ease, something an EDC work knife must do.

The handle seems very comfortable and has no hot spots, though there were times I wished it were a bit wider to help me power through a cut. As slim as the handle is it carries very well. The lock held firmly. At an MSRP of $64.99, the knife is a great value. Country of origin: China.

Bastinelli Knives Bastien Coves

BBR2’s titanium lock side is anodized a bronze color
The BBR2’s titanium lock side is anodized a bronze color. The blade spine thumb rest is at the most forward point of the grip and has traction notches. The pocket clip carries the closed knife blade tip up and is non-reversible.

The knife designs of Bastien Coves of Bastinelli Knives are very progressive and geared toward tactical with an emphasis on high utility. Ergonomics are a priority with Bastinelli’s designs and they are some of the most comfortable tacticals around.

The BBR2 framelock folder showcases Bastien’s fine design talent. Made in Italy by Lionsteel, the knife has a 3.1-inch drop-point blade of D2 tool steel in a stonewash finish for a good visual contrast. The blade is rather interesting as it is a “dropped” design in relation to the handle. This permits Bastinelli to make full use of the ergonomic handle and allows the blade to be used to its full potential by lowering the cutting edge below the handle, reducing interference from the user’s hand and making the blade more useful in various cutting tasks. D2 was chosen for its high performance for the money. Dual thumb studs provide ease of one-hand opening, and the pivot’s Ikoma Korth Bearing System (IKBS) ensures ultra-smooth blade rotation. A fuller milled into the blade reduces weight and provides a nice visual and an aggressive presence.

If you follow Bastinelli’s work, you know the BBR2 is available in a plain edge blade. Starting in 2024, Bastinelli will begin offering the BBR2 in a partly serrated blade as well, and provided an early sample of the semi-serrated iteration to road test for the article.  

A partly serrated blade on the Bastinelli BBR2
A partly serrated blade on the Bastinelli BBR2 is new for 2024.

The handle is a half-and-half construction, with a milled G-10 presentation side and a titanium lock side anodized bronze. The curved handle with prominent index finger groove is one of the best things about the BBR2. It is super comfortable. The handle edges are chamfered as is the grip to remove some material to fit your hand better. The blade spine thumb rest is at the most forward point of the grip and has traction notches. An aluminum spacer protrudes stylistically at the handle butt to form a skull cracker point. The pocket clip carries the closed knife blade tip up and is non-reversible. (Sorry, southpaws.) I also like the rounded G-10, which helps the knife sit better in your hand. At first it did feel a bit weird with the rounded G-10 and the flat titanium lock side, but after working with the knife for a while you get used to it. MSRP: $250.  

CRKT Padawan

For using, the author’s favorite of the two blade patterns of the CRKT Padawan is the wharncliffe.
For using, the author’s favorite of the two blade patterns of the CRKT Padawan is the wharncliffe. The full flat grind gradually tapers down to the edge and makes it an absolute slicer. 

CRKT’s newest folder design, the Padawan is designed by Brazilian knifemaker Pedro Buzetti of Presidential Prudente, Brazil. Buzetti is the protege of Flavio Ikoma (page 36), the Ikoma of the Ikoma Korth Bearing System (IKBS) and a well-known Brazilian knifemaker who also has several collaborations with CRKT. The Padawan is Buzetti’s first collaboration with the company and is a stylish EDC folder. Pretty much a scaled-down tactical folder, the Padawan features a steel handle and framelock construction. It comes in two blade styles—an upswept semi-skinner and a wharncliffe, both 3 inches long. Blade steel is Sandvik 14C28N stainless, comparable to AUS-8.

There are two choices of handle overlays: textured black G-10 for the wharncliffe and brown canvas Micarta® for the semi-skinner. The overlays not only provide enhanced grip and visual styling but also act as a lockbar stabilizer. At 4.1 inches closed, the Padawan rides very well in the pocket, thanks in part to a blade-tip-up, deep-carry clip. Unfortunately, the clip is not reversible. Both knives feature flipper opening and the IKBS to provide easy, fast blade deployment.  

For using, my favorite of the two blade patterns is the wharncliffe. The full flat grind gradually tapers down to the edge and makes it an absolute slicer. The wharncliffe has a more defined tip than the semi-skinner’s drop point. The Sandvik 14C28N steel holds an edge well for the money and is fairly easy to resharpen.

CRKT Padawan offers two choices of handle overlays
The CRKT Padawan offers two choices of handle overlays: textured black G-10 for the wharncliffe and brown canvas Micarta® for the semi-skinner. The overlays not only provide enhanced grip and visual styling but also act as a lockbar stabilizer.

The Padawan is a breeze to carry. It just disappears in your pocket. The handle is slender and comfortable, with the primary finger groove helping your index finger seat itself, with the rest of the fingers falling into place naturally. Chamfers in the grip make the handle feel slimmer than it actually is. Attention to detail is not lost at all, from the stylized tri-wing pivot screws to the mirror-polished, crowned blade spine. Such little touches make a good knife even better and add value. The Padawan is a great EDC framelock built stout that carries well without feeling bulky. MSRP for either version is a very reasonable $99.99. Country of origin: China.

Check Out More Buyer’s Guides:

American Knife Boom: Roundtable With Top Knifemakers

Four U.S. knife manufacturers talk making knives in the USA

Editor’s note: Last time, BLADE® featured four of today’s U.S.-based knife manufacturers ranging from long-time companies to the latest factory operations: Emerson Knives, Inc., White River Knife & Tool, Tactile Knife Co. and Montana Knife Co. (MKC). This time the author asks the respective principals of each company—Ernest Emerson, John Cammenga Sr., Will Hodges and Josh Smith—about their success, the high cost of making knives in America, and the future of the U.S. factory knife industry.

BLADE: What are some of the most difficult things about making knives and staying profitable in today’s market?
CAMMENGA: I’m sure most companies in our industry feel the same. Most challenges are from heavy taxation, excessive regulation, and now, expensive capital.
SMITH: The taxes and regulations we deal with make it difficult to have margins that China-made-knife companies have.
HODGES: Our price points are pretty reasonable compared to other made-in-USA companies, which has been hard.

BLADE: John, you’ve mentioned that finding reliable help is also an issue. Would any of the rest of you like to comment?
HODGES: We’ve been very fortunate to find great employees that are dedicated to the mission.

White River Fillet Knife
White River’s John Cammenga indicated he remains excited about making outdoor knives. Fillet knives are among the company’s specialties, including the Traditional Fillet model, here in a choice of Micarta® and Micarta-with-cork grips. The 6-inch blades are 440C stainless. MSRPs: $140 to $150. (Josh Wayner image)

BLADE: Ernest, you’ve said that the main competition to all USA knife companies is competition from overseas. Please elaborate.
EMERSON: [We are] competing against companies that manufacture or buy their knives for under $20 apiece and then sell them for the same price as we do. As China made considerable inroads in the knife industry, one of their major advantages was labor force, thus being able to produce quality products at reduced prices. This kept the entire industry on its toes and the American companies no doubt started feeling the pinch in a big way.

BLADE: Why is it so much more expensive to make knives in America than overseas?
HODGES: The biggest factor is labor. I’m dedicated to paying my employees well and providing health insurance, paid time off, a 401K and a great working environment. If you want to have good employees, you want to treat them well in hopes that you will retain such help.  Investing in your employees in this way is a bit costly but it’s the price of doing business.
CAMMENGA: It is simply not a level playing field. We are committed to making it work here [in the USA]. We are committed to our employees and customers alike by making our knives in the USA and using USA-sourced materials as well.
SMITH: Employee wages factor into this as well. Our dollar per hour paid is what [Chinese] workers get paid per day. 
EMERSON: [There’s also the] usual regulations and taxes and the cost of setting up shop here in the USA. American wages, American raw materials, American taxes, American restrictions, all of those good things go into it.

Archer framelock
At Tactile Knife Co., Will Hodges said good help is key. “I’m dedicated to paying my employees well and providing health insurance, paid time off, a 401K and a great working environment,” he noted. Tactile’s most recent launch is the Archer framelock folder designed by knifemaker TJ Schwarz.

BLADE: There are some advantages to making knives in the USA that you hold over those who make them overseas.  What are those and how do you try to capitalize on them?
EMERSON: Through the generations my entire family spent time in service to this country, and I never will forget that. I never wanted to do anything but put Americans to work.  I never wanted to be anything except an American-made manufacturer, American-made company.
SMITH: Making knives in the USA has allowed companies like Montana Knife to be more agile as a company. Our knives and materials do not sit in container ships for months. We can ramp up and slow down production in real time, thus allowing us to respond to customer demand.
CAMMENGA: This means not having to be at the mercy of the almighty supply chain. It is very nice not to have supply chain issues, increasingly expensive overseas shipping, and concerns over the geopolitical landscape.

Knife Grinding
Josh Smith said one of the reasons American knives are so expensive to make is differences in employee wages. “Our dollar per hour paid is what [Chinese] workers get paid per day,” he observed. A Montana Knife Co. fixed blade gets an edge touchup.

BLADE: Will, you said that there are advantages to making friends in the knife industry. How so?
HODGES: When we run into an issue, we have plenty of friends to go to for advice. As much as the companies in this industry are in competition with each other, they are also there to help each other out as well.
CAMMENGA: We have benefitted from the current re-shoring trends in our OEM work. [Author’s note: As mentioned last time, White River Knife & Tool also does OEM manufacturing work, making knives for other companies as well as knives under its own brand. So, you may or may not own a White River knife without knowing it!] 

Emerson Knives Kwaiken and Mini Sheepdog
As you might guess and as Ernest Emerson indicated, U.S. regulations and taxes are another cost additive to making knives domestically. Two of the most popular knives in the Emerson line are the Kwaiken (top) and the Mini Sheepdog (bottom), each equipped with the Wave Shaped Feature for fast and easy opening. (Knives from the author’s collection; Marty Stanfield knife image)

BLADE: What can BLADE readers expect in your next big knifemaking project, and when do you expect it to be available for public consumption?
CAMMENGA: We are excited about producing some of the finest outdoor fixed blades and have some folding knives in the works. We hope to have at least one folding model out in 2024 and several more in 2025.
HODGES: We are excited about our most recent launch, the Archer framelock folder designed by knifemaker TJ Schwarz. It’s a heavy-duty design that is a different direction than our current Maverick folder. We do have another fun launch that should happen by the time BLADE readers read this. 
SMITH: Twenty-twenty-four will be the year that Montana Knife Co. will experience more product line diversity. We will shift into the culinary end heavily. Additionally, we are going into the tactical knife space. We estimated that by the mid-third quarter, MKC’s tactical knives will be out on the market. We also have some really cool collaborations coming with well-known people. 

CQC-7 Is25

Sharpening A knife
As John Cammenga observed, another advantage to making knives stateside is not being at the mercy of the supply chain, increasingly expensive overseas shipping, and concerns over the geopolitical landscape. A White River fixed blade gets an edge tune-up.

For Emerson Knives, Inc., 2024 will be the silver anniversary of the CQC-7, so expect some exciting surprises to commemorate the iconic tactical folder. Lucas Emerson, Ernest’s son, has become an accomplished knifemaker and designer in his own right, and the company will debut the first folder designed by the younger Emerson, the MX200. Emerson-made automatic openers will be a reality as Emerson is tooling up to produce the knives in a satellite facility in Colorado. Ernest said he hopes to introduce the prototypes at this year’s BLADE Show. And, finally, a kitchen cutlery line will augment the Emerson tactical knife line, too.

Emerson Knives, Inc., Montana Knife Co., Tactile Knife Co. and White River Knife & Tool—look for these and other outstanding U.S.-based knife companies to expand their knife lines and enlist you in what shapes up to be the Great American Knife Boom.

Check Out More Of Tools Of The Pros:

Knife Blade Repair: Bringing Old Blades Back To Life

0

Practice the proper steps with the proper equipment and, most important, be safe and knife blade repair is a snap.

I have been fortunate enough to make not just one but two side hustles out of my knife hobby. First is the obvious—writing for BLADE® Magazine. Second is running a knife-and-tool sharpening service out of my garage, serving folks in my community and metro area with full-service sharpening on most cutting tools found in the home, workshop and garage. I have always had a strong interest in sharpening in general and have been practicing the skill for about as long as I have been into knives in general.

While I sharpen many knives and scissors, I also repair damaged knife blades. Those repairs include—but are not limited to—straightening bent blade tips, fixing severely damaged cutting edges, and regrinding new blade tips from broken ones. While sharpening is something I still enjoy very much and to a degree it remains fun work for me, it’s these minor repairs at customer request that I love doing. You can too provided you have the proper equipment and the desire to learn.

Knife with sharpening stone
In knife blade repair, carbon steel blades make the steps easy as they sharpen up quicker than stainless blades.

Before we get into the thick of blade repair, let’s discuss equipment. I run four Work Sharp Ken Onion Elite sharpening machines—I keep one as a backup or deploy it as backup should I need to augment what I’m already running—plus a 1×30 single-speed belt sander, a “Harbor Freight special.” I do all my sharpening on this equipment.

I have used the Ken Onion Elite since the start of my sharpening service almost 10 years ago. I started out with just one Work Sharp. I added a second one awhile after that. The 1×30 came about from trying to revive a few totally dull butcher knives. In the process, I realized I needed another machine that would be in charge of hogging off material to get a quick starter edge that the Work Sharp machines could sculpt into a razor-sharp edge.

Profiling the blade
After profiling the basic shape of the new tip, the author uses the X65 belt of the Work Sharp Ken Onion Elite sharpener to further massage and fine tune it, as well as blend in the appearance of the blade spine at the tip to match the rest of the spine. 

Keep in mind that the Ken Onion Elite is not just a sharpener but also a variable-speed miniature belt sander as well, especially when you turn the unit around 180 degrees and work off the platen side. You can easily work on plastic, PVC, metal and wood. This is also how I regrind new blade tips, as well as fixing blade damage caused by hitting something solid and chipping the edge out. We will dive more into specifics in a bit. It’s important to note here that to do blade repairs of any sort successfully, you must have some sort of variable-speed, motorized, belt-sander-type machine.  

DEMO KNIFEThe demo knife is one a coworker on my day job gave me to refurbish. It is a vintage, carbon steel Case jackknife that saw a lot of use in a previous life. The blades were extremely worn down. Both tips were broken off. The main blade was resharpened so much that the cutting edge was a bit on the curved side. Both blades also had some dings in the edge as well. The owner wanted me to rehab the blades by regrinding new tips and sharpening them. I will take you through step by step on what I did and how it was done. WARNING! Please exercise caution when working with power tools such as belt sanders. Should you attempt such a task as outlined in this story, neither I nor BLADE is liable for any injuries that might occur as a result. 

Heat Management

Whenever executing such repairs on a knife blade, remember to not let the blade heat up or you can ruin the steel’s heat treat. Always keep a jar filled with water within arm’s reach of your machine and dunk the blade into the water every few seconds to keep it cool. Doing so will ensure that you will not overheat the steel. If working on a larger blade such as a machete, I recommend using a spray bottle filled with water. The blade is simply too long to dunk into a jar, so spraying it down every so often will help.  Something else that will help is to have a pair of cut-resistant gloves on hand and always wear them when handling the blade. The gloves usually have a textured coating on the gripping surfaces for the fingers and palms. This will help you hold the blade securely as well as keep your hands and fingers safe from accidental cuts. The gloves usually are inexpensive, less than $10, so there’s no excuse to not have a pair.

Where To Start Repairing A Blade

WARNING! Whenever faced with a blade-tip-rehab task, remember to sharpen the blade last. Why? Because you will be holding the blade as you regrind the new tip. This applies even if you’re wearing cut-proof work gloves.

Blade Tip

When regrinding tips, I always start with my 1×30 sander with an 80-grit Norton Blaze SG belt. It is the orange belt specifically engineered for knifemaking and removing steel. The 1×30 hogs off material and rough shapes the new blade tip.

Knife blade repair shaping the blade
The author reshapes the new tip on the pen blade using the 1×30 belt sander with an 80-grit Norton Blaze SG belt. 

I start by visualizing where the new tip is going to lie. I start at the uppermost point of the broken-off tip, usually on the blade spine side. I start grinding at that point and remove material to where eventually a new tip is created. As I grind it down, I also pay attention to the visual “flow” of the new tip and how it transitions to the rest of the blade spine. I may have to round off the harsh angle to blend it back into the spine. A lot of this is done by eye, making everything blend right in. The goal is to make the new blade tip look as though nothing happened.

Blade Shaping

After roughing out the new tip with the 1×30 belt sander, I begin to dial in the final shape of the new tip with the Ken Onion Elite. I have much more control at this juncture due to the less aggressive belt grit and the slower belt speed. I can finesse the new tip on, keeping a close eye on the evenness of the ground-down portion, making it parallel with the rest of the untouched blade spine.

chamfering the edges
The author carefully knocks off the sharp edge at the corner created by rough grinding the new tip.

Finish

After tweaking the new tip to final shape, I concentrate on the finished appearance of the ground portion by holding the knife almost vertical and sanding only on the ground portion, blending it in visually and removing the coarse-grit scratches with the 80-grit belt on the 1×30.

Chamfering And

When everything is blended in visually, the last step is to chamfer the ground portion and remove the crisp corners made by all the sanding. You’ve seen how blade spines have a small, rounded corner on both sides? You are essentially doing that here. Hold the blade at an angle and lightly touch the blade spine to the belt to cut the crisp corner down. Remember: you can always cut more later if needed. The key is to use a light touch and stop only when the corners are smooth to the touch and you don’t detect crisp edges. The result is a new blade tip that is highly functional but doesn’t look “factory,” though it will be awfully close.

Fixing An Uneven Blade

The main blade of the demo knife was worn away unevenly due to years of manual sharpening, so I straightened that out as well. Like the shaping of the new tip, I did the bulk of the straightening of the cutting edge on my 1×30 belt sander. I used a light touch on the belt—I cannot stress enough that it’s easier to grind cautiously—eyeing the straightness of the new cutting edge. Grind a bit then dunk the blade in water to keep it on the cool side.

Straightening the edge
After grinding the new tip on the main blade, the author uses the 1×30 belt sander to straighten the uneven cutting edge by evening it out back to straight. The 80-grit belt eats off material in a hurry. At this juncture the author eyeballs what is to be straight.  

Once I attained an even edge, it was time to grind the new edge. Straightening out the edge will cause a wide flat spot on it, so you have to grind the spot away evenly on both sides. Work diligently and carefully, and don’t forget to dunk the blade in water. With the smaller of the two blades, I repeated the same steps to even out the edge as there were some imperfections I wanted to remove also. As a result, I wound up starting a new edge on the small blade as well.

Once I ground the starter edges, I progressed to the Work Sharp machines to carefully sculpt the new final edges. This is the step where you bring the blades to life. The carbon steel blades make the steps easy as they sharpen up quicker than stainless blades. After the final sharpening of both blades, the result is a vintage pocketknife with a new lease on life sporting new tips and fresh cutting edges. 

Final Cut

Sharpening—transforming a cutting tool from dull to razor sharp in a few minutes—is very therapeutic. Toss in creating new blade tips on top of that and the combination is undeniably very satisfying. If you carefully follow these steps, you too can renew any knife blade with a broken tip. And it doesn’t have to be a pocketknife. I’ve ground new tips on tactical folders and karambits, too. Just follow the same steps outlined here. In fact, larger knives are probably easier because there is more to hold onto while working on them. If you have the equipment and the desire to renew and rehab knife blades, give it a try.

Final repaired knife
The end result is a demo knife with two sharp points and two sharp edges.

It is also possible to use a regular belt sander like mine to do all the shaping steps. Be sure to have an assortment of belts of various grits at your disposal. You will want to change to the finer grits to finesse your work. I recommend using only a 1×30 given the size and width of belt. Again, you can find an inexpensive 1×30 at Harbor Freight Tools for around $50. Who knows, you might even find some other uses for it outside of blade repair.

Knife blade repair can be very satisfying. And because you are working with knives as well as power tools, please exercise the utmost caution and pay attention to what you are doing to prevent serious injury.

Have fun and good luck!

Hone Your Knife Sharpening Knowledge:

Advertisement

Must Read Articles

Read this before you make a knife

Knifemaking 101 – Read This Before You Make a Knife

  by Wayne Goddard My experience has taught me that there's nothing like digging in and getting started. I've often said the hardest part of the...
how to forge damascus steel

How to Forge Damascus

Advertisement
Advertisement