GiantMouse Releases New Set Of Sleek, Robust Folding Knives–the ACE Corta line–Made From Austrian Steel.
Stylish. Tough. Strong.
Those are just a few words to describe the newest folding knives released by GiantMouse. The ACE Corta Knife comes in three different styles and is as good as it gets when it comes to an EDC folder.
The showpiece is the blade, made of Böhler M390 stainless steel from Austria. Known as one of the ultra-premium stainless steel, martensitic steel is renowned for its and ease of sharpening. Essentially, it’ll take and keep an edge.
At 3.1 inches in length with a flat saber grind, the ACE Corta is a flipper inspired by GiantMouse’s limited-run GM6 knife.
The Natural Canvas version of the ACE Corta
The ACE Corta comes in three styles: a green-canvas-colored Micarta handle and a stonewashed finish on the blade, a natural-canvas-color Micarta handle with a satin finished blade and a black PVD finish blade itself with a black G10 laminate handle.
All three knives have an overall length of 7.3 inches, a handle length of 4.18 inches, and come in between 3.8-4 ounces in weight.
The knives open quickly and smoothly thanks to the ball-bearing pivot. They all have a wire clip so it can slide easily onto a belt, purse, or pocket. And each version of the knife has an MSRP of $195.
Given the engineering that has gone into the ACE Contra, the price should prove a value to most.
Editor’s Note: This article was written by Mike Ableson.
An EDC That Does It All, The Outdoor Edge FieldLite Is An Excellent And Affordable Option That Stands Out From The Pack.
What’s better than a strong, easy-to-use EDC that shines in numerous situations? A knife that does all that and clocks in under $30. Say hello to your new best friend: The FieldLife from Outdoor Edge.
With the DNA of a robust hunting knife flowing through it, the FieldLite stands out in a crowded EDC market thanks to its steel as well as its light and durable handle. The handle is a mix of glass and nylon with rubberized inserts embedded to enhance grip. Coupled with
Outdoor Edge FieldLite
a thumb stud on one side, this knife is fun to hold and fun to open. It also has a clip so it can easily slide onto a belt or purse strap.
The 3.3-inch blade is made from 8Cr13MoV stainless steel. A budget steel that swings above its weight with a Rockwell Hardness of 62, the knife holds an edge well and resists wear and corrosion thank to its high percentage of Chromium.
At just 7.5 inches in total length, and weighing in at only 2.6 ounces, the FieldLite is absolutely worth a look if you are interested in a fairly-priced knife that can handle day-to-day tasks as well as more intense work while out hunting.
With an MSRP of $29.95, the FieldLite can be purchased online or at numerous sporting good retailers.
Editor’s Note: This article was written by Mike Ableson.
The Knife Sharpener Is An Excellent Tool To Have In Your Kitchen. No Matter The Model, They Are Easy To Use And Can Help Revive Your Knives.
I cook daily. I enjoy it. It decompresses me, and I’m able to provide my wife and me with a lovely meal to end our day together. Nothing makes cooking harder than a dull knife.
Beyond increasing the difficulty of easy tasks, dull knives are incredibly unsafe and can cause serious injuries in the kitchen. Knowing how to use a kitchen sharpener can keep your knives like new and, best of all, take just a few minutes to use.
How To Use A Pull Through Knife Sharpener
Pull-Through kitchen knife sharpeners come in a variety of prices ranging from $10 all the way up to $100. Regardless of how expensive your sharpener is, they all work in similar ways by removing a small amount of material to renew a knife’s edge.
To show you how to sharpen your knives in numbered easy steps, I pulled out my small sharpener–a Goodcook–I picked up at my local supermarket.
Step 1: Safely Secure The Sharpener To The Surface
My trusty knife sharpener
Yes, it seems straightforward, but always remember to safely secure your knife sharpener to the surface you plan to use. I did this on my dining room table, but a counter or stovetop works just as well.
Some higher-end models may come with a vise, but the majority, like mine, are secured by firmly holding the end of it down onto the surface. The underside of my sharpener came with a channel in it so you could secure it against the edge of a table. This is meant to keep the knife away from you when you pull it through the sharpening stones.
Channel underneath the sharpener for edge use.
Step 2: Pull Your Knife Through The Coarse Side Of The Sharpener
Your sharpener will, at a minimum, have a coarse and fine setting. Start by pulling your blade through the coarse side first. This will remove more material from the edge and get rid of any bigger burrs or imperfections in the knife.
Put light pressure on the knife and gently pull it through. I chose to do three passes, but you can do however many you like. The little bump at the end of each pull is the knife tapping into the base of the sharpener.
Step 3: Do The Same On The Fine Side Of The Sharpener
The fine side is good for refining the edge of the blade and bringing it back to a razor’s edge. You’ll notice that it sounds different as you pull the knife through. I also pulled my paring knife through it three times.
And in three easy steps, in less than two minutes, you’ve sharpened a knife. I try to hone my knives multiple times a week and sharpen them monthly or every other month. By investing just a few minutes at a time into caring for your knives, you’ll extend their life and keep them cutting like new for years to come.
How To Use A Whetstone To Sharpen A Knife
Another, more traditional way of sharpening knives, is with a whetstone. These stones allow you to precisely control what part of your knife is being sharpened and how much material gets removed from your blade. Below are the steps to follow to successfully sharpen your knives on a whetstone.
Step 1: Gather Your Supplies
This means getting your stone, a moderately deep container like a baking dish, deep bowl, or a bucket to soak the stone in water, your knives, a towel to dry them off, and a spoon or small cup to scoop water onto the stone.
Step 2: Soak The Stone
When you place your stone into your container it should be fully submerged under water. You’ll see bubbles start to come up. That’s air getting forced out of the stone. Let it soak for 10-15 minutes or until the bubbles disappear. That’s the sign that your stone is ready to use.
Step 3: Secure Your Stone
Most stones come with a holder. Always use that if available. If there is no holder, a towel wrapped around the base of the stone will work. You always want the stone secured. At best, it could scratch your tabletop if it slides, and at worst you could slice yourself from a knife coming off a sliding stone.
Step 4: Sharpen On The Course Side
The majority of whetstones you can buy online or in stores today will have two sides, one coarse and one fine. The lower the grit number, the more coarse. This means that more material will come off with each pass of the knife.
It’s best to start sharpening your knives on that side. Get your blade to an angle between 20-25 degrees and pass it back and forth against the stone 10-15 times on each side of the blade.
If a dry spot starts appearing on your stone, use your spoon or small cup to pour a little bit of extra water onto the spot to re-wet it.
Step 5: Sharpen On The Fine Side
Now that you’ve removed most of the egregious burrs and nicks from the edge turn your stone over and sharpen the blade against the fine side. This will finish and polish the edge back to razor quality and have your knife like new again.
Again, you’ll stroke the blade 10-15 times at 20-25 degrees, then check the blade for sharpness.
Popular Youtuber, and New York Times bestselling author, Joshua Weissman gives a simple but in-depth tutorial on how to use a whetstone to revive your knives and bring back a razor edge.
How To Use An Electric Sharpener
A more intense version of the handheld kitchen knife sharpener is the electric sharpener. More pricey than a handheld device, electric sharpeners use different types of grinding stones powered by a motor to grind away material and sharpen your knives.
Some models have a single slot where the user will need to toggle between fine and coarse grit stones. Others have multiple stages and multiple stones allowing for more precise sharpening. Regardless of the type of electric sharpener, they operate similarly.
Step 1: Place The Sharpener On A Solid Surface
Always make sure your sharpener is on a table or countertop. Never hold it in your hand while pulling your knives through. That’s a quick way to wind up on your local news for all the wrong reasons.
Step 2: Read Your Sharpener’s Directions
With so many varieties of sharpeners it’s important to know how to correctly use yours, and, just as importantly, what type of knives can be sharpened.
Some can handle serrated knives while others are just good for flat knives. Know this because pulling the wrong type of knife through the sharpener can damage the blade.
Step 3: Sharpen Your Knives As Desired
You gently place your knife into the slot and pull it through at a leisurely pace. Do this 10-15 times for each stage of the sharpener and your knives should be like new.
To get an idea of how easy it truly is to use an electric knife sharpener, the folks at Linkyo show you how to use one of their models. It’s not even two minutes so you can’t afford to miss it.
Editor’s Note: This article was written by Mike Ableson.
Editor’s Note: This article was written by Mike Ableson.
Knowing How To Use A Whetstone, Or Sharpening Stone, Can Restore A Dull Blade And Should Be Part Of Regular Upkeep For Your Knives.
There are many inexpensive ways to sharpen your knives at home, but nothing feels the same as sharpening your knives on a whetstone. Used for centuries around the world to keep an edge on everything from swords to kitchen knives, the whetstone is an intimate, precise way to maintain your knife’s edge and bring it back to life.
The “whet” in whetstone has nothing to do with being wet or any type of moisture. It comes from the Old English term “hwettan” which means “to whet or sharpen.” Coincidentally, most whetstones do need some type of moisture for top performance. In all cases, this means water or oil. However, a majority of stones you’ll find in stores or online–particularly for kitchen use–will be waterstones.
Oil Stone Vs Waterstone
Honestly, in some cases, there is no difference.
The preference of lubrication–water or oil–is left up to the user. Both will do the same job, swarfing the surface of the stone so it does a better job sharpening.
However, there are other cases where one or the other must be used with a particular stone. Natural sharpening stones, for instance, mostly use water. Rub them down with oil and you’ll render them useless.
Manufacturers will spell out whether your particular whetstone is water, oil or both.
The main difference between whetstones that use oil and whetstones that use water is that waterstones are softer so the old abrasive material breaks off faster than an oil stone. This means you’re sharpening on fresh stone material more consistently.
Waterstones are also less messy and easier to clean vs oil stones, which adds another point in the bucket for waterstones. Waterstones also come in more grit varieties than oil stones.
Oil stones, especially those made of novaculite, are a traditional sharpening stone, and many are quarried in America, specifically in Arkansas.
Differences In Grits
You’ll see stones of all types come in a variety of grits. The lower the number, the more coarse the grit. The more coarse the grit, the more material gets removed with each pass of the knife.
For at-home sharpening, grits in the range of 1,000-8,000 should be more than enough. However there are stones that come as coarse as 120 and as fine as 30,000. Consider these specialists and stick to the common grits for most jobs.
Whetstone Accessories
While there are many gizmos and accessories out there to help with your whetstone sharpening, there are two that stand above the rest. You can see them in the photo at the top of this article.
The first is the stand for your whetstone. This should come with the stone when you purchase it. You do not want to lay your stone directly onto your table or countertop. It can slide, and mixing sliding things with sharp knives is a recipe for losing a finger.
The second is that little thing to the right of the stone. It looks like a chip clip, but it’s actually an angle guide. Some will clip onto the top edge of your knife while others might need to be strapped to the stone itself. Either way, the angle guide will help set your sharpening angle and allow you to maximize each pass of the blade across the stone.
I’ve used a 1000/6000 waterstone for years to keep my kitchen knives sharp. You can find plenty of quality 1000/6000 whetstones online for under $40. But having the stone doesn’t account for much if you don’t know how to use it. I pulled out my sharpening set up to help give you a step-by-step breakdown of how to sharpen your knives with a whetstone.
Step 1: Get Your Equipment
Things I use to sharpen on a whetstone
Ready to start sharpening? Hold up a minute. You’ll need more than a whetstone and your knife.
In addition to the obvious tools for the task, I start with a whetstone stand, a container of water and a spoon (you heard right).
There are special notes on a couple of these items.
The water container is to prep the whetstone and should have some specific attributes. I want a deep container so the stone can sit in it and fully soak. These babies are thirsty, so you can’t just dab water on one and expect it to work.
Here I’m using a baking dish, but a plastic tub or kitchen sink work equally as well.
The spoon … no, you’re not taste testing your knife’s edge. It’s there to literally spoonfeed the stone more water during sharpening to clear off the shavings.
Step 2: Soak The Whetstone
Soaking the whetstone
Here’s the speedbump of the process.
As mentioned, whetstones require a good soaking before use. This isn’t a splash-and-go process.
Plan to let your stone sit fully submerged for a good 10 to 20 minutes before it’s primed for use. There’s a simple way to tell it’s good to go.
Plunge that baby into water and you’ll see it bubble like an aquarium aerator. Quite literally, this is the stone drinking up water in its microscopic pores and displacing air in the process.
As time goes on, fewer and fewer bubbles pop out of the whetstone (see the above picture). When it’s none or next to none, you’re good to go.
Step 3: Secure The Stone
OK, this sounds obvious. But it must be said–you must secure your wetstone before sharpening.
Not only does this stave off a tongue lashing from your significant other, ensuring you don’t scratch up the counter or dinner table. It also keeps your digits from getting cut up.
In most cases, you’ll have a holder that, well.. holds the stone. If you don’t, never fear, a towel or rag makes a dandy impromptu stone holder.
Whatever the case may be, make certain your stone isn’t going anywhere before you actually begin sharpening.
Step 4: Determining The Sharpening Angle
Rubber, you’re almost ready to meet the road!
Before you actually start scraping away precious material to create a fresh sharp edge, you need to determine exactly what angle to sharpen at.
Some knives require a somewhat uncommon angle to sharpen. This is spelled out in the owner’s instructions if this is the case. Lose those, check the company’s website, these vital specs are usually there.
However, in most cases–a vast majority–20 to 25 degrees is the best angle to achieve a good cutting edge. And you don’t even need a protractor to determine this pitch.
Think of it this way, the edge pointing straight down at the stone is at 90 degrees. Tilt the blade halfway down, now the blade is at roughly 45 degrees. Tilt the knife halfway again and, there you are about 22.5 degrees–a sweet spot for a good edge.
Or you can go the easy route and use an angle guide, mentioned earlier in the article.
Step 5: Course Sharpening
Start with the lower grit, which in this case is 1,000. It takes off more material and gets the edge almost all of the way back to razor sharpness.
Usually, I do 10 passes on each side of the blade, but I fully sharpened my knives a few weeks ago and just did two here as a demonstration.
Keep the blade angled between 20-25 degrees to get the best possible results.
Step 4: Turn The Stone Over & Sharpen With The Finer Grit
I finish with the fine grit, 6,000 on my whetstone.
You’ll notice each time I pass there’s some new metal shavings on the stone. That’s the swarf. It’s fine for your knives if you leave the swarf on the stone as you sharpen, but you can also wash it away with some extra water.
Again, like the coarse grit, I usually do 10 passes on each side of the knife.
Step 5: Wash Off Your Knives & Clean Up
Once you’re done sharpening you should rinse your blades and wipe them dry with a towel. Once your knives are accounted for, give your water container a thorough cleaning. I used a baking dish, and it’s important to fully clean it so you aren’t ingesting microscopic metal shavings.
For the stone itself, I double check that it’s secure in its holder and leave it out overnight to let the water evaporate out of it. Once it’s completely dry I put it back in its spot in the drawer.
And there you have it, a simple, straightforward guide showing you how to sharpen your knives using a whetstone.
Editor’s Note: This article was written by Mike Ableson.
See Who Took Home Awards For the Best Custom Knives At Blade Show In Atlanta.
An expert panel of judges determined the winner in 17 categories of custom knives that were as diverse as Best Miniature to Best Bowie. Best In Show went to Dionatam Franco.
The largest knife show in the world featured exhibitors and attendees from around the globe showing off the best in all things knives.
Below are this year’s custom knife award winners from this excellent event.
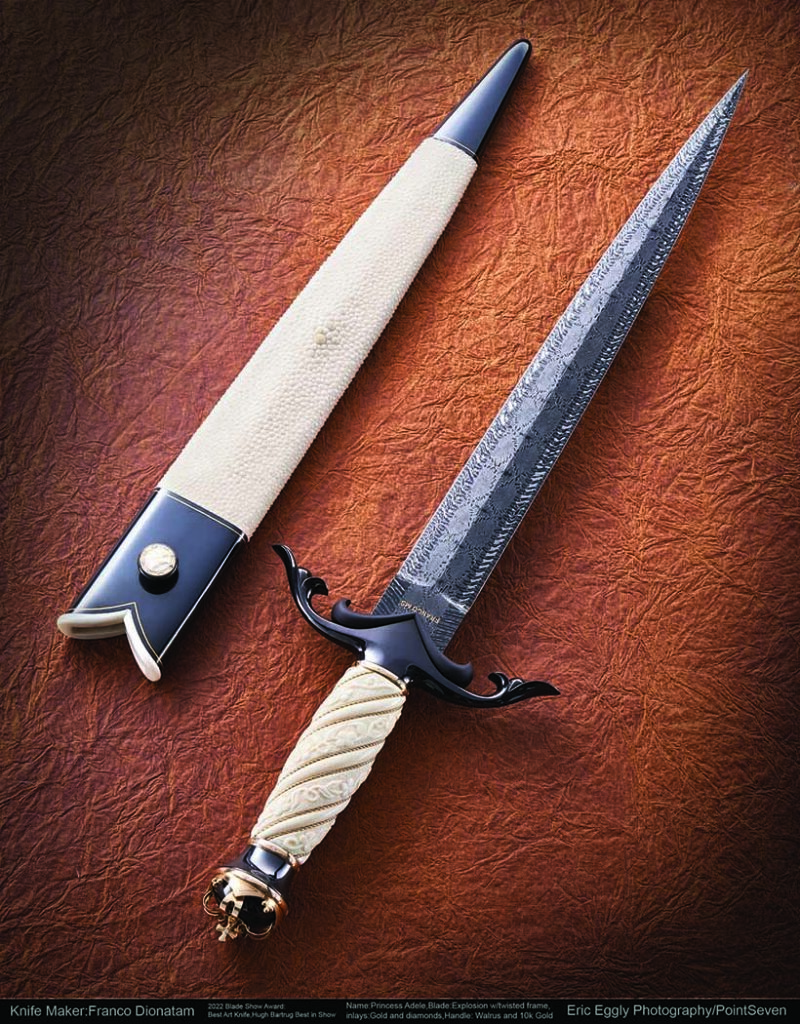
Hugh Bartrug Best In Show & Best Art Knife: Dionatam Franco
Best Art Knife: Dionatam Franco. Franco created this intricate dagger accompanied with a handmade stingray sheath.
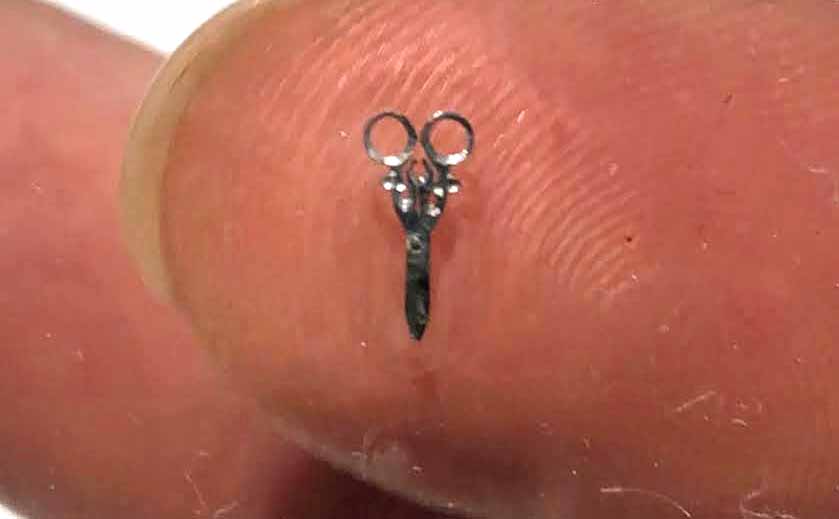
Yvon Vachon Best Miniature: Grace Horne
Best Miniature went to Grace Horne for these full-functioning scissors. They were handmade by her with watchmaker tools underneath a microscope.
Best Tactical Folder: Dmitry Sinkevich
Best Tactical Folder: Dmitry Sinkevich
Most Innovative Design: Walt Halucha
Most Innovative Design: Walt Halucha for this unique locking mechanism on this folding blade.
Best Slip Joint: Luke Swenson
Best Slip Joint: Luke Swenson
Best Handle Design: Fabio Barros
Best Handle Design & Best New Maker: Fabio Barros
Best Utility Hunter: Ben Pittman
Best Utility Hunter: Ben Pittman
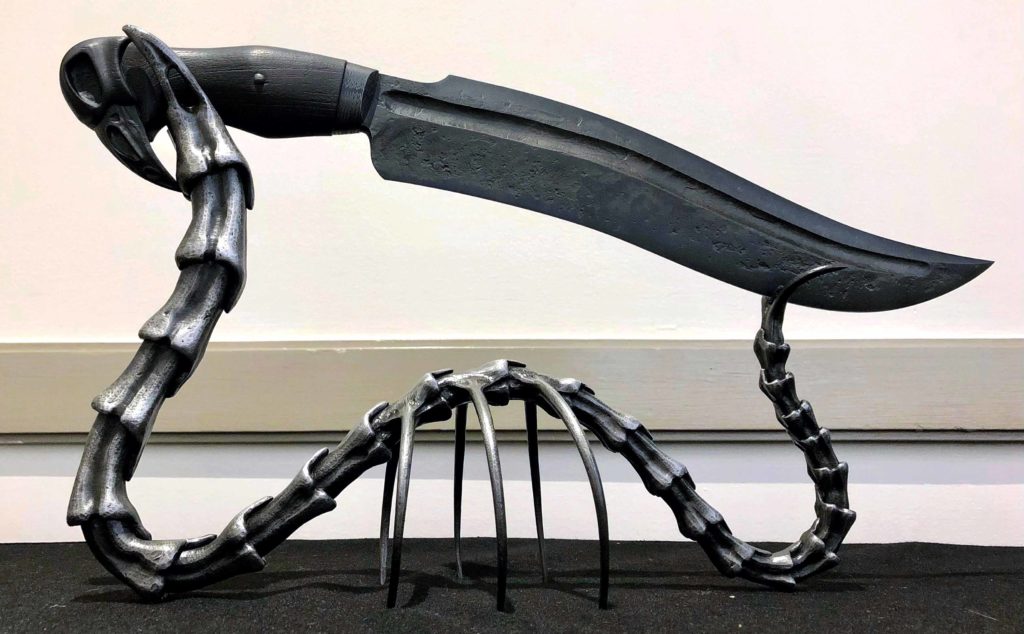
Best Fighter: Henning Wilkinson
Best Fighter: Henning Wilkinson
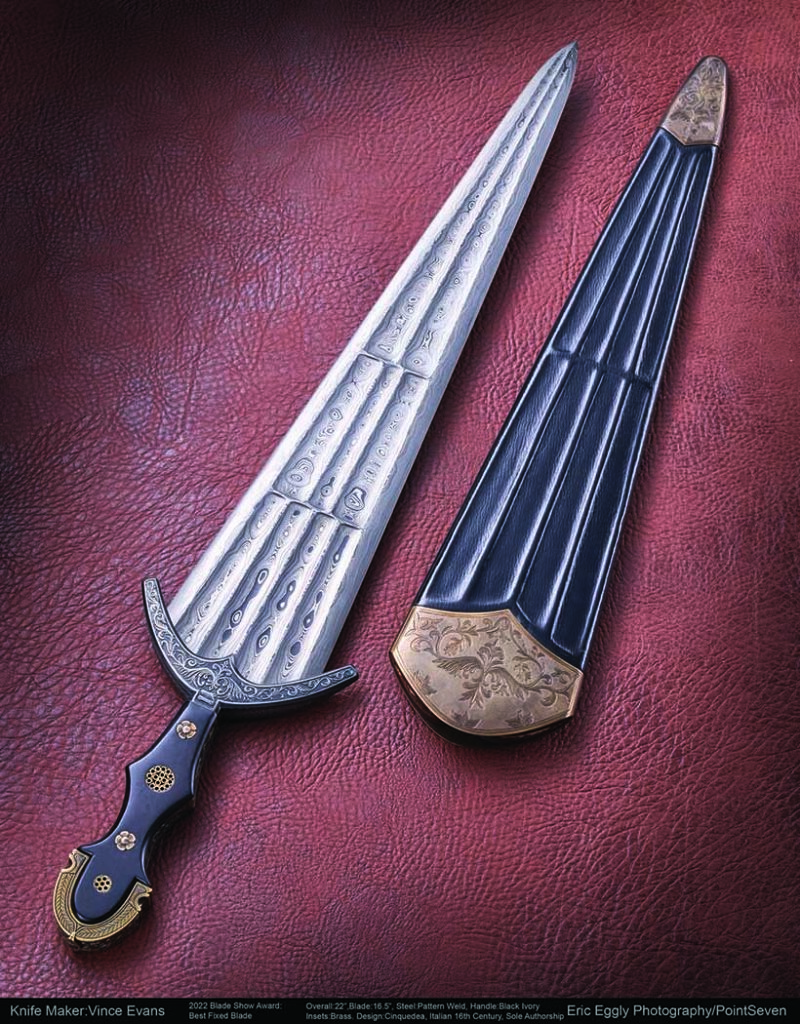
Best Sword: Vince Evans
Best Sword: Vince Evans
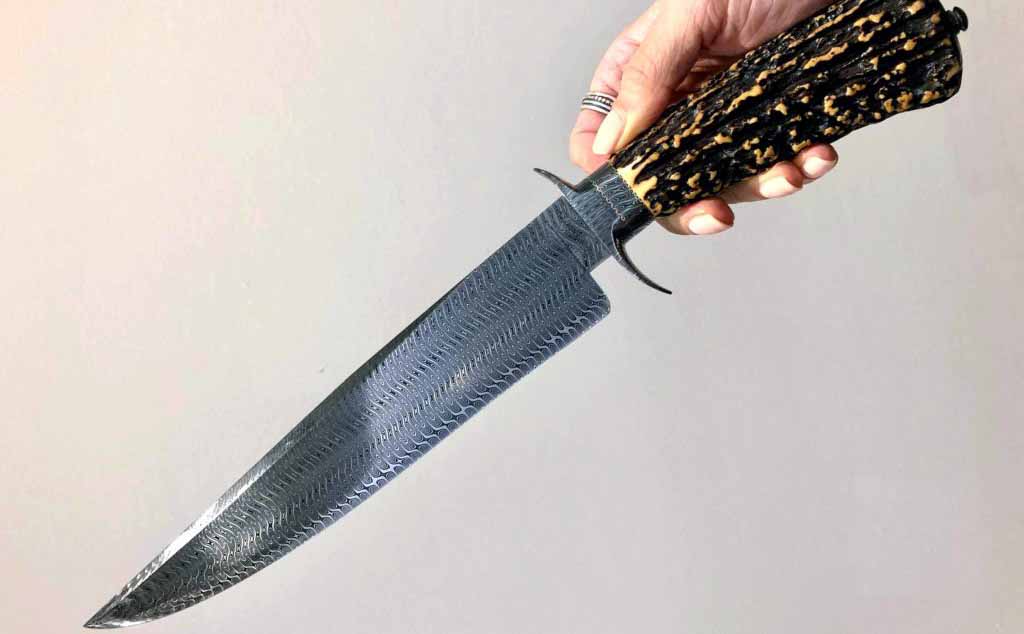
Best Bowie: Tommy Gann
Best Bowie: Tommy Gann
Best Fixed Blade: Vince Evans
Best Fixed Blade: Vince Evans
Best Collaboration: Seth Lopez & Leah Aripotch
Best Collaboration: Seth Lopez & Leah Aripotch. Lopez forged the knife while Aripotch created the stand.
Best Folder: Javier Vogt
Best Damascus: Mike Quesenberry
Best Damascus: Mike Quesenberry
Best New Maker: Fabio Barros
Best New Maker: Fabio Barros
Best Kitchen Knife: Will Stelter
Best Kitchen Knife: Will Stelter
Best Of The Rest: Dmitry Sinkevich
Best Of The Rest: Dmitry Sinkevich. Sinkevich said that the design was inspired by a combination of the ulu knife and watch rotor.
Editor’s Note: This article was written by Mike Ableson.
See who took home the hardware at from the BLADE Show Knife-Of-The Year® Awards.
Winners were determined in 11 categories at BLADE show in Atlanta, by an expert pannel of judges. Awards ranged from Knife Of The Year to Best Kitchen Knife and everything in between.
The 2022 Overall Knife of the Year® was the Pro-Tech Malibu Operator. Pro-Tech would go on to win in two other categories. The world’s largest knife show featured attendees and exhibitors from around the world showing off the best and newest in all things knives.
Below are this year’s factory award winners from this tremendous event.
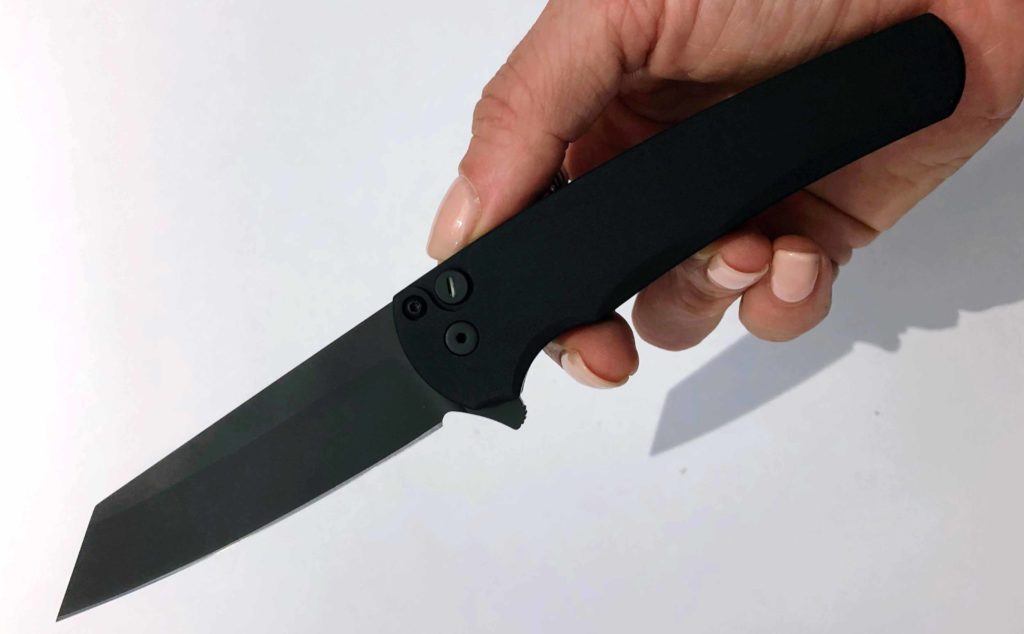
Overall Knife of the Year®: Pro-Tech Malibu Operator
Pro-Tech Malibu Operator
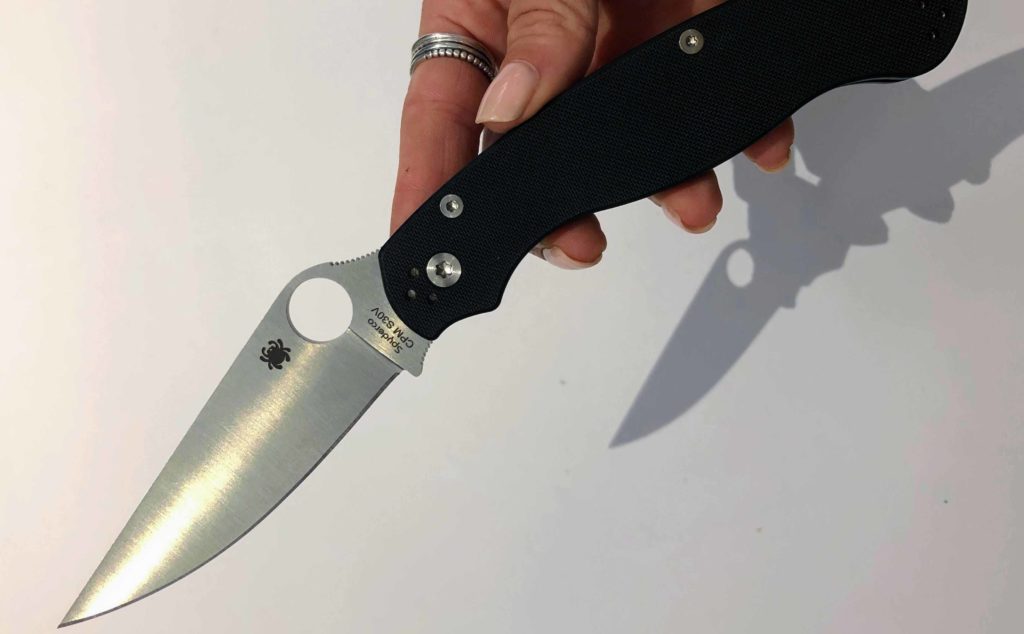
American-Made Knife Of The Year®: Spyderco Military 2
Spyderco Military 2
Most Innovative American Design: Asheville Steel Warlock
Asheville Steel Warlock
Imported Knife Of The Year®: MKM – Maniago Knife Makers Miura
MKM – Maniago Knife Makers Miura
Most Innovative Import Design: Civivi Orthrus
Civivi Orthrus
Accessory Of The Year: Lionsteel Eggie
Lionsteel Eggie
Best Buy: Sencut Sachse
Sencut Sachse
Investor/Collector Knife Of The Year®: Pro-Tech Ultimate Collection Terzuole ATCF Auto
Pro-Tech Ultimate Collection Terzuole ATCF Auto
Collaboration Of The Year: Pro-Tech Terzuole ATCF Auto
Counter-bending begins with the counter-bending jig. These are made by forging a steel bar .75-1 inch square and about five inches long into a “bottom swage” device. This looks something like a cradle. It can be placed into your anvil’s hardy hole or locked in a vise.
You don’t necessarily need to weld the hardy stud on the bottom, just lock it in the vise. A banana would fit nicely into this cradle. File a groove into the top-right edge to “catch” the point. I use railroad spikes to make this jig. As you make more knives you may choose to change that radius depending upon factors between you, your tools, and your steel.
Bending With The Railroad Spike Counter-Bending Jig
Place the counter-bending jig in the hardy hole or vise. Place the blade bar in the forge at the most convenient position for extraction and quick placement on the jig. Heat to orange. Place the bar on its spine, with the choil and cutting edge looking up and the point at the groove. Keep the bar at the center of the jig.
Note the “air” between the billet and the spike. The blade is almost resting at the bottom of the jig. The next blow will force it completely into the concavity of the railroad spike jig.
NOTE: Blacksmiths will refer to shaping tools like this railroad spike jig as a swage. Sometimes as a bottom swage. Swages (sometimes called ‘swedges’) are concave in shape. Fullers, on the other hand, which are also shaping tools, are convex.
With the round hammer face strike the bar in the center. This will take one to several heats and hits depending on how hot the bar is and how hard you hit it. Rarely will it take one heat and one hit. Usually it takes many. Do not hit it any more than necessary. We want the entire blade in the concavity of the jig. When it’s there, stop.
NOTE: Remember that straightening blows are much lighter than forging blows. Straightening blows are just hard enough to bring the blade back to straight and flat.
Then, put the blade back into the forge, take a heat, and do the swage business again. Steel, when hot, is extremely malleable (like soft clay) and can be told what shape to take.
You can purchase Paul White’s Forged: Making a Knife With Traditional Blacksmith Skills here.


 Best Miniature went to Grace Horne for these full-functioning scissors. They were handmade by her with watchmaker tools underneath a microscope.
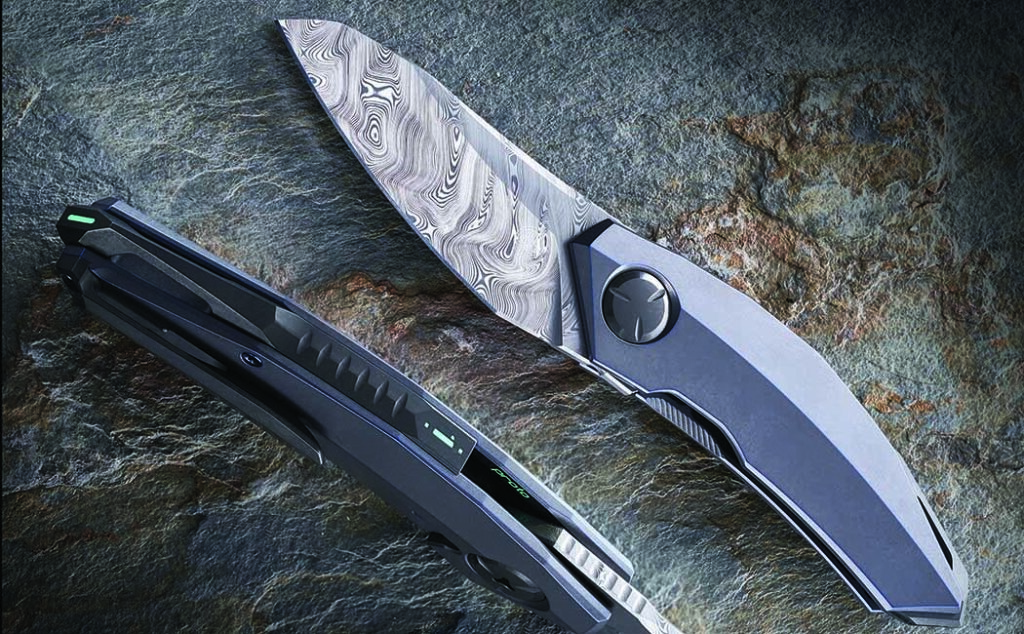 Best Tactical Folder: Dmitry Sinkevich
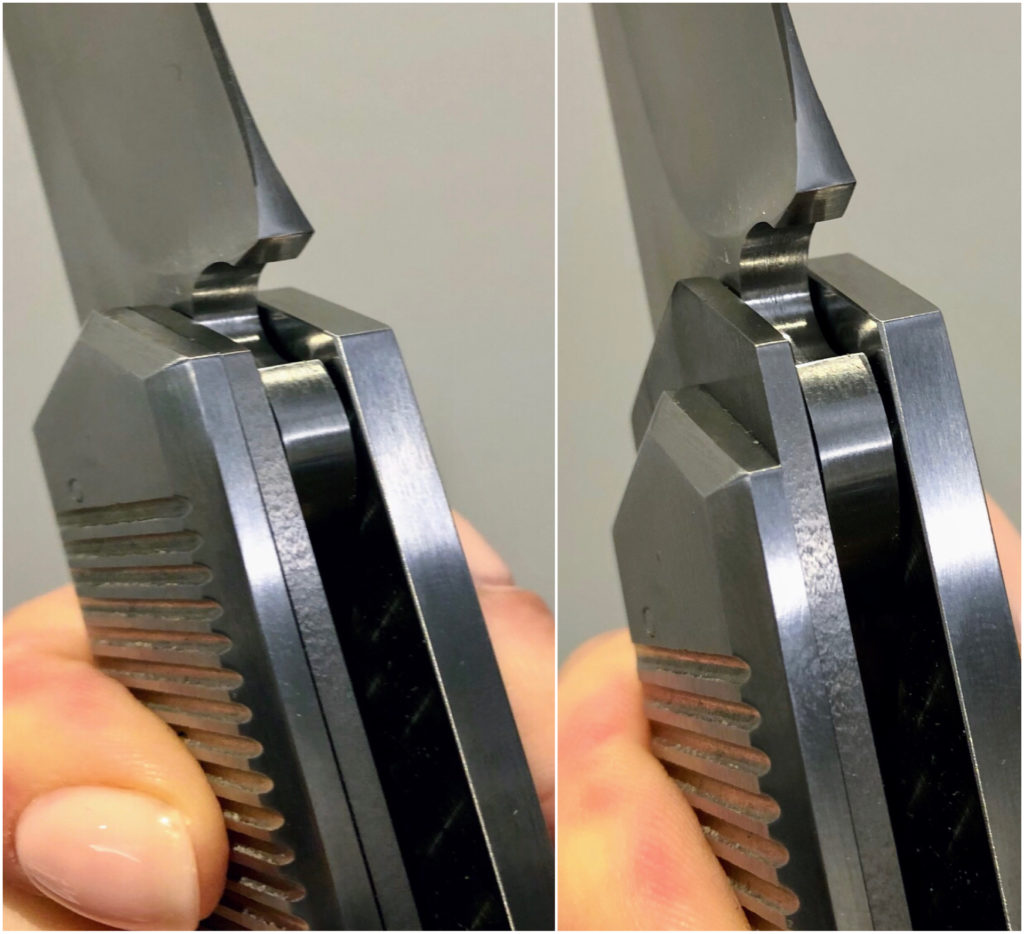
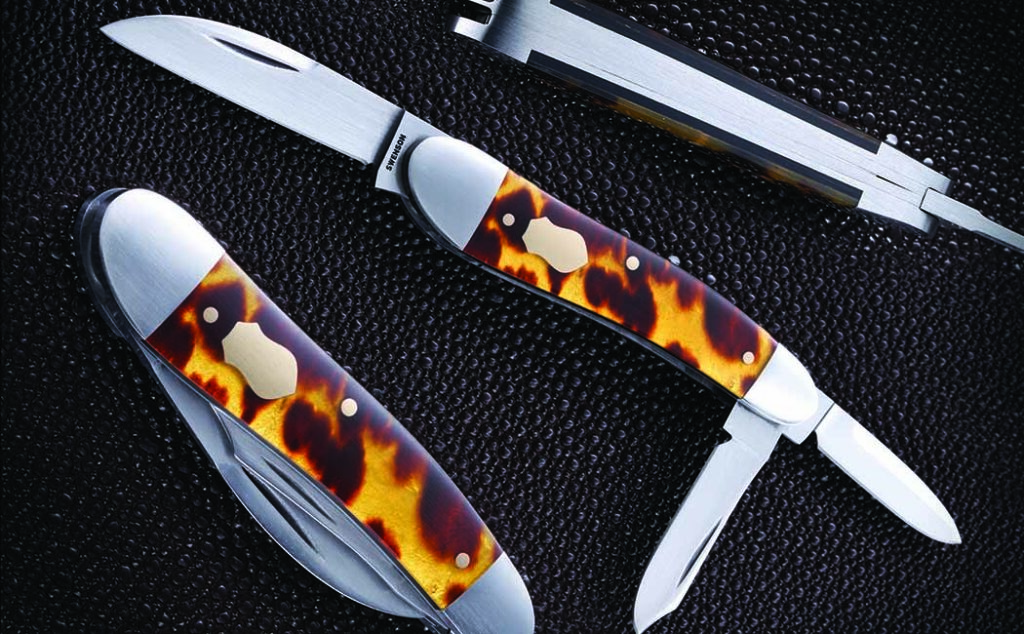 Best Slip Joint: Luke Swenson
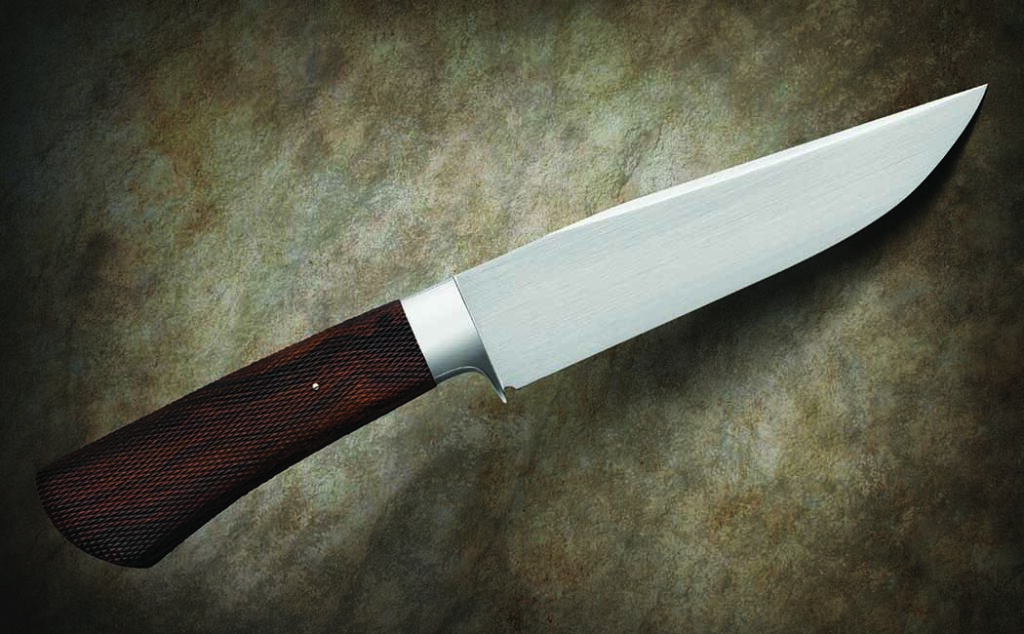 Best Handle Design & Best New Maker: Fabio Barros
 Best Utility Hunter: Ben Pittman
 Best Fighter: Henning Wilkinson
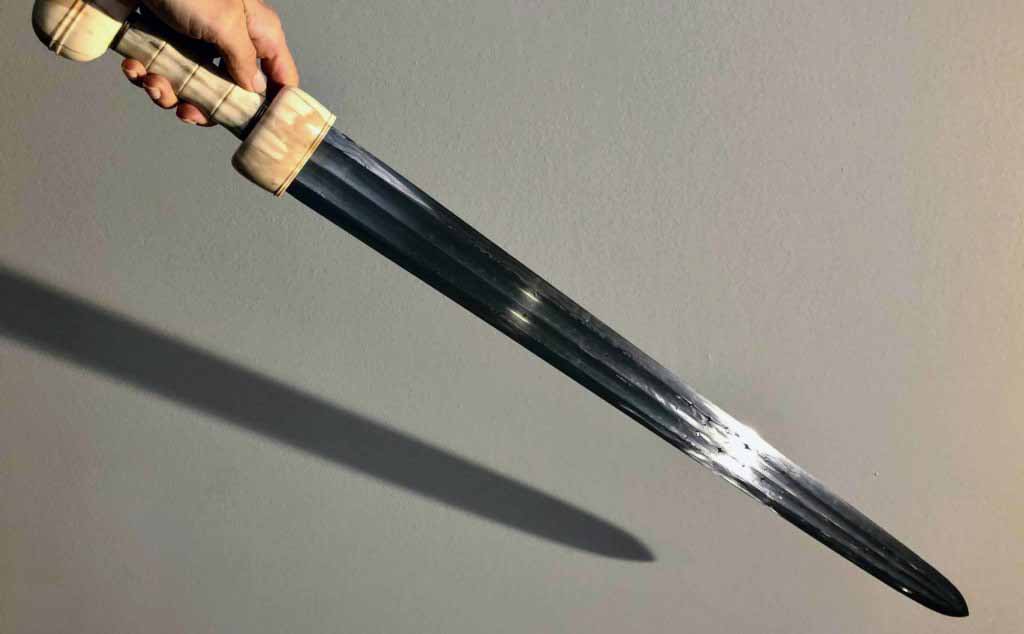 Best Sword: Vince Evans
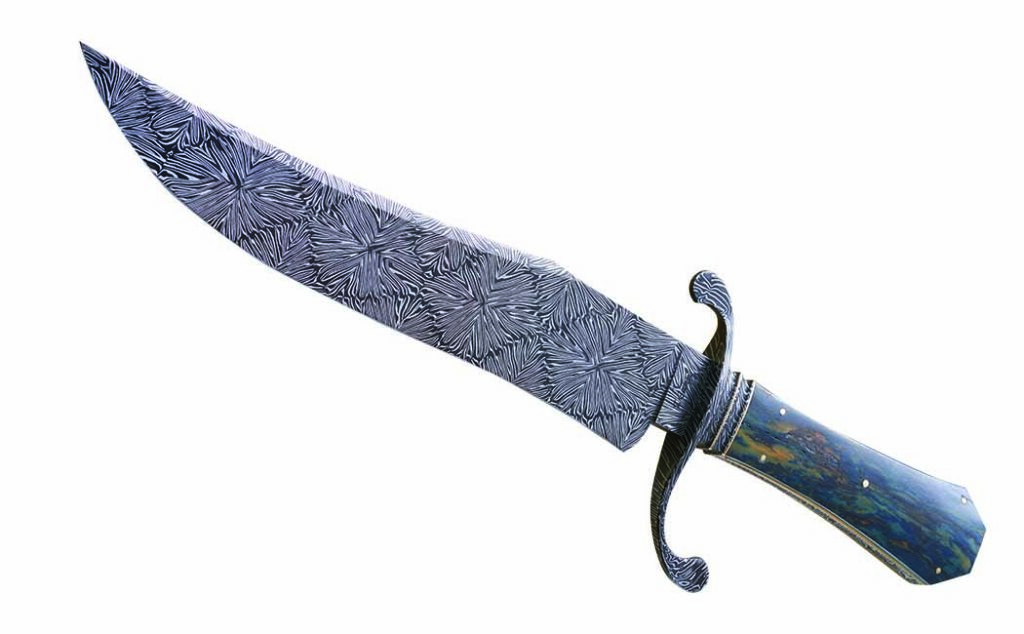
 Best Collaboration: Seth Lopez & Leah Aripotch. Lopez forged the knife while Aripotch created the stand.
 Best Damascus: Mike Quesenberry
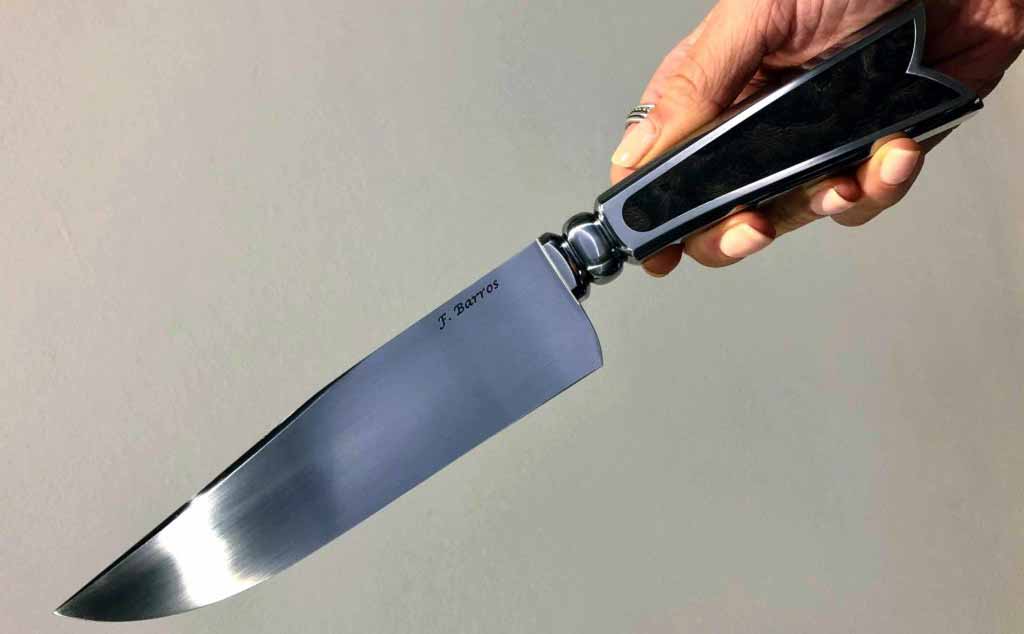 Best New Maker: Fabio Barros
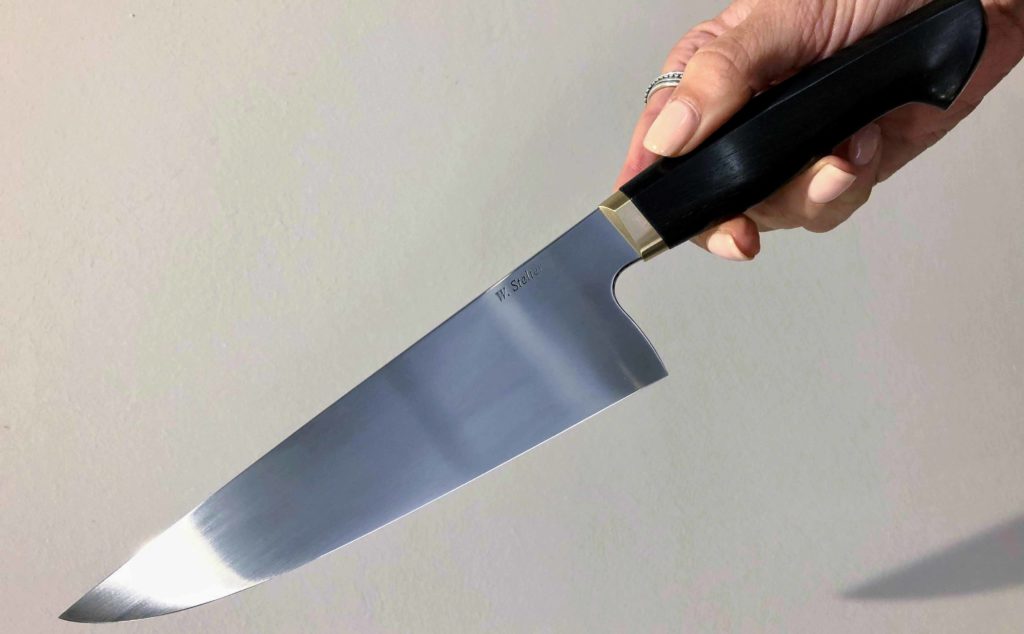 Best Kitchen Knife: Will Stelter
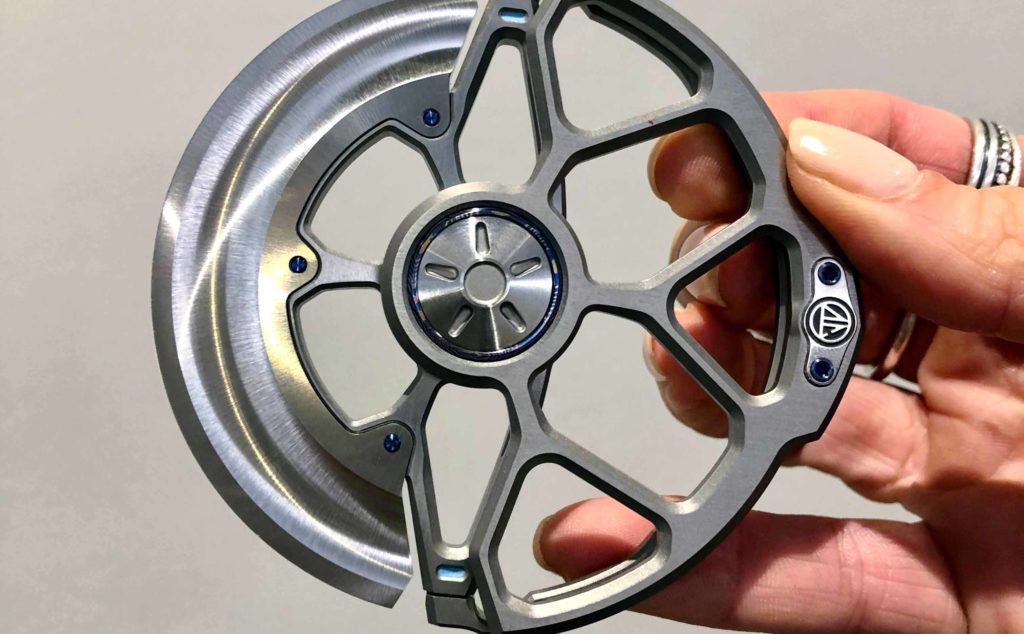 Best Of The Rest: Dmitry Sinkevich. Sinkevich said that the design was inspired by a combination of the ulu knife and watch rotor.
 Spyderco Military 2
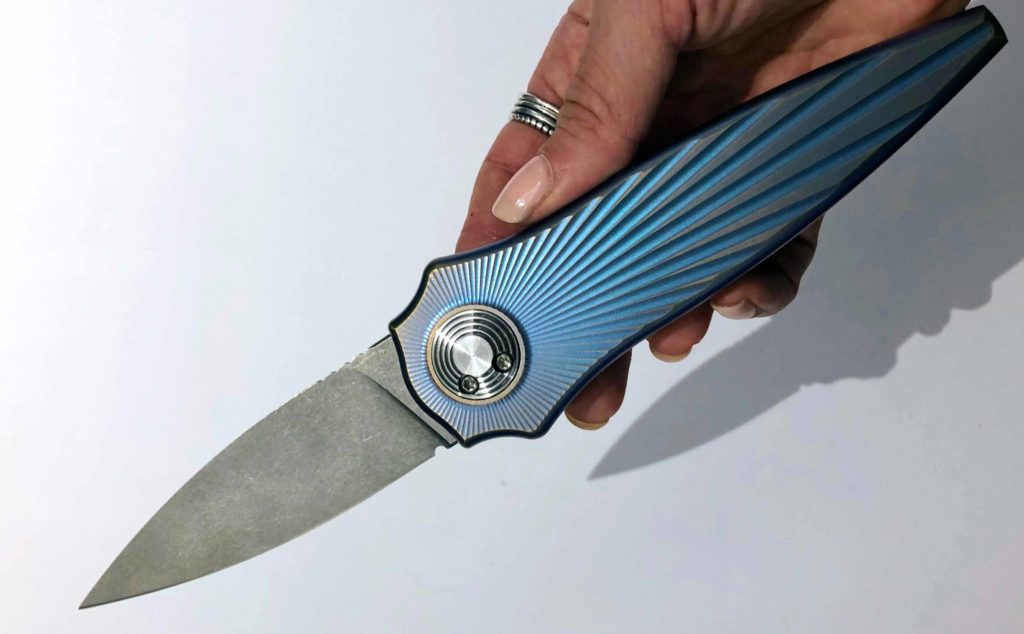 Asheville Steel Warlock
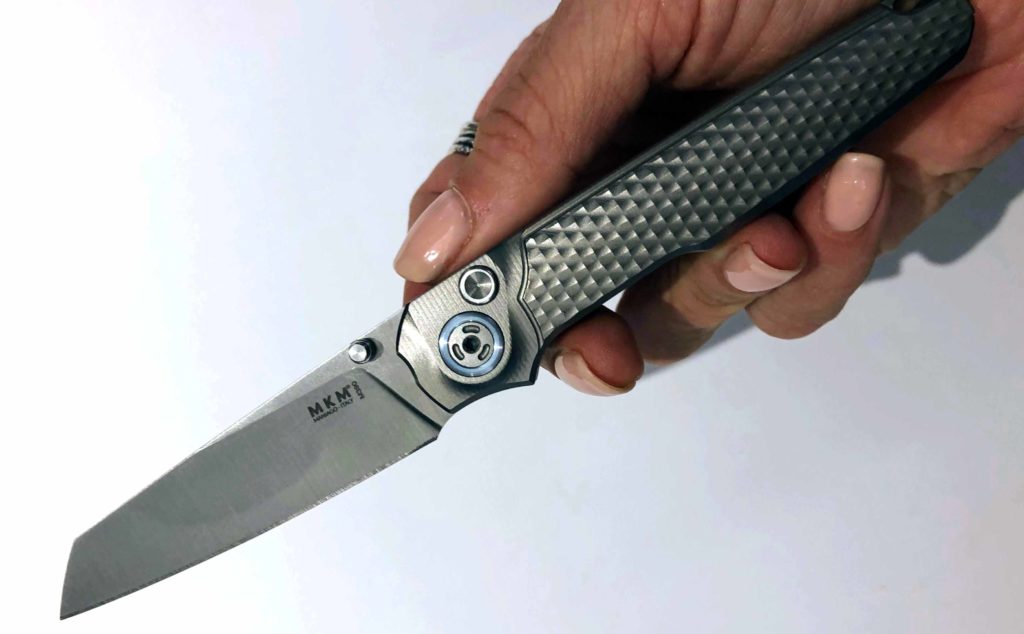 MKM – Maniago Knife Makers Miura
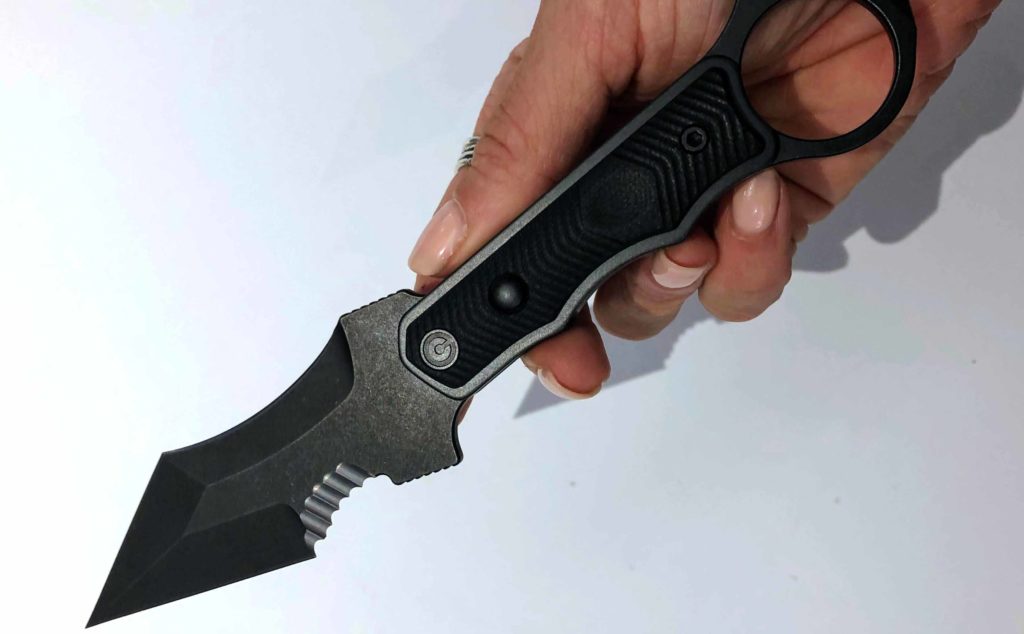 Civivi Orthrus
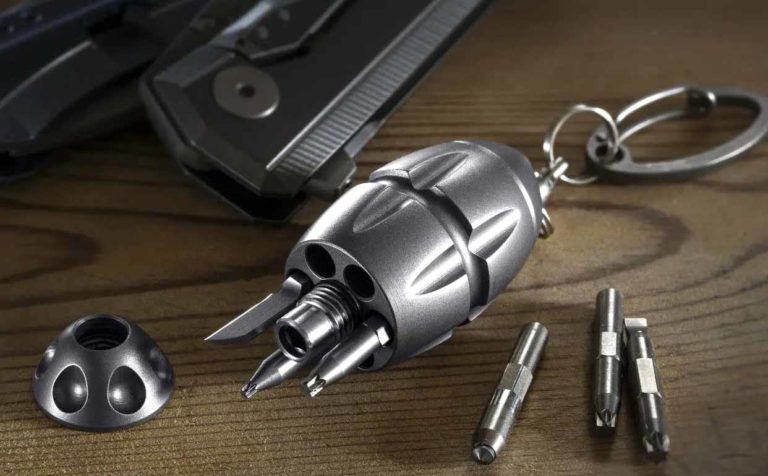 Lionsteel Eggie
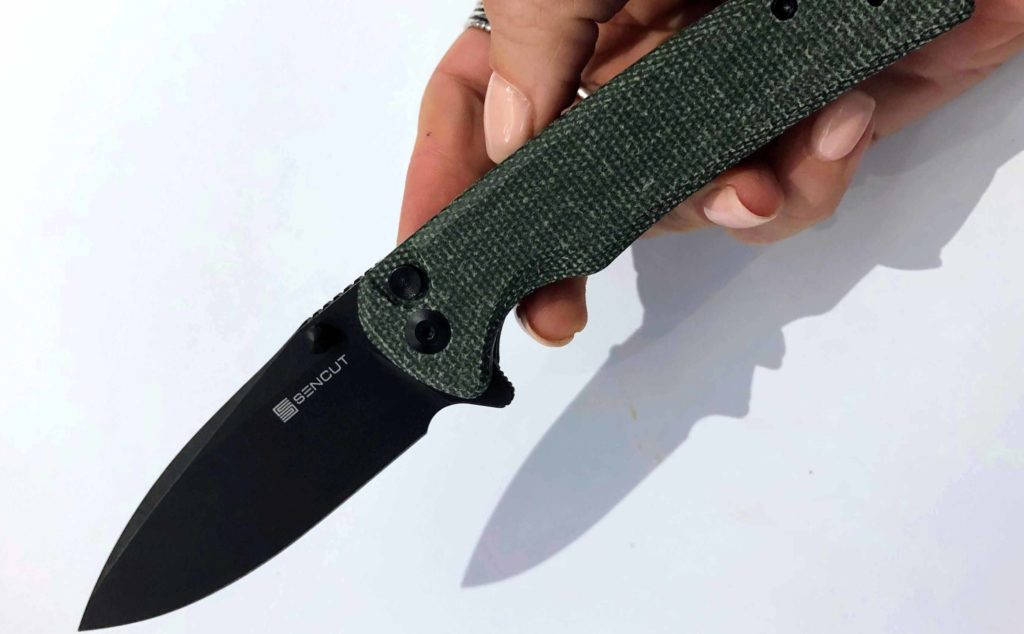 Sencut Sachse
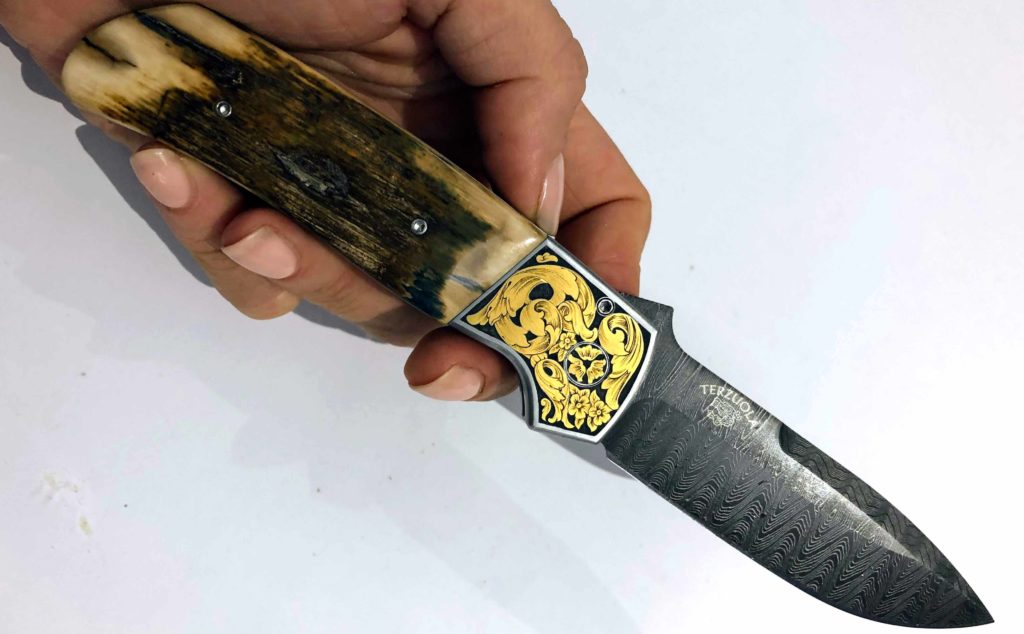 Pro-Tech Ultimate Collection Terzuole ATCF Auto
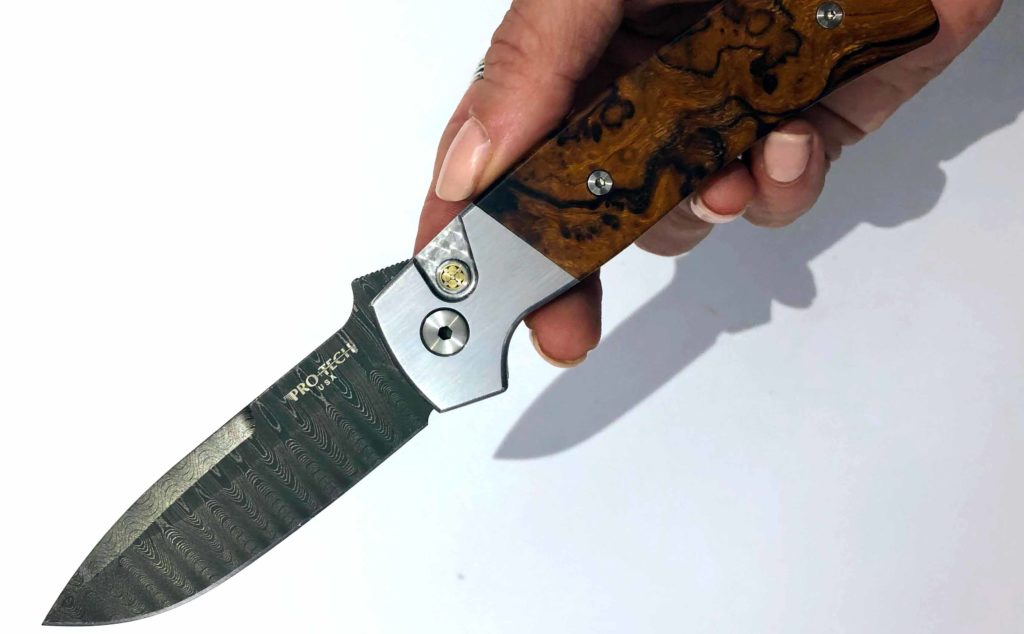 Pro-Tech Terzuole ATCF Auto
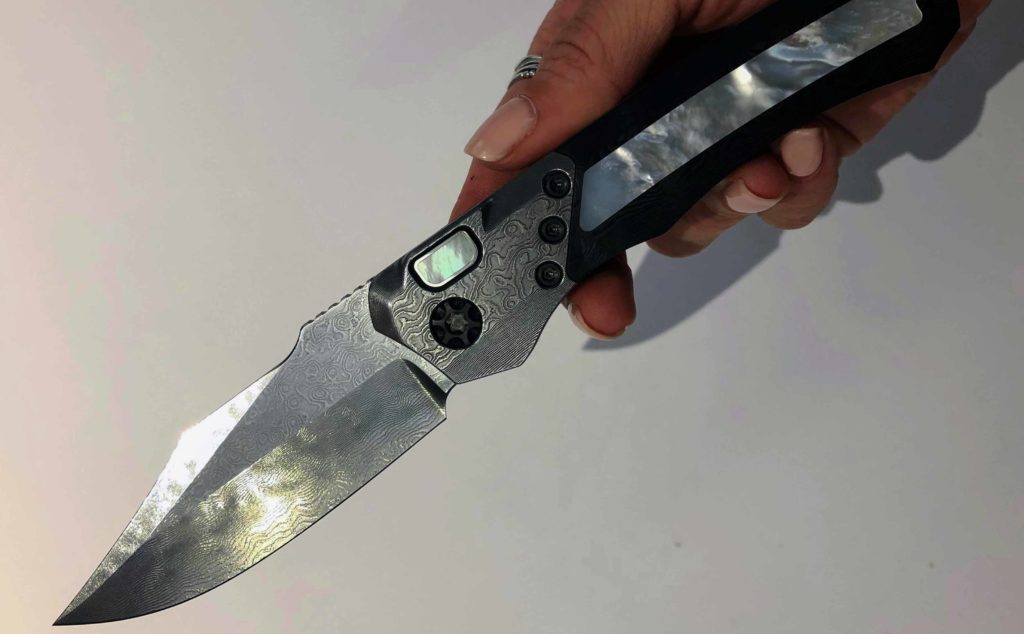 Heretic Wraith Auto
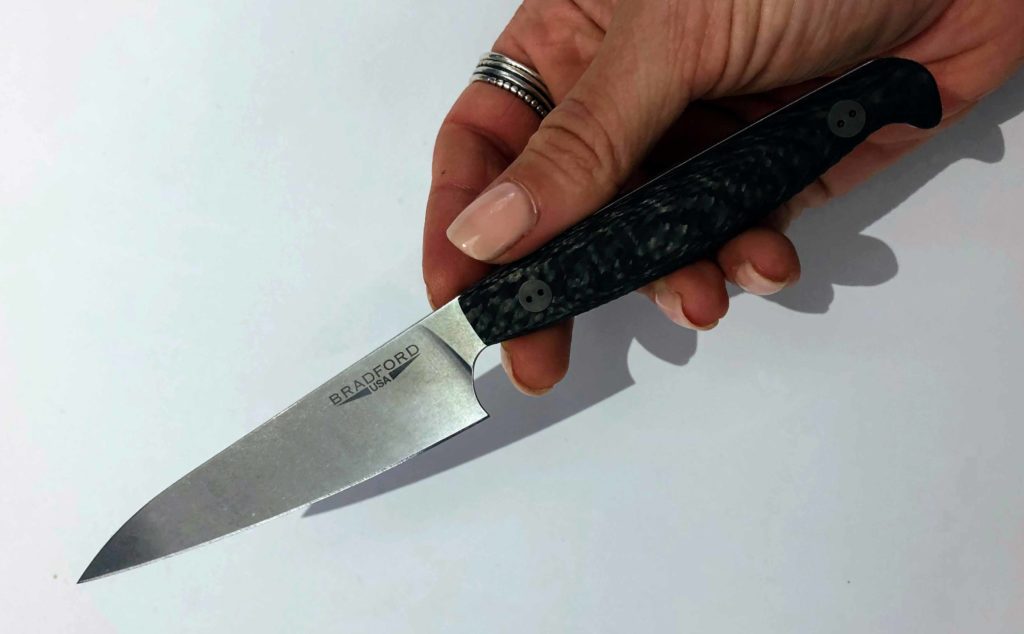 Bradford Paring Knife