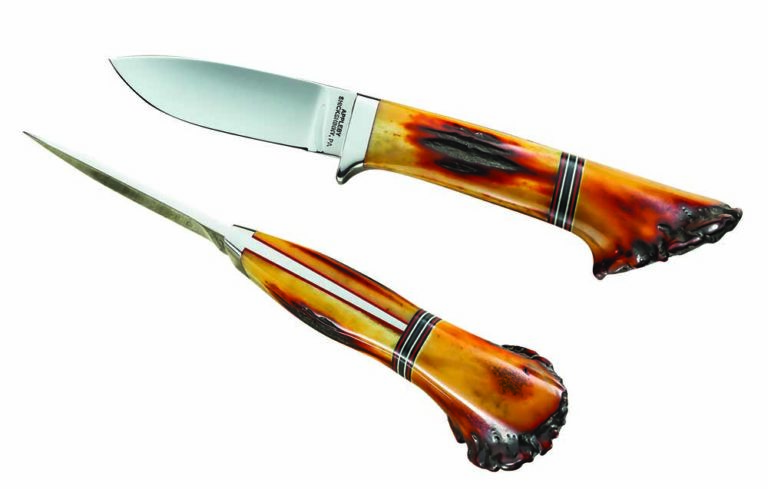
Robert Appleby nails a Loveless dropped hunter in crown stag.
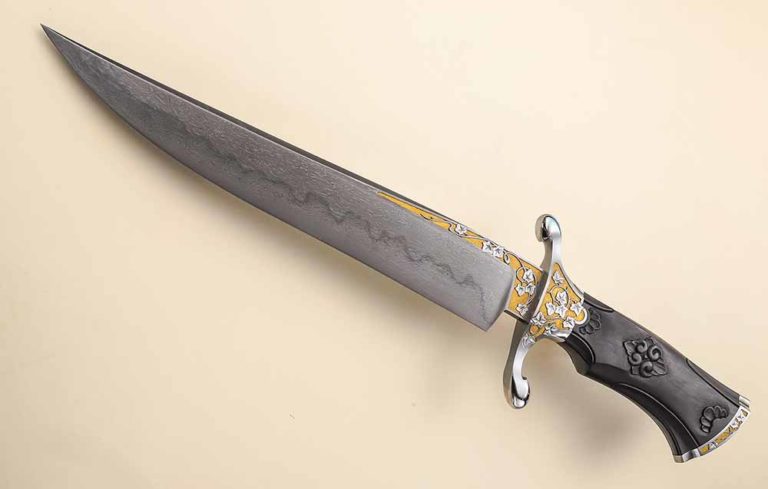
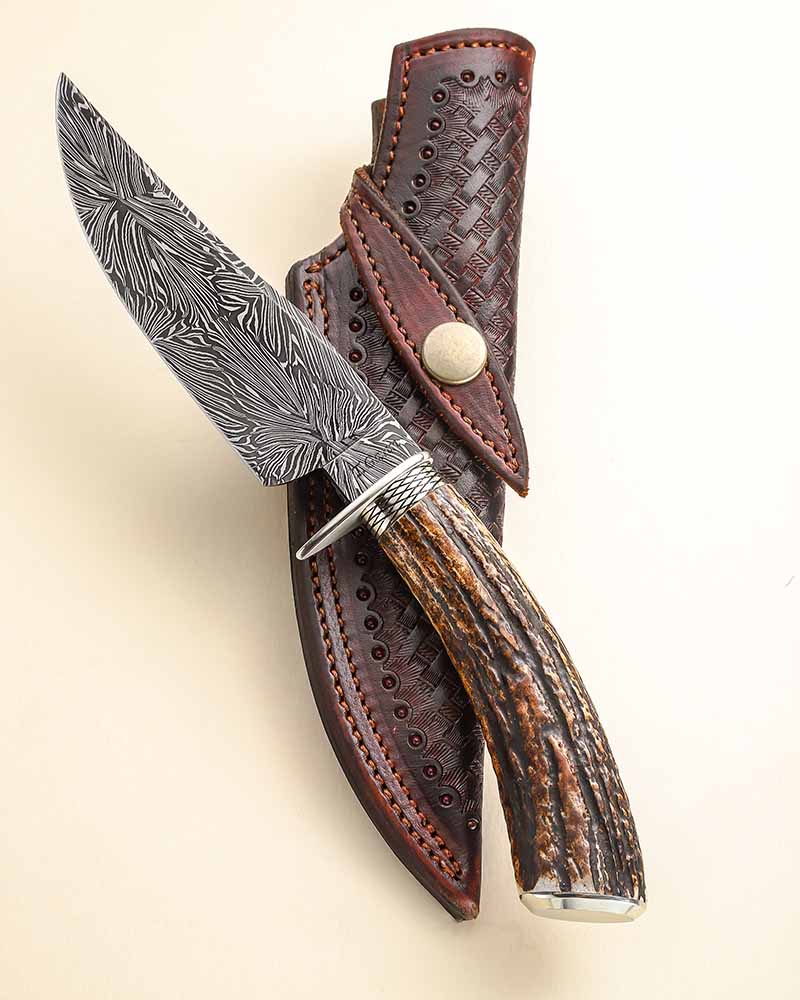
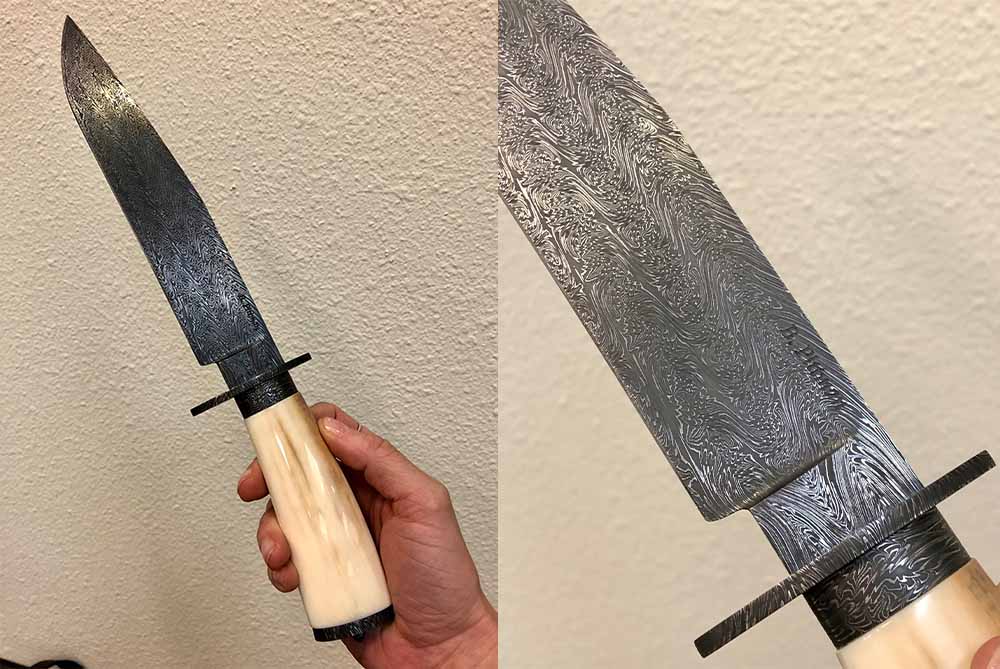
Robert Appleby’s custom-order reproduction of a dropped hunter by BLADE Magazine Cutlery Hall-Of-Fame® member Bob Loveless in amber crown Sambar stag is Loveless in all the right places.
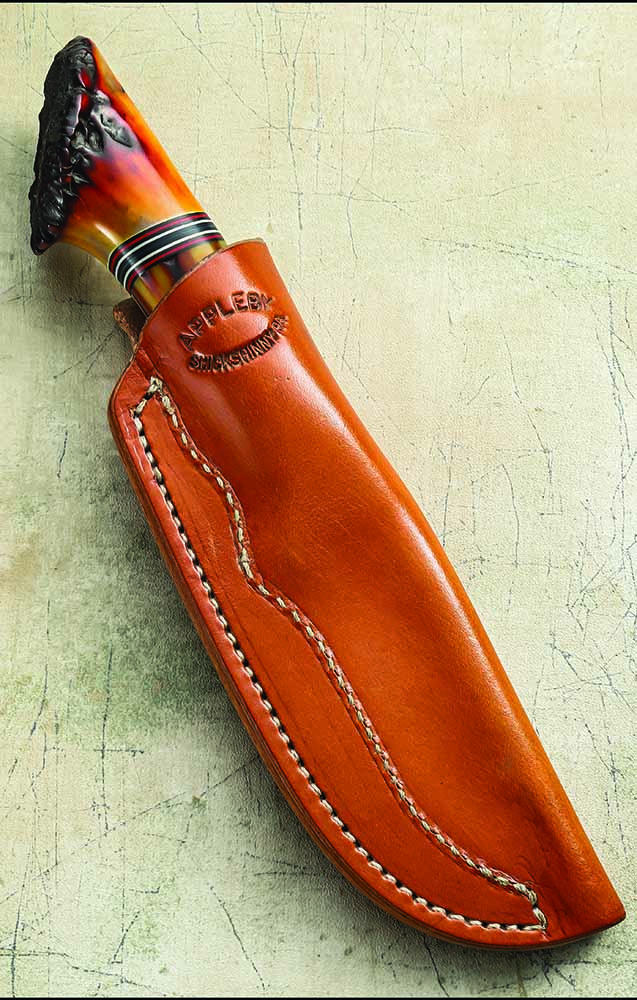
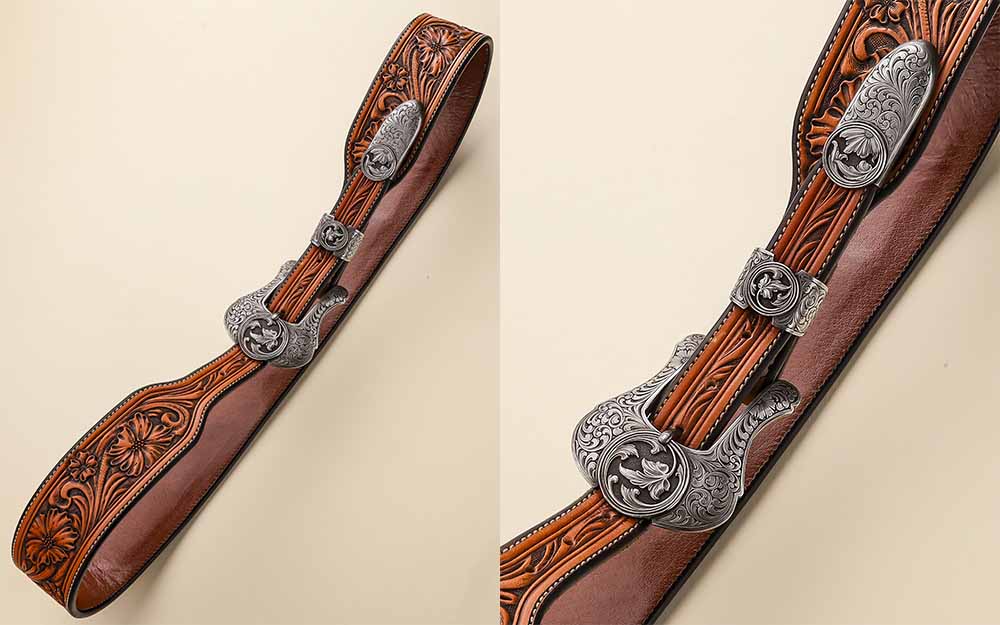
The pouch belt sheath of 8- to 9-ounce leather from Wicket & Craig is also in the Loveless style. Robert is celebrating 25 years of knifemaking.
A customer sent Robert an image of an original Loveless knife and Appleby went to town, reproducing the tapered full tang faithfully to the original.
“It’s still a full tang, not a frame,” he explained, “one solid piece from the point to the back.” He tapered the tang, left the stub at the end and mortised it into the stag crown handle butt. He glued the spacers like a block, which fit over the stub. The stag is from Culpepper & Co., which amber dyed it as well.
“I really enjoyed that knife,” Robert noted. He said the satisfaction he felt after he had finished it was similar to the same sort of happiness he has when experiencing “the old muscle cars.”
Loveless Repro Dropped Hunter Specs Maker: Robert Appleby Blade length: 35/8” Blade material: AEB-L stainless steel Blade finish: Mirror polish Handle: Amber-dyed crown Sambar stag Bolster: 416 stainless steel Overall length: 9” Maker’s list price for a similar knife and sheath: $625
Shop Dump: Top makers reveal the key equipment that helps them get the job done
“Shop Dump” is a new BLADE® feature showcasing the special knifemaking equipment of some of today’s leading knifemakers and bladesmiths. The new feature kicks off with ABS master smith Rick Dunkerley and knifemaker Jason Fry.
Rick Dunkerley
Rick Dunkerley
“I’ve been making knives for almost 40 years,” Rick Dunkerley observed, “and in that time I think I’ve developed a style that is recognizable as my own.” It’s specific equipment that plays a crucial role in him making knives in that style. There are many more tools that help along the way, but he uses seven in particular on every knife.
1. Propane Forge
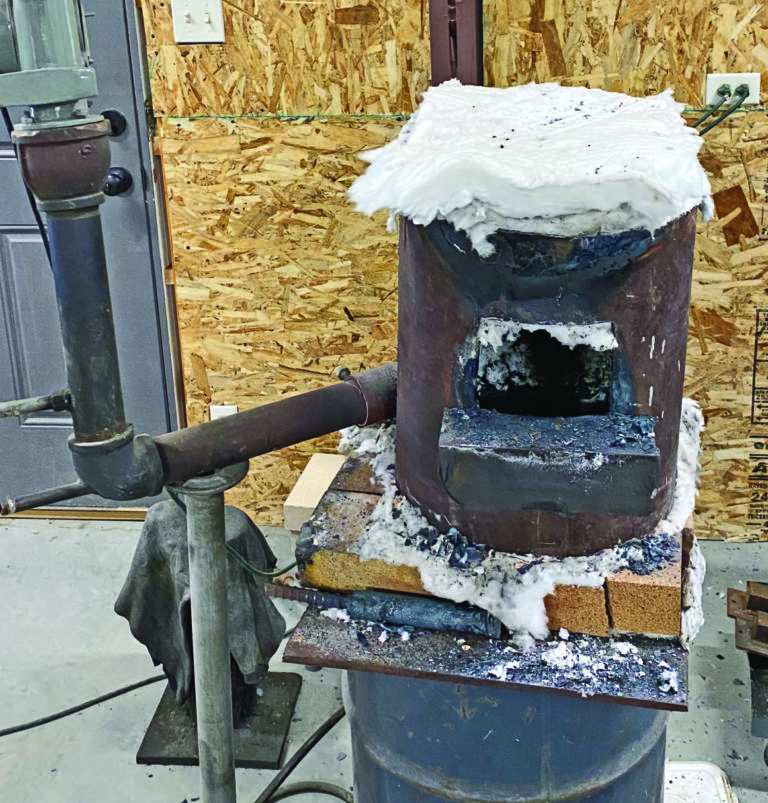
Dunkerley’s propane forge
His propane forge is homemade and the burner is over 20 years old. “It’s a vertical Don Fogg design,”he commented, “lined with ceramic wool lining. Since 99 percent of my knives are damascus steel, they begin in this forge.” Dunkerley began using his hydraulic press built by Billy Bob Sowell to forge damascus in the early 1990s. It’s Rick’s third hydraulic press, incorporating a larger cylinder, motor and hydraulic pump than his earlier models. The press helps him finish the damascus he forges.
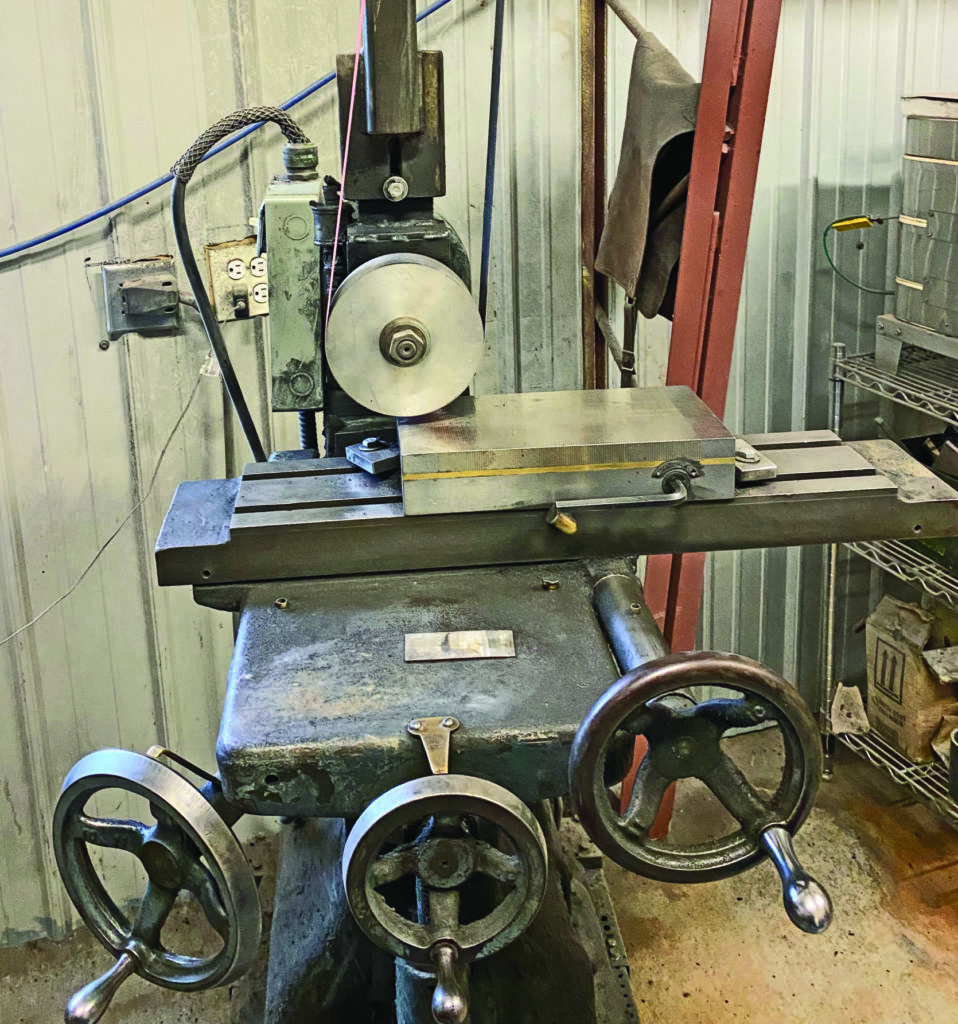
2. eBay Bargain Surface Grinder
Surface grinder
An eBay-bargain ($300) surface grinder has served Rick well for 20 years. “I don’t know the make or the model,” he said, “and I changed it to a single-phase motor and converted it to run 2×72 belts with an aluminum contact wheel. It works on the damascus as it’s being made, and then precision grinds the blade and back bar material for my folders.”
3. Craftsman Drill Press
Dunkerley’s small Craftsman drill press “has drilled the holes on almost every folder to come from my shop,” he declared. “It’s very accurate and small, which is convenient as I can place it on my bench right next to my disc sanders. I added a keyless chuck to speed up the bit changes.”
4. Tru-Grit Disc Sander
Tru-Grit Disc Sander
Rick’s 9-inch Tru-Grit disc sander is another machine he’s had for 20 years. “The disc is great for flattening material, dovetailing bolsters, shaping handles and grinding blades. It’s reversible and set up with a foot switch to allow me to place the material against the disc and then turn it on,” he explained. “I wouldn’t want to make knives without a disc sander. I actually have three in my shop and would like one more.”
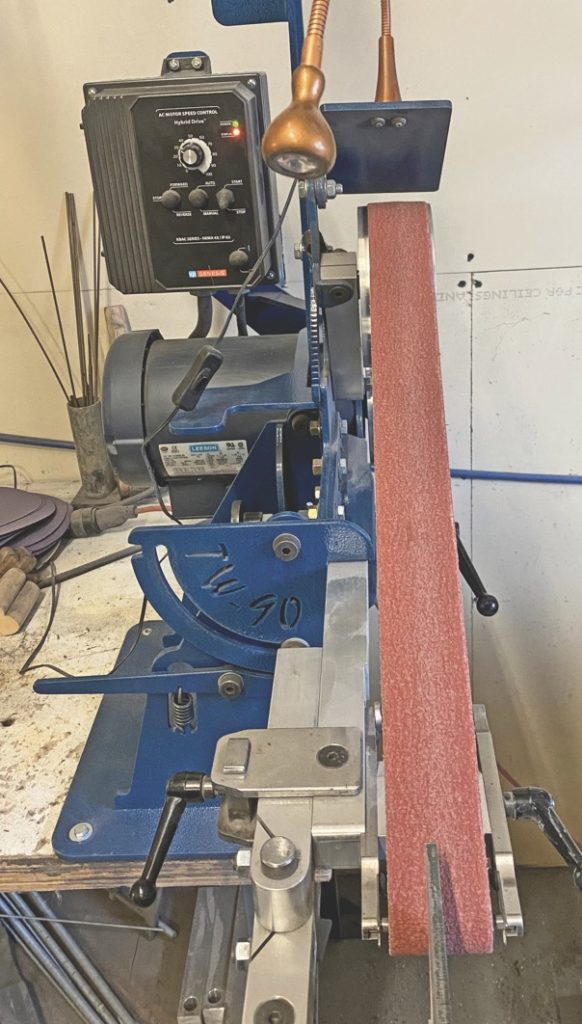
5. TW-90 Belt Sander
TW-90 Belt Sander
Dunkerley follows up with a TW-90 belt sander. “The versatility of this machine makes it one of the most used in my shop,” he remarked. “From rough grinding all types of material to fine finish work, this thing saves me huge amounts of time. The small wheel attachment and the fact that it turns into a horizontal grinder help me eliminate other machines that I would only use for specific jobs. The first time I saw one of these machines work, I knew it would make me a better knifemaker.
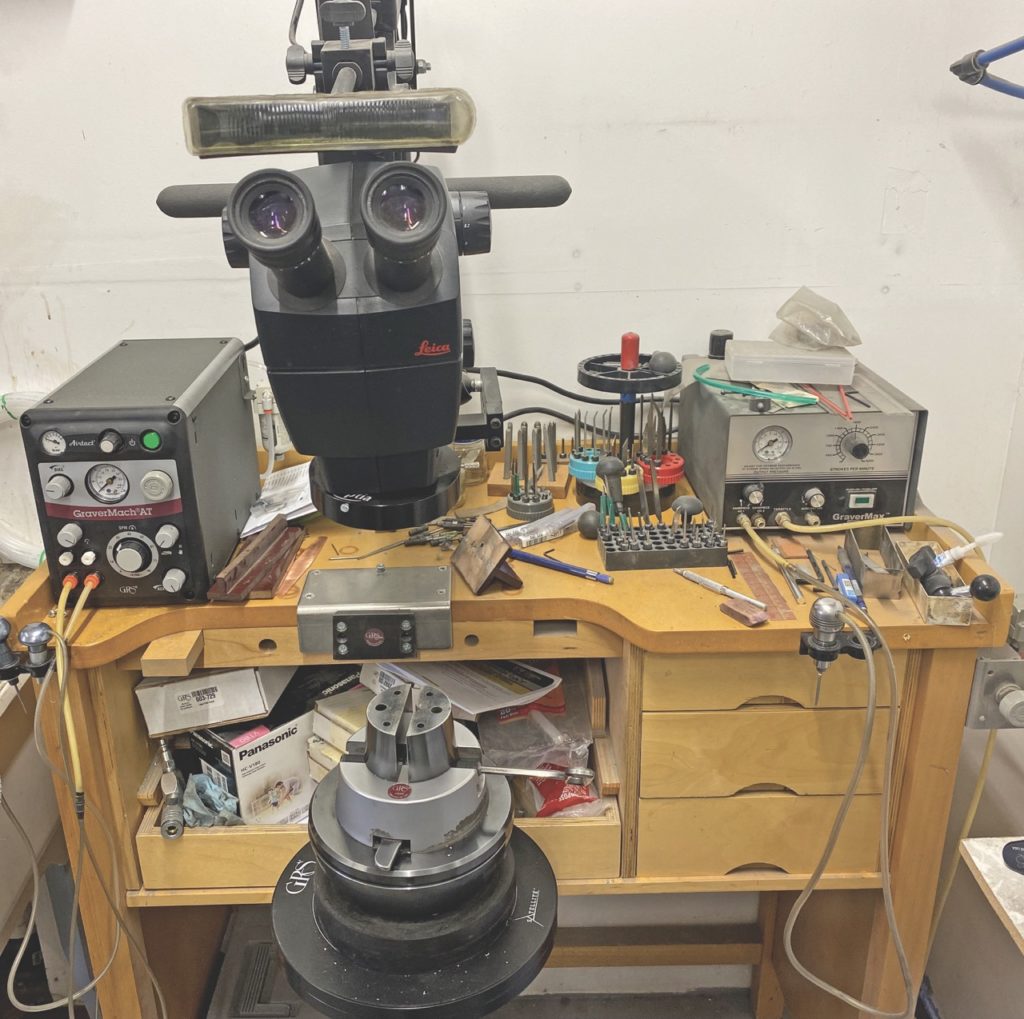
6. GRS Engraving Equipment
GRS Engraving Equipment
Rick uses his engraving equipment to give his knives an unmistakable quality and aesthetic. “Nearly every folder I make has engraving and some gold inlay,” he noted. “That happens here. My equipment was made by GRS and has served me very well. I continually think of new ways to use this equipment to add details to my knives.”
Jason Fry
Jason’s shop-proven equipment serves as a milestone along the way
Jason Fry
Jason Fry follows a direct route to excellence and each of his shop-proven pieces of equipment serve as a milestone along the way.
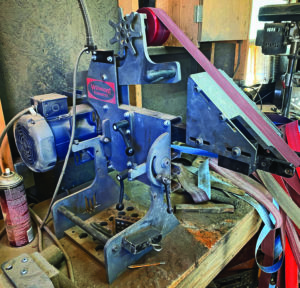
1. Wilmont Grinder
“My number one machine is my 2×72 Wilmont grinder,” he explained. “After 13 years on a homemade machine, I recently upgraded to the Wilmont Quattro.
Most of the recent high-end grinders will have variable speed, horizontal tilt, adjustable tool rests and specialty fixtures. This is the only ‘brand new’ machine I have ever purchased.”
Jason’s Wilmont Grinder
Fry adds a comparison of his heat-treat oven choice, relating, “You can argue Ford vs. Chevy or Evenheat vs. Paragon, but all the modern production ovens have digital temperature control. This gives the maker the ability to precisely dial in the heat treat of their chosen steels, and to heat treat stainless steels that require longer soaks at high temperatures.” Jason acknowledges that he bought a used Evenheat oven but he’s friends with all the folks at Paragon. “I got a good deal on the oven,” he smiled. “I had an old dental oven that I sold for three-fourths the price of my Evenheat, and it was a good upgrade.
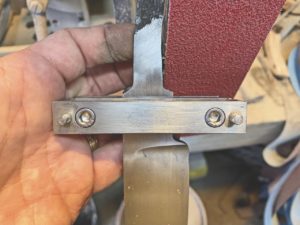
2. File Guide
A file guide, such as this one by ABS master smith Bruce Bump, has carbide inserts that allow the maker to grind up against the guide and create a square shoulder on the blade.
“Another important tool is the file guide. I use a Bruce Bump file guide with carbide inserts. Bruce was an inspiration to me with his epic WIP threads in the forum days before Instagram, so I wanted one of his file guides when it came available.
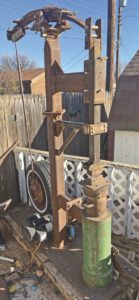
3. Power Hammer
Jason’s power hammer
“My power hammer is a homemade ‘junkyard’ hammer in the ‘Appalachian’ or ‘Rusty’ basic design. It has a 40-pound head and hits at around 200 beats per minute. It makes the forging process faster and also allows me to efficiently make my own damascus. I chose the design because it was simpler to build from scrap than the tire hammer design.
“I competed on Forged in Fire back in May 2018 and my episode aired in September,” Jason added. “As I was preparing for the show, practicing forge welding and such, it came to mind to build a hammer. I prepared for Forged in Fire by building a hammer because even if I lost in the first round, I’d still have a hammer I could use for the rest of my career. This hammer took me about two months of intense weekends to build, and other than the initial test run, the first time I ran it was when I filmed the final [FIF episode] at my house. I still use it every forging session almost three years later, and having the hammer has made forging much more enjoyable and greatly expanded my capacity.”
Capitalizing on the right shop tools and equipment has made an enormous contribution in knifemaking, and listening to those who have been down the road gives others the opportunity to test, refine and choose what works best in their own shops. Meanwhile, the knife buyer can have an enriched ownership experience knowing more about the process and the pride that goes into each finished knife.
Everything is bigger in Texas. That includes knife competitions. BLADE Show Texas’ first year in the Fort Worth Convention Center March 18-19, 2022, the BLADE Show Texas Awards turned out a host of excellent entrants in 11 factory and custom knife categories. The knives were judged by a panel of top knifemakers from across the industry, who evaluated each for superior utility, design, creativity, materials, aesthetics, and feel, among other traits.
Blade Show Texas and Texas Gun Experience have teamed up to provide Blade Show Texas attendees a night of hands-on experience in a safe and managed environment. Blade Show Texas attendees with PROOF of attendance (show receipt or wristband) are invited to a private demo event on Saturday evening March 19, from 7 p.m. to 10 p.m. at 1901 S Main St, Grapevine, TX 76051.
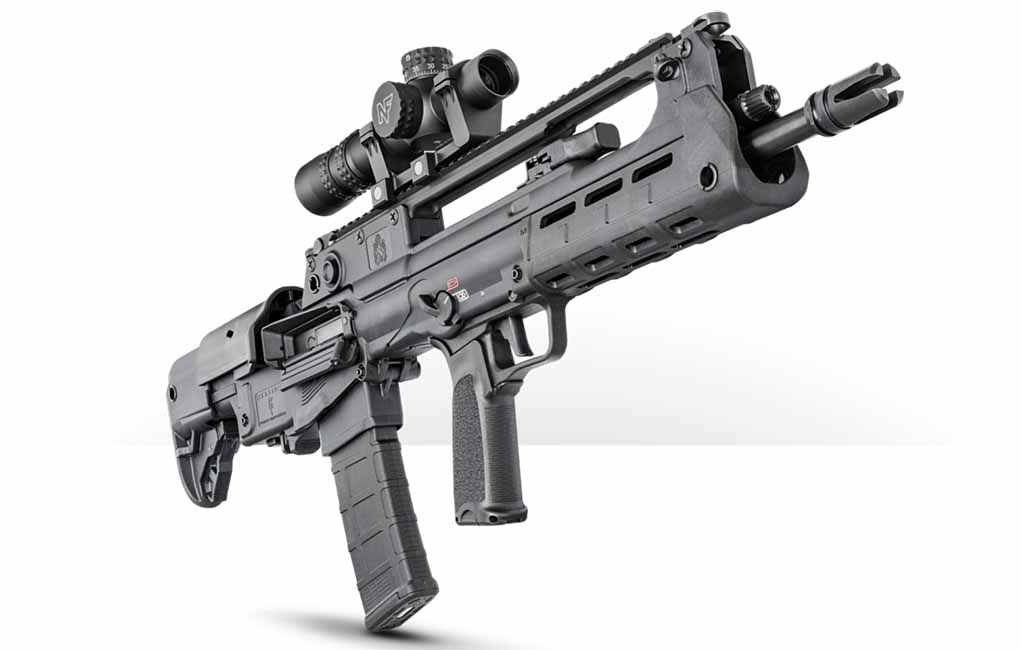
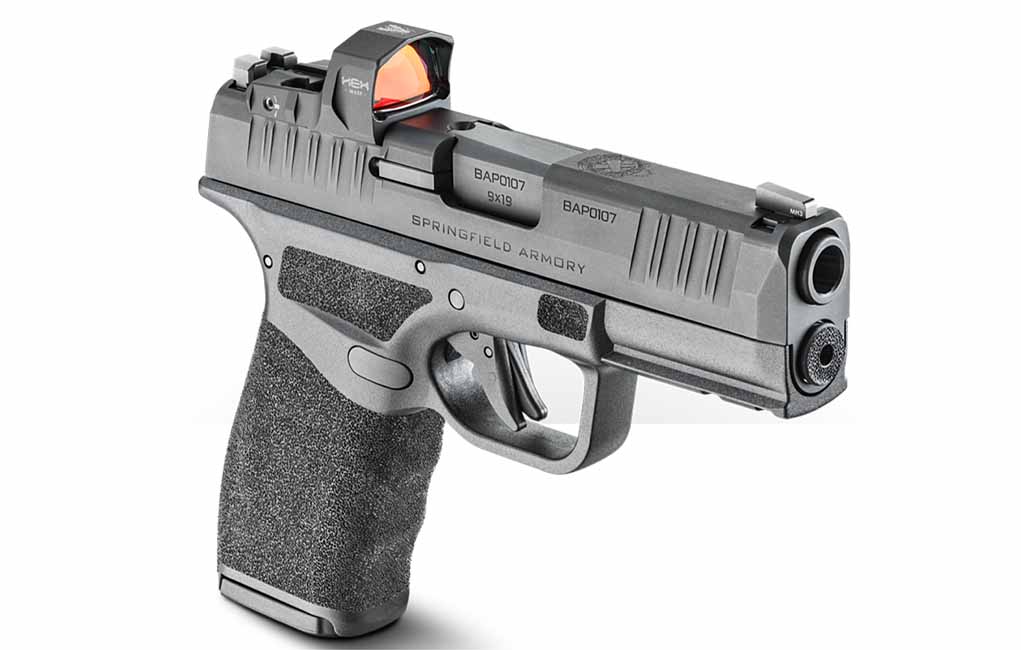
Springfield Hellion
The shooting experience will be limited to the first 200 attendees or until the ammunition runs out. For further details and to secure a guaranteed shooting experience, stop by the Texas Gun Experience booth by the SHOW ENTRANCE and subscribe to one of the following magazines: BLADE, Gun Digest, RECOIL, CONCEALMENT, OFFGRID.
Bigger and better than ever, BLADE Show Texas has something to offer everyone deep in the heart of the Lone Star State.
A switch to the plush Fort Worth Convention Center, an expanded roster of international and domestic custom and factory knifemakers and much more promise to make BLADE Show Texas one for the record books March 18-19 in Fort Worth.
Formerly known as the International Custom Cutlery Exposition (ICCE) and held last year at the Fort Worth Stockyards, the new name of BLADE Show Texas and the new venue are all part of the event’s continued revamping under the umbrella of the world’s largest and most important knife show operation, the BLADE Show, the latter which will be June 4-6 at the Cobb Galleria Centre in Atlanta.
But first thing first—and that thing is BLADE Show Texas.
Approximately 300 exhibitors will be on hand to display their hottest knives, knifemaking supplies and more. Among those exhibitors are members of both The Knifemakers’ Guild, the American Bladesmith Society and many other unaffiliated makers as well. Also exhibiting will be a number of cowboy artisans to show off their creative works in spurs, bits and similar gear in a special section of the Exhibit Hall E-F called Cowboy Alley. All will gather in the expansive Fort Worth Convention Center in the heart of downtown Fort Worth. Spanning 14 city blocks of the city’s central business district, the convention center is surrounded by four-star hotels, restaurants, shops, galleries and assorted performance venues, with free transportation provided throughout the downtown area via Molly the Trolley.
Helping make the show a reality are its sponsors, which include Smoky Mountain Knife Works, WE Knife Co., Civivi, Hogue Knives, New Jersey Steel Baron and The Blade Bar.
Last year’s show was one of the first major knife events to return after the pandemic had caused a number of other shows to cancel, and people who both attended and exhibited gave it rave reviews. Many makers sold out and many who didn’t sell out didn’t miss by much. Bubba Crouch, who, along with many other members of the South Texas Cartel of custom slip joint makers returns this year, said it was the best-attended show he’d been to since BLADE Show 2019. “There was a lot of money in the room and a lot of veteran-type collectors,” he observed. “I brought three or four customers who’d never been to a knife show and they were overwhelmed with all the talent.”
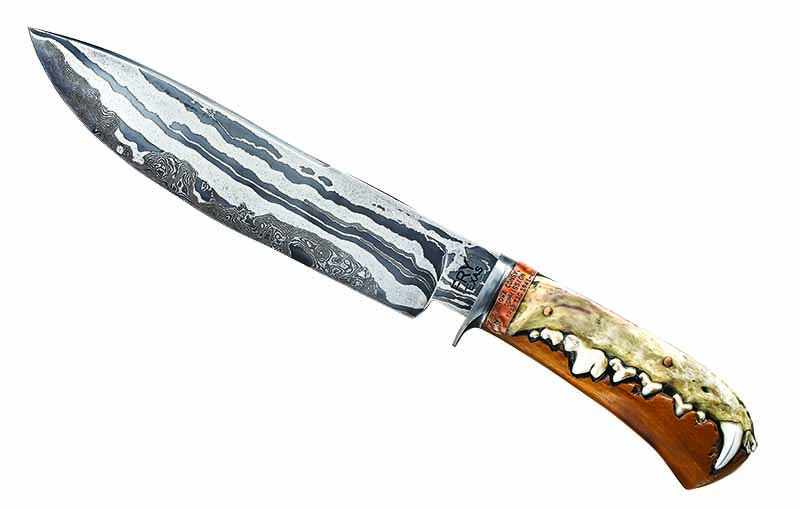
Coyote jaws, 1912 bois d’arc and a 1941 trap tag highlight the handle of the Trapper Bowie by BLADE Show Texas exhibitor Jason Fry. Blade damascus that includes among its forged components a vintage Newhouse trap spring is clad over a random damascus core. Overall length: 13 inches.
This year’s array of talented artisans promises to be even better. An incomplete but representative sample of domestic and international exhibitors in assorted categories includes:
Bladesmiths: Bill Burke; Brion Tomberlin; Bruce Bump; Murray Carter; Jerry Fisk; Harvey Dean; Jason Fry; South Africa’s Henning Wilkinson; J.W. Randall; James Cook; James Rodebaugh; Jason Knight; Jean Louis Regel of France; Josh Fisher; John Horrigan; Kelly Vermeer Vella; Lin Rhea; Mike Tyre; Rick Dunkerley; Steve Schwarzer; Scott Gallagher; Shane Taylor; Shawn Ellis; Shayne Carter; Belgium’s Veronique Laurent; and Tommy Gann;
Slip joint makers: Bill Ruple, Chris Sharp, Bubba Crouch, Burt Flanagan, P.H. Jacob, Enrique Pena, Tom Ploppert, Stanley Buzek, Luke Swenson, Tim Robertson, Tobin Hill and Trae Gaenzel;
Assorted other top makers: Allen Elishewitz, Brian Fellhoelter, Peter Carey, Dennis Friedly, Johnny Stout, Tom Krein, Lee Williams, Jeremy Marsh, Princeton Wong, Brian Nadeau, T.R. Overeynder, Todd Begg, Scorpion 6 Knives and Michael Zieba;
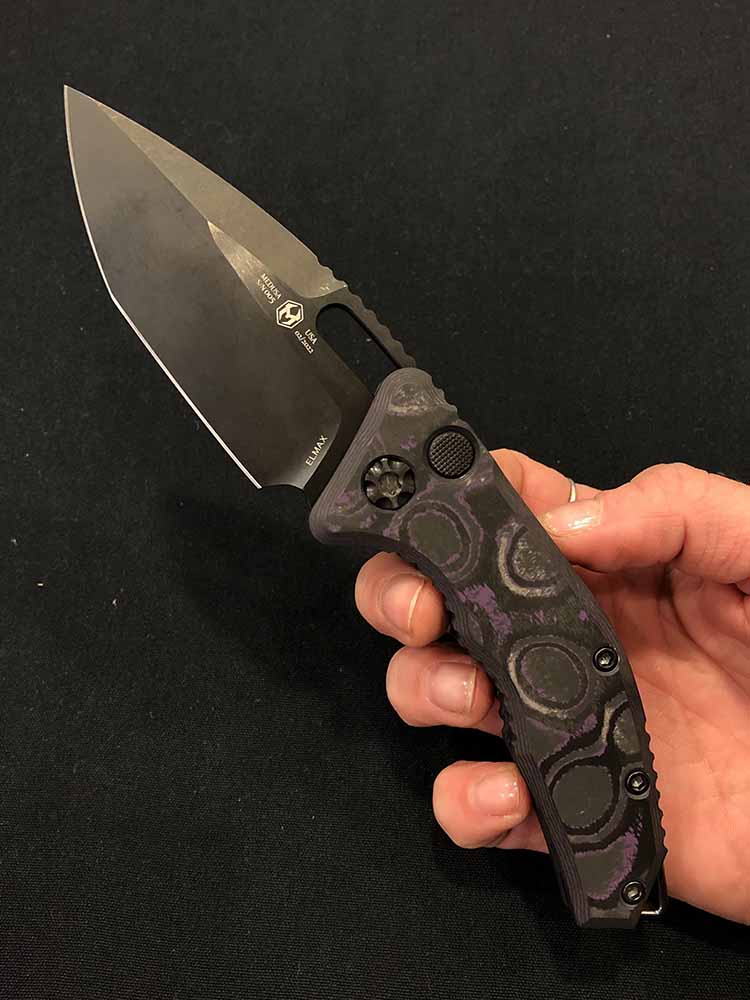
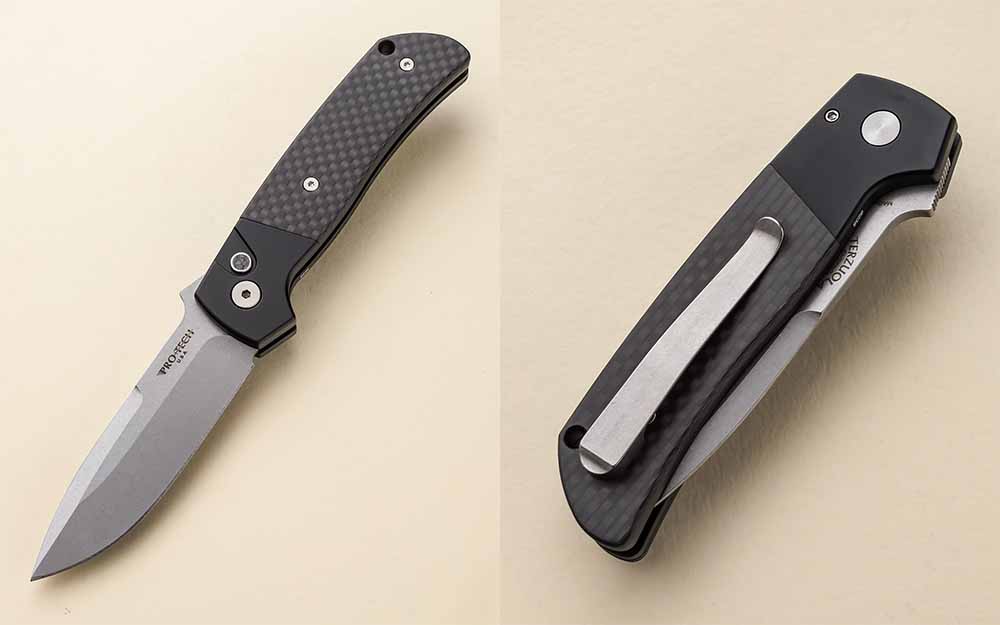
Factory knife/accessory companies: Fox Knives, Heretic Knives, Hogue Knives, KeyBar, Liong Mah Designs, Microtech, Pro-Tech, Reate, RMJ Tactical, Squid Industries, TOPS Knives, White River Knife & Tool, WE Knife/Civivi and Wicked Edge Precision Sharpeners; and;
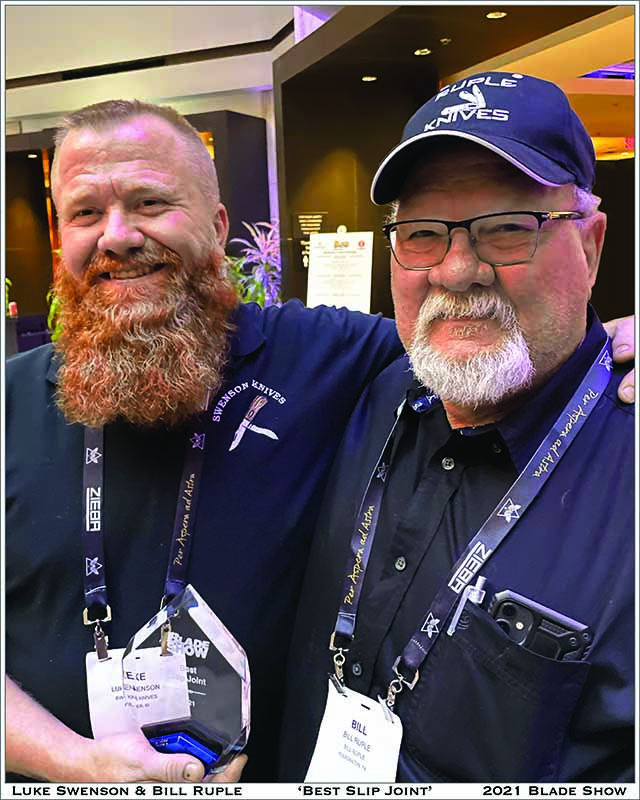
BLADE Show 2021 Best Slip Joint winner Luke Swenson (left), Bill Ruple (right) and assorted members of the South Texas Cartel will conduct the demo How to Make a Single Blade Trapper at 12 p.m. Saturday in Room 104. The slip joint below is Ruple’s ax-handle single-blade. (SharpByCoop images)
BLADE Show Texas Awards
The knife awards for the Texas BLADE Show have been especially tailored this year to address the specialties of the exhibiting makers. As a result, the awards in the custom category will be Best EDC, Best Slip Joint, Best Kitchen Knife, Best Fixed Blade, Best Folder, Best Damascus, Best Art Knife and Best in Show. Each winner will be judged in terms of how well it fits the category, quality design, construction and materials, fit and finish, line and flow, and the other intangibles that identify most top knives.
The knife awards in the factory category will be Best EDC, Best Fixed Blade, Best Folder and Best in Show, with each winner judged in the same terms as those used to rate the custom winners as outlined in the preceding paragraph.
Demos
The BLADE Show franchise is renowned for its cutting-edge demos, and those for BLADE Show Texas maintain that tradition. All are free of charge to show attendees. On Friday those demos will include:
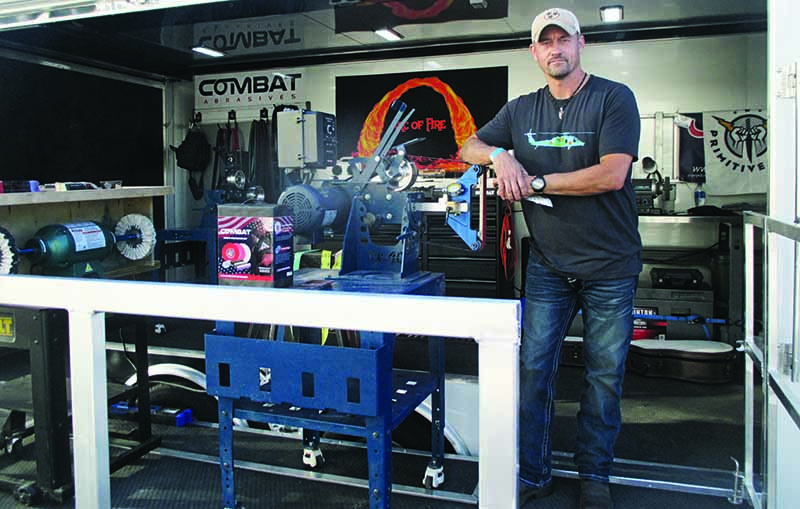
Joe Maynard of Primitive Grind will provide free knife sharpening and hands-on demos in his Mobile Forge all day long each day of the show.
12 p.m., Grinding Seminar, Room 104: Using only four abrasive belts on his Moen Tooling Platen and grinding fixture, Jerry Moen of Moen Tooling will show you how to apply a bevel grind in a 2,000-grit finish. 2 p.m., Fundamentals of Inlay, Room 104: Award-winning bit-and-spur maker Wilson Capron will demonstrate several different inlay styles and techniques and the tools to do them with, styles and techniques that can be applied to assorted media; 3 p.m., How to Make the X-Rhea Knife, Room 104: ABS master smith Lin Rhea will outline the details that go into the making of his X-Rhea knife, including variations on a theme, how the design came to be, how to forge it and more. All Day, Free Knife Sharpening and Hands-On Demo, the Mobile Forge: Joe Maynard of Primitive Grind will provide hands-on demos and free knife sharpening.
Saturday’s demos will kick off at 10:30 a.m. in Room 104 with a repeat rendition of Jerry Moen’s Grinding Seminar. In addition, Joe Maynard will conduct his All-Day Free Knife Sharpening and Hands-On Demo in the Mobile Forge. The day’s other seminars will include: 12 p.m., How to Make a Single Blade Trapper, Room 104: Award-winning makers Luke Swenson and Bill Ruple and other members of the South Texas Cartel will show you how it’s done based on Swenson’s video tutorial “Slipjoints with Luke Swenson.” 1:30 p.m., Leather Sheath Making Demo, Room 104: Joey Dello Russo of Imperial Leather Works will give a complete rundown on how to make a sheath, including measuring the blade, leather thickness, welt dimensions, belt loop location, and sizing, laying out and drawing the pattern.
Texas Gun Experience
Blade Show Texas and Texas Gun Experience have teamed up to provide a night of hands-on experience in a safe and managed environment. Show attendees are invited to a private demo event on Saturday evening from 6 p.m. to 10 p.m. Only those that have a BLADE Show Texas wristband will be eligible to attend to the TGE event and are eligible to win the following giveaways:
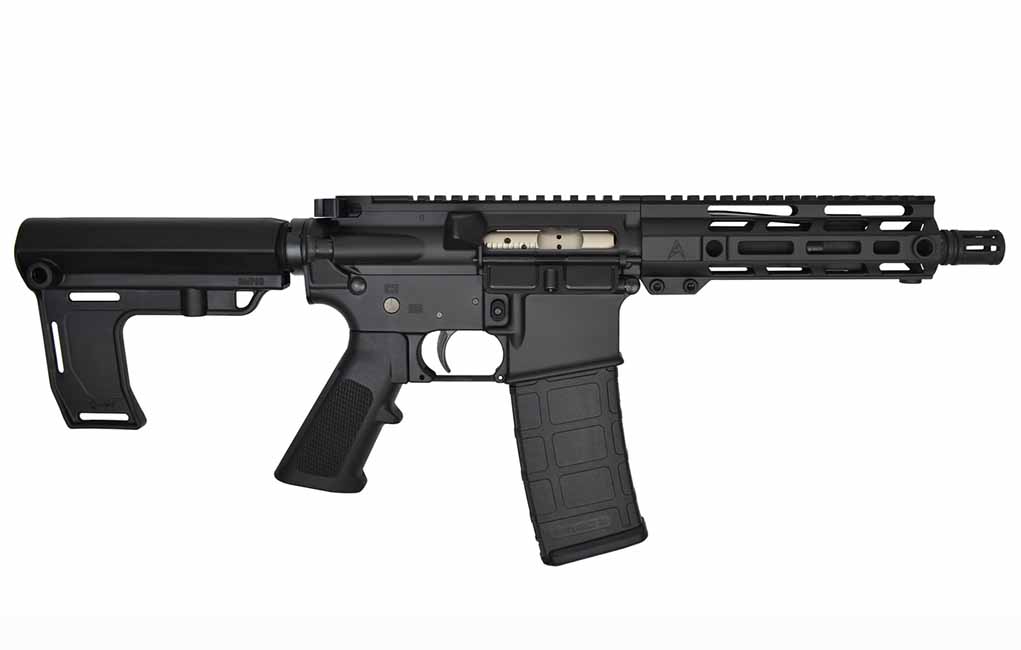
Springfield Armory’s Hellcat Giveaway
Springfield Armory’s Hellion Bullpup Giveaway
Ammo from AMMO, Inc
Ammo from Global Ordnance
Possible Ear Protection from AXIL Earbud Hearing Protection
RifleScope from Accufire
And other products…
For more information on the show, pick up your special show program at the event itself or visit bladeshowtexas.com. For more information on the Fort Worth Convention Center, visit fortworth.com/convention-center.
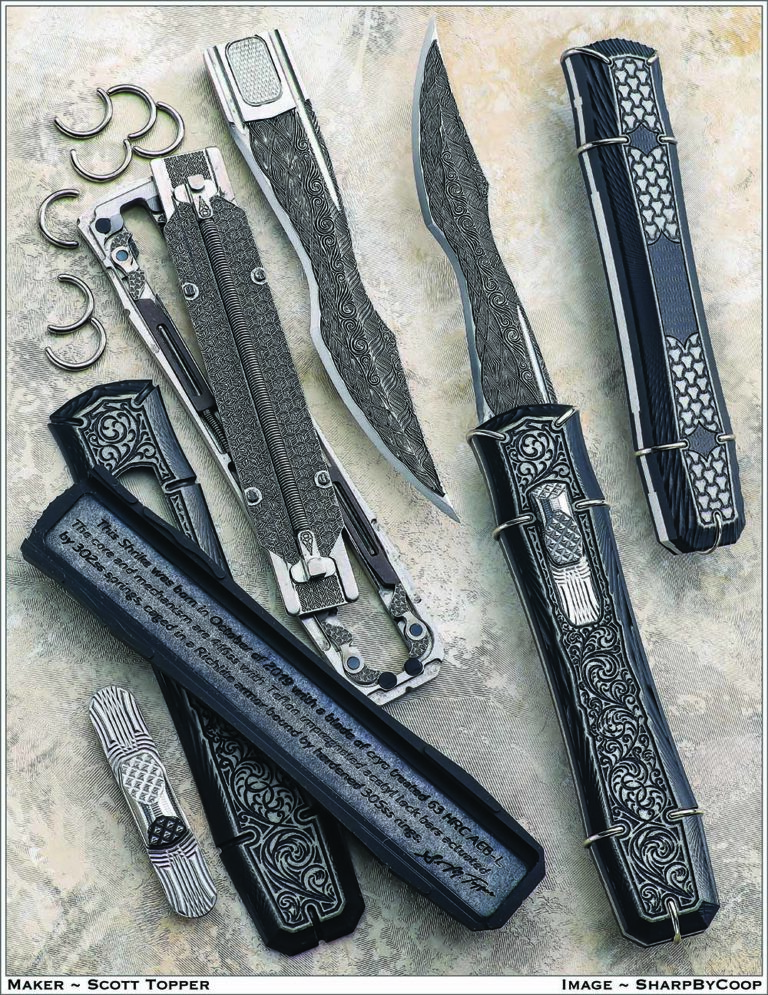
Scott Topper’s off-the-charts out-the-front is a multi-part marvel, the Shrike Out, brings an artistic twist to the automatic.
It’s hard not to like the Shrike, a custom out-the-front dual-action automatic by Scott M. Topper.
The blade is cryogenically treated AEB-L stainless steel. According to Scott, since AEB-L’s micro-structure allowed for a finer edge, it originally was a go-to steel for disposable razors. He indicated the version of the material he uses competes well against crucible steels, and is made through a conventional metallurgy technique.
The six inside springs are hand wound stainless steel. The four locks are independent. The brown lock parts are Teflon-impregnated Delrin for permanent lubricity. The black Richlite scales are inlaid with white to add contrast to the engravings.
The knife comes nested in a velvet-lined walnut box. Plain and all-stainless versions of the Shrike are also available. According to Scott, the various styles of the knife are available through the PVK Showroom (888-878-5643 pvk.com) in Las Vegas.
Shrike Out Specs Knife: Shrike Out The Front Dual Action Auto Blade length: 4” Blade steel: Cryogenically treated AEB-L stainless Frame material: 416 stainless steel Handle material: Paper phenolic composite Closed length: 5”
The great World War II Japanese swordsmiths, war sword souvenirs and more
Kurihara Akihide established the Nippon To Denshujo. Akihide was a member of the Japanese Diet or congress. The Diet asked him to help make swords and train swordsmiths. He set up the Nippon To Denshujo in Tokyo in 1933 and hoped to train about 1,000 swordsmiths. His first student was Yoshihara Kuniie, the grandfather of perhaps the today’s foremost living swordsmith, Yoshindo Yoshihara. Kuniie later became head of a sister forging organization in Yokohama, and the head of the Army Forge in Tokyo. Kuniie’s brother and son (Yoshindo’s uncle and father) also joined the Denshujo and began making swords at this time.
1 of 2
The standard Japanese Army or gunto-style sword mounting circa 1932 included a wood scabbard covered with a metal sheath lacquered a shade of khaki. There is also the sword guard, or tsuba, a wrapped hilt, and the traditional metal fittings. A single hanger supports the sword on a belt. (Aram Compeau image)
Here is how the standard Japanese Navy style mounting, or kaigunto, appeared circa 1932. All the traditional fittings are present, but there are two hangers to support the sword from a belt. The scabbards can be covered with lacquered sharkskin, rayskin or are sometimes simply lacquered black. (Aram Compeau image)
The Denshujo’s students usually took names beginning with the character Aki from the founder Akihide’s name (such as Akifusa, Akimitsu, etc.). Kuniie originally signed with the name Akihiro but soon began to use the name Kuniie, as did Yoshindo’s father (Yoshindo’s father was the second-generation Kuniie). The swords from the Denshujo are of very strong interest to collectors, as well as any Yoshihara sword from this period, and also any swords made by the Denshujo’s chief instructor, Kasama Shigetsugu, and its founder, Kurihara Akihide. A surprisingly large number of Japanese smiths working today can trace their professional lineage to someone who worked at the Denshujo from 1933 to 1945.
Akihisa made this Japanese war sword in 1942. He worked in the Nippon To Denshujo in Tokyo. Overall length: 26 inches. It is a good example of the army swords of the period. It is somewhat stout and heavy, and has a fairly complex hamon composed of small loops, or gunome. (Aram Compeau image)
SEKI CITY
Seki was home to 350 licensed swordsmiths as well as a large number of associated craftsmen. The city had a population of around 30,000 and about half of them probably were involved in sword production, polishing and mounting. In the 1940s, Seki shipped about 18,000 mounted swords a month to the military organizations. Traditional tama hagane swords comprised about 6-to-7 percent of the output. Many others were made from puddled steel, and cheaper swords were made from foundry steel and salvaged structural steel. The leading smiths in Seki commonly signed with names beginning with the character Kane, such as Kanefusa, Kanenobu, etc, and many of the resulting swords are of interest to collectors today.
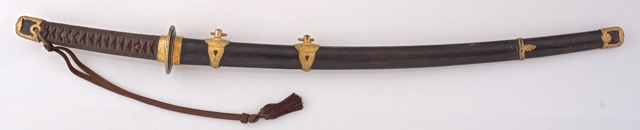
A Japanese swordsmith named Kanenobu made this sword in the 1940s. It is 24.5 inches long, stout and somewhat heavy, and has a simple, almost straight, hamon. Kanenobu was one of 350 registered smiths working in Seki City in the 1940s. (Aram Compeau image)
The Manchurian Railway Co. in Manchuria made specialty steels and used them for swords. All the swords were signed indicating they were made by the Manchurian Railway Co., and very rarely have an individual swordsmith’s name on them. The swords appear to be made of several types of proprietary steels folded and forged together. They almost always have a simple, straight hamon.
There were many very good smiths scattered around Japan whose work is valuable today. Some of them included Nagamitsu in Okayama, Takeshita Yasukuni in Hokaido, the Horii family in Hokaido, the Gassan family in Osaka, Minimoto Yoshichika, Masakiyo, Takahashi Yoshimune, and many others, as well as swords signed Koa Isshin Mantetsu saku made by Manchurian Railway Co.
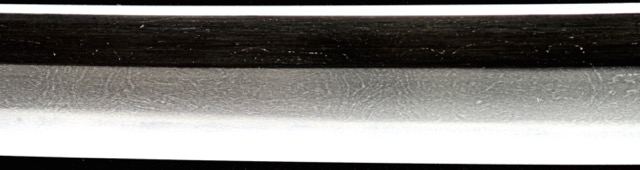
A macro photo shows a recently polished sword made by Nagamitsu. Nagamitsu worked in Okayama and was a very prolific swordsmith. He apparently used only tama hagane for his swords, and this shows the excellent quality of his forging work. There is a very clear and prominent wood grain pattern or itame hada on the blade. Note that the lines forming the pattern are long and continuous. (Aram Compeau image)
All Japanese sword production stopped in 1945 and was illegal until the U.S. occupation ended in 1953. Sword production then resumed slowly and, by 1964 when the Tokyo Olympics was held, there was finally a healthy market in Japan again for newly made swords, or gendaito.
WAR-ERA KOSHIRAE
The original Westernized koshirae used by the Japanese military closely resembled 19th-century European-style mountings with slight adaptations to fit Japanese swords. Around 1931 or 1932, new koshirae styles were adopted and are the ones seen with most World War II Japanese swords. The new army mounting was closer in form to the traditional Edo-period-style koshirae. It could properly contain a traditional Japanese sword and allow it to easily be used in the traditional manner.
The navy also adopted a new koshirae at about the same time, and is how surviving Japanese World War II naval swords commonly are mounted. The army scabbards were usually covered with a thin sheet of metal lacquered a shade of khaki. There was a traditional sword guard or tsuba, and all the traditional metal fittings were present. The navy scabbards often were covered with sharkskin or rayskin, with all the traditional metal fittings and tsuba in tow, too. In 1944, a new model army koshirae appeared which seems to be an evolution of the 1932 version. Generally, swords that appear in these types of military koshirae have blades of tama hagane or puddled steel and are generally well made.
JAPANESE WAR SWORD COMPARISONS
In general, Japanese sword blades of the 1930s and 1940s are well constructed. They feature steel that was forged proficiently and a visible jihada if they receive a new, quality traditional polish. However, in comparing World War II-era swords to older swords and to swords made after 1960, there are clear differences.
The differences arose from the lack of traditional tama hagane for the swords, and pressure to produce a large number of swords in as short a period of time as possible. Using tama hagane is very time consuming and requires expensive raw materials and a large amount of forging time. Consequently, when comparing swords from World War II to other periods, they appear to be stout and heavy with a strong amount of tapering in the width of the blade from the hilt to the point (typically about 20 to 30 percent). In addition, the hamon are usually straight, or are straight and have simple projections (ashi) extending to the edge, or are simple gunome or regular small loops or waves. This type of hamon is relatively easy and fast for swordsmiths to make.
Using puddled steel avoided the time necessary to make tama hagane and to fold it 12 times to give the steel the proper qualities. In addition, the puddled steel (and all swords not made from tama hagane) was made of a single piece of steel forged to shape. Traditional tama hagane swords are composite structures with a high-carbon outer jacket and a soft tama hagane inner core. This reduced the costs and time involved in making the swords, which was important because officers had to buy the swords from the various forging groups. Typically, a tama hagane sword was twice the price of a puddled steel sword, and the other types of swords were less expensive. Yasukuni swords were traditional and very expensive, and cost about twice as much as a traditional sword made in Seki.
WAR SOUVENIRS
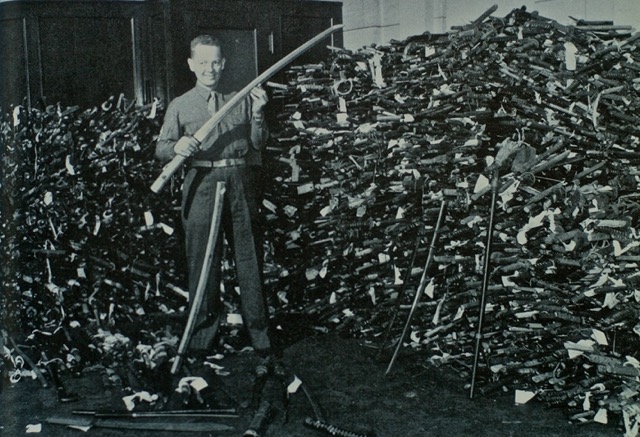
During World War II, many American soldiers simply picked up swords on battlefields. During formal surrenders, the Japanese soldiers surrendered their swords in the field. After the occupation began in 1945, U.S. military authorities went house-to-house to collect all weapons, including swords. In Tokyo, the Akabane Armory was the place where all confiscated swords were taken. At one point, one of the army staff members in charge of the confiscated swords said there was a stack of swords about 6 feet high and 300 feet long. Any U.S. soldier who wanted a souvenir sword simply went to the armory and picked out whatever he desired.
A stack of confiscated approximately 40,000 swords about 6 feet high and 300 feet long languishes in the Akabane Armory in Tokyo circa 1945. A U.S. soldier could simply pick up any of the swords and take it home. This collection is part of the reason so many Japanese swords came to the USA after the war. (image courtesy of Richard Fuller)
According to some collectors, in the early 1950s there were probably more Japanese swords in the USA than in Japan. As Japan recovered and became prosperous after the war, many of the swords here were bought and returned to Japan.
The World War II era was a unique period in Japanese sword history. The variety of swords made, the excellent quality of the fully traditional models, the somewhat distinct style of the swords, and the very large number made all help to define a very specific period in Japanese sword history.
GLOSSARY of JAPANESE SWORD TERMS
Ashi—simple projections from the hamon extending to the edge of the blade
Gendaito—newly made swords Gunome—loops or waves in the hamon Gunto—Japanese Army style of sword mounting Hamon—temper line Itame hada—a wood-grain pattern on the blade Jihada—blade surface pattern
Kaigunto—Japanese Navy style of sword mounting Koshirae—sword mounting
Puddled steel—steel from railroad rails used to make Japanese sword blades Tama hagane—traditional steel for Japanese sword blades Tsuba—traditional sword guard
References: Fuller, R. and Gregory, R. Japanese Military Swords and Dirks, Howell Press, Inc., USA. 1997
Kapp, L., Kapp, H., and Yoshihara Yoshindo, Y. Modern Japanese Swords and Swordsmiths, Kodansha International, USA 2002
Dawson, J. Swords of Imperial Japan, Stenger Scott Publishing, USA 2007
A Japanese swordsmith named Kanenobu made this sword in the 1940s. It is 24.5 inches long, stout and somewhat heavy, and has a simple, almost straight, hamon. Kanenobu was one of 350 registered smiths working in Seki City in the 1940s. (Aram Compeau image)