Practice the proper steps with the proper equipment and, most important, be safe and knife blade repair is a snap.
I have been fortunate enough to make not just one but two side hustles out of my knife hobby. First is the obvious—writing for BLADE® Magazine. Second is running a knife-and-tool sharpening service out of my garage, serving folks in my community and metro area with full-service sharpening on most cutting tools found in the home, workshop and garage. I have always had a strong interest in sharpening in general and have been practicing the skill for about as long as I have been into knives in general.
While I sharpen many knives and scissors, I also repair damaged knife blades. Those repairs include—but are not limited to—straightening bent blade tips, fixing severely damaged cutting edges, and regrinding new blade tips from broken ones. While sharpening is something I still enjoy very much and to a degree it remains fun work for me, it’s these minor repairs at customer request that I love doing. You can too provided you have the proper equipment and the desire to learn.
Before we get into the thick of blade repair, let’s discuss equipment. I run four Work Sharp Ken Onion Elite sharpening machines—I keep one as a backup or deploy it as backup should I need to augment what I’m already running—plus a 1×30 single-speed belt sander, a “Harbor Freight special.” I do all my sharpening on this equipment.
I have used the Ken Onion Elite since the start of my sharpening service almost 10 years ago. I started out with just one Work Sharp. I added a second one awhile after that. The 1×30 came about from trying to revive a few totally dull butcher knives. In the process, I realized I needed another machine that would be in charge of hogging off material to get a quick starter edge that the Work Sharp machines could sculpt into a razor-sharp edge.
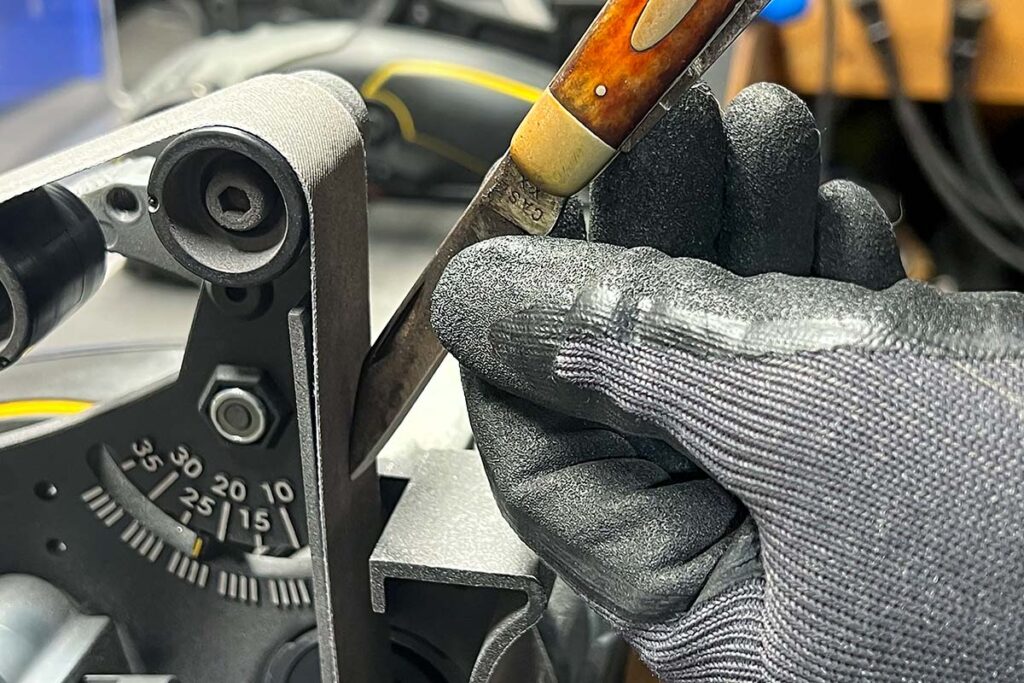
Keep in mind that the Ken Onion Elite is not just a sharpener but also a variable-speed miniature belt sander as well, especially when you turn the unit around 180 degrees and work off the platen side. You can easily work on plastic, PVC, metal and wood. This is also how I regrind new blade tips, as well as fixing blade damage caused by hitting something solid and chipping the edge out. We will dive more into specifics in a bit. It’s important to note here that to do blade repairs of any sort successfully, you must have some sort of variable-speed, motorized, belt-sander-type machine.
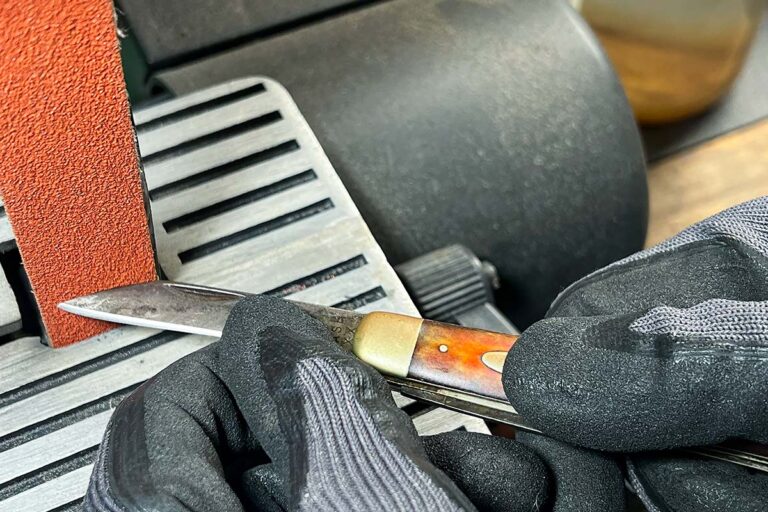
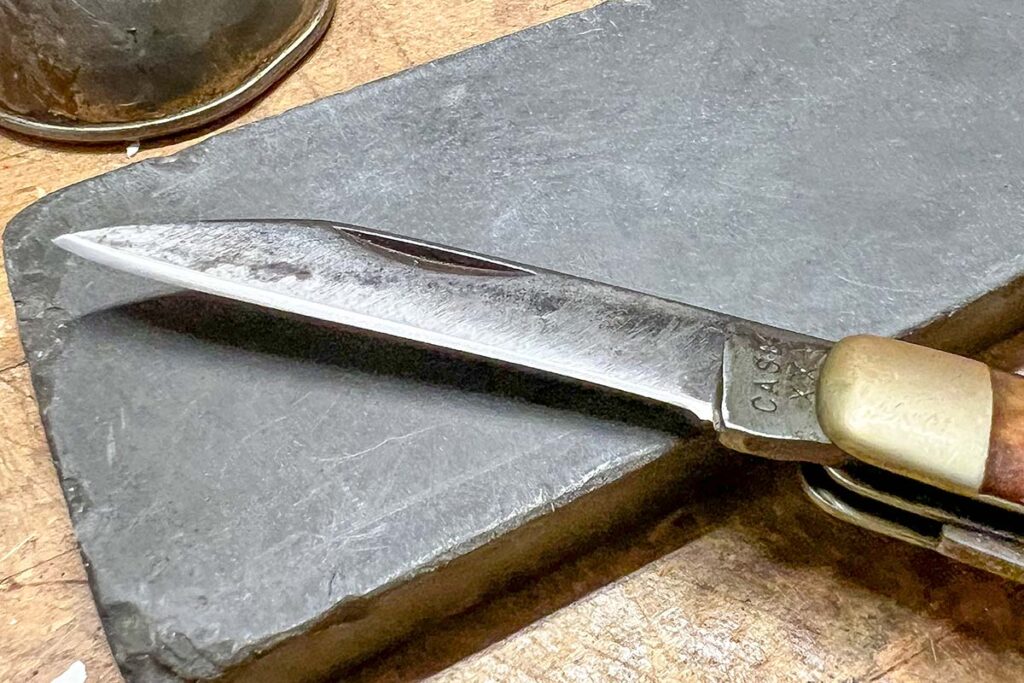
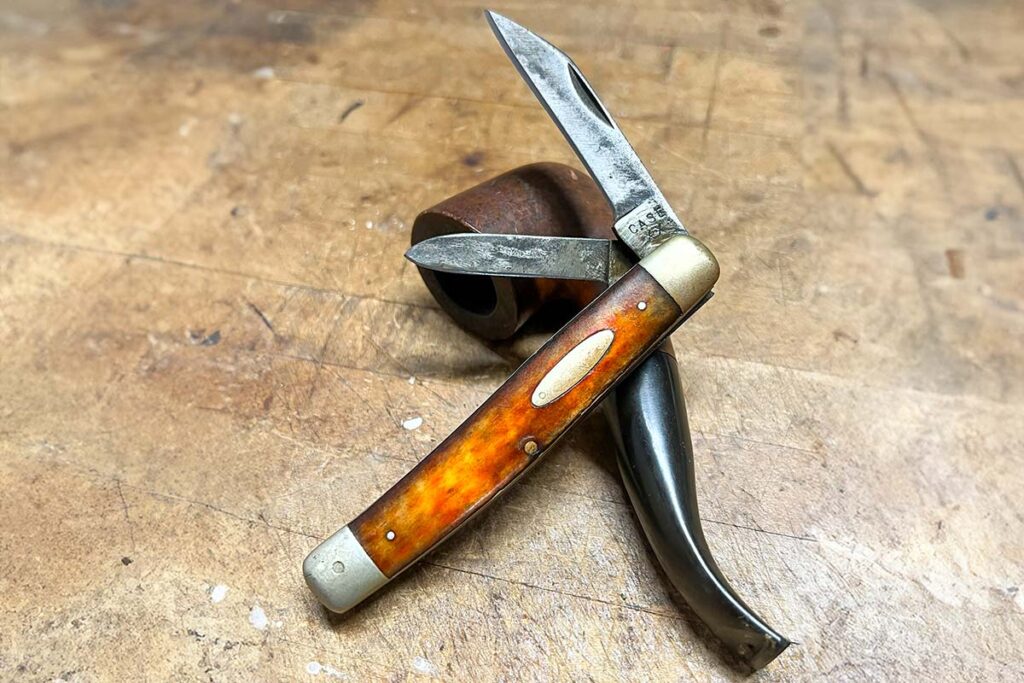
DEMO KNIFEThe demo knife is one a coworker on my day job gave me to refurbish. It is a vintage, carbon steel Case jackknife that saw a lot of use in a previous life. The blades were extremely worn down. Both tips were broken off. The main blade was resharpened so much that the cutting edge was a bit on the curved side. Both blades also had some dings in the edge as well. The owner wanted me to rehab the blades by regrinding new tips and sharpening them. I will take you through step by step on what I did and how it was done. WARNING! Please exercise caution when working with power tools such as belt sanders. Should you attempt such a task as outlined in this story, neither I nor BLADE is liable for any injuries that might occur as a result.
Heat Management
Whenever executing such repairs on a knife blade, remember to not let the blade heat up or you can ruin the steel’s heat treat. Always keep a jar filled with water within arm’s reach of your machine and dunk the blade into the water every few seconds to keep it cool. Doing so will ensure that you will not overheat the steel. If working on a larger blade such as a machete, I recommend using a spray bottle filled with water. The blade is simply too long to dunk into a jar, so spraying it down every so often will help. Something else that will help is to have a pair of cut-resistant gloves on hand and always wear them when handling the blade. The gloves usually have a textured coating on the gripping surfaces for the fingers and palms. This will help you hold the blade securely as well as keep your hands and fingers safe from accidental cuts. The gloves usually are inexpensive, less than $10, so there’s no excuse to not have a pair.
Where To Start Repairing A Blade
WARNING! Whenever faced with a blade-tip-rehab task, remember to sharpen the blade last. Why? Because you will be holding the blade as you regrind the new tip. This applies even if you’re wearing cut-proof work gloves.
Blade Tip
When regrinding tips, I always start with my 1×30 sander with an 80-grit Norton Blaze SG belt. It is the orange belt specifically engineered for knifemaking and removing steel. The 1×30 hogs off material and rough shapes the new blade tip.
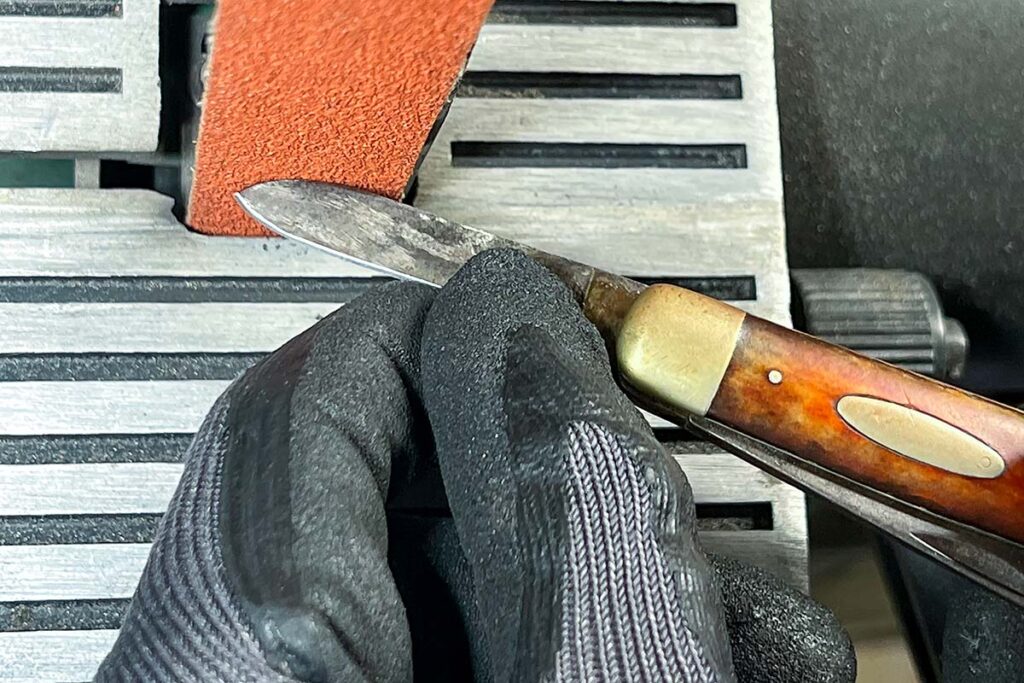
I start by visualizing where the new tip is going to lie. I start at the uppermost point of the broken-off tip, usually on the blade spine side. I start grinding at that point and remove material to where eventually a new tip is created. As I grind it down, I also pay attention to the visual “flow” of the new tip and how it transitions to the rest of the blade spine. I may have to round off the harsh angle to blend it back into the spine. A lot of this is done by eye, making everything blend right in. The goal is to make the new blade tip look as though nothing happened.
Blade Shaping
After roughing out the new tip with the 1×30 belt sander, I begin to dial in the final shape of the new tip with the Ken Onion Elite. I have much more control at this juncture due to the less aggressive belt grit and the slower belt speed. I can finesse the new tip on, keeping a close eye on the evenness of the ground-down portion, making it parallel with the rest of the untouched blade spine.
Finish
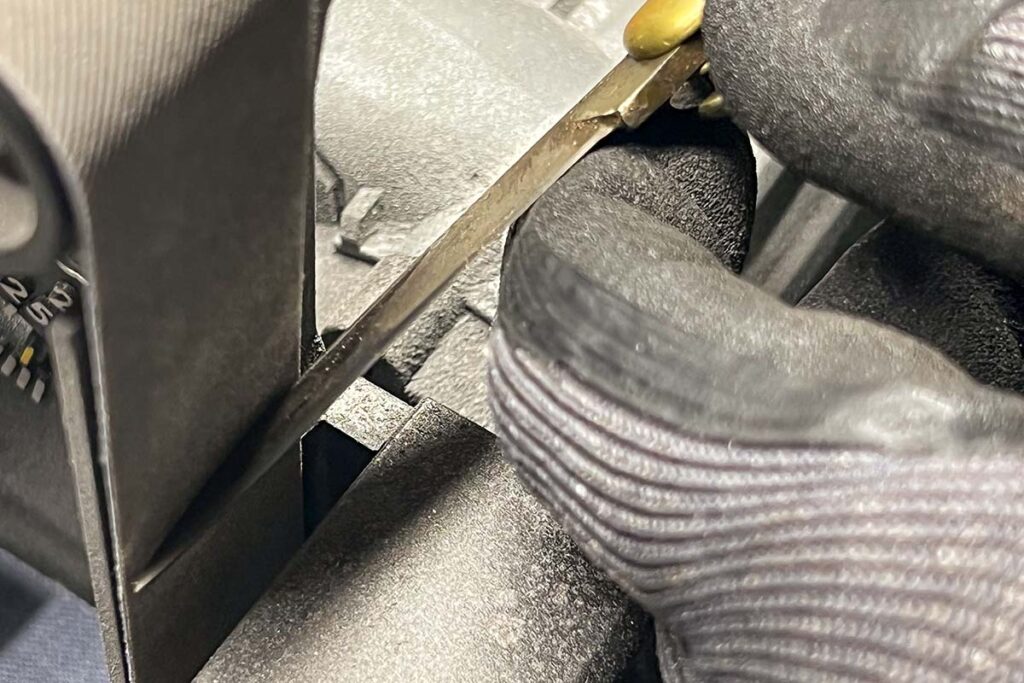
After tweaking the new tip to final shape, I concentrate on the finished appearance of the ground portion by holding the knife almost vertical and sanding only on the ground portion, blending it in visually and removing the coarse-grit scratches with the 80-grit belt on the 1×30.
Chamfering And
When everything is blended in visually, the last step is to chamfer the ground portion and remove the crisp corners made by all the sanding. You’ve seen how blade spines have a small, rounded corner on both sides? You are essentially doing that here. Hold the blade at an angle and lightly touch the blade spine to the belt to cut the crisp corner down. Remember: you can always cut more later if needed. The key is to use a light touch and stop only when the corners are smooth to the touch and you don’t detect crisp edges. The result is a new blade tip that is highly functional but doesn’t look “factory,” though it will be awfully close.
Fixing An Uneven Blade
The main blade of the demo knife was worn away unevenly due to years of manual sharpening, so I straightened that out as well. Like the shaping of the new tip, I did the bulk of the straightening of the cutting edge on my 1×30 belt sander. I used a light touch on the belt—I cannot stress enough that it’s easier to grind cautiously—eyeing the straightness of the new cutting edge. Grind a bit then dunk the blade in water to keep it on the cool side.
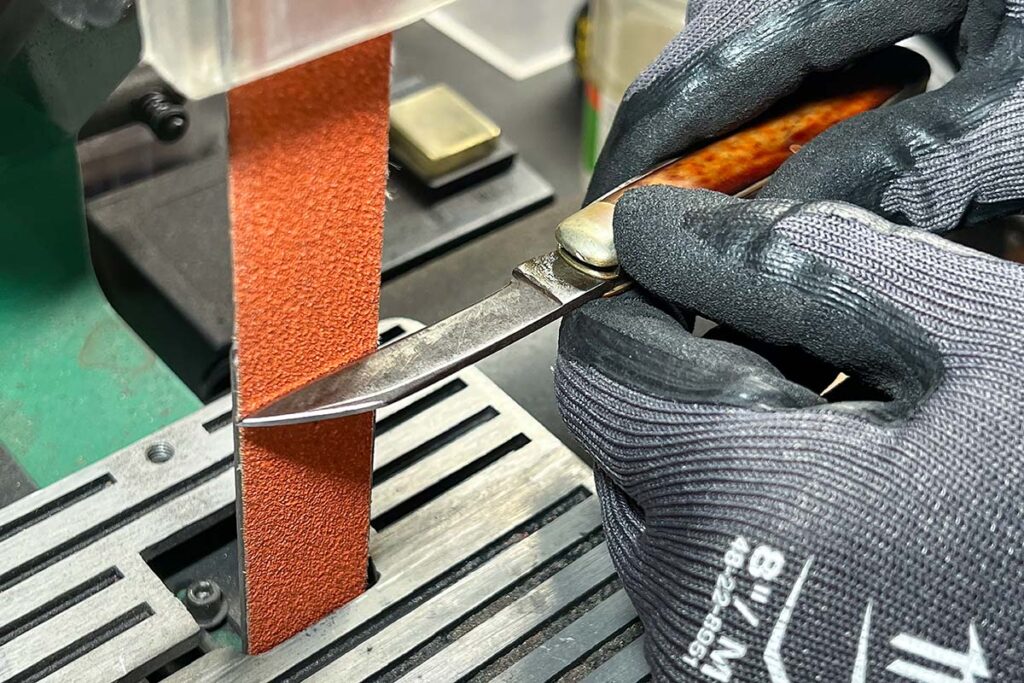
Once I attained an even edge, it was time to grind the new edge. Straightening out the edge will cause a wide flat spot on it, so you have to grind the spot away evenly on both sides. Work diligently and carefully, and don’t forget to dunk the blade in water. With the smaller of the two blades, I repeated the same steps to even out the edge as there were some imperfections I wanted to remove also. As a result, I wound up starting a new edge on the small blade as well.
Once I ground the starter edges, I progressed to the Work Sharp machines to carefully sculpt the new final edges. This is the step where you bring the blades to life. The carbon steel blades make the steps easy as they sharpen up quicker than stainless blades. After the final sharpening of both blades, the result is a vintage pocketknife with a new lease on life sporting new tips and fresh cutting edges.
Final Cut
Sharpening—transforming a cutting tool from dull to razor sharp in a few minutes—is very therapeutic. Toss in creating new blade tips on top of that and the combination is undeniably very satisfying. If you carefully follow these steps, you too can renew any knife blade with a broken tip. And it doesn’t have to be a pocketknife. I’ve ground new tips on tactical folders and karambits, too. Just follow the same steps outlined here. In fact, larger knives are probably easier because there is more to hold onto while working on them. If you have the equipment and the desire to renew and rehab knife blades, give it a try.
It is also possible to use a regular belt sander like mine to do all the shaping steps. Be sure to have an assortment of belts of various grits at your disposal. You will want to change to the finer grits to finesse your work. I recommend using only a 1×30 given the size and width of belt. Again, you can find an inexpensive 1×30 at Harbor Freight Tools for around $50. Who knows, you might even find some other uses for it outside of blade repair.
Knife blade repair can be very satisfying. And because you are working with knives as well as power tools, please exercise the utmost caution and pay attention to what you are doing to prevent serious injury.
Have fun and good luck!
Hone Your Knife Sharpening Knowledge:
- BEST SHARPENING STONES TO KEEP YOUR EDGE
- WHAT’S THE BEST KNIFE SHARPENING ANGLE?
- 5 MYTHS ABOUT KNIFE SHARPENING
- 5 BEST SHARPENING RODS
 NEXT STEP: Download Your Free KNIFE GUIDE Issue of BLADE Magazine
BLADE’s annual Knife Guide Issue features the newest knives and sharpeners, plus knife and axe reviews, knife sheaths, kit knives and a Knife Industry Directory.Get your FREE digital PDF instant download of the annual Knife Guide. No, really! We will email it to you right now when you subscribe to the BLADE email newsletter.


