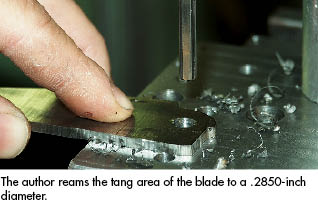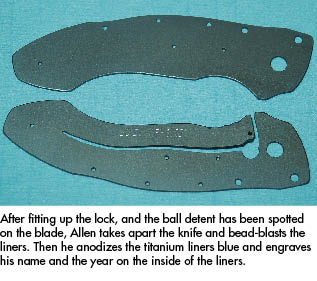
I take the liner from the lock side with all the holes drilled and use it as a pattern to transfer the holes to my bolsters. Then I take the other liner and clamp it onto the lock-side liner. I transfer-drill the spacer holes, the handle-screws holes and the bolsters-screws holes. I use the liner as a pattern to ensure more precise and consistent holes locations on all parts. The only holes I do not drill are the pivot pin and my two stop pins.
I take the two liners and screw them together through the spacer holes. The three screws holding the liners together will prevent them from shifting. This allows me to drill the pivot-pin hole and ream both pivot-pin holes together. Then I am able to drill the two stop pin holes. The reason why I do it this way is because the liners are in the condition they will be in when the knife is assembled. What I am doing here is removing all types of variables that could cause the pivot pin holes and the two stop pin holes to not be perfectly aligned.
At this point all holes are drilled, tapped, reamed and countersunk on the liners. I shift my attention to the bolsters, and I square up the back end where the handle material will come in contact with them. Then I counter bore the pivot pin hole to accept the head of my pivot pin. I locate the screw hole and drill and counter bore the screw hole on the bolsters. The bolsters can then be screwed onto the liners and everything should be aligned.
With the bolsters screwed onto the liners, I then flatten my handle material and square up the front end where it meets the bolsters. With a vise, I clamp the handle onto the liners, making sure there is no gap between the handle material and bolsters. I then transfer-drill the screw holes from the liners to the handle material. I drill and counter bore the handle material for the mounting screws.
I take my G-10 spacer, which has been ground to a specific size, and clamp it onto my handle pattern. I will drill out the holes for the screws. After this is done, all the parts have been drilled.
 NEXT STEP: Download Your Free KNIFE GUIDE Issue of BLADE Magazine
BLADE’s annual Knife Guide Issue features the newest knives and sharpeners, plus knife and axe reviews, knife sheaths, kit knives and a Knife Industry Directory.Get your FREE digital PDF instant download of the annual Knife Guide. No, really! We will email it to you right now when you subscribe to the BLADE email newsletter.


