Home Authors Posts by Wally Hayes

Wally Hayes

Knifemaking: How to Make Temper Lines

0

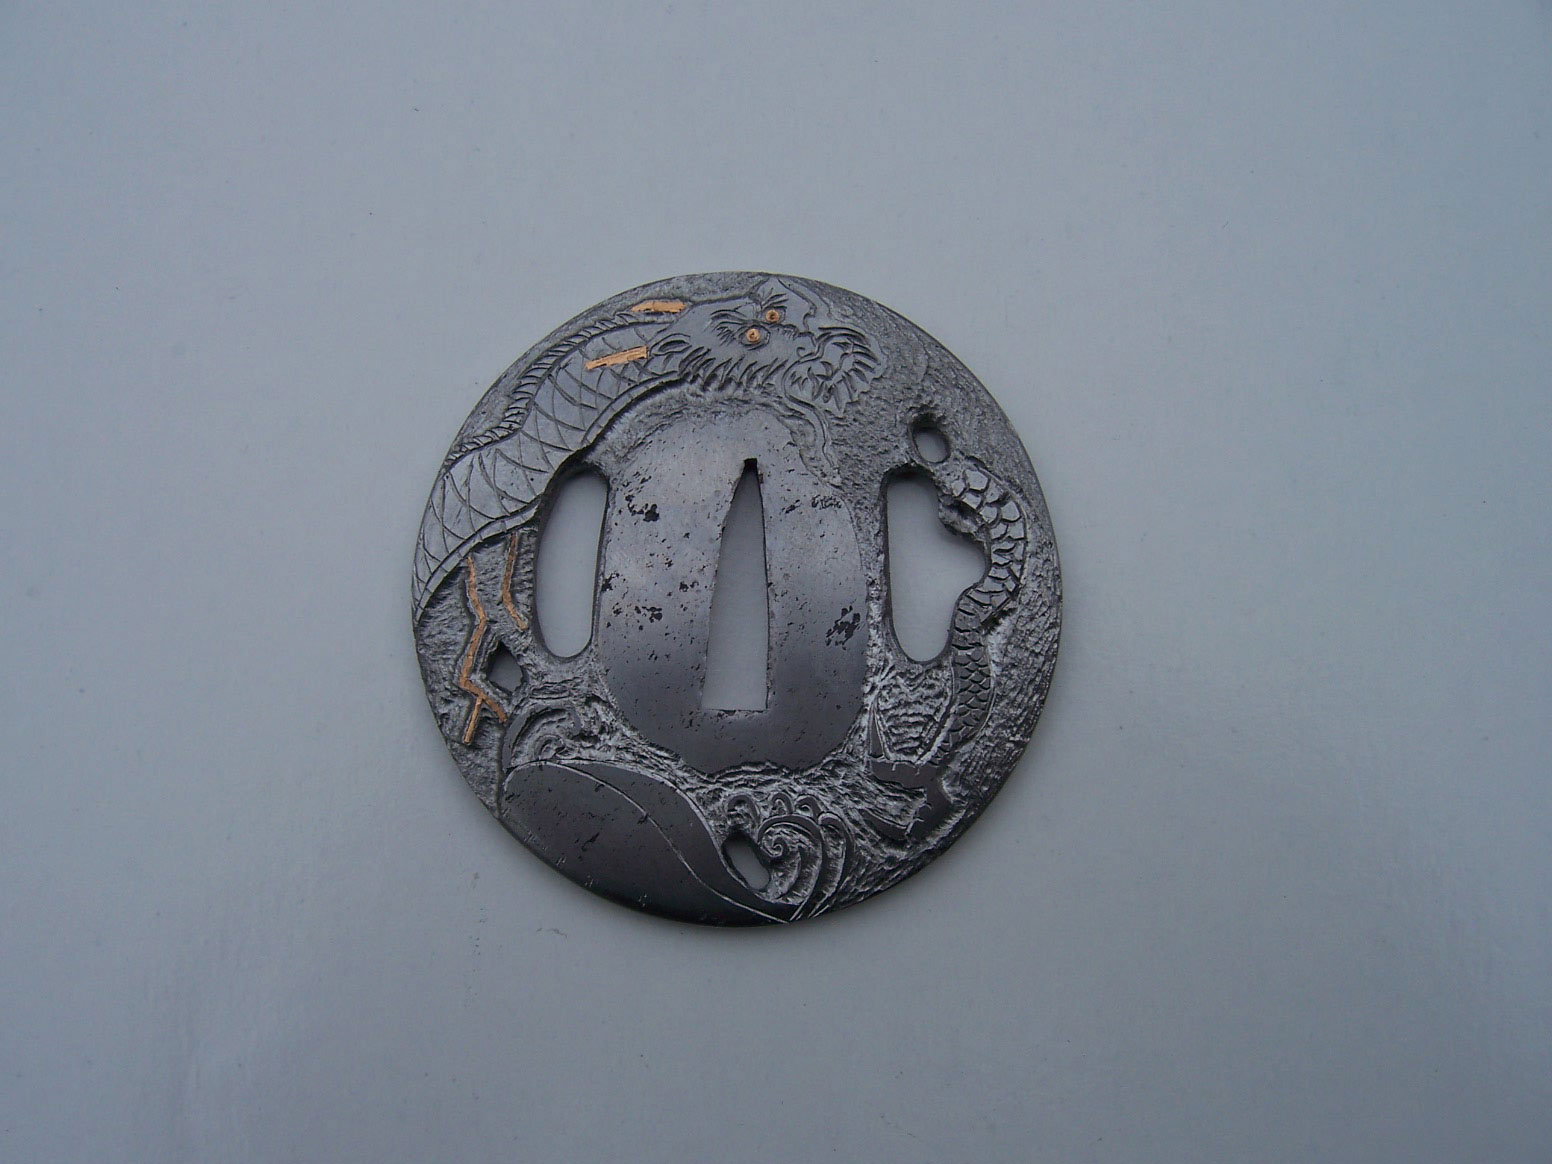
Temper lines—aka hamons—are a very exciting part of knifemaking, and I would like to share with you how I produce cool temper lines on folders. -Wally Hayes


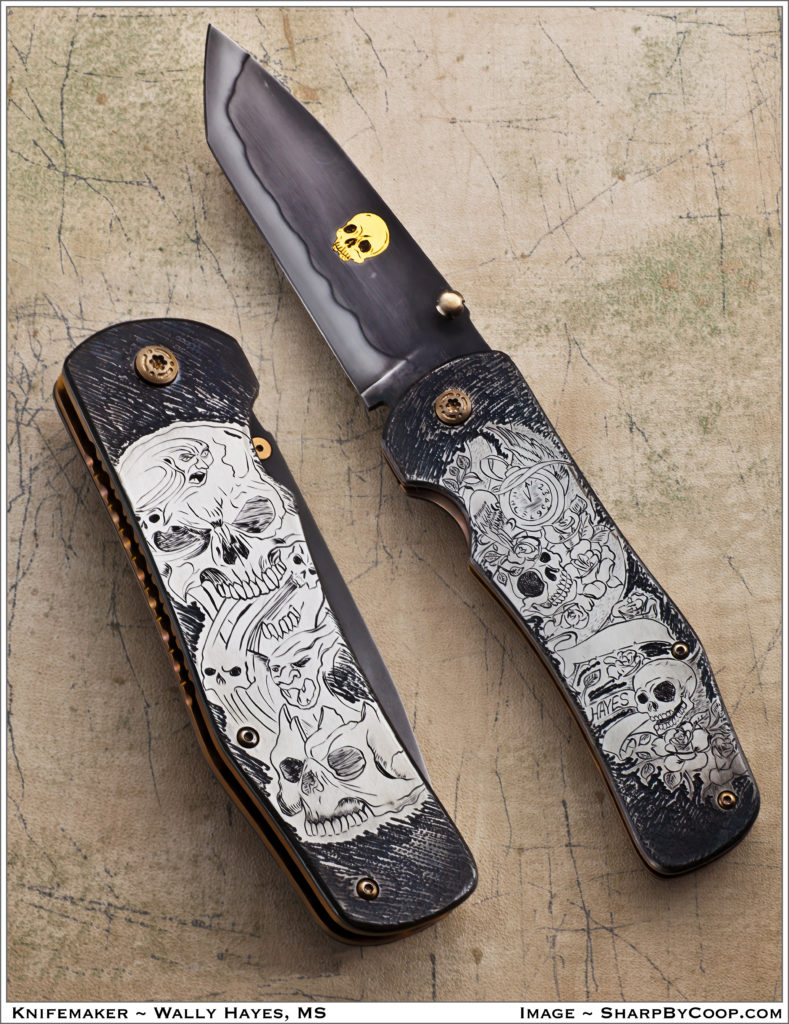
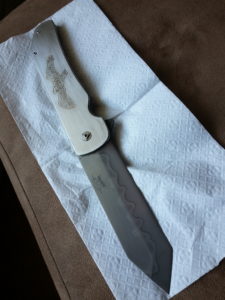
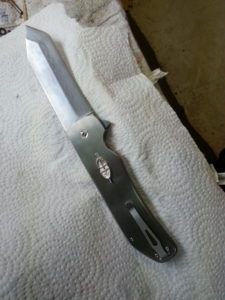
The latest folder exhibiting a handsome temper line—aka a hamon—by the author (inset) is this skull-encrusted model. (SharpByCoop knife image)

STEEL and CLAY

First you need to select your type of steel. You can use 1084 carbon steel or high-carbon damascus, but I prefer W2 tool steel. I get mine from New Jersey Steel Baron because I can get it surface ground to whatever thickness I need.

The W2 is low in manganese, enabling you to create wild temper lines. I grind the blade leaving the edge about the thickness of a dime. The thickness helps prevent your blade from warping in the quench and also helps hold the heat, giving you time to get the blade into the quenching oil.

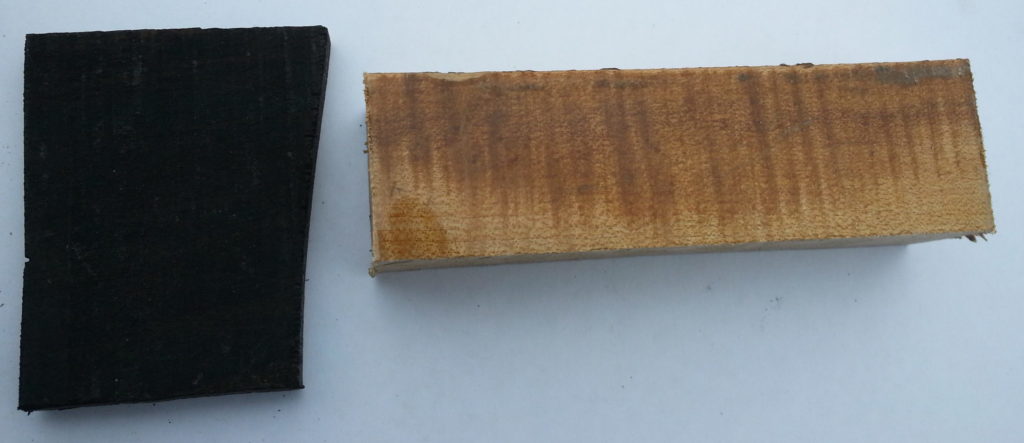
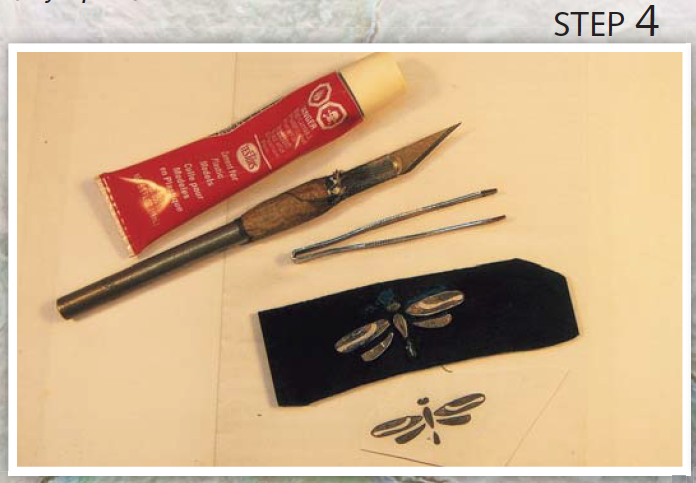
The clay I use is a stove furnace cement used to repair fireplaces and chimneys. I get mine at the hardware store and it comes in a small tub or a tube like the tubes of silicone used with a squeeze gun for calking.
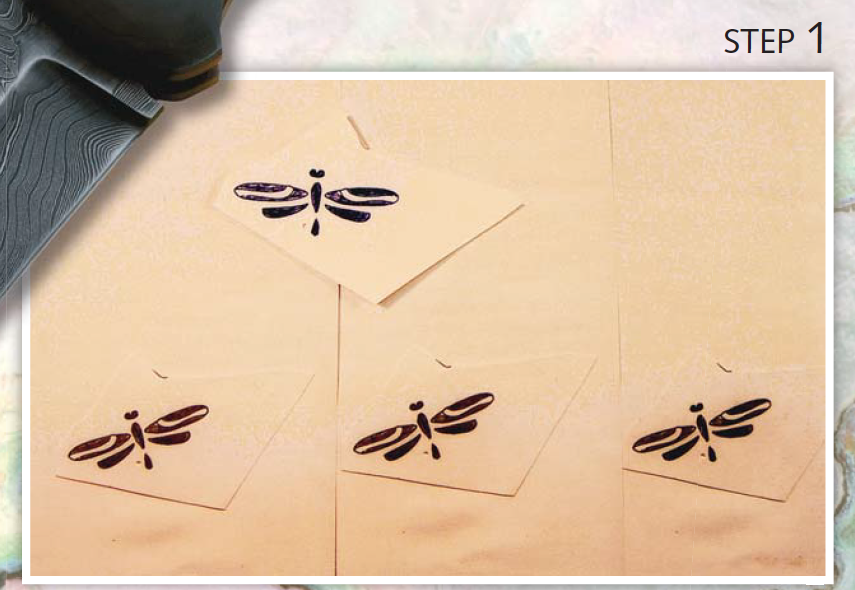
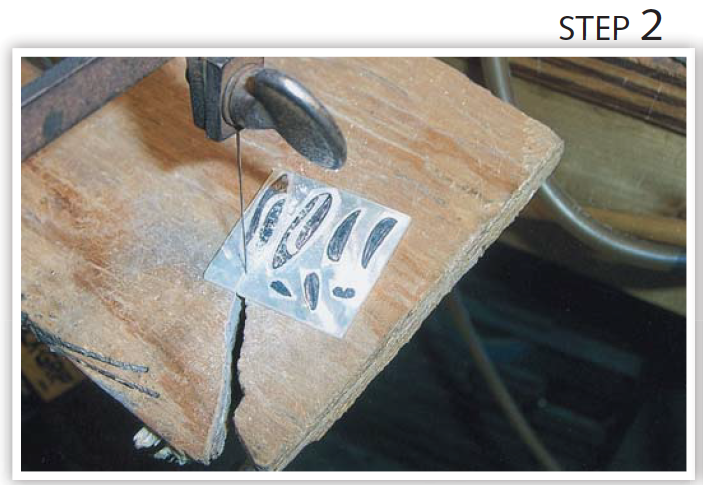
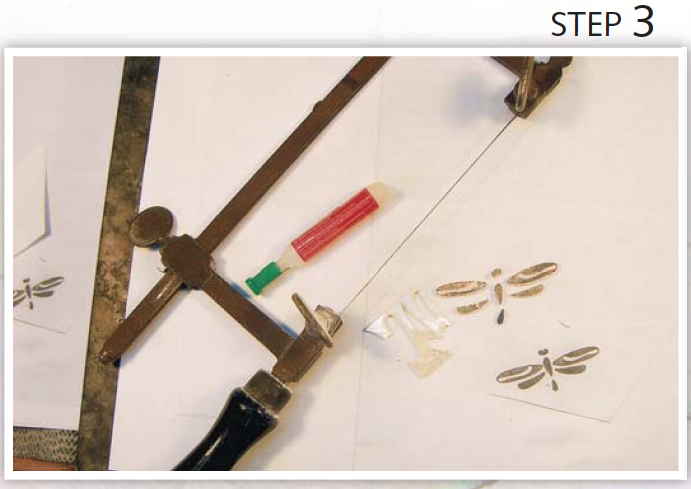
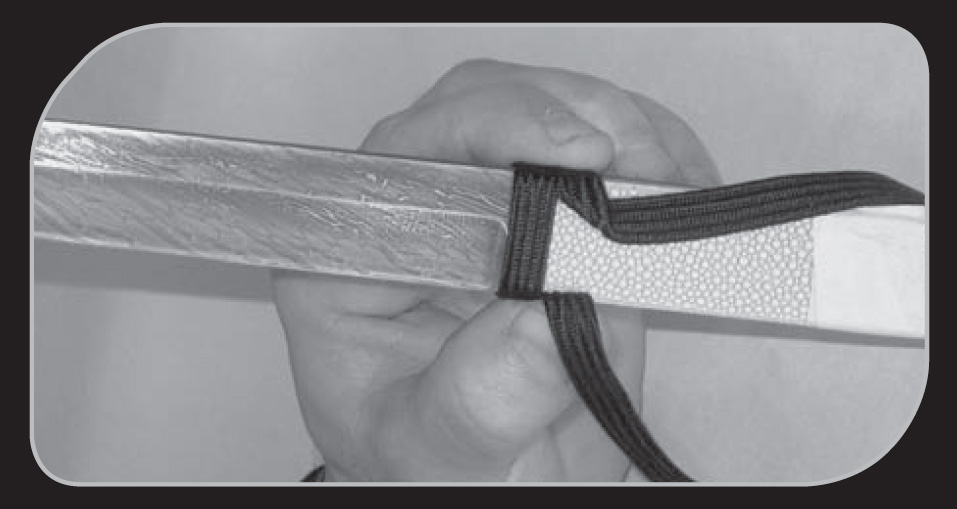
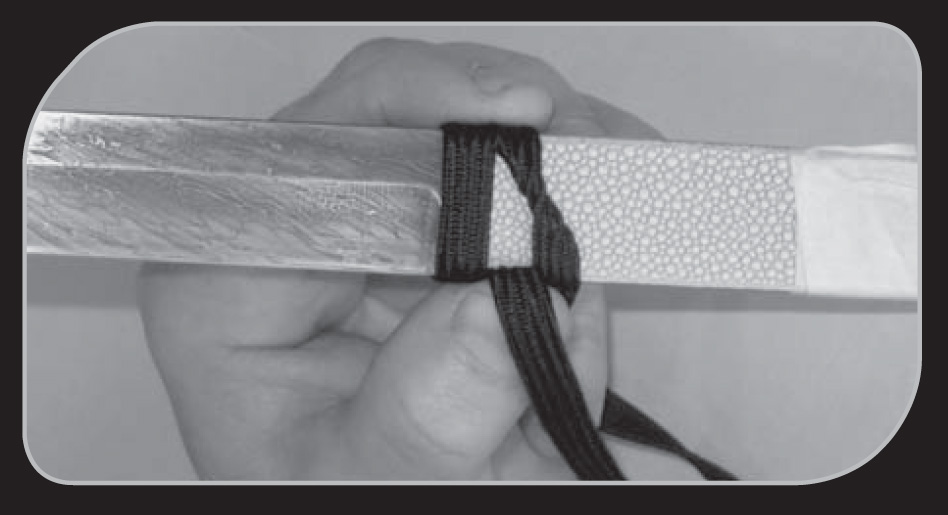
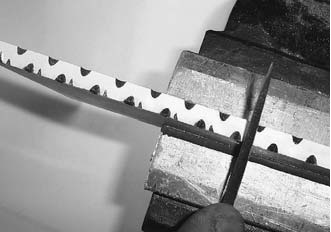
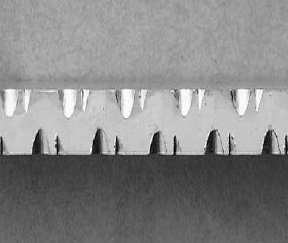
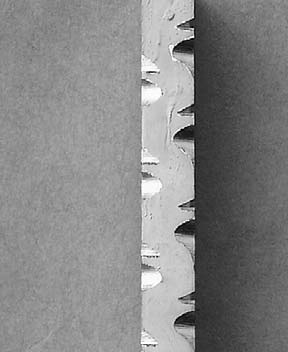
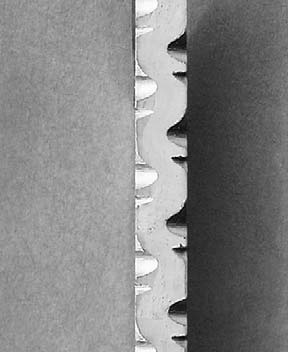
APPLYING the CLAY

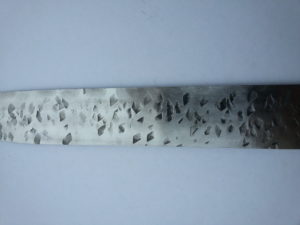
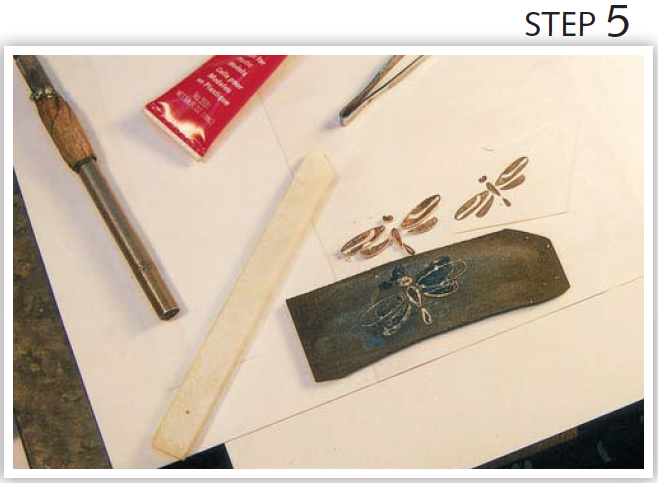
To apply the clay I use a sharpened Popsicle® stick, being careful not to put any clay where the ball bearing in the liner will travel on the tang of the blade. Also, do not put any clay near the pivot hole as you want that area to become fully hard when quenched.

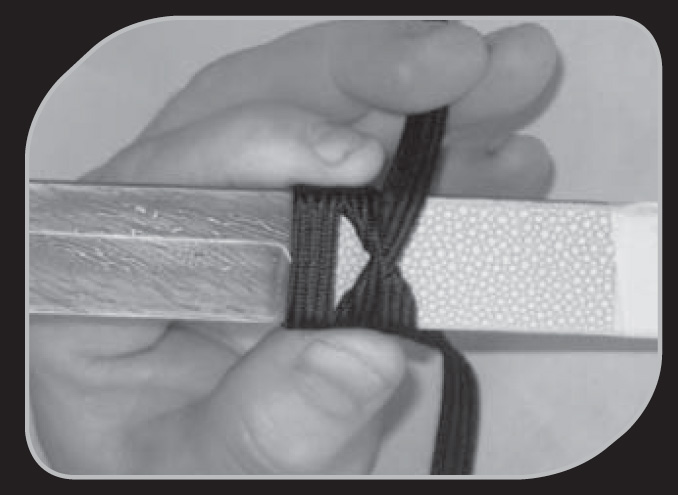
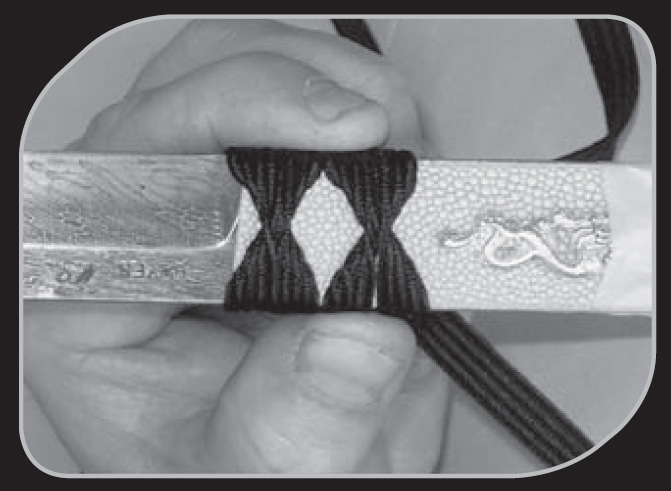
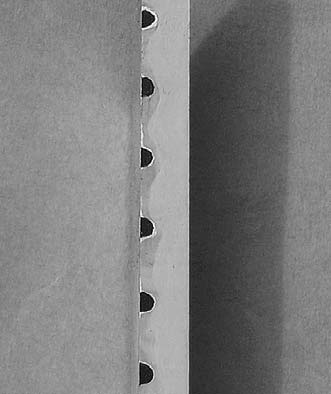
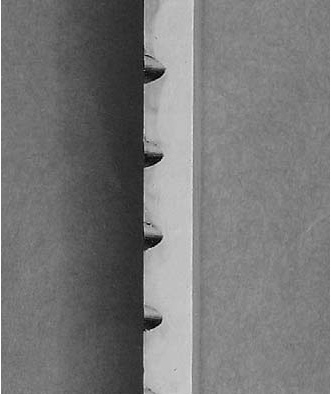
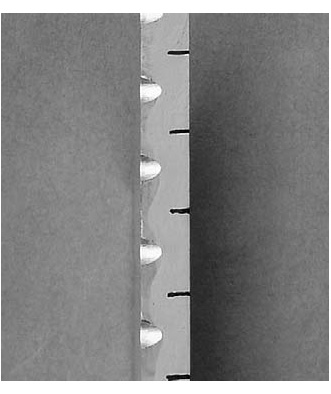
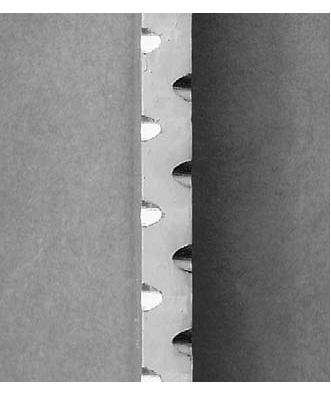
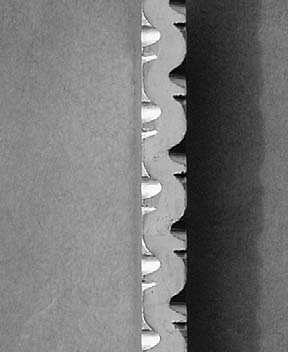
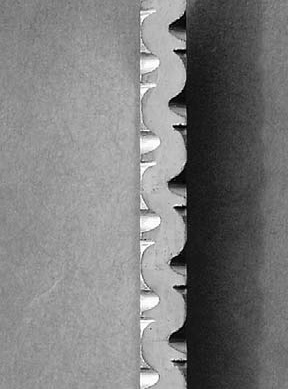
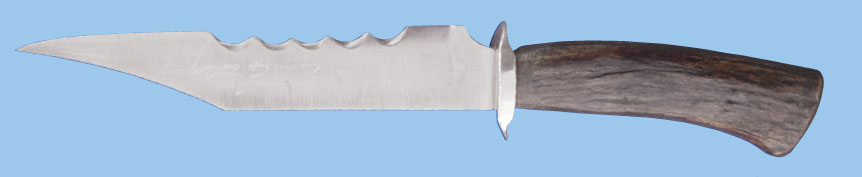
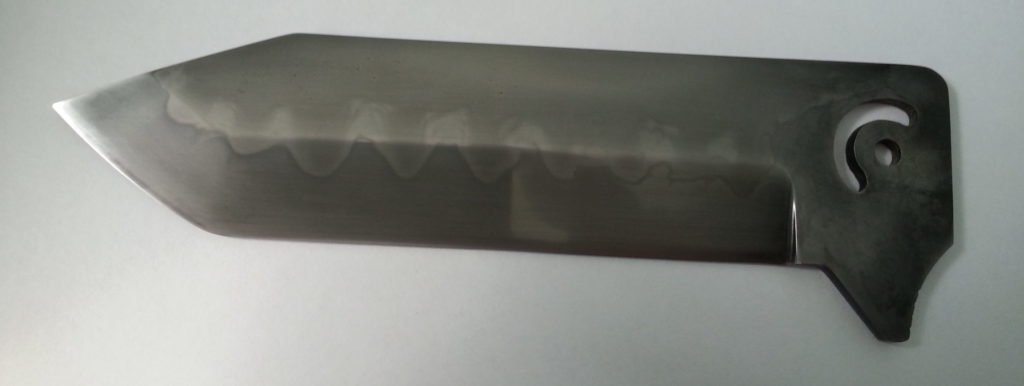
I like a very exaggerated temper line with big waves. You can achieve this by placing short lines of clay every half inch down the blade. Do not carry the clay line all the way to the edge as you want the edge fully hard.

1) The author likes very exaggerated temper lines with big waves. You can achieve this by placing short lines of clay every half inch down the blade.

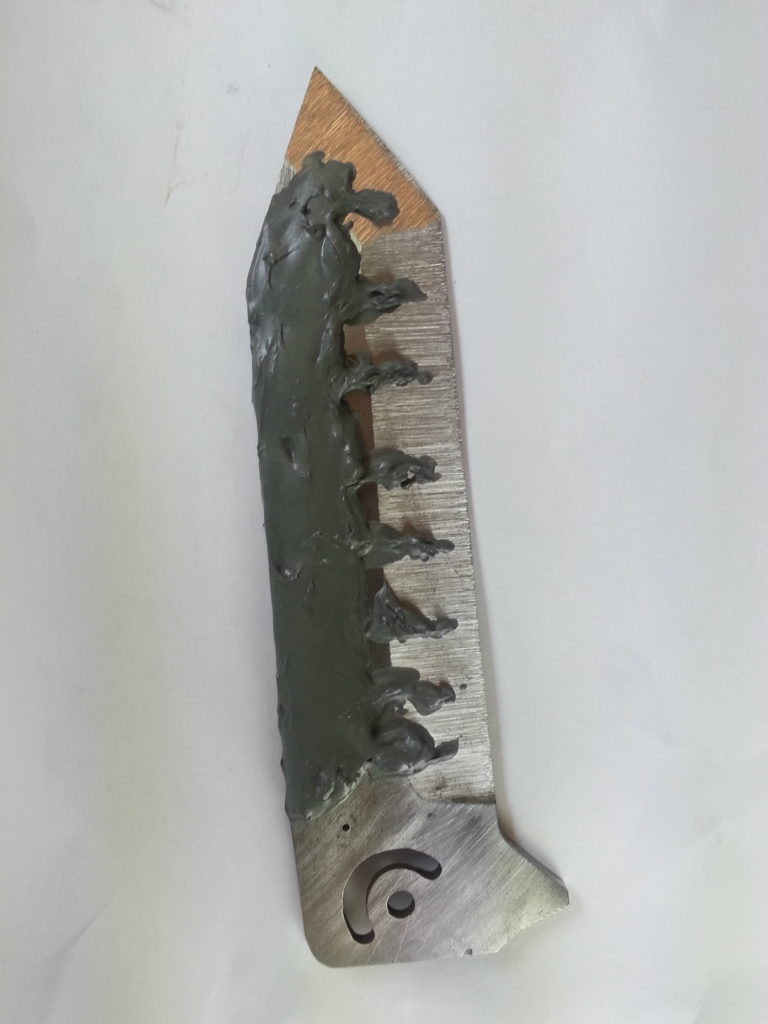
I put the clay on the blade about an eighth of an inch thick. This seems to work very well. Let the clay dry for about four hours before you heat treat it. To heat treat the blade I use a propane forge. I place a coat hanger through the pivot hole and twist it around the tang of the folder to give me something to hold onto. 
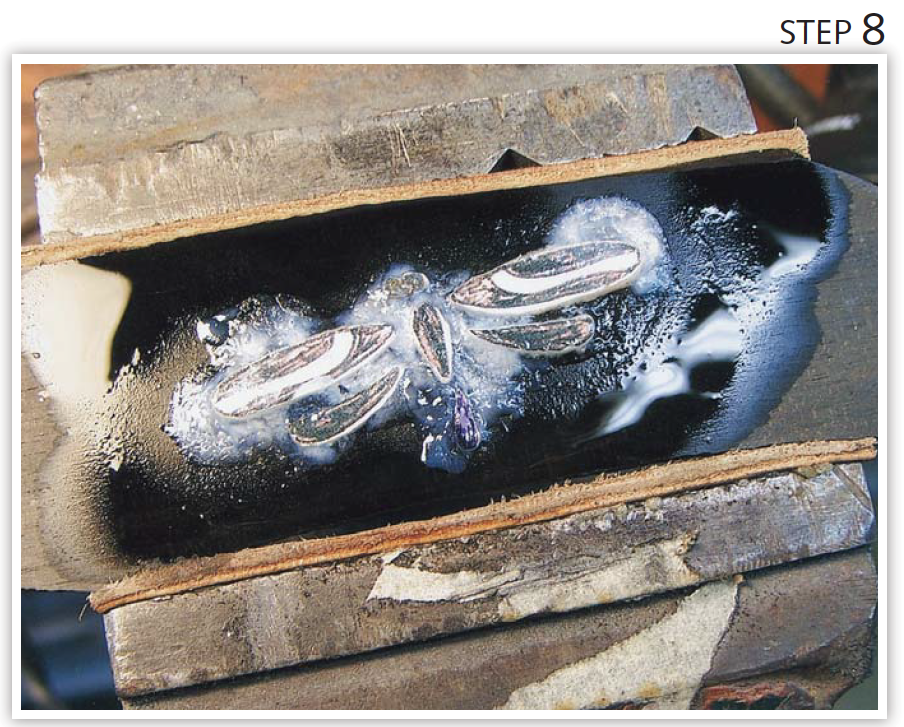
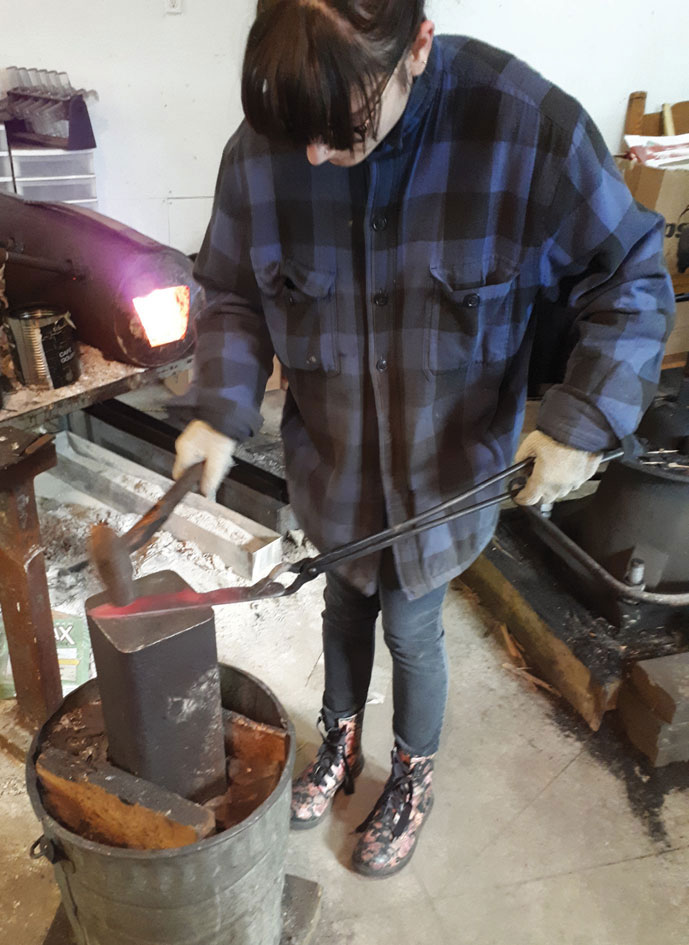
 

HEAT and QUENCH

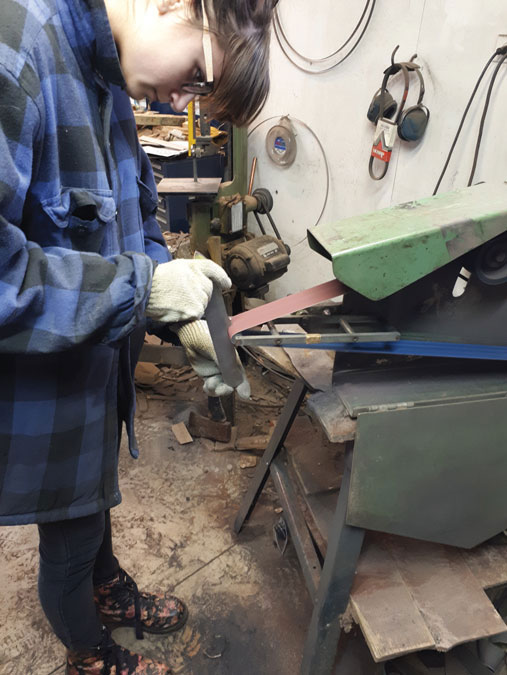
Gently heat the blade near the opening of the forge for a minute before placing it into the forge edge up. Watch the blade come up to temperature, placing the tang near the hottest part of your fire. The tang is the thickest area of the blade and slowest part to get up to critical temperature. Heat the blade until a magnet does not stick to it. I use a cow magnet on the end of a pipe and keep testing the blade as it heats up to temperature.

When a magnet does not stick to high carbon steel the steel is at critical temperature, at which point the blade should be removed from the forge and quenched in oil. For steel, I use a fast-quench oil such as the kind from Parker or Fensoil. I have also done many successful quenches in vegetable oil.

2) Here is the blade after quenching. The author uses a fast-quench oil such as the kind from Parker or Fensoil. He also has done many successful quenches in vegetable oil.

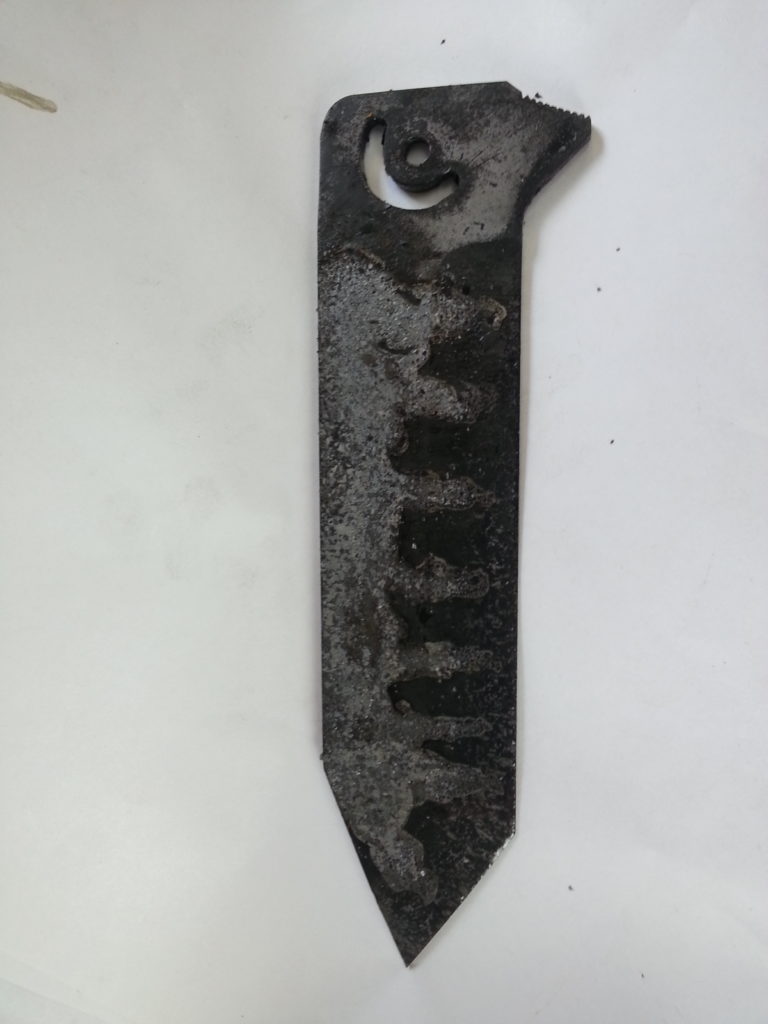
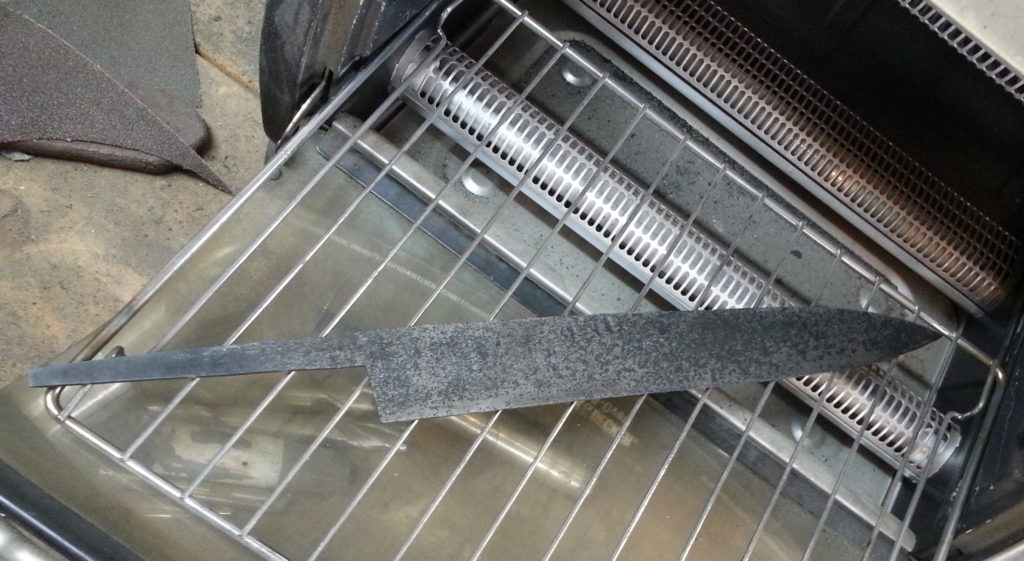
I quench the blade and then leave it submerged for two minutes before removing it. Once its out, I clean the blade with a paper towel. I then put the blade in the toaster oven for one hour at 385°F.

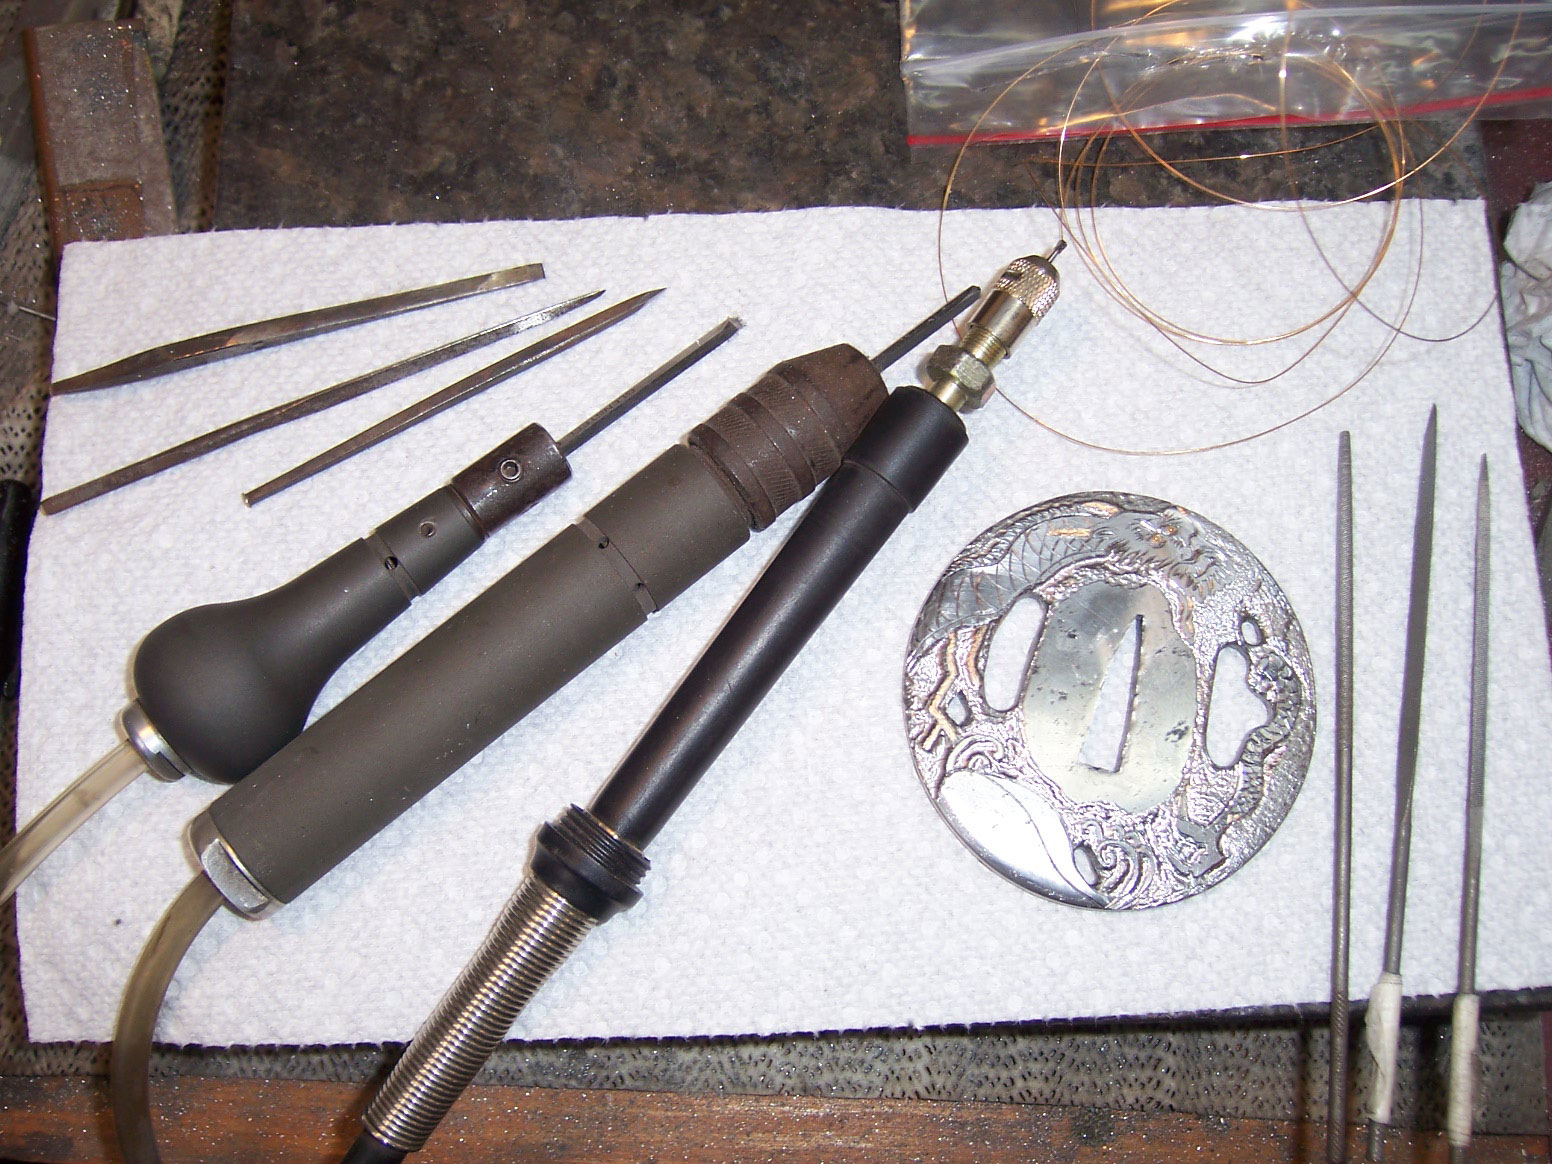
WARP CHECK, GRIND and POLISH

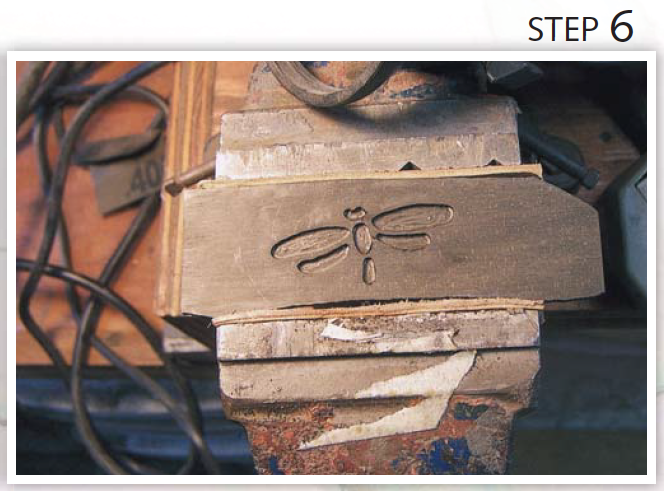
After the blade is cool I check it for straightness on a flat piece of steel. I use a set of parallels for this. If the blade is warped, I clamp it to a slightly curved piece of thick steel, and press the warp out with the twist clamp. Then I place the clamped blade in the toaster oven for another hour’s worth of temper at 350°F. This works really well and is less stressful to the blade when compared to trying to straighten it another way.

3) The red marks served as guides for the finish-ground blade.

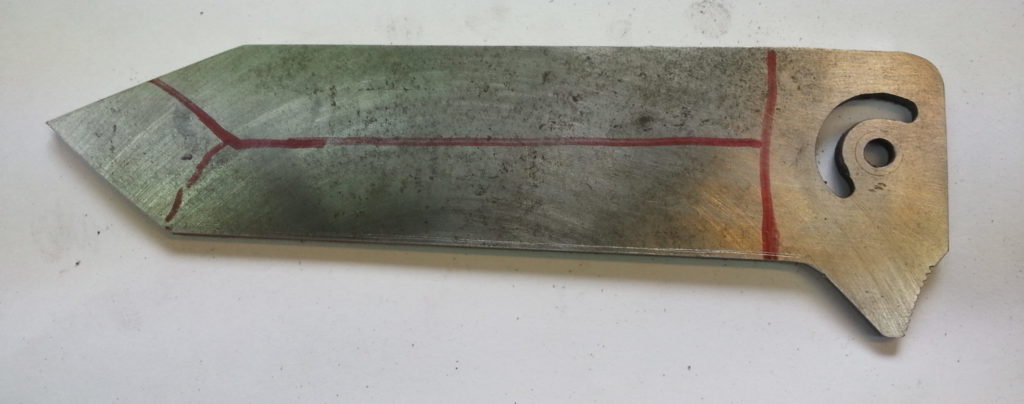
Once the blade is straight it is time to finish grind and polish it up to 2,000 grit. I do the final polishing by hand to ensure every scratch has been removed. After this I sharpen the edge and make sure it is also polished carefully. Finally, I use sand paper backed up by a thick piece of leather and sand very slowly so I don’t cut myself.
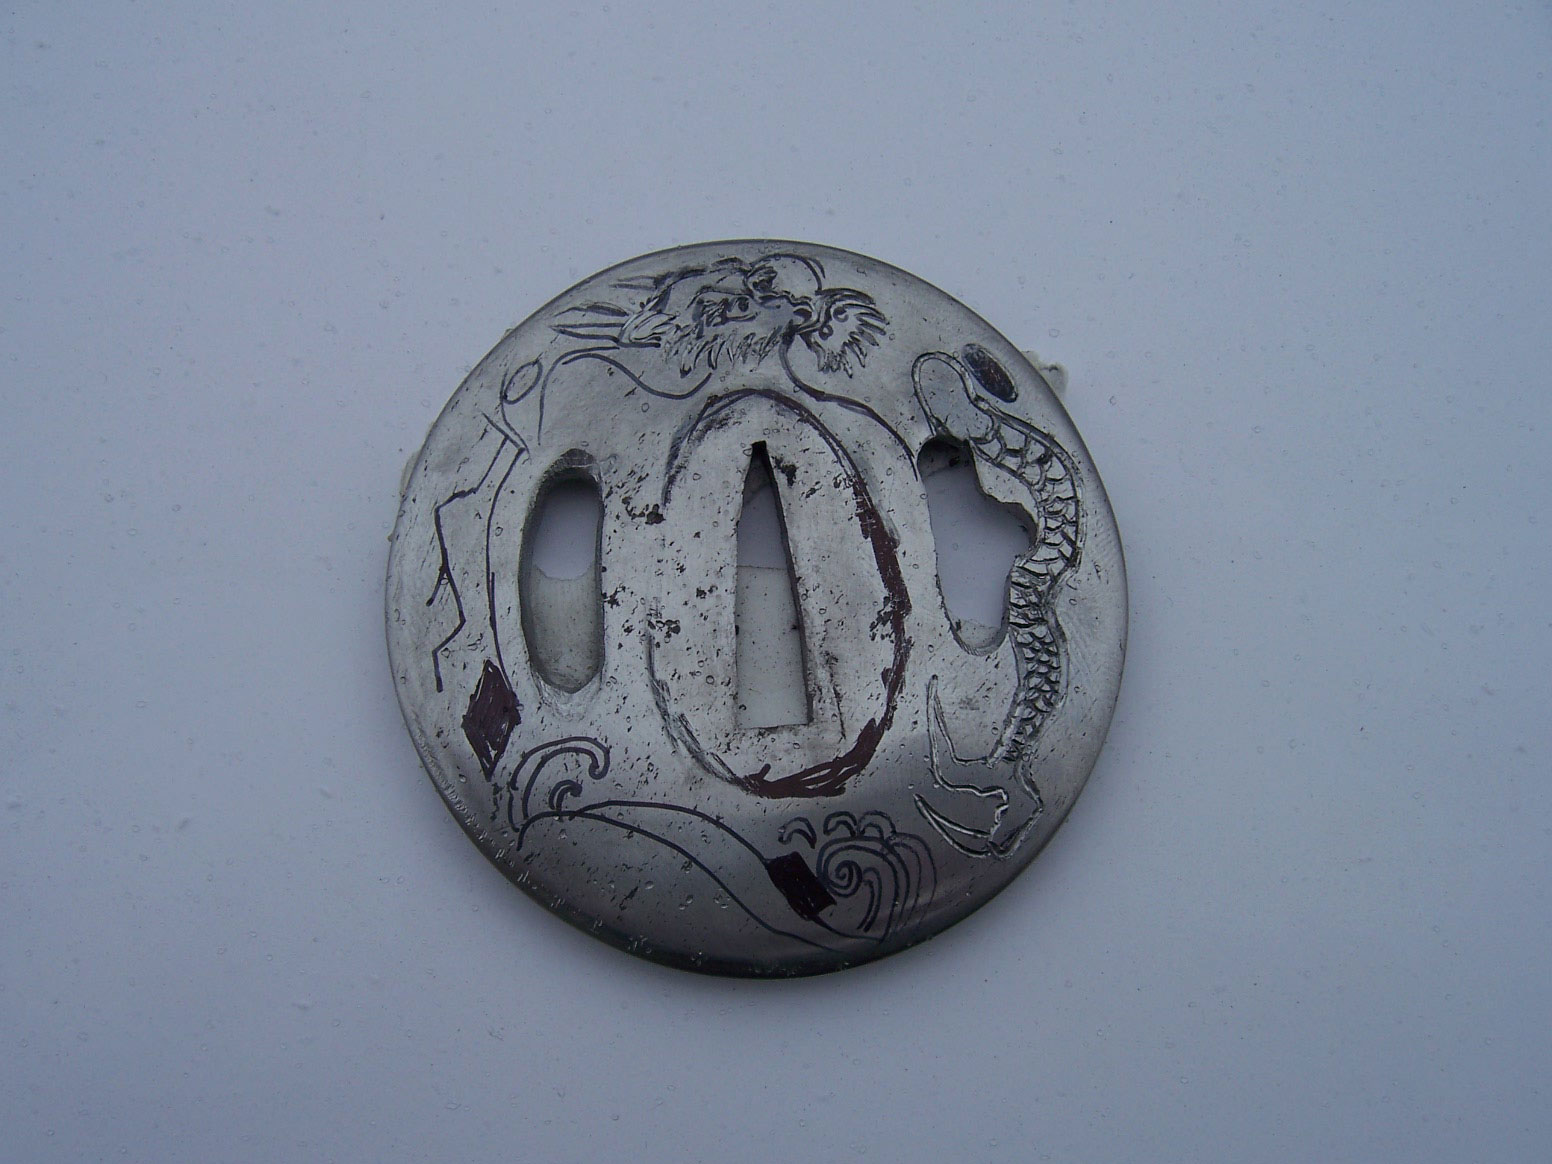
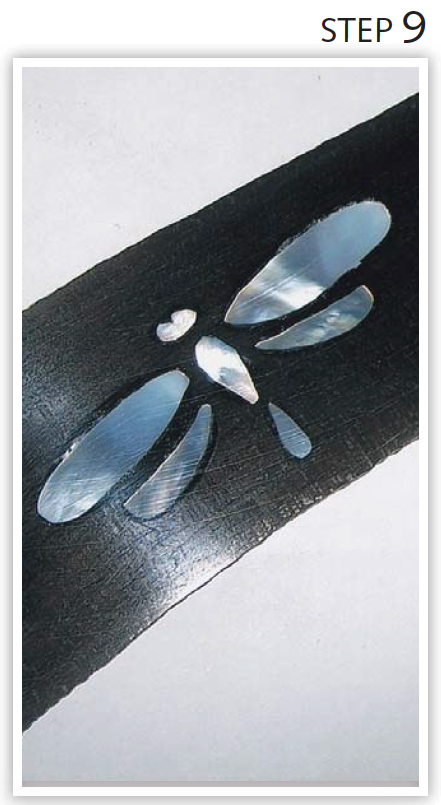
The ETCH

Next up: Etch the blade to bring out the temper line. Clean the blade with acetone. Wear latex gloves to protect your hands and to keep oils from your hands off the clean blade. To etch the blade I use ferric chloride diluted four-to-one with distilled water—that is, four parts water to one part ferric chloride. Hang the blade with a cotton string tied through the pivot hole and place it in the acid for 15 seconds. Remove the blade from the acid and spray it with Windex®. This neutralizes the acid and stops the etching. Dry the blade and coat it with WD-40®. Rub a little bit of polishing compound onto the blade to remove some of the residue from the etching. I use Flitz or Peek polishing paste with a paper towel and some WD-40. Polish lightly and be very mindful of the sharp edge. Clean the blade with WD-40 and wipe off any excess oil.

4) Here is how the blade appears after polishing and etching. The temper line is now visible.

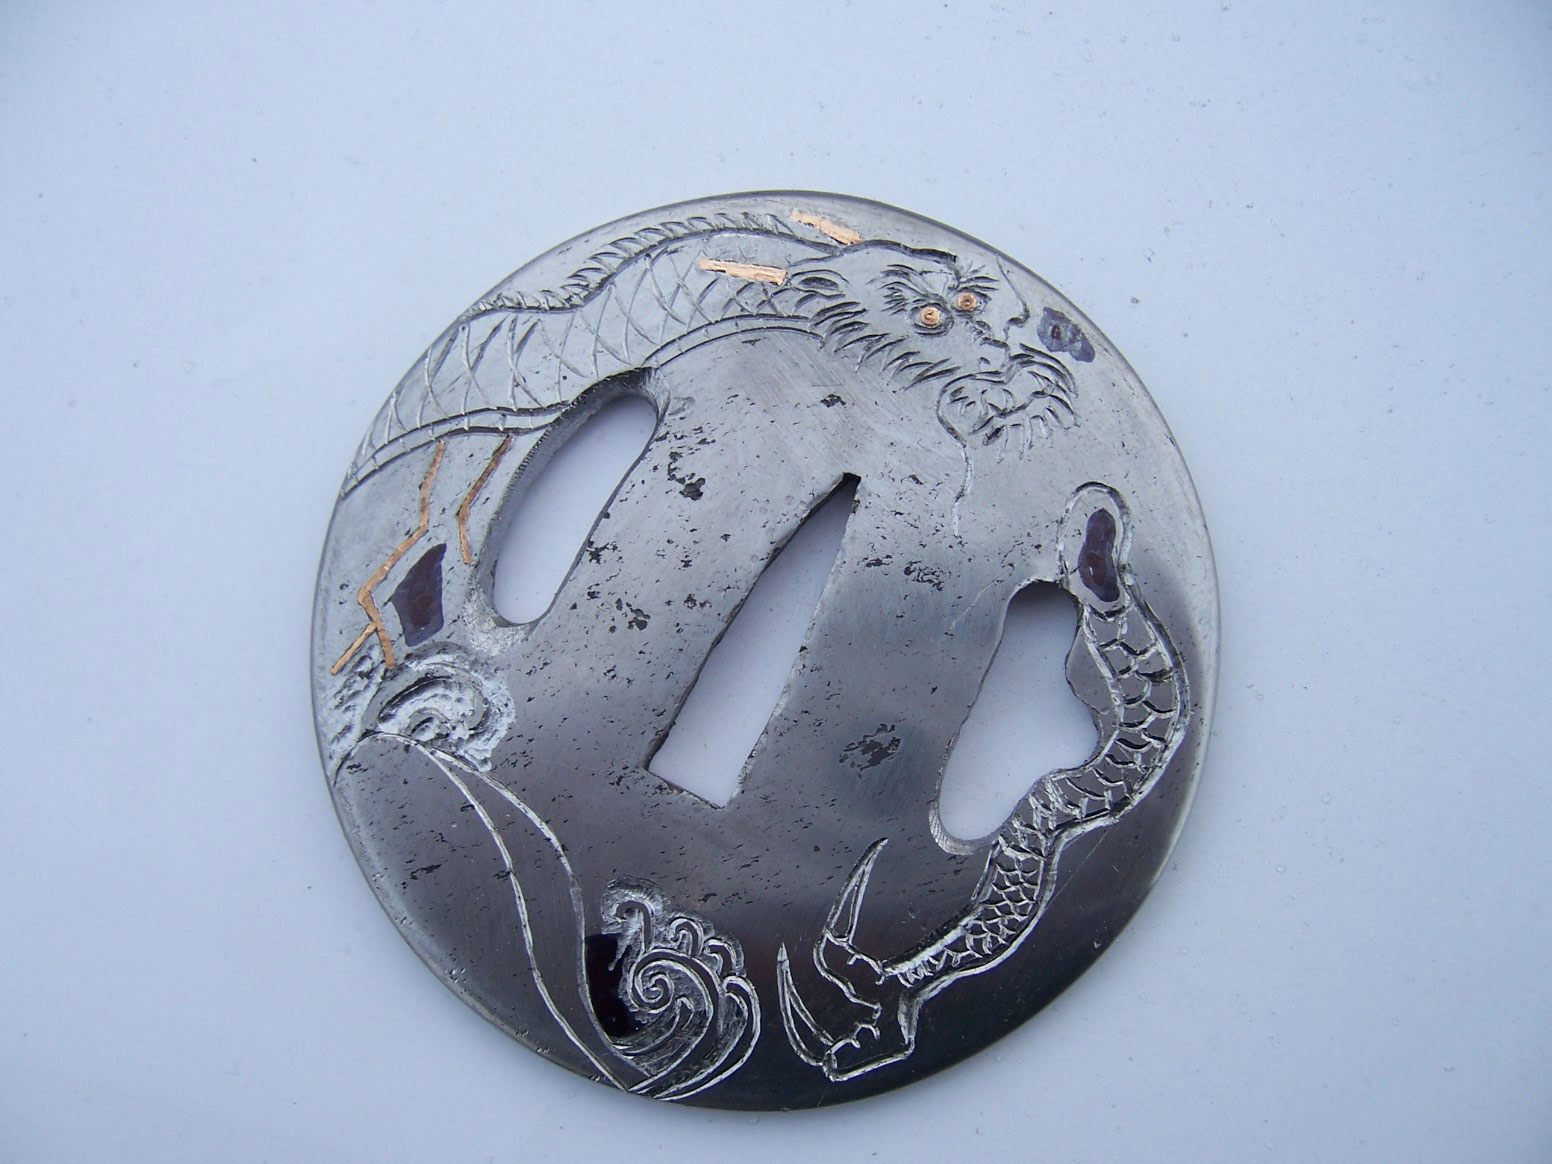
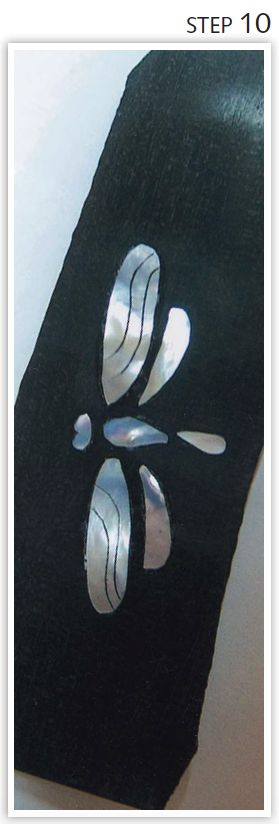
To get the temper line white, go over the blade lightly with a piece of 3,000-grit-or-higher sandpaper.

I hope this gives some insight into the fun world of temper lines and more people will experiment with this fun process.

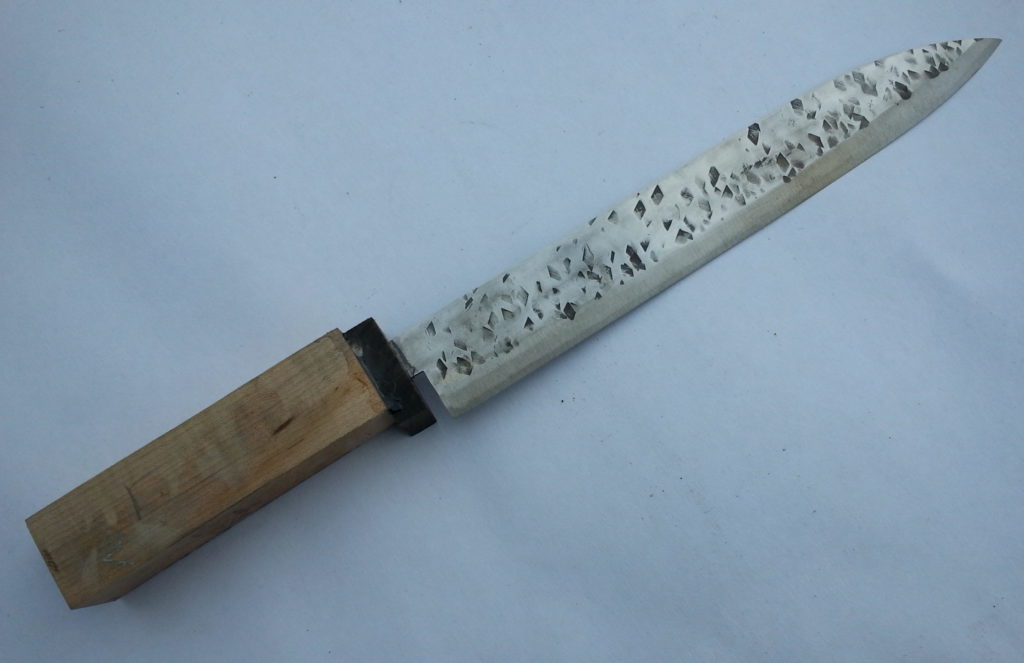
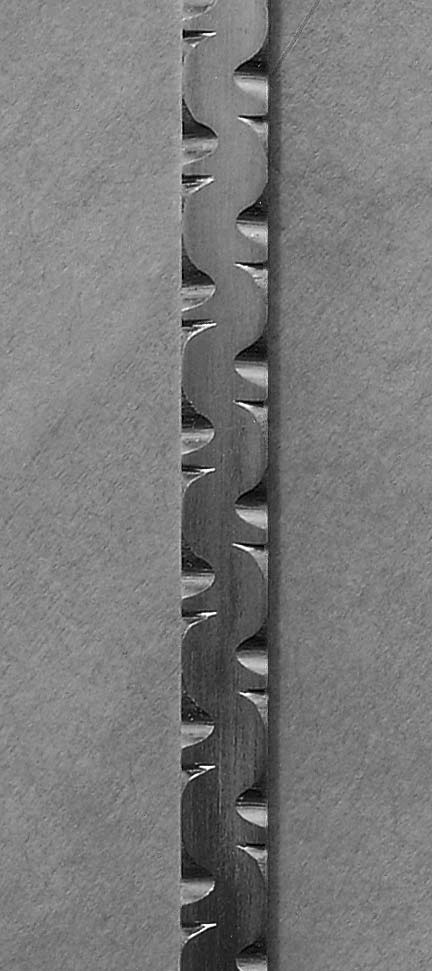
Above: The blade of the author’s finished folder exhibits a temper line with big waves—just the way he likes it.

For more information contact Wally Hayes, 9960,9th Concession, RR#1, Essex, ON, CanadaN8M-2X5 226-787-4289.

How to Make a Sushi Knife

0

By Wally Hayes

Sushi knives are light, thin, very sharp and a blast to make. Here’s how I make them from start to finish.

The sushi knife started out as a 90-thousandths-inch thick bar of 15N20 carbon steel and maple and ebony slabs.

For blade material I use 90-thousandths-inch thick 15N20 carbon steel from New Jersey Steel Baron. First, I cut the blade to shape, around 7 inches long. The tang is about 4 inches. I take one of my old hammers and cut a cross hatch into the face using a side grinder with a cut-off wheel.

Then I heat up the blade in my forge and hammer a textured finish into the steel. This takes about five heats and is lots of fun! I put dents into both sides of the blade and then make sure it is straight. The reason for the texturing on the surface of the steel is to create air pockets so food does not stick to the blade.


If you want to push the forging experience, forge in the bevel on one side for your edge. Use a regular hammer. It will be a chisel-ground blade, so don’t hit the edge with your texturing hammer. Hammer an eighth of an inch back from the edge.


NORMALIZING

The next step is to normalize the blade. Heat it to critical temperature—a steel blade reaches critical temperature when a magnet does not stick to it—then let it air cool. After you heat the blade to critical temperature, quench it in warm Fensoil or Parker Oil, both of which are fast-quench oils made for heat treating steel. Vegetable oil also will work.

Clean the blade after it cools and place it in a toaster oven heated to 375°F for one hour. Look at the blade and see if it is straight. If it is bowed, secure it to a scrap piece of steel with a metal clamp and press the warp out, then return it all clamped up to the toaster oven. Temper it for another hour. This works really well.

After hardening, the blade it goes into the toaster oven to temper.

To remove all scale and the black from the blade, place it in a plastic container with vinegar for one day. Rinse with water and baking soda and wash the blade. Scrub it with a paper towel. From there I use a little wire-wheel brush on my drill press to brush off everything and make it all silver and bright. Next I sand the blade on a medium Scotch-Brite™ belt to round the top edges and smooth out the blade surface.

After tempering, the author places the unfinished knife in a container filled with vinegar for about a day to remove all the scale and the black from the blade.

This is the time to grind in your edge. Don’t get the blade too hot during grinding or you may remove the hardness. When the blade gets hot, dunk it in water to cool it. I chisel grind it on the right side so I can get paper-thin cuts with it.


The HANDLE

Time to make the handle. Use whatever material you like. I like cocobolo and ebony best as they are very easy to finish. I used maple and ebony for the handle of the knife for this project.

I make the handle in two parts. The front spacer is ebony about a half-inch thick. Sand the sides and ends of the blocks of wood on a disc sander. Disc sanders seem to work better than belt sanders to get a flat surface. Use a 1/16-inch drill bit to drill the front spacer and then use a small saw to open it up to fit the tang. The longer handle section can be drilled out and fitted easily. I grind down a drywall saw to fit into the hole to make a slot—this works great. Use epoxy to glue the parts together.

Glue the parts together with epoxy and let dry. The author said he uses many coats of glue for the finish.

When the glue dries, I sand the handle into an octagon shape and then hand sand it to 600 grit.

After the glue has dried, the author will sand and buff the handle. Cocobolo can be finished on a fine Scotch-Brite™ belt and then buffed and oiled.

For the maple handle I used many coats of Krazy® Glue for the finish. I paint the coats on then sand and buff. Cocobolo can be finished on a fine Scotch-Brite belt and then buffed and oiled. I use a food-friendly oil like walnut oil. To sharpen the blade use a 7,000-grit Japanese water stone.

Try this project—you’ll like it. It is really a fun knife to make.

Tsuba Time: Make a Guard for a Japanese Sword

Wally Hayes Japanese style sword
The tsuba the author made for this story appears on a katana he said he made for Axl Rose of Guns ‘N Roses fame. All photos via the author.

Making a “tsuba,” Japanese for “guard,” is one of my favorite steps in sword making. You have a chance to build something as simple or as complicated and artistic as you like.

I first started making the tsuba (pronounced SUE-ba) way too thick and heavy, and learned over the years how to refine all of my sword parts. I hope this overview helps shed some light on the subject and gives you some ideas.

I have made tsuba from damascus, mild steel, high-carbon steel and antique wrought iron. Many traditional tsuba were made from folded Japanese steel called “tamahagane.” I used wrought iron for this demonstration.

Step One: Thin it Out

Wally Hayes
Photo 1: Wrought iron forged out and rough cut round for the tsuba.

To begin, cut 3.5 inches of steel from an old wagon wheel. Forge it thinner and wider, and taper the edges thinner all the way around (Photo 1). If you leave the center a little thicker and taper the edges, it looks more balanced and is lighter. Wrought iron is soft and forges out easily and is simple to cut, sand, file and drill. Using the spray from a can of WD-40™, trace around your steel. Cut it out on a band saw and grind the shape round. Sand the tapers even, gradually progressing to finer-grit belts.

Wally Hayes tsuba
Photo 2: Sand the tsuba and start cutting the holes.

Before polishing, I drill the holes (Photo 2). I use a Dremel cut-off wheel to cut out the webbing between the holes. You can also try a jeweler’s saw. I use both.

Employing needle files, make the tang hole big enough to slide up to the “sepa” (washer) on the sword. At this point I polish the tsuba to an 800-grit finish.

Wally Hayes tsuba
Photo 3: Draw the design with a Sharpie® and start engraving.

Depending on how detailed the engraving is, I draw my design on or transfer the design onto the tsuba (Photo 3). This one I drew the design on with a Sharpie® marker. I printed out some of my favorite design pictures to use as a reference.

Engraving and Etching

Wally Hayes tsuba
Photo 4: Tools of the trade: gravers, chisels, and high-speed air and Dremel® tools.

Now the fun begins: engraving the lines. I use square gravers from GRS and from engraver Steve Lindsey. The new gravers both work great and Steve’s Carbalt gravers got me back into engraving. The tips of standard high-carbon gravers break too often. The new gravers last a long time and take a real beating. I use a Dremel Tool and a high-speed air hand grinder to texture the background (Photo 4).

Wally Hayes tsuba
Photo 5: Inlay the gold into the tsuba.

If you practice it a lot, gold inlay is easy (Photo 5). First, cut your line with a square graver, then take a small flat chisel and tap it perpendicular along the line to undercut the groove. Raise some burrs along the bottom of the groove, then tap in the 24k-gold wire.

Wally Hayes tsuba
Photo 6: Texture and carve the background.

After engraving, I etch the tsuba in acid. This brings out the pattern in the wrought iron and resembles damascus somewhat. It gives an old look and feel to the piece. I mix four parts distilled water to one part muriatic acid or ferric chloride. I neutralize the etched steel with Windex® and then lube with WD-40. To bring out the highlights on the engraving, I use a small Cratex® rubber wheel and polish the surface by hand.

When done, I apply Renaissance Wax to keep the tsuba from rusting.

Wally Hayes tsuba
Photo 7: Carve the other side of the tsuba.
Wally Hayes tsuba
Photo 8: Blue the tsuba with cold gun blue.
Wally Hayes tsuba
Photo 9: Polished, waxed and finished, the tsuba is ready for mounting.

Keep Learning About Making Swords 

Learn swordmaking

Knifemaking: How to Do Pearl Inlays

0

Pearl Inlays: Impressive Yet Simple

From the Editor: Wally Hayes is probably best known for his tactical folders and Japanese-style knives and swords, but he also offers something on the embellished side when he can.

The Canadian ABS master smith has penned a number of informative how-to stories for BLADE®, and his seminars on how to wrap a Japanese knife handle at past BLADE Shows have been some of the most popular and best hands-on demos in show history.

Here, he shows you how to inlay pearl—specifically, in the shape of a butterfly—into a handle. He said it’s easy once you know how.

Pearl Inlays Knifemaking
Draw your design and make multiple photocopies. I run the copies off on my printer. (Hayes photo)
Pearl Inlay Knife Technique
Cut out the butterfly parts with an X-ACTO® knife and Krazy Glue® them to the pearl. After the glue dries, I use a jeweler’s saw and a No. 2 blade to cut the butterfly parts from the pearl. (Hayes photo)
Pearl Knife Handle Inlay
At bottom right is one of the drawn butterfly designs. To the upper left of it are the cutout pearl parts arranged in the shape of a butterfly. (Hayes photo)
Pearl Inlay Tips
Sand a piece of ebony or African blackwood to 400 grit. Arrange the pearl parts in the shape of a butterfly and glue them to the wood with plastic model cement. Let dry and scribe around the parts with an X-ACTO® blade. (Hayes photo)
Tips for making pearl inlay
Lift the pearl off the wood and rub chalk into the scribed lines. (Hayes photo)
Pearl Inlay Tutorial
Rout out the wood with a 1/16-inch end mill bit. I use a Dremel® Tool with a router attachment. (Hayes photo)
Pearl Inlay Knife Handle Tips
Here are the implements I use, from top: a Dremel® Tool with router attachment, X-ACTO® blade, Krazy Glue® and Insta-Set™ spray. (Hayes photo)
Pearl Inlay Handles How To
Place the pearl parts into the wood. Squeeze lots of Krazy Glue® onto the pearl, being sure to fill all the gaps. Freeze the glue with the Insta-Set Spray™. (Hayes photo)
Pearl Inlay
Let the glue harden well. Sand the pearl flush to the wood, working up from 80 grit to 1,000 grit. Buff with white compound. (Hayes photo)
Make Knives with Pearl Inlay
Engrave the pearl with a square graver and rub black India ink into the grooves. Wipe clean and you’re done! (Hayes photo)

If you enjoyed this tutorial, be sure to check out BLADE‘s other knifemaking features.

Get the Supplies

Photos: How to Wrap a Japanese-Style Handle

0
Japanese Style Knife Handle Wrap
The finished wrap should look like this.

ABS master smith Wally Hayes details each step in this photo series. This demonstration wraps over a ray skin handle.

Japanese Style Handles
Step 1: Lay the middle of the silk wrap across the handle, overhanging the ray skin a little bit.
Knifemaking photos
Step 2: Start by folding the wrap a half turn down. The trick is to fold the wrap, not twist it.
Wally Hayes knifemaker
Step 3: Fold the wrap a half turn up.
Japanese knife handles
Step 4: Fold the wrap a half turn down, being sure to always turn the half-turned-down part into the handle side.
How to wrap a knife handle
Step 5: Fold the wrap a half turn up and lay it across the handle. Reach around the back of the handle and pull the ends of the wrap tight.
Knife handle wraps
Step 6: Start again on the right-hand side of the handle. Fold the wrap a half turn down.
Ray skin knife handles
Step 7: Fold the wrap a half turn up.
Wrap a knife handle with cord
Step 8: Fold the wrap a half turn down and then a half turn up, lay it over the right side and grip it. Adjust your grip, pull the ends of the wrap tight and re-grip. The wraps will lock into each other. Keep the folds and crossover section in the middle of the handle. Pull both ends tight.
Knife handle wrapping tips
Step 9: Continue wrapping down the handle. The first wrap on each side is left over right. As you continue down the handle, alternate left over right, then right over left.
Japanese Style Knife Handle Wrap Example
Step 10: Once you get to the handle butt, feed the wrap through the lanyard hole.
Step by step knifemaking tips
Step 11: Feed the wrap through the lanyard hole until you cover the entire butt.
Gluing knife handle wrap
Step 12: Hold both ends of the wrap and apply a drop of Crazy Glue® to freeze the wrap in place.
Wrapping a knife handle
Step 13: Turn the knife over and clamp the blade to a table. Cut off the ends of the wrap with an exacto blade.
Gluing a knife handle
Step 14: Being careful not to get it on the ray skin, apply epoxy to the wrap with a small paintbrush.


Knifemaking 101: The 12-Step Vine Filework Method

0

Step-By-Step Instructions In Photos

Vine filework is my favorite style of filework. If you break it down into baby steps, it is quite easy to do.

The materials you will need are a Sharpie® marker, a vise, and a 5/32-inch round file and a small triangle file. You can use a bigger round file on thick blade material or a smaller round file when engraving liners or thin blades.

The triangle file is ground safe (sanded) on two sides to produce one corner that is sharper than the other two corners. This provides a left and right safe side for opening up your vine file cuts, and for giving them sharp points as well.

STEP 1

Bladesmithing filework

Using your Sharpie® marker, lay out half-round marks approximately 5/16 inch apart down one side of the blade spine. (Though not shown here, be sure to secure the blade in a vise.) (Hayes photo)


Step 2

Wally Hayes master smith

File the marked side with the round file at a 45-degree angle. File into the spine, stopping just short of the middle of the blade. (Hayes photo)


Step 3

Fileworking techniques

Using the marker, put marks down the other side of the blade spine in-between the notches. (Hayes photo)


Step 4

File knife spine

File in another row of half-round notches on the “new” side. Remember to keep the file at approximately a 45-degree angle and stop filing just short of the center of the blade. (Hayes photo)


Step 5

Bladesmithing filework

Next, take your triangle file and place it beside one of the notches. I leave about a sixteenth of an inch between the half-round notch and the triangle I am going to cut.

Before you cut, make sure you have a safe (sanded) side of your file closest to the notch you are cutting beside. Tilt the file so the cut closest to the notch is perpendicular (90 degrees to the blade). This gives you a straight line into your cut and an angle coming back out of the cut.

In other words, you want this “V” notch to be straight on one side and angled on the other. (Hayes photo)


Step 6

Filing techniques for knifemaking

Turn the blade around in the vise and cut “V” notches in front of the other half-round notches. (Hayes photo)


Step 7

Filework on knives

Take the triangle file and file the corner of each half-round notch, producing a gentle curve opening up one side of the half-round notch. (Hayes photo)


Step 8

Techniques for fileworking knives

Open up the other sides of the half-round notches. In both cases, they are in front of the “V” notches. This is how I remember so I do not get mixed up. (Hayes photo)


Step 9

How to filework a knife

Now let’s move on to the “V” notches. Open up one side of the blade spine first. File the “V” notch to produce an even arc to the edge of the blade spine. If you do not twist the file in your hand as you file, you will get a flat spot. GO SLOW AND EASY. (Hayes photo)


Step 10

File working knives

Turn the blade around and open up the “V” notches on the other side of the spine. Remember the “V” notch is opened on one side only, behind the halfround notch. The safe 90-degree side is not touched. (Hayes photo)


Step 11

Art filing knife spine

Take the sharp safe-sided angle of the triangle file and file into each point of the “V” notch. File it to a sharp, crisp point. (Hayes photo)


Step 12 (Final)

For the 12th and final step, go over the entire fileworked area with fine sandpaper. Increase 3-inch strips of 320-grit sandpaper and put the paper over the round file and triangle file to back up the paper. Do not push too hard and tilt the wrap away from the safe sides so you do not round safe (square) the corners of the filework.

Have fun and stay safe.

Making Knives from “Supernatural,” “Game of Thrones” and “The Hobbit”

Making knives with kids
When she was 15, Charlotte asked Wally if she could make a knife. He likes teaching her so he said, “Sure, let’s do it!” (Morgan Graham image)

Making “Ruby’s Knife” from Supernatural

My daughters Savannah and Charlotte had always been craftsy and artistic, but they rarely spent time in my shop. One day in 2016, Charlotte, who was 15 at the time, asked me if she could make a knife. It was to be based on a knife from a TV show she was watching called Supernatural. A character on the show named Ruby used the knife to kill “demons.” It is a very unusual design.
I like teaching so I told her, “Sure, let’s do it!”

A Daughter’s First Knifemaking Project

Knifemaking safety
To get Charlotte started, Wally had her practice grinding. Note her safety glasses and gloves.

For her first knife I thought grinding it out would be easier than forging it. To get started I had her practice grinding wood to learn how to use the 2×72 belt sander. Grinding the bevels of the blade in wood to practice gives you very fast feedback and speeds up the learning process. I don’t use jigs, so it can be tricky to get hollow grinds the same height up the blade on both sides. Flat grinding is an easier technique to start with compared to hollow grinding, so we began with that.

Charlotte cut out and ground the blade, getting it ready for heat treating. We heated the blade until it reached critical temperature (when a magnet will not stick to the steel), then took the blade out of the fire and quickly quenched it in oil. Next we tempered the blade and sanded it to a high polish.

Charlotte carved the markings on the blade, and we found a piece of deer antler very similar to the TV knife to use as the handle.

Safety First

Knifemaking eye and hearing protection
Charlotte drills a hole while in her dad’s
shop. Note the gloves and ear protection.

As I taught each step I also taught her about knife shop safety, as so many of the tools and machines can be dangerous.

For instance, it’s important to know how to safely clamp a blade on a table for sanding and how to hold a blade against a buffer—the latter which I think is the most dangerous machine in the shop.

I showed her how to drill holes and gave her a safety tip on how to make sure a blade does not get away from you and spin around and cut you. She had her hair tied back and wore safety glasses, as well as Kevlar® gloves and hearing protection.

A Fantastic Finish

Supernatural TV show demon killing knife
That first knife is always special. Charlotte’s initial piece not only is special but also unusual—based on a model used by a character in the TV show Supernatural to kill “demons.”

Charlotte’s first knife turned out great and it was so cool to see how fast she learned and progressed. It also surprised me that she did not experience all the challenges I had when I started.

The knife’s fit and finish was great, and the blade was straight. She decided to keep her first knife for herself. Each subsequent knife she made was different and she had to learn new skills for each new model.

Making the Game of Thrones Obsidian Dagger

The next knife Charlotte made was a copy of the obsidian dagger from the TV series Game of Thrones. In the show the dagger was made from “dragon glass” and was used to kill “night walkers.”

Charlotte employed O1 tool steel for the blade so she could gun blue it black like the TV dagger. She ground the blade and then textured it with the small half-inch-wheel attachment to look like obsidian. She polished it with a Dremel® tool. My brother Ted loved the knife so much he bought it.

Next Up: Sting from The Hobbit

Next up was a mini letter opener modeled after Bilbo’s sword “Sting” from The Hobbit. The new model required her to grind a dagger blade with a straight line down the center. She used a flat grind and, after heat treating, polished the blade by hand. She also learned how to carve with my high-speed/hand-held grinding tool.

She made the mini sword as a gift for her best friend, Morgan.

Hooked on Knifemaking

Charlotte wants to make knives for fun and as a part-time job, so she decided to make a kitchen knife to sell. It was a Japanese-style model and when it was done, I posted it on Facebook. It sold in no time.

With this new model she learned about Japanese kitchen knives and how thin they are. She also was introduced to forging by texturing the blade, which was later ground off to make the knife thinner.
Moreover, she learned a new skill making a multi-part octagon handle for the knife. Excited by her new part-time job, she decided to make a tanto. Again, the new style required learning many new skills. Her tactical-style tanto has a hollow grind, so we started with wood again to teach her how to hollow grind, ensuring the grind was even on both sides. She learned how to grind in a tanto tip and how to make the angle the same on both sides.

Japanese knife handle wrap
Charlotte learned how to tie a Japanese handle wrap and etch the blade to make the temper line or hamon really stand out on her tanto. She also learned how to make the mune (the blade spine).

To make Japanese-style tantos, she had to learn how to create temper lines and put a high polish on the blade. She learned how to tie a Japanese wrap and etch the blades to make the temper line really stand out. She also learned how to make the mune (the blade spine). I posted a picture of the knife on social media and she quickly sold it and received another tanto order.

This past March break she forged out a bushcraft-style knife and will continue to work on it in my shop. She is not taking orders as she has a heavy school year finishing the 12th grade. She has been accepted to the University of Windsor in the forensic science program next fall.

She does have a waiting list and loves working with her hands. Knifemaking fills her need for creativity, just like it did for me. Charlotte intends to make one order at a time and she is getting comfortable using all the equipment. Making leather sheaths is the next skill she wants to learn.

Making bushcraft knives
This past March break, Charlotte forged out a bushcraft-style knife and was working on it in her dad’s shop at press time.

What Better Way to Spend Quality Time with Family?

There are so many branches to the tree of knifemaking and I look forward to seeing where she takes her knifemaking in the future Charlotte is a unique 17-year-old who wants to make knives and can do so just as well as boys. Her favorite part of knifemaking is watching the progress of polishing the blade. She takes her time with each step and really is a perfectionist. I am so proud of both my girls and it has been so much fun to show Charlotte what I have been doing for 32 years.

Go, Charlotte!

* All images by Wally Hayes unless otherwise noted.

Advertisement

Must Read Articles

Read this before you make a knife

Knifemaking 101 – Read This Before You Make a Knife

  by Wayne Goddard My experience has taught me that there's nothing like digging in and getting started. I've often said the hardest part of the...
how to forge damascus steel

How to Forge Damascus

Advertisement
Advertisement