PHOTO 1: The spacer arrangement includes the temporary Micarta® spacer in the middle and the actual stainless piece for the spacer in the author’s hand.
BY LIN RHEA ABS MASTER SMITH
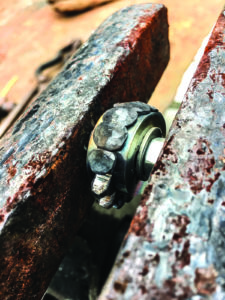
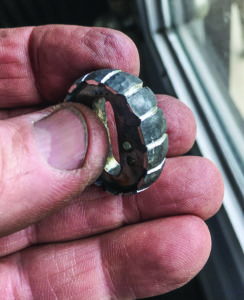
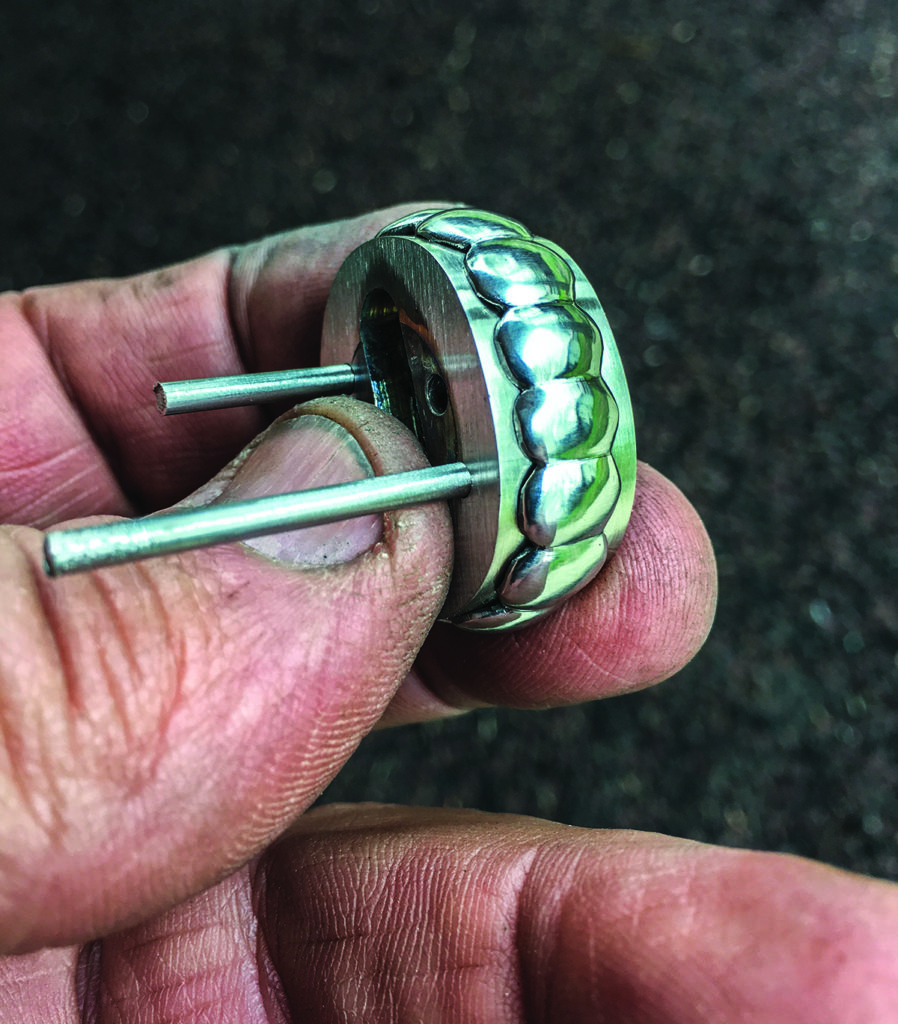
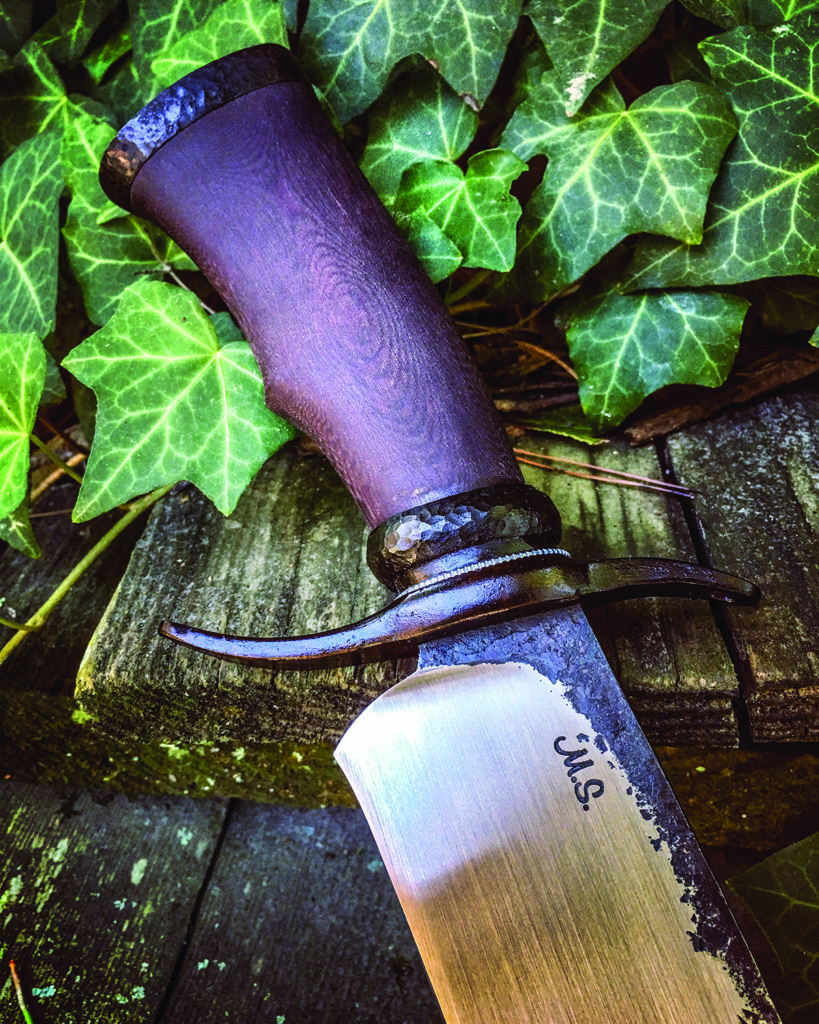
Blending the old with the new sometimes can yield notable results.
It’s been said there’s nothing new under the sun. I might add that new ideas in knifemaking are rare. I do not claim the technique I am about to share is new because that could start the story off on the wrong foot. On the other hand, I will say I have not seen it done in the context of making knife parts. Comparisons can be drawn to particular cultural techniques, and I encourage that in the name of inspiration. Speaking of, that will be the purpose of this discussion—inspiration.
PHOTO 1: The spacer arrangement includes the temporary Micarta® spacer in the middle and the actual stainless piece for the spacer in the author’s hand.
PHOTO 2: The stainless piece is inserted into the middle and the outside layers of spacers are used as templates for drilling alignment holes, and to establish the margin of reveal above the surface—in this case, 1⁄4 inch. The middle spacer is simply cut and ground to this margin and further prep is done. (See PHOTO 3.)
PHOTO 3: The margin of reveal is established and, for the author’s purposes in this particular look, the notches are cut. If you want a simpler look, you may want the smooth band—often called wedding band—and omit the notches. For the wedding band, the author recommends not only omitting the notches but using less reveal, say, 3/16 inch or so. Remember, every decision has its consequences. Consider the volume of the material no matter how small and adjust accordingly.
PHOTO 4: The next consideration is “How do you hold the thing?” The author inserted a bolt of appropriate size into the slot. Note: On a knife this large, use a quarter-inch center hole as a start to the slot. Hence, a quarter-inch bolt (or all thread) works well for the process. The bolt has a washer and a
nut on each side and is cut off after tighten- ing. The alignment pins are slightly inside the surface so as not to interfere with the bolt/nut arrangement, as well as the necessary pressure to hold it, while forging the spacer.
I have been fortunate to have had several sources of inspiration, not the least of which is my time and training in historic blacksmithing. One of the guiding principles of the early blacksmith was practicality. You will end up being the judge as to whether or not this technique is practical or not for your purposes. I will try to show how blending the old with the new sometimes can yield unique results that can be beautiful as well as inspiring.
I call the technique intermediate forging. I chose the name to imply it involves a mixture of old and new techniques within the same process in order to accomplish the task. It can involve forging—the old—as well as the new via the use of modern tools such as grinders, saws, etc. The particular order of the use of the techniques is at your discretion as well. In other words, you may forge, then saw/grind, then forge more before, perhaps, grinding again and finishing or polishing.
PHOTO 5: While this vise is not the one the author uses for this step, it illustrates the way the piece is held and the relative position to the top of the jaws that the piece should be held during forging. Use a small, 6-to-8-ounce ballpien hammer so as not to move the piece around in the vise when forging the small areas heated by the torch. The grip of a common post vise under moderate jaw pressure will be enough. The radius of the ball along with the positioning in the vise jaws will pro- tect from beating up the outside spacer. The parallel lines provided by the jaws and the layers of the spacer will provide ample references to target the blows. This might take actually doing it before you really get confident.
PHOTO 6: The proud area of the middle spacer is forged down a little at a time using focused heat from a brazing tip of an oxyacetylene torch. The piece is set within the jaws of a vise large enough to provide mass and enough force to the grip. The mass absorbs residual heat that could build up and soften areas that must not be deformed.
PHOTO 7: This shows the progress of the forging as the middle spacer is forged down against the outer spacers. The piece will have to be turned often and with a tool that won’t scar it. The author uses flat-jaw tongs very carefully. The outer spacers should need a light surface clean- ing only, so everything outside the forged part should be viewed as fragile—especially the rim.
PHOTO 8: The piece appears as it does after a few rotations and triple checks to ensure the forging is done. Note that it
is not beat up, nor wracked out of shape and shifted. Risky work? Yes, but it can be done. Bladesmiths do this kind of thing all the time. As the man said, “Aim small, miss small.”
It’s time to return to the finishing. Take the piece apart and examine it.
11: The piece is ready for final shaping and finishing.
Intermediate forging can be used on blades or integral parts of blades. This may be where it is easiest to see and accept the possibility of enlisting the technique. I’m sure you may have seen the need to return to the forge to refine or make corrections in order to improve or actually save a project. It’s often viewed as a concession or acknowledgment of defeat if you must return to the forge for corrections. I now present to you the possibility of pushing aside the puristic view and actually using the intermediate forging technique as part of some projects, and opening up new combinations of techniques for new looks.
PHOTO 12: After final shaping and finishing, the author installs permanent alignment pins. While the way the three pieces are fit together means it’s unlikely they’ll get turned around, the author pins them anyway just to be on the safe side.
PHOTO 13: All hail the completed project!
The HANDLE SPACERS
One way in particular I have made changes in the look of my knives by intermediate forging is on the handle spacers. The accompanying photos and descriptions pertain to how I set up and mix the techniques of old and new to arrive at a unique process with almost endless possibilities. I show the progression of one project along with a finished photo, and then some other examples of variations of the technique.
I use stainless steel for the spacer, though mild steel or other forgeable materials would work as well. I start with three layers, leaving the middle layer proud by a chosen margin according to my plan. Note: I often “lean” the guard and spacer forward. This creates the need to provide a fake middle spacer that will be discarded after the outside spacers have their inclination established. I then insert the actual middle spacer and leave it proud for the subsequent steps.
The author used his intermediate forging process to make the handle spacer for his S-guard bowie. (Whetstone Studio image)
YOU be THE JUDGE
As noted, you must be the judge as to whether intermediate forging is for you. I’ve found that the results are worth the extra effort it takes to accomplish my intent. Also, while steps in this process are examples of workmanship of risk*, the risk is usually limited to an individual part of and not the whole knife. I’ve also found that risk itself adds intrigue to the project, and intrigue attracts the curious. Of course, as with a movie, risk and intrigue are good when the ending can be written with a predictable result. Hence, intermediate forging also needs to have predictable results. I can say that it certainly has for me.
*Workmanship of risk refers to a principle found in the book, The Nature and Art of Workmanship, by David Pye.
For more information, contact Lin Rhea, Dept. BL11, 413 Grant 291020, Prattsville, AR 72129 870-942-6419 [email protected], rheaknives.com.
NEXT STEP: Download Your Free KNIFE GUIDE Issue of BLADE Magazine
BLADE’s annual Knife Guide Issue features the newest knives and sharpeners, plus knife and axe reviews, knife sheaths, kit knives and a Knife Industry Directory.
Get your FREE digital PDF instant download of the annual Knife Guide. No, really!
Click Here to Get Your Free Issue