


* Images by the author, Jeremy Spake and Austin Moody unless otherwise noted.
Pronounced “moe-ka-may ga-nay,” mokume-gane—or mokume as it is more commonly known—is all about layering. For me it’s simply another component of my work, but within itself it’s about color and pattern.
In short, you stack a variety of different metals, bond them together, forge them down, pattern the material by cutting then forging, or forging then cutting, and expose the various colors that lie beneath. It sounds pretty simple and much like damascus.
Neither is true. I do find mokume a bit more difficult and less forgiving. However, all of this is subjective and depends on the specific materials you’re working.
For damascus I use straightforward, low-alloy high carbon steel; for mokume I frequently use exotic alloys that are not forgiving. You can use exotic high-alloy steel, which makes damascus less simple, and straightforward metals for mokume, which makes it simpler.
But enough of my doubletalk—let’s get into the process.
What You Need
Torque plates: 1-inch-thick 316 stainless steel. The plates should be large enough to accommodate both your billet—with some wiggle room—and a half-inch bolt in each corner of the plate.
Bolts, nuts, washers: at least half-inch thick Grade 8 heat-treated, high-alloy steel bolts. Black oxide will help prevent the bolts from bonding to the nuts. I hope this goes without saying, but you will need the correct size of nuts and washers to accompany your bolts.
Boron nitride: It acts as a resist between bolts, nuts, washers, torque plates and your billet. It also acts as a lubricant.
Three plastic tubs at least 1 foot by 1.5 feet and 6 inches tall, or whatever makes the most sense with the size billet you’re making.
Distilled water.
Simple green® Concentrate All-Purpose Cleaner.
For cleaning, 7447 maroon Scotch-Brite™.
Scott® Shop Towel. .002-inch-thick 304 stainless steel sheet. Medium silver solder: It’s always important to have on hand and can help fix problems should they arise.
Activated charcoal pellets.
How to Make Mokume Step by Step
STEP 1: Cut all of the metal to the appropriate-sized sheets, deburr, and make sure they are relatively flat without denting or kinking the metal. You need each piece to be of a consistent thickness. All the sheets can be different thicknesses, but there must be no dents or tapers within individual pieces.
STEP 2: Take the torque plates with the holes already drilled and coat the inside faces with boron nitride. The inside faces of the plates should be dead flat. Also, coat the threads of the bolts and the faces of the washers. Set aside to dry.
STEP 3: Take the three plastic tubs and place them one next to the other. Fill tub number one and number three with 1 inch of distilled water and the center tub with 1.5 inches of the water.
STEP 4: Mix a couple of tablespoons of the simple green cleaner in tub one.
STEP 5: Using tub one and a small piece of Scotch-Brite, clean each side of the first piece of metal. Use a scratch pattern to track your progress. When finished rinse the piece in the first tub, being sure that the water skims cleanly and easily over the surface. If it beads up anywhere, clean again.
STEP 6: After cleaning and rinsing the piece of metal in tub one, rinse it in tub two and store it in tub three.
STEP 7: Clean all of the metal, dedicating respective corners of tub three to hold each type of metal.
STEP 8: Place the bolts through the holes in the bottom torque plate and set it close to tub three.
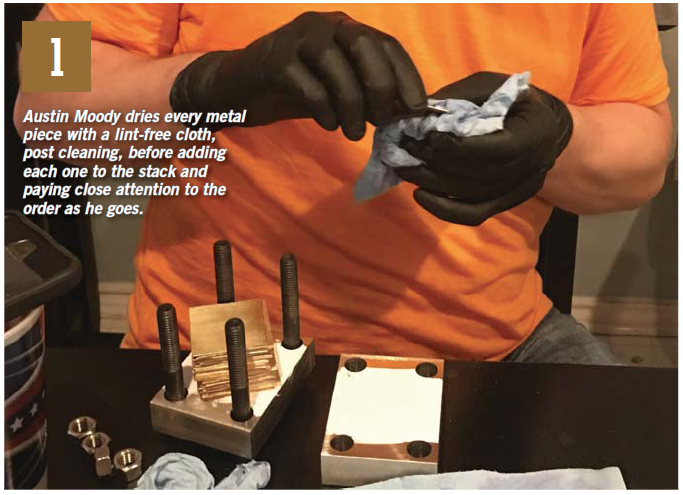
STEP 9: Remove each piece, gently dry using the Scott Shop Towel, and stack in the correct order on your torque plate (see image 1).
STEP 10: Your kiln should be preheated by this point.
STEP 11: Align the metal using a straight edge or square.
STEP 12: When you place the second torque plate on top, be careful to not knock around the billet. Re-align the sheets as necessary while tightening the nuts and bolts.
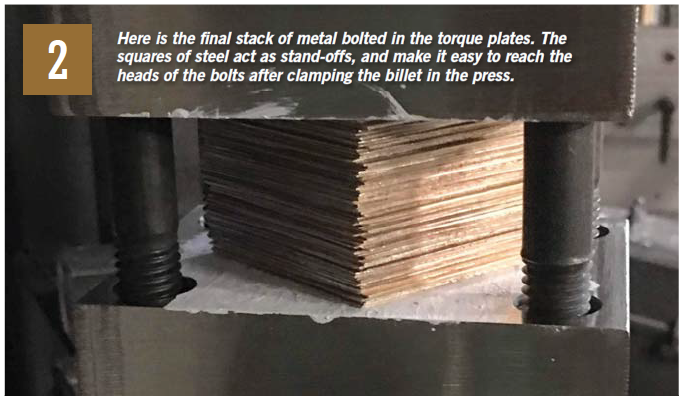
STEP 13: When everything is tight, go to your hydraulic press. Use steel standoffs to get past the nuts and bolts, and press down on the stack. Tighten the nuts with the billet under pressure (see image 2).
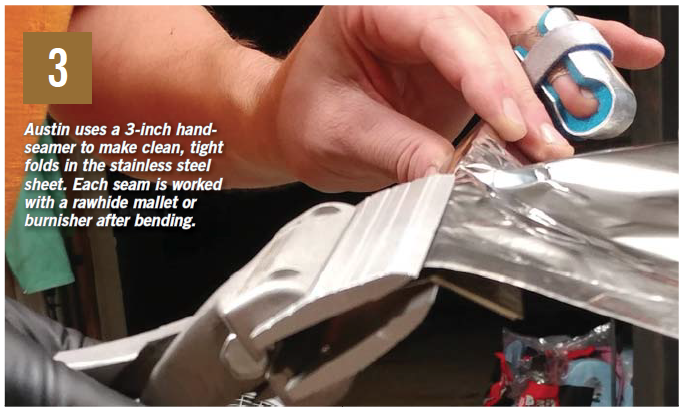
STEP 14: When you create the stainless steel jacket, you want all of the seams to be folded twice. After each fold, either work the seams with a rawhide mallet or burnish them with an appropriate tool (see image 3).
STEP 15: Activated charcoal is ideal for this process—use two tablespoons—but if you only have charcoal on hand, that’s fine. We used hardwood charcoal and crushed the chunks up a bit. You need only a small amount. The point is to seal the foil well enough where no oxygen can come in to cause combustion and burn up the charcoal. Prior to adding the charcoal to the packet, let it sit in the oven for one hour at 250°F to remove any moisture from the charcoal.
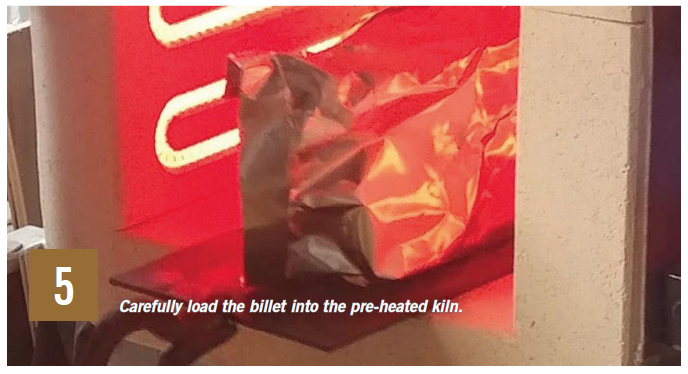
STEP 16: To prevent damage to the bottom of the kiln, we slid our packet in on a thin piece of steel (see image 5).
STEP 17: Kiln time varies depending on how large the billet and torque plates are. You really need everything to be at temperature for only a couple of hours. Larger billets obviously take longer to get to temperature. I recommend doing some research. The billet documented in the article was fired for three hours.
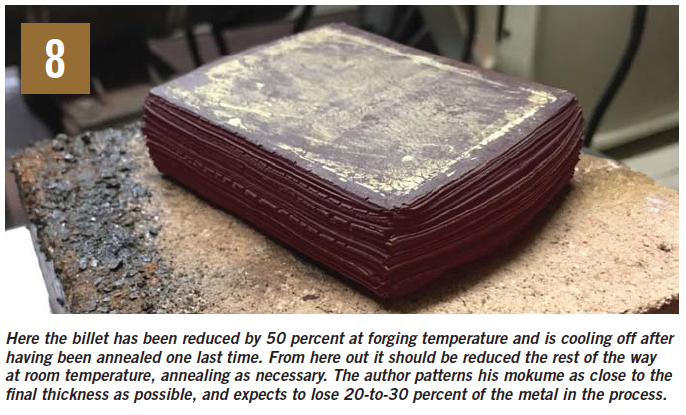
STEP 18: When you have fired the billet long enough, remove it from the kiln, remove it from the foil, and reduce the entire billet by 50 percent thickness at forging temperature. Reduce between 20-to-30 percent with each heat.
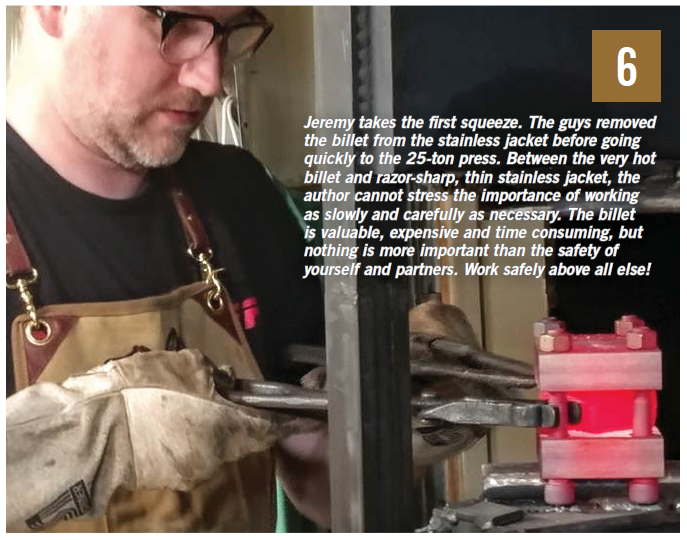
STEP 19: For the first forging process, leave the billet in the torque plates and go straight to the press (see image 6).
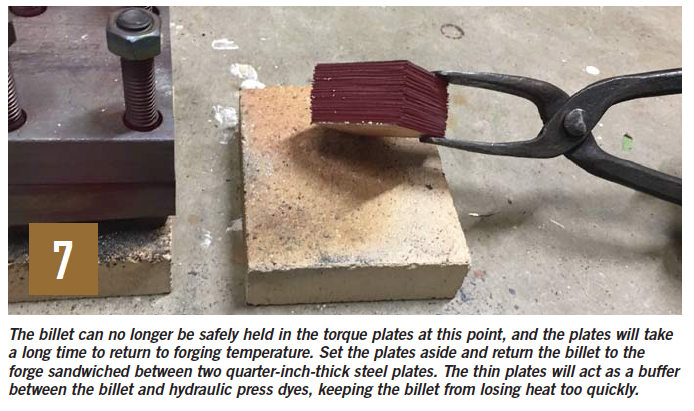
STEP 20: After the first reduction, the billet should slide out of the plates when tilted to the side. You can place the billet between two thinner steel plates—though only if you have a secure way to hold everything—and put them back in the kiln at forging temperature. The plates will help prevent the press dyes from chilling the billet too quickly. Continue until you have reduced by 50 percent from your starting point (see image 7).
STEP 21: Now you can go to cold working. Start out by reducing the billet no more than 10 percent prior to annealing. As you work the billet down, you can start to get closer to 20 percent between annealing cycles. The process for annealing depends on your metal combination. The relevant information should be easy to find with an Internet search.
STEP 22: When it comes to patterning mokume, the process is very similar to damascus. However, instead of using a milling machine or angle grinder to cut a pattern into the metal, tools such as a flex shaft or files would be more appropriate. After cutting a pattern into the metal, forge the billet flat to bring the low points to the surface. As with damascus you can also forge patterns into mokume, either with a hammer or specific coining dyes. Reveal your pattern by grinding down to the low points. As a rule of thumb, it’s not recommended to pattern deeper than one-third the thickness of the billet.
More than One Way to Do It
Full disclosure: there is more than one way to make mokume. I have made and know others who make mokume using processes that differ from what I am sharing.
 NEXT STEP: Download Your Free KNIFE GUIDE Issue of BLADE Magazine
BLADE’s annual Knife Guide Issue features the newest knives and sharpeners, plus knife and axe reviews, knife sheaths, kit knives and a Knife Industry Directory.Get your FREE digital PDF instant download of the annual Knife Guide. No, really! We will email it to you right now when you subscribe to the BLADE email newsletter.


