See Who Took Home The Hardware From The 2024 Custom Knife Awards At BLADE Show.
Once again, the Custom Knife Of The Year® Awards at the June 7-9 BLADE Show at the Cobb County Gallery showcased some of the finest bladesmithing in the knife world. The challenge was determining which knives would rise to the top.
In a fiercely competitive field, a panel of expert judges selected the top knives in various categories, highlighting the best of the best. Below are the winners, including the prestigious Hugh Bartrug Best In Show award.
Best of Show & Best Folder: Evan Nicolaides
Photo: Jocelyn Frasier
Best of Show Contender: Jean Louis
Photo: Jocelyn Frasier
Best Art Knife: Fabio Barros
Photo: Jocelyn Frasier
Best Kitchen Knife: Jordan LaMothe
Photo: Jocelyn Frasier
Best Bowie: Samuel Lurquin
Photo: Jocelyn Frasier
Best Collaboration: Javi Garcia, Enrique Pena, Jared Oeser
Photo: Jocelyn Frasier
Best Damascus: Ronmell Fernandes
Photo: Jocelyn Frasier
Best Fighter: Seth Lopez
Photo: Jocelyn Frasier
Best Fighter Contender: Samuel Lurquin
Photo: Jocelyn Frasier
Best Fixed Blade: Harvey Dean
Photo: Jocelyn Frasier
Best M.A.C.K.: Sergey Shirogorov
Photo: Jocelyn Frasier
Best Folder Contender: Vogt Knives
Photo: Jocelyn Frasier
Best Handle Design: Vogt Knives
Photo: Jocelyn Frasier
Best New Maker: Bobby House
Photo: Jocelyn Frasier
Best Sword: Vince Evans
Photo: Jocelyn Frasier
Best Tactical Folder: Dmitry Sinkevich
Photo: Jocelyn Frasier
Best Utility Hunter: Dionatam Franco
Photo: Jocelyn Frasier
Most Innovative Design: Carlos Queiros
Photo: Jocelyn Frasier
Best Miniature: Rhidian Gatrill
Photo: Jocelyn Frasier
Best Slip Joint: Rhidian Gatrill
Photo: Jocelyn Frasier
See Past 2023 Factory Knife Of The Year® Awards Winners:
See who took home the hardware from the 2024 BLADE Show.
The BLADE Show held from June 7-9 at the Cobb County Gallery saw one of the most intense Knife Of The Year® Awards competitions in recent memory.
A diverse array of makers entered the contest, filling the display cases outside the main hall to capacity. The sheer number of entries wasn’t the only impressive factor—quality, innovation, and craftsmanship were all at their peak, from knife accessories to the blades vying for the top award.
With such high standards, the 10 judges, including industry experts, knife writers, makers, and Cutlery Hall Of Famers, had a challenging task. Below are the knives that met their rigorous criteria, winning honors in 10 categories and the overall Knife Of The Year award for 2024.
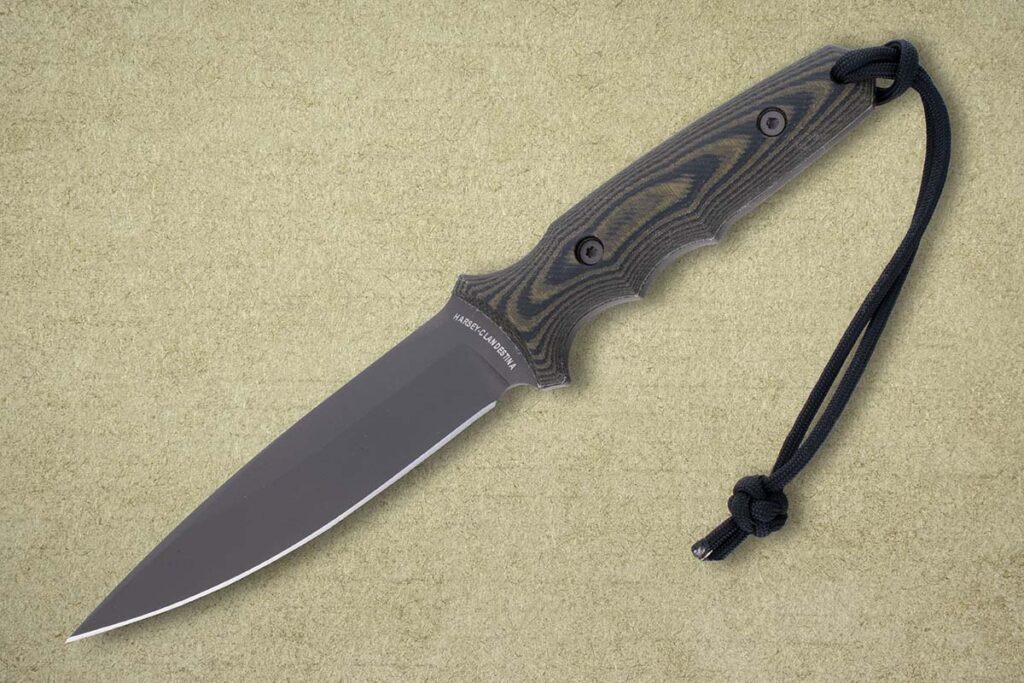
Overall Knife Of The Year®: Spartan Blades Harsey Clandestina
Photo: Jocelyn Frasier
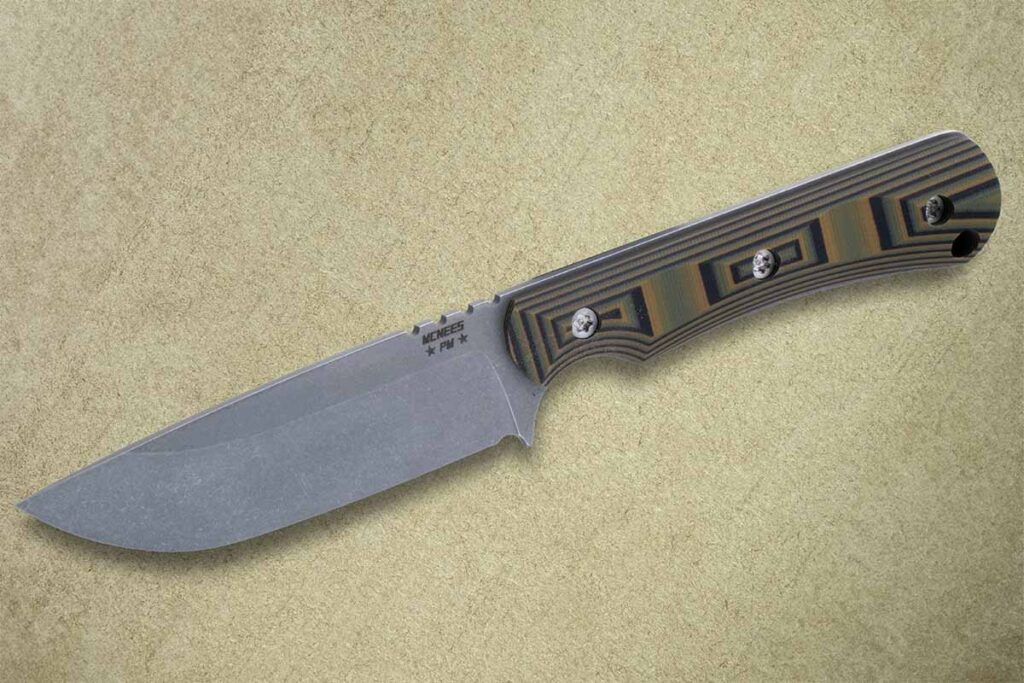
American-Made Fixed Blade Of The Year®: McNees Knives Ridge Runner
Photo: Jocelyn Frasier
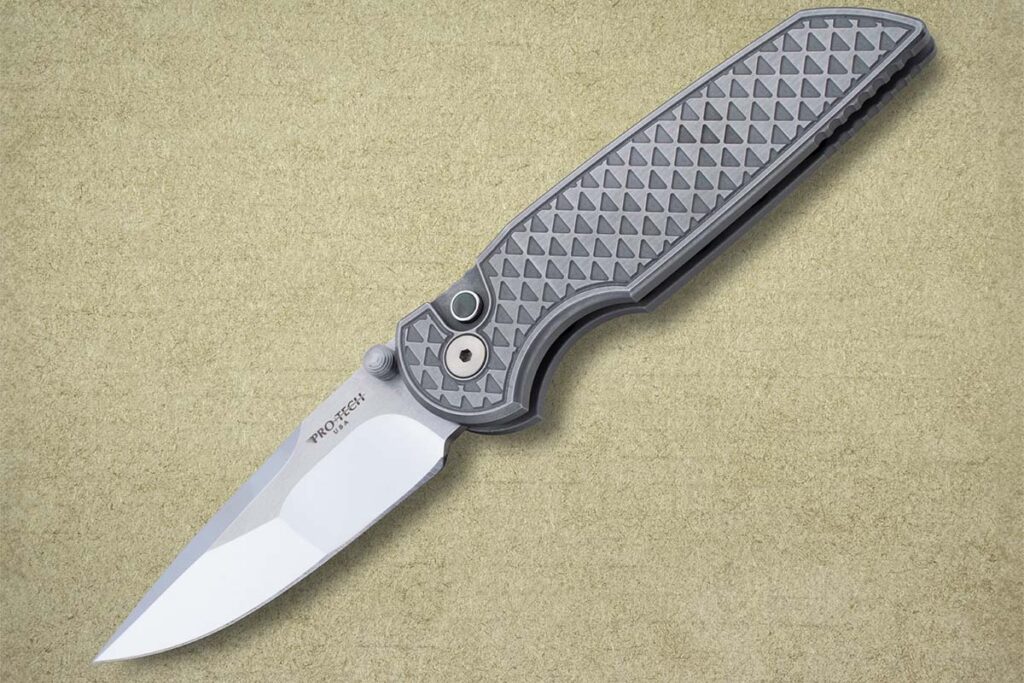
American-Made Folding Knife Of The Year®: Pro-Tech TR-3 Integrity Manual Flipper
Photo: Jocelyn Frasier
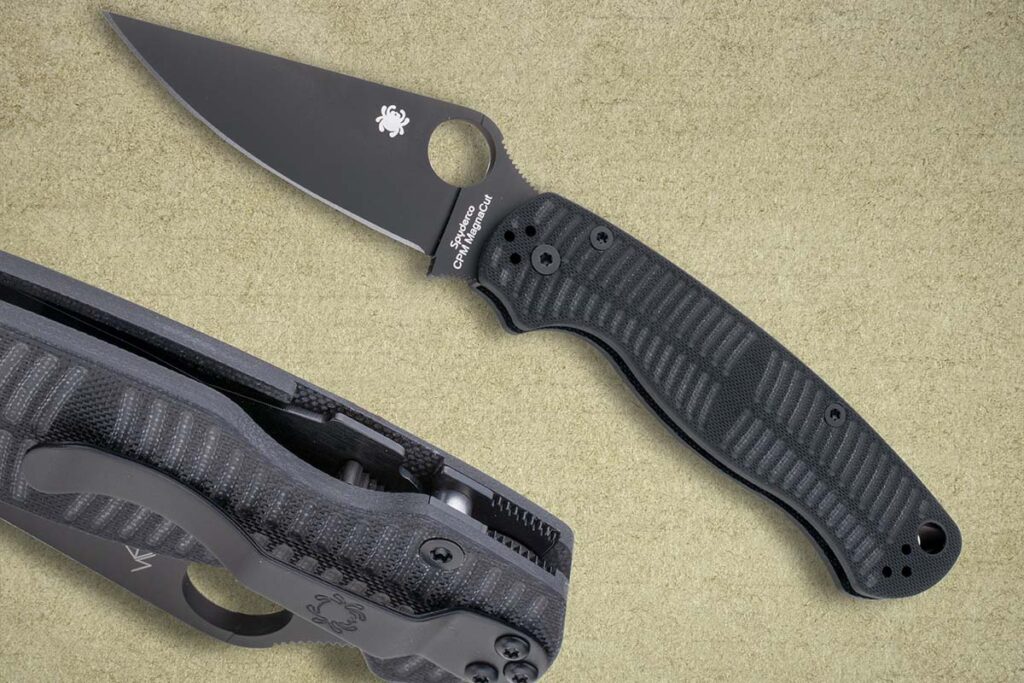
Most Innovative American Design: Spyderco Para Military 2 Salt
Photo: Jocelyn Frasier
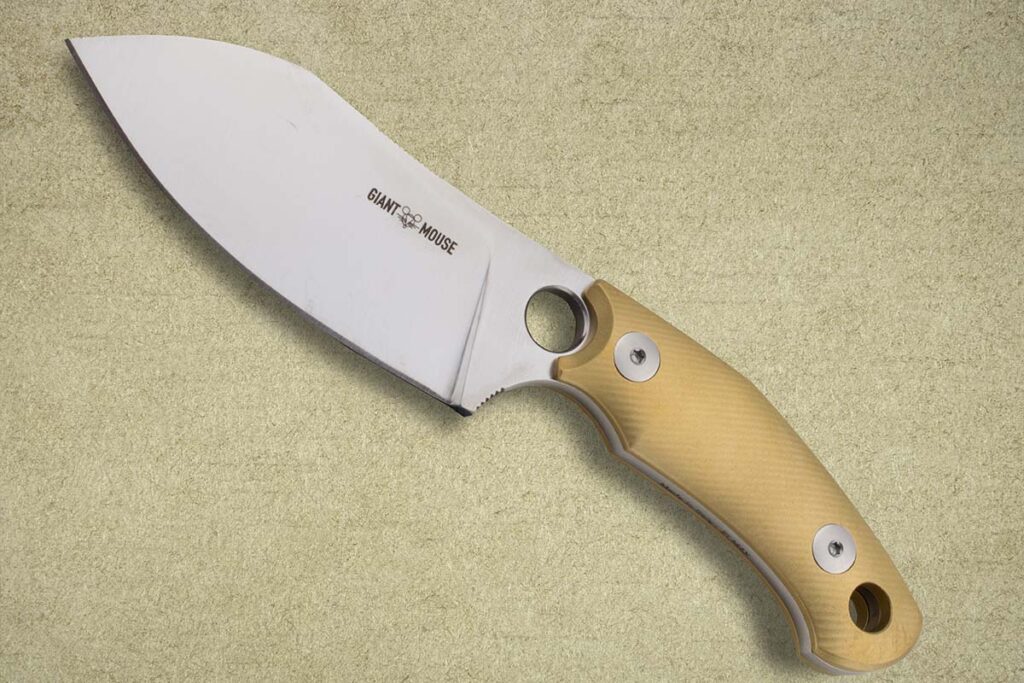
Imported Fixed Blade Of The Year®: Giant Mouse GMF1
Photo: Jocelyn Frasier
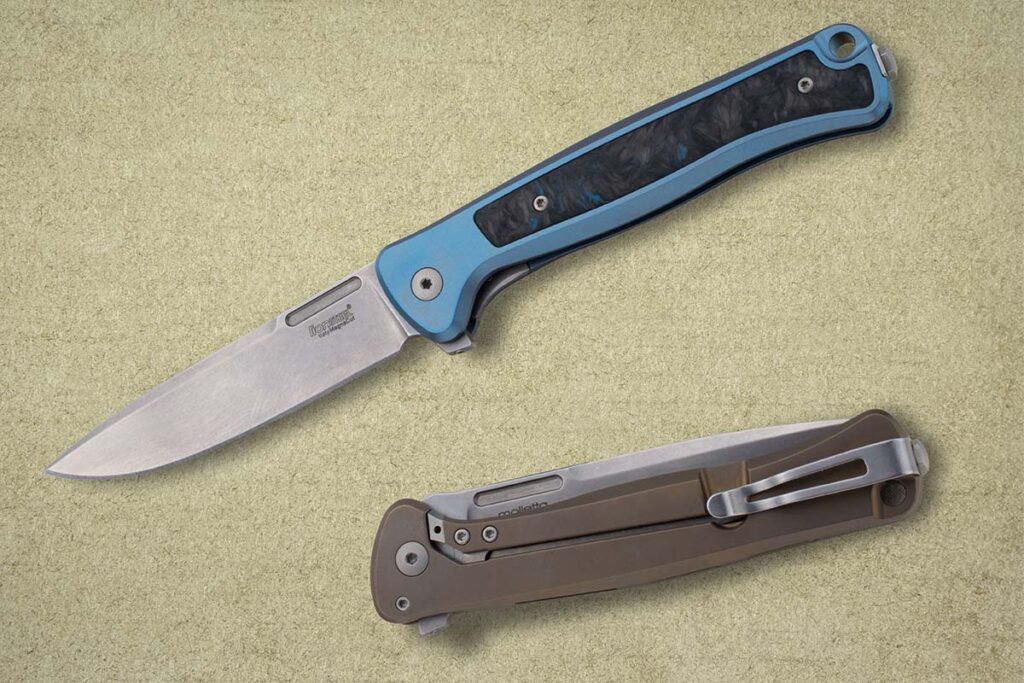
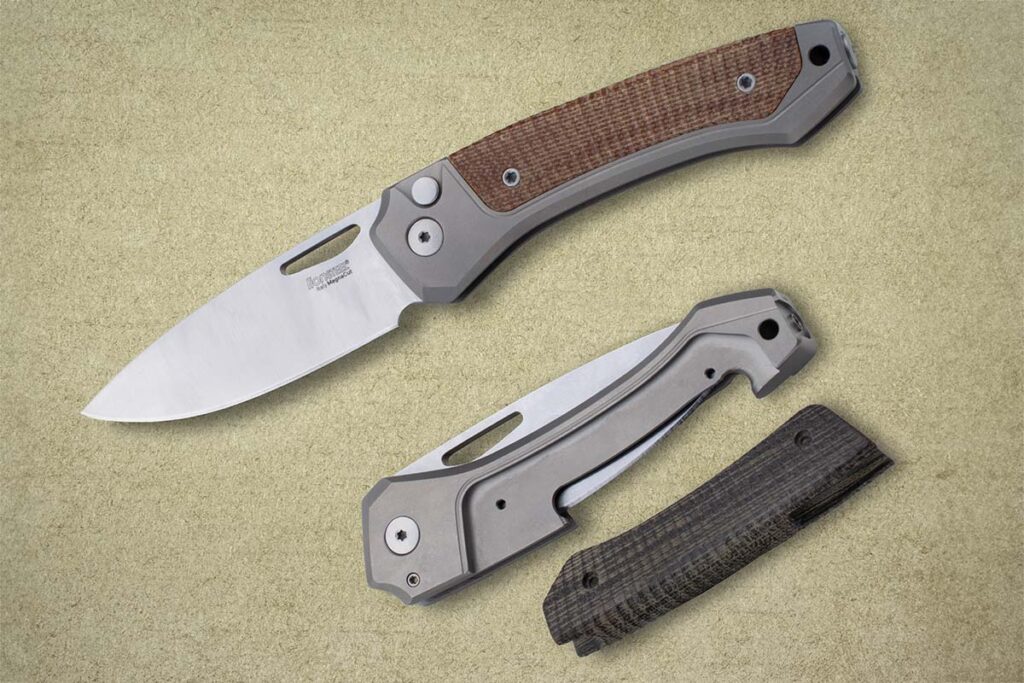
Imported Folding Knife Of The Year®: Lionsteel Skinny
Photo: Jocelyn Frasier
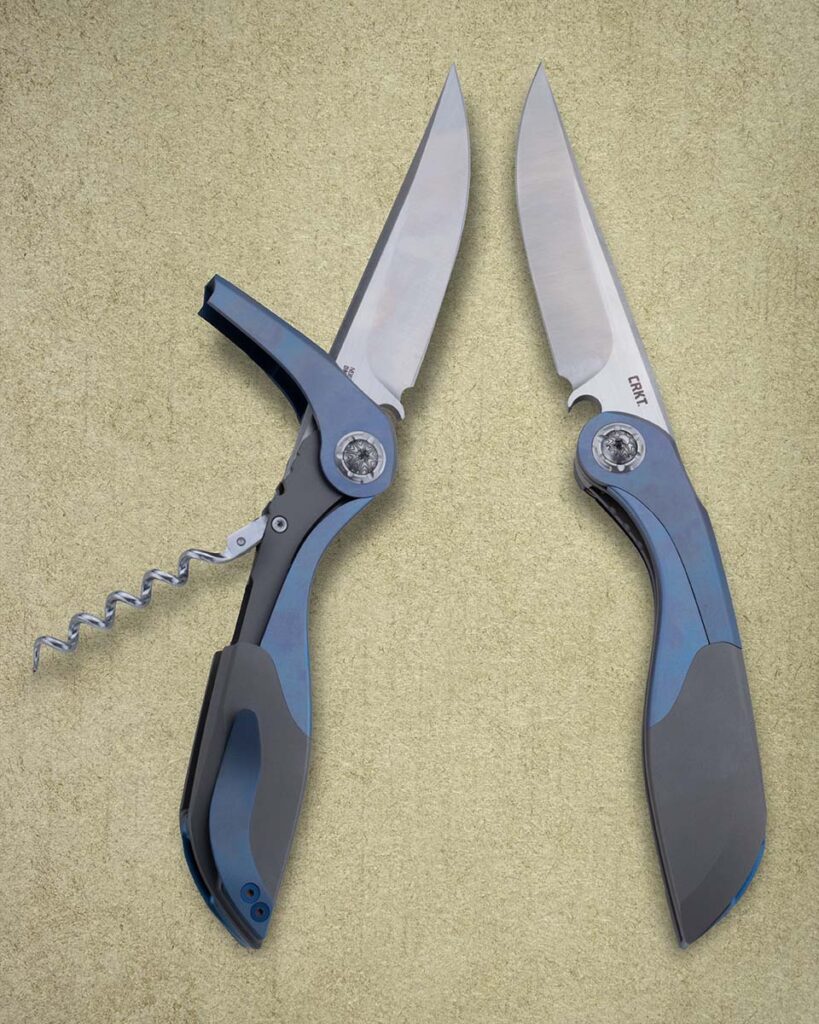
Most Innovative Imported Design: CRKT Fial
Photo: Jocelyn Frasier
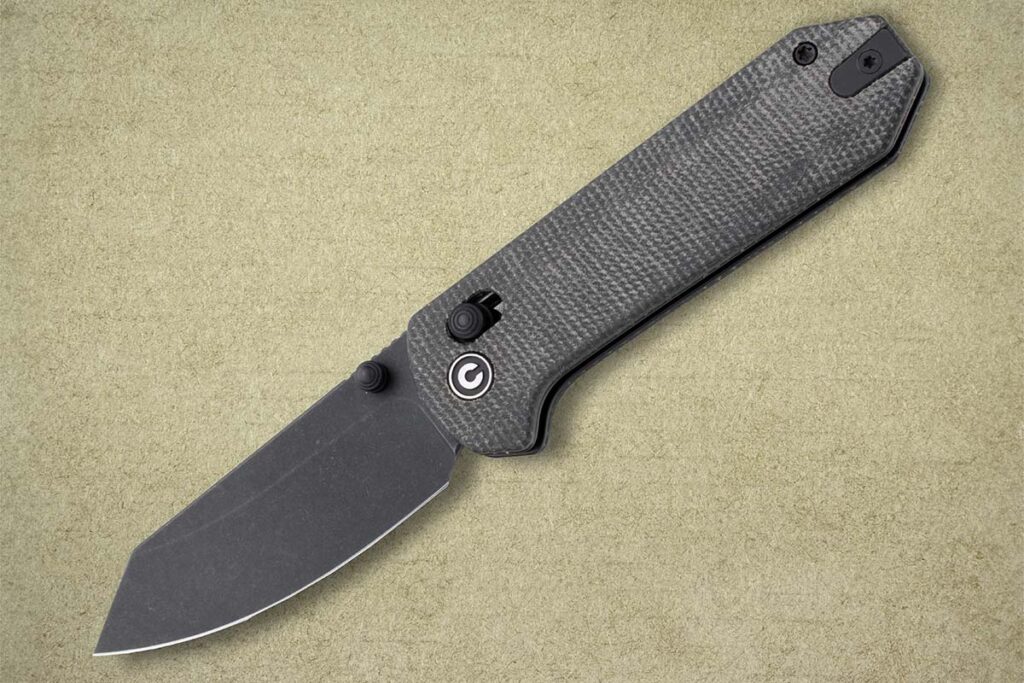
Best Buy Of The Year®: CIVIVI Yonder
Photo: Jocelyn Frasier
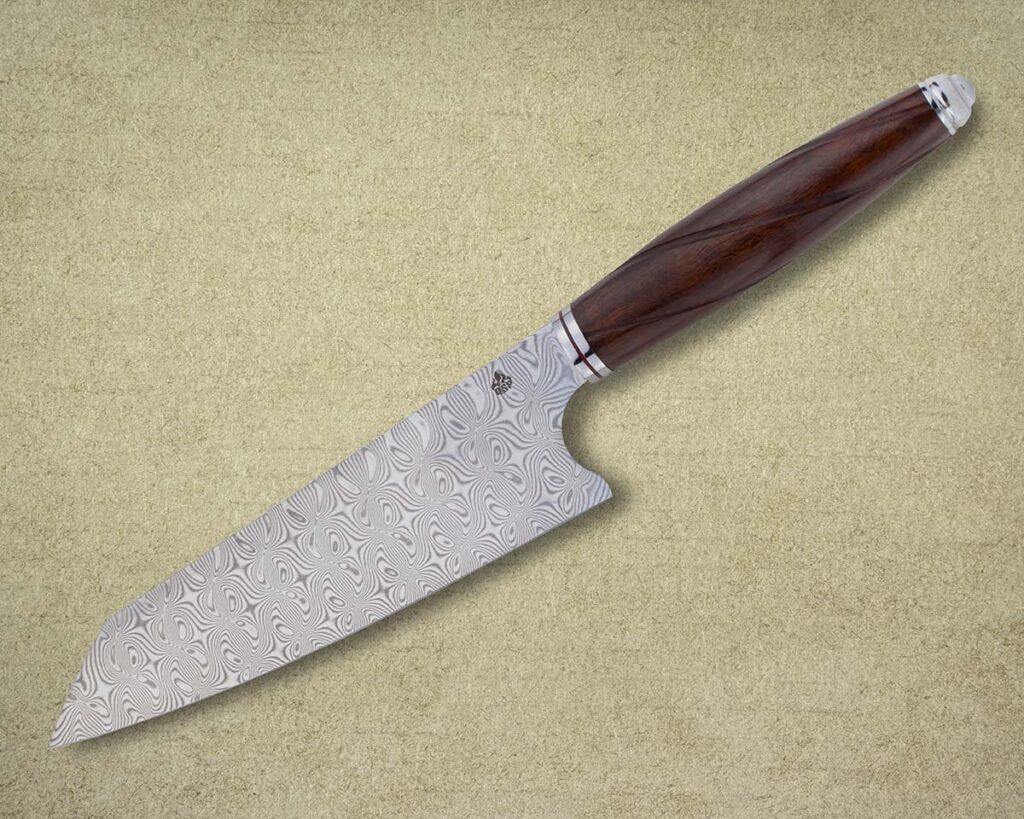
Kitchen Knife Of The Year®: QSP Kiritsuke
Photo: Jocelyn Frasier
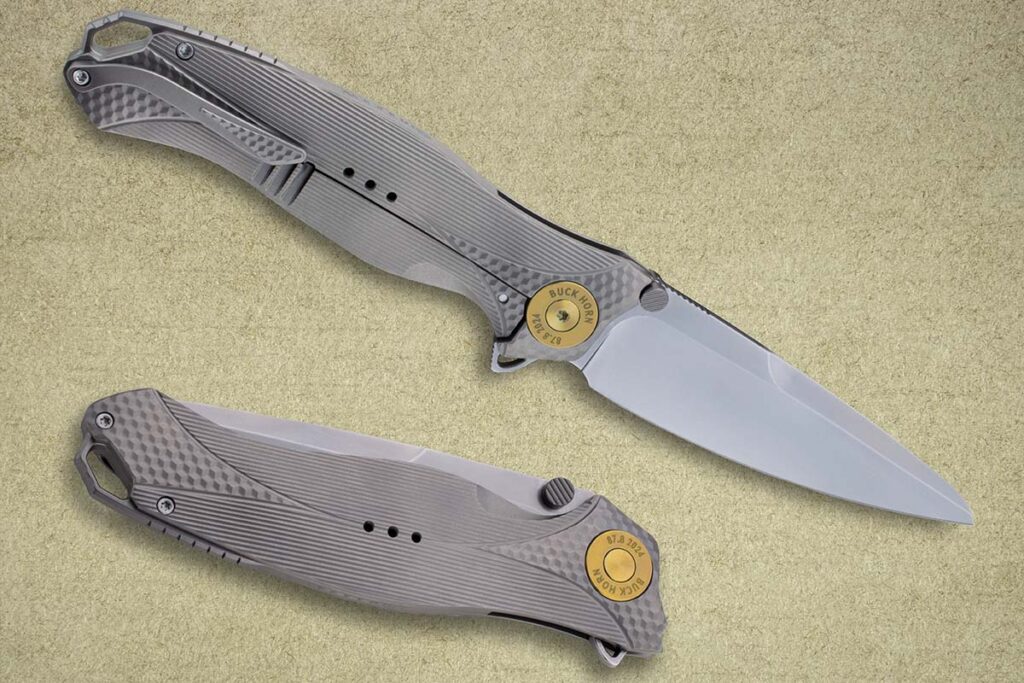
Knife Collaboration Of The Year: Ketuo-Ken Onion Buck Horn
Photo: Jocelyn Frasier
Manufacturing Quality Award: Lionsteel
Photo: Jocelyn Frasier
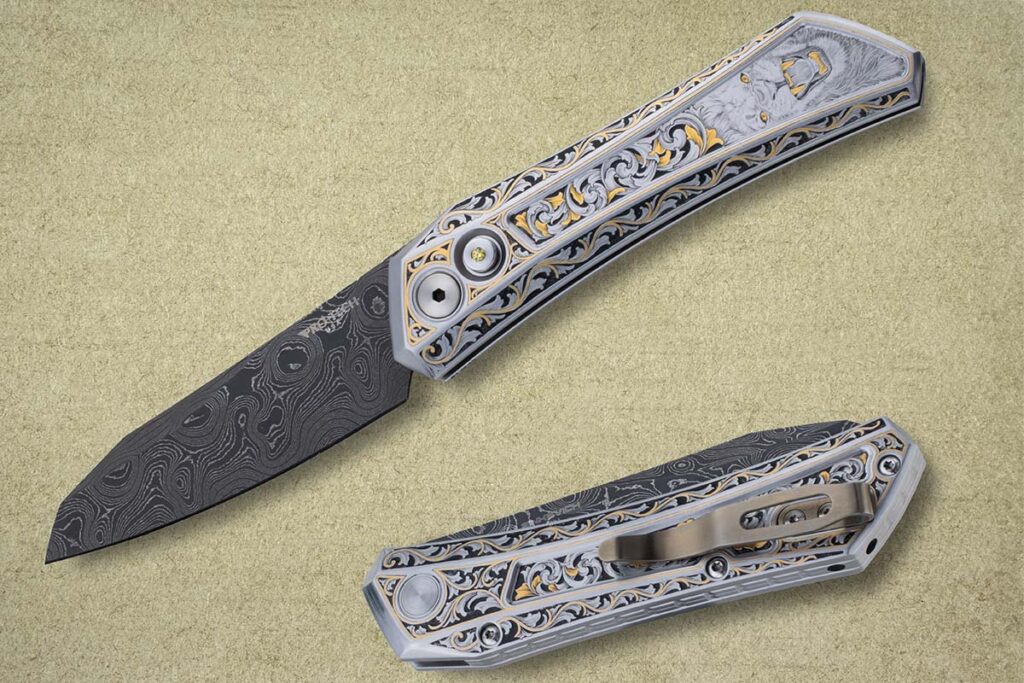
Investor/Collector Knife Of The Year®: Pro-Tech Ultimate Custom
Photo: Jocelyn Frasier
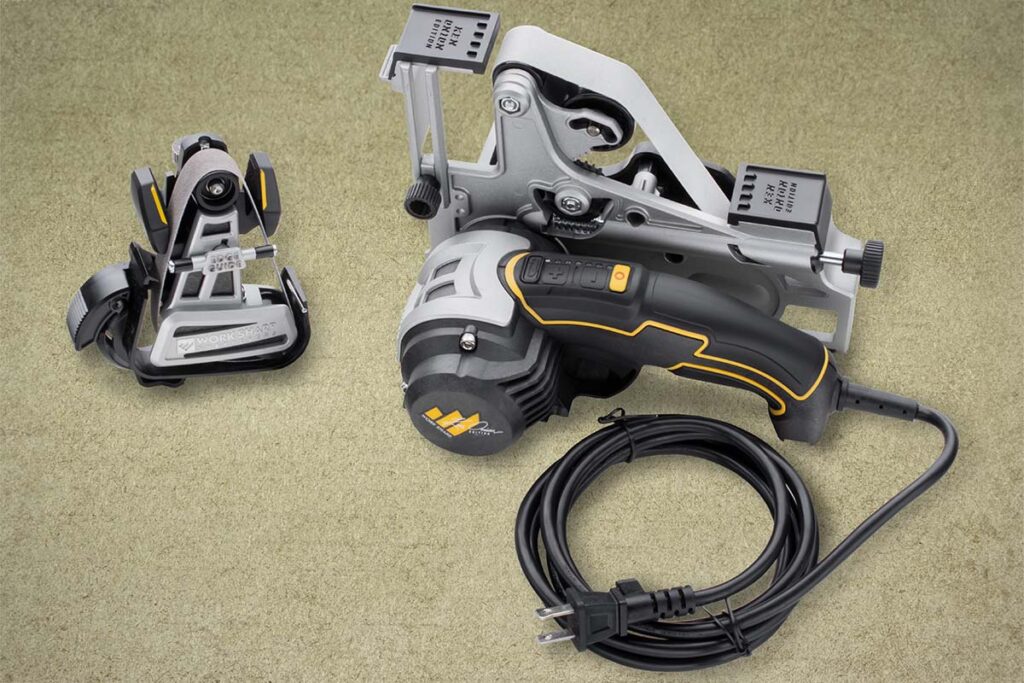
Knife Accessory Of The Year
Photo: Jocelyn Frasier
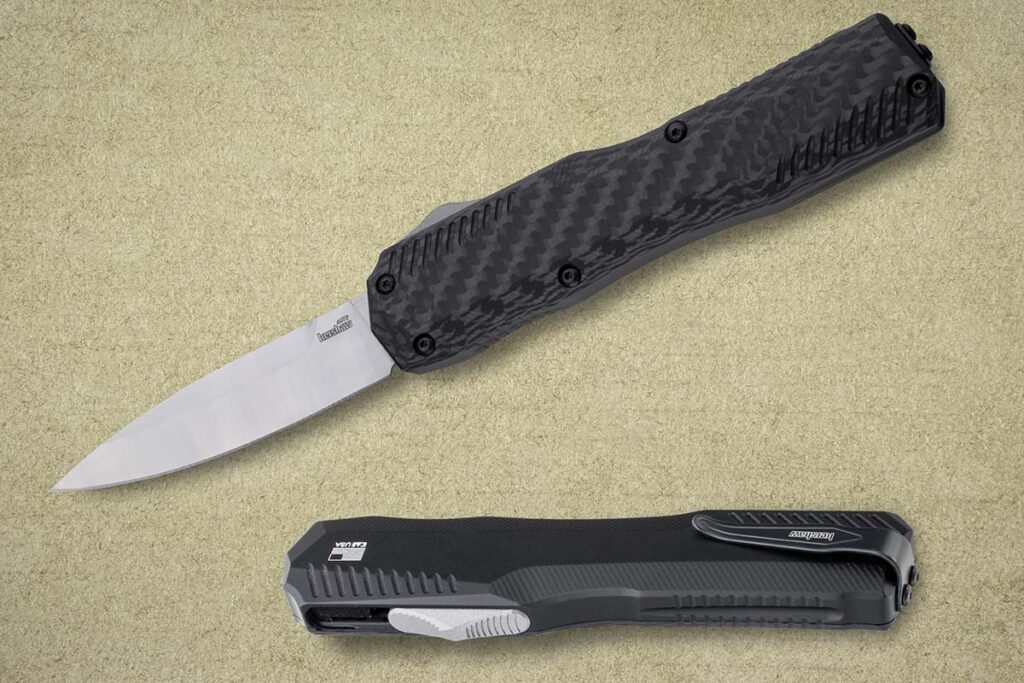
PVK Automatic Knife Of The Year: Kershaw Livewire
Photo: Jocelyn Frasier
See Past 2023 Factory Knife Of The Year® Awards Winners:
Josh Blount reproduces Chingachgook’s gunstock war club.
ABS apprentice smith Josh Blount recently rewatched the 1992 version of The Last of the Mohicans, and the gunstock war club of the character of Chingachgook in the film inspired him to make his own stunning version.
Josh patterned his reproduction after the movie piece* but with his own spin, including a low-layer-twist damascus blade and curly maple stock decorated with silver wire inlay in assorted mountain images: a daytime scene with hawks circling the sun, a nighthawk nighttime scene amid moon and stars, etc. “My background is wildlife biology, so I live birds and chasing wildlife,” he noted. “So, I put a little bit of that in there.”
Josh and son Elliott appear here (inset) after beginning to forge a Scottish dirk for Elliott’s 10th birthday.
Josh’s mentors include the late Ron Claiborne and Larry Harley, and, of course, ABS master smith Daniel Winkler, who made some of the knives and tomahawks for Mohicans (February 1993 BLADE®). In fact, Josh visited the Winkler shop just over 20 years ago. Josh was bladesmithing then too, but life happened and he went to college. Now he’s back to hammering hot steel in Franklin, West Virginia, and hopes to test for ABS journeyman smith in the near future.
Gunstock War Club Specs Maker: Josh Blount Blade length: 6.5” Blade material: 80CrV2 carbon and 15N20 nickel-alloy steels Handle/stock: Curly maple from Dunlap Woodcraft, w/pewter pins and deerskin wrap from Crazy Crow Trading Post Overall length: 40” Maker’s price for a similar piece: $800
*The gunstock war club in The Last of the Mohicans was made by the movie’s prop department.
The gun maintenance equipment company tackles knives.
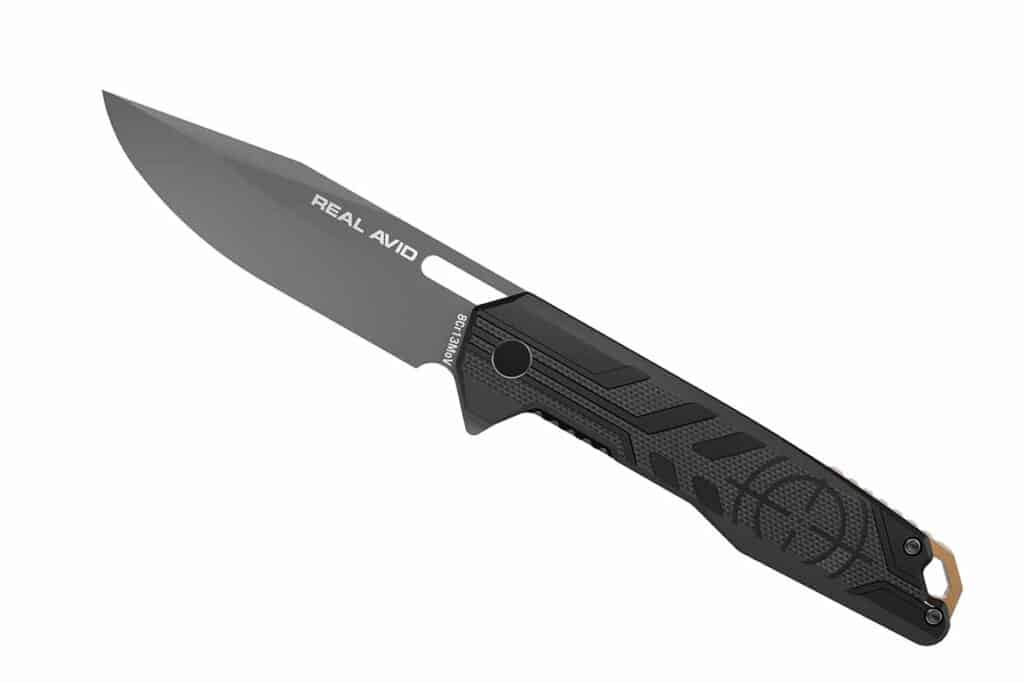
Any of you who tinker around with guns should be familiar with the name Real Avid. The company offers up some fairly innovative gun maintenance gear at a pretty decent price. But now the Minnesota concern is dipping its toe into the knife world with the release of what it calls its RAV series.
In all, the line folders comprise seven knives—all of them well falling into the budget end of the market. The offerings range from $29.99 to $49.99, making them ready for rough use and if need be worry-free replacement if your chores prove too taxing. Nearly across the board Real Avid 8Cr13MoV for the blade steel, except for the RAV-1—the most budget-conscious model—which has a 4cr14 blade. Overall, the steels sharpen well, but you’ll likely have to hone their edges plenty as retention in these stainless steels is marginal.
Real Avid RAV 7 with the bullseye pattern in it’s G-10 handle.
Almost every one of the RAVs has a drop or clip point of some style, except the 6, which stands as the lone tanto in the bunch. As for the handles, nylon, aluminum and stainless steel are pretty much the order of the day. However, the tonier RAV-7 does boast a G-10 handle with some nice texturing and a bullseye pattern in the middle. All of them are flippers, though a few models have been outfitted with thumbholes to offer multiple deployment options.
For the most part, these knives fit into Real Avid’s MO as a gun accessories company. Certainly, the blades aren’t going to knock the socks off your blade-aficionado friends. But for something to carry in a range bag, pry out stuck cartridges, unseal a can of ammo, or any other such thing, they’re right in line.
With BLADE Show 2024 just around the corner, many new knives are hitting the custom and factory markets. We scoured the former end—hitting all points of the compass along the way—to bring you some of the latest and greatest handmade gems. If you’re heading to Atlanta, be on the lookout for these and other great custom creations.
Camille Sennegon Fighter
Blade length: 8” Blade material: 80CrV2 carbon steel Blade grind: Flat, w/a small convex grind on the edge Blade finish: 800-grit satin Blade pattern: Harpoon w/recurve edge Handle: Ironwood Bolster: 304 stainless steel Overall length: 13” Maker’s price for a similar knife: $800 at press time rate of exchange Maker’s remark: “I made this knife based on a design drawn and given to me by my friend, ABS master smith Samuel Lurquin.” (Jocelyn Frasier image)
Francesco Piccinin Northern Style Utility
Blade length: 4” Blade steel: 14C28N stainless Blade grind: Flat Handle: White G-10 w/black G-10 frame and spacers w/hole for a lanyard Bolster: Ash burl Overall length: 9” Sheath: Leather w/belt loop and leather tiedown w/bead Maker’s price for a similar knife and sheath: $600 at press time rate of exchange (Jocelyn Frasier image)
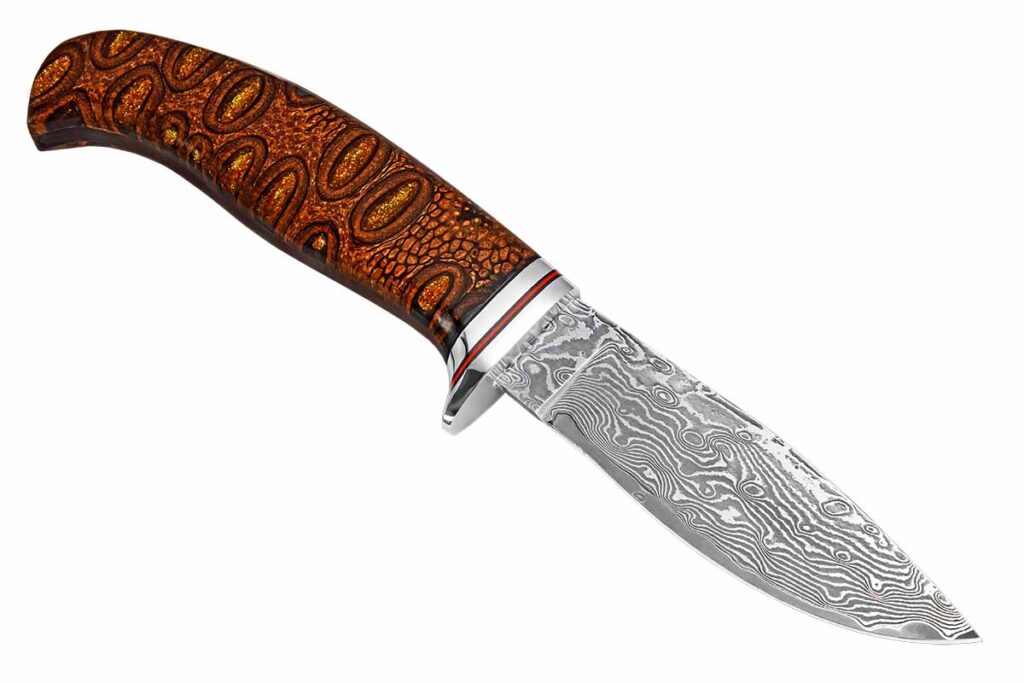
Steven Ramos Pisces
Knife pattern: Hunting/utility Blade length: 7” Blade steel: CPM 154 stainless Blade grind: Hollow Blade finish: Bead blast Handle: Micarta® w/G-10 liners Overall length: 10.625” Sheath: Kydex over aluminum frame; made by Steven Ramos Maker’s price for a similar knife and sheath: $825 (Jocelyn Frasier image)
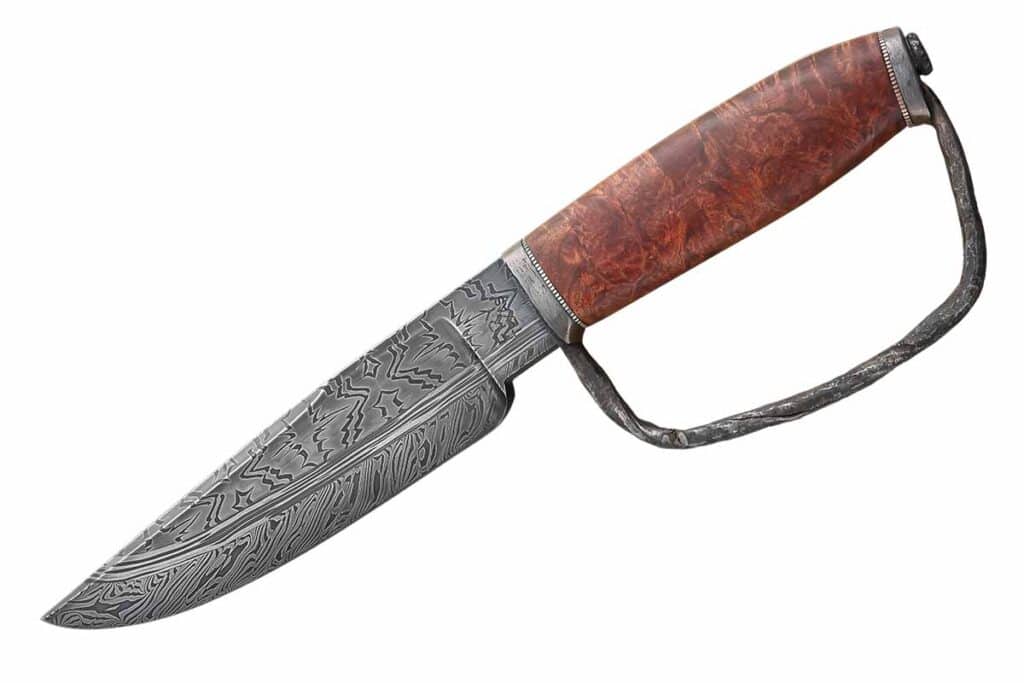
David Lisch Singing Crusader
Knife type: Fixed blade Blade length: 5.25” Blade material: Damascus of 1080 carbon and 15N20 nickel alloy steels Blade grind: Convex Construction: Damascus integral Handle: Forged pipe handle holds ball bearings that make the knife “sing” when shaken Knife to know: The bear head pommel is hand forged; the maker is an ABS master smith Overall length: 10.5” Maker’s price for a similar knife: $1,500, though this one being a one-of-a-kind, the pipe handle and carved pommel would be somewhat different, as would the damascus pattern davidlisch.com (Jocelyn Frasier image)
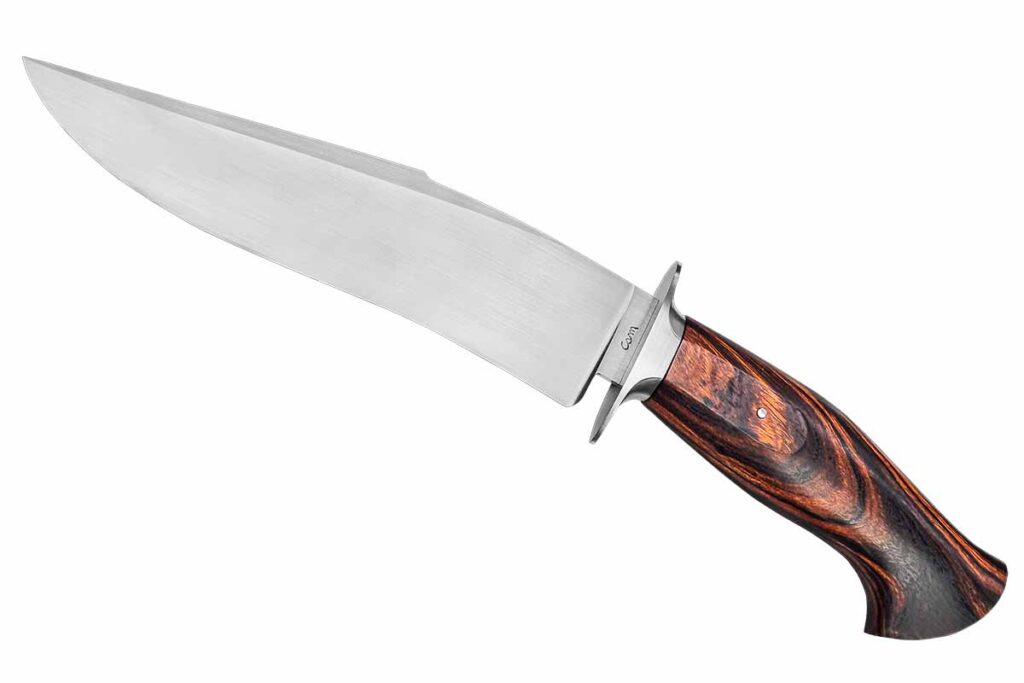
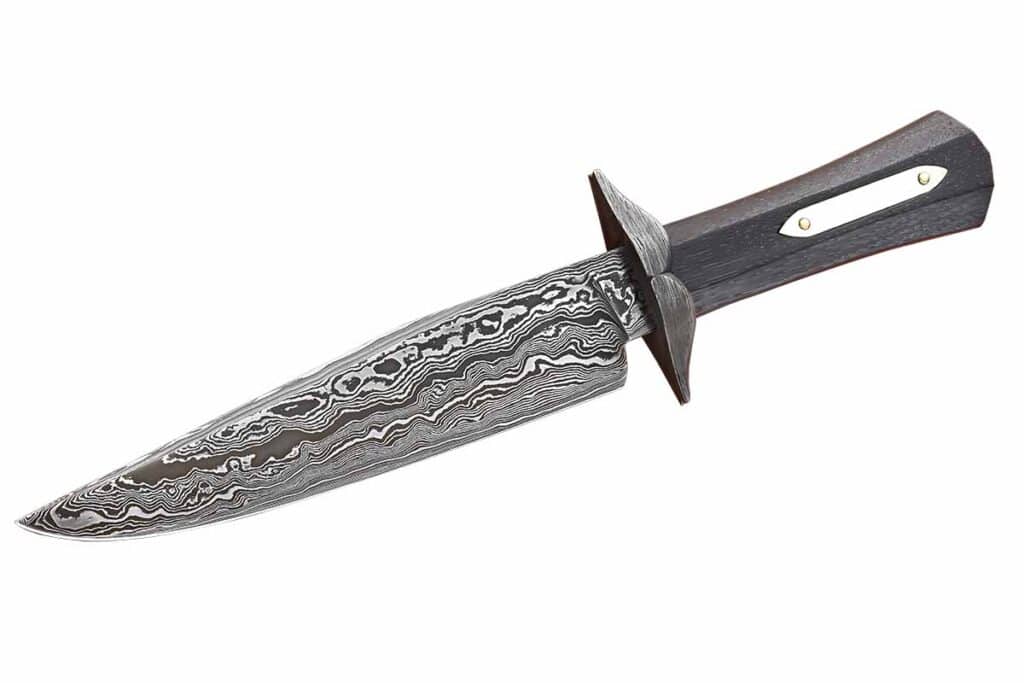
Jason Fry Border Bowie
Blade length: 8” Blade material: Explosion/twist/border-wall damascus D-guard/bolster: 1880s wrought iron artifacts Handle material: Mesquite Frame: 1848 and 2023 half dollars Overall length: 13” Knife to know: Border-wall stand included Maker’s price for a similar knife: $4,200 frycustomknives.com (SharpByCoop image)
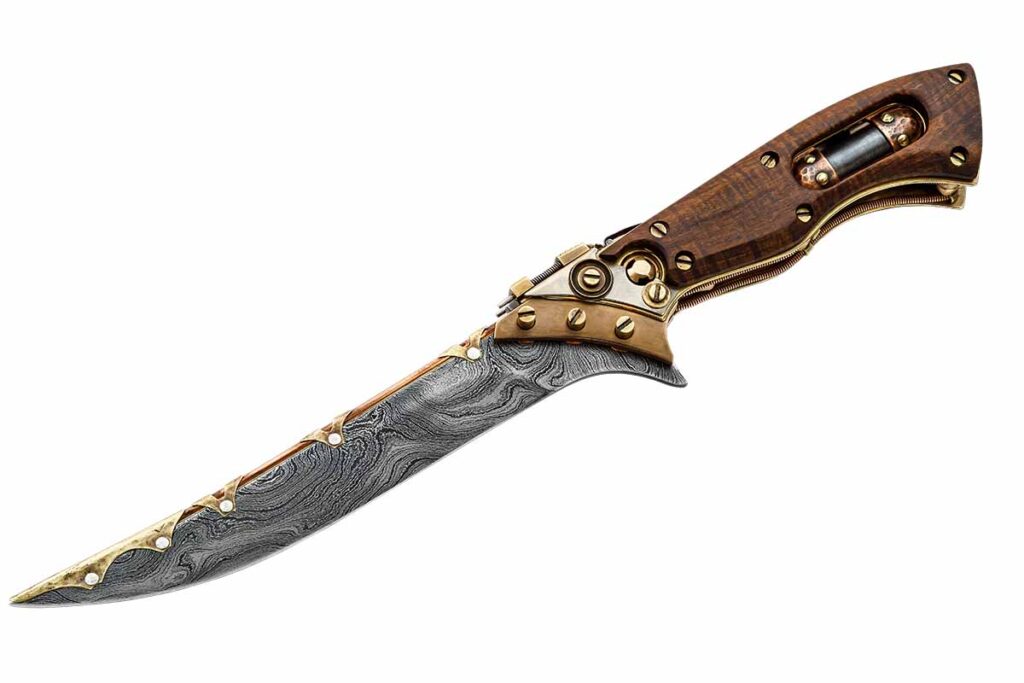
Blade length: 5.9” Blade material: Damascus of 1075 carbon and 15N20 nickel-alloy steels Blade grind: Flat Handle: Tasmanian blackwood Frame: Brass, copper, steel, clock parts, nickel silver Guard: Bronze Knife to know: The knife includes parts from clocks, a piano, cordless drill, gas valves, cigarette lighter and a gas bottle; the maker is a member of the Australian Knifemakers Guild and is an ABS apprentice smith Overall length: 12.2” Maker’s price for a similar knife: $4,700 at press time rate of exchange (Rod Hoare image)
Gabriel Turner Fixed Blade
Blade length: 6.25” Blade material: Damascus of 1084 carbon and 15N20 nickel-alloy steels Blade grind: Full flat Guard: Cable damascus Handle material: Bog oak Overall length: 11.25” Maker’s price for a similar knife: $1,050 (SharpByCoop image)
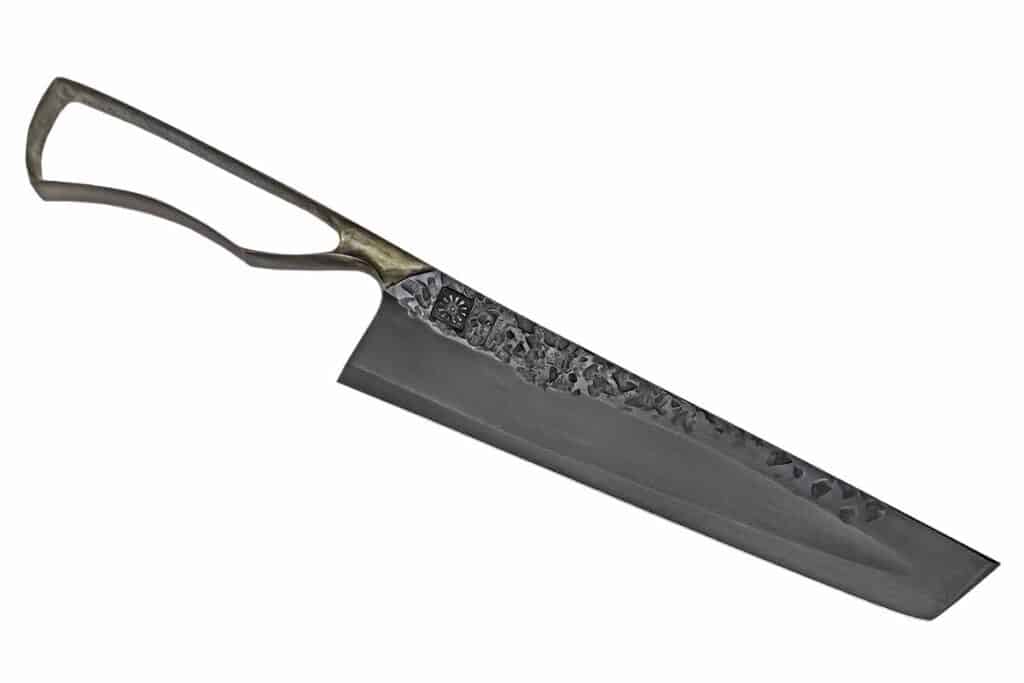
Julian Roche Nakiri Chef’s Knife
Blade length: 8.27” Blade material: 1084 carbon steel Blade grind: “S” grind Blade thickness @ ricasso: .196” Blade at widest: 1.77” Knife to know: Forged from one piece of 1084; rust-blue finish and brassed Overall length: 12.6” Maker’s price for a similar knife: $450-$475 at press time rate of exchange (Rod Hoare image)
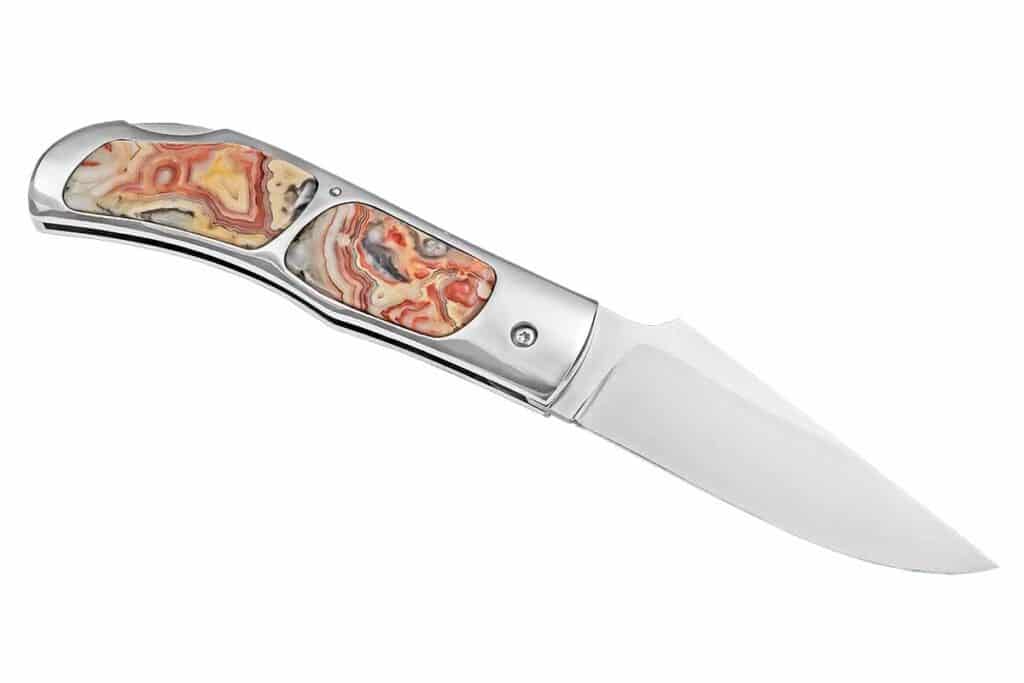
Jeremy Wheaton Leon
Knife type: Lockback folder Blade length: 3.19” Blade steel: CPM 154 stainless Blade thickness @ ricasso: .12” Blade @widest: 1.2” Blade grind: Flat Handle: Crazy lace agate seed inlays; a local miner sourced the agate Frame: 410 stainless steel Closed length: 5.27” Maker’s price for a similar knife: $445 at press time rate of exchange Maker’s remark: “The photo is a testament to Rod Hoare, who has worked very hard to bring his work up to an international standard. All of us Australian knifemakers are very grateful that we now have an artist of his caliber servicing our industry.” wheatonartsandcrafts.com (Rod Hoare image)
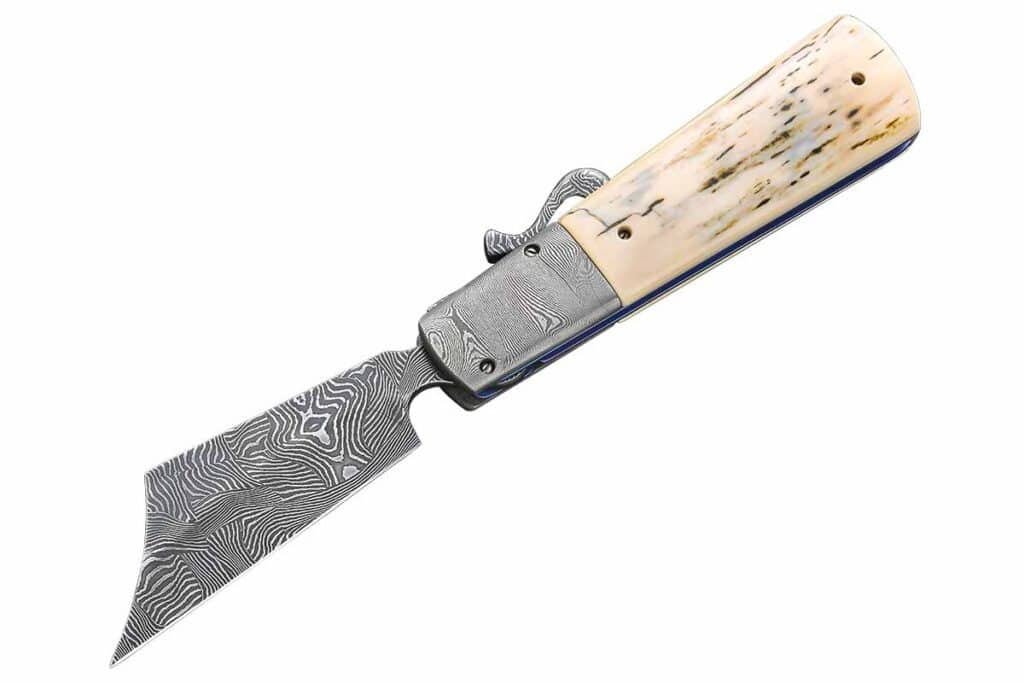
Mike Tyre Beavertail
Knife type: Double-action automatic/manual folder Blade length: 3.5” Blade material: Damascus of O1 and L6 tool steels Blade grind: Flat Blade pattern: Wharncliffe Blade opener: Thumb stud Handle: Gold-lip mother-of-pearl Frame: Titanium Lock: Linerlock Closed length: 4.5” Knife to know: Engraving w/gold inlay by Joe Mason; heat-colored filework Maker’s price for a similar knife: $4,200 miketyrecustomknives.com (SharpByCoop image)
Companies from every corner of the globe will unveil their new knives at the BLADE Show.
Knife companies know how their bread is buttered—by blue-collar and other like-minded knife enthusiasts who buy factory knives by the wagonload. And there’s no better place to tap that wealth of grassroots knife enthusiasts than the BLADE Show.
More companies from more countries than ever before will introduce their latest cutters in Atlanta’s Cobb Galleria Centre June 7-9. Scrutinize this and the following pages for just one knife each applicable company will debut. There will be many more, including those of exhibiting companies that were unable to participate in the story for one reason or another.
All the featured knives are either available for sale now or will be in June.
W.R. Case & Sons Ruple Axe Handle
Designer: BLADE Magazine Cutlery Hall-Of-Fame® member Bill Ruple Knife type: Folder Blade length: 3.5” Blade steel: 154CM stainless Blade grind: Flat taper Handle material: Natural birdseye maple Lock: Lockback Special features: Axe-handle-shaped handle Weight: 4.2 ozs. Closed length: 4.4” Carry: Taco-shaped suede leather pouch a la the ones that came with past Case/Tony Bose collaborations Knife to know: The knife marks the first of what promises to a series of collaborations between Case and Ruple as Bill officially succeeds the late Cutlery Hall-Of-Famer Tony Bose as Case’s go-to custom knifemaker designer Country of origin: USA MSRP: To be determined
Halfbreed Blades CQC-02S
Designers: Halfbreed in collaboration w/Jared Wihongi Description: Karambit Knife type: Fixed blade Blade length: 3.54” Blade material: K340 carbon steel Rockwell hardness: 59-60 HRC Edge: Polished, partially serrated Blade finish: PVD coated black Blade pattern: Talon point Blade @ thickest: .23” Handle material: G-10 Knife weight: 7.65 ozs. Overall length: 7.48” Sheath: Molded Kydex Mounting: IWB and belt (DOTS design) Color options: Black, dark earth, Ranger green Country of origin: Comprises Australian and Taiwanese make MSRP: $220
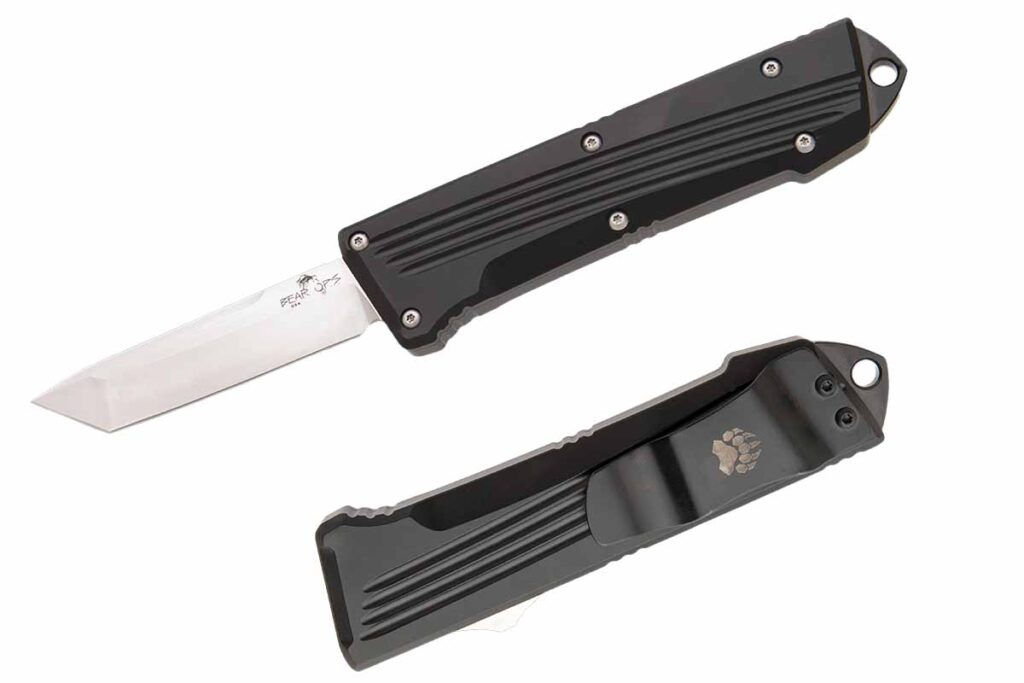
Bear OPS 4.5” Double Clutch IV
Knife type: EDC Blade length: 2.5” Blade material: D2 tool steel Blade grind: Taper Handle material: Aircraft aluminum w/grip ridges, hole for a lanyard Opening mechanism: Automatic Pocket clip: Robust steel model Weight: 3.3 ozs. Closed length: 4.5” Country of origin: USA MSRP: $289.99
Kansept Link
Knife type: EDC Blade length: 3.55” Blade steel: CPM 20CV stainless Blade grind: Flat Handle material: Titanium+Gecko camo carbon fiber Lock: Framelock Pocket clip: Milled titanium Weight: 3.85 ozs. Closed length: 3.61” Country of origin: China MSRP: $284
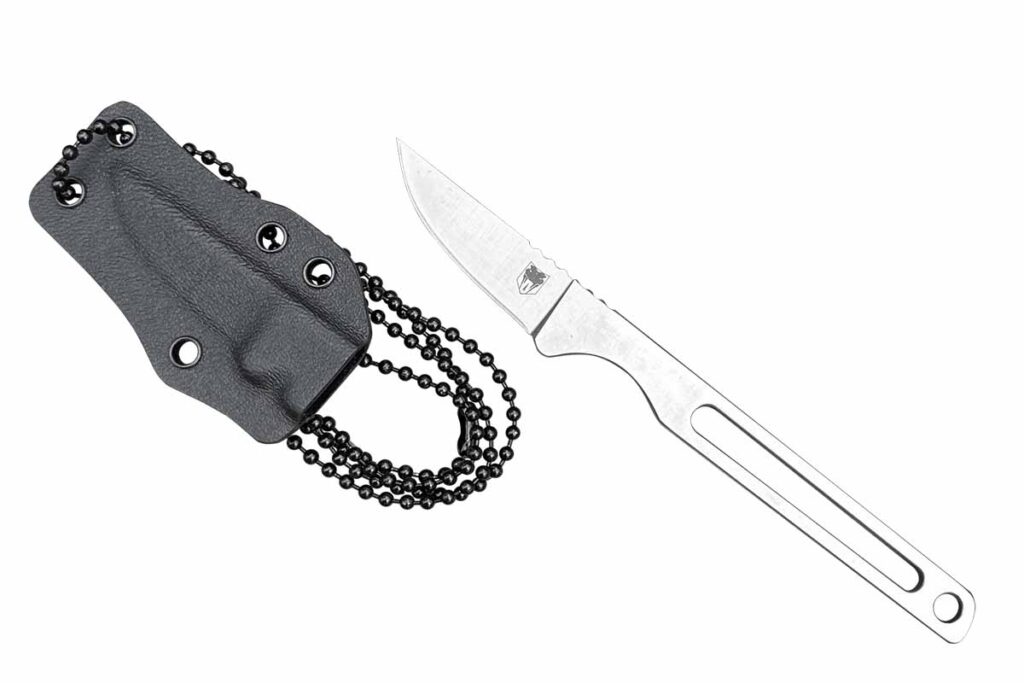
CobraTec Surgeon
Knife type: Necker Blade length: 1.75” Blade steel: M390 stainless Blade grind: Flat Handle material: M390 stainless Construction: Full tang Weight: 1.2 ozs. Sheath: Kydex w/necklace bead chain Country of origin: China MSRP: $99.99
A.G. Russell Knives
Knife type: EDC Designer: BLADE Magazine Cutlery Hall-of-Fame® member A.G. Russell Blade length: 3.25” Blade Material: D2 tool steel Rockwell Hardness: 60-61 HRC Blade grind: Flat saber Handle material: Green G-10 (also available in blue) Blade opener: Thumb stud Blade finish: Hand rubbed Lock: Cutlery Hall-of-Famer Blackie Collins-inspired design Pocket clip: Deep pocket, ambidextrous, blade tip up Weight: 3.7 ozs. Closed length: 4.25” Country of origin: China MSRP: $135
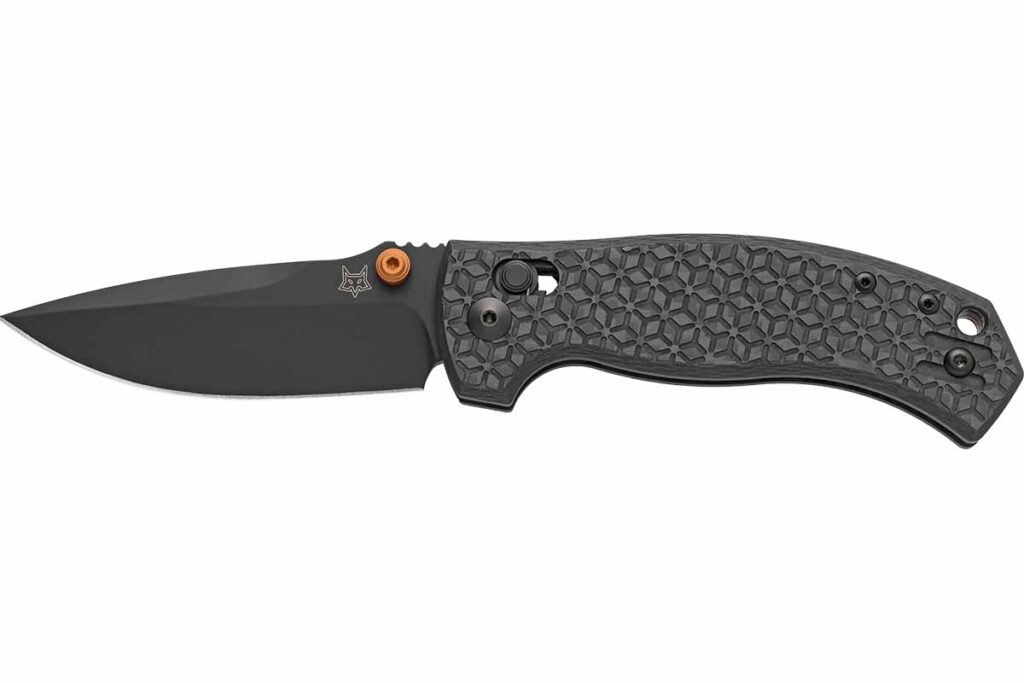
Fox Cutlery Anzu
Designer: Les George Knife type: EDC Blade length: 3.15” Blade steel: CPM MagnaCut stainless Blade finish: Black PVD Blade grind: Flat Handle material: 3K carbon fiber Lock: Verso Lock Pocket clip: Black PVD-coated 420 stainless steel, reversible Weight: 3.7 ozs. Closed length: 4.13” Country of origin: Italy MSRP: $225 at press-time exchange rate
Ocaso Duo Desk Knife
Model type: Desk knife Blade length: 2.75” Blade steel: 420J2 stainless Blade grind: Chisel Handle material: 420J2 Special features: Dual knives w/neodymium magnets Weight: 3 ozs. Overall length: 5.5” Knife to know: Includes walnut and stainless steel stand Country of origin: Taiwan MSRP: $149.99
Condor Tool & Knife Narrowsaur
Knife type: Survival Blade length: 4.2” Blade material: 1095 carbon steel Blade grind: Scandi Handle: Walnut Weight: 4.9 ozs. Overall length: 8.66” Sheath: Handcrafted leather Country of origin: El Salvador MSRP: $89.98
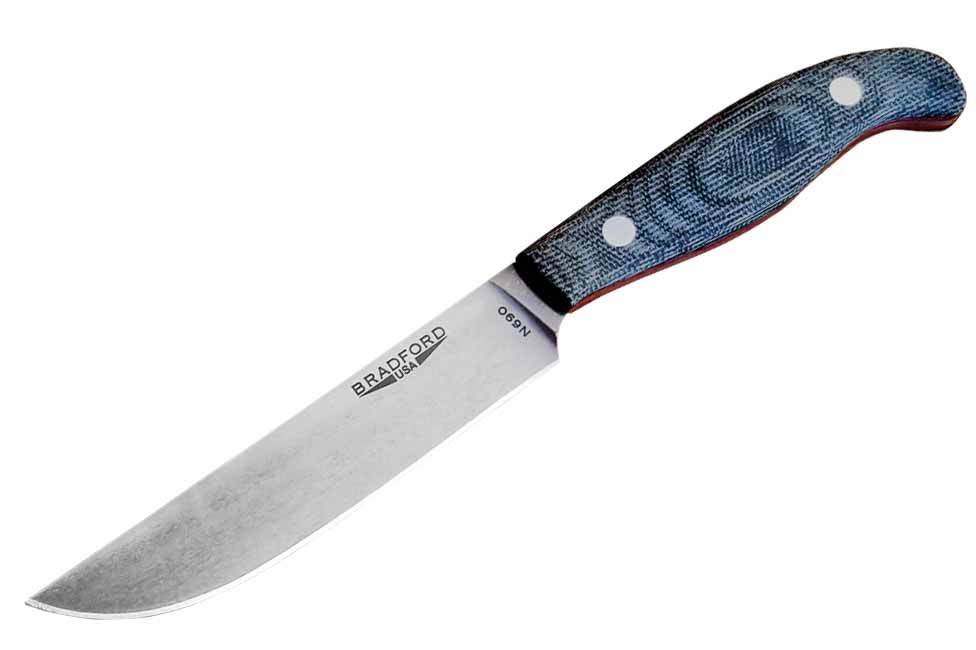
Bradford USA Gatsby Steak Knife
Knife type: Culinary Blade length: 4.5” Blade steel: N690 stainless Blade grind: Full-height flat Handle options: Maroon, wheat or ivory canvas Micarta®, and carbon fiber MAKER’S REMARK: As Nicole Bradford noted, “It makes your steak taste better!” Weight: 2.7 ozs. Overall length: 8.5” Sheath: 4-pack leather roll and/or individual Kydex Country of origin: USA Proud MSRP: $199 each
QSP Knife Turtle Punk
Designer: Keanu Alfaro Model type: Pocketknife Blade length: 3.5” Blade steel: Sandvik 14C28N stainless Blade grind: Flat Handle material: Black-and-white-pattern G-10 Lock: Linerlock Pivot: Ceramic ball bearings Pocket clip: Blade tip up, stainless steel, deep carry, ambidextrous Weight: 4.6 ozs. Closed length: 4.5” Overall length: 8” Country of origin: China MSRP: To be determined
Reate GTR
Knife type: EDC Blade length: 3.6” Blade steel: M390 stainless Blade finish: Hand satin Blade openers: Flipper tab, blade hole and thumb stud Blade pattern: Harpoon Handle: Titanium in a selection of finishes, color anodizations, Zircuti inlays and more Weight: 5.5 ozs. Closed length: 5” Country of origin: China MSRPs: $687 (w/Zircuti inlays) and $450 (titanium version)
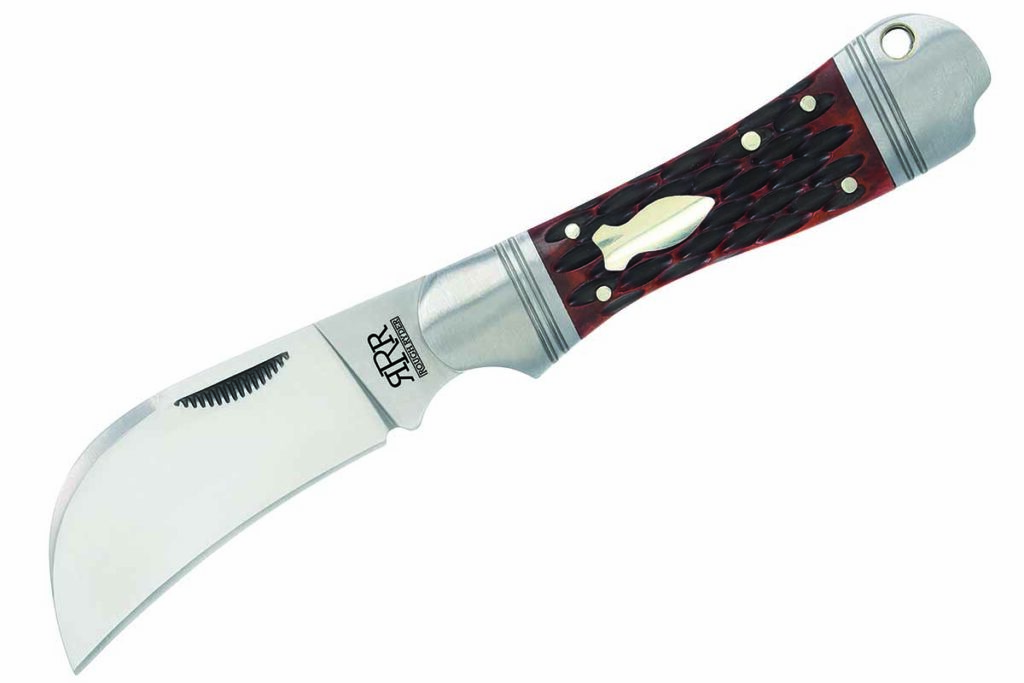
Smoky Mountain Knife Works Rough Ryder Reserve Hawkeye
Knife pattern: Gentleman’s hawkbill Designer: Brian Wilhoite Blade length: 25/8” Blade material: D2 tool steel Handle material: Brown jigged bone Action: Slipjoint w/half stop Weight: 3.2 ozs. Closed length: 3.5” Special features: Brass liners and lanyard tube, nickel silver bomb shield and pins Country of origin: China MSRP: $44.95
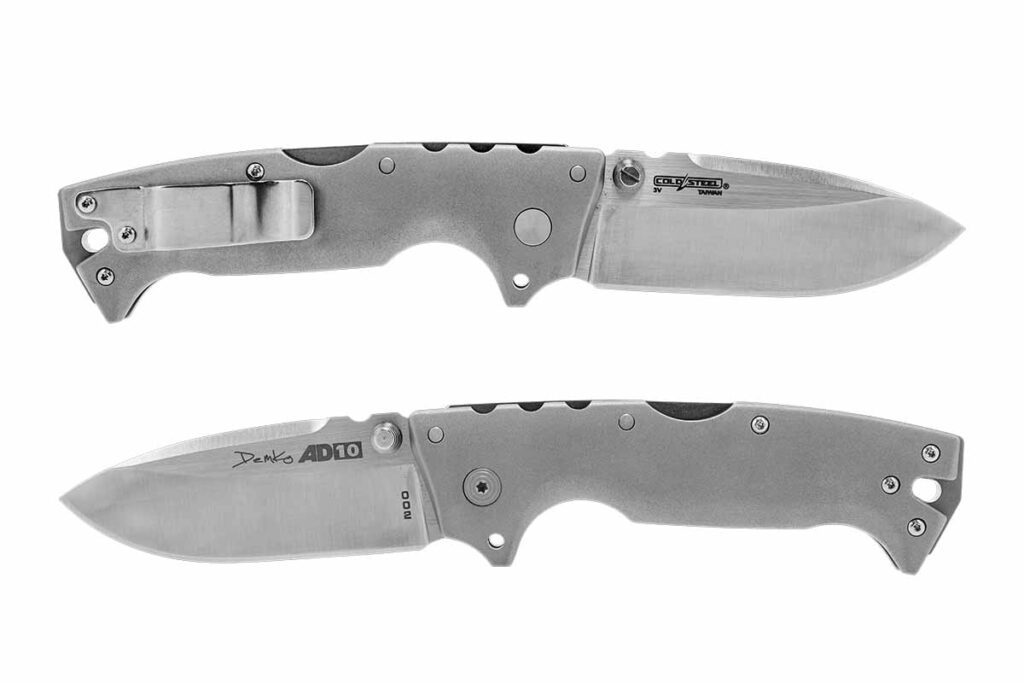
Designer: Andrew Demko Knife type: EDC Blade length: 3.5” Blade material: CPM 3V carbon steel Blade pattern: Drop point Handle material: Titanium Lock: Tri-Ad Pocket clip: Blade tip up Special features: Full titanium; limited run of 1,000; presentation box Weight: 9 ozs. Closed length: 5.25” Country of origin: Taiwan MSRP: $279.99
Spartan Blades Spartan-Harsey Clandestina
Designer: William W. “Bill” Harsey Jr. Knife type: Fixed blade, combat/utility Blade length: 5.5” Blade steel: CPM MagnaCut stainless Rockwell hardness: 61-63 HRC Blade grind: Flat/saber Blade @ thickest: 3/16” Handle material: CE canvas Micarta®, black or camo (shown) Weight: 7.6 ozs. Overall length: 10 3/16” Knife to know: Flat ground main bevel with tapered top edge Sheath: MOLLE and Kydex options Country of origin: USA MSRP: $360
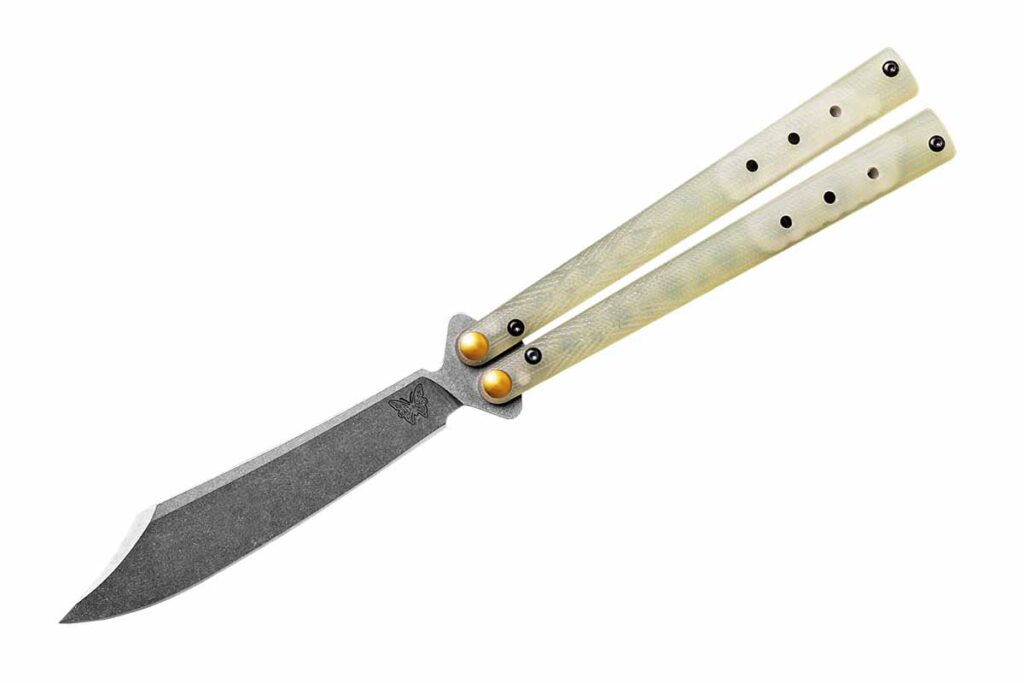
Benchmade 99 Necron
Knife type: Balisong Blade length: 4.59” Blade steel: CPM S30V stainless Blade grind: Scimitar Handle material: G-10 Lock: Latchless balisong Special features: Interchangeable backspacers and an interchangeable tungsten weight system beneath the G-10 scales tune the flipping dynamics; comes in ivory and ruby red (99BK-1) versions Weight: 4.21 ozs. Closed length: 5.08”; 5.92” w/extensions Carry: Nylon sleeve Country of origin: USA MSRPs: $500 ivory version, $550 ruby red version
WHAT: BLADE Show WHERE: Cobb Galleria Centre, Atlanta WHEN: June 7-9 DAYS and TIMES: Friday, 11 a.m.-6 p.m. (early bird ticket holders can enter at 10 a.m.) Saturday, 9 a.m.-6 p.m. Sunday, 9 a.m.-2 p.m.
Thirty-five countries—including an increase in international exhibitors from 118 to 152—will be among the almost 950 exhibitors total for the 43rd Annual BLADE Show June 7-9 at the Cobb Galleria Centre in Atlanta.
Sponsored by Smoky Mountain Knife Works, the BLADE Show is where more knives—custom, factory, antique, classic collectibles, etc.—are exhibited, bought and sold than at any other knife event. Exhibitors will bring their latest and greatest knives and examples of most every edged tool extant, accessories, knifemaking supplies and more. Sharpeners, knife collections, knife purveyors and other cutlery entities too numerous to mention will showcase their wares as the world knife community makes the yearly pilgrimage to Georgia.
Knives debuted by factory companies for the first time anywhere, the educational knife instruction of BLADE University (see sidebar), and a selection of informative, entertaining and action-packed free demos (see sidebar) are among the sharp goodies awaiting show patrons. The BLADE Magazine 2024 Knife-Of-The-Year® Awards, the custom knife judging competition and the knife collection display judging competition are others. The American Bladesmith Society (ABS) Knife Auction, formal inductions of the latest members of the BLADE Magazine Cutlery Hall Of Fame®, and some of the best knives the ABS and the Knifemakers’ Guild and unaffiliated makers in general have to offer are still others.
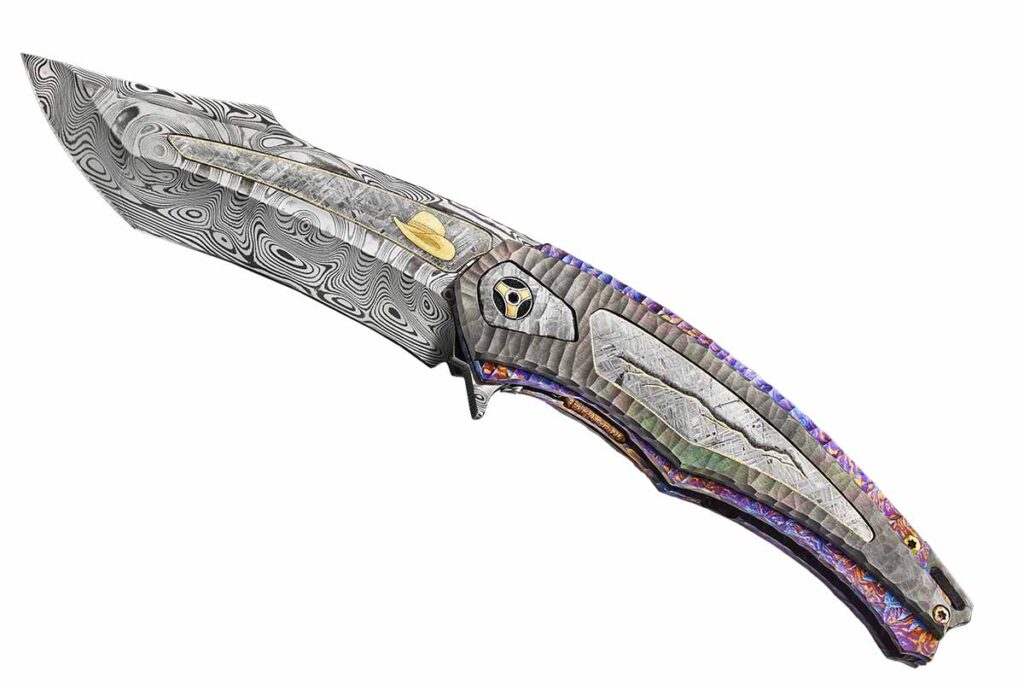
Italy’s Manuele Messori will be among the record-setting number of international exhibitors at BLADE Show ’24. An example of his edged wizardry is his folder in a blade of Damasteel Grossrosen damascus, an interframe handle of zirconium with Gibeon meteorite inlay, and 24k-gold engraving. (Francesco Pachi image)
And don’t forget The Pit, the after-hours meeting place in and around the sunken bar of the host hotel, the Renaissance Atlanta Waverly, where show patrons and exhibitors will party into the wee hours beginning the night before the show through the end of the weekend to compare knives, swap lies and otherwise celebrate the year’s most momentous cutlery weekend.
International Boom
As the world continues to recover from the travel, business and other bans spawned by the pandemic, the BLADE Show reflects that recovery in the boom in international exhibitors. In fact, that boom might even provide proof that the recovery is complete—at least as far as the BLADE Show is concerned. France leads the way among exhibitors from other countries with 21. South Africa is second with 18, Italy is third with 15 and Brazil is fourth with 13.
Some of the top names by country among the internationals are Bertie Rietveld, Theuns Prinsloo, Henning Wilkinson and Neels van den Berg (South Africa); Franco de Souza, Rodrigo Sfreddo, Fabio Barros and Gus Cecchini (Brazil); CAS Knives and Mauricio Daletzky (Argentina); Halfbreed Blades (Australia); WE Knife, Reate and Ketuo (China); Kiku Matsuda and Koji Hara (Japan); Lionsteel, Manuele Messori, Fox Cutlery and Maniago Knife Makers (Italy); Anders Hogstrom (Sweden); Helle Knives (Norway); Jean Louis Regel, Veronique Laurent and Samuel Lurquin (Belgium); and Grace Horne (United Kingdom).
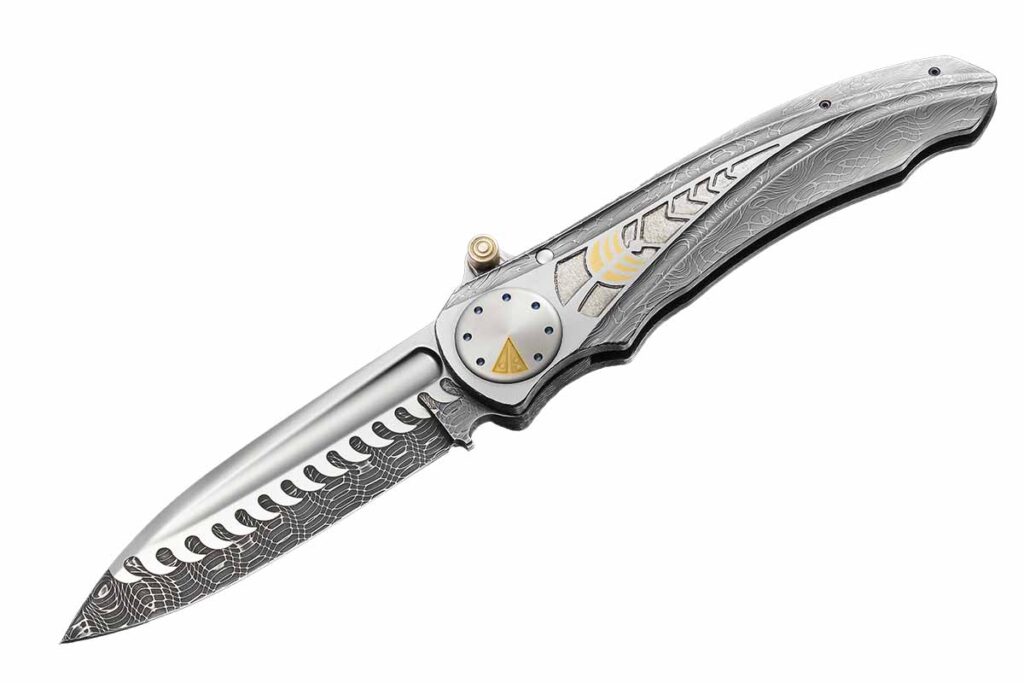
BLADE Magazine Cutlery Hall-Of-Fame® member Michael Walker will exhibit his world-renowned knives at a BLADE Show for the first time in quite a spell. His Platinum Zipper features Michael’s fourth-generation BLADElock system. (Francesco Pachi knife image)
Among some of the more recognizable American makers will be BLADE Magazine Cutlery Hall-Of-Fame® member Michael Walker, who will be exhibiting knives at a BLADE Show for the first time in recent memory. Others include Cutlery Hall-Of-Famers Bill Ruple and Steve Schwarzer; ABS master smiths Harvey Dean, Mike Quesenberry, Shane Taylor, David Lisch, Jordan LaMothe and Andrew Meers; slipjoint makers Tom Ploppert, Luke Swenson and Tim Robertson; Vladimir Kolenko; and Owen Wood (a native of South Africa, Owen now calls Texas home).
Blade University: Added Day
Avail yourself of the latest knifemaking techniques and other trending sharp subjects during the 11th Annual BLADE University on Thursday, Friday and Saturday. New for this year is a special Thursday class taught by award-winning knifemakers Tom Krein and Lucas Burnley the day before the show begins. See the sidebar for more on it.
Sponsored by Work Sharp Sharpeners, BLADE University has the most extensive schedule of knife, knifemaking and other instruction held at any knife show. For the full list of classes, see sidebar.
THURSDAY, JUNE 6 4 to 5 p.m. The Art of Selling at a BLADE Show, Room 104. Knifemakers Tom Krein and Lucas Burnley outline what makers who are serious about selling knives should do and how they should behave behind an exhibitor table during the BLADE Show.
FRIDAY, JUNE 7 8 to 9:30 a.m. Fundamentals of Grinding, The Courtyard. AmeriBrade and guest makers cover grinds, technique and different equipment. 10 to 11:30 a.m. How To Run a Small Successful Knifemaking Business, Room 103. ABS master smith Bob Kramer shares his 30 years of experience running a productive knifemaking operation. 10:30 to 11:30 a.m. Thermal Cycle Steel for High Performance, Room 104. Larrin Thomas examines how to heat treat steel after forging, normalizing and grain-refining cycles, thermal cycling stainless steels after forging and more. 1 to 2 p.m. Symmetrical Quillon Dagger 101, Room 107. ABS master smith Neels van den Berg discusses making a symmetrical quillon dagger, covering design, proportions, aesthetics, materials, fluting and finally the entire manufacturing process. 1:30 to 2:30 p.m. Intro to Power Forging, Room 103. Bring your forging questions to our group of expert panelists including Logan Gillihan, Will Stelter, Salem Straub and Charlie Ellis. 2 to 3 p.m. Metal and Wood Fitting Techniques for Keyhole Handles, Room 113. ABS journeyman smith Henning Wilkinson outlines the correct techniques for fitting metal and wood in the construction of the keyhole integral knife handle. 3:30 to 4:30 p.m. Hands on Sharpening, Room 113. Bring your knife or a borrowed one and learn the progression of shaping a bevel, sharpening and edge maintenance from the team at Work Sharp Sharpeners. 4:30 to 5:30 p.m. Originality: Experimentation, Innovation and Ingenuity, Room 107. Can creativity be learned? Lucas Cao, founder of Squid Industries, explores tools and techniques that anyone can apply to become more original.
SATURDAY, JUNE 8 8:30 to 9:30 a.m. Elevating Your Handle Appearance: Spine Filework, Handle Shapes and Pin Placement, Room 113. Knifemaker Kyle Daily shares how to enhance your knife with distinctive features that go far beyond standard production models. 9:30 to 11 a.m. Insert Welding, Room 104. ABS master smith Bob Kramer covers how to forge weld inserts with high precision and control to create realistic depictions of animals and patterns. 9:45 to 10:45 a.m. How to Make the Most Difficult Pocketknife, Room 107. Knifemaker Tim Robertson delineates what makes lockback whittlers so hard to make, with a major focus on backspring design and function. 11 a.m. to 12 p.m. The Process Is the Product, Room 113. Knifemaker/designer TJ Schwarz shares his insights on how to create a successful knife business, including the key point of understanding actually what it is that you’re selling. 2:15 to 3:15 p.m. Let the Pros Critique Your Knife, Room 114. ABS master smiths Bob Kramer and James Rodebaugh and leading makers David Carver, Enrique Pena and Luke Swenson examine your knife and tell you what’s good about it, what’s not and how to make it better. 2:15 to 3:15 p.m. Hands on Sharpening, Room 113. Bring your knife or a borrowed one and learn the progression of shaping a bevel, sharpening and edge maintenance from the team at Work Sharp Sharpeners. 2:30 to 3:30 p.m. Making Scissors in a Knife Workshop, Room 107. Grace Horne examines the early history of scissors, methods of producing the blanks, inside information on the twist and the curve, and her method of scissors making that requires no specialist tools or equipment. 4 to 5 p.m. Pattern Welding Panel, Room 104. Salem Straub, Mareko Maumasi, Charlie Ellis, Josh Prince and Will Stelter explain the steps that went into creating their wild mosaic damascus billet collaboration, Consortium.
Knives Of The Year
The BLADE Magazine 2024 Knife-Of-The-Year® Awards will be announced and presented during the BLADE Magazine Awards ceremony Saturday at 8 p.m. by The Pit of the Atlanta Renaissance Waverly Hotel lobby.
The entries are limited to BLADE Show factory booth exhibitors, and will be on display show Friday and Saturday under glass in a special locked cabinet in the lobby. The winners will be announced on BLADE’s blademag.com website after the awards presentation, and a list will be posted outside the show entrance Sunday morning.
Custom Knife Awards
Leading industry authorities will pick the best custom knives by BLADE Show exhibitors in the annual knife judging competition, with the winners announced during the BLADE Magazine Awards ceremony Saturday at 8 p.m. in The Pit.
Neels van den Berg won the 2022 B. R. Hughes Award for the best knife submitted by a master smith applicant for his European quillon dagger. Join him for his BLADE University class, Symmetrical Quillon Dagger 101. (Eric Eggly/PointSeven image)
The categories are: Hugh Bartrug Best Of Show; Best Fixed Blade; Best Damascus; Best Kitchen Knife; Yvon Vachon Best Miniature; Best Art Knife; Best Fighter; Best Bowie; Best Handle Design; Best Tactical Folder; Best M.A.C.K. (Machine Assisted Custom Knife); Best Utility Hunter; Best Folder; Most Innovative Design; Best Knife Collaboration; Best Sword; Best New Maker; and Best Of The Rest.
The competition is open to the show’s custom knife exhibitors only. The winners will be announced on BLADE’s blademag.com website after the awards ceremony, and a list will be posted outside the show entrance Sunday morning.
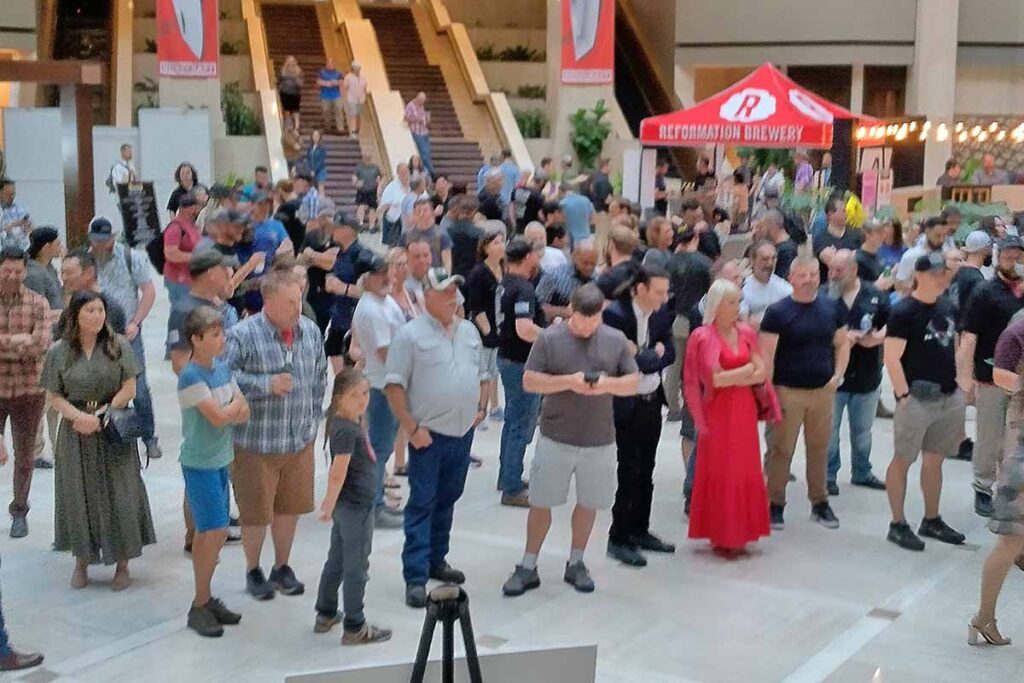
World Cutting Titles
The BLADE Show World Championship Cutting Competitions will be conducted by BladeSports International (BSI) and held in The Courtyard, the parking lot of the host hotel, the Renaissance Atlanta Waverly, Saturday at 4:30 p.m.
At press time, contestants in both men’s and women’s divisions were scheduled to compete. Last year, Ben Propst won the men’s division and Michael Clifton the women’s. Second through fourth place in the latter went to Sara Maly, Sue Ann Propst and Jo Carothers, respectively. The same respective place finishers in the men’s division were Gary Bond, Dan Keffeler and Donavon Phillips.
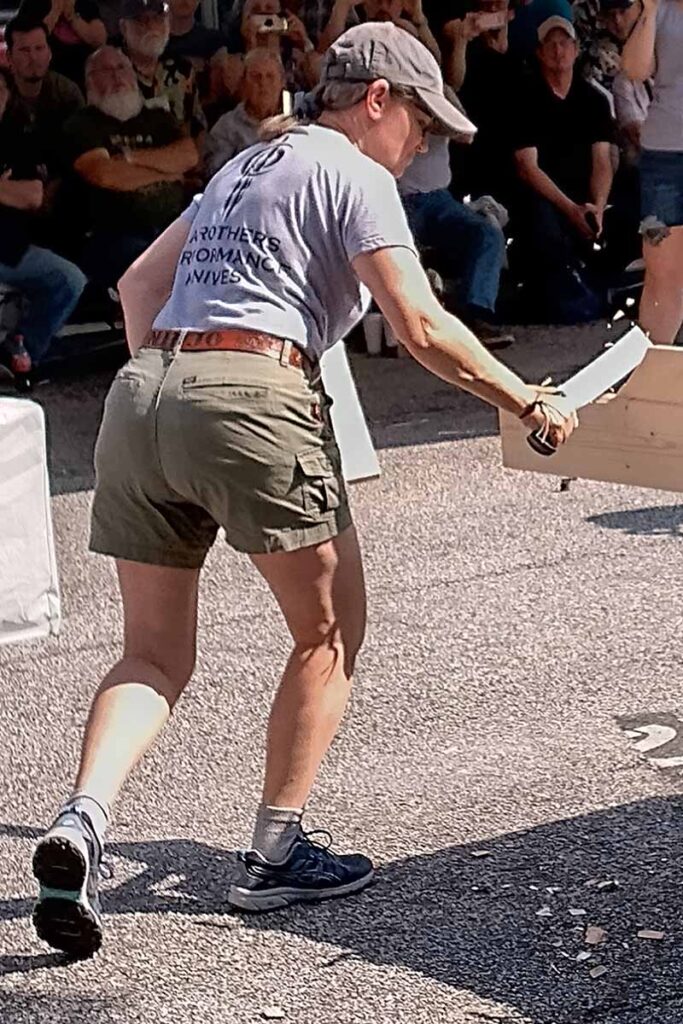
Jo Carothers finishes off the 2×8 in the women’s division of last year’s BLADE Show World Championship Cutting Competition.
Seminars & Events
Seminars and demonstrations are held in classrooms inside the Cobb Galleria or under the BLADE University tent in The Courtyard—the latter in the parking lot of the host Renaissance Atlanta Waverly Hotel. Admission is free to BLADE Show ticketholders. Two of the highlights include:
In what he termed will be the most important seminar he has ever given, Ernest Emerson of Emerson Knives, Inc., will deliver a no-holds-barred analysis of what it takes to be “made in America.” He will present a true insider’s, behind-the-scenes look at how difficult and yet how important it is to recognize the vital importance of American-made knife companies for the future of the knife industry.
High-Endurance Performance Knife master smith/BLADE® field editor Ed Fowler will ask just how confident you are that your EDC can handle everything from light office duty to saving a life. Key questions will include what is the knife made for? The design is what you see but the quality is up to the maker. The title of Ed’s seminar says it all: Can Your EDC Cut It?
SATURDAY 8 a.m.: BLADE Magazine Cutlery-Hall-Of-Fame Inductions, Kennesaw Room, Renaissance Atlanta Waverly Hotel 10-to-11:45 a.m.: ABS Knife Auction (page 30), Room 103 Noon-to-1 p.m.: Can Your EDC Cut It? High-Performance Endurance Knife master smith/BLADE® field editor Ed Fowler, Room 107 Noon-to-2 p.m.: NEW LOCATION 8th Annual Battle for Bali-Champion, conducted by Blade HQ, Garden Court area inside the Renaissance Atlanta Waverly Hotel (flipping starts at 12:30) 1-to-2 p.m.: What It Means to be Made in America, Ernest Emerson, Emerson Knives, Inc., Room 104 12-to-3 p.m.: Buck Collectors Club, Room 103 4:30 p.m.: BLADE Show World Championship Cutting Competitions, conducted by BladeSports International in The Courtyard
Cutlery Hall of Fame
The BLADE Magazine Cutlery Hall Of Fame® will formally induct three new members at 8 a.m. show Saturday in the Kennesaw Room of the Renaissance Atlanta Waverly Hotel. (At press time, the new members had not been determined.) Tickets are required ahead of time for the ceremony, which includes a breakfast. Seating is limited.
Knife Collections
Outstanding knife collections will be on display, with the best recognized via a judging competition. Last year’s winners included Gene Merritt, who took Best In Show for his Buck Yellowhorse display. Judges Awards went to Tim Lindsey for his display entitled “Vern Taylor Buck Collectors Club Founder” and Ed Cooper for “Yellowhorse Knives.” Sarah Lindsey won the Youth Award for her display, “One of a Kind Buck Custom Character Knives Incredible!”
Bali Title: New Location
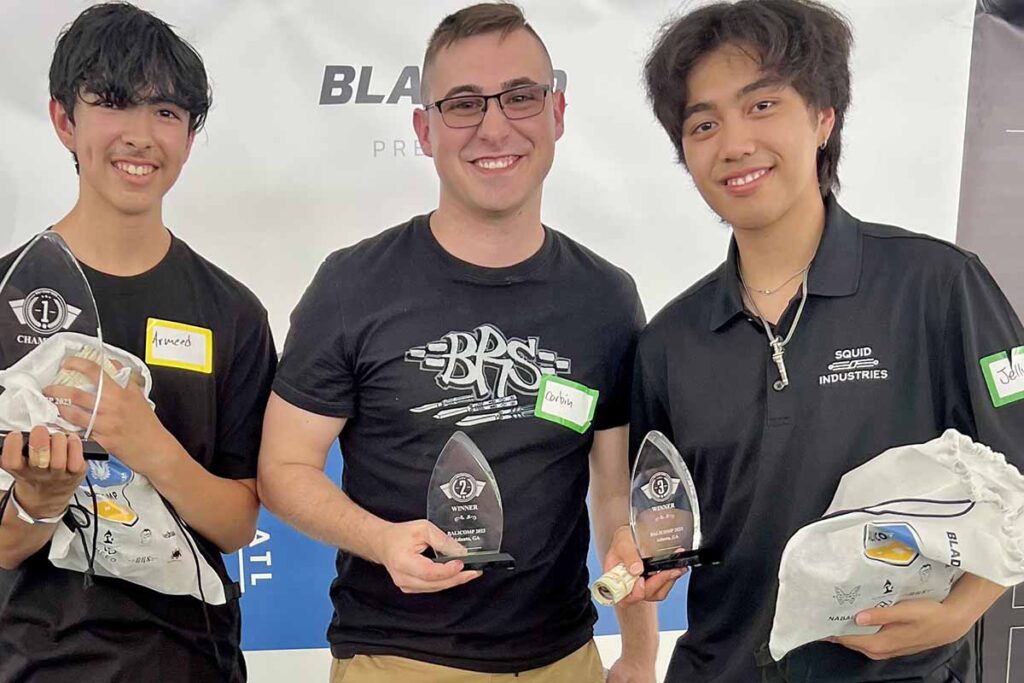
Top balisong flippers will vie for the title of “Grand Master” in the 8th Annual Battle for Bali Champion sponsored and conducted by Blade HQ.
Balisong Competition placers
BLADE Show ticket holders are invited to watch the competition in the Garden Court area located inside the Renaissance Atlanta Waverly Hotel on show Saturday from noon to 2 p.m. This is a venue change from last year’s Courtyard location, so please make a note. Competitors will start flipping knives at 12:30 p.m.
The top three finishers will receive prizes and all participants will get swag bags. The competition will be limited to 48 contestants. Landon C. Morrison was crowned Bali-Champion last year, with Corbin Lovins finishing second and Gene Keli Castillejo third.
More To Come
The final BLADE Show-sponsored event for 2024 will be BLADE Show West, Oct. 4-5 at the Salt Palace Convention Center in Salt Lake City, Utah. For details, visit bladeshowwest.com. BLADE Show Texas 2025 will be March 7-8 at the Fort Worth Convention Center. Visit bladeshowtexas.com for more on it. And, of course, it’s never too late to start thinking BLADE Show 2025 June 6-8 at the Cobb Galleria Centre in Atlanta. For details, visit bladeshow.com.