Here are BLADE Magazine’s Featured Knives of the Week. Browse through these articles to find the best knives available from both custom knifemakers and factory knives.
TRUE Knives Swift Edge Is A Flexible Folder That Allows You To Change Blades To Meet Your Needs.
What’s better than a good folding knife? How about a good folding knife with three blade options. The newest folder from TRUE Knives can do just that and a whole lot more. The Swift Edge can handle numerous cutting situations thanks to coming with a tanto blade, two drop points, and a sawing blade that can all be changed in seconds.
Utilizing a two-step release system for safety and simplicity, you can change blades quickly. The tanto and drop points come in a black oxide finish and are made of 5Cr13 steel. The saw blade is made from 65Mn steel and is coated in titanium nitride to aide in wear resistance.
The Swift Edge features a two-step release system that you can use to change between the knife’s three styles of blades.
All of the blades are 3.5 inches in length, and the knife is 8.5 inches when fully open. Coming in at roughly 6.5 ounces, the Swift Edge is heavier than many other folders, but the added mass helps while cutting especially with the saw.
The handle is made from durable reinforced G10 laminate which can hold up to heavy use with ease. The knife also comes with a pocket clip that you can put on either side of the knife.
With an MSRP of $49.99, the Swift Edge comes with all four blades as well as a carrying case for the knife.
Editor’s Note: This article was written by Mike Ableson.
GiantMouse Releases New Set Of Sleek, Robust Folding Knives–the ACE Corta line–Made From Austrian Steel.
Stylish. Tough. Strong.
Those are just a few words to describe the newest folding knives released by GiantMouse. The ACE Corta Knife comes in three different styles and is as good as it gets when it comes to an EDC folder.
The showpiece is the blade, made of Böhler M390 stainless steel from Austria. Known as one of the ultra-premium stainless steel, martensitic steel is renowned for its and ease of sharpening. Essentially, it’ll take and keep an edge.
At 3.1 inches in length with a flat saber grind, the ACE Corta is a flipper inspired by GiantMouse’s limited-run GM6 knife.
The Natural Canvas version of the ACE Corta
The ACE Corta comes in three styles: a green-canvas-colored Micarta handle and a stonewashed finish on the blade, a natural-canvas-color Micarta handle with a satin finished blade and a black PVD finish blade itself with a black G10 laminate handle.
All three knives have an overall length of 7.3 inches, a handle length of 4.18 inches, and come in between 3.8-4 ounces in weight.
The knives open quickly and smoothly thanks to the ball-bearing pivot. They all have a wire clip so it can slide easily onto a belt, purse, or pocket. And each version of the knife has an MSRP of $195.
Given the engineering that has gone into the ACE Contra, the price should prove a value to most.
Editor’s Note: This article was written by Mike Ableson.
An EDC That Does It All, The Outdoor Edge FieldLite Is An Excellent And Affordable Option That Stands Out From The Pack.
What’s better than a strong, easy-to-use EDC that shines in numerous situations? A knife that does all that and clocks in under $30. Say hello to your new best friend: The FieldLife from Outdoor Edge.
With the DNA of a robust hunting knife flowing through it, the FieldLite stands out in a crowded EDC market thanks to its steel as well as its light and durable handle. The handle is a mix of glass and nylon with rubberized inserts embedded to enhance grip. Coupled with
Outdoor Edge FieldLite
a thumb stud on one side, this knife is fun to hold and fun to open. It also has a clip so it can easily slide onto a belt or purse strap.
The 3.3-inch blade is made from 8Cr13MoV stainless steel. A budget steel that swings above its weight with a Rockwell Hardness of 62, the knife holds an edge well and resists wear and corrosion thank to its high percentage of Chromium.
At just 7.5 inches in total length, and weighing in at only 2.6 ounces, the FieldLite is absolutely worth a look if you are interested in a fairly-priced knife that can handle day-to-day tasks as well as more intense work while out hunting.
With an MSRP of $29.95, the FieldLite can be purchased online or at numerous sporting good retailers.
Editor’s Note: This article was written by Mike Ableson.
The Knife Sharpener Is An Excellent Tool To Have In Your Kitchen. No Matter The Model, They Are Easy To Use And Can Help Revive Your Knives.
I cook daily. I enjoy it. It decompresses me, and I’m able to provide my wife and me with a lovely meal to end our day together. Nothing makes cooking harder than a dull knife.
Beyond increasing the difficulty of easy tasks, dull knives are incredibly unsafe and can cause serious injuries in the kitchen. Knowing how to use a kitchen sharpener can keep your knives like new and, best of all, take just a few minutes to use.
How To Use A Pull Through Knife Sharpener
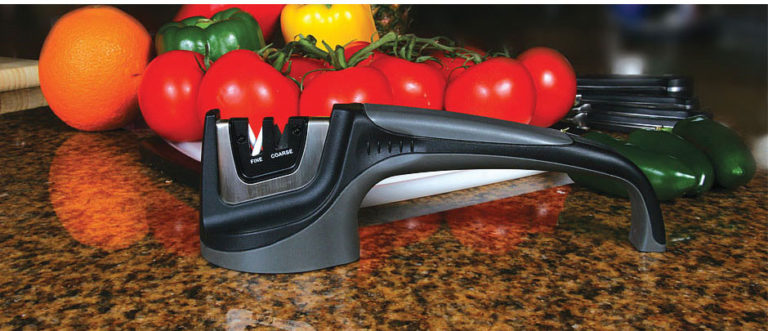
Pull-Through kitchen knife sharpeners come in a variety of prices ranging from $10 all the way up to $100. Regardless of how expensive your sharpener is, they all work in similar ways by removing a small amount of material to renew a knife’s edge.
To show you how to sharpen your knives in numbered easy steps, I pulled out my small sharpener–a Goodcook–I picked up at my local supermarket.
Step 1: Safely Secure The Sharpener To The Surface
My trusty knife sharpener
Yes, it seems straightforward, but always remember to safely secure your knife sharpener to the surface you plan to use. I did this on my dining room table, but a counter or stovetop works just as well.
Some higher-end models may come with a vise, but the majority, like mine, are secured by firmly holding the end of it down onto the surface. The underside of my sharpener came with a channel in it so you could secure it against the edge of a table. This is meant to keep the knife away from you when you pull it through the sharpening stones.
Channel underneath the sharpener for edge use.
Step 2: Pull Your Knife Through The Coarse Side Of The Sharpener
Your sharpener will, at a minimum, have a coarse and fine setting. Start by pulling your blade through the coarse side first. This will remove more material from the edge and get rid of any bigger burrs or imperfections in the knife.
Put light pressure on the knife and gently pull it through. I chose to do three passes, but you can do however many you like. The little bump at the end of each pull is the knife tapping into the base of the sharpener.
Step 3: Do The Same On The Fine Side Of The Sharpener
The fine side is good for refining the edge of the blade and bringing it back to a razor’s edge. You’ll notice that it sounds different as you pull the knife through. I also pulled my paring knife through it three times.
And in three easy steps, in less than two minutes, you’ve sharpened a knife. I try to hone my knives multiple times a week and sharpen them monthly or every other month. By investing just a few minutes at a time into caring for your knives, you’ll extend their life and keep them cutting like new for years to come.
How To Use A Whetstone To Sharpen A Knife
Another, more traditional way of sharpening knives, is with a whetstone. These stones allow you to precisely control what part of your knife is being sharpened and how much material gets removed from your blade. Below are the steps to follow to successfully sharpen your knives on a whetstone.
Step 1: Gather Your Supplies
This means getting your stone, a moderately deep container like a baking dish, deep bowl, or a bucket to soak the stone in water, your knives, a towel to dry them off, and a spoon or small cup to scoop water onto the stone.
Step 2: Soak The Stone
When you place your stone into your container it should be fully submerged under water. You’ll see bubbles start to come up. That’s air getting forced out of the stone. Let it soak for 10-15 minutes or until the bubbles disappear. That’s the sign that your stone is ready to use.
Step 3: Secure Your Stone
Most stones come with a holder. Always use that if available. If there is no holder, a towel wrapped around the base of the stone will work. You always want the stone secured. At best, it could scratch your tabletop if it slides, and at worst you could slice yourself from a knife coming off a sliding stone.
Step 4: Sharpen On The Course Side
The majority of whetstones you can buy online or in stores today will have two sides, one coarse and one fine. The lower the grit number, the more coarse. This means that more material will come off with each pass of the knife.
It’s best to start sharpening your knives on that side. Get your blade to an angle between 20-25 degrees and pass it back and forth against the stone 10-15 times on each side of the blade.
If a dry spot starts appearing on your stone, use your spoon or small cup to pour a little bit of extra water onto the spot to re-wet it.
Step 5: Sharpen On The Fine Side
Now that you’ve removed most of the egregious burrs and nicks from the edge turn your stone over and sharpen the blade against the fine side. This will finish and polish the edge back to razor quality and have your knife like new again.
Again, you’ll stroke the blade 10-15 times at 20-25 degrees, then check the blade for sharpness.
Popular Youtuber, and New York Times bestselling author, Joshua Weissman gives a simple but in-depth tutorial on how to use a whetstone to revive your knives and bring back a razor edge.
How To Use An Electric Sharpener
A more intense version of the handheld kitchen knife sharpener is the electric sharpener. More pricey than a handheld device, electric sharpeners use different types of grinding stones powered by a motor to grind away material and sharpen your knives.
Some models have a single slot where the user will need to toggle between fine and coarse grit stones. Others have multiple stages and multiple stones allowing for more precise sharpening. Regardless of the type of electric sharpener, they operate similarly.
Step 1: Place The Sharpener On A Solid Surface
Always make sure your sharpener is on a table or countertop. Never hold it in your hand while pulling your knives through. That’s a quick way to wind up on your local news for all the wrong reasons.
Step 2: Read Your Sharpener’s Directions
With so many varieties of sharpeners it’s important to know how to correctly use yours, and, just as importantly, what type of knives can be sharpened.
Some can handle serrated knives while others are just good for flat knives. Know this because pulling the wrong type of knife through the sharpener can damage the blade.
Step 3: Sharpen Your Knives As Desired
You gently place your knife into the slot and pull it through at a leisurely pace. Do this 10-15 times for each stage of the sharpener and your knives should be like new.
To get an idea of how easy it truly is to use an electric knife sharpener, the folks at Linkyo show you how to use one of their models. It’s not even two minutes so you can’t afford to miss it.
Editor’s Note: This article was written by Mike Ableson.
Editor’s Note: This article was written by Mike Ableson.
Knowing How To Use A Whetstone, Or Sharpening Stone, Can Restore A Dull Blade And Should Be Part Of Regular Upkeep For Your Knives.
There are many inexpensive ways to sharpen your knives at home, but nothing feels the same as sharpening your knives on a whetstone. Used for centuries around the world to keep an edge on everything from swords to kitchen knives, the whetstone is an intimate, precise way to maintain your knife’s edge and bring it back to life.
The “whet” in whetstone has nothing to do with being wet or any type of moisture. It comes from the Old English term “hwettan” which means “to whet or sharpen.” Coincidentally, most whetstones do need some type of moisture for top performance. In all cases, this means water or oil. However, a majority of stones you’ll find in stores or online–particularly for kitchen use–will be waterstones.
Oil Stone Vs Waterstone
Honestly, in some cases, there is no difference.
The preference of lubrication–water or oil–is left up to the user. Both will do the same job, swarfing the surface of the stone so it does a better job sharpening.
However, there are other cases where one or the other must be used with a particular stone. Natural sharpening stones, for instance, mostly use water. Rub them down with oil and you’ll render them useless.
Manufacturers will spell out whether your particular whetstone is water, oil or both.
The main difference between whetstones that use oil and whetstones that use water is that waterstones are softer so the old abrasive material breaks off faster than an oil stone. This means you’re sharpening on fresh stone material more consistently.
Waterstones are also less messy and easier to clean vs oil stones, which adds another point in the bucket for waterstones. Waterstones also come in more grit varieties than oil stones.
Oil stones, especially those made of novaculite, are a traditional sharpening stone, and many are quarried in America, specifically in Arkansas.
Differences In Grits
You’ll see stones of all types come in a variety of grits. The lower the number, the more coarse the grit. The more coarse the grit, the more material gets removed with each pass of the knife.
For at-home sharpening, grits in the range of 1,000-8,000 should be more than enough. However there are stones that come as coarse as 120 and as fine as 30,000. Consider these specialists and stick to the common grits for most jobs.
Whetstone Accessories
While there are many gizmos and accessories out there to help with your whetstone sharpening, there are two that stand above the rest. You can see them in the photo at the top of this article.
The first is the stand for your whetstone. This should come with the stone when you purchase it. You do not want to lay your stone directly onto your table or countertop. It can slide, and mixing sliding things with sharp knives is a recipe for losing a finger.
The second is that little thing to the right of the stone. It looks like a chip clip, but it’s actually an angle guide. Some will clip onto the top edge of your knife while others might need to be strapped to the stone itself. Either way, the angle guide will help set your sharpening angle and allow you to maximize each pass of the blade across the stone.
I’ve used a 1000/6000 waterstone for years to keep my kitchen knives sharp. You can find plenty of quality 1000/6000 whetstones online for under $40. But having the stone doesn’t account for much if you don’t know how to use it. I pulled out my sharpening set up to help give you a step-by-step breakdown of how to sharpen your knives with a whetstone.
Step 1: Get Your Equipment
Things I use to sharpen on a whetstone
Ready to start sharpening? Hold up a minute. You’ll need more than a whetstone and your knife.
In addition to the obvious tools for the task, I start with a whetstone stand, a container of water and a spoon (you heard right).
There are special notes on a couple of these items.
The water container is to prep the whetstone and should have some specific attributes. I want a deep container so the stone can sit in it and fully soak. These babies are thirsty, so you can’t just dab water on one and expect it to work.
Here I’m using a baking dish, but a plastic tub or kitchen sink work equally as well.
The spoon … no, you’re not taste testing your knife’s edge. It’s there to literally spoonfeed the stone more water during sharpening to clear off the shavings.
Step 2: Soak The Whetstone
Soaking the whetstone
Here’s the speedbump of the process.
As mentioned, whetstones require a good soaking before use. This isn’t a splash-and-go process.
Plan to let your stone sit fully submerged for a good 10 to 20 minutes before it’s primed for use. There’s a simple way to tell it’s good to go.
Plunge that baby into water and you’ll see it bubble like an aquarium aerator. Quite literally, this is the stone drinking up water in its microscopic pores and displacing air in the process.
As time goes on, fewer and fewer bubbles pop out of the whetstone (see the above picture). When it’s none or next to none, you’re good to go.
Step 3: Secure The Stone
OK, this sounds obvious. But it must be said–you must secure your wetstone before sharpening.
Not only does this stave off a tongue lashing from your significant other, ensuring you don’t scratch up the counter or dinner table. It also keeps your digits from getting cut up.
In most cases, you’ll have a holder that, well.. holds the stone. If you don’t, never fear, a towel or rag makes a dandy impromptu stone holder.
Whatever the case may be, make certain your stone isn’t going anywhere before you actually begin sharpening.
Step 4: Determining The Sharpening Angle
Rubber, you’re almost ready to meet the road!
Before you actually start scraping away precious material to create a fresh sharp edge, you need to determine exactly what angle to sharpen at.
Some knives require a somewhat uncommon angle to sharpen. This is spelled out in the owner’s instructions if this is the case. Lose those, check the company’s website, these vital specs are usually there.
However, in most cases–a vast majority–20 to 25 degrees is the best angle to achieve a good cutting edge. And you don’t even need a protractor to determine this pitch.
Think of it this way, the edge pointing straight down at the stone is at 90 degrees. Tilt the blade halfway down, now the blade is at roughly 45 degrees. Tilt the knife halfway again and, there you are about 22.5 degrees–a sweet spot for a good edge.
Or you can go the easy route and use an angle guide, mentioned earlier in the article.
Step 5: Course Sharpening
Start with the lower grit, which in this case is 1,000. It takes off more material and gets the edge almost all of the way back to razor sharpness.
Usually, I do 10 passes on each side of the blade, but I fully sharpened my knives a few weeks ago and just did two here as a demonstration.
Keep the blade angled between 20-25 degrees to get the best possible results.
Step 4: Turn The Stone Over & Sharpen With The Finer Grit
I finish with the fine grit, 6,000 on my whetstone.
You’ll notice each time I pass there’s some new metal shavings on the stone. That’s the swarf. It’s fine for your knives if you leave the swarf on the stone as you sharpen, but you can also wash it away with some extra water.
Again, like the coarse grit, I usually do 10 passes on each side of the knife.
Step 5: Wash Off Your Knives & Clean Up
Once you’re done sharpening you should rinse your blades and wipe them dry with a towel. Once your knives are accounted for, give your water container a thorough cleaning. I used a baking dish, and it’s important to fully clean it so you aren’t ingesting microscopic metal shavings.
For the stone itself, I double check that it’s secure in its holder and leave it out overnight to let the water evaporate out of it. Once it’s completely dry I put it back in its spot in the drawer.
And there you have it, a simple, straightforward guide showing you how to sharpen your knives using a whetstone.
Editor’s Note: This article was written by Mike Ableson.
Caping Knives, Or Capers, Are Necessary For The Finer Parts Of Creating Taxidermy. They’re Also Capable Carving Knives Or A Great EDC.
Caping knives, a.k.a. capers, aren’t mentioned very often in the grand scheme of all things cutlery—though don’t tell that to those who like to mount their trophy game. The caper is a huge part of skinning game in preparation for taxidermy where preserving the fine details is absolutely essential.
Tasks such as trimming around the animal’s eye sockets and mouth area are particularly critical, and the blade must be sharp and small enough to get down to the nitty gritty. That’s not to say a caper can’t handle other functions, such as fine carving and cutting cord. Heck, it can even be used as an EDC.
WEB Pocket Hunter-Caper
The A.G. Russell Knives Pocket Caper cut nice, tight circles in the suede thanks to the sharp tip and thin blade geometry. The two cutouts at lower right were made with the Russell blade, and the one on the lower left by another blade that didn’t fare as well.
The WEB Pocket Hunter-Caper is produced under the War Eagle Blades division of A.G. Russell Knives, hence the WEB in the name. We’ll just call it the Russell Pocket Caper for simplicity’s sake—and what a simply utilitarian knife it is! The hidden-tang fiberglass-reinforced-nylon (FRN) handle comes in black or bright orange. The blade is a straight-back style with a V-grind from edge to spine. The snap-lock FRN color-coordinated sheath has a tubed hole in the base to hold a lanyard or neck knife cord/chain.
Since one main function of a caper is precision cutting, I wanted to see which of our test knives could turn on a dime—or in this case, a nickel. Using spray adhesive, I tacked a square of suede to a smooth wood surface and drew a group of circles using the perimeter of a nickel as a guide. I then hand-cut each circle to see how precise I could be in removing it from the base. The Russell Pocket Caper, with its much thinner blade, allowed the tip to glide around the outline of the nickel with precision and cut the suede with very little effort. As you might guess, the thinner the blade, the less resistance I encountered.
Bear & Son Rosewood Caper
Two nice features of the Bear & Son Rosewood Caper handle are 1) the choil adds excellent purchase and 2) the gimped thumb rest on the spine enables you to choke up on the blade.
The Bear & Son Rosewood Caper is a modern take on the classic trailing-point knife many of us grew up with. The upswept blade is devoted to cutting chores. The knife’s weight is very manageable and a natural leather belt sheath is included.
The Bear & Son has the second thinnest blade of the test group and placed second to the Russell in cutting out suede circles. I also tested the knives on slicing graceful curves and upward pull-through cuts and found the Bear & Son to have its own advantages.
The generously gimped thumb rest enables you to choke up on the blade, which allows more precision and force to be placed on the task at hand, and, just as importantly, with great comfort. Similarly, the index finger has a nice place to land in the reverse grip while executing pull-throughs, which makes skinning—an equally important part of caping—easier.
Puma SGB Smooth White Bone Caper
The Puma SGB Smooth White Bone Caper slices like a house afire, cutting strips of tanned leather with ease. Drop-point blades are skinners at heart and this little gem does the job well.
The Puma SGB Smooth White Bone Caper is the smallest of the test subjects but makes up for anything it may lack in size with stylish good looks. The decked-out caper boasts a hollow-ground recurved blade in a drop-point pattern. Like most all of the more budget-friendly SGB models, the blade is made in Germany and the knife is assembled in Asia.
The handle is curvaceous, tapering upward from the base to a bolster that serves as a guard. A round Puma shield graces the scales and a hole in the base has a leather lanyard attached. (I removed the lanyard for photographic purposes.)
With its recurved drop point, the Puma SGB is a totally different blade design than the other test capers. Drop-point patterns are well known for their skinning ability, particularly riding under flesh without piercing organs. This is where the White Bone Caper is at home—slipping under skin and separating viscera from its meaty rewards. It wasn’t as agile cutting out tight circles of suede because where the blade is wide at the tip got in the way as I turned it. That said, it’s a superb slicer.
Utica Shoehorn Elk 1
The Utica Shoehorn Elk I is the bull of the woods among the test capers. The blade is 4 inches long, 3.75 of that in cutting edge. Though similar in blade configuration to the Bear & Son offering below it, the Shoehorn Elk I dwarfs it in size.
The Utica Shoehorn Elk 1 is by far the largest of the test knives. The drop-point blade has a healthy choil and a two-inch dip on the spine that serves as a thumb rest. The handle sports ample, curvaceous scales. The knife weighs over twice that of any of the other review capers. Considering the knife’s size, the price is very reasonable.
The Shoehorn Elk 1 is not billed as a caper but it has a blade configuration very similar to that of the Bear & Son test model. The Elk in the name is a dead giveaway that the knife is meant for caping and skinning large game.
I deviated from the suede leather in testing the blade and went to something tougher. I glued together three layers of tight-patterned, corrugated postal board—stout stuff—and gave the knife a go at slicing it the hard way: across the grain. It took some pressure but the blade severed 5.25-inch lengths in single strokes. I have no doubt the Shoehorn Elk 1 could take on tough hide—even alligator scute. While the tip mauled the circle in the nickel-size precision test, it would perform much better on game proportionate to its size.
Finding The Best Caper
All of the knives brought something to the table in the tests. For tight precision caping on small-to-medium game, the Russell and Bear & Son capers were virtually neck-and-neck—the former slightly more geared to precision, the latter a tad more versatile. The Puma SGB excelled more in slicing and a bit less in precision. The Utica can handle the tough hide of larger game the others can only dream of.
Bottom line, it’s really just a matter of choosing which caper fits your needs the best.
Drawknives Are A Woodworker’s Best Friend And One Of Many Unique Knives Craftsmen Use Regularly
Knives take on many shapes and sizes. As tools, their designs sometimes focus on specific tasks. In the case of the drawknife, it is designed for woodworking. Drawknives have been found to date back to the Viking era more than a millennium ago.
The design itself takes many different shapes for a variety of purposes. At times, it is not referred to as a drawknife but, at first glance, you can see the relationship and how a number of tools can be considered part of the same family. As with any tool, different cultures have different interpretations of how the tool should be designed.
What Is A Drawknife?
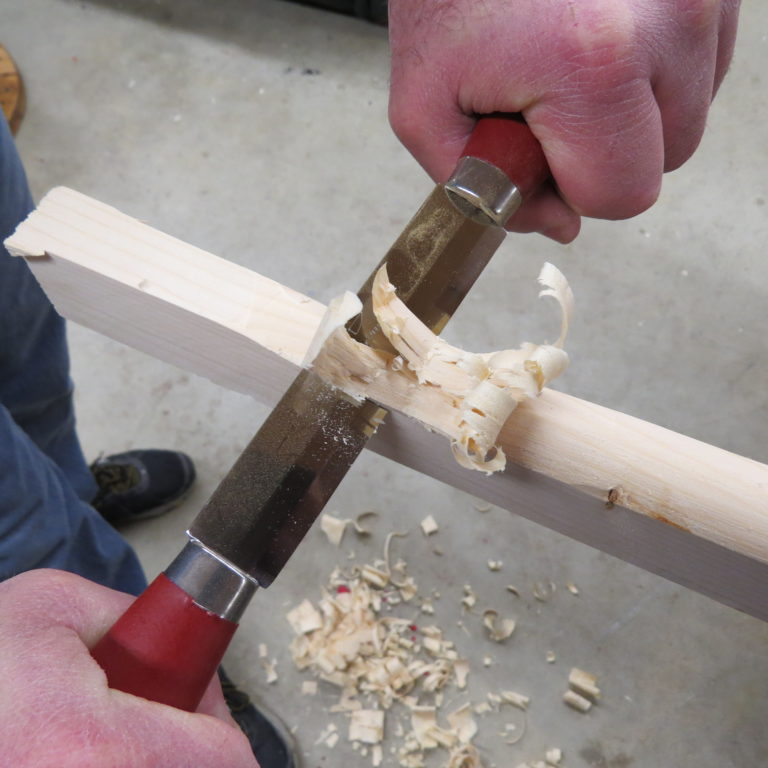
A drawknife is a single-beveled blade placed between two handles. The tool gets its name from how it is used. You simply grab both handles and draw the knife towards you bevel up. Controlling the angle that the blade enters the wood will control the depth of cut. A steep angle will get you a deeper, more aggressive cut but will also require more effort.
Lowering the angle makes for a shallower cut and also gives you a finer finish as the material is removed less aggressively. Some designs have long handles on plane with the blade. Other designs have the handle tight in and below the plane of the blade. No matter where the handles are, the action is the same but the point of control changes.
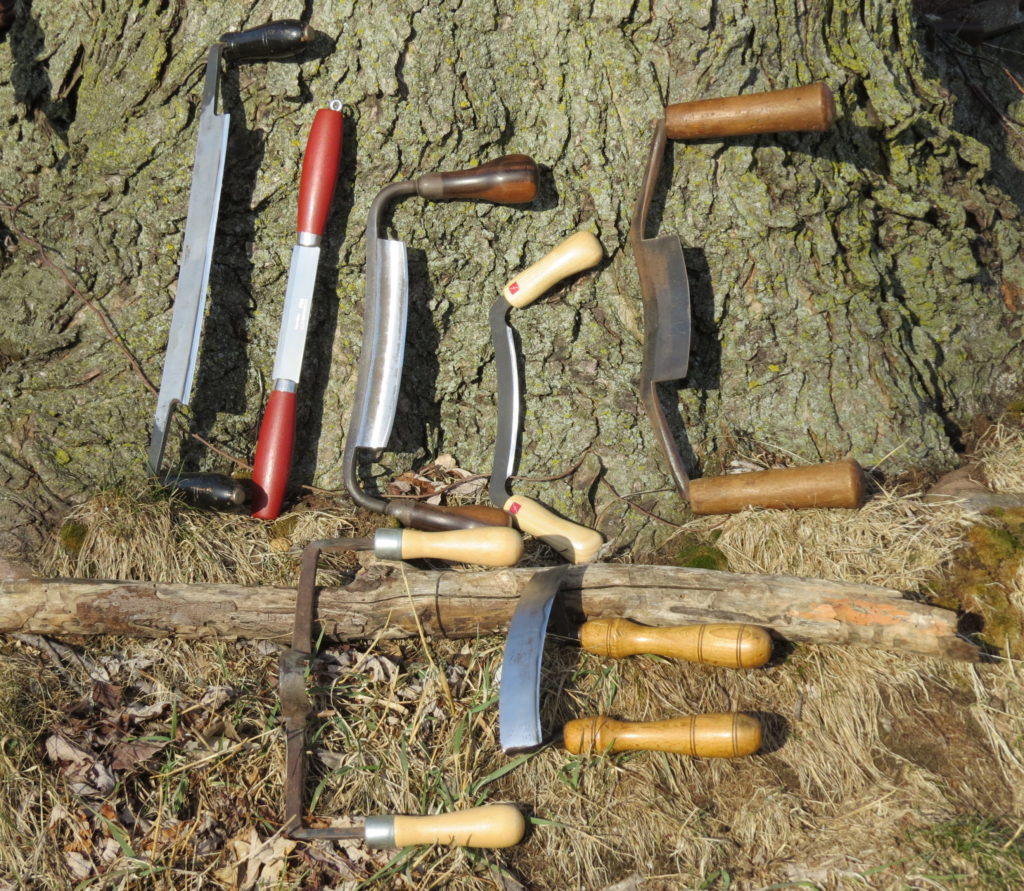
Top row, from left: a German-style drawknife made in Western Germany, Mora push knife, English-style drawknife, Flexcut 5-inch drawknife and a cooper’s knife. Bottom row, same order: Round drawknife and a chair maker’s scorp.
How To Use A Drawknife
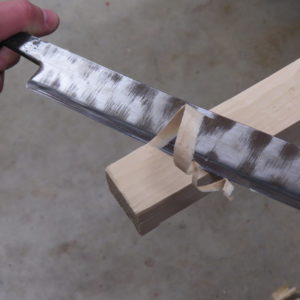
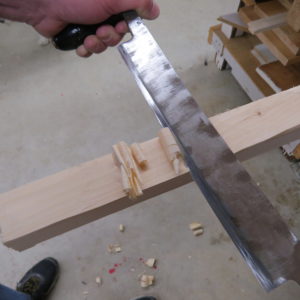
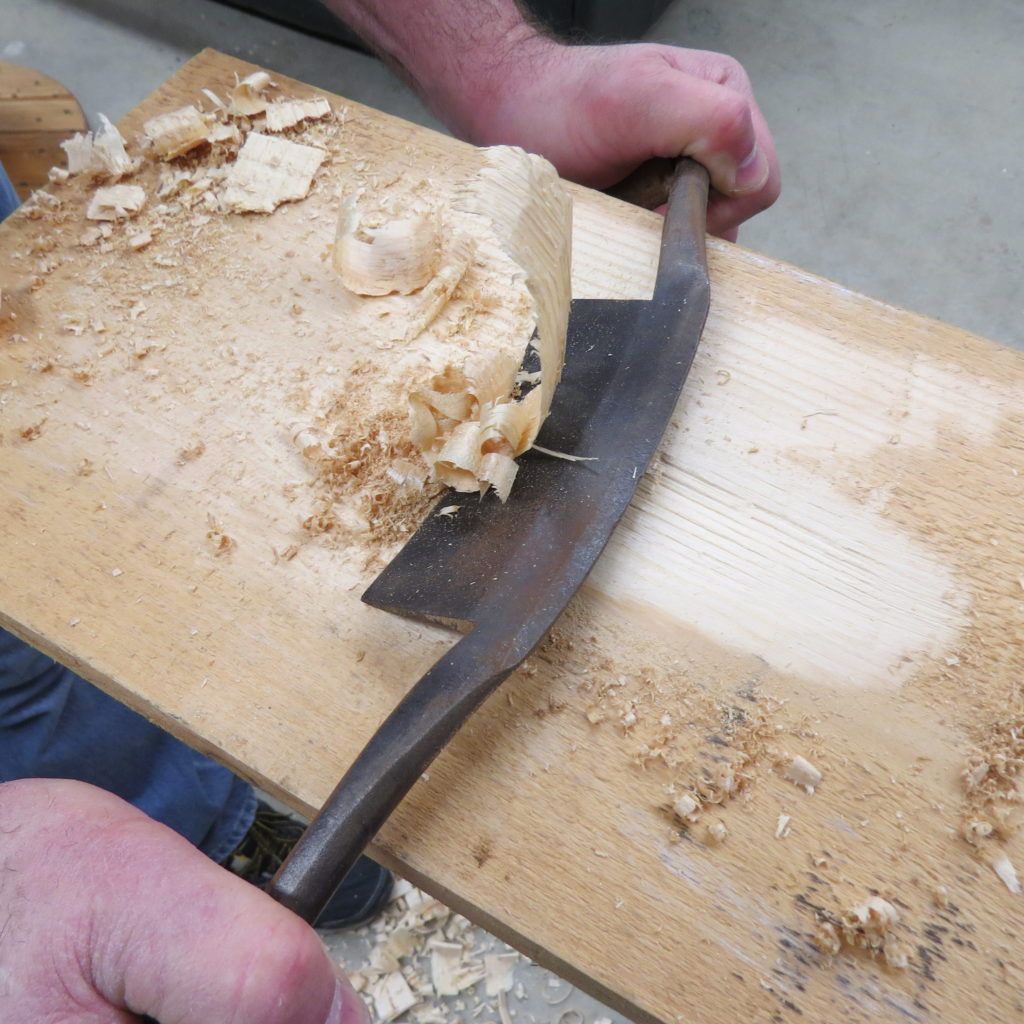
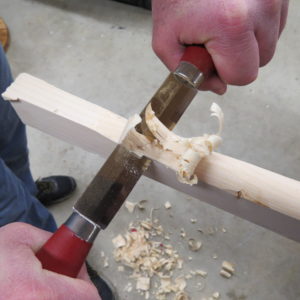
When working with a narrow stock up to two inches wide, it’s easy enough to draw the knife straight back toward you. On wider stock, it is better to skew the knife. Skewing the knife provides a leading edge and causes less resistance during the cut. When working with hardwoods you want to keep the cut light, as the dense grain provides more resistance and bogs the knife down.
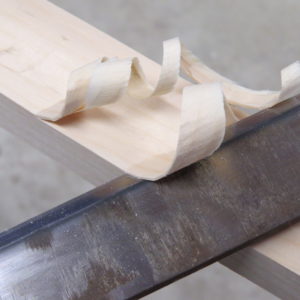
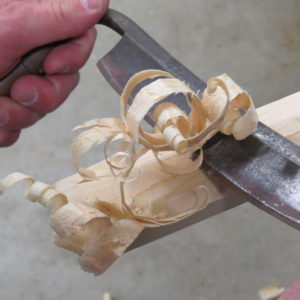
If you skew the knife and work the corners it is easy to remove long curls.
Even when working a flat when skewing the drawknife blade you can get some beautiful shavings.
Learning to use a drawknife properly is a bit like working a puzzle. The easiest way to make a cut is to work the facets of the material. For instance, say we are working on a piece that is square. To shape the piece to the required size it is easier to work the corners down, creating more corners until you get to your desired shape. By working the flats, you must use more energy and struggle to make a cut.
When first using a drawknife, the tendency is to use your arms to power the tool. Instead, use your back muscles, which are larger and less likely to fatigue quickly. Draw the knife back as if you were using the same muscle for rowing. If done right, it should feel like your shoulder blades are trying to meet in the middle of your back. For safety’s sake, keep your elbows in tight. As you draw the knife back your elbows will hit your core acting as a safety stop, preventing you from slipping and cutting yourself.
Types Of Drawknifes
A debarking knife is usually a larger style of drawknife used for extracting bark from logs. They are larger and heavier than their woodworking counterparts so that you can blast through the bark.
It has been my experience that when working green wood, the knife doesn’t need to be kept as sharp. In fact, it is somewhat more helpful to keep the knife a bit dull when cutting green wood so as to avoid diving too deep into the wood itself. On seasoned logs, because of the lack of sap between the bark and sapwood, I find it better to have the knife a bit sharper.
Woodworking drawknives come in a variety of shapes and sizes. The two main types I have used: English and German. The English style has a blade that bares a slight arch and the handles are on the same plane as the blade. German-style knives have handles that sit lower than the blade and the blade tends to be straight. The knives’ handles can vary. Most of mine have a pear-like shape. There are other styles like a round knob style, which is a ball shape.
The English style drawknife has a small but thin bevel that makes for some beautiful curls.
The German knife has a steep angle to the bevel. If used straight across a narrow piece wood, it can remove large amounts of material. At the time of the photo, the author had not finished cleaning up the blade, ergo the hammer marks in it.
Specialty styles of knives include any drawknife that is shaped to obtain a specific result. A cooper’s knife is shaped to accommodate the making of barrel staves. I also have a handle-making knife. The handle-making knife is a tight arch designed to make handles for things like brooms or garden implements. The basic shape is a half circle, so instead of trying to round a piece off by angling a number of cuts, you get a piece of wood close to size and simply let the knife shape it.
The cooper’s shave is designed to hollow out the staves of a barrel.
Push Knife
The model uses the Mora push knife to clean up curls left at the bottom of a curve. With the push knife, you can work the wood in an opposite direction without repositioning the piece.
A Scandinavian invention, the push knife is similar to a drawknife in that it has a blade attached by two handles on either side. Using a push knife is different in the way that you are expected to force the edge away from your body instead of pulling it toward you. Unlike a drawknife, the handles come straight out from the sides, which allows you to either push or pull the knife. I normally use the knife in the manner that gets the job done—meaning on occasion I will draw the knife toward me rather than push.
What Is A Scorp?
Technically, scorps are not drawknives. However, in terms of looks and use you can’t help but lump them in the same family. I have a chair maker’s scorp that is designed to hollow out the seats of chairs. On older chairs is a slight depression where the person sits. A chair maker’s scorp was used to produce the shape. The tool operates just like a drawknife except it has a shorter blade with a more pronounced arch.
How To Sharpen A Drawknife
Like any other cutting tool, a drawknife must be sharpened. Perhaps the trickiest part of sharpening a drawknife is finding a way to brace it. I find dynamic sharpening the easiest way to sharpen a drawknife. I brace the knife and move the sharpening medium instead of the other way around. One way to brace the knife for sharpening is to put one handle in your armpit and hold the other handle in your off hand. Once the knife is braced this way, take a stone to it. Another way is to brace one handle on the bench, lean your chest on the other handle, and then begin sharpening. Keep in mind a drawknife must be sharp (except where noted previously) but since it is not necessarily a fine woodworking tool, don’t get carried away.
YouTuber James Wright shows you how to sharpen a drawknife using a set of sharpening stones in his shop.
Lastly, keep it oiled. Even the newer ones are not made from new high-tech steels. Most are from simple carbon stock and a light coat of oil goes a long way. Among others, Flexcut offers a contemporary drawknife.
Other Wood Carving Tools
Beyond drawknives and planes, there are many other types of wood carving knives out there that can help with some of the finer points of woodworker. Small, nimble wood carving knives like a sloyd knife or a spoon knife.
A sloyd knife is a short, sturdy blade good for small, finite carving tasks. A spoon knife, as the name suggests, is meant to carve out the concave scoop of a spoon but can be used for any other situation where you are trying to create a concave dip in the material.
There are certainly more than just these few tools to being a successful woodworker, but knowing how to use wood carving tools big or small can get you on the path to success.
Why To Use A Drawknife
Long before there was solar power, fossil fuel power, steam power, etc., there was muscle power. Humans developed the world using tools with muscle and sweat. There is something satisfying about making something by hand. The feel of a good day’s work is sometimes what the soul needs. A drawknife not only gets the job done but also gives you an accomplishment to savor.