Home Authors Posts by Abe Elias

Abe Elias

Head-To-Head Of Two Fillet Knives

Comparing Smith’s Flex Fillet and Bear & Son Smooth White Bone Pro Fillet in fish-skinning dominance.

I was just about to type “fishing season is nearly upon us.” Living in Canada, it has never stopped. Up here, thousands of fishermen are manning their shanties, huddled over a hole, heaters blazing their favorite brand of barley pop nearby. Up north, fishing is a sport that runs year-round.

Why do men go ice fishing? Maybe they go for the love of it? Maybe the solitude and peace on the ice? Either way, they are out there. And certainly, a part of their kit is a good fillet knife. If you intend on eating some of what you catch, you need one. Which brings us to our topic.

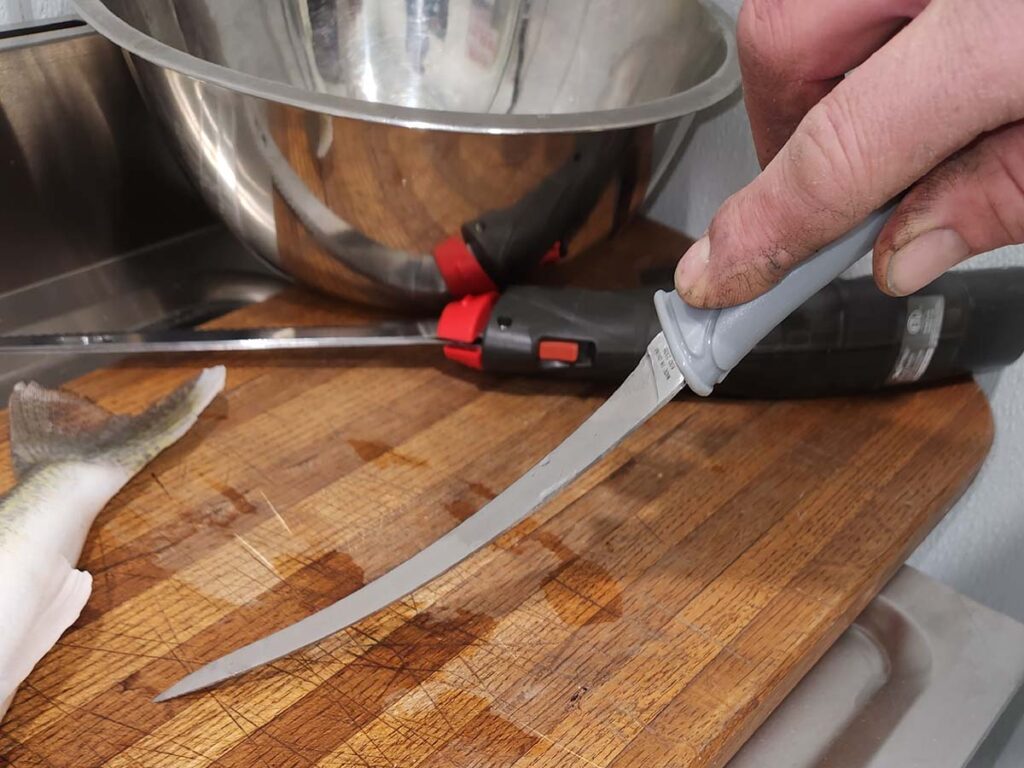
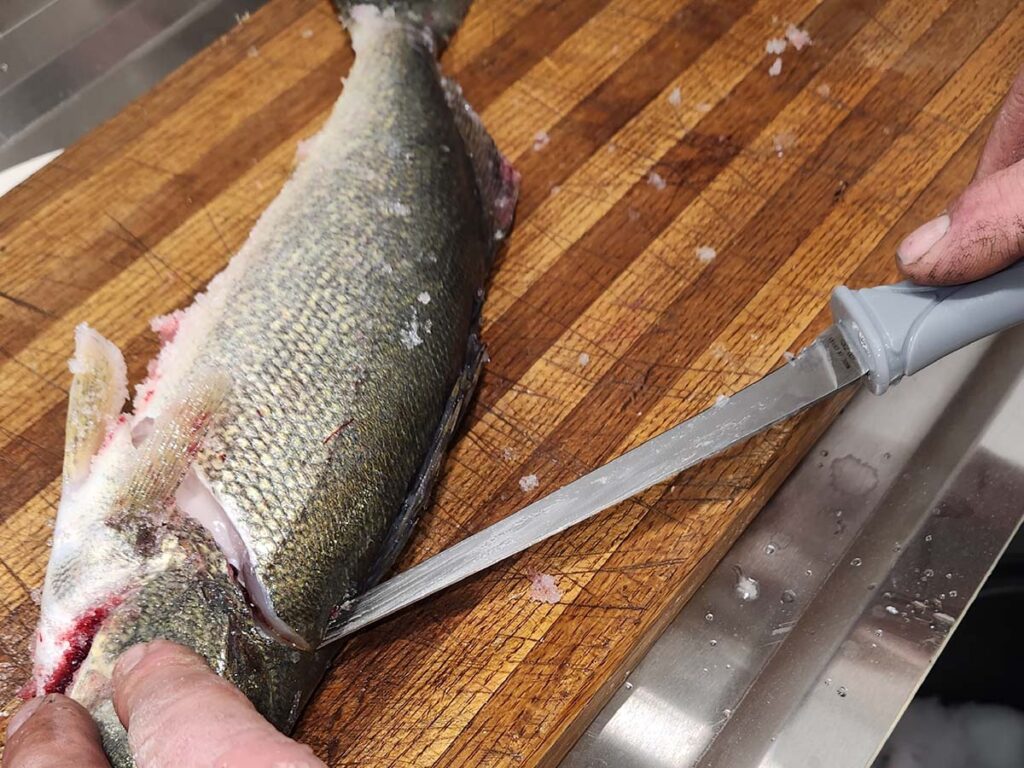
We’ll head-to-head two fillet knives at opposite ends of the price spectrum. At the budget end is the Smith’s Flex Fillet Knife, and in the premium tier, the Bear & Son Smooth White Bone Professional Fillet Knife. Both knives have 7-inch-long blades, and both will be tested on some fresh catch from Lake Erie. Crossing my fingers, we get fillets for a meal.

A buddy of mine who is braver than I for facing the cold brought in a variety of pickerel (walleye for my American readers) and my favorite, yellow perch. Anyway, let’s talk knives. Some would figure that putting a $145 dollar knife up against a $20 isn’t a fair comparison. I would suggest that price sometimes doesn’t matter as much as value.

Tale Of The Tape

With a 7-inch blade, the Smith’s Flex has a mid-range flex to it. Beyond filleting fish, the author could see this stiffness making it a solid boning knife.
Given its thicker stock, the author found the White Smooth Bone’s blade on the stiff side. Out of the two blades, he could see this knife pulling duty cleaning game.

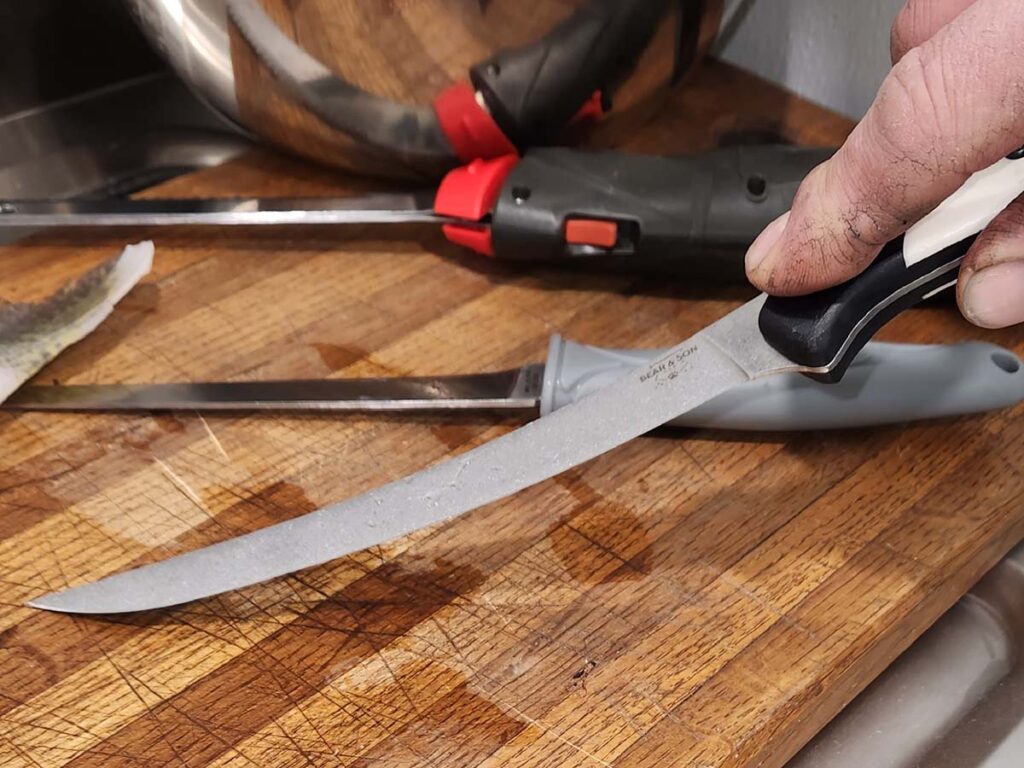
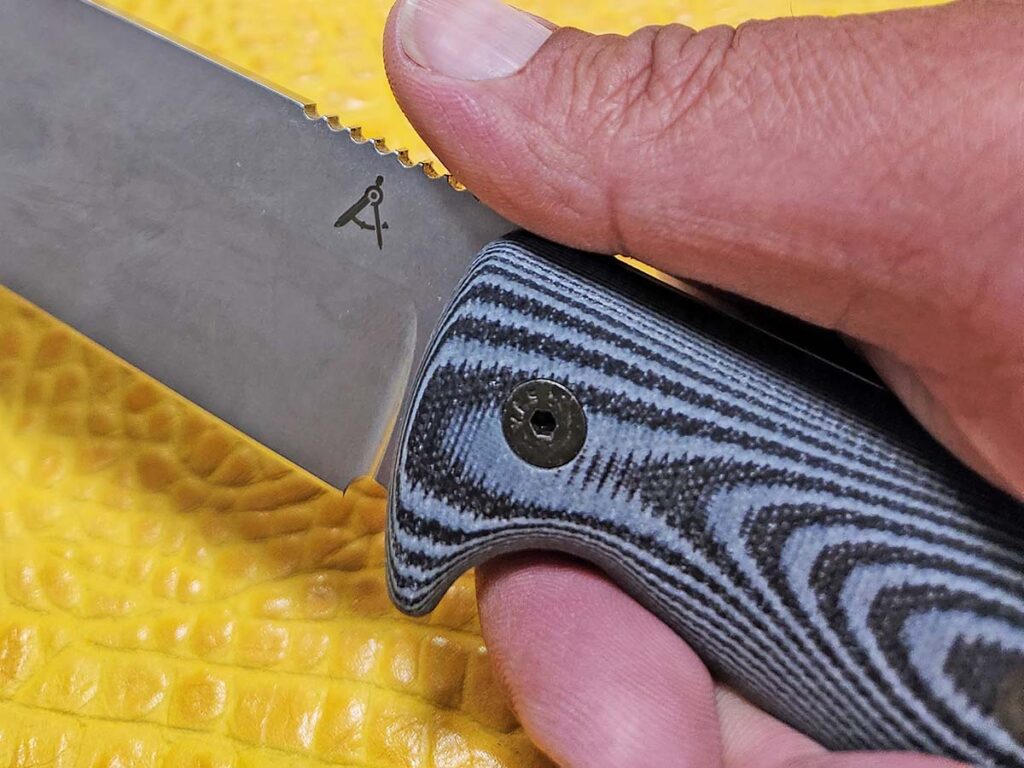
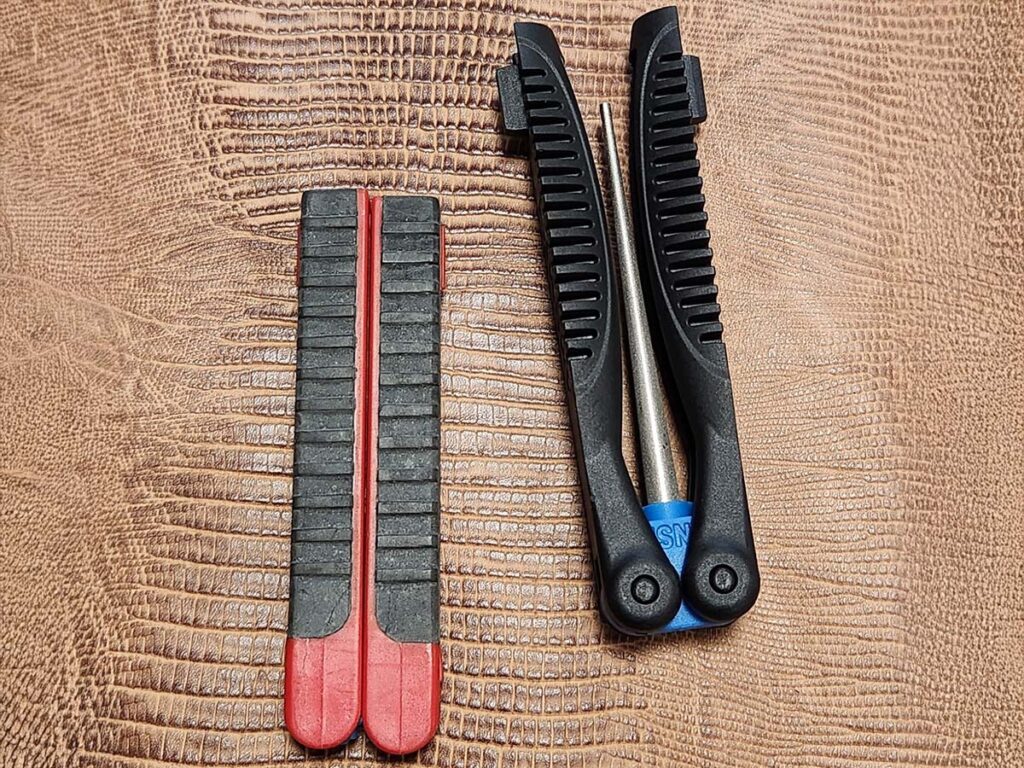
Handle ergonomics is important in a knife used for long periods of time. It is one thing to chop an onion and a completely different thing when you need to manipulate a blade to make detailed cuts repeatedly. Ergonomics on the Bear & Son are pretty good. The overall profile of the handle has the right contours. Out of the two, there is no doubt that the White Bone Professional has better looks with its split 25 percent black and 75 percent white handle scales. Part of the presentation of the handle is black liners that run into the black bolsters. Bear & Son use screws to fasten the scales to the full tang design. They also include a lanyard hole.

Smith’s, on the other hand, goes with a light injection-molded plastic handle. Unfortunately, they do not detail what material the handle is made from, and since do not play guessing games I will not hazard a misinformed guess. The molded handle on the Smith’s is lightweight. On the weight (without sheaths), the Bear & Son weighed in at 5.46 ounces, and the Smith’s weighed in at 2.98 ounces, according to my kitchen scale. Therefore, the Smith’s came in at almost half the heft. If you prefer a knife with a little heft to it, the Bear & Son is your model.

The author liked the Smith’s handle and found the design made the tip controllable for detailing jobs.

Sheaths for these knives are not a main area of concern, as a fillet knife isn’t generally meant for belt carry. You do want the blade protected. Naturally, you want to avoid holes in whatever you choose to tote your fishing gear in. Smith’s comes in a very minimal sheath, no belt loop and plenty of drainage holes, allowing the blade to dry. All those slots make sure the sheath is easy to wash out. The Professional comes with a sturdy molded sheath with various lashing points so you can attach it to your gear. Furthermore, it has a great friction lock-up. The only drawback to the Bear & Son sheath is a tiny drainage hole. This, however, is easily fixed with a large drill bit.

Fillet Fray

A good, sharp knife like the Smith’s Flex made it easy for the author to get clean fillets off the fish.

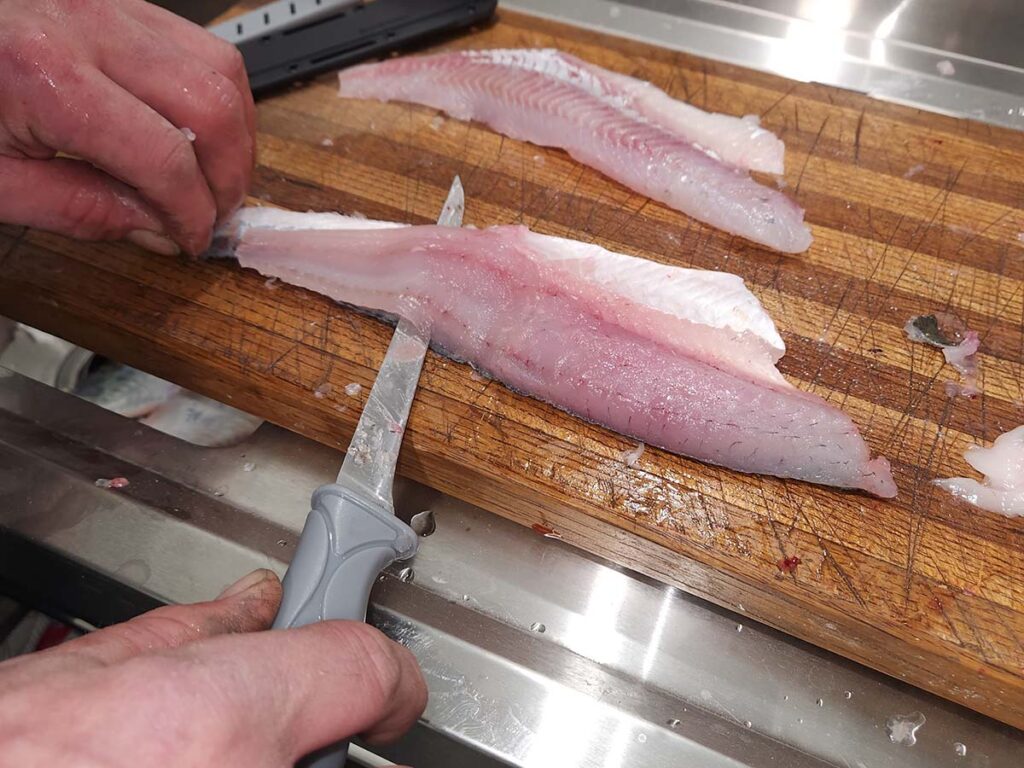
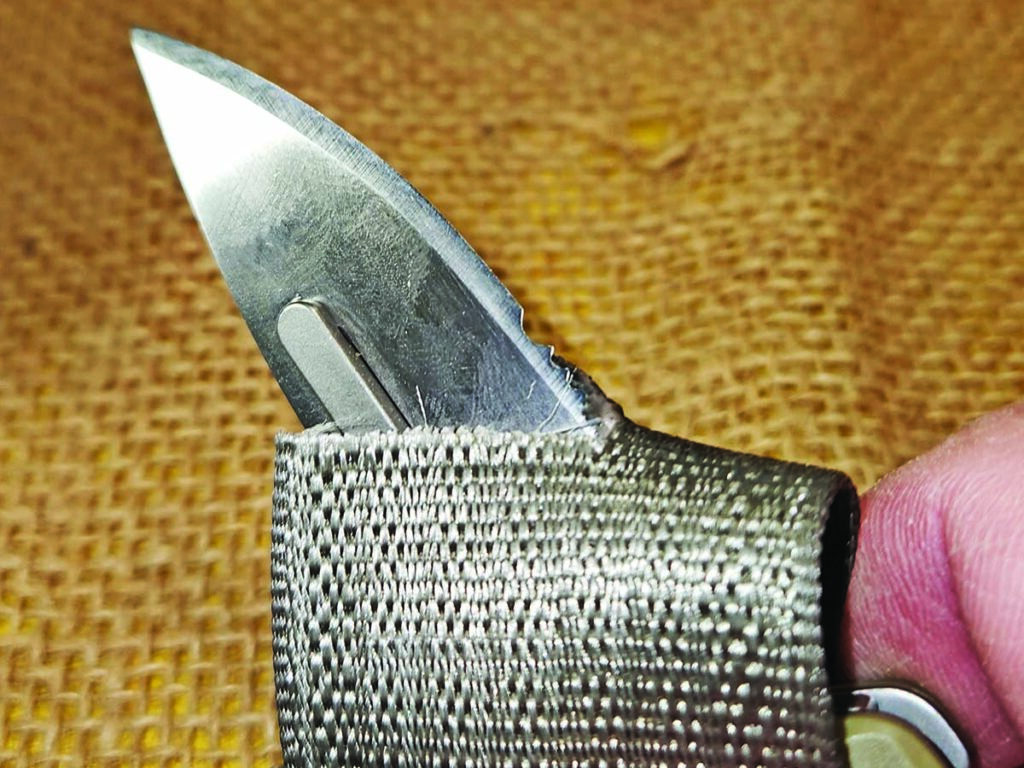
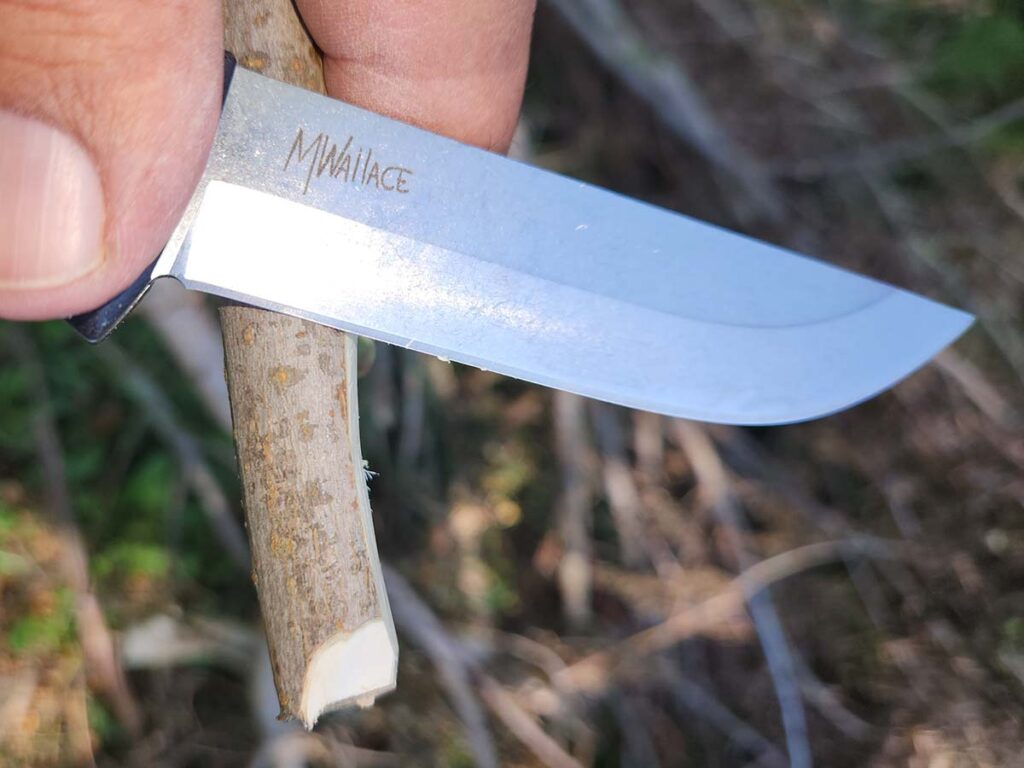
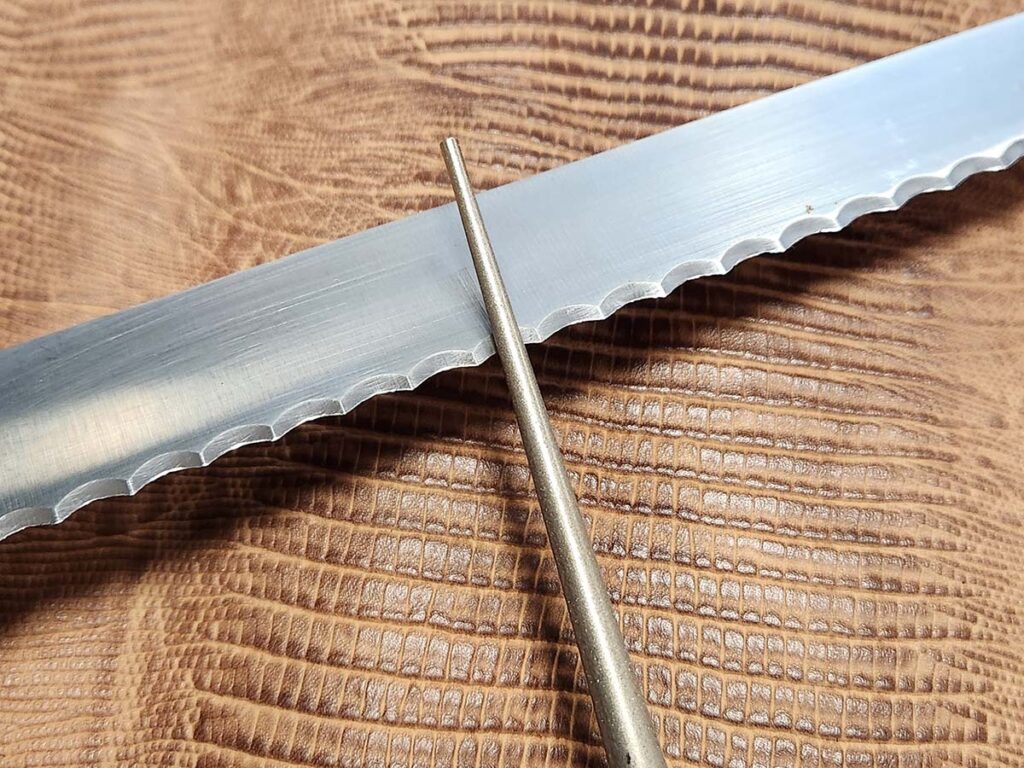
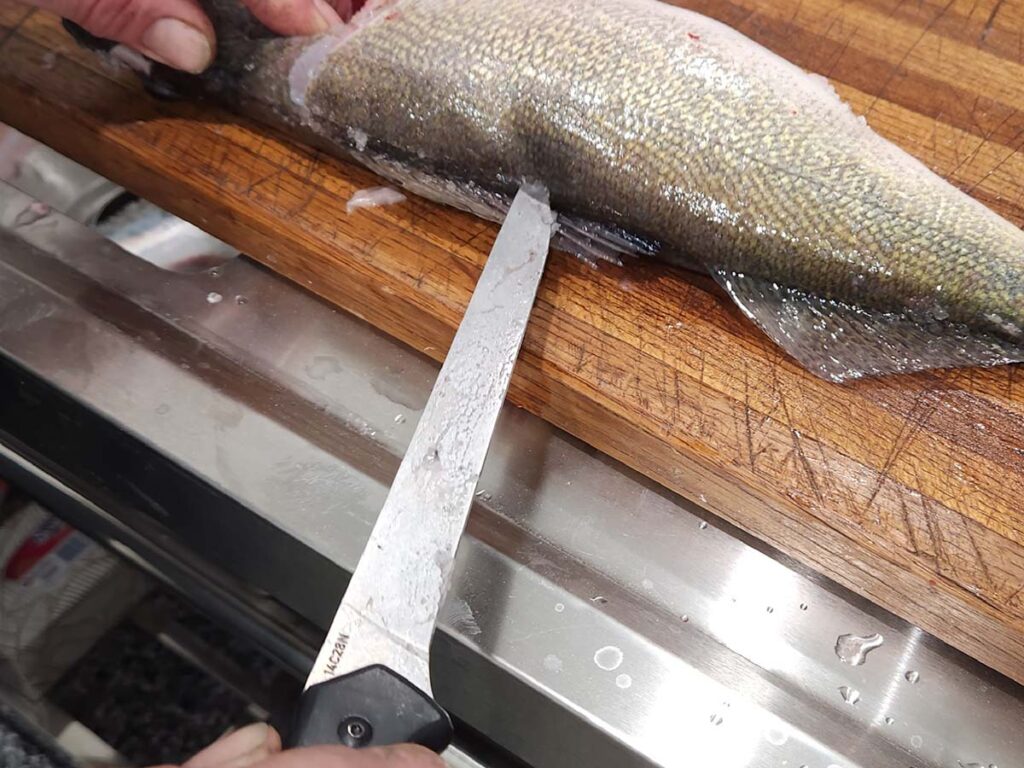
The Professional is made from 14C28N stainless steel, popular in fishing and fillet knives. The Smith’s is listed as a 400 series stainless steel, found in more budget-conscious blades—particularly kitchen cutlery. Despite the differences in materials, the Smith’s knife was sharp out of the box. The blade cleaned the fish with ease. We cut around the ribs to start, and, for the test, we cut through the ribs. Then, we deboned the fillets.

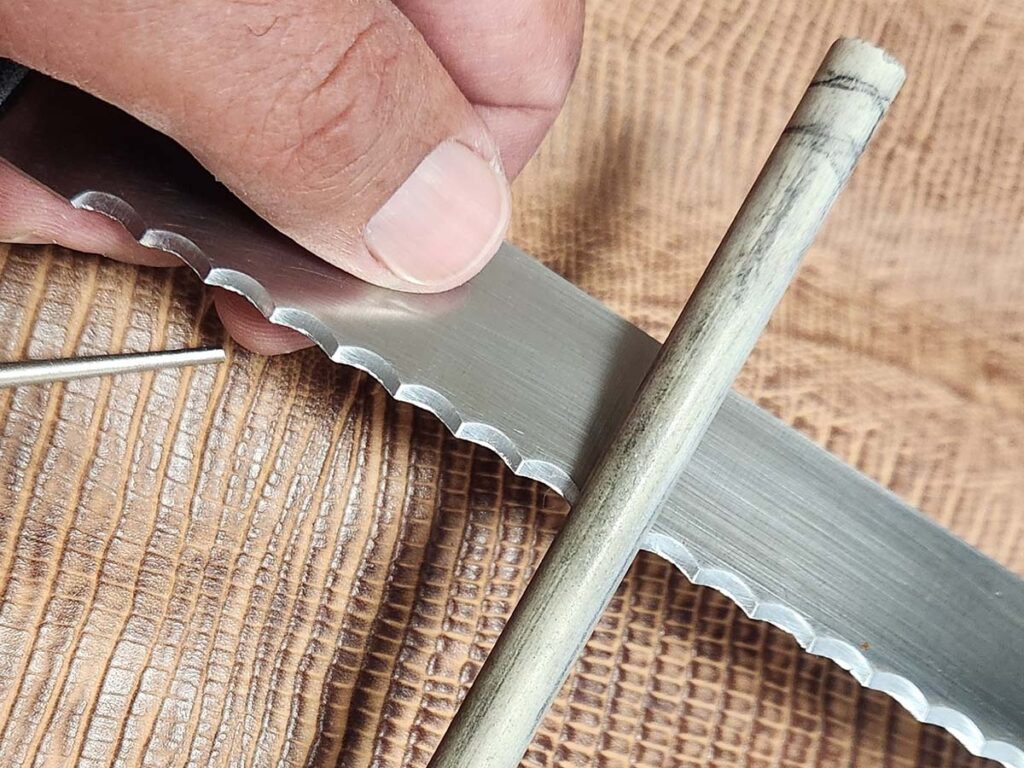
Next came the White Smooth Bone Professional. Right off, it needed work on its edge. Luckily, my friend had a draw-through type sharpener, and he touched up the edge. This improved the knife’s performance a bit, but it was still not optimal for the job at hand. Cutting through the ribs was more like breaking through them. Out-of-the-box sharpness, hands down, goes to the Smith’s Flex. In fact, we finished the rest of the haul with the knife, and it is still sharp enough to clean fish.

The author liked the Smooth White Bone Professional Fillet’s ergonomics and aesthetics. Once he upgraded the edge, it handled well and made easy work of its filleting tasks.

I will note that I worked on the Professional later after the test and did get the edge up to snuff, but it wasn’t there fresh from the box.

Final Cut

My final thoughts on the two are, for the money, the Smith’s probably gives a fisherman as much knife as most he’ll need. And it does so from the get-go. How will it perform long-term? I will have to do the hard work of going fishing to find out.

As for the Bear & Son? If you like the knife, you likely have to do some work to get its performance up. Please keep in mind that these are samples of one of each knife and may not hold true as a rule for either blade across the board. In the knifemaking process, the final step of putting an edge on the blade is mostly still done by hand. Whoever put the edge on the White Smooth Bone didn’t form it properly. Human error isn’t uncommon.

Either choice, good luck out there, and catch a bunch.

More Reviews:

Replaceable-Blade Utility Knives: Irreplaceable Utility

0

These replaceable-blade utility knives cut to the quick of convenient EDC.

I have to say, I have never been a fan of utility-style knives for everyday carry. Certainly, there is a place for them, and they are suitable for a multitude of jobs a regular knife might not do as well. Handyman detail comes to mind, where an always sharp blade and thin edge are appreciated. However, traditional everyday carry knives tend to excel in EDC duty, except, perhaps, in one facet—convenience.

From air travel to avoiding the sharpening stone, EDC utility blades have an undeniable edge on their fixed and folding counterparts. Additionally, knifemakers have further improved the utility of these pocketable cutters, offering different blade styles tailored to different circumstances, allowing the right tool for the job.

I grabbed four replaceable-blade knives and took each of them to work with me to see the pros and cons of each. A large part of my focus was on convenience, as you can buy different blades for all of them, save one. Let’s roll on to what I found out about these tools while putting them to work.

CobraTech OTF Utility

The fact the blade holder on the CobraTec extends further out from the handle gives you the opportunity to get a better look at the edge for fine cutting. When it is important you follow a precise line for an accurate cut, you want to see the blade.

I thought I would start off with the coolest concept for a replaceable-blade utility knife. For folks who need a fidget toy, CobraTec’s OTF Utility fits the bill. Someone there had their thinking cap on with the design. It takes a standard utility blade—with toolless replacement—but this genre offers several styles—hooked, serrated and razor. If you need some added durability, titanium-coated and ceramic blades are options. Note, pay attention to the blades you use; the quality can vary widely.

CobraTec’s OTF works just like any other OTF automatic, perhaps making it among the coolest utility knives.

The body of the knife is built out of 6061 aluminum that is anodized blue or green. For the blade bracket—what holds the blade—CobraTec uses steel. There was only a small amount of play in the bracket when deployed, an important feature. You want as little wiggle as possible to facilitate an easy and accurate cut. The OTF Utility is a double-action auto, shooting the blade in and out crisply through a switch on the side. The company provides two carry options: a sturdy pocket clip and a small nylon belt pouch. Personally, I would chuck the pouch. The pocket clip makes it much more convenient. It is a solid tool and cool as well. The OTF Utility has an MSRP of $90.

Outdoor Edge Slidewinder

The one drawback to the light-duty SlideWinder is it doesn’t offer much blade when fully deployed. On the flipside, it does give users a splash of color with three different options: orange, black and blue.

Outdoor Edge has a neat little tool in the Slidewinder. I first stumbled upon this when I was looking for something TSA-compliant to take with me to trade shows. The blade is easily removable, and the frame by itself should pass through TSA. At least it has for me in the past. I have taken it on a few airplane trips without a hassle. Keep in mind, in the end, it depends on what TSA agent you get when you go through security. When I get to my destination, I simply buy another blade.

The Slidewinder is multitalented, boasting a bottle opener, a standard screwdriver and a flat Philips screwdriver to go along with its blade. The credit-card-sized tool takes regular utility blades and holds them securely in place. Blade replacement is a snap, as simple as pressing a button on the slide. To deploy the blade, you move the slide forward.

The Outdoor Edge SlideWinder has utility beyond cutting. At the 12-o’clock position, over the blade, is a bottle opener, at 1 o’clock is a flat-head screwdriver and at 7 a flat Phillips-head screwdriver.
The Outdoor Edge SlideWinder has utility beyond cutting. At the 9-o’clock position, over the blade, is a bottle opener, at 1 o’clock is a flat-head screwdriver and at 7 a flat Phillips-head screwdriver.

Outdoor Edge uses one steel scale and one G10 scale, available in orange, blue and black. For easy carry, the knife has a low-profile pocket clip. I would have to say the SlideWinder makes for a great little tool and is convenient for travel, as I mentioned. On the other hand, its size makes it more of a light everyday carry and not suited to heavy jobs. Outdoor Edge puts an MSRP of $11 on the SlideWinder.

Havalon REDI

 The Havalon REDI cut through this seat belt material like nobody’s business. What makes it better fit for these tougher jobs is a longer cutting edge than that found on utility blades.
The Havalon REDI cut through this seat belt material like nobody’s business. What makes it better fit for these tougher jobs is a longer cutting edge than that found on utility blades.

Havalon’s REDI is an assisted-opening everyday carry knife. The company uses a proprietary blade made from AUS-8 stainless steel in a drop-point pattern. The knife comes with two blades with different edges—razor and half serrated. A nice touch, the company includes a small plastic case to carry the extra blade. Changing the blades is easy, with a retention release button and a forward slide freeing the cutting portion of the knife. Havalon provides a tool with the knife to depress the retention button, but it isn’t necessary. A thumbnail should suffice.

There is some play in the blade, but the retention system holds it in place. The blade itself is held in place with a liner lock and has a solid deployment via thumb studs. To aid your grip, Havalon uses polymer scales that are textured and come in three color choices: orange, black, and green. The REDI has an ambidextrous tip-up carry pocket clip. I find tip-up works well with an assisted opener.

Conveniently, the Havalon REDI comes with two blades. The razor edge blade (left) and mounted on the knife is the combo serrated/razor blade (right). Unlike the other knives, the blades are proprietary and longer then a standard utility blade.

It’s a good knife and a solid carry option with a replaceable blade. My one point of contention with knives is the proprietary blades. You must keep extras on you. I know people would say it’s a similar story with other utility knives. The obvious difference is that I can source regular utility blades nearly anywhere. Overall, the REDI is a good carry and very versatile, just keep the blade issue in mind. With an MSRP of $55, the REDI is at the more expensive end of this class of knife.

Gerber EAB Slim

The Gerber EAB Slim (top) offers more grip than the original EAB (bottom) thanks to a buit-in keyring. It might not seem like much at first glance, but it offers more leverage than on the trim package.

The EAB Slim is exactly that—slim. Compared to earlier models I tested, like Gerber’s Prybrid and the original EAB, this model is trimmer. Yet, the extra length gives the utility knife a better grip, even compared to some of the options in this article. The EAB uses a standard utility blade and deploys from a slide lock. It is not the smoothest system, but it works and is dependable. If you want to retract the blade, just reverse the motion. Gerber added a bottle opener and a lanyard hole for some bells and whistles. I suppose you could put it on your key chain, but I would find it a bit bulky because of its 4.4-inch length.

Gerber has added some subtle gimping at the front of the handle. The texture is helpful and keeps you from struggling with the thin knife’s profile. It’s a good tool I would carry for light jobs—opening packages or even as an extra, inexpensive blade to stash in a backup kit. When I worked retail, this would be a perfect edge for all my regular chores, without adding bulk to my pockets. At $16, the Slim is light on the pocketbook.

Convenient Utility Carry

These utility knives aren’t full-fledged knives, but they do everything we need over an ordinary day. Working in maintenance, these knives cover most of my cutting duties and are easy to carry to boot. Due to their compact size, they aren’t my first pick for heavy-duty jobs. However, if you aren’t in maintenance or construction, these would be a great way to carry an edge for quick jobs.

More Knife Reviews:

Puukko Knives: Top Blades Of The Finn Folk

0

Today’s puukkos are knives you can trust in the great outdoors.

It’s a crisp, early winter morning. You wake and need to start a fire to get breakfast underway. As you exit your hut, your warm breath clouds the air. While you gather wood, you gaze out over your reindeer herd.

At least this story would be yours if you were a Sami, a traditional reindeer herder of Finland’s Lapland region. And a traditional Sami tool is the Finnish puukko-style knife, three versions of which are our test subjects this time.

Puukko Specs Comparison

Kellam HawkAPOC Wallace Large PuukkoCondor Tool & Knife Survival Puukko
Overall length (inches)7.5″9.25″8.5″
Blade length (inches)3″4.25″3.9″
Blade materialCarbon steel7Cr15MoV stainless1095 carbon
Handle materialQuilted birch burlG-10Black paper Micarta®
SheathLeatherLeatherKydex
MSRP$106.88$123.53$79
FinlandChinaEl Salvador

Condor Tool & Knife Survival Puukko

The Condor is a capable cutter but the stout grind tends to make creating thin slivers difficult.

Though called a puukko, the blade profile of the Condor Tool & Knife Survival Puukko follows more the pattern of a leuku, a bigger Scandinavian chopper. The grind is a stout Scandi and it arrived work ready right out of the box. While it cut very well, I would have liked to see it come with a bit more of a traditional higher grind.

An interesting feature is that the steel pommel is attached to the tang. I would say that would come from a Mors Kochanski* influence as he promoted such a design aspect as a striker plate. The blade is 1095 carbon steel, which will hold an edge well when heat treated properly. The scales are polished black paper Micarta® accented with white liners.

The Condor’s pommel is connected to the tang, which allows you to use the pommel as a striking plate. The white liners set off the black paper Micarta® scales. “Some say they don’t care if a knife is pretty just as long as it works,” the author observed. “Well, if it works it doesn't hurt if it’s pretty, too.”
The Condor’s pommel is connected to the tang, which allows you to use the pommel as a striking plate. The white liners set off the black paper Micarta® scales. “Some say they don’t care if a knife is pretty just as long as it works,” the author observed. “Well, if it works it doesn’t hurt if it’s pretty, too.”

I found the handle a bit small for my bear paw hands. The grip’s inward curved profile tends to bunch my fingers together. Add a smallish handle and it started crowding my grip, causing discomfort. (Keep in mind, my hand is over 4.5 inches wide.) Two stainless steel pins affix the scales to the tang, with the lanyard hole a bit too small for a paracord. The full leather pouch sheath is well made.

Designed by Joe Flowers, the Survival Puukko is a good, serviceable cutting tool. It is a clean knife design with tight fit and finish. One thing: before you buy it, be sure it fits your hand.

APOC Wallace Large Puukko

From this point, you can see the secondary bevel on the APOC. It’s not a Scandi grind but is still a good cutter.

Right out of the gate, I must say you get a lot for the price with the APOC Wallace Large Puukko. I would have expected a higher MSRP on this package. Having said that, let me roll out the high points.

Designed by Mike Wallace, the knife is a good size for bushcraft. Handle ergonomics aren’t amazing but are pretty darn good. The textured black scales are trim so it’s a nice, nimble cutter. As profiles go, it is a dead-on use of the puukko. On the grind end of things, it is not a Scandi. The blade actually has a secondary bevel. However, since it has a high grind it remains an effective cutter.

The tang of the APOC is exposed at the lanyard hole, which allows the lanyard to nest into the handle material and stay out from underneath your grip.

The sheath is molded Kydex and then some, including a fire steel and a striking plate on the side. In testing the striking plate I found the belt clip gets in the way, and I could get sparks just fine using the blade spine. You have the choice of horizontal or vertical carry with the G-style belt clip.

If I had to pick a downside, I would go with the belt clip. For a bushcraft knife, you want more mobility and accommodation from your sheath if you’re wearing a backpack, getting in and out of a canoe or kayak, even something as simple as bending over. In the vertical position, I find the knife rides too high. To make carrying it easier I would add a belt loop or even a dangler, allowing the knife to ride lower.

As a cutting tool, it works and works well. I would have no problem putting the Wallace Large Puukko on my side for a walk into the woods.

Kellam Hawk Puukko

The high grind on the Kellam allows for great control, letting you hog off lots of material or make fine slivers.

The Kellam Hawk is a perfect example of the traditional puukko design. A full leather pouch sheath with dangler loop makes it easy to carry. Scales are a quilted birch burl that has a dark stain to it. The handle is not polished, which leaves a nice textured matte finish that adds to the knife’s value. Because the Hawk is a stick-tang design, Kellam could shape the handle to perfection, and it did. As I write these words, I can’t resist just holding the knife for the feel of the handle. Then again, stick and hidden tangs are advantageous in that they are constructions that make it easier to fully sculpt a handle.

The blade is a carbon steel with a forged finish on the flats and a Scandi grind. Performance wise it is a capable cutter. Scandi edges excel at cutting wood but can have issues with other tasks. Cleaning an animal is one. If you bump a piece of bone with a Scandi edge, chances are the edge will chip.

A look along the contour of the Kellam’s grip shows how smoothly a handle’s lines can flow when using a hidden tang.

Light and quick, the Hawk will help you craft many things around the camp, making your time in the woods easier. Over my 23 years of writing reviews for knife magazines, I have never met a Kellam I didn’t like.

*An international bushcraft legend, Mors Kochanski (1940-2019) was an outdoor educator and survival instructor for almost half a century and is recognized by many as the godfather of modern bushcraft.

Check Out More Outdoor Knives:

Build Your Own Knife: Medford TFF-4 & ARCHITECT AK 5.5

0

Explore the world of build-your-own knives with firsthand reviews of Medford’s TFF-4 folder and Architect’s AK 5.5 fixed blade.

In my early days of being a knifemaker, the internet played a factor in my business, largely in getting me exposure on various knife forums. As the years passed, it helped grow my enterprise, making international sales possible. These days, you can hardly imagine a knife business without the ’net.

One of the greatest challenges was helping customers decide on their orders. I had a “record” exchange with one customer of 51 emails to nail down the order. Needless to say, I later deleted the customer’s email from my files.

One way for knife enthusiasts and makers to avoid such kerfuffles is for the customer to “build” his or her knife on the company’s site and get the price, all in real time. Enter two of the outfits that provide that service today: Medford Knife & Tool and Architect Knives (there are others as well).

I went to both sites, followed their processes and “assembled” my knives. Following are the results.

MEDFORD TFF-4 Build

If you’ve read my articles over time, you know I have a thing for knife names. While TFF-4 (starting MSRP $550) doesn’t stand out, I must start cutting companies some slack as the sheer number of manufacturers makes giving a model a name that’s not already taken nearly impossible.

The flipper action is crisp and quick on the TFF-4. Medford provides a pronounced flip so you can quickly deploy the blade.

Anyway, back to the build.

Go to the Medford site and make your way to the “build your own knife now” button. You have three choices: folder, fixed blade or auto. Each of the applicable website pages gives you an overview of the models available. I chose folders and the TFF-4.

It couldn’t be much simpler. Follow the process starting with blade type. As you make each choice, the knife evolves and you start to see it develop. For instance, if you choose the bronze finish the color changes to match your choice. Keep in mind the devil is in the details, so play around a little bit. Either you can have everything match or you can play with contrast.

“I decided to go with a contrasting presentation by making the pivot point, screws and handle inlay black along with the spacer,” the author wrote of the TFF-4. “I could have just made the inlay black and matched the rest to the body. Options are the beauty of a build-your-own knife. I ordered the clip in black as well.”

There were only a couple of cons with the build. Granted, this is my opinion. The example knife was at the top of the page, so as I scrolled down to make my selections, I was constantly scrolling back up to see the result. Secondly, there is no visual representation of the inlay until you choose it. You select your inlay from a pull-down menu and then color options for the inlay from a second pull down. Small things, I know, but they aren’t hard knocks for me. The process still went slick as goose droppings on ice. Part of the fun is going through a number of variations. I just wish I had the money to order all the ones I like.

Medford Results

Tank best describes the resulting TFF-4. If Gucci made a tank, this would be it. I mean this in a nice way. It has style and is built solidly—think a Chris Reeve Sebenza on steroids. It’s clean and the finish is impeccable. It is a framelock design built to point. Lock up is solid and it releases smoothly with no sticking.

As the author noted, it is a lot trickier at times to get a quality lock up on a linerlock or framelock. “On the TFF-4’s framelock Medford has matched the balance between solid lock up and ease of use,” he assessed.

The blade is hollow ground from S45VN stainless. Keep in mind, you don’t have a choice of steels. Medford leaves grind lines on the hollow grind and a false grind to contrast the flat. I enjoy a hollow grind on my folders, as they are easy to get razor sharp due to the fine edge. The TFF-4 is a flipper design and opens lightning fast.

For carry, it has a robust designer clip. A downside to a sturdy clip can be that it’s difficult to attach to some pockets. The TFF-4 clip being so tight with a small opening angle makes it a bit difficult to capture some pocket rims.

Medford provides a solid user with its build-it-yourself folder. I like the clean presentation and have enjoyed carrying it. My experience with its one-handed operation has guaranteed it’s going to be riding in my pocket regularly.

ARCHITECT AK 5.5 Build

In the AK 5.5 (MSRP $285), Architect Knives offers a build-it-yourself EDC fixed blade. The blade lengths range from 3 to 8 inches in half-inch increments. At first, I saw what I thought would make an excellent bushcraft camp knife. I chose the AK 5.5 for the aesthetics and larger outdoor chores. Had I wanted an urban EDC, I would have gone with the 3-inch blade; in fact, I might still do that.

When the author pulled everything out of the bags for the Architect AK 5.5, this is what he got. The sheath was assembled. A threaded post system attaches the scales, and there were plenty of extra screws for the sheath and handle. All the bags are quality and of the Ziploc® type. Tool users will appreciate them.

To start the build process, Architect provides an icon-driven selection menu to the left and you get to see your knife develop to the right. From mine, I chose MagnaCut stainless steel, Midnite 1×1 layer G-10, and a gun-metal grey Kydex sheath with leather backer and a dangler attachment.

Operating the site was a breeze. Navigating the plethora of choices was what took time. There are too many to list here. Let’s just say if you can’t find a carry style you like with all the options Architect provides, a paper bag is your only choice. It truly was a breeze to design my AK 5.5. Each icon activates a pull-down menu of options you can choose from while still viewing your example.

ARCHITECT Results

Architect sends you a knife but it is more like you receive a kit. The knife shows up with some assembly required. You get your blade, all the hardware (plus extras) and all your options. The company provides some thread-lock epoxy and two Allen keys for the handle hardware. You will need a slotted screwdriver and a Phillips to assemble the sheath. It wasn’t much work and everything went together in a matter of minutes. I assembled mine in the front seat of my truck in the parking lot. Yes, I carry tools with me.

“I like thumb gimping,” the author stated of the feature on the AK 5.5, “but I will probably knock it down a bit.”

My AK 5.5 came shaving sharp out of the box. I was immediately impressed with the ergonomics of the handle. It has an extended tang with gimping and the extension has a lanyard hole. There are a number of carry options, as mentioned. I chose the Kydex with leather belt loop. The Kydex has a tension-adjustment screw and I customized the tension to my liking. As an extra I got the dangler option, which Architect gets from Casstrom with the “D” carabiner.

The blade sports a high saber grind and the spine has gimping for a thumb rest. I found the gimping a tad crisp on my thumb. It’s a sturdy knife and definitely a cutter. At the rear of the edge is a micro choil. I often find micro choils get caught up on things. The blade carves well but, as to be expected with its 1.5-inch width, it doesn’t excel at detail work. Overall, I am very pleased with the knife and would have no issue taking it on an adventure.

No Downsides

As a maker, I see no downside to building a knife online. As a customer, I see no downside, either. For both parties it streamlines the design processes and allows instant generation of information. Best of all, for the customer it eliminates a lot of the guesswork and stress associated with ordering.

More Knife Reviews:

Lansky Folding Tapered Diamond Rod Sharpener Vs. Serrated Blades

0

The author tries out the Lansky Folding Tapered Diamond Rod Sharpener.

Over the years I’ve written a number of articles on sharpening. I have also taught countless sharpening classes covering everything from knives, saws to Forstner bits. Sometimes you need a special tool to get the job done. In the case of serrated edges, you need a dedicated sharpening tool. This time it’s the Folding Tapered Diamond Rod by Lansky. I will cover the basics of sharpening a serrated blade as well.

The two serrated blades I carry most is the one on my Leatherman Wave and my Spyderco Police. I am a property maintenance man and the Wave is like my right arm. The Police sends chills down the spines of people when I open it. Let’s get to sharpening them.

Keep It Simple

First off, there are those who would like to complicate sharpening by making it seem more than it is. At its core, sharpening is simply polishing two surfaces that meet at an edge. In the case of a serrated blade, the edge has a series of gullets (channels) and teeth. The different contours on a serrated edge require a sharpening tool that can accommodate such a surface.

Sometimes when sharpening a serration with a broad diameter, the author follows the secondary bevel across the edge instead of pushing the sharpener into the blade.

Another feature of serrated edges is that a number of them are formed with a chisel-style grind. By chisel-style grind, I mean the secondary bevel to the edge is on one side only. Since serration patterns vary, you need a sharpener that will accommodate different sizes of teeth and gullets. A common form is the use of a cone. A cone-shaped sharpener should match the size of a serration somewhere along the cone.

Sharp Specs

Lansky has taken a tapered diamond impregnated rod and created a foldable handle that acts like a case for the rod. The style is not uncommon except Lansky takes the ergonomics a step further by making the injection-molded handle contoured for a more solid grip.

The author’s older Lansky folding sharpener (left) does not have a large enough diameter for some bigger serrations. Meanwhile, the new Lansky model (right) has a larger tip diameter than the older one, making it impossible to use on smaller serrations.

The diamond coating is electrostatic-plated to the rod, which is better than using an epoxy as some others do. Lansky uses a 600-grit coating. It is not an aggressive grit, though on the other hand you don’t want a grit that is too aggressive for serrations. If you get too aggressive of a grit, then a mistake can ruin the blade. The one issue I find with the Lansky is the tip of the cone is a bit large for some serrations. Other than that, I plan to get a lot of work out of this sharpener for years to come.

The Method

First, brace the blade you are sharpening against a stable surface. Position the blade’s secondary bevels up. I tend to prefer the dynamic style of sharpening in these cases, so I move the sharpener, not the blade. Match the angle of the secondary bevel when placing the rod in the serration.

There is often more than one way to do something. Here the author uses a ceramic sharpening rod whose diameter closely matches the serration.

Position the rod a bit before the diameter of the cone that matches the serration being worked on. You don’t want to start your sharpening stroke at the beginning of the cone as that will change the shape of the gullet. The intent is to remove as little material as necessary. If you start sharpening close to the beginning of the cone, you will cut into the gullet. Keep close to the diameter of the gullet and take short passes.

When finished, I check all the teeth to make sure they are still pointed. Then I briefly strop the opposite side of the blade with a compound-loaded leather strop. Just a couple of passes will remove the burr. Lansky lays out the static method in the directions, which means you move the blade along the rod. Try both methods and see which one works best for you. Everyone has their own preference. In the end it is more important to get good results.

Parting Cuts

Serrations shine when it comes to cutting fibrous materials such as cord, rope and nylon straps. At my shooting range, when I score a bunch of cardboard for backers, I usually use my serrated knife to cut the cardboard down to size.

A downside to the new Lansky folding sharpener is that it isn’t as compact as the older Lansky design (right).

It is best to maintain serrated edges. With a plain edge you can let it go then sit down with it and bring it back to life easy enough. Serrated edges I find it best to stay on top of and regularly give them some upkeep. Wearing down the tips off the teeth and blowing out the gullets just makes more work and creates more chance you will mess up the serrations.

If you don’t own a good quality serrated knife because you are concerned about sharpening it, then buy a cheap one and practice your technique. Lastly, if you own just one serrated knife outside your kitchen bread knife, make it the rescue knife in your car.

Lansky Folding Tapered Diamond Rod Sharpener
Abrasive: Diamond-coated rod
Rod length: 3.5”
Rod thickness: 1/16” at tip, ¼” at base
Grit: 600
Handle: Nylon
Sharp stuff: Sharpens serrated blades, fishhooks, gut hooks and more; the rod folds into the handle for protection and ease of carry
Weight: .2 oz.
Closed length: 5”
Open Length: 9”
Country of origin: USA
MSRP: $19.95

More Sharpening Articles:

Knife Handle: Why Handle Ergonomics Should Be Your Focus

How you exert control determines knife handle design.

After 19 years as an autoworker, 30 years as a traditional woodworker and what seems an entire life of being a knife nut, I have come to appreciate a properly formed tool handle. During any workday at the auto plant, I picked up and used tools over 500 times—to be precise, once every 43 seconds. After a while, I started to take notice and favor tools shaped in an ergonomic fashion that allow efficient, accurate manipulation.

How useful is your knife if you can’t hold it and can’t control the edge? Just look to the “Riddle of Steel” from the original Conan the Barbarian movie. Steel is nothing compared to the hand that wields it. Perhaps that is where I find my largest bane. I constantly hear custom makers and users alike talking about a “super steel” and how they would use no other steel or find those to be the best, yet the fact that the knife is a system gets left by the wayside. A knife should be considered a tool and, as such, a tool that is easy to use. That’s if you plan to use it. “Gucci knives” are exempt. The blade and handle working together and a properly heat-treated steel is part of that, so let’s get started with how to hold a knife.

Two Diving Sparrow Knives prototypes. Follow the layering lines built into the material and you can see the flowing contours. The contours not only provide a place to grip but the subtle grooves give your fingers platforms to manipulate the knife in your hand

First off, I am not a human kinetics major so let me indulge myself and develop my own vocabulary for this section, along with some proper terms. The grip consists not only of just your hand but extends back farther through your wrist, forearm, elbow and all the way to the shoulder. Your arm works as a system and how your hand grasps an object will affect the positioning and strength exerted by your wrist and so on up the line.

3 Grip Functions

Starting with your hand, there are three functions of the grip I call selection, reaction and manipulation. Selection is when the hand selects or picks something up, often via the index finger and thumb. Usually, the intent of selection is to seek control over the object until it is firmly held within your grasp, resulting in a solid purchase. The group of muscles and body parts, that is, your index finger and thumb, are also the same group that normally exerts finite control for most people. Writing with pencil and paper is an example how over time humans have developed the index finger and thumb pinch for finer control. Watch any surgeon or chef use a cutting tool; specific direction is guided by the two main leaders of the band, the thumb and index finger.

The Grohmann knives survival model uses a flared teardrop handle, narrow at the front and wide at the back, to prevent the knife from slipping from your grip.

Reaction is best reflected in the act of catching an item, be it a ball or what have you. Your hand is prepared to catch and instantaneously selects the process of gripping the item based on how it enters your hand and what parts of your hand it touches first. A good example is when something small touches the center of your hand; your fingers surround it because it is already in the middle of your grip. If the item is touched to the outside, say just on your fingertips, your hand tries to react by drawing the item to the center and then closing the fingers.

How reaction works in the use of tools can be expressed as “for every action there is an equal and opposite reaction.” Without getting into a huge physics argument over string theory and the purity of the law as it applies to using a knife, it is a simple expression of how your body works. As the cut is made, your body exerts force. In turn, the item being cut provides resistance. To maintain control, your body must adjust your grip; in that that way you can manipulate the tool to continue cutting. Simply speaking, your reflexes kick in, something your mind has been honing all your life and now operates on a subconscious level.

The Cold Steel Republic uses texture on the handle belly to prevent slipping.

Manipulation is what I call a blend of selection and reaction. During your effort to control a tool while using it, you try to coordinate selection and reaction to manipulate it. Remember: how your hand works is mostly subconscious. The process seems inherently simple while using tools; you decide what you want to do. Therefore, the next step is to direct the tool. Your hand goes into a selection mode with the intent of gripping and directing the tool. As you use the tool, different forces often change and your grip must adjust. Taken altogether, I refer to this manipulation as the process of exerting force with a tool and reacting while trying to accomplish the task/directing the tool.

Knife Handle Shape

Ideally, a knife handle should be large enough to fill your hand yet small enough for your hand to grasp it. Given that you’re provided just enough volume to fill your grip, you might figure you could solve the shape issue by grabbing a ball of clay and mimicking the resulting shape. Alternatively, you could keep it simple and use the broom handle approach.

Fox uses a curved handle on its bolo-style machete to allow your hand some movement up and down the grip. “I tend not to like such a grip on smaller knives as it crams the fingers into a small area during use,” the author opined. “The flared back end prevents the hand from slipping off during a swing.

To optimize a handle, I use what I call the absence and presence method. Take, for example, a box-end wrench. The hole in the end of the box-end wrench fits around the nut. At the same time, the wrench has platforms designed to exert force on the flats of the nut to turn it. As the box-end wrench is to a nut, the hand is to a handle. A handle should be shaped to allow the hand to be able to grasp it, yet there should be enough handle to provide various platforms for the hand to exert pressure on to manipulate the knife itself. To achieve this, consider the knife’s purpose.

In shaping the handle, keep in mind first and foremost it must fit the hand. Secondly, it must have platforms/contours that provide places to push off from to control the edge, all the while being mindful not to create hot spots that might abrade the skin either via sharp surfaces or by simply rubbing against the handle.

Knife Handle Materials

The trim profile of the Spyderco Police (left) allows manipulation for draw cuts, point use and especially lateral force. The Spyderco Endura (center) is a good midway thickness for an EDC. The Benchmade Griptilian (right) has a thicker handle and, like the Endura, scale texture. When using the Griptilian you will find lateral rolling in your hand a bit smoother because of the handle’s fullness.

There is a staggering array of available handle materials, including wood, G-10, carbon fiber, Kirinite and many more. Custom makers even employ rubber barn mats used for horses for cutting competition/chopper handles. Materials chosen correctly can enhance your grip or even overcome some shortfalls of certain handle designs. The use of materials is a large enough topic on its own; I cannot do it justice here. Let it be said, though, that a lot of it is influenced by design and structure.

A handle occupies a three-dimensional space, so forming it should take a three-dimensional approach that addresses the grip’s length, width and thickness. Fine points in design depend on the knife’s use. For instance, a chopper should have a natural stop at the handle butt to prevent your hand from sliding off while swinging, though the stop should not jam or create a rub point to irritate your hand.

The trim handle of the Police enables it to sit nicely over the joints and in-between the pads of your fingers. The trim grip also enhances lateral knife control.

There are many fine points to look over in a handle but the major thing for me is that those finer points should get more consideration. For example, consider again a chopper. Too often I’ve seen chopper handles be too narrow. When a chopper strikes something solid, the energy from the impact travels through the chopper to your hand. A wider handle would distribute the force more evenly, preventing shock to your hand. If the handle is too narrow, the force will be concentrated on a small area. A wider handle will disperse the energy over a broader area, lessening the effect of the impact. In the end there is a fine balance because you do not want the handle to be so large that it’s difficult to hold. That’s why handle design tends to be a sticking point for me when not enough attention is paid to doing it properly.

There is way more information to cover about handles than I can cover in such a short article. I have only grazed the surface here. Creating a well-formed handle and covering common mistakes would take a chapter of a book. I could burn up a whole article on handle nomenclature alone. Hopefully, this will get you thinking more about the handle on your knife than just the latest super steel for the blade.

More On Knife Handles:

Catchy Names On Great Knives

Recognition, catchiness and marketability are but three keys to knife names.

What’s in a name? A knife by any other name will still cut, hopefully. Many people don’t realize what hangs on a name. Is it good enough to be memorable, catchy as it were? A catchy name will make a knife more or less marketable.

If you’ve read my stories long enough, you’ve seen me comment on a knife’s name, especially if it is a long, drawn-out one. To me, it is important for the name to have a short form. For example, salespeople can’t sell a knife by word of mouth if they have to say the company name followed by Omega Kilroy Uber Cutter, Men In Black Forever Ever Sharp Cutting Commando, etc. When I was having knives licensed, the licensing companies would check to see if there were other knives on the market with the same name to avoid any copyright or other legal problems. They no doubt still do that.

I think now more than ever naming a knife would be even more difficult than designing one. After all, you can have numerous drop points but when you go to name your knife you don’t want it drowning in a sea of cutlery. With so many new knife companies out there, knife production is at an all-time high. How on earth do they make their knives stand out from the rest? One way is with the name. Following are some lighthearted ones.

RMJ Tactical Stabby Guy

The large finger loop in the handle butt of the Stabby Guy provides a great platform to support the knife in your hand and keep it from slipping during thrusting motions. The fuller helps maintain blade strength and reduces weight.

Stabby Guy Specs
Overall Length: 7.25″
Handle length: 3.5″
Blade Length: 3.75″
Blade Steel: CPM 3V carbon
Handle material: Black G-10, Dirty Olive Hyena Brown
Sheath: Kydex
MSRP: $240
Country Of Origin: U.S.A.

RMJ Tactical chose a name short and sweet for its Stabby Guy. I prefer—no, actually love—names like this. If you find yourself wandering off into multi-syllable diatribes for a name, you’ve lost me. Not only is Stabby Guy brief, it’s to the point, pun totally intended. It is what it says it is. I would call it a self-defense blade. It is slender in design and has an American-style-tanto tip. It is built solid, with the body of the knife having no primary edge.

A fuller runs full length on one side of the blade. The fuller allows the knife to keep its strength and still not weigh a ton. After all, this knife technically is equivalent to a tactical sewing needle. Save the fancy moves for Hollywood and put the machine on surge with the Stabby Guy. It has a simple, ergonomic, basically straight handle. A finger loop at the butt serves to anchor your grip and substitutes for the lack of a guard. A guard stops your hand from slipping forward while thrusting with the knife; the finger loop serves the same purpose.

Though there’s not a lot of edge, the knife need not be dead weight all day while you’re waiting for a prison riot to break out. The small but sharp edge can do a ton of minor chores. However, don’t expect to carve a chess set with it. It has a Kydex sheath equipped with a belt loop. I carried mine in my back pocket and forgot it was there. It’s a cool concept of a knife with a name that doesn’t leave you guessing.

Condor Tool & Knife Rude Boy Machete

The overall profile of the Rude Boy shows the sweet spot of the blade is a few inches back from the tip. The farther out the sweet spot, the more force it has during a swing.

Stabby Guy Specs
Overall Length: 7.25″
Handle length: 3.5″
Blade Length: 3.75″
Blade Steel: CPM 3V carbon
Handle material: Black G-10, Dirty Olive Hyena Brown
Sheath: Kydex
MSRP: $240
Country Of Origin: U.S.A.

Condor Tool & Knife’s aptly named Rude Boy Machete is made for light vegetation like that in a rain forest. Some machetes, on the other hand, are geared toward North American vegetation, such as hardwood or softer trees.

People often view a machete as a survival or bushcraft tool. Actually, it is more of a hiking tool with such primary uses as clearing walking trails through the jungle. For these endeavors the knives are often not razor sharp like many in North America believe. Maintaining a high level of sharpness would be next to impossible in such conditions and at best too time consuming. For that reason, a powerful swing with a thin, dull machete works well in dispatching vegetation. The Rude Boy is not only thin but lightweight, making it possible to swing for long periods. The well-constructed leather sheath has a pivoting belt loop to help avoid hanging up easily on vegetation.

The only thing I take issue with is the blade profile. The blade’s lengthy defined tip leaves the belly swell farther back from the end. My preference would be to have the widest part of the blade farthest out to get the most out of the swing. Don’t get me wrong, the Rude Boy worked well, but a long day of swinging makes you want to optimize a blade’s performance. Then again, you do want some variety in appearance.

The best feature is the handle. In profile it is pretty much the American military style, though there are some excellent ergonomics added to the design. The plastic handle is overmolded to create a hidden tang. Instead of being blocky the contours are smoothed out for a comfortable grip you can use for long periods. I like the Rude Boy and I can see me beating the snot out of it once yardwork season arrives.

Toor Knives Jank Shank S

The sharp point and clean grind lines of the Jank Shank S make it easy to see how the author was able to use it to clean 50 muskrats with minimal effort.

Jank Shank S Specs
Overall Length: 7″
Handle length: 3″
Blade Length: 4″
Blade Steel: CPM M4 carbon
Handle material: G-10
Sheath: Kydex
MSRP: $250
Country Of Origin: U.S.A.

Out of the creatively named test models, I probably gave the Jank Shank S from Toor Knives the longest going over. I used it as an EDC but the bigger workout was when I took it to my sportsman’s club. Many in the tactical crowd promote rings in the handle butt for changing positions during combat, but I like them for the advantage they give while cleaning game. That’s right, cleaning game.

When cleaning animals I often find I want to free my hands to work with the carcass. Instead of putting the knife down, I let it dangle from my pinky. I do what needs to be done and then just move the knife into my grip. There’s no fiddling around; it’s quick, simple and no searching for where I put it down.

My club has an annual muskrat dinner, and depending on ticket sales we clean up to 400 muskrats. I cleaned 50 of the varmints with the Jank Shank S, including splitting open the chest and neckbone. Not once did I sharpen it. When done I cleaned it off, gave it a touch up and bam!—it was crazy sharp again. The textured G-10 scales made it easy to grip despite my hands being covered in blood. It worked so well the muskrats didn’t even complain. I liked it so much you won’t hear me grumble about the blade’s fur-catcher choil. Oh, and did those muskrats ever look good with fries and a side of deluxe baked beans! The sheath fits well with no break-in, period. I will add an UltiClip to the sheath and it will be an instant EDC. The Jank Shank S will make it into my game kit any time. Muskrats beware!

Name-Gamers

A name can add to the appeal of a knife by being entertaining. It is also important to have a good name to make the design stand out and be memorable. In the end you don’t want the name associated with a piece of junk, so it is always best to put the most effort into a great design. Our three name-gamers fill that bill.

Catchy Cutlery Call Signs

  • Catchy Cutlery Call Signs
  • Altered Beast (V Nives)
  • American Lawman (Cold Steel)
  • Bot (CRKT)
  • Dreadeye (Tactile Knife Co.)
  • Juma Blue Snake (Fallkniven)
  • June Bug (Emerson Knives, Inc.)
  • Laid Back Jack (Jack Wolf Knives)
  • Little Bugger (TOPS Knives)
  • Monkey Thumper (Fox)
  • Separateur (Bastinelli)
  • Smooth Criminal (Medford)
  • Waning Moon Yataghan (APOC/CAS Iberia)
  • Warhead Auto (BRS)
  • Zilch Baltic Haze (Gerber)

Pocketknife Info:

Advertisement

Must Read Articles

Read this before you make a knife

Knifemaking 101 – Read This Before You Make a Knife

  by Wayne Goddard My experience has taught me that there's nothing like digging in and getting started. I've often said the hardest part of the...
how to forge damascus steel

How to Forge Damascus

Advertisement
Advertisement