


From maintaining symmetry to adding fullers, we break down the intricate process of making a dagger design into a physical knife.
A dagger is not a kitchen knife in disguise. It is a purpose-built instrument of thrust and that purpose demands precision at every stage of construction. Small errors that might pass unnoticed in a hunter or utility knife compound on the exacting canvas of the dagger. A centerline that begins drifting by a fraction at the ricasso becomes an off-center tip, an uncentered bevel a blade that twists, the result a thrust off target. The difference between success and failure is geometry, and nowhere does geometry matter more than in the making of a dagger.
The process begins with detailed design and planning. The execution begins with precise layout. The central axis is the spine on which the whole piece will rest, and without it symmetry is impossible—the whole blade will stand or fall on getting this right. There are some tricks that will help ensure success.
Dagger Half Template
Once you have determined the blade profile, preferably in some physical form like a drawing, make a template so it can be accurately transferred to steel. Here’s the thing, though: you only need half. A template representing only half of the blade profile will allow you to use it for each edge, ensuring perfect symmetry. Include the tang on your profile, not just the blade.
If you’re careful, your half template can be held on your blade stock aligned on a scribed center line and scribed on each side. If you’re less careful, oversize your blade stock and template so you can drill holes for alignment pins in the end of each that is outside the final profile. Using these holes to align the half template for marking each edge is the most precise way to lay out a symmetrical profile. If the stock is oversized, you’ll grind off the alignment holes when grinding the profile.
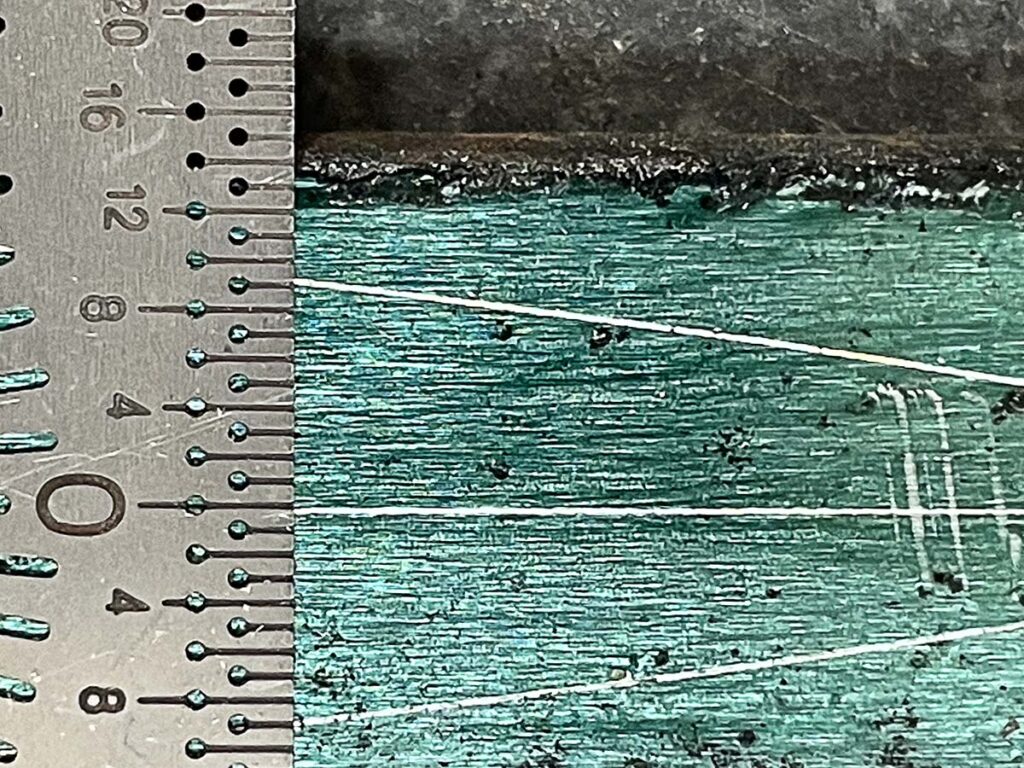
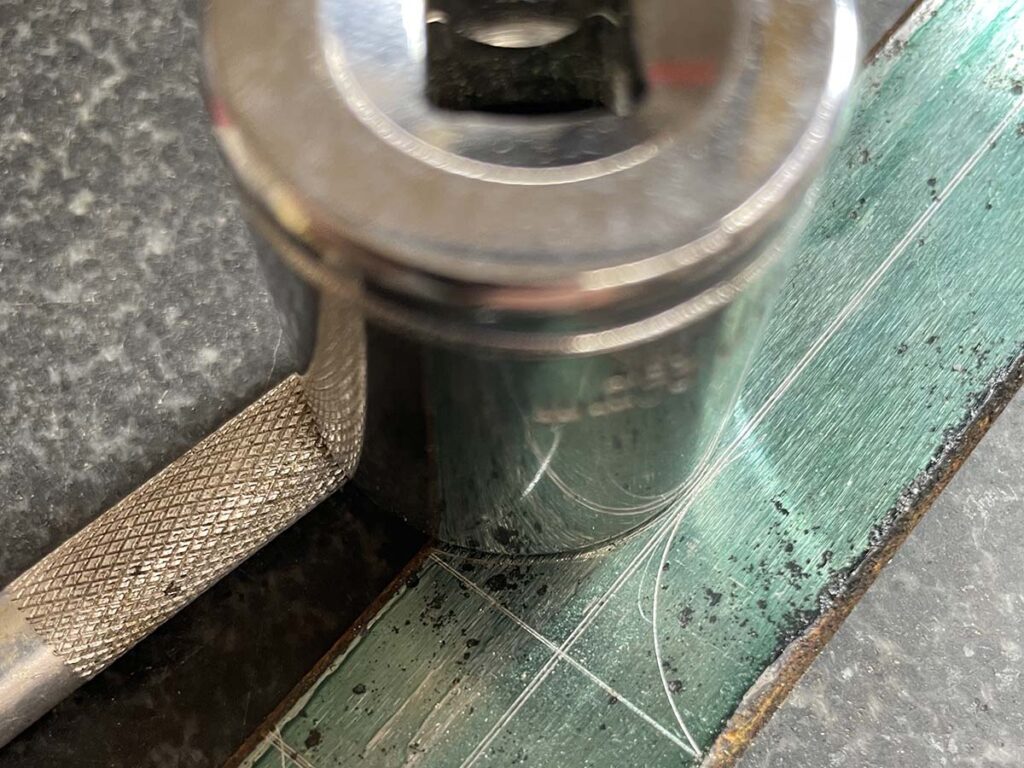
Planning Plunge Lines
Once you’ve accurately laid the profile out on the blade stock, take the time to scribe in the planned plunge lines on the blade flats and the edge. Sweeping, curved plunges are more visually appealing and careful layout will help ensure that your vision becomes reality. These lines are not decorative. They are the stops, targets if you will, that prevent the grind from slowly creeping toward the ricasso with each grinding pass.
When it comes to grinding these sweeping plunges, hollow grinding on a wheel is easier than flat grinding on a platen—it’s easier to grind a curve with a curve—but by all means use a flat platen if that’s what you have. If you’re already grinding on a wheel, a 1-inch-wide wheel with a 1-inch belt will be an easier path to success than the standard 2-inch wheel and belt.
Sweeping plunges also will result in a thicker edge toward the ricasso. This is fine—you shouldn’t try to sharpen this part as doing so most likely will ruin all your careful design work. Will the unsharpened part of the edge impair the stabbing function? Perhaps, but only a little. Though it pains a serious knife person to admit it, most handmade modern daggers are for show. In most societies stabbing others is frowned on, and if you’re going to all this effort, choosing to focus on aesthetics is a good bet. However, if your dagger will be deployed in combat, ignore the aesthetics, grind sharper plunges and take the edge all the way to the ricasso.
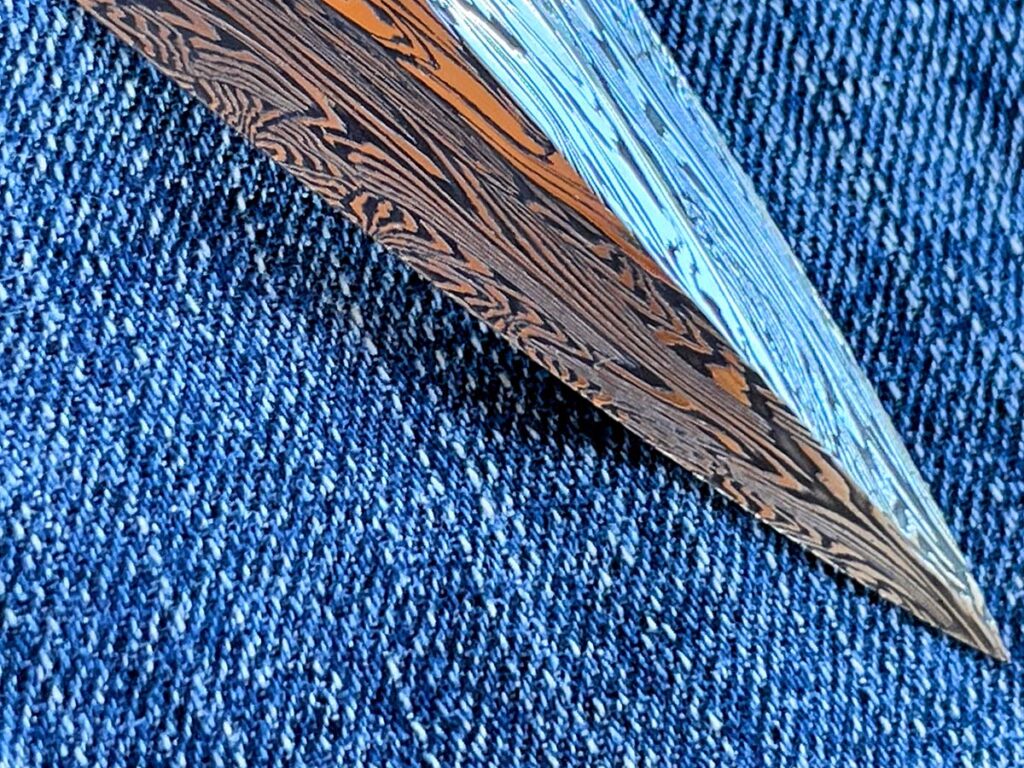
Dagger Grinding And Stock Removal
Grinding and stock removal are the way to go for daggers. This is admittedly a hot take but in a game where winning is determined by symmetry, forging introduces unnecessary variables and distorts the base stock, making accurate layout more complicated—not impossible, just not as easy. There is little to gain by forging unless the steel itself or the situation requires it, or if you simply like doing it that way. If you want a damascus pattern to taper toward the tip, or if you’re making a dagger for American Bladesmith Society testing, by all means forge. It’s an impressive skill set. If you want to make the best dagger possible with an eye toward efficiency, and thereby your profit margins, grind it. Stock removal is the more predictable path, and predictability is the soul of symmetry. Every forged blade is a stock removal blade before it’s completed; don’t get hung up on this unless you have reason to.
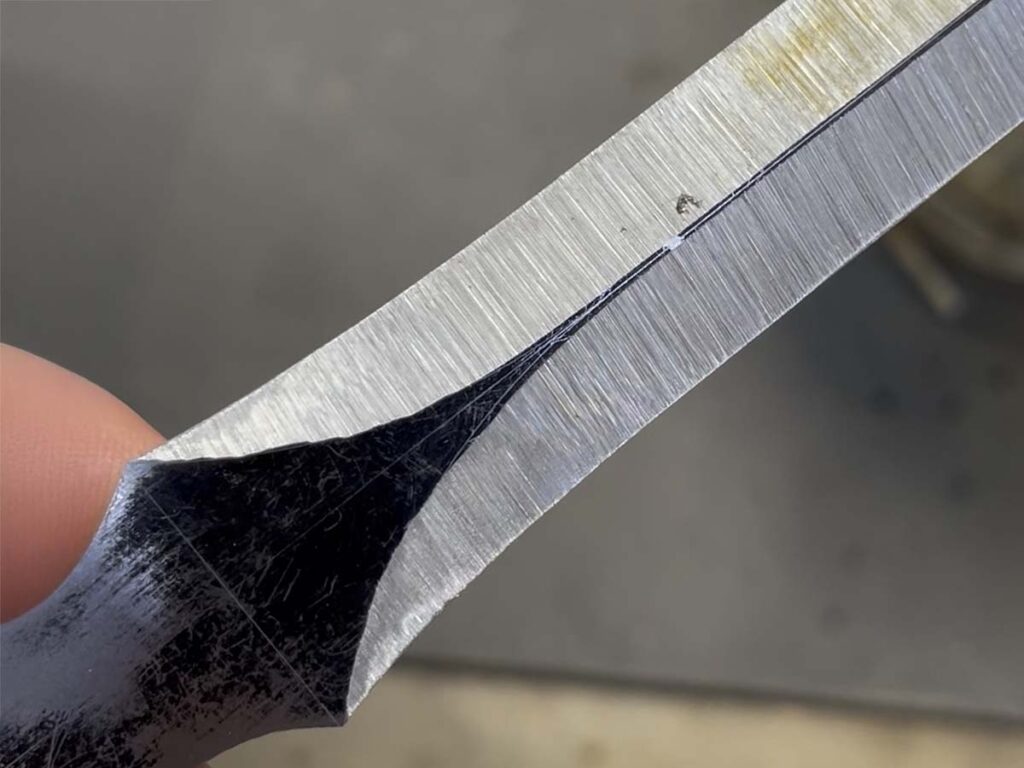
Delicacy Of The Dagger Tip
Where the mass of the ricasso anchors the entire weapon and provides strength at the critical juncture of guard and tang, the tip, by contrast, demands delicacy. Once your profile is carefully ground to shape and you turn to grinding the bevels, grind the tip first. More specifically, grind it at a steeper angle than you plan for the main bevels, and try not to cross the centerline even at that obtuse degree, except at the very end. After that, leave it alone.
Grind the main bevels like you normally would, paying perhaps more attention than usual to your scribed lines, and try to avoid that last inch toward the tip until everything else is pretty much done. This seems a bit odd at first, but consider that the final inch must maintain its thickness in order to be strong enough to pierce effectively without deformation or fracture. If you do it right, you’ll end up with a bevel at the transition. Some makers polish the transition so it remains crisp, while others blend it smooth while polishing. Either way, it should be deliberate. Neglect this and the point will be too thin.
When To Add Fullers
Fullers, if they are to be included, should be cut early while the blank still has parallel flats. Attempting them later invites misalignment, or at the least inserts a potentially unnecessary level of difficulty. Better machinists than this writer/dagger enthusiast will likely have little difficulty either way, but life has enough complications of its own without inviting them into play.
Dagger Balance
Balance matters as much as steel. A well-made dagger should balance at or just ahead of the guard, a neutral point where the hand feels neither burdened nor abandoned. This can be tested with nothing more elaborate than a rod beneath the mostly assembled knife, shifting it until it rests level. It’s really just as easy to adjust weight distribution by feel, removing or adding weight to the component parts until it feels right. Don’t forget to consider the added weight of your epoxy. When balance is right, the blade becomes an extension of the wrist, alive and responsive.
Tang & Spacers

Even the tang deserves forethought. When profiling the blade blank, leaving the tang longer than necessary provides room for correction and fitting, and a threaded end can serve as both a work-holding aid during construction and a permanent anchor if a pommel or nut will close the assembly.
Spacers, fitted between guard and handle and again between handle and pommel, make alignment easier and allow pins to register each component precisely during glue-up. They’re also relatively easy targets for weight adjustment when working on overall balance. These details are seldom glamorous but are what let the final assembly come together without struggle.
Embellishments
What results from this attention is not decoration but readiness. The embellishments will come later… the fluted handles and twisted wires and all the flourishes that mark the master’s hand. But none of that matters if the design is poor, the execution haphazard, the details unconsidered.
More On Daggers:
- Dagger Design: The Geometry of Penetration
- Dagger Design: Point For Perfecting Blade Performance
- Best Daggers: Top Options That Get To The Point [Tested]
- Best Push Dagger: Background And Buyer’s Guide (2024)
 NEXT STEP: Download Your Free KNIFE GUIDE Issue of BLADE Magazine
BLADE’s annual Knife Guide Issue features the newest knives and sharpeners, plus knife and axe reviews, knife sheaths, kit knives and a Knife Industry Directory.Get your FREE digital PDF instant download of the annual Knife Guide. No, really! We will email it to you right now when you subscribe to the BLADE email newsletter.


