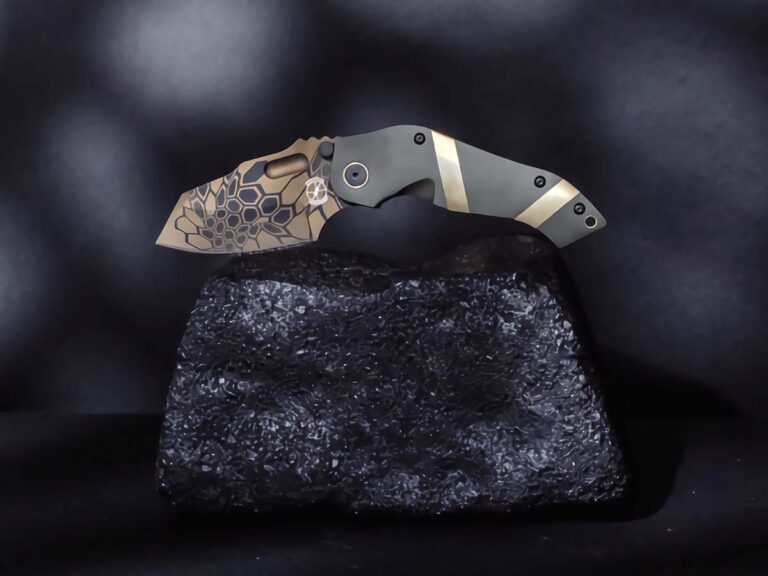
Sniper Bladeworks is sharpening its presence in the independent retail market.
The Kansas City-based tactical knife brand has officially joined forces with Nation’s Best Sports (NBS), a premier buying group serving more than 450 independent sporting goods retailers across the country. As one of only a handful of cutlery vendors approved for NBS, Sniper Bladeworks will debut its partnership at the upcoming NBS Fall Semi-Annual Market, held August 18–21 in Fort Worth, Texas.
For Sniper Bladeworks, this moment marks a major step forward in its mission to get quality, hard-use knives into the hands of professionals and working Americans. “Heartfelt thanks to Tyler and the entire NBS team for entrusting our brand and product,” said Sniper CEO Adam Pener. “Being an approved NBS vendor means something, and we’re honored to be part of this trusted network.”
To celebrate the partnership, Sniper is rolling out exclusive show specials available only to NBS dealersthrough August 31. The deals include special pricing on best-selling models, early access to upcoming 2025 releases, and tiered ordering incentives for event attendees. “We built these specials just for the NBS audience,” said Sniper COO Houston DeFoe. “This is a rare opportunity to grab premium blades at unbeatable pricing, just in time for hunting season.”
Founded by former SWAT sniper Lance Abernathy, Sniper Bladeworks has earned a loyal following for its distinct ergonomic designs and no-nonsense performance. Its knives—many featuring the brand’s signature pistol-grip handles—are built with end-users in mind, from tactical operators to outdoor adventurers. The company relaunched in 2020 with a blockbuster Kickstarter campaign and has since completed three successful production runs, expanding its catalog of field-proven, limited-edition models.
While the knives speak for themselves, the team behind them is just as committed to service. “We’re excited to connect face-to-face with the NBS community in Fort Worth,” said DeFoe. “This show is about more than sales—it’s about building relationships with the family-owned dealers who serve America’s hunters, cops, EMTs, and outdoorsmen.”
At the show, dealers can expect:
Exclusive pricing on top models
Hands-on demos and live meet-and-greets
Sneak peeks at 2025 limited releases
Event-only ordering incentives
With this new partnership, Sniper Bladeworks cements its place in the gear rooms, range bags, and tackle boxes of America’s hardest-working knife users—right where it belongs.
Learn how to spot flaws in Damascus steel blades, like delamination and inclusions, with expert tips from master bladesmiths.
They may be small and insignificant or obvious and glaring, but the skill that is involved in forging damascus steel and then fashioning blades and furniture that adorn custom knives like no other component naturally produces the potential for flaws in the steel itself.
Ironically, the structure of damascus steel, the allure of its beauty and texture, images and etched artistry, is brought together with the potential for a flaw. The production of billets that contain welded elements of 1080 carbon- and 15N20 nickel-alloy steels or other variations involves the marriage of metals. And like any union there is the possibility of a fault. The flaws may be serious or inconsequential. For the buyer, the ability to spot an imperfection and make a value judgment is highly beneficial in the ownership experience.
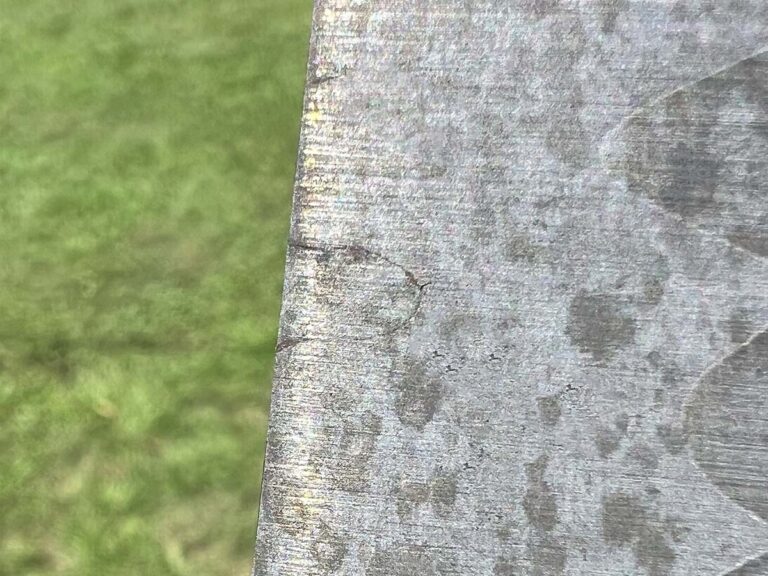
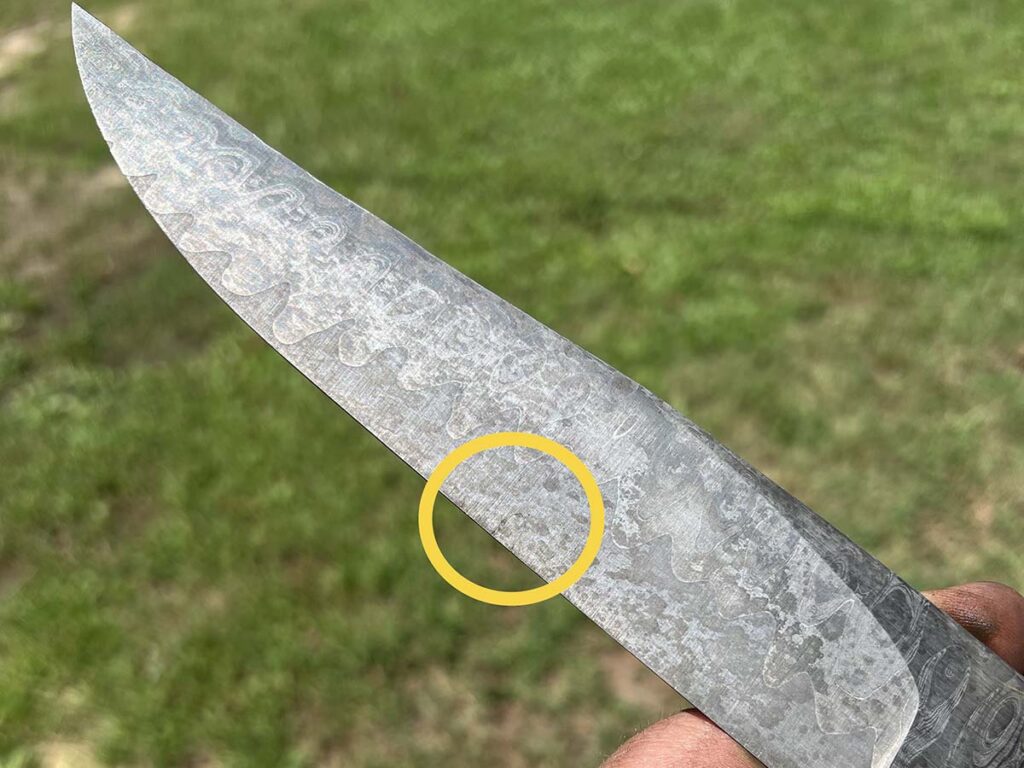
“I would say the most common flaw in a damascus blade is delamination,” ABS master smith Lin Rhea opined. “This shouldn’t be in a knife that is offered for sale. It’s usually evident as a hairline void in the layering and could occur anywhere on a blade. But I see them mostly in the deepest part of the blade as they are revealed in the bevel grinds. I believe this could be prevented by being sure the billet is up to proper welding heat before extracting it from the forge for the first weld in the particular stage of pattern development.”
In a similar perspective, ABS master smith Bill Burke sees imperfections as “a closed shut or incomplete weld that can be found anywhere on the blade. It can be seen as a dark or silvery line in lightly etched damascus or becomes a deep crevasse on heavily etched damascus—and it is caused by the smith not letting a billet soak at heat long enough before welding, or by manipulating a weld that has not been fully set and then working this tear back into the pattern.”
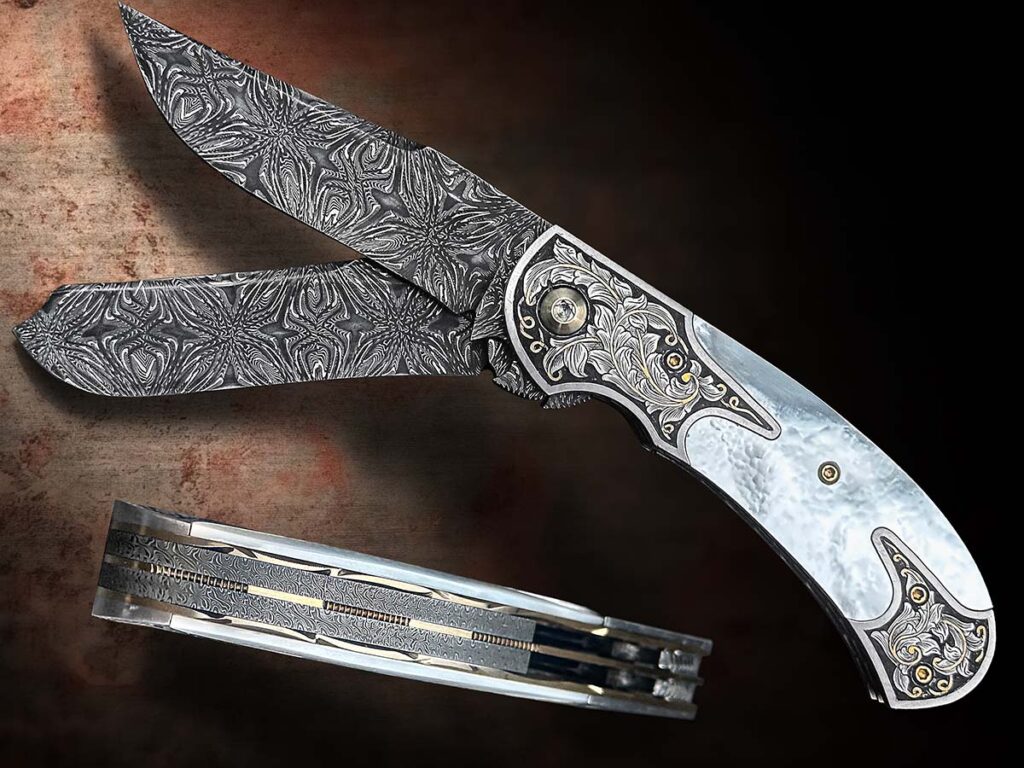
Fortunately for knife enthusiasts, most quality damascus knives are free of flaws, such as Eliot Maldonado’s saddlehorn trapper in Blackbird damascus by Chris Zimmerman. (Jocelyn Frasier image)
ABS master smith Steve Randall agrees and sees these types of imperfections and other potential flaws as well.
“The most common flaw on a damascus blade is the cold shut or an area where the pieces did not weld,” he observed. “It is not so much where it occurs on the blade such as the tip, edge or spine, but where the two different steels meet in the pattern. It’s the two steels that didn’t weld together that creates the flaw, and sometimes they aren’t noticed until [the maker starts] grinding into the blade.
“I would say another common flaw for damascus, mosaic specifically, would be shadow lines from the tiling process,” Steve continued. “Structurally they don’t change the steel, but they can detract from the mosaic visually.”
Both Rhea and Burke have encountered other flaws related to the fusion of the two steels in damascus.
“Less common is an inclusion of some kind,” Burke explained. “Twenty years ago flux inclusions were fairly common. Now one sees inclusions of weld filler material, though, overall, inclusions are less common now than 20 years ago. Inclusions are always found in between the elements that make up the pattern in a bar of damascus.”
Lin added, “I’ve also seen where the maker has left a bit of welding rod material within the damascus blade. This appears as a cloudy gray area and is pretty distinct in appearance from the hardened damascus. In the event wrought iron or mild steel is mixed with high carbon and the layering is of a relatively low number count, this could be part of the intended pattern, so it might be acceptable.”
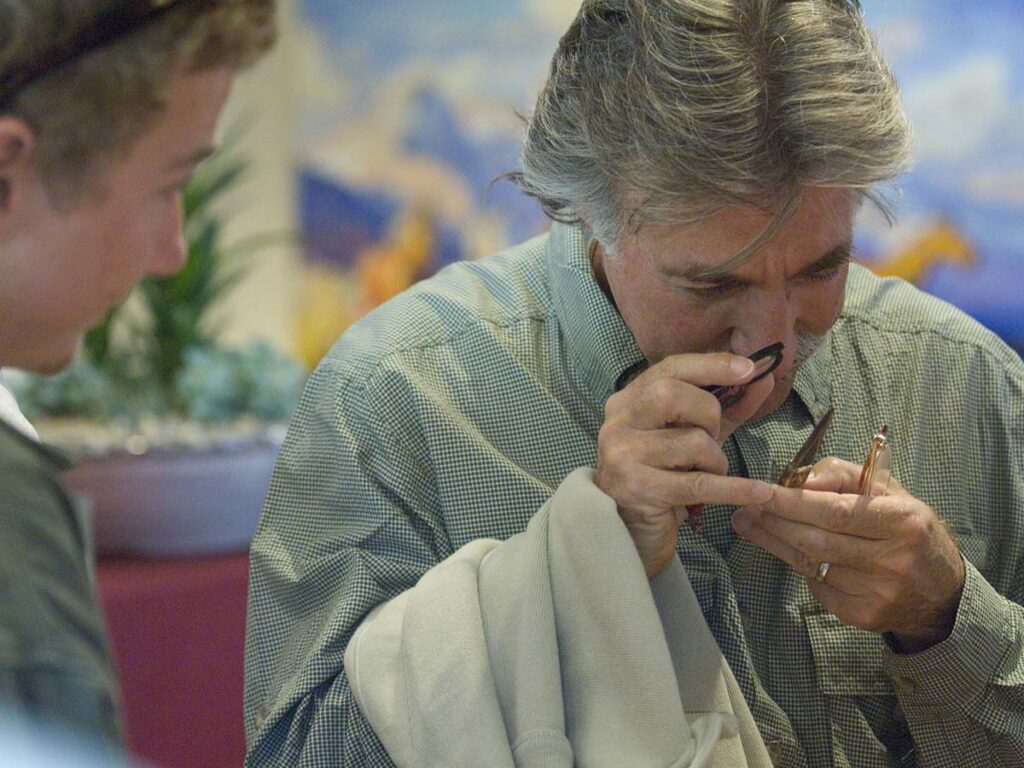
“If you’re at a show and feel you want to look at the blade under a magnifier, then you should ask the maker if he minds,” Bill Burke noted. “If he says ‘no’ or gets upset, then thank him and walk away.” (Eric Eggly/PointSeven image)
According to ABS master smith/BLADE Magazine Cutlery Hall-of-Fame® member Steve Schwarzer, the particular combination of steels might raise the prospects for a flaw to develop, especially when the skills of the maker are evolving. He commented.
“The worst flaws are the delaminations and inclusions,” he said. “These might come from poor welding practices and the choice of alloys involved. Some welds are much easier to make than others and a higher level of skill may be required. Most of it is visual—bad welds are bad welds and don’t have the necessary molecular bond.”
For a potential buyer the ability to spot a flaw is an attribute that pays off when dollars are exchanged for the finished product. Although a flaw may have no impact on the structural integrity of the damascus steel itself, the degree of impairment—if any—ultimately lies with the potential buyer who assesses the level of discrepancy. Approaching a maker’s table, discussing the damascus, and taking a closer look at the blade will sometimes generate relevant conversation and exchange of information. Flaws can show up anywhere in damascus construction, so visual inspection comes with the territory.
Schwarzer advises buyers to check the knife thoroughly.
“Using magnification helps. If the blade doesn’t look right, it probably isn’t. A flaw may show up as a bright spot in a dark area, and some skilled people can reweld their billets. I do that regularly and especially when I do guards and stuff, taking a light hammer and welding heat to fix it, but not everything can be repaired. Sometimes there is no way to repair it, and that is one reason why I hardly ever sell damascus steel—[and if I do] only to skilled professionals.”
Visual Signs
When a buyer’s interest is piqued, the next steps involve courtesy and cordial exchange with the knifemaker.
“Flaws in damascus can range from very hard to see to blaring and obvious,” Burke remarked. “An experienced eye in good light and magnification are the best ways I know to detect them. Some can be felt, but feeling the blade and running your fingers up and down and across it are not reliable and can cause rust and tarnish. If you’re at a show and feel you want to look at the blade under a magnifier, then you should ask the maker if he minds. If he says ‘no’ or gets upset, then thank him and walk away.”
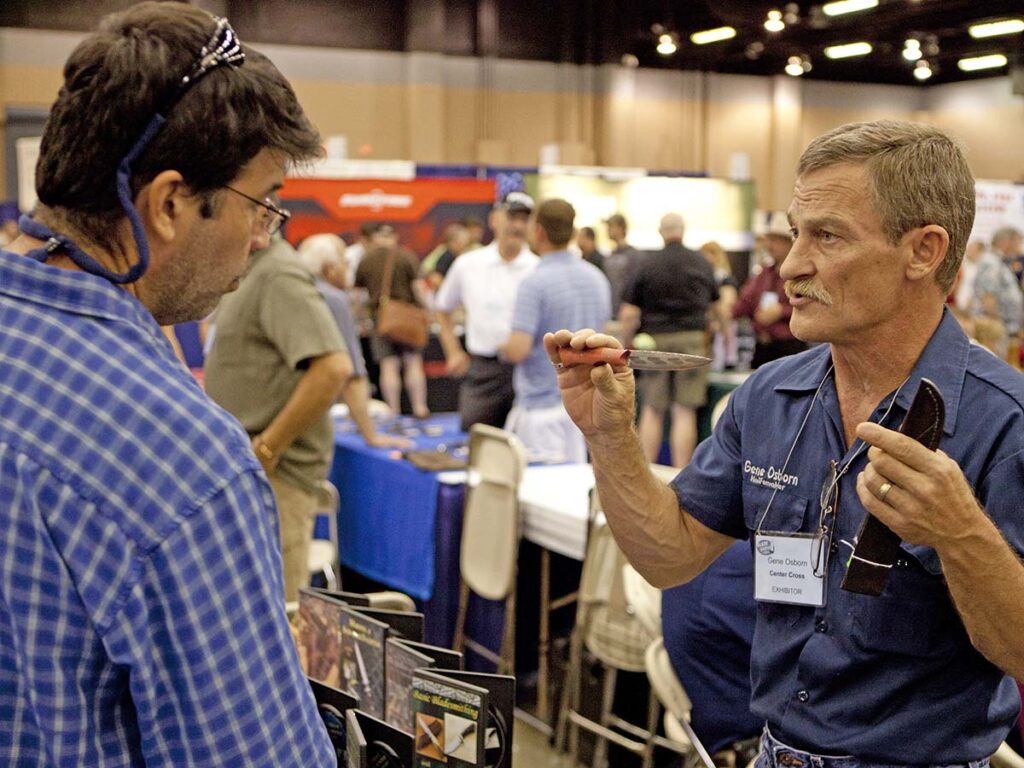
Steve Randall said most makers would not intentionally sell a knife knowing it had a flaw or without first pointing it out to the buyer. Gene Osborn (right) discusses a damascus knife with a customer at a past BLADE Show. (Eric Eggly/PointSeven image)
Randall concurs with that point of view.
“Bright light sure helps,” he observed. “It is difficult to find small flaws once a damascus blade has been etched. Running your fingers over the blade won’t tell you anything, and if you’re at a show I advise not doing it. Using a magnifying glass at the maker’s table could be awkward, and I would suggest respectfully asking before doing it.”
Historically, skilled makers and smiths have assessed their own work and identified flaws, correcting them or chalking up a flawed blade to the hazards of the craft. When ABS master smith Mike Quesenberry considers the flaw in context, he is frank in his response.
“The smith sees the weld lines with flaws before the steel is etched. To me that is something the smith has to deal with. I don’t have any problem scrapping a blade if [a flaw] shows up in the process. The hand sanding and grinding are where the time is really invested, and makers should be honest with their work. If you see a flaw, scrap it,” he stressed. “The best way to fix a flaw is to throw that blade away and start over again.”
Schwarzer smiles when he relates the style of an ancient practice.
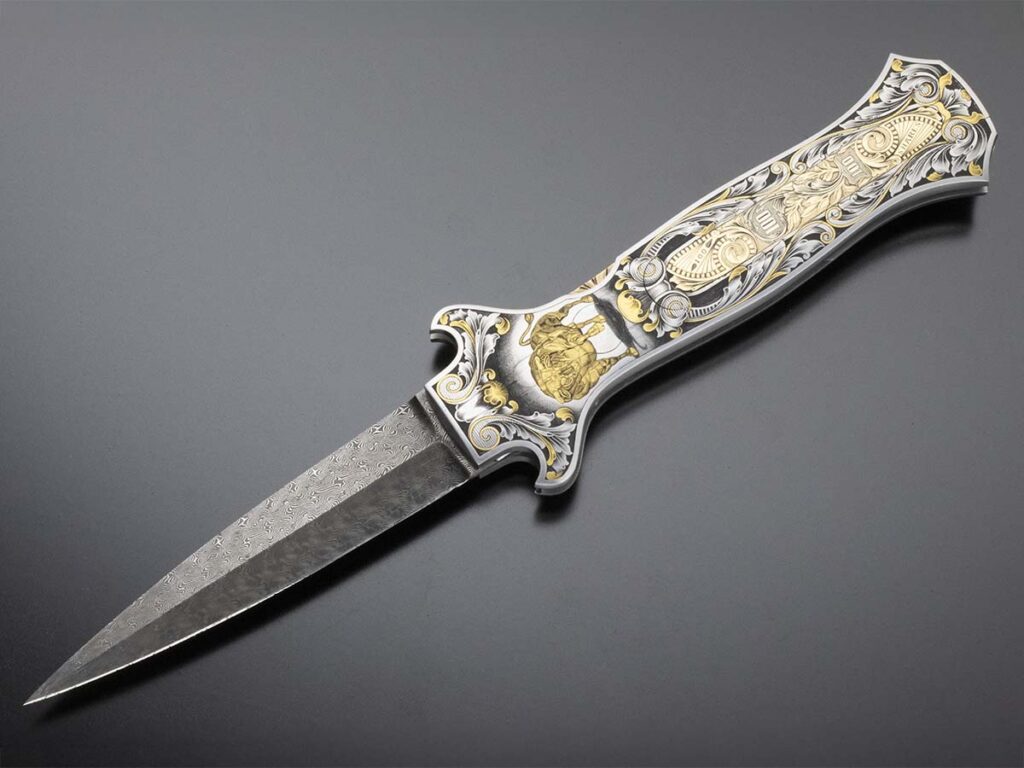
“Japanese smiths worked out a way to hide a flaw if it didn’t mechanically affect the viability of the blade. They would do a nice little gold inlay. That was done in Persia, too, and a lot of other places. They would put artwork over something that was unseemly. If you have $300 in a blade and there is no mechanical problem, then that is a way to make it go away. It’s been said that the difference between a journeyman and a master smith is the size of the screw-up you can fix.”
Rhea acknowledges the human side of the situation. There may be a temptation to continue working on a knife with a flaw in the damascus, but then comes the realization on the part of the maker that causes him to refrain from that option. “When a buyer sees any odd discoloration in the form of surface treatment, color or texture, ask questions and give the maker the opportunity to explain or rethink his position,” he noted.
Resolving Situations
Bladesmiths and custom makers are genuinely committed to excellence. However, at times there may be a situation involving a flaw. When a purchaser detects something that may or may not be an imperfection, talking with the maker can resolve the situation to mutual satisfaction.
A welding flaw might pass a cursory glance, which is why you should always inspect any damascus blade you plan to buy closely.
“If you buy a blade and then find a flaw, you should contact the maker and ask them about it,” Burke advised. “If it is something you cannot live with, ask for a refund or allow the maker to replace the flawed knife. In most cases, the maker is going to be unaware of the flaw. If the maker is aware of the flaw or refuses to do anything for you, then you either have to keep it and say, ‘Oh well’ or sell it to someone else with full disclosure of the flaw.”
“When I have a buyer who experiences issues of any kind, I would prefer that they contact me and give me the opportunity to evaluate, discuss and make it right,” Randall noted. “I’m sure most makers would not intentionally sell a knife knowing it had a flaw or without first pointing it out to the buyer.”
Rhea sees the interested parties taking the high road in almost every case. “Most makers will honestly make a sale with good intent and in good faith,” he reasoned. “If there’s a problem just contact the maker and let him or her explain or make it right. Ultimately his reputation is on the line and he deserves the chance to make it an overall pleasant experience.
“When it comes to flaws and issues,” Lin concluded, “we all have them and we handle them in our own ways. To the degree we act to prevent problems for the buyer we also prevent problems for ourselves as makers, as well as enhance our reputation. Leaving flaws in damascus will reflect on our honesty and our attitude toward the buyer. This is something to think about very seriously. So, will there be problems? Yes, but we should go to great effort to prevent them rather than having to correct things that might be perceived as an oversight. In the end, we are human and will want to use common courtesy and humility in our dealings.”
Celebrate the new class of master and journeyman smiths! See who received the top honors from the American Bladesmith Society at the recent BLADE Show.
The American Bladesmith Society awarded its coveted ratings of master smith and journeyman smith at the recent BLADE Show in Atlanta.
Three applicants achieved the rating pinnacle of master smith:
Andrew Blomfield (Australia)
Luiz Gustavo Gonçalves (Brazil)
Erik McCright (Weatherford, Texas)
Gonçalves also won the awards for Best Kitchen Knife and Best Fighter during the BLADE Show custom knife judging competition.
Argentina’s Matias Funes was awarded his ABS journeyman smith stamp during the 44th Annual BLADE Show after his five test knives met with the approval of the ABS JS judging panel. (SharpByCoop image)
Journeyman smith stamps were awarded to:
Felipe Cavallin (Brazil)
Jason W. Coy (Squires, Missouri)
Viktor De Bonte (Woodinville, Washington)
Adam Fromholtz (Australia)
Matias Funes (Argentina)
PJ Gouws (South Africa)
Nate “Tuna” Grant (Seguin, Texas)
Matthew Hartwig (Bozeman, Montana)
Nishan Mood (Fullerton, California)
Christopher Moss (Asheboro, North Carolina)
William Porto (Brazil)
Willie Van Der Merwe (South Africa)
Jan C. Vatelau, (Boise, Idaho)
Michael Hobbs (Shelbyville, Tennessee)
In addition, Gonçalves won the award for the best knife presented by a master smith applicant for judging, and Funes won the award for the best knife presented by a journeyman smith applicant for judging.
Journeyman smiths are the second highest level of ABS member bladesmiths, surpassed only by master smiths. Each must pass rigorous tests before achieving their respective rates, with the journeyman smiths having to wait a specified time once making JS before they can apply for the top rating of MS. For a complete rundown of the tests, requirements and other bona fides of both ratings, visit americanbladesmith.org and click on “Member Resources.”
A veteran maker shares timeless advice on commissions, design, and running a successful craft business.
I rarely do commissions. It’s difficult to keep some clients from wanting to take part in the process. Their job is to tell you how much they like the piece when it is finished and gather the money to cover their overextended budgets. In your role as crafter/knifemaker, don’t let them bully you. There are no grounds for complaints if you give them what they originally approached you about.
The most difficult part of doing commissions, aka taking orders, is keeping everything on schedule. A delivery date is just that. Even if it’s a couple of years out, don’t wait until the end to go looking for materials and services. Casters work better with a heads-up beforehand and engravers may need a year to get past what they are working on. As a result, get your name on the list with others waiting for a bit of the crafters’ time to cast your pieces and for the engraver to work out a design for your project.
I run on satisfied customers. One black mark cancels out a slew of gold stars. I’ve never had a customer who wasn’t satisfied, period. I give even my smallest work the same close attention to detail as the larger and more standout ones. Every piece deserves the most attention I can give it to bring it to the right state of finish when everything is done.
I don’t spend time debating how much it costs if they are paying up front. It’s out of your hands at that point. If they insist and it does make for a tighter presentation, I have no complaints—if I’m still doing it my way.
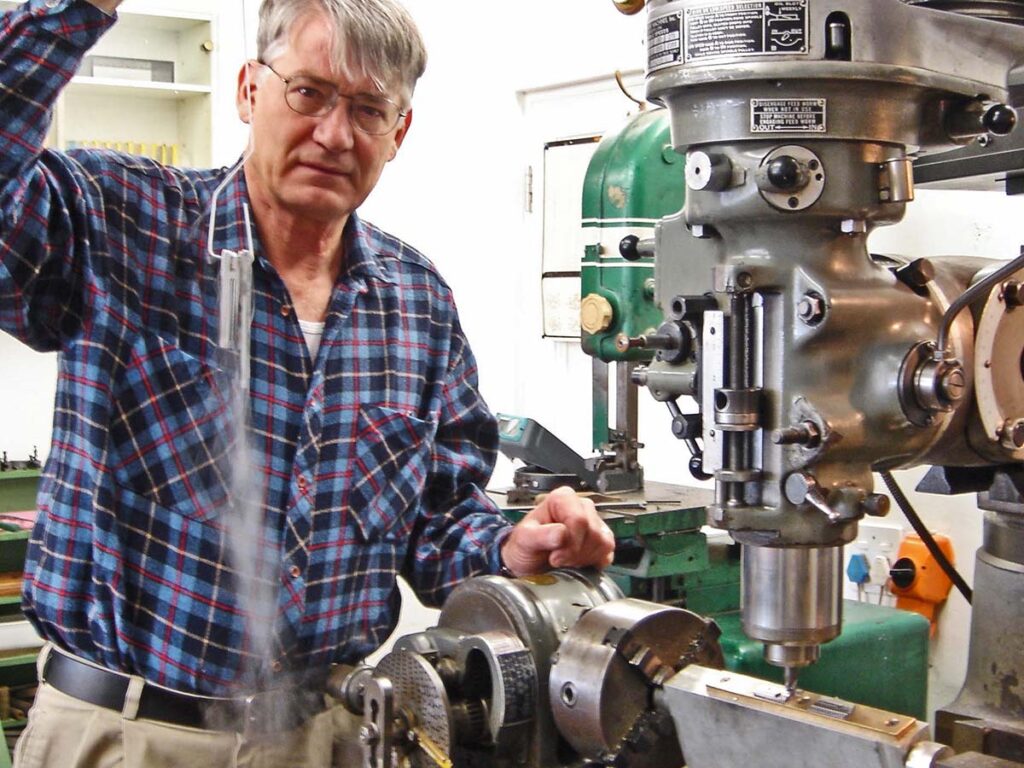
When buying tools think about their longevity—good ones last, cheap ones don’t. South African knifemaker Des Horn’s Bridgeport milling machine is one of the good ones. (Des Horn image)
One time I had a 36-carat uncut ruby for a specific part of a presentation. The clients changed that out and added another $10,000 to the materials list. Put a pound of 24k gold in the mix, two feet of AAA lapis lazuli and another pound of silver and you have nearly a year of work making it all look like something that befits the materials. There is nothing finer than 24k gold and large ruby star sapphires set in deep blue AAA lapis lazuli.
Of course, there is the matter of it not existing until you do it. That part can be intimidating at times. Then there are the occasions when the client goes well over the beginning budget. If this happens, you must deal with the backlash from him blaming you, when all was done at his request.
Maintain Your Health
People were making wondrous things with simple ingredients 4,000 years ago, without the benefit of dental care, bifocals and electric lights and on a diet that barely sustained them most of the time. They died by 45 usually, so had only the time between when they were 9 or 10 until their eyes began to fail them by 40 or so. I have been making and selling my work for more than 50 years with all the benefits living in a civilized time can bring. I am still excited about projects, no matter the size. I still eat lots of fruits and greens and shredded wheat large biscuits.
If you want to do your best work, you must stay healthy. Like any other working mechanism, your body tissues need the time to relax and rejuvenate. For example, if you don’t give the fingers in your hand enough time off, they will give you problems later in your career. The cartilage in your joints will only take so much punishment, so give the muscle tissues in these areas time to relax a bit before moving onto your next project.
Engravers may need a year to finish an ongoing project before they can accept your order. As a result, get your name on the list with others waiting for an engraver to work out a design for your project. The engraving on a Herucus Blomerus folder is by Henk Viljoen. (SharpByCoop image)
Sometimes it may take a few days for an overworked appendage to return to normal if you’ve stressed it in some way. Always protect your eyes and ears from foreign objects and stressful sounds. I finally took the large subwoofer out of my studio because it was leaving me partially deaf by the end of the day, even more so than most of my tools.
Design Process
Design is where you make your identity come to life with a few pencil marks and colored markers. You want to present a consistent image that people will remember and that you can live with in the future.
The most important thing to know when you begin making anything is what it’s supposed to look like when it’s finished. That’s where those blank sheets of paper and erasures come into play.
Make your design mistakes on paper. Don’t wait until you’re well into something before admitting to there being some mystery grey areas concerning how it’s supposed to work. Wait to start something until you have a good idea as to how to feasibly do it. The sketches are just that; they allow you to put a bunch of feasible ideas down on paper next to each other and put big X’s on the ones that don’t work with the others. It may take a few tries to get what you’re looking for down, but now you can start thinking about materials, colors, etc., and establish the theme of the drawing. This will help you decide the things needed to make it real.
Your body needs time to relax and rejuvenate. For example, if you don’t give your fingers enough time off, they will give you problems later in your career. Steve Johnson files a guard in his shop. (Steve Johnson image)
Once you’re working, don’t deviate from the drawings unless it will make it a stronger presentation. I always try and give the piece the best ideas I can to make it able to stand with the other things I have made, and give the customer the best I can do at the time. It makes for more hours but also gives a much stronger presentation.
Money Matters
All crafters have money fixed firmly in their minds. If you can just get the circumstances right, you know people will like your work and you will sell it.
As a group, crafters are undercapitalized and have no backup cash for when calamity strikes. Until you can show a profit and can pay your suppliers, you don’t have enough funds to sustain your business when the bottom falls out of your market, either locally or globally. All of today’s crafters have experienced this. I wish I had an answer—I wish someone had an answer.
Maintaining Materials
Materials are “the paint” of my work: silver for white, gold for yellow of differing shades, bronze for brown gold, jade for green, emeralds for green, Nigerian green tourmaline for green, rubies for red, carnelian for orange/red, lapis lazuli for blue, etc. Your stockpile of materials controls the variables in your work. Where would Van Gogh have been without yellow, orange and electric blues on his pallet?
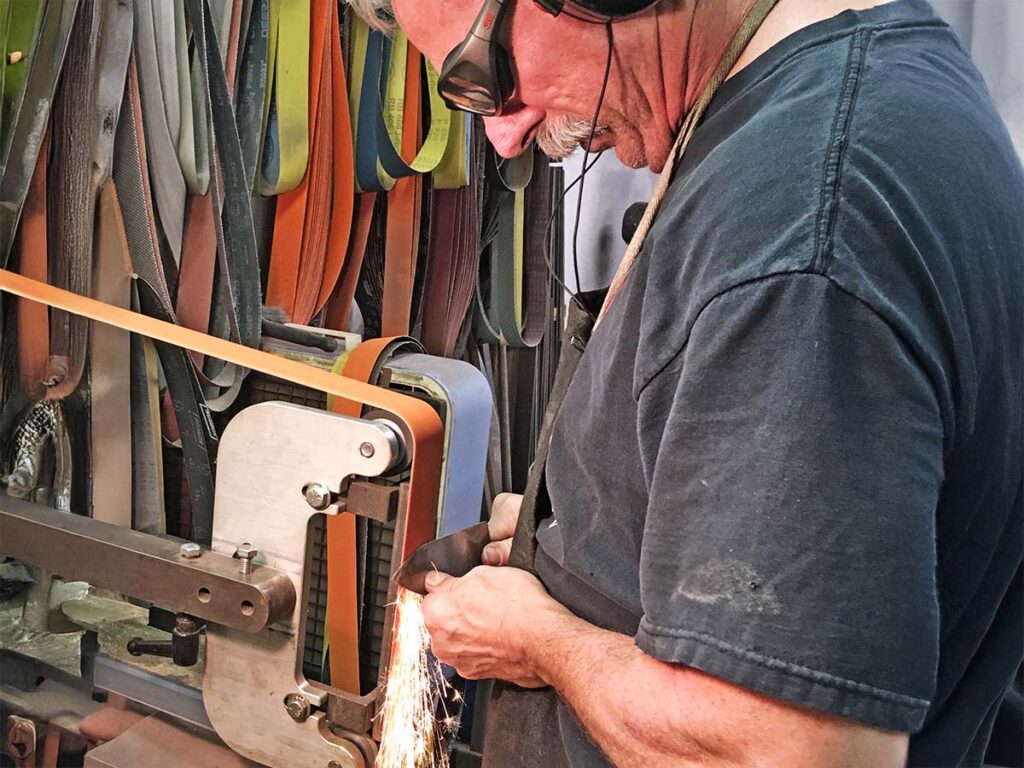
Always protect your eyes and ears from foreign objects and stressful sounds. ABS master smith Steve Randall shows how it’s done. (Steve Randall image)
It has always been considered easier to do color photography than black and white photography. I think there is a correlation in craft. The simpler the design, the more important it is not to deviate from the original line. A fine example of this is the work of Wolfgang Loerchner; it is so clean and simple in design, with wonderful materials, and no room for any deviation in the completed piece. That’s difficult for me. His work is spotlessly fine while I spend part of my time trying to make it look like I didn’t have any difficulties in the making.
If your budget allows it, always stockpile unusual materials that are necessary in your work so there are no down times while you wait for four feet of Madagascar ebony, or a pallet of clay to be dropped at your step. If you already have it on hand, there are no delays.
Buy quality materials. You don’t want your turned goblet to twist and crack and eventually fall apart because the wood wasn’t properly dried or treated after it was done. Most natural materials will take no heat because they were created at normal earth temperatures. Too much heat and anything will crack—if not today, weeks or years later. Epoxies usually give way at anything over 150° F. Buffers will bring the temperature up to that point quickly, making the epoxy no more than a filler rather than bonding the materials together.
Knifemaking Tools
Every craft has its list of necessary items you need to do it well. When you’re buying those things think on the longevity of the tool—good tools last, cheap ones don’t. I’m still using items I purchased in the early ’70s on a regular basis. They don’t always have to be “show dog quality” in appearance if they still work well.
Conclusion
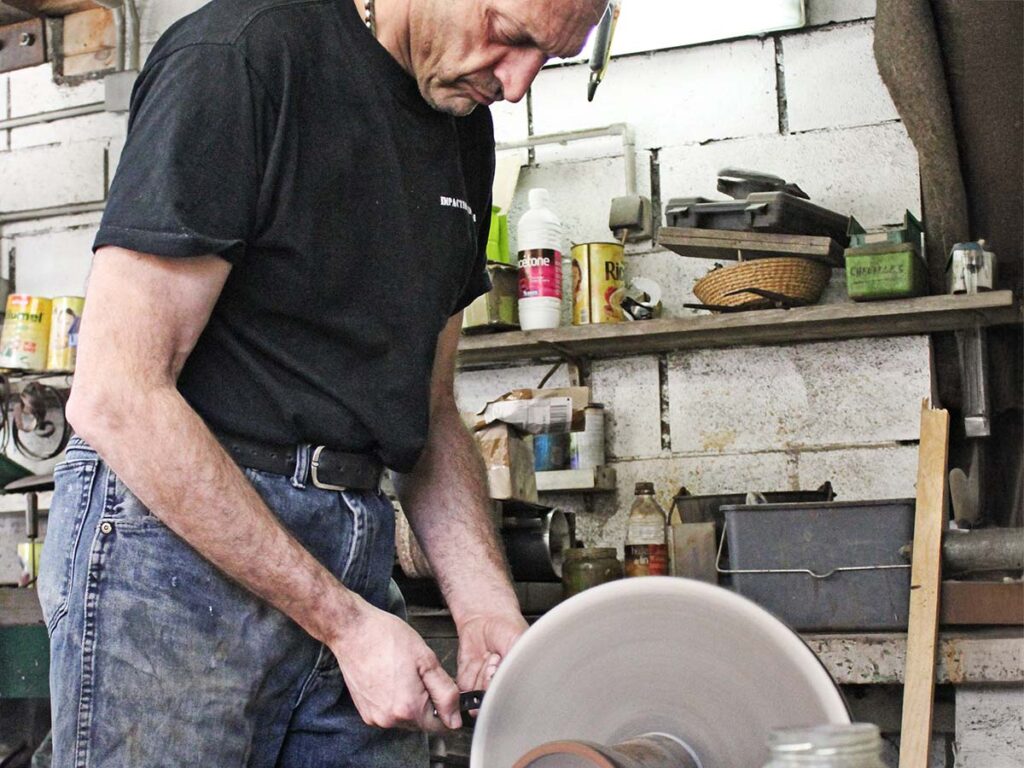
Too much heat and anything will crack—if not today, weeks or years later. Epoxies usually give way at anything over 150° F. Buffers will bring the temperature up to that point quickly, making the epoxy no more than a filler rather than bonding the materials together. Veteran French knifemaker Fred Perrin polishes a knife on an old-school buffing wheel in his shop. (image courtesy of Michael Janich)
To you out there who have jumped on the craft wagon: always think things all the way through beforehand. It will make your landing much more enjoyable. I know I have given you a list of things that is larger than you want to deal with, but if you want to see your name in lights someday, you must follow the simple rules every business must have to survive or you will only make it more difficult for yourself, your career as a crafter, and, most of all, your family standing behind you.
It’s always a swim against the current for all of us.
See the artistry and craftsmanship of seven custom swords from some of the best bladesmiths in the world.
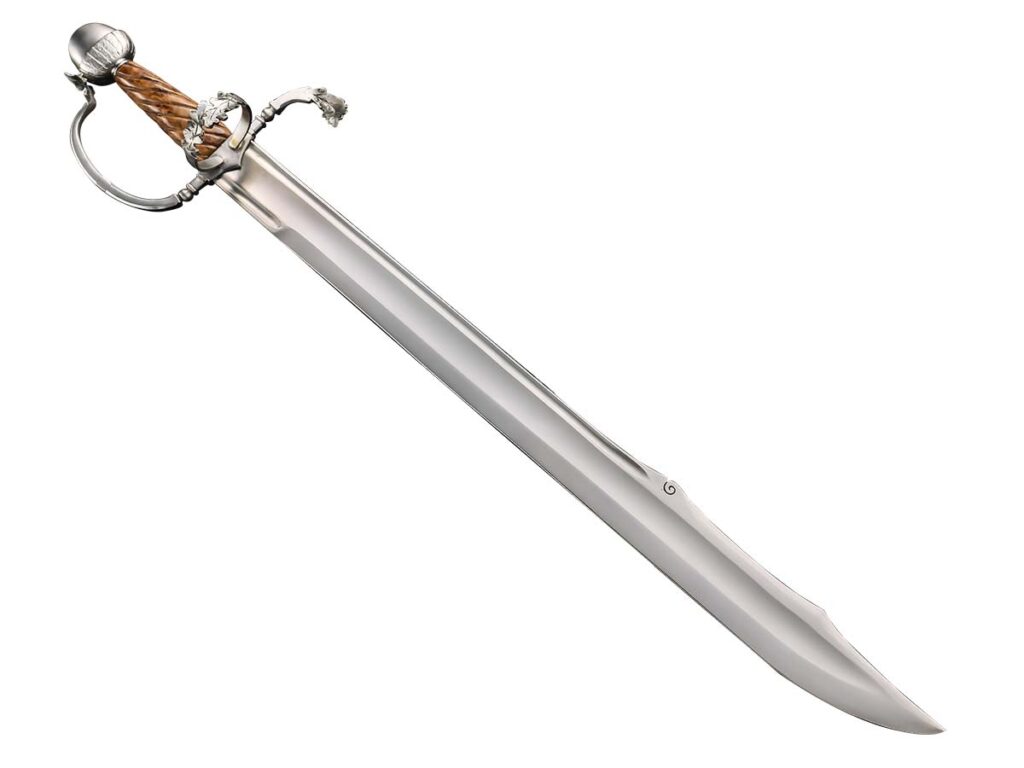
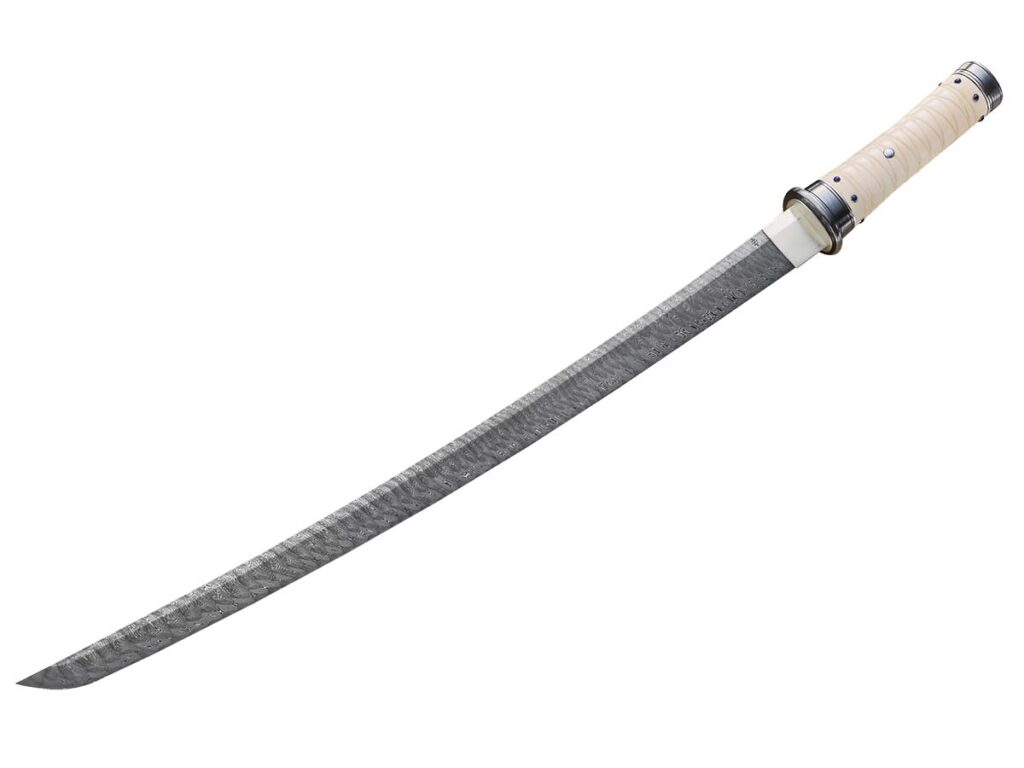
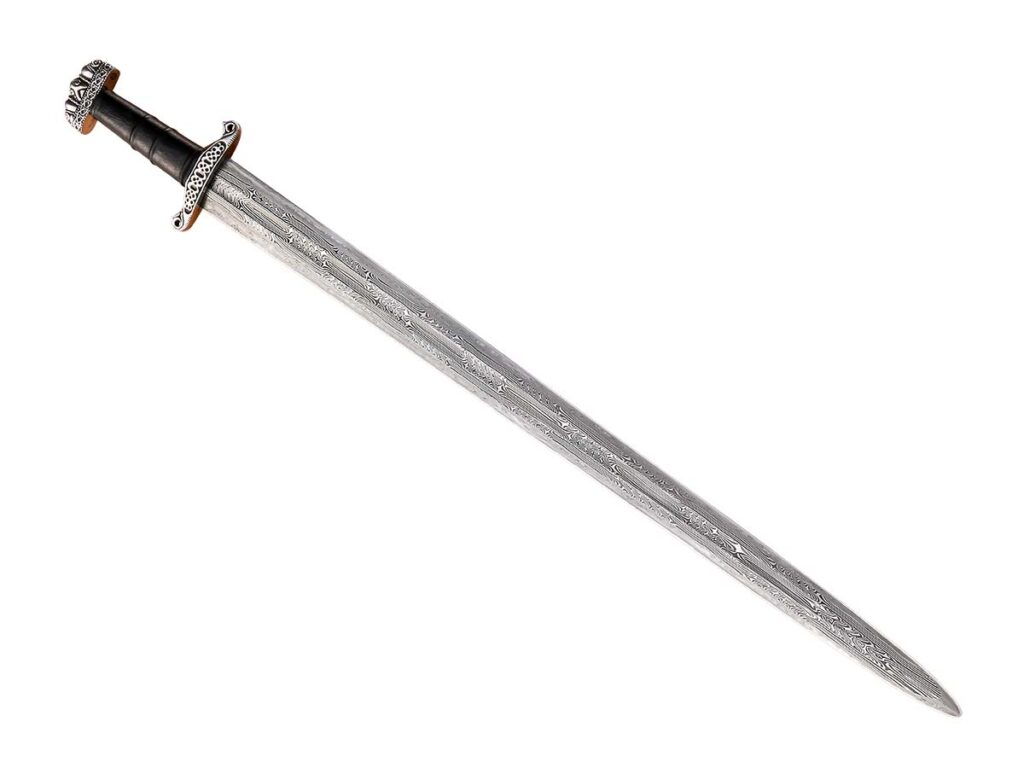
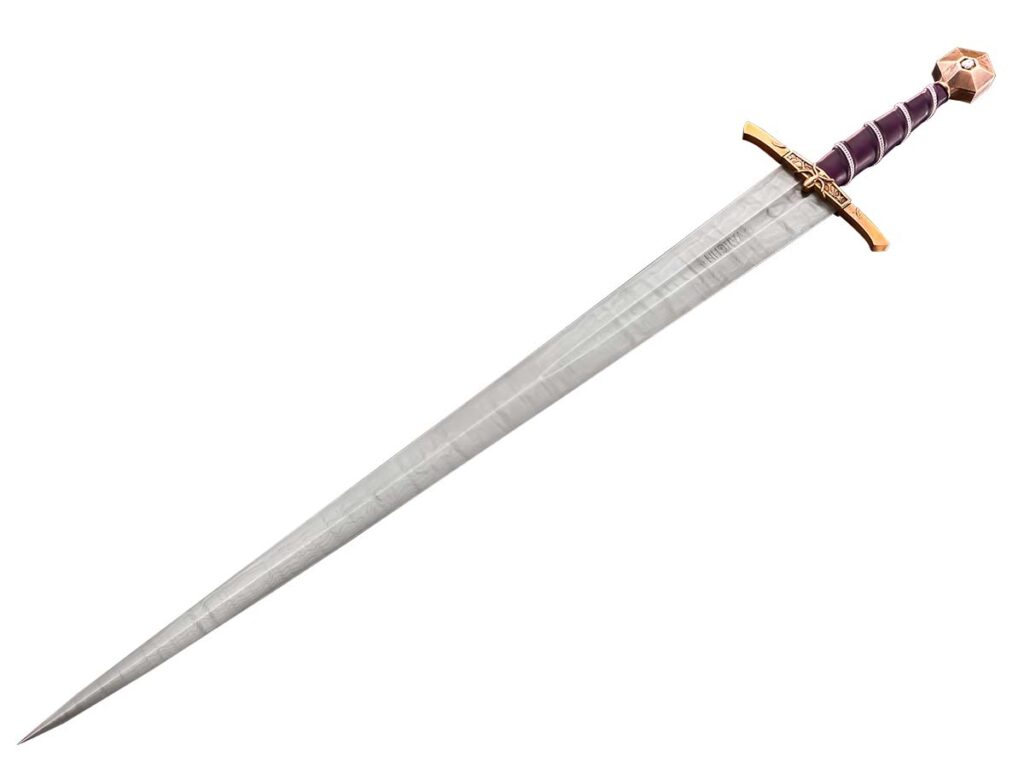
Not only do swords bring out the best in some makers, those who make quality versions of them often seem to be among the best makers as well. Check out the long blades on this and the facing page and see if you agree.
Garbriel Turner: Jineta
The Jineta by Garbriel Turner has a 28-inch wootz blade, an ancient walrus ivory grip and iron/gold fittings. Blade grind: flat. Overall length: 36.5 inches.
Eric Estlund: Oak Themed Storta
Eric Estlund’s Oak Themed Storta is in a 17th-century Italian style. The 28-inch blade is 8670 carbon steel and the handle is oak burl. An acorn pommel helps complete the theme. A high-relief scabbard (not shown) and steel leaf chape with carved acorn finial add to the presentation.
Matt Parkinson: Arming Sword
The sword shown is an Arming sword with a complex laddered and mosaic damascus blade. Polished steel fittings and a spalted maple handle. 29-inch blade 36-inches overall, weighing in at 2 pounds 10 ounces.
Zack Jonas: Wakizashi
A Gordian core twist damascus completes the 22-inch blade of a Zack Jonas wakizashi. Fittings: W’s damascus and silver. The handle is interior mammoth ivory. Blade pattern: shinogi-zukuri. Overall length: 28 inches. The colorful scabbard (not shown) is by Matt Venier.
Ben Abbott: Viking Sword
A 26-inch blade of multi-bar damascus, a leather-covered wood handle and cast sterling silver fittings outfit Ben Abbott’s Viking sword repro. Ben carved the waxes for the guard and pommel.
Ryan Breuer: PhD Sword
We published a closeup of the handle of Ryan Breuer’s PhD Sword the September 2025 issue. Here’s the full-blown model. The 32-inch blade is a damascus of 1084 carbon and 15N20 nickel-alloy steels. The handle is birch, leather and sterling silver.Overall length: 40 inches.
Jordan Borstelmann: Elmslie Type I
Jordan Borstelmann’s Elmslie Type I of a falchion sword boasts a 28-inch blade of 1075 carbon steel and a handle of leather, cord and wood. Blade grind: flat. Guard: 1045 carbon steel. Overall length: 35 inches.
Top bladesmiths discuss the three hottest damascus patterns.
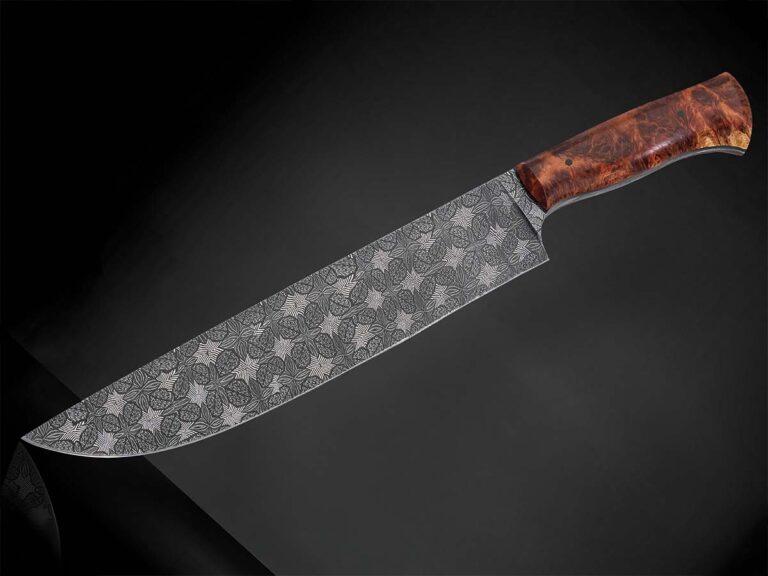
As damascus patterns emerge through the years, their popularity waxes and wanes. The steel itself, layers of intrigue and interest, experimentation and innovation captivate the steel forger, the custom maker and the knife-buying public like nothing else. The patterns abound and in recent reviews of photos, commentary from those in the business and observation it appears that the feather and mosaic, with twist not far behind, have been and continue to be hot.
“I agree that feather and mosaic patterns are predominantly what is made, or certainly what is getting photographed [a lot],” related ABS master smith Steve Randall. “Both patterns are popular because they have lots of character and can be pretty dramatic. Feather patterns are very cool because they can be unique yet still hold true to the feather pattern. The mosaics can move off into so many different styles. They allow the maker to be really creative.”
Feather Damascus Pattern
ABS master smith Bill Burke praises the versatility of the feather pattern and its breadth of presentation.
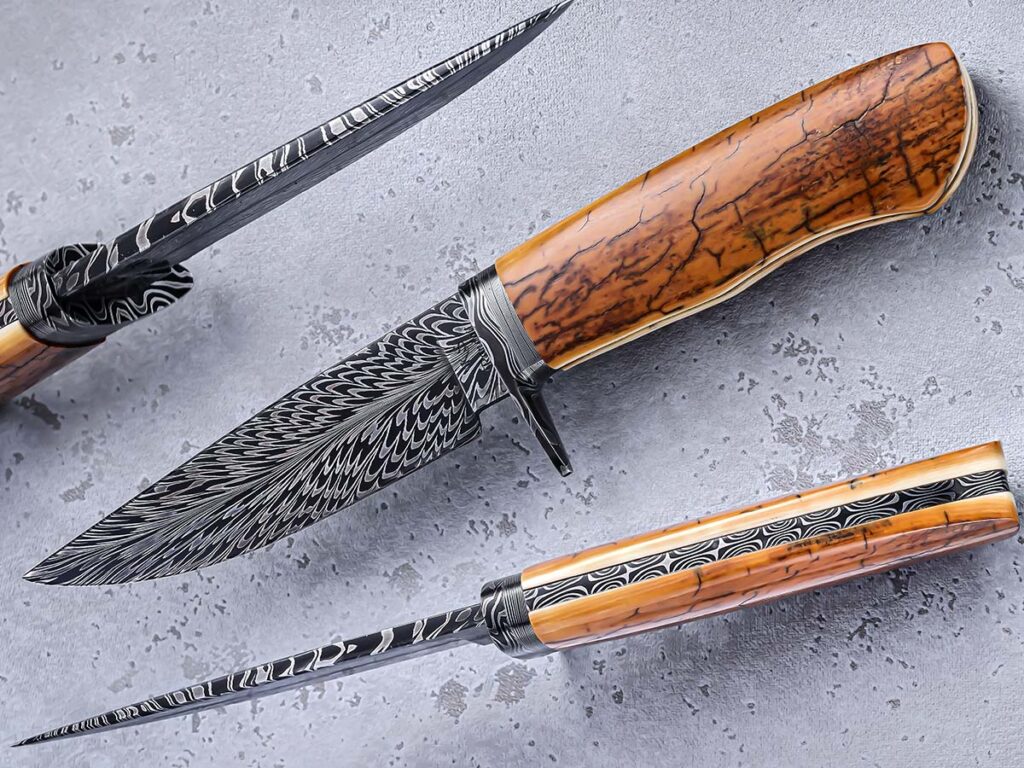
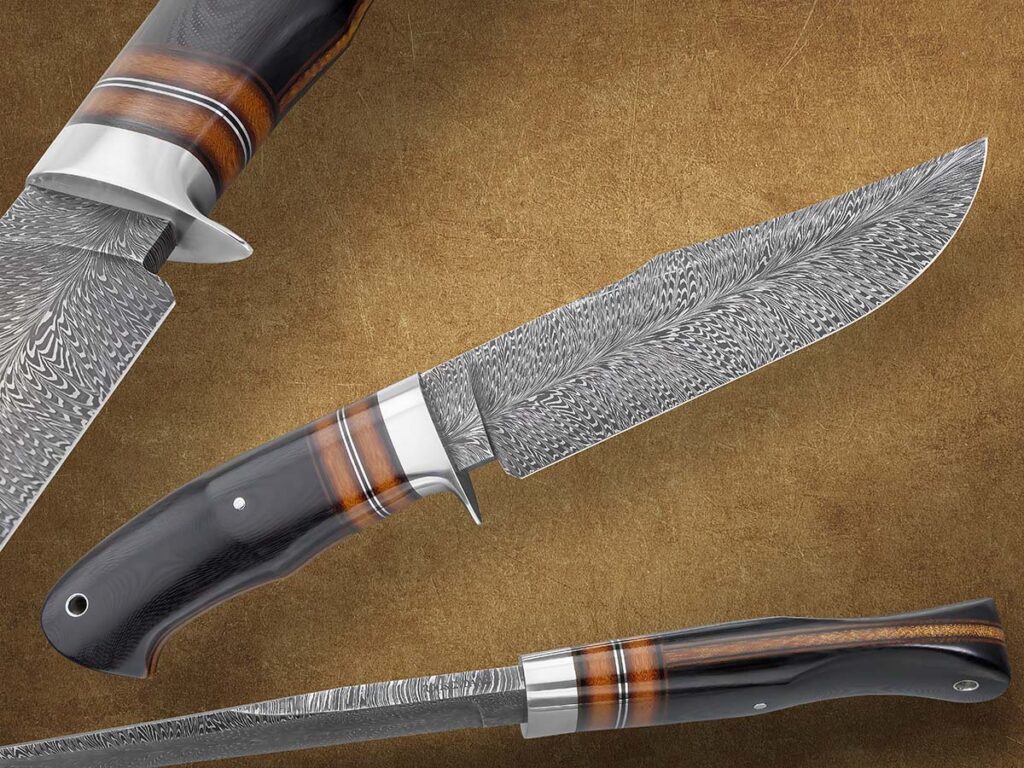
“I think that you see a lot of feather pattern because it is so striking and looks good on almost any knife style,” he commented. “It is also quite a challenge to produce. A well-done feather will have a flow from end to end with nicely curved veins, while a feather that has interruptions in the pattern or has the center area drawn out into a long ‘V’ shape then curves out rather sharply to the edge is not done so well. I don’t feel a feather pattern is difficult to do after one has mastered pattern welding. It becomes difficult when an inexperienced smith rushes into trying to make a feather before mastering basic pattern-welding techniques.”
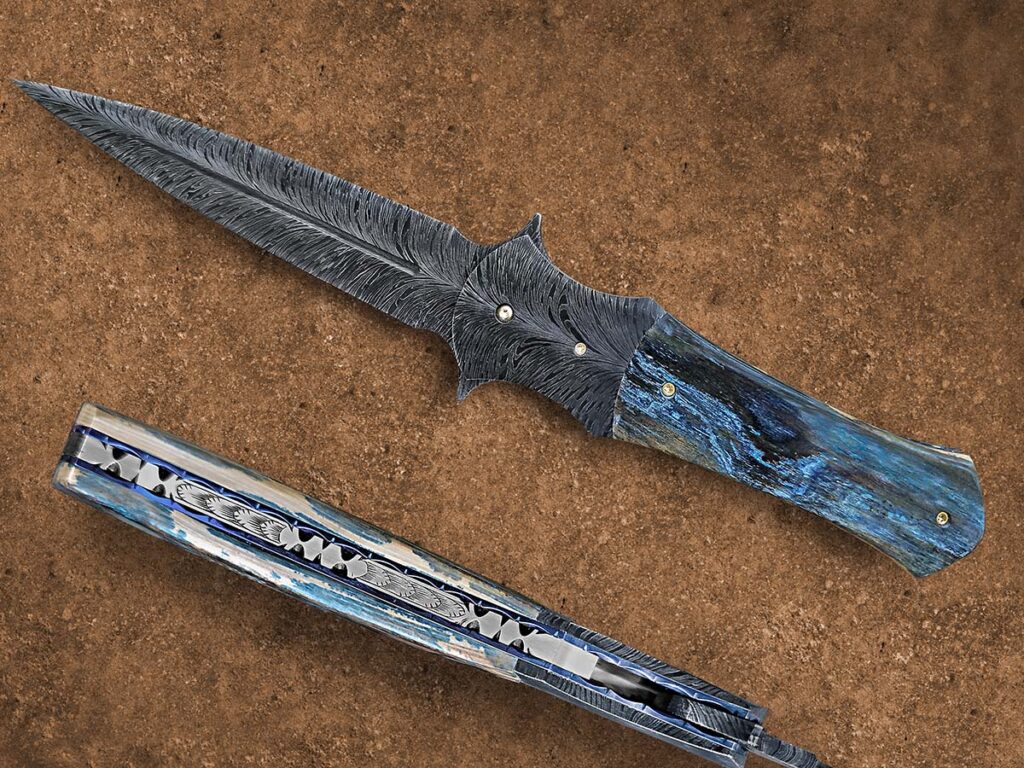
“Feather patterns are very cool because they can be unique yet still hold true to the feather pattern,” Steve Randall observed. He matches up the feather pattern with a mastodon ivory handle on his frame-handle hunter. Overall length: 9 inches. (SharpByCoop image)
BLADE Magazine Cutlery Hall-of-Fame® member and ABS master smith Steve Schwarzer sees the artistry in the feather pattern as well, and when he considers the magnitude of its relative surge concludes, “Absolutely. What you don’t see much of is images and the forge skill required to put that in damascus. Both the feather and mosaic damascus are fairly easy to do, and with the internet there are thousands of recipes out there with visual step-by-step instructions. I did the first feather pattern ever done in a folding knife, and [Cutlery Hall-of-Famer] Don Fogg in his Life and Death Dagger was the only one who did a feather pattern before me. I did the first that was recognizable in the folding knife.”
Degree of difficulty is and will forever be a matter of individual perspective and opinion. Randall stresses the experience level of the maker in fashioning the feather pattern.
“I would say that feather damascus can be a difficult pattern,” he offered. “There are a lot of pieces that have to forge weld together, which opens the opportunity for cold shuts or poor welds. Once that happens, you’ve pretty much got a paper weight.”
Mosaic Damascus Pattern
The perspective on mosaic damascus is similar to that of the feather pattern. Its uptick in popularity is driven by the skill of the maker and the diversity of the presentation. Mosaic makes its statement in both subtle and bold blade aesthetics.
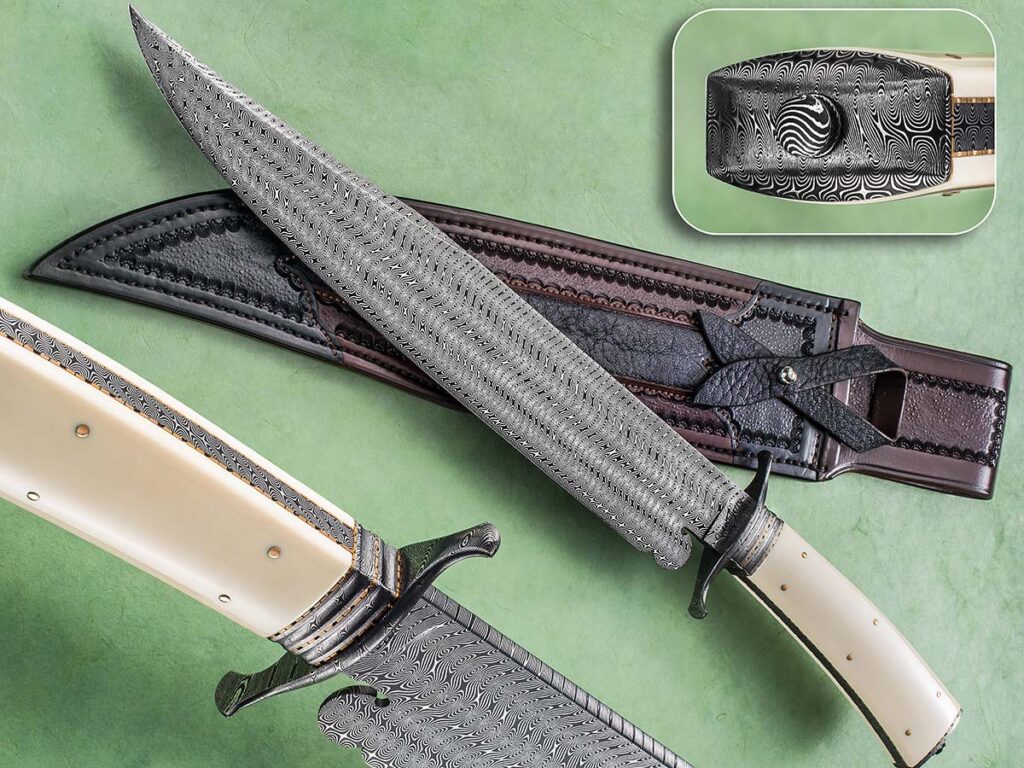
“While a simple twist pattern is rather mundane,” Bill Burke noted, “when four or more bars are twisted in opposite directions and stacked one on top of the other to create a Turkish twist, the result can be striking.” A lavish five-bar Turkish-twist damascus comprises the blade, including the Spanish notch at the base of the edge, on Mike Quesenberry’s Mediterranean bowie. (SharpByCoop image)
“Mosaic patterns do lend themselves to individual creativity,” Burke remarked. “They can vary from not too hard to extremely difficult to do. Mosaics are limited only by the smith’s skill and imagination. Mosaics that are done well will have the patterns lined up with no unintended interruptions in the elements and all the individual tiles matched up well.”
Tiles, incidentally, are the small, angled pieces of steel that are carefully assembled and then forge-welded together to create the distinctive, repeating mosaic pattern. The tiles are cut from the billet or block of welded steel that forms the basis for the creation of any damascus pattern. The tile cuts are made with a scarf joint that facilitates the joining of the surfaces to be mated during the forge welding process.
ABS master smith Mike Quesenberry is a big fan of the mosaic pattern, particularly its possibilities for expression.
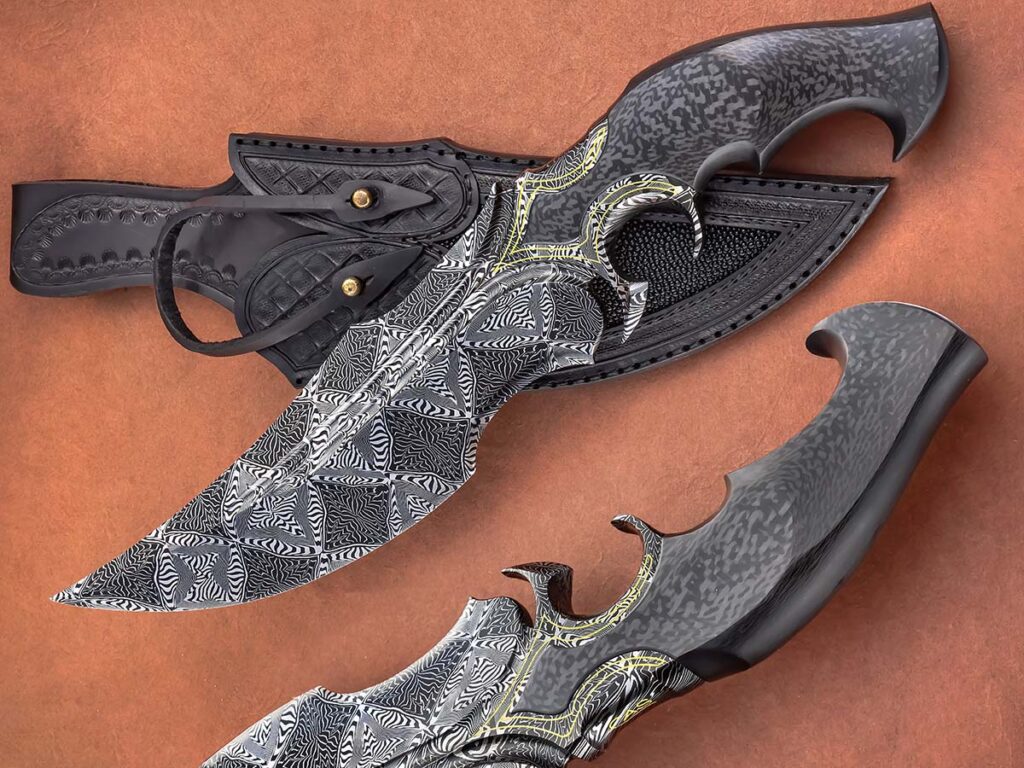
Mike Quesenberry stated the black and silver contrast of mosaic patterns can do “all kinds of crazy, wild things. It is huge with so many possibilities, and it turns out to be a really good pattern that some like in a fine look and others prefer in a bold statement.” The Sobral Brothers go bold with the pattern on their keyhole subhilt fighter. Overall length: 13 inches. (SharpByCoop image)
“I love mosaic and its creativity,” he declared, “along with the fact that smiths can take mosaic and make it bold or fine and there are all sorts or variations that make it fantastic, from W’s to many others. You can add different layers to fine and thick material, 1080 or 15N20 or whatever alloy. That black and silver contrast can do all kinds of crazy, wild things.
It is huge with so many possibilities, and it turns out to be a really good pattern that some like in a fine look and others prefer in a bold statement.”
Things To Look For
Assessing the quality of the individual feather and mosaic product is an exercise in discernment and preference along with the display of basic skill that is evident. Randall takes a subjective point of view.
“One of the most important signs of a feather pattern that is well done is its flow through the blade,” he observed. “The feather should flow from the center of the ricasso through the blade and out the tip. Both feather and mosaics being well done are in the eye of the beholder. Layer count has a big impact. The higher the count does not always make the pattern better.”
Bill Burke indicated a well-done feather pattern will have a flow from end to end with nicely curved veins. ABS master smith Scott Gallagher nails the concept in the feather-pattern blade of his Dolan Dagger Folder. Closed length: 5.25 inches. (Jocelyn Frasier image)
Schwarzer agrees that the individual’s taste has a tremendous weight in the interpretation of well-done damascus.
“It’s all subjective,” he related. “It involves how pleasing to the eye the fine or bold patterns are. The whole thing can’t be just a hodgepodge of stuff stuck together. It has to tell a story, and if it tells a story, then it is art—and to a lot of people it is great art. There is stuff out there that is incredibly complicated to do that looks simple on the face of it, but it isn’t. We are in the infancy of pattern welding, and a lot of it has come from Daryl Meier.
“There have been patterns out there with faces and images in them since the 1700s,” Steve continued, “and now we are painting with steel. When Bill Moran showed up with random-pattern blades in the early ’70s, he was continuing something that had never stopped. Pattern welding has probably been going on for 4,000 years, and you have to forge, fold and weld the iron to clean it. Then, when you get the alloy in there, it shows the pattern. Pattern welding, including feather and mosaic damascus, is a technique and a skill set that is developed. Once you develop that skill, the trick is to get it back together without flaws, turning something mundane into something striking. Mosaic requires more planning and skill than feather.”
One of the pioneers in—and a most outstanding forger of—Turkish twist damascus is Jerry Rados (inset), who forged the steel for the Wall Street Knife by Joe Kious. Jerry’s Turkish twist has what Steve Schwarzer calls a kaleidoscopic appearance. (KnifePurveyor.com knife image)
Twist Damascus Pattern
Although some patterns may stand out from others for a while, there are always those that maintain their place among the most popular. Twist patterns and specifically Turkish twist are regularly in the conversation when collectors are seeking their prize blade.
“Twist and Turkish twist are the same and totally different at the same time,” smiled Burke. “While a simple twist pattern is rather mundane, when four or more bars are twisted in opposite directions and stacked one on top of the other to create a Turkish twist, the result can be striking. However, like almost all other patterns these two can also be drawn out or stretched too far, which detracts from the looks of the pattern. While a simple twist is relatively easy, the Turkish twist billet is wrought with potential for failure and is very labor intensive.”
A key element in producing twist patterns is control, and Schwarzer respects the precision required.
“Very precise control is necessary in the twisting so you get that twisting the same in fine or coarse layers,” he said. “Jerry Rados was the American guy who did the most of that, and we both learned from Daryl Meier in Carbondale [Illinois]. The early blades made by Daryl in the 1980s are beautiful, but you’ve got to be almost [obsessive compulsive] to produce that stuff. It involves a lot of planning and the turns have to be precise. You can twist mosaic and make it look like a kaleidoscope.”
Chris Roosendaal’s feather pattern in 1084 carbon- and 15N20 nickel-alloy steels borders on the mesmerizing. The scales are black G-10 and Micarta®. Overall length: 11.22 inches. (Rod Hoare image)
Randall says that a Turkish twist done right is “very classy.” Its degree of difficulty is a cut above basic twist, but in his experience, it isn’t quite as demanding as feather pattern work due to the requirement of fewer pieces to “cut, flip and weld together.”
When Quesenberry talks Turkish twist, he affirms his love of the look but decries the amount of waste he sees in its production.
“I’m a huge fan,” he commented, “and I love the fact that it’s an appealing pattern. But I don’t like the huge amount of waste. To me, the cool pattern is in the middle third of the bar. There aren’t really a lot of American and European guys into Turkish twist, but some of the South Americans are really pros who are turning out some bold patterns.”
Shifting Damascus Pattern Preferences
Of course, the shifting preferences and envelope of creativity that is constantly pushed keep the damascus conversation going. And it is likely to remain lively long into the future.
“Trying to say one pattern or another is more popular is always subjective,” Randall concluded. “There are some great classic patterns that are very appealing. For example, the ladder, twist, crushed W’s and others. Sometimes the mosaics get visually busy, so some people don’t enjoy them as much, but who doesn’t love a feather or explosion pattern? They are too cool. Some of it does depend on the overall knife design. The blade design and size with guard and handle can enhance—or take away—from a pattern.”
Considering damascus pattern popularity past, present and future, one element is certain. The driving force of creativity and the artistry of the forge will keep this ancient steel relevant for generations to come.
More On Damascus:
Damascus Steel: Experts Forecast Growth In The Knife Industry
Explore the classic clip-point bowie knife from apprentice smith Robert Burns of Wilderness Ironworks.
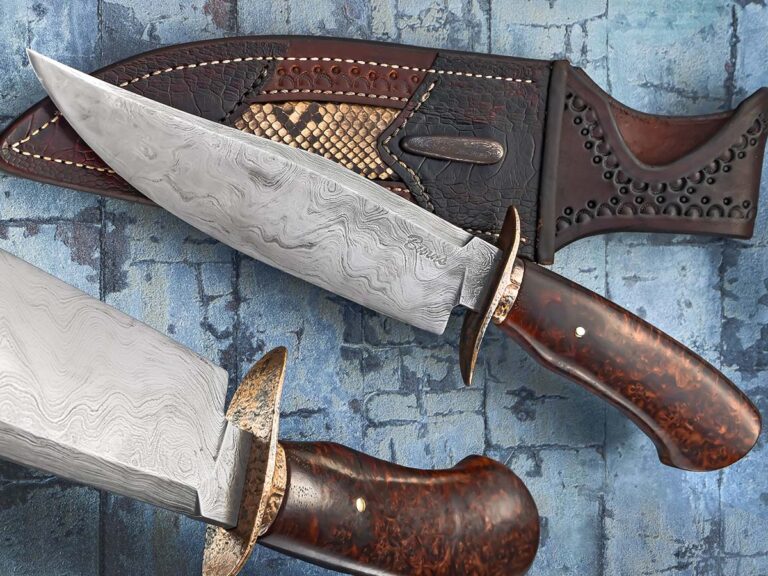
ABS apprentice smith Robert Burns of Wilderness Ironworks wanted a project that would take him back to the roots of being a bladesmith, and appears to have satisfied that desire through his classic clip-point bowie.
“My goal was to combine the ancient and the contemporary,” he wrote.
For the ancient, he started with iron ore from Minnesota and iron sand from Connecticut. He smelted the two into bloom steel, which he then refined, “my goal being to make a steel fine enough that it could potentially pass for modern damascus”—thus the “contemporary.”
Robert Burns of Pittsburgh, Pennsylvania, used ancient materials such as iron ore and iron sand for the blade and a historic mix for the fittings of his sole-authorship bowie.
To augment the “ancient,” he used a “historic mix from the Bronze Age” for the bronze for the fittings.
As Robert noted, the knife is true sole authorship, from starting ore to the finished sheath.