Knifemakers From Around North America Came To Auburn, Maine For The 2022 New England Bladesmithing Symposium
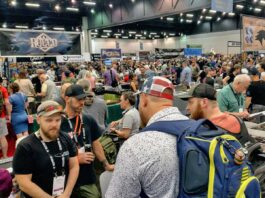
The 12th annual New England Bladesmithing Symposium brought nearly 100 knifemakers and enthusiasts together for the first hammer-in since 2019.
The event ran from July 15-17 in Auburn, Maine at the New England School of Metalwork and featured classes and workshops galore. Throughout the weekend there was something to scratch any itch you may have had about knives.
Master Smith Lin Rhea presented a tutorial on how to make his dynamic X-Rhea knife. There were workshops on everything from how to build out your knifemaking business to forging recurves.
It was a brutally hot Saturday in the Pine Tree State, yet it didn’t dampen spirits, particularly for the main event– the Battle of the Bladesmiths. The 2-hour competition to pushed four makers to their limits, and drew the largest crowds and interest.
Learning From The Best
The classroom at the NESM is covered wall to wall with tools and other metalwork made by past students just like this.
During the afternoon I was able to drop into a few of the classes. The one I got the most out of was led by Master Smith Christoph Deringer.
Derringer class about the anatomy of the knife was a joy, particularly the care he gave answering questions. His wry sense of humor even out, like when he called flux a crutch pertaining to forge welds. In that particular case, he suggested simply listening to the metal and letting it guide you when you forge weld, no flux is needed.
He taught everyone a neat trick for adding patina to a blade, as well. The crux, you hang the knife above a piece of heated copper. Heating the copper causes it to emit gasses that rise up and patina the blade to an almost bronze color.
A Successful Weekend
It was a big weekend for the school, gathering makers from the Northeast, Eastern Canada, and even as far west as California. For NESM director Dereck Glaser, it was a successful weekend, particularly given the COVID-related lapse in the symposium the past few years.
“The school, in general, draws from around New England,” Glaser said. “I’m excited to see more Canadians here, to be honest. We can’t forget we have a whole other country on our border. I can’t be pulling students out of the Atlantic Ocean so Canada’s a really good option.”
It’s important for anyone with even a passing interest in knifemaking to visit their local school and learn. Not only can you save yourself toil and trouble, but supporting the broader community of makers helps it survive and thrive even in the lean times.
Journeyman smith Mace Vitale runs a workshop on handle shaping.
“It saves exponentially the number of years,” Glaser said. “Indebting yourself to a week and about $600 could potentially save you 3-5 years of trial and error on your own. The amount of compressed skill and support you get in 4-5 days of a course, answering those questions that’ll take 3-5 years to figure out on your own.”
Glaser said that even with the uncertain economy, he believes the future of the school and knifemaking is bright because the passion is boundless.
“The fiscal issues we’re having is making it rough. It’s 90+ percent an enthusiast kind of hobby and craft for most people,” Glaser said. “Where inflation and cost of living’s gone, everyone’s seeing a toll in the crafts. We’re even seeing it in the welding, which is an employment-based skill. But on a whole, I think the energy is still there. The love for it is greater than ever. A lot of people did a lot of things to better themselves in it through the pandemic, so I think coming out on the other end I think people are kind of stronger.”
The Passion For Knives
A nice bit of camraderie. Two of the battle contestants Leo Potter (in the hat) and Jeremy Yelle share a fun moment ahead of the contest.
As informative and enlightening as the classes were the attendee’s conversations. Everyone was excited, whether it was to learn from a particular smith, show off a piece they made, or for the battle at night, everyone was open and welcoming.
A Previous winner of the Battle of the Bladesmiths, Emiliano Carrillo (owner of Sun and Stars Forge), was particularly poetic in what he said about the process of making his own steel.
“When I started the smelt earlier in the day the sand runs through my fingers, and by the time the day’s done it’s a lump of material that can be turned into something,” the owner of Massachusetts-based Sun and Stars Forge said. “It goes from being this throwaway material to something that’s actually useful. I think that’s crazy. It really is alchemy to me. It’s addictive. You do it and it works and you do it again and again and it breaks your heart, and then you have some successes.”
The day ended with the battle. Four young smiths were tasked with turning a one-foot bar of 1084 into a complete knife in just two hours. You can read all about the contest here.
In total, the symposium was absolutely worth the trip and should be on your checklist if you’re a serious maker in the Northeast U.S. or Eastern Canada.
To learn more about the New England School of Metalwork, click here.
From Forging And Picking The Right Materials To Putting Together The Fairest Return Policy And How To Run Your Business, There Are Many Questions Fledgling Knifemakers Should Ask Veterans.
This is the first of a multi-part series about knifemaking
When you consider buying a custom knife, certain questions come to mind. Some are easier asked and certainly more easily answered than others. However, anytime money is forked over in exchange for a handmade, well-built knife, an exchange of information takes place. Still, there may be a fine line between the ordinary, the somewhat sensitive and the downright invasive.
BLADE® asked some well-established custom knifemakers and purveyors what they thought about playing 20 questions with a prospective buyer. In this round of discussion, we’ll tackle those questions that should be asked and answered.
Testing And Heat Treating
I like the questions about testing and heat treating,” commented American Bladesmith Society (ABS) master smith Mike Quesenberry. “As for heat treating, it’s good to know what the maker does. Do they do the work themselves, and what type of heat treating do they do? Is it in a forge, heat-treating oven, do they use a salt pot? Then, on the performance aspect of the knife, is the maker doing any testing, taking it out and beating it or something else depending on the intended use of the knife?”
Veteran ABS master smith and mosaic damascus pioneer Steve Schwarzer agrees. The heat-treating query is near the top of his list. If the makers did the heat treating, did they do it themselves?
“If so, have each maker explain the method. It is perfectly acceptable to ask this question because it is the heart of the blade,” Steve reasoned. “If the maker did not heat treat the blade, ask who did and check the reliability of the heat treater.”
When buying a hunting knife, it’s fair to ask if the makers are hunters themselves or use their own knives in the field. J.C. Provost’s hunter features a 4-inch blade of CPM 154 stainless and scrim by Joanna Provost. (SharpByCoop image)
Authorship
The origin of the steel itself, the aspect of sole authorship, and even asking a bit about the maker’s background is perfectly reasonable, according to longtime purveyor Les Robertson.
“Did the maker do all of the work on the knife? If not, which part of the process is outsourced and why?” Les offered. “If certain aspects of the maker’s knife are being outsourced, this may not be a true custom knife. There can be a fine line between a custom knife and a mid-tech knife. Often, makers grind knives in batches. Consequently, it is more efficient time-wise and more economical to send the blades to a reputable heat treater.
“If the knife features a forged type of blade, especially when it comes to damascus, ask the maker if he forged the steel,” Robertson added. “This question is more germane to those makers not in the American Bladesmith Society. Several people specialize in making damascus for makers to use in their work. Most do an excellent job and offer patterns that will give your knife a unique look. Asking the makers if they belong to a particular knifemakers’ organization is a fair question. But you, as the buyer, should understand what requirements have to be met to belong to the organization and attain certain ratings in each.”
How They Do It
Methods, maker preferences, and perspectives are good areas to probe when discussing the makers’ work. How do they do their thing day in and day out?
“I think buyers should ask whether a knifemaker is a stock removal maker or forger,” said award-winning maker David Broadwell. “That will start to determine what kind of knives people will want. But then, it may not make any difference as long as they like the knife and the maker. Then, the knifemaker should be asked if he or she does all their own work, and if not, what is done outside their shop. This is to determine honesty on the knifemaker’s part. There are other things to ask as well to get to know the knifemaker—full or part-time, family. I like people to know who I am.”
Knifemaker Guarantees
Purchases are often made with the understanding of a guarantee, a buy-back to ensure customer satisfaction.
“You can ask, but I don’t fault anyone if they don’t offer a [buy-back] guarantee,” Broadwell noted. “You can’t buy most any product, say a Harley-Davidson motorcycle, and decide you don’t like cruiser bikes and expect your money back! A deal is a deal, as they say. Now, some makers specialize in multiples of given models, and they may be happy to take a return if they believe they’ll sell it right away.”
The components that make the knife sometimes have a bearing as well. After stressing the sole-authorship point, BLADE Magazine Cutlery Hall-Of-Fame® member Dan Delavan of plazacutlery.com finds a warranty to be reasonable in some circumstances, and then adds a question on components as important to the sales equation.
“Warranty? Just workmanship,” Delavan offered. “The maker cannot guarantee materials as they shrink and expand. The maker should be willing to repair for a charge. Then, does he or she do all the work, and if not, what is done by others? Does the maker bring in outside parts that he or she does not make on her own, examples being such as parts that are made in China or elsewhere, even in the USA? Is the maker able to make modifications?”
For Robertson, the concept of a guarantee is implicit in the trust that develops between maker and buyer. An understanding of care and use is necessary when the question of the guarantee is posed.
“A lifetime guarantee comes with certain responsibilities for both the maker and the buyer,” Les related. “The makers should guarantee the work with regards to their craftsmanship and materials used. Your responsibility as the buyer is to use the knife as it was intended to be used. During normal use, if the blade breaks, yes, the maker should build you a new knife. Now, if you are using a folder as a pry bar and the blade breaks, you are not using the knife for its intended purpose. Subsequently, that is your fault and the maker does not owe you a new knife.”
Genre Specific
Vince Evans
Some makers specialize in historical pieces, reproductions of knives and swords that reflect the times in which the originals were active. Such situations might influence the dialogue between maker and buyer, according to maker Vince Evans.
“My little corner of the field is very different from most other makers,” he explained. “My work is mostly ‘historical’ in nature, so questions to ask could be, ‘Can you tell me more about this piece?’ or ‘What culture is this piece based on?’ or ‘Is this sword based on a specific find?’ When I first met [Cutlery Hall-Of-Fame writer] Ken Warner years ago at the BLADE Show, he walked up and asked, ‘Am I looking at antiques or did you make these?’
“When it comes to period pieces, a telltale sign that a maker hasn’t seen or handled an antique knife or sword is that his rendition is oversized or overweight. Most antique swords, daggers and knives were much more petite and delicate than you would imagine. I encourage makers to study original pieces firsthand, even if it is through a glass case in a museum, before making a period piece. Photos in books and online do not give you a true feel for the original, although many resources do give you measurements and weight. There is no substitute to studying originals firsthand.”
The genre or style that a maker pursues is often the first indicator that a discussion is at hand. Catching the customer’s eye naturally leads to inquiries. When conversation surrounds a custom order, there must be clear understanding related to the finished knife.
“There has to be an exchange between the maker and the customer,” Quesenberry noted, “and that relates directly to how the knife will be used. If it’s a hunting knife, will the customer be skinning only, or will they be breaking bone with it? The customer has to ask what the maker’s knife is intended to do, or if the maker can produce the using knife the customer wants.”
Communication is the key for both parties to be satisfied with the outcome of the buy-sell arrangement. For example, when purchasing a hunting knife, it’s fair to ask if the makers are hunters themselves or use their own knives in the field.
“Sure,” Delavan smiled, “but in some cases the knives can be too expensive for the maker to use. Most knifemakers are not rich!”
Knifemaking Mentors
One of the most important questions to ask makers relates to their background, where they learned their craft—particularly who their mentor, or mentors, in the industry might be. Identification of those who introduced makers to their life’s work or helped bring their skill set along will provide an insight into philosophy, work ethic and mindset, and, ultimately, quality.
“Ask who their mentors are,” Schwarzer advocated. “This is especially important if the maker is forging blades.”
Several people specialize in making damascus for makers to use in their work. Most do an excellent job and offer patterns that will give your knife a unique look. Del Ealy forged the ladder-pattern damascus for the Angel’s Wing art dagger by Steve Vanderkolff. (Caleb Royer image)
Added Quesenberry, “It’s always good to know a guy’s background and the schools they went to and whether the makers continue to educate themselves on newer methods or techniques, or are they becoming stagnant? Do they want to up their game and experiment with different things?”
Chipped in Broadwell, “Of course, I’m proud of the men who shared information and helped me in my earlier years, and if I learn something new I’m happy to share that person’s help as well.”
Open Dialogue
The best approach to discussing the buying or selling of a knife is for both maker and potential purchaser to have mutual respect for one another. In the end, talk may be cheap. However, real, honest and open dialogue develops trust and assurance that the process is working for each party.
Ask questions. Consider responses. Come to informed conclusions, and remember that the entire experience revolves around the knife itself, its quality, materials, looks, and price tag. Most makers welcome questions and are willing to provide candid answers. In that alone, the level of assurance is elevated.
For Maximum Toughness Without Sacrificing Edge Performance, Consider A Soft-Backed Blade.
For centuries, smiths from various cultures recognized the necessity of blades that do the job without critical failure. Some Eastern cultures specialized in differential hardening, particularly the Japanese. European cultures tended to forge weld a hardenable edge to a softer spine. In each case, the end result is an edge hard enough to cut well and a spine tough and resistant to breaking.
One of the measures of a modern knifemaker is the willingness and ability to successfully navigate the certifications processes of the world of knives, such as the American Bladesmith Society’s (ABS) journeyman and master smith certifications. Similarly, one measure of a knife blade is its ability to perform various tasks that put its edge geometry and heat treatment to the test.
If you’ve been around the knife industry any time in the past 40 years or so, you’ve no doubt seen stories of blades that demonstrate edge holding ability that also have the strength and flexibility to bend without breaking. The key to this kind of performance is for the blade to have a hard edge and a soft back. Pardon the pun, but let’s break that down a bit.
First things first—a knife must cut. One key to premier cutting performance is a well-hardened edge. A properly hardened edge comes from the use of steel with adequate carbon, brought to the proper hardening temperature, quenched in the proper quench medium, and tempered to the proper hardness.
Each of these variables has an impact, but at the end of the day if the maker does things right, the edge of a well-performing blade will be hardened and tempered martensite in the 58 to 60 HRC Rockwell hardness range, plus or minus a point or two depending on geometry. If the edge is left too soft, the blade will not cut as it should.
Shawn Ellis originally learned the edge hardening process from ABS master smith Jim Crowell in the early 1990s when Jim—here at the grinder—demonstrated edge hardening using an acetylene torch. (Jay Morrissey image)
But what about the blade’s spine? Does it need to be as hard as the edge? The answer is “it depends.” Hardness as a metallurgical property is directly opposed to toughness, in that the harder the blade the more brittle it is. At the same time, an unhardened blade of annealed steel is very difficult to break but won’t hold an edge. If the maker hardens the blade fully from edge to spine, the knife will be more likely to break under chopping or bending loads.
Let me talk about “more likely” in this case. Are you more likely to be struck by lightning or bitten by a shark? As it turns out, you’re about 7.5 times more likely to be struck by lightning than bitten by a shark, but the odds of being struck are only 1 in 500,000. Either way, neither is very likely. I state that because while it is empirically true that a fully hardened blade is “more likely” to break than a blade with a soft back and hardened edge, if the maker does the heat treatment properly and the user uses the blade properly, either will perform very well with a very low risk of catastrophic failure.
Soft-Backed Bennies
Even if the overall risk of breaking in normal use is small, it still makes sense that some makers want to chase that last bit of performance by taking advantage of the strength of the soft-backed blade. So what does a soft-backed blade do? What are the benefits? By hardening the edge but intentionally softening the spine, the blade is more resistant to breaking when subjected to extreme force. This remains true whether the force comes to the blade parallel as in chopping or perpendicular as in bending.
ABS journeyman smith and past Forged in Fire champion Shawn Ellis is a proponent of the soft-backed blade. He originally learned the edge hardening process from ABS master smith Jim Crowell in the early 1990s when Jim demonstrated edge hardening using an acetylene torch.
He heated the edge only, quenched the blade, and then used the torch to draw the temper back. To temper, he started with the torch at the spine and used a wet rag to keep the edge cool. When he was finished, the edge was a light bronze and the spine was blue.
Even though that was quite a few years ago, the method Crowell taught Ellis remains viable. Heating only the edge leaves the spine soft and annealed but transforms the edge into the tempered martensite required for cutting performance. Using the torch afterward to “blue back” the blade relieves any internal stresses that may result from heating only the edge to the critical temperature, that is, to a non-magnetic state.
Ellis found that heating the blade at least a third of the way from edge to spine resulted in better performance. Subsequently, he switched to heat treating in a forge, and then later in an oven.
While it’s possible to edge harden with a forge or an oven, the methodology changes. Edge hardening in this way results in a martensitic edge and a spine that retains the microstructure it previously had. If the blade was forged and normalized, the spine would be soft pearlite. If the blade was ground from bar stock, the spine would be spheroid carbides.
Another way to achieve a hard edge with a soft back is to quench the edge only. You can bring the whole blade up to temperature in a forge or oven, and then place only the edge of the blade in the oil for hardening. This is the method currently taught at the ABS schools.
In this case, you need enough oil volume to cool the steel properly, so you can’t just fill your quench tank with oil to the half-inch level. Instead, use a limiter plate to keep the edge at the right depth while allowing the tank to have an increased volume of oil. You rock the blade in the oil in such a way that the edge is quenched properly while the spine cools slowly.
The slow cooling of the spine results in a pearlite microstructure, while the quenching of the edge results in martensite. The result is again a hard edge and soft back, and a “blue back” draw is again recommended. Blades that are edge hardened are resistant to breaking, though the soft spine may bend and stay bent.
The final way to achieve a soft-backed knife is the most difficult but results in the highest performance. In this method, the blade is hardened completely, with the whole blade up to critical temperature and the whole blade quenched fully. After regular tempering in the oven, the blade is then torch tempered on the spine.
In this scenario, the spine is pushed past blue all the way to gray, but not to the point where it starts to show heat color. Essentially in this case, you’re applying differential tempering rather than differential hardening, adding heat in the 650-800°F range to the spine only, resulting in highly tempered martensite. Since you’re working with higher temperatures, extra care must be taken to keep the edge cool by keeping it immersed in water or wet sand.
ABS master smith Scott McGhee’s Mamba damascus fighter features forge-finished flats with bronze fittings and a koa wood handle. He prefers 1075 carbon steel and uses two propane torches to draw the spine evenly, keeping the edge cool in wet sand.
ABS master smith Scott McGhee teaches the Introduction to Bladesmithing class at Haywood Community College in Haywood, North Carolina. Students learn from McGhee how to make a knife that will pass the ABS performance test using a full quench and a torch draw. He prefers 1075 carbon steel and uses two propane torches to draw the spine evenly, keeping the edge cool in wet sand.
STRUCTURAL RESULTS
I asked metallurgist Larrin Thomas for insight on the structural results of the different edge hardening approaches. According to Larrin, “When it comes to Rockwell hardness, torch tempering a fully hardened blade to 650-800°F results in hardness in the Rockwell hardness range of 45 to 55 HRC, depending on the steel and the time spent at the tempering temperature. Slow cooling the spine by quenching the edge will result in soft pearlite similar to air cooling during normalizing and grain refining. This puts the spine in the range of 20 to 40 HRC, depending on the steel. Some steels have such high hardenability that they will partially harden during air cooling, such as oil quenching steels O1 or L6, and may even reach 60 HRC if the cross section is thin enough.
“The softer the spine, the more resistant the blade is to breaking but the more likely it is to take a “set” during bending. In other words, less bending of a softer spine would be required for the blade to stay permanently bent. The ideal condition would be one where the steel has sufficient hardness to avoid staying bent but sufficient toughness where it will not fracture. This combination of properties is best achieved by a full quench and a spine torch temper.”
For many years now the certified smiths of the ABS have demonstrated competence at these processes. If you want to climb the ladder of knifemaking skills and certifications, or if you want to climb the ladder of high performance hard-use knives, the heat treatment of a soft-backed knife is a skill you’ll want to master. If you’re the kind of knifemaker or the kind of knife buyer who wants 100 percent of the toughness a blade can offer without sacrificing edge performance, consider a soft-backed blade.
The Swiss Army Knife Is Iconic, And Over The Years It’s Featured Many Different Tools. Most Are Useful, But Some Are Just Plain Odd.
The Swiss Army Knife has become a utilitarian icon. Manufactured by Victorinox, and formerly Wegner, the knife got its name due to American GIs in World War 2 being unable to pronounce the proper German name of the name, the Offiziermesser, which translates to “officer’s knife.”
Traditionally clad in red, the color of the Swiss flag, the knife is a versatile multi-tool filled with different implements ranging from knives and screwdrivers to corkscrews and nail files. Below is a selection of some of the most useful tools in the Swiss Army Knife and some tools that are a bit more unique.
The Original Tools
The first Swiss Army Knife, simply called a Modell 1890, featured four tools. Those four are still a part of many SAK models today and immediately come to mind when you think of the tool.
Spear Point Blade
While a larger Swiss Army Knife may feature multiple blades, every model will feature a spear point. An icon in its own right, the SAK spear point will appear on the largest models all the way down to tiny ones meant for keychains.
Made of stainless steel, the spear point can cut thread just as well as it can cut meat. However, I wouldn’t want to butcher much with one that’s keychain size.
Reamer
The reamer is probably the least-known of the four original tools but is no less important. It is two functions. The first is to drill small holes into wood to give screws a head start. The second is to help with sewing. The hole in the middle of the tool is meant to be used to slide thread through to help give a stable anchor point while sewing materials together.
While this might not be the most necessary tool today at home, it’s incredibly important for a soldier on the march or on the battlefield.
Screwdriver.
Nowadays you can find some Swiss Army Knives with as many as four different screwdrivers inside. They all can tie their lineage to the screwdriver that made it onto the original model. Important for a soldier trying to fix a rifle in battle, important to a homeowner trying to reinstall an outlet cover in the kitchen, the screwdriver is one of the implements that sets the SAK, and other multi tools apart from other types of tools.
Can Opener.
Yet again, a great all-rounder tool with military use in mind. A can opener is a necessary tool for a soldier to have in the field to open rations. While most homes today have either a crank or an electric can opener, the original handheld version still remains in many Swiss Army Knives.
Other Necessary Tools
Swiss Tool X Plus Ratchet
Some of the larger Swiss Army Knives today have as many as 15 layers and dozens of tools inside of them. As the knives have grown larger, so has the roster of tools within them. These may not be the originals, but they sure are just as useful.
Needle Nose Pliers
Great for prying and pulling things apart, the needle-nose pliers are a standard tool in the larger SAK models. As the knives became more and more associated with outdoorsmen and tradesmen, the tools evolved to meet those demands.
Made of stainless like so many of the other tools, it’s a great pair of pliers, and the fact that they fold away into the knives makes them invaluable when you’re outdoors.
Saws
Over the years the SAK has grown to include multiple types of saws. The main two are a wood saw and a metal saw. The wood saw is a smaller version of a classic handheld saw, great for cutting small pieces of wood or through small, thin brush.
The metal saw features files on both sides, which compare to a standard, flat file. The serrated edge is analogous to a hacksaw. It will cut through metal, but it’ll take a while to do it.
Scissors
What’s better than a pair of scissors? If you’re looking to cut paper or fabric, not much. That’s why scissors are included today on the largest Swiss Army Knife (38 tools) and the smallest (seven tools).
Like the majority of the other tools, it’s made of stainless steel. Of course, they are quite small so it’ll take a minute or two to finish cutting, but when you need scissors no other tool can match up.
Toothpick
Currently a standard tool on the smaller SAK models, the toothpick is great because no one likes having food stuck in their teeth. Unlike most of the other tools in the knives, this one is not made from metal. It’s made from hard plastic and slides out of the body of the knife. However, it is easy to clean and stow back away so while it may seem like a reusable toothpick might not be the most sanitary tool, Victorinox has engineered it in such a way that it is easy to disinfect.
The Outrageous Tools
Over the years there have been plenty of tools in the Swiss Army Knife that range from maybe being a bit overkill to being completely out of left field. Two of these are still available on some SAK models while the other tools are just relics of bygone knives.
Cigar Cutter
The cigar cutter is the most eye-catching tool from the past. Cigar smoking isn’t as popular as it was, but there were once five models of Swiss Army Knives that featured a cigar cutter. It was unique because it was not spring-loaded. It featured a lever that would slice the cigar with a blade like a guillotine.
Toilet Paper Holder Key
That’s not a joke. A limited number of Swiss Army Knives in Europe were made with this incredibly specific tool to open industrial paper towel holders in public/commercial bathrooms.
Pharmaceutical Spatula
You’re reading that right. Some knives feature a pharmaceutical spatula. This tool is meant to stir ointments and creams as well as safely move pills into bottles. It’s as specific as it gets when it comes to tools on a Swiss Army Knife. Well, there might be one tool more specific.
Hoof Cleaner
If you’re a farrier and need to clean out some horse hooves, there’s a tool for you. The small hook features no sharp edge so as to not hurt the horse as you clean out their hoof before putting on a new shoe.
The Newest Tactical Folder From Kershaw Looks Phenomenal And Is A Ton Of Fun To Use.
Yet again, Kershaw has produced an excellent piece with its new Outlier folding knife. Featuring a Blackwash hawkbill blade, the Outlier is excellent for tactical use. The knife is made from 8Cr13MoV steel, and the handle is made from glass nylon.
Kershaw Outlier in the closed position.
The large steel ring at the end of the karambit-designed handle allows you to use the knife in a forward or reverse grip. Great for slicing and cutting, the Outlier is a great utilitarian knife as well, especially when it comes to doing things like cutting rope or cardboard.
The Outlier has an assisted opening and a reversible pocket clip so you can easily take it with you on the go. At an MSRP of $57.59, Kershaw has hit another home run.
Editor’s Note: This article was written by Mike Ableson.
The Correct Sheath Is Pivotal To The Complete Hunting Knife Package. A Good Sheath Can Keep Your Knives Safe And Sharp For Decades.
For the hunter in the field, a dependable and durable hunting knife is indispensable equipment, and it follows that the sheath that holds the knife must be equally up to the task.
Secure carry, protection for the blade and handle, easy access, and the ability to stand up to the elements and hard use are essential. While there is a variety of sheaths available and each one contributes something to the equation, the sheathmakers themselves have come to eye-opening conclusions as to the making and deployment of the correct sheath for the hunting knife. Personal preference is still a prime mover, but the basics make the difference between cooperation and catastrophe in the field.
“The best style for a hunting knife sheath is whatever the hunter wants,” explained veteran sheathmaker Paul Long. “Personal preference is very important. However, the knife that would best be described as a hunter would be best suited in a deep seat pouch with a loop that would carry relatively high on the belt. In most cases the deep pouch would preclude the need for a retention strap. For a double-guard hunter, a drop-loop belt sheath would probably be best with a snap strap for secure retention.”
Depending on the style of the knife, the guard often dictates the best pouch configuration. “I favor the pouch-type sheath, and the hunting knife generally has a single guard as opposed to a double guard,” related sheathmaker Paul Lebatard, who also has found success with his custom knives through the years. “I make a lot of doubles, too. You would have to make a snap-type sheath with a keeper strap, but on hunting knives with single guards the pouch type is always best.”
Three different styles of pouch sheaths by Kenny Rowe, from left: regular pouch, plain leather; strap pouch, floral hand carved; and full flap pouch, full coverage gator. (Kenny Rowe image)
A sheathmaker for over 50 years, Chris Kravitt zeroes in on the personal preference perspective. “First and foremost, it’s a matter of the configuration of the knife, and then if more than one style will work it becomes a matter of personal preference,” he observed. “My preference is to go with the pouch because it is easier to draw and resheathe the knife without worrying about straps.”
At the same time, Kravitt acknowledges varying hunting knife construction and its influence in sheath form and function. “If a knife has a double guard, it isn’t going to work on a pouch sheath, and if you have a knife with an integral handle, possibly,” he said. “Certain things don’t lend themselves to the traditional style, like when the blade is the widest part of the knife or there is no bolster or ricasso extending beyond the edge.”
Kenny Rowe, owner of Rowe’s Leather in Hope, Arkansas, adds another option on the hunting knife sheath. “Ninety percent of these sheaths would be the pouch type because they cover most of the knife, and with the guard you can make a welt where the knife has some resistance coming in and out,” he noted. “Some sheaths will have a lid that has a snap on it, and that is as secure as you can get with the flap snapping over the front of the sheath.”
The consensus with the pouch sheath makes sense for all the reasons that the hunter encounters in the field. For its toughness and the ability to shape and mold the sheath as desired during the construction process, cowhide reigns supreme among sheath materials. Most sheathmakers use 7-to-9-ounce* vegetable-tanned cowhide.
Style Of Sheaths
The use of exotics such as ostrich, stingray, alligator, crocodile or other hides is a continuing option, though for the most part they are used as accents, often in the form of inlays, rather than adding any performance-related component to the sheath.
“Exotics are very useful in sheathmaking but primarily for aesthetics,” Long explained. “Elephant and shark are two that are tough enough to withstand very hard use and are usually built as an overlay on a vegetable-tanned base sheath. I work with various snakes, lizards, ostrich and many others.”
Ultimately, Chris Kravitt—here working on a sheath in his shop—stands by the individual perspective. “First and foremost,” he begins, “it’s a matter of the configuration of the knife, and then if more than one style will work it becomes a matter of personal preference.” (Chris Kravitt image)
As Kravitt noted, “The basic sheath is going to be cowhide 99 percent of the time, but for overlays and inlays my favorite is stingray, which is near bulletproof but more expensive and harder to work with—but great stuff. Ostrich leg or shin is very nice, and Malaysian horned frog has a very nice texture to it. Snakeskin is not very durable, but it’s fine when the knife and sheath are for show since it won’t hold up with regular use.”
Tooling and carving also provide style points and may be pleasing to the eye. However, neither actually contributes to the performance of the sheath in field use. “I occasionally do some tooling with stamps, but carving is a talent I don’t have,” Lebatard remarked. “Still, on almost every sheath I’ll put something in keeping with the theme of the knife, like a small deer. Someone might place an order and specify that they just want a bare, plain sheath, or they may want just their initials on it. That’s a good thing about leather. When it is wet it can be molded and stamped, and when it dries it will hold that impression.”
Tanning And Steel
Vegetable tanning is essential when the blade meets the sheath leather for an extended period. In contrast to chrome-tanned leather, a vegetable-tanned leather is not known to corrode or stain a blade left in the sheath for any length of time. That old admonition to store the knife itself separately from the sheath will then get a longer look.
“A lot of people say not to store knives in the sheaths, but as long as the sheath is made of good vegetable-tanned leather, I’ve never had a problem,” Lebatard noted. “I made a knife for a friend a few years ago and he didn’t want a sheath. He was going to get someone else to make the sheath for him. Several years later, he brought the knife to me and he had had it in a chrome-tanned leather sheath. It was nearly rusted through. The chrome-tanned leather is very corrosive.”
Kravitt has had similar experiences. “I hear so many people say not to store knives in leather sheaths, but I have kept knives in sheaths for years and never had a problem,” he recalled. “My sheaths are all vegetable tanned as opposed to chrome tanned. Chrome-tanned leather may have salts and other things in it.”
Drainage And Inserts
Waterproofing is another essential element, and in the construction itself there are questions surrounding drainage holes and inserts as well.
Most sheathmakers shy away from inserts since contact with the blade may dull the edge. After all, the welt and/or strap should suffice for a snug fit. Inserts in and of themselves may be judged to provide some measure of redundancy, but contribute little to the overall stability of the lockup or in protecting the knife itself. Long says, “Even the best inserts, being rigid, will do more harm to a blade than top grain leather.”
The different decorations Kenny Rowe offers with his sheaths include, from left: smooth; border tooled; basket weave; acorn and oak leaf hand carving; exotic skin overlay (gator); exotic skin inlay (beaver tail); and exotic skin full coverage (ostrich leg). (Kenny Rowe image)
At first glance it might appear that a drainage hole is a good idea to help maintain cleanliness and prevent the buildup of moisture or debris within the sheath. Not so fast!
“I do not ordinarily put a drain hole in my sheaths,” Long asserted. “Nor do I do any waterproofing of the interior of the sheath. Rather, I depend on the normal intelligence of my client to not go swimming with their sheath, and to at least try to clean the blood and guts off the blade before reinsertion.”
Rowe agrees. “I don’t see any sense in it,” he commented. “I can count on one hand the number of sheaths I’ve made with drain holes in them, and I’ve been making sheaths for 35 years at least. The only time I would expect someone to have their sheath in really wet conditions would be if they accidentally rolled into a deep river or their boat sank. I wouldn’t expect someone to haul off into neck deep water with their hunting gear on. For debris, it’s easy enough to take a wire with a little hook in the end and just rake the sheath out, or blow it out with air, or stand it upside down and shake it or tap it on a table.”
Kravitt, on the other hand, will utilize a drain hole and an insert from time to time. Often, the insert itself is fashioned from leather to avoid additional friction against the knife edge. The employment of the drain hole is in direct response to the future use of the gear in the field.
“If I know the sheath will be used in harsher conditions, I think it should have a drain hole,” he remarked, “not just for draining moisture, but also removing debris—especially when the user has spent a lot of time in the woods.”
Sheathmakers do tend to rely on the owner of the product and of the hunting knife to exercise responsibility in the field. “Explain to the client, if they are a novice, about the ‘care and feeding of a leather sheath,’” Long smiled.
How To Care For A Hunting Sheath
The well-crafted sheath is the constant companion of the hunting knife, either in the field or a collector’s cabinet, and the best measure of the sheath’s contribution is its role in that partnership. For the sheath to function properly, owners must remember the fundamentals of hunting knife care. Keep both the knife and sheath clean. Wipe away moisture and other fluids. Maintain the surfaces as needed. Don’t put the knife away wet and expect the sheath to do more than expected.
Adhering to best practices will ensure long life for both the hunting knife and its all-important sheath.
*According to the Montana Leather Co. website (montanaleather.com), leather thickness is typically measured in ounces. For instance, an ounce of leather is equal to 1/64 inch. As a result, 7-to-9 ounce leather will be in the 1/8 inch range, give or take a few millimeters.
Frame Handles Remain Just As Useful In Making A Knife Today As It Was Centuries Ago.
Frame handle construction for knives has been around for centuries. Historical examples of many Eastern styles like the kard, khyber and yataghan often feature ornamented frame handles. Nineteenth-century knives attributed to James Black and some of the early American bowies also had frame handle construction. Though it’s been around a long time, the frame handle remains a viable modern construction method for today’s custom knifemakers.
There are many ways to crack the nut/skin the cat on frame handle construction. This article will walk through the frame handle process and point out particular problems and potential solutions for those who wish to pursue building a frame handled knife.
Why You Should Build A Frame Handle
Frame handle construction is best defined as using a wrap-around “frame” to conceal the tang of a hidden tang knife. The first question many people ask regarding a frame handle construction is, “Why would you want to do it that way?”
My first thought goes back to the earlier days of the internet when forums were at their peak, and fine makers like ABS master smith Bruce Bump took the time to document “work in progress” (WIP) threads. Bruce had a fine frame handle WIP on the KnifeDogs.com forum in 2013, and the consensus at the time was that you build a frame handle for quite a few reasons, though the first one is “because you can!”
An exploded view shows an ABS journeyman smith Karl Andersen frame handle construction knife before assembly. (Karl Andersen image)
A frame handle is a much more complex build process than your standard full- or stick-tang knife. However, in addition to the show of skill by the maker, frame handle construction has a few distinct advantages that make the complexity worth the effort:
1. A frame handle allows for the look of a full tang, but with the guard-fitting techniques of a stick tang. For a forged stick-tang-knife design that needs a guard, a frame handle allows the use of full-tang-style handle construction;
2. A frame handle is a good way to use scales or slabs on a stick-tang knife. If you have a good set of stag or mammoth slabs, or if you have stabilized wood slabs that might be too fragile for through-tang construction, the frame handle allows you to use the materials on a stick-tang knife; and;
3. The use of a frame handle gives the maker another area to embellish the knife. Some frames are great for engraving, while others may highlight a damascus pattern. Either way, the frame makes the embellishment stand out in ways that are harder to accomplish on a full-tang knife.
How To Build A Frame Handle
At a basic level, the frame of a frame handle is a piece of material, usually metal, that wraps around a stick tang and mimics the look of a full-tang knife. This presents some challenges that have resulted in a few different creative solutions.
•Challenge 1: The tang must fit inside the frame. Some makers insist on precision so there are no gaps and the fit is tight. Others concede that the handle will be held together with mechanical fasteners and sealed with epoxy, so a precise fit between the frame and the tang is not necessary.
•Challenge 2: All parts of the handle must be securely fastened together. I sat through a class with ABS master smith Mike Williams in which he admonished the students, “Don’t trust in the magic of chemistry” by putting your faith only in the strength of glue. Likewise, veteran bladesmith Jerry Fisk challenges makers to think ahead to what their knives might be like in 100 or 1,000 years, and recommends a mechanical connection that won’t fail over time.
One way to address this challenge is to use pins. If you pin the scales to the frame, pin the completed handle assembly to the tang and follow up with glue, there’s no opportunity for failure. Some choose to make all the pins visible as an artistic element, while others take advantage of hidden pins for all but the one through the tang. Another way is to use a threaded fastener.
Bladesmith Salem Straub recently illustrated the technique on a frame handle WIP on his Instagram feed. Salem used a threaded fastener in an internal slot in the frame to mechanically lock all the parts together tightly. The handle material is relieved on the inside to accommodate the fastener.
Another way to use a threaded connection is to thread the end of the tang and use a fastener on the handle butt. An advantage of this approach is that the fastener itself can become part of the embellishment.
•Challenge 3 is the complex fit-up between all of the knife’s elements. Frame handle construction naturally doesn’t excuse a poor guard fit, but it also provides other places for gaps and misalignment. Once again, there are several potential solutions to alignment problems.
One is the use of alignment pins to make sure everything is secure. Pins on the end of the frame go through any spacers and into holes in the back of the guard so that each part indexes the same during assembly. Some makers, including Bruce Bump in the aforementioned epic WIP, advocate for leaving metal tabs on the end of the frame and fitting the tabs into similar holes on the back of the guard
. In both cases, there’s a mechanical connection that prevents the guard, spacers and frame from rotating out of alignment around the center axis of the handle. Either way, when you build a frame handle, the construction will require you to assemble and disassemble the knife repeatedly, so you’ll need some mechanical way to keep things lined up.
Another fit-up challenge is the overall requirement for clean-fitting joints with no gaps. It sounds simpler than it is, but two surfaces that are dead flat will join together without a gap. The challenge of a multi-piece frame handle with a guard and a few spacers is that you are creating a multitude of surface joints, and every single surface must be dead flat.
At a minimum, you’ll have a joint between the guard and frame, and also between the frame sides and the handle material. Any bump or wiggle on any surface and you’ll have a gap in the final product. Flatness comes in degrees. You can get a fairly flat surface on a platen, flatter on a disk, and still flatter on a surface plate or surface grinder. You have to make the joints as flat as you can with the tools you have available if you want a gap-free fit.
I tend to prefer the look of a tapered tang on a full-tang knife, so I’ve started tapering the frame of my frame handles as well. Others stick with a full thickness frame, where the thickness closely matches that of the blade at the ricasso. Some add spacers between the tang and handle material, while others choose to go with the frame and handle slabs only.
ABS master smith Mike Quesenberry used frame-handle construction on his dog-bone bowie. (Eric Eggly/PointSeven image)
Another fit challenge is presented by the frame itself. In order to adequately finish the visible surface of the frame, whether by simple polishing, bluing or etching, or by engraving, the frame must be 100 percent at final-grit finish prior to final glue up.
Many makers learned to make a full-tang knife by finishing the front edge of the scales, gluing the knife together, shaping the scales down to the exposed tang, and then polishing the handle and the tang at the same time. That method will not work for a frame handle that needs to be blued or etched. Personally, I tend to use dummy pins to fit the entire handle assembly together, then grind the scales down to the frame. In his recent Instagram example, Salem Straub used small screws to hold the handle material to the frame.
With regard to the relationship between the handle material and the frame itself, some choose to leave the material slightly proud of the frame for a “museum” or “heirloom” fit. Others prefer the material to fit flush to the tang. Less commonly, some makers round the frame and leave it slightly proud of the material. Whichever you choose, it is important that the fit be maintained consistently all the way around the frame, from the joint at the guard on the top all the way down to the joint at the guard on the bottom.
Once the profile is set, I polish the handle and the frame together down to final grit, and then apply any surface finish to the frame itself. Once all parts are 100 percent complete, they can be glued together as a final step.
When To Make A Frame Handle
So when should you try making a frame handle? In my mind, if you can make clean full- and stick-tang knives, you could be up to the challenge. If you have slabs of exceptional handle material that deserve more than a simple full-tang knife, a frame handle is a way to step up and put the materials on full display. If you have a knife in mind where the frame and guard need to be blued, damascus or engraved, a frame handle is the way to go.
A frame handle knife has its advantages, but the complexity of the construction presents plenty of challenges. As a skilled maker, you may choose to rise to the challenge of a frame handle just to show that you can.