New Limited Edition Swiss Army Knife Comes As A Result Of A Collaboration Between Off-White And Victorinox.
The Italian-based premium lifestyle brand Off-White has collaborated with venerable Swiss knifemaker Victorinox to make a Swiss Army knife for the brand’s Equipment project done with Korean brand Post Archive Faction.
The knife is gorgeous thanks to the white Corian scales with black silhouettes of the tools included in the knife. The Corian material is a composite of acrylic and a mix of natural materials, the majority of which are derived from bauxite. The piece is modeled after the story of Adam and Eve, and the silhouettes of the tools can be positioned to look like the collaboration’s design motif which is a fig leaf.
The knife itself is a gem, and only 3,000 are being made. There are both small and large blades, two sizes of screwdriver, and a bottle opener among many other tools you’d expect to see on a SAK of this size.
The whole construction is just 2.9 ounces in weight, and it is packed with features big and small. However, get ready to pay big for this knife due to its small production run.
Off-White ℅ Victorinox Knife Specs
Length: 3.7 inches
Height: .7 inches
Width: 1.6 inches
Weight: 2.9 ounces
Tools: Reamer, punch, and sewing awl, corkscrew, bottle opener, wood saw, large blade, 6mm screwdriver, can opener, wire stripper, 3mm screwdriver, small blade, key ring
TIP: The most important principle in this section is to overlap hammer blows. The right edge of your previous hammer blow becomes the center point of your next hammer blow.
Forge-beveling allows a consistent pushing of the hot steel in all directions at each blow. The physics are consistent, predictable, and reliable. At each strike, the force of the rounding hammerhead pushes the bottom half of the blade and the spine in opposite directions. The tip-to-choil forces are contained for the most part by the blade’s mass.
It’s much like when the smith makes breakfast sausage patties. Imagine pushing the center of that sausage patty down with the heel of your hand (hammer) against the counter (anvil). The patty spreads out in all directions with a dimple in the center, the same as the steel. With repeated overlapping blows the bevel thins and widens downward as the spine stretches upward. The resulting geometry is a thinning and reshaping of the blade between the cheek line and the cutting edge. A bevel is forged and formed with your rounding hammer, anvil and blacksmith’s eye.
Once forge-beveling is mastered you can actually form a hollow “grind” by hollow forging (another lesson, another book).
NOTE: Look at a knife with the pommel to the left and the point to the right, cutting edge down and spine up. For reference and description, this is the right side of the blade.
This is the right side (i.e. right-hand side) of the knife blade
Setting the Bevel
The forge-beveling procedure is advanced forging. Beveling with a hammer is a blacksmith secret used by few these days. Learn this method and you will certainly be connected to the smiths of old.
This forge-beveling procedure takes me six heats or more, at minimum; three on each side. Theoretically, one heat per line, three lines per side (explained below in Half, Fourth, Eighth). Make these passes down the bottom half of the blade traveling its full length. Because you might be a beginner it may take many more passes than six.
You may need more heats due to being hammer shy or because of rookie hesitation. You may start and stop frequently due to under-heating, overheating, dropped blades, re-positioning your piece or “Where’s my hammer?”. All of those are OK. We all do them.
Half, Fourth, Eighth
Let’s go through the forge-beveling principle. First think of cross-section geometry. Develop a visual in your brain of the relative distance from the center point of the hammer face to the bottom one-half of your blade as you travel along its length from ricasso to tip.
Do this by visualizing one-half, one-fourth, and one-eighth. If we were to saw a blade vertically in half and view its cross-section, we would see that its shape is thickest at the top, along its spine. It holds that dimension down to the cheek (about the halfway point) and then dramatically loses thickness as it approaches the cutting edge. This is the bevel. Your bevel. Think halfway from cheek line to cutting edge. This is the 1/2 line.
This traditional way to set this bevel can only be acquired with dozens of latitudinal hammer strikes passing from left to right at those three descending levels: 1/2, 1/4, 1/8. Remember one-half, one-fourth, one-eighth.
Note and maintain a mental image of the three all important forge lines.
NOTE: This 1/2, 1/4, 1/8 business does not mean fractional inches. The fractions refer to the position of your hammer’s center face on the horizontal bar (i.e. halfway, a quarter of the way, and an eighth of the way from the edge to the cheek).
Remember this is a theoretical thing becoming a real thing. The blade is 1-inch wide, and the face of a 2.5-pound rounding hammer is about 1.5 inches. Think exact center of a hammer face on those latitudinal forging lines.
TIP: See the author setting the bevel on YouTube. Search for: Paul White FORGED.
Try not to strike above the imaginary cheek line that runs about halfway between the spine and edge. Your hammer passes will form the cheek line. The final cheek line usually falls well above the halfway point because maintaining that line exactly in the center is almost impossible with a round hammer face, your billet bouncing around on the anvil, and you’re trying to hit on exact points. However, the primary objective is to maintain the original thickness in the spine (1/8-inch) as far down to that halfway line as possible.
Blade Tipping
Each pass will require a slight upward tipping of the spine to acquire about a 10° to 12° angle to be set in the bevel as you hammer. It takes a simple inward twisting of the wrist to keep the blade from resting flat on the anvil face. It must be done at each horizontal pass. This smartly places just the right amount of bevel angle. After a few passes, the blade will “find” that angle as you place it down.
After a complete pass from choil to tip on the right side of the blade, flip the piece over, tip to 10° to 12°, place at the top of the anvil, and do the left side. This is the place to use your indexing skills. It takes most smiths some time and practice to fully master this concept. I’ll go over this beveling thing a couple more times. Read this whole section and look at the drawings and photos several times before doing this.
TIP: Sometimes it takes fewer total passes than I indicate in this book. This is due to the individual smith’s power and/or heat control and/or blade position and/or hammer penetration and/or steel composition. There are lots of variables. If your blade is almost straight after fewer than the recommended strikes or passes, back off on the heat and/or reduce the power or reduce the passes. If you place blows beyond what is needed, the blade will curve upward. Usually, fewer strikes per pass will be necessary as the beveling chore proceeds. This happens because the smith usually increases his or her power and confidence as time at the anvil is increased. Also, the bevel becomes thinner with repeated heats requiring less steel to be moved.
The forging sequence is as follows. Take a heat. Place the blade at the bottom of the anvil. Tip to 12°. Place overlapping blows down the blade on the right side at the 1/2 line. Take a heat. Flip to the left side of the blade at the top of the anvil. Tip to 12°. Forge down the left side at the 1/2 line at the top of the anvil. Take a heat. Flip to bottom. Tip. Place blows down the right side of the blade at the 1/4 line. Heat. Flip. Tip, down the left side at the 1/4 line at the top. Take a heat. Flip. Tip and down the 1/8 line on the right side. Heat. Flip. Tip. Then down the left side at the 1/8 line. Your blade should be nearly straight after three or five passes and however many heats as needed.
By hammering in this 1/2, 1/4, 1/8 method you will “set the bevel” of your knife in the traditional way, FORGING! Ninety-three percent of all bladesmiths set their bevels at the grinder. I have met only a handful of smiths that do this the old way. You’ll be the only blacksmith in the surrounding ten counties that sets the bevel with your three-pound hammer!
Do not strike randomly up and down the blade or space-out (i.e. not overlap) your blows and expect anything good to happen.
BLACKSMITH SECRET: To gauge forging heat have a wooden box close by and away from any direct light. Hold your blade in the box to see the true forging heat. Even when hot the “red” is sometimes difficult to see in a lighted room. However, the red will show in the shade of your box. This means you are above forging heat and will thus avoid potential edge cracks. Remember this is high carbon steel and your working parameters are narrower. Iron can be worked over a greater temperature without damage. At the end of each forging and before you lose forging heat in your blade use the last few seconds to straighten and align your work. Make all lines right with the world.
The successful counter-bend is placed at the “bottom” of the anvil with the choil just at the anvil’s corner next to the table. Several hammer blows are placed at the halfway point/line and then the hammer travels down the blade to the smith’s right.
You can buy Forged: Making A Knife With Traditional Blacksmith Skills here
We give you an overview of the Crawford Knives Survival Staff. This is a hiking staff that is a very high quality survival system. This staff can be used f…
Test your knowledge of damascus steel with this 25-question quiz from BLADE Magazine. From ancient origins to modern master smiths, see how deep your damascus expertise runs.
Think you know your damascus steel? From ancient Persia to modern-day master smiths, the history of damascus is layered—just like the blades themselves. This quiz digs deep into the facts, myths, and makers behind one of the most iconic steels in knife history. Whether you’re a seasoned collector, a curious forger, or just a damascus fanboy, it’s time to put your knowledge to the test. Ready to slice through 25 questions on the steel for the ages? Let’s see what you’ve got.
Answers at the bottom of the page.
1) Canned steel/canister steel is a method for the making of: a) maidenhair damascus b) stainless damascus c) mosaic damascus
2) The first recorded use of canned steel was in the making of high carbon steel from: a) blister steel b) wrought iron c) shear steel
3) BLADE Magazine Cutlery Hall-of-Fame® member Steve Schwarzer made his first powder-metal mosaic damascus in 1990 with the help of: a) Cutlery Hall-of-Famer Alfred Pendray b) Joe Hytovick c) Daryl Meier
4) When Cutlery Hall-of-Famer Bill Moran introduced the modern American custom knife industry to damascus steel blades at the 1973 Knifemakers’ Guild Show, how many damascus knives did he display on his table?: a) seven b) 11 c) eight
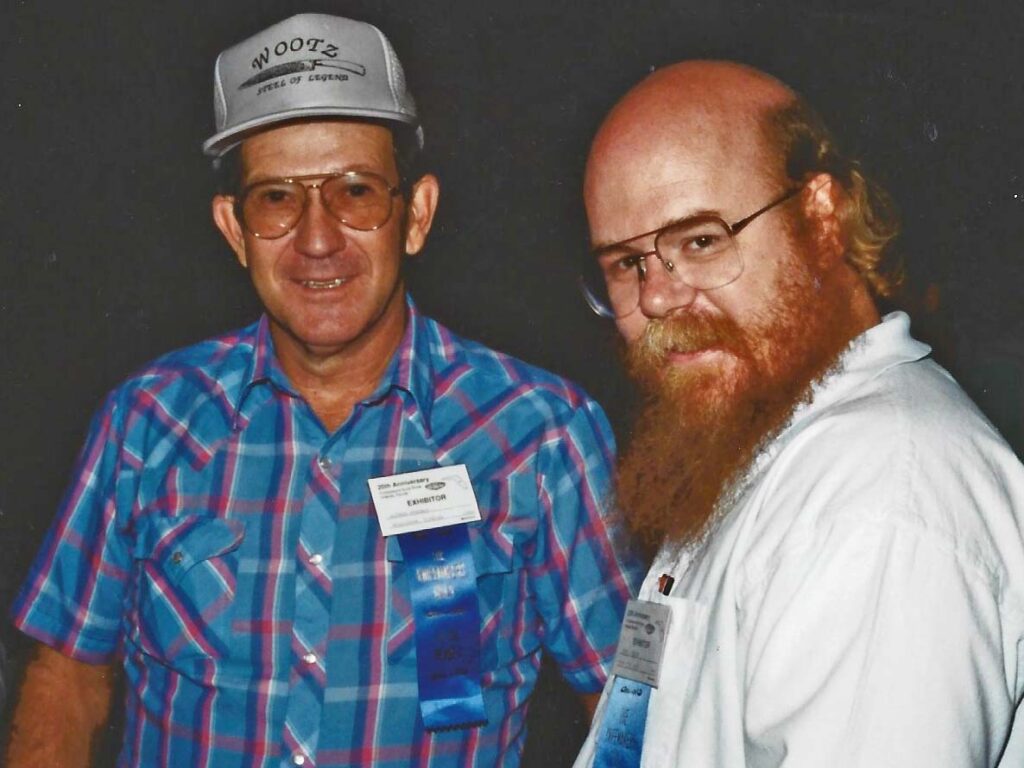
Al “The Wizard of Wootz” Pendray (left) and knifemaker John Salley at an early ’90s Guild Show.
5) Another name for damascus steel is: a) Samarkind steel b) pattern-welded steel c) wood-grain steel
6) The art of forging damascus had developed into a highly developed industry in Damascus, Syria, by circa: a) 1000 A.D. b) 1200 A.D. c) 1400 A.D.
7) According to Bill Moran, the first pattern-welded or damascus blades were made by the Merovingian Franks and Vikings at least as early as the: a) 2nd century A.D. b) 4th century A.D. c) 8th century A.D
8) Damascus steel was named after Damascus, Syria, because: a) the steel was forged there b) the city was one of the most important centers of commerce for the steel c) the name sounded a lot more romantic than calling it pattern-welded steel
9) In areas of Asia, damascus steel was called: a) fulat b) bulat c) both a and b
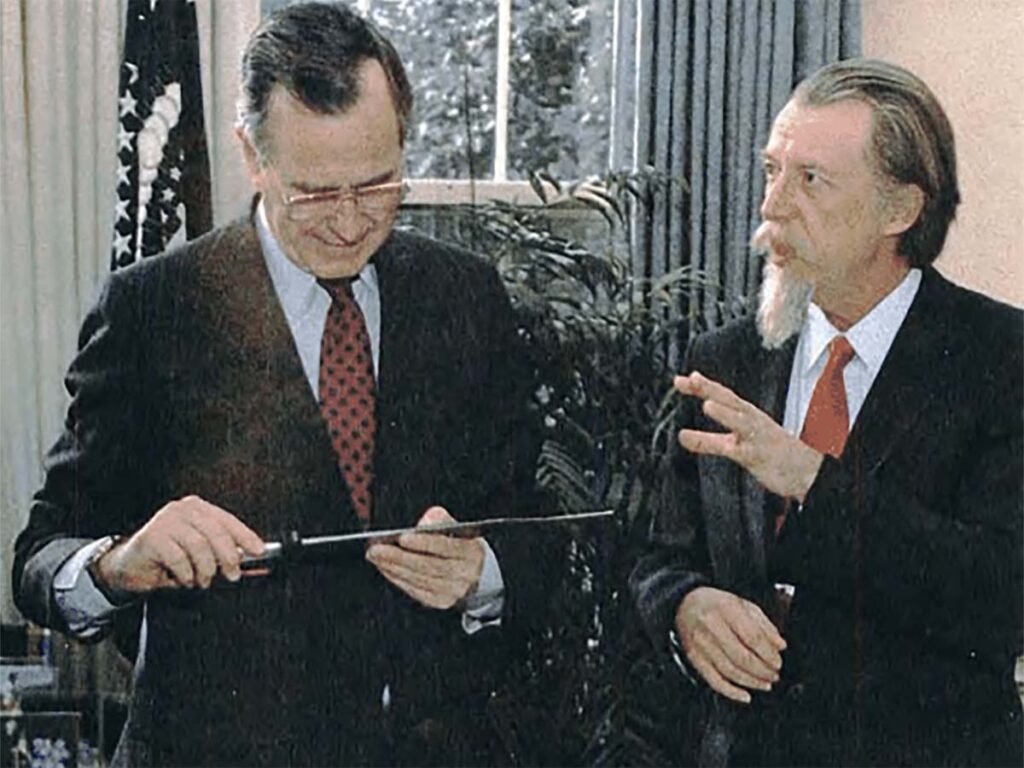
Daryl Meier’s American Flag Knife featured images of 13 flags, each with 50 stars, running the length of the blade. Meier (right) presented the knife to President George H.W. Bush (left) in the White House Oval Office in 1991.
10) The Arab word damas means: a) sharp b) aqueous, water, flowing c) super steel.
11) What resident of Essen, Germany, forged blades of damascus prior to World War II?: a) Hans Gruber b) Erwin Mueller c) Fritz Schwigat
12) Also known as the master smith of the Third Reich, who made hunting knives and entire sets of cutlery with damascus blades for his friends and others—including members of the Nazi Party?: a) Max Schultz b) Paul Muller c) Herman Rommel
13) Toward the end of the 1960s, what German maker/steel researcher forged a number of bowie knives of damascus steel?: a) Manfred Sachse b) Erich Von Stupp c) Heinrich Boker.
14) ABS master smith/Cutlery Hall-of-Famer Wayne Goddard popularized blades of cable damascus in the mid-1980s. According to Wayne, up to that time knives of forge-welded wire cable had been made in Oregon for at least how long?: a) 40 years b) 60 years c) 80 years.
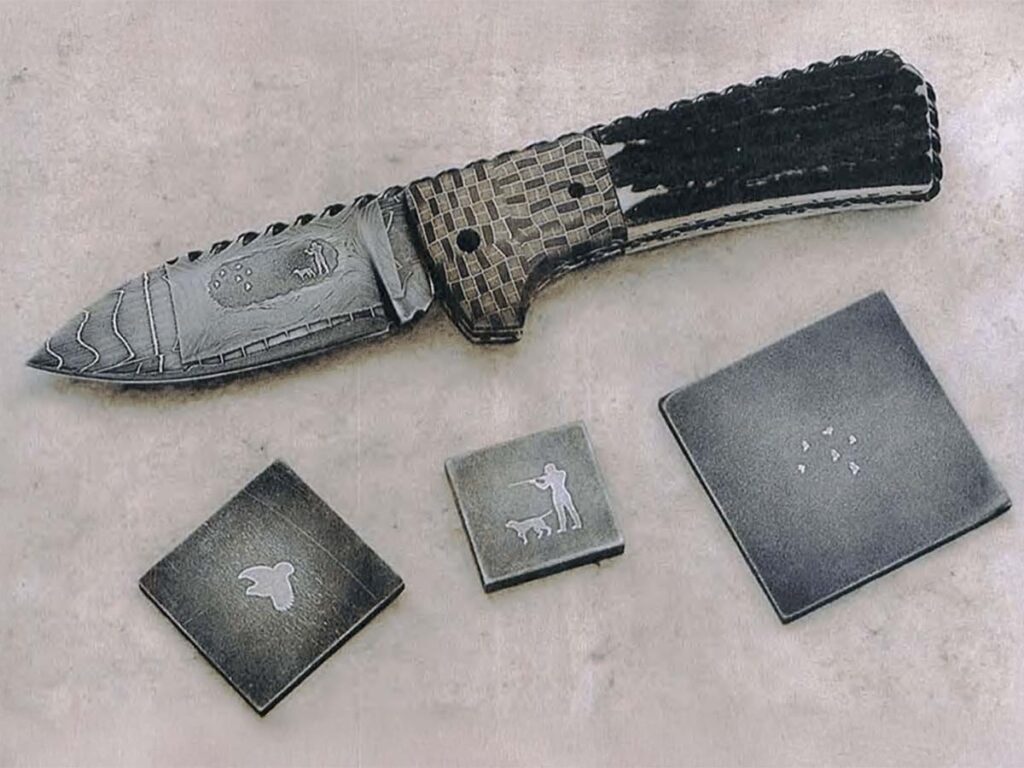
Steve Schwarzer’s pioneering mosaic damascus knife, “The Hunter’s Dream.”
15) According to On Damascus Steel by Dr. Leo S. Figiel, steel made by a crucible process—that is, wootz steel—was made as early as: a) 200 B.C. b) 100 B.C. c) 100 A.D
16) Also according to On Damascus Steel, the first damascus steel was made as early as: a) the second century B.C. b) the first century B.C. c) the first century A.D
17) Western Europeans experienced the effectiveness of damascus swords used by defenders of the Muslim faith during the Crusades of the 11th, 12th and 13th centuries. The Westerners referred to the long blade used by their opponents as the: a) Sword of Islam b) Sword of Death c) Sword of Destiny
18) Bill Moran once wrote the best and most beautiful damascus blades consisted of how many layers of steel?: a) 256 b) 512 c) 1,024
19) With whom did Cutlery Hall-of-Famer Jim Parker collaborate to produce a series of factory damascus knives in the mid-1980s?: a) Daryl Meier b) Don Fogg c) Fain Edwards.
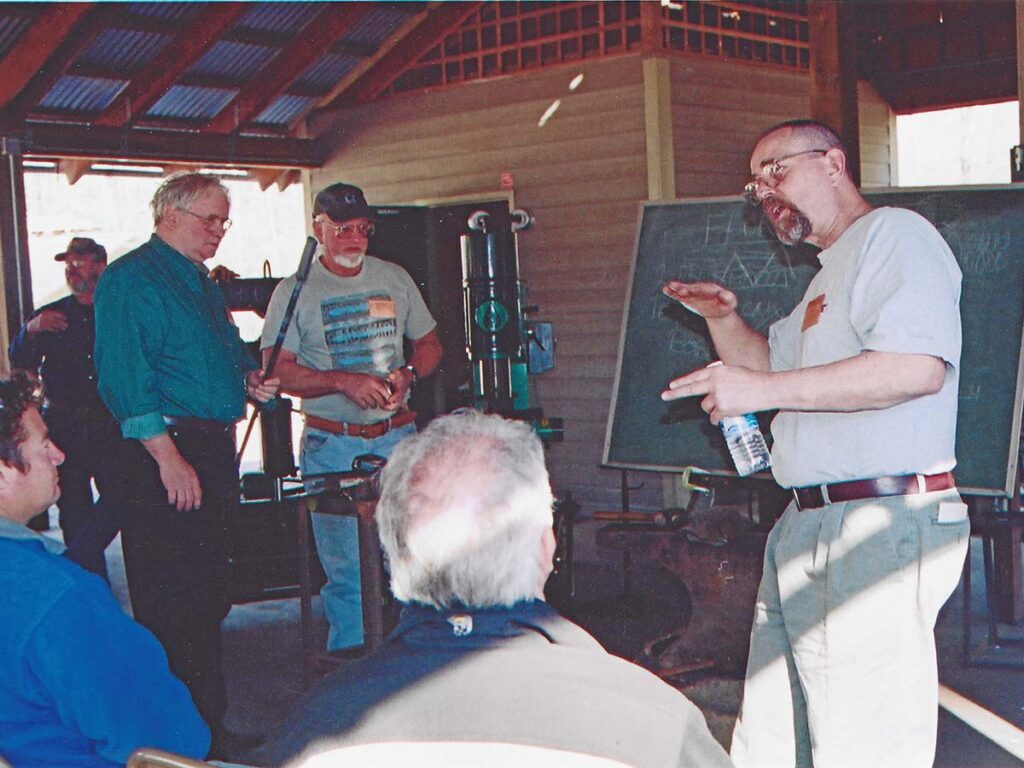
Standing, from right: Don Fogg, Steve Schwarzer and Jim Batson during a class at a past Batson’s Bladesmithing Symposium.
20) One of the landmark damascus knives Bill Moran exhibited at the 1973 Knifemakers’ Guild Show was this European quillon dagger. Who bought it at that historic show?: a) Peter Semon b) Rita and Cutlery Hall-of-Famer Butch Winter c) Paul Lansingh.
21) In his groundbreaking The Hunter’s Dream mosaic knife, Steve Schwarzer adapted some of the techniques of what process to avoid the distortions seen in most mosaic patterns up to that point in time?: a) glass blowing b) Venetian glass working c) glass inversion
22) In the early ’90s, an ABS master smith forged a damascus pattern with images that looked like flames ascending from the edge toward the spine. Not surprisingly, he called it flame edge. His name: a) Robbin Hudson b) Larry Fuegen c) Don Fogg
23) In ancient Persia, the pattern called Kirk Narduban is the pattern known today as: a) random b) mosaic c) ladder
24) Al Dippold created a mosaic damascus method that included his surname appearing 11 times on each side of the blade. Al called the method: a) Accordion b) Jigsaw c) What’s My Name?
25) According to Daryl Meier, letters or words first started appearing on pattern welds between the: a) 5th and 8th centuries b) 11th and 13th centuries c) 15th and 16th centuries
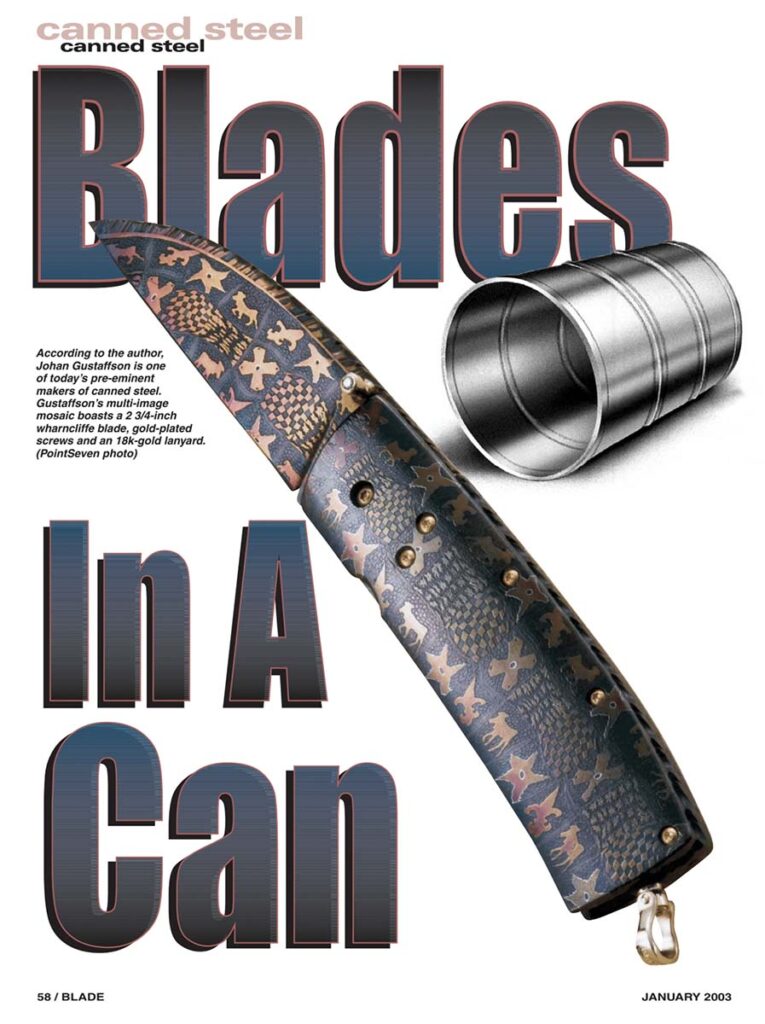
Steve Schwarzer was among the first to outline canned steel in detail and did so most astutely in his story in the January 2003 BLADE®.