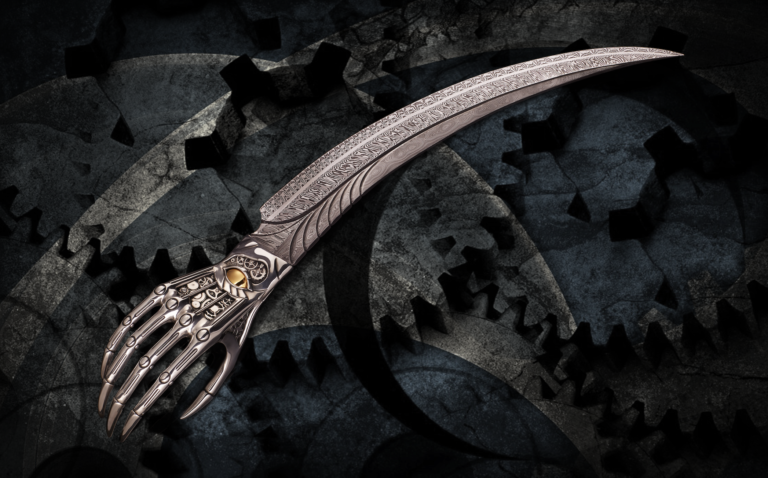
“A knife capable of movement and gifted with intelligence …”
—Jean-Marc Laroche
“On fitting your hand into that of the knife, you already feel a strange clasping in response when, suddenly, the mechanical fingers close! You can’t get free! With the same movement, an eye opens and stares at you intensely. It’s awake! Now you are under its control, and the knife is master of you who dared to take it in your grasp.”
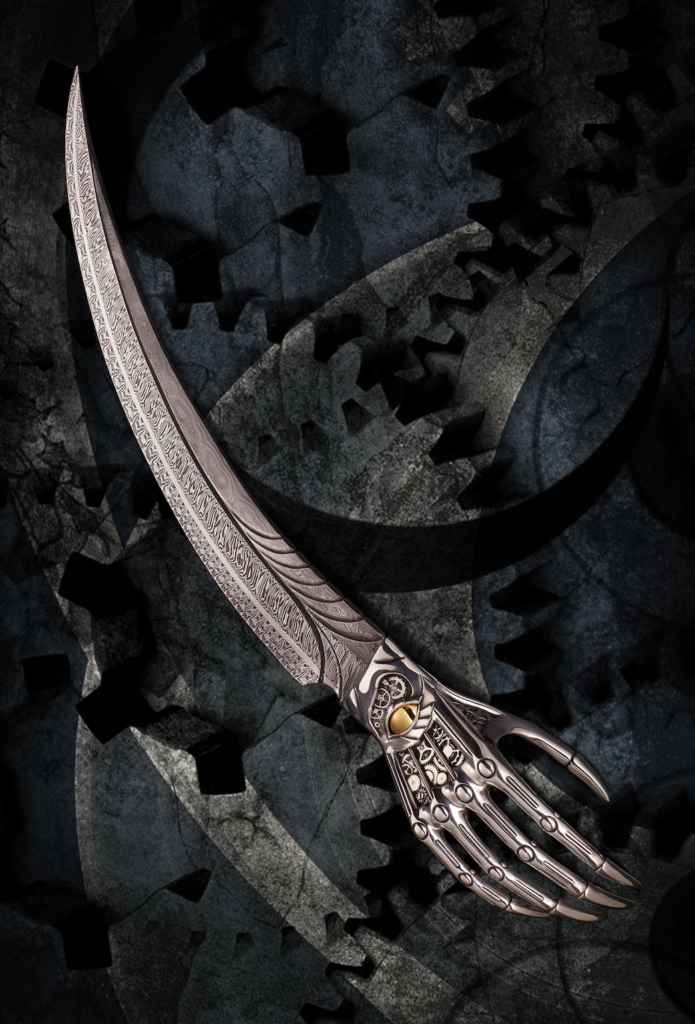
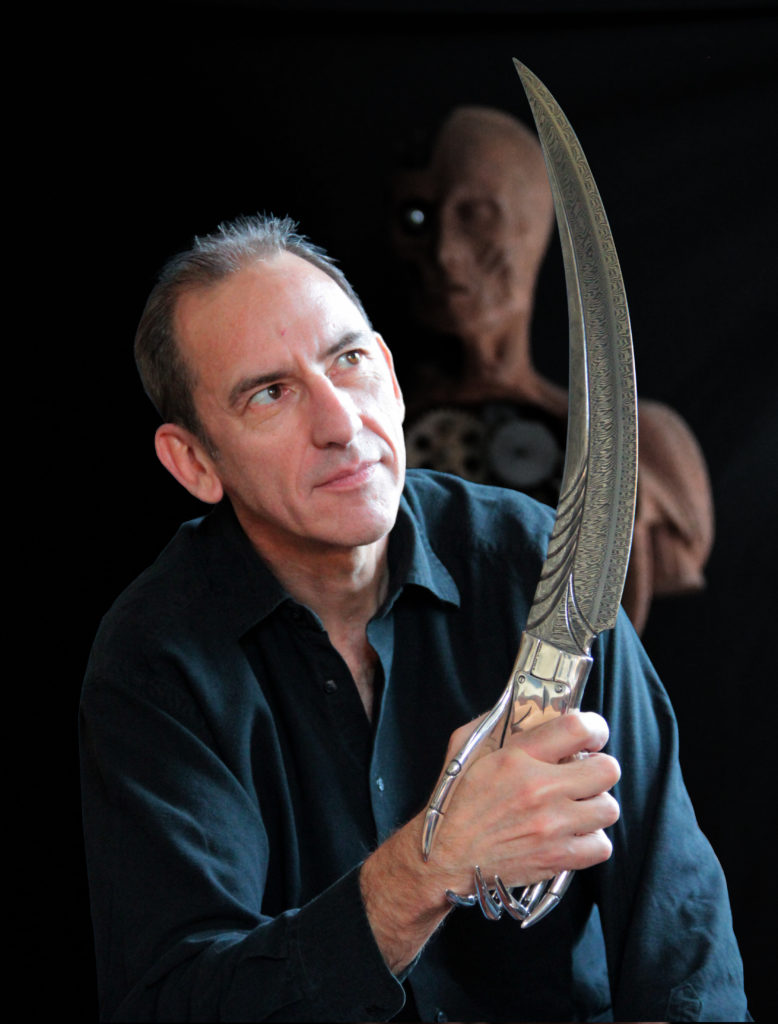
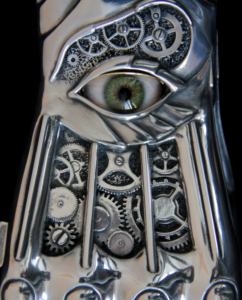
Above: The Living Knife by Jean-Marc Laroche features a mechanical hand for a handle that, as you grab it, literally grabs you back. The damascus blade is a composite of 15N20, 15LM and UHB11 high-alloy nickel and carbon steels in explosion, twist and random patterns forged by Swedish maker Roger Bergh. Overall length: 25 inches. (images courtesy of Jean-Marc Laroche)
In addition to the above, French knifemaker/artist Jean-Marc Laroche refers to his latest creation—this issue’s cover piece—as “The Living Knife.” Since it has a “hand” for a handle with “fingers” that close, an “eye” and an overall lifelike appearance, who are we to argue? As you grab the handle, the “fingers” actually grab back so that it’s hard to tell who’s holding whom. And, as the fingers grab your hand, the “eye” opens. The hand also is embellished with gears in the Steampunk style.
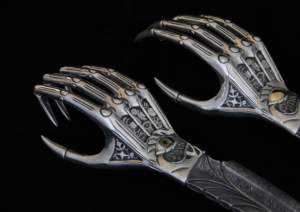
A close-up of the silver-plated bronze hand shows the detail of the gears in a Steampunk motif. (image courtesy of Jean-Marc Laroche)The opening eye.
The Living Knife is indeed a most unusual creation—but then Laroche has been making otherworldly pieces for over two decades. Even by his standards, though, this one takes his knife art into uncharted territory.
“It was from the cinema of fantasy films that I drew my inspiration,” he notes. “It took me 12 years to implement my idea, six months to carry it out and a fair number of technical difficulties had to be overcome.
“Yet here it is, like a cunning thing from another time that a mad inventor out of the 19th century would have dreamed up. This biomechanical being activates its workings to move its fingers; it seizes control of the situation with its eye’s intelligence.”
The Living Knife is an assembly of mechanical parts, the prototype having been made in resin. A few rare versions in bronze, gold and silver are in the process of being forged.
“Swedish knifemaker Roger Bergh participated in this project. Indeed, I have been talking to Roger about it for 10 years and he has always been enthusiastic,” Laroche observes. “Roger first forges damascus steel to obtain various types of structures; he then assembles them into magnificent combinations. A world-renowned knifemaker, he has remained down-to-earth and open. Working with him is a real pleasure.”
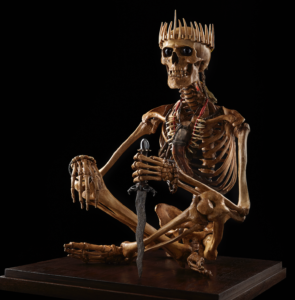
In addition to knives, Jean-Marc Laroche sculpts skeletons on a lifelike scale. An example is his “Warlord,” a kind of Javanese king holding a kris. The skeleton is resin on a steel structure. The crown is assorted animal bones, the eyes are natural quartz crystal, and the necklaces and bracelets are from “different ethnic tribes.” The knife is made from an old Indonesian kris blade, some teeth and hematite.
KNIFE SPECTACULAR
BLADE® first learned of Laroche at the 1992 East Coast Custom Knife Show, where his knives with “alien-head” handles were a show hit. The alien heads were those of animals he customized and coated with a special resin.
In 1997 Laroche’s “Mother Ship with Fighters”—a set of four knives including one large one and three smaller ones with dagger blades and curved, claw-like guards—was a winner of the annual BLADEhandmade Best In Show Award. His “Byakhee,” a spectacular knife with a handle resembling a large, bat-like bird inspired by the science-fiction stories of H.P. Lovecraft, won Best Fantasy Knife at the 1998 BLADE Show West.
Laroche introduced The Living Knife to an appreciative audience this past June at the FICX, an invitation-only knife show in Paris that also featured a few U.S. makers, including Kevin Casey. It was Jean-Marc’s first knife show since 2002. Since then he had been involved in other forms of sculpture and exhibiting them worldwide.
Actually, The Living Knife is not Laroche’s first attempt at such a piece, his “Devil Hand” predating it. However, the Devil Hand did not have the mechanical grasping capability, the same materials or other select features of Laroche’s newest rendition. Laroche said he also has made two knives similar to The Living Knife, the first being sold to the Instituto Ricardo Brennand (http://www.institutoricardobrennand.org.br/index2.html), a museum in Recife, Brazil.
For a video on how The Living Knife operates, watch the video below:
The author fashions it in the style of the classic 19th-century maker
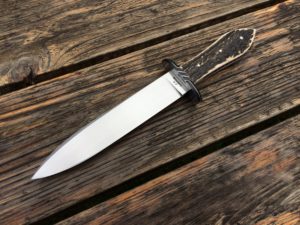
In 2017 I received a commission for a piece in the style of Michael Price, a mid-19th-century knifemaker whose knives are stamped “M. Price San Francisco.” The customer sent me an image of the knife I should use as my template: a spear-point bowie with elk antler scales and Price’s iconic “peanut”-shaped handle. However, he also asked me to add some filework and make it my own. This was not intended to be a replica of the historic piece.
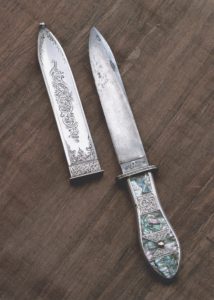
BLADE Magazine Cutlery Hall-Of-Fame® member Phil Lobred was a big collector of original 19th-century Michael Price knives, including this one with an abalone handle. (Eric Eggly image)
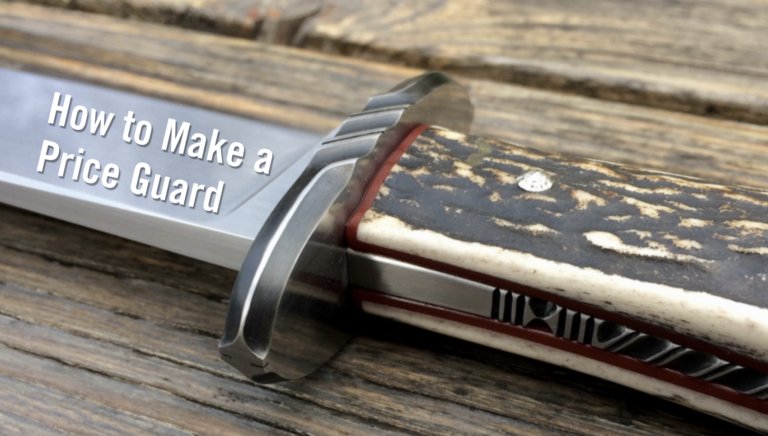
The Price knife whose shape I was to imitate was symmetrical and quite simple, but I found myself a bit baffled by the guard, struggling to answer the question, “How did he attach it?” From the single-side-view photograph I had, several explanations would have been possible: It might have been a frame handle, or the guard might have been slid on from the blade end and soldered in place; or perhaps the image was just an optical illusion, and the swell in the handle was narrow enough so that the guard could slide on from the tang.
Lacking access to the knife or to photos showing the guard/handle juncture, I voiced my confusion on the American Bladesmith Society internet forum. ABS master smith Lin Rhea responded promptly with the expertise of one who has extensively studied and taught 19th-century blacksmithing and knifemaking techniques.
Lin wrote that the knife had a full tapered tang and that Price likely “slid the guard on from the back and forged the tang wider.” Lin added that the shape of the handle would allow the guard to slide back far enough so I could still finish the blade, and the blade would have been hardened after forging the tang to shape.
The practice of passing one piece through another and subsequent forging to form a captive part is common in the traditional joinery found in ornamental and architectural blacksmithing. However, it seems to have been largely forgotten in the knifemaking realm. Meanwhile, I have always fitted the guard after heat treatment and final grinding. It struck me as a new way of thinking about the knifemaking process, one I was eager to try. With Lin’s excellent instructions, all I had to do was execute the design, carefully thinking through the order of operations.
FORGE, GRIND and SAND
Forging the Price-style knife was barely different from forging a hidden-tang blade—I just left the tang really beefy. I forged the blade shape and bevels and shouldered the tang ever so slightly. I left the tang as close to the stock thickness as I could for its entire length so I would have plenty of material to forge it wider and taper it later.
After forging I ground the blade to its final dimensions, knowing that any grinding would be more difficult after the guard was attached, and tapered the tang slightly on all four sides. Though I left the bevels of the blade with a 600-grit belt finish, I knew any part of the blade that contacted the guard must be finished as close to the final polish as possible. Any material removed in final polishing would affect the guard fit, so I hand-sanded the ricasso. I also sanded the edges of the tang from the shoulders back about 1 inch—any sanding beyond that would have been lost when forging the tang. In anticipation of the particular fit I wanted between the handle liners and the tang, I slightly rounded the tang’s edges. At that point, every surface contacting the guard was exactly the way I wanted it in the finished knife, and I was ready to fit the guard itself.
FITTING the GUARD
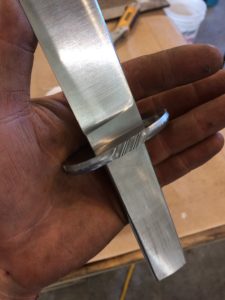
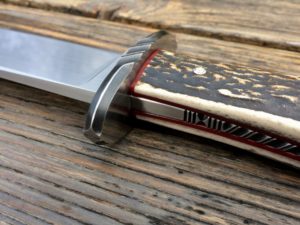
Fitting a guard for a full tang is only slightly more difficult than fitting one for a hidden tang. As always there must be no gaps between the face of the guard and the ricasso, or beneath the blade shoulders. The added challenge is that there must also be no gaps between the back side of the guard and the edges of the tang (the flats of the tang can be drafted slightly, because the handle scales will cover the transition). I used mild steel for the guard, which would be selectively blued to highlight my filework and would withstand the high heat of forging the tang. I also shaped the guard and added filework. Though these processes wouldn’t affect any of the fitting tolerances, they would have been much slower with the guard in place. I then sanded both guard faces to their final grit finish (Figure 1).
The author sanded both guard faces to their final grit finish.
BACK to the FORGE
After spending hours grinding, filing and sanding, I was ready for the nerve-wracking challenge of putting my hard work back in the forge. At the time I made the knife, I used a coal forge almost exclusively—it was the perfect heat source for this kind of forging.
In order to protect the carefully finished guard and blade, it was important to have a very isolated heat on the tang, which also allowed me to hold the blade in a gloved hand while forging to avoid galling the soft metal with tongs. A torch could also have provided such control, but a gas forge would have made it difficult. I kept my coal fire very contained so that I had a small area of intense heat to use.
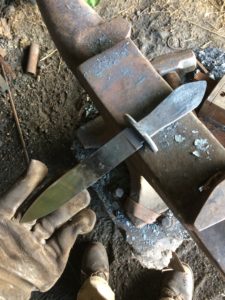
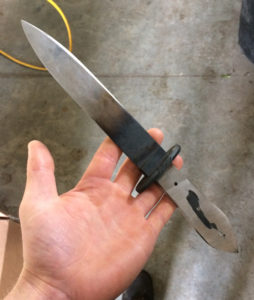
To forge the peanut shape into the handle I first drew the taper in profile, keeping the thickness consistent, and then used the cross-pien on my hammer to forge the swell. Once the profile was adequate, I refined the tapers in the thickness of the tang with the face of my hammer, making sure to keep them flat or a little convex. Any “sway” in the flats of the tang would result in gaps underneath the handle scales that could not be removed by grinding (Figure 2). I then ground the forged tang to its final dimensions and drilled the pinholes. The blade was ready for hardening (Figure 3).
Figure 2
I hardened the knife using my heat-treating oven as I do on most of my knives. Nonetheless, in retrospect, heating it in the forge might have resulted in less scale to clean off the blade due to the more-neutral atmosphere. After hardening and tempering I used a torch to soften the tang, which would enable me to add the desired filework.
Figure 3
FINISHING
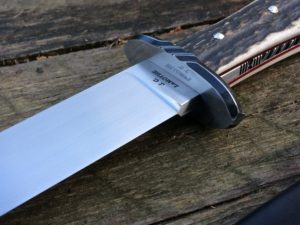
To finish the hardened and tempered blade, all surfaces on the knife and guard had to be re-sanded to remove oxidation. The setup sanding that I did prior to forging the tang enabled me to sand only small amounts of material off critical places—such as the ricasso and guard face—to minimize the changes to the guard fit. Though not flawless, the final guard transitions were very clean on both the front and back faces (Figures 4 and 5).
Figure 4
Figure 5
From this point forward, finishing the Michael Price-style knife was a fairly typical progression of fitting the handle materials and shaping them to meet the tang, making sure to properly mask the carefully sanded faces. After shaping the handle, I added the filework to the tang, bluing and polishing as my design required. After every piece had received its final finish, I glued them all together with epoxy and added three piened nickel-silver pins to complete the knife (Figure 6).
Figure 6
LEARNING & RE-LEARNING
The process of making a knife such as this requires more forethought and planning than most techniques that involve fitting a guard after all the forging is complete. It is also considerably more difficult to meet the high standards of fit and finish that are to be expected on today’s handmade knives. Working from a drawing helped to keep all aspects of the knife consistent with my desired result. Even so, reasoning out the order of polishing was still crucial, because each step limited access to certain places on the knife.
Such an inflexible order of operations begs the question, “Why use this process at all in our modern day and age?” If form, fit and finish are the primary goals, then using frame-handle construction would, indeed, give more reliable results for a knife of this shape. Additionally, it would be impossible to use this guard technique on any asymmetrical handles that flare directly after the guard.
From a practical standpoint, one answer is that forging the tang after slotting the guard is an expedient way to make a symmetrical handle without the meticulous and time-intensive machining that frame-handle construction requires.
Perhaps more importantly, however, practicing historical techniques shows attention to the history of knifemaking and adds a depth of craftsmanship to any given piece. It is a process of learning and re-learning that can yield different perspectives on what is possible in knifemaking, enriching the craftsperson and adding to the vitality of the craft.
For more information contact Jordan LaMothe, Dept. BL12, 1317 Count Rte. 31, Granville, NY 12832 518-368-5147 [email protected], jordanlamothe.com.
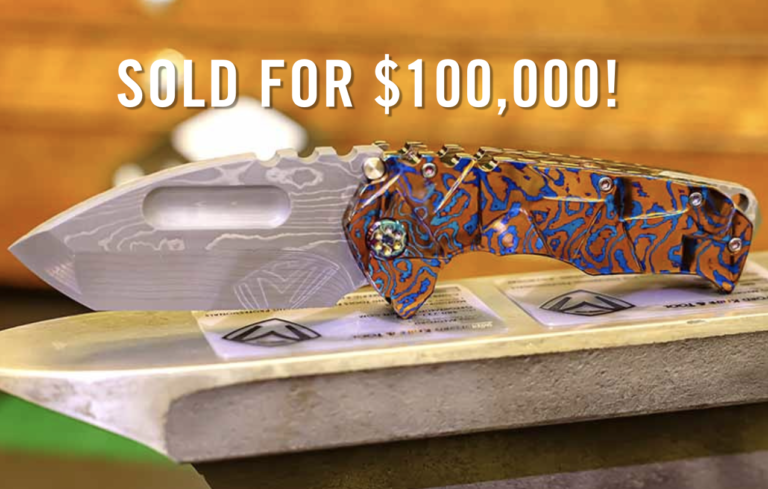
Medford Knife listed a rendition of its flagship model for $100,000 last week and moved it out the door!
Truth be known, knives fetching six figures isn’t out of the ordinary. Typically, they’re the work of some semi-mad forging genius, who’s slaved away on his creation for months, if not years, and adorned it with the finest gold, a unique design and blood, sweat and tears. Yeah, these are the blades that get every mouth-watering and collectors scrambling for their wallets. Less common, a production knifemaker’ blade fetching such princely sums. However, this is exactly what Medford Knife did with a rather spectacular rendition of its famous Praetorian.
An intriguing rendition of Medford’s flagship model, only one made. Photo: Medford Knife
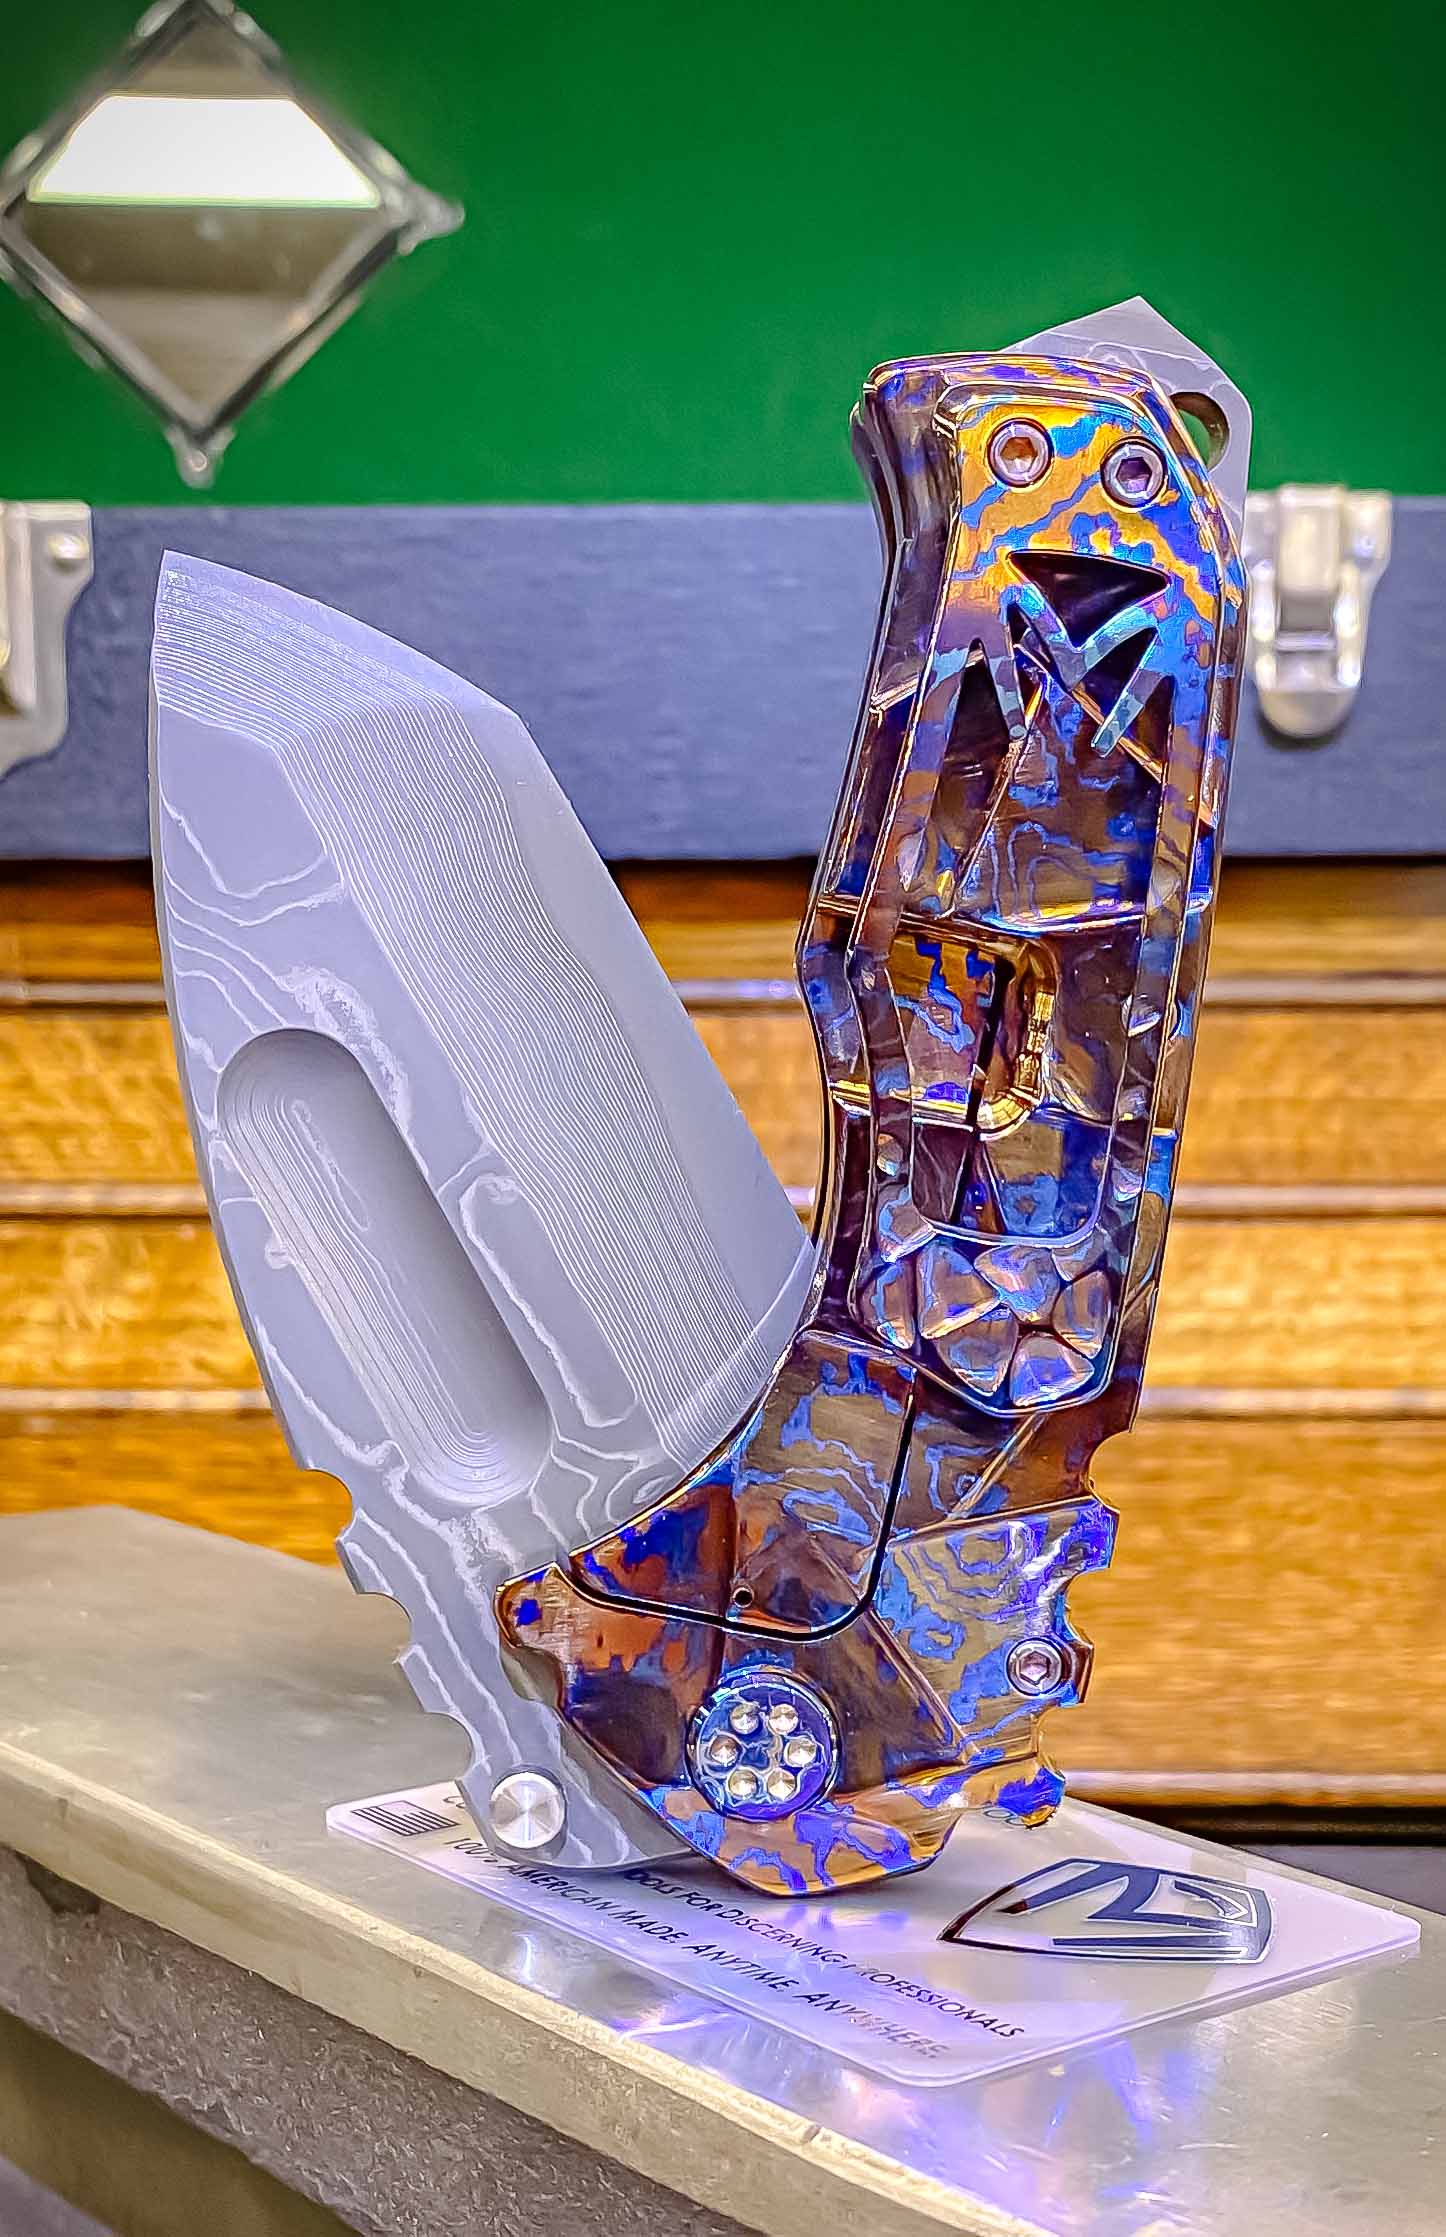
Dubbed the #1 Praetorian TITAN OAK, the vibrant and exclusive version of the company’s flagship model. And on Black Friday, the folder was purchased for an impressive $100,000, an amount Geoff Oprandy, head of Medford business operations, confirm.
“Yes, $100k USD,” he said via email.
Apparently, it didn’t take long for the Praetorian to find its new owner. Oprandy said the timeline for the company’s virtual show Nov. 26 was a bit foggy, but it moved soon after it was listed.
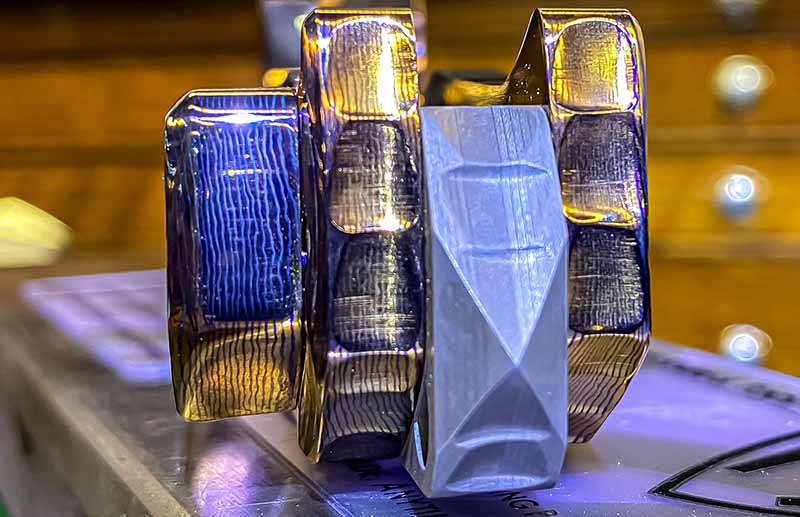
The knife is certainly eye-catching with its colorful hand-sculpted Timascus handle and dark Damascus blade. And yes, it’s made of and includes top-end components—titanium pivot barrel, Timascus M signature clip and Lucite Safe and ZERO Halliburton presentation case. But those perhaps weren’t the driving factors in the Praetorian drawing top dollar. The knife’s description sheds some light:
The entire knife required new tooling and unique hardware as well as extensive engineering and prototype-free development. There is ONE of these knives in existence. We only had material for a single try and if it went South it would have delayed the knife for another year.
Weighing in a more than 1 pound, Medford’s top-end offering is beefy. Photo: Medford Knife
One thing can be said, if you purchased the #1 Praetorian TITAN OAK you wouldn’t have to worry about running into someone else with the same one. That’s certainly enough to motivate many buyers. What say you, would you have dropped that sort of coin to add the TITAN OAK to your collection?
The knife’s Timascus handle and Damascus tanto blade are eye-catching. Photo: Medford KnifeThe #1 Praetorian TITAN OAK in all its glory. Photo: Medford Knife
Inattentive operators are more dangerous than the machines themselves
BY JOE SZILASKI BLADE® FIELD EDITOR
“I am a newbie to knifemaking with a limited budget for machines and tools. My main concern is the horror stories I have heard concerning the accidents some makers have experienced working with their machinery. I would like to know what you think are the most dangerous machines in the shop.” -John, Pennsylvania
This is one of the most frequently asked questions I have from students attending my knifemaking classes. If I were to categorize all the tools in my shop, I am not sure which tool would be the winner of “most dangerous.” Whether a power tool or not, they are all dangerous, some more than others. Therefore, I have a lot of respect for even the simplest of knifemaking tools.
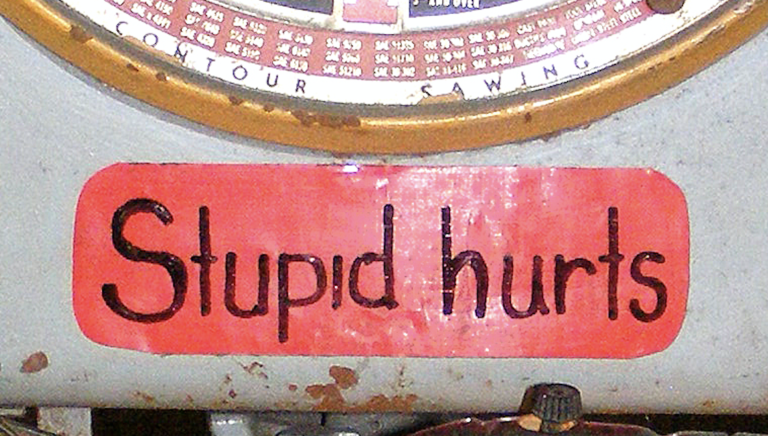
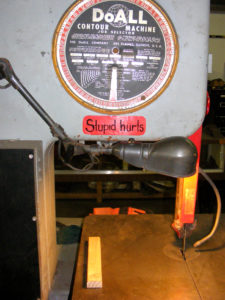
I have a sign in my shop styled like a big bandage that reads “Stupid Hurts,” and that is about the size of it. Stupidity is the cause of many accidents. Accidents happen but are often preventable.
1: GRINDER
I would like to mention a few tools found in most every maker’s shop. Let’s start with the grinder. My grinders are equipped with 2×72-inch belts and are very safe until you exert extra pressure to remove excess material faster. In a good scenario you will burn your finger from friction heat; worse, you slip and grind your knuckles, what you would call really bare knuckles, or give yourself a manicure by grinding right into your nails. Of course, the belt can snap and hit you in the forehead, reminding you to not apply too much pressure when grinding.
I teach my students to grind their knives freehand, no gloves and without the use of a tool rest. The blade can get caught between the rest and the contact wheel. This could get your fingers where they do not belong, snap your belt, or throw the blade out of your hand. I am glad I learned to grind this way and so have all of my students.
2: DRILL PRESS
The drill press looks quite innocent but most drill bits are very brittle. If you put more pressure on your drill bit than it can take, it could break or explode into small pieces and make you look like you had a fight with a porcupine. Or, the bit can snag the material you are drilling and snatch it out of your hand. Before you are able to move your hand away, the snagged material will smack you at least 10 times.
3: BAND SAW
The band saw can be an intimidating creature. I put it into the meat-eater category along with T-Rex and a pool of piranhas. To avoid all those teeth, use push sticks. Again, use just enough pressure to cut the material—nothing more, nothing less.
4: BUFFER
As most makers will tell you, the buffer is certainly one of the most dangerous tools in the shop. It may sound funny but my ex-partner wore a homemade plywood apron for when he was buffing.
Avoid putting your buffer on a workbench against a wall. I made this mistake in my old shop. I had a 1-horsepower buffer. One day the soft buffing wheel caught a guard I was working on and grabbed the knife out of my hand. The knife hit the table, ricocheted into the cinder block wall, and went right through the thin section of cinder block. I would hate to think what would happen if the blade had hit me with that much force.
Many years ago, Gil Hibben was buffing a blade when the buffer grabbed the knife and hurled it blade first into one of his main arteries. Miraculously, a friend was nearby and got Gil to the hospital before he bled to death. (Carter photo)
I replaced the buffer with a small quarter-horsepower model I could practically stop with my hand. I compensated for the lack of horsepower by sanding my knives with a higher-grit paper to make it easier for the small buffer to get the polish I wanted.
Now that I have a big dream of a shop with plenty of room for all the tools, I have that big buffer on a pedestal and away from anything that a blade can ricochet off. The buffer may still throw the blade toward my leg or foot causing a very nasty injury, but it is less likely to come toward my body.
5: POWER HAMMER
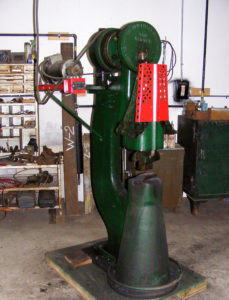
Since I forge most of my blades, about 20 years ago I bought a 50-pound Little Giant power hammer to make my life easier. This piece of equipment can be one hell of a potato masher, and then some.
Early on I developed one good habit. Whenever I stepped away from any power tool, I shut it down. That habit paid off one day. I had just shut my power hammer off when I lost my footing. My reflexes kicked in and I grabbed something to regain my balance. That is when I realized my left hand had grabbed the anvil of the power hammer, and my foot was on the pedal that would have activated the hammer. If the hammer had been turned on, my hand would now make a good stop sign at a school crossing. After that I installed an on/off switch directly on the machine and close by so I do not have to step away from the machine to shut it off. I also got the surgery on my foot I had been avoiding so now I do not lose my footing so easily.
Whenever the author steps away from any power tool—including his power hammer—he shuts it down to help avoid potential accidents. (Lori Szilaski photo)
Recently a friend of mine had a similar situation—tripping and accidentally grabbing the anvil of his air hammer. Unfortunately, his hammer was turned on. Fortunately, the doctors were able to save his three fingers that were crushed.
Tools are made to help us, not hurt us. It is true tools do not have feelings and do not care what they cut, smash or maim. You do not have to be afraid of your tools but, like I mentioned earlier, you certainly have to respect them.
In my opinion, people who do not know how to operate the tools properly are much more dangerous to themselves and others than the tools themselves. Knowing how to use your power equipment is most important in order to avoid the horror stories we have all heard about. All power tools come with lengthy warning labels. There is a good reason for these besides the manufacturer covering their you-know-whats from lawsuits. Such accidents have happened before and it is up to you to avoid having the same ones in the future.
Long ago I worked in an art foundry that made bronze sculptures. One young lady was using a hydraulic roller she was not qualified to use. Her gloves were way too big for her and the roller caught the tip of her glove and pulled in her whole hand. She has had quite a few surgeries to reattach and rebuild what the doctors could. She was lucky the maintenance guy was passing by and hit the reverse switch. He may have saved her life, as the machine was big enough to pull her in completely.
CREATE A SAFE ENVIRONMENT
Create a safe environment for your shop. Be sure to not overcrowd it. Keep things off the floor you can trip on, especially in the area around your power tools. And always maintain your tools—it is a pleasure to work on well-maintained equipment. Finally, wear proper fitting clothes and safety gear when appropriate.
Remember the basics. Do not rush or use power tools when you are too tired. Never be overconfident around power tools no matter how many years you have worked with them. I have seen people crippled and killed because of this. Sorry to add to your horror story, but the bottom line is you are the one with the brain and common sense—use both.
Send your questions for Wayne Goddard or Joe Szilaski to BLADE®, POB 789, Ooltewah, TN 37363-0789 [email protected]. Include a self-addressed, stamped envelope with your name and address for a personal response from Wayne, or e-mail him at [email protected]. E-mail Joe at [email protected]. If you wish, BLADE will not print your name with your question.
Herb Drury was my wife’s uncle, a World War II veteran and a friend. He passed away in 2007. I miss him and the discussions we used to have. I guess I was one of only a couple of people he talked to about his time in World War II. He served in the Pacific Theater on Attu Island in Alaska and in the Philippines. The thing I noticed was he always went to Attu. For some reason the place haunted him and was still fresh in his memory after 60 years.
Uncle Herb was a tall, thin man with mild mannerisms. As he told me about the battle of Attu, it was hard to picture him there. It was even harder to visualize this kind and gentle man hurting anyone.
He was trained for desert fighting in Africa. As part of the U.S. 7th Infantry Division, he was sent to Attu Island. They had no winter gear. The Army thought the heavy gear would slow the men down. Even though it was May, the arctic weather was below freezing. He told me of men burning the wooden stocks of their rifles trying to stay warm. He said it was a pretty easy landing and they thought maybe the Japanese had left. It wasn’t long before they discovered the Japanese were still there.
He talked about the banzai attack. He could not comprehend that the Japanese were so willing to die. He said that after the attack, “We walked around and looked at the damage. The men in the hospital tent had been killed in their beds.” He told me the Japanese soldiers, before allowing themselves to be taken prisoner, would gather in a circle and hold grenades to their chest to commit suicide. He said he came upon a wounded Japanese soldier. “I just emptied my gun into him,” he recalled. It was hard to picture this soft-spoken, gentle man doing this.
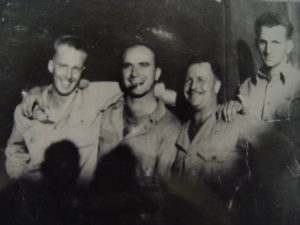
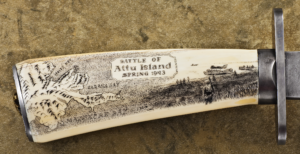
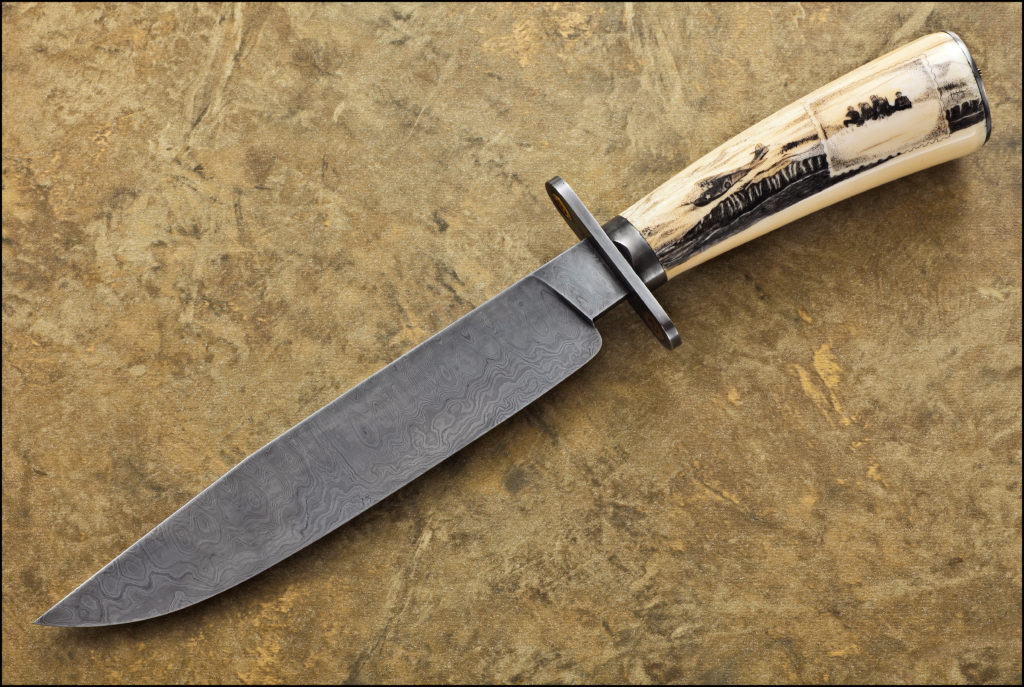
Andy Sharpe’s Uncle Herb and his fellow soldiers enjoy a lighter moment on Attu. Sharpe and ABS journeyman smith A.C. “Chuck” Richards collaborated on the Project Attu Knife in their and their fellow comrades’ honor. The scrimmed Attu Island scene is by Richard “Hutch” Hutchings. (SharpByCoop knife photo)
After he passed away I thought of him often, and when I thought of him I thought of Attu. I wanted to do something in his memory. As a knifemaker it only made sense that I make a knife. It had to be special. Then it came to me: Use artifacts from Attu. And so the research began.
I searched the Internet for weeks trying to find all I could about Attu Island. I discovered that the only people on the island were 22 members of the U.S. Coast Guard. I did find an article about the Coast Guard’s Attu Station that listed the phone numbers for the commander. I called the number and I talked with Commander Robert Coyle for about an hour. He told me he had just what I needed—an exploded artillery shell and assorted shell casings that had been found on the Coast Guard station. Problem was, no items could be removed from the island. The island is a National Historic Landmark and game preserve with a no-stone-turned policy and is under the control of the Alaska Fish and Game Department. I would need the department’s permission to remove the artifacts. He also gave me the name and contact information of other informed sources.
After three months of paperwork and waiting, I received permission to remove the artifacts from the island, with the stipulation that only one knife would be made and all the remaining materials be returned to Attu. I could receive items found only on the inside of the boundaries of the Coast Guard station. Commander Coyle boxed up the items and shipped them to me.
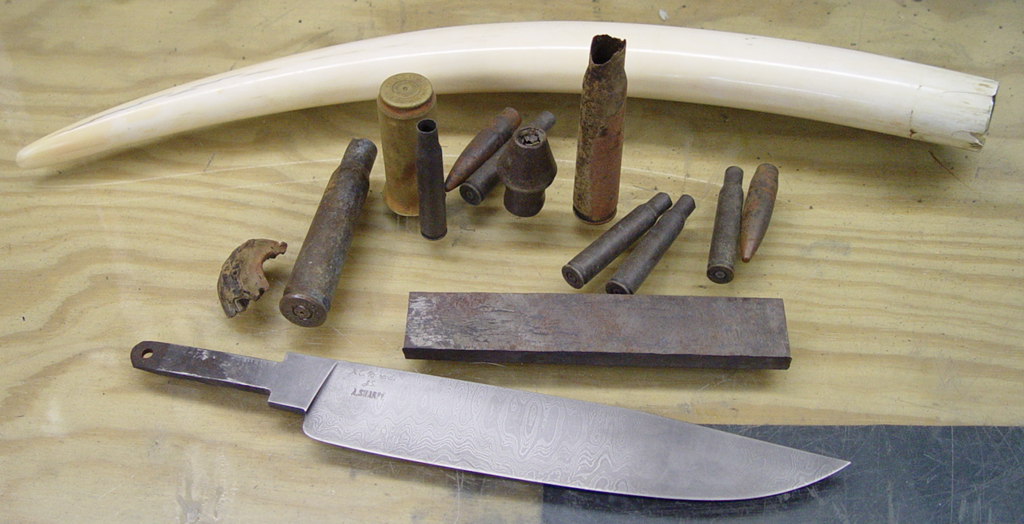
When the box arrived I was in awe. This was not just a bunch of scrap metal; this was a box of history. These are possibly the only documented artifacts from Attu Island in private hands:
PROJECT ATTU
I really began to start doubting my skills as a knifemaker. I was on the Knife Network Website and posted my story. ABS journeyman smith Chuck Richards expressed a great desire to be part of the project.
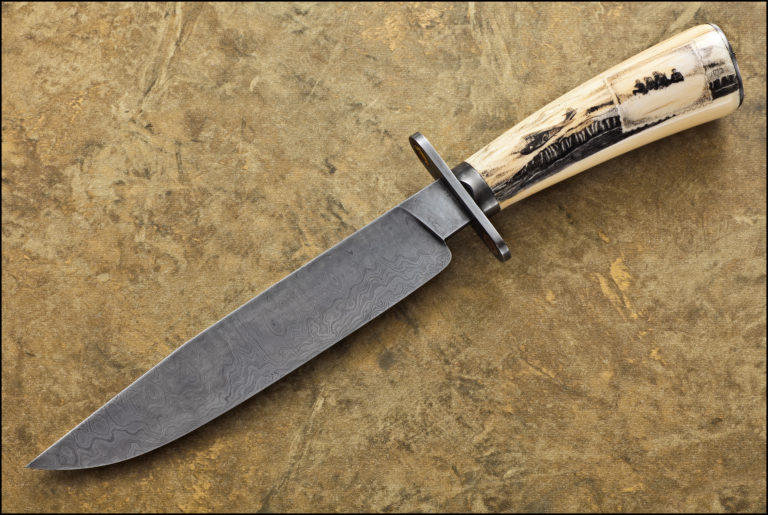
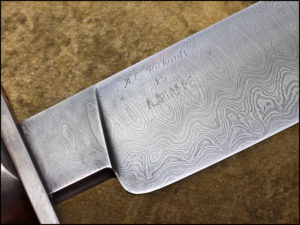
Chuck and I decided to collaborate on a simple knife design. He did his magic—a 9-inch bowie-style fighter of 575-layer ladder-pattern damascus. He forged the steel from an exploded artillery shell, a piece of spring from an abandoned truck on Attu and some 15n20 for contrast. The steel had a lot of waste due to micro cracks in the shell and corrosion from 60-plus years of exposure to the Alaskan weather.
An ABS journeyman smith, Chuck Richards forged the blade from World War II artifacts from Attu, including an exploded artillery shell, a piece of spring from an abandoned truck and some 15n20 for contrast. The steel had a lot of waste due to micro cracks in the shell and corrosion from 60-plus years of exposure to the Alaskan weather. (SharpByCoop knife photo)
We discussed the project and the weird feeling we would get while working with these materials. To make a knife is one thing—to make one from materials that cannot be replaced and if we messed it up it could not be redone is another. I think Chuck’s stress level maxed out. I cannot say enough about the artistry he brought to the project.
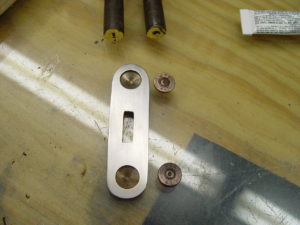
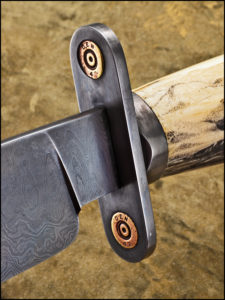
Now the knife was in my hands. How could I do justice to the beautiful blade? “Keep it simple” kept running through my brain. I decided on a basic flat guard made from a piece of the artillery shell. I had several M1 shell casings marked “42” for 1942—the military dates its ammunition—from Attu Island. I cut the base off the shells and set them in the front of the guard.
Above: Keeping it simple, Sharpe made the basic flat guard from a piece of an Attu artillery shell. He cut the base off two M1 shells the military had marked “42” for 1942 and set them in the front of the guard. (SharpByCoop.com knife photo)
The handle was easy. I had an ancient ivory walrus tusk I bought in Alaska in the mid-1970s. I never knew why I had kept it all these years but now I did. This is where it belonged. I made the ferrule and buttcap from pieces of artillery shell and cut the tusk to fill the void. I kept the tusk’s natural shape as much as possible.
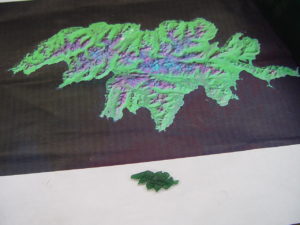
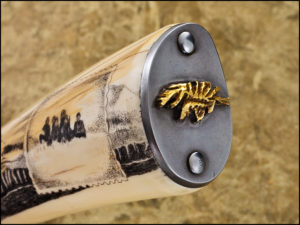
I took the M1 shells I had cut the base from and melted down the brass. I did a sand cast of Attu Island from the brass and used it as the centerpiece for the buttcap. A light etching for character and I was done.
Attu Island
The Buttcap (SharpByCoop.com knife photo)
Above: Sharpe did a sand cast of Attu Island from the brass melted down from the M1 shells and used it as the centerpiece for the buttcap.
Jim Cooper of SharpByCoop.com volunteered to do a photo shoot of the knife. His work really brought out the knife’s details:
Sharpe used an ancient walrus ivory tusk he already had on hand. Richard (Hutch) Hutchings volunteered to scrimshaw the handle.
Allen Hutton donated his time and wood skills to make the display stand. He used the wood shipped from Alaska and California to build the structures to sustain the men fighting on Attu. (There are no trees on Attu Island.) His work is simply amazing.
They decided to raffle the knife off with 100 percent of the proceeds going to the World War II Memorial Fund. We donated the funds not from those of us who worked on the project but on behalf of Herbert Reginald Drury—Uncle Herb—and all the men who fought and those who died on this all but forgotten Island.
The final outcome.
More on the Battle of Attu
The westernmost and largest island in the Near Island group of the Aleutian Islands of Alaska, Attu was the site of the only World War II land battle fought on an incorporated U.S. territory.
Japanese forces occupied Attu, home to a few native Aleuts, in June 1942. On May 11, 1943, a U.S. invasion force that included scouts recruited from Alaska nicknamed Castner’s Cutthroats set out to recapture the island. Frigid weather seriously hampered the invasion, with many GIs suffering frostbite. Rather than contest the landing, the Japanese dug in on the island’s high ground. Heavy fighting resulted in 3,929 U.S. casualties, including 580 killed.
On May 29, the last of the Japanese forces attacked without warning in one of the largest banzai charges of the Pacific campaign, penetrating the rear echelon of the American lines. After brutal hand-to-hand combat, the Japanese force was basically eliminated. Enemy dead numbered 2,351, though hundreds more were thought to have been buried during bombardments. Only 28 of the Japanese survived.
Friedly/Rudolph collaboration is an homage to American Indian culture
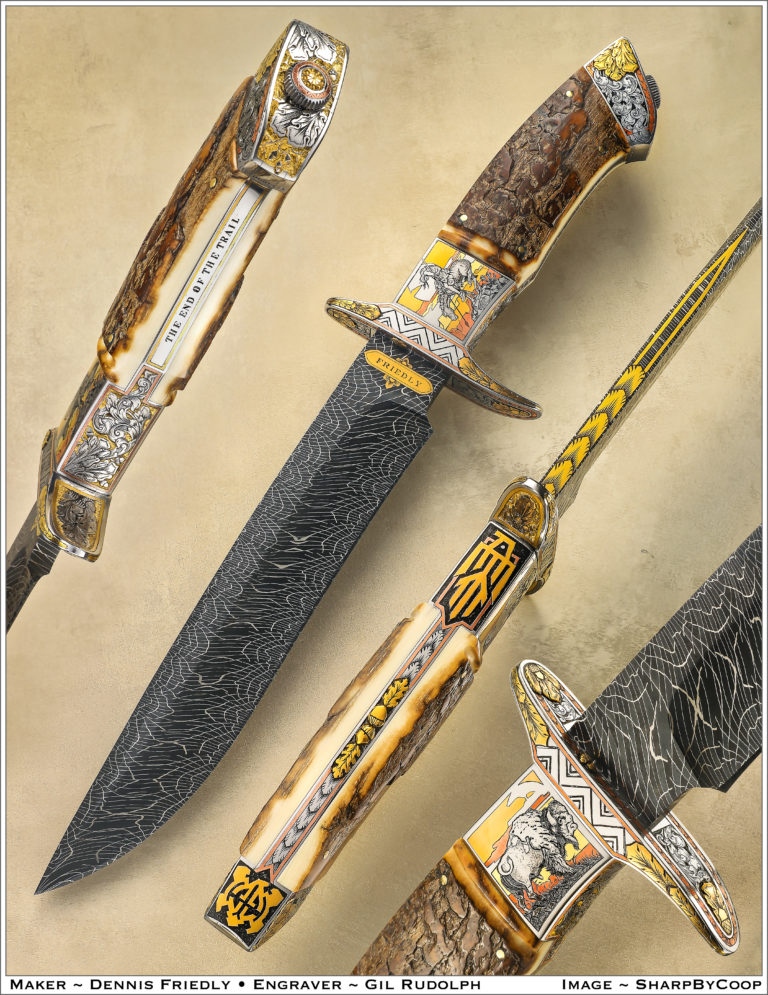
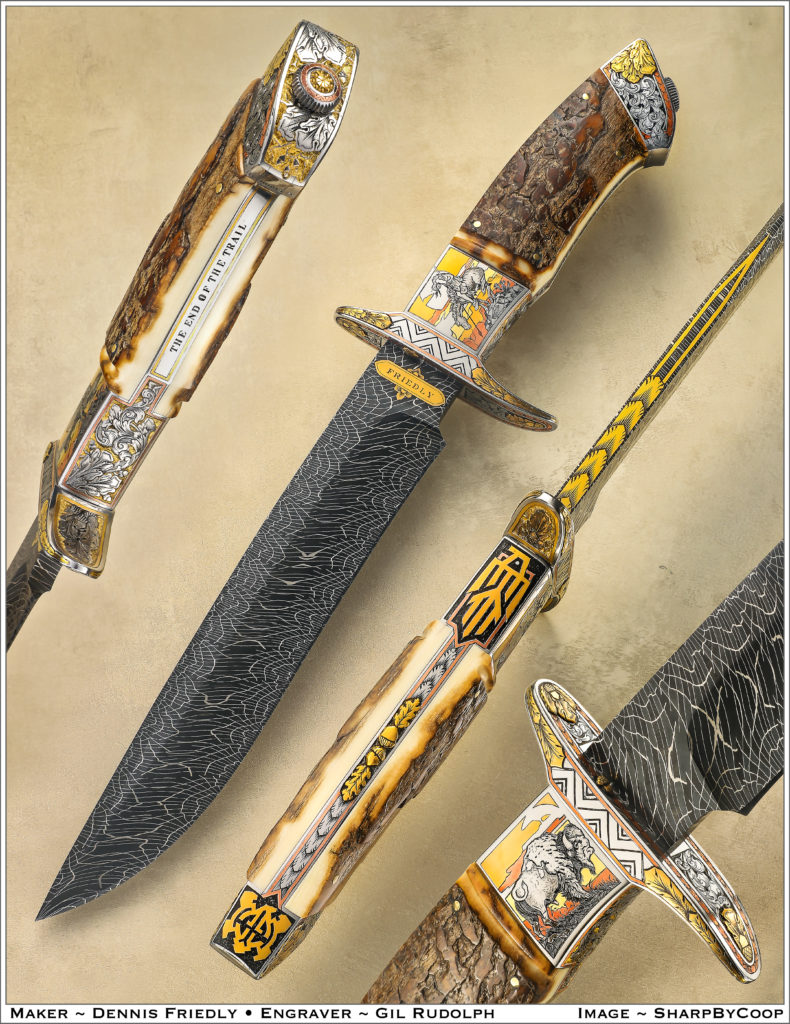
Based on the famous sculpture by James Earle Fraser, The End of The Trail by Dennis Friedly memorializes the struggles for survival of the American Indian and the Plains bison. Gil Rudolph did the copious amount of 24k-gold inlay and raised gold engraving in assorted American Indian motifs. (SharpByCoop knife image)
The End of The Trail by Dennis Friedly is a theme piece dealing with the separate battles that American Indians and the Plains bison fought for survival in 19th-century America.
The famous sculpture of the same name by James Earle Fraser is reproduced in 24k gold inlay engraving by Gil Rudolph on one bolster and an American bison on the other. The look and even of the texture of the distinctive ancient bark ivory slabs resemble that of a bison. Meanwhile, Rudolph’s spectacular 24k-gold and raised gold work engravings are configured to represent various symbols of American Indian culture, including all over the guard, pommel and spines of the handle and blade.
SPEC CHECK
Knife: The End of The Trail
Maker: Dennis Friedly
Blade length: 8.5”
Blade steel: Robert Eggerling damascus
Handle material: Ancient bark ivory
Engraving: 24k gold in inlay and raised gold work, all by Gil Rudolph
Construction: Take down
Maker’s price for a similar knife: $14,500
For more information contact Dennis Friedly, Dept. BL9, 12 Cottontail Ln. E, Cody, WY 82414 307-527-6811 [email protected], friedlyknives.com.
Custom hawks and axes combine history, fantasy and imagination
From Danes to dragons, draft horses and drawing smoke, the axe and the hawk have become avenues of artistic expression for some of the most innovative artisans of sharp blades. Long a trusted and dependable companion on the trail, in the bush, around the camp and in the military, axes and hawks are utilitarian and versatile, both in form for their intended purposes and as striking examples of imagination, innovation and aesthetic appreciation.
Utilizing the best in materials and employing their long study of the axe and the hawk, several makers have produced notable works in recent years, among them Peter Pruyn, Tom Ward, Dave Armour and Bill Burke. Each has his own approach to the craft and adds perspective in producing works of incredible beauty.
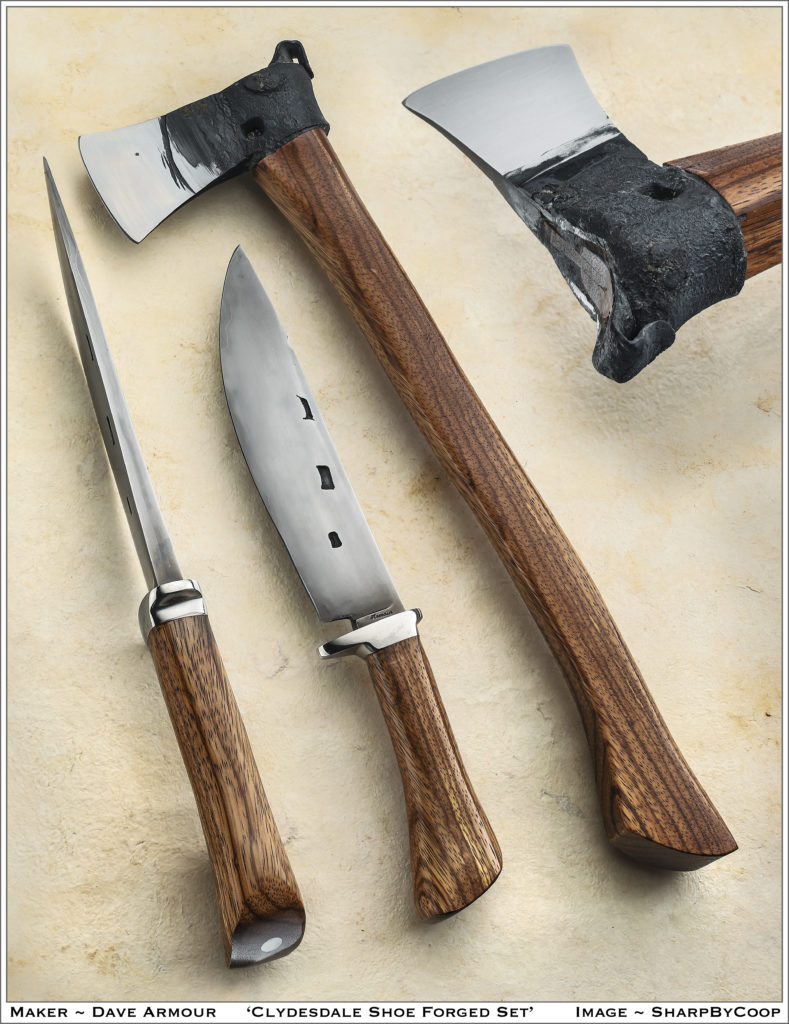
“My motivation was to try something new,” related Armour, a knifemaker for about 12 years, fashioning hawks and axes for six years and turning his attention to full-time blade work only seven months ago. “In addition, a small, easy-to-carry axe can be a great complement to a hunting or other working knife. I call my style ‘sufficiently evil and deliberately casual.’ I take the function side of things—like heat treating and edge geometry—very seriously, but treat the rest of knifemaking as a chance to play and have some fun.”
With his Clydesdale Set, which includes both a 12.5-inch knife and a 17-inch axe, Dave Armour (inset) lets his ingenuity gallop through. The set is made with a single Clydesdale horseshoe that he obtained through his wife’s employment, involving a tour of Warm Springs Ranch in Missouri, home of the world famous Budweiser Clydesdales. (SharpByCoop axe image)
With his Clydesdale Set, which includes both a 12.5-inch knife and a 17-inch axe, Armour’s ingenuity gallops through. The set is made with a single Clydesdale horseshoe that he obtained through his wife’s employment, involving a tour of Warm Springs Ranch in Missouri, home of the world famous Budweiser Clydesdales.
“I used the sides of the shoe for the outer layers of the knife blade and the bottom for the body of the axe,” Dave said. “I wanted something rustic without looking primitive. So, I made choices like leaving the shoe nail holes unfilled and using a simple hardwood for the handles. I used W2 for the knife core steel and 80CrV2 for the axe bit. Anytime you’re using a unique material, it is stressful. If I messed this up, it wasn’t like I could just scrounge another Clydesdale shoe lying around somewhere.”
Armour, who plies his craft in Auburn, Illinois, uses the term “foundwood” for his handle material. Though he isn’t completely sure, he said he believes it is sassafras, liberated from the bottom of a box of cast-off exotic pieces in a local lumberyard.
The finished Clydesdale Set consists of the beautifully forged san-mai blades, foundwood handles, and a stainless steel bolster/guard. The blade measures 7.5 inches while the edged surface on the axe is 2.25 inches. Dave stated he would produce a similar set for $750 or the axe alone for $300—and he would enjoy the journey “tailoring my technique to the piece.”
MAGIC DRAGON
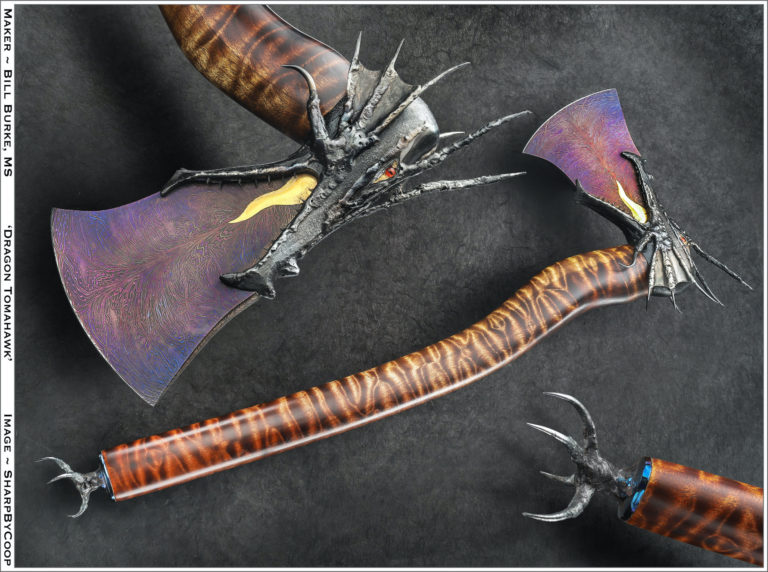
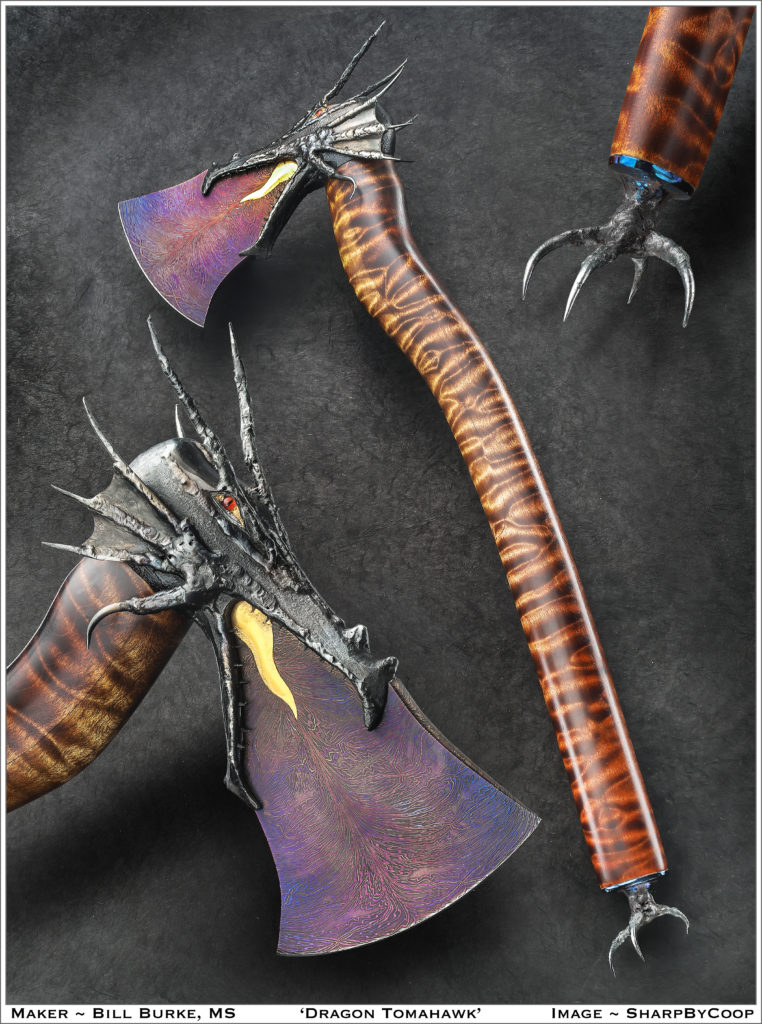
Forging knives since 1998, Burke received his ABS journeyman smith stamp at the 2003 BLADE Show. “I returned home, quit my job, and have been a full-time maker ever since,” he grinned. His Dragon Tomahawk is nothing short of breathtaking, and he acknowledges that the project was an investment of energy in his Boise, Idaho, shop. “This piece took three months of six- to eight-hour days, seven days a week for me to complete,” he noted. “I have a second piece flying around in my head now.”
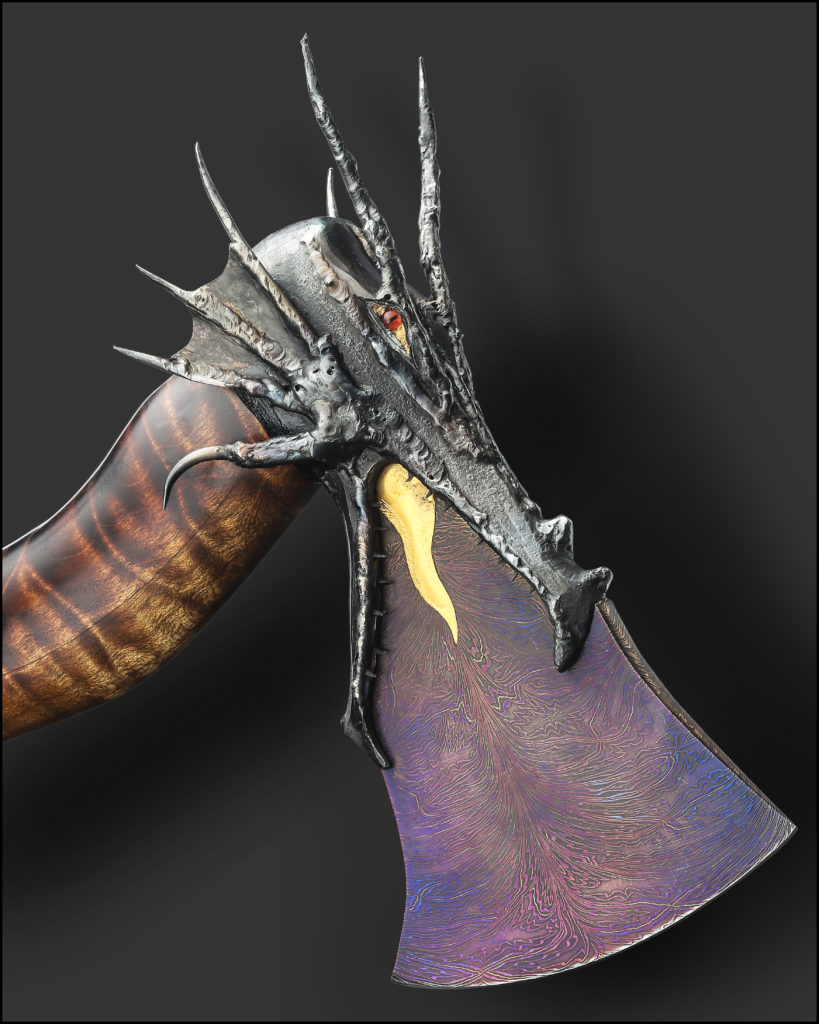
The Dragon Tomahawk is 20.5 inches overall, with a 4-inch cutting surface of damascus and a curly maple handle. The head is wrought iron and 1018 mild steel forged into a “W’s” pattern, and the blade steel is 1080, 15N20 and 201 series nickel forged together to create Bill’s Dragon’s Breath pattern. (SharpByCoop image)
The second will be a show-stopper if it compares to the 20.5-inch masterpiece that sports a 4-inch cutting surface of damascus and handle of stout curly maple. “The head is wrought iron and 1018 mild steel forged into the ‘W’s’ pattern,” he commented. “The blade is 1080, 15N20 and 201 series nickel forged together to create my Dragon’s Breath pattern. The handle was first drawn and cut/carved from a piece of red fir, and then, after a few refinements, the pattern was drawn on the piece of maple and the handle made from that.”
Bill Burke lightly fire-etched the head of his Dragon Tomahawk, along with heat coloring the blade in niter salts to achieve a purple/blue-and-red coloration before it was welded to the dragon’s head. The teeth were raised from the steel of the head, and the tongue, inlaid into the blade, gleams in 24k gold. (SharpByCoop image)
Bill has been noted for his quality damascus, and with this piece took inspiration from the work of ABS master smith Joe Szilaski. “All my knives and hawks are forged by me in my shop,” Bill said. “I normally just get an idea of what I want to make and start forging. From almost the first moment that I made the Dragon’s Breath pattern, I knew I wanted to make a dragon-headed tomahawk, breathing fire down the blade of the hawk.”
The dazzling result includes a lightly fire-etched head “because dragons are born in fire and should look that way,” along with heat coloring the blade in niter salts to achieve a purple/blue-and-red coloration before it was welded to the dragon’s head. The teeth were raised from the steel of the head, and the tongue, inlaid into the blade, gleams in 24k gold. Bill indicated he would produce a similar piece for about $17,000, depending on embellishments.
NO PIPE DREAM
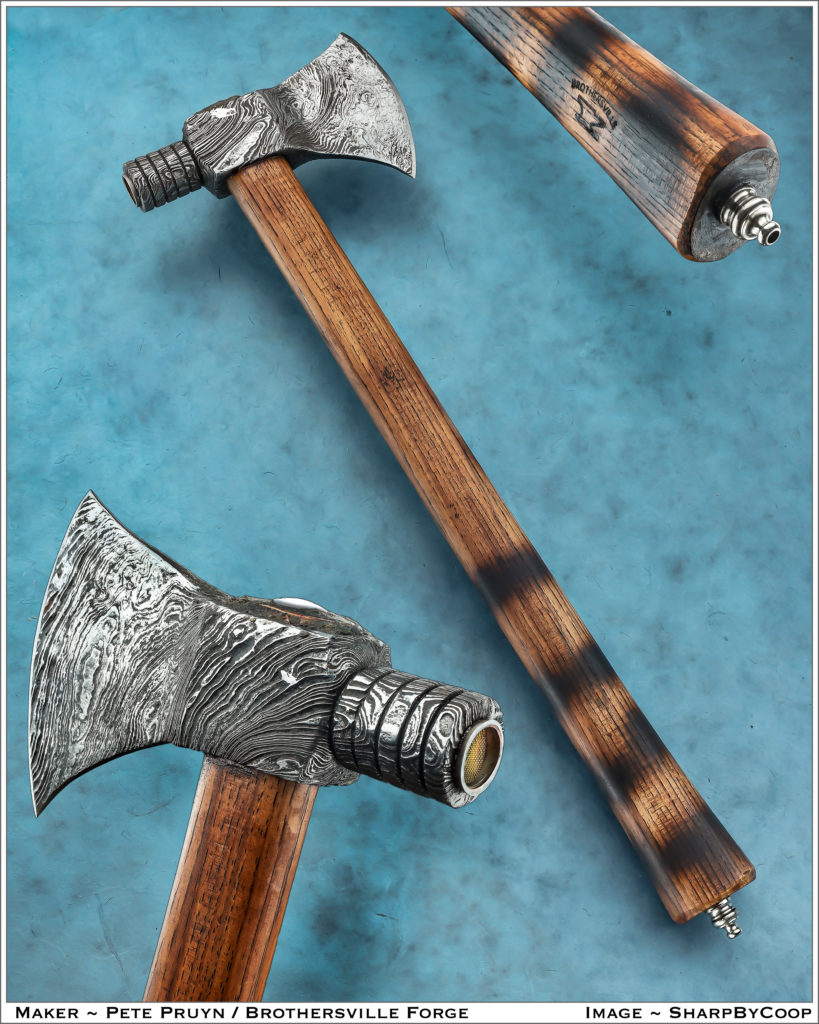
One of the most intriguing works by Peter Pruyn is his 15-inch Pipe Axe with ash handle, 4-inch blade and a bowl of hammered twist damascus. He forged the steel from layers of 1070, 15N20 and nickel. (SharpByCoop axe image)
Peter Pruyn was self-taught for quite a while after taking up knifemaking when he lost a valued knife he had carried for years. He later learned the stock removal method from Gene Martin and also attended an ABS bladesmithing class. “That definitely made me a more diverse maker, and it opened me up to forging different types of edged weapons and tools,” he said. From there, he worked with ABS master smith Red St. Cyr, who taught him to forge a tomahawk from a ball-peen hammer.
Through 14 years making knives—12 of those full time—Peter developed an interest in Viking blades, and he has sold a number of pieces on BladeGallery.com. One of his most intriguing works is his 15-inch Pipe Axe with ash handle and 4-inch blade and bowl of hammered twist damascus. He forged the steel from layers of 1070, 15N20 and nickel.
“I was forging an axe for the BLADE Show about seven or eight years ago when I had the idea of making it into a pipe axe, which is similar to a pipe tomahawk,” Peter remembered. “It really only has a larger blade.”
While working on the Pipe Axe, Peter greeted a friend who had come to his shop to work on the electrical setup. “He spotted the head when I removed it from the etchant,” Pruyn recalled, “and immediately claimed it. I was trying something different on this particular one. I did a very long etching process, and it gave a very deep, rough texture and an antiquated look to the steel. I did the Viking rings on the handle, but I also wanted to put some rings on the pipe bowl to give it a better look.”
The effect was certainly achieved, and Peter successfully tested it using cigar tobacco. “It worked quite well,” he concluded. He said a similar model would run $700.
HALVDAN SWUNG ME
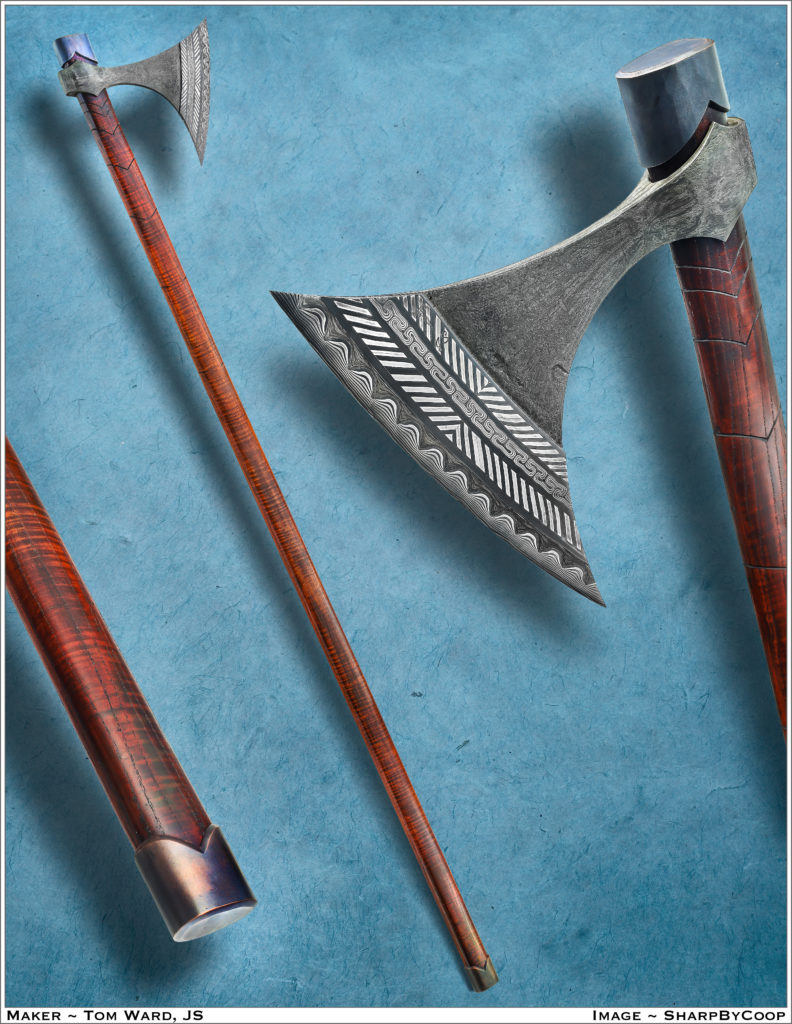
Christened “Halvdan Swung Me,” the Dane Axe by Tom Ward is based on Viking lore and representative of the weapons Viking mercenaries may have wielded in the service of the emperor of Constantinople, today known as Istanbul. His list price for a similar axe: $3,200. (SharpByCoop axe image)
After recently relocating his enterprise, along with his wife’s furniture business, from Carbondale, Illinois, to Istanbul, Turkey, Tom Ward looks forward to future custom orders. Among these may well be a request for a piece similar to his hefty Dane Axe.
When in design school in Boston, Tom took an elective course on forging damascus and bladesmithing taught by ABS master smith J.D. Smith (see May and June issues of BLADE®). “I really fell in love with the process and the idea of making high-quality objects to last someone’s entire life or longer,” he related. “I also loved the history of it and what you could learn through those venues. J.D. was my mentor for about four years before I left school and Boston. My work was fairly independent until 2017, when I started my degree at Southern Illinois University and spent three years researching damascus steel with Richard Smith in Carbondale.”
One of the most significant results of Ward’s career in steel, the Dane Axe, christened “Halvdan Swung Me,” is based on Viking lore and representative of the weapons Viking mercenaries may have wielded in the service of the emperor of Constantinople, today known as Istanbul.
“The phrase ‘Halvdan was here’ is carved into the bannister of the balcony of the Hagia Sophia in Istanbul,” Ward remarked. “So, he was the inspiration for the piece and the name. The shape is not exactly like any Dane axe but serves the same idea with an angled broad blade and beard, and a thin cross section as most war axes had. The angle of the blade is to deliver a deeper chopping or swinging cut, and it is the same cutting concept as the curve of a saber. The forward point is also hypothesized for stabbing, and the beard for hooking legs and shields.”
Damascus legend Daryl Meier sold the wrought iron, salvaged from a bridge that was torn down in Illinois, for inclusion in the Dane Axe steel combination, and encouraged Tom’s pursuit of pattern welding. The Dane Axe haft, fashioned from sturdy hickory and ash laminate, extends beyond 5 feet.
“The pattern welding on the blade is sort of an East meets West thing,” Tom commented, “with traditional wolf’s tooth from northern Europe and the Persian chain patterns, as well as the Byzantine tendency for geometric patterns with the chevrons.”
These exceptional craftsmen are among many who have explored the addition of hawks and axes to their repertoire. They set the bar high and bring additional interest to another creative frontier.
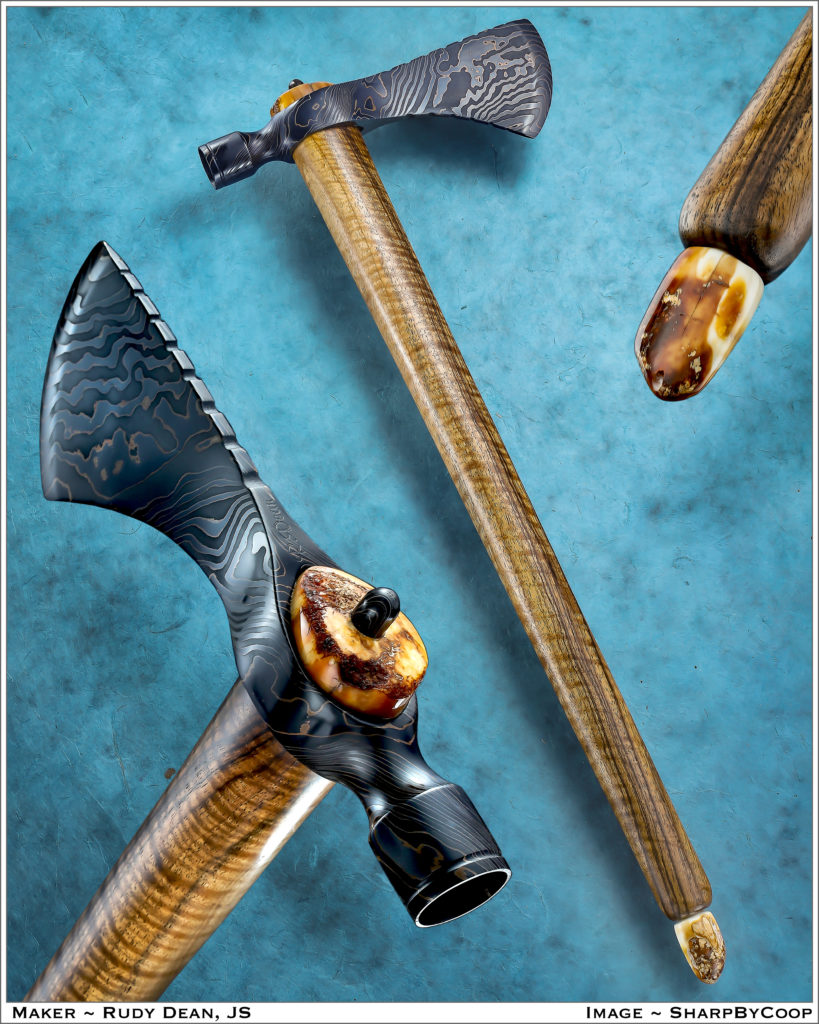
Above: Rudy Dean’s pipe hawk features a 4.5-inch blade of twist damascus and a handle of curly English walnut. The smoke hole plug is damascus and the mouthpiece and eye cap are ancient walrus ivory. (SharpByCoop image)