Home Blog Page 119

The 5 Most Dangerous Knifemaking Machines

0

Inattentive operators are more dangerous than the machines themselves

BY JOE SZILASKI BLADE® FIELD EDITOR

“I am a newbie to knifemaking with a limited budget for machines and tools. My main concern is the horror stories I have heard concerning the accidents some makers have experienced working with their machinery. I would like to know what you think are the most dangerous machines in the shop.” -John, Pennsylvania

This is one of the most frequently asked questions I have from students attending my knifemaking classes. If I were to categorize all the tools in my shop, I am not sure which tool would be the winner of “most dangerous.” Whether a power tool or not, they are all dangerous, some more than others. Therefore, I have a lot of respect for even the simplest of knifemaking tools.

I have a sign in my shop styled like a big bandage that reads “Stupid Hurts,” and that is about the size of it. Stupidity is the cause of many accidents. Accidents happen but are often preventable. 

1: GRINDER

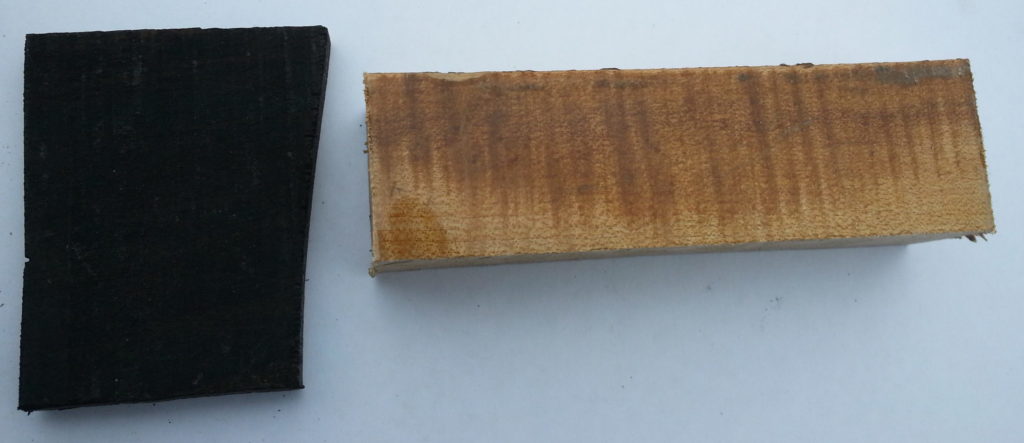
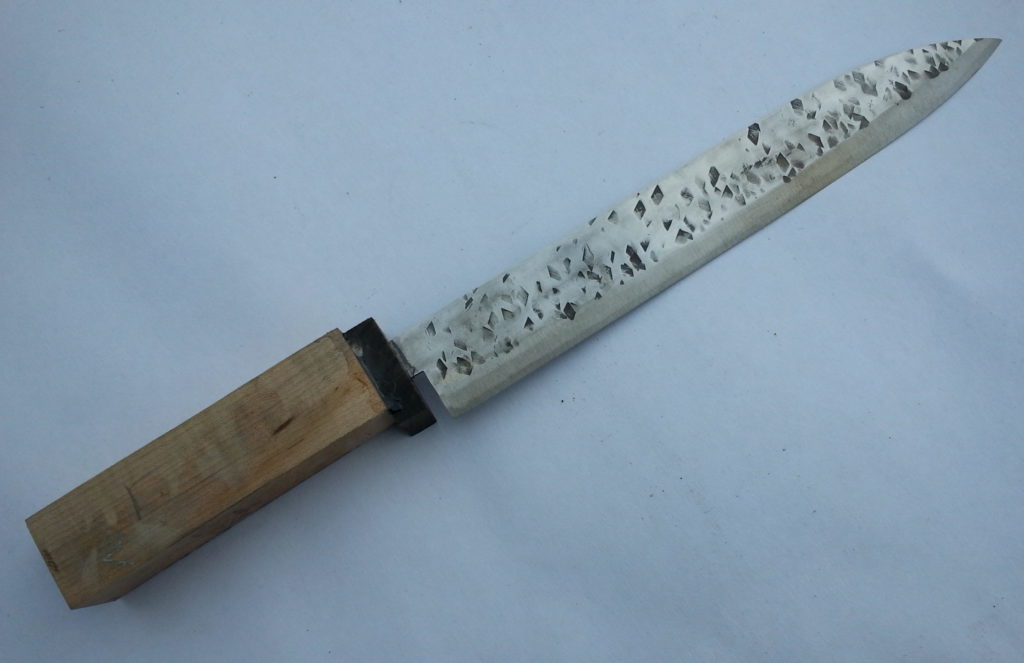
I would like to mention a few tools found in most every maker’s shop. Let’s start with the grinder. My grinders are equipped with 2×72-inch belts and are very safe until you exert extra pressure to remove excess material faster. In a good scenario you will burn your finger from friction heat; worse, you slip and grind your knuckles, what you would call really bare knuckles, or give yourself a manicure by grinding right into your nails. Of course, the belt can snap and hit you in the forehead, reminding you to not apply too much pressure when grinding. 

I teach my students to grind their knives freehand, no gloves and without the use of a tool rest. The blade can get caught between the rest and the contact wheel. This could get your fingers where they do not belong, snap your belt, or throw the blade out of your hand. I am glad I learned to grind this way and so have all of my students. 

2: DRILL PRESS

The drill press looks quite innocent but most drill bits are very brittle. If you put more pressure on your drill bit than it can take, it could break or explode into small pieces and make you look like you had a fight with a porcupine. Or, the bit can snag the material you are drilling and snatch it out of your hand. Before you are able to move your hand away, the snagged material will smack you at least 10 times.
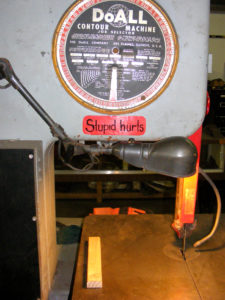
3: BAND SAW

The band saw can be an intimidating creature. I put it into the meat-eater category along with T-Rex and a pool of piranhas. To avoid all those teeth, use push sticks. Again, use just enough pressure to cut the material—nothing more, nothing less.

4: BUFFER

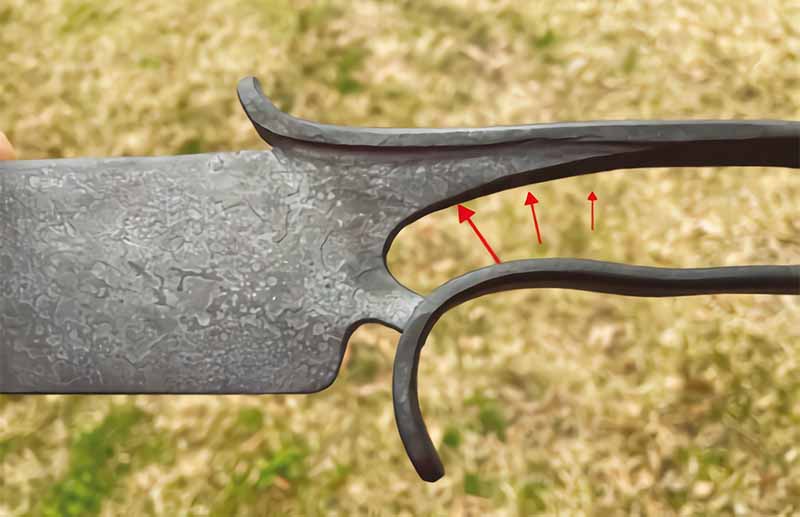
As most makers will tell you, the buffer is certainly one of the most dangerous tools in the shop. It may sound funny but my ex-partner wore a homemade plywood apron for when he was buffing.

Avoid putting your buffer on a workbench against a wall. I made this mistake in my old shop. I had a 1-horsepower buffer. One day the soft buffing wheel caught a guard I was working on and grabbed the knife out of my hand. The knife hit the table, ricocheted into the cinder block wall, and went right through the thin section of cinder block. I would hate to think what would happen if the blade had hit me with that much force.


Many years ago, Gil Hibben was buffing a blade when the buffer grabbed the knife and hurled it blade first into one of his main arteries. Miraculously, a friend was nearby and got Gil to the hospital before he bled to death. (Carter photo)

I replaced the buffer with a small quarter-horsepower model I could practically stop with my hand. I compensated for the lack of horsepower by sanding my knives with a higher-grit paper to make it easier for the small buffer to get the polish I wanted.

Now that I have a big dream of a shop with plenty of room for all the tools, I have that big buffer on a pedestal and away from anything that a blade can ricochet off. The buffer may still throw the blade toward my leg or foot causing a very nasty injury, but it is less likely to come toward my body. 
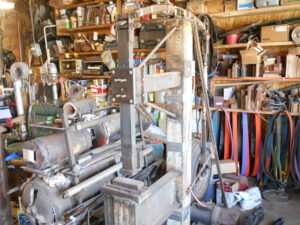
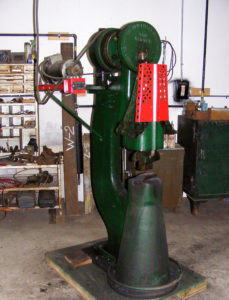
5: POWER HAMMER

Since I forge most of my blades, about 20 years ago I bought a 50-pound Little Giant power hammer to make my life easier. This piece of equipment can be one hell of a potato masher, and then some. 

Early on I developed one good habit. Whenever I stepped away from any power tool, I shut it down. That habit paid off one day. I had just shut my power hammer off when I lost my footing. My reflexes kicked in and I grabbed something to regain my balance. That is when I realized my left hand had grabbed the anvil of the power hammer, and my foot was on the pedal that would have activated the hammer. If the hammer had been turned on, my hand would now make a good stop sign at a school crossing. After that I installed an on/off switch directly on the machine and close by so I do not have to step away from the machine to shut it off. I also got the surgery on my foot I had been avoiding so now I do not lose my footing so easily.

Whenever the author steps away from any power tool—including his power hammer—he shuts it down to help avoid potential accidents. (Lori Szilaski photo)

Recently a friend of mine had a similar situation—tripping and accidentally grabbing the anvil of his air hammer. Unfortunately, his hammer was turned on. Fortunately, the doctors were able to save his three fingers that were crushed.

Tools are made to help us, not hurt us. It is true tools do not have feelings and do not care what they cut, smash or maim. You do not have to be afraid of your tools but, like I mentioned earlier, you certainly have to respect them. 

In my opinion, people who do not know how to operate the tools properly are much more dangerous to themselves and others than the tools themselves. Knowing how to use your power equipment is most important in order to avoid the horror stories we have all heard about. All power tools come with lengthy warning labels. There is a good reason for these besides the manufacturer covering their you-know-whats from lawsuits. Such accidents have happened before and it is up to you to avoid having the same ones in the future.

Long ago I worked in an art foundry that made bronze sculptures. One young lady was using a hydraulic roller she was not qualified to use. Her gloves were way too big for her and the roller caught the tip of her glove and pulled in her whole hand. She has had quite a few surgeries to reattach and rebuild what the doctors could. She was lucky the maintenance guy was passing by and hit the reverse switch. He may have saved her life, as the machine was big enough to pull her in completely.

CREATE A SAFE ENVIRONMENT

Create a safe environment for your shop. Be sure to not overcrowd it. Keep things off the floor you can trip on, especially in the area around your power tools. And always maintain your tools—it is a pleasure to work on well-maintained equipment. Finally, wear proper fitting clothes and safety gear when appropriate.

Remember the basics. Do not rush or use power tools when you are too tired. Never be overconfident around power tools no matter how many years you have worked with them. I have seen people crippled and killed because of this. Sorry to add to your horror story, but the bottom line is you are the one with the brain and common sense—use both.


Send your questions for Wayne Goddard or Joe Szilaski to BLADE®, POB 789, Ooltewah, TN 37363-0789 [email protected]. Include a self-addressed, stamped envelope with your name and address for a personal response from Wayne, or e-mail him at [email protected]. E-mail Joe at [email protected]. If you wish, BLADE will not print your name with your question.


Andy Sharpe/Chuck Richards collaboration salutes the heroes of the Battle of Attu

1

“A Knife For Those Who Saved Alaska”

BY ANDY SHARPE

Herb Drury was my wife’s uncle, a World War II veteran and a friend. He passed away in 2007. I miss him and the discussions we used to have. I guess I was one of only a couple of people he talked to about his time in World War II. He served in the Pacific Theater on Attu Island in Alaska and in the Philippines. The thing I noticed was he always went to Attu. For some reason the place haunted him and was still fresh in his memory after 60 years.

Uncle Herb was a tall, thin man with mild mannerisms. As he told me about the battle of Attu, it was hard to picture him there. It was even harder to visualize this kind and gentle man hurting anyone.

He was trained for desert fighting in Africa. As part of the U.S. 7th Infantry Division, he was sent to Attu Island. They had no winter gear. The Army thought the heavy gear would slow the men down. Even though it was May, the arctic weather was below freezing.  He told me of men burning the wooden stocks of their rifles trying to stay warm. He said it was a pretty easy landing and they thought maybe the Japanese had left. It wasn’t long before they discovered the Japanese were still there. 

He talked about the banzai attack. He could not comprehend that the Japanese were so willing to die. He said that after the attack, “We walked around and looked at the damage. The men in the hospital tent had been killed in their beds.” He told me the Japanese soldiers, before allowing themselves to be taken prisoner, would gather in a circle and hold grenades to their chest to commit suicide. He said he came upon a wounded Japanese soldier. “I just emptied my gun into him,” he recalled. It was hard to picture this soft-spoken, gentle man doing this.

Andy Sharpe’s Uncle Herb and his fellow soldiers enjoy a lighter moment on Attu. Sharpe and ABS journeyman smith A.C. “Chuck” Richards collaborated on the Project Attu Knife in their and their fellow comrades’ honor. The scrimmed Attu Island scene is by Richard “Hutch” Hutchings. (SharpByCoop knife photo)

After he passed away I thought of him often, and when I thought of him I thought of Attu. I wanted to do something in his memory. As a knifemaker it only made sense that I make a knife. It had to be special. Then it came to me: Use artifacts from Attu. And so the research began.

I searched the Internet for weeks trying to find all I could about Attu Island. I discovered that the only people on the island were 22 members of the U.S. Coast Guard. I did find an article about the Coast Guard’s Attu Station that listed the phone numbers for the commander. I called the number and I talked with Commander Robert Coyle for about an hour. He told me he had just what I needed—an exploded artillery shell and assorted shell casings that had been found on the Coast Guard station. Problem was, no items could be removed from the island. The island is a National Historic Landmark and game preserve with a no-stone-turned policy and is under the control of the Alaska Fish and Game Department.  I would need the department’s permission to remove the artifacts.  He also gave me the name and contact information of other informed sources.

After three months of paperwork and waiting, I received permission to remove the artifacts from the island, with the stipulation that only one knife would be made and all the remaining materials be returned to Attu. I could receive items found only on the inside of the boundaries of the Coast Guard station. Commander Coyle boxed up the items and shipped them to me. 

When the box arrived I was in awe. This was not just a bunch of scrap metal; this was a box of history. These are possibly the only documented artifacts from Attu Island in private hands:


PROJECT ATTU

I really began to start doubting my skills as a knifemaker. I was on the Knife Network Website and posted my story. ABS journeyman smith Chuck Richards expressed a great desire to be part of the project. 

Chuck and I decided to collaborate on a simple knife design. He did his magic—a 9-inch bowie-style fighter of 575-layer ladder-pattern damascus. He forged the steel from an exploded artillery shell, a piece of spring from an abandoned truck on Attu and some 15n20 for contrast. The steel had a lot of waste due to micro cracks in the shell and corrosion from 60-plus years of exposure to the Alaskan weather.

An ABS journeyman smith, Chuck Richards forged the blade from World War II artifacts from Attu, including an exploded artillery shell, a piece of spring from an abandoned truck and some 15n20 for contrast. The steel had a lot of waste due to micro cracks in the shell and corrosion from 60-plus years of exposure to the Alaskan weather. (SharpByCoop knife photo)

We discussed the project and the weird feeling we would get while working with these materials. To make a knife is one thing—to make one from materials that cannot be replaced and if we messed it up it could not be redone is another. I think Chuck’s stress level maxed out. I cannot say enough about the artistry he brought to the project.

Now the knife was in my hands. How could I do justice to the beautiful blade? “Keep it simple” kept running through my brain. I decided on a basic flat guard made from a piece of the artillery shell. I had several M1 shell casings marked “42” for 1942—the military dates its ammunition—from Attu Island. I cut the base off the shells and set them in the front of the guard.

Above: Keeping it simple, Sharpe made the basic flat guard from a piece of an Attu artillery shell. He cut the base off two M1 shells the military had marked “42” for 1942 and set them in the front of the guard. (SharpByCoop.com knife photo)

The handle was easy. I had an ancient ivory walrus tusk I bought in Alaska in the mid-1970s. I never knew why I had kept it all these years but now I did. This is where it belonged. I made the ferrule and buttcap from pieces of artillery shell and cut the tusk to fill the void. I kept the tusk’s natural shape as much as possible.

I took the M1 shells I had cut the base from and melted down the brass. I did a sand cast of Attu Island from the brass and used it as the centerpiece for the buttcap. A light etching for character and I was done.


Above: Sharpe did a sand cast of Attu Island from the brass melted down from the M1 shells and used it as the centerpiece for the buttcap. 

The knife was finished but it needed something. I contacted Richard (Hutch) Hutchings. He volunteered to scrimshaw the handle. Hutch’s work is amazing. While doing the Attu knife he was commissioned to do the scrimshaw for BLADE Magazine Cutlery Hall-Of-Fame© member Gil Hibben on the knives for The Expendables movie and all the residual work that came from that project. In addition, around the same time Hutch had a fire in his shop that destroyed a lot of his studio. Fortunately, he had locked all the knives he was working on in a fireproof safe. With all the setbacks the scrimshaw took over a year. 

Jim Cooper of SharpByCoop.com volunteered to do a photo shoot of the knife.  His work really brought out the knife’s details:

Sharpe used an ancient walrus ivory tusk he already had on hand. Richard (Hutch) Hutchings volunteered to scrimshaw the handle.

Allen Hutton donated his time and wood skills to make the display stand. He used the wood shipped from Alaska and California to build the structures to sustain the men fighting on Attu. (There are no trees on Attu Island.) His work is simply amazing.

They decided to raffle the knife off with 100 percent of the proceeds going to the World War II Memorial Fund. We donated the funds not from those of us who worked on the project but on behalf of Herbert Reginald Drury—Uncle Herb—and all the men who fought and those who died on this all but forgotten Island.

The final outcome. 

More on the Battle of Attu

The westernmost and largest island in the Near Island group of the Aleutian Islands of Alaska, Attu was the site of the only World War II land battle fought on an incorporated U.S. territory.

Japanese forces occupied Attu, home to a few native Aleuts, in June 1942. On May 11, 1943, a U.S. invasion force that included scouts recruited from Alaska nicknamed Castner’s Cutthroats set out to recapture the island. Frigid weather seriously hampered the invasion, with many GIs suffering frostbite. Rather than contest the landing, the Japanese dug in on the island’s high ground. Heavy fighting resulted in 3,929 U.S. casualties, including 580 killed.

On May 29, the last of the Japanese forces attacked without warning in one of the largest banzai charges of the Pacific campaign, penetrating the rear echelon of the American lines. After brutal hand-to-hand combat, the Japanese force was basically eliminated. Enemy dead numbered 2,351, though hundreds more were thought to have been buried during bombardments. Only 28 of the Japanese survived.

Why The X-Rhea Knife?

1

The X-Rhea Is The Result Of Having A Curious Mind And The Ability To Explore Possibilities.

Why did I come up with the X-Rhea knife design? I’ve asked myself this several times and only recently have I been able to supply a reasonable answer. Th e X-Rhea started as a personal challenge. I wanted to make a knife, handle and all, from one piece of steel. Th at’s it: no scales, no added glues, pins, extra space fillers, inlays—nothing. Moreover, I wanted it to look good and be comfortable and as structurally sound as any good knife should be, without being overly heavy.

This challenge nagged at me. If I limited myself to steel and fire as my basic resources, could I forge a knife from one piece of steel, a knife that left no doubt about its viability? Could it look good, feel good and perform well? I also wanted a handle design versatile enough to fit different sizes and types of knives.

“A full tang knife is stronger than a hidden tang knife” is something I’ve heard many times. That statement oversimplifies the matter; which is better? I’ve heard some say, “At least with a full tang, if the scales fall off you still have a knife.” While I don’t agree with either statement, it indicates in some people’s minds a full tang blade alone qualifies as “a knife,” even without scales. And what qualifies as a knife, as well as what part strength plays, might differ from person to person.

In my visits with renowned historic blacksmith Peter Ross, my eyes were opened to the multi-dimensional vision the historic blacksmith needed in order to execute the complex forgings of everyday objects of the colonial era. The ability to understand how something is shaped, combined with the hand skills to actually shape it, are two separate things. The combination of those two qualities in one individual is rare. Peter showed me how to change the way I think about shaping steel. My mind raced with possibilities every time I worked with him. He taught me how to take a project from concept to reality.

Just as steel is shaped by the blows of a hammer, my thoughts were shaped to the challenge at hand. I felt I was in a unique set of circumstances that directed me to mix my forging with the mostly forgot ten techniques of historic blacksmithing. My years of training helped provide some ability to execute my ideas and theories. Theories? OK, it’s my “theory” that about 90 percent of tactile, meaningful contact between the hand and a knife handle is concentrated on the top and the bottom. Think pliers, wrenches, etc. The mind seems to understand the vacancy of the remaining areas between the top and bottom. Also, the hand “soaks up” and “fills in” to meet these vacancies to a degree. If I could add contouring and sculpting to the essential top and bottom, could the hand and mind fill in the rest? Can a knife with no scales be an option?

The Answer To X-Rhea

Finding the answer took significant effort and a lot of time. I worked out a forging sequence for my X-Rhea hunting knives that satisfied me, but I kept thinking it would be great to forge a bowie with top and bottom lugs. It took years to work out the stages of the process. While the accompanying photographs attest to my relative success, it leaves a lot unsaid about the adjustments I had to make in my thinking. I used the blacksmithing principle of eliminating things that hinder the process, and re-emphasizing and adjusting things that assist it. I also considered efficiency in timing, appropriate temperature, or other techniques** that are most practical.

The author up close and personal with an X-Rhea Knife forged red hot.

While modern tooling could speed up some of the steps in my process, modern thinking and modern expectations would not. Aft er all, this process was being developed around the early 19th-century blacksmith tools: a coal forge, blacksmith leg vise, and the use of handheld hammers. This uncluttered my thinking and required me to face the same challenges as the early blacksmith. Elevating one’s skills with basic tools, improving understanding of the materials, and bearing full responsibility for the outcome was my expectation. While this might seem restrictive and limiting, the improved skill level and the readjusting of my views had a freeing effect. I am not as dependent on modern tools, which enables me to be more creative. The willingness to adjust one’s thinking was, and remains, an invaluable aid to the blacksmith.

Material Limits

When forging a complex shape, a smith must consider the limitations of the material, sometimes working near its limits but never exceeding them. Wisdom calls for choosing material suited for the extreme changes of geometry in the knife. Steels that are prone to air hardening must have special consideration or be avoided. Like some historic objects, the X-Rhea Knife is forged from one piece of steel, in this case, entirely high carbon steel. Those qualities and characteristics must be allowed for and considered.

Making an X-Rhea is a multi-step process. It must be pre-formed, with all needed parts and adjustments made before final shaping and peening the handle. Recognizing and maintaining a high standard of precision in the pre-form details is absolutely necessary to a satisfactory final result.

Even after I successfully made one of these knives, I found that part of the challenge was yet to come—acceptance. I showed up at a cutting competition with one of my X-Rhea bowies and sure got some stares. The safety judges looked it over as if it were a new species of animal. “Is it strong? Will it hurt your hand?” they asked. As I recall I placed well in the competition using it, but the initial reaction was still mixed.

Will it hurt your hand? I previously mentioned the handle contouring and sculpting. This is a standard part of the forging and filing process, as it is with any knife handle. Depending on the maker’s forging skill, it may require some filing in-between forging steps. Each step has some amount of adjustability to allow for correction, while leading to a beautiful profile and comfortable grip. It can be surprising to those who handle the knife just how good it feels, considering the remarkable difference in construction and the “open” appearance.

X-Rhea Strength

Is it strong? This is where the application of common blacksmith tool-making skills and logic are applied. Sufficiency was the guide for an early blacksmith. Making a piece overly strong for its intended use might sound impressive, but in use it becomes clear that this strength adds unneeded and undesirable weight for the intended use, and does not account for other desirable characteristics such as flex and toughness. I view heavy,
unwieldy blades generally as a mark of a novice. Unless the intended purpose calls for excessive strength, sufficiency should also, be the guide not only for blades but for knives overall.

For those inclined to overthink a matter, look at the “T” cross section of the blade-to-handle transition. It eff ectively converts the stress loads in the needed directions.

Today when I see a thickly built knife, instead of looking at it and saying to myself “This thing sure is strong!” I ask, “Why does it need to be so heavy?” For the X-Rhea handle, I try to use sufficiency as my guide. Where it can structurally be lightened, I do that by forging and filing, leaving it sufficiently strong but not overly heavy. This distribution of strength serves to provide literal balance to the knife exactly as any conventional knife, regardless of construction. Either should have balance when properly built to a purpose and have sufficient strength to perform its purpose. That fact, while amazing to me at first, is testimony to the principle of sufficiency. In other words, the X-Rhea should compare well in balance and weight as well as function to any well-made conventional knife for the same application.

For those inclined to overthink a matter, look at the “T” cross-section of the blade-to-handle transition. It effectively converts the stress loads in the needed directions. Viewed from the profile, the slight rotation of the ricasso as an “X” instead of a vertical “cross” assists in adding strength with less material (weight) to the connection. The upper leg of the ricasso’s “X” tapers back to brace the upper part of the handle, which bears the majority of the workload. The handle then tapers in thickness slightly as it goes back to the forged integral pommel and proceeds to the handle tenon where it is peened. To further lighten the knife, the handle band is sculpted gently to taste. Taste? I try not to get so engrossed in the math and mechanics that I lose the necessity of making the knife look good. Like a scroll forged by a blacksmith, the application of math and mechanics are the basis for all aspects of proportion and form. To keep it simple, I want to make it graceful, not blocky, getting the absolute most out of a minimum of material volume.

The X-Rhea Process

In my situation, I set a challenge for myself and it led to the X-Rhea. For me, the process is as important as the knife itself. I made a lot of individual knives, some better than others, but what I was actually concentrating on was developing a forging process, so the one-piece forged knives could be repeated via a repeatable process with predetermined features, checkpoints and adjustability built-in along the way. To emphasize adjustability, whether by forging, grinding or filing, is key. It enables the smith to reach predetermined checkpoints before proceeding with the rest of the process. When following a well-designed process, the outcome will be consistent and meet a standard as would the product of a well-designed and adjusted machine.

While we are far from machines that guarantee specific outcomes, diligent attention to the execution of each heated and hammered step and making needed adjustments, when appropriate, will carry the project along. As aptly pointed out in David Pye’s book, The Nature and Art of Workmanship, “The quality of the result is continually at risk during the process.” Overcoming the risk by careful determination, as well as time spent in practice, is its own challenge and entirely rests upon the craftsperson.

Like some historic objects, the X-Rhea Knife is forged from one piece of steel, in this case, entirely high carbon steel.

I believe it is noble to preserve cultural objects, and it’s also my belief that preserving the processes used to make those objects is equally important. The hand of the individual craftspeople, following already established processes, can be seen in the objects of the past. A society or culture can lose appreciation for the craftsman’s touch. Pye stated, “The danger is not that the workmanship of risk will die out altogether but rather that, from want of theory, and thence lack of standards, its possibilities will be neglected and inferior forms of it will be taken for granted and accepted.” It would be a shame to neglect the possibilities or take for granted why we craft things the way we do.

I also believe there is room remaining to explore new designs and theories in today’s knifemaking. We can find new ideas and inspiration from places we don’t expect. With the ever-changing laws and shortages of materials such as stag and ivory, we may be wise to consider creating a market based on a process we develop using otherwise unexpected, but available, materials and techniques. This requires time and risk. Are we willing to apply time and effort to follow through with a concept without certainty that there will be a payoff? Is the payoff worth it in monetary or cultural dividends? One can really never know the answers to such questions, and those possibilities were not a serious factor in my efforts.

The X-Rhea is the result of having a curious mind and the ability to explore possibilities. It was an idea, turned into a challenge, turned into reality. The simple sequence is available to everyone. Its cultural value is a matter of opinion, but the process of the X-Rhea Knife shows that new and interesting ideas can be pursued in knifemaking.

Also Read:

8 Tips for Successful Home-Based Knife Shops

0

How to keep your shop in operating order and maintain a safe and happy family life in the process

By Joe Calton

There have been tons of stories on how to be a knifemaker. Most are great and deal with subjects like taxes, suppliers, marketing, sales, bookkeeping and safety. Other great articles cover the technical side of how to make the knives you wish to sell, including stories on forging, grinding, heat treating, handles, sheaths and more.

My story will outline some things I have learned over the years as a full-time knifemaker in a home-shop setting that I think will benefit you, your knives and, most importantly, your family.

The author’s home-based shop is a two-car garage attached to the house by a single door. Sure it’s cluttered—but how much do you want to bet he knows where every tool, piece of equipment, grinding belt, spec book, etc., is?

The GREAT 8

1) Buy a toaster! Your wife’s kitchen oven is not the place to be tempering knives, warming up knife sheaths for waxing them, heating Kydex® for the molding, or burning out axe heads. A $5 toaster at the flea market will do all that in your shop and is a bargain at twice the price.


Buy a toaster! Your wife’s kitchen oven is not the place to be tempering knives, warming up knife sheaths for waxing them, heating Kydex® for the molding or burning out axe heads.

2) Along with the toaster, while at the thrift shop get a selection of pots and pans, cutting boards and a small scale. Trust me, the lure of using one of your wife’s pots or pans for “just this one little project” will be too great—and that is not a road you want to travel! Forget this one and dinner may taste a little “off”—even if you were able to sneak the pan out of the kitchen and into the shop and back again.

3) Install a sink in the shop. At the very least, put a five-gallon bucket of water on a stand for washing your hands before you head into the house. You may not mind grease, oil and dust prints on your clothes, but one time of leaving a smear of quenching oil on your wife’s nice clothes and your knifemaking will take a big hit. Spilling acid on a concrete floor also has far fewer ramifications than spilling it on the countertop in the kitchen. Oh—and don’t forget to wipe your feet on the way into the house.

Installing a sink will help keep things clean.

4) If who like your coffee as much as I do, get a big thermos, fill it in the morning, and take it to the shop with you. This cuts down on the trips away from the shop, as a trip inside the house to grab another cup can turn into an hour away by the time you get the cup, peek in the fridge, check for phone messages, etc.


5) Know when to quit for the day. This is one lesson I’m still learning. You get wrapped up in your work and the next thing you know it’s 2 in the morning. Not only will you spend that night on the couch, but you may spend the next one there too if, as a result, you also forgot the plans you made, dinner, one or more of the kids’ school activities, etc. It’s tough to make good knives after a rough night on the couch.

When working in the shop, don’t lose track of time and work too late or else you could forget to do important family jobs—and wind up being relegated to sleeping one or more nights on the couch with Fido as a result.

6) Use some of your knife money to buy your wife flowers. Buy them on a regular basis. Put it on the calendar if you must so you will remember. Think of the flowers as supplies, like grinding belts. This is very important! Not if but when you forget one of the preceding tips, hopefully you will have gotten her flowers recently—and it just may save your bacon. For the home-based knifemaker, buying flowers for the wife is at least as important as safety glasses. You can continue to make knives with only one eye but you cannot make knives if you have been dispatched with a heavy frying pan.

In order to have the wherewithal to make such knives as his drop-point hunter, the author keeps peace with his wife by buying bunches of roses on a regular basis.

7) Know that what happens in your shop does not stay in your shop, and act accordingly. Dust from exotic woods will make it into your home. You may not be allergic to them but your wife, kids or family pets may be. Keep an eye peeled for anything out of the ordinary when introducing new woods or materials into your shop. This also goes for smoke from quenching. Use “green” quenchants when you can, including vegetable-based oils and water. And keep the door to the rest of the house closed until you clear the air.

8) If you’re considering moving your shop away from your house, think long and hard about it. Yes, a home-based shop offers some challenges. However, it offers quite a few benefits, too. Among them: the morning commute is a thing of the past so you save fuel and time, you have a good place to fix toys and household appliances, and everyone always knows where to find you. If you are a workaholic like me, the home-based shop keeps you at home instead of at the office. Move the shop as some friends of mine have done and you may end up moving it right back.

A benefit of a home-based knife shop is that you can also repair appliances, junior’s toys, etc. And don’t forget to buy a big thermos for plenty of coffee so you don’t have to make return trips to the house for that extra cup.

Also, when you take a break, throw a load of clothes in the washer and they will be ready for the dryer by your next break. Or, you can start a crock-pot meal for that evening’s dinner. By the way, there is no better test of the kitchen knives you make than to use them in making dinner a couple nights a week. This is a twofer in that not only do you get the immediate feedback from hands-on testing, but also the household benefits of cooking a couple meals a week will go far toward keeping your knifemaking in the good graces of “The Boss.”

2 BIGGEST CHALLENGES

My list of tips is not complete. It is based on my experiences in working from a home-based shop, which is a two-car garage attached to the house by a single door. You may be in a detached shop or a basement. Whatever your setup, I hope I have helped with two of the biggest challenges faced by a knifemaker in a home-based shop: keeping the shop in operating order and maintaining a happy home life in the process.

For more information e-mail Joe Calton at [email protected].

Install a sink in the shop. You may not mind grease, oil and dust prints on your clothes, but one time of leaving a smear of quenching oil on your wife’s nice clothes and your knifemaking will take a big hit. The sheath knife with blade hamon and wood handle and brass rivets is by the author.

3 Backup Knives That Are Sharp As Ever

1

Small-to-medium military-style blades that make the perfect backup knives, ready to tackle the toughest duty.

What Are The Best Backup Knives:

Soldiers have carried blades to war throughout recorded history, but the kinds of blades they carried have changed since Herodotus. Swords have long since fallen into disuse. Even large fixed blades are not as commonly used as they were in World War II and Vietnam.

Like others, I carried a Randall Model 1 with a 7-inch blade when I was in uniform, which was shortly after the invention of repeating firearms. And recently we saw a photo of Billy Waugh, a legend in the Special Ops community, on horseback in Afghanistan with a 12-inch bowie on his belt.

Marines have their KA-BARs and some soldiers still carry large fixed blades, but small handy pieces, often folders, are the most common knives carried by today’s soldiers. These knives are often used as tools. Less often, though on critically important occasions, they serve as backup weapons.

We reviewed three knives that fit into today’s parameters: two fixed blades and one folder. We cut nylon webbing and cord, rubber tubing, wall paneling and tough saddle leather. We also stabbed layered saddle leather, a plastic barrel and two zombies. I’m kidding about the zombies—just making sure you’re awake. In fact, no zombies were injured during this review.

Cold Steel Mini Leatherneck Double Edge

The Mini Leatherneck slices garden hose. Some daggers, due to steep blade geometries, do not cut very well. Not so this little puppy.

The Cold Steel Mini Leatherneck Double Edge is a diminutive dagger terrific at what daggers are designed to do: stab things. The Mini Leatherneck penetrated deeper and with less effort than the other review knives in five layers of saddle leather, and went deeper into the thick plastic barrel than the others. Some daggers, due to steep blade geometries, do not cut very well. Not so this little puppy. We were surprised at just how well the fairly thick-bladed little dagger did cut, well enough to make it useful as an all-around tool as well as a weapon of last resort. The blade needed sharpening after hard use but we expected that. Comfortable handle, solid guard, secure sheath, what more do you need? And all for 29 bucks, please. Try to find a better bargain.

Puma SGB Stonewashed Tactical Folder

The Puma tanto blade created some resistance while pushing into simple things like cardboard, but the edge  and steel more than made up for it.
The Puma tanto blade created some resistance while pushing into simple things like cardboard, but the edge
and steel more than made up for it.

Today’s troops, except for some Special Forces units, carry folders by a ratio of at least five-to-one over fixed blades, and with good reason. Modern tactical folders with clips are convenient to carry, quick to the hand with various opening devices,
and, though not as strong as fixed blades, can serve as formidable backup weapons of last resort. The Puma SGB Stonewashed Tactical Folder with Seat Belt Cutter and Glass Breaker—Puma SGB TAC for short—fulfills these functions and adds a glass breaker that works and a seat-belt cutter that’s safer to deploy than an ordinary blade. The tanto point penetrates reasonably well, though not with the ease of the Cold Steel dagger. It is, nonetheless, very strong. When we punched it into the tough plastic drum, there was no doubt the point would withstand twisting and ripping. The straight edge cut well and didn’t need sharpening. Secure clip, easy opening with thumb stud, locks open solidly—all in all, a good tool and backup knife for soldiers.

RMJ Tactical UCAP (Up Close and Personal)

The RMJ UCAP stabs through five layers of  saddle leather.
The RMJ UCAP stabs through five layers of
saddle leather.

Sharp, tough and handy, the RMJ Tactical UCAP (Up Close and Personal) fixed blade reflects its name and fits into the current mode of small fixed blades. The curved edge was the best slasher and cutter of the group, and indeed was a stand-out. The reinforced point penetrates almost as well as the Cold Steel and gives up nothing in strength to the tanto-pointed Puma. The blade has a small fuller, which contributes to good overall balance. The grooved handle is secure and comfortable. The single integral guard adds to grip security during a full power stab. This is a well-designed, well made, handy-sized fixed blade that would serve a soldier well and be equally good as a bushcraft knife. The Kydex sheath is versatile, secures the knife in three positions and can be attached to a MOLLE system. This one is a winner.

Also Read:

How to Make a Sushi Knife

0

By Wally Hayes

Sushi knives are light, thin, very sharp and a blast to make. Here’s how I make them from start to finish.

The sushi knife started out as a 90-thousandths-inch thick bar of 15N20 carbon steel and maple and ebony slabs.

For blade material I use 90-thousandths-inch thick 15N20 carbon steel from New Jersey Steel Baron. First, I cut the blade to shape, around 7 inches long. The tang is about 4 inches. I take one of my old hammers and cut a cross hatch into the face using a side grinder with a cut-off wheel.

Then I heat up the blade in my forge and hammer a textured finish into the steel. This takes about five heats and is lots of fun! I put dents into both sides of the blade and then make sure it is straight. The reason for the texturing on the surface of the steel is to create air pockets so food does not stick to the blade.


If you want to push the forging experience, forge in the bevel on one side for your edge. Use a regular hammer. It will be a chisel-ground blade, so don’t hit the edge with your texturing hammer. Hammer an eighth of an inch back from the edge.


NORMALIZING

The next step is to normalize the blade. Heat it to critical temperature—a steel blade reaches critical temperature when a magnet does not stick to it—then let it air cool. After you heat the blade to critical temperature, quench it in warm Fensoil or Parker Oil, both of which are fast-quench oils made for heat treating steel. Vegetable oil also will work.

Clean the blade after it cools and place it in a toaster oven heated to 375°F for one hour. Look at the blade and see if it is straight. If it is bowed, secure it to a scrap piece of steel with a metal clamp and press the warp out, then return it all clamped up to the toaster oven. Temper it for another hour. This works really well.

After hardening, the blade it goes into the toaster oven to temper.

To remove all scale and the black from the blade, place it in a plastic container with vinegar for one day. Rinse with water and baking soda and wash the blade. Scrub it with a paper towel. From there I use a little wire-wheel brush on my drill press to brush off everything and make it all silver and bright. Next I sand the blade on a medium Scotch-Brite™ belt to round the top edges and smooth out the blade surface.

After tempering, the author places the unfinished knife in a container filled with vinegar for about a day to remove all the scale and the black from the blade.

This is the time to grind in your edge. Don’t get the blade too hot during grinding or you may remove the hardness. When the blade gets hot, dunk it in water to cool it. I chisel grind it on the right side so I can get paper-thin cuts with it.


The HANDLE

Time to make the handle. Use whatever material you like. I like cocobolo and ebony best as they are very easy to finish. I used maple and ebony for the handle of the knife for this project.

I make the handle in two parts. The front spacer is ebony about a half-inch thick. Sand the sides and ends of the blocks of wood on a disc sander. Disc sanders seem to work better than belt sanders to get a flat surface. Use a 1/16-inch drill bit to drill the front spacer and then use a small saw to open it up to fit the tang. The longer handle section can be drilled out and fitted easily. I grind down a drywall saw to fit into the hole to make a slot—this works great. Use epoxy to glue the parts together.

Glue the parts together with epoxy and let dry. The author said he uses many coats of glue for the finish.

When the glue dries, I sand the handle into an octagon shape and then hand sand it to 600 grit.

After the glue has dried, the author will sand and buff the handle. Cocobolo can be finished on a fine Scotch-Brite™ belt and then buffed and oiled.

For the maple handle I used many coats of Krazy® Glue for the finish. I paint the coats on then sand and buff. Cocobolo can be finished on a fine Scotch-Brite belt and then buffed and oiled. I use a food-friendly oil like walnut oil. To sharpen the blade use a 7,000-grit Japanese water stone.

Try this project—you’ll like it. It is really a fun knife to make.

Friedly/Rudolph Collaboration is an Homage to American Indian culture

0

The End of The Trail

Friedly/Rudolph collaboration is an homage to American Indian culture

Based on the famous sculpture by James Earle Fraser, The End of The Trail by Dennis Friedly memorializes the struggles for survival of the American Indian and the Plains bison. Gil Rudolph did the copious amount of 24k-gold inlay and raised gold engraving in assorted American Indian motifs. (SharpByCoop knife image)

The End of The Trail by Dennis Friedly is a theme piece dealing with the separate battles that American Indians and the Plains bison fought for survival in 19th-century America.

The famous sculpture of the same name by James Earle Fraser is reproduced in 24k gold inlay engraving by Gil Rudolph on one bolster and an American bison on the other. The look and even of the texture of the distinctive ancient bark ivory slabs resemble that of a bison. Meanwhile, Rudolph’s spectacular 24k-gold and raised gold work engravings are configured to represent various symbols of American Indian culture, including all over the guard, pommel and spines of the handle and blade.

SPEC CHECK

Knife: The End of The Trail
Maker: Dennis Friedly
Blade length: 8.5”
Blade steel: Robert Eggerling damascus
Handle material: Ancient bark ivory
Engraving: 24k gold in inlay and raised gold work, all by Gil Rudolph
Construction: Take down
Maker’s price for a similar knife: $14,500

For more information contact Dennis Friedly, Dept. BL9, 12 Cottontail Ln. E, Cody, WY 82414 307-527-6811 [email protected], friedlyknives.com.


Advertisement

Must Read Articles

Read this before you make a knife

Knifemaking 101 – Read This Before You Make a Knife

  by Wayne Goddard My experience has taught me that there's nothing like digging in and getting started. I've often said the hardest part of the...
how to forge damascus steel

How to Forge Damascus

Advertisement
Advertisement