
Knifemaking: Frame Handle Construction

KNIFE SHOP BY JASON FRY

Are you up to the challenge of frame handle construction?

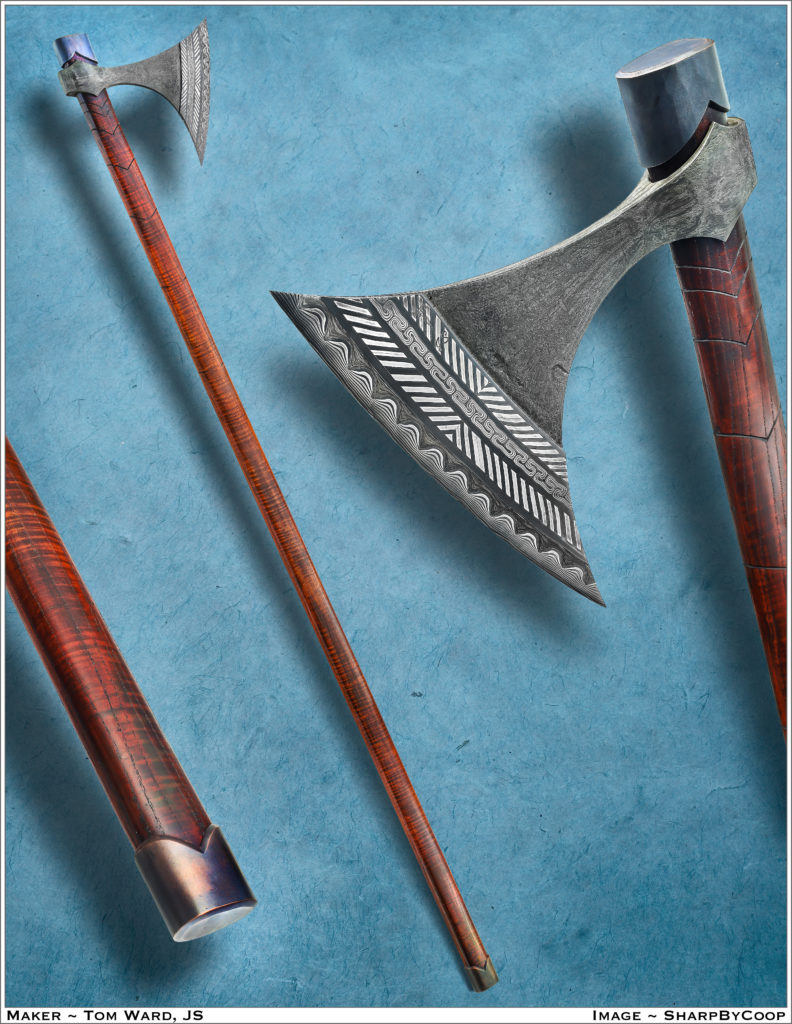
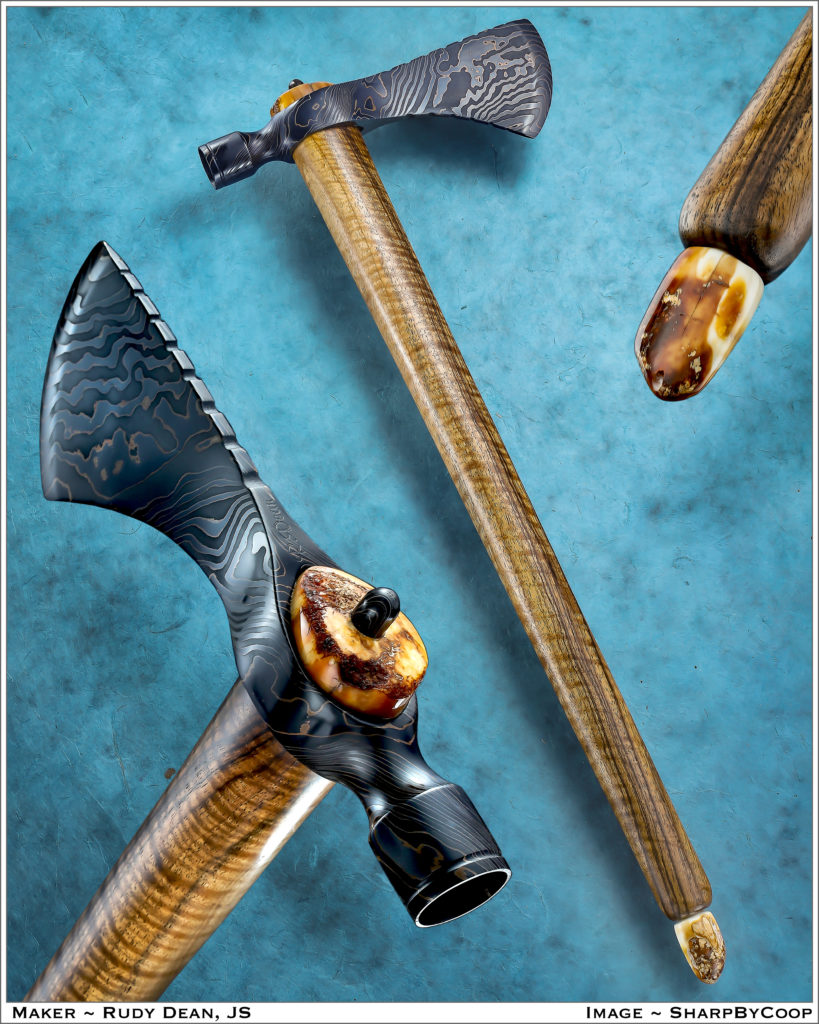
Frame handle construction for knives has been around for centuries. Historical examples of many Eastern styles like the kard, khyber and yataghan often feature ornamented frame handles. Nineteenth-century knives attributed to James Black and some of the early American bowies also had frame handle construction. Though it’s been around a long time, the frame handle remains a viable modern construction method for today’s custom knifemakers.

There are many ways to crack the nut/skin the cat on frame handle construction. This article will walk through the frame handle process and point out particular problems and potential solutions for those who wish to pursue building a frame handled knife.

3 REASONS WHY

Frame handle construction is best defined as using a wrap-around “frame” to conceal the tang of a hidden tang knife. The first question many people ask regarding a frame handle construction is, “Why would you want to do it that way?”

My first thought goes back to the earlier days of the internet when forums were at their peak, and fine makers like ABS master smith Bruce Bump took the time to document “work in progress” (WIP) threads. Bruce had a fine frame handle WIP on the KnifeDogs.com forum in 2013, and the consensus at the time was that you build a frame handle for quite a few reasons, though the first one is “because you can!”

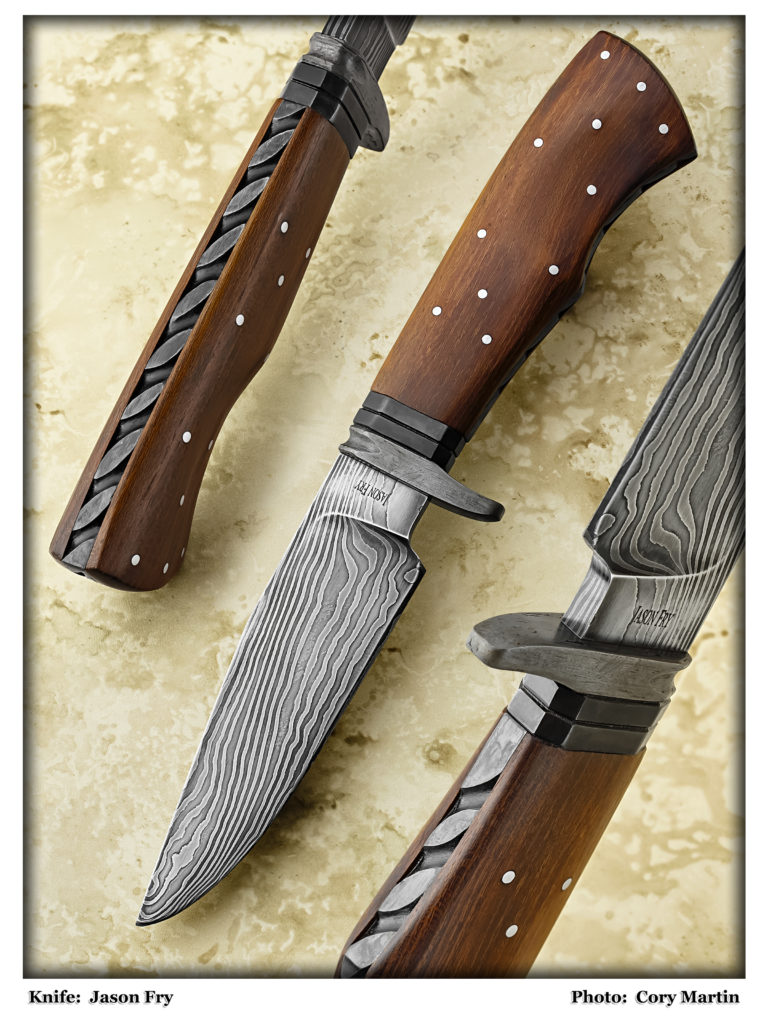
The author used frame handle construction for his hunter in a blade of 33-layer damascus, a wrought iron guard and scales taken from a fence post made in 1912 from bois d’arc wood, aka osage orange. The spacers are World War II practice bomb material. (Cory Martin knife image)
A frame handle is a much more complex build process than your standard full- or stick-tang knife. However, in addition to the show of skill by the maker, frame handle construction has a few distinct advantages that make the complexity worth the effort:

  • A frame handle allows for the look of a full tang, but with the guard-fitting techniques of a stick tang. For a forged stick-tang-knife design that needs a guard, a frame handle allows the use of full-tang-style handle construction;
  • A frame handle is a good way to use scales or slabs on a stick-tang knife. If you have a good set of stag or mammoth slabs, or if you have stabilized wood slabs that might be too fragile for through-tang construction, the frame handle allows you to use the materials on a stick-tang knife; and;
  • The use of a frame handle gives the maker another area to embellish the knife. Some frames are great for engraving, while others may highlight a damascus pattern. Either way, the frame makes the embellishment stand out in ways that are harder to accomplish on a full-tang knife.

HOW to DO IT

At a basic level, the frame of a frame handle is a piece of material, usually metal, that wraps around a stick tang and mimics the look of a full-tang knife. This presents some challenges that have resulted in a few different creative solutions. 

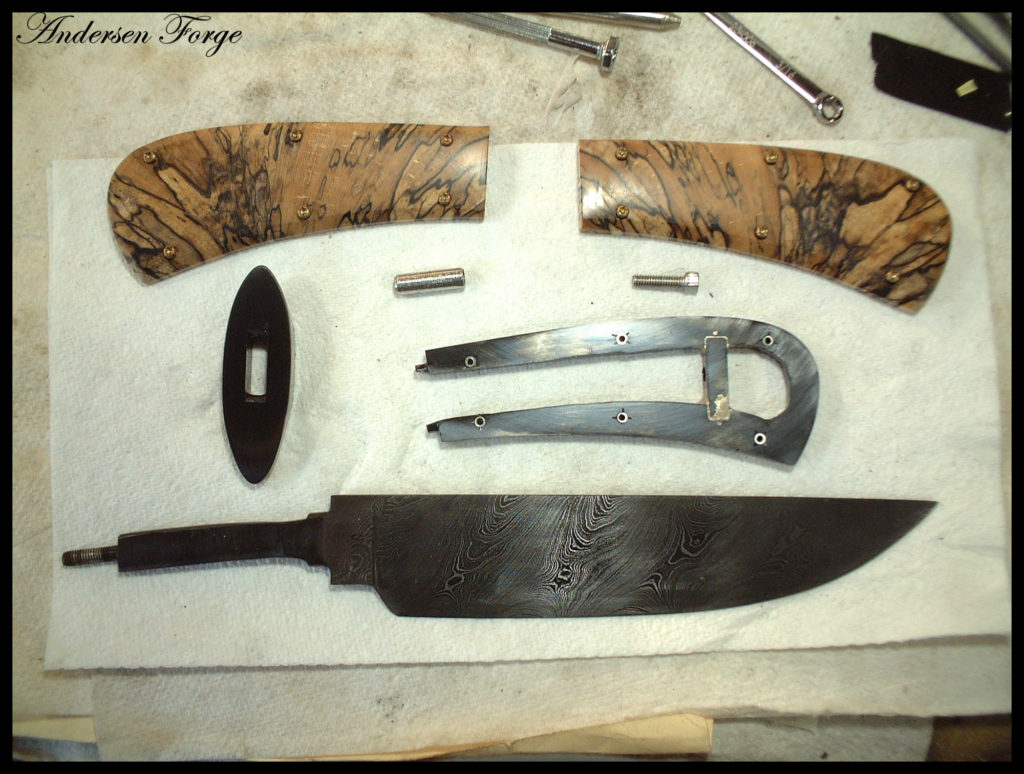
An exploded view shows an ABS journeyman smith Karl Andersen frame handle construction knife before assembly. (Karl Andersen image)
  • Challenge 1: The tang must fit inside the frame. Some makers insist on precision so there are no gaps and the fit is tight. Others concede that the handle will be held together with mechanical fasteners and sealed with epoxy, so a precise fit between the frame and the tang is not necessary.
  • Challenge 2: All parts of the handle must be securely fastened together. I sat through a class with ABS master smith Mike Williams in which he admonished the students, “Don’t trust in the magic of chemistry” by putting your faith only in the strength of glue. Likewise, veteran bladesmith Jerry Fisk challenges makers to think ahead to what their knives might be like in 100 or 1,000 years, and recommends a mechanical connection that won’t fail over time.

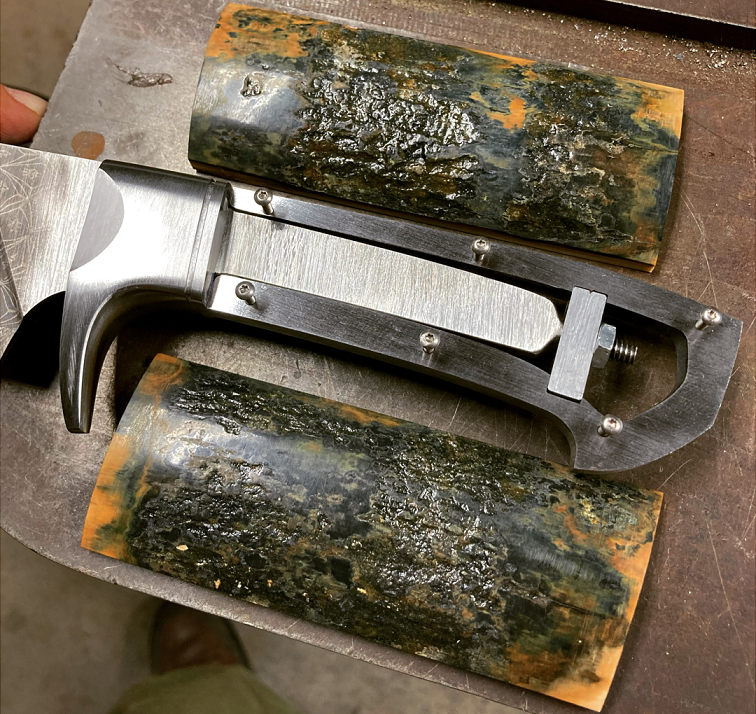
One way to address this challenge is to use pins. If you pin the scales to the frame, pin the completed handle assembly to the tang and follow up with glue, there’s no opportunity for failure. Some choose to make all the pins visible as an artistic element, while others take advantage of hidden pins for all but the one through the tang. Another way is to use a threaded fastener. Bladesmith Salem Straub recently illustrated the technique on a frame handle WIP on his Instagram feed. Salem used a threaded fastener in an internal slot in the frame to mechanically lock all the parts together tightly (Image 1). The handle material is relieved on the inside to accommodate the fastener.

Another way to use a threaded connection is to thread the end of the tang and use a fastener on the handle butt. An advantage of this approach is that the fastener itself can become part of the embellishment.

  • Challenge 3 is the complex fit-up between all of the knife’s elements. Frame handle construction naturally doesn’t excuse a poor guard fit, but it also provides other places for gaps and misalignment. Once again, there are several potential solutions to alignment problems.

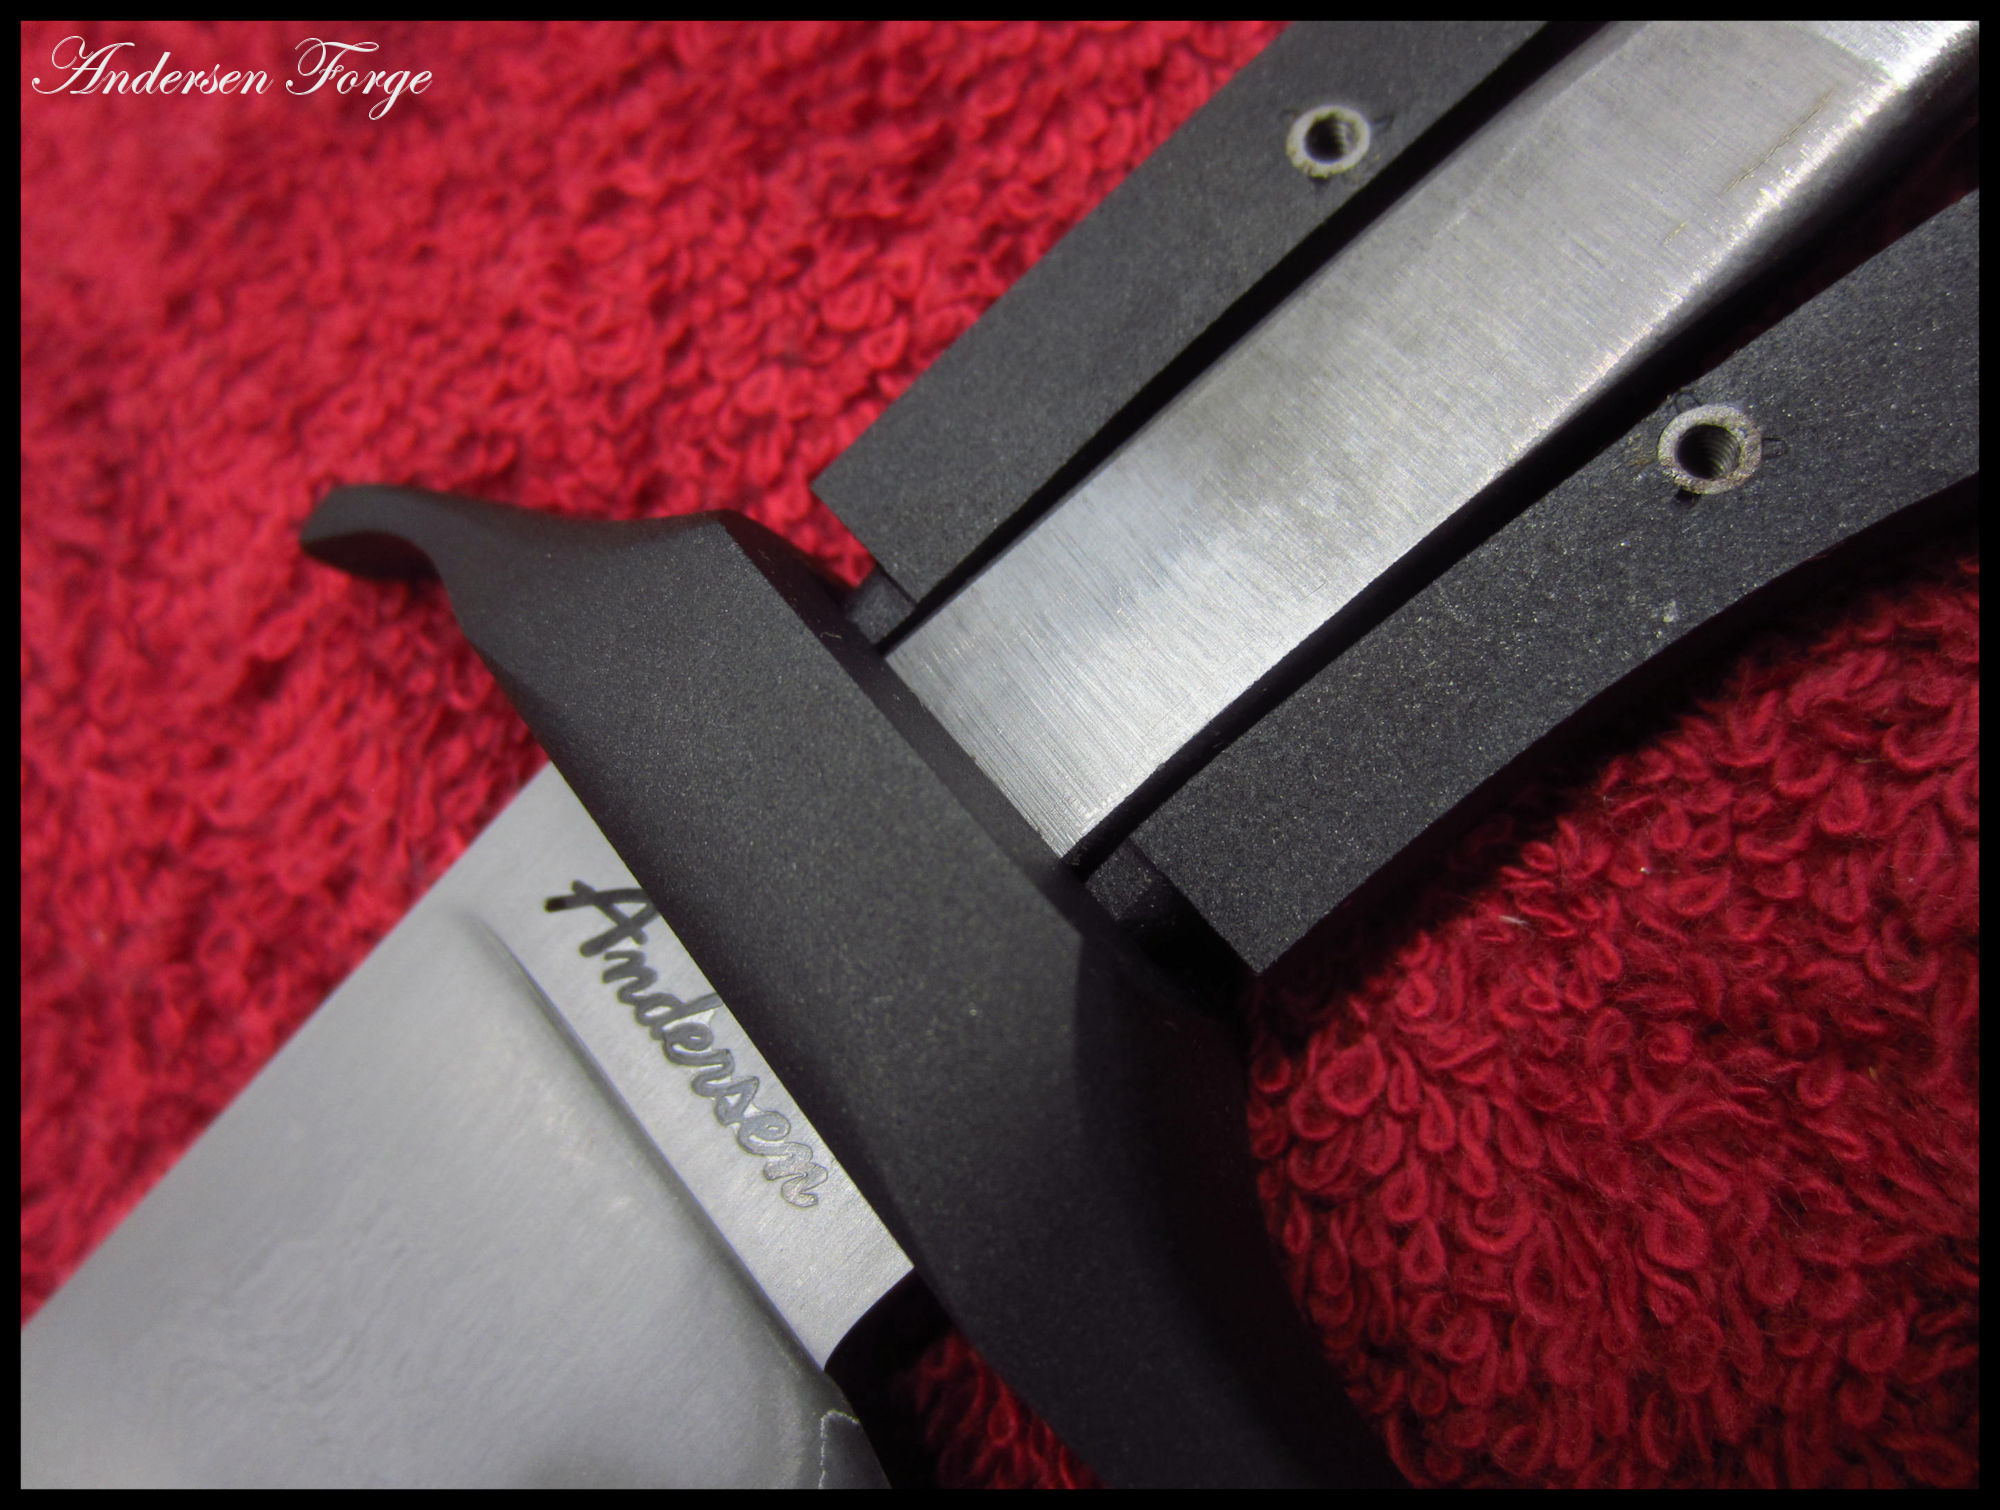
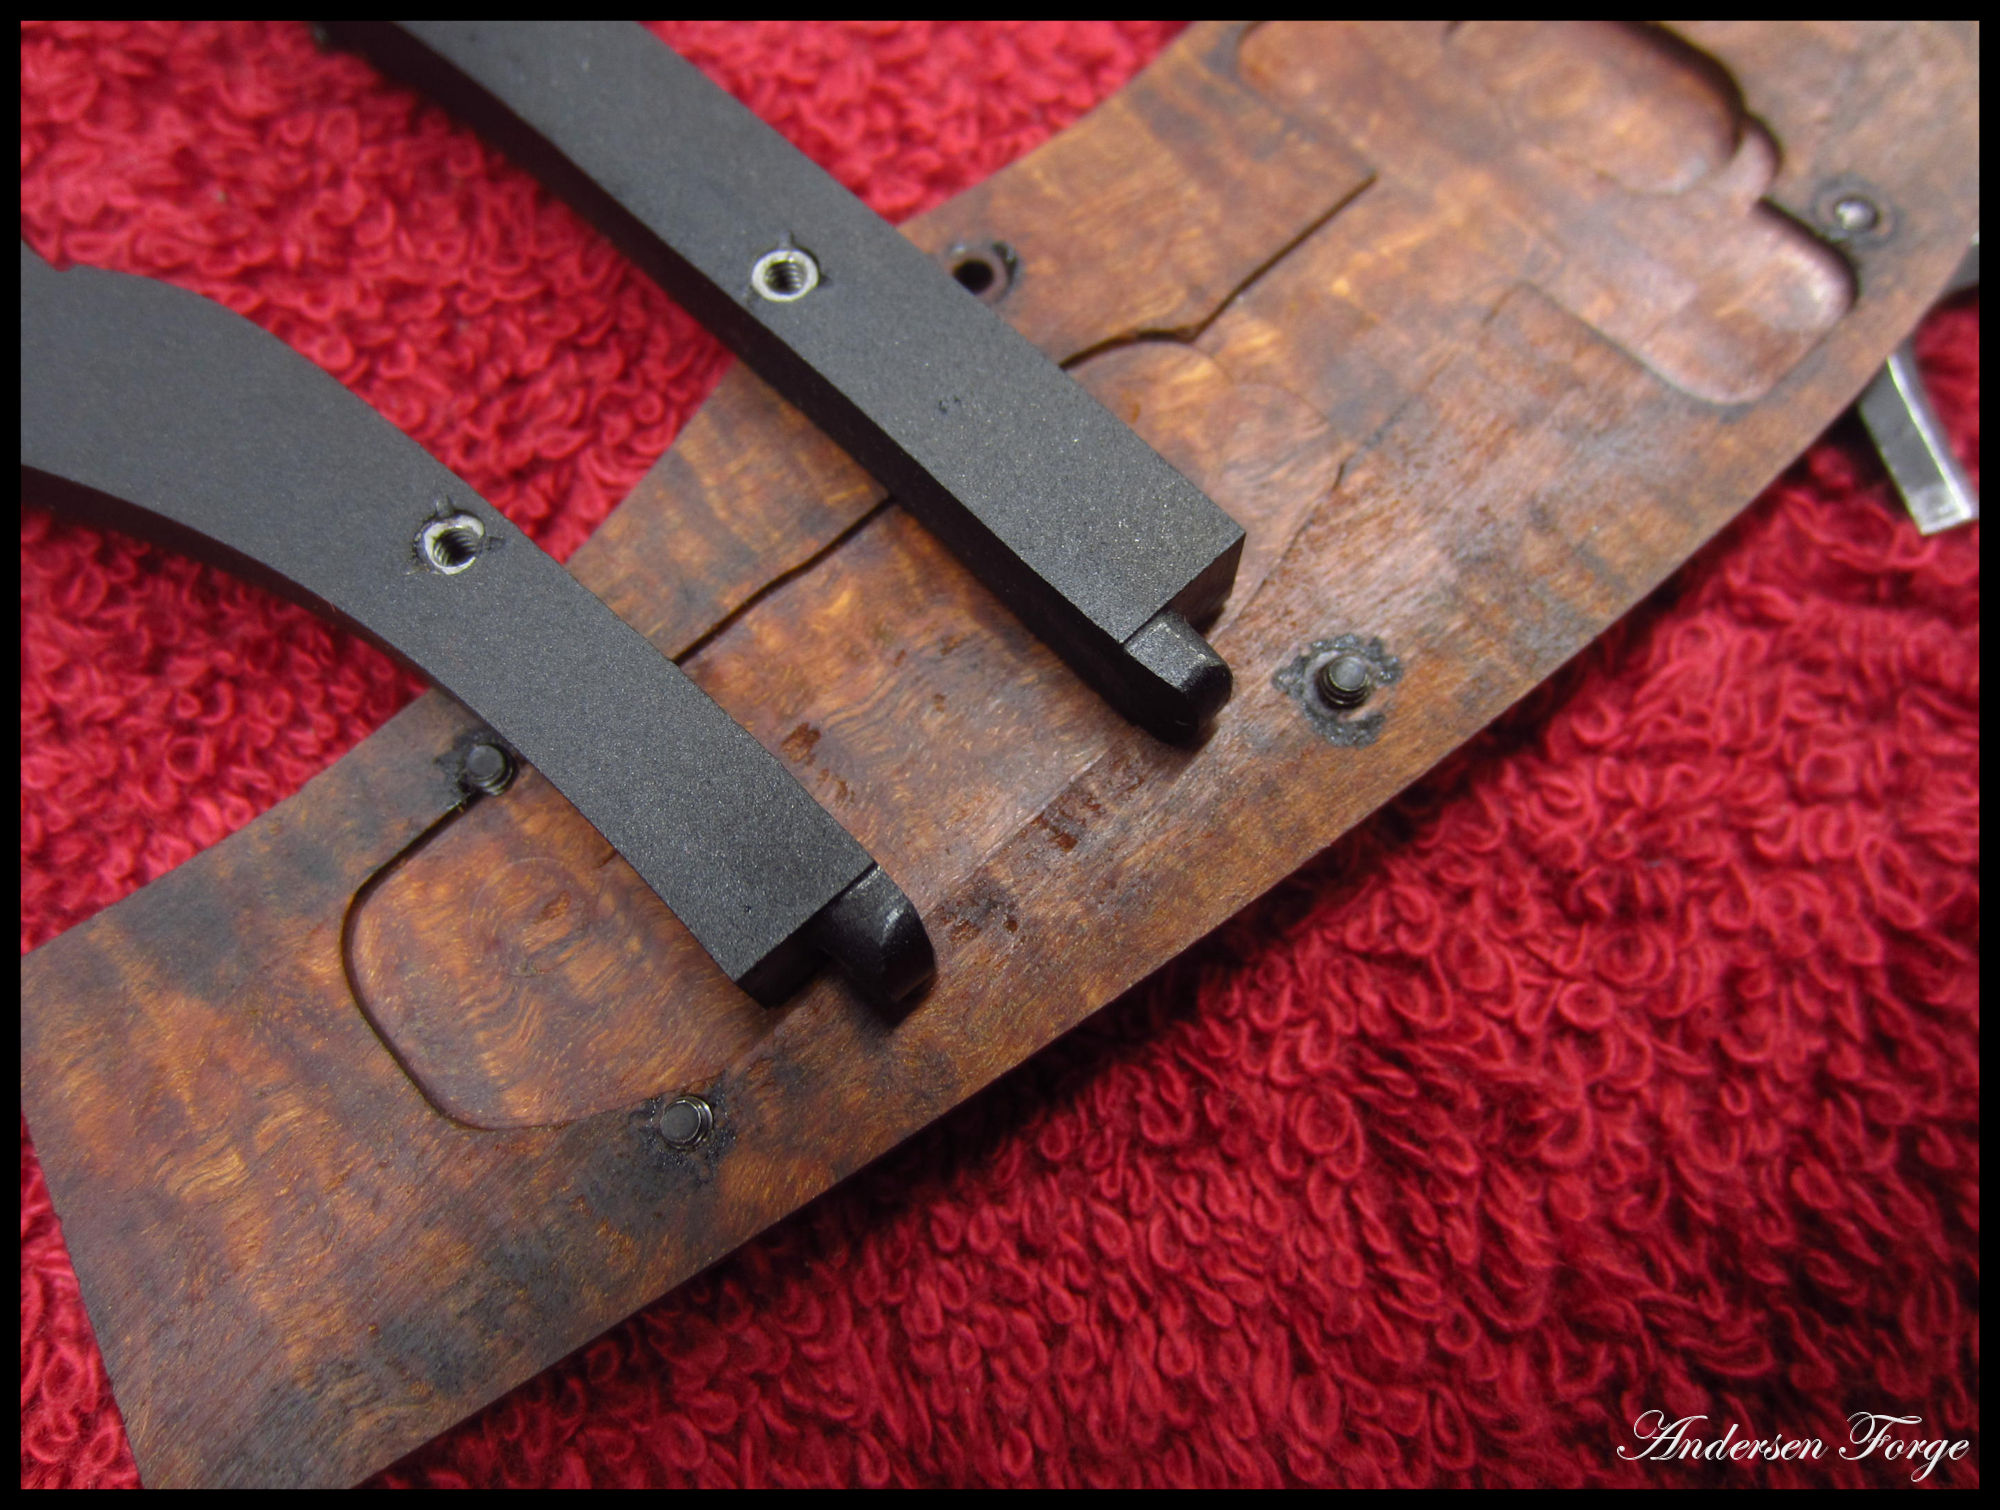
One is the use of alignment pins to make sure everything is secure. Pins on the end of the frame go through any spacers and into holes in the back of the guard so that each part indexes the same during assembly. Some makers, including Bruce Bump in the aforementioned epic WIP, advocate for leaving metal tabs on the end of the frame and fitting the tabs into similar holes on the back of the guard (Images 2 and 3). In both cases, there’s a mechanical connection that prevents the guard, spacers and frame from rotating out of alignment around the center axis of the handle. Either way, when you build a frame handle, the construction will require you to assemble and disassemble the knife repeatedly, so you’ll need some mechanical way to keep things lined up.

Above: Some makers advocate for leaving metal tabs on the end of the frame and fitting the tabs into similar holes on the back of the guard. In both cases, there’s a mechanical connection that prevents the guard, spacers and frame from rotating out of alignment around the center axis of the handle. (Karl Andersen images)

Another fit-up challenge is the overall requirement for clean-fitting joints with no gaps. It sounds simpler than it is, but two surfaces that are dead flat will join together without a gap. The challenge of a multi-piece frame handle with a guard and a few spacers is that you are creating a multitude of surface joints, and every single surface must be dead flat. At a minimum, you’ll have a joint between the guard and frame, and also between the frame sides and the handle material. Any bump or wiggle on any surface and you’ll have a gap in the final product. Flatness comes in degrees. You can get a fairly flat surface on a platen, flatter on a disk, and still flatter on a surface plate or surface grinder. You have to make the joints as flat as you can with the tools you have available if you want a gap-free fit.  

I tend to prefer the look of a tapered tang on a full-tang knife, so I’ve started tapering the frame of my frame handles as well. Others stick with a full thickness frame, where the thickness closely matches that of the blade at the ricasso. Some add spacers between the tang and handle material, while others choose to go with the frame and handle slabs only. 

Another fit challenge is presented by the frame itself. In order to adequately finish the visible surface of the frame, whether by simple polishing, bluing or etching, or by engraving, the frame must be 100 percent at final-grit finish prior to final glue up. Many makers learned to make a full-tang knife by finishing the front edge of the scales, gluing the knife together, shaping the scales down to the exposed tang, and then polishing the handle and the tang at the same time. That method will not work for a frame handle that needs to be blued or etched. Personally, I tend to use dummy pins to fit the entire handle assembly together, then grind the scales down to the frame. In his recent Instagram example, Salem Straub used small screws to hold the handle material to the frame. 

With regard to the relationship between the handle material and the frame itself, whichever method you choose, it is important that the fit be maintained consistently all the way around the frame. (Jason Fry image)
With regard to the relationship between the handle material and the frame itself, some choose to leave the material slightly proud of the frame for a “museum” or “heirloom” fit. Others prefer the material to fit flush to the tang. Less commonly, some makers round the frame and leave it slightly proud of the material. Whichever you choose, it is important that the fit be maintained consistently all the way around the frame, from the joint at the guard on the top all the way down to the joint at the guard on the bottom.

Once the profile is set, I polish the handle and the frame together down to final grit, and then apply any surface finish to the frame itself. Once all parts are 100 percent complete, they can be glued together as a final step.

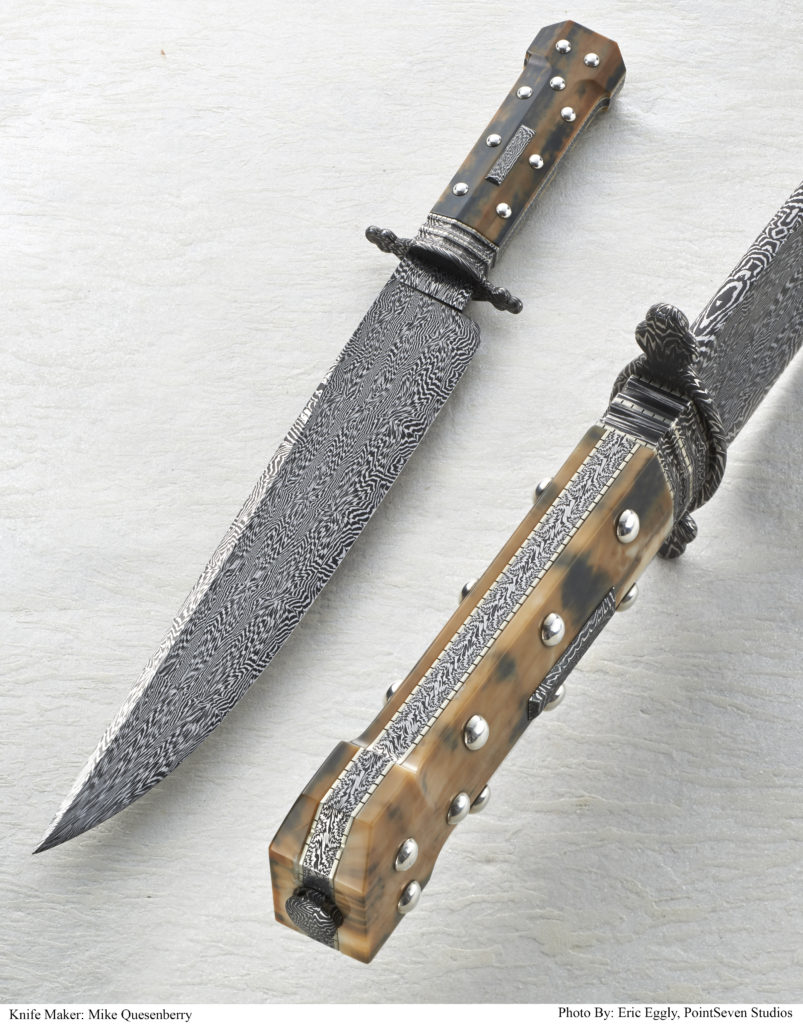
ABS master smith Mike Quesenberry used frame-handle construction on his dog-bone bowie. (Eric Eggly/PointSeven image)
WHEN to DO it

So when should you try making a frame handle? In my mind, if you can make clean full- and stick-tang knives, you could be up to the challenge. If you have slabs of exceptional handle material that deserve more than a simple full-tang knife, a frame handle is a way to step up and put the materials on full display. If you have a knife in mind where the frame and guard need to be blued, damascus or engraved, a frame handle is the way to go.

A frame handle knife has its advantages, but the complexity of the construction presents plenty of challenges. As a skilled maker, you may choose to rise to the challenge of a frame handle just to show that you can.

For more information on frame handle construction contact the author at [email protected].

The Author

A voting member of The Knifemakers’ Guild and president of the Texas Knifemakers’ Guild, Jason Fry also is the author of the most entertaining new book, Knifemaking Hacks: 384 Tips To Make Knives Like The Pros.  For information on how to buy your copy visit https://www.gundigeststore.com/product/knifemaking-hacks-384-tips-to-make-knives-like-the-pros/.

5 Angle-Guide Knife Sharpeners That Make The Cut

1

The proper angle is key to a sharp blade. Here are the angle-guide sharpeners that ensure you’ll always get it right.

A big part of sharpening, aside from proper sharpener selection, is how to select and maintain the proper angle of the blade to the sharpener. In fact, the key to successfully sharpening any blade regardless of the grade of steel is being able to maintain that angle. Ever try sharpening freehand on a bench stone with little experience doing so? The reason folks get frustrated with learning to sharpen is they don’t keep the angles consistent. It’s all about the angles. You must take into account what use your knife will see and sometimes that determines the specific angle to use.

You probably know of the angle guide kits with a metal clamp that affixes to the blade and has uprights on either end with a series of holes that correspond to various degrees of angles. Such kits all help instill confidence and the ability to subtract guesswork at maintaining the desired angle.

SHARPENER TYPES
There are plenty of sharpeners capable of reproducing keen edges. Avoid the pull-through types that require you to drag the blade through. Those are set at one angle and use carbide to get the job done. These will ruin a blade in time, and I don’t recommend them. You need a sharpening kit that’ll help establish and hold a consistent angle. All you need to be concerned with is making the motions to get the edge sharp.

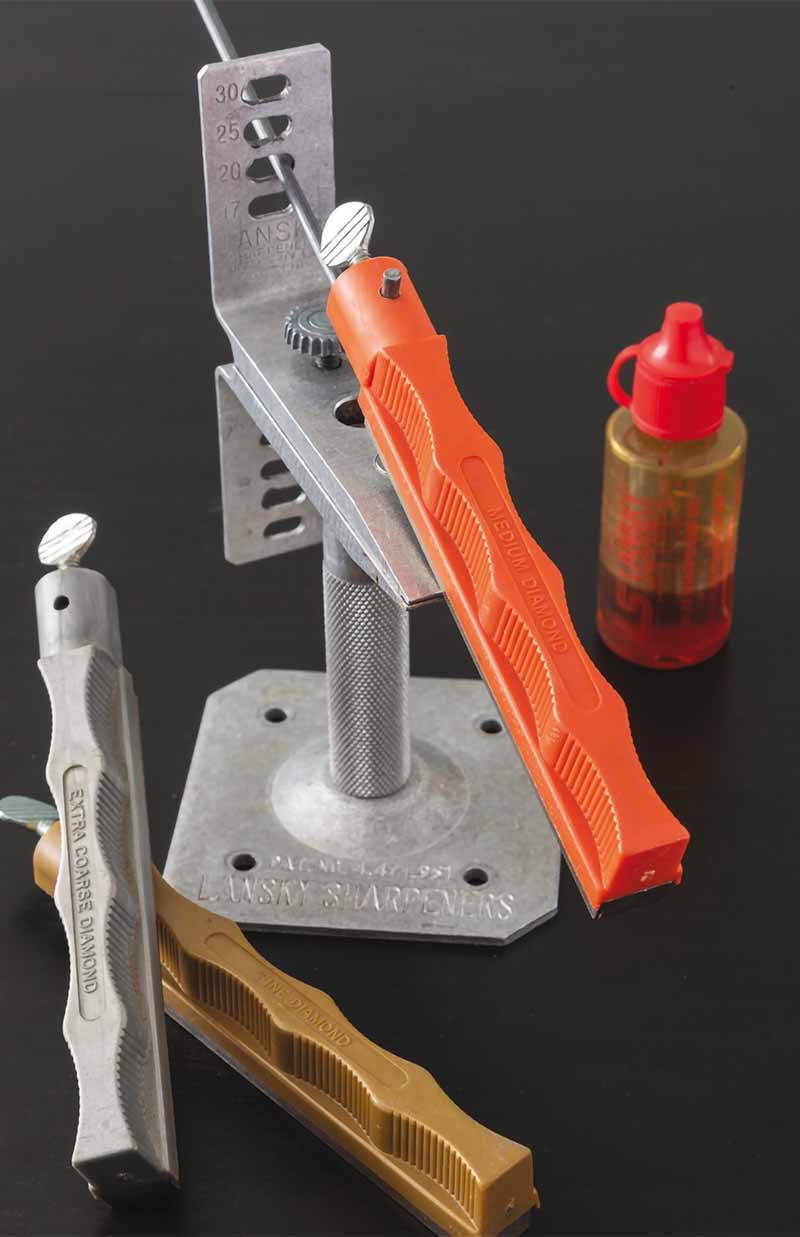
The Lansky Deluxe Diamond Knife Sharpening System is one of the oldest angle guide kits on the market. Four various grits of diamond-coated hones are featured, including extra-coarse for fast work of reviving dull blades. The sturdy aluminum clamp holds the knife securely.

Lansky’s four-stone Deluxe Diamond System Precision Knife Sharpening Kit is the best the company offers in angle guide clamp units. It includes an extra coarse hone great for reprofiling edge angles. It also has coarse-, medium-, and fine-grit diamond-coated hones for fine-tuning the edge once it’s been established. The aluminum clamp is sturdy and offers four edge angles: 17, 20, 25, and 30 degrees. The kit stores in a sturdy plastic storage case. MSRP: $114.99.

GATCO offers the Ultimate Diamond Hone Sharpening System, which is similar to the Lansky. Featuring coarse-, medium-, and fine-grit diamond-coated abrasives, the kit includes Ultimate Finishing and triangular-shaped serration hones, too. It works on plain, serrated, and partially serrated edges. The hones are wider and longer for more effective use and have molded-in integral handguards for safety. There’s also a plastic storage case. MSRP: $119.99. 


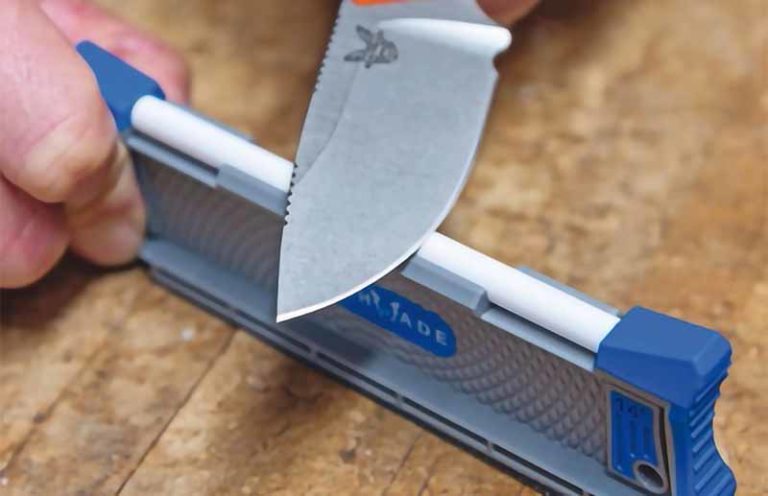
To sharpen the CPM S90V blades with the SelectEdge 14 degree angle of its Hidden Canyon Hunter and Saddle Mountain Skinner, Benchmade offers the model 50082 14 Degree SelectEdge Guided Hone Tool. Designed in conjunction with and manufactured by Work Sharp, this compact sharpener incorporates a fine grit ceramic rod and a leather strap on the backside. Built-in guides set the blade at the correct 14-degree angle. The idea with this one is to apply frequent edge touchups. A premium steel, S90V is notoriously difficult to resharpen, a difficulty negated via frequent edge maintenance sessions with the 50082. MSRP: $25.

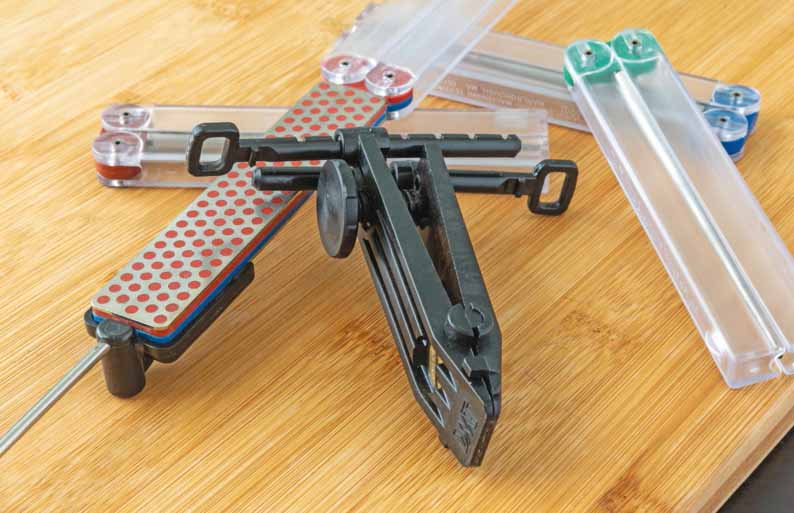
DMT’s Magna-Guide angle kit includes a magnetic guide rod and sturdy blade clamp with adjustable angles. Use  any model DMT Double Sided Diafold folding fi le and you have two sharpeners in one—a freehand fi le and an  angle guide kit.
DMT’s Magna-Guide angle kit includes a magnetic guide rod and sturdy blade clamp with adjustable angles. Use
any model DMT Double Sided Diafold folding fi le and you have two sharpeners in one—a freehand fi le and an
angle guide kit.

For knives without the SelectEdge technology, Benchmade offers the Edge Maintenance Tool, also designed with and manufactured by Work Sharp. It uses a fine-grit ceramic rod and a leather strop but in a more compact folding format with a pocket clip for easy carry. As with the 14 Degree SelectEdge Guided Hone Tool, built-in guides assist in achieving the optimal angle for edge restoration. The Edge Maintenance Tool works well with pocketknives, fixed blades, and tactical folders—pretty much any knife. MSRP: $50.

DOWNSIZED 2X72
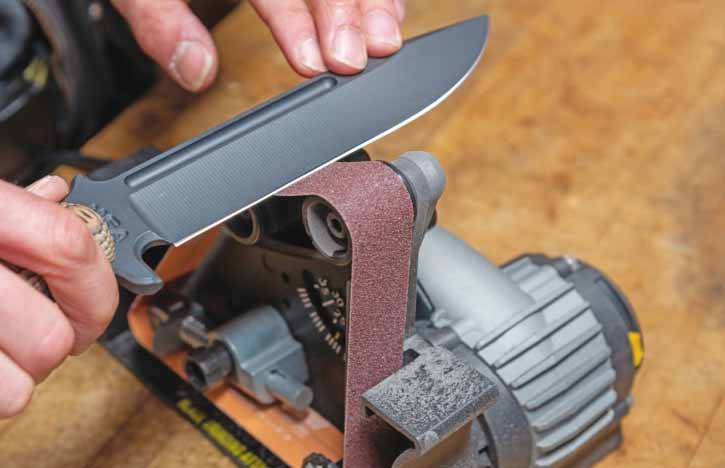
For the more advanced sharpeners among you, Work Sharp offers the Ken Onion Elite Sharpening System, a variable speed motorized unit employing long-lasting flexible abrasive belts made by Norton Abrasives. It’s pretty much a downsized version of a larger and much more expensive 2×72 slack belt grinder used by many knifemakers.

The Work Sharp Ken Onion Elite sharpener is pretty much a downsized version of a larger and much more  expensive 2x72 slack belt grinder used by many knifemakers.
The Work Sharp Ken Onion Elite sharpener is pretty much a downsized version of a larger and much more expensive 2×72 slack belt grinder used by many knifemakers.

Designed by BLADE Magazine Cutlery Hall-Of-Fame® member Ken Onion, the Elite makes quick work of bringing completely dull and/or damaged knife edges back to life and is fully adjustable for applying edges between 10 and 35 degrees. The abrasive belts measure 1 by 18 inches and make quick work of any sharpening task. Once you become comfortable with how the sharpener operates, you can consistently grind an even edge on your blades. (Author’s note: Motorized sharpening is best left to those with sharpening experience.) MSRP: $199.95.

Diamond Machining Technology (DMT) offers the Double Sided Diafold Magna-Guide Sharpening System centered around the company’s Double Sided Diafold folding diamond files. The Magna-Guide System features the Aligner Blade Guide clamp with integrated, adjustable angle guides. A metal guide rod affixes securely to the Double Sided Diafold file via a large rare earth magnet. Attached to an FWCX Extra Coarse/Coarse Double Sided Diafold, the manual system can easily reprofile an edge to any one of seven pre-set angles.

DMT’s Double Sided Diafold diamond files are built well, highly effective, and among the best compact sharpeners on the market. One of the best things about the Magna-Guide is you can use the Double Sided Diafold files as stand-alone sharpeners without the guide rod and angle guide clamp. Consequently, you get a guided sharpening system and a standalone sharpener for the price of one. The Magna-Guide Kit’s MSRP: $27.49 (works with any Double Sided Diafold file).

Get More Knife Sharpening Info:

BIG Blades: 4 Monster Choppers for the Bush

BY JAMES MORGAN AYRES

Wherever folks live close to the earth, they use big knives

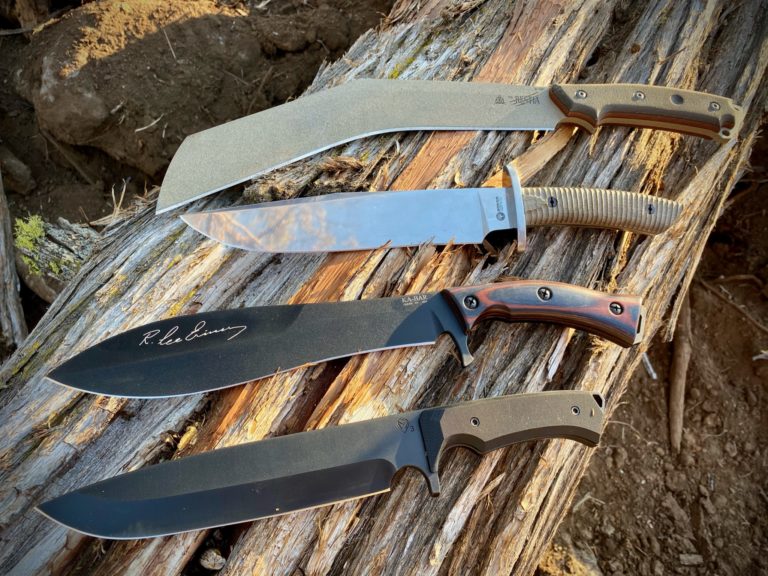
Little knives are convenient to carry but, if you have a lot of work to do, big knives are it. I’ve lived and worked with indigenous peoples in Latin America and Southeast Asia and found that wherever folks live close to the earth, they use big knives—machetes, parangs, goloks, bolos and the like. They use them for everything from rough work such as cutting poles and opening coconuts, to dressing out pigs and game, to delicate work such as slicing mangoes.

The advantage of the big blade was illustrated to me one day when I was working alongside a villager who, with his bolo and its 14-inch blade, cut wood for a fire, bamboo poles for a cooking rack, lopped off a banana leaf on which he filleted two large fish and sliced them thin as a sushi chef—all in the time it took me to bring down a few stalks of bamboo with my hair-shaving-sharp Randall Model 1.

We reviewed the test knives with that standard in mind. We chopped and split wood and sliced meat and tomatoes. We also, just because, cut hanging rubber hose and slashed through water-filled plastic bottles.


LONG, TALL & HANDSOME: Boker Arbolito El Gigante


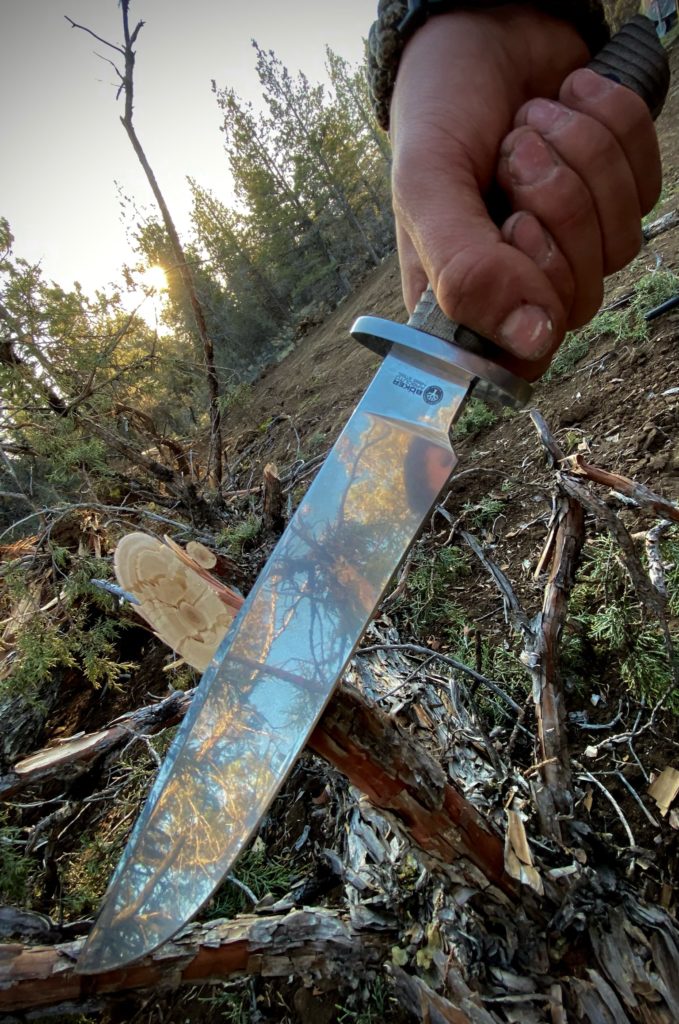
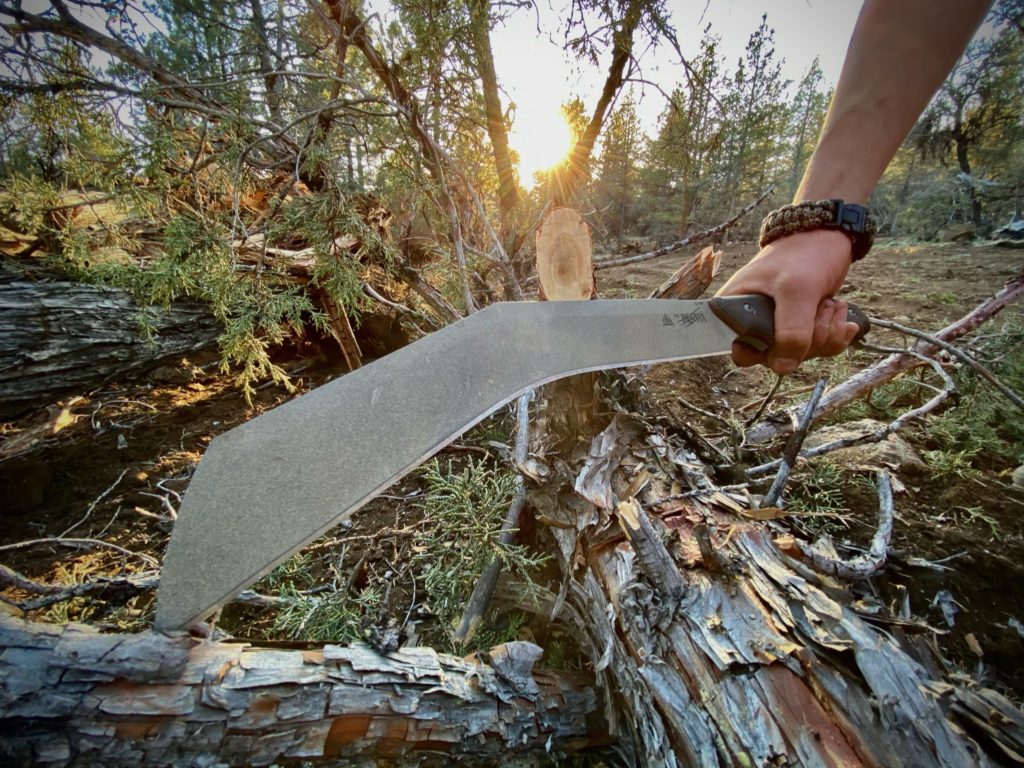
The Boker Arbolito El Gigante is a handsome classic bowie with a stonewashed blade, comfortable handle and nice leather sheath. Balance is excellent, all very much in the bowie tradition. Construction is top quality; so is performance. It cleaved 2-inch pine saplings with one stroke. The quarter-inch-thick spine was brought down to a well-supported edge fine enough to slice tomatoes, and slice meat thin enough to see light through the slices. We slashed rubber hose and the water bottles with ease.

Like all well-designed and crafted bowies, this is a versatile all-around knife.

A tree branch succumbs to the reflective blade of the Boker Arbolito El Gigante. It cleaved 2-inch pine saplings in one stroke.

BOKER ARBOLITO EL GIGANTE
Blade Length: 9.25”
Blade Steel: Bohler N695 stainless
Blade Thickness: .24”
Blade Grind: Flat
Blade Finish: Stonewash
Handle Thickness: .94”
Handle Material: Green Micarta®
Weight: 15.75 ozs.|
Overall Length: 14.75”
Sheath: Leather
Country of Origin: Argentina
MSRP: $229

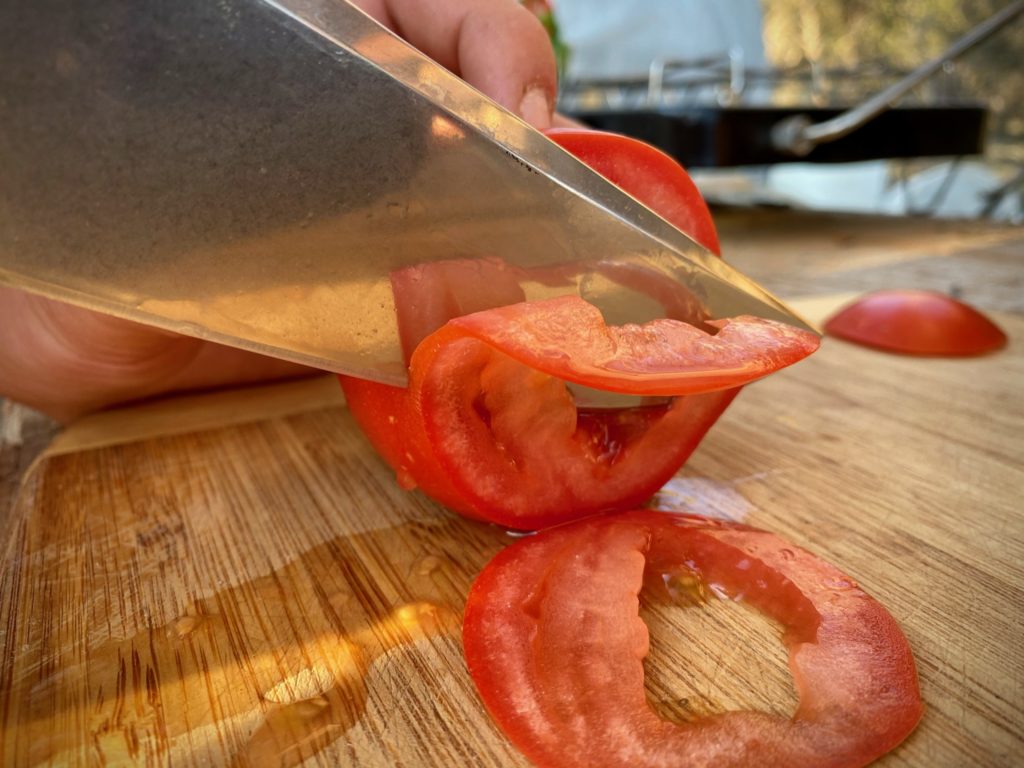
The El Gigante also proved its mettle after chopping wood by slicing a tomato nice and thin.


SEMPER FI! The KA-BAR Gunny


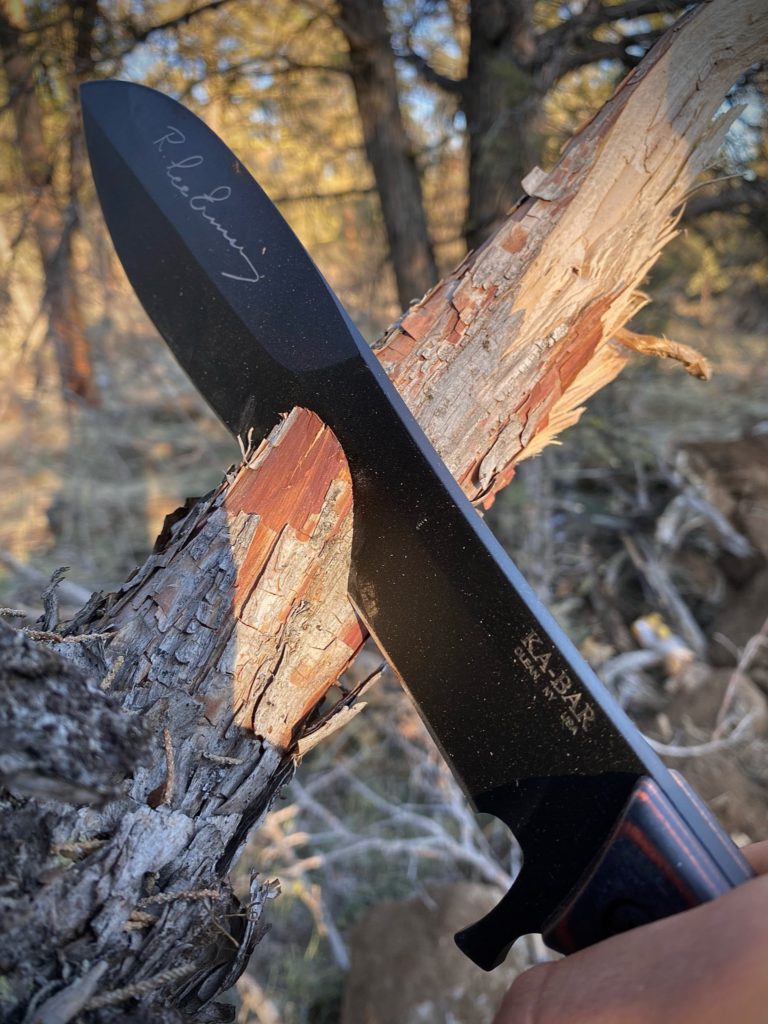
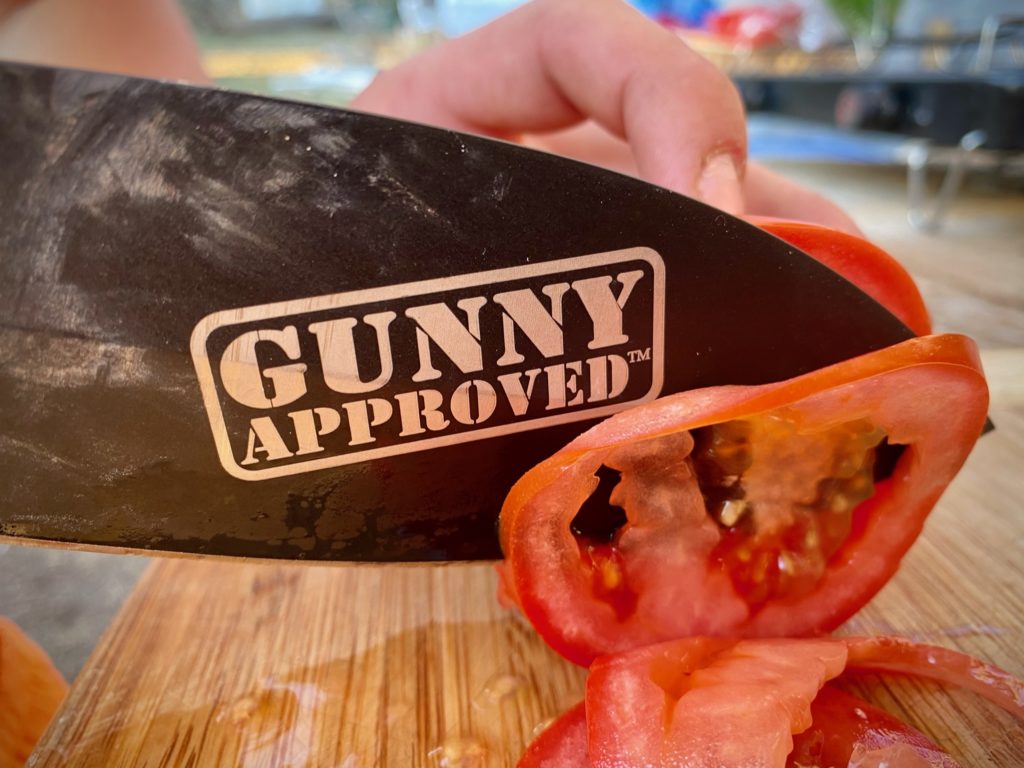
The KA-BAR Gunny is a hybrid design that resembles a bolo. I suspect R. Lee Ermey, the unforgettable Gunny who serves as the knife’s namesake, spent some time in jungles because this combination chopper/slicer’s performance is on par with village-forged bolos I’ve used in Southeast Asia, and that’s a high compliment. Its forward weight and terrific blade design promote efficient chopping.

The KA-BAR Gunny chomps into dry pine. Its forward weight and blade design promote efficient chopping.

We cut through 3-to-4-inch-thick saplings with two strokes. We took down a tree with a 6-inch-thick truck just because we could. After the chopping the blade was still sharp enough for camp kitchen work. The belly, good balance and fine edge combined to make slicing meat and vegetables a pleasure. Slashing hanging rubber hose and the water bottle were a piece of cake. The comfortable handle lends itself both to heavy chopping and fine meat cutting, which is unusual.

The Gunny is an excellent all-around bush knife. The sheath has a pocket for a sharpening stone, which was not included with the review model.

After chopping wood, the Gunny sliced tomatoes like a chef’s knife.

KA-BAR GUNNY
Designer: R. Lee “Gunny” Ermey
Blade Length: 9.75”
Blade Material: 1095 Cro-Van carbon steel
Blade Width: 2”
Blade Thickness: .2”
Blade Grind: Flat
Handle Width: 1.5”
Handle Thickness: .94”
Handle Material: Wood
Weight: 15.29 ozs.
Overall Length: 15.5”
Sheath: Leather
Country of Origin: USA
MSRP: $292


RAZOR SHARP: Medford Knife & Tool Bonfire


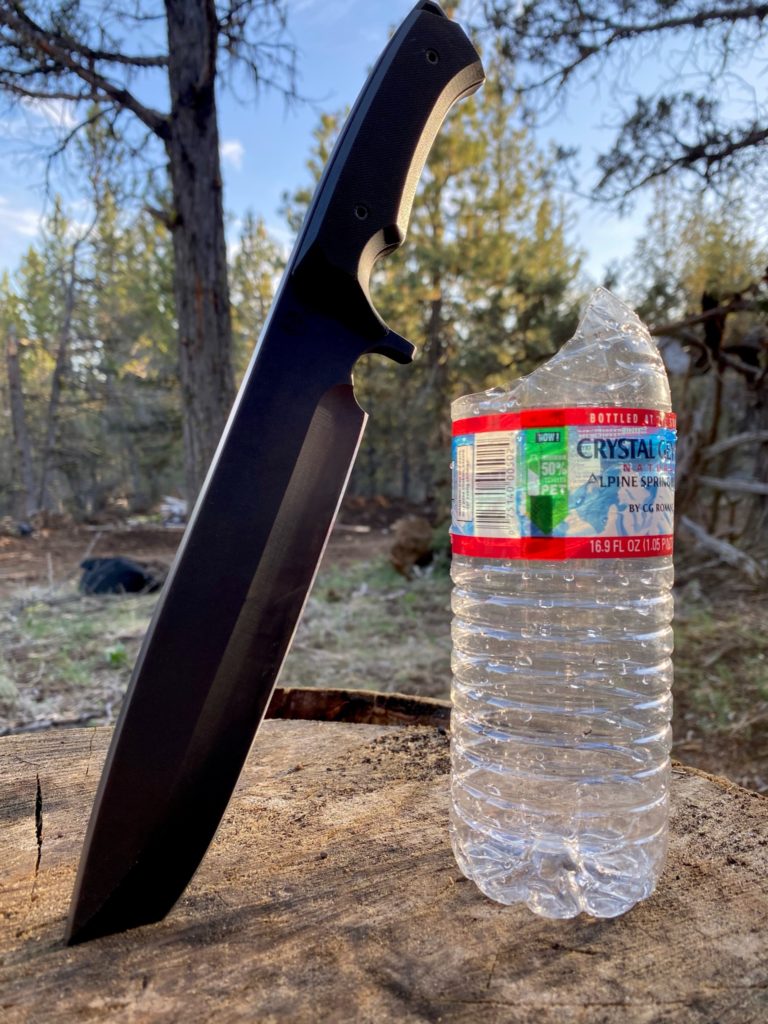
The Medford Knife & Tool Bonfire came from the maker absolutely razor sharp! The blade design is interesting in that we do not often see a contemporary styled drop point and hollow grind on such a big blade. I don’t know the Rockwell, but the steel is hard and tough. It was just as razor sharp after we put it through its paces as when we started.

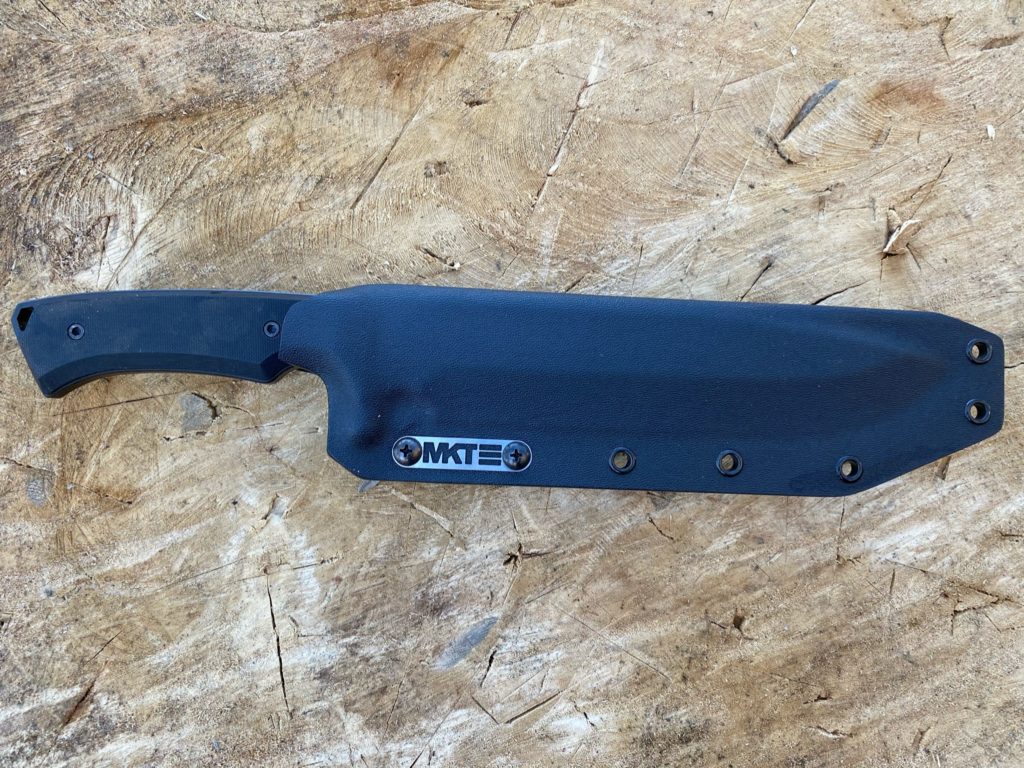
The Bonfire comes with a well-fitted Kydex sheath.

The fine edge made for a very good slicer and slasher and lopped off thin branches with one cut. The hollow grind tended to bind when chopping wood, though that’s to be expected—hollow grinds aren’t chopping designs. It’s better to think of this knife as a well-designed and crafted big knife rather than a bush tool such as a panga or kukri. It sliced rubber hose with a snap of the wrist and slashed through water bottles with more consistency than the other review blades and cut meat just fine. You probably could dress out a bear with it.

Use it as a big knife on soft materials and you won’t be disappointed. It comes with a well-fitted Kydex sheath.


The Medford Knife & Tool Bonfire slashed through water-filled plastic bottles with more consistency than the other review blades.

MEDFORD KNIFE & TOOL BONFIRE
Blade Length: 8.25”
Blade Material: CPM 3V carbon steel
Blade Thickness: .24”
Blade Grind: Hollow
Handle Thickness: .64”
Handle Material: G-10
Weight: 19.16 ozs.
Overall Length: 13”
Sheath: Nylon
Country of Origin: USA
MSRP: $450


CHEF’S CHOPPER: The TOPS Bestia


The TOPS Bestia is just a beast. A kukri-styled 13-inch blade and hefty weight make it the blade of choice for serious chopping or zombie cleaving. We hacked though a 3-inch sapling with one stroke, and used it to clear a stand of saplings and brush. The handle remained comfortable during an hour or so of work. Heavy as a small hatchet, it is more versatile and safer in use, especially in thick brush. During many survival classes, I’ve seen more injuries from hatchets than from big blades with their longer cutting edges.

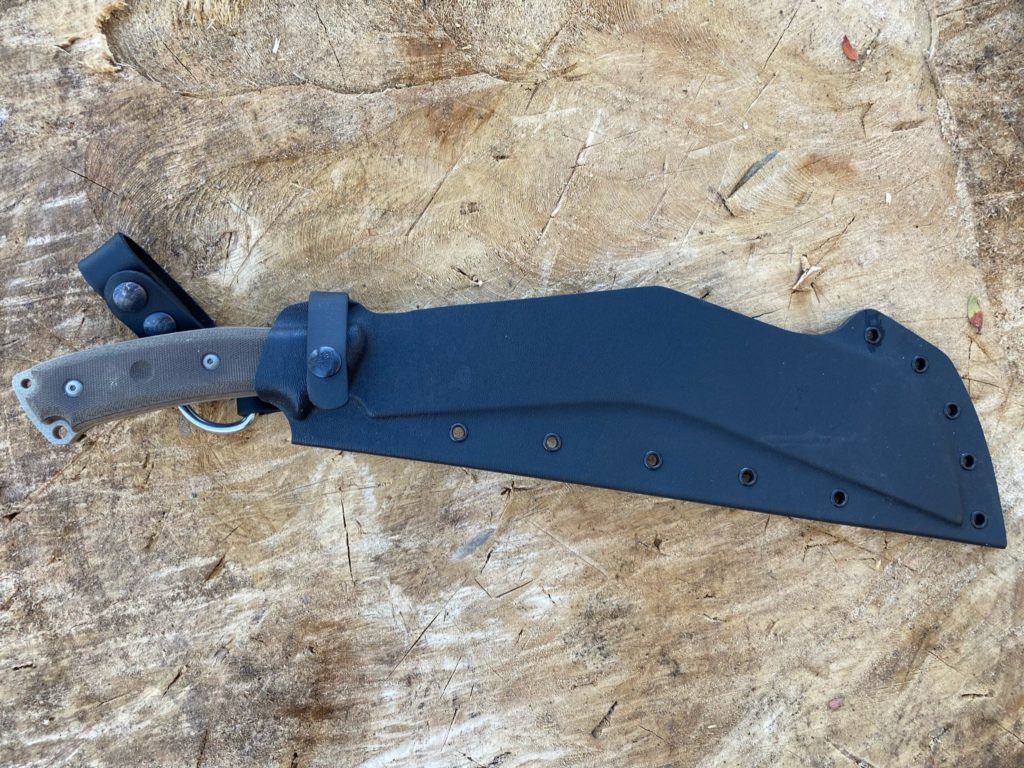
The Kydex sheath is formed to fit the unmistakable kukri-style blade of the Bestia.

Given its heft, blade design and chopping ability, the Bestia is surprisingly usable in the camp kitchen. We found it could slice meat quite well, allowing for adjustments in maneuverability due to its blade length.

The TOPS Knives Bestia’s kukri-styled 13-inch blade and hefty weight made it the blade of choice for serious chopping or, as the author puts it, “zombie cleaving.”

TOPS KNIVES BESTIA
Designer: Leo Espinoza
Blade Length: 13”
Blade Material: 1095 carbon steel
Rockwell Hardness: 56-58 HRC
Blade Width: 2.25”
Blade Thickness: .25”
Blade Grind: Flat
Handle Width: 2.125”
Handle Thickness: .97”
Handle Material: Green Micarta®
Frame/Liner: Micarta
Weight: 1 lb., 13.18 ozs.
Overall Length: 19.5”
Sheath: Kydex
Country of Origin: USA
MSRP: $300


VERSATILE BUSH TOOLS
If you haven’t spent much time with a big blade, try one. Work with it for a while. Direct close attention to your work and you’ll find a good big blade to be a terrific, versatile bush tool.

Katz Knives Stockman Executive: Complete Review

Katz three-blade Stockman Executive Drop Point stacks up against the knives of old school.

Most in my age group were raised with a slip joint knife. It’s the knife Dad always carried in his pocket. Being raised with a dad who was a commercial fisherman, I used knives as tools every day—everything from cleaning fish to making fishing nets.

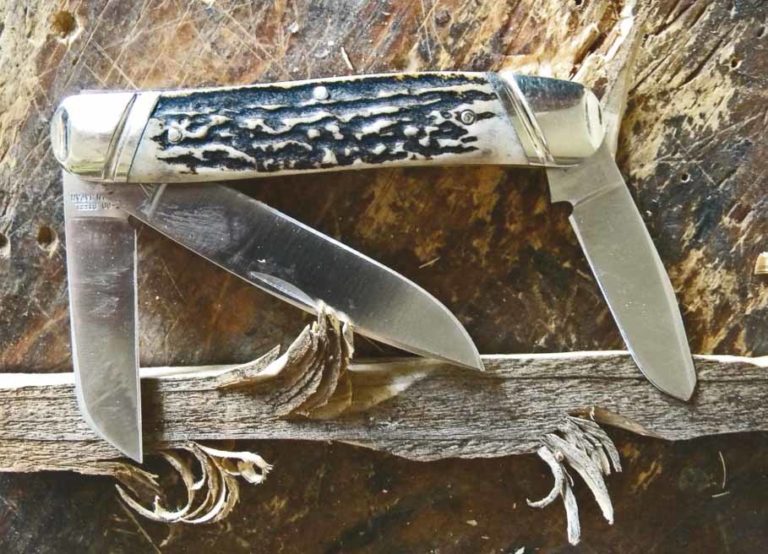
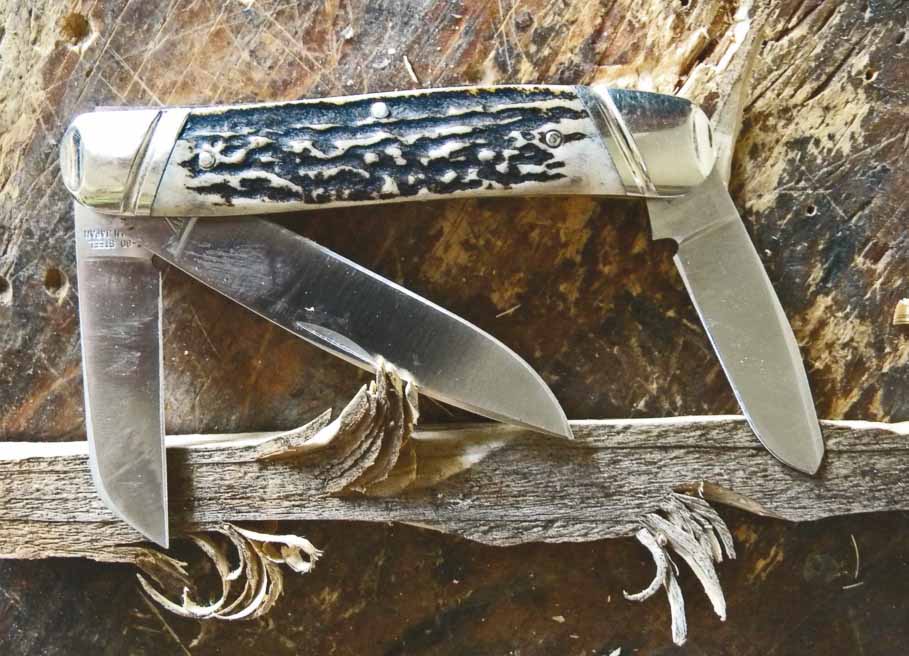
The main blade carved nice curly-cues with great control. The sheepsfoot had a tendency to dig deeper into the pine for thicker curly-cues. The spey was about midway on the curly-cues and depth of cut.

My father, Jacob, always used a three-bladed stockman for working with twine while making or repairing 90-foot trawl nets. It would take him 30 days or more to hand-tie every square in the massive nets. He would always work with the knife’s smallest blade. When it was sharpened down to a nub, he would go to the next blade. The knife would last him five years of heavy work. Then he would put it in his junk drawer and start using a new one. Only carbon steel blades knives were allowed—stainless steel had not evolved to the performance levels of today.

Katz Knives has taken old-school looks and added blades of high-performance XT-80 stainless steel on its Stockman Executive Drop Point. Let’s see if Dad would have approved.

TEST ’EM UP
In a quick sharpness test on 20-pound bond copy paper, all three blades sliced cleanly and smoothly. The shorter blades can be a bit challenging till you get used to them. The sharpening notch/choil caught on the paper during testing.

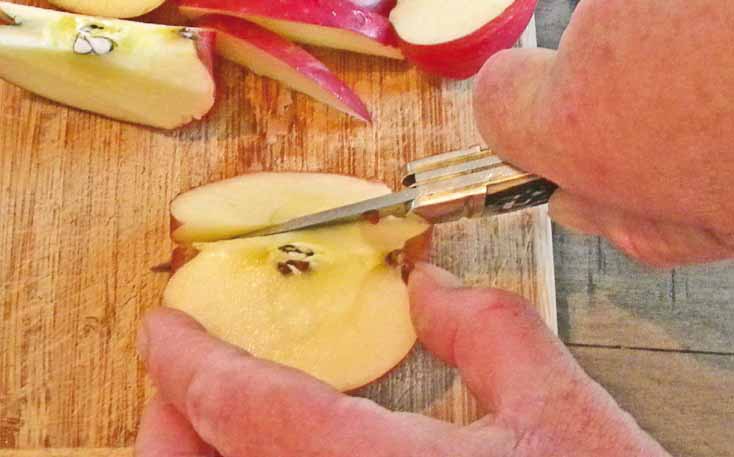
My wife, Melissa, wanted to play with the knife so I got an apple from the fridge for her to slice. The drop-point main/master blade worked great for sectioning the apple into wedges. Next was the sheepsfoot blade for seed removal and skinning the wedges. (The wedges were yummy.)

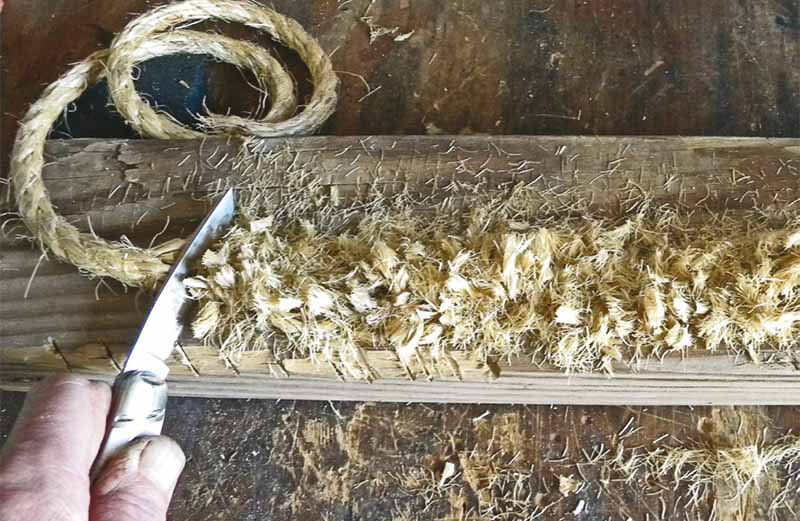
The main blade crunched to 74 clean cuts on the half-inch sisal rope before the edge started to slide.

Single-walled cardboard was next. All blades bit into it aggressively. The cardboard got hung up on the sharpening notches of the two smaller blades while slicing. As a result, I had to slow down the slicing and control the edge placement. The master blade made short work of the cardboard.

It was time to make some firesticks as camping season was in full swing and I needed a fire to roast marshmallows. The master blade gave me nice curly-cues with great control. The sheepsfoot blade had a tendency to dig deeper into the pine for thicker curly-cues. The spey blade was about midway on the curly-cues and depth of cut. SAFETY NOTE: Care must be taken while doing heavy cutting with a slip joint. It does not take much pressure to accidentally close a blade on a finger.

To make kindling from end cuts of a fence, I softly batonned the main blade into the slabs. This worked very well and smoothly with no damage to the blade. Again, care was taken to avoid a blade closing on a finger.

The final test was cutting half-inch sisal rope. Only the main blade was consistent during cutting due to its ample enough length giving me the stand-off needed to make crunching cuts. The XT-80 stainless crunched to 74 clean cuts before the edge started to slide.

Melissa uses the drop-point main blade to cut the apple into nice bite-sized sections.

This knife is well-executed in design and manufacture.

REPORT
Using the stockman was a very nice experience and provided good memories. You have three blades to work with, so you should always have a sharp edge on hand. The Katz is a very welcome addition to your pocket.

CHANGES
I love the straight edge of a sheepsfoot blade. I would add a midsize wharncliffe blade instead of the smaller spey.

Stockman Executive Drop Point Specs
Company: Katz Knives
Blade Lengths/Patterns: 23∕4” drop point, 23∕16” sheepsfoot & 2” spey
Blade Steel: XT-80 stainless
Handel: Stag bone
Bolsters: Nickel silver
Liners: Brass
Weight: 2 ozs.
Closed Length: 3.75”
Country Of Origin: Japan
MSRP: $181.90

To learn more about the Stockman Executive, please visit katzknives.com


Also Read:

The Latest EDC Multitools

People Who Like to be Prepared Will Love the latest EDC Tools

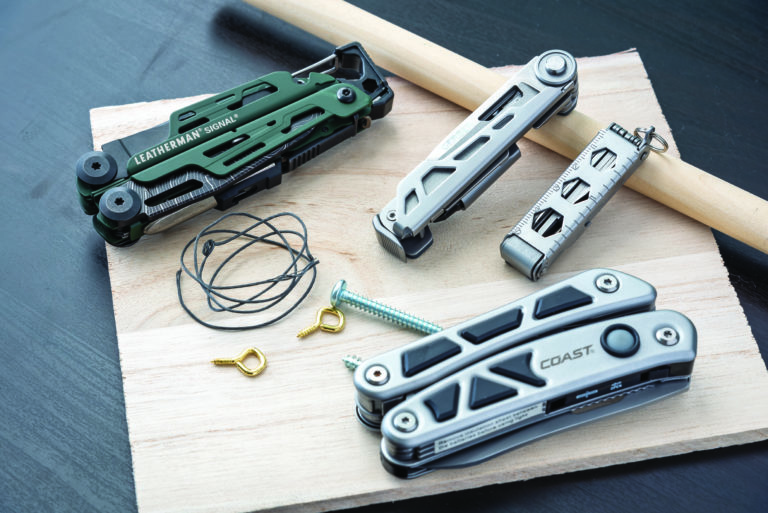
Knife guys love gadgets, fix-it people love gadgets and DIY-ers love gadgets, so it’s easy to see why multi-tools do so well in the knife market. Though not knives per se, they off er more versatility than just cutting ability by offering on-board tools. With broader appeal than knives, multi-tools have a further reach and encompass more markets, too. They appeal to folks who like to be prepared.In addition to DIY-ers, campers, hunters, fishermen, hikers, mountain bikers and anyone who enjoys outdoor activities benefits from owning and using a multi-tool. It performs in-fi eld repairs on equipment when you do not have access to regular tools.  It can mean the difference between bowing out of a camping trip because of equipment failure, or performing an expedient in-field repair or adjustment and carrying on with your adventure. As with knives, advances in multi-tools have made them stronger and more user friendly and versatile.


FLASH in the HAND: Coast’s LED150 multi-tool 

When you think of multi-tools, what immediately comes to mind is a pliers-based tool with little fold-out implements nestled inside the handle. Truth is, multi-tools can take on any form as long as they incorporate the implements necessary for field-expedient repairs and adjustments.

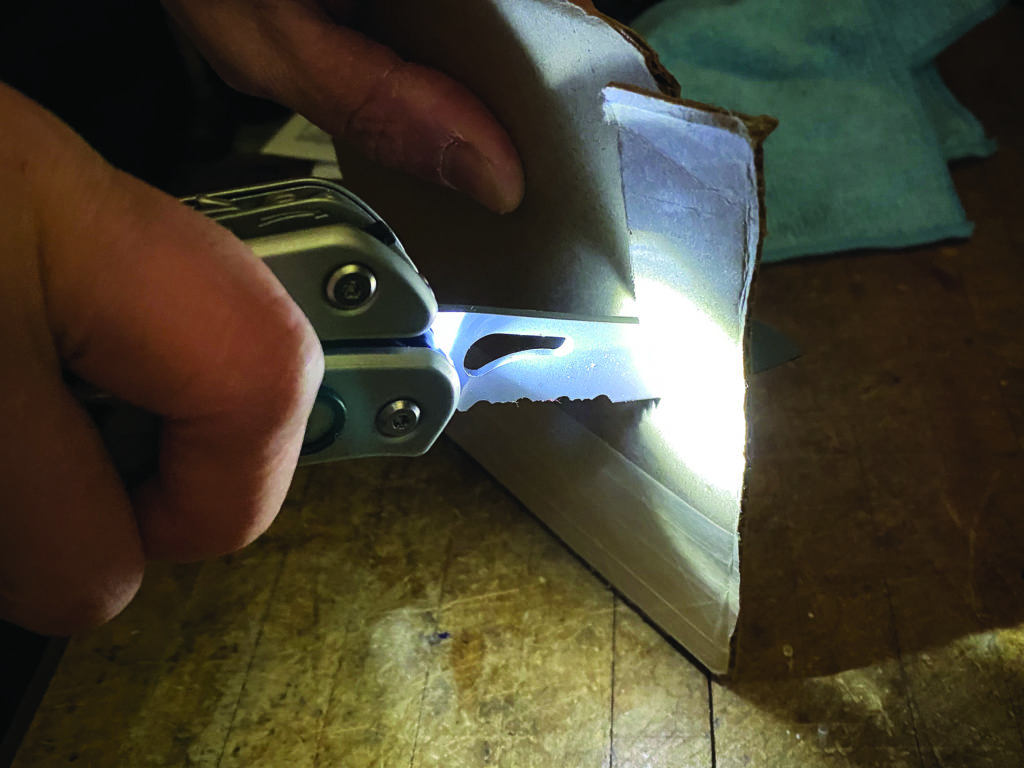
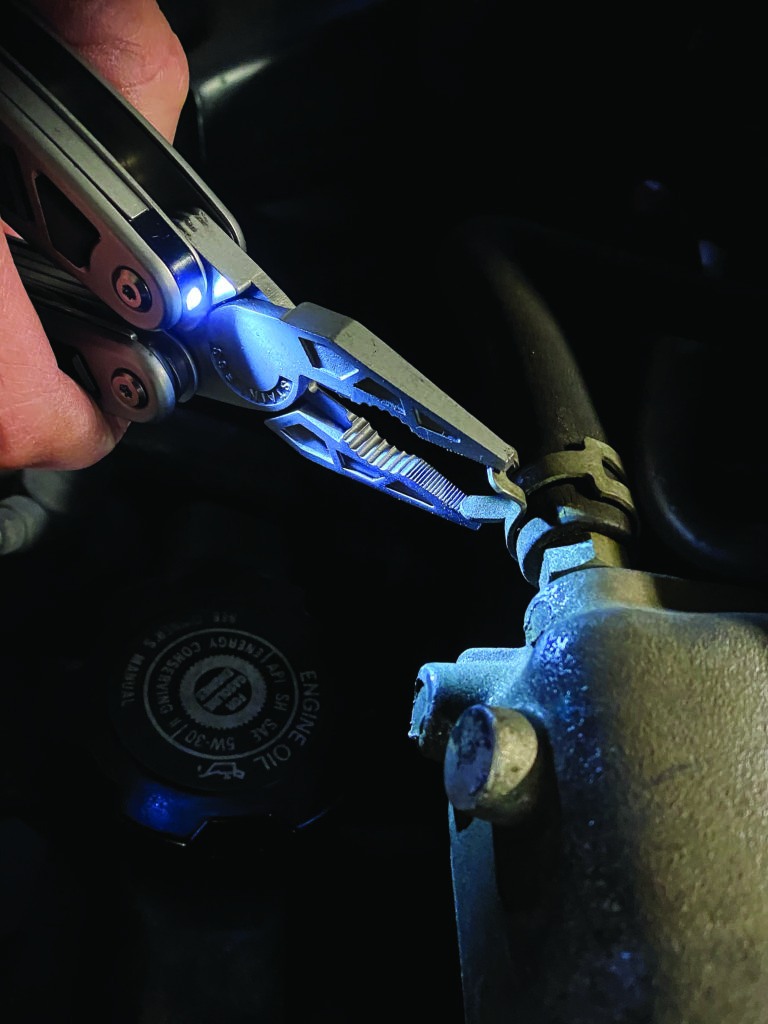
At first glance, Coast’s LED150 multi-tool might appear like any other pliers-based multi-tool, except for one thing: it incorporates not one but two LED lights. One LED is on the pliers jaw end and the other is on the partially serrated end of the knife blade. This way, you can confidently work in tight and dark spaces with confidence thanks to the illumination. The lights are activated by a recessed push button located on one side of the handle. Press once to activate the light by the main blade. Press again and the light turns off and, at the same time, the light on the pliers jaws end turns on. Press again and the jaws light turns off. With the multi-tool closed, you can use either light as a stand-alone flashlight, further expanding the multi-tool’s versatility. The lights are powered by two CR1616 lithium button batteries. The batteries replace easily.

The light on the end of the Coast LED150’s handle illuminates what you’re cutting.

The pliers jaws have different gripping surfaces for smaller objects and larger nuts/round objects. The jaws themselves are spring loaded, which helps to open them by spring tension, reducing hand fatigue. When closed, all the fold-out tools are easily accessible: a partially serrated main blade that works on a linerlock, spring-loaded scissors, large and small flat-head screwdrivers, can opener, Phillips head screwdriver and the pliers jaws—most all the common implements necessary for field repairs and adjustments.

The handles are aluminum and feature raised hard rubber for a non-slip grip. The LED150 has a good heft and the heavy-duty build will withstand normal use. The sturdy ballistic nylon belt pouch has a fabric-fastener flap closure. Manufacturer’s suggested retail price (MSRP): $49.  

One of the LED lights on Coast’s LED150 multi-tool shines on the pliers jaws end so you can effectively work in dark areas easily without the need for a separate flashlight.


AFFORDABLE SOLUTION: Gerber’s Armbar

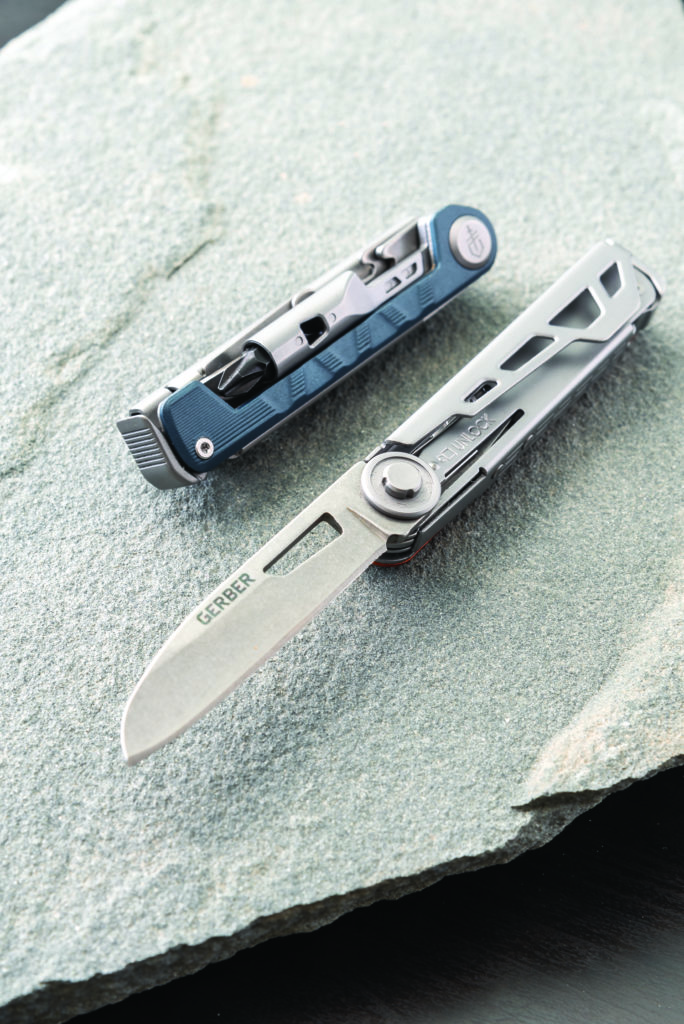
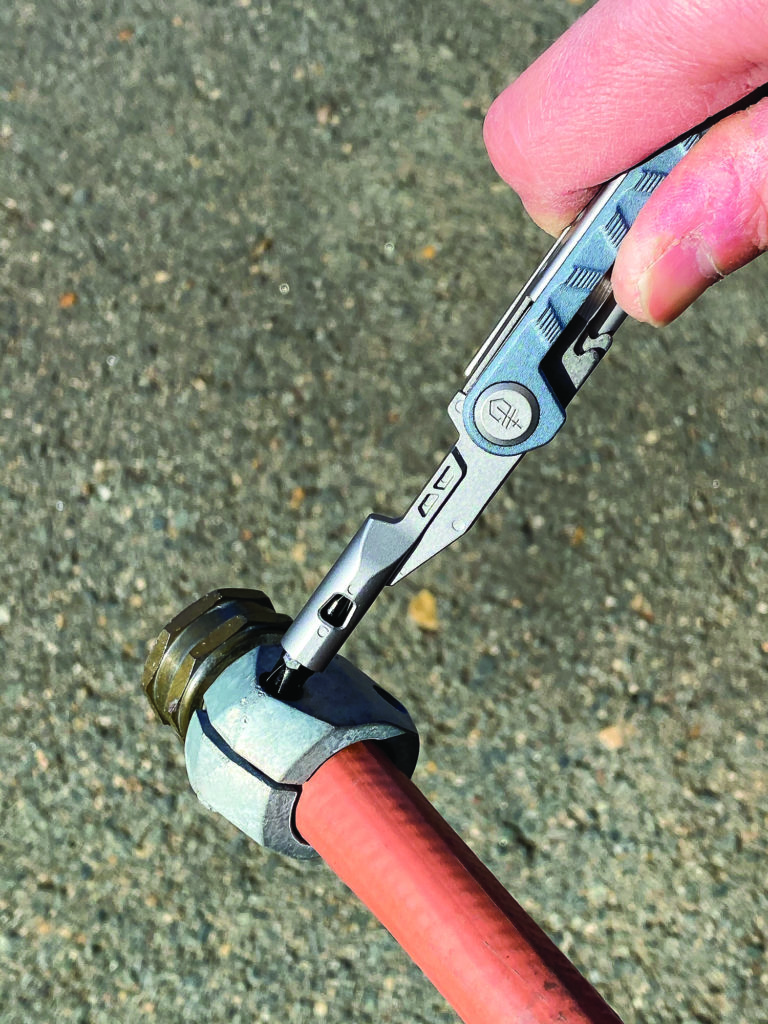
Gerber’s Armbar series incorporates the fold-out implements of pliers-based multi-tools like the Coast LED150—minus the pliers. Sometimes, you just need the versatility of screwdrivers, a knife blade and scissors. About the same size as a large multi-blade pocketknife, the Armbar Drive features seven on-board fold-out tools: 2.5-inch plain edge sheepsfoot blade with opening hole and framelock, 2.5-inch extension driver with a double-sided bit of Phillips and flat-head screwdrivers, a prybar, bottle opener, hammer, scissors and awl.

The Gerber Armbar Drive features a sturdy main blade. The entire package has about the same dimensions as a medium-sized traditional pocketknife.

The extension driver has a magnet that holds the double-sided bit and allows for fast flip-over when transitioning to different screws. The driver socket can accept aftermarket quarter-inch drive bits, too. Hence, you can customize your Armbar Drive just about any way to fit your tasks. The spring-loaded scissors provide enough blade length for cutting coupons, stray threads and duct tape. The plain edge sheepsfoot blade thumbs open easily like any lock blade. The blade is mostly exposed even when closed, but the metal channel protects it from damage and you from accidental cuts.

Perhaps the neatest implement is the combination hammer/prybar/bottle open-

er, which in the closed position is in the hammer mode by default. The squared-off back end takes care of light hammering. The prybar function is rather limited as you’re not going to get a ton of leverage. However, if you need staples removed or to pry open a casing and such, it does the job. 

A fold-out prybar/bottle opener on the Gerber Armbar Drive performs light-duty prying when needed, saving the blade tips on your standard knives.

One thing I wish Gerber would have included is the ability to lock the screwdriver in the fully open as well as the 90-degree position. When you torque down with the driver, your hand may move and this will cause the screwdriver to fold a bit. Also, when you use the tool in the 90-degree position, you apply more torque. Having it lock in the 90-degree position would make it easier to use—if not lock in both positions, then a strong detent and a half stop, like a slip joint, would be better than nothing. The form factor permits easy carry in your pocket, toolbox, glove box or a backpack.

At 3.1 ounces the smallest multi-tool in the Armbar line, it comes in an aluminum handle anodized in a choice of urban blue, orange or onyx. With an MSRP of $39, it presents an affordable solution to a typical pliers-based multi-tool by reducing bulk and weight—that is, if you don’t need pliers.

The screwdriver tool on the Gerber Armbar Drive is easy to manipulate. The magnetic socket allows you to flip the double-end bit over, as well as use most any aftermarket quarter-inch driver bit.


TINY TOOLBOX: Utica Minimaster

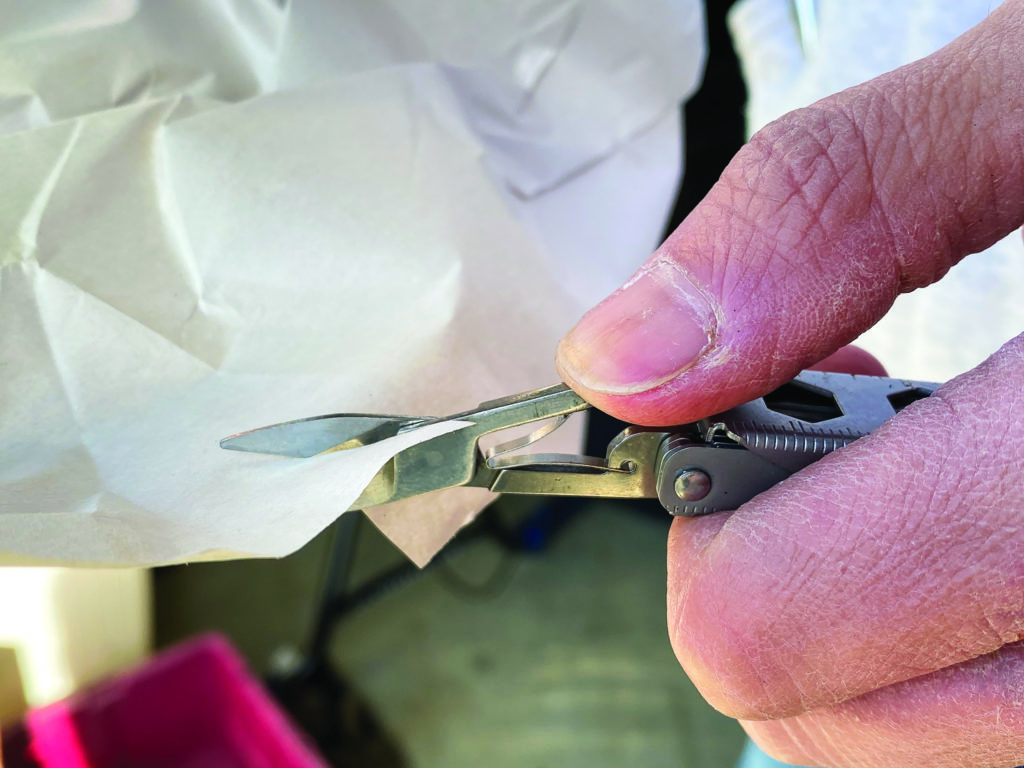
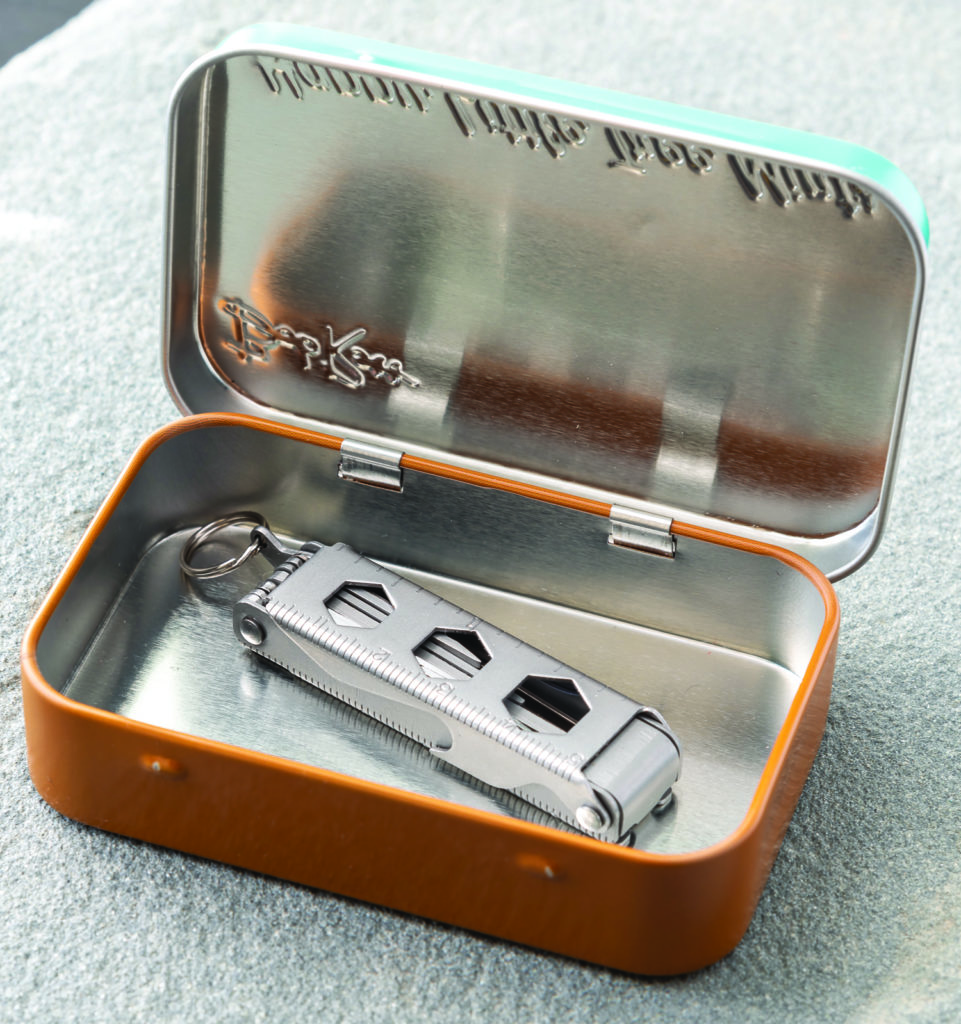
Utica primarily manufactures knives for hunting and tactical but also makes multi-tools. The Minimaster is the smallest multi-tool of the test bunch. It’s loaded with many small fold-out implements: a pair of tweezers, large and small flat-head screwdrivers, a Phillips screwdriver, scissors, fingernail file/cleaner, knife blade, bottle opener, and -, 11/32- and -inch wrenches integrated into the folding cover. Made in the USA, it’s roughly the size of a Victorinox Classic, so it fits well on a keyring, its preferred method of carry.

The scissors may be tiny on the Utica Minimaster but it is effective.

None of the tools lock in the open position. You pull one out and then close the cover; the cover held closed by your grip acts as the lock so the tools won’t fold on you. The tweezers are pretty neat—this is the only compact multi-tool I know of that integrates one. The tips are not textured or ground precise like regular tweezers, so grasping some things with it can be a bit difficult, though having one is better than not. As for the rest of the tools, they are handy to have and definitely will work in a pinch when you need them.

The ultra-compact size of the Utica Minimaster makes it a great candidate for improvised tin-based survival kits.

The only down side to the Minimaster is the hinged cover. It needs to detent tighter in the closed position, as the sample sent to us for review had a tendency to open partway easily. This could present a safety issue, especially if the tools open inadvertently. MSRP: $60. There’s also an imported version that retails for $9.95. Same construction and implement selection, except the multi-tool is made overseas.

MAPPED MULTI-TOOL: Leatherman Signal

When it comes to an article about multi-tools, I would be remiss to not include Leatherman Tool Group, the brand that pioneered the concept. It is the originator of the pliers-based format, and still among the best of them after all these years.

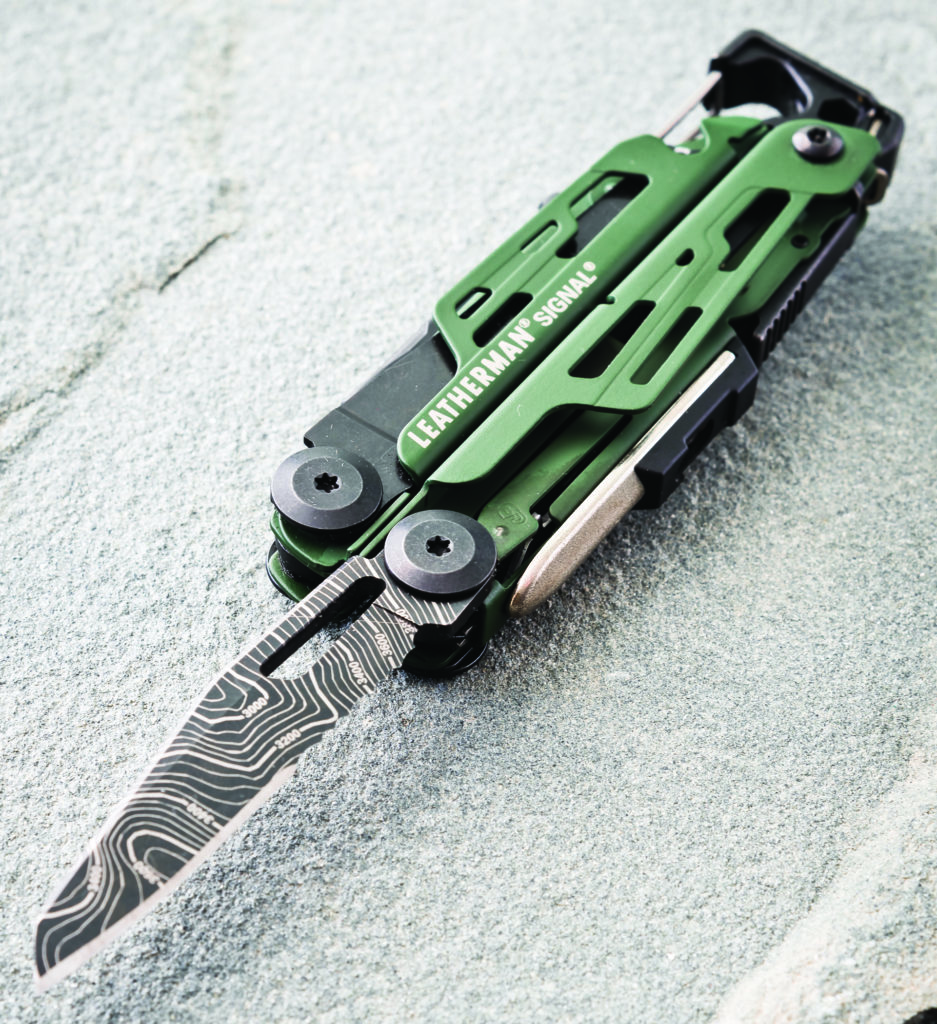
The main blade of the Leatherman Topo Signal features a map-topography laser etching, hence the multi-tool’s name.

The limited-edition Topo Signal is a variant of Leatherman’s Signal multi-tool. The Signal was developed specifically for the outdoor enthusiast, integrating features like a ferrocerium fire starter rod, saw, survival whistle, diamond sharpener and hammer, along with standard Leatherman features such as pliers jaws with replaceable cutting inserts, fold-out driver with reversible bit, awl and can opener. There’s also an integrated quarter-inch-bit socket built into the hammer portion of the handle, which will accept any standard quarter-inch bit driver.

The main blade is a partially serrated 420HC stainless sheepsfoot pattern that locks open via a linerlock. The blade features an oblong opening hole, while the partial serrations eat through tough and fibrous materials with ease. The blade has a map-topography-style laser etch, hence the name. The distinctive appearance is pretty neat and fits in perfectly with the outdoor theme. Speaking of outdoor theme, the Topo Signal comes in a nice dark green Cerakote coating for the aluminum handles and pliers jaws, fold-out implements, and all-black hardware.

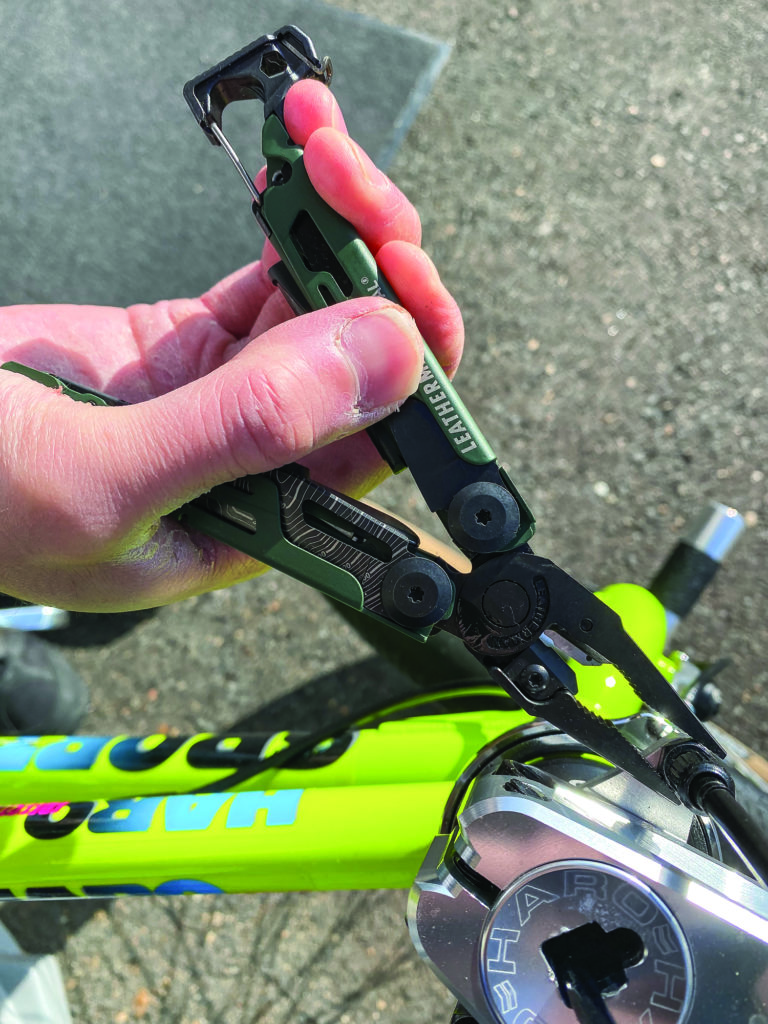
Making on-the-spot repairs and adjustments are a multi-tool specialty. The needle-nose pliers of the Leatherman Topo Signal works great at accessing small nuts in cramped places.

Each one comes with a nice ballistic nylon belt sheath with  button snap closure. It has a steel pocket clip. There’s also an integrated carabiner in the hammer portion so the tool can be clipped on a D-ring, etc.

Comparatively speaking, a Leatherman multi-tool is engineered better than most on the market. MSRP: $119.95. Country of origin: USA. It is the most expensive of the test group, but the quality of the manufacture and fit and finish justifies the price.

EVENT NEWS: BLADE SHOW WEST HAS MOVED TO LONG BEACH

0

BLADE Show, the world’s largest knife show, has announced a major venue upgrade for its BLADE Show West exhibition. The 2021 event will take place at the Long Beach Convention Center in Long Beach, California, on Friday and Saturday, Oct. 8-9.

After months of searching for the best possible location for BLADE Show West, the BLADE Show staff unanimously concluded that Long Beach is the place to be.

“Many exhibitors and attendees who joined us in Portland, Oregon, for the past two West shows suggested ways we could improve on the experience. We listened and started looking for alternative locations. The Long Beach area has so much going for it that this was an easy decision,” said Alicia Newton, BLADE Show director.

“Foremost in our decision is the fact that Long Beach is knife-friendly in ways that many of the other venues we considered are not. Management at the Long Beach Convention Center has been easy to work with and is genuinely excited about adding our event to their calendar. Exhibitors can expect great show traffic and hassle-free transactions.”  

Long Beach has all the amenities that show attendees and exhibitors value. It’s easy to navigate, there are plenty of hotel options, and a huge variety of dining and entertainment options can be found within walking distance of the convention center. Further, the size and layout of the convention center lends itself to expansion in future years.

Additional details, including lodging information, will be posted regularly at bladeshowwest.com during the coming weeks, so check back often.

To get a head start on planning your trip to the Long Beach area, visit longbeachcc.com/attendees.

The official BLADE Show West website is bladeshowwest.com.

Interested in exhibiting? Please email us at [email protected].

Three Blades with an East Asian Design Flair

Three blades with an Eastern design flair are zesty cutters

For many decades Asian knives, tools and swords languished in the cutlery industry, remembered most for blades brought back by U.S. service personnel who fought in the Pacific during World War II. Times have certainly changed, thanks in no small part to a highly accomplished custom knifemaker named Bob Lum.

Of Asian descent, Lum introduced the custom knife world to his “American” version of the Japanese tanto and leaf-shaped blades circa 1980. Through the balance of the ’80s, and later in the ’90s, Lum’s tanto design was rabidly embraced by a budding modern tactical knife crowd. The tanto has been a mainstay ever since. Other Asian blade styles, such as the bolo and kukri, have been embraced as well. My team and I look at three modern takes on the “Asian Equation” here and put these intriguing cutters through the paces.

CHAMP CHOPPER: Spyderco Lum Darn Dao

source: knifecenter.com

Designed by Lum before he passed away way too early in 2007, the Spyderco Lum Darn Dao is a full-tang Chinese dao-style knife. Overall length: 16.27 inches. The 10.63-inch blade is CPM 154 stainless steel with a flared tip and a swedge grind terminating at the clip on the spine. The 5.64-inch handle has a flared base and the black G-10 scales are ample, fully sculpted and highly polished. A handcrafted dark brown leather sheath with a thumb-break retention loop comes standard. Weight (minus the sheath): 17.89 ounces. MSRP: $649.95. This is a limited edition of one production run only.

The first thing we noticed about the Lum Darn Dao is that it’s not as cumbersome as it initially looks, and then we realized it’s just shy of 18 ounces, which is not that unwieldy as large knives go. The handle is an exercise in comfort—well sculpted all the way around.

The Lum Darn Dao has a deep V-grind, making it an excellent slicer. Sisal rope was a piece of cake. Full grinds like that of the Darn Dao slice and chop well, as the edge doesn’t encounter the hump of a ricasso when it goes about its work.

One inch seemed to be the Darn Dao’s magic number. Employing a basic hammer grip, we used the blade to cut through 1-inch sisal rope like it was butter. When we challenged it on an old phone book (remember those?) with diagonal full-force chops, it repeatedly sunk in an inch deep. For long-term use we’d opt for a rougher finish or texture on the G-10 grip, but all in all the Darn Dao chopped like a champ. 

Specs: SPYDERCO LUM DARN DAO
Blade length: 10.63 inches
Blade steel: CPM 154 stainless
Handle length: 5.64 inches
Handle material: Sculpted G-10
Sheath: Leather belt carry
Weight: 17.89 ounces
Overall length: 16.27 inches
Country of origin: Taiwan
MSRP: $649.95

SHORT, WIDE HYBRID: SOG’s Kiku XR Blackout

SOG’s Kiku XR Blackout is a mid-size folder 7.375 inches open and 4.3 inches closed. Designed by custom knifemaker Kiku Matsuda of Japan, the 3-inch black-coated blade of CTS-XHP stainless steel is a hybrid of the tanto style with some interesting twists. The main grind is recurved and there is a swedge grind on the spine that ends in a harpoon dip. The blade opens via a kidney-shaped hole in the blade or by an optional gimped flipper. The black handle has sculpted G-10 scales over black stainless steel liners, and SOG’s XR pull-down slide release unlocks the blade. On the rear is a blade-tip-up pocket clip. Weight: 5.19 ounces. MSRP: $189.95.


SOG’s Kiku XR Blackout has a hybrid version of the American tanto blade. The recurved portion of the main grind does a great job trapping leather and rope, and the tip finishes the job as it is pulled through.

The Kiku XR Blackout’s blade is shorter and wider than the traditional tanto pattern. We tested it first on 1.5-inch-wide harness leather, executing straight cuts and pull-throughs. The modified edge cut very well, though we almost ran out of blade while pulling upward through the leather strip.

Rope was much easier. The recurve of the blade trapped the rope, and the secondary grind from the dividing line—or yokoke—to the tip finished the job. It should be noted not all tantos have a yokoke; some simply sweep through upward to the tip. The cuts on 3/8-inch rappelling rope were clean as a whistle, while the edge tended to shred thicker 1-inch sisal. The handle was plenty comfortable and added to our cutting pleasure.

SPECS: SOG KIKU XR BLACKOUT
Blade length: 3 inches
Blade steel: CTS XHP stainless
Blade type: Hybrid American tanto
Handle material: Sculpted G-10
Special features: Multiple blade grinds
Carry: Pocket clip, blade tip upWeight: 5.19 ounces
Closed length: 4.375 inches
Country of origin: Taiwan
MSRP: $210.95

2-HAND HOSS: The TOPS CUMA Kage

photo source: knifecenter.com

The TOPS CUMA Kage is a tour de force by martial arts guru Sijo Wayson Johnny Tsai. Overall length: 23.75 inches. The 15.5-inch blade of 1095 high carbon steel sports TOPS’ Black Traction Coating. The lengthy handle is 8.25 inches with Micarta scales sized for two-handed delivery. The blade is a hybrid straight sword pattern blended with 7 inches of kukri bulge at the tip to give it a bit of utility to go with its, ahem, badassery. It includes a full-length black Kydex sheath with a dangler/attachment ring. Weight: 31.5 ounces. MSRP: $360.

Using one hand or two, the author found the CUMA Kage cut brush equally well. However, as you might expect, you can take on much heavier tasks with it by using both hands.

To test the CUMA Kage for its utility billing, we took it outside for brush-clearing duty. We’ve always admired the kukri and have cleared an acre or two over the years with one, so this long send-up of the chopper intrigued me. We found out quickly we could use the CUMA Kage with one hand or two, which gives it a big leg up on its smaller cousin. The Micarta handle is well filled out and plenty grippy. One-handed we were able to easily whack through half-inch-thick green hardwood stalks and branches. Two-handed we sliced through stalks three-quarter of an inch with ease, and 1 inch as long as we had clearance to pull back for a full stroke. Though not the CUMA Kage’s original intent, it does have formidable utility.


Specs: TOPS CUMA KAGE
Blade length: 15.5 inches
Blade material: 1095 carbon steel
Blade finish: Black Traction Coating
Handle length: 8.25 inches
Handle material: Micarta
Special features: Kukri blade tip 
Sheath: Kydex w/leather dangler
Weight: 31.5 ounces
Overall length: 23.75 inches
Country of origin: USA
MSRP: $360

MELONIOUS ASSAULT

After testing the blades on a variety of fare, just for fun we took to the backyard to let them each have a go at a cantaloupe. Leading off with a reverse grip on the SOG Kiku XR, we stabbed the forlorn melon to the hilt. As stubby a version of the tanto as the Kiku XR’s blade may be, the cantaloupe’s pithy skin gave into the knife’s wishes quite easily.

Next up the TOPS CUMA Kage tried the task of halving the cantaloupe in one fell swoop, which we captured in burst mode on my neighbor’s IPhone. Mission accomplished. Finally, we used the Lum Darn Dao to “prepare the meal” by using the blade in quick, rapid-fire chops. The sword’s deep V-grind—not unlike that of a chef’s knife—performed admirably.

Like an oversized chef’s knife, the Lum Darn Dao deftly whacked the cantaloupe into chunks with speed and style.

BEASTS of the EAST

While we often think of knives and swords of an Asian design in the context of combat and martial arts, it’s easy to forget that many Eastern blades were used for everyday utility as well. The tanto was an everyday carry by the Samurai class in Japan, and men and women alike carried a smaller version, the kaiken, aka kwaiken. The chisel grind was not typical on tantos as we see on some of them today, but on knives for culinary purposes. The Japanese kiridashi, which is rapidly gaining a toehold in the cutlery world, was also chisel ground and used for wood carving and marking.

The wicked Indian/Nepalese Kukri was employed in combat, but is primarily a tool for clearing land and is used widely for bush whacking today. Even the Indonesian karambit was considered a working knife by its users. If nothing else, the distinctiveness of Asian cutlery design has added richly to our knowledge base of cutlery and given us a plethora of modern-day knives to explore.

Advertisement

Must Read Articles

Read this before you make a knife

Knifemaking 101 – Read This Before You Make a Knife

  by Wayne Goddard My experience has taught me that there's nothing like digging in and getting started. I've often said the hardest part of the...
how to forge damascus steel

How to Forge Damascus

Advertisement
Advertisement