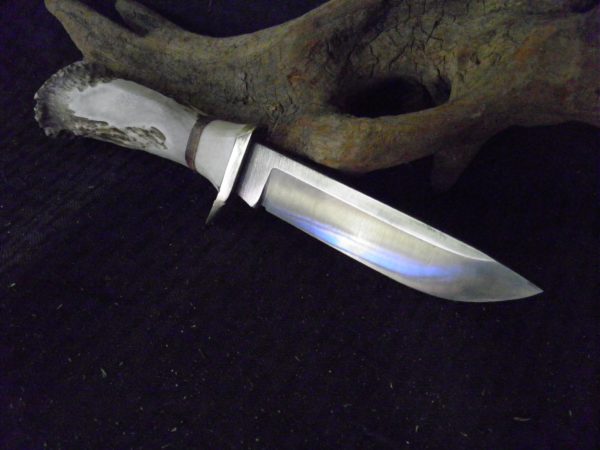
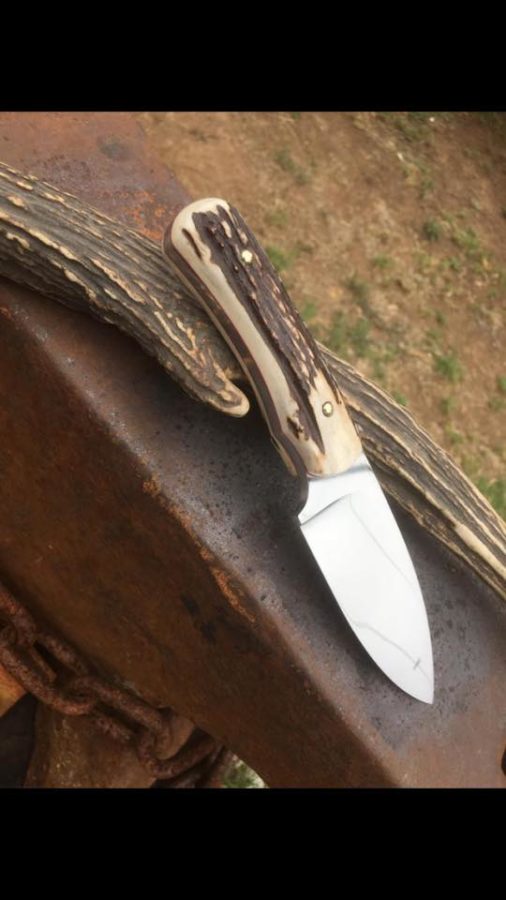
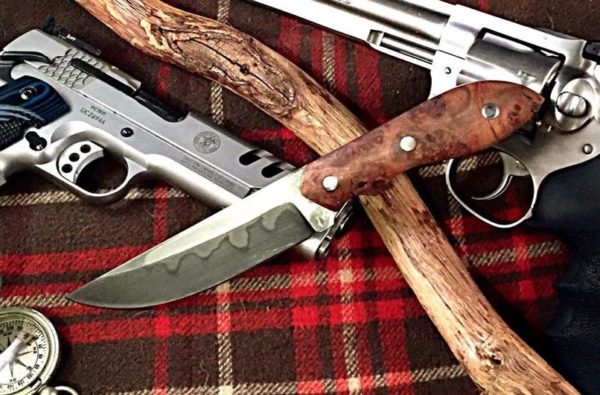
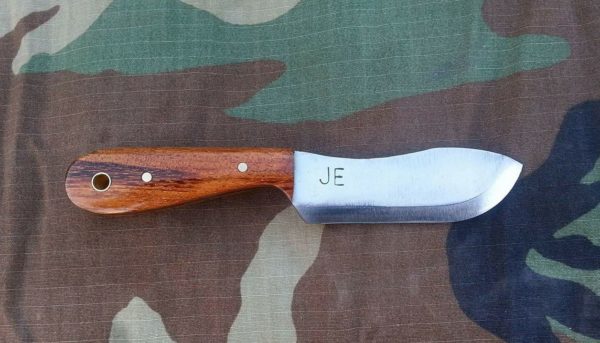
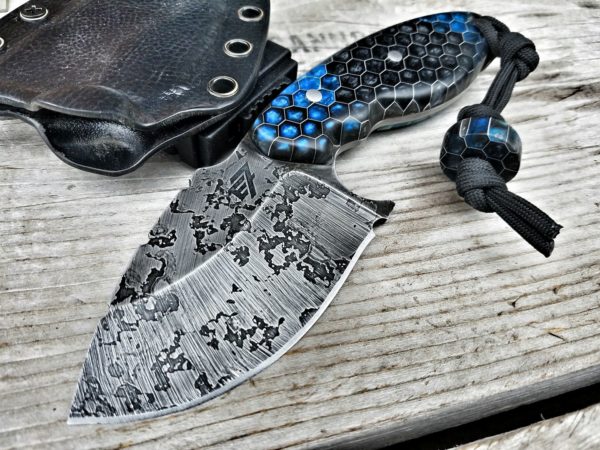
Sylvester Stallone (top) holds the Gil Hibben Toothpick (second from top left, above) in a scene from The Expendables 2. Along with the modified version of Gil’s Alamo Bowie (top left, above), it is a carryover from the first film in the series, The Expendables. The Legion Fighter (fourth from top left, above) is the knife Hibben made expressly for Stallone for the sequel. (photo from The Expendables 3 by Frank Masi; photo of Hibben knives by Mike Carter)
The longest-running custom knifemaker/movie star connection of all time will have another go soon with the imminent worldwide release of the action blockbuster, The Expendables 2.
In 2010, The Expendables, co-written, directed by and starring Stallone, along with an all-star cast of action-film heroes, again employed Gil’s knives. Stallone’s character, team leader Barney Ross, carried a custom Hibben 17.5-inch “Toothpick” model (cover, November 2010 BLADE). Meanwhile, Gunnar Jensen, played by Dolph Lundgren, and Lee Christmas, played by Jason Statham, took turns using a huge, 19-inch custom Hibben bowie.
All of the original Expendables except Mickey Rourke return for The Expendables 2, which at press time was due to open in theaters Aug. 17. The all-star cast has grown with the addition of Chuck Norris and Liam Hemsworth to the Expendables team. Action star Jean-Claude Van Damme joins the cast as the leader of an opposing team of mercenaries, along with his right-hand man, Hector, played by Scott Adkins. Both Bruce Willis and Arnold Schwarzenegger return with more substantial parts in the new film. The $100 million sequel was filmed in Bulgaria in late 2011.
SLY ON LINE 1
Gil received the call from Stallone early last year to discuss the knives Stallone wanted for the sequel. Two of Gil’s knives from The Expendables will return to the big screen in The Expendables 2. His big custom bowie again will be carried by Lundgren, and both Stallone and Van Damme will be seen with the Toothpick. But Stallone said he wanted more—a lot more.
The amazing 76-year-old Gil set to work and delivered at least 10 different models, including multiple copies of some and a few prop knives with half blades to give the appearance of being embedded into something or someone. As before, some of the knives have the Expendables skull-and-raven logo scrimshawed on the handles by scrimshander Richard “HutcH” Hutchings, who does nearly all of Gil’s scrimshaw work. HutcH also scrimmed the logo on several sets of black Micarta Colt .45 pistol grips Gil provided for the film.
Some of the knives Gil made for the movie were based on previous models he has made during his 55-year career, though some are new designs he made especially for the film. Among those expected to be prominently seen is his Legion Fighter, this issue’s cover knife, a recurve fighter with a 9.5-inch blade of quarter-inch 440C stainless steel. The Micarta handle is sandwiched between a hefty stainless steel guard and buttcap.
One of the new, never-before-seen models is a split-blade fighter, somewhat reminiscent of Gil’s “Double Shadow” knife (second photo from top, third knife down from top left), with a stainless steel guard and buttcap and a handle of black Micarta and amber.
Stallone chose the big bowie that appears in both the original movie and the soon-to-be-released sequel after seeing a similar model, Gil’s Alamo Bowie, on the Hibben Knives website (www.hibbenknives.com). The decision was made to modify it with a different handle of ivory Micarta® that could be scrimshawed with the skull-and-raven Expendables logo seen throughout the original film on tattoos, motorcycles, clubhouse doors and the knives. The long, slender Toothpick carried by Stallone in both movies was an entirely new design Gil developed for The Expendables.
I have seen some stills from the sequel and a couple of preview trailers that show some of the knives very prominently displayed, but it remains to be seen what makes the final cut. “We never know what will actually end up in the movie,” Gil notes. “Sometimes scenes are filmed using the knives and then those scenes get cut in editing. I guess we will find out when everyone else does at the theater.” (Editor’s note: From reports at press time, the Legion Fighter cover knife gets its best movie air time when actor Randy Couture, who plays the role of Toll Road, uses it.)
IMPROVISE AND REVISE
As is usually the case when making knives that will be featured in a film, designs are revised and changed along the way to satisfy the producers, directors, prop masters and actors involved. Once the designs are finalized and approved, Gil has to scramble to get several copies made and delivered to remote filming locations such as Burma for The Expendables and Bulgaria for The Expendables 2. The knives he makes for the films are fully functional and sharpened. In some cases the prop department will make dull replicas that can be safely used in close-up fight scenes.
The Expendables featured an impressive lineup of stars that, in addition to Stallone, Lundgren, Statham, Willis, Couture, Schwarzenegger and Rourke, included Jet Li, Steve Austin and Terry Crews as a team of elite mercenaries. Eric Roberts played the bad-guy/corrupt CIA agent.
The Expendables was No. 1 at the box office in its opening weekend in August 2010. The film’s budget was reportedly $70 million. It grossed over $274 million worldwide by the end of the year, and that is not counting DVD sales. That was certainly enough success to entice movie officials to make a sequel.
REEL STEEL BY THE DOZENS
Gil has made knives for dozens of movies and television shows, including designing and making Klingon swords and knives for assorted Star Trek TV shows and movies, throwing knives in Steven Seagal’s Under Siege, and knives in The Perfect Weapon starring Jeff Speakman. He also has enjoyed a following among Hollywood celebrity collectors, among them Elvis Presley, John Wayne, Steve McQueen and Shelley Berman.
Stallone long has been a collector of custom knives and a fan of Gil’s work. In fact, Stallone ordered some large custom lockback folders based on the Rambo III knife design he had personalized as gifts to Willis and Schwarzenegger during the filming of The Expendables.
The Expendables 2 will be the fourth Stallone film for which Gil has made custom knives. There are Hollywood rumors of further Rambo and Expendables sequels, so you may be seeing more of the Stallone-Hibben connection.
The Expendables 2 is produced by Nu Image and Millenium Films, and is distributed by Lionsgate. It is written by Sylvester Stallone and Richard Wenk and directed by Simon West.
Depending on where you live and by what method you hunt, deer season is underway. There are any number of blade patterns you could select for a skinning knife, but why are they shaped the way they are? What is the maker considering when he crafts a knife he calls a skinner? Let’s look at 20 examples of 5 types of skinners, plus an extra.
1. Bull-Nose Skinners
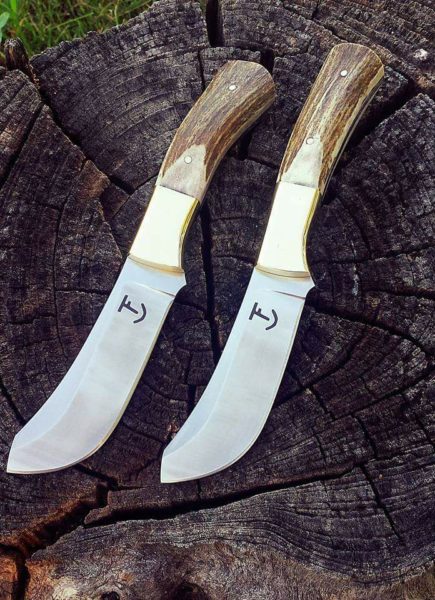
“The blunt tip in conjunction with the trailing point helps from punching through the hide,” noted Travis Fleming of Fleming Fabrications in North Texas about bull-nose skinners.
This set of bull-nose skinners were made for a father and son by Travis Fleming. The 4 1/2-inch blade is made out of CPM 154 stainless steel. The bolster is brass, and the antler handles were supplied by the son from the first buck he got with his dad. Overall length: 9 inches. Maker’s list price: $500/set. Contact Travis Flemming at [email protected] or on Facebook at Fleming’s Fabrications.
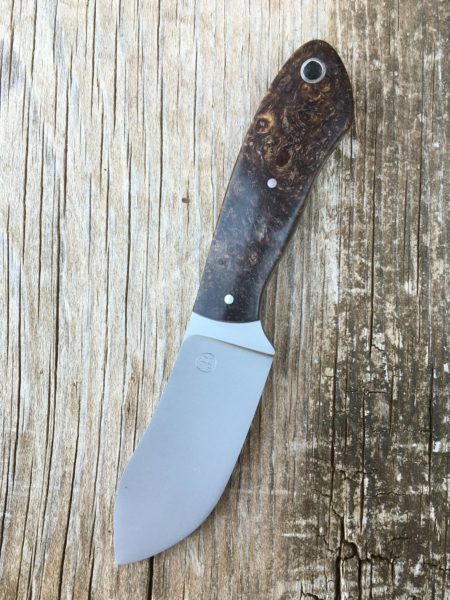
Josh Bryant of JB Custom Knives put it this way: “The bump and large drop at the tip are intended to go over guts without popping them.”
Josh Bryant’s Mini Green River Skinner is made with a 2 3/4-inch blade out of CPM 154 steel. The handle is made of dyed stabilized maple burl. Overall length is 6 inches. Maker’s list price: $180 with leather sheath made by the maker. Contact Josh Bryant at [email protected], on Facebook at JB Custom Knives and on Instagram @jb_custom_knives.
“I like a skinner made with a CPM steel,” Mike Cleveland of Half Life Knives commented. “(It) keeps its edge longer and that means more game prepared before sharpening.” Mike added: “I prefer the fuller belly for its ability to cape around tight areas. I value that over the ability to stab in a skinner. With this style of blade you’ll finish ahead of those with a sharper point.”
Michael J. Cleveland of Half Life Knives uses CPM S90V to make the 3.85-inch blade on this skinner. The overall length is 8.5 inches. The handle is made of mammoth bone with Voodoo Resin bolsters. Maker’s list price: $650 with leather sheath. Contact Mike Cleveland at Half Life Knives on Facebook or at 405-627-6097.
2. Drop-Point Skinners
The drop-point skinner is one of the most, if not the most, popular skinning knife blade design. Within the drop-point category, however, there is plenty of individual styling.
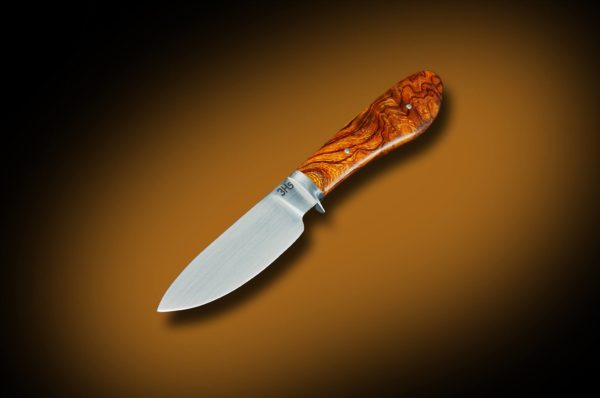
When Raymon Hunt of 3H’s Knives LLC makes a skinner, he strives for “enough belly for caping, but with enough point to make opening the cavity easy without piercing the organs.” A skinner should be balanced and lightweight, he notes. “It is amazing how carrying a heavy knife along with a rifle on a six-hour stalk through the bush can wear you out.” Raymon added that comfort is important. There should be no areas on the handle that could produce hot spots.
Raymon Earl Hunt’s Nessmuk-style drop-point hunter has a forged 4-inch flat-ground blade made out of 1075 steel. The convex cutting edge is 3 1/2 inches, and the knife is 8 1/2 inches overall. The mortised handle is made with exhibition-grade desert ironwood with sterling silver pins and 416 stainless steel guard. Maker’s list price: $600 (includes sheath). Contact Info: Ramon Hunt at www.3hsknives.com, raymon.hunt@3hsknives and on Facebook at 3H’s Knives, LLC.
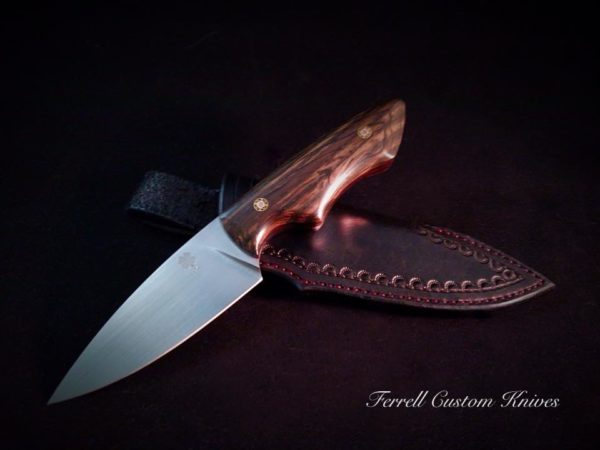
“I feel the most important parts of a good skinner are on edge-holding and the ability to be sharpened easily in the field,” Lane Ferrell of Farrell Custom Knives commented. He pointed out that comfort, not being too heavy and being balanced well, is essential “since some skinning jobs can take a while to finish.” He noted that a skinner “should also be small enough to be carried on a belt or in a pack, but large enough to get the job done effectively.”
Lane Ferrell’s Razorback model skinner has a 4.25-inch blade made with 1084 steel. The handle is Russian bog oak with red G10 liners and mosaic pins. Overall length is 8.75 inches. Price $275 with vegetable-tanned leather sheath with red stitching. Contact Lane Ferrell at [email protected] or Facebook at Ferrell Custom Knives.
“I do such a wide variety of skinners that it all depends on what the customer wants,” Spencer Aplin of STA Custom Knives noted. “Most people want a 3- to 4-inch drop-point. Then the second most requested is a trailing-point 4- to 5-inch blade.” And in Spencer’s experience, a whopping 99 percent want finger grooves.
This Spencer Aplin skinner has a 4-inch blade made of ELMAX Steel. The handle is made with stabilized myrtle burl. Maker’s list price $550 with padded zippered pouch. Hand-tooled and carved sheathes are available upon request at an additional cost. Contact Spencer Aplin at [email protected], www.stacustomknives.com or on Facebook at STA Custom Knives.
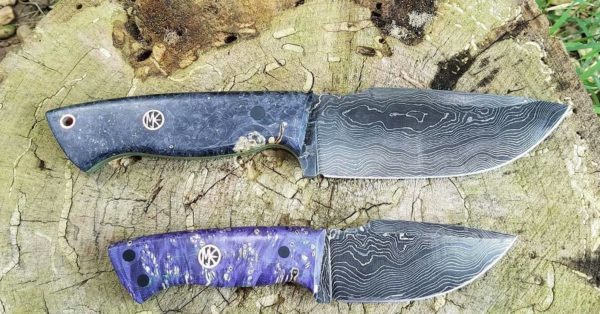
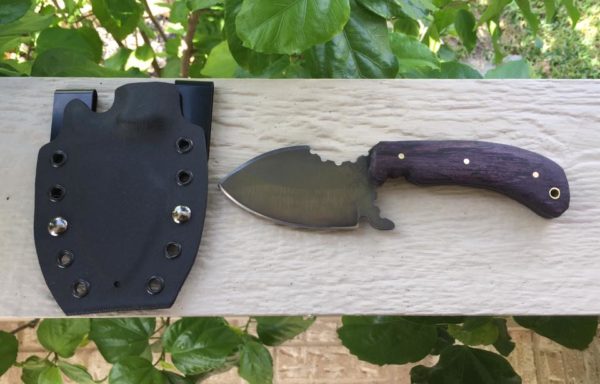
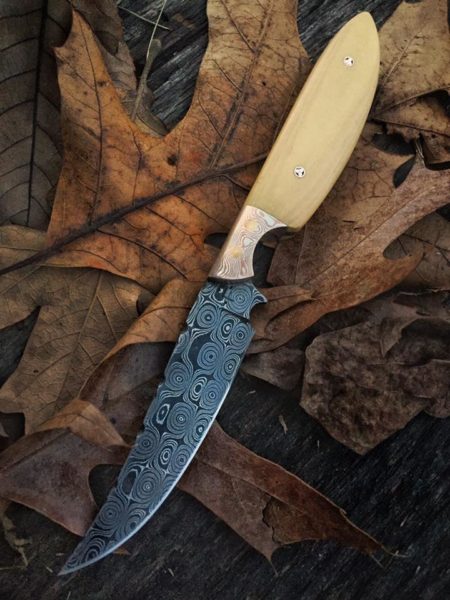
Chris Rowley made this 3.25-inch blade from pattern-welded 1084 and 15N20 steels. The overall length is 7.5 inches. Scales are by Voodoo Resins. Maker’s list price: $350 with Kydex sheath. Contact Chris Rowley at [email protected] and at Nomad Custom Knives and Tools group on Facebook.
Mike Jeffries of 2 Birds Metalworks made the smaller skinner in this set as a companion to the camp knife. “The slight fighter profile and small size make it excellent for thumb, as well as index, purchase for those internal and fine skinning tasks,” Mike noted.
This drop-point set was made with pattern-welded steel from Alabama Damascus Steel. The scales are made from dyed box-elder burl. The blade on the bottom knife is 3 inches, contributing to an overall length of just over 7 inches. Maker’s list price: $320 with leather sheath. Contact Mike Jefferies at [email protected], on Facebook at 2Birds Metalworks and on Instagram @2birdsmetalworks.
The carbon content in the steel James McClendon used to make this skinner is approximately 1.27 percent. “Makes a most excellent knife,” James declared. “Those old files are getting harder to find.” James likes the “second-to-none on edge-holding–at least as simple-carbon steels go.” He added that the addition of a soft backdraw gives the blade toughness. “I just prefer a guard on a blade so sharp it could take a finger off with one slip. LOL. I also leave just a hint of the file teeth but not enough to hold contaminants.”
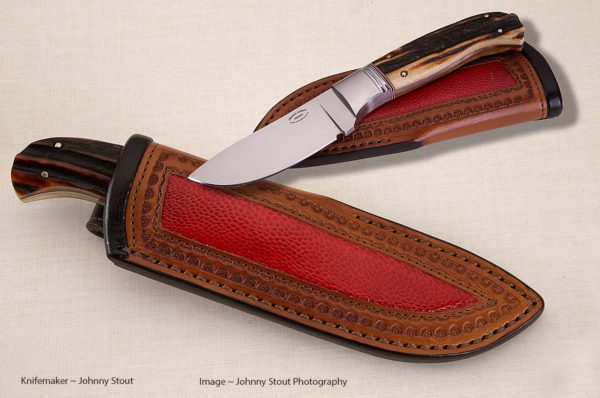
James McClendon made this 4-inch drop-point hunter/skinner out of a Black Diamond file. The bolt-through handle is made of stabilized stag. Overall length is 8 1/2 inches. Maker’s list price: $180 with sheath. Contact James McClendon at [email protected].Johnny Stout’s Rio Grande Skinner has a 3 3/4-inch blade made out of 154 CPM steel. Overall length is 8 inches. Handle is made from amber stag antler. Fluted bolsters are 416 stainless steel. Maker’s list price: $925 with custom Paul Long sheath with red full-quill ostrich inlay. Contact Johnny Stout at 830-606-4067 or [email protected].
Will Thompson put it this way: “The 3 1/4-inch blade is perfect to get around those places that you just can’t get to with a bigger blade. It’s ready to help you get those hams and backstraps to the ice.”
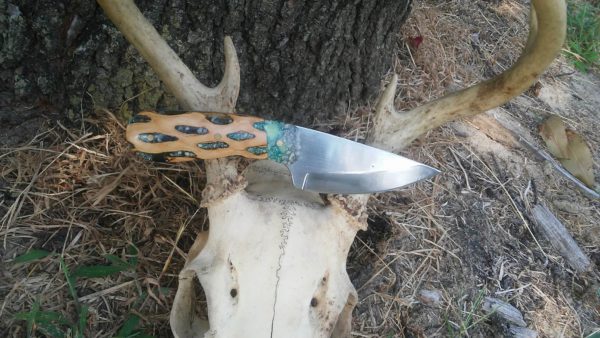
Will Thompson made this 3 1/4-inch drop-point blade out of 1095 carbon steel. The Plantstone handles are by Robert Belcher. Overall length is 6 7/8 inches. Maker’s list price: $120 with leather sheath. Contact Will Thompson at [email protected] or 910-385-6021.Phill Bilkey’s Sambar Skinner has a 3.5-inch blade made of 1085 carbon steel. The handle material is Australian sambar antler with red G10 liners. $200 AUD with leather sheath. Contact: Southern Cross Custom Knives on Facebook.Eric Pearson of Lake Effect Knifeworks made this 4.25-inch hollow-ground drop-point blade out of 1095 steel with hamon. Overall length 9 3/4 inches. The scales are big-leaf maple burl. Maker’s list price: $200-plus. Contact Eric Pearson at Lake Effect Knifeworks on Facebook.
3. Nessmuk-Style Skinners
Joe Elinburg in northeast Florida likes the Nessmuk pattern for a skinner. “The rounded point makes skinning easier with less chance of putting a hole in the hide if you’re going to save it for tanning,” he commented. “Also the swoop in the back of the blade makes a great finger rest for more control of the blade.”
This Mini Nessmuk Skinner is made by Joe Elinburg in northeast Florida out of 1095 high carbon steel. The 3-inch blade is convex ground. Overall length is 6 inches. Handle material is camaru. Maker’s list price: $90 with Kydex sheath with mounted metal belt clip. Contact Joe Elinburg at [email protected], @jecustomknives on Instagram or call 904-962-0341.
4. Spear-Point Skinners
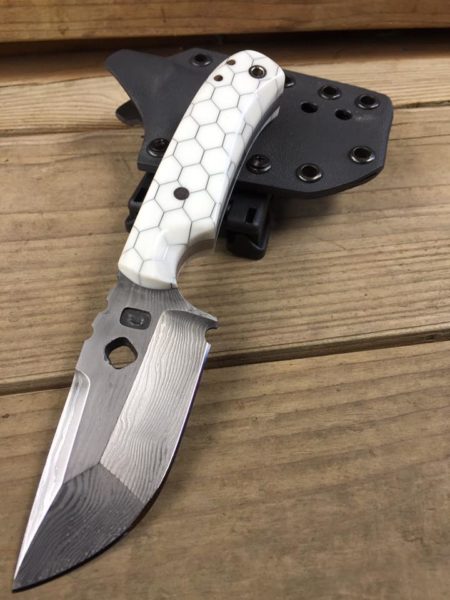
“I have always been a fan of spear-point skinners,” Jon Waltz commented. His son designed this model, and Jon made a few changes by adding the thumb ramp and expanding the belly. The deep finger guard and thumb ramp allow for full control of the blade. “The hollow grind makes for a extremely sharp cutting edge, and the large belly is great for slicing through flesh with precision,” Jon added.
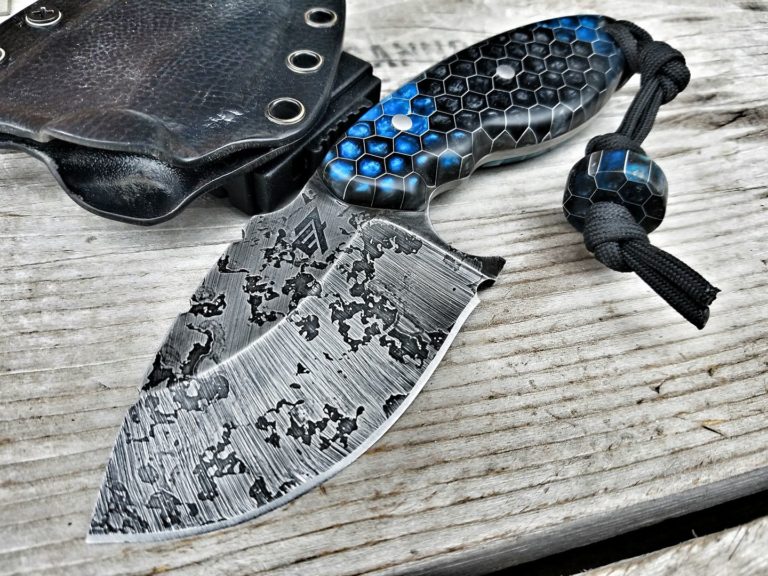
Jon Waltz of Edge7 Custom Knives calls this model the 24/7 Skinner. The Hex resin scales are custom-made. Overall length is 7 inches. The 3-inch hollow-ground blade on this particular one is made of CPM D2 steel, but they are now made in PSF27 steel. Available finishes include acid etched, sandblasted and stonewashed. Makers list price: $275 and up with leather or Kydex sheath with combat loop. Contact Jon Waltz through www.edge7customknives.com.
Denny Furey of Furey’s Urban Combat Knives Unlimited uses NJ Steel Baron 1095 steel to make his Sukina, which is Japanese for skinner. Overall length is 7.75 inches with a 3.25-inch blade with a dark blued polished finish. The handle scales are Rob Carper Innovations (RCI) stabilized, dyed spalted maple. Maker’s list price: $175 with Kydex sheath with belt attachments. Contact Denny Furey at Furey’s Urban Combat Knives Unlimited on Facebook.
5. Trailing-Point Skinners
Trailing-point skinners excel for skinning small game, and are probably the second most popular skinning knife blade design behind drop-points.
“I believe that the finger groove and the thinned spot between it and the spine allows for easier indexing when trying to be precise while skinning raccoons or fox,” commented Tyler Freund of Freund’s Custom Knives. “One can simply pinch the knife between their thumb and finger. Much like you would a scalpel.” In addition, “the thin tip and thin steel lets the user make less intrusive cuts and more precise cuts around the wrists and ankles of the coon,” Tyler explained. He feels this would be more challenging with a bigger-bellied or thicker-bladed knife. “The knife has just enough belly in it that you can draw the knife and skin efficiently once you’ve gotten around the ribs,” he concluded.
Tyler Freund made this small-game skinner for a local trapper. The 3-inch trailing-point blade is made out of Vegas Forge’s raindrop-patterned steel, and the maker added file work along the spine. The handle is bone Micarta paired with Mike Sakmar mokume-gane. The knife is 7 1/4 inches overall. Maker’s list price: $350. Contact Tyler Freund at Freund’s Custom Knives on Facebook or on Instagram @tylerfreund08.Bryce Love’s trailing-point skinner has a 5-inch acid-etched stonewashed blade made out of 1095 steel. Overall length is 9 inches. The handle is made from curled cherry. Maker’s list price: $140. Contact Bryce Love on Facebook at 50Cal Forge or [email protected].
“This skinner has a short blade with pointed tip to reach into tight areas when skinning and caping,” Scooter Davis of Rough Run Forge explained about his Shrade-Sharpfinger-like knife. “The recess on the spine serves as a finger rest, allowing you to choke up forward on the knife for more control.”
Scooter Davis made this Shrade-Sharpfinger-style skinner with a 2 1/2-inch hollow-ground blade forged from 52100 steel. The scales are prickly pear cactus fastened with stainless steel corby pins. Maker’s list price: $175 with leather sheath. Contact Scooter Davis at Rough Run Forge on Facebook or call 540-560-1672.
Although not a traditional trailing-point blade shape, an upswept point is still evident. Richard Darby’s customer said you can make long sweeping cuts with this big-bellied blade design, as well as flesh with it. “Plus it gives a longer cutting edge for the length of the blade,” Richard noted.
Richard Darby’s big belly skinner has a 4.5-inch blade of 1095 steel with hamon. Overall length is 9 inches. The handle is made with flame masur birch from JHue Custom Sales. Maker’s list price: $150. Contact Richard Darby at [email protected].
Miscellaneous Skinners
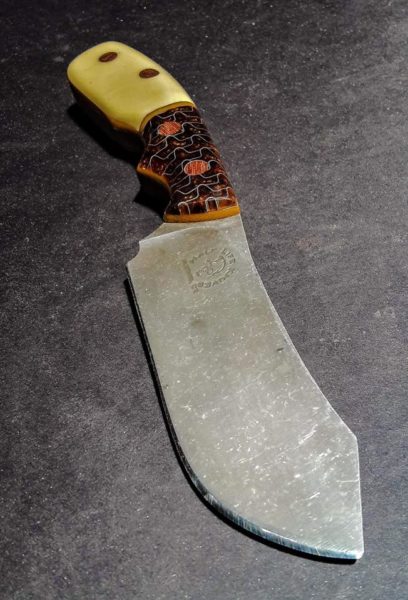
When you skin, the idea is to pull the skin back and make sweeping slices like you would when using an ulu, but it’s not an ulu, Matthew Nolan from Angry Beaver Knives explained. “The whole handle fits in your hand while grasping the blade with thumb and pointer finger…more blade…angles…equals more slicing…and it fits nice in the hand for sweeping strokes.”
Matthew Nolan’s Dear Beaver deer skinner is made out of 15N20 or 1095 steels. The overall length is 5 to 6 inches, depending on the hand size of the customer. The scales are Dustin Smith lace maple burl at Simply Scales. Maker’s list price: $225 with Kydex only sheath. Contact Matthew Nolan at Angry Beaver Knives at [email protected] or at 518-791-2551.
Learn Which Knife Designs Stand The Test Of Time
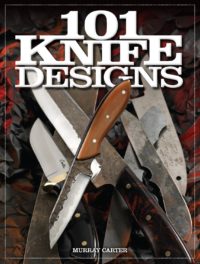
“101 Knife Designs” provides actual scaled patterns that you can use to spark your own designs. At $19.53, you’ll be saving 35 percent on a classic.
Compare and contrast different skinner designs as well as knife patterns of all types. Hiro Soga’s images will satisfy your knife eye-candy jones, you’ll be able to delve into the theory of blade design and you’ll get 101 scaled patterns that you can use to initiate you’re own design. “101 Knife Designs” by Murray Carter is a must-have in hard copy so you can work with the designs, mark with notes and refer to again and again.
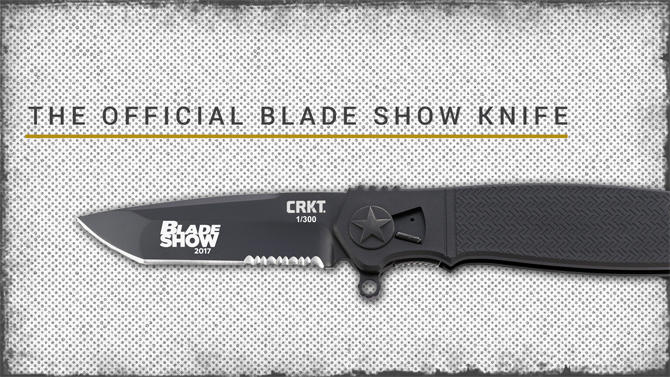
The world’s largest and most important knife event, BLADE Show 2018 will return next year at the Cobb Galleria Centre in Atlanta—and there’s no time like now to make plans to attend the annual edge-stravaganza that true knife enthusiasts can’t afford to miss.
Slated for June 1-3, BLADE Show 2018 will assemble thousands of knife exhibitors and knife enthusiasts from around the globe, and with international attendance increasing every year, it’s wise to make your hotel plans now.
If you have attended the BLADE Show before, you know how fast hotel rooms disappear–not only at the Renaissance Waverly, the host hotel, but at lodging anywhere near the Cobb Galleria. If you’ve never been to a BLADE Show, then you cannot know the mad rush that is BLADE Show planning time. Don’t learn the hard way and get left out–plan and make your hotel reservations now!
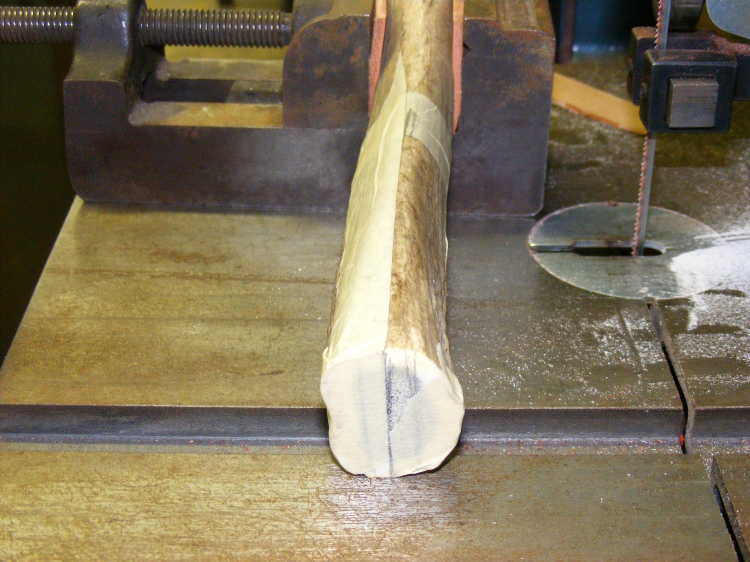
After cutting the antler section to size, cut it in half lengthwise to form slabs. Mark the centerline using masking tape along the antler’s top, bottom and ends. (photo courtesy of Joe Szilaski)
By Joe Szilaski, BLADE® field editor
1: I enjoyed reading and learned a lot from your story (page 52, July BLADE®) on using elk antler on hidden-tang knives. I have some nice elk antlers and would like to use them for the handle on a full-tang knife. You mentioned in your article that elk antler can be very porous in the center. What is the best way to go about cutting slabs from elk? (Johnny C., address n/a)
An elk rack is quite massive. Each time I hold one of these magnificent specimens, my mind wanders off to great childhood memories. I grew up in Hungary where elk were plentiful, and I was fortunate that my godfather was the forest ranger. One of his responsibilities was monitoring the elk herds, and I saw many majestic bull elks, especially during full rut season.
Elk antler can make an excellent handle for a full-tang knife. Before answering your question, I would like to tell BLADE readers what to look for when buying elk antlers for handles.
Try to buy a “seasoned” rack; otherwise, you will need to store it for a few years before use. You cannot be 100 percent sure it is a seasoned rack unless the seller knows and is honest about it. The only way to be sure is to cut into the antler and see if the core is sort of gooey or oily feeling. If so, this means the antler is still green and you should wait at least two to three years before using it. Using green antler is not a good idea because the shrinkage will be much greater. This is the case with most natural materials.
I look for an antler that feels heavy for its size. In other words, the heavier the antler, the more solid it should be. The heavier weight is a good indication the antler is less porous in the center and has a thicker outer wall. A lighter antler is usually more porous in the center and has a thinner outer wall.
Of course, the thinner wall does not mean you cannot use the antler for scales. You can but it takes a little more work. As I mentioned in the July BLADE, you must remove the porous section and fill the void with wood or other solid material.
When working with a more solid antler, by the time you grind your scales to the desired thickness and size, there will not be much porous section left to worry about—and that you can saturate with extra-thin Super Glue® in order to make it solid. Most likely you will need to repeat the application of glue a few times. Make sure the glue has completely dried before applying another coat.
As far as the best way to cut your antler, I can tell you what has worked for me. WARNING: Be safety conscious if you use tools such as a power saw.
Before cutting it, I study the rack from different angles and determine which sections would be more suitable for hidden-tang knives or as slabs for full-tang knives. I hold the different parts of the antler to find the sections that feel most comfortable in my hand. From there, I mark with masking tape where each cut will be.
After cutting the section to size, I cut it in half lengthwise to form slabs. I mark the centerline using masking tape along the top, bottom and ends of the antler (see photo above).
When positioning the antler into the vise, I use 10-ounce leather to line the vise jaws. The leather prevents damage to the antler and will result in a better grip because the soft leather will form to the antler’s irregular shape.
I use a small precision drill block to check the angle of the antler in the vise. The goal is to have the centerline positioned perfectly vertical for cutting.
Most of the time, I use a small wooden wedge to compensate for the irregularity of the antler and to help true up the centerline. If marked and cut correctly, the slabs should be similar in size and thickness, so not much effort will be required to grind or sand the scales flat.
If the antler is small, I may use a wide-faced, sheet-metal locking pliers instead of a machinist’s vise and slowly push the antler on the band-saw blade to cut lengthwise.
Only your imagination limits what you can make using elk antler. Dave Herman, my friend and ex-partner, made a knife and gave it to me as a present in 1989. It shows how creative you can be with elk antler. The handle is pieced together like a jigsaw puzzle. The top half is hidden-tang construction and the bottom half is slabs. I made a few sub-hilt fighters with similar “jigsaw handles.” It is a lot of fun but also a lot of fitting. As noted, you are limited only by your imagination—and maybe your patience.
Send your questions for Wayne Goddard or Joe Szilaski to BLADE, POB 789, Ooltewah, TN 37363-0789 [email protected]. Include a self-addressed, stamped envelope with your name and address for a personal response from Wayne, or e-mail him at [email protected]. To contact Joe by e-mail, his e-mail address is [email protected]. If you wish, BLADEwill not print your name with your question.
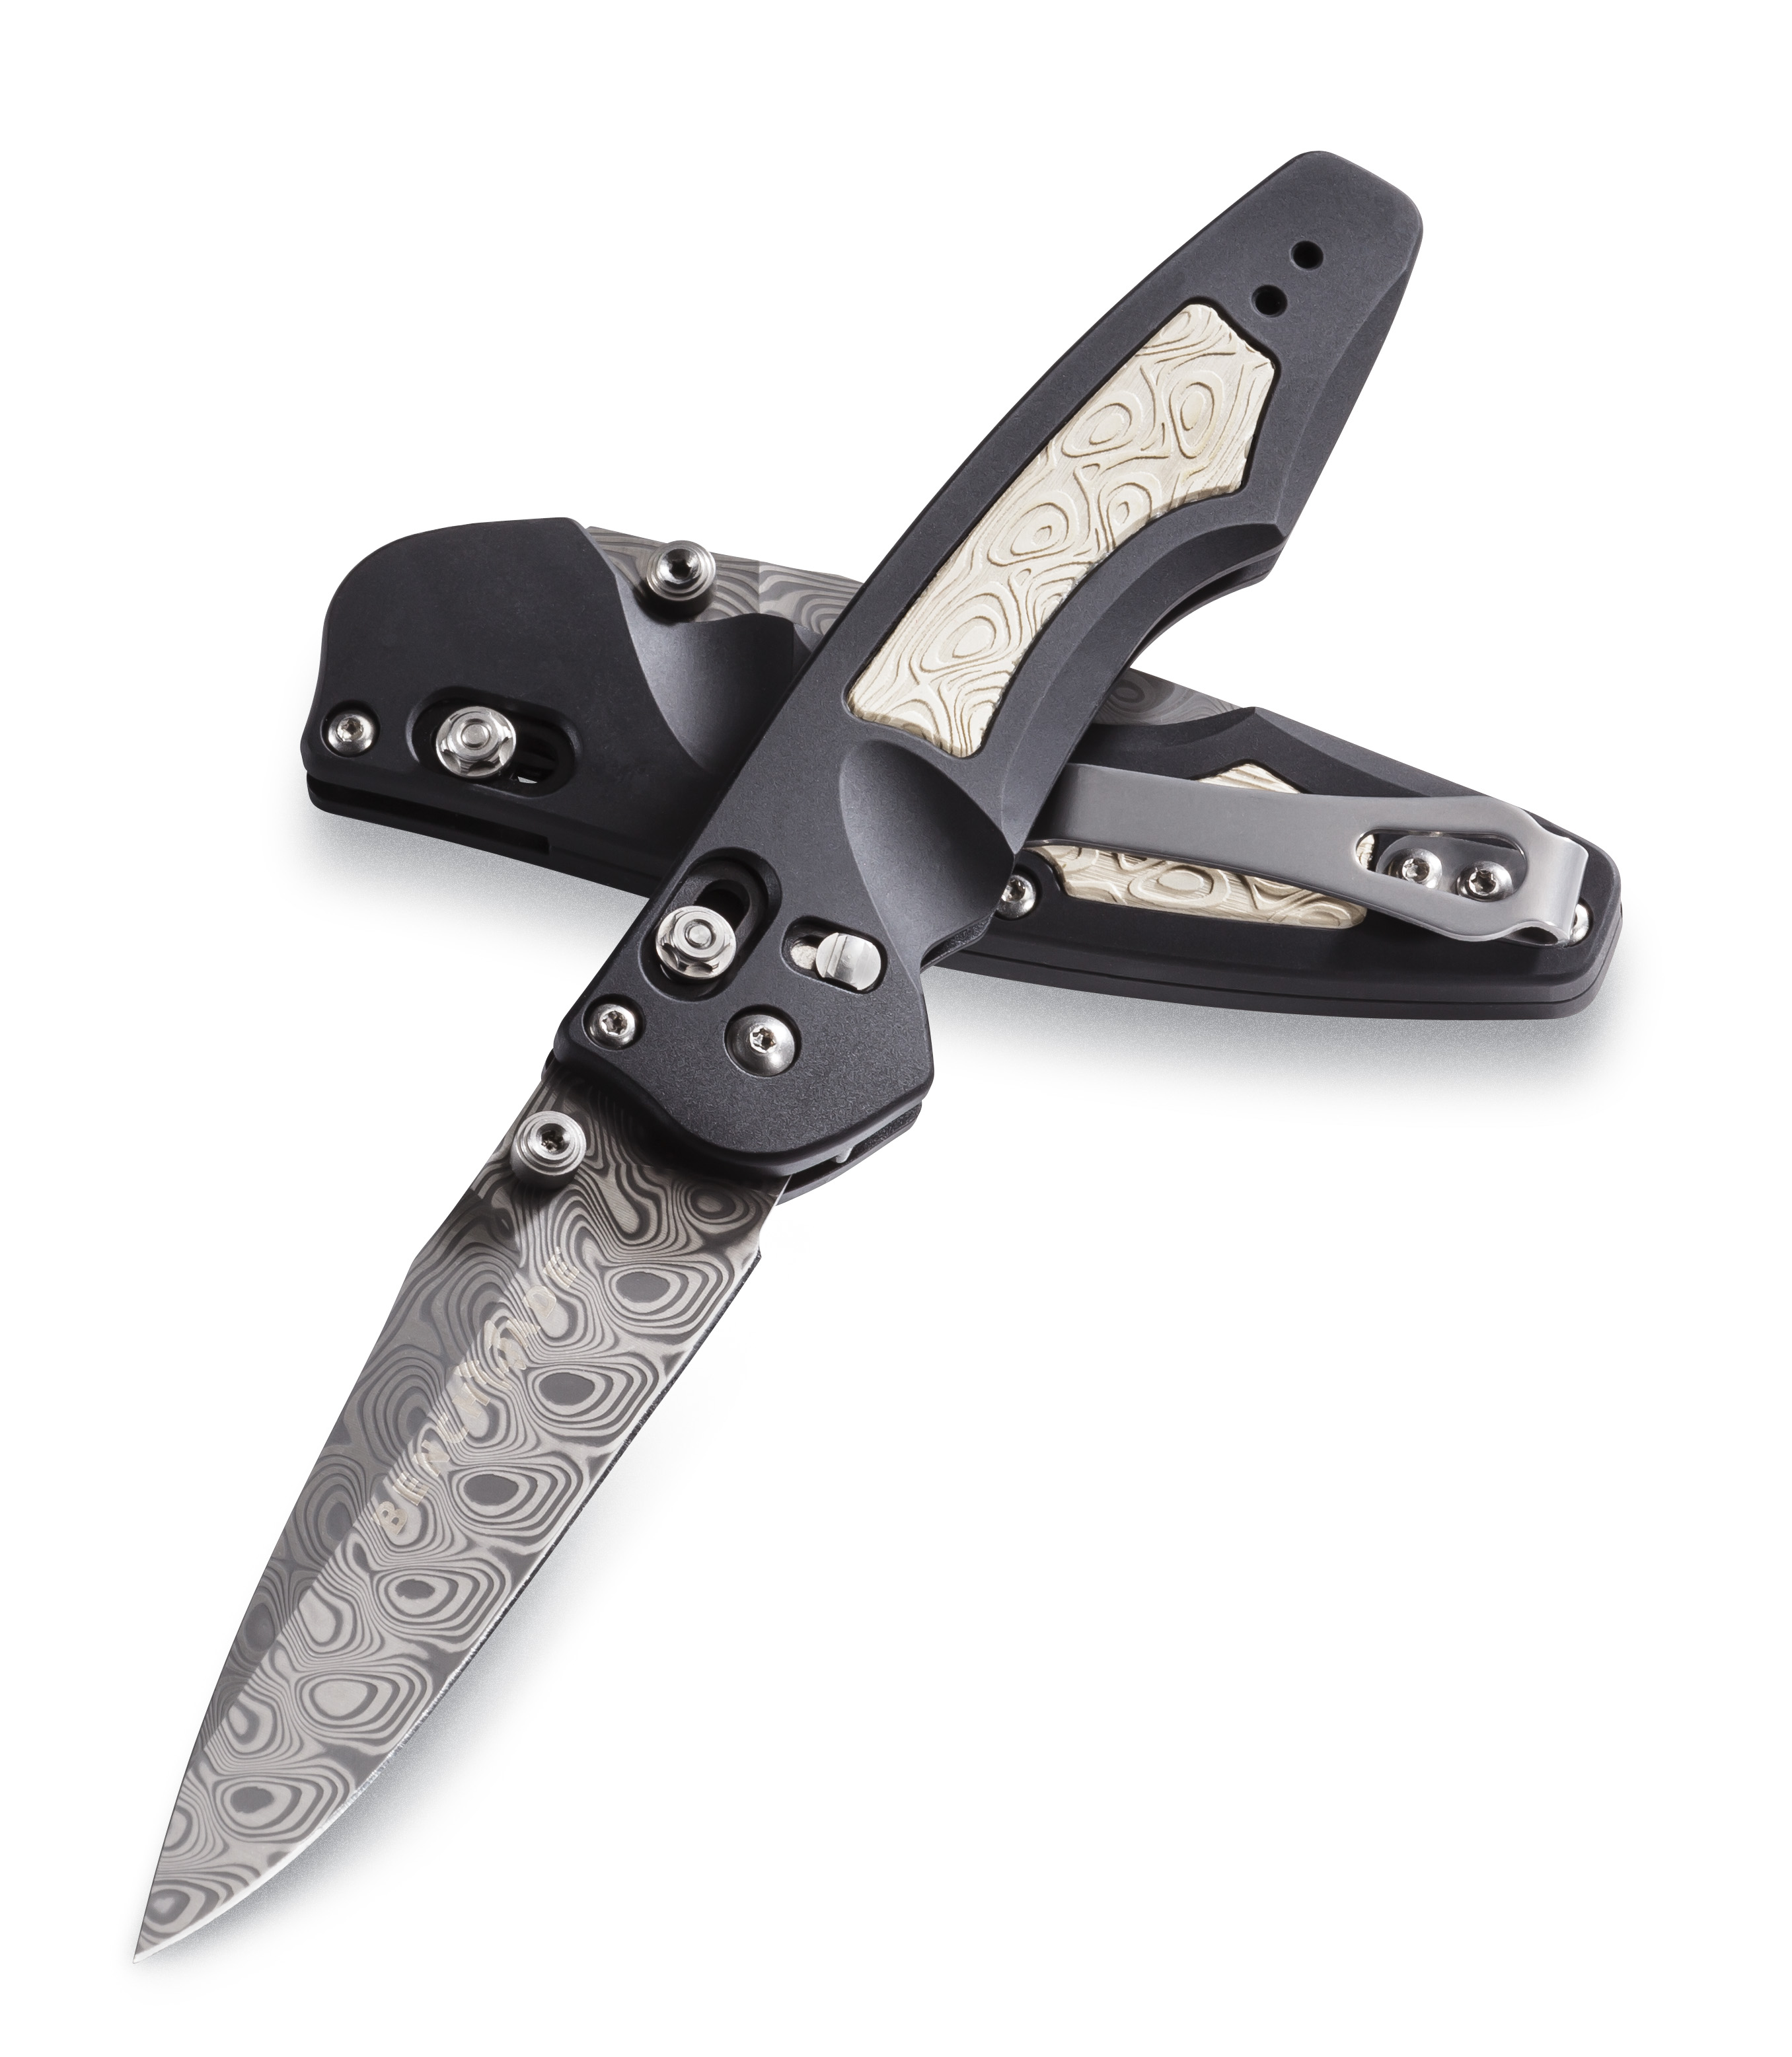
An example of one of Warren Osborne’s Benchmade collaborations is the Emissary.
Long-time knifemaker Warren Osborne passed away Jan. 4 after a long illness. His death comes almost 13 months to the day after his good friend and fellow maker Joe Kious was killed in a truck accident.
A native of Australia, Osborne moved to Texas, where he resided in Waxahachie for many years. He was a full-time knifemaker and sold his first custom knife in 1980. In his trademark cowboy hat and cowboy boots, Warren was a fixture at knife shows and BladeSports International (BSI) cutting competitions. Despite failing health, he exhibited at the recent International Custom Cutlery Exposition in Kansas City, the first-ever knife show coordinated by both the Knifemakers’ Guild and the American Bladesmith Society.
He was known for his high-end custom folding knives, many of them interframes ornately engraved by some of the industry’s leading embellishers. He joined the Knifemakers’ Guild as a probationary member in 1985. He later became a voting member and served on the Guild’s board of directors for a number of years. His knife designs may be best known among the largest number of people through his many collaborations with Benchmade Knife Co.
More recently he was instrumental in the founding of BSI, the world’s leading association of those who compete in knife-cutting competitions. He competed successfully on the BSI circuit for several years and designed and made his own competition knives. He was among the first to use CPM M4 carbon steel for the blades of his competition cutters, a steel that takes a great edge and is tough enough so that M4 blades can be ground very thin without damage to the edge or chipping while in use, great traits for competition cutters to have. He was also among the first to use horse-stall-mat rubber for the handle of a competition cutter. The material excels in enhanced purchase and non-slip qualities. His knives were recognized by many BSI observers for high performance in the competitions. The BSI coordinates the BLADE Show World Championship Cutting Competition at the BLADE Show each year. This year’s event will be held during the BLADE Show June 3-5 at the Cobb Galleria Centre in Atlanta, Georgia.
As he noted on his website, Warren was fascinated by “anything with a blade” from early childhood in his native Australia, and made knives from crosscut saws, chainsaw bars and anything else he found “laying around.” “Bladed weapons were a family thing, so between three brothers and myself, we had quite a collection,” he noted. Later on during his work as a ranch hand in Australia and as a horse trainer in the USA, sharpening and making knives became a spare-time endeavor.
In the March 2014 BLADE® he tied for No. 13 with Shane Taylor and Jason Knight among the top custom makers of the years 2001-2012. As Larry Connelley of KnifeArt.com noted in that issue of BLADE, “Warren’s knives exhibit extremely clean workmanship, combined with outstanding design and a solid business ethic.” The story went on to note, “From art knives to utility and higher-end designs to competition cutters, Osborne’s work has covered as many bases as just about any other maker.”
As good friend and fellow award-winning maker Tom Overeynder observed, “What a great friend and craftsman Warren was. He will be missed by all who ever met him.” Added BSI Executive Director Donavon Phillips, “Warren was a friend and mentor to so many. I feel like I should say more but the words won’t come to me right now.”
Funeral services were held Thursday, Jan. 7, at the Wayne Boze Funeral Home on 1826 W. Hwy. 287 in Waxahachie. Instead of flowers, please make any donations to The Wounded Warrior Project.
Taking great photographs of knives is no easy task—unless you’re a professional, in which case you can stop reading. Essentially, you’re taking a highly detailed shot of something that fills the entire frame, not something small like a bee in the center of a background of blurred petals, but a long, thin item that needs to be in focus from point to butt. But there’s so much more. Every line must be fully revealed and a depth established to convey thickness or thinness. I know close to zero about the mechanics of the art. There are plenty of videos and online courses out there that’ll give you the science of the “study of light.” They can speak to you of aperture, ISO and shutter speed in infinite combinations. All I know is a good photo when I see one, and how I have tried to improve my own photography. Here are the 6 things BLADE looks for in a knife photo. It’ll be up to you to make it happen. Why? Because there are “5 Ways To Get Your Knives Featured In BLADE” and you want to be ready.
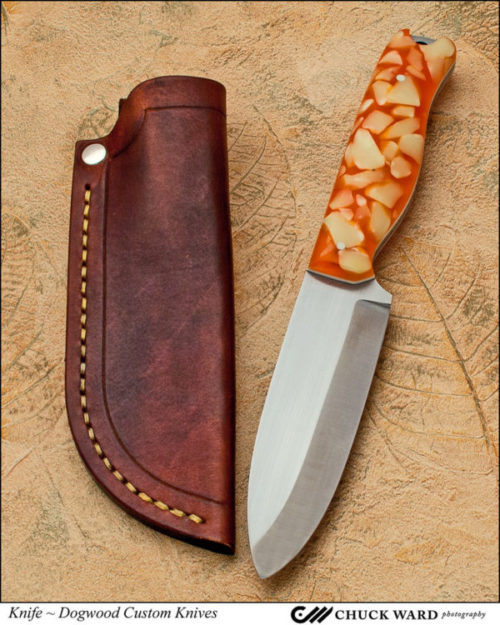
Dan Eastland of Dogwood Custom Knives used professional photographer Chuck Ward to take this exquisite image of his Hawkins knife. Chuck will be the official photographer at the 2017 BLADE Show. Contact www.dogwoodcustomknives.com for more about this outdoorsman’s knife.
Hire A Professional
Knife manufacturers, like good real estate agents, know that great photos will close a sale. They understand that the investment in a professional photographer pays off. When BLADE asks for a photo of their latest release, for example, some even allow high-resolution downloads right from the consumer website without having to go through a media relations person. That can be a time-saver at deadline. I’ve even experienced a large company resubmitting photos with even better ones. There’s nothing that says a one-man-show can’t learn from that level of perfectionism. It’s the same effort you put into crafting your knives.
Hiring a professional photographer will cost you some money, and it’s worth every penny. But like all professionals, some are more versed in what we’re trying to accomplish than others. A portraitist, wedding photographer or photojournalist may or may not be able to give you the results you’re looking for. You want to make sure you chose someone who can show you a portfolio of knives, guns, tools or similar items that looks…well…perfect.
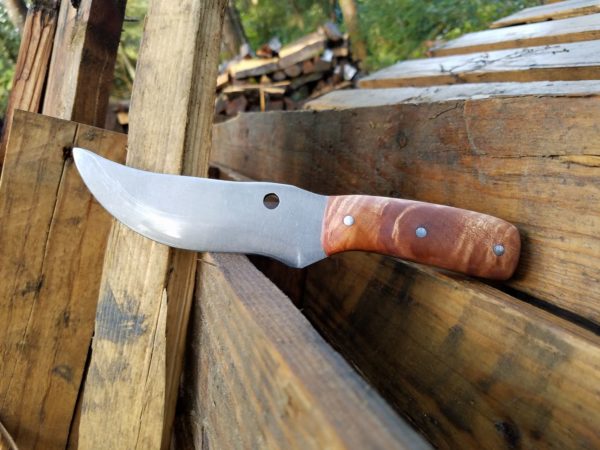
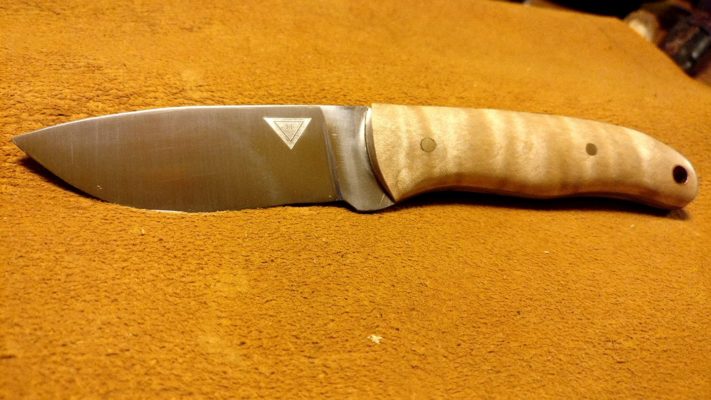
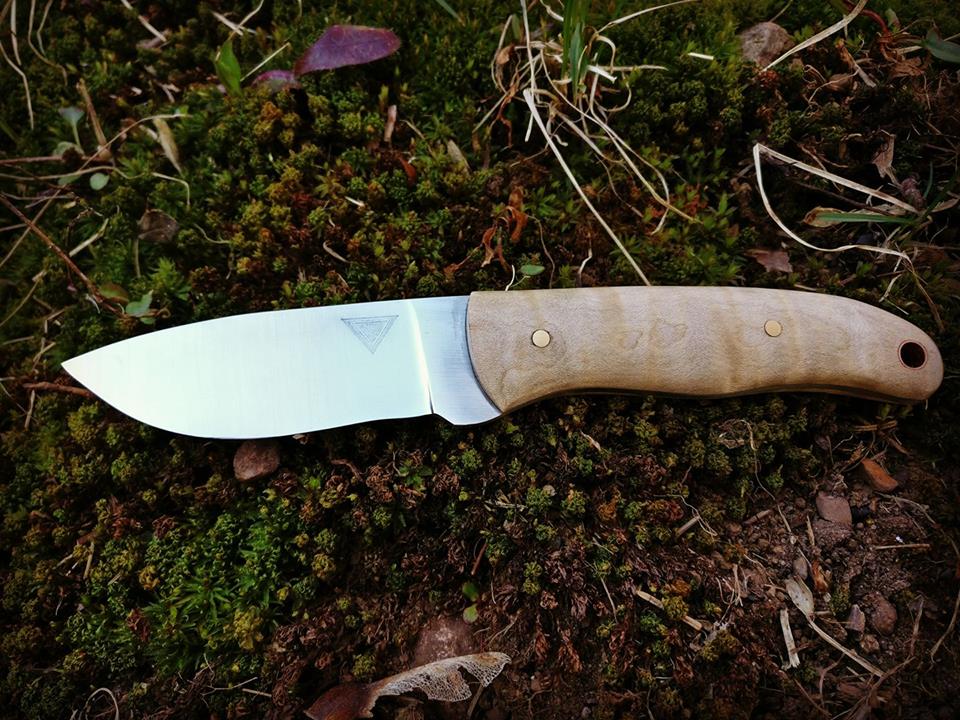
The handle on Tim Tracey’s everyday performer doesn’t stand out as much as it could against the similarly colored background. The caramel color ends up saturating everything in the photo. Also, although the focus on the blade is crisp, the topline on the handle is a touch soft.Tim Tracey took his knife outside and got not only a good image of the blade and handle, but good contrast and a better depiction of the piece’s fullness. The recurved blade is made of 1095 steel and sports exhibition grade curly maple scales. Makers list price: $220. Contact [email protected], Timtraceyknives.com on Facebook or @TimmTracey on Instagram.
You will want two kinds of photos. Photos for your website and social media will create an emotion, an atmosphere. Instagram is full of examples of survival, bushcrafting and hunting knives being photographed outdoors and tactical knives being shot in gritty workshops or light-painted in darkness. Makers create everyday carry still lifes with folders, wallets and watches. Typical? Sure, but each one tells a story that has been told a thousand times before in a slightly different way. Nobody reads just one novel, and nobody looks at just one knife photo. They are all beautiful in their own way. The other kind of photos you will need are those of just the knife itself on a simple background, what is often referred to as glamour or beauty shot.
The question you have to ask yourself is: Are you willing to put as much study and effort into your photography as you are your knifemaking? Answer honestly. There’s no shame in shelling out cash for stunning work. Fill your website with those choice images and have them on hand for BLADE, and then you can practice your own photography skills for social media. Even on social media, though, take the time to post only your best images. Plenty of knife-related Facebook Groups out there are looking for banner photography and have to reject knifes they’d like to showcase because the image is, say, out of focus.
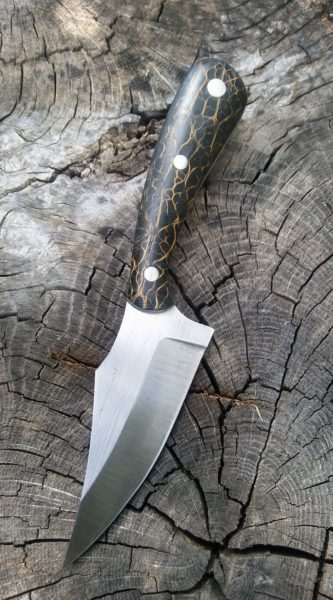
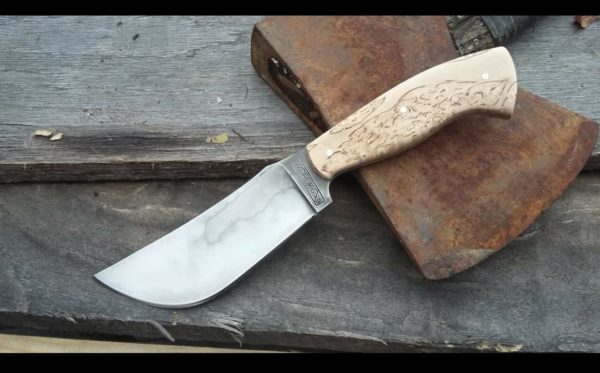
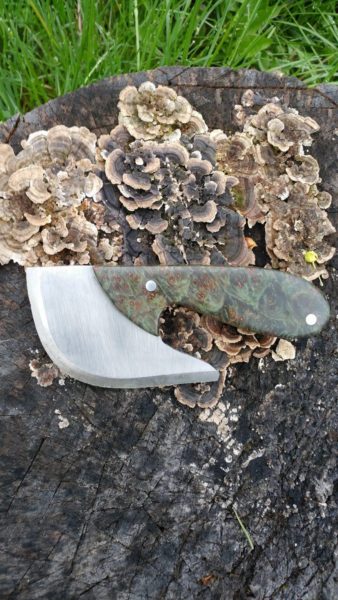
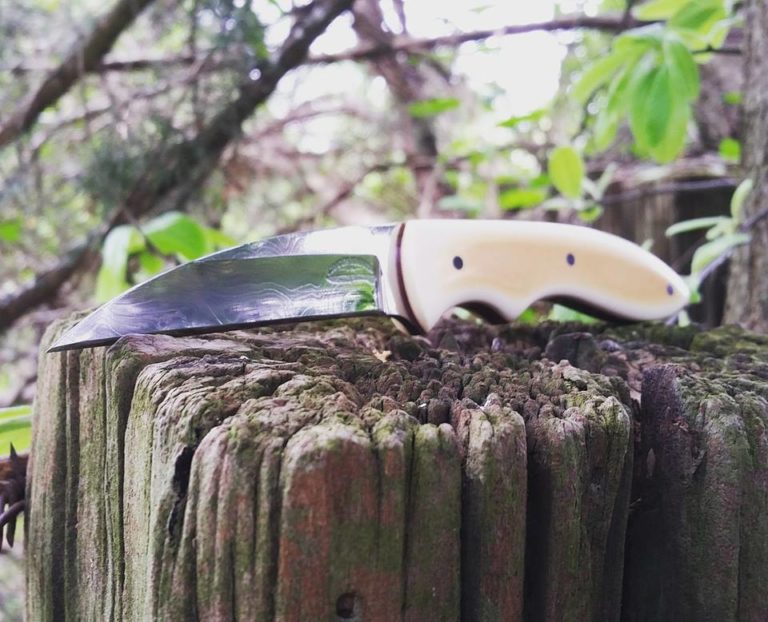
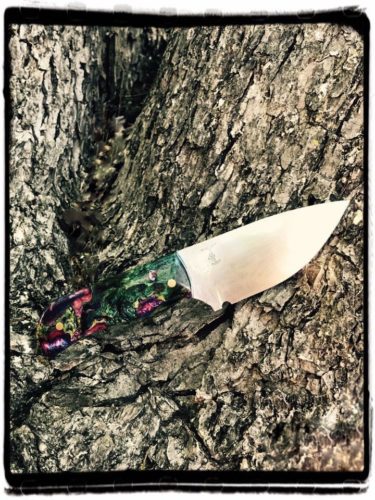
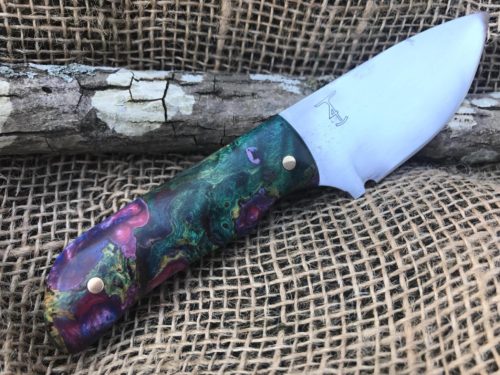
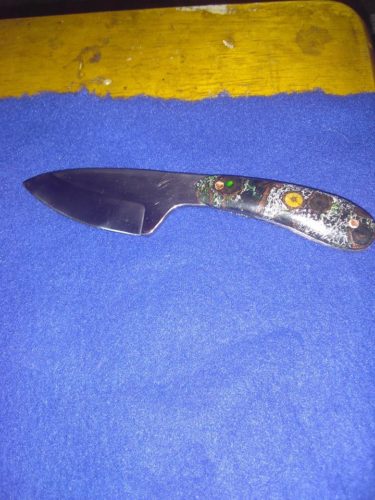
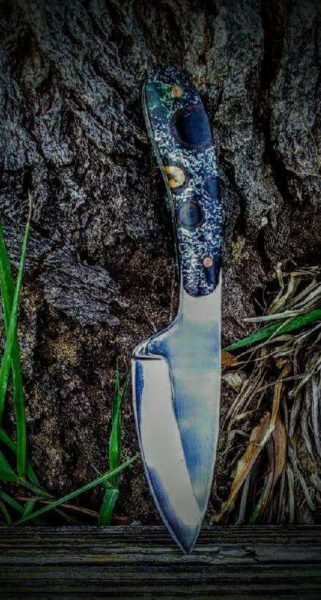
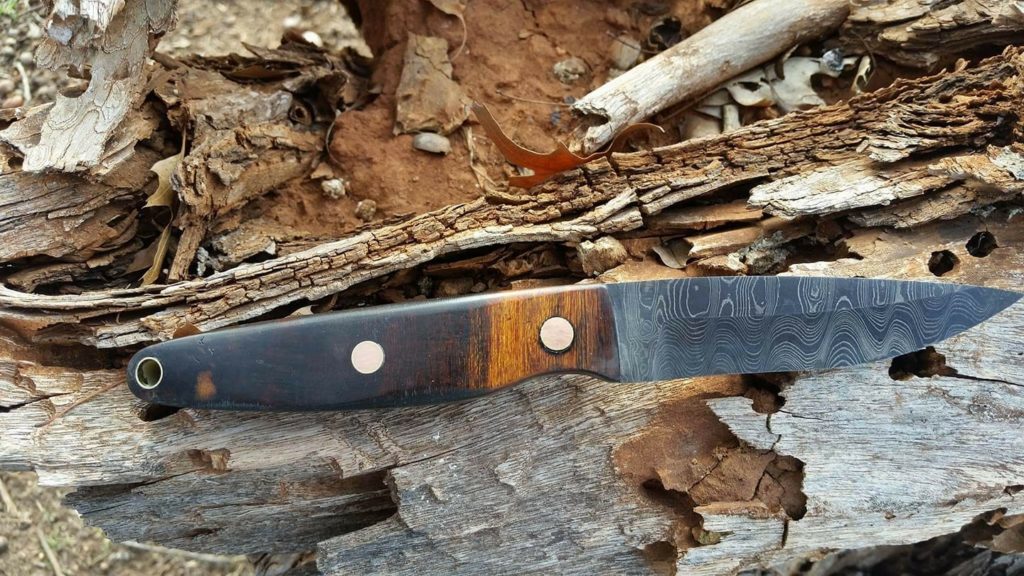
Although this image clearly shows the blade on this skinner by Bobby Toerck, the multicolored handle gets lost in the textured bark.In this image, the handle on Bobby Toerck’s drop-point skinner is nicely contrasted against the still-textured, but now single-colored burlap. And the 80CrV2 blade still looks terrific. The handle is triple-dyed box elder burl by Terry Dunn. Maker’s list price: $175 with Kydex sheath. Contact T4 Custom Knives on Facebook or call 903-812-1173.
Do-It-Yourself
Let’s say you can’t justify the expenditure at this point in your knifemaking journey. Or, more likely, by the very nature of your interest in crafting, you’re determined to take quality photos of your knives yourself. You think, How hard can it be? Very. It can be very challenging to produce the kind of photos needed for a glossy magazine.
“Real” Camera Vs. Camera Phone
You can take the cost of a few sessions with a photographer and buy yourself a decent camera, for starters. Keep in mind, however, that lenses that come with a camera are usually not very good. Be prepared to buy a decent mid-range lens at a minimum.
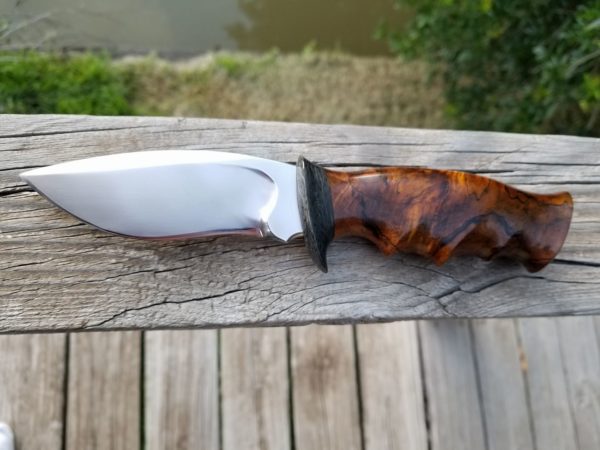
In this vertical image of a horizontal knife, the butt is cut off. There is also glare on the handle and the blade looks dull. Will Thompson decided to get some help for the reshoot.Even though Will Thompson’s handle has to work to stand out against the tree bark, it succeeds. The pattern is now discernible and the blade looks great. This drop-point finger skinner is made of 1095 steel and the Plantstone (stabilized pine branches with aluminum flakes) scales are from Robert Belcher. Maker’s list price: $75. Contact [email protected] or on Facebook at Dusty’s Cutlery.
Then again, there are some excellent photos being taken with newer camera phones. Do NOT attempt this with an older model. You will only frustrate us both because they do not allow for high enough resolution of the images. Be sure if you submit a photo from your phone that you email it at its largest size. If there are settings on your phone that need to be changed to allow for taking photos at higher resolution, then you’ll need to set those accordingly. Those settings will apply only to photos you take going forward; you cannot retroactively apply them to photos already taken. Whether you use your phone or a “real” camera, the same fundamentals of photography apply.
Tip: If you smoke or if you have your phone in your shop, there could be resin or dust on your lens. You’ll want to clean that—gently—before you begin.
Be sure to take great photos of all your work before they are sold, and to back them up, either in the cloud, through an online backup service or on a thumb-drive.
6 Things BLADE Looks For In A Knife Photo
Focus
The entire knife must be in focus, from point to butt. Are there some artsy shots of crystal clear blades and blurred handles or vice versa? Sure, but that’s not what we’re looking for in print. Online, we’re more open to considering some of those shots, provided we have some conventional full-focus shots to accompany the story as well.
If you are taking what we call a “using” shot where you’re photographing the knife in use for an online story or if we are working on a story together for print, be aware of where your camera is focusing. I have seen crystal clear shots of a leaves on the ground while the knife and the hand it’s in are both blurry. Focus is probably the single most important aspect of a good photo.
Contrast
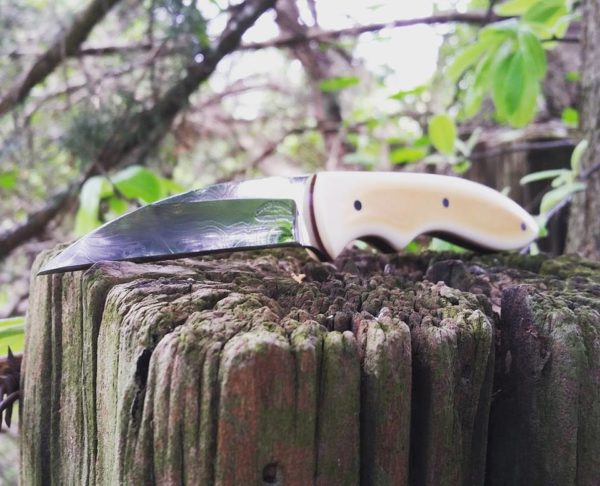
Be aware of the color of your background. A grey knife on gray pavement, a black knife on a blackened tree stump, camouflage your knife. It’s like a silver or gray car against gray pavement on a gray winter day—you can’t see it. No contrast. This applies to multicolored handles against multicolored backgrounds as well.
In this image of Andrew Griggs’ knife, the blade looks dull and the focus on the handle is somewhat soft. Also, if this image were being used for a BLADE Magazine section that required a cutaway, the prop would be in the way of the blade.Andrew Griggs got outside to reshoot his knife. Now you can see the pattern-welded steel! The Southern Comfort gentleman’s fixed blade has a Vintage Paper Micarta handle. Maker’s list price: $300 with leather sheath. Contact Griggs Knives on Facebook.
Composition
For two of BLADE’s sections, “What’s New” and “Knifemaker Showcase,” only cutaway images of the knife are used. (See the “5 Ways To Get Your Knives Featured In BLADE.”) This means that you don’t need to worry about the background at all. In fact, white paper is fine, but watch for any shadows. It’s fine to have a slight shadow, provided the lines of the knife are clearly visible. If the edge or spine of your knife bleeds into the shadow to the point where you can’t tell where the knife starts and the shadow ends, that’ll need to be reshot. Our designers need to able to see those lines.
Mood images are fine for both a feature in print and for online stories. Feel free to get as creative as you want, but ensure that the knife is the main attraction. Photographing knives is one of those times when the rule of thirds really isn’t applicable. The knife is the main attraction and we’re not going for proportional sharing with a background. If the image you’re submitting for consideration is for a section of the magazine that uses cutaways and there’s moss or grass, fabric or fur encroaching on the blade itself, that’ll impede the designers in their work.
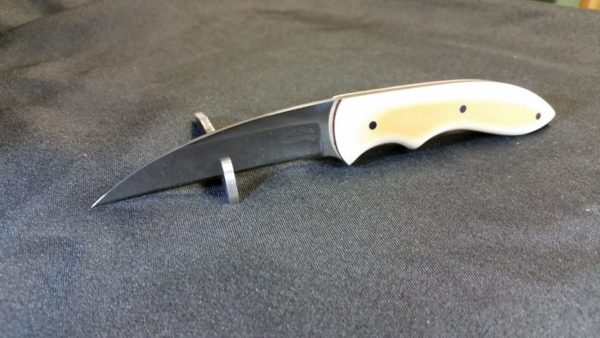
Make sure no part of the knife is cut off, and don’t crowd the point or butt. If you place the knife in a stand and that stand encroaches on the knife, it can’t be used for a cutaway, but it could possibly still be used for an online story or in print.
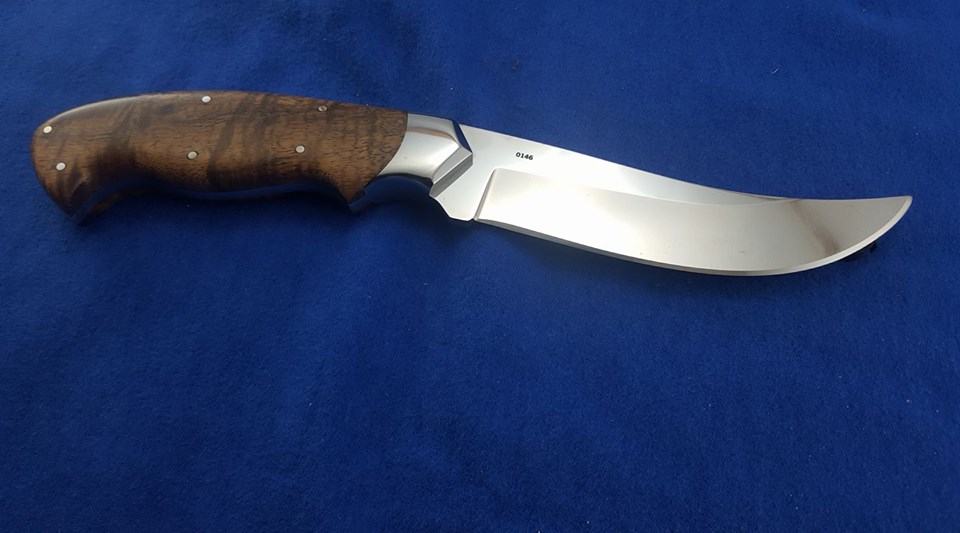
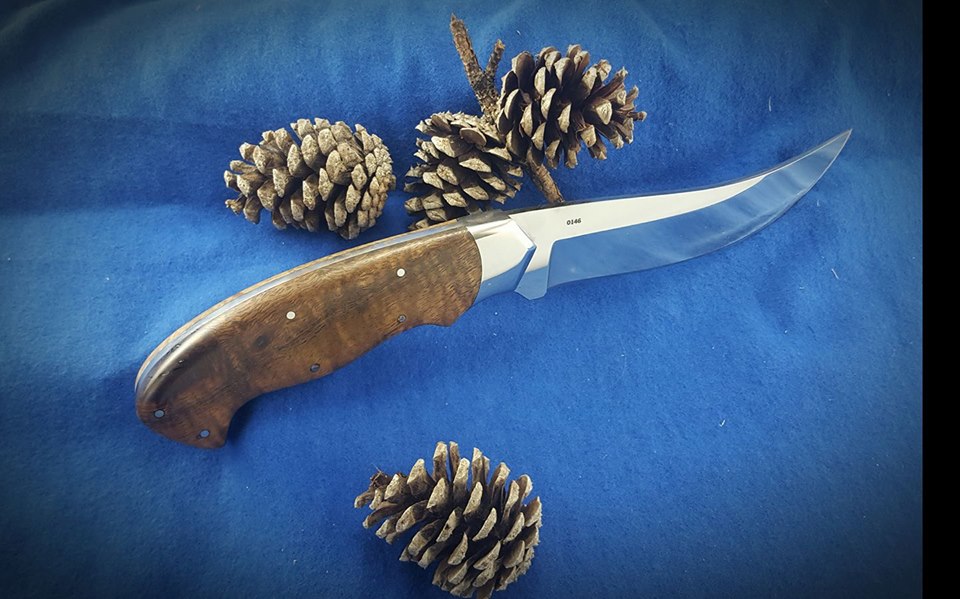
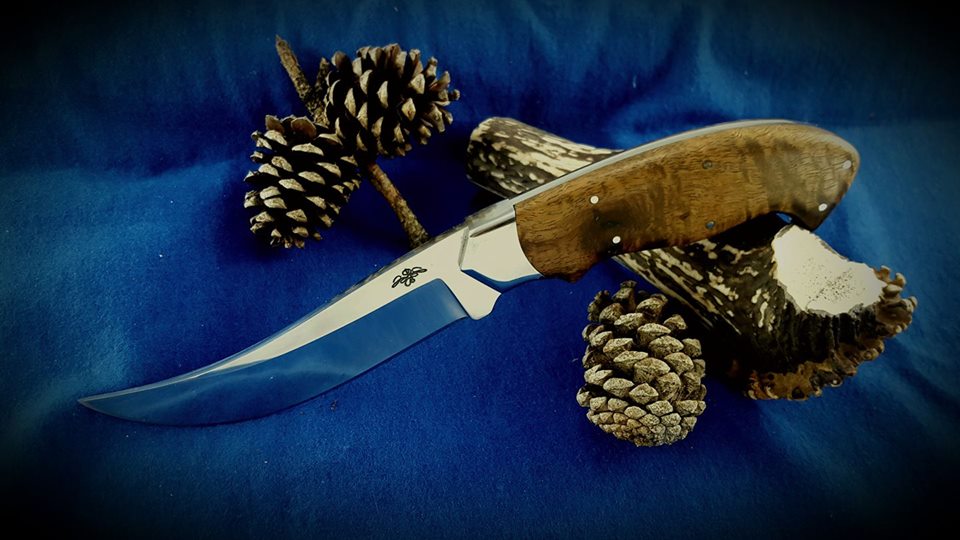
Devin Bliss has taken a very good photograph here. However, there is shadow at the handle, which would make it challenging for the designers to see where to make the cutaway image for inclusion in say, BLADE’s “What’s New” or “Knifemaker Showcase” sections.In Devin Bliss’s second attempt, the handle is more visible, but looks less rich in the harsher lighting. The inclusion of the pinecones makes a nice vignette without encroaching on any line of the knife, so it could still be used for a cutaway or as is. As a side note: Artists will tell you that the eye finds odd numbers more pleasing. I did not tell Devin that. I simply told him the truth: He had surpassed my level of being able to offer suggestions for improvement. He contacted another knifemaker for guidance.At this point, knifemaker Devin Bliss has reached a level of photography that serves his knives well. What did he do? “I changed the direction, propped up the handle onto the antler, moved the lighting around and used a foil reflector to get…a bit more light on the handle and a white reflector to mask off some glare on the blade and bolster.” This modified pronghorn is made of CTS-XHP steel with a curly koa handle. Maker’s list price $300 with stamped leather sheath. Contact [email protected], 903-736-3052 or on Facebook at DB Custom Knives.
Depth and Angles
In layman’s terms, you need to ensure your knives don’t look flat. You’re trying to capture something that’s three-dimensional in a two-dimensional medium. This is where some knives can look disproportionate because you’re focusing on the handle and the blade is in the fuzzy background, so to speak. A shallow depth of field is fine as long as your knife is standing out crisply from point to butt.
Finding the right angle will also help prevent your knife from looking flat. Prop up your knife somehow. Even just leaning it against a pebble allows you to move and capture the thickness or thinness of the piece. Laying it on your hand can work as long as your flesh doesn’t obstruct any of the knife’s lines.
Tip: Take dozens of photos from many different angles and distances and pick the best one of the bunch. If you don’t nail it, don’t compromise, don’t settle, get back there and take dozens more. Pros will take hundreds of impressions to deliver 30. Seriously. Take more shots. No, more. Get a ladder and shoot down, circle your quarry and shoot multiple shots from each hour of the clock, and get down and shoot at eye level. Shoot at morning, noon and night, but mostly late afternoon, to see how different types of sunlight affect your knife images. It’s what the pros did when they were starting out. Now, after years of experience, they can judge the sun’s angle and know how to get what they need.
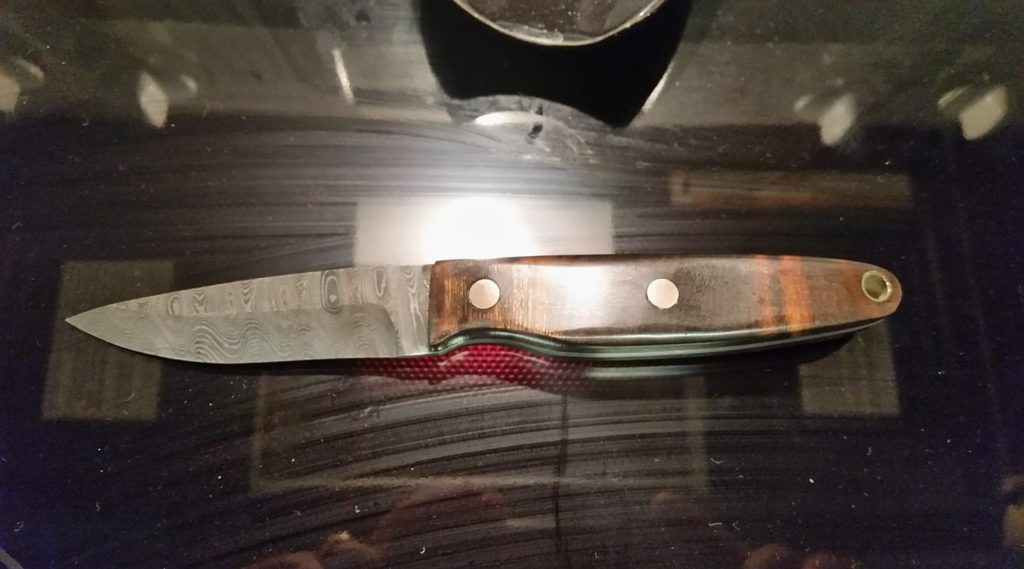
Charles Hawkins has a hard time taking a bad photo, but he pulled out all the stops on this one. That is a stovetop background, complete with streaks and a red glow. The glare on the handle deadens the handle and the pattern in the steel also appears dull. Note the photographer’s hands reflected on the cooktop. Analyze the entire photograph closely.Charles Hawkins took his knife outdoors, and now the focus is as sharp as can be. The background adds interest while still allowing for plenty of contrast. The 3.5-inch blade is made of pattern-welded steel from Alabama Damascus Steel. The handle is ironwood. Maker’s list price: $300. Contact www.hawkcustomknives.com.
Lighting
Natural light is easiest for the amateur to master. A cloudy day is good to reduce blade glare but sometimes it will dull colors. Try a sunny day, but shoot in the shade. Avoid glare on either the handle or the blade whether you’re shooting indoors or out. You also don’t want dappled light coming through the leaves of a tree to interfere with the hamon, for example, so try to find a solid overhang. You also don’t want reflection to make your blade look different than it is in reality.
Indoor lighting is infinitely more challenging. Low light, fluorescent light, light-painting in a dark room—they all have the potential to become “noisy,” grainy, soft. I will leave it to the articles and videos you’re going to pour over to explain why, but trust me, it’s not easy. Sometimes, in light-painting for example, the pins might absorb all the light and they take over the picture. Or the handle’s too dark, or the handle’s visible, but the blade looks dull. Changing the countless variables on this project will help you get the right shot out of your many attempts. It can help to take notes so you know what you’ve tried and whether or not it worked.
Avoid using the flash inside your camera. It will only give you an overlit image that makes your work look flat. An external flash, shot off a wall or ceiling or even a white T-shirt, or an extra light diffused with a white paper bag, may help, but now your knifemaking shop has turned into a spaceship and you’re behind in your orders.
Specs
Images need to be 300 dpi for print with the photo at least 8 inches on the longest side, preferably 10. The image size should be at the very least 600 KB. It’s not that we’ll run it that large, but we need to have the option to do so, especially if we’re doing a cutaway and the knife doesn’t fill the frame.
We prefer .jpg format, and that you attach the image file rather than dragging it into the email. Sometimes that can make a difference in resolution quality, though it admittedly shouldn’t. Also, for similar reasons, submit originals and not versions scraped from Facebook or other social media platform, even for online stories.
Remember, it’s all about the knife here at BLADE. Oh, and makers and manufacturers, too. But without a fantastic photo of a knife as a starting point, how are we ever going to get to know you better?
“101 Knife Designs” is not only filled with great comparisons of blade designs and design theory, but offers terrific examples of exceptional knife photography by Hiro Soga.
Knifemakers of all skill levels will enjoy comparing knife designs in this book by Murray Carter. The photographs by Hiro Soga are exquisite! There is even a discussion on the theory of knife design to help you better understand your craft. Save 35 percent off the cover cost of $29.99 for a total of $19.99.
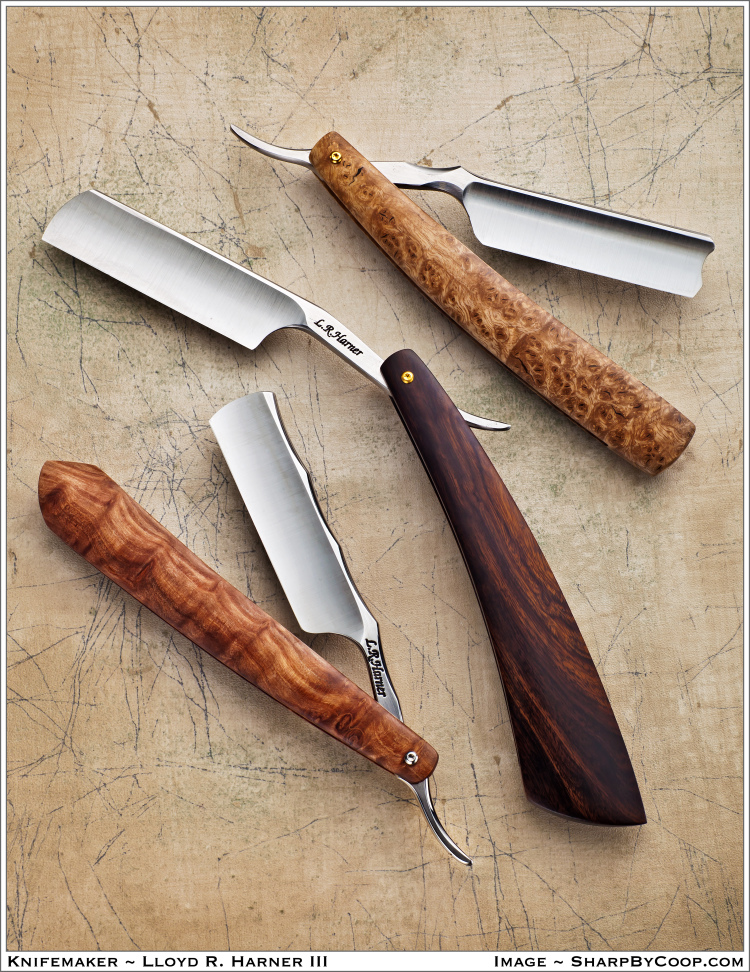
ThereIn the burl category, redwood (left) and black ash (right) are among the more popular woods. Lloyd Harner uses each for the handles of his razors, as well as the most popular of all woods, ironwood (center). The hollow-ground blades are 52100 carbon steel. (SharpByCoop.com photo)
There’s no time like the present to be a stickler for wood knife handles
Curiosity about the wood of choice among makers, users and collectors in terms of utility, user friendliness and good looks gives rise to the obvious question, “Which natural wood handle material is most popular, especially for custom knives?” American Bladesmith Society journeyman smith Peter Bromley and I were discussing the subject over coffee.
“There are so many types of woods and so many variations within each type that the possibilities are nearly endless,” Bromley said. “You also have to find a piece of wood with a busy grain structure, so when you cut a handle-size piece, then the pattern carries over into the smaller portion.”
Problem is, sometimes what looks good on a large piece of wood gets lost when you scale it down to handle size.
“It’s why makers tend to like burl,” Bromley reasoned. “It’s always busy no matter how small the handle is.”
Shannon McFall of Knife & Gun Finishing Supplies, Chris Hartman of Masecraft Supply, and Chuck Bybee and his daughter Jessica Bybee Walker of Alpha Knife Supply each responded with two words: desert ironwood.
“When it’s the highest quality, the most beautiful patterns are ironwood,” McFall said. “It’s still in relatively low supply, but we haven’t had a problem with replacement yet.” The shortage problems result from government regulations regarding the material. “It has become a lot harder to get the nicely figured desert ironwood,” as a result, Walker noted. “If we can’t get it, we switch to walnut. Turkish walnut is extremely dense with high contrast and performs similar to ironwood.” Bybee said he favors the look of highly figured curly koa. For high-end stuff, koa’s deep curls are rich in chatoyance, he opined. Chatoyance is the luster a material—in this case, wood—exhibits when you move it back and forth under a source of light, Bybee explained
Hartman said ironwood is a favorite in terms of utility, looks and the best combination of both features. However, he questions whether there is a low supply of the material. “Have you ever been to a knife show that didn’t have tables full of ironwood?” he asked. With quality comes price and all those interviewed indicated ironwood is the most expensive of the woods. On the other hand, Walker said maple is probably the least expensive.
WHERE THE BURLS ARE
“Amboyna burl machines well and is a nice wood,” Walker began. She added redwood burl is always very popular—though not with production knife companies because it is more difficult to machine—along with box elder. Hartman agreed. “Amboyna burl has nice, tight patterns and it wears well, plus there seems to be a good, consistent selection available,” he said. “It looks good, feels good and sells well.” McFall cited the popularity of California buckeye, box elder, maple and amboyna burls, all of which are softer woods that must be stabilized to make them suitable for handle use.
“Maple burl probably was the first wood stabilized successfully, it’s the most readily available and the cheapest, but we don’t sell a lot anymore and it’s not in the top five,” said Mike Ludeman of Wood Stabilizing Specialists International (WSSI). “Box elder burl is the most versatile wood and we double-dye it. Black ash burl and California buckeye burl are popular, and with buckeye each piece has to be graded individually because it can look nice, but have a huge void on the inside, so each piece has to be graded individually and priced accordingly.”
McFall, whose Knife & Gun Finishing Supplies also provides a stabilization service, echoed Ludeman about the box elder and California burls. “They have the best patterns and finest colors,” she said. “Box elder takes a dye the best in single/double dyed, and you can get the effects of a lot of natural wood with more control over the colors.”
Along with advances in the stabilization process comes more options. “Something normally bland with a figure can now be dyed to a natural look, rather than staining it as in the past,” McFall noted. “You have more control over the colors.”
“BETTER” OR “JUST NEW”?
Ludeman said stabilization methods are “highly regarded secrets” in a field that is growing.
“Stabilized is not a word I like to use because it’s thrown around loosely anymore,” he noted. “I achieve 100 percent penetration of an acrylic impregnated wood.” Hartman embellished the point. “I have seen a lot of new ‘stabilizers’ advertised out there, which doesn’t make them ‘better,’ just new,” he offered. “As far as I know, the important part is proper selection and preparation of the wood, and fully understanding the entire stabilization process.” Bybee warned that amidst the growth in companies and individuals offering stabilization services, you should research the subject and exercise caution.
Factory knives with stabilized wood handles are rare. “Generally, a factory uses stabilized wood, typically U.S. maple or box elder, for a special/limited edition” because of the cost factor, Ludeman said. “It’s not something they make tens of thousands of.” Hartman concurred. “Who can supply 500 pieces of high-quality stabilized woods on a consistent basis for two years?” he asked. “You can do limited-edition runs but it’s very hard to supply quality consistently over long periods of time in that quantity.” Bybee agreed, adding, “Factories have moved almost exclusively to man-made materials, with G-10 and Micarta® dominating now, because they can count on availability and consistency.”
FUTURE WOODS
What woods will be popular in the future? “It varies because a lot of popular woods are harder to get so they don’t actually show up more,” Walker said. “Turkish walnut has a really rich color, nice dark browns with lighter streaks running through it, and I think it shows promise in gaining popularity.”
“I would love to see somebody come up with something new made from bamboo,” Hartman stated. “This could be the perfect material, it’s sustainable, has a lot of good qualities, but just not enough character or pattern to become a hot-selling knife material.” He also identified the need for a “passionate supplier” of exotic woods.
“There are a lot of ‘suppliers’ of woods, myself included, but no ‘master wood supplier’ that does only exotic woods, stabilizes and does nothing else,” he mused, “a ‘wood crazy’ company that lives and breathes wood dust for knife folks.”
The complexities involved in natural and stabilized woods make the possibilities, as Bromley noted, “nearly endless.” There is an attraction that cannot be denied. “Wood is naturally, beautifully created,” Hartman said, “and it’s a silly man who thinks he can improve on that kind of art.”—by Stephen Garger
Wood: It’s Not a Wash!
The No. 1 maintenance tip Jessica Bybee Walker offers is to not wash the knife in a dishwasher.
“A lot of knifemakers use vulcanized fiber liners, which are very susceptible to moisture and can shrink and pull back or swell up in the dishwasher and crack,” she warned. Chuck Bybee recommended putting mineral oil on your hand and rolling the handle around in it. “I also put Renaissance Wax on all my ironwood knives as one of my yearly rituals,” he said.
“Wood is a natural product so I don’t use a petroleum-based blend. I use a thin coat of olive oil on wood handles. Besides,” Peter Bromley smiled, “I like the smell.”
Stabilized woods do not require the same amount of care as untreated woods, but that does not translate as “no” care. “Basically, stabilized wood is an enhanced wood—not the cure-all for swelling, shrinking, etc.,” Ludeman noted. “The real purpose stabilization serves is to expand the availability of woods that are otherwise too soft for knife handles.” In other words, stabilized or not, use common sense and do not leave your knife sitting on the dashboard in 90-degree heat.—by Stephen Garger
Woods: Most, Good and Least
MOST POPULAR: Desert Ironwood
MOST EXPENSIVE: Desert Ironwood
GOOD IRONWOOD SUBSTITUTE: Turkish walnut
MOST PLENTIFUL: Maple
LEAST EXPENSIVE: Maple
MOST POPULAR BURLS: Amboyna, redwood, box elder, California buckeye, maple and black ash
For more on the latest knives, knife legislation, knifemaking instruction, knife trends, knifemakers, what knives to buy and where and much more, subscribe to BLADE® Magazine, the World’s No. 1 Knife Publication. Click on http://www.shopblade.com/blade-magazine-one-year-subscription-us/?r+ssfb071212 for more information.





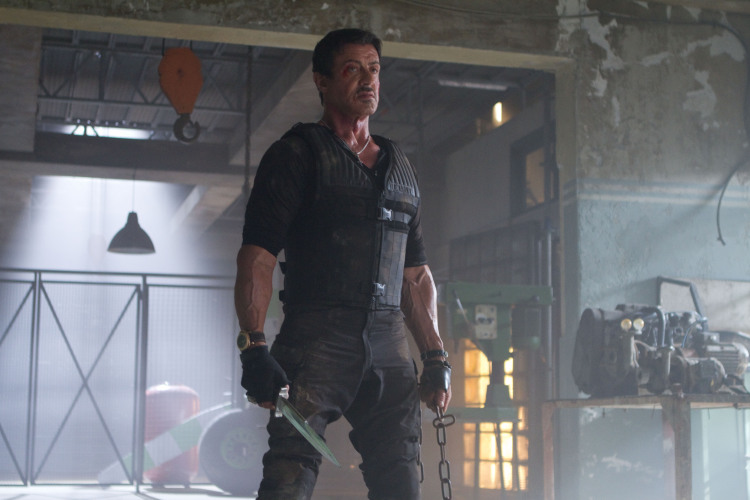
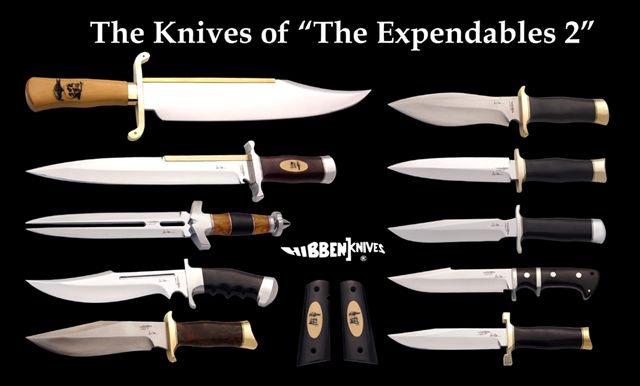 Sylvester Stallone (top) holds the Gil Hibben Toothpick (second from top left, above) in a scene from The Expendables 2. Along with the modified version of Gil’s Alamo Bowie (top left, above), it is a carryover from the first film in the series, The Expendables. The Legion Fighter (fourth from top left, above) is the knife Hibben made expressly for Stallone for the sequel. (photo from The Expendables 3 by Frank Masi; photo of Hibben knives by Mike Carter)