Here are BLADE Magazine’s Featured Knives of the Week. Browse through these articles to find the best knives available from both custom knifemakers and factory knives.
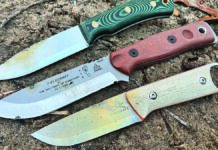
GiantMouse Releases New Set Of Sleek, Robust Folding Knives–the ACE Corta line–Made From Austrian Steel.
Stylish. Tough. Strong.
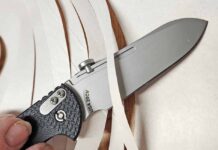
Those are just a few words to describe the newest folding knives released by GiantMouse. The ACE Corta Knife comes in three different styles and is as good as it gets when it comes to an EDC folder.
The showpiece is the blade, made of Böhler M390 stainless steel from Austria. Known as one of the ultra-premium stainless steel, martensitic steel is renowned for its and ease of sharpening. Essentially, it’ll take and keep an edge.
At 3.1 inches in length with a flat saber grind, the ACE Corta is a flipper inspired by GiantMouse’s limited-run GM6 knife.
The Natural Canvas version of the ACE Corta
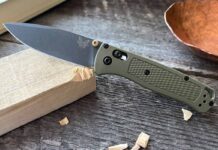
The ACE Corta comes in three styles: a green-canvas-colored Micarta handle and a stonewashed finish on the blade, a natural-canvas-color Micarta handle with a satin finished blade and a black PVD finish blade itself with a black G10 laminate handle.
All three knives have an overall length of 7.3 inches, a handle length of 4.18 inches, and come in between 3.8-4 ounces in weight.
The knives open quickly and smoothly thanks to the ball-bearing pivot. They all have a wire clip so it can slide easily onto a belt, purse, or pocket. And each version of the knife has an MSRP of $195.
Given the engineering that has gone into the ACE Contra, the price should prove a value to most.
Editor’s Note: This article was written by Mike Ableson.
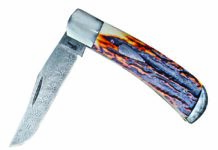
The Ontario Knife Company’s New Knife, The Old Hickory, Is A Modern Take On The Classic Outdoor Slip Joint Folder.
The new Old Hickory slip joint folder from Ontario Knife Company is a classy knife. It looks straight out of a classic Western film with its 1075 high-carbon steel blade, walnut handle scales, and brass liners. It may be made in New York, but this feels like a cowboy knife at heart.
And it’s a great EDC thanks to a heat treat that hardened the 2.9-inch blade to a 56-58 HRC. The knife opens with ease thanks to a sizable nail nick toward the tip. At 5.6 inches in total length, the OKC Old Hickory is a compact knife that can serve you well as an everyday carry without feeling too big or bulky.
The Old Hickory is an All-American knife made by an All-American company and stands out from the pack.
There aren’t many dull, boring or mundane trends, and for good reason.
Knifemakers embrace the old saying, “change is constant.” The “same old, same old” never catches on with a new generation. Knife craftsmen strive for fascinating and innovative ways of blade building, and collectors seek out the rare and unusual.
Eventually knifemakers find something modern that is not only aesthetic and utilitarian, but it also catches on with other artists. That’s the start of a trend.
You get the idea—trends are born out of creative thinking and design capabilities, and not from copying old patterns without any tweaking, improving or thinking outside of the box.
Sure, some trends have staying power. There are many new trends to take in, like dimpled, sculpted, grooved and glass-beaded knives, for example.
It is a trend in knives that presented itself to me while I poured over 1,000s of images from knife photographers for possible inclusion in the Knives 2014 book, now available and a gorgeous book, if I may say so myself, but not because of anything I did. It’s the knives and images thereof that make it a handsome title, and the Trends, State Of The Art, Factory Trends and Feature articles therein.
Enjoy, and keep your eyes peeled for new knife trends in the industry, particularly if you’re a collector, investor or general enthusiast with a habit of accumulating custom or production pieces.
Lately I’ve been carrying a Gerber Bear Grylls clip-point, lockback folder. I love the feel of the rubber handle inserts, and I’ve gotta tell ya, the black and orange combo just looks cool. But this isn’t about me. It’s about what knife industry professionals say are selling, being carried, receiving positive feedback and working well as EDC’s.
“You could poll 10 people and have 10 different opinions on what the ideal EDC knife is,” suggests Dan Weidner of Boker USA. “A construction worker is not going to select what an office worker or traveling salesperson carries, and a first responder won’t choose what an outdoorsman wants.
“Most folks have a few EDC knives,” he adds. “I carry the Boker Plus Damascus Gent II to the office. It does everything I need during the day, feels good in my pocket, is easily accessible, and when a visitor arrives, I have a beauty that I can say, ‘Look what I have.’ After all, at the end of the day we like to show off what we carry.”
What the Damascus Gent II locking-liner folder (this issue’s cover knife) has to show off is a 2.75-inch, 67-layer-damascus, drop-point blade, ebony handle scales, dual thumb studs and a detachable pocket clip. Weighing 1.6 ounces, its manufacturer’s suggested retail price (MSRP) is $89.95.
“It’s just a classy looking knife, and the damascus blade and ebony handle blend into artistic cutlery,” Weidner comments. “When it comes to packing for a hike into the Rockies, it goes on top of the dresser and out comes a more formidable piece that can handle rugged duty. Yard work calls for good old-fashioned high carbon steel, sharp as can be, with a totally blackened blade.
“It’s this chameleon EDC change-up that keeps the industry rolling!” Weidner concludes. “I think most will agree, there is no best EDC material that covers all bases.”
Rob Sterner, senior vice president of sales for Swiss Army Knives, says the Victorinox Hunter Pro Folding Blade has been designed to meet the needs of the serious hunter, as well as the general outdoors enthusiast, making it a versatile knife. “For the first time, we have incorporated the blade steel from our professional knives, which we’ve provided to the slaughterhouse and meat-packing industries since 1884,” he explains.
The Boker Gnome Is A Fun Little Fixed Blade That’s An Excellent Neck Knife And Can Serve You Well As An EDC.
Sometimes bigger isn’t necessarily better. The new Boker Gnome fixed blade is a little gem that can be your trusty sidekick in the home and elsewhere.
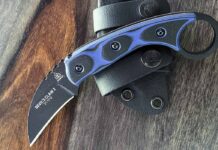
It starts with a 2.2-inch wharncliffe blade of D2 tool steel. The knife comes in two different handle types. The one featured above is made from olivewood, and there is a slightly more expensive green Micarta® version. The big lanyard hole at the butt of the handle comes in handy if you want to lash the Gnome to your pack or hang it around your neck. Everything is kept safe thanks to the included leather belt sheath.
Even though it’s small, the handle is rounded in such a way that the knife is easy to grip. It weighs just 1.6 ounces so is light and simple to use. So many neck knives trade quality for convenience. The Boker Gnome is high quality as it is convenient.
Knowing How To Use A Whetstone, Or Sharpening Stone, Can Restore A Dull Blade And Should Be Part Of Regular Upkeep For Your Knives.
There are many inexpensive ways to sharpen your knives at home, but nothing feels the same as sharpening your knives on a whetstone. Used for centuries around the world to keep an edge on everything from swords to kitchen knives, the whetstone is an intimate, precise way to maintain your knife’s edge and bring it back to life.
The “whet” in whetstone has nothing to do with being wet or any type of moisture. It comes from the Old English term “hwettan” which means “to whet or sharpen.” Coincidentally, most whetstones do need some type of moisture for top performance. In all cases, this means water or oil. However, a majority of stones you’ll find in stores or online–particularly for kitchen use–will be waterstones.
Oil Stone Vs Waterstone
Honestly, in some cases, there is no difference.
The preference of lubrication–water or oil–is left up to the user. Both will do the same job, swarfing the surface of the stone so it does a better job sharpening.
However, there are other cases where one or the other must be used with a particular stone. Natural sharpening stones, for instance, mostly use water. Rub them down with oil and you’ll render them useless.
Manufacturers will spell out whether your particular whetstone is water, oil or both.
The main difference between whetstones that use oil and whetstones that use water is that waterstones are softer so the old abrasive material breaks off faster than an oil stone. This means you’re sharpening on fresh stone material more consistently.
Waterstones are also less messy and easier to clean vs oil stones, which adds another point in the bucket for waterstones. Waterstones also come in more grit varieties than oil stones.
Oil stones, especially those made of novaculite, are a traditional sharpening stone, and many are quarried in America, specifically in Arkansas.
Differences In Grits
You’ll see stones of all types come in a variety of grits. The lower the number, the more coarse the grit. The more coarse the grit, the more material gets removed with each pass of the knife.
For at-home sharpening, grits in the range of 1,000-8,000 should be more than enough. However there are stones that come as coarse as 120 and as fine as 30,000. Consider these specialists and stick to the common grits for most jobs.
Whetstone Accessories
While there are many gizmos and accessories out there to help with your whetstone sharpening, there are two that stand above the rest. You can see them in the photo at the top of this article.
The first is the stand for your whetstone. This should come with the stone when you purchase it. You do not want to lay your stone directly onto your table or countertop. It can slide, and mixing sliding things with sharp knives is a recipe for losing a finger.
The second is that little thing to the right of the stone. It looks like a chip clip, but it’s actually an angle guide. Some will clip onto the top edge of your knife while others might need to be strapped to the stone itself. Either way, the angle guide will help set your sharpening angle and allow you to maximize each pass of the blade across the stone.
I’ve used a 1000/6000 waterstone for years to keep my kitchen knives sharp. You can find plenty of quality 1000/6000 whetstones online for under $40. But having the stone doesn’t account for much if you don’t know how to use it. I pulled out my sharpening set up to help give you a step-by-step breakdown of how to sharpen your knives with a whetstone.
Step 1: Get Your Equipment
Things I use to sharpen on a whetstone
Ready to start sharpening? Hold up a minute. You’ll need more than a whetstone and your knife.
In addition to the obvious tools for the task, I start with a whetstone stand, a container of water and a spoon (you heard right).
There are special notes on a couple of these items.
The water container is to prep the whetstone and should have some specific attributes. I want a deep container so the stone can sit in it and fully soak. These babies are thirsty, so you can’t just dab water on one and expect it to work.
Here I’m using a baking dish, but a plastic tub or kitchen sink work equally as well.
The spoon … no, you’re not taste testing your knife’s edge. It’s there to literally spoonfeed the stone more water during sharpening to clear off the shavings.
Step 2: Soak The Whetstone
Soaking the whetstone
Here’s the speedbump of the process.
As mentioned, whetstones require a good soaking before use. This isn’t a splash-and-go process.
Plan to let your stone sit fully submerged for a good 10 to 20 minutes before it’s primed for use. There’s a simple way to tell it’s good to go.
Plunge that baby into water and you’ll see it bubble like an aquarium aerator. Quite literally, this is the stone drinking up water in its microscopic pores and displacing air in the process.
As time goes on, fewer and fewer bubbles pop out of the whetstone (see the above picture). When it’s none or next to none, you’re good to go.
Step 3: Secure The Stone
OK, this sounds obvious. But it must be said–you must secure your wetstone before sharpening.
Not only does this stave off a tongue lashing from your significant other, ensuring you don’t scratch up the counter or dinner table. It also keeps your digits from getting cut up.
In most cases, you’ll have a holder that, well.. holds the stone. If you don’t, never fear, a towel or rag makes a dandy impromptu stone holder.
Whatever the case may be, make certain your stone isn’t going anywhere before you actually begin sharpening.
Step 4: Determining The Sharpening Angle
Rubber, you’re almost ready to meet the road!
Before you actually start scraping away precious material to create a fresh sharp edge, you need to determine exactly what angle to sharpen at.
Some knives require a somewhat uncommon angle to sharpen. This is spelled out in the owner’s instructions if this is the case. Lose those, check the company’s website, these vital specs are usually there.
However, in most cases–a vast majority–20 to 25 degrees is the best angle to achieve a good cutting edge. And you don’t even need a protractor to determine this pitch.
Think of it this way, the edge pointing straight down at the stone is at 90 degrees. Tilt the blade halfway down, now the blade is at roughly 45 degrees. Tilt the knife halfway again and, there you are about 22.5 degrees–a sweet spot for a good edge.
Or you can go the easy route and use an angle guide, mentioned earlier in the article.
Step 5: Course Sharpening
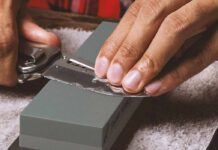
Start with the lower grit, which in this case is 1,000. It takes off more material and gets the edge almost all of the way back to razor sharpness.
Usually, I do 10 passes on each side of the blade, but I fully sharpened my knives a few weeks ago and just did two here as a demonstration.
Keep the blade angled between 20-25 degrees to get the best possible results.
Step 4: Turn The Stone Over & Sharpen With The Finer Grit
I finish with the fine grit, 6,000 on my whetstone.
You’ll notice each time I pass there’s some new metal shavings on the stone. That’s the swarf. It’s fine for your knives if you leave the swarf on the stone as you sharpen, but you can also wash it away with some extra water.
Again, like the coarse grit, I usually do 10 passes on each side of the knife.
Step 5: Wash Off Your Knives & Clean Up
Once you’re done sharpening you should rinse your blades and wipe them dry with a towel. Once your knives are accounted for, give your water container a thorough cleaning. I used a baking dish, and it’s important to fully clean it so you aren’t ingesting microscopic metal shavings.
For the stone itself, I double check that it’s secure in its holder and leave it out overnight to let the water evaporate out of it. Once it’s completely dry I put it back in its spot in the drawer.
And there you have it, a simple, straightforward guide showing you how to sharpen your knives using a whetstone.
Editor’s Note: This article was written by Mike Ableson.
Sometimes A Simple Knife Is All You Need, And This New Folder From Gerber Looks Sharp And Is Sharp.
The new Affinity from Gerber is a straightforward, plain-edge folding EDC. That’s not a slight but a compliment. The piece comes in two colorways and both shine thanks to their construction and ease of use.
It starts with the aluminum version that has a 7CR blade and an easy-access frame lock. This allows the cutting edge to be exactly where you expect it and allows you to slice with confidence knowing the blade is secure.
The handle is highly-polished for a clean, modern look. The ergonomic design, along with the adjustable thumb stud, allows you to make the knife your own and have it feel perfect in your hand. The pocket clip allows for easy carry as it discretely tucks away.
Gerber Affinity – Copper
The other version is the copper. The copper features all the same features as the aluminum version with two key differences. The most obvious are the machined copper scales that give the blade a tough-looking exterior.
The other key difference is the in the blade; the copper has a blade made from D2 steel, which drives up the price although both are affordable folders.