What is the purpose of stropping? Is it the same as sharpening a knife? We’ll answer those questions and more as we explore how to put the finishing touches on a blade.
Burr is a term used to describe the turned-over edge of a freshly sharpened blade. The burr can be seen as an ultra-thin, wire-like structure at the edge. When sharpening you are bringing one edge surface closer to the other edge surface with alternating and even strokes, left-right-right-left against an abrasive such as a sharpening stone or metal grade sandpaper or strop. By alternating sides you simultaneosly remove surface material from both of the sides forming that burr. Sharpen back-and-forth, one side and then the other, and the burr appears.
What Sharpening Does To A Blade
At first the two opposite sides are divided by the blade’s edge thickness and there is no burr. This is seen as that paper thin shiny line from tip to choil. As one side is brought closer to its opposite side (i.e. sharpened), one side or the other will eventually meet the other and the thin shiny line will disappear.
At that point there isn’t enough mass to support the edge against the hard-abrasive surface, and the super-thin edge rolls/curves over in the opposite direction, forming the burr. The burr can be seen with the unaided eye and felt with your thumb. The objective at this point is to switch and sharpen the edge from the other direction with a yet finer grit abrasive. This maneuver makes an even smaller and thinner burr on the opposite edge. After you sharpen several times like this in opposite directions, with finer and finer grit paper, the burr will be reduced microscopically and be difficult to see or feel but will still be there. This final use of fine grits of abrasive is considered, and is called, a hone.
What Stropping Does
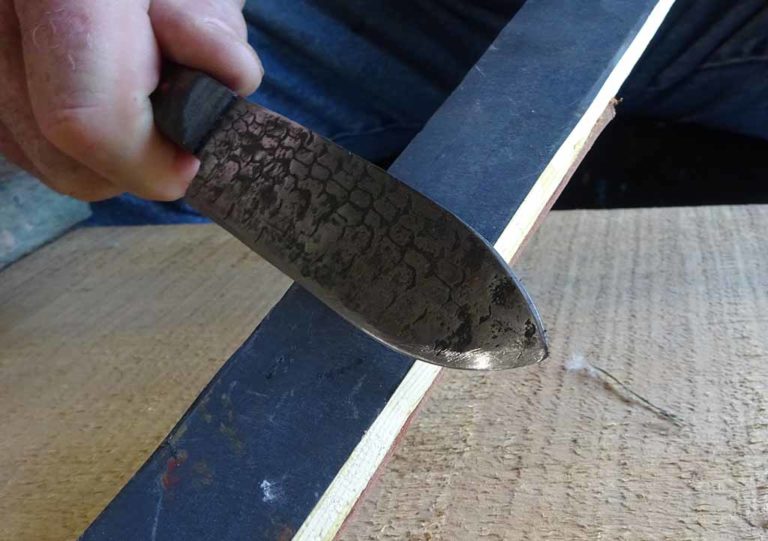
At this point switch from a superfine hone-grit paper (1500 plus grit) to a leather strap, belt, or section of a belt, called a strop. The fine sandpaper hones, and the leather strops. Strop with the same back and forth motion, strop the blade’s edge against the leather. This action bends the now unseen burr back and forth against the leather and the burr finally breaks free. The edge thickness is now just paper thin or less. So “paper thin” doesn’t sound like the edge would bear up during use, being this thin, right on the very pinnacle of the blade’s edge—but it does.
With removal of the burr the edge acquires maximum sharpness and can be re-honed repeatedly without subjecting the blade to recurring sharpening cycles with lower grit sandpaper. This maintains the thin-and-sharp element of your blade.
Choosing A Strop
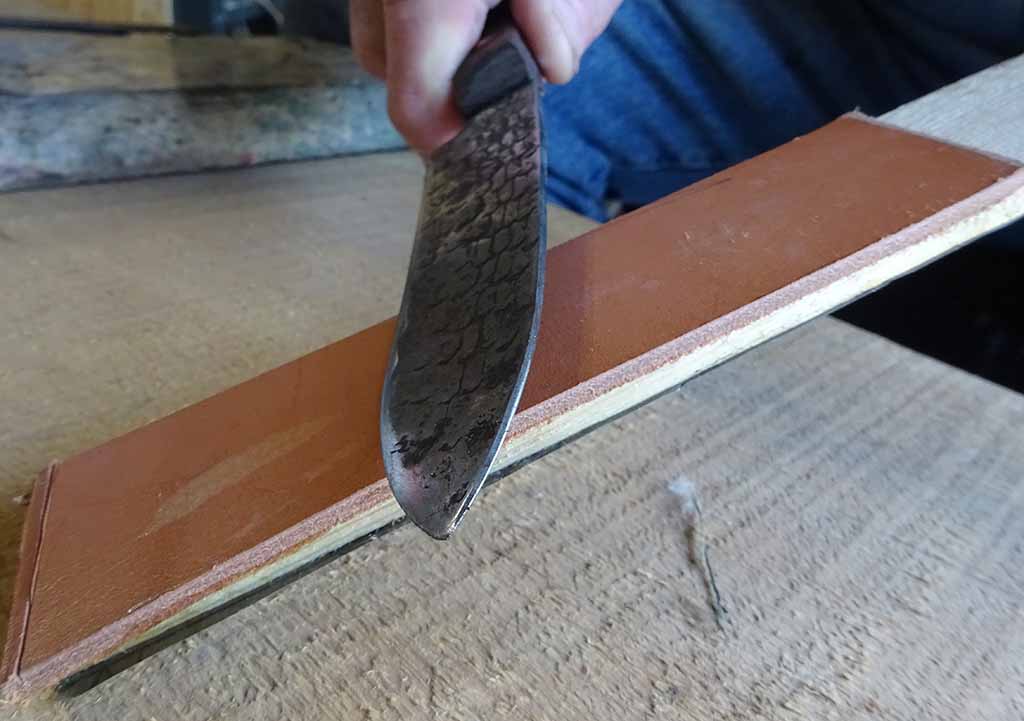
Make your strop from a strip of leather belt (10-inches long) glued to a bit of yardstick or lath material. Glue a strip of 800-1500 grit wet-n-dry sandpaper to the other side for a hone.
The same exact motion is used on the leather side of the strop stick. When the smith is “into” the motion it is similar to a continuous figure-8 movement. Most of the time the leather is enough to restore the blade’s edge without using the sandpaper side of the stick.
How To Strop
Stropping is a low-angle slap and slide motion. The leather actually sharpens the microstructure of the blade’s edge. It 1) bends the burr back to a sharp edge or 2) bends it back and forth till it breaks, like bending a wire coat hanger back-and-forth, revealing a new raw edge. Visualize a barber in an old-west, cowboy movie slappin’-n-slidin’ his straight razor on a big leather strop. Slap-n-slide your Frontier blade on the 800 to 1500 grit black W/D sandpaper 10 to 15 times then on the leather the same number of swipes. When your edge dulls you can often just strop with the leather, forgoing the hone altogether, in the restoration of a keen cutting edge.
After stropping, if your knife edge isn’t near razor sharp, go back to your wet-n-dry-sharpening action with the higher numbered sandpaper grits (400, 600, 800) then strop again.
Testing The Edge
Feel the edge with your thumb, perpendicular to the edge. Never run your thumb or fingers vertically up or down the blade. It will cut. With time you’ll be able to tell in an instant various level of sharpness with just your thumb. With time you will feel the burr and know the angle of any blade with just a touch of your thumb.
Another sharpness indicator is the use of an old leather belt or scrap of leather. Almost any “sharp” knife can cut a sheet of paper but stiff leather is the true challenge. First, use a knife of known sharpness. Cut a bit from the leather. Note the force needed to peel off a few pieces of leather. Use the same piece of leather on subsequent blade edges you sharpen in the future. By comparison, the quality of those blades’ sharpness can be gauged.
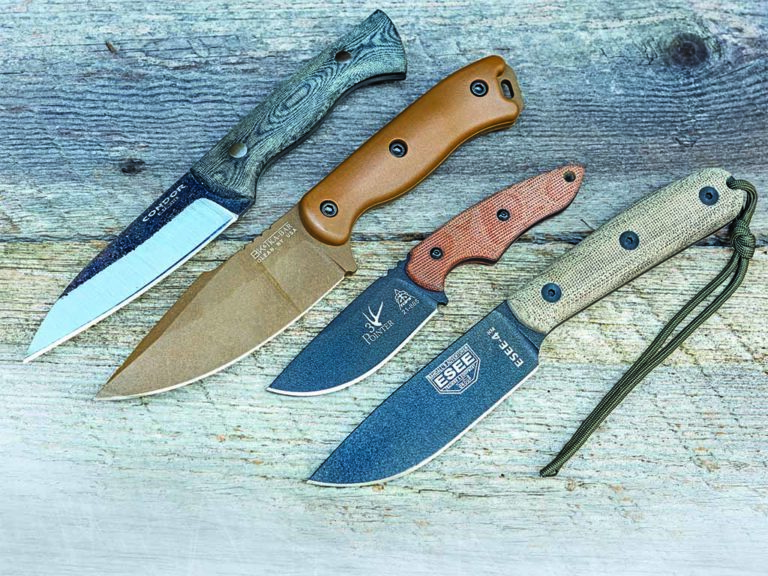
Looking for a tough and ready option for EDC? Here are 4 factory high-carbon steel knife options that wear and use the reliable 1095 steel well.
Knives in tried-and-true carbon blade steels such as 1095 often are left out of the conversation. Do they still have relevance in the modern world of knives? The short answer is yes—and they remain relevant for the same advantages that made them popular in the first place.
“There are a number of reasons why 1095 is popular with consumers and manufacturers,” states Joe Bradley, sales and marketing manager for KA-BAR Knives. “It’s a great steel to work with and maintain, which is the primary reason we have used 1095 Cro-Van for decades.” Says Shane Adams, marketing director for ESEE Knives, “It takes a beating and is field-serviceable. We know it, use it and trust it with our lives.” Adds Jeremiah Heffelfinger of TOPS Knives, “1095 is also easier to sharpen, especially in the field, than some stainless steels.”
You can work 1095 to death, then take your favorite sharpener and put an edge right back on it. Try doing that with CPM S30V stainless! Because of 1095’s tendency to rust, you must maintain it more than stainless. Many 1095 blades sport a coating that protects most of the surface except the edge. If you’re not careful, corrosion can begin at the edge then travel up underneath the coating. Consequently, in a wet environment keep a light coat of oil on the blade. If you wash the knife, towel dry it carefully and let it air dry, too. As for some of today’s top models in 1095, check these out.
Condor Tool & Knife Bush Slicer Sidekick
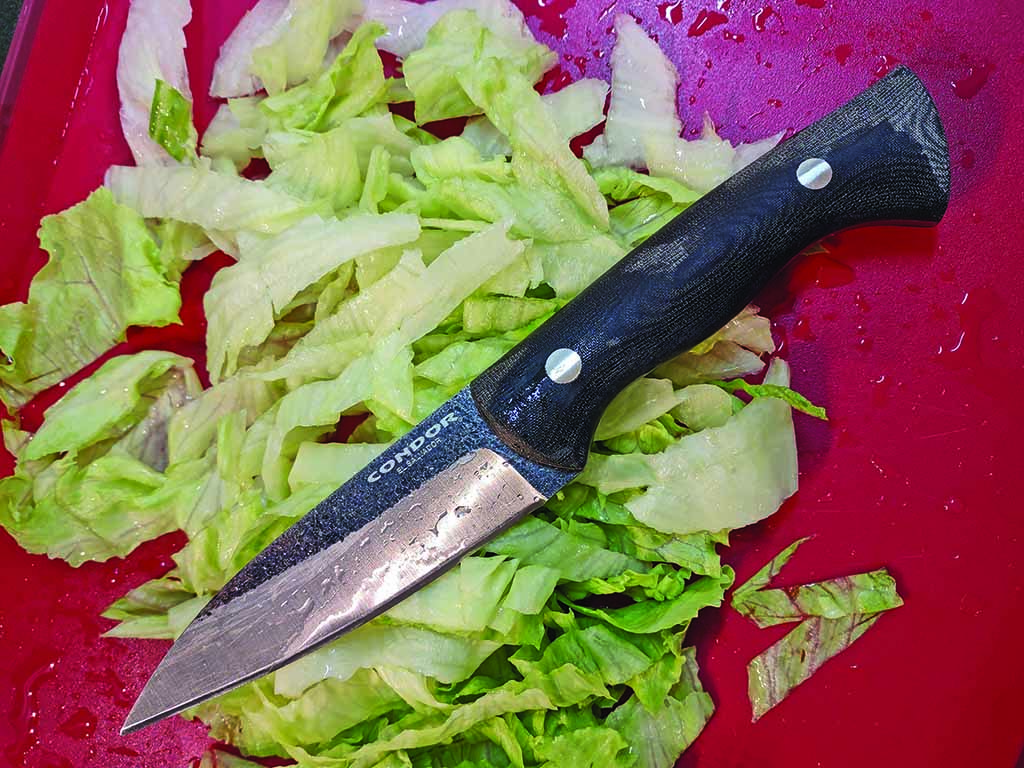
The Bush Slicer Sidekick from Condor Tool & Knife is a small, lightweight fixed blade high-carbon steel knife designed to handle intricate food prep tasks similar to those paring knives address. It also functions as a stand-alone tool for bushcraft, as well as day hikes and such.
The Bush Slicer Sidekick from Condor Tool & Knife is a small, lightweight fixed blade designed to handle intricate food prep tasks similar to those paring knives address. It also functions as a stand-alone tool for bushcraft, as well as day hikes and such.
The 6.4-inch modified wharncliffe blade on this high-carbon steel knife has a defined tip for intricate cutting tasks, but also enough sharpened real estate to get work done. Close to 9 inches overall, the knife carries well and is neither too big nor too small for many food prep and camp chores. The black Micarta® handle is ergonomically shaped for maximum user comfort. The sheath is well designed, too. One of the few hybrid-constructed models employing Kydex and leather, it is quite user friendly. You get the rigid protection of Kydex along with the carry versatility a leather loop offers, allowing the sheath to move somewhat while on the belt. The gray Kydex complements the handle’s appearance.
The Bush Slicer Sidekick is built extremely well, with high quality fit and finish. The edge is razor sharp out of the box. The standard Condor blade finish is two tone, with the darkened heat-treat scale finish on the flats and machine satin on the bevels. The cutting edge is tilted up a bit in relation to the handle, giving more hand clearance on a flat surface. The way the blade profile tapers toward the tip is smart as well, giving the knife the ability to tackle finer cutting tasks. Another nice feature is the 90-degree blade spine for use in conjunction with a fire-starting ferrocerium rod.
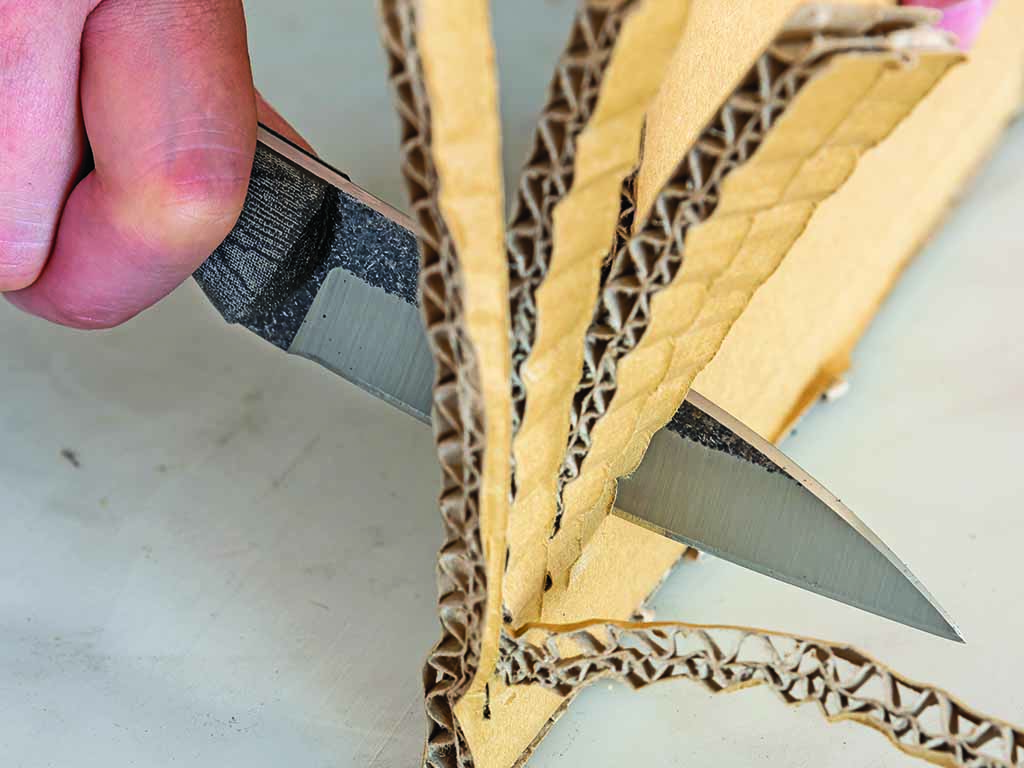
Condor’s knives are not flashy but work like pack mules. The Bush Slicer Sidekick slices cardboard like a champ. The flat grind tapers the edge to a thickness that is both durable and sharp.
The flat-ground blade thins the edge well so it sails through a variety of materials, yet is thick enough for durability. The tip is controllable for fine and precise cutting. Integral front and rear guards prevent unwanted hand movement in either direction. However, those with larger hands may find the grip a bit small. It also lacks a lanyard hole. At a manufacturer’s suggested retail price (MSRP) of $119, the Bush Slicer Sidekick represents excellent value in an expertly crafted using fixed blade. County of origin: El Salvador.
TOPS Knives 3 Pointer
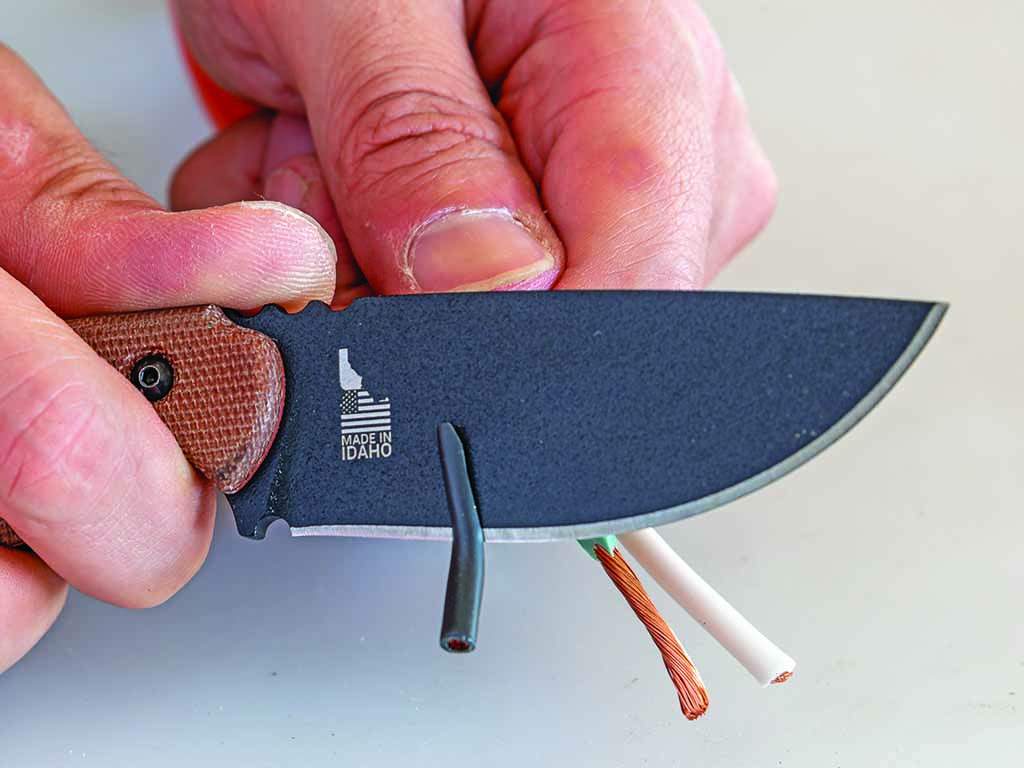
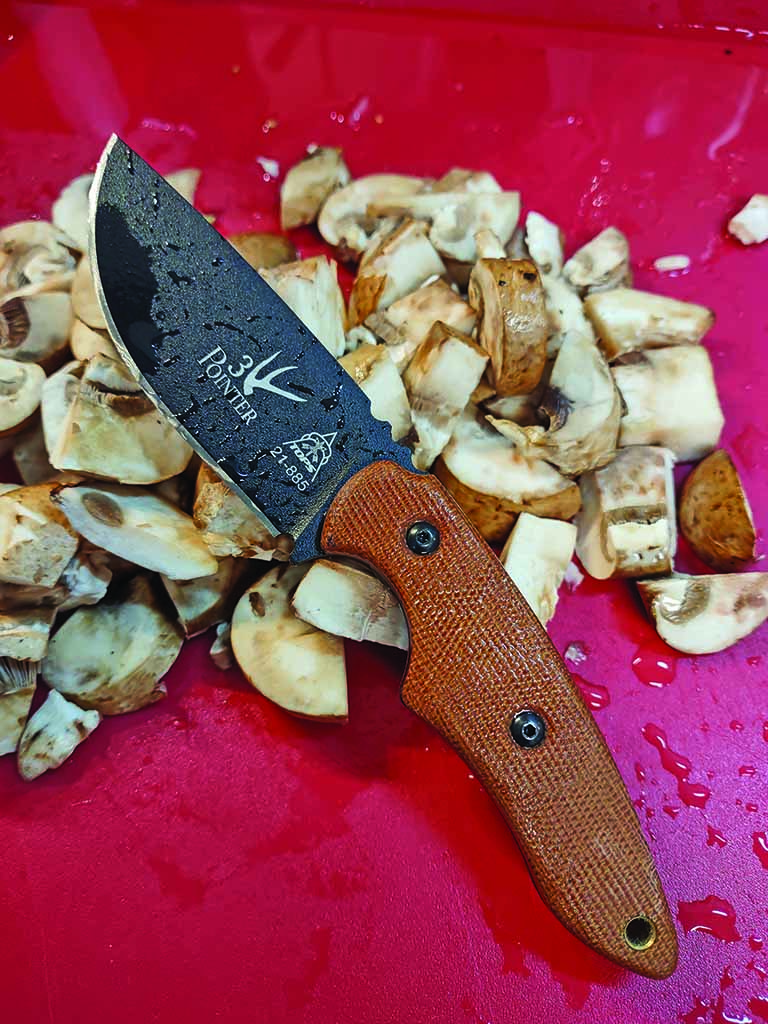
The TOPS Knives 3 Pointer is a great multi-carry high-carbon steel knife, a fixed blade, with the option of being a neck knife. The drop-point blade is great for cutting food as well as utility tasks that require a sharp blade and precise control, such as wire stripping.
The TOPS Knives 3 Pointer might be the smallest of the test bunch, sporting a 3.1-inch blade and 6.6-inch overall length, but also has the most options. It comes in three handle choices—black Micarta, tan Micarta and skeletonized. In addition, each model comes with two modes of carry. Straps screwed to the sheath permit horizontal belt carry, and a chain provides neck carry (just remove the belt loops). The options might make you consider the 3 Pointer to replace a folder for EDC.
The high-carbon steel knife’s heart and soul lies in its deep-bellied drop-point blade capable of field dressing game, doing chores in camp, etc. Black Traction Coating helps ward off rust. It is a very durable coat that withstands frequent heavy use.
The handle is particularly interesting. The pronounced finger groove can lock into your grip, with the rest of your fingers falling into place on the tapered handle. Unlike other fixed blades of this size, the handle isn’t blocky or bulky, which allows it to be carried as a belt or neck knife. We tested the tan handle version, which has a nice contrast in appearance to the black blade. Three large traction notches accept a thumb comfortably on the spine to exert control and pressure. The red liners provide a subtle pop of color contrast.
The 3 Pointer’s handle is particularly interesting. The pronounced finger groove can lock into your grip, with the rest of your fingers falling into place on the tapered handle.
The Kydex sheath is well made and designed with an integrated thumb rest that lets you grip the knife handle and push out, easily popping it free of the sheath. The feature is very well thought out and not found on many knives.
I carried the 3 Pointer mainly as a neck knife for the evaluation. Neck knives are a love ’em/hate ’em proposition. If you want to carry a smaller fixed blade in a discreet manner this is the most viable option, as neckers conceal easily, even under a plain T-shirt*. They also work well with polo-style and button-down dress shirts. And when you start layering as the temperatures drop, neck knives carry well under a hoodie and other cold weather wear. The flat handle profile enhances discreet carry without printing underneath the aforementioned T-shirt. I like how the shape and contours help you obtain a very secure grip.
The drop point blade is usually my favorite when it comes to straight knives due to its versatility. The belly allows the blade to tackle sizeable cutting tasks while remaining easy to carry. If you prefer taking a small fixed blade into a restaurant to substitute for the knives provided, the 3 Pointer is low profile enough to cut food without attracting unwanted attention. The TOPS 3 Pointer in tan Micarta has an MSRP of $125—an excellent deal for a USA-made sheath knife.
ESEE 4HM
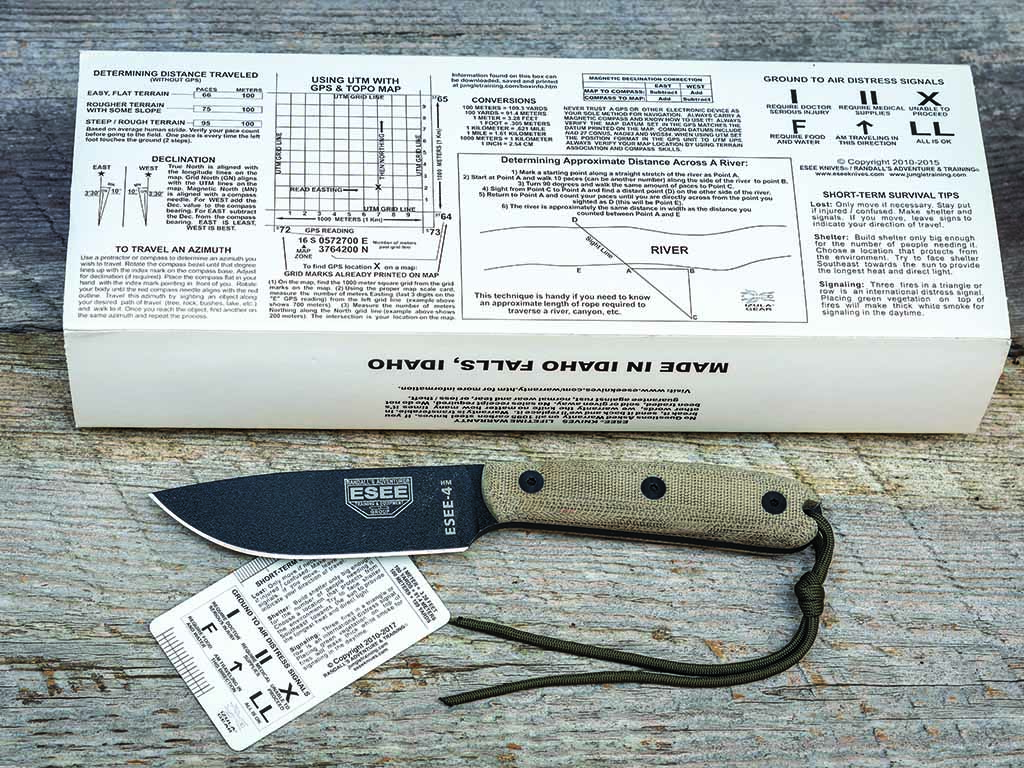
The ESEE 4HM comes in some of the most utilitarian packaging anywhere with information that every outdoor survivalist needs, including how to determine distance traveled, GPS and topographical map tips, and much more.
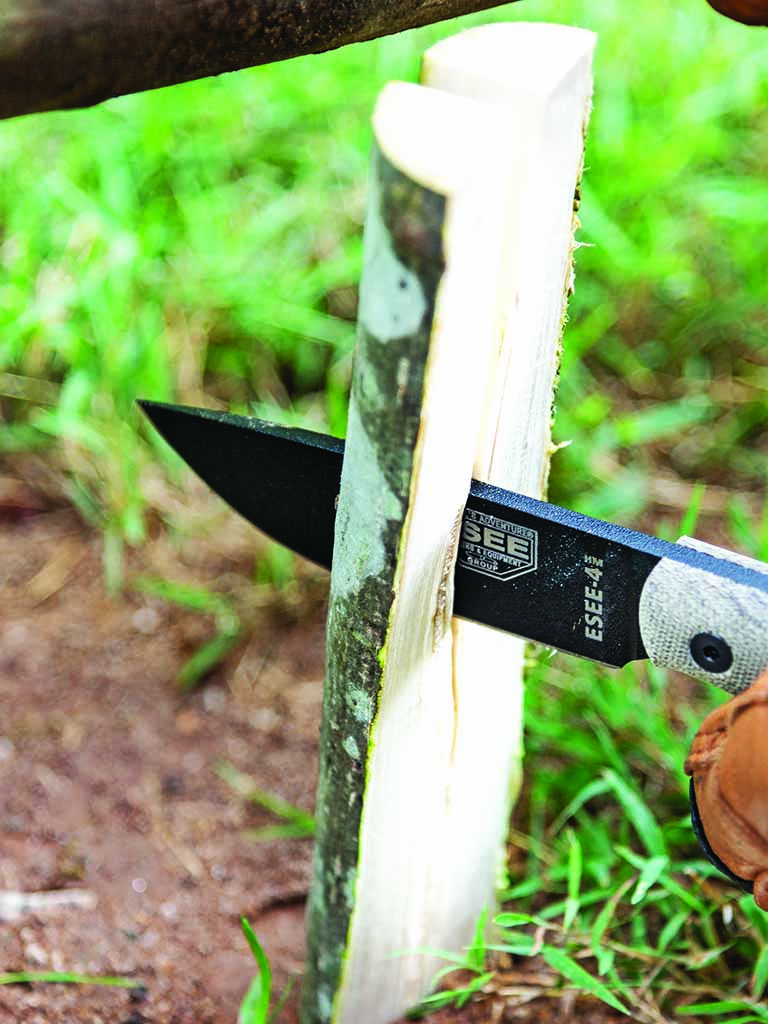
The ESEE 4HM blends toughness and cutting efficiency in one package that carries easily and is built for extended use. The 4.3-inch blade has a generous belly for field dressing, food prep and some bushcraft. Overall length is just short of 9 inches. Blade thickness is .1875 inch and the flat grind is robust for long-term durability, though thin enough for slicing. The blade has a black powder coat to protect it from the elements.
The ESEE Knives 4HM is designed to be a more modern variation of a bushcraft/utility high-carbon steel knife. With its straight-forward design, it offers high performance with a more user-friendly blade.
The Micarta handle is beefy but rounded in the right places, and fills your hand without generating hot spots. The Micarta is fastened to the tang using three sets of flat-head Torx screws. A lanyard hole comes with a length of paracord, making the 4HM easy to extract from the well-made, sewn pouch sheath of brown leather. The knife sits down in it securely but loose enough so it comes free smartly when needed.
It is a great all-around fixed-blade high-carbon steel knife. The blade and handle shapes are universal and work well in most scenarios. The drop point shape is also a great scraper, if needed. The fat handle cross section gives a reassuring grip, as opposed to shapes that might be comfortable but, due to being too thick, are not as secure in the hand. If you enjoy hunting, camping and hiking and use a fixed blade a lot, this is the knife you need. Country of origin: USA. MSRP: $178.
KA-BAR BK18 Harpoon
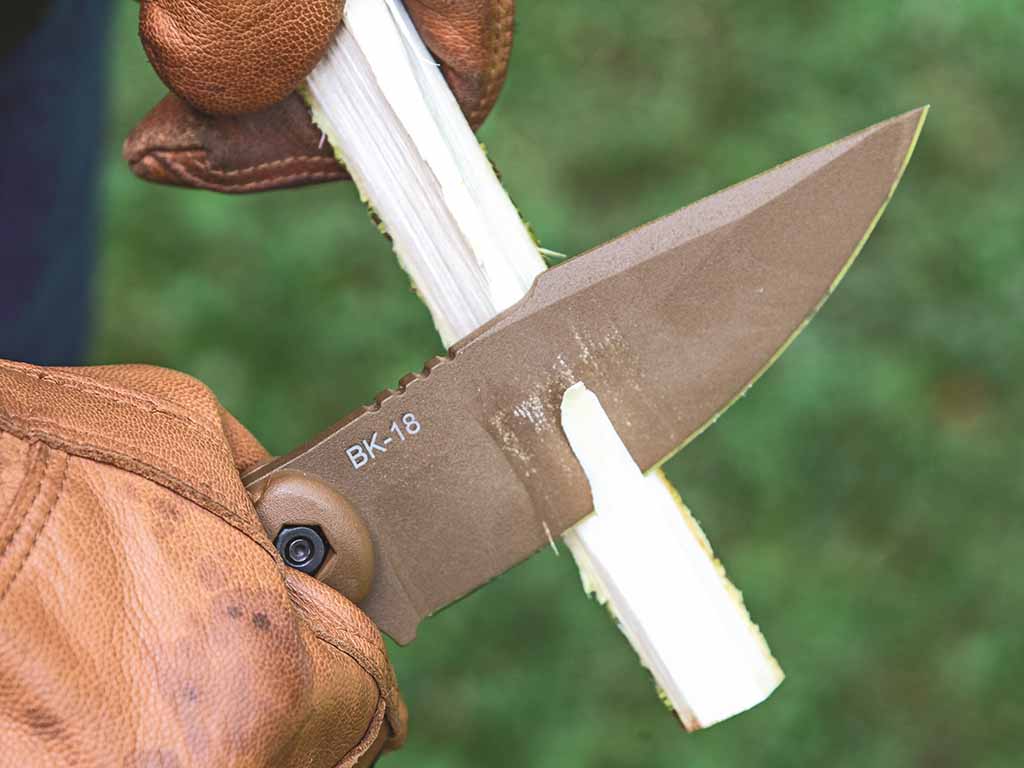
The BK18 Harpoon’s tall, flat grind engages whittling and carving jobs with gusto. The swedge provides a bit of visual attitude, too.
The BK18 Harpoon is Ethan Becker’s latest design for KA-BAR. The 4.5-inch drop-point blade offers plenty of length for food prep and outdoor tasks. The prominent harpoon-style swedge projects attitude. The ergonomic handle features multiple swells for comfort and a non-slip grip. A palm swell fills your hand and provides excellent stability and control. The harpoon blade forms an integral forward guard, and the slightly dropped handle butt helps capture your hand. There’s an oblong hole for a lanyard.
At 9.3 inches overall, it’s a great mid-sized sheath knife. The blade belly slices easily, while the handle provides the ultimate in control. Traction notches on the spine allow you to choke up. The sheath is a molded Celcon® polymer with a heavy duty nylon webbing belt loop. The knife fits/clicks in to avoid inadvertent loss. A nifty feature is the two molded-in vent channels that reduce moisture by allowing inside air flow. A secondary webbing button snap secures the handle in place, though the way the knife clicks tightly into the sheath, I cannot imagine it popping loose accidentally. The belt loop also can be re-mounted to set the knife up for left-hand carry.
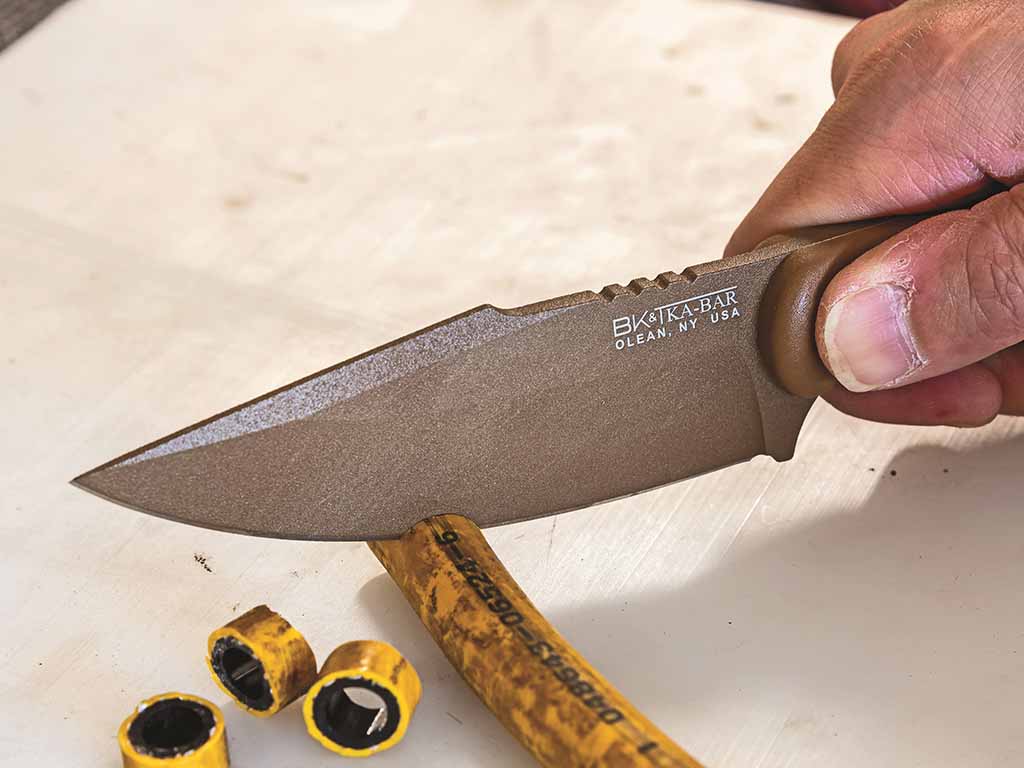
The KA-BAR Becker BK18 Harpoon is equally at home with food prep or work tasks. The high-carbon steel knife’s blade’s sweeping belly tackles a host of chores inside and out.
One thing many remember about seeing their first Becker design is the chunky handle design. As awkward as it may look, it works. No matter the model, basically the same handle shape is used, a hallmark of Becker designs. The BK18 Harpoon has the same configuration but it’s slimmed down considerably. It’s comfortable for extended use and helps keep your hand in place with no awkward sliding in either direction. It also helps prevent the handle from rotating in your grip.
Speaking of handles, there is an optional upgrade. The tan Micarta kit, which replaces the stock molded grip, is $35. It’s worth it. The Micarta has a nice grab-you-back feel that holds well even with wet hands—a feature the stock handle somewhat lacks. MSRP is $120, also not bad for a USA-made fixed blade.
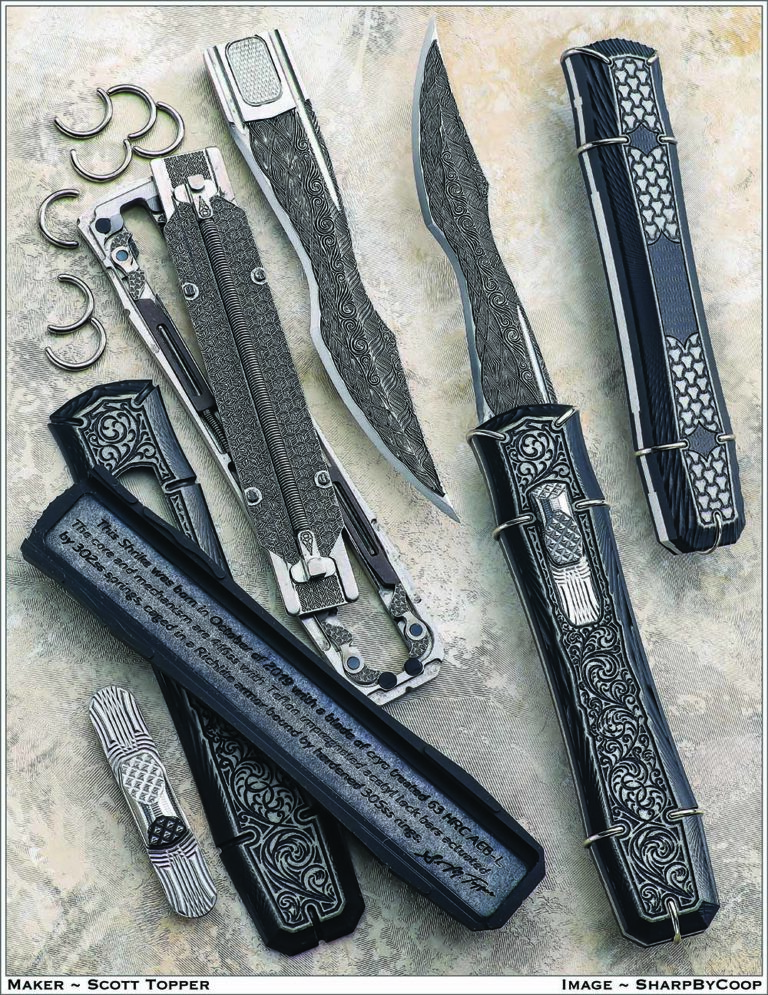
Scott Topper’s off-the-charts out-the-front is a multi-part marvel, the Shrike Out, brings an artistic twist to the automatic.
It’s hard not to like the Shrike, a custom out-the-front dual-action automatic by Scott M. Topper.
The blade is cryogenically treated AEB-L stainless steel. According to Scott, since AEB-L’s micro-structure allowed for a finer edge, it originally was a go-to steel for disposable razors. He indicated the version of the material he uses competes well against crucible steels, and is made through a conventional metallurgy technique.
The six inside springs are hand wound stainless steel. The four locks are independent. The brown lock parts are Teflon-impregnated Delrin for permanent lubricity. The black Richlite scales are inlaid with white to add contrast to the engravings.
The knife comes nested in a velvet-lined walnut box. Plain and all-stainless versions of the Shrike are also available. According to Scott, the various styles of the knife are available through the PVK Showroom (888-878-5643 pvk.com) in Las Vegas.
Shrike Out Specs Knife: Shrike Out The Front Dual Action Auto Blade length: 4” Blade steel: Cryogenically treated AEB-L stainless Frame material: 416 stainless steel Handle material: Paper phenolic composite Closed length: 5”
The great World War II Japanese swordsmiths, war sword souvenirs and more
Kurihara Akihide established the Nippon To Denshujo. Akihide was a member of the Japanese Diet or congress. The Diet asked him to help make swords and train swordsmiths. He set up the Nippon To Denshujo in Tokyo in 1933 and hoped to train about 1,000 swordsmiths. His first student was Yoshihara Kuniie, the grandfather of perhaps the today’s foremost living swordsmith, Yoshindo Yoshihara. Kuniie later became head of a sister forging organization in Yokohama, and the head of the Army Forge in Tokyo. Kuniie’s brother and son (Yoshindo’s uncle and father) also joined the Denshujo and began making swords at this time.
1 of 2
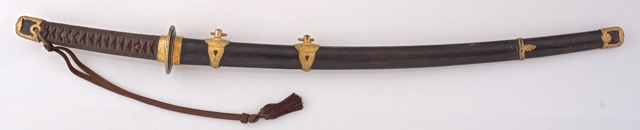
The standard Japanese Army or gunto-style sword mounting circa 1932 included a wood scabbard covered with a metal sheath lacquered a shade of khaki. There is also the sword guard, or tsuba, a wrapped hilt, and the traditional metal fittings. A single hanger supports the sword on a belt. (Aram Compeau image)
Here is how the standard Japanese Navy style mounting, or kaigunto, appeared circa 1932. All the traditional fittings are present, but there are two hangers to support the sword from a belt. The scabbards can be covered with lacquered sharkskin, rayskin or are sometimes simply lacquered black. (Aram Compeau image)
The Denshujo’s students usually took names beginning with the character Aki from the founder Akihide’s name (such as Akifusa, Akimitsu, etc.). Kuniie originally signed with the name Akihiro but soon began to use the name Kuniie, as did Yoshindo’s father (Yoshindo’s father was the second-generation Kuniie). The swords from the Denshujo are of very strong interest to collectors, as well as any Yoshihara sword from this period, and also any swords made by the Denshujo’s chief instructor, Kasama Shigetsugu, and its founder, Kurihara Akihide. A surprisingly large number of Japanese smiths working today can trace their professional lineage to someone who worked at the Denshujo from 1933 to 1945.
Akihisa made this Japanese war sword in 1942. He worked in the Nippon To Denshujo in Tokyo. Overall length: 26 inches. It is a good example of the army swords of the period. It is somewhat stout and heavy, and has a fairly complex hamon composed of small loops, or gunome. (Aram Compeau image)
SEKI CITY
Seki was home to 350 licensed swordsmiths as well as a large number of associated craftsmen. The city had a population of around 30,000 and about half of them probably were involved in sword production, polishing and mounting. In the 1940s, Seki shipped about 18,000 mounted swords a month to the military organizations. Traditional tama hagane swords comprised about 6-to-7 percent of the output. Many others were made from puddled steel, and cheaper swords were made from foundry steel and salvaged structural steel. The leading smiths in Seki commonly signed with names beginning with the character Kane, such as Kanefusa, Kanenobu, etc, and many of the resulting swords are of interest to collectors today.
A Japanese swordsmith named Kanenobu made this sword in the 1940s. It is 24.5 inches long, stout and somewhat heavy, and has a simple, almost straight, hamon. Kanenobu was one of 350 registered smiths working in Seki City in the 1940s. (Aram Compeau image)
The Manchurian Railway Co. in Manchuria made specialty steels and used them for swords. All the swords were signed indicating they were made by the Manchurian Railway Co., and very rarely have an individual swordsmith’s name on them. The swords appear to be made of several types of proprietary steels folded and forged together. They almost always have a simple, straight hamon.
There were many very good smiths scattered around Japan whose work is valuable today. Some of them included Nagamitsu in Okayama, Takeshita Yasukuni in Hokaido, the Horii family in Hokaido, the Gassan family in Osaka, Minimoto Yoshichika, Masakiyo, Takahashi Yoshimune, and many others, as well as swords signed Koa Isshin Mantetsu saku made by Manchurian Railway Co.
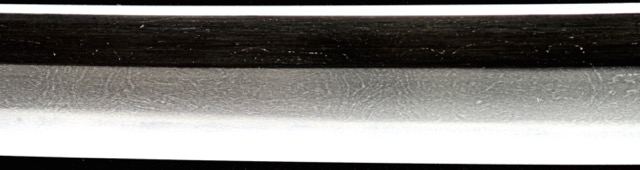
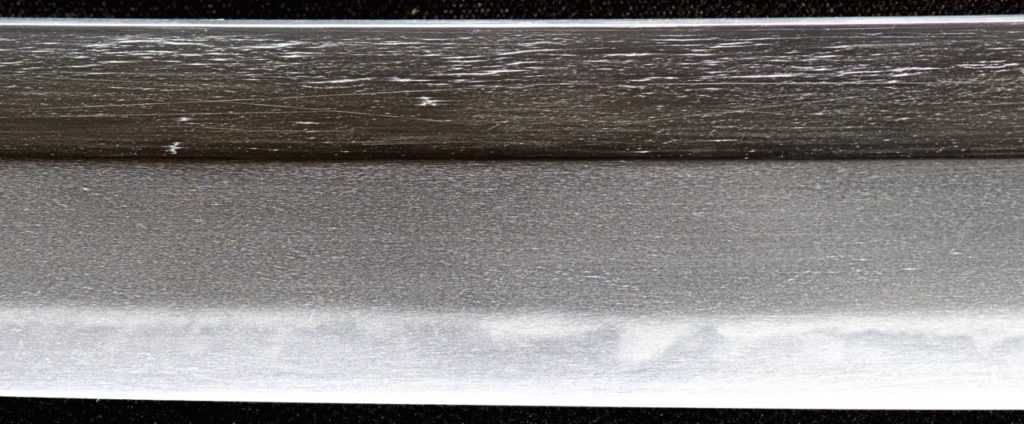
A macro photo shows a recently polished sword made by Nagamitsu. Nagamitsu worked in Okayama and was a very prolific swordsmith. He apparently used only tama hagane for his swords, and this shows the excellent quality of his forging work. There is a very clear and prominent wood grain pattern or itame hada on the blade. Note that the lines forming the pattern are long and continuous. (Aram Compeau image)
All Japanese sword production stopped in 1945 and was illegal until the U.S. occupation ended in 1953. Sword production then resumed slowly and, by 1964 when the Tokyo Olympics was held, there was finally a healthy market in Japan again for newly made swords, or gendaito.
WAR-ERA KOSHIRAE
The original Westernized koshirae used by the Japanese military closely resembled 19th-century European-style mountings with slight adaptations to fit Japanese swords. Around 1931 or 1932, new koshirae styles were adopted and are the ones seen with most World War II Japanese swords. The new army mounting was closer in form to the traditional Edo-period-style koshirae. It could properly contain a traditional Japanese sword and allow it to easily be used in the traditional manner.
The navy also adopted a new koshirae at about the same time, and is how surviving Japanese World War II naval swords commonly are mounted. The army scabbards were usually covered with a thin sheet of metal lacquered a shade of khaki. There was a traditional sword guard or tsuba, and all the traditional metal fittings were present. The navy scabbards often were covered with sharkskin or rayskin, with all the traditional metal fittings and tsuba in tow, too. In 1944, a new model army koshirae appeared which seems to be an evolution of the 1932 version. Generally, swords that appear in these types of military koshirae have blades of tama hagane or puddled steel and are generally well made.
JAPANESE WAR SWORD COMPARISONS
In general, Japanese sword blades of the 1930s and 1940s are well constructed. They feature steel that was forged proficiently and a visible jihada if they receive a new, quality traditional polish. However, in comparing World War II-era swords to older swords and to swords made after 1960, there are clear differences.
The differences arose from the lack of traditional tama hagane for the swords, and pressure to produce a large number of swords in as short a period of time as possible. Using tama hagane is very time consuming and requires expensive raw materials and a large amount of forging time. Consequently, when comparing swords from World War II to other periods, they appear to be stout and heavy with a strong amount of tapering in the width of the blade from the hilt to the point (typically about 20 to 30 percent). In addition, the hamon are usually straight, or are straight and have simple projections (ashi) extending to the edge, or are simple gunome or regular small loops or waves. This type of hamon is relatively easy and fast for swordsmiths to make.
Using puddled steel avoided the time necessary to make tama hagane and to fold it 12 times to give the steel the proper qualities. In addition, the puddled steel (and all swords not made from tama hagane) was made of a single piece of steel forged to shape. Traditional tama hagane swords are composite structures with a high-carbon outer jacket and a soft tama hagane inner core. This reduced the costs and time involved in making the swords, which was important because officers had to buy the swords from the various forging groups. Typically, a tama hagane sword was twice the price of a puddled steel sword, and the other types of swords were less expensive. Yasukuni swords were traditional and very expensive, and cost about twice as much as a traditional sword made in Seki.
WAR SOUVENIRS
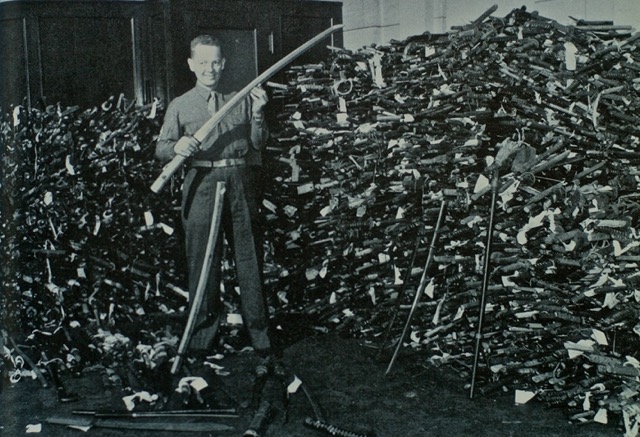
During World War II, many American soldiers simply picked up swords on battlefields. During formal surrenders, the Japanese soldiers surrendered their swords in the field. After the occupation began in 1945, U.S. military authorities went house-to-house to collect all weapons, including swords. In Tokyo, the Akabane Armory was the place where all confiscated swords were taken. At one point, one of the army staff members in charge of the confiscated swords said there was a stack of swords about 6 feet high and 300 feet long. Any U.S. soldier who wanted a souvenir sword simply went to the armory and picked out whatever he desired.
A stack of confiscated approximately 40,000 swords about 6 feet high and 300 feet long languishes in the Akabane Armory in Tokyo circa 1945. A U.S. soldier could simply pick up any of the swords and take it home. This collection is part of the reason so many Japanese swords came to the USA after the war. (image courtesy of Richard Fuller)
According to some collectors, in the early 1950s there were probably more Japanese swords in the USA than in Japan. As Japan recovered and became prosperous after the war, many of the swords here were bought and returned to Japan.
The World War II era was a unique period in Japanese sword history. The variety of swords made, the excellent quality of the fully traditional models, the somewhat distinct style of the swords, and the very large number made all help to define a very specific period in Japanese sword history.
GLOSSARY of JAPANESE SWORD TERMS
Ashi—simple projections from the hamon extending to the edge of the blade
Gendaito—newly made swords Gunome—loops or waves in the hamon Gunto—Japanese Army style of sword mounting Hamon—temper line Itame hada—a wood-grain pattern on the blade Jihada—blade surface pattern
Kaigunto—Japanese Navy style of sword mounting Koshirae—sword mounting
Puddled steel—steel from railroad rails used to make Japanese sword blades Tama hagane—traditional steel for Japanese sword blades Tsuba—traditional sword guard
References: Fuller, R. and Gregory, R. Japanese Military Swords and Dirks, Howell Press, Inc., USA. 1997
Kapp, L., Kapp, H., and Yoshihara Yoshindo, Y. Modern Japanese Swords and Swordsmiths, Kodansha International, USA 2002
Dawson, J. Swords of Imperial Japan, Stenger Scott Publishing, USA 2007
A Japanese swordsmith named Kanenobu made this sword in the 1940s. It is 24.5 inches long, stout and somewhat heavy, and has a simple, almost straight, hamon. Kanenobu was one of 350 registered smiths working in Seki City in the 1940s. (Aram Compeau image)
It was over seven long decades ago on Sept. 2, 1945, that the Japanese signed the agreement formalizing their surrender, for all intents and purposes officially marking the end of the Second World War. The ceremony aboard the deck of the USS Missouri in Tokyo Bay took all of 23 minutes to close the book on a conflict that extinguished more lives and destroyed more goods and property than any before or since.
While the world has changed much since then, one of the most iconic symbols that existed long before and throughout World War II—and continues to resonate today—is the Japanese sword.
TRADITIONAL vs. WWII SWORDS
Traditional Japanese swords have been made for almost 1500 years, with the fully modern Japanese sword appearing during the Kamakura period from 1185 to 1334. Japanese swords were the symbol and badge of the Samurai class right up to the beginning of the Meiji period (1868-1926) when Japan began to modernize. At the beginning of the Meiji period, the demand for swords fell drastically, and, by the early 1900s, very few swordsmiths were still working—and even fewer were making swords as a full time profession. There was not much of a demand for swords at this time, and what demand existed was satisfied by the existing stock of swords made right before the beginning of the Meiji Restoration.
In addition, a new type of sword had been designed for the Japanese army. These were called Murata To or Murata swords. They were forged from foundry steel and had a simple hamon (aka temper line) made by quenching in oil rather than water. Generally, these were light and thin compared to traditional swords and were mounted in European-style mountings.
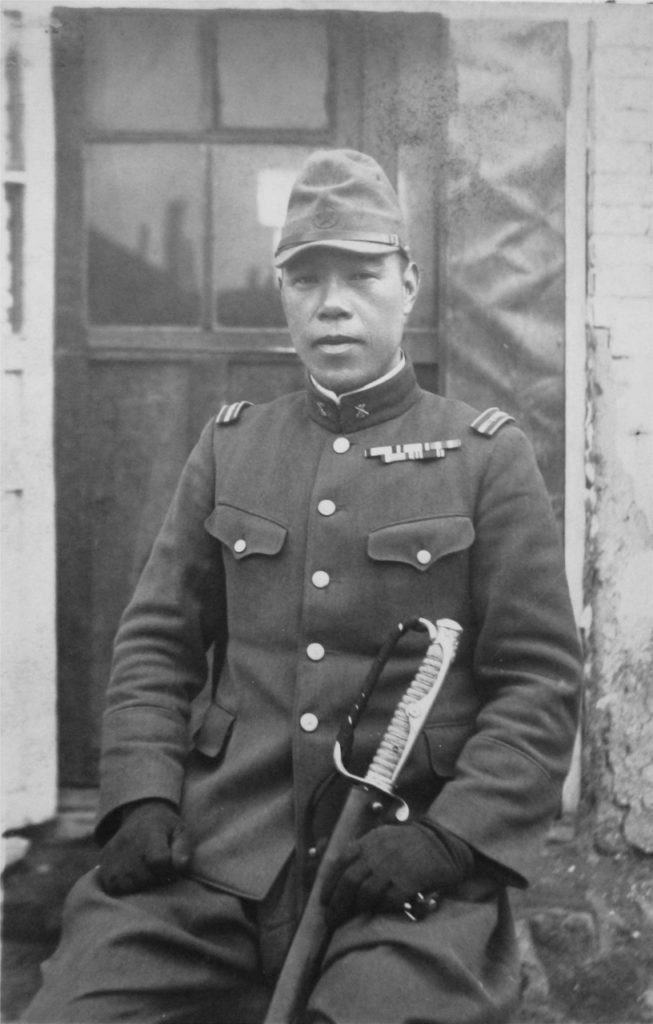
A Japanese first lieutenant in a 1930-31 uniform holds an 1886-style kyu-gunto sword mounting. Note the large “D” ring over the hilt. (Richard Fuller image)
However, by the 1930s Japanese military forces were rapidly expanding, and the leaders of the Japanese military organizations decided that all officers in the army and navy should carry a traditional Japanese sword to constantly remind them of their cultural heritage. This led to the development of a new style of sword mounting (koshirae), and also efforts to train new swordsmiths and ensure the new swords were made to traditional specifications and quality.
It was decided that all officers should carry a sword, and that meant that about 20 percent of army personnel and about half of navy personnel were eligible to carry swords. From the information provided by Yasukuni Shrine, this meant that around 2 million Japanese military personnel were eligible to wear swords. Some estimates from historical data suggest that about 2 million swords were produced in Japan from the 11th to the 19th century. This meant that the military wanted to produce almost as many swords in the 20th century as had been made in the previous 800 to 900 years.
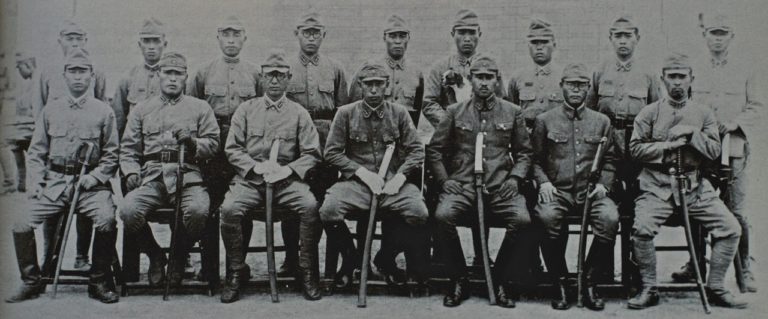
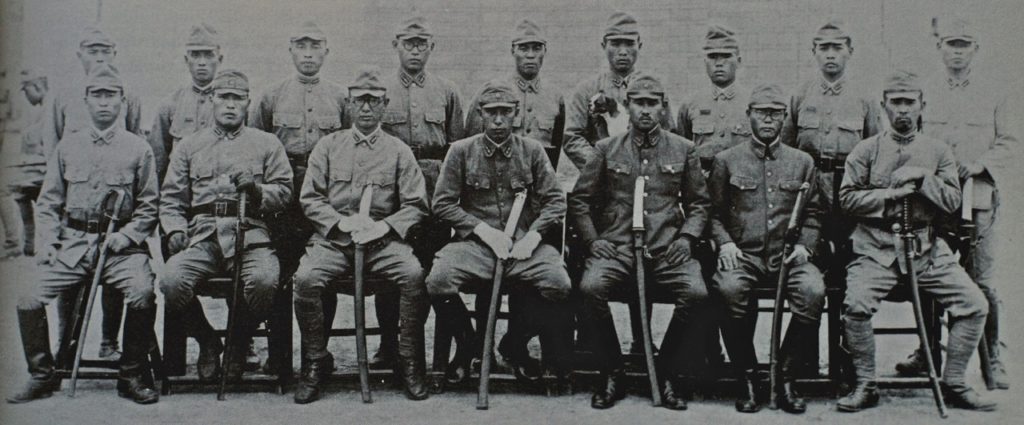
This photograph was taken in China in 1941. The Japanese soldiers in the front row all have swords in an array of different types and styles. (Richard Fuller image)
This was a very large number of swords to make, and there were not enough smiths or material available to make so many swords. It has been estimated that the town of Seki probably produced about 70 percent of the wartime swords, and the rest of the production took place all over Japan. With this scale of production, it was impossible that all swords could be made to strict historical standards. There simply were not enough smiths or enough of the traditional Japanese steel called tama hagane to do so.
JAPANESE SWORD STEELS
As a result, several types of swords were made during the period. The best ones were made from tama hagane and were fully traditional in terms of hamon and shape. Since there was a shortage of tama hagane and time, many swords were also made from puddled steel, a type of steel made in Europe during the late 1800s and early 1900s. Japan imported this type of steel for railroad rails. When the railroad tracks were replaced, the puddled steel was salvaged for use in swords. Apparently, there was a large supply of puddled steel, and it became the favorite substitute for tama hagane. The quality of the puddled steel was very good. In fact, the Eiffel Tower was also constructed from this type of steel.
The resulting swords have a visible jihada (surface pattern) and hamon, and were very hard to distinguish from tama hagane swords. Japanese military authorities were concerned about this, and, by 1940, a regulation was passed requiring that any Japanese sword not made from tama hagane must have a stamp on the tang indicating as much. Hence, from 1940 all swords had to be signed, and if they were not made from tama hagane there would be a stamp on the tang above the signature solely to indicate as much.
This is the tang and signature on a sword made in 1943 by Hiromitsu of Chikuzen in Kyushu. Note the star stamp above the signature and near the top of the tang. The stamp indicates the sword was made from a type of steel other than tama hagane. Various military contractors or forges used several different stamps. (Aram Compeau image)
The swords made from puddled steel appear to be identical to tama hagane swords, but a high-quality polish can reveal differences in the surface and jihada. In addition, the hamon on puddled steel swords have characteristic differences from hamon on tama hagane swords, and it requires experience to recognize the differences.
This style of Japanese army sword and mounting was introduced about 1944. The mounting diverges from that of its predecessor in that the hilt wrapping is different, often there are two pins or a screw and a pin to secure the sword in the hilt, and the scabbard (not shown) is lacquered a matte shade of khaki or brown. (Aram Compeau image)
Other swords were made from foundry steel and have no jihada and often no hamon, either. Many are found in mounts or koshirae that are different from the standard World War II koshirae, and serial numbers may be stamped on the blade, or they appear to be modeled after European-style blades and mounts. The Japanese cavalry used many of these swords early in the 20th century, as did the police and civilian workers. The swords also were worn in parades or for formal occasions. In general, these other types of blades are easy to distinguish from traditional swords.
A sword by Masatsugu features a visible surface pattern or jihada on the blade. The thin white lines form the jihada, and the lines form short and somewhat discontinuous tracks on the surface. The blade probably is made from 19th-century puddled steel. (Aram Compeau image)
MOST IMPORTANT MAKERS OF MODERN JAPANESE SWORDS
The most important makers of modern Japanese swords were found in Seki, in the Nippon To Denshujo, and at Yasukuni Shrine. Yasukuni Shrine and the Nippon To Denshujo were in Tokyo, and there were other organizations located all around Japan. Yasukuni Shrine’s forging group was established in 1933 with the support of military officials, and all the smiths took names beginning with Yasu, such as Yasunori, Yasuoki, Yasutoku, Yasumitsu, etc. All of these swords are collectible and sought after today.
The Yasukuni smiths were among the most important makers of Japanese swords in the World War II era. Among them was Takeshita Yasukuni, maker of this sword in Hokaido in 1943. It is large, heavy and long (27 inches long) for the period and has a complex hamon. This smith’s swords appear in civilian or non-military mountings as well as military ones. The large size and style of some of his swords resemble work from the 15th century. (Aram Compeau image)
The Yasukuni smiths were expected to make everything by hand in a completely traditional manner and with no power tools. Ideally, one smith working with two assistants or hammer men (sakite) was expected to produce between 10 and 15 swords a month. Yasukuni swords were unique in one other interesting respect: the smiths were asked to model their work after specific blades made by Mitsutada of Bizen Province from around the mid-1200s. Thus, most of their work followed a consistent pattern, and Yasukuni swords are usually recognizable today by their shape, hamon and general style.
Next time, in the conclusion: Such great Japanese swordsmiths as Kurihara Akihide, Yoshihara Kuniie, Kasama Shigetsugu and others, the role of Seki city, the Manchurian Railway Co., war-era koshirae, Japanese army and navy swords, Japanese swords as war souvenirs and more.
GLOSSARY of JAPANESE SWORD TERMS
Hamon—temper line Jihada—blade surface pattern Koshirae—sword mounting
Puddled steel—steel from railroad rails used to make Japanese sword blades Sakite—swordsmith’s assistants or hammer men Tama hagane—traditional steel for Japanese sword blades
Expert craftsmen give insight on how to find the best hunting knife sheath for the best protection, performance and look.
For the hunter in the field, a dependable and durable hunting knife is indispensable equipment, and it follows that the sheath that holds the knife must be equally up to the task.
Secure carry, protection for the blade and handle, easy access, and the ability to stand up to the elements and hard use are essential. While there is a variety of sheaths available and each one contributes something to the equation, the sheathmakers themselves have come to eye-opening conclusions as to the making and deployment of the correct sheath for the hunting knife. Personal preference is still a prime mover, but the basics make the difference between cooperation and catastrophe in the field.
“The best style for a hunting knife sheath is whatever the hunter wants,” explained veteran sheathmaker Paul Long. “Personal preference is very important. However, the knife that would best be described as a hunter would be best suited in a deep seat pouch with a loop that would carry relatively high on the belt. In most cases the deep pouch would preclude the need for a retention strap. For a double-guard hunter, a drop-loop belt sheath would probably be best with a snap strap for secure retention.”
Depending on the style of the knife, the guard often dictates the best pouch configuration. “I favor the pouch-type sheath, and the hunting knife generally has a single guard as opposed to a double guard,” related sheathmaker Paul Lebatard, who also has found success with his custom knives through the years. “I make a lot of doubles, too. You would have to make a snap-type sheath with a keeper strap, but on hunting knives with single guards the pouch type is always best.”
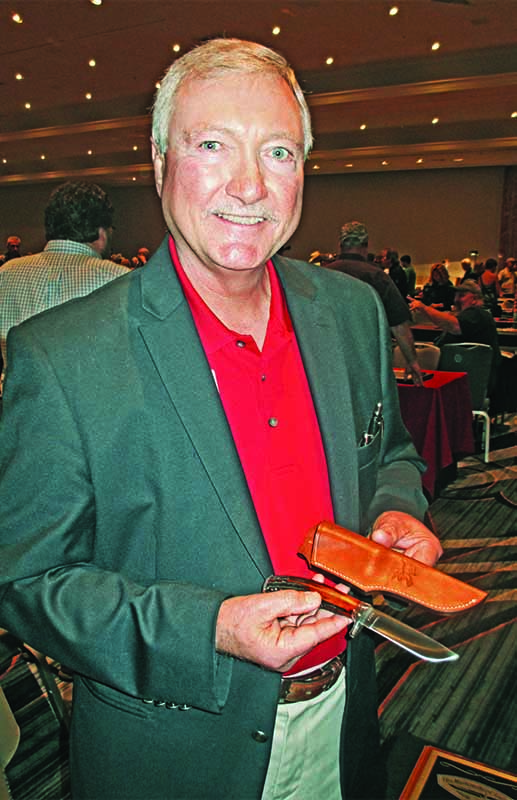
Knifemaker Paul Lebatard shows off one of his custom hunting-knife-and-sheath packages.
A sheathmaker for over 50 years, Chris Kravitt zeroes in on the personal preference perspective. “First and foremost, it’s a matter of the configuration of the knife, and then if more than one style will work it becomes a matter of personal preference,” he observed. “My preference is to go with the pouch because it is easier to draw and resheathe the knife without worrying about straps.”
At the same time, Kravitt acknowledges varying hunting knife construction and its influence in sheath form and function. “If a knife has a double guard, it isn’t going to work on a pouch sheath, and if you have a knife with an integral handle, possibly,” he said. “Certain things don’t lend themselves to the traditional style, like when the blade is the widest part of the knife or there is no bolster or ricasso extending beyond the edge.”
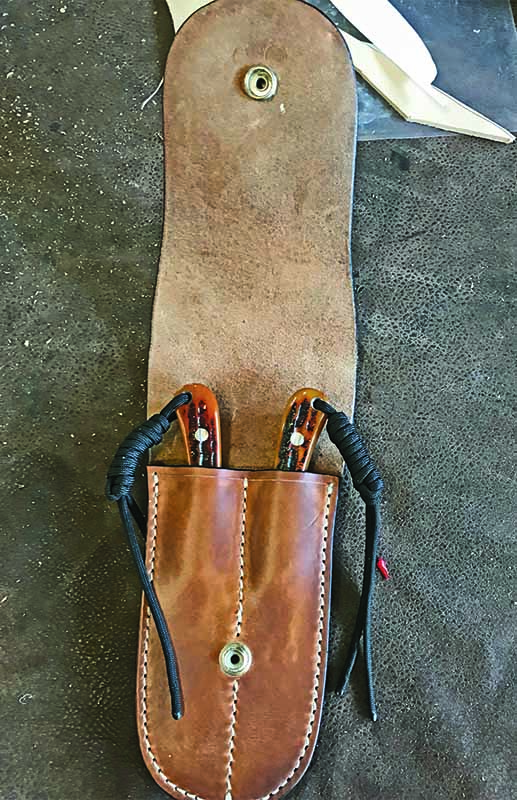
Kenny Rowe, owner of Rowe’s Leather in Hope, Arkansas, adds another option on the hunting knife sheath. “Ninety percent of these sheaths would be the pouch type because they cover most of the knife, and with the guard you can make a welt where the knife has some resistance coming in and out,” he noted. “Some sheaths will have a lid that has a snap on it, and that is as secure as you can get with the flap snapping over the front of the sheath.”
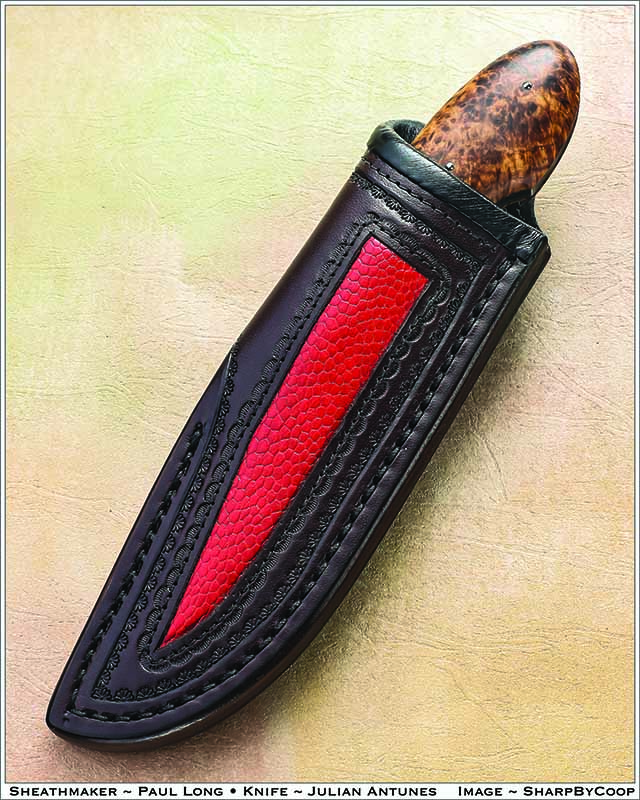
Exotic leathers make great inlay materials, and Paul Long uses various animal skins, including snake, lizard, ostrich and others. He employs ostrich for the red inlay on the sheath of a fixed-blade utility knife by Julian Antunes.(SharpByCoop images)
The consensus with the pouch sheath makes sense for all the reasons that the hunter encounters in the field. For its toughness and the ability to shape and mold the sheath as desired during the construction process, cowhide reigns supreme among sheath materials. Most sheathmakers use 7-to-9-ounce* vegetable-tanned cowhide.
Sheath Leather Types
The use of exotics such as ostrich, stingray, alligator, crocodile or other hides is a continuing option, though for the most part they are used as accents, often in the form of inlays, rather than adding any performance-related component to the sheath.
“Exotics are very useful in sheathmaking but primarily for aesthetics,” Long explained. “Elephant and shark are two that are tough enough to withstand very hard use and are usually built as an overlay on a vegetable-tanned base sheath. I work with various snakes, lizard, ostrich and many others.”
In addition to standard sheaths, Paul Lebatard also makes doubles, many of vegetable tanned leather. “A lot of people say not to store knives in the sheaths, but as long as the sheath is made of good vegetable-tanned leather, I’ve never had a problem,” he noted. (Paul Lebatard images)
As Kravitt noted, “The basic sheath is going to be cowhide 99 percent of the time, but for overlays and inlays my favorite is stingray, which is near bulletproof but more expensive and harder to work with—but great stuff. Ostrich leg or shin is very nice, and Malaysian horned frog has a very nice texture to it. Snakeskin is not very durable, but it’s fine when the knife and sheath are for show since it won’t hold up with regular use.”
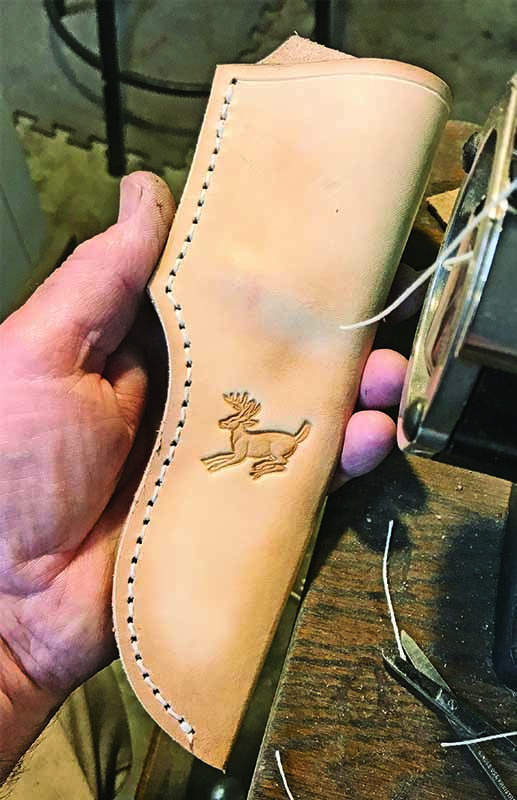
Tooling and carving also provide style points and may be pleasing to the eye. However, neither actually contributes to the performance of the sheath in field use. “I occasionally do some tooling with stamps, but carving is a talent I don’t have,” Lebatard remarked. “Still, on almost every sheath I’ll put something in keeping with the theme of the knife, like a small deer. Someone might place an order and specify that they just want a bare, plain sheath, or they may want just their initials on it. That’s a good thing about leather. When it is wet it can be molded and stamped, and when it dries it will hold that impression.”
Tanning Styles
Vegetable tanning is essential when the blade meets the sheath leather for an extended period. In contrast to chrome-tanned leather, a vegetable-tanned leather is not known to corrode or stain a blade left in the sheath for any length of time. That old admonition to store the knife itself separately from the sheath will then get a longer look.
“A lot of people say not to store knives in the sheaths, but as long as the sheath is made of good vegetable-tanned leather, I’ve never had a problem,” Lebatard noted. “I made a knife for a friend a few years ago and he didn’t want a sheath. He was going to get someone else to make the sheath for him. Several years later, he brought the knife to me and he had had it in a chrome-tanned leather sheath. It was nearly rusted through. The chrome-tanned leather is very corrosive.”
Kravitt has had similar experiences. “I hear so many people say not to store knives in leather sheaths, but I have kept knives in sheaths for years and never had a problem,” he recalled. “My sheaths are all vegetable tanned as opposed to chrome tanned. Chrome-tanned leather may have salts and other things in it.”
Sheath Extras
Waterproofing is another essential element, and in the construction itself there are questions surrounding drainage holes and inserts as well.
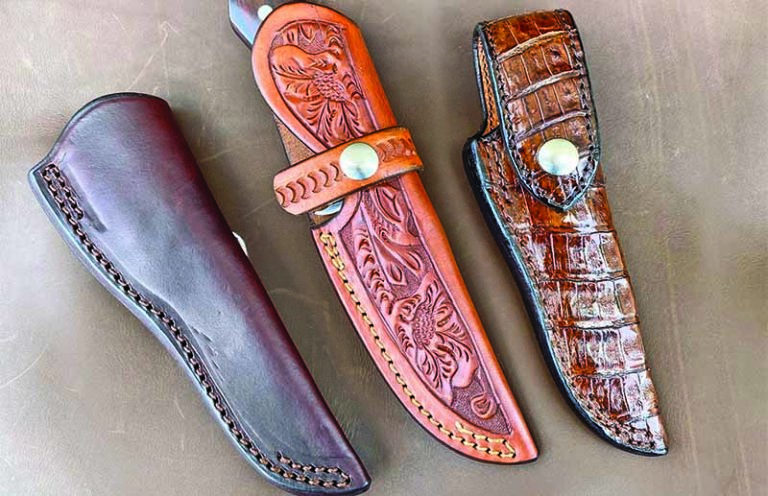
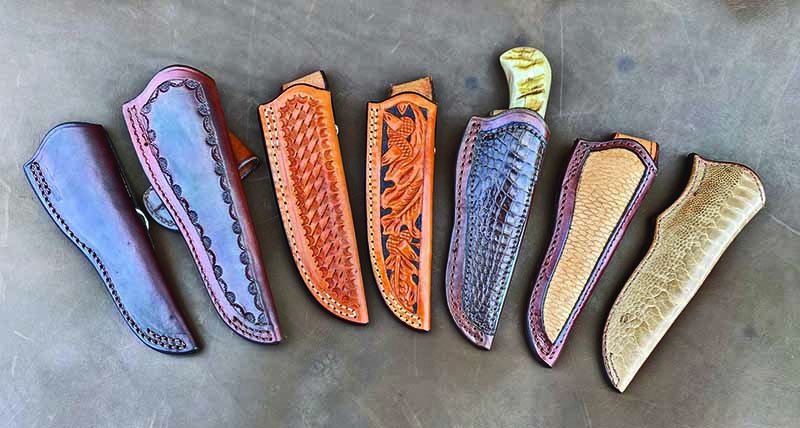
The different decorations Kenny Rowe offers with his sheaths include, from left: smooth; border tooled; basket weave; acorn and oak leaf hand carving; exotic skin overlay (gator); exotic skin inlay (beaver tail); and exotic skin full coverage (ostrich leg). (Kenny Rowe image)
Most sheathmakers shy away from inserts since contact with the blade may dull the edge. After all, the welt and/or strap should suffice for a snug fit. Inserts in and of themselves may be judged to provide some measure of redundancy, but contribute little to the overall stability of the lockup or in protecting the knife itself. Long says, “Even the best inserts, being rigid, will do more harm to a blade than top grain leather.”
At first glance it might appear that a drainage hole is a good idea to help maintain cleanliness and prevent the buildup of moisture or debris within the sheath. Not so fast!
“I do not ordinarily put a drain hole in my sheaths,” Long asserted. “Nor do I do any waterproofing of the interior of the sheath. Rather, I depend on the normal intelligence of my client to not go swimming with their sheath, and to at least try to clean the blood and guts off the blade before reinsertion.” Rowe agrees.
“I don’t see any sense in it,” he commented. “I can count on one hand the number of sheaths I’ve made with drain holes in them, and I’ve been making sheaths for 35 years at least. The only time I would expect someone to have their sheath in really wet conditions would be if they accidentally rolled into a deep river or their boat sank. I wouldn’t expect someone to haul off into neck deep water with their hunting gear on. For debris, it’s easy enough to take a wire with a little hook in the end and just rake the sheath out, or blow it out with air, or stand it upside down and shake it or tap it on a table.”
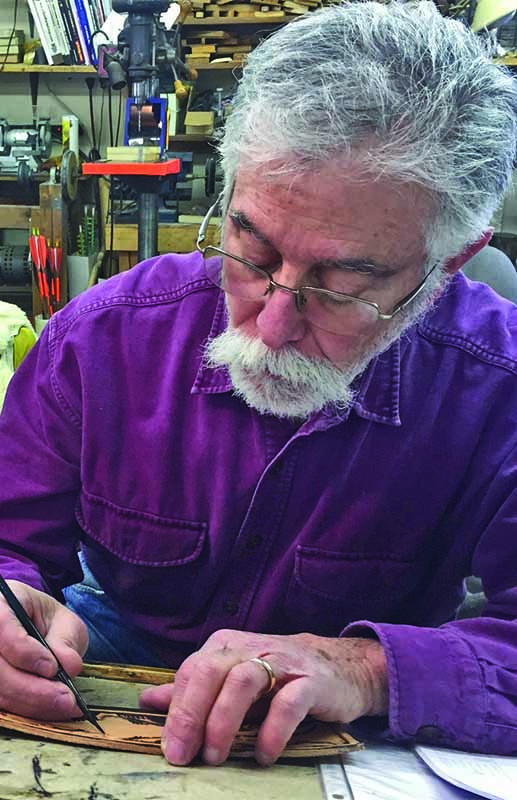
Ultimately, Chris Kravitt—here working on a sheath in his shop—stands by the individual perspective. “First and foremost,” he begins, “it’s a matter of the configuration of the knife, and then if more than one style will work it becomes a matter of personal preference.” (Chris Kravitt image)
Kravitt, on the other hand, will utilize a drain hole and an insert from time to time. Often, the insert itself is fashioned from leather to avoid additional friction against the knife edge. The employment of the drain hole is in direct response to the future use of the gear in the field.
“If I know the sheath will be used in harsher conditions, I think it should have a drain hole,” he remarked, “not just for draining moisture, but also removing debris—especially when the user has spent a lot of time in the woods.”
Sheathmakers do tend to rely on the owner of the product and of the hunting knife to exercise responsibility in the field. “Explain to the client, if they are a novice, about the ‘care and feeding of a leather sheath,’” Long smiled.
On almost every sheath, Paul Lebatard puts something in keeping with the theme of the knife, such as a small deer. “That’s a good thing about leather,” he observed. “When it is wet it can be molded and stamped, and when it dries it will hold that impression.” (Paul Lebatard image)
Finding The Best Option
The well-crafted sheath is the constant companion of the hunting knife, either in the field or a collector’s cabinet, and the best measure of the sheath’s contribution is its role in that partnership. For the sheath to function properly, owners must remember the fundamentals of hunting knife care. Keep both the knife and sheath clean. Wipe away moisture and other fluids. Maintain the surfaces as needed. Don’t put the knife away wet and expect the sheath to do more than expected.
Adhering to best practices will ensure long life for both the hunting knife and its all-important sheath.
*According to the Montana Leather Co. website (montanaleather.com), leather thickness is typically measured in ounces. For instance, an ounce of leather is equal to 1/64 inch. As a result, 7-to-9 ounce leather will be in the 1/8 inch range, give or take a few millimeters.
Purveyors help knife buyers and collectors with what they need to know
Working with a reputable purveyor/dealer enhances the knife acquisition experience. The buyer/collector develops a sense of trust, with time and money well spent as the dealer provides advice and access to certain knives that otherwise may be hard to find.
Talking with a dealer offers an educational opportunity, but often enough the experience falls short of realizing its full potential. What questions should buyers and/or collectors be asking? Going to the source of the answer is a good place to start.
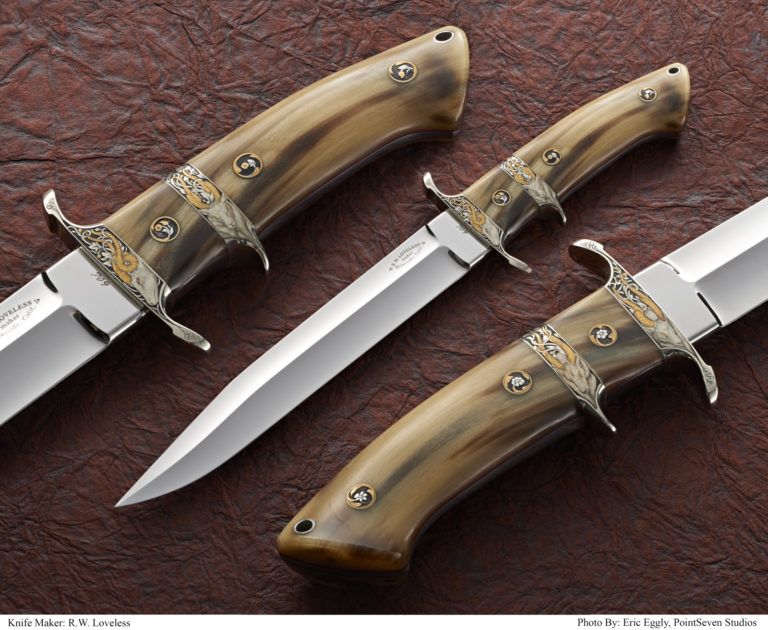
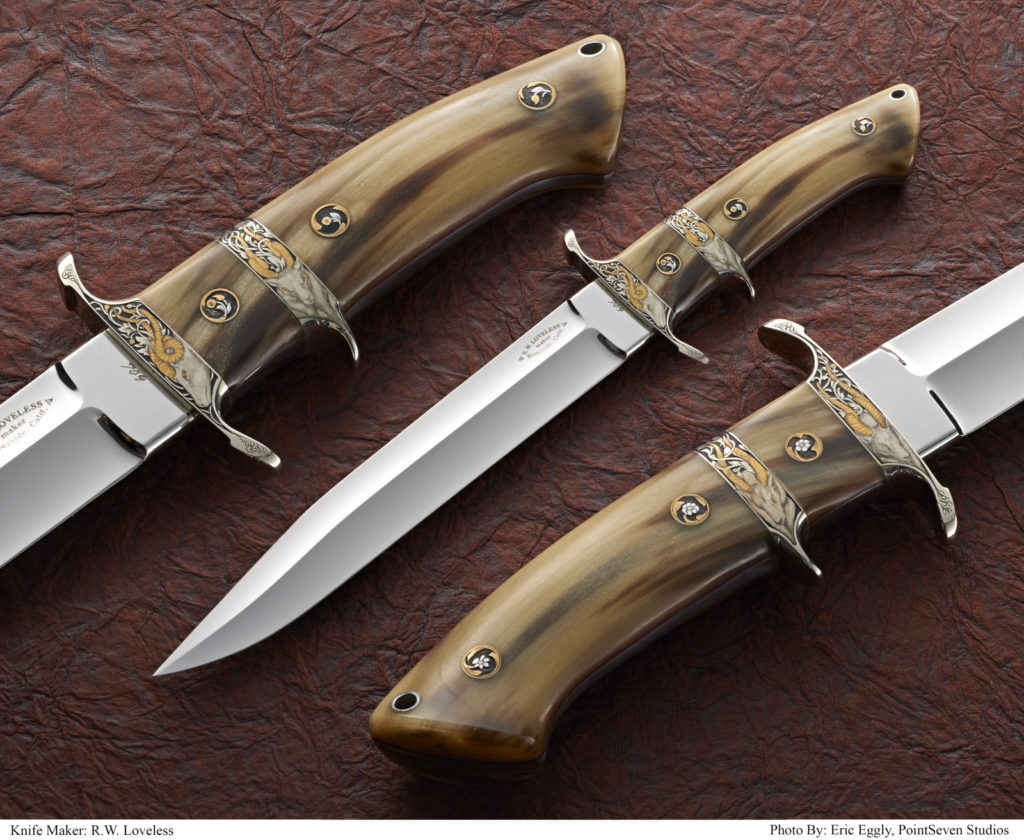
Bob Loveless knives are amongst some of the most sought-after knives in the collecting world. Photographed above is a Loveless Big Bear in sheep horn and Dan Wilkerson engraving (PointSeven knife image)
1. Know the Knife Collecting Trends
Loveless knife specialist John Denton says that staying informed is important.
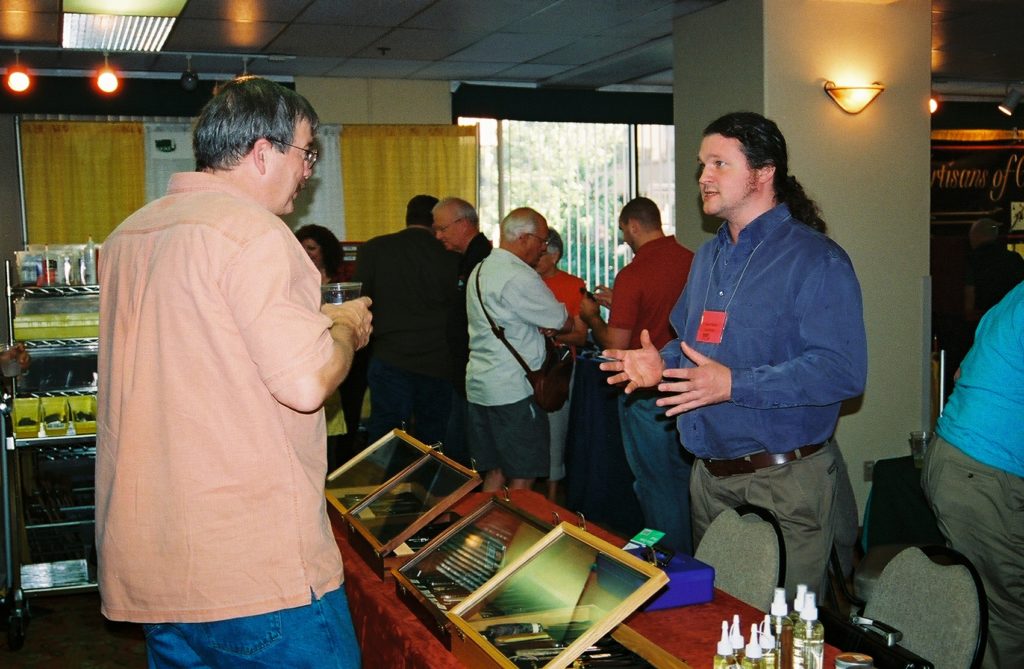
“This has got to be through the old way of human contact,” Denton observed, “sort of like the lunchroom in school. You hang out, listen, see what is moving, what dealers are buying and, of course, now with the ‘inter-web,’ we have so much more information within seconds, while in the ’70s or ’80s we had to wait for BLADE® Magazine or the gun magazines to run stories on Loveless. Shows are still important to attend, but nowhere like they were years ago. Face to face is still part of the knife world.”
2. Maker Charisma
Gauging which knives and makers are hot is an integral byproduct of the dealer’s intuition and experience. How does the dealer determine what makes a knife or knifemaker hot? A lot depends on whether the maker has the kind of personality that appeals to the knife enthusiast.
At BladeGallery, Daniel O’Malley specializes in one-of-a-kind custom knives. The answer includes multiple factors. “There are a lot of things that go into making a knifemaker’s knives ‘hot,’” he reasoned. “Part of it is the personality of the maker. When a collector meets a maker for the first time, the collector often has a picture in his head of what the maker will be like. If the maker falls short [of the collector’s expectations], it can be quite disillusioning.”
3. Customer Service
“[The maker] being willing to repair knives when there is a problem is also very important,” O’Malley continued. “It can easily make the difference in a collector continuing to purchase a maker’s work. It can even be the difference in whether a person continues to collect the maker’s knives over time. After all, if a collector has spent a large sum of money on their collection, it can be very nerve wracking to find that it’s hard to get a damaged knife repaired. Similarly, it can be comforting if a problem can be relatively painlessly solved.”
Daniel O’Malley of BladeGallery.com said the maker’s willingness to repair a knife when there is a problem is very important.
4. Do Your Homework
Les Robertson of Robertson’s Custom Cutlery offers custom fixed blade and folding knives, including tacticals and presentation pieces, as well as some exclusives. His take on the delicate topic of a maker’s reliability and the quality of the maker’s work is sage advice for knife enthusiasts in any price range or level of experience.
“I give my client the very best information I have at the time,” Robertson asserted. “This includes issues with a maker or the quality of their work. Often, a maker’s skill level, quality, customer service, and/or delivery issues are overlooked because the knife can be sold immediately for a profit. Given the prices of many of the custom knives today, I highly recommend that collectors do their homework before purchasing a knife. I realize this takes away from the thrill of instant gratification and removes some of the fun out of the hobby. Long term, though, you will feel great about every knife you have bought, and your wallet will thank you.”
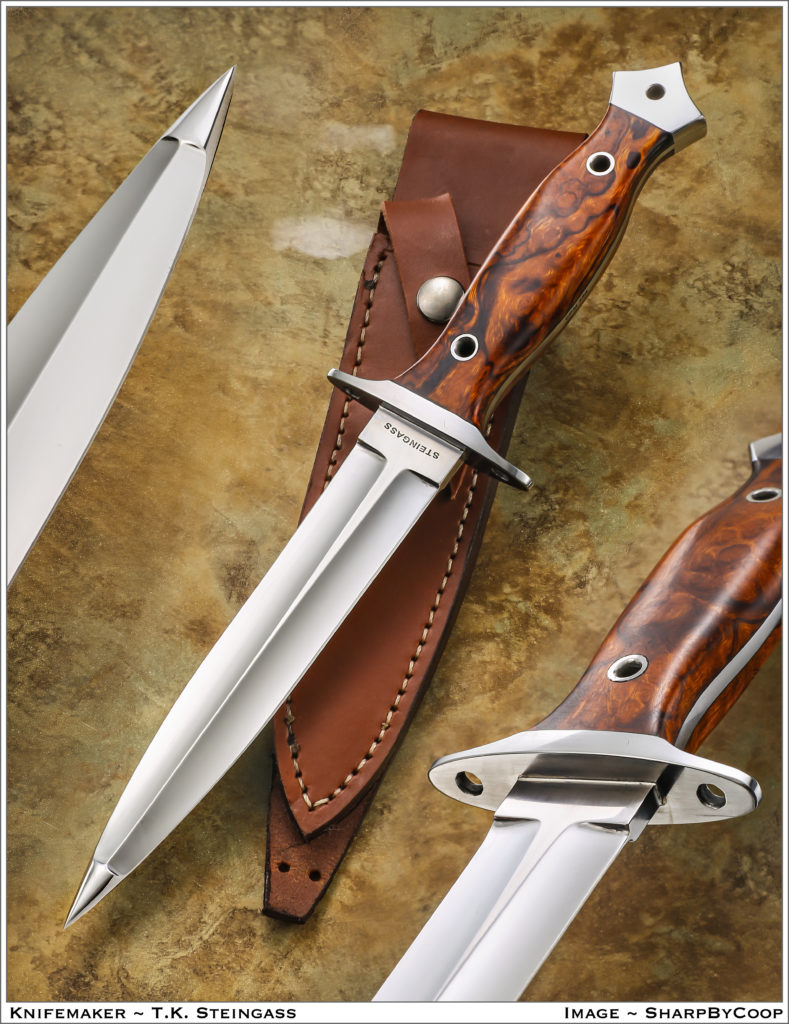
Les Robertson said many buyers/collectors make the mistake of overlooking a maker’s skill level, quality, customer service, and/or delivery issues because the knife can be sold immediately for a profit. The presentation Bastion Dagger by Tim Steingass features an armor-piercing tip. (SharpByCoop knife image)
5. Set An Allowance
Everyone, it seems, has spending limits. The role of the dealer often involves assisting clients in determining how much to spend. Recognition of the amount of disposable income available keeps a buyer/collector in the game.
6. Collect with a Purpose
Denton advises customers to acquire some knowledge on prices and to assess their real purpose for buying custom knives in the first place. “First of all, you want collectors to be educated,” he commented, “and not to be buying just to make money. That is the most risky way to approach collecting. But then if they buy what they like and in three years can’t get 10 cents on the dollar, it will cut their knife buying down and drive them out of the market.”
Dealer Dave Ellis of Exquisiteknives.com notes that the investment perspective differs greatly from that of the collector who wants to enjoy, build and retain knives for years to come. “When I chat with newbies,” he remarked, “a lot of them get into knives from an investment standpoint. They have read in the Wall Street Journal that investing in knives is a good idea, or heard about a knife that was purchased for $800 and then sold for $8,000. I tell them to buy what they like first and to worry about resale later because if it doesn’t pan out, then they won’t have to hold onto something they don’t like.”
Taking a measured approach is key to successful, price-sensitive acquisitions. “I tell the collector to pace themselves,” Denton said. “Get into a knife that will be easy to turn if you get tired of it down the road. I’ve had several people ask me to build them a $300,000 collection, and I tell them I don’t do that because they will get mad if they don’t make 14 percent growth per year—and they don’t know why they’re buying the knife. The true collector has studied the knives and the market, and he will realize what knives are worth and what he can resell them for.”
“There are more heavy hitters getting in the game with lots of money,” he said, “but that doesn’t mean they are buying the right things. What have their interests been up to now? Did they grow up with knives? Do they carry and use a knife? What is their reason for buying now? Use it? Collect it? Give it to a nephew for college graduation? I don’t want to offer a $7,000 Loveless hunter when a $150 skinner by any smith will do.”
Above: Purveyor Dave Ellis—seated at left with Mick Strider at a past California Custom Knife Show—says to always buy what you like first and worry about resale later. The fixed-blade art knife is by E.C. Loerchner. (Dave Ellis images)
7. Attend Knife Shows that Fit
Though knife shows may be one of many ways to gain information and see what is out there, the individual contact with dealers, makers and other knife enthusiasts is invaluable. Attending shows that mean the most to the individual buyer’s needs and wants helps in the education process and in finding the people and knives that enhance the experience.
Robertson attends the BLADE Show due directly to its diversity of custom knives for sale. He says that the Arkansas Custom Knife Show is also one of the premier forged blade shows and features apprentice, journeyman and master smiths in the American Bladesmith Society.
“The New York Custom Knife Show offers a variety of knives from very well-known custom knifemakers,” Robertson added. “This show in recent years has had more of a tactical knife flavor. The USN Show offers the widest variety of tactical folders you will see at any show in the world.” These are just a few of Robertson’s picks. Other shows are out there, and many of them are quite beneficial to knife enthusiasts looking for certain styles of knives and/or makers.
DEVELOP a DIALOGUE
The questions are endless. The enjoyment of knife collecting can be boundless. Develop a dialogue with a dealer. Ask the questions herein and others that come to mind, and feel the positive energy of a well-executed knife purchase.