Home Blog Page 125

Knifemaking: How to Make Temper Lines

0

Temper lines—aka hamons—are a very exciting part of knifemaking, and I would like to share with you how I produce cool temper lines on folders. -Wally Hayes
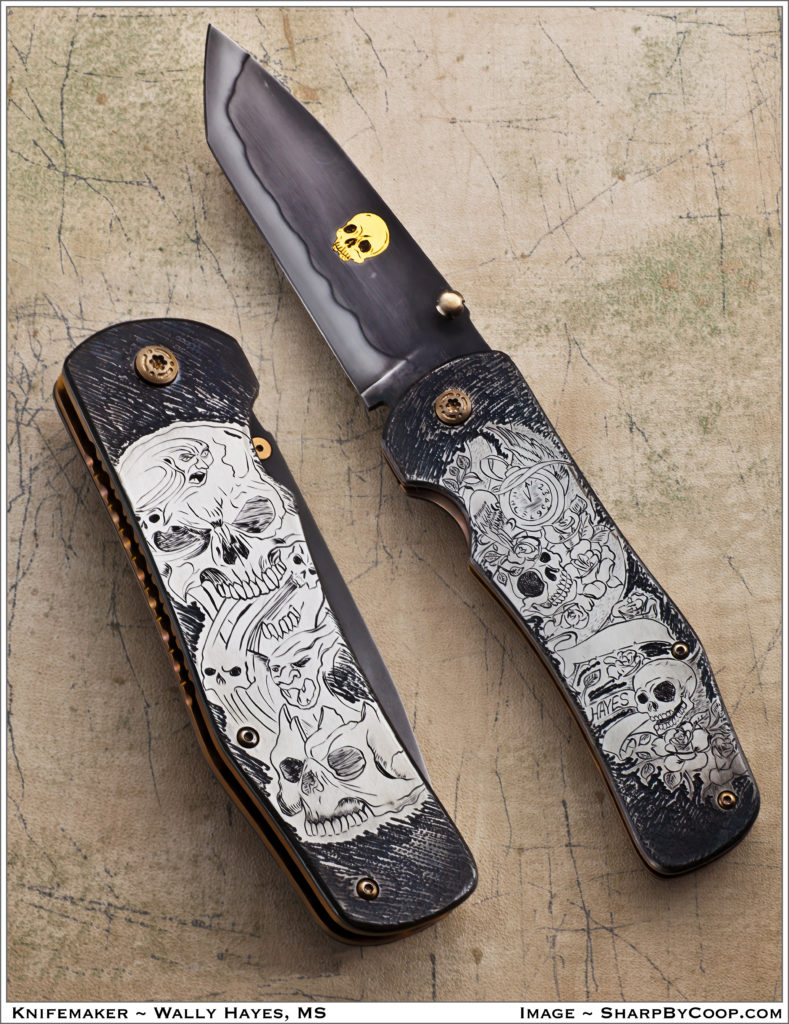

The latest folder exhibiting a handsome temper line—aka a hamon—by the author (inset) is this skull-encrusted model. (SharpByCoop knife image)

STEEL and CLAY

First you need to select your type of steel. You can use 1084 carbon steel or high-carbon damascus, but I prefer W2 tool steel. I get mine from New Jersey Steel Baron because I can get it surface ground to whatever thickness I need.

The W2 is low in manganese, enabling you to create wild temper lines. I grind the blade leaving the edge about the thickness of a dime. The thickness helps prevent your blade from warping in the quench and also helps hold the heat, giving you time to get the blade into the quenching oil.

The clay I use is a stove furnace cement used to repair fireplaces and chimneys. I get mine at the hardware store and it comes in a small tub or a tube like the tubes of silicone used with a squeeze gun for calking.

APPLYING the CLAY

To apply the clay I use a sharpened Popsicle® stick, being careful not to put any clay where the ball bearing in the liner will travel on the tang of the blade. Also, do not put any clay near the pivot hole as you want that area to become fully hard when quenched.

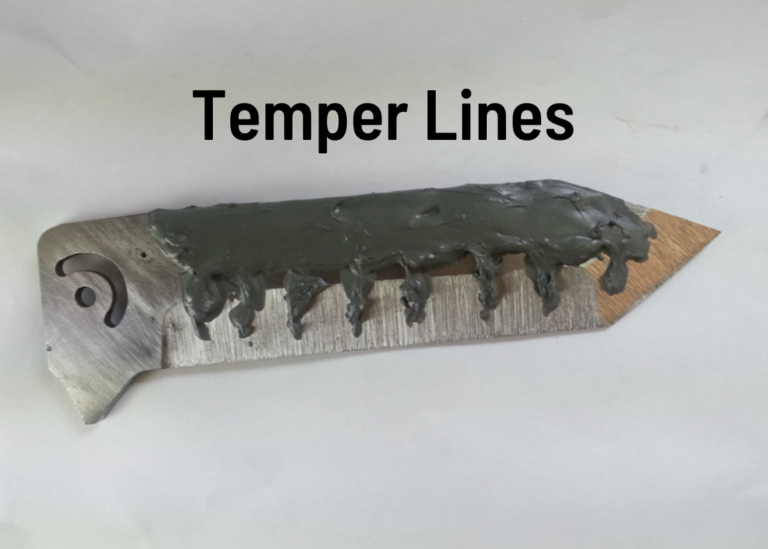
I like a very exaggerated temper line with big waves. You can achieve this by placing short lines of clay every half inch down the blade. Do not carry the clay line all the way to the edge as you want the edge fully hard.
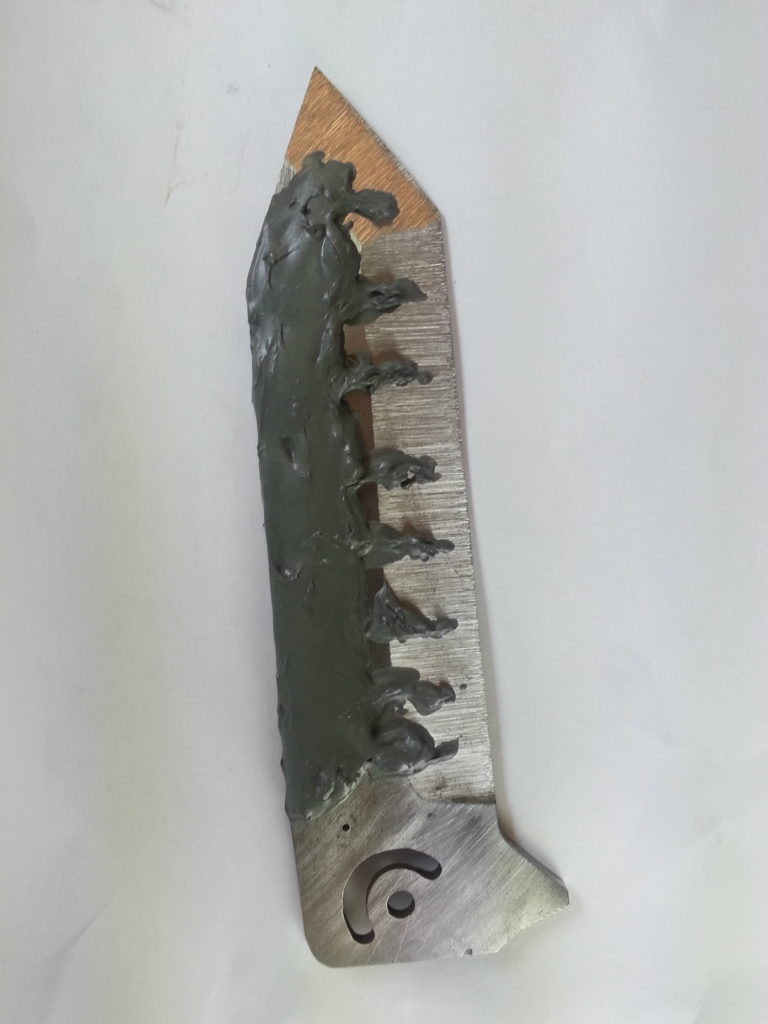
1) The author likes very exaggerated temper lines with big waves. You can achieve this by placing short lines of clay every half inch down the blade.

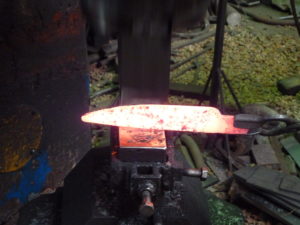
I put the clay on the blade about an eighth of an inch thick. This seems to work very well. Let the clay dry for about four hours before you heat treat it. To heat treat the blade I use a propane forge. I place a coat hanger through the pivot hole and twist it around the tang of the folder to give me something to hold onto. 


HEAT and QUENCH

Gently heat the blade near the opening of the forge for a minute before placing it into the forge edge up. Watch the blade come up to temperature, placing the tang near the hottest part of your fire. The tang is the thickest area of the blade and slowest part to get up to critical temperature. Heat the blade until a magnet does not stick to it. I use a cow magnet on the end of a pipe and keep testing the blade as it heats up to temperature.

When a magnet does not stick to high carbon steel the steel is at critical temperature, at which point the blade should be removed from the forge and quenched in oil. For steel, I use a fast-quench oil such as the kind from Parker or Fensoil. I have also done many successful quenches in vegetable oil.
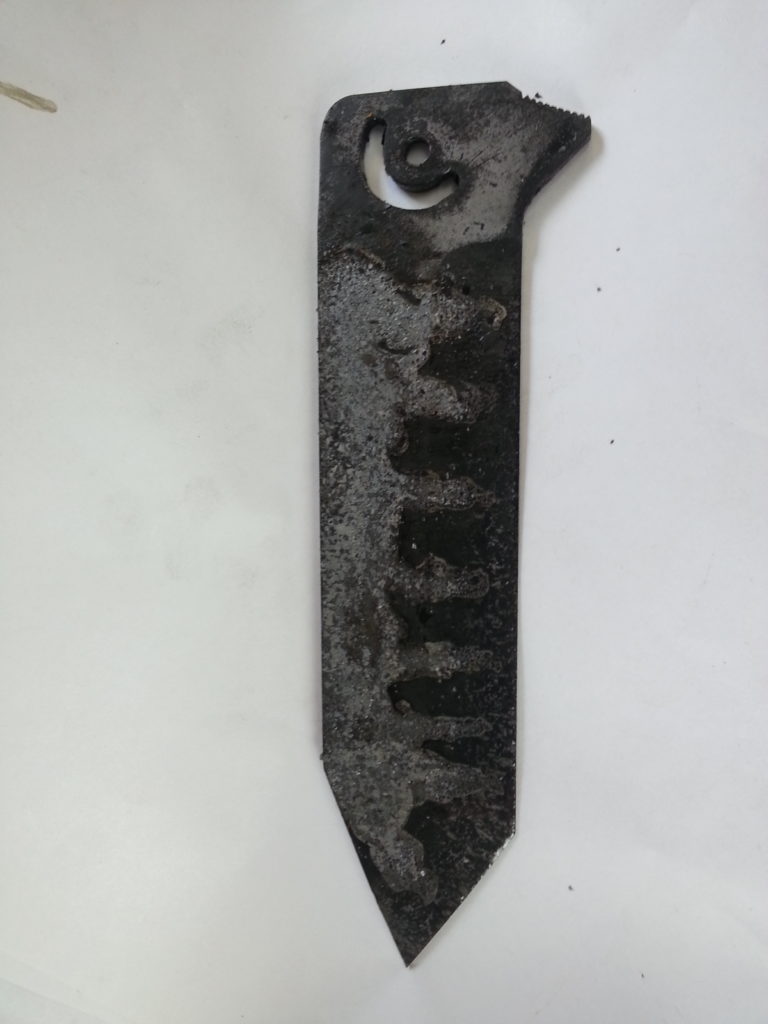
2) Here is the blade after quenching. The author uses a fast-quench oil such as the kind from Parker or Fensoil. He also has done many successful quenches in vegetable oil.

I quench the blade and then leave it submerged for two minutes before removing it. Once its out, I clean the blade with a paper towel. I then put the blade in the toaster oven for one hour at 385°F.

WARP CHECK, GRIND and POLISH

After the blade is cool I check it for straightness on a flat piece of steel. I use a set of parallels for this. If the blade is warped, I clamp it to a slightly curved piece of thick steel, and press the warp out with the twist clamp. Then I place the clamped blade in the toaster oven for another hour’s worth of temper at 350°F. This works really well and is less stressful to the blade when compared to trying to straighten it another way.
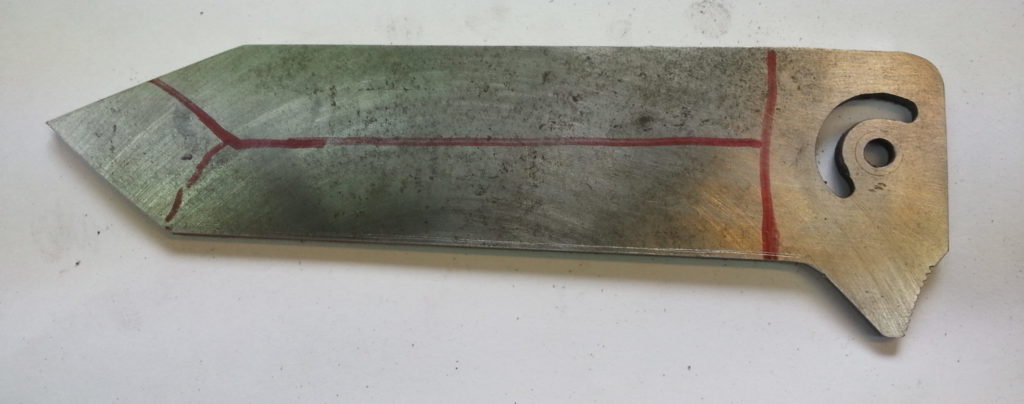
3) The red marks served as guides for the finish-ground blade.

Once the blade is straight it is time to finish grind and polish it up to 2,000 grit. I do the final polishing by hand to ensure every scratch has been removed. After this I sharpen the edge and make sure it is also polished carefully. Finally, I use sand paper backed up by a thick piece of leather and sand very slowly so I don’t cut myself.

The ETCH

Next up: Etch the blade to bring out the temper line. Clean the blade with acetone. Wear latex gloves to protect your hands and to keep oils from your hands off the clean blade. To etch the blade I use ferric chloride diluted four-to-one with distilled water—that is, four parts water to one part ferric chloride. Hang the blade with a cotton string tied through the pivot hole and place it in the acid for 15 seconds. Remove the blade from the acid and spray it with Windex®. This neutralizes the acid and stops the etching. Dry the blade and coat it with WD-40®. Rub a little bit of polishing compound onto the blade to remove some of the residue from the etching. I use Flitz or Peek polishing paste with a paper towel and some WD-40. Polish lightly and be very mindful of the sharp edge. Clean the blade with WD-40 and wipe off any excess oil.
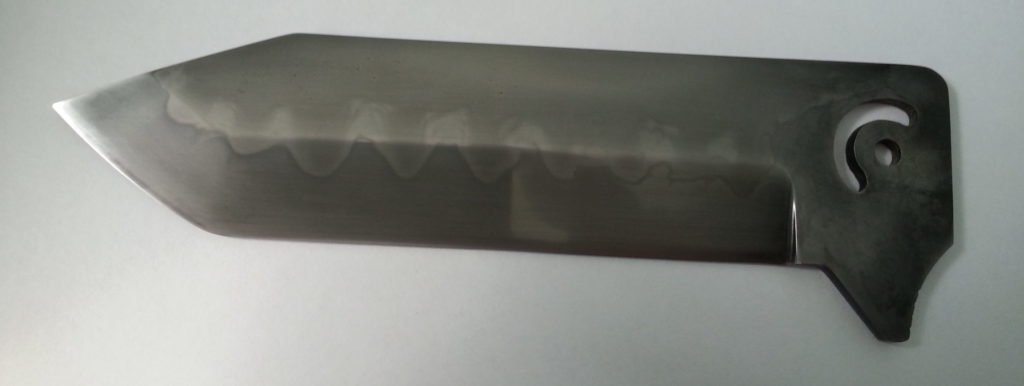
4) Here is how the blade appears after polishing and etching. The temper line is now visible.

To get the temper line white, go over the blade lightly with a piece of 3,000-grit-or-higher sandpaper.

I hope this gives some insight into the fun world of temper lines and more people will experiment with this fun process.
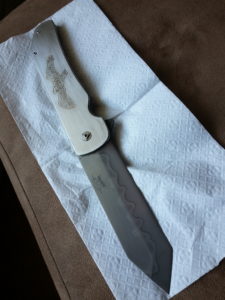
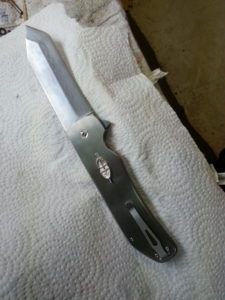
Above: The blade of the author’s finished folder exhibits a temper line with big waves—just the way he likes it.

For more information contact Wally Hayes, 9960,9th Concession, RR#1, Essex, ON, CanadaN8M-2X5 226-787-4289.
How to Do Plug Welds on Knives

0

Plug Welds the David Lisch Way

The ABS Master Smith shows how he puts a plug weld in a damascus blade

On this and the following pages, I will show you how to do a plug weld. Firstly, this is not a new technique. That being said, I would like to think that the way I am using it here is new—or at least it is new to my knives. I’m not showing how I made the damascus pattern as it would take way too many photos. Perhaps I will show that in another story.
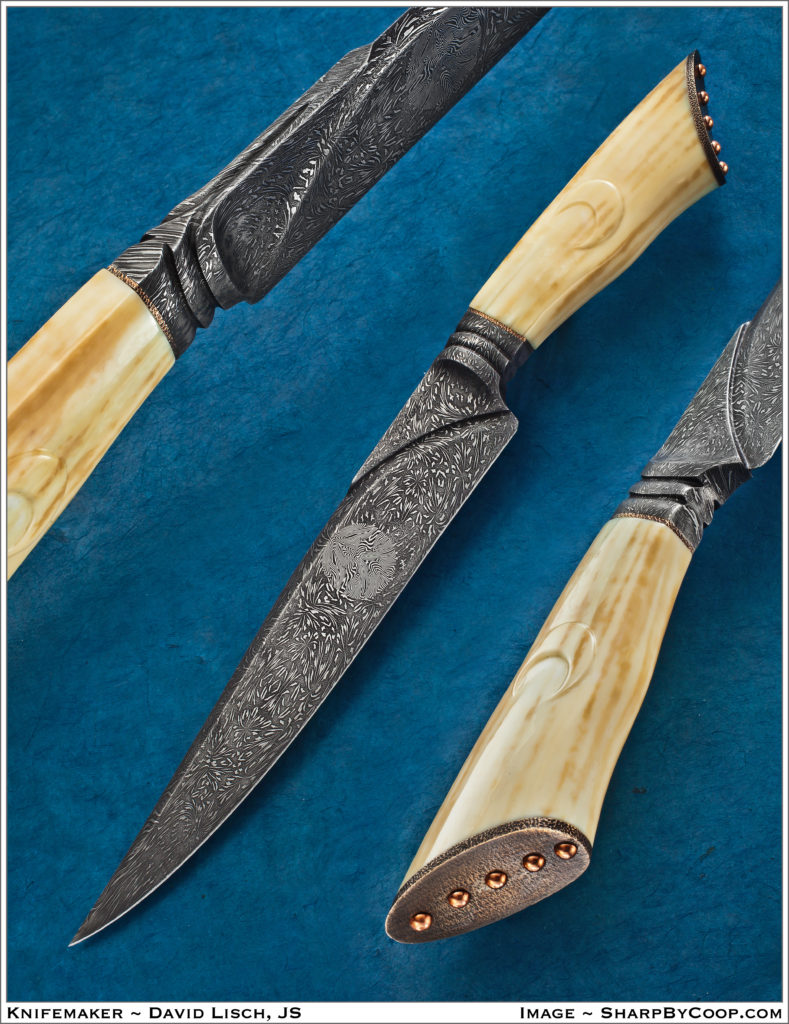
The Moon Fighter is one of two knives I have made in this style. The first one was the Sun Fighter. The Sun Fighter was the first time I made a knife using the plug weld technique. I took an order for a knife like the Sun Fighter. Since the resulting knife was slightly different, therefore I named it the Moon Fighter.

HOW DAVE DOES IT

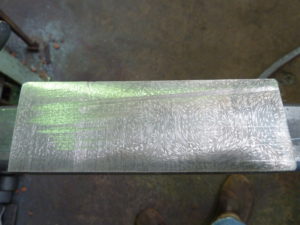
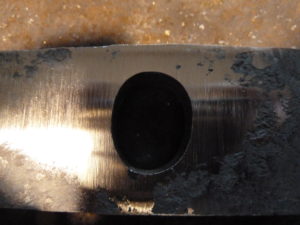
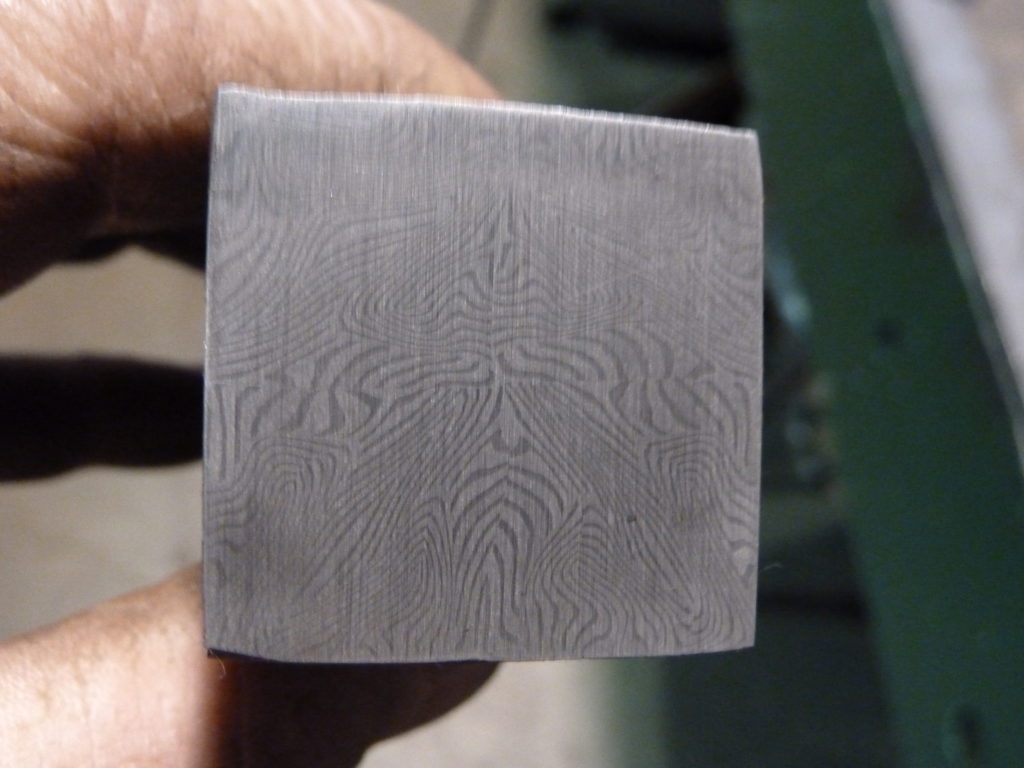
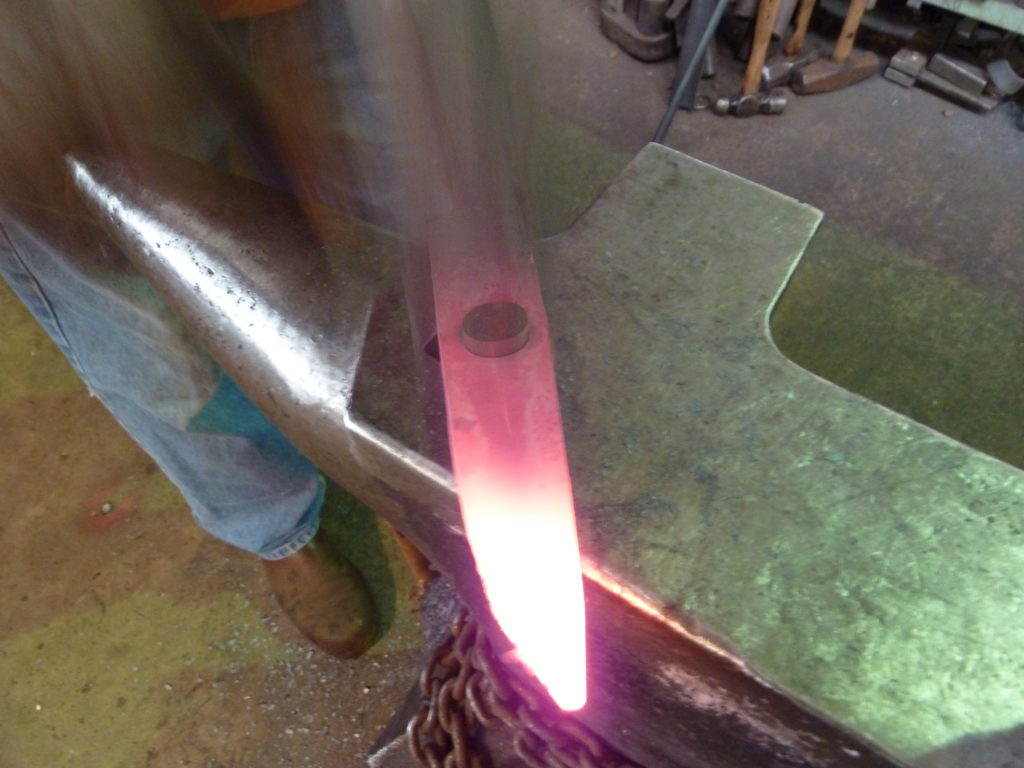
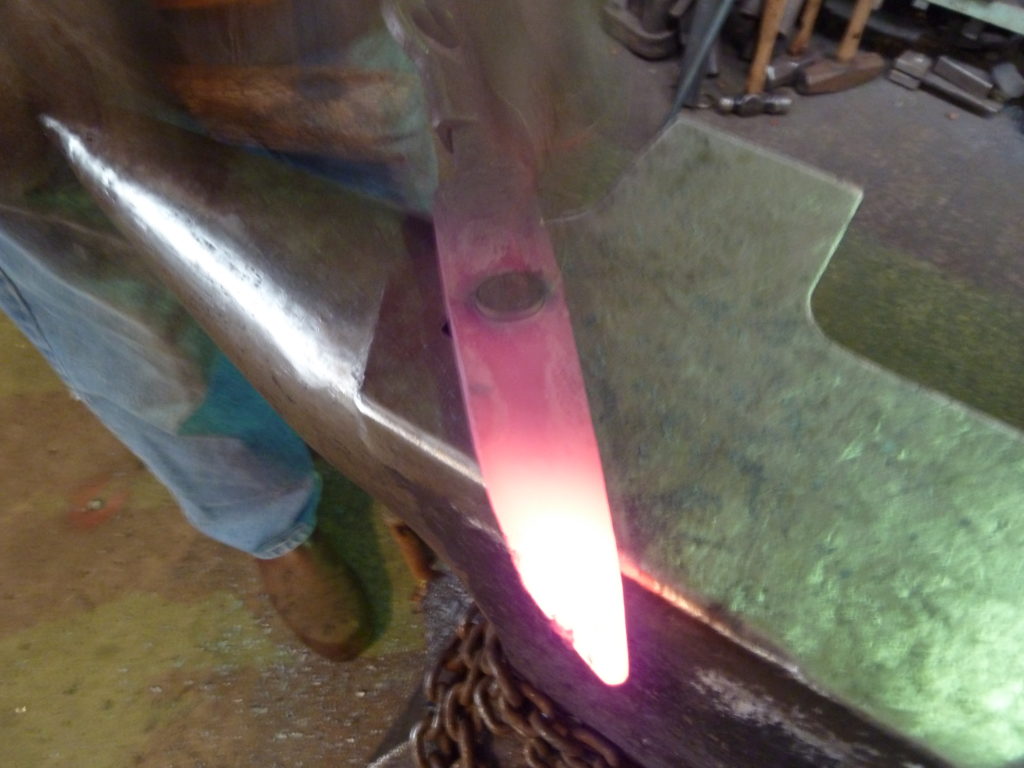
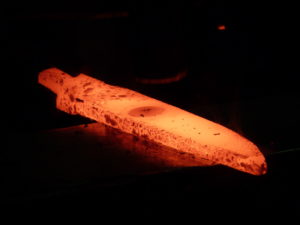
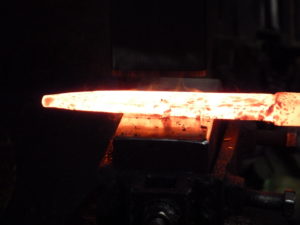
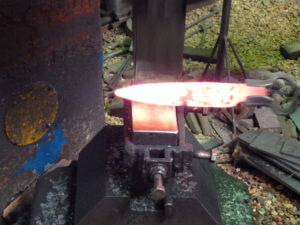
In Photo 1, I am cutting an oval hole into a forged integral blade. I forged the blade from a billet of my Star Night Damascus (Photo 2). It is important that the hole be an oval shape so it will be round once it is forged (Photo 3).

3: It is important that the hole be an oval shape so it will be round once forged.

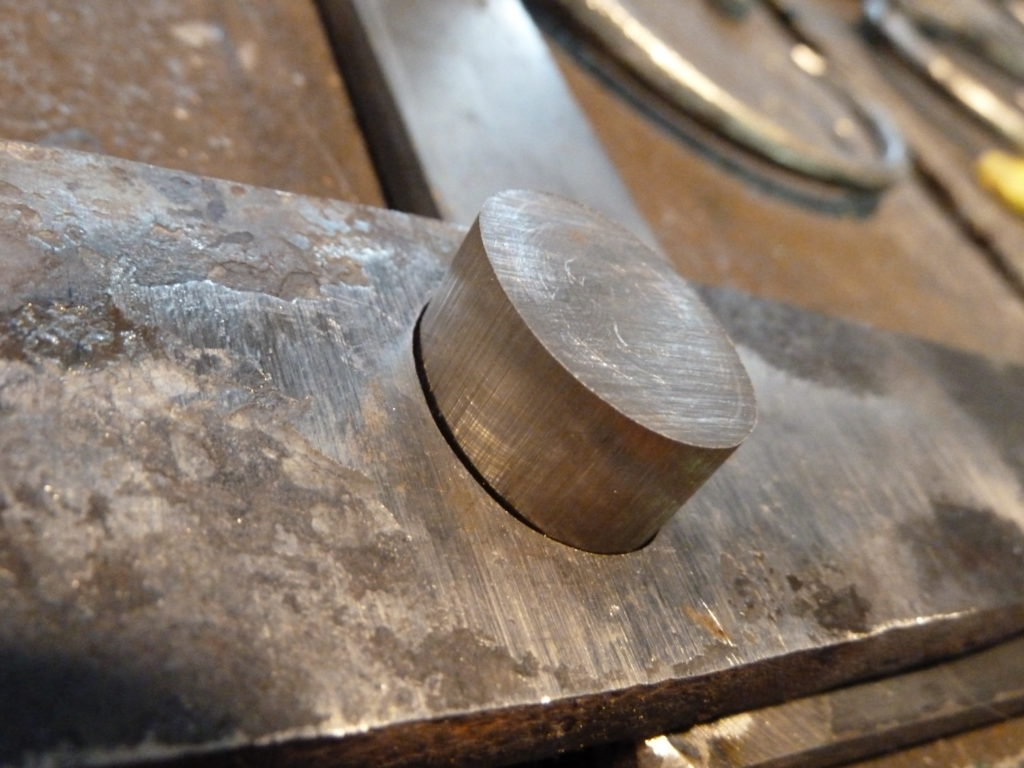
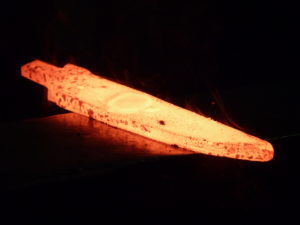
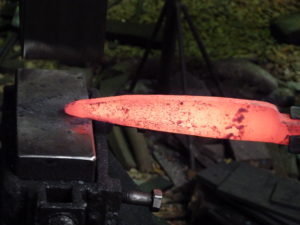
Blade thickness is just over 3/8 inch. This will give me room to forge the blade once I make the plug weld. Photo 4 shows the end of the moon billet. I will shape the square into the oval to the make the plug for the “moon.”

In Photo 5 you can see that the plug is ready for insertion into the hole. It is close to the right size but just a bit big. I put a slight taper on the edge of the plug so it can “find” the hole. The plug is an eighth inch thicker than the blade. This will allow the plug to expand and weld into the blade.

Above Photos 6 and 7: The hammer is a blur as the author pounds the plug into the hole in the hot steel.

With any process there is a learning curve. I learned that to get a really tight fit with the plug, it works best to put a dull red heat on the blade. Place the tapered plug into place and hammer it into the dull red blade (Photos 6 and 7). In Photo 8 the plug is in place. It is 1/16 inch proud on both sides of the blade. Back into the fire to a dull red and add flux.

In Photo 9 I have made the first weld. The moon is still visible. In Photo 10 the moon is still a bit cooler than the blade and is getting a bit bigger. Now is the time for some heat. Photo 11 shows work at the power hammer for some drawing down of thickness and adding length to the blade. It also makes the oval moon round and very hard to see.

In Photo 12 I am forging the blade close to its final shape. In Photo 13 I am drawing out the tip, adding more length to the blade. The moon is very close to being round. After a few final taps under the power hammer (Photo 14), I will finish tuning up the profile by hand.

NO SET FORMULA

I do not have a set formula for this process. It is by gut feeling. I can see how much the steel moves when I forge it. The first time I tried it I put a round hole into the blade and wound up with an oval, so it made sense to start with an oval hole if I wanted to wind up with a round one.

With the Sun Fighter the blade was 480-layer damascus and the “sun” was a very tight W’s-pattern damascus. Once I made the initial weld, the blade was still over 3/8-inch thick at that juncture. I ground in sunrays on both sides then forged up the rays and the sun to its round shape. On the Moon Fighter I wanted the backdrop to resemble shooting stars. This took some trial and error and a lot more time than I thought it would to get a pattern I liked.

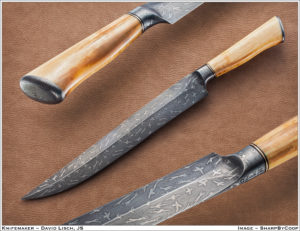
The result of the plug weld made to resemble the moon is plainly evident in the center of the damascus blade of the Moon Fighter by ABS master smith David Lisch (inset). (SharpByCoop knife photo)

NO LIMIT

There is no limit to the cool new things that can be done with damascus. I have heard folks say it has all been done before. Well, I don’t believe it. I think new and exciting things are happening in little knife shops all over the world, and the only way to keep things moving forward is to try new stuff and share the new things with everyone we can.

Please feel free to try this process. There are so many different things that can be done with it. When you come up with something new, share it so we continue to advance the art of damascus and knifemaking. Or, buy a damascus knife from your favorite maker and watch for that sparkle in his eye as he thinks to himself, “Cool, now I get to make another knife.”

Marine Vet’s Knife Memorializes the Ultimate Sacrifice of His Iraq Comrades

1 Knife for the Lima Company 11

BY MIKE HASKEW BLADE® FIELD EDITOR

*This article originally appeared in BLADE Magazine Winter 2013

The bond of brotherhood, sacrifice, and selflessness forged by fighting men in combat is, perhaps, the strongest emotion human beings can experience. So it is with Travis Williams.

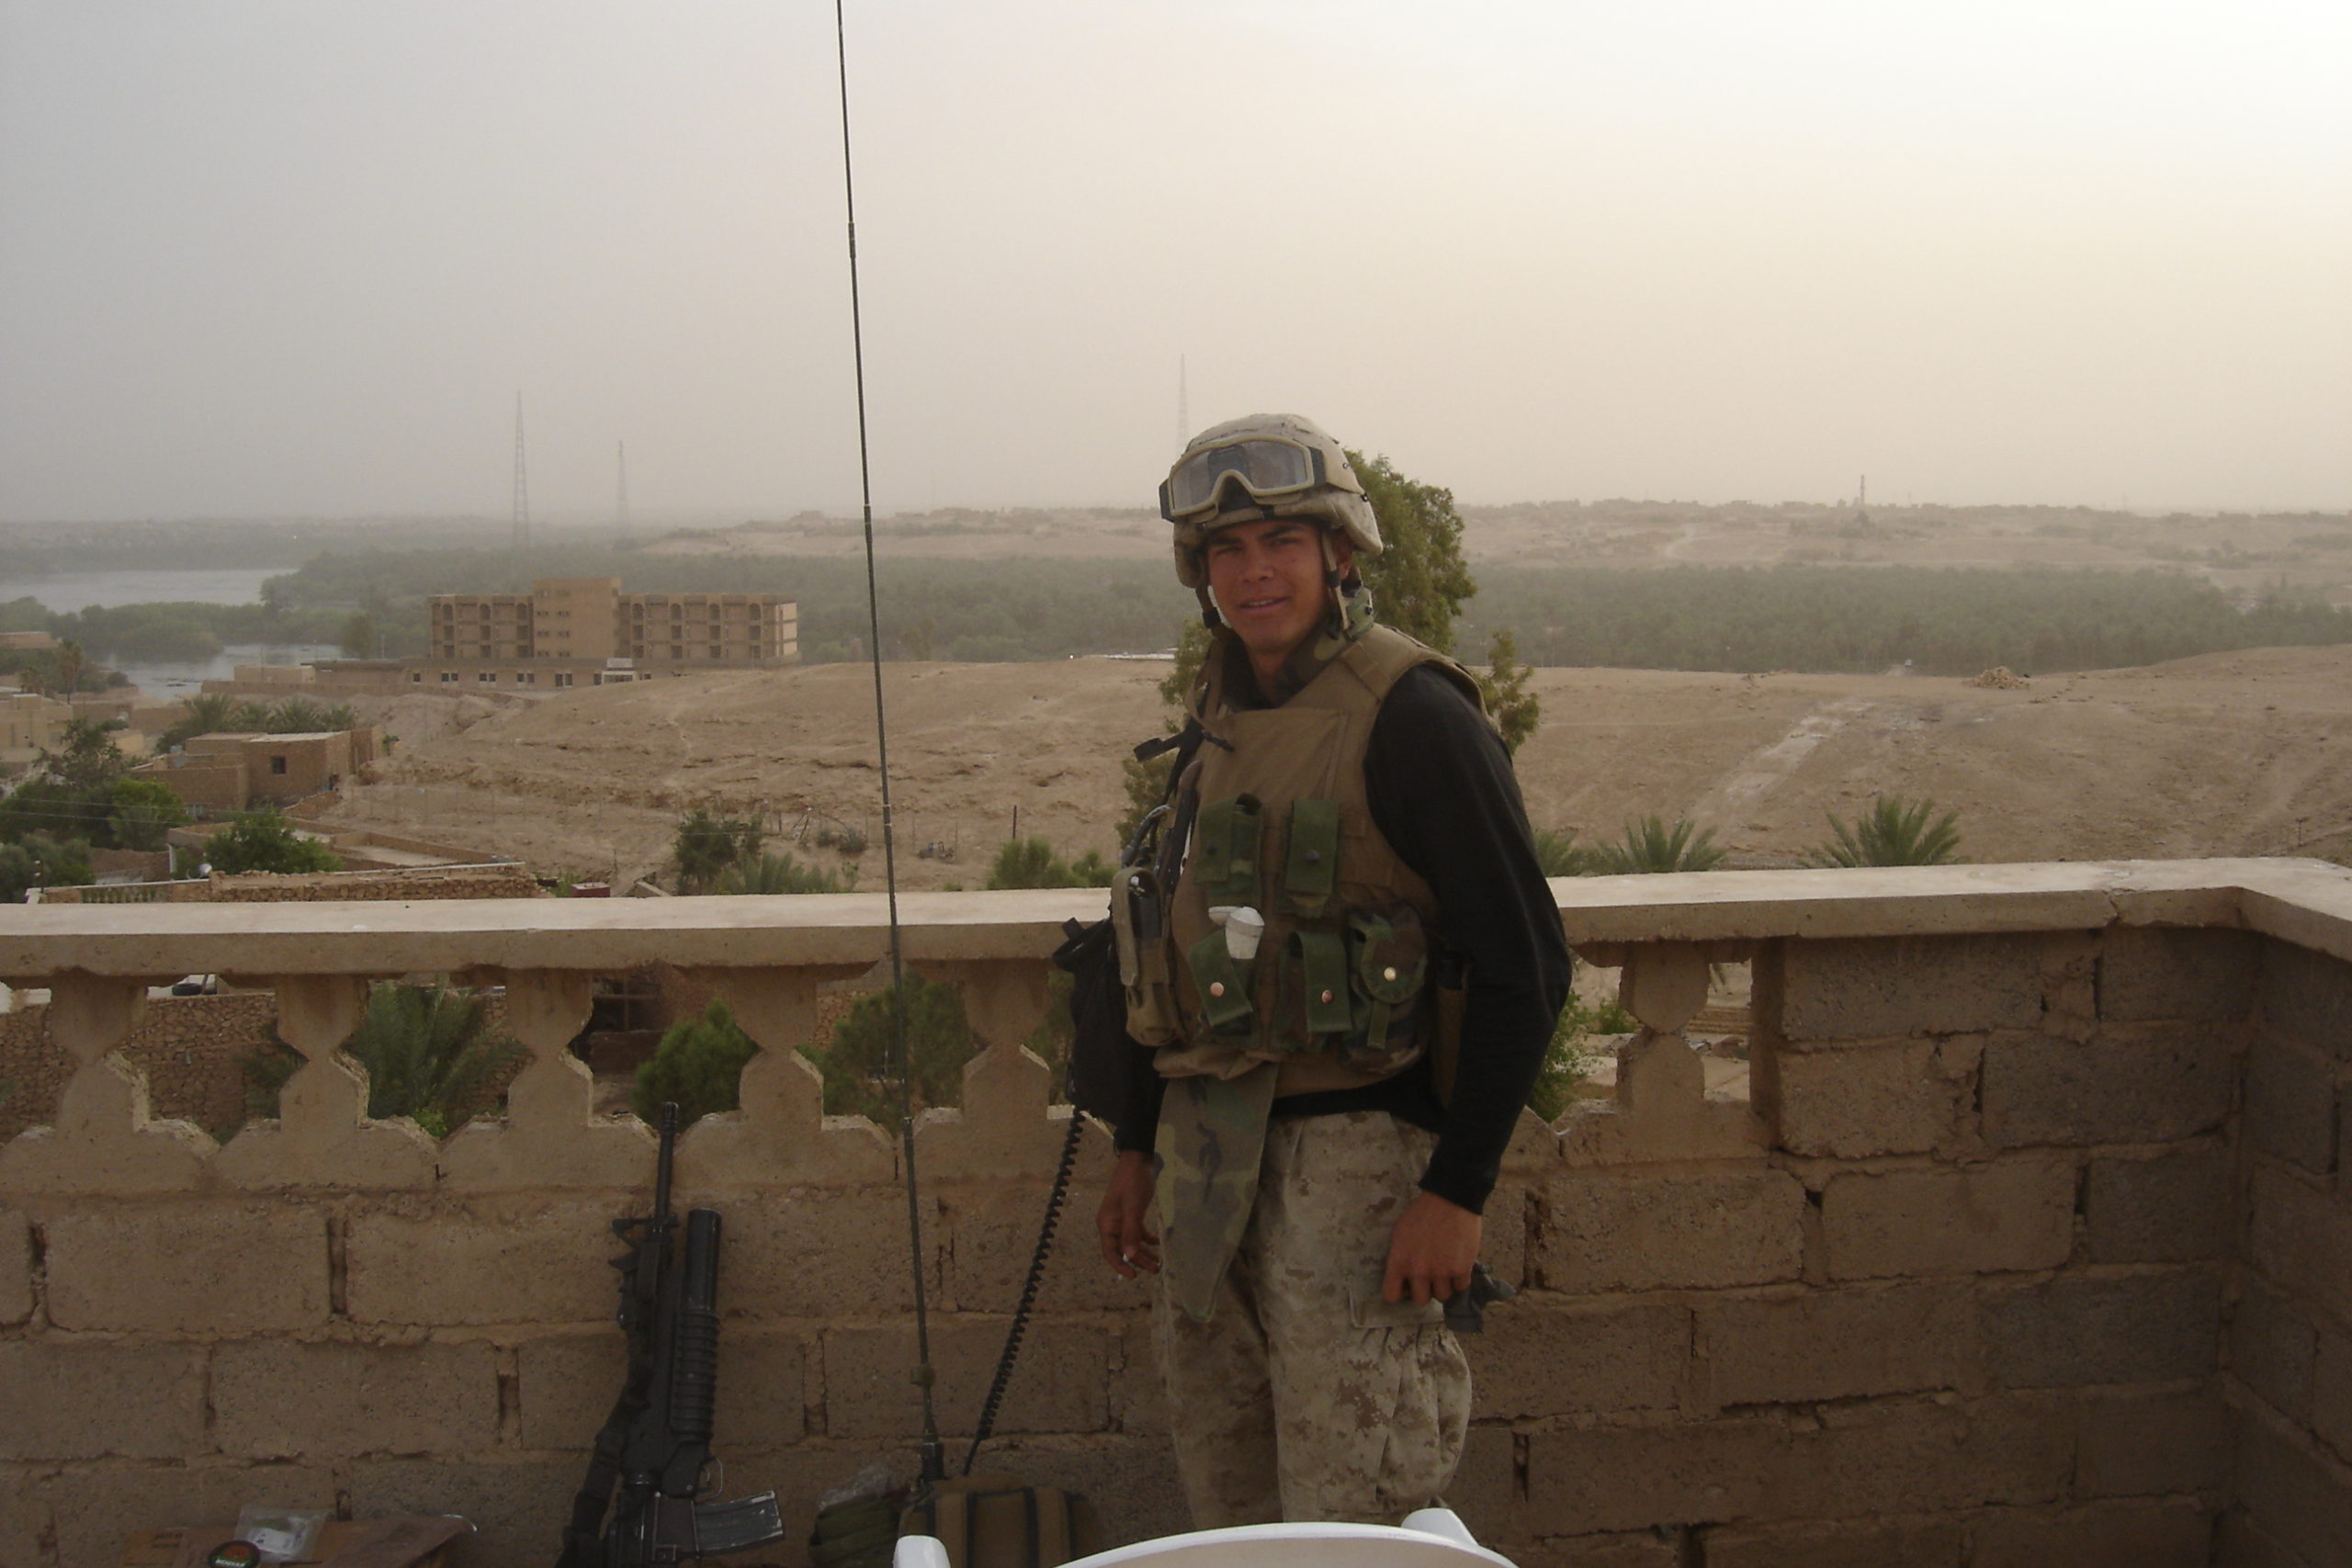
Having just turned 18, Travis enlisted in the United States Marine Corps In December 2001. He reported for duty the following August and spent the next four years in the service. While he trained, his original reserve unit had already deployed to Iraq, and he was among a few who were reassigned to Lima Company, 3rd Battalion, 25th Marines, another reserve unit, headquartered in Columbus, Ohio.

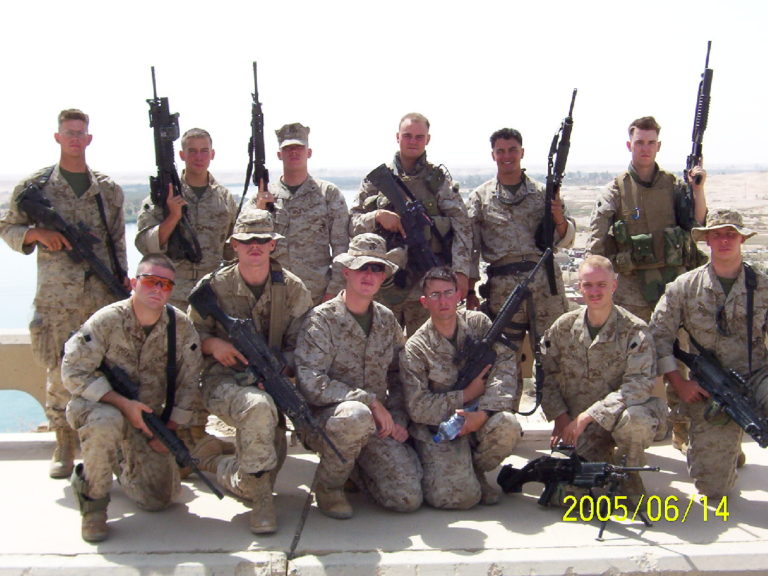
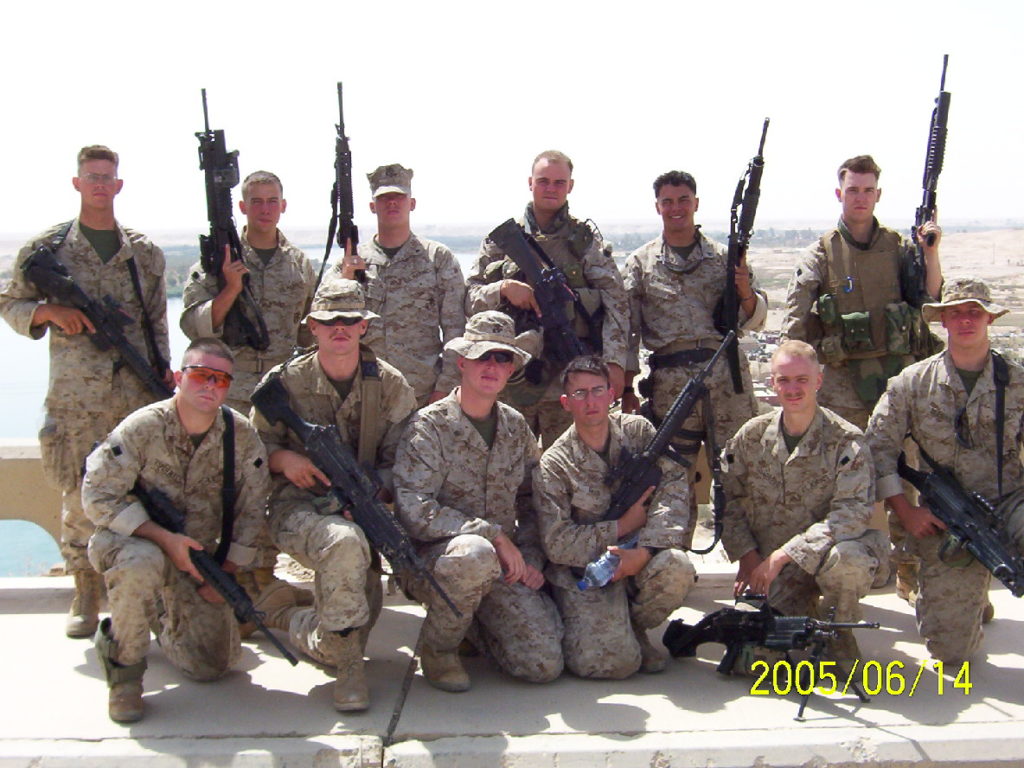
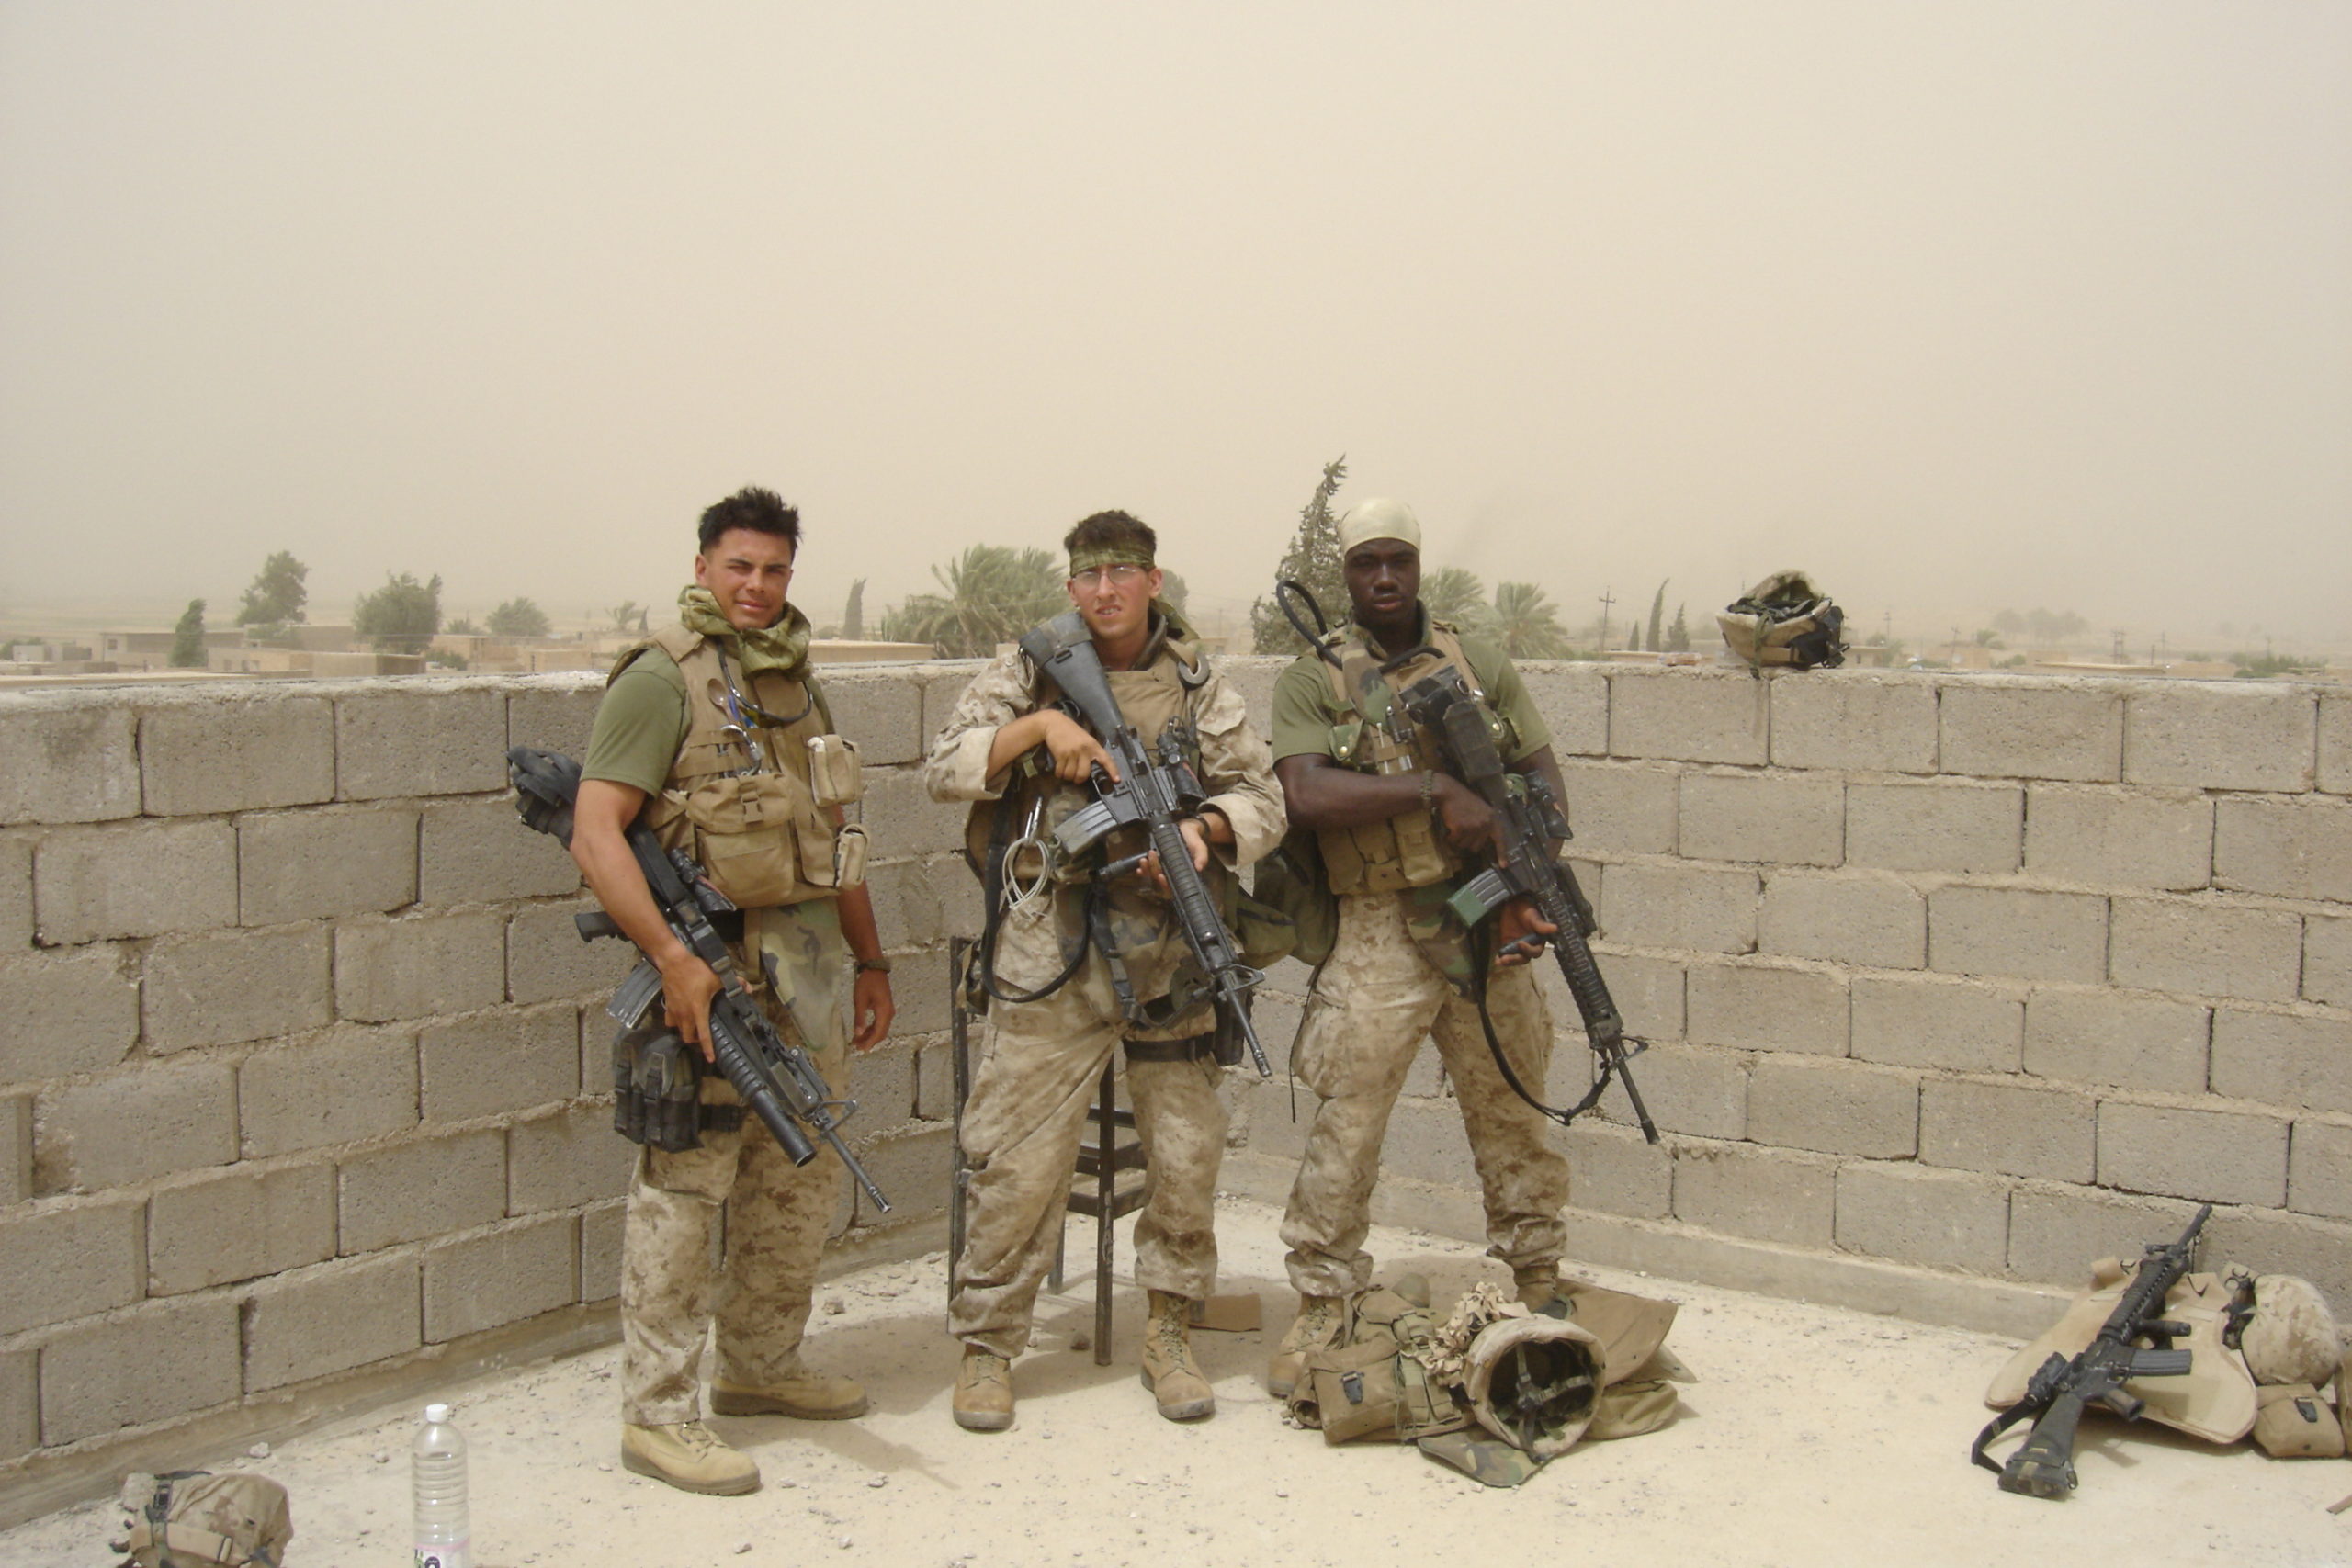
Travis Williams (second from right, back row) stands proud with his squad mere weeks before the deadly IED strike. (photo courtesy of Travis Williams)

During its deployment to Iraq, Lima Company endured days of patrols in harm’s way, intense firefights, and the ever-present danger of IEDs (Improvised Explosive Devices). With a strength of about 180 Marines, Lima Company lost 24 killed in action, and one in eight of its Marines received the Purple Heart for wounds received or death as a result of enemy action. By late 2005, Lima Company was the hardest hit unit of its size in the Marine Corps. Lima’s battalion lost 48 men killed in Iraq.


AUG. 3, 2005

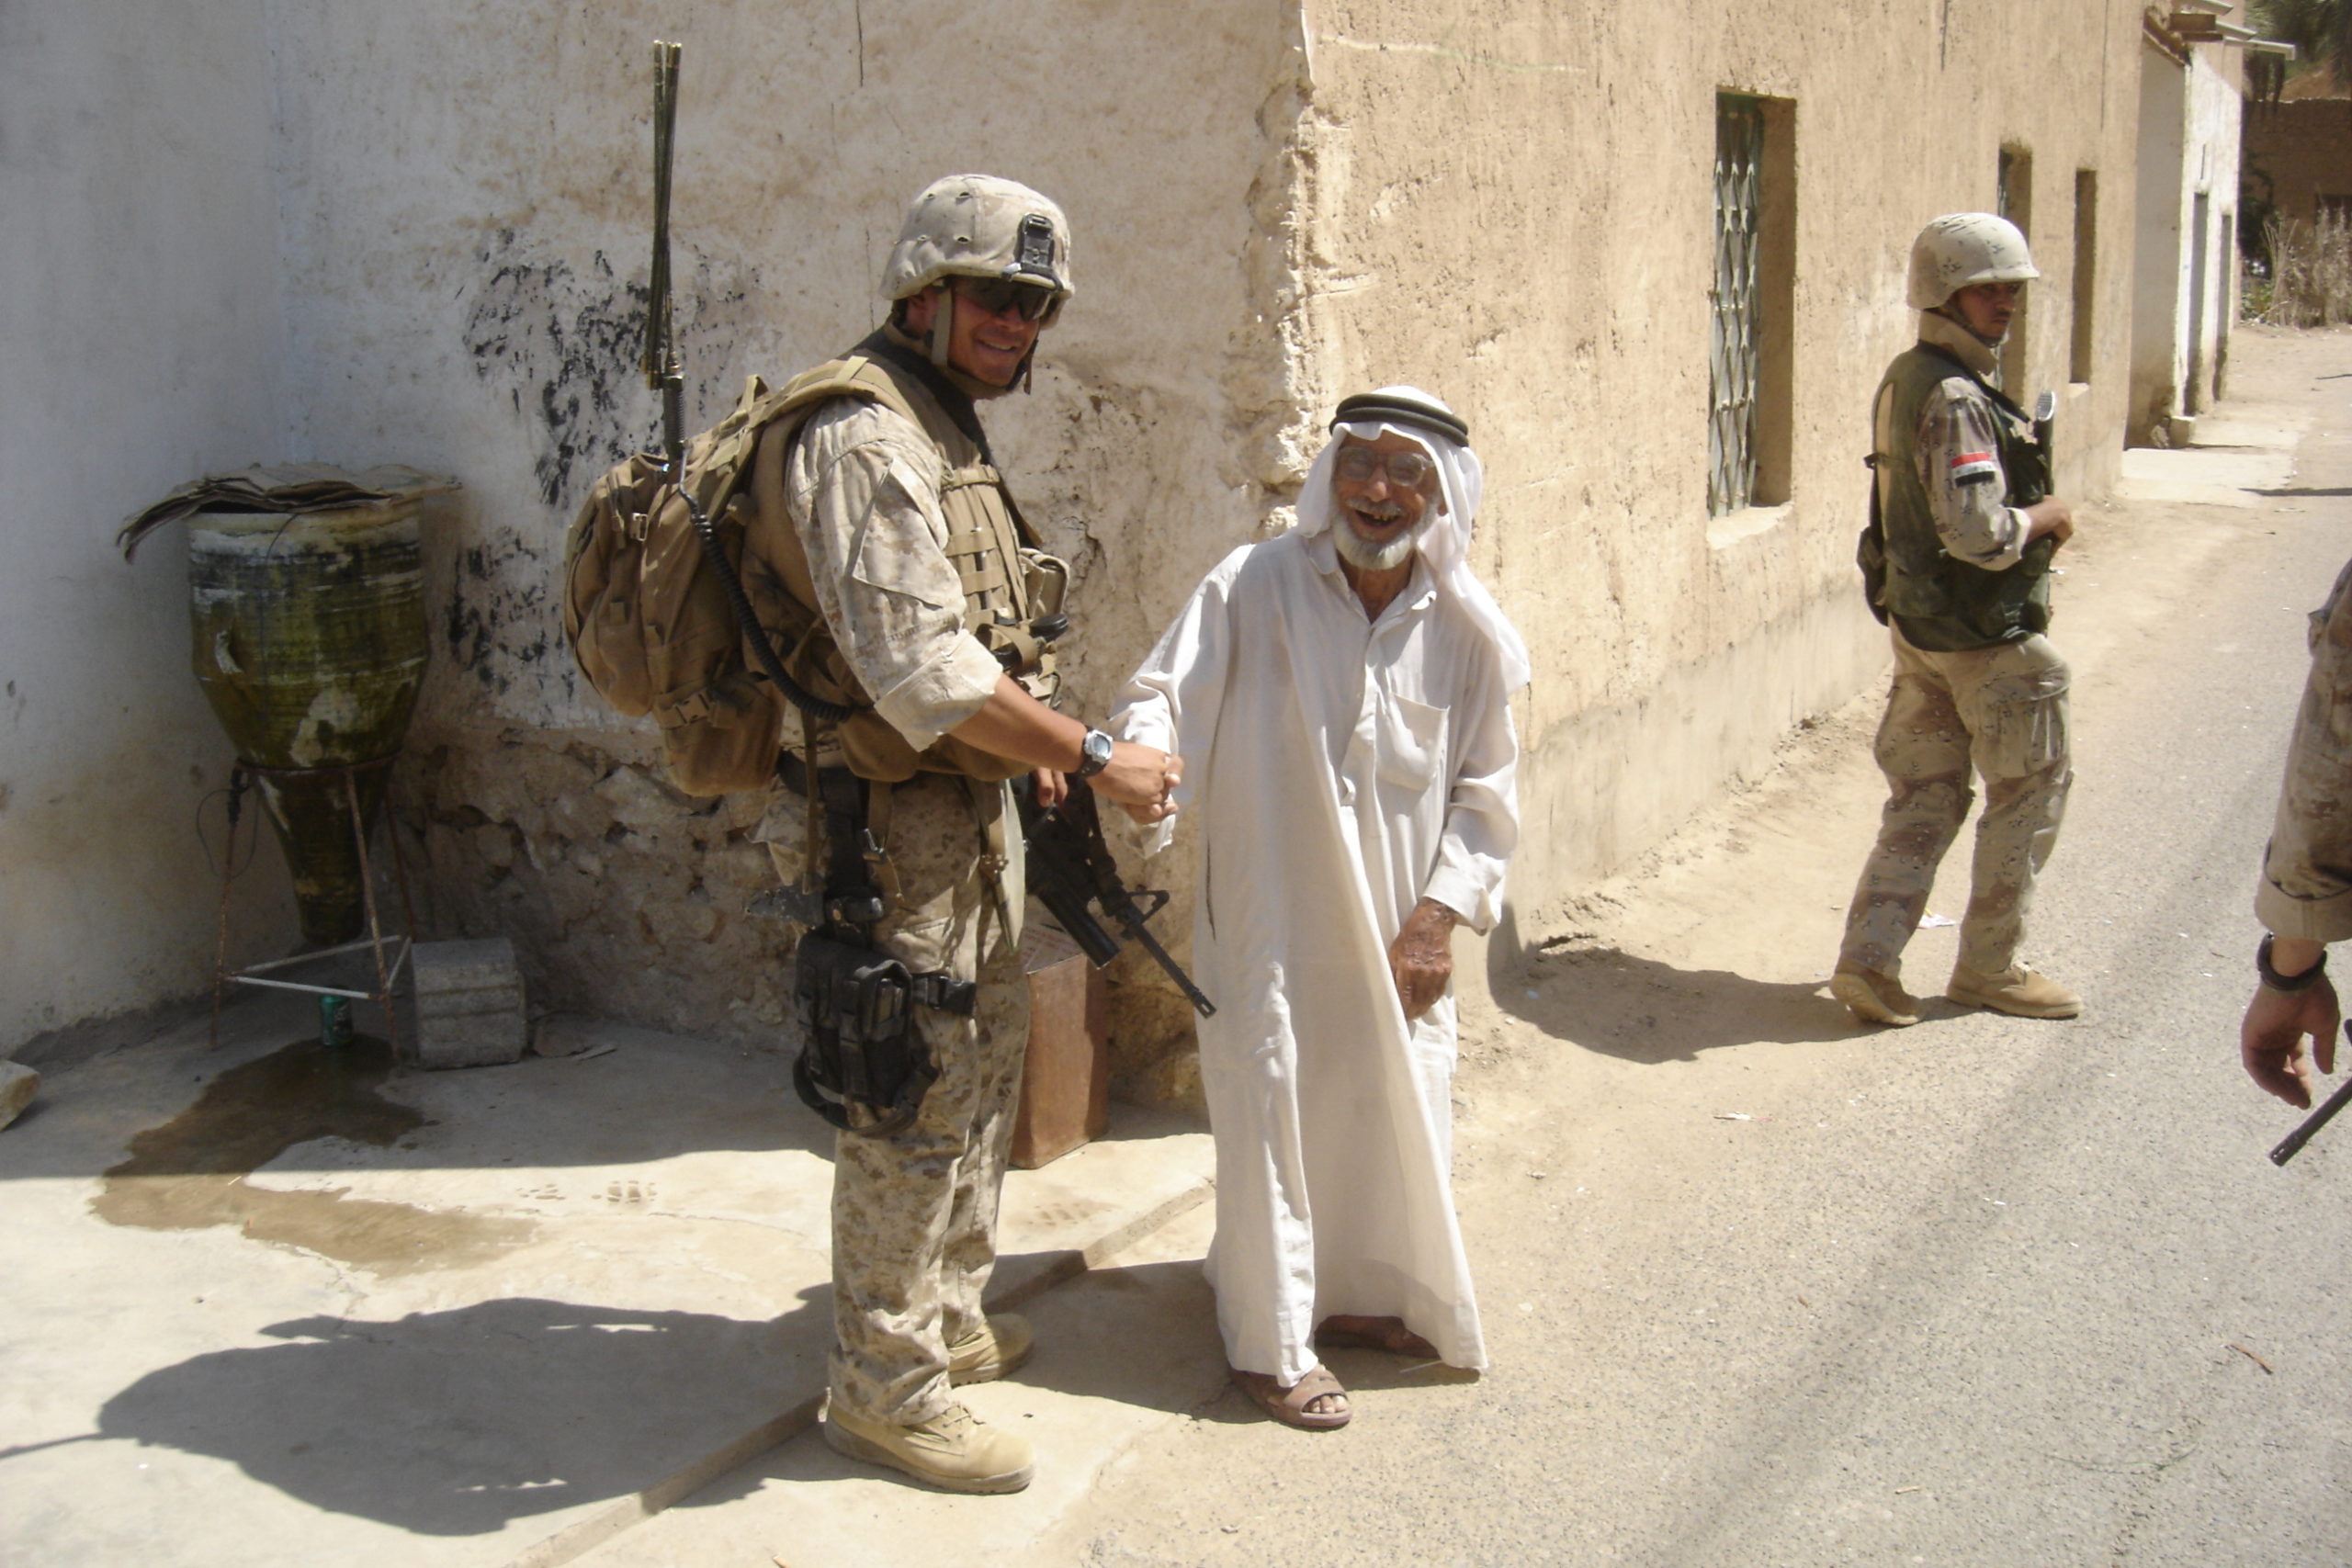
Considering the tedium and tension that encompassed his time in Iraq, a single day stands out in Travis’ memory. On Aug. 3, 2005, during a patrol near the town of Barwanah, 11 Marines from his squad were killed in a massive IED explosion.

“We were going to start at 0600,” Williams recalled. “We loaded our amtracs, big transport vehicles, and about five minutes before we stepped off, a call came down from higher. For some reason the platoon commander and I got pulled out of our vehicle with 1st Squad and put in a vehicle ahead of theirs with Iraqi forces in it. We headed for town and weren’t going to take any roads in. It was about a month before we were to leave the country, and we had seen a lot of firefights and IEDs.”

After the patrol received word that the road was, in fact, clear, the catastrophic explosion erupted. “We hopped on the road, and right as we made the turn for town I was sitting down in the vehicle,” Travis continued. “Somebody has to stand up to provide security, and I saw the explosion in the glasses of the guy standing up in our vehicle.”

Williams still does not know why he and the platoon commander were ordered out of the vehicle that was hit. He was not injured. Fifteen men occupied the stricken amtrac, and he had known those Marines that were killed for more than a year. Among them was his best friend, Lance Corporal Aaron Reed of Chillicothe, Ohio.

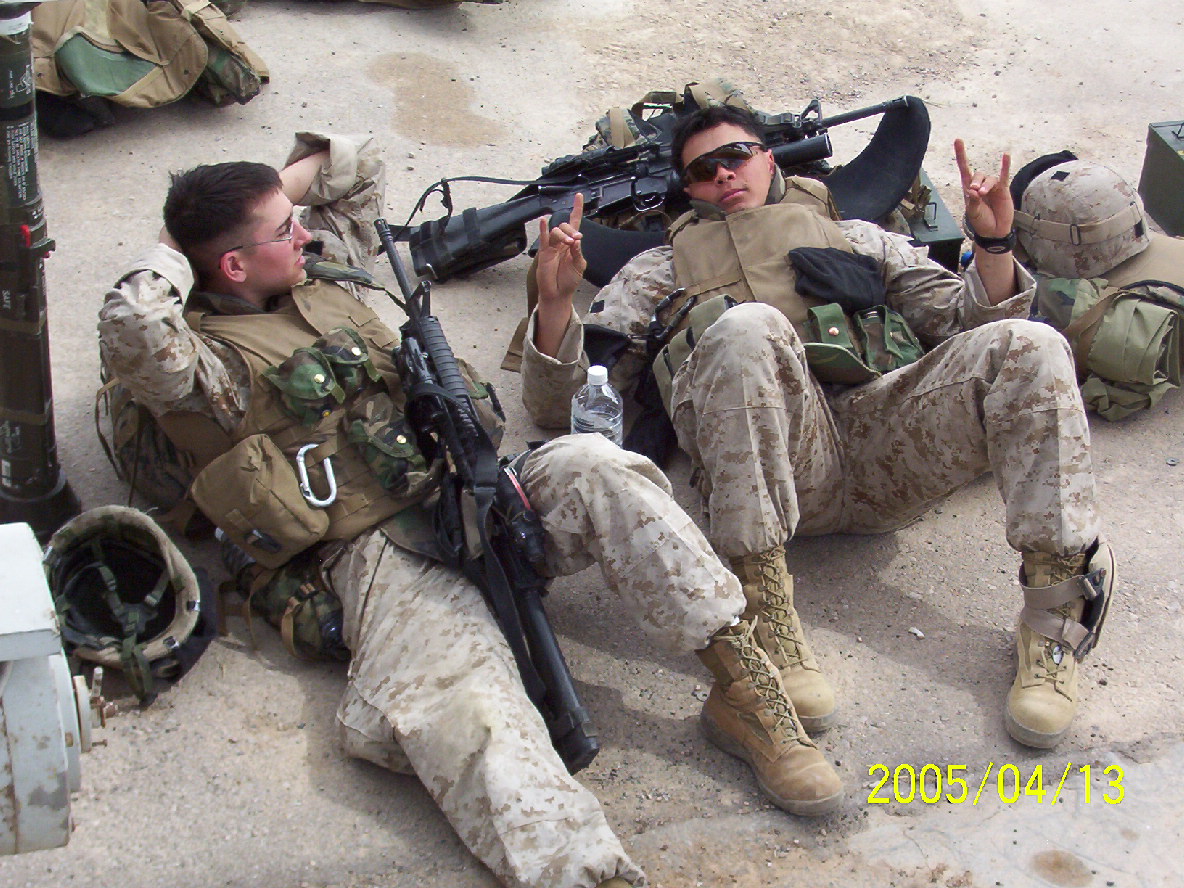
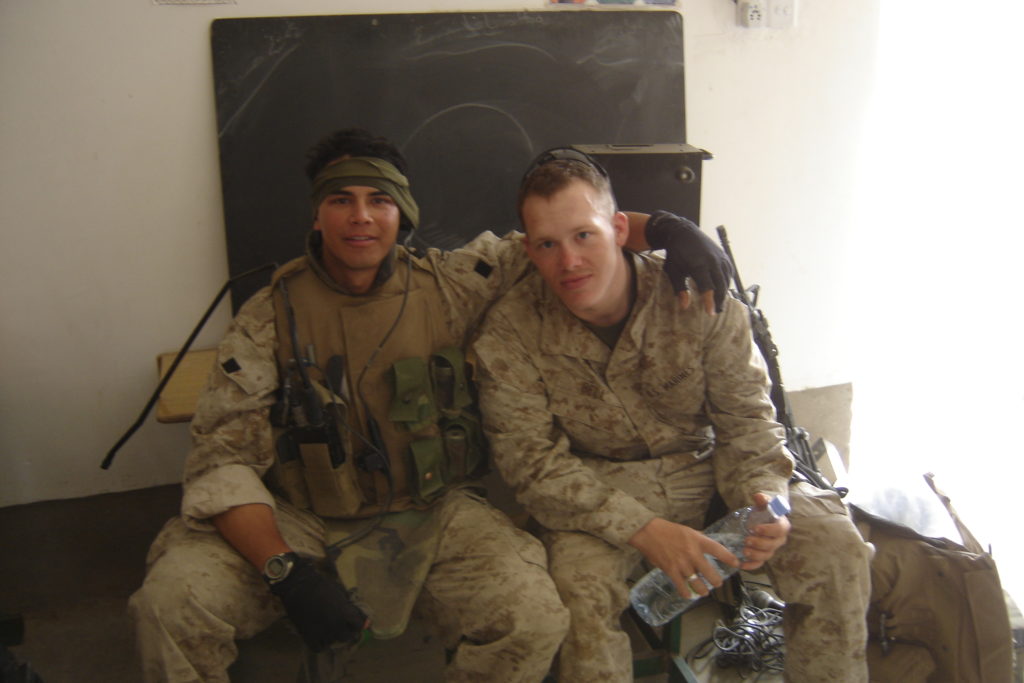
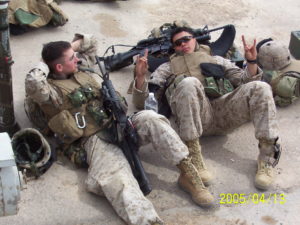
Travis and Lance Corporal Timothy M. Bell Jr., 1983-2005, enjoy some downtime. Bell, 22, was killed by the IED. His awards include the Purple Heart, Navy and Marine Corps Achievement Medal with Combat “V” for valor, and the Combat Action Ribbon. (photo courtesy of Travis Williams)

When Lance Corporal Travis Williams returned home to Missoula, Montana, in August 2006, he brought with him the memories and the scars of his wartime experience. He worked as a private investigator for about five years, and then an opportunity that he could not pass up presented itself. Always fascinated and intrigued by knives, he met custom knifemaker James Behring, Jr.

“James moved to Missoula from Michigan in 2011, and he married my friend’s sister,” Travis said. “I would hang out at the shop and watch what he was doing, and finally he told me that he was looking to hire somebody. I jumped in from there, cutting out blades from bar stock, soldering guards and finishing handles and stuff like that—until I was able to make a knife.”

GOLD STAR FAMILIES

This past February, the Wall Street Journal featured Travis in an article observing the 10th anniversary of the war in Iraq. “They wanted to know how I was doing,” he commented, “and there was a video with it and a guy followed me around the shop while we were making knives.”

A fellow Marine veteran saw the article and contacted Travis, telling him that a benefit was being organized for Gold Star Families in Ohio. These are the families of those who have lost a loved one in battle. “He asked me to make a knife for a silent auction, and the proceeds would go to support the work of an artist that was painting life-size portraits of the guys that were killed from the company,” said Williams. “It was on short notice because the event was going to be in three weeks. I cleared it with James and then contacted Roger ‘Mudbone’ Jones of Waverly, Ohio, to make sure he could make the sheath if I got the knife to him in time.”

Mudbone is an accomplished knife and sheathmaker in his own right. A friend of the Behring family who considers James Behring “like my own son,” Mudbone agreed to make the sheath. His relationship with Travis has grown as well, and he simply considers the former Marine a second son. In fact, it is Mudbone who brought this compelling story to the attention of BLADE®.

“Travis called and said he wanted to tell me about the knife and get some pointers on it and the sheath,” Mudbone remembered. “It knocked me out when he said this was for his friends, and particularly his best friend who had been killed. It turns out Aaron Reed was from my hometown, Chillicothe, Ohio. I had never met the boy, but I knew of his mother, who had been a teacher in a local school.”

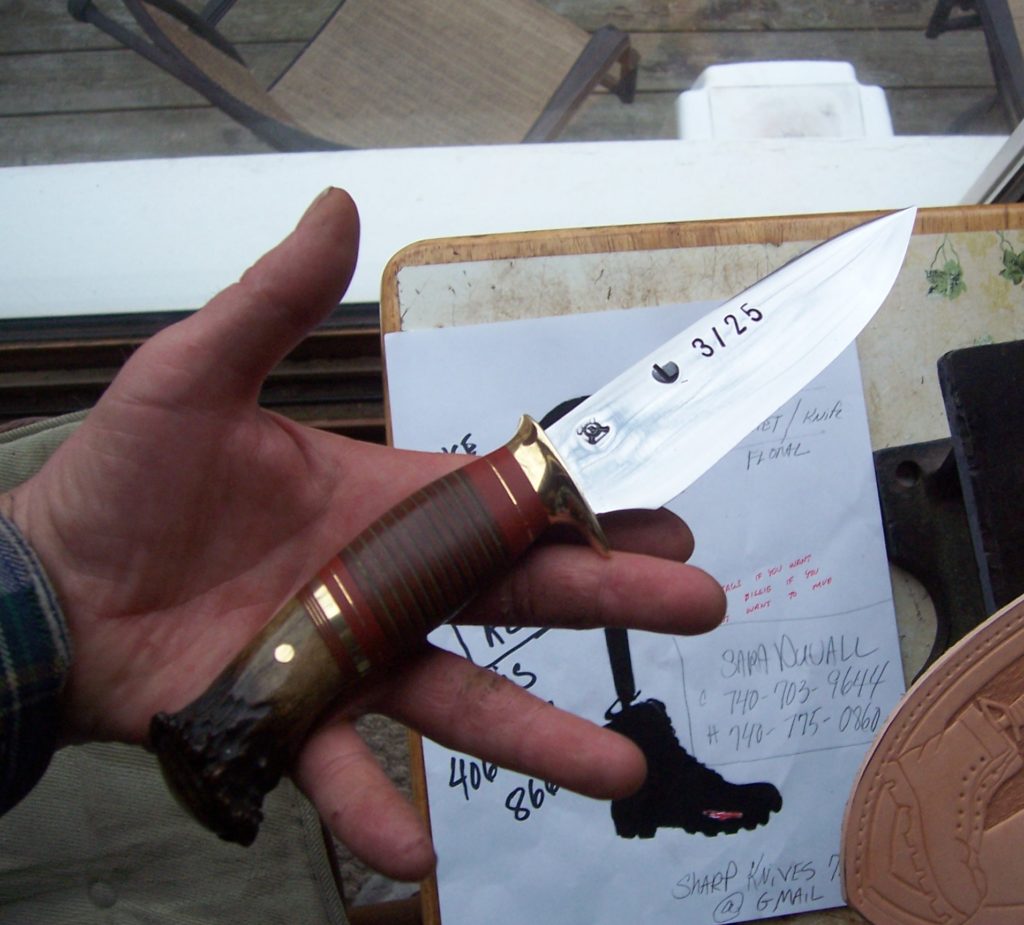
Travis set to work under the watchful eye and guidance of Behring. The finished knife includes a 6-inch drop point blade of O-1 tool steel, a thick brass guard, and a stacked-leather-washer handle with a butt of whitetail crown stag. Inserted between the leather washers is a piece of the nametape, typically worked across the top of the uniform pocket, of each of the 11 Marines killed on Aug. 3, 2005. The letter “L” for Lima Company and “3/25” for 3rd Battalion and 25th Marine Regiment are hot stamped into the blade.

Made by Travis under the watchful eye of Jim Behring, the knife has a 6-inch blade of O1 tool steel, brass guard, and a stacked-leather-washer handle with a butt of whitetail crown stag. Between the leather washers is a piece of the nametape, typically worked across the top of the uniform pocket, of each of the 11 Marines killed on Aug. 3, 2005. The letter “L” for Lima Company and “3/25” for 3rd Battalion and 25th Marine Regiment are hot stamped into the blade. (photo courtesy of Mudbone Jones)

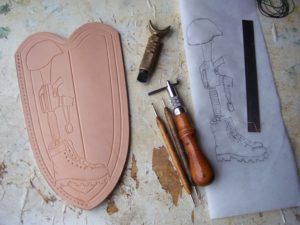
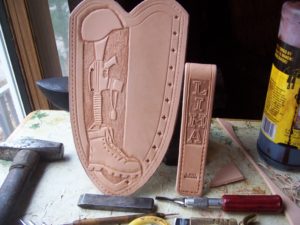
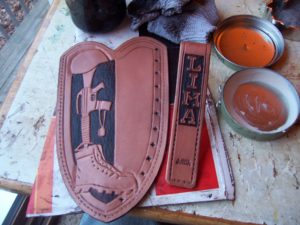
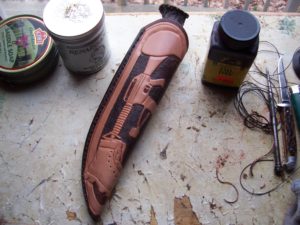
When the knife was complete, Mudbone set to work. With only a week to complete the task, he crafted a leather sheath with the iconic image of the rifle turned down into a boot and topped by a helmet. A dog tag hangs from the weapon. The word “LIMA” is also prominent.

“On the back of the sheath there are 11 four-pointed North Stars,” added Mudbone. “Craftsmen of earlier times stamped these on guns and knives so the owner could always find his way home. They finished the knife on a Saturday. I got it on Tuesday and dropped everything else to get the sheath done. Sometime around 3:30 or 4:30 a.m. the next Saturday, I pulled the last stitch and put the last wax on it.”

Above: Working from the drawing, Roger “Mudbone” Jones employed a Marine theme of helmet, weapon, dog tags and boots to make the knife’s leather sheath, including the Lima Company name. On the back of the sheath are 11 four-pointed North Stars,” added Mudbone. “Craftsmen of earlier times stamped these on guns and knives so the owner could always find his way home.” (photos courtesy of Mudbone Jones)

SOLD for $7,000

The knife sold for $7,000, but not during the silent auction. “Doc” Wentworth, a Navy corpsman who had been assigned to Lima Company, was determined to keep the Lima Knife with the portraits so beautifully painted by artist Anita Miller. The memorial event at the Ohio Statehouse in Columbus was moving and inspirational, and Wentworth succeeded through social media in raising small donations that bought the knife and will allow the memorial to remain together in its permanent home in the statehouse. An accompanying book, The Lima Company Memorial:  A Remembrance of Spirit and Choice, has also been produced.

UNBREAKABLE TIE

Learning the art of knifemaking and continuing to work with James Behring has proven therapeutic for Travis, and he is pleased with his opportunity at Behring Made Knives. While continuing to work in the shop, he attends events that help other veterans adjust to life after active duty. At some point in the future, he may begin making more knives and even taking orders. For now, he is content to continue learning.

“I like where I am with James’ company,” Williams said. “I do everything from heat treating to finishing blades and handles, and have recently gotten into making Kydex. On some of our CNC knives I’m doing the blasting, coating and sharpening of the blades. James is sitting there watching me, and someday I would like to get to the point where I am making knives on my own.”

Today, Travis finds contentment with his work and sees the future with optimism. There will, however, always be that unbreakable tie to his fellow Marines. Meanwhile, with a little help from his friends, he has created a lasting tribute to his fallen comrades.

Travis and his best friend, Lance Corporal Aaron H. Reed, take five. Reed was among those killed by the IED. His awards include the Purple Heart and Combat Action Ribbon. He was 21. (photo courtesy of Travis Williams)

For more information contact Roger “Mudbone” Jones, Dept. BL12, 320 Prussia Rd., Waverly, OH 45690 740-739-4562 [email protected], or Travis Williams, c/o James Behring, Dept. BL12, POB 17317, Missoula, MT 59808 406-926-1193 (shop) [email protected], www.behringmade.com.

Offset Kitchen Knife Handles? We Test 3 of Them.

0

The offset handle may just save your skin during meal prep

Most will agree that offset handles on kitchen knives look just a bit funky, but have you ever pondered why the unusual “stepped design” is what it is? Actually, there’s a method to the madness and it’s really quite simple. It’s to save your knuckles from getting banged up while slicing. Little has been written about this unusual handle, so we thought it would be both fun and informative to give a handful of o set-handle kitchen knives a spin around the cutting board.

It should be noted that such cutters often are referred to as bread* or sandwich knives which, when you think about it, makes sense, since loaves of bread typically have largish,  at bottoms that require getting the digits down low when cutting. Plus, like the majority of bread knives, most are serrated.

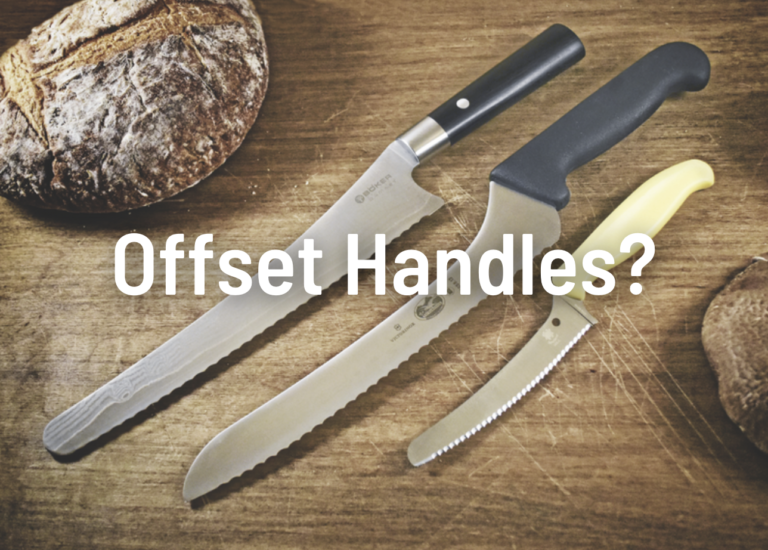
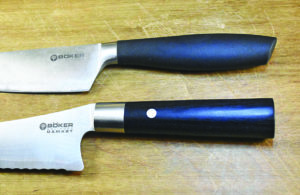
What’s an offset worth? In this case a half inch. At top is a Boker chef’s knife the author has used for years. The drop from handle to blade edge is .75 inch. On the Boker Black Damascus Bread Knife at bottom, the drop is 1.25 inches.

The test knives have full serrations and, interestingly, there is a slight bow to the blades as well.  The slight curve enables you to rock the blade back and forth on all cutting to make sure the cut is complete, a trait common to most cleavers as well. Serrations are a double-edged sword, so to speak, in that they make it easy to saw through most media.  The other edge of the sword is that they can be a nightmare to sharpen, a feat some prefer to job out to the factory or professionals. However, serrations work particularly well at food prep for many breads, meats and vegetables, which is why so many kitchen knives of all types have them. Note that the featured models are hidden-tang knives—all the better to keep unwanted fluids out of the nooks and crannies found on their full-tang counterparts.

KITCHEN CUTTERS 

The Boker blade is all business as there is no effort to etch the damascus, though the pattern is faintly visible.

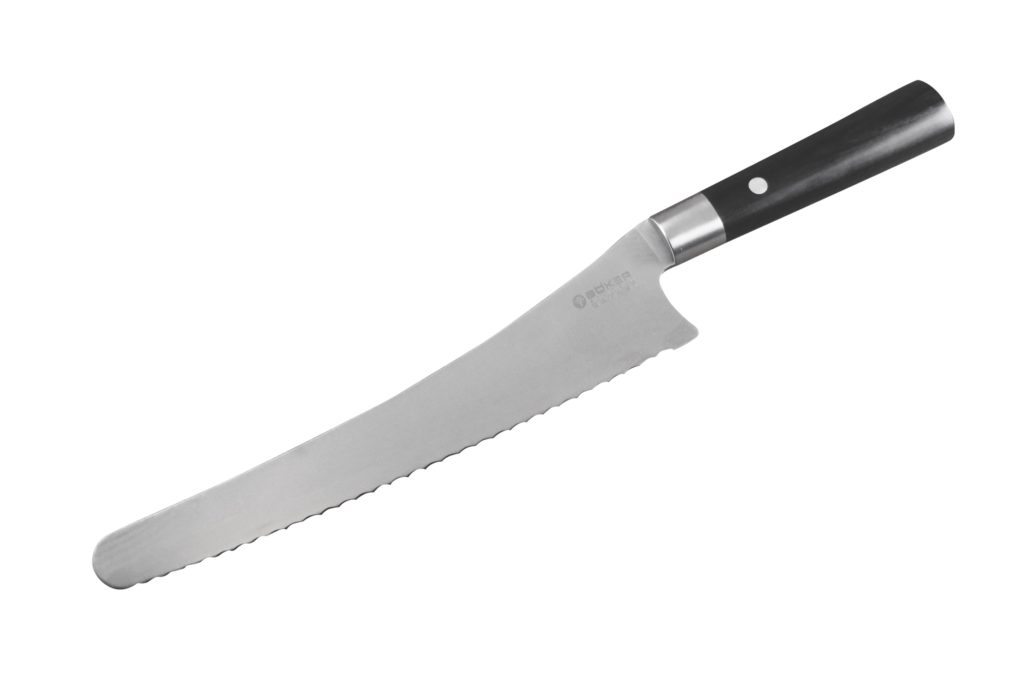
The Boker Black Damascus Bread Knife is the high-priced spread, pun intended. It is a large bread knife but is extremely lightweight due to its very thin blade.  The blunt-tipped pattern has full serrations, each approximately .25 inch long. According to a Boker spokesperson, the blade’s core is VG-10 stainless.  The damascus pattern is forged of various stainless steels by Japan’s Takefu Special Steel, Ltd.  The blade is all business as there is no effort to etch the damascus, though the pattern is faintly visible.  The ovate handle is topped with a stainless steel bolster.


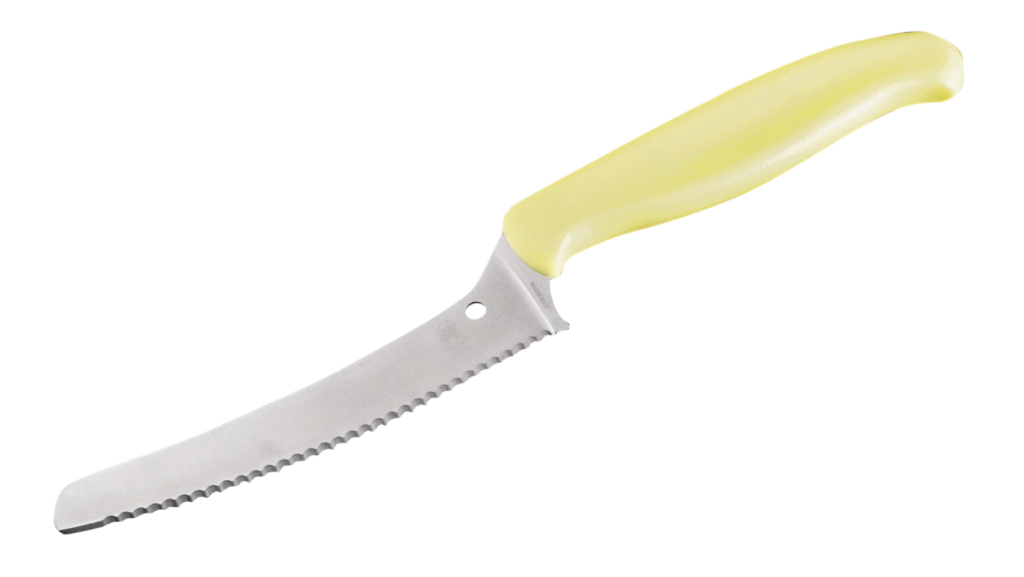
 The Spyderco Blunt-Tip Z-Cut is the smallest of the test slicers. Billed as a “go-to knife for all food preparation chores,” its blade has fine .125-inch serrations along the edge.  The CTS BD1N stainless blade steel is made by Carpenter Technology, a leader in the industry, and is considered much better than common culinary alloys.  The handle is yellow polypropylene, a common synthetic found on many kitchen knives because it is dense and repels water.  The Blunt-Tip Z-Cut is super lightweight.

The Blunt-Tip Z Cut is a smaller, handier version of the other two test knives.
 

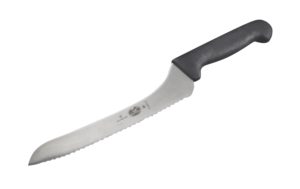
The Victorinox 9-inch Offset Sandwich Knife is the largest and heaviest of the test bunch, edging out its Boker counterpart by a half inch and a half ounce. Victorinox has always been hush-hush about its proprietary steels but does indicate that the blade is stainless steel with a carbon content of .5 percent^.  e blade has .25-inch serrations and the ample handle is a black synthetic. After its acclaimed Swiss Army knives, Victorinox is well known for the Forschner brand kitchen knives, which it has owned controlling stock in since 1981.

The Victorinox 9-inch O set Sandwich Knife is the largest and heaviest of the test bunch, edging out its Boker counterpart by a half inch and a half ounce.

TASTY TESTING

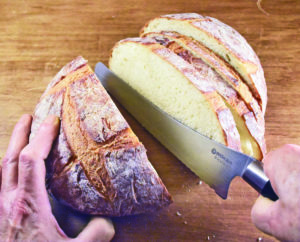
I tested the two large o set knives sideby-side as their specs were so similar, starting with a 4×7-inch loaf of Publix Tuscan Boule bread. Unlike run-of-the-mill white bread, Tuscan Boule has a very tough rind. Using the knives in sawing strokes, I took off quarter- to half-inch slices. Both knives performed admirably, giving me any grief only on the  at base of the loaf due to its full 7-inch rind. Once I got used to rocking the blade on the final cut, this, too, made for quick business. My biggest takeaway, however, was that offset handles do indeed work! In fact, I didn’t come anywhere close to busting a knuckle. My knuckles tapped the cutting board top a few times, but nowhere near as badly had I been using a handle without the offset. Both the Boker and Victorinox were comfortable in the hand, with the latter having an edge due to its fat, curvaceous—not to mention slightly longer—handle, though you’d be  fine with either knife.

The Boker Black Damascus Bread Knife takes off nice, clean slices of Tuscan Boule bread. The bread has a tough rind but the serrated blade made quick work of it.

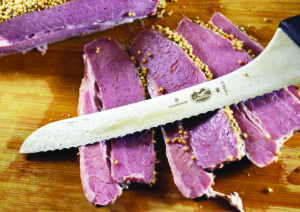
Next I took the knives outside the Bread Zone, testing them on other foodstuffs such as corned beef and Cajun sausage. Both knives sliced extremely well. Indeed, you could make an entire sandwich using these knives—but would you want to? By doing so you’d dull your serrations faster, even if minutely. It may be better to stick to bread and let your other kitchen knives share the cutting chores.

The author took the Victorinox 9-inch Sandwich Knife out of the “Bread Zone” and used it to cut neat slices of corned beef. You may or may not wish to use your bread knife in this manner, but the option is there.

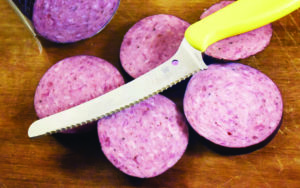
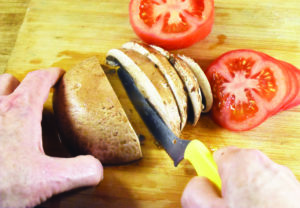
 The Spyderco Blunt-Tip Z-Cut is a smaller, handier version of the two bigger models, mainly because you need not drag out a large cutting board to use it. It’s not going to slice its way through a large loaf like the Tuscan Boule, but it will whip its way through a smaller sub-style sandwich or your standard white bread lunch quickie. I also gave it a spin slicing tomatoes, portobello mushrooms and a 3-inch chub of summer sausage.  The knife performed very well and is limited only by its size.  The Blunt-Tip Z-Cut’s blade is scary sharp—not surprising since serrations have been in Spyderco’s wheelhouse for quite a while.  Where’s also a plain-edge version of the knife available—the Pointed Z-Cut.  These two make for good companion knives and the plain-edge version will cut down your use of the serrated one.

The Z-Cut proved to be a little powerhouse, taking slices off a chub of summer sausage with aplomb. The CTS BD1N stainless steel takes a sharp serrated factory edge—a Spyderco specialty.
The Spyderco Blunt-Tip Z-Cut is billed as a versatile knife for all sorts of food prep. The author sliced up some tomato and worked on a portobello mushroom cap. Note the precise slices.

CHOICES ABOUND

All of the test knives were wicked sharp. You might ask yourself, if the two large bread knives cut equally well, why pay such a higher price for the Boker? For the same reason some carry affordable Kershaw folders as their EDC and others spend much more on a Chris Reeve: choices abound in the culinary world, just as they do in the EDC realm.

*Editor’s note: Standard bread knives have conventional, straight handles.

^Medium carbon steel has a carbon content of approximately .3 to .59 percent. High carbon steel has a carbon content of approximately .6 to .99 percent. 

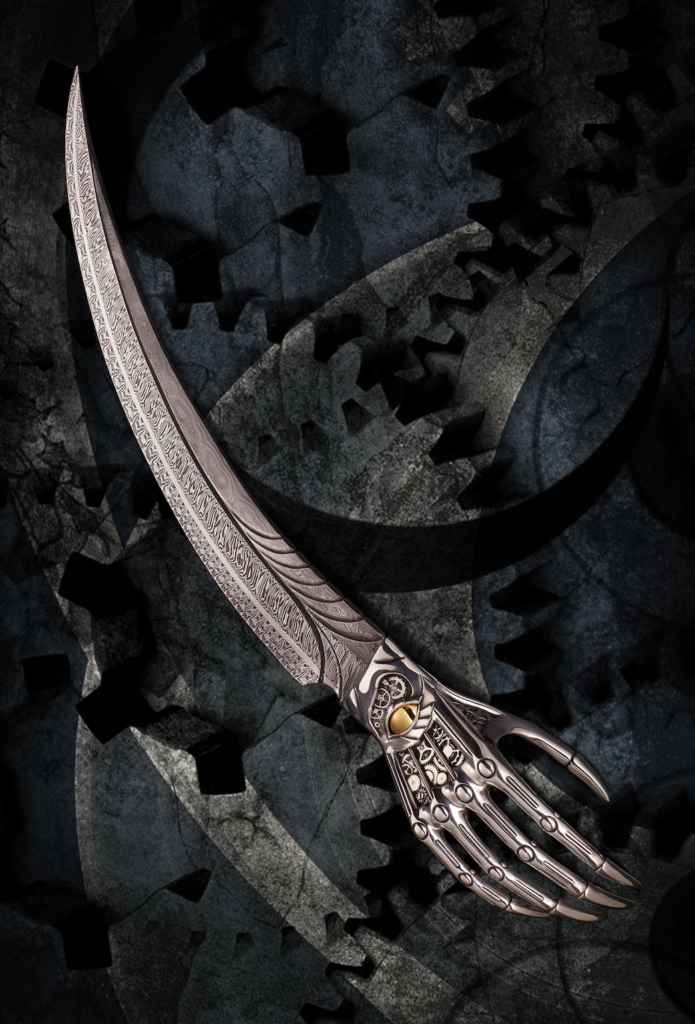
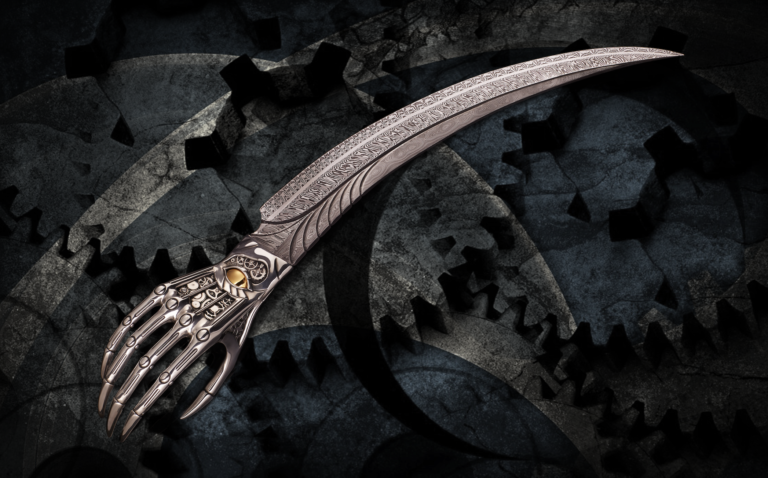
IT’S ALIVE! The Living Knife by Jean-Marc Laroche will grab you—literally

“A knife capable of movement and gifted with intelligence …”
—Jean-Marc Laroche

“On fitting your hand into that of the knife, you already feel a strange clasping in response when, suddenly, the mechanical fingers close! You can’t get free! With the same movement, an eye opens and stares at you intensely. It’s awake! Now you are under its control, and the knife is master of you who dared to take it in your grasp.”

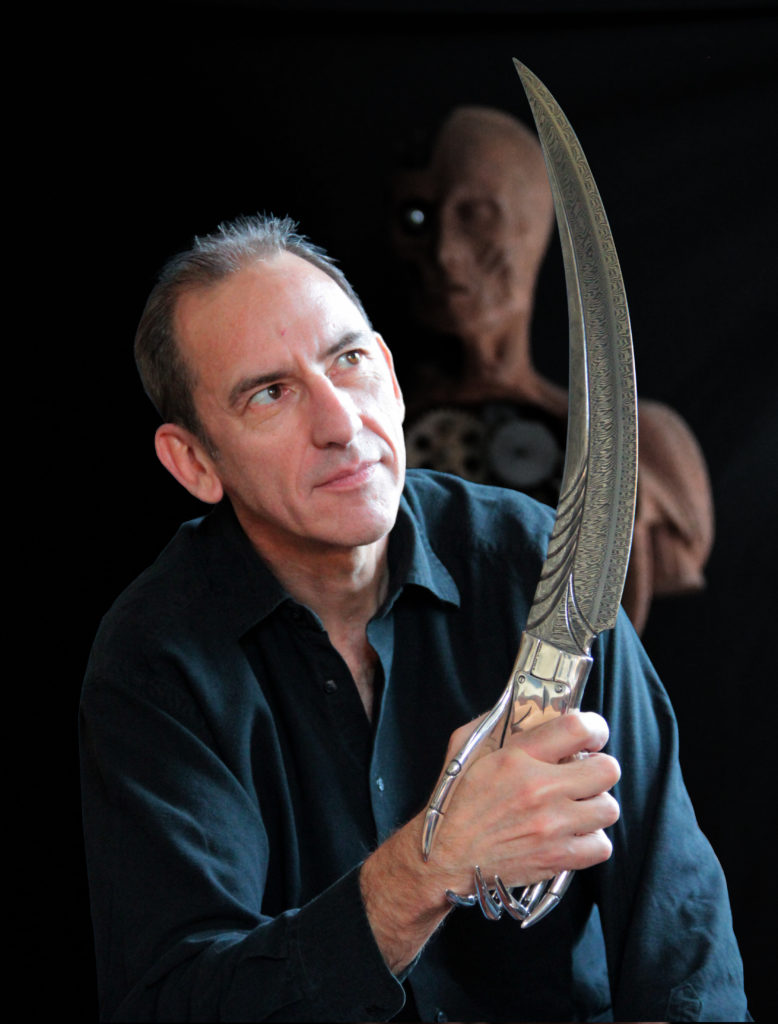
Above: The Living Knife by Jean-Marc Laroche features a mechanical hand for a handle that, as you grab it, literally grabs you back. The damascus blade is a composite of 15N20, 15LM and UHB11 high-alloy nickel and carbon steels in explosion, twist and random patterns forged by Swedish maker Roger Bergh. Overall length: 25 inches. (images courtesy of Jean-Marc Laroche)

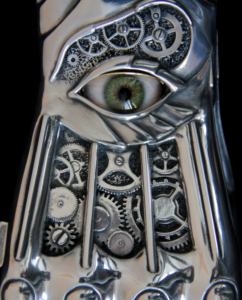
In addition to the above, French knifemaker/artist Jean-Marc Laroche refers to his latest creation—this issue’s cover piece—as “The Living Knife.” Since it has a “hand” for a handle with “fingers” that close, an “eye” and an overall lifelike appearance, who are we to argue? As you grab the handle, the “fingers” actually grab back so that it’s hard to tell who’s holding whom. And, as the fingers grab your hand, the “eye” opens. The hand also is embellished with gears in the Steampunk style.

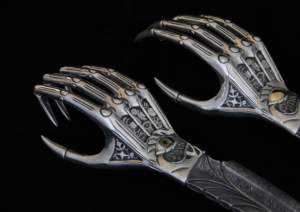
A close-up of the silver-plated bronze hand shows the detail of the gears in a Steampunk motif. (image courtesy of Jean-Marc Laroche)
The opening eye.

The Living Knife is indeed a most unusual creation—but then Laroche has been making otherworldly pieces for over two decades. Even by his standards, though, this one takes his knife art into uncharted territory.

“It was from the cinema of fantasy films that I drew my inspiration,” he notes. “It took me 12 years to implement my idea, six months to carry it out and a fair number of technical difficulties had to be overcome.

“Yet here it is, like a cunning thing from another time that a mad inventor out of the 19th century would have dreamed up. This biomechanical being activates its workings to move its fingers; it seizes control of the situation with its eye’s intelligence.”

The Living Knife is an assembly of mechanical parts, the prototype having been made in resin. A few rare versions in bronze, gold and silver are in the process of being forged.

“Swedish knifemaker Roger Bergh participated in this project. Indeed, I have been talking to Roger about it for 10 years and he has always been enthusiastic,” Laroche observes. “Roger first forges damascus steel to obtain various types of structures; he then assembles them into magnificent combinations. A world-renowned knifemaker, he has remained down-to-earth and open. Working with him is a real pleasure.”


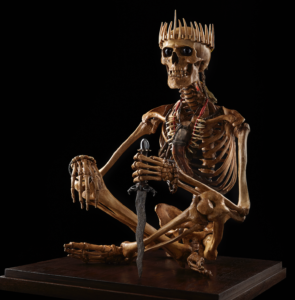
In addition to knives, Jean-Marc Laroche sculpts skeletons on a lifelike scale. An example is his “Warlord,” a kind of Javanese king holding a kris.
The skeleton is resin on a steel structure. The crown is assorted animal bones, the eyes are natural quartz crystal, and the necklaces and bracelets are from “different ethnic tribes.” The knife is made from an old Indonesian kris blade, some teeth and hematite.

KNIFE SPECTACULAR

BLADE® first learned of Laroche at the 1992 East Coast Custom Knife Show, where his knives with “alien-head” handles were a show hit. The alien heads were those of animals he customized and coated with a special resin.

In 1997 Laroche’s “Mother Ship with Fighters”—a set of four knives including one large one and three smaller ones with dagger blades and curved, claw-like guards—was a winner of the annual BLADEhandmade Best In Show Award. His “Byakhee,” a spectacular knife with a handle resembling a large, bat-like bird inspired by the science-fiction stories of H.P. Lovecraft, won Best Fantasy Knife at the 1998 BLADE Show West.

Laroche introduced The Living Knife to an appreciative audience this past June at the FICX, an invitation-only knife show in Paris that also featured a few U.S. makers, including Kevin Casey. It was Jean-Marc’s first knife show since 2002. Since then he had been involved in other forms of sculpture and exhibiting them worldwide.

Actually, The Living Knife is not Laroche’s first attempt at such a piece, his “Devil Hand” predating it. However, the Devil Hand did not have the mechanical grasping capability, the same materials or other select features of Laroche’s newest rendition. Laroche said he also has made two knives similar to The Living Knife, the first being sold to the Instituto Ricardo Brennand (http://www.institutoricardobrennand.org.br/index2.html), a museum in Recife, Brazil.                   

For a video on how The Living Knife operates, watch the video below:

The Best Blade Grinds: What To Look For

0

As with most things knife, one type never fits all.

BY MIKE HASKEW BLADE® FIELD EDITOR

Finding the best blade grind for the job at hand has become the subject of some debate, but most knife users agree that certain grinds are better suited for certain functions. Combinations of steel, knife design and use influence the choice of grind.

“I’m a proponent of the right grind for the right job,” related author/knifemaker Abe Elias. “In small bushcraft knives, a thin, flat grind and a saber grind are hard to beat. It makes sense that clear cuts are best flat edged. Carving chisels have rounded convex edges to go into wood and take small cuts and come out.”

An inappropriate grind may produce drag, a ragged or erratic cut, and generally poor results. “For overall working of wood and good, straight, controlled cuts, you want a knife grind to ride flat against the surface so it cuts past certain levels and growth lines, riding flat on the wood between growth lines,” Elias added. “It’s just physics. That’s all, and nobody can really argue it.”

One of the most popular grinds for bushcraft knives is the scandi grind, and Elias describes it as a perfectly flat grind with no secondary bevel, starting at the shoulder with an angle that is perfectly flat and straight to zero.

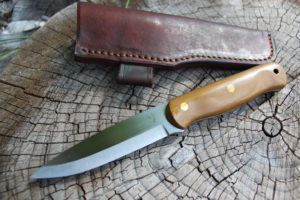
One of the most popular grinds for bushcraft knives is the scandi grind. Abe Elias describes it as a perfectly flat grind with no secondary bevel, starting at the shoulder with an angle that is perfectly flat and straight to zero. He used it on the blade of his Woodcrafter model. (Abe Elias image)

“Scandi grinds will go on any steel you want, but there are limitations to them because of the shoulder,” he noted. “It doesn’t tend to go through soft surfaces well, such as processing meat. When the knife enters a malleable surface, it creates too much drag on the blade. Like anything else, the thinner it is the easier it enters into other masses. We run into problems when custom makers make them and factories produce them without following the golden rule of proportion. The angle should be proportional to the thickness of the steel and the design of the knife itself.”

CONVEX MODIFIED

Influenced heavily by BLADE Magazine Cutlery Hall-Of-Fame® member Bill Moran, Bill Bagwell, and Don Hastings, ABS master smith Jim Crowell recognized early in his knifemaking career that the intent was to make a full convex grind from the spine of the blade to the cutting edge. He has adapted those original lessons through the years.

“I’ve found that it’s the edge that needs to be convex, not necessarily the whole cross section of the blade,” Jim noted. “Consequently, I have now, for many years, ground my blades flat from spine to cutting edge, stopping short of going to zero and then rolling the cutting edge on convexly. The trick is to get the geometry correct for the thickness the edge was ground to prior to sharpening in conjunction with the type and heat treat of the steel used.”

Crowell says he believes the convex grind is best for knives in the field, including bowies, fighters, and fillet knives. He uses the convex grind almost exclusively and indicates it allows for an uninterrupted transition from the cutting edge to the full thickness of the spine of the knife. No matter how thick or thin the spine of the knife, with convex geometry it will have the least amount of resistance when cutting through an object.

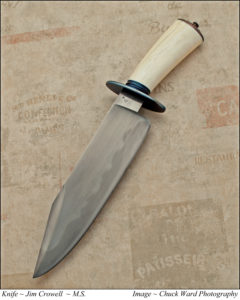
ABS master smith Jim Crowell has ground his blades in a modification of the convex style for many years, grinding them flat from the spine to the edge, stopping just short of a 0-degree angle, and then rolling the edge in a convex shape. His 15.5-inch bowie features W2 tool steel and walrus ivory. (Chuck Ward knife image)

As for sharpness, Jim gives the nod to the scandi grind. However, he believes that when the cutting edge is, in fact, the grind line as well, the edge itself is more fragile in comparison to other grinds.

“Scandi grinds are great,” he said, “and useful for a lot of small chores. Then there are special-purpose applications like some sushi knives that have specialized grinds. Still, for day in and day out I like and recommend the flat, convex grind.”

COMFORT MATTERS

Knifemakers tend to use the grinds they are comfortable with and which they believe fill the bill for the types of knives they make. The degree of difficulty associated with a particular grind lies more in the experience of the maker than in the grind itself.

“The hardest grind is the one you do not regularly do, and the easiest would be the one you do all the time,” Crowell reasoned. “When I started, I used to hollow grind stock removal blades. You could lay everything out and follow the lines—it is still hard though. When I started forging it was really hard because there were no layout lines to follow, and all the scale and hammer marks made it hard to tell what I was doing. Daggers are generally acknowledged to be more difficult. Some of the Russian and Persian stuff with a ‘T’ spine or center ridge would be tough.”

According to Jim Crowell, the dagger blade pattern generally is acknowledged to be more difficult to grind than most. Michael Jankowsky ground the blade to a double edge on his “Thor” model in Elmax steel and Siberian jade inlay. The engraving is by Kati Mau.(Francesco Pachi image)

“The hardest grind is the one you do not regularly do, and the easiest would be the one you do all the time.”—Jim Crowell

ABS journeyman smith David Lisch—shown grinding the blade of a custom collaboration knife to raise money for the African Wildlife Foundation in its fight to protect elephants from poachers—applied a Persian grind to his 16-inch integral fighter in Thunderbird damascus and walrus ivory. (SharpByCoop.com knife image; image of Lisch courtesy of Mark Knapp)

FACTORY APPROACH

Knife manufacturers gear their grinds for prospective use as well. Hollow grinds are usually the most efficient for manufacturing because both sides of the blade are ground at the same time. Flat grinds are ground one side at a time, and precise machining and good tooling create the even grinds for which manufacturers are known. Convex grinds are usually finished by hand, and such work is the province of a skilled custom maker.

“Hollow grinds are great for slicing,” commented Jim MacNair, new product coordinator and senior designer at KAI-USA Kershaw, “and they create a nice, thin edge geometry, and the panel of the grind stays thinner as you sharpen away the blade over time. These blades will feel very sharp because the grind scoops away more material and makes the blade thinner overall.

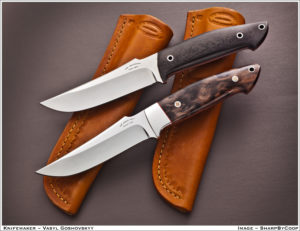
The hollow grind is great for slicing and feels very sharp because it scoops away more material and makes the blade thinner overall. Vasyl Goshovsky employs a hollow grind on his working knife’s 4.5-inch blade of N690Co stainless steel. (SharpByCoop.com image)

“The most obvious benefit of the flat grind is strength and toughness. The wheel is grinding a flat surface rather than a concave one like a hollow grind, and it removes less material from the blade. That added material makes the blade thicker and stronger.”

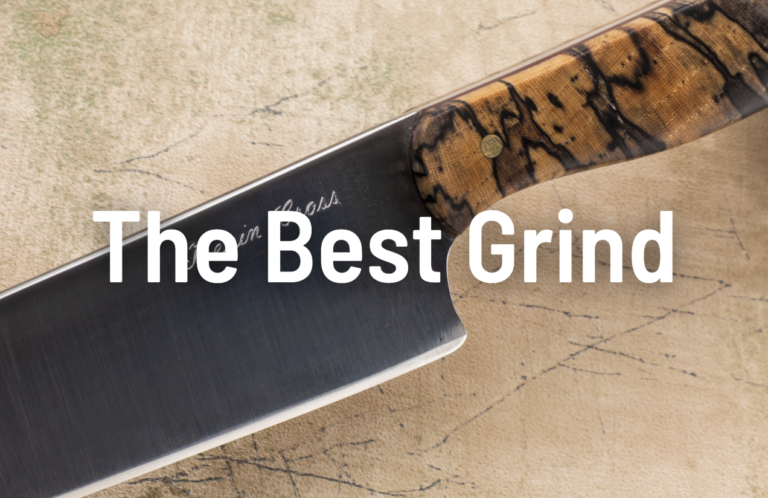
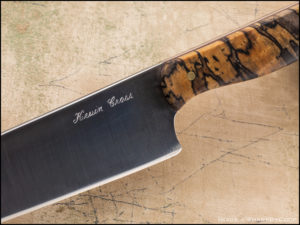
The most obvious benefit of the flat grind is strength and toughness, according to Jim MacNair. Kevin Cross flat ground the 52100 blade of his kitchen knife. The handle is spalted hickory. (SharpByCoop.com images)

MacNair sees compound grinds emerging in the custom market, including blades that feature a combination of flat- and hollow-ground bevels. These are often done to create a “cool” look, and the maker is also providing the best of both cutting options: a thin, hollow-ground edge for slicing and a thick, flat-ground tip for toughness.

Innovation continues to find its way into new and user-friendly blade grinds, while the emphasis on the job to be done is at the center of the decision. Putting the proper edge on the blade for cutting, slicing, skinning, chopping or any other task will always be primary.

SWORD GRINDS HOSTETTER’s WAY

Swordsmith Wally Hostetter focuses on Japanese blades and tailors the grind of each to its anticipated function. He forges the blades and sets up the edge geometry with hand filing.

“A lot of guys do hollow or flat grinds with a machine, but what I do has to be done by hand,” Wally explained. “I hand polish to the cutting edge, and there is no micro-bevel. Some have an appleseed [convex] edge—niku is the Japanese term—and some have the edge slightly rolled in for better cutting. For cutting heavy stuff, the niku comes to a finite edge but runs farther up the blade. There are many subtleties to it.”

According to Hostetter, other Japanese grinds, such as that found on the tanto, are fine and done to a thin edge because they are not intended for hard striking against surfaces. He uses 1095 carbon steel primarily and decides on the appropriate grind based on both the use of the blade and the historical time period that is being replicated.

Jerry Hossom makes a Navy-themed set for Capt. Ryan Heilman of the USS Nevada

Submariner Steel

Jerry Hossom makes a Navy-themed set for Capt. Ryan Heilman of the USS Nevada

Jerry Hossom had that twinkle in his eye again and this time it was by his table at BLADE Show in Atlanta, where he was all fired up about the latest set he had made for Capt. Ryan Heilman, USN, of the USS Nevada (SSBN-733).

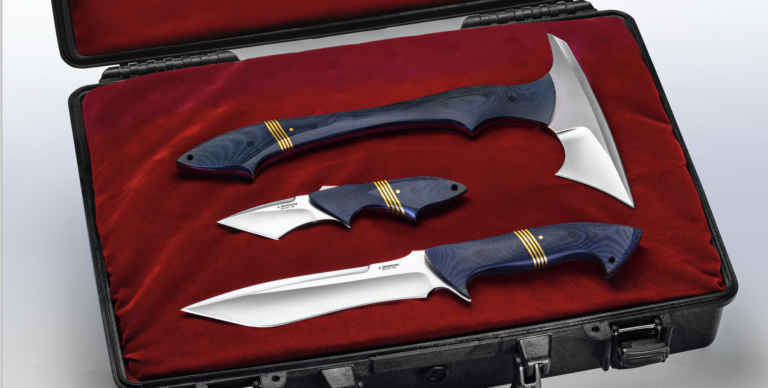
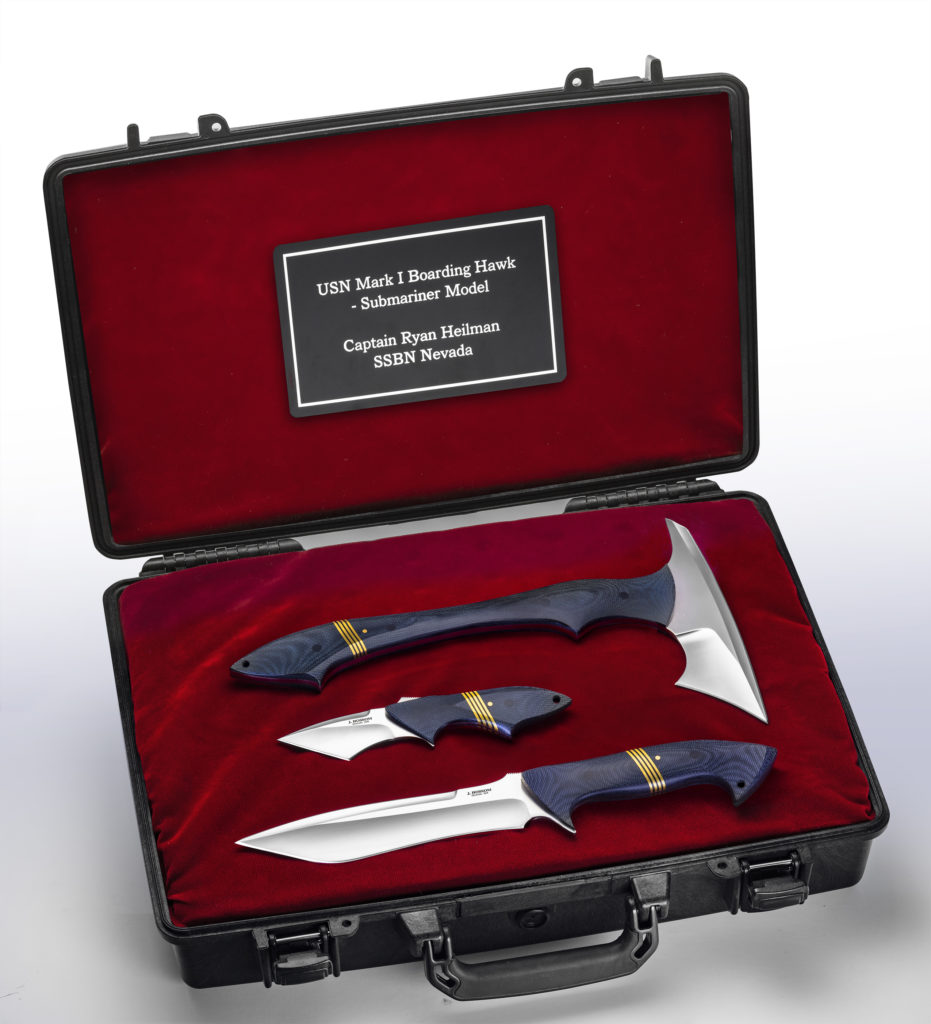
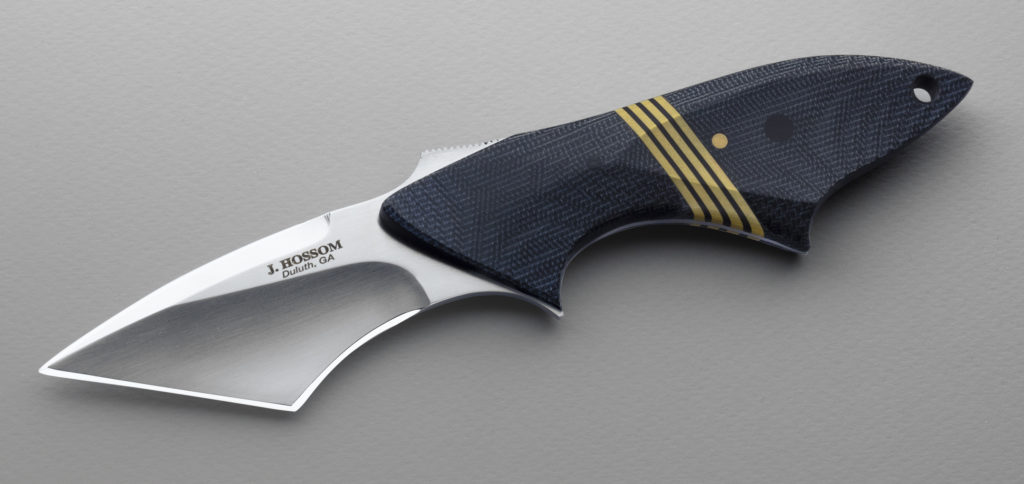
Sporting Navy blue Micarta handles, the set consists of Jerry’s USN Mark I Boarding Hawk-Submariner Model, a Retribution fighter and one of his small Dog Tag knives. However, as with many edged sets, it was a project that wound up a bit larger than when it first started.


In addition to the Submariner Boarding Hawk, the Retribution fighter and smaller Dog Tag knife complete the set and are contained in a red-velvet-lined briefcase. A sign with the set’s and owner’s names appears on the underside of the briefcase lid.

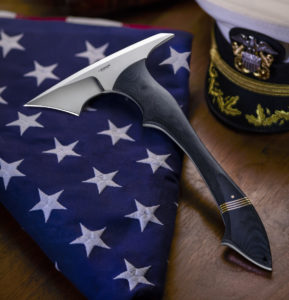
“Ryan’s wife Karen wanted something for him and I made the Boarding Hawk. I dyed the handle blue and I wanted it to look like the sleeve of a captain’s uniform. Captain Heilman has four gold stripes on his uniform sleeve and this would normally be a star, but I can’t do stars,” he laughed, pointing to the brass pin above the four brass stripes on the handle. “And so I made this and sent it to him.”

The USN Mark I Boarding Hawk-Submariner Model by Jerry Hossom is part of a three-piece set Jerry made for Capt. Ryan Heilman of the USS Nevada SSBN-733), a ballistic missile submarine in the United States Navy.

Soon after that Karen texted Jerry with an additional request. “She said what Ryan really wanted was one of my Retribution fighters, and so I did that,” Jerry smiled. “And then Karen said maybe you can complete the set with one of your little Dog Tag knives.” Pointing to the Dog Tag knife, Jerry said, “So this was the last one I did last week just before the show.”

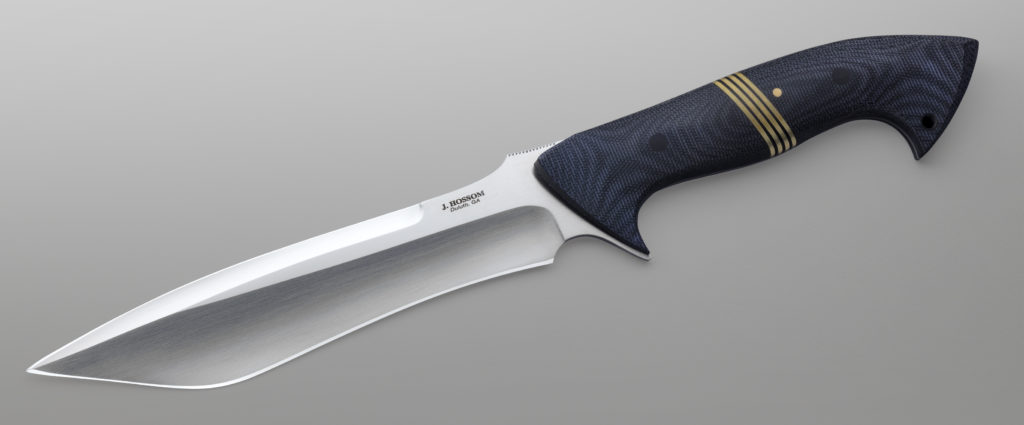
One of Hossom’s most recognizable knife models is his Retribution fighter. According to Capt. Heilman’s wife Karen it was the Hossom knife the Captain really wanted. Blade steel: Carpenter PSF-27 stainless. Handle: Navy blue Micarta® with bronze captain stripes and pin. Overall length: 13 inches.

Of course, Jerry outfitted both the Retribution and Dog Tag models with the same Navy blue Micarta handles and the brass stripes and pins to match the Submariner Boarding Hawk. In-between the stripes are thin layers of Navy blue G-10 that match the balance of the handles’ Navy blue Micarta. The handles of both the Submariner Boarding Hawk and Dog Tag knife have Jerry’s trademark palm cutouts that extend across the bronze pin and just north of the bronze stripes. The Retribution fighter, meanwhile, features a cradle handle style with the bird’s beak pommel on one end and the single guard on the other combining to form the cradle. The captain’s sleeve effect on all three is equal parts unmistakable and tastefully understated.

Hossom’s Dog Tag knife rounds out the three-piece set. As with the other three pieces, note the handle configured to resemble a captain’s sleeve with the four bronze stripes and pin. All the materials are the same for it as the Submariner Boarding Hawk and Retribution, including the blue G-10 in-between the stripes. Hossom would have made a regulation Navy star instead of the pin but, as he laughed, “I can’t do stars.”
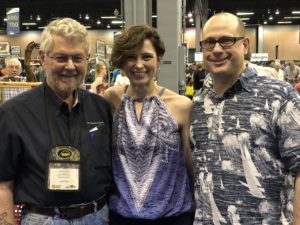
From left, Jerry Hossom and Karen and Ryan Heilman enjoy themselves at BLADE Show In between Jerry and Karen in the background knifemaker Grace Horne interacts with a customer at her table.

Blade steel for all three pieces is Carpenter PSF 27 stainless, one of Jerry’s favorites. Respective lengths for the Submariner Boarding Hawk, Retribution and Dog Tag are 14, 13 and 7 inches. All are contained in a red-velvet-lined briefcase with a sign inside the lid that reads “USN Mark I Boarding Hawk-Submariner Model” over “Captain Ryan Heilman SSBN Nevada.”


For more information contact Jerry Hossom, Dept. BL10, 3585 Schilling Ridge, Duluth, GA 30096 770-449-7809 [email protected], hossom.com.

The USS Nevada

The USS Nevada (SSBN-733) is a United States Navy Ohio-class ballistic missile submarine that has been in commission since 1986. Its homeport is Bangor, Washington, and its motto is Silent Sentry. This nuclear-powered craft is 560 feet long, has a speed greater than 25 knots (29 mph) and a test depth greater than 800 feet. It boasts a complement of 15 officers and 140 enlisted men, and its armament consists of 24 Trident II D-5 ballistic missiles, MK-48 torpedoes and four 21-inch torpedo tubes.

Capt. Ryan J. Heilman, USN

Capt. Ryan J. Heilman, 

Capt. Ryan J. Heilman is commanding officer of the Blue Crew and captain of the USS Nevada (SSBN-73). He enlisted in the Navy as a machinist mate, nuclear option, and was selected for the Nuclear Enlisted Commissioning Program in 1991 and was commissioned from Officer Candidate School in Pensacola, Florida, in 1994.

Heilman was assigned to the PCU Wyoming (SSBN 742) in 1996, where he served as Navigation Division Officer and in several other positions. In 2002 he reported as Navigator/Operations Officer to the USS Nevada. He reported to Trident Training Facility, Bangor, Washington, in 2005 as the Engineering Training Department Director. In March 2008 he became Executive Officer of the USS Nebraska (SSBN 739). In 2011, after graduating from the U.S. Naval War College with a Master of Arts degree in National Security Studies, he was assigned as a Military Professor in the Joint Military Operations Department at the U.S. Naval War College in Newport, Rhode Island. In 2013, he reported to Submarine Squadron Seventeen in Bangor, Washington, as Deputy Commander for Readiness.

Capt. Heilman is a graduate of the U.S. Army’s Command and General Staff College, the Navy’s Naval War College and is a qualified Joint Service Officer. His awards include the Meritorious Service Medal, the Joint Commendation Medal, the Navy Commendation Medal (four awards) and the Navy Achievement Medal (two awards).

Advertisement

Must Read Articles

Read this before you make a knife

Knifemaking 101 – Read This Before You Make a Knife

  by Wayne Goddard My experience has taught me that there's nothing like digging in and getting started. I've often said the hardest part of the...
how to forge damascus steel

How to Forge Damascus

Advertisement
Advertisement