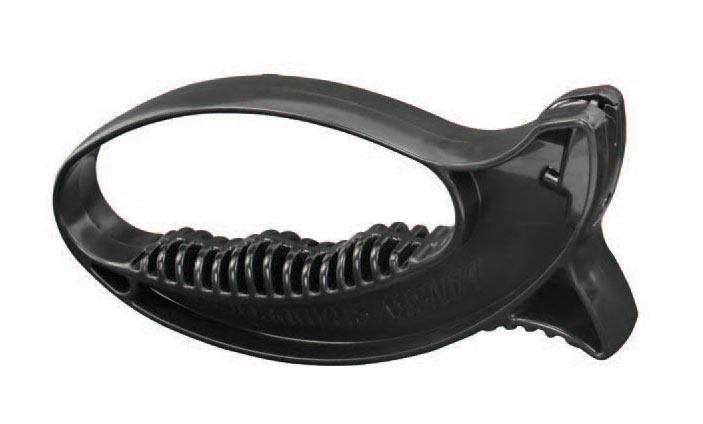
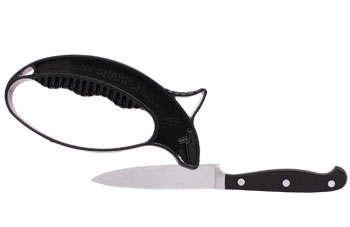
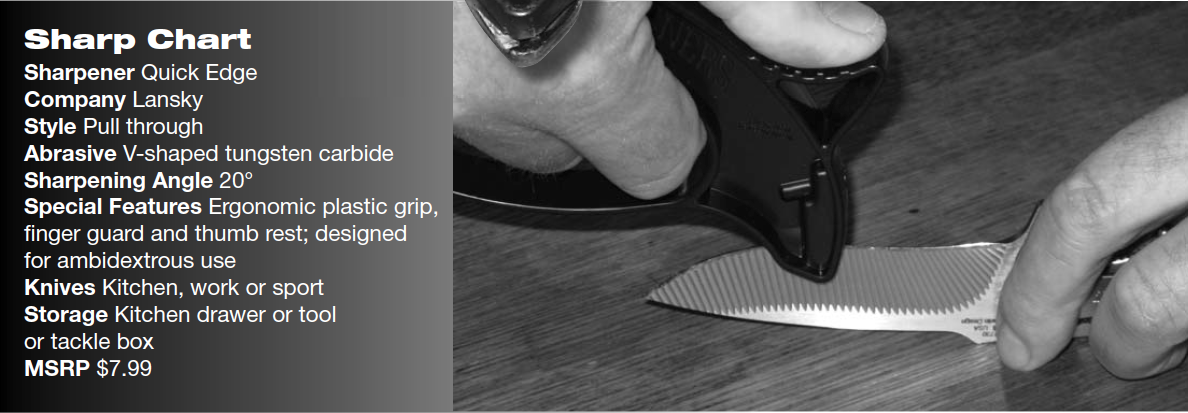
The Quick Edge works like most other pull-through-type sharpeners. It consists of a sturdy plastic handle with a D-guard, and there is a pair of tungsten-carbide cutters in the sharpener’s head set at a pre-set angle of 20 degrees.
How It Works
(Lansky image)
The pull-through sharpener works on the principle of scraping a tiny amount of steel from the edge to reconfigure it to a crisp “V” shape. Pull-through sharpeners require very little skill to master—just pull the sharpener head over the entire cutting edge a few times and you’ve got a sharp knife. The Quick Edge is fast, convenient and safe, too, thanks to the D-guard that prevents accidental cuts during sharpening.
The handle’s understated, user-friendly finger grooves enhance grip, and the D-guard is large enough to accommodate a gloved hand comfortably and securely.
A thumb rest on the handle enables you to use your thumb to aid in providing downward pressure during sharpening.
Using the Quick Edge
Place the V-shaped carbide sharpening element over the cutting edge at the tang and pull toward the blade tip. Repeat until you obtain a sharp edge. The knife is the Kershaw Groove. (Dexter Ewing photo)
Place the knife you want to sharpen edge up on a sturdy work surface. Firmly grip the knife’s handle with one hand and, with the other hand, place the Quick Edge cutting head down on the cutting edge at the area closest to the tang.
With light to moderate pressure, drag the sharpener over the edge in one motion, going toward the blade tip. Once you reach the tip, replace the sharpener where you started and repeat the process several times until you have a sharp edge.
Due to how pull-through sharpeners work—not just the Quick Edge but most pull-through models—I caution against using them with high-quality using knives, including customs. However, if you need a good, serviceable edge for inexpensive working or hunting knives, the Quick Edge is for you.
For instance, if you do a lot of machete work, the Quick Edge should be your cup of tea. When the edge gets dull, sharpen it with a series of pulls and you can go right back to work. The edge the Quick Edge creates will not be as sharp or uniform as one provided by any of Lansky’s clamp-style sharpening kits—hence my recommendation against using the Quick Edge on high-quality cutlery.
Nonetheless, the pull-through model provides a nice, serviceable edge for cutting/chopping outdoor knives that see a lot of use and, perhaps, abuse.
Stored in a tackle box or toolbox, the Quick Edge is ideal for fast stock removal in the field and works best with low- to mid-grade blade steels.
In honor of National Learn About Butterflies Day (you are celebrating, right?), BLADE presents these three balisongs for your consideration. Get ready, nation, to learn about butterfly knives!
Why Do Knife Enthusiasts Enjoy Balisongs/Butterfly Knives?
What is it exactly about the butterfly knife that is so captivating? It is a distinctive breed of folder with handles that freely rotate, allowing experienced butterfly users to deftly manipulate the handles in a fancy manner to expose the blade. There is more than a little bit of flash and rock ’n roll to these knives.
As folders have progressed through the years with the use of high-end materials, ball bearings in the pivots and more, so have butterfly knives. Many premium models feature the same blade and handle materials found in high-end tactical folders, and some butterflies have pivot bearings for glassy-smooth handle rotation that you must experience to believe.
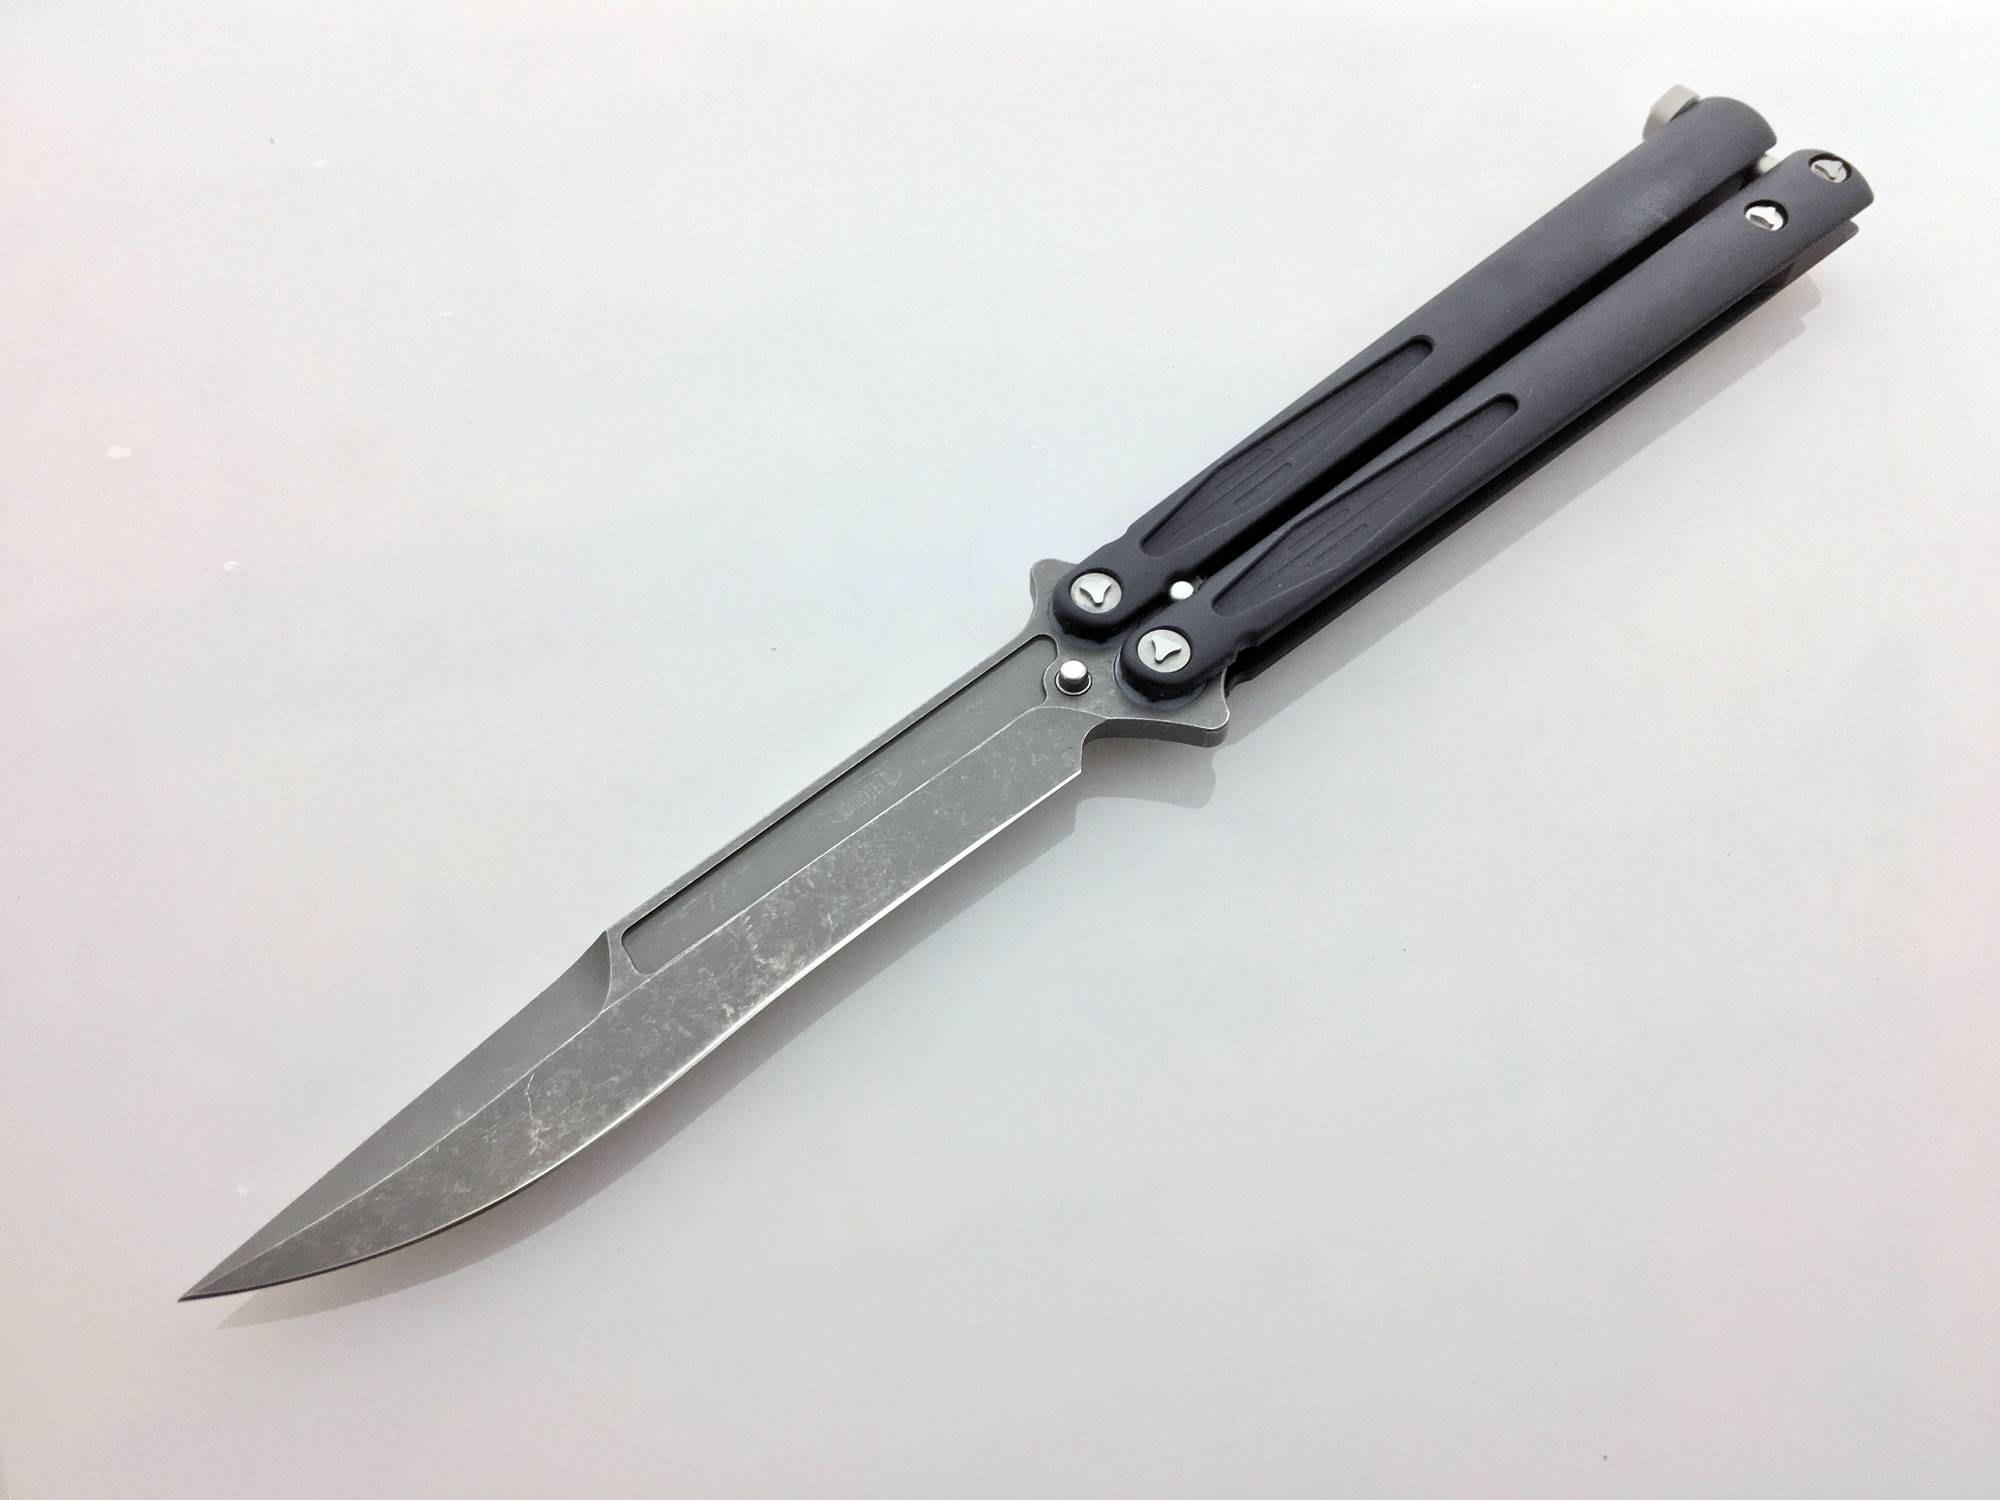
Microtech Tachyon III
Microtech’s Tachyon III is the third iteration of the company’s Tachyon butterfly, done up in true Microtech fashion through quality materials coupled with top-notch machining and overall craftsmanship.
“It mimics the design and engineering of the ever-popular Marfione Custom Tachyon III, other than the hidden pocket clip,” says Jason McCoy, Microtech’s government and military sales manager. “The handle materials are T6 aircraft-grade aluminum, and we decided to go with Bohler ELMAX blade steel to make it a very durable, affordable cutting tool.”
About 10 inches long overall, the Tachyon III is impressive. The slight recurve of the edge gives the blade enhanced slicing abilities. The milled-in fuller lends a bit of an aggressive appearance, along with the unsharpened swedge. As with some upper-end butterfly knives on the market, the Tachyon III employs pivot bearings for that addicting, glassy smooth action. The handles have machined-in decorative recesses that aid in knife manipulation, giving you a tactile reference point as to blade orientation during flipping maneuvers.
Another noteworthy feature of the Tachyon III is the spring-loaded handle latch, an uncommon feature on butterflies. From the closed/secured or open handle positions, squeeze the handles and the latch pops loose. Moreover, the spring-loaded latch does not bang on the other handle as more conventional, non-spring loaded latches do during flipping exercises.
A steel clip carries the Tachyon III in the pocket very comfortably—a nice feature many butterflies do not have.
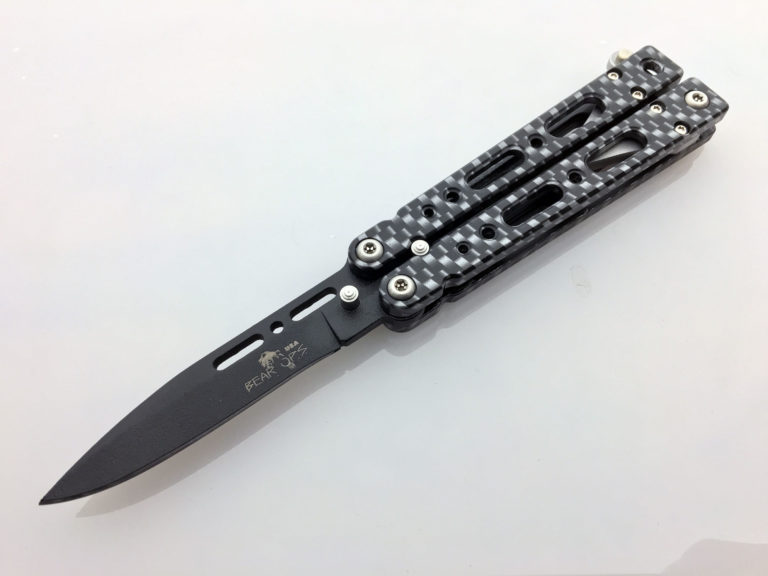
Bear Song IV
Bear & Son Cutlery offers the Bear Song IV butterfly knife in two sizes and several blade styles. The Bear Song IV Model B-450-ALCF-B is a nice, compact knife. It offers the only non-stainless-steel blade among our featured butterflies—2 7/8 inches of 1095 high carbon steel in a stain-resistant, no-glare black powder coat.
Approximate closed length: 4.25 inches. Weight: 3.5 ounces. Skeleton holes in the blade match those in the handles, which are T6 aircraft-grade aluminum with a nice carbon-fiber graphic finish.
Also the smallest featured butterfly, do not discount the Bear Song IV’s compact size in terms of its quick manipulation.
“It has ideal weight and balance for flipping with its stainless steel handle spacers to provide continued momentum for performing tricks,” says Matt Griffey, Bear & Son vice president. Phosphor bronze washers facilitate smooth handle rotation. “It has been the number-one-selling butterfly in the Bear OPS line,” Griffey states. “It’s a nice complement to add the next step up for a higher-end butterfly to our entry-level butterflies.”
The Bear Song IV line offers clip-point, tanto and single-edge dagger blades along with Sandvik 14C28N stainless in addition to the 1095 for blade material choices. There is also a high-definition damascus option for some models.
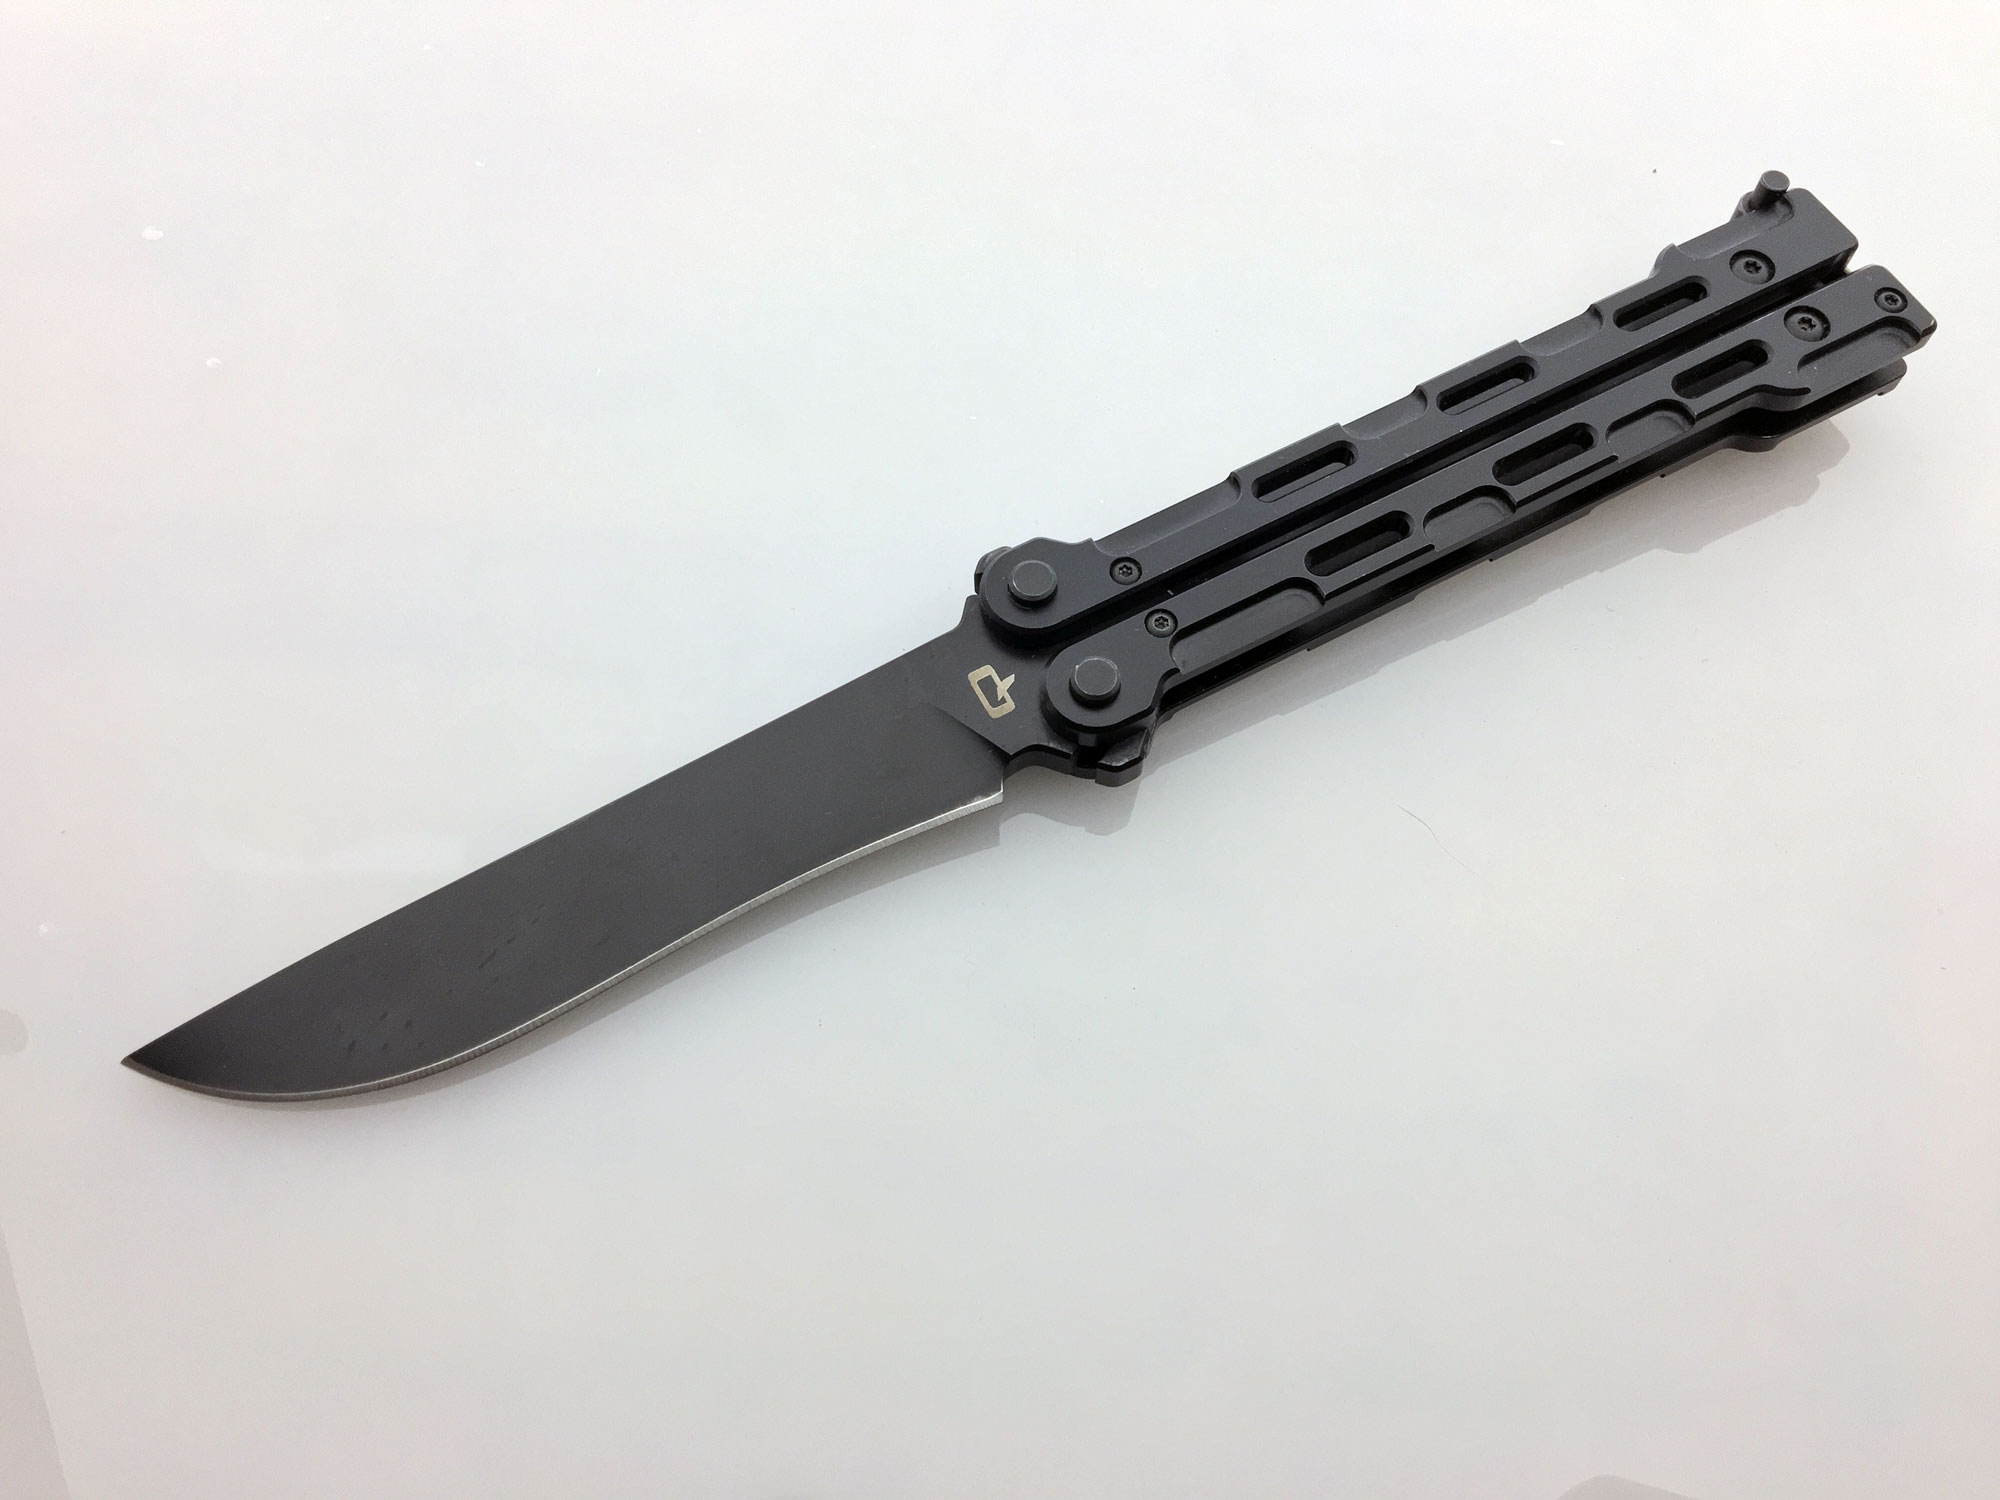
Marty McFly
The aptly named Marty McFly butterfly knife from Quartermaster Knives is a nod to the year of the knife’s release, 2015. Twenty-fifteen is the year when the main character of the movie Back to the Future, Marty McFly, sets the DeLorean time machine to travel forward in time. When the movie was released in 1985, 2015 did indeed seem a long way off.
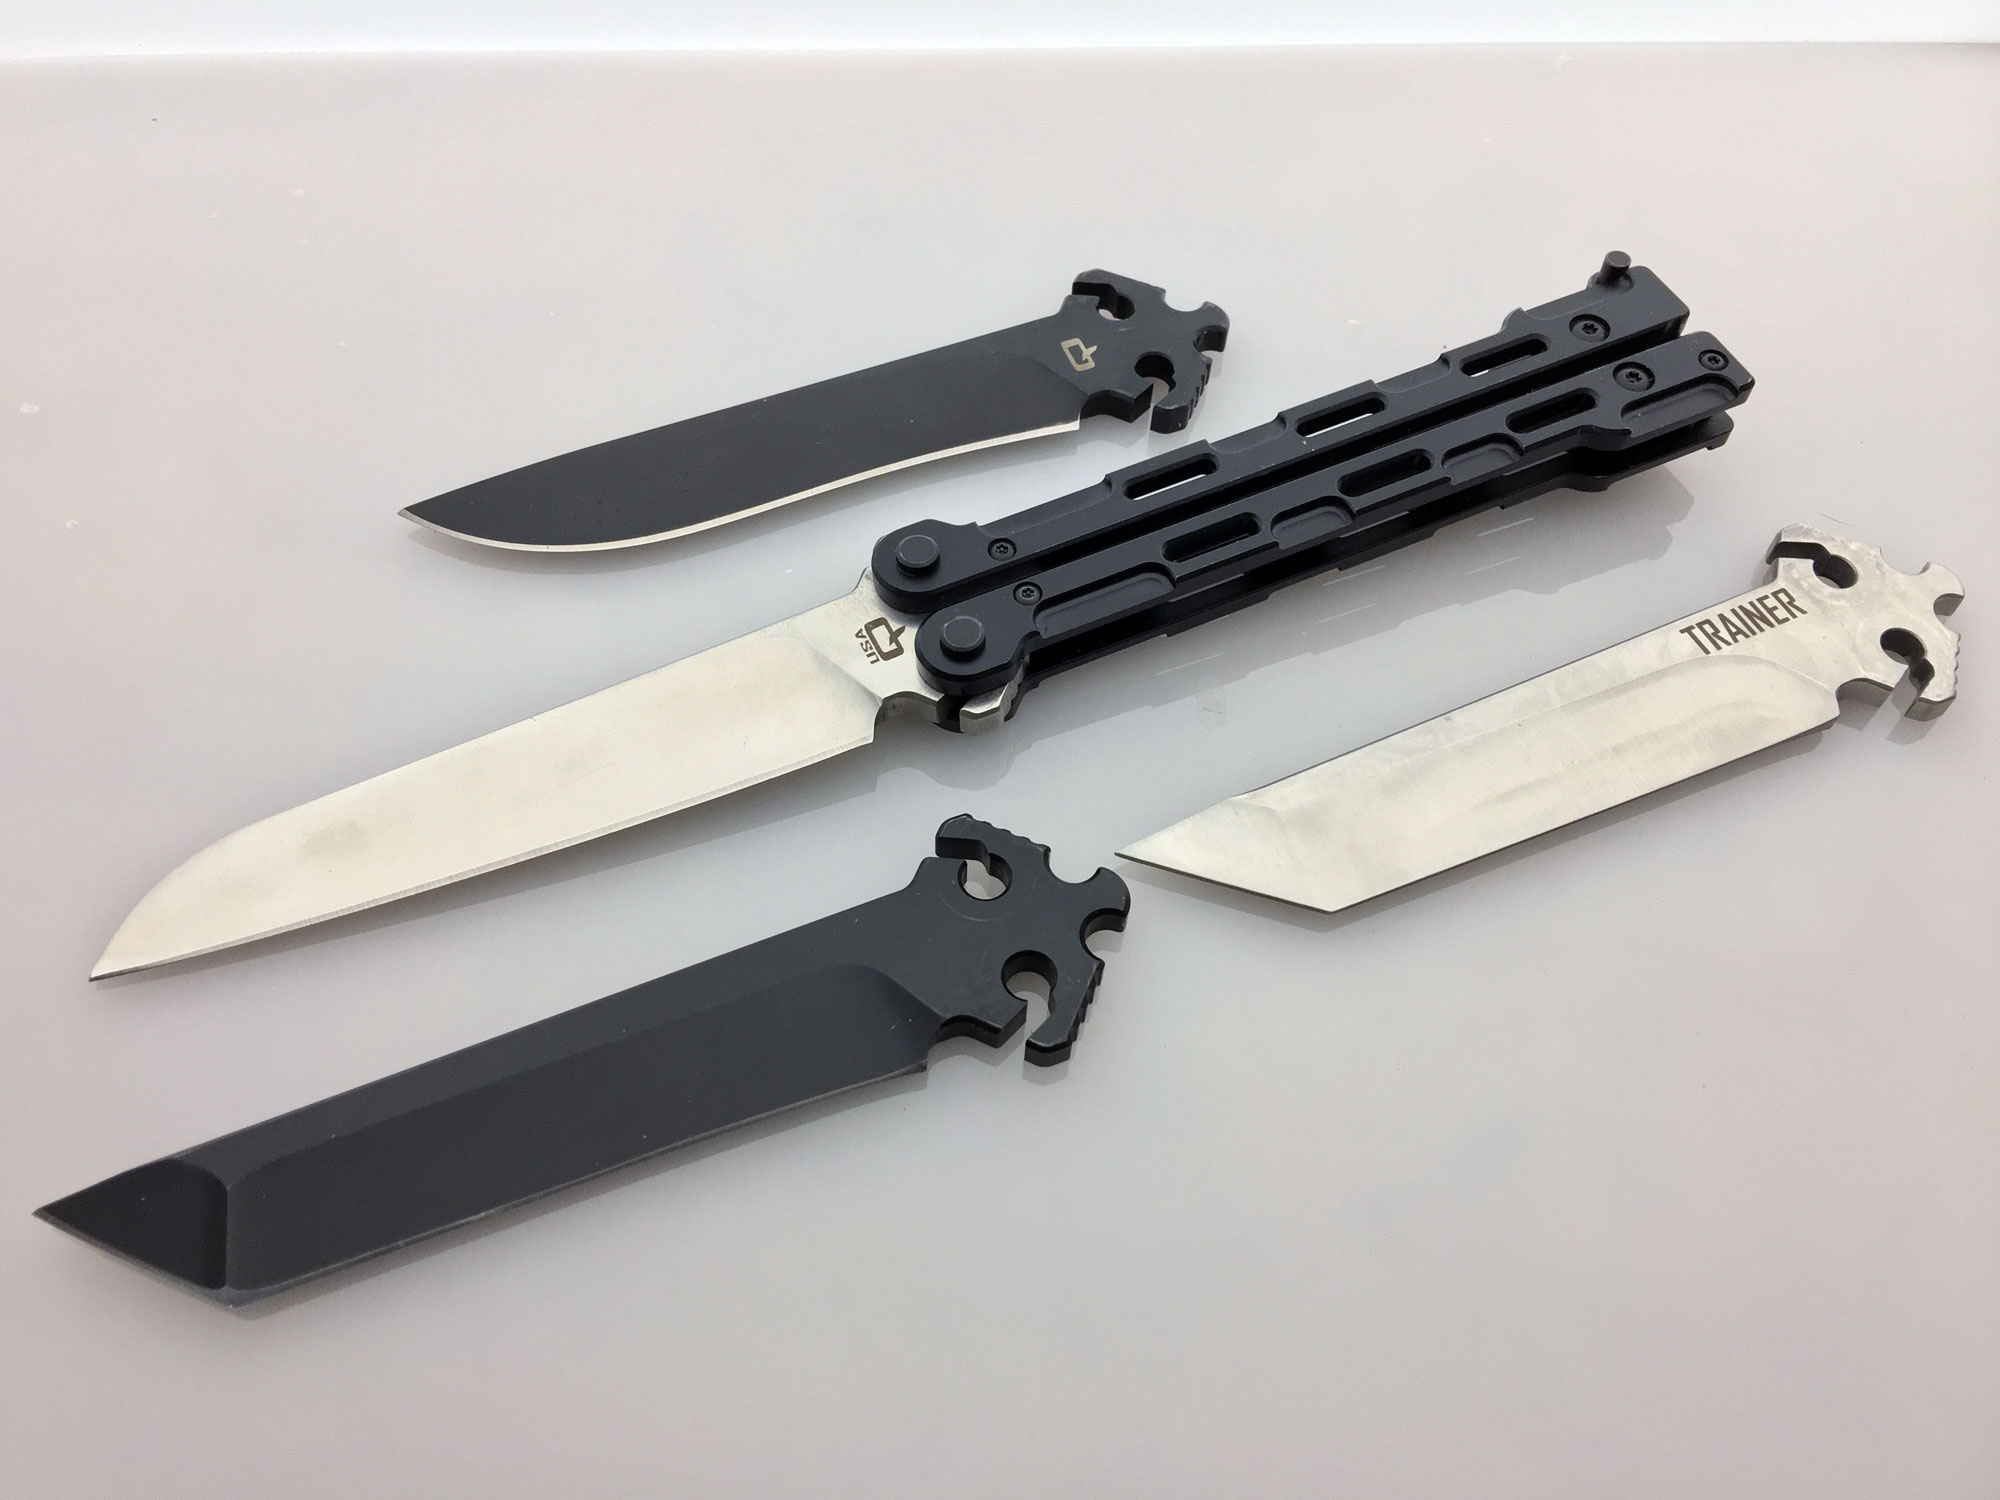
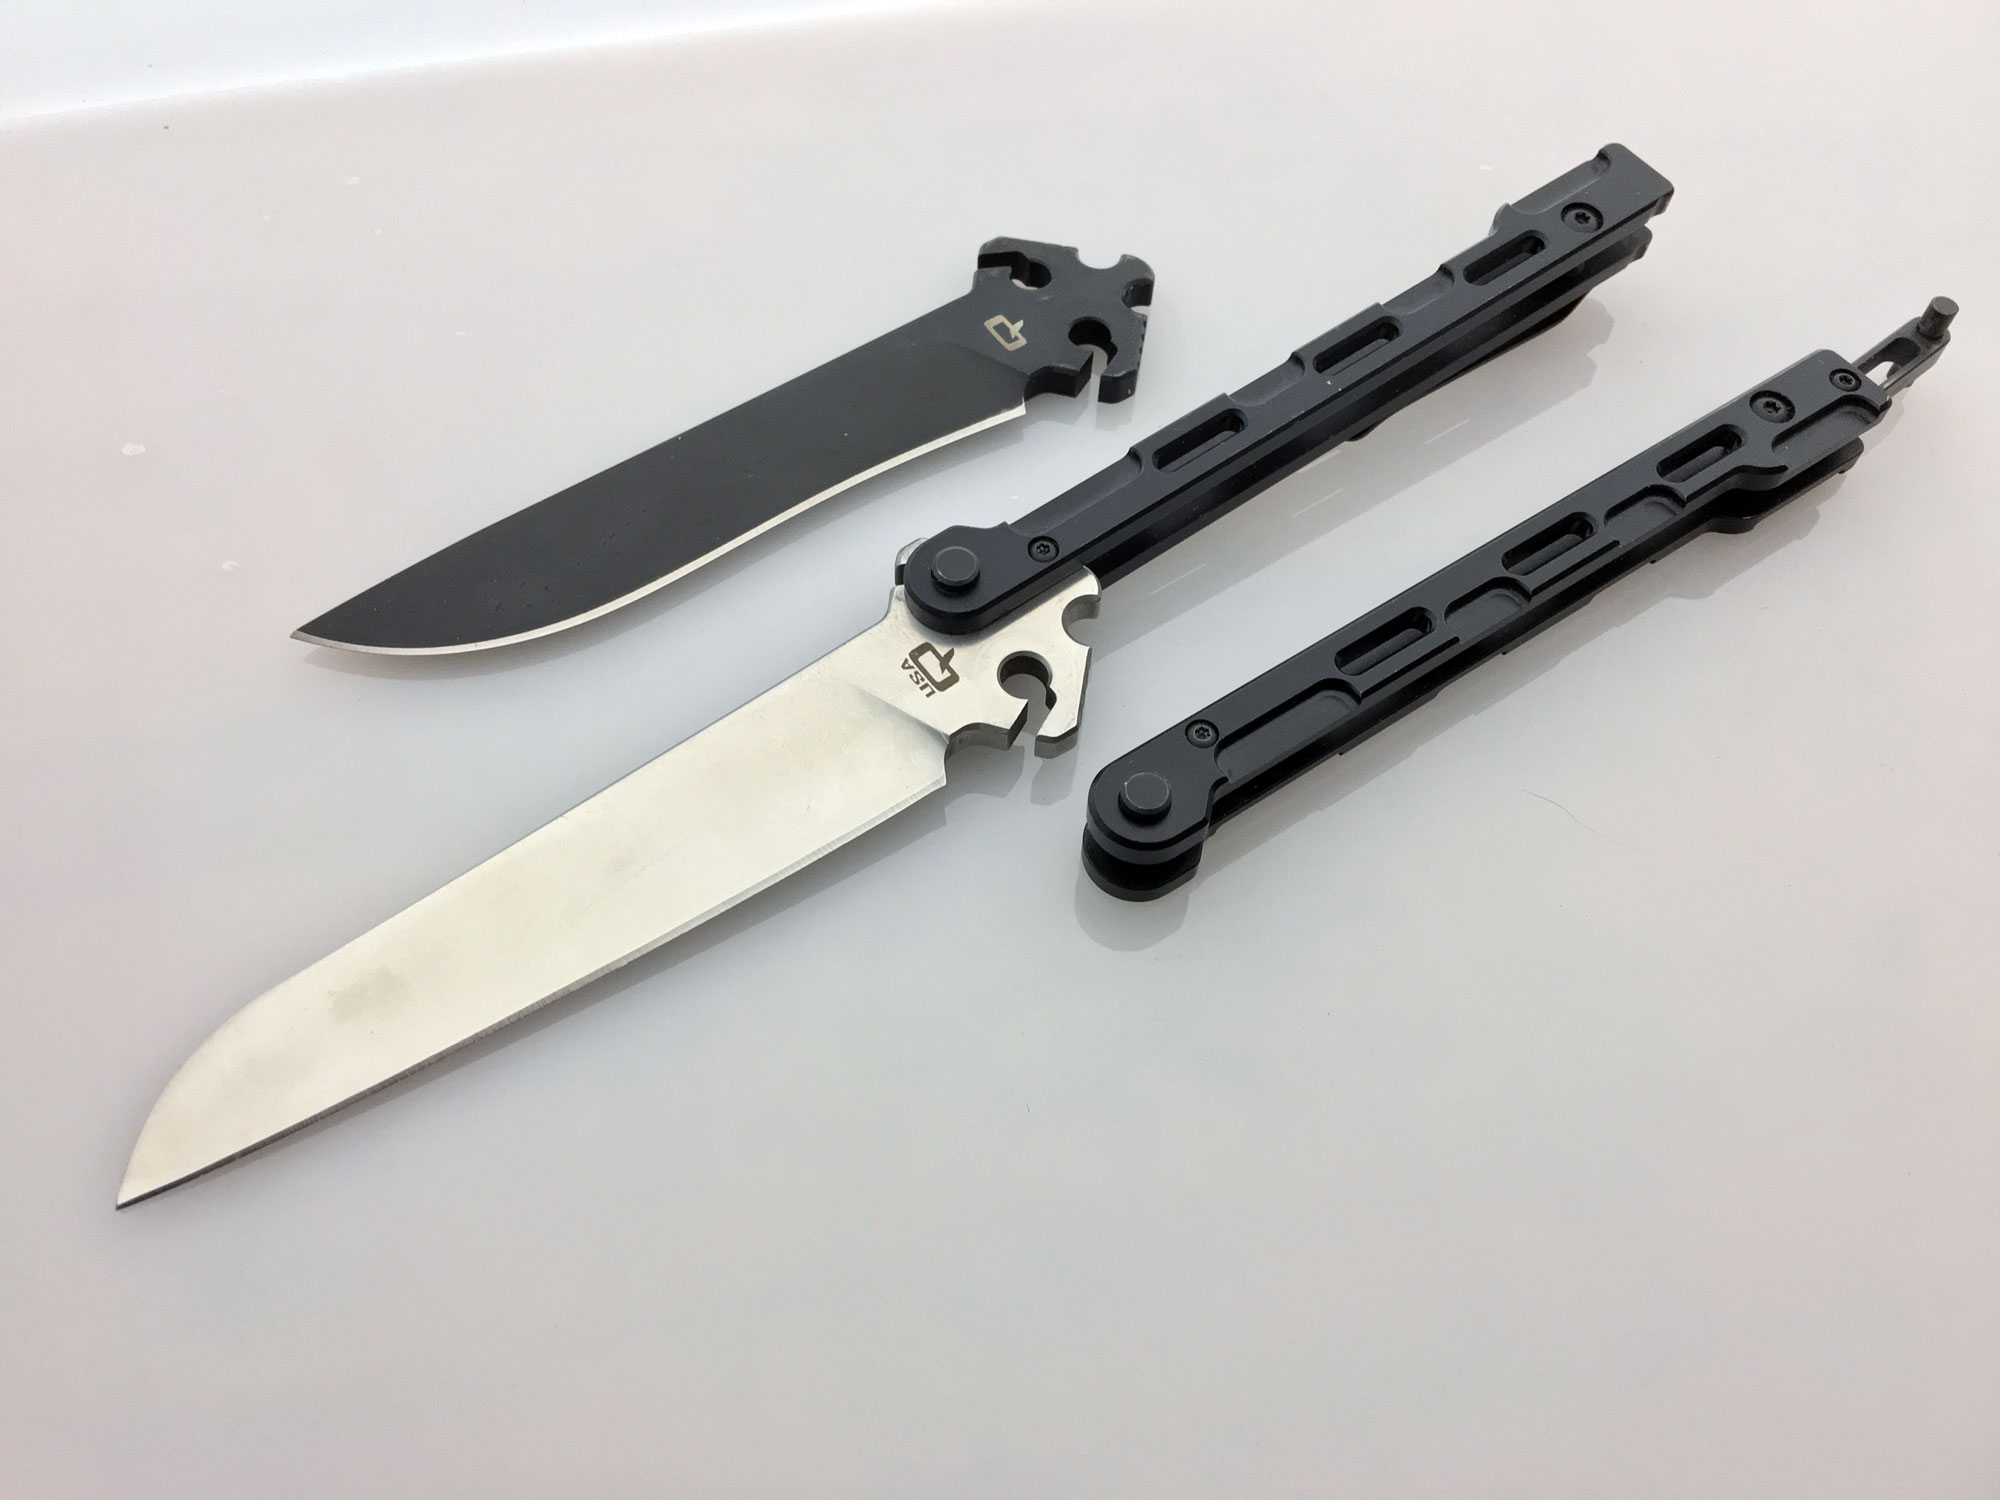
The Marty McFly resembles many other butterfly knives, but it is what you cannot see initially that is special. Incorporating Quartermaster’s BladeExchange feature, the blade can be swapped out of the handles and replaced with one of three other blade styles to tailor the knife to the task at hand.
“The knife is able to quickly and easily exchange its blade shape, color or sharpness level without any tools whatsoever,” says Lee Price, Quartermaster Knives co-founder. With a simple press of a button at each handle’s pivot, you can slide the handle away from the blade and replace it. “This is useful when training, as users can easily switch to a dull trainer blade so as to not cut themselves while attempting new manipulations,” he notes.
Quartermaster uses D2 tool steel for the blades and CNC-machined titanium for the handles, catapulting the McFly into high-end butterfly territory. “The QBS-1 and QBS-2 Marty McFly knives are among the all-time best-selling models for us,” Price states. “We plan to introduce new blade styles and updated handles, which will of course be compatible with all prior blades and handles.”
Price adds that the QBS-1 Marty McFly is the company’s initial foray into the butterfly market, and is something consumers have embraced enthusiastically.
“I have been thinking of making a hidden-tang knife with a blade made by one of the companies that advertises in BLADE®. However, that leaves a problem. Most of the blades in question have either a small tang, which causes a possible stress point, or a traditional-shaped tang that seems very short. Which is better and why?
“I also have seen hidden tangs cut out of full-tang knives; how can this be done without affecting the temper?”
~Anonymous knifemaker
Answer
Let me start with the second question about converting a full-tang knife into a stick-tang- or a so-called hidden-tang knife without affecting the temper. If this is what you would like to do, it certainly can be done without damaging the blade or losing the temper.
While most factory-made blades are fully heat treated, tang and all, you do not need to be so worried about softening the tang. This area could just be spring hardened. But, as you know, it is very important to not let the heat travel up into the blade and soften it.
You will need a bench grinder or a belt sander, or you can even use a disc grinder. Any will do. Whichever machine you happen to have or choose to use, the main thing is to not overheat the material while working it.
To ensure this, you will need to use a coarser grinding stone or a new sanding belt not higher than 60 grit. A fresh new belt is essential for the operation. The sharper the belt, the less friction/heat will occur. A duller belt will create a lot more heat.
Another thing to watch for is to not apply a lot of pressure when you are grinding. Again, the more pressure, the more heat.
Besides using a sharp belt and light pressure, after each pass on the grinder be sure you cool off the blade completely by dipping it in cool water. If you want to get fancy, you can place the blade on a piece of dry ice to cool it, though it is not necessary to go to such lengths.
One obstacle when converting a full-tang knife into a hidden-tang one is the pin and glue holes. The size and placement of the holes will dictate the shape of the tang and obviously the handle shape as well. Consequently, you are limited as to what you can do.
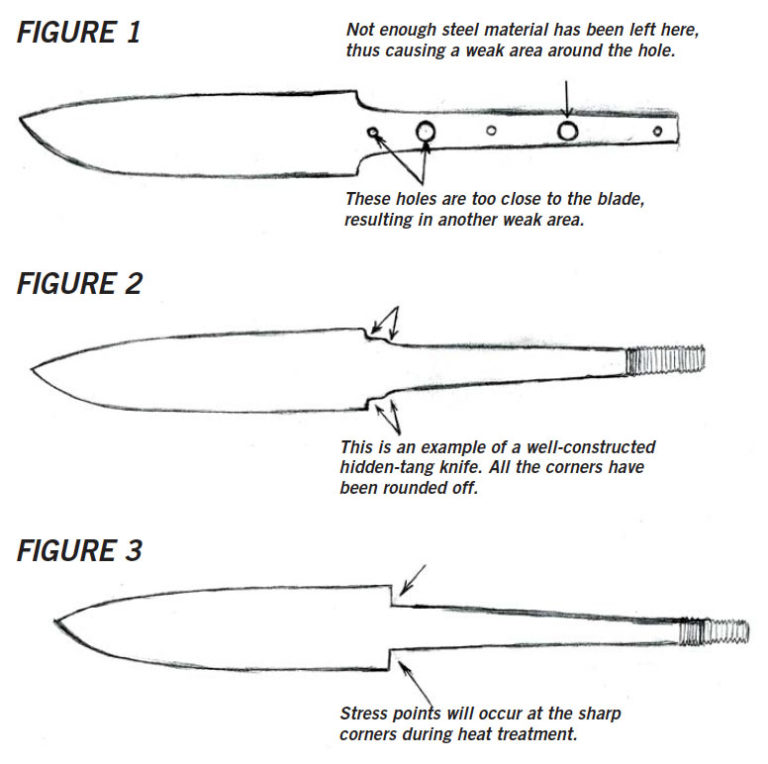
One last thing to watch for is to not grind too close to any of the pin or glue holes because this will be the fault or weakest point of the knife. (See Figure 1.)
As for your first question, both the hidden-and full-tang style of knife construction have been serving mankind for hundreds of years, so I would not consider one more traditional than the other.
Concerning which type of tang is better, it is up to individual preference. The properly prepared tang, either full or hidden, will perform well. A well-constructed hidden-tang knife should have no stress points. (See Figure 2.) A stress point can occur during heat treating if the juncture where the blade and tang meet has sharp corners. (See Figure 3.)
This juncture is where you need to pay more attention and take care to avoid creating sharp corners and edges. A full-tang knife also can have stress points if the drilled holes are not slightly countersunk to eliminate sharp edges.
You mentioned that some of the tangs appeared short in the advertisements you have seen. They say a picture is worth a thousand words, but sometimes a picture does not do justice or give you a true measure of the proportions of the subject.
While checking out all the pictures and blade designs available, you may have missed the information written under each picture. Each picture has the overall size and the blade size. If you take away the blade size from the overall size, you will end up with the exact measurement of the tang.
I am happy to hear you are going to try making a knife from a kit or a factory-made blade. Everyone needs to start somewhere. Maybe it will lead you to try making your own knives, too.
Learn More About Knifemaking
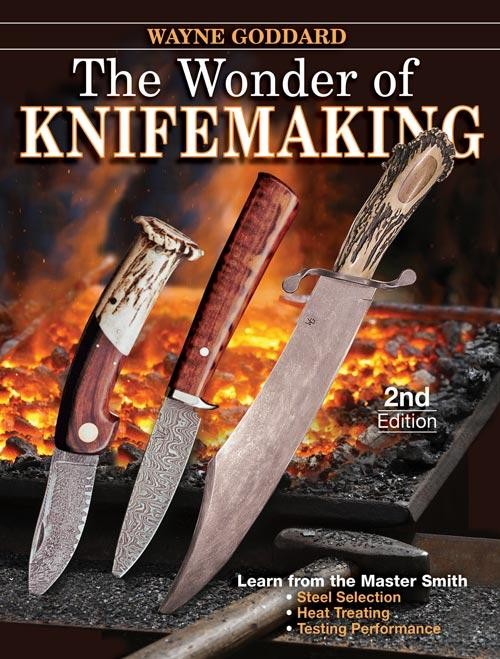
Wayne Goddard’s book makes knifemaking a wonder to behold.
Here i go. One Month no knife use at all for any reason. This includes razors, scissors, clippers. Anything that cuts except my teeth and my wit. ( ill still be making knives, as i cant go broke) Ill be reporting to @BladeMagazine on my progress in detail. This will be hard! pic.twitter.com/I9kqq4ZhBO
Roger Barnes, of BC Cutlery Co., is running an experiment. He’s seeing what would happen if he went an entire month without using a knife, and he’s documenting the hurdles he comes across.
It’s an interesting thing to think about. Whether you use a knife or not, the conveniences that make modern living possible are grounded in a blade turning one thing into two things.
BLADE will be following Barnes as he plays out his experiment over the coming weeks, and summing everything up in an article. You can follow along, too, on Twitter.
Photographer Documents What Happens When Knifemaking Leaves Town
Jason Koxvold is a photographer who set out to document the decline of the cutlery industry in the Hudson Valley of New York, which for 150 years formed the bulk of that region’s economy. The result is KNIVES, a photo gallery depicting the fallout.
KNIVES is a project made over several years, using documentary photography to trace the shifting relationships between masculinity, myth, and violence in a rural town whose economic base remains eviscerated by globalisation.
The cutlery industry formed the economic backbone of New York’s Hudson Valley for over 150 years, until the Schrade knife factory abruptly moved production to China in 2004, leaving 500 men and women out of work. The town’s maximum security prison, Eastern Correctional Facility, became the largest employer in the area, shielded from the wider community by layers of secrecy. As businesses continued to close during the decade that followed, drug abuse, mental disorders, and rare cancers have become more widespread.
Koxvold’s work is less about the knife industry in general and more about the disruptive effects of a changing global economy on certain parts of the United States. Still, it’s worth a look for knife enthusiasts, if only to better understand how knives fit into the bigger picture.
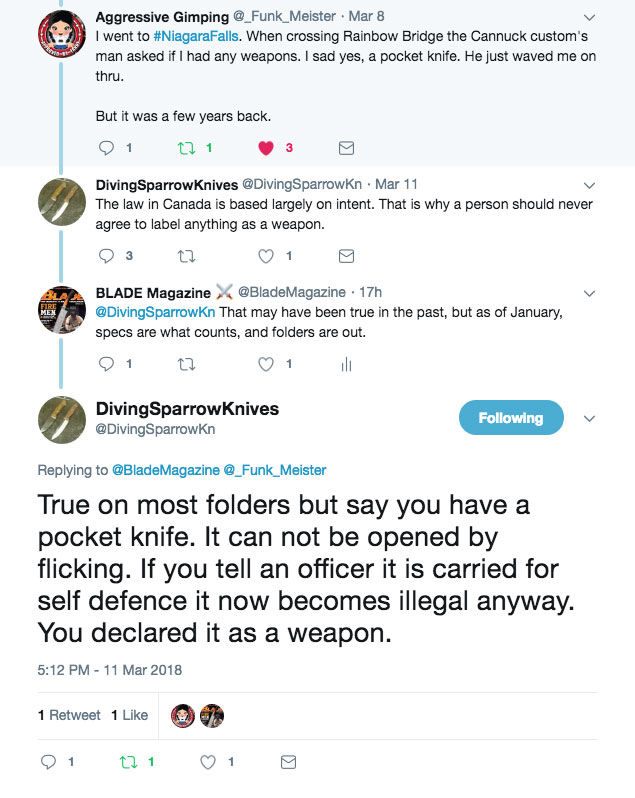
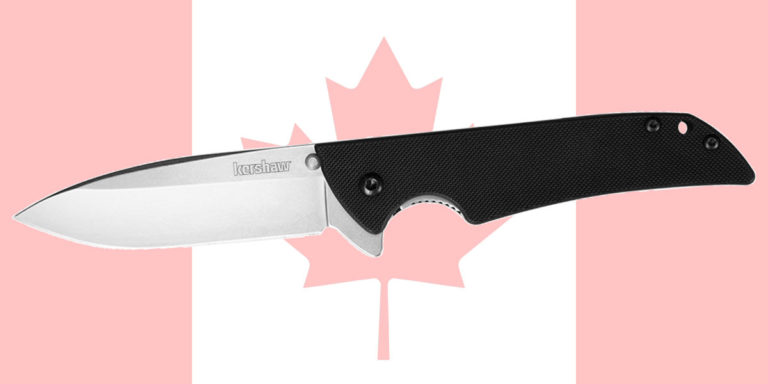
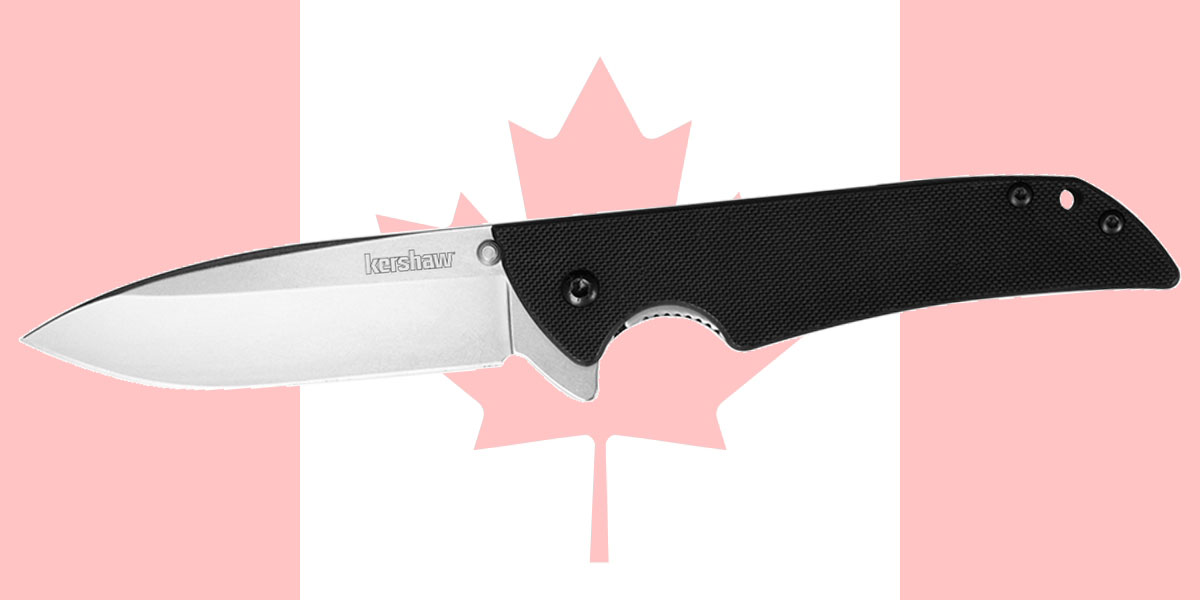
The American Knife & Tool Institute (AKTI) has been actively working since mid-January with Canadian stakeholders towards a solution to the recent ruling by the Canadian International Trade Tribunal (CITT) which upheld a Canadian Border Services Agency (CBSA) decision that classified most folding knives as prohibited weapons to import, even though these knives are legal to sell and possess in Canada.
We are communicating behind the scenes with different levels of government and organizations on both sides of the border to hopefully get this resolved as soon as possible.
Right now we need help gathering information on the impact this ruling has both in the U.S. and Canada. There is a link at the bottom of the whitepaper to a form asking for information on how you are being impacted. This data will be used to demonstrate the problem to the government. We will keep the information in strictest confidence and only use your contact information to keep you informed.
Please share the link above with any knife business, collector or organization representing people who use knives every day as tools for work or recreation.
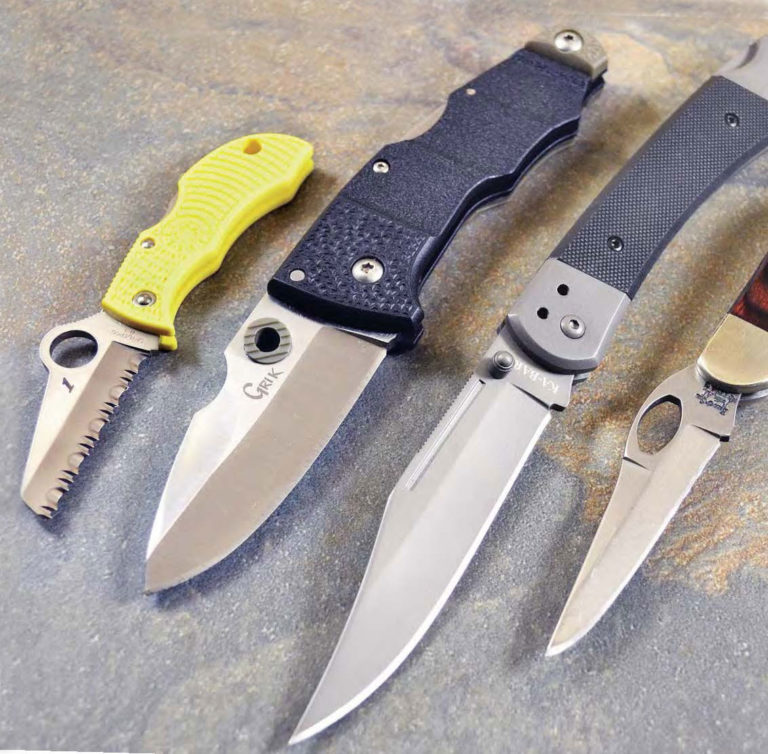
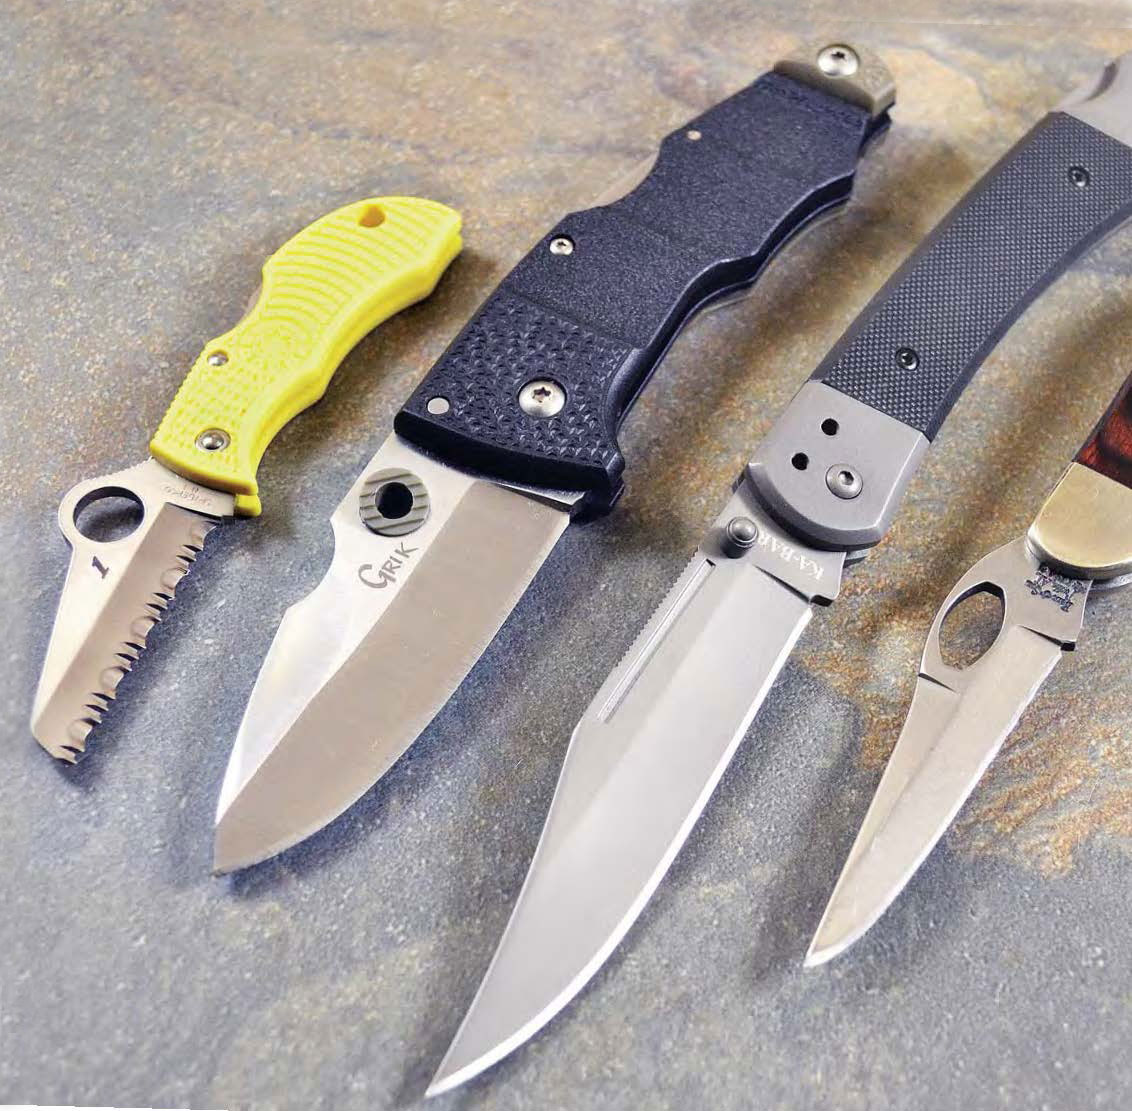
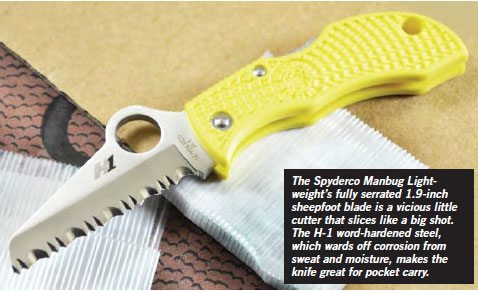
Lockbacks have never been so diverse. From left, with manufacturer’s suggested retail prices in parentheses: Spyderco Manbug Lightweight ($79.95), Cold Steel Grik ($59.99), KA-BAR Folding Hunter ($24.21) and Bear & Son Cowhand ($70.95).
Locking folders have been part of the cutlery scene for centuries. As for the lockback, some form of it has been around since the mid-1800s, when it started out as a tabbed lock and progressed over time as the more user-friendly detent style most of us know today.
The simple yet effective lockback mechanism got a massive shot in the arm in 1964 when Buck Knives introduced the now legendary Model 110 Folding Hunter.
These back-locking stalwarts have never left the folding knife scene, they have just been overshadowed by newer locking mechanisms. Lately they’ve been making a nice resurgence and are more diverse than ever.
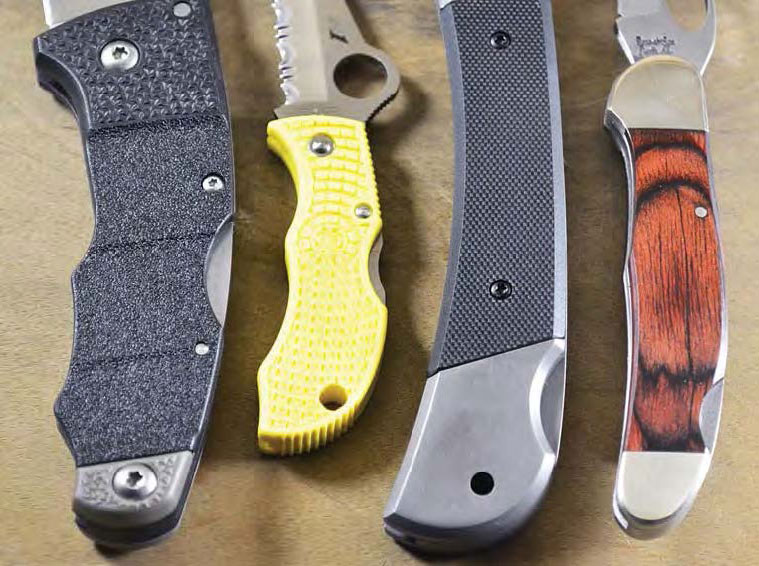
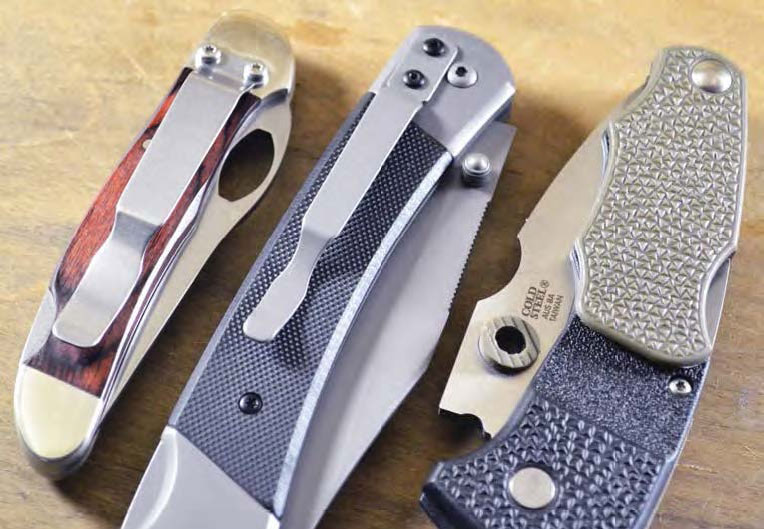
Lock positions vary on the four lockbacks. The Cold Steel Grik and Spyderco Manbug Salt (from left) have mid-locks or front locks, while the Bear & Son Cowhand and KA-BAR Folding Hunter (from right) have theirs located near the base, which is more common among the breed.Three of the test lockbacks have pocket clips for everyday carry. From left: Bear & Son Cowhand, KA-BAR Folding Hunter and Cold Steel Grik. The Cowhand’s clip can be removed for loose pocket carry as you would a traditional pocketknife.
Spyderco Manbug Salt Lightweight
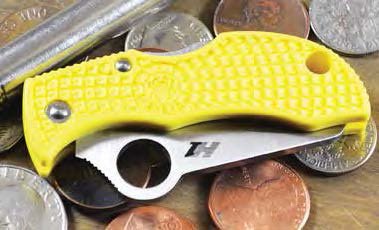
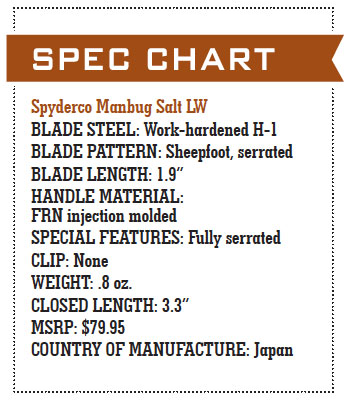
The Spyderco Manbug Salt Lightweight is a small, pocket carry model bent on defying its weight class. The smallest of the test knives, the Manbug Salt is a scant 4.4 inches extended with 1.9 inches of the total focused on a wicked, fully serrated sheepfoot blade. Spyderco knives come extremely sharp out of the box and this small lockback was no exception.
The bright yellow handle is the company’s classic, molded FRN synthetic, accoutered with the same, bumpy pattern found on its popular Delica and Endura models. The Manbug Salt’s rustfree blade of “corrosion-proof” H-1 work-hardened steel makes for pocket carry worry-free from sweat and moisture. Its midlock positioning is located halfway up the rear handle spine, and there is a lanyard/neck cord hole in the base. MSRP: $79.95.
The Spyderco Manbug is small enough to carry loose in the pocket, or you can use a cord for neck carry if so inclined. Excellent for daily chores such as opening packages, the small folder also makes for a wicked little hideaway knife.
The Manbug Salt Lightweight is not designed to be a serious knife user’s primary blade, but it is a great secondary carry loose in the pocket. I tested it for a week around the office opening boxes, ripping through corrugated board and other daily functions. The blade is extremely sharp, as Spydercos typically are, and slices through packing tape with ease. I stacked up three layers of heavy-duty reinforced packing tape and it sliced through it like butter—and after a week the edge was as effective as ever. In the pocket you hardly know its scant .8 ounce is there. I also like it as a last ditch hideaway knife should I ever need one. That little 1.9-inch blade is bigger and badder than it looks.
Bear & Son Cowhand Lockback
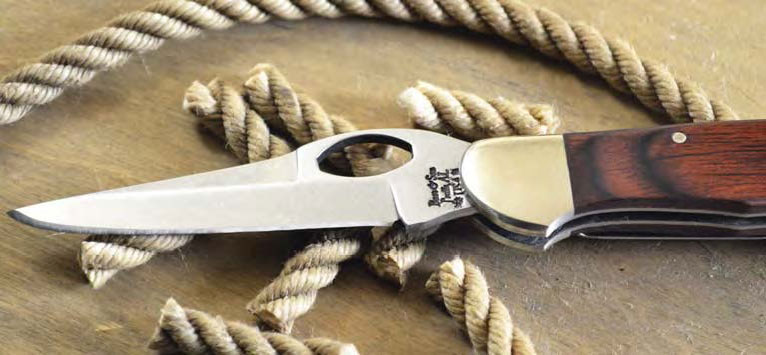
With its sleek California clip point blade, the Bear & Son Cowhand is a great slicer for medium size cutting chores such as rope. If you like a blend of traditional styling brought up to modern standards, the Cowhand will fill the bill.
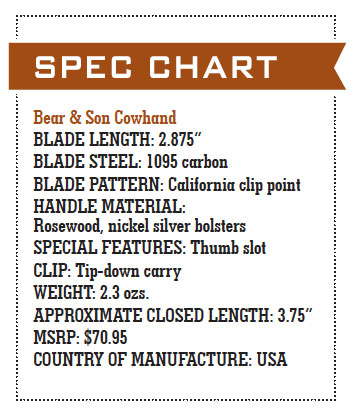
The Bear & Son Cowhand Lockback has the look and feel of a modernized version of the traditional copperhead pattern. The 3.75-inch handle sports rosewood scales sandwiched between nickel silver bolsters, with the lock located at the lower rear base.
The slender 1095 carbon steel blade, a California clip point, is 2.875 inches long and accessed via an ovate thumb hole. On the back side is an ample 2.5-inch stainless steel pocket clip positioned for tip-down carry, or if you like you can remove the clip and carry the Cowhand loose in the pocket. At about 3 inches closed and tipping the scales at 2.3 ounces, the Cowhand is a medium-size folder that won’t bog you down. MSRP: $70.95.
I gave the Cowhand an initial run on some 550 paracord. The blade sliced through one, two and three lengths of cord with ease on both flat surfaces and pull-through strokes. I moved up to some much tougher waxed quarter-inch lasso rope on a flat surface. Applying pressure, I had no trouble slicing the rope in single strokes. Pull-throughs required multiple strokes but this extremely dense material gives most knives fits. Of the three folders in our lineup with pocket clips, the Cowhand’s is the deepest fitting. If you’re an aficionado of traditional folders, you’ll enjoy the feel of Rosewood in your hand as opposed to a synthetic.
Cold Steel Grik
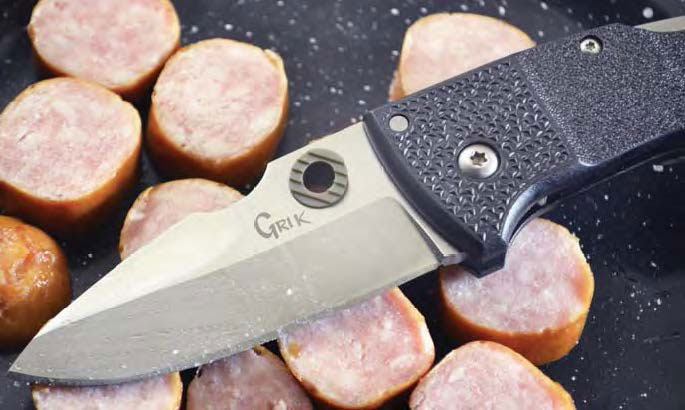
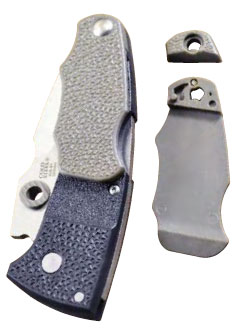
The Cold Steel Grik is nothing short of cool and every bit as handy. The deep-bellied grind worked well for slicing sausage for a meal of red beans and rice, and can handle similar chores around the home.When it comes to pocket clips, the Cold Steel Grik gets the award for thinking outside the box. The company provides a mirror-image clip for left-hand pocket carry with an additional base plate to complete the package.
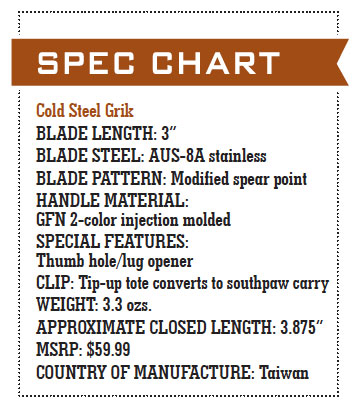
As cool looking lockbacks go, the Cold Steel Grik rates an 11 out of 10. Cold Steel has been a longtime proponent of the lockback and uses the trademarked name Tri-Ad Lock™ for its mechanism. The aggressively styled Grik is a mid-sized midlock folder—6.875 inches overall, 3.875 inches closed, 3.3 ounces—with a tactical-looking handle profile and a 3-inch spear-point blade of AUS-8 stainless steel.
Adding to its attitude is a heavy, ramped and checkered lug-shaped thumb stud on each side for ambidextrous access. Another cool feature is a tip-up pocket clip that spans the width of the GFN injection molded handle. Left -hand conversion is available for southpaws. MSRP: $59.99.
I liked the Grik’s wide, deep-bellied blade and put it to the test on slicing up sausage for a pot of red beans and rice. The links were approximately 1 inch in diameter and, while the Grik doesn’t have a long blade like a chef ’s knife, it had no trouble whatsoever taking off clean, consistent slices. Similar edibles such as carrots and shallots would be no problem.
As an EDC the Grik would be useful performing other daily chores around the office, and its wicked, double-ground blade can offer up a sweet bit of protection should the occasion arise. If you desire a thoroughly modern mid-sized lockback with a wide range of capabilities, the Grik will serve you well.
KA-BAR Folding Hunter
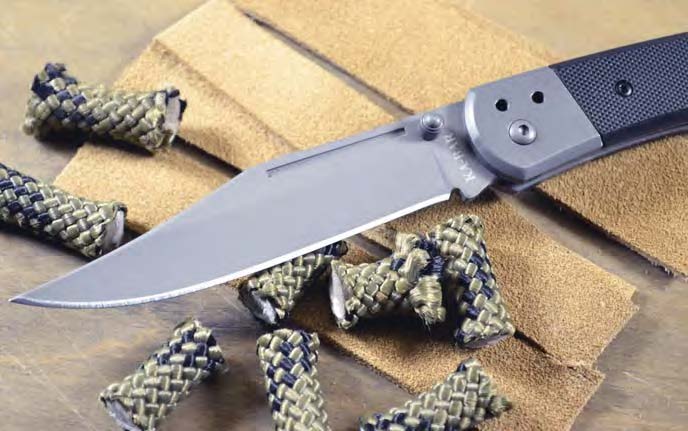
The KA-BAR Folding Hunter’s 3.87-inch clip point blade has ambidextrous thumb studs with an optional long-pull nail nick for blade deployment options. The blade was equally at home slicing leather strips and taking off portions of 3/8-inch rappelling rope.
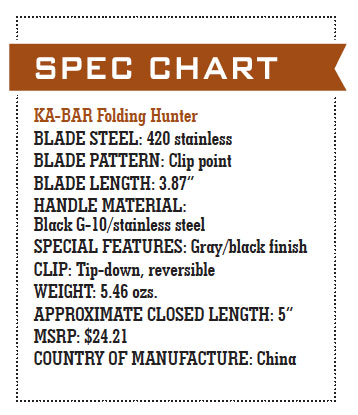
The KA-BAR Folding Hunter is, simply stated, a modern tactical take on the legendary Buck 110 and KA-BAR’S subsequent Model 1189. The overall design and dimensions are very close, but the new KA-BAR version takes off from there in a hurry. About 5 inches closed, the KA-BAR Folding Hunter has a gray, nonreflective 3.87-inch clip point blade of 420 stainless steel with matching bolsters and black G-10 scales—which combined give it a very stealthy look.
The blade has ambidextrous thumb studs along with an optional long-pull nail nick on the front side for opening. On the backside is a 2.25-inch tip-down reversible stainless steel pocket clip. The cross-section of the handle is a trim .5 inch across, cutting down on weight and signature. The KABAR Folding Hunter is affordably priced at an MSRP of $24.21.
KA-BAR’s Folding Hunter was the only large-sized lockback in the pack and, like its predecessors, has the ability to perform tough tasks. I tested the blade on some 1/16-inch suede leather to see how well it could take off nice, clean strips. Laying the suede down on a flat wooden surface, I used the knife to slice through the material in easy, even strokes. The blade sliced equally well through 3/8-inch rappelling rope. Skinning, meal prep and shaving wood would be no problem with the KA-BAR Folding Hunter.
Lockback Knives are Back
Very much alive, the lockback folder is more diverse than ever, and choices abound. The Spyderco Manbug Salt Lightweight can fulfill many daily chores and also prevent wear and tear on your larger EDC, if so desired. The Bear & Son Cowhand and Cold Steel Grik give you a choice between a lockback with traditional styling versus a modern tactical one. If you want a full-size carry capable of more heavy-duty chores, the KA-BAR Folding Hunter will do the trick.
Some people are bolstered by success, and others create bolsters to help them succeed. In the latter category would be knifemakers fashioning folders with bolsters, whether for utilitarian or aesthetic purposes, or both.
Gawie Herbst
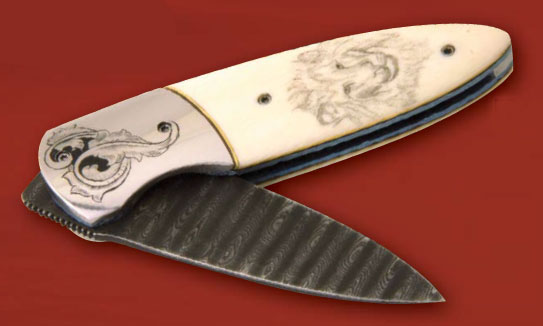
South African knifemaker Gawie Herbst knew just the person to engrave the bolsters of his art folder, his son Thinus, yet it was Gawie who scrimshawed the elephant ivory handle, and complemented it with a damascus blade and blued-titanium liners.
Scot Matsuoka
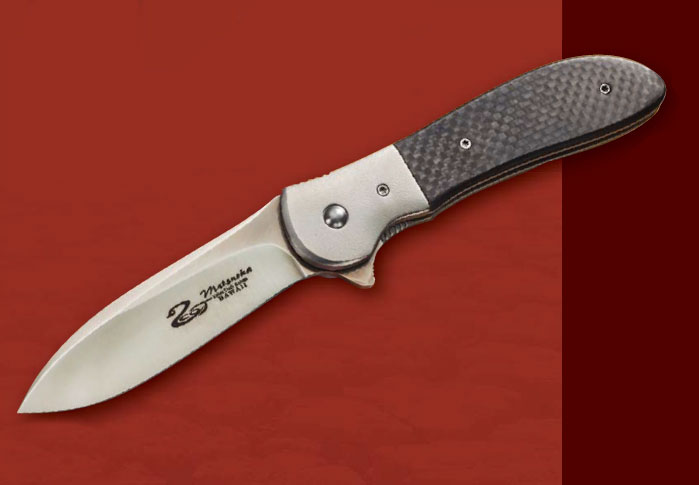
There are no straight lines on Scot Matsuoka’s titanium frame-lock folder, not on the titanium bolsters, the carbon fiber handle scales, nor the 3.75-inch, hollow-ground CPM 154 blade. The folder also features the IKBS (Ikoma Korth Bearing System) and Rick Hinderer Lockbar Stabilizer. (SharpByCoop image)
Jeremy Marsh
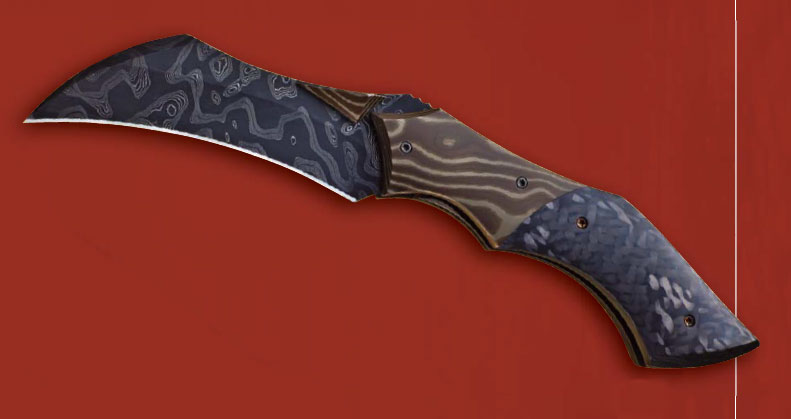
Mokumé bolsters provide a nice respite between the claw-like damascus blade and carbon fiber handle scales of Jeremy Marsh’s compound-ground folder. (SharpByCoop image)
Bill Duff
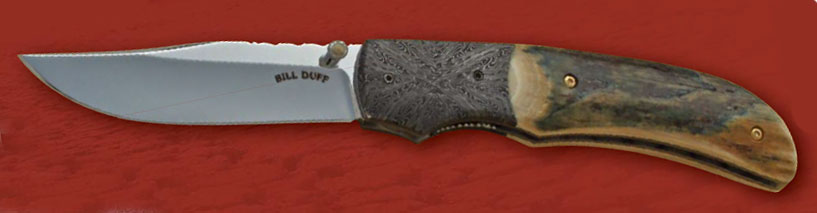
Bill Duff chose mosaic damascus bolsters for his locking-liner folder in a 3-inch, fileworked 440C blade and mammoth ivory handle scales. (Chuck Ward image)
Norman Sandow
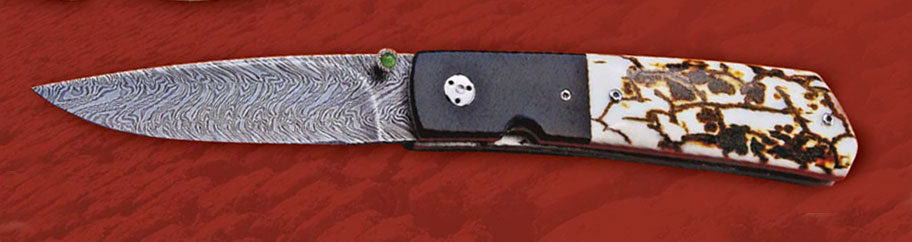
Knifemaker Norman Sandow blackened the titanium bolsters of a locking-liner folder showcasing a damascus blade, a jade-inlaid damascus thumb stud and mammoth ivory handle scales.
Fellhoelter/Horton
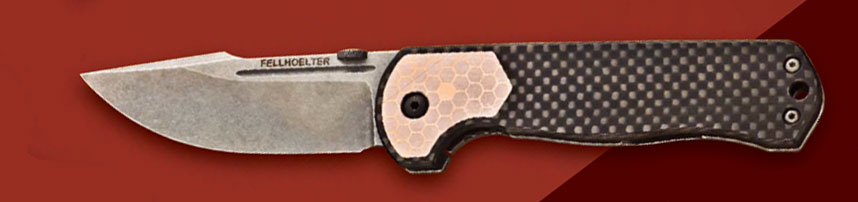
A collaboration between Brian Fellhoelter and Jeremy Horton, the “FTR” features a 3.5-inch fullered blade. Niobium bolsters help set off the piece, as do carbon fiber handle scales and a one-side-only titanium frame that doubles as the frame lock. (SharpByCoop image)
Dan Chinnock
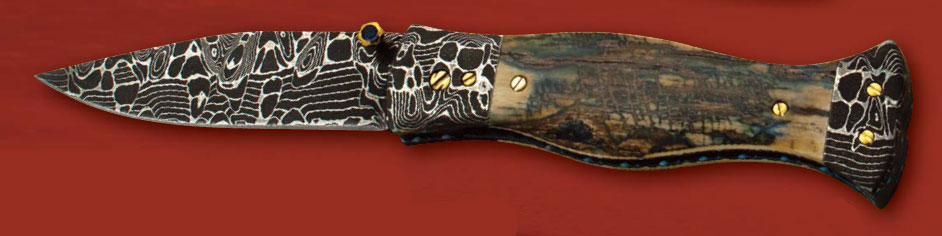
Appropriately named the “Fish Tail” for its handle and pommel shape, Dan Chinnock’s locking-liner folder parades a 2.75-inch Chad Nichols damascus blade and bolsters, blue mammoth-ivory handle scales, a sapphire-inlaid 24k-gold thumb stud, gold screws and anodized titanium liners. (Chuck Ward image)