


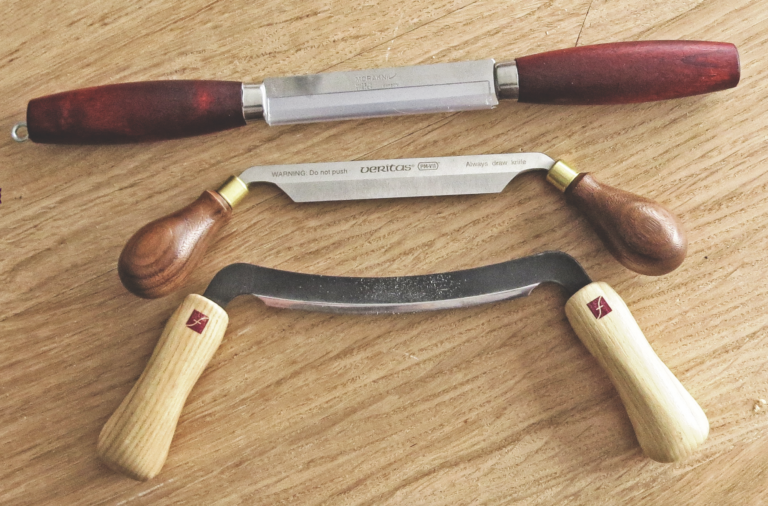
What is a Drawknife? Three Examples

Whether for bushcraft, carving, or just straight woodworking, drawknives are handy tools that range quite a bit in size, function, and style. There are large drawknives to peel bark or hew small logs, as well as models for specialty purposes such as coopering or making chair seats. There even used to be specialty drawknives for shaping round handles small in diameter for brooms, rakes, and other implements.

Three small drawknives for carving and crafting are the focus this time: the MoraKniv Classic wood splitting knife, Flexcut Drawknife, and Veritas Drawknife. They are great because they are relatively compact and portable, and help comprise part of what you could call a portable rustic tool kit.

DUAL BEVEL

I know, right off the bat the MoraKniv Classic is called a wood splitting knife and not a drawknife. I thought this model would be interesting to test because it departs from the regular one-bevel blade geometry. The handle positioning is straight, giving the tool a compact configuration for transporting. It also comes with a sheath.
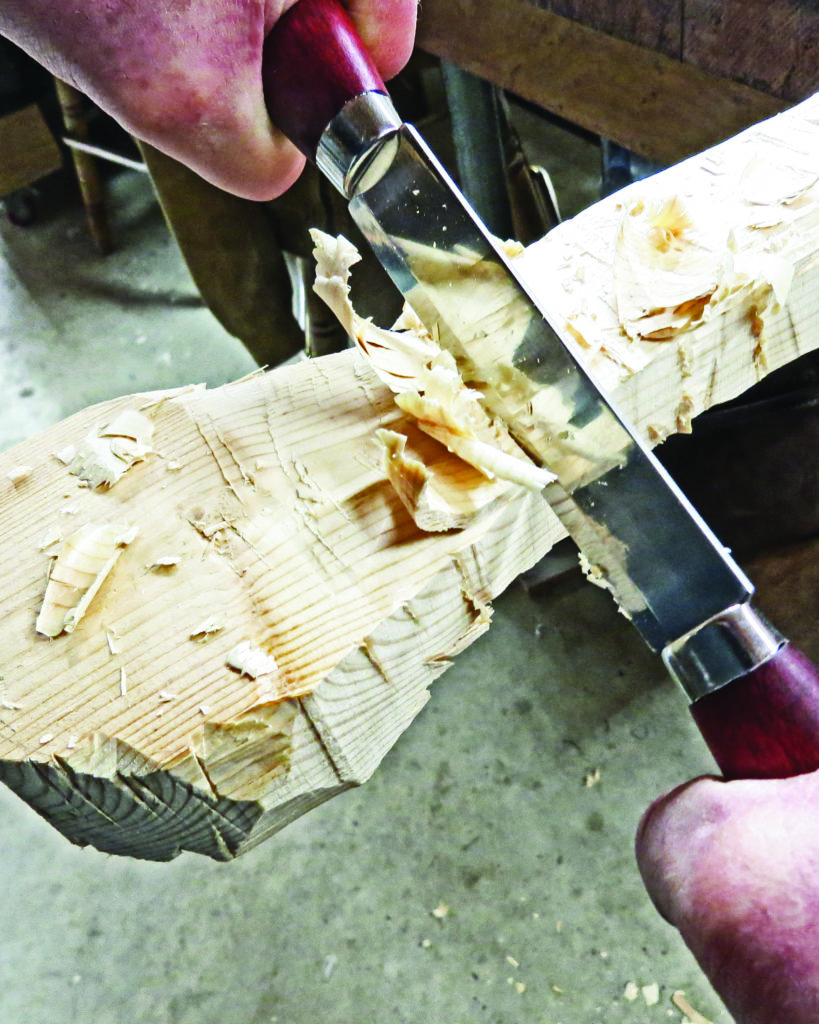
The author uses the MoraKniv Classic wood splitting knife in a push-cut motion to perform a stop cut while contouring the grip on a paddle.

Over the years, I’ve seen many a bushcrafter try and find a way for a standard knife to act as a drawknife. You can do many bushcraft chores with the MoraKniv Classic, from spoon work to shaping a tenon on a stool leg. You can do some of the same things with a regular knife, but with a drawknife it can be easier.

The 4.5-inch carbon steel blade has a dual bevel. An advantage of such a bevel is it makes the knife more versatile. A disadvantage is you don’t have depth control on a cut like you do with a single bevel. Single-bevel blades provide control similar to using a woodworking plane or a chisel. You shear through the levels you need to and, once you establish your depth of cut, you can remove material without bogging down by using a bit of depth control. Given that the dual bevel is a Scandi grind, it makes control easier than, say, a grind with a micro and major bevels on both sides. Control is most certainly easier than, for instance, with a convex grind. In the end, it is no big deal. Having to control a blade only becomes a problem when its design is not conducive to the job at hand.
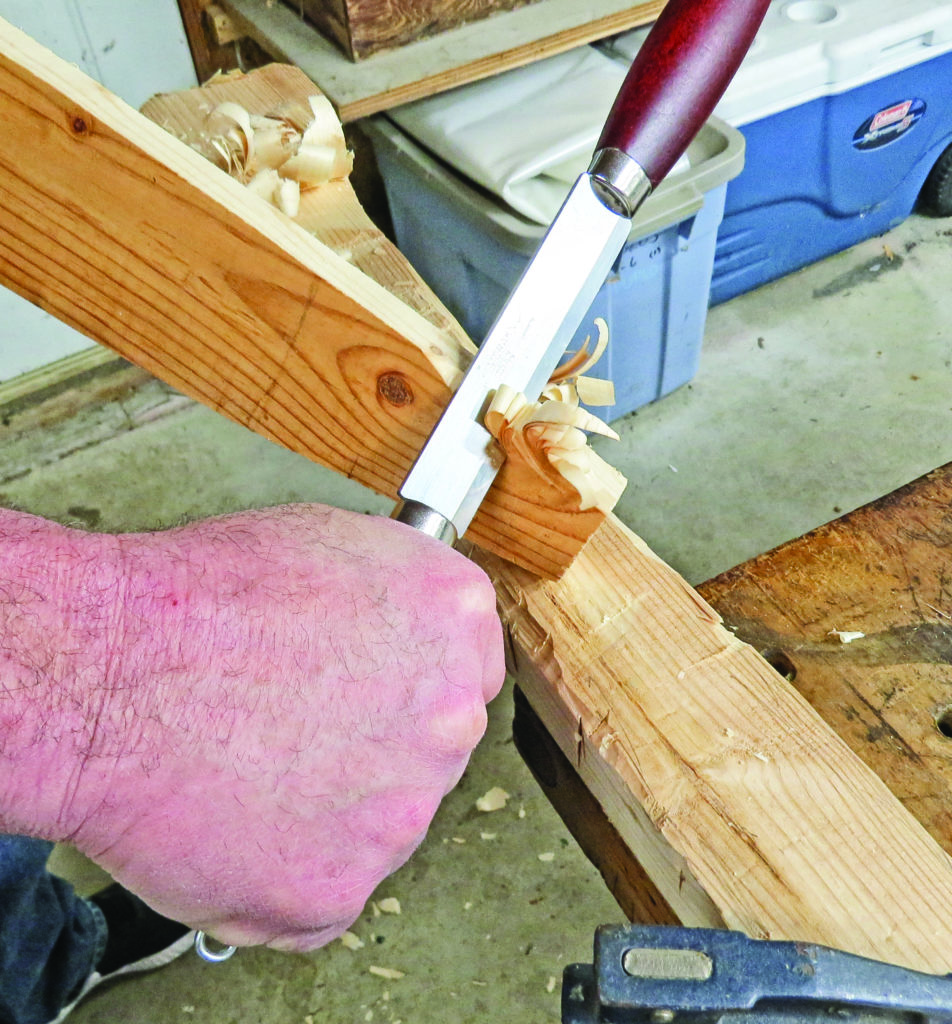
Having in-line handles and a dual bevel, the Mora allows use like a sheath knife. It adds to the tool’s versatility and saves time, as you don’t have to put one knife down and pick up the other.

For the most part, control affects how much energy you put into making the blade do exactly what you want. In the case of a convex-ground blade, if you want to make a long, straight cut at the same depth, you will expend more energy than you should trying to keep the blade from “porpoising” (that is, front to rear bouncing of the blade). The alternative is simply getting used to making shorter controlled cuts more frequently.

The Classic cuts extremely well. Due to the straight handles and dual-bevel blade, you can switch and use it like a sheath knife in a split second.


WESTERN TRADITIONAL

Flexcut has a variety of tools covering chip, relief, and decoy carving, just to name three. The company also has a couple of drawknife styles. The Flexcut Drawknife is more of a traditional Western version. The 5-inch blade is 1095 carbon steel with the bevel brought to a mirror shine.
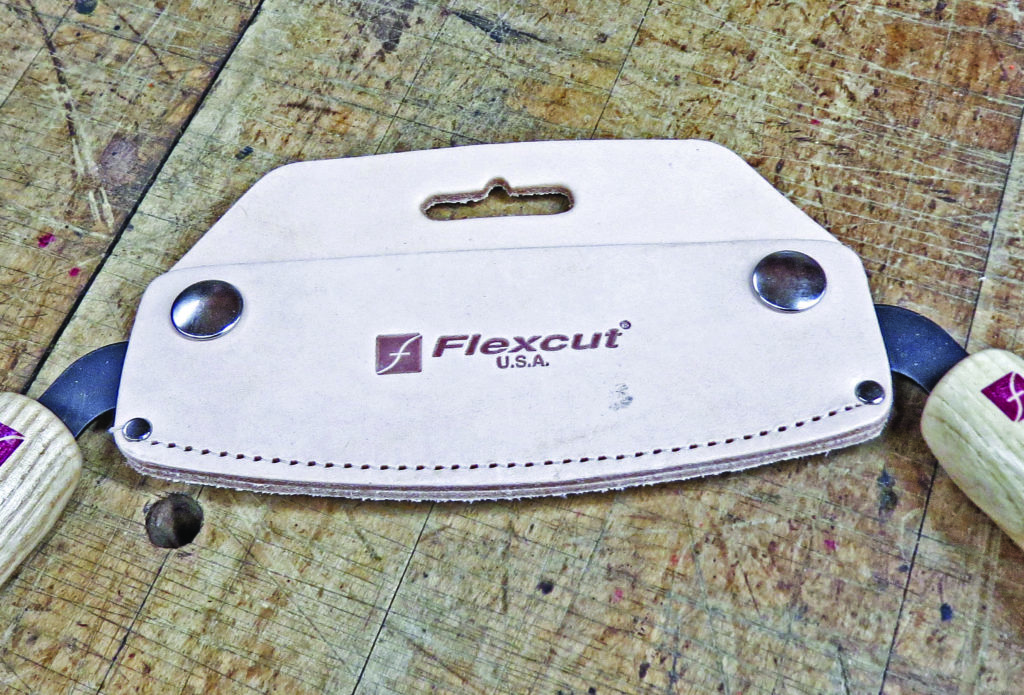
The Flexcut comes with a well-made sheath. It is always nice to have something protecting the edge—if not for safety’s sake, for that of preserving the edge from accidental harm.

Right out of the box, this thing is wicked sharp. It comes in a leather case with a peg-hole loop. It has a curved blade, which gives it a natural tendency to skew in a leading edge cut. If you haul the spine up a bit on your cuts, it will make more of a scraping action for a hollowing effect. It is a thin blade and not suited for hogging off large amounts of wood at one time. It is great for detailed jobs like the subtle contours you might find in a canoe yoke.
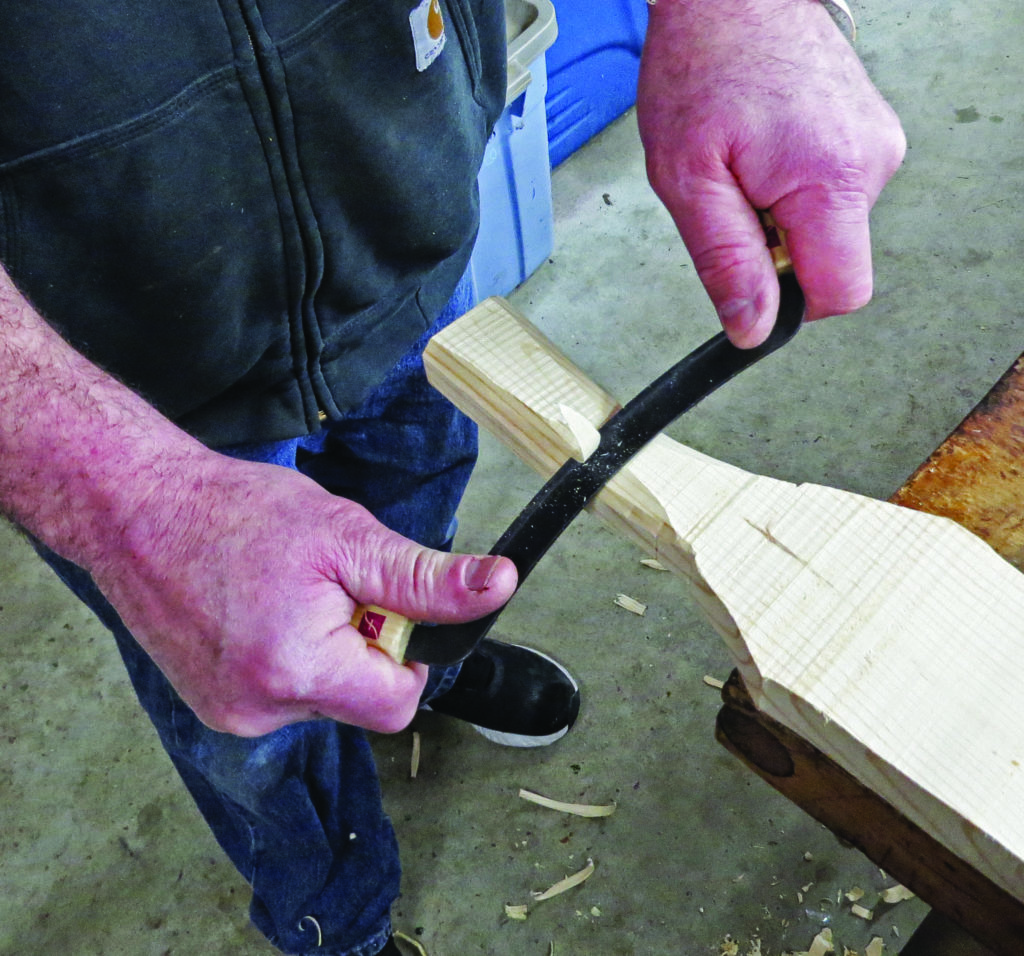
Using the Flexcut Drawknife, the author shapes the handle for a flat-board atlatl. The efficiency you gain using a drawknife is hard to beat for control and energy.

Such a small drawknife is a good tool not only to create art but to make utilitarian items. Given its Western-style handles, it doesn’t make a streamlined package for carrying in a pack like the Mora does, but it still has very little bulk and weight. The arched blade can be sharpened with a flat stone, though I find sharpening it with a small handheld stone and using a dynamic sharpening method easier. The Flexcut Drawknife is the kind of tool that suits the creative mind.

HOB-KNOBBER

The Veritas tool company manufactures the last of the test drawknives in Ottawa, Canada. Sporting a 4-inch blade, it is a small carving-style model. Steel is PMV-11, a stainless with a Rockwell hardness of 61-63 HRC. Veritas made the switch from traditional tool steels like O1 and A2 to up cutting performance and edge retention. A case for the knife sells separately.
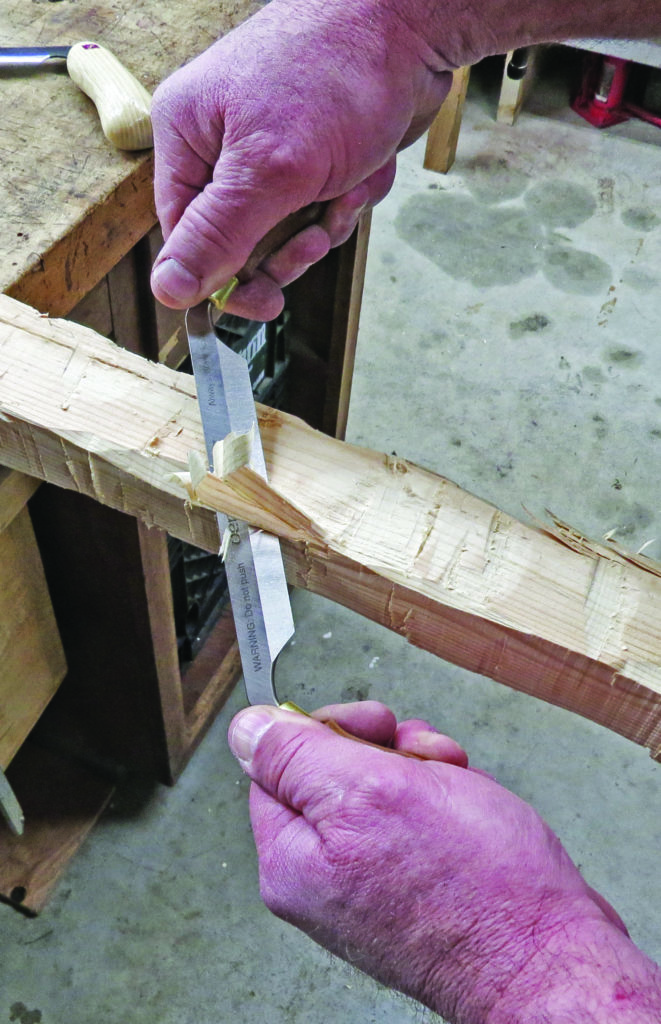
The Veritas Drawknife’s 20-degree angle cuts aggressively and you have complete control with the well-shaped handles. Here the knife is skewed compared to its cutting path. Skewing the knife provides a leading edge to the cut, reducing resistance

The company’s technical information says the bevel is ground at 20 degrees. To sharpen the Veritas, be sure the sharpener is of a flat design. Given the knife’s size, you can sharpen it in either a dynamic or a static style*. To cover/sharpen the entire bevel, you will need a flat surface. There is no micro bevel on the Veritas, though that’s not to say you can’t apply one. However, if you want to keep it original, you will need to cover the bevel.

The angling of the handles is a traditional Western style, though they have more of an elongated knob shape to them. The shape helps reduce fatigue. Because of the handle angling the Veritas does not offer as compact of a carry as the Mora, but the .125-inch-thick blade makes it a bit sturdier user than the
Flexcut. Handle material is torrefied maple. Due to the kilning process, the material has a greater stability to it without the use of chemicals. At the top of each handle is a brass ferrule.
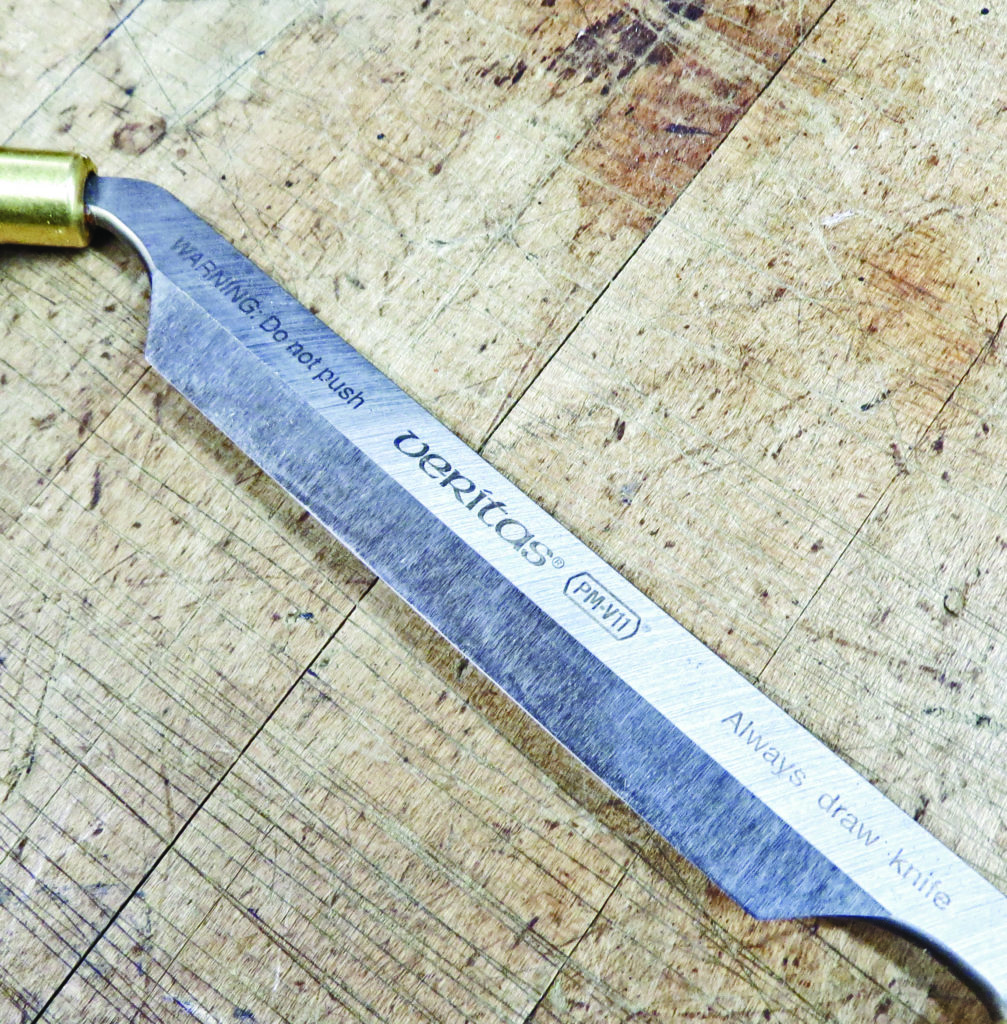
The author stated he has been known to push a drawknife to make a quick cut. The Veritas Drawknife clearly warns not to do that. At a 20-degree bevel, you take a chance of damaging the edge if you were to catch and roll it.

It is a good-looking product and out of the box is ready to work. It is the most expensive of the review knives, yet is not so much more that you wind up scratching your head. A drawknife like this can be put to work doing a number of things limited only by your imagination. Veritas promotes it more as a carving tool and actually shows it making a decoy in the company’s marketing media.

Staying within the bounds of this tool, I can’t think why you couldn’t get chores done or entertain yourself by making pieces of art with it. Keeping you busy in the woods and not necessarily only during a survival situation promotes better mental health. It is a great little package and a good tool—I just think the company could include the sheath. When you hold the knife you see where the extra cost is as the precision work shows in the fit and finish.

EXPLORING OPTIONS

Once you leave the big city behind, in order to thrive you must know how to make what you need. Many of the tools you carry will depend on what you plan on doing. If you’re building up a getaway spot, you might need to build items for the camp. When planning to build a more substantial base, you will need more tools. Again, it all depends on what you plan on doing. A good drawknife can greatly increase your cutting and carving options—not to mention that being able to use two hands greatly reduces fatigue. If you haven’t tried a drawknife yet, I highly recommend doing so.

*Static sharpening is when the stone is stationary, and dynamic is when the stone is moving.
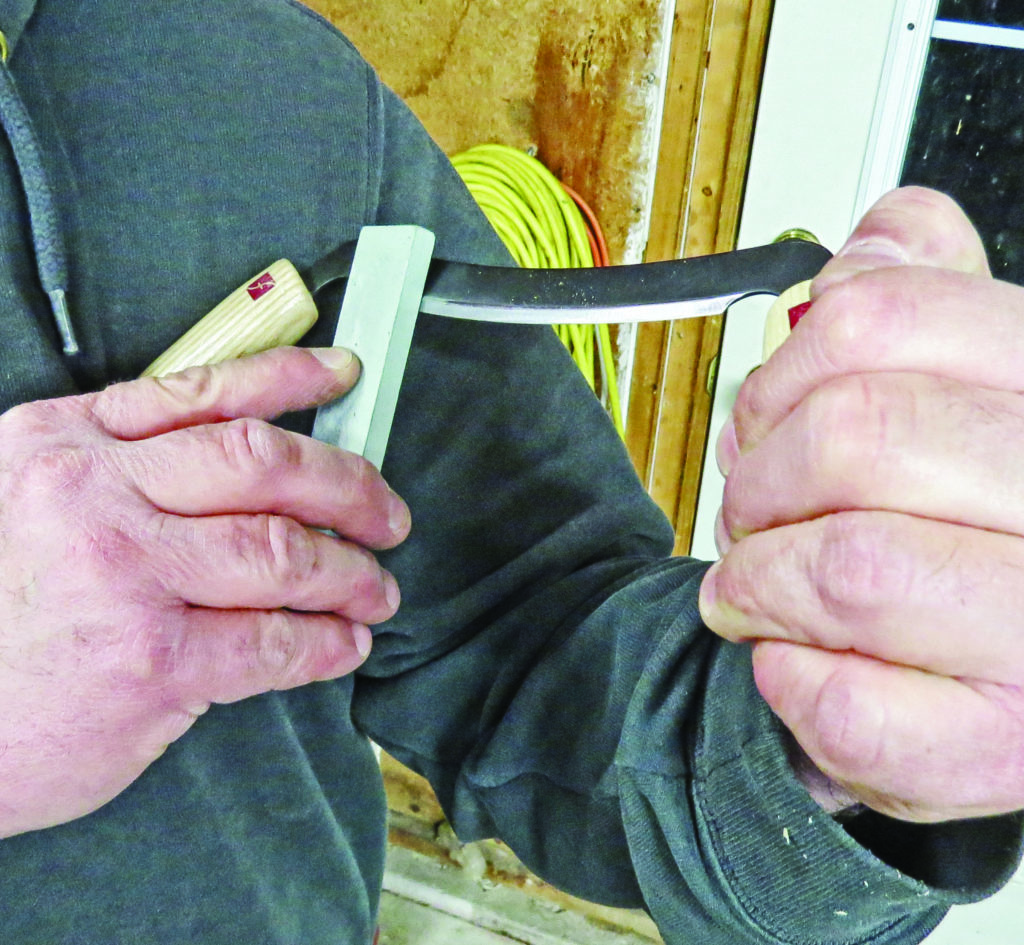
A trick to sharpening drawknives both in the shop and field is to brace one handle against your armpit or chest. After bracing the knife, simply use a dynamic sharpening method with a small stone running parallel to the edge.

The Latest EDC Multitools

People Who Like to be Prepared Will Love the latest EDC Tools

Knife guys love gadgets, fix-it people love gadgets and DIY-ers love gadgets, so it’s easy to see why multi-tools do so well in the knife market. Though not knives per se, they off er more versatility than just cutting ability by offering on-board tools. With broader appeal than knives, multi-tools have a further reach and encompass more markets, too. They appeal to folks who like to be prepared.In addition to DIY-ers, campers, hunters, fishermen, hikers, mountain bikers and anyone who enjoys outdoor activities benefits from owning and using a multi-tool. It performs in-fi eld repairs on equipment when you do not have access to regular tools.  It can mean the difference between bowing out of a camping trip because of equipment failure, or performing an expedient in-field repair or adjustment and carrying on with your adventure. As with knives, advances in multi-tools have made them stronger and more user friendly and versatile.


FLASH in the HAND: Coast’s LED150 multi-tool 

When you think of multi-tools, what immediately comes to mind is a pliers-based tool with little fold-out implements nestled inside the handle. Truth is, multi-tools can take on any form as long as they incorporate the implements necessary for field-expedient repairs and adjustments.

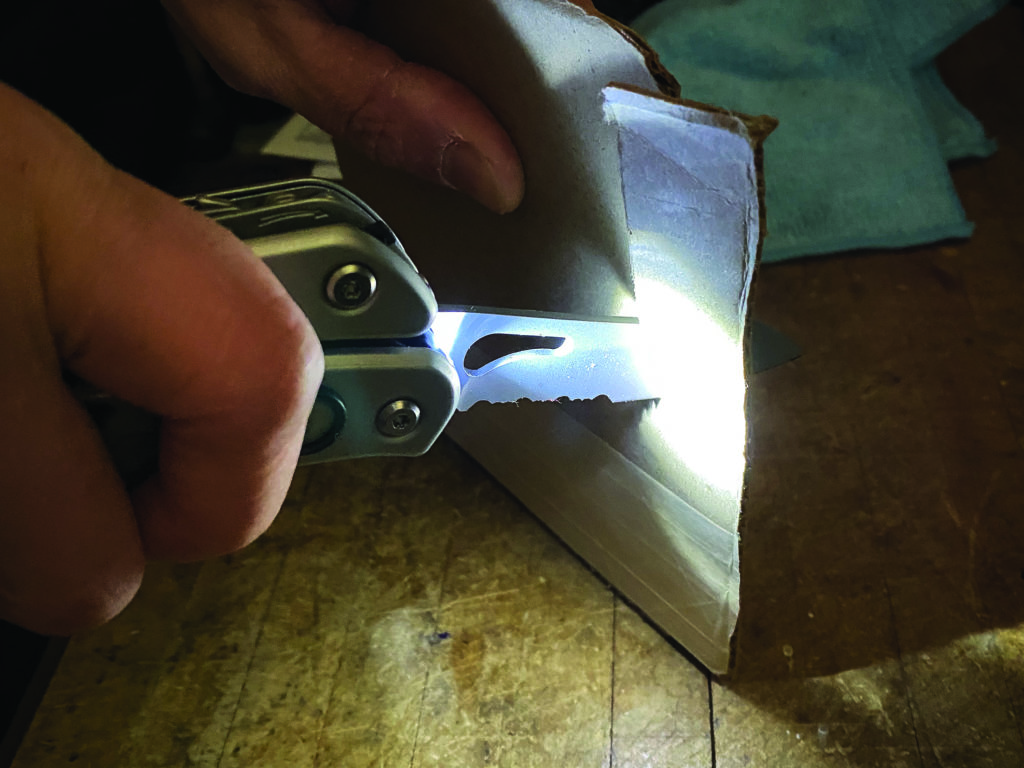
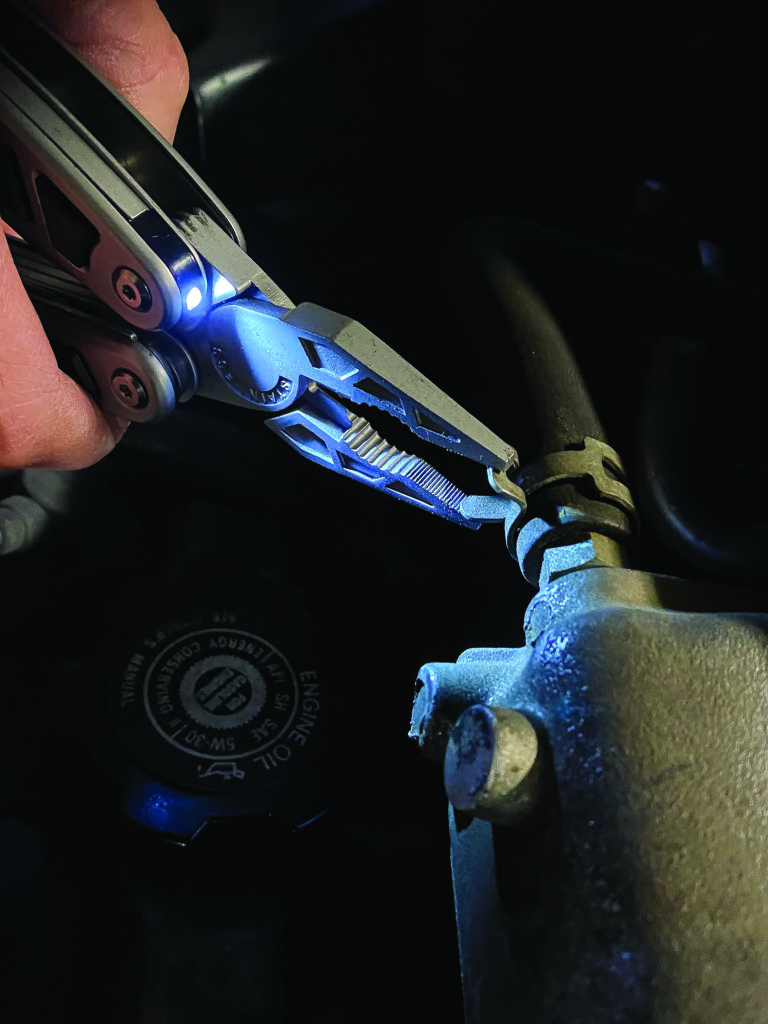
At first glance, Coast’s LED150 multi-tool might appear like any other pliers-based multi-tool, except for one thing: it incorporates not one but two LED lights. One LED is on the pliers jaw end and the other is on the partially serrated end of the knife blade. This way, you can confidently work in tight and dark spaces with confidence thanks to the illumination. The lights are activated by a recessed push button located on one side of the handle. Press once to activate the light by the main blade. Press again and the light turns off and, at the same time, the light on the pliers jaws end turns on. Press again and the jaws light turns off. With the multi-tool closed, you can use either light as a stand-alone flashlight, further expanding the multi-tool’s versatility. The lights are powered by two CR1616 lithium button batteries. The batteries replace easily.

The light on the end of the Coast LED150’s handle illuminates what you’re cutting.

The pliers jaws have different gripping surfaces for smaller objects and larger nuts/round objects. The jaws themselves are spring loaded, which helps to open them by spring tension, reducing hand fatigue. When closed, all the fold-out tools are easily accessible: a partially serrated main blade that works on a linerlock, spring-loaded scissors, large and small flat-head screwdrivers, can opener, Phillips head screwdriver and the pliers jaws—most all the common implements necessary for field repairs and adjustments.

The handles are aluminum and feature raised hard rubber for a non-slip grip. The LED150 has a good heft and the heavy-duty build will withstand normal use. The sturdy ballistic nylon belt pouch has a fabric-fastener flap closure. Manufacturer’s suggested retail price (MSRP): $49.  

One of the LED lights on Coast’s LED150 multi-tool shines on the pliers jaws end so you can effectively work in dark areas easily without the need for a separate flashlight.


AFFORDABLE SOLUTION: Gerber’s Armbar

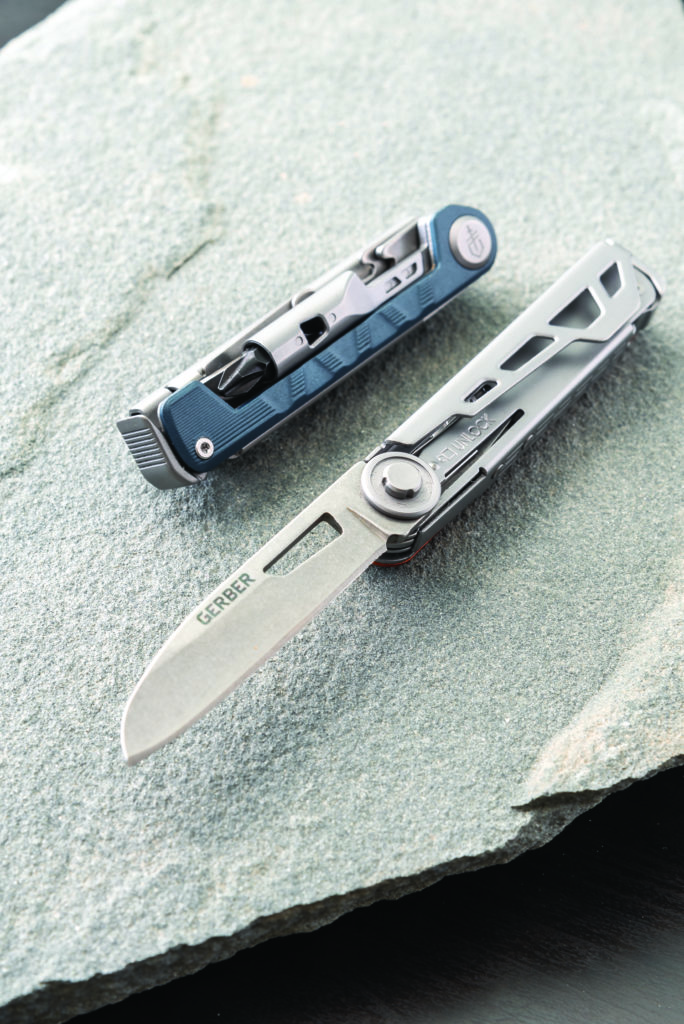
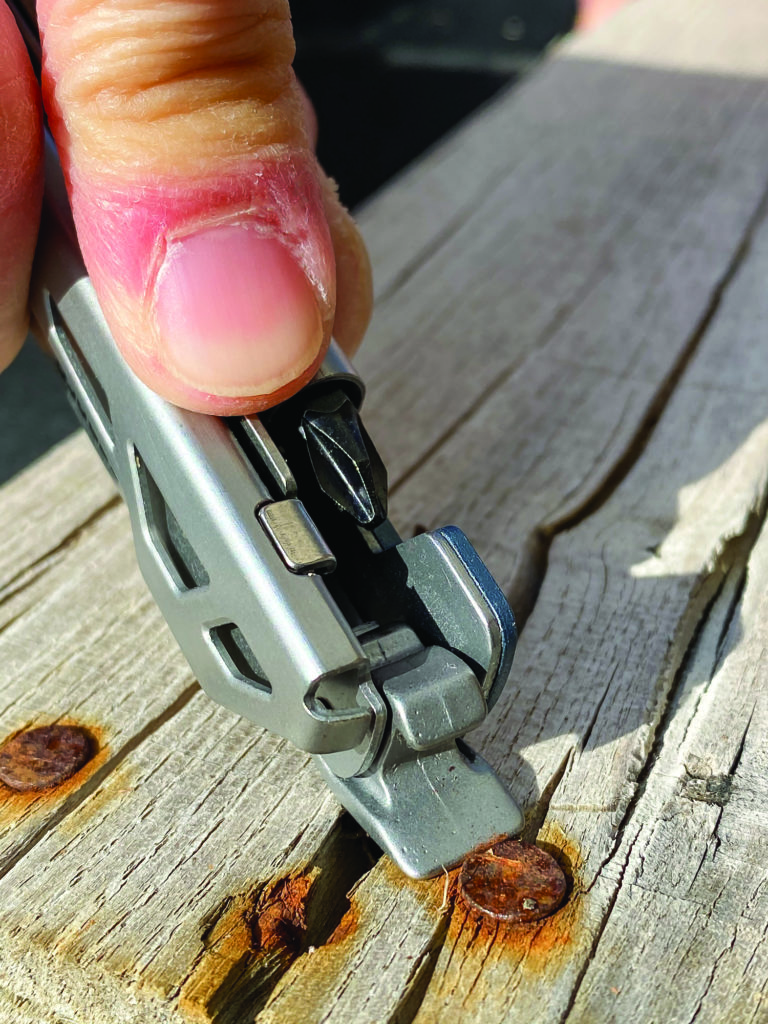
Gerber’s Armbar series incorporates the fold-out implements of pliers-based multi-tools like the Coast LED150—minus the pliers. Sometimes, you just need the versatility of screwdrivers, a knife blade and scissors. About the same size as a large multi-blade pocketknife, the Armbar Drive features seven on-board fold-out tools: 2.5-inch plain edge sheepsfoot blade with opening hole and framelock, 2.5-inch extension driver with a double-sided bit of Phillips and flat-head screwdrivers, a prybar, bottle opener, hammer, scissors and awl.

The Gerber Armbar Drive features a sturdy main blade. The entire package has about the same dimensions as a medium-sized traditional pocketknife.

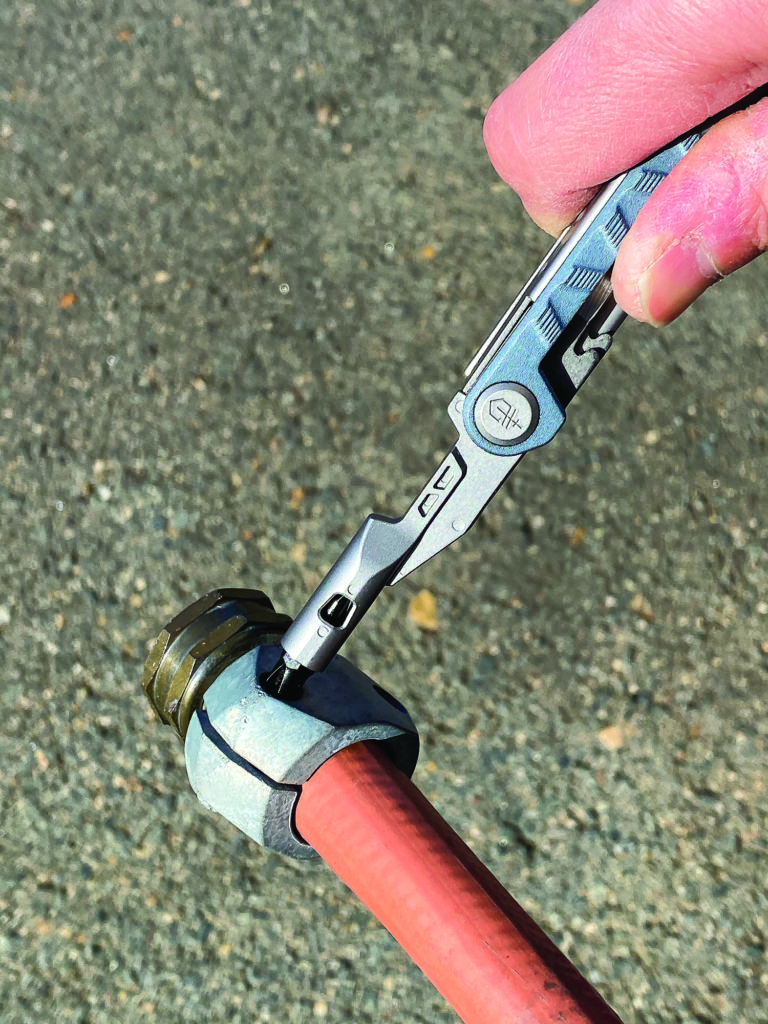
The extension driver has a magnet that holds the double-sided bit and allows for fast flip-over when transitioning to different screws. The driver socket can accept aftermarket quarter-inch drive bits, too. Hence, you can customize your Armbar Drive just about any way to fit your tasks. The spring-loaded scissors provide enough blade length for cutting coupons, stray threads and duct tape. The plain edge sheepsfoot blade thumbs open easily like any lock blade. The blade is mostly exposed even when closed, but the metal channel protects it from damage and you from accidental cuts.

Perhaps the neatest implement is the combination hammer/prybar/bottle open-

er, which in the closed position is in the hammer mode by default. The squared-off back end takes care of light hammering. The prybar function is rather limited as you’re not going to get a ton of leverage. However, if you need staples removed or to pry open a casing and such, it does the job. 

A fold-out prybar/bottle opener on the Gerber Armbar Drive performs light-duty prying when needed, saving the blade tips on your standard knives.

One thing I wish Gerber would have included is the ability to lock the screwdriver in the fully open as well as the 90-degree position. When you torque down with the driver, your hand may move and this will cause the screwdriver to fold a bit. Also, when you use the tool in the 90-degree position, you apply more torque. Having it lock in the 90-degree position would make it easier to use—if not lock in both positions, then a strong detent and a half stop, like a slip joint, would be better than nothing. The form factor permits easy carry in your pocket, toolbox, glove box or a backpack.

At 3.1 ounces the smallest multi-tool in the Armbar line, it comes in an aluminum handle anodized in a choice of urban blue, orange or onyx. With an MSRP of $39, it presents an affordable solution to a typical pliers-based multi-tool by reducing bulk and weight—that is, if you don’t need pliers.

The screwdriver tool on the Gerber Armbar Drive is easy to manipulate. The magnetic socket allows you to flip the double-end bit over, as well as use most any aftermarket quarter-inch driver bit.


TINY TOOLBOX: Utica Minimaster

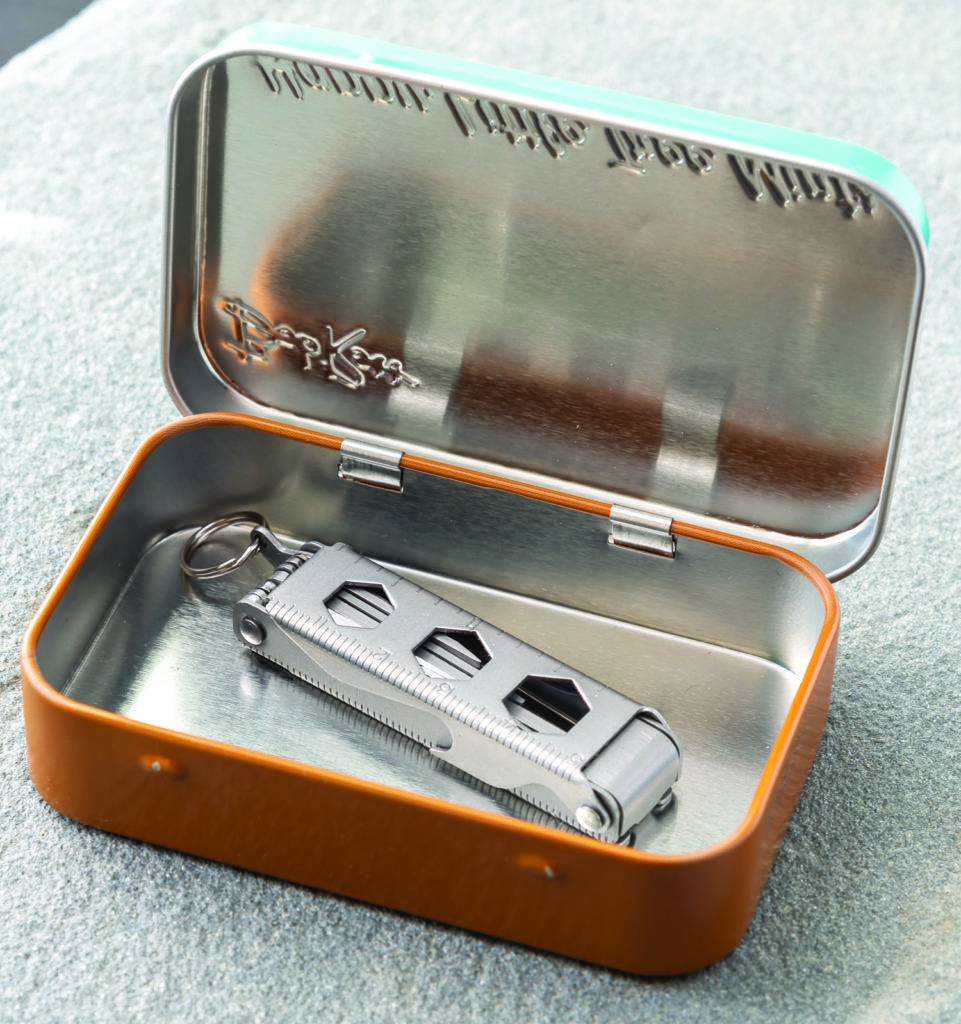
Utica primarily manufactures knives for hunting and tactical but also makes multi-tools. The Minimaster is the smallest multi-tool of the test bunch. It’s loaded with many small fold-out implements: a pair of tweezers, large and small flat-head screwdrivers, a Phillips screwdriver, scissors, fingernail file/cleaner, knife blade, bottle opener, and ⅜-, 11/32- and ⅝-inch wrenches integrated into the folding cover. Made in the USA, it’s roughly the size of a Victorinox Classic, so it fits well on a keyring, its preferred method of carry.

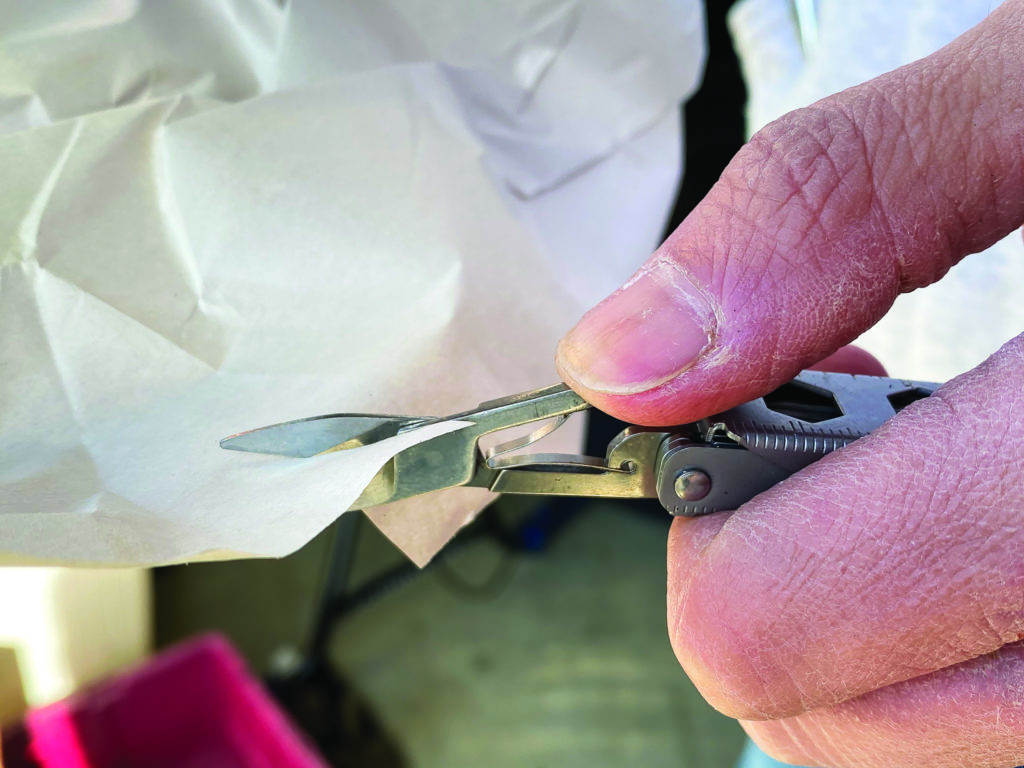
The scissors may be tiny on the Utica Minimaster but it is effective.

None of the tools lock in the open position. You pull one out and then close the cover; the cover held closed by your grip acts as the lock so the tools won’t fold on you. The tweezers are pretty neat—this is the only compact multi-tool I know of that integrates one. The tips are not textured or ground precise like regular tweezers, so grasping some things with it can be a bit difficult, though having one is better than not. As for the rest of the tools, they are handy to have and definitely will work in a pinch when you need them.

The ultra-compact size of the Utica Minimaster makes it a great candidate for improvised tin-based survival kits.

The only down side to the Minimaster is the hinged cover. It needs to detent tighter in the closed position, as the sample sent to us for review had a tendency to open partway easily. This could present a safety issue, especially if the tools open inadvertently. MSRP: $60. There’s also an imported version that retails for $9.95. Same construction and implement selection, except the multi-tool is made overseas.

MAPPED MULTI-TOOL: Leatherman Signal

When it comes to an article about multi-tools, I would be remiss to not include Leatherman Tool Group, the brand that pioneered the concept. It is the originator of the pliers-based format, and still among the best of them after all these years.

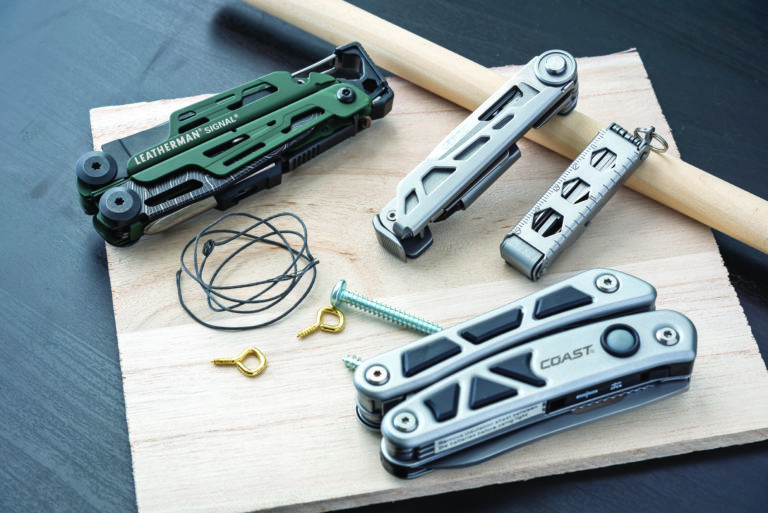
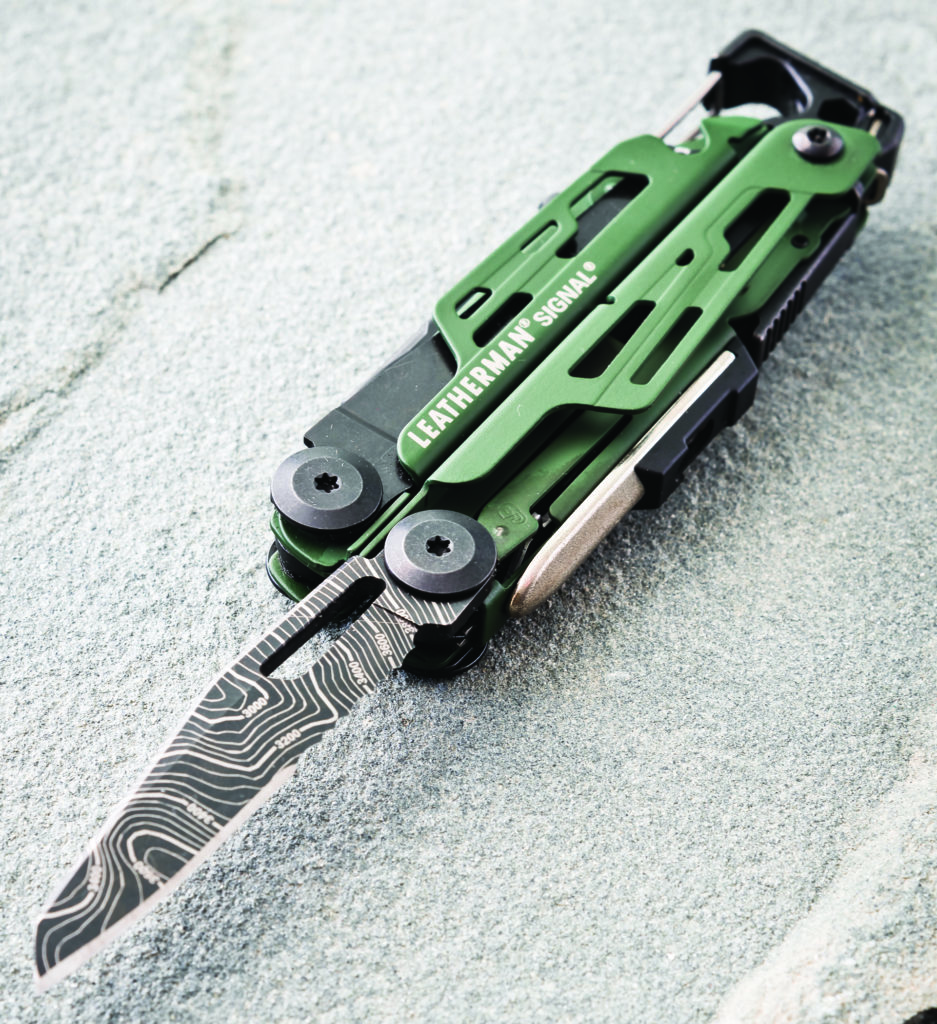
The main blade of the Leatherman Topo Signal features a map-topography laser etching, hence the multi-tool’s name.

The limited-edition Topo Signal is a variant of Leatherman’s Signal multi-tool. The Signal was developed specifically for the outdoor enthusiast, integrating features like a ferrocerium fire starter rod, saw, survival whistle, diamond sharpener and hammer, along with standard Leatherman features such as pliers jaws with replaceable cutting inserts, fold-out driver with reversible bit, awl and can opener. There’s also an integrated quarter-inch-bit socket built into the hammer portion of the handle, which will accept any standard quarter-inch bit driver.

The main blade is a partially serrated 420HC stainless sheepsfoot pattern that locks open via a linerlock. The blade features an oblong opening hole, while the partial serrations eat through tough and fibrous materials with ease. The blade has a map-topography-style laser etch, hence the name. The distinctive appearance is pretty neat and fits in perfectly with the outdoor theme. Speaking of outdoor theme, the Topo Signal comes in a nice dark green Cerakote coating for the aluminum handles and pliers jaws, fold-out implements, and all-black hardware.

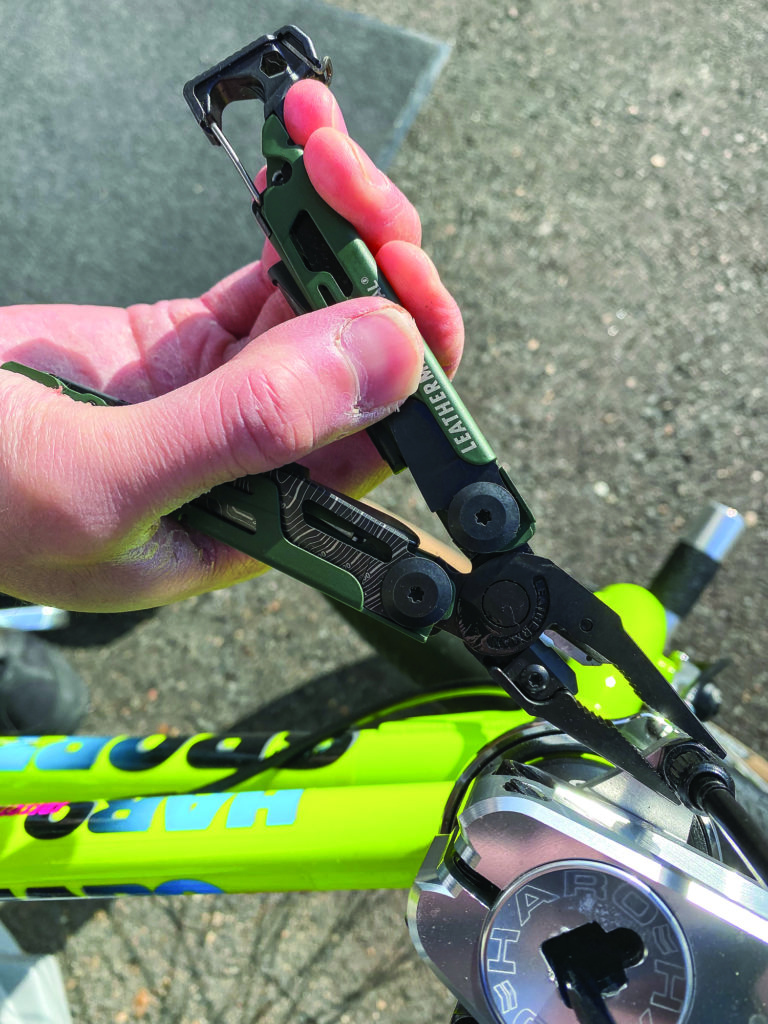
Making on-the-spot repairs and adjustments are a multi-tool specialty. The needle-nose pliers of the Leatherman Topo Signal works great at accessing small nuts in cramped places.

Each one comes with a nice ballistic nylon belt sheath with  button snap closure. It has a steel pocket clip. There’s also an integrated carabiner in the hammer portion so the tool can be clipped on a D-ring, etc.

Comparatively speaking, a Leatherman multi-tool is engineered better than most on the market. MSRP: $119.95. Country of origin: USA. It is the most expensive of the test group, but the quality of the manufacture and fit and finish justifies the price.

Knife Performance: Is Steel Type Really the Most Important?

It’s easy to use steel type as shorthand for quality, but that’s only one factor when it comes to the performance of a knife. Heat treating, Rockwell hardness and geometry also matter.


Sure, it’s all about the steel. Blade steel makes the knife world go ’round, right? Well, further analysis just might reveal a few additional elements that weigh in on the sharpness of a knife blade, and custom knifemakers already account for these factors when they complete their stock in trade.

In Search of “True Sharpness”

Considering heat treat, edge geometry, handle ergonomics, Rockwell hardness and other contributors, the comprehensive analysis of “true sharpness” is an eye-opening experience.

“Assume that all knives are sharp when you get them,” said maker Jerry Hossom. “The question is more about what you want to cut, and is the edge geometry and ­finish one that will do the work you want done. For example, a sharp but coarse edge will not hold up well with hard blade materials.”

Frankly, the ingredients are intertwined, and the path to true sharpness makes frequent stops along the way.

Experience in making and cutting with various materials and knife designs brings knowledge of the process and the expected results.

Physical Features

Best knife steels
ABS master smith Jim Crowell has won a number of cutting competitions through the years, including the first ABS/BLADE Show World Championship Cutting Competition in 2003. Here is the knife he used and his championship belt buckle. (Jim Crowell images)

“I can and will only speak from personal experience,” commented ABS master smith Jim Crowell, winner of numerous cutting competitions through the years, including the fi­rst ABS/BLADE Show World Championship Cutting Competition in 2003. “Since it would be difficult if not impossible to tell by looking, I would consider the reputation of the maker and his or her history.

“Not knowing who made the knife, I would consider the following: Visualize the geometry and edge treatment. The intangible here is the heat treat. If I’m looking at a knife I know nothing about, the physical features that herald sharpness and performance are blade grind/geometry and the edge. If the blade is ground from the spine to the cutting edge, it achieves the smoothest transition from ‘zero’ at the cutting edge to the full thickness of the spine.

“In my opinion, a flat-ground blade with a convex edge is the best geometry. This is the smoothest transition from cutting edge to spine irrespective of spine thickness or width.”

Steel Type & Blade Performance

Best knife blade steels
“Buying a knife from a reputable maker should be simple,” Tim Britton noted. “My questions would be steel type, Rockwell hardness, and what kinds of tools the maker has in their shop.” Tim’s gentleman’s slippy boasts a 2.5-inch blade of BG-42 stainless steel. Closed length: 3.25 inches. (Eric Eggly/PointSeven image)

Of course, a quick nod to the steel has to ­figure in. Without the steel itself, nothing else matters.

“How often have I heard that a knife holds an edge very well but is too difficult to sharpen?” Hossom offered. “They are opposite sides of the same coin. Wear resistance in cutting is the same attribute as wear resistance in sharpening, and again, it depends on the intended use.”

Discussion also surrounds standard versus premium steels, given that either is properly prepared.

“So-called standard steels have their place, but I’m not sure where,” explained maker Tim Britton. “I started with O1 in 1972 and Blackie Collins talked me into using 440C. Peer pressure… Ted Dowell, Frank Centofante, Jimmy Lile and Bob Dozier had settled on D2. New stuff like S35VN leaves them all in the dust. It takes twice as many belts to grind the blade and is max stain resistant. I’ve had great field reports from guides who dress a lot of deer, and one who is a pest control hunter and kills a lot of hogs and nutria.”

According to Crowell, everyone probably agrees that quality steel is a must.

“Some steels lend themselves to cutlery more so than others,” he reasoned. “There are some ‘exotic’ steels that truly outperform, but they are usually more expensive and harder to work with. Then, there are inexpensive steels used in cheap manufactured knives sold in bargain stores.”

Crowell looks at the long-time rub between carbon and stainless steels and likes the “10” series spring steels, 5160, O1, W2 and L6, among others. He prefers steels with 75 percentage points of carbon or more, though 5160 with 60 points of carbon is workable as well.

Rockwell Hardness

For some makers, Rockwell hardness sets the bar in potential sharpness for knife blades. Other factors are important but the scale tells the tale.

“Rockwell hardness has a huge influence on how sharp you can get a knife and how it will hold an edge,” asserted maker Murray Carter. “There may be a rebuttal out there, but I believe it is a universal truth. If hardness is related to how sharp you can get the blade and how it will hold an edge, the element of carbon is responsible for the hardness you can achieve.”

Hardness is forever linked to heat treating. Blades that are not heat treated properly just won’t stay sharp—and they are likely to fail in other performance metrics as well. Game over!

Heat Treating

Best blade steel for knives
“Unless it is heat treated properly, a steel is an undefined mass of metal with uncertain performance qualities,” custom knifemaker Jerry Hossom pointed out. “In fairness, it should not even be labeled as a specific type of steel because such a label implies proper heat treatment.” The blade material on Jerry’s fighter is the
high-performance CPM 3V carbon steel. (Eric Eggly/PointSeven image)

Proclaimed Britton, “Heat treating is critically important for any steel.”

Added Hossom, “Unless it is heat treated properly, a steel is an undefined mass of metal with uncertain performance qualities. In fairness, it should not even be labeled as a specific type of steel because such a label implies proper heat treatment. I have my blades professionally heat treated by Paul Bos Heat Treating because I simply can’t do it as well as he can, especially with high alloy, high performance grades of steel.”

Carter echoed that sentiment.

“Heat treating is so important,” he emphasized. “All our blades are quenched in water, while some quench theirs in oil. Others are just air hardened. Water quenching is severe, an extreme form, and the only one harder is brine quenching.”

Geometry

Crowell ups the ante with the bold statement, “My strong opinion is that heat treat and geometry are more important to the performance of a knife than the specific type of steel. ­The best steel in the world would not fare well if the heat treat was bad and the geometry poor.”

Stressing edge geometry, Crowell further advises, “Edge geometry is particularly important. If a maker tests his work and is confident about the heat treat but the knife is not cutting well, the edge can be adjusted or ‘rolled’ to a different shape.”

What Factor is the Most Important?

So perhaps the most important takeaway from a discussion on sharpness is the advice the pros give to prospective buyers. Assessing the sharpness and relative quality of the future cutting experience involves a discerning eye and some attention to detail. What advice do custom knifemakers over the buying public?

“I would start by looking at the knife and seeing if the geometry looked good and how well made the knife appeared to be,” Crowell advised. “­That would show the maker was paying attention to detail and would be a positive sign to me. I would ask what kind of steel was used and how it was heat treated, and by whom. ­There are several very good heat treaters out there. If the maker did the heat treat, I would ask how—oven, forge, kiln, torch? I would want to know if the maker tests his work and if he has chopped, whittled, and cut stuff.”

The inquiry is basic, Britton says, and the maker should be forthcoming with reasonable responses.

“Buying a knife from a reputable maker should be simple,” he noted. “My questions would be steel type, Rockwell hardness, and what kinds of tools the maker has in his shop. I’m a dinosaur. I won’t buy a production knife that was made by machines in batches of 20 or 30. I’m a proud member of the ABS and don’t know any steel beaters who mass produce any design.”

The sharpness of a knife blade goes well beyond the steel. The combination of steel, hardness, heat treat, edge geometry and handle ergonomics feeds the finished product. However, these are only as supportive of the knife’s function as the skill set of the maker’s hand in action.

Tsuba Time: Make a Guard for a Japanese Sword

Wally Hayes Japanese style sword
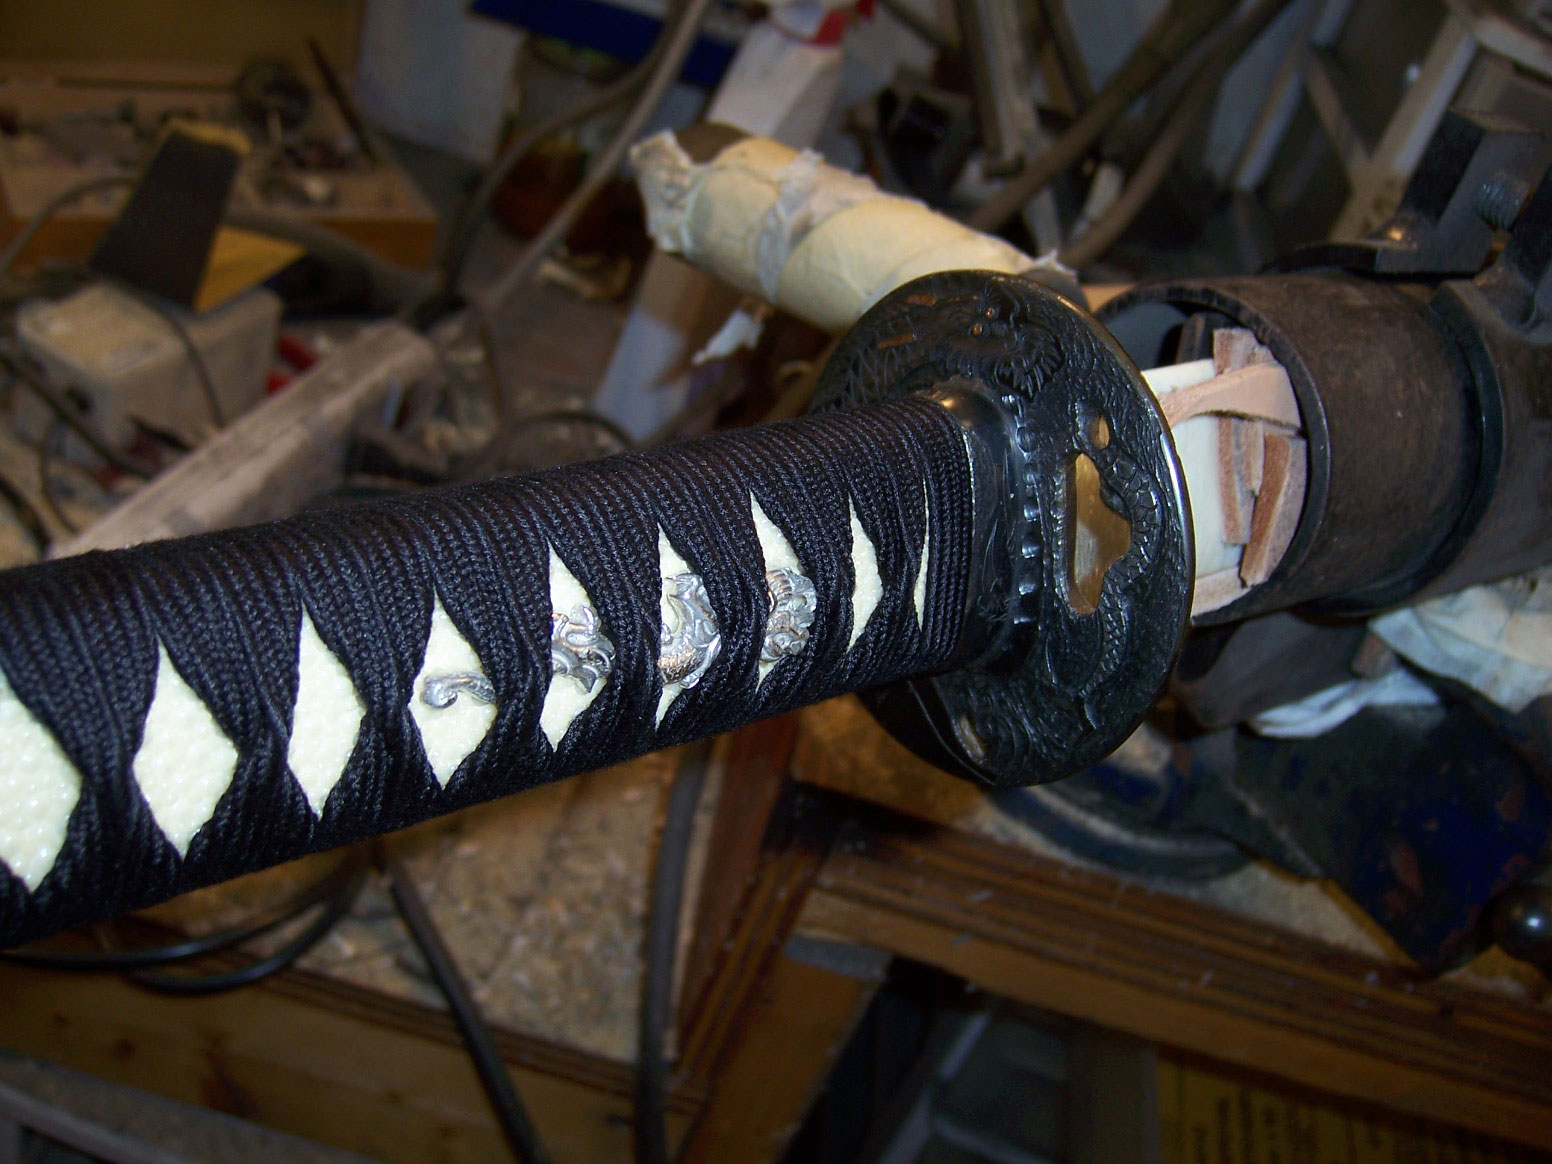
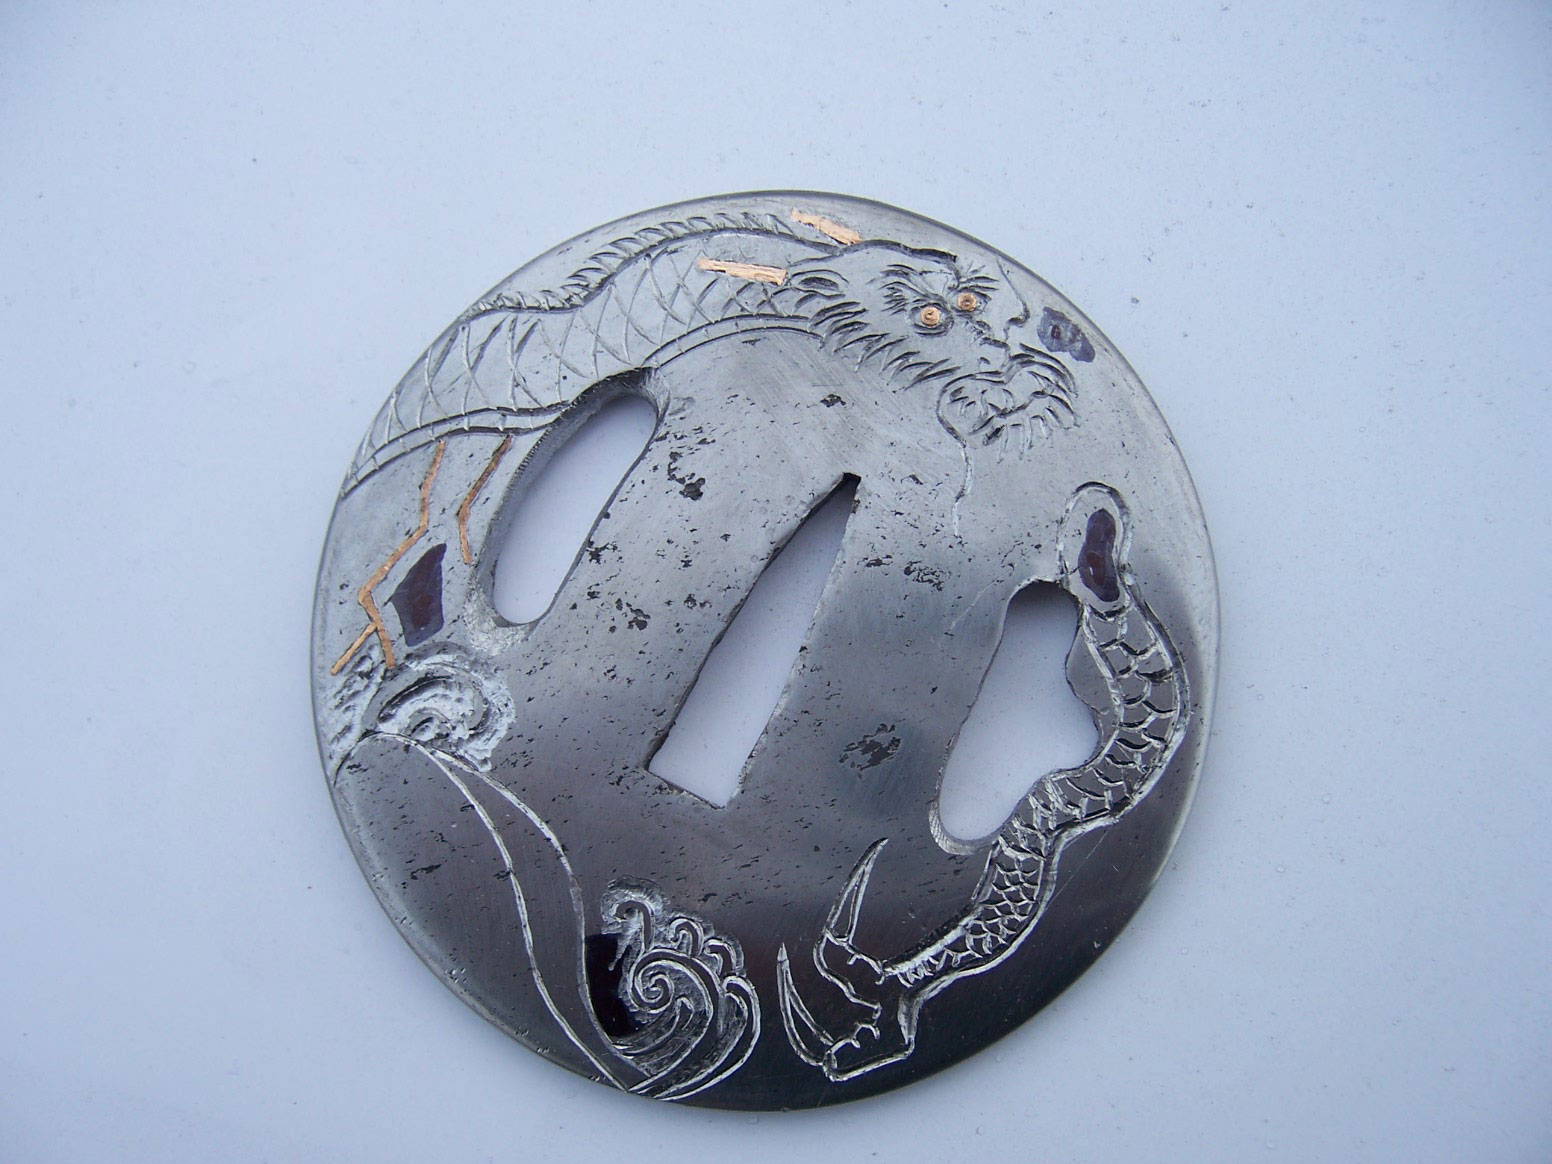
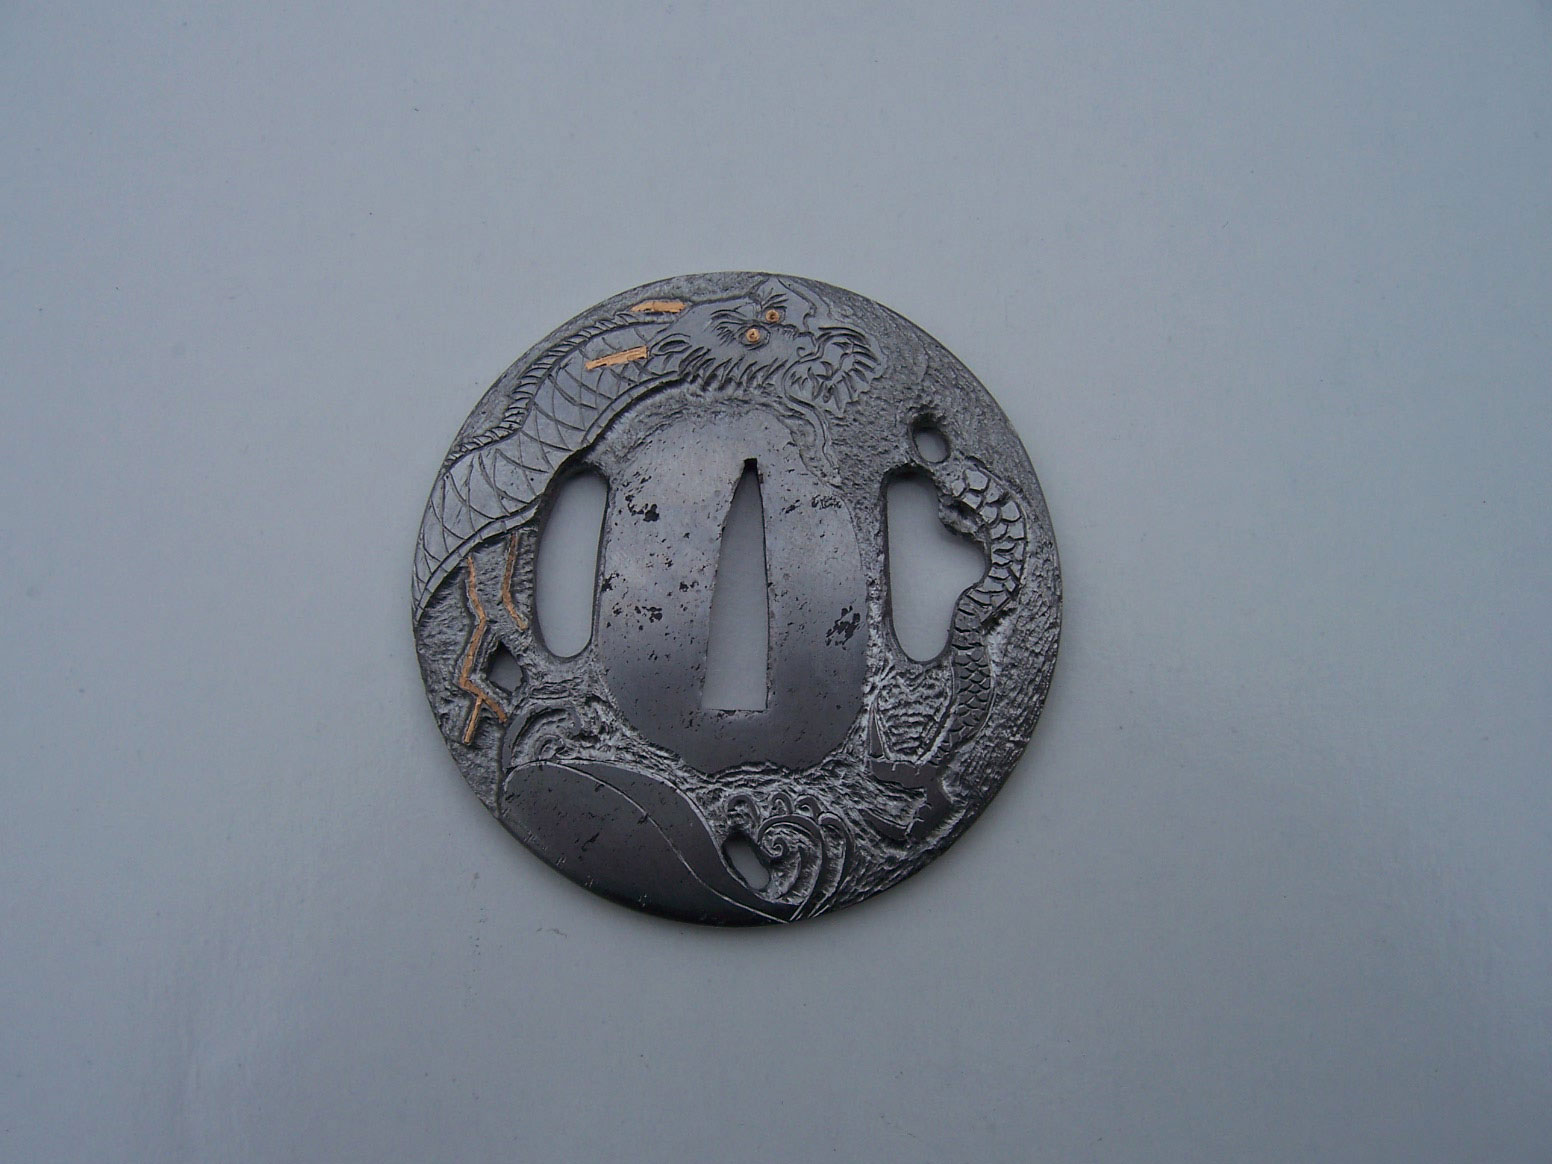
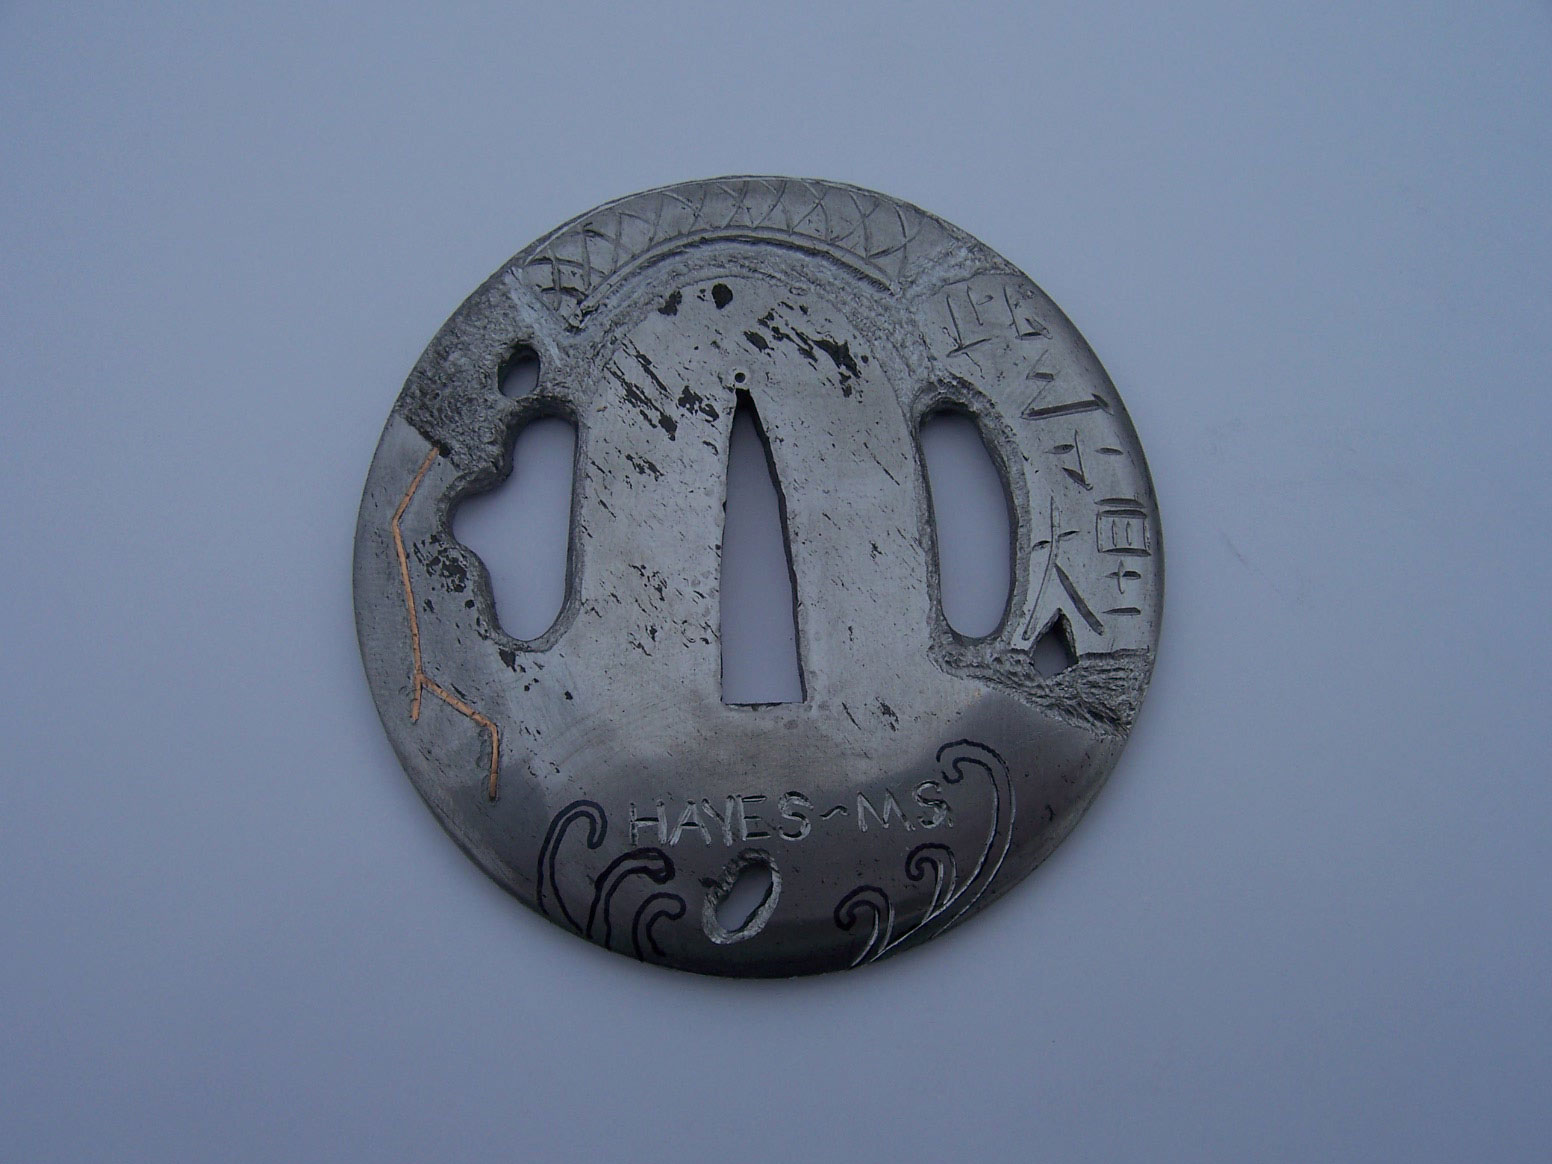
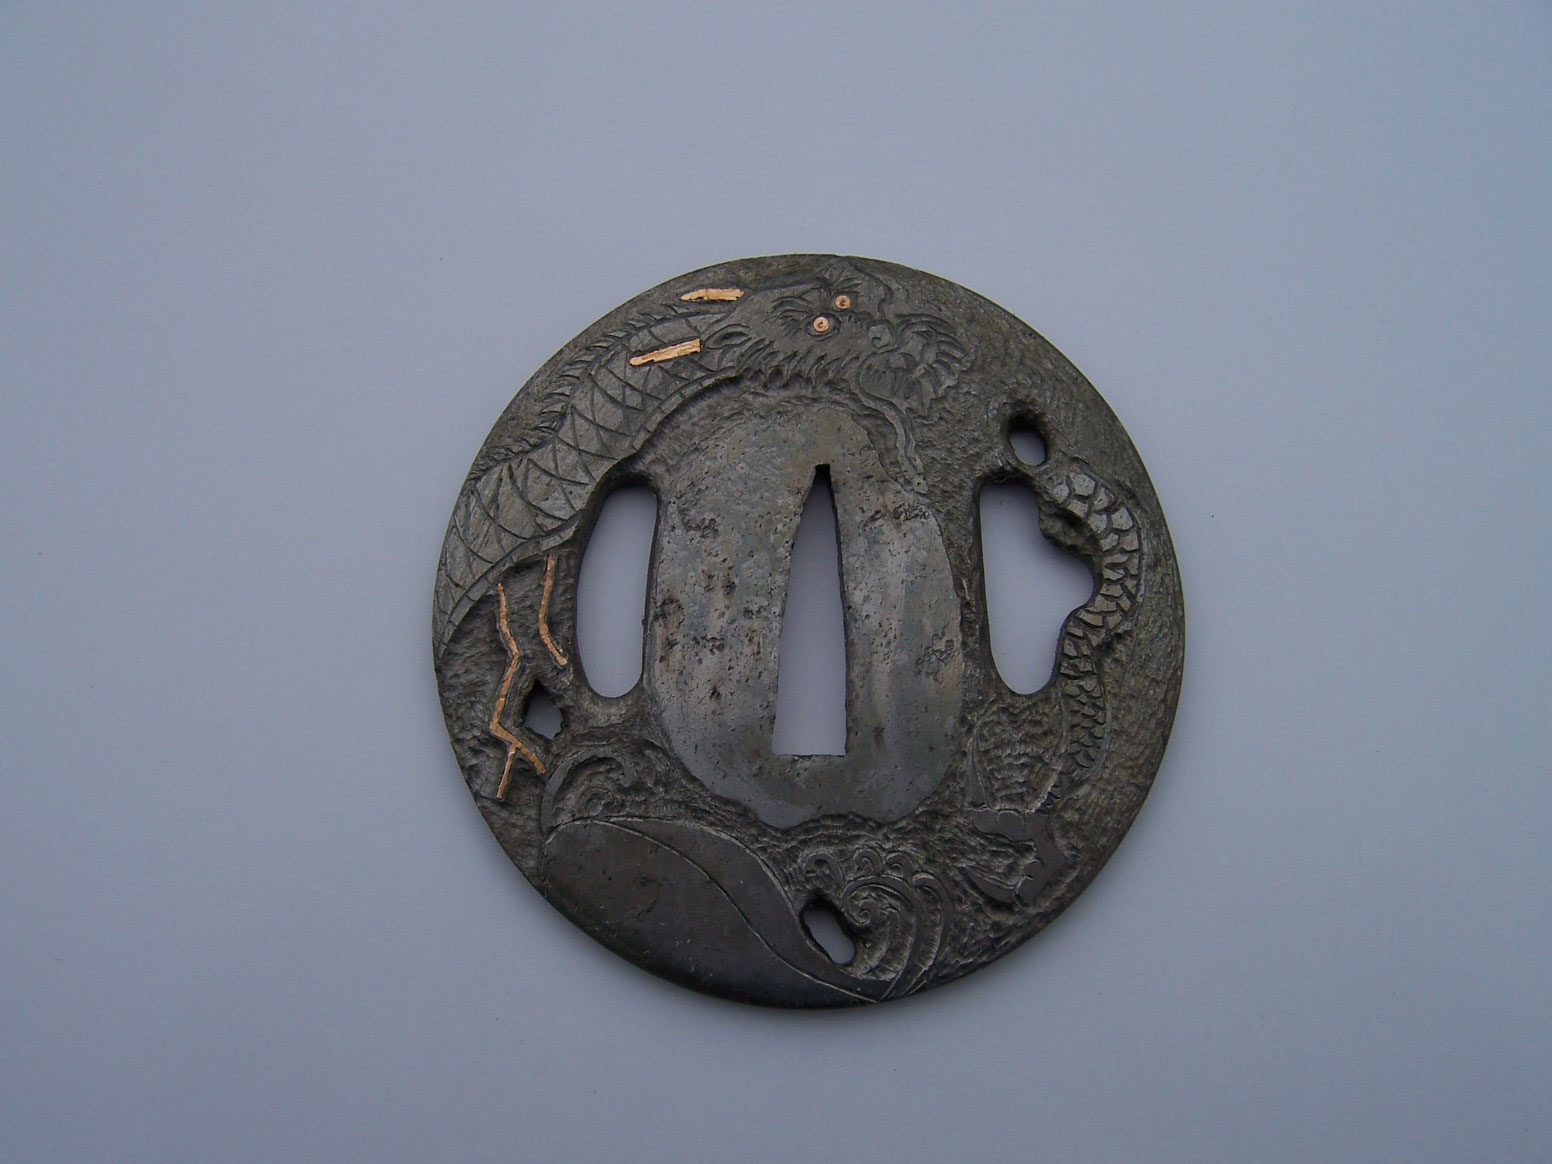
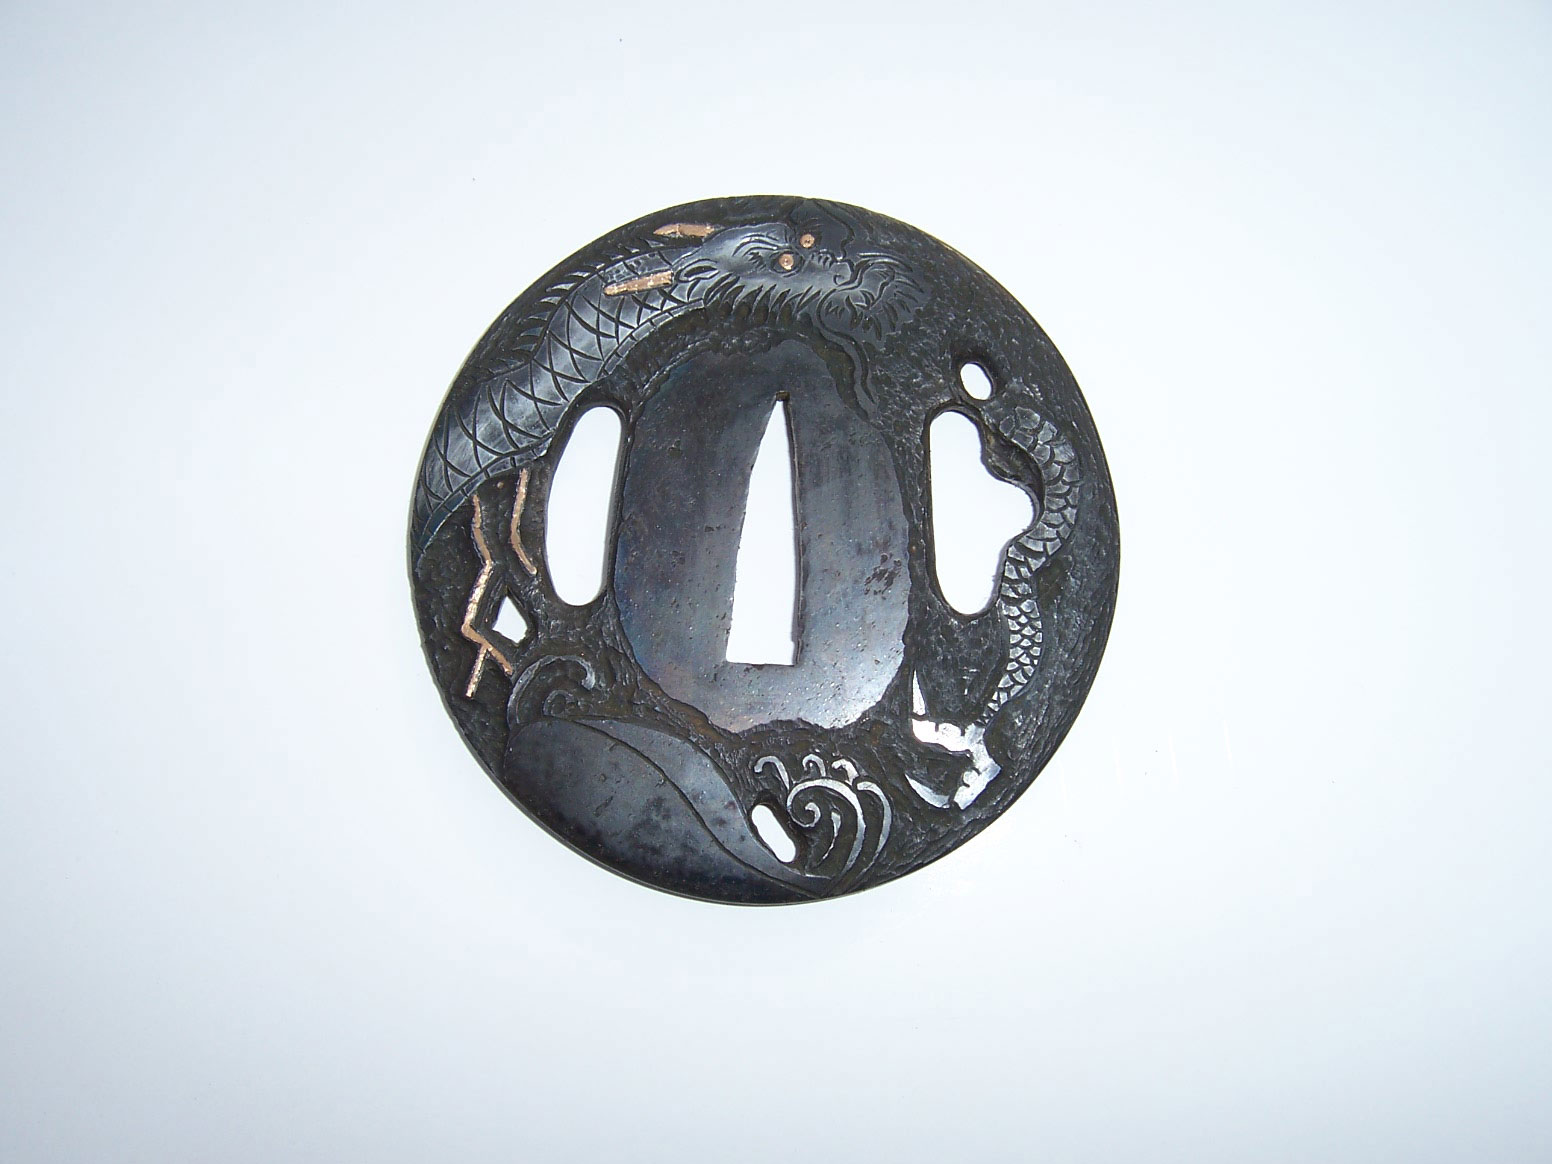
The tsuba the author made for this story appears on a katana he said he made for Axl Rose of Guns ‘N Roses fame. All photos via the author.

Making a “tsuba,” Japanese for “guard,” is one of my favorite steps in sword making. You have a chance to build something as simple or as complicated and artistic as you like.

I first started making the tsuba (pronounced SUE-ba) way too thick and heavy, and learned over the years how to refine all of my sword parts. I hope this overview helps shed some light on the subject and gives you some ideas.

I have made tsuba from damascus, mild steel, high-carbon steel and antique wrought iron. Many traditional tsuba were made from folded Japanese steel called “tamahagane.” I used wrought iron for this demonstration.

Step One: Thin it Out

Wally Hayes
Photo 1: Wrought iron forged out and rough cut round for the tsuba.

To begin, cut 3.5 inches of steel from an old wagon wheel. Forge it thinner and wider, and taper the edges thinner all the way around (Photo 1). If you leave the center a little thicker and taper the edges, it looks more balanced and is lighter. Wrought iron is soft and forges out easily and is simple to cut, sand, file and drill. Using the spray from a can of WD-40™, trace around your steel. Cut it out on a band saw and grind the shape round. Sand the tapers even, gradually progressing to finer-grit belts.

Wally Hayes tsuba
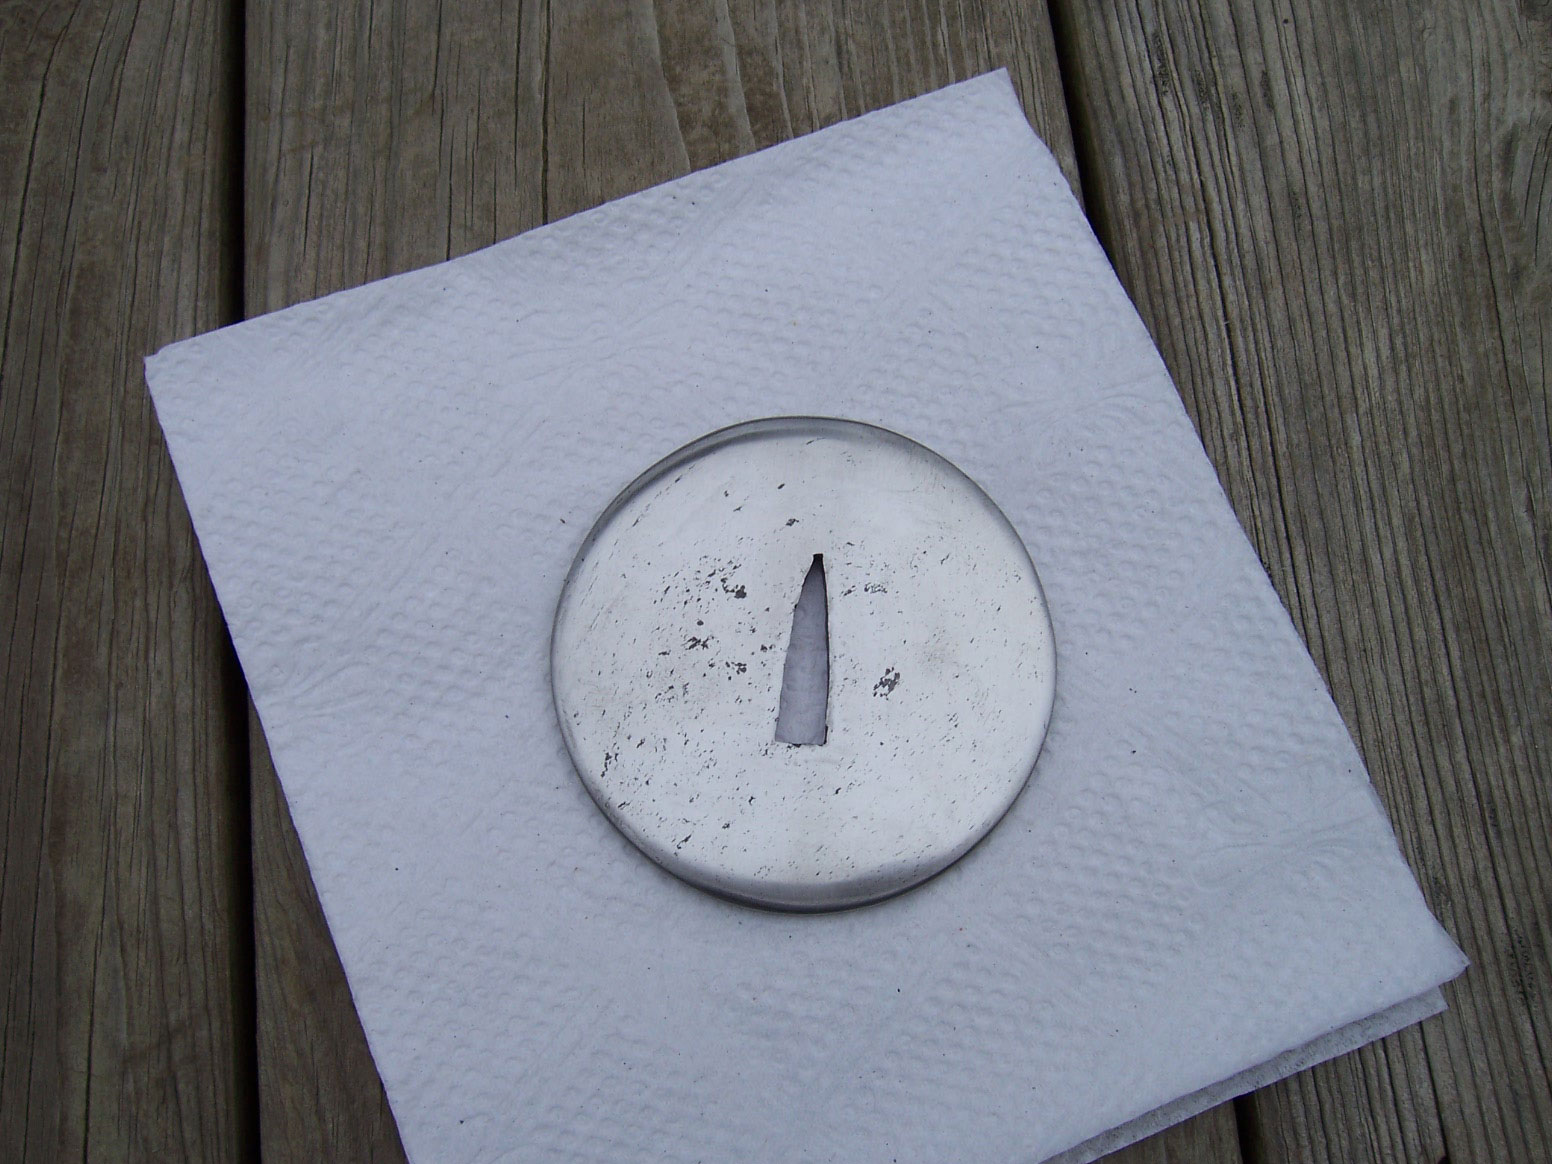
Photo 2: Sand the tsuba and start cutting the holes.

Before polishing, I drill the holes (Photo 2). I use a Dremel cut-off wheel to cut out the webbing between the holes. You can also try a jeweler’s saw. I use both.

Employing needle files, make the tang hole big enough to slide up to the “sepa” (washer) on the sword. At this point I polish the tsuba to an 800-grit finish.

Wally Hayes tsuba
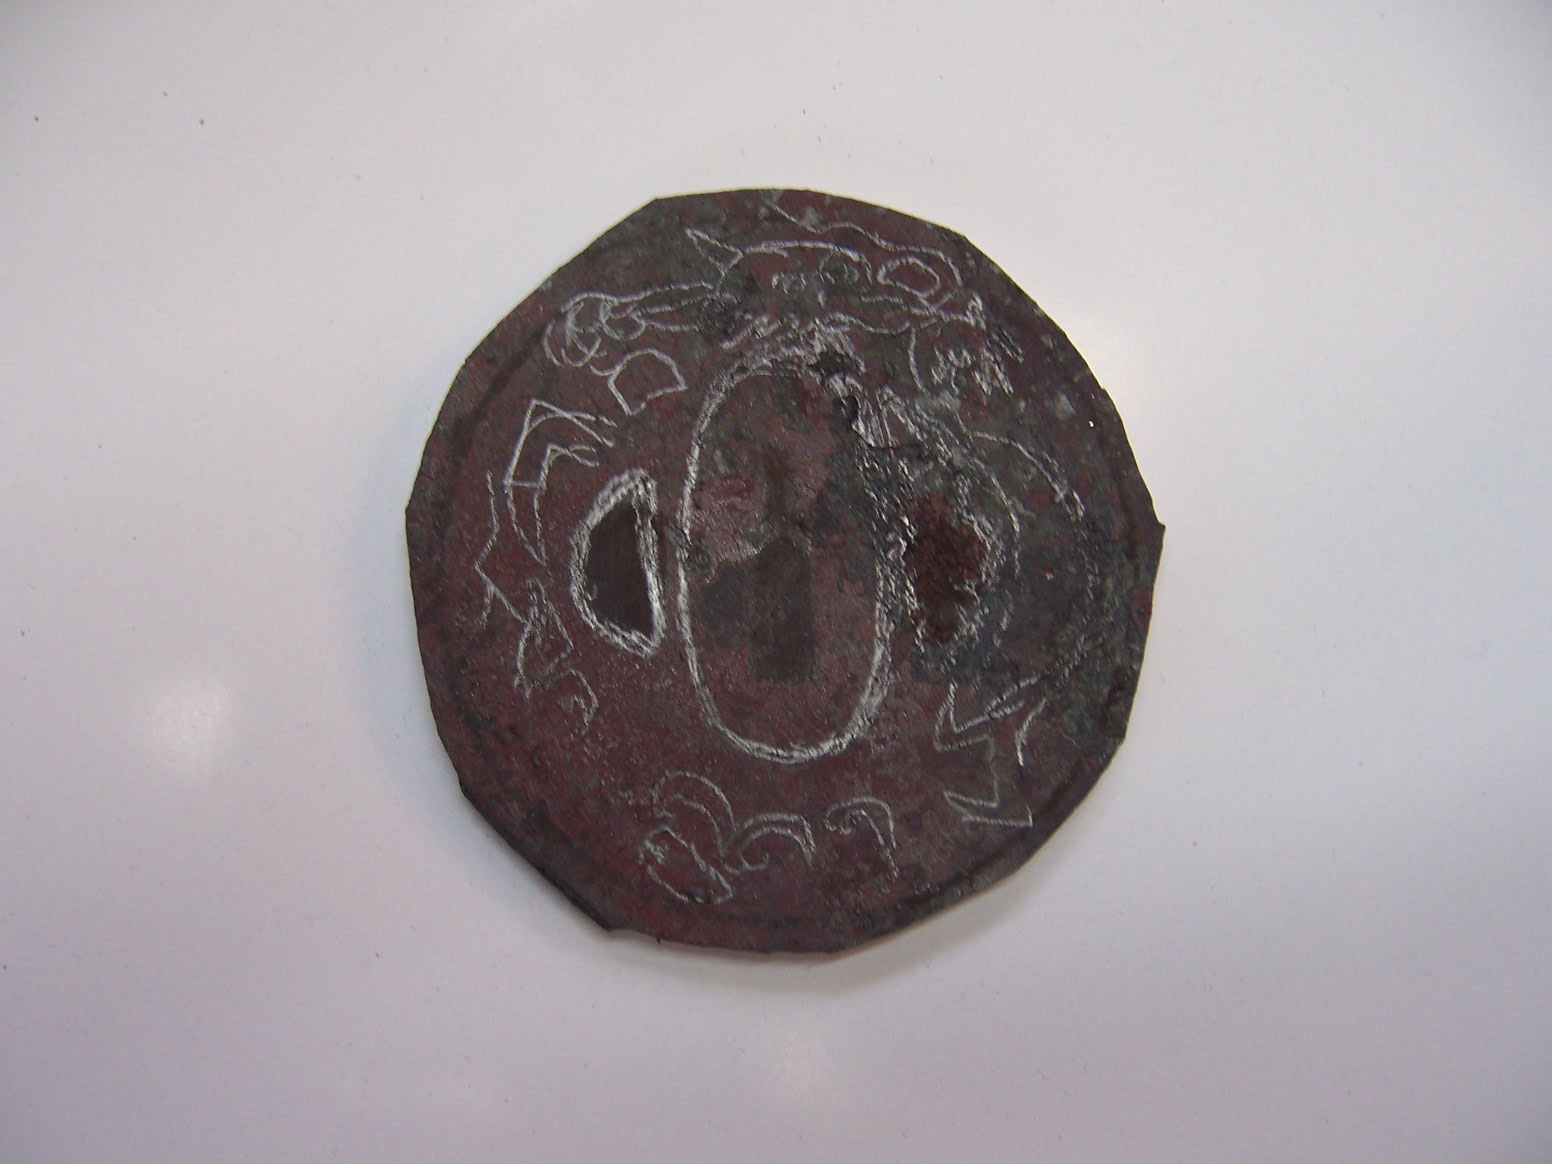
Photo 3: Draw the design with a Sharpie® and start engraving.
Depending on how detailed the engraving is, I draw my design on or transfer the design onto the tsuba (Photo 3). This one I drew the design on with a Sharpie® marker. I printed out some of my favorite design pictures to use as a reference.

Engraving and Etching

Wally Hayes tsuba
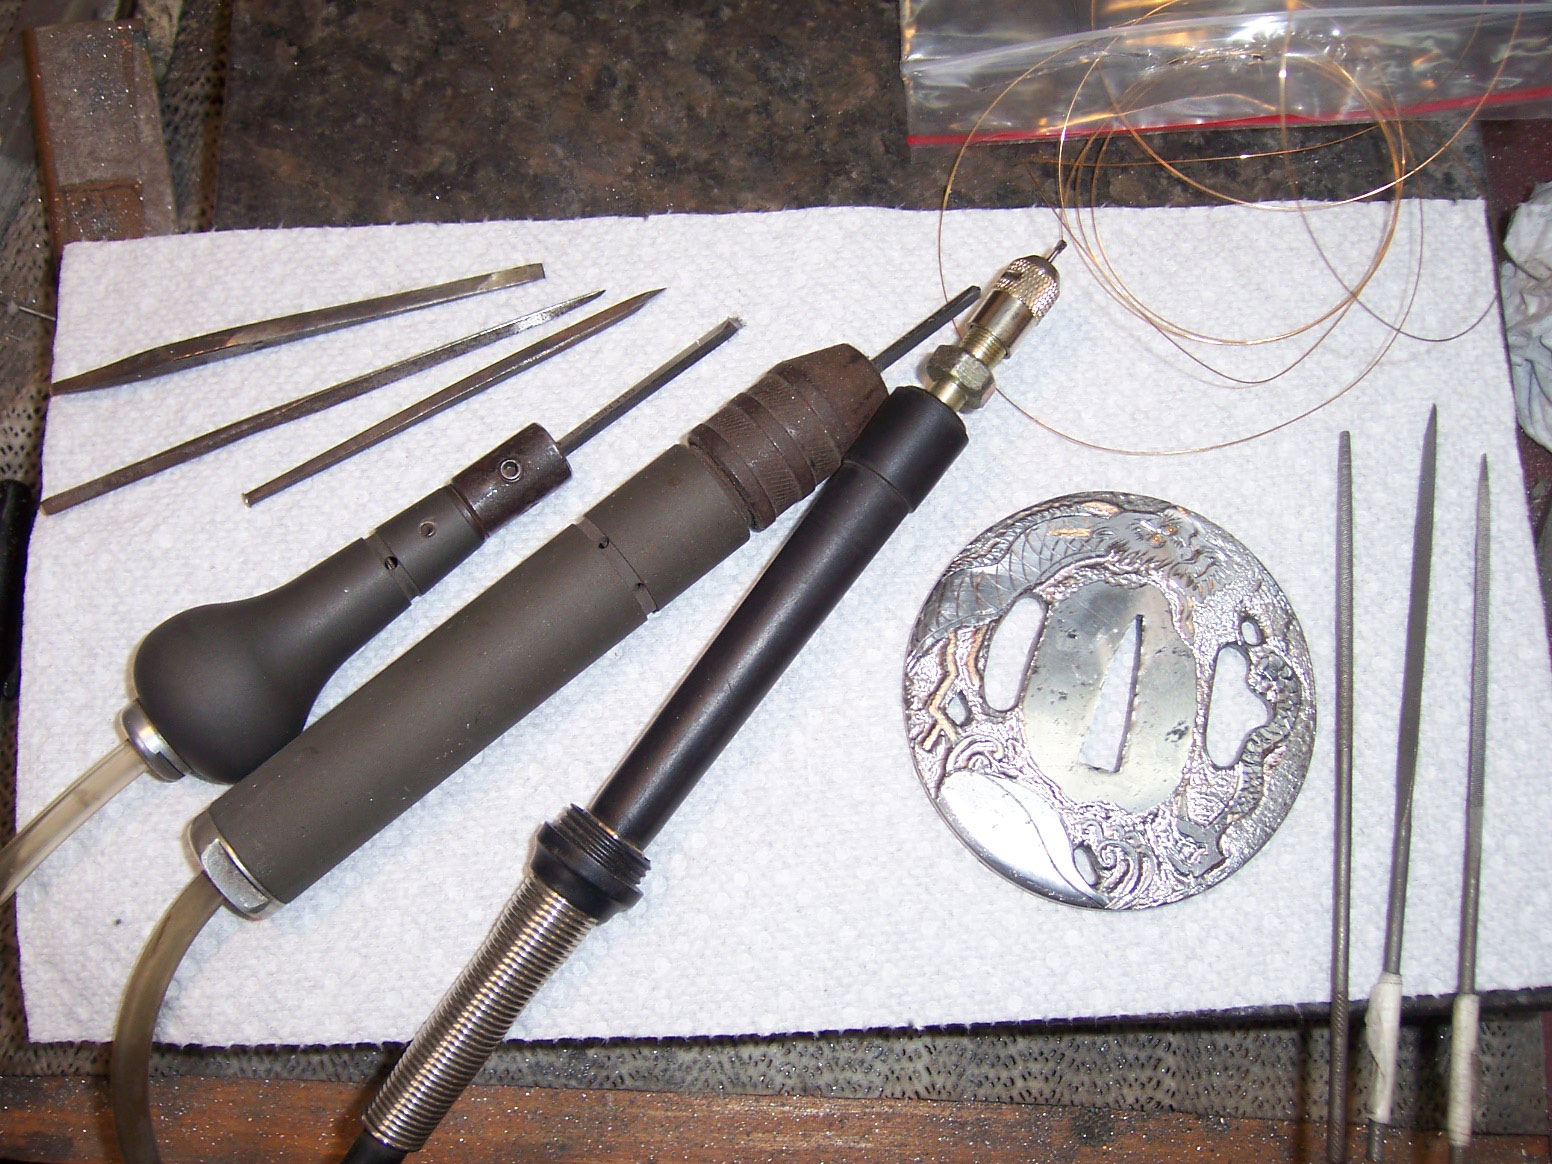
Photo 4: Tools of the trade: gravers, chisels, and high-speed air and Dremel® tools.

Now the fun begins: engraving the lines. I use square gravers from GRS and from engraver Steve Lindsey. The new gravers both work great and Steve’s Carbalt gravers got me back into engraving. The tips of standard high-carbon gravers break too often. The new gravers last a long time and take a real beating. I use a Dremel Tool and a high-speed air hand grinder to texture the background (Photo 4).
Wally Hayes tsuba
Photo 5: Inlay the gold into the tsuba.

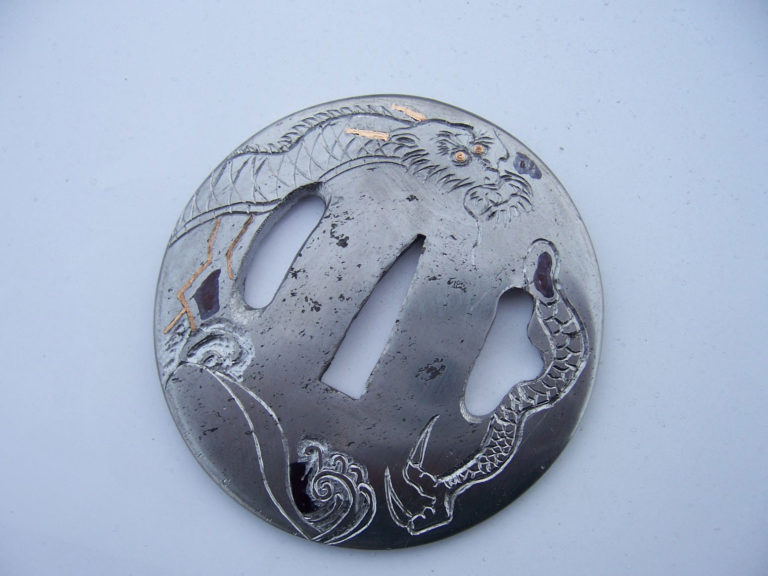
If you practice it a lot, gold inlay is easy (Photo 5). First, cut your line with a square graver, then take a small flat chisel and tap it perpendicular along the line to undercut the groove. Raise some burrs along the bottom of the groove, then tap in the 24k-gold wire.

Wally Hayes tsuba
Photo 6: Texture and carve the background.

After engraving, I etch the tsuba in acid. This brings out the pattern in the wrought iron and resembles damascus somewhat. It gives an old look and feel to the piece. I mix four parts distilled water to one part muriatic acid or ferric chloride. I neutralize the etched steel with Windex® and then lube with WD-40. To bring out the highlights on the engraving, I use a small Cratex® rubber wheel and polish the surface by hand.

When done, I apply Renaissance Wax to keep the tsuba from rusting.

Wally Hayes tsuba
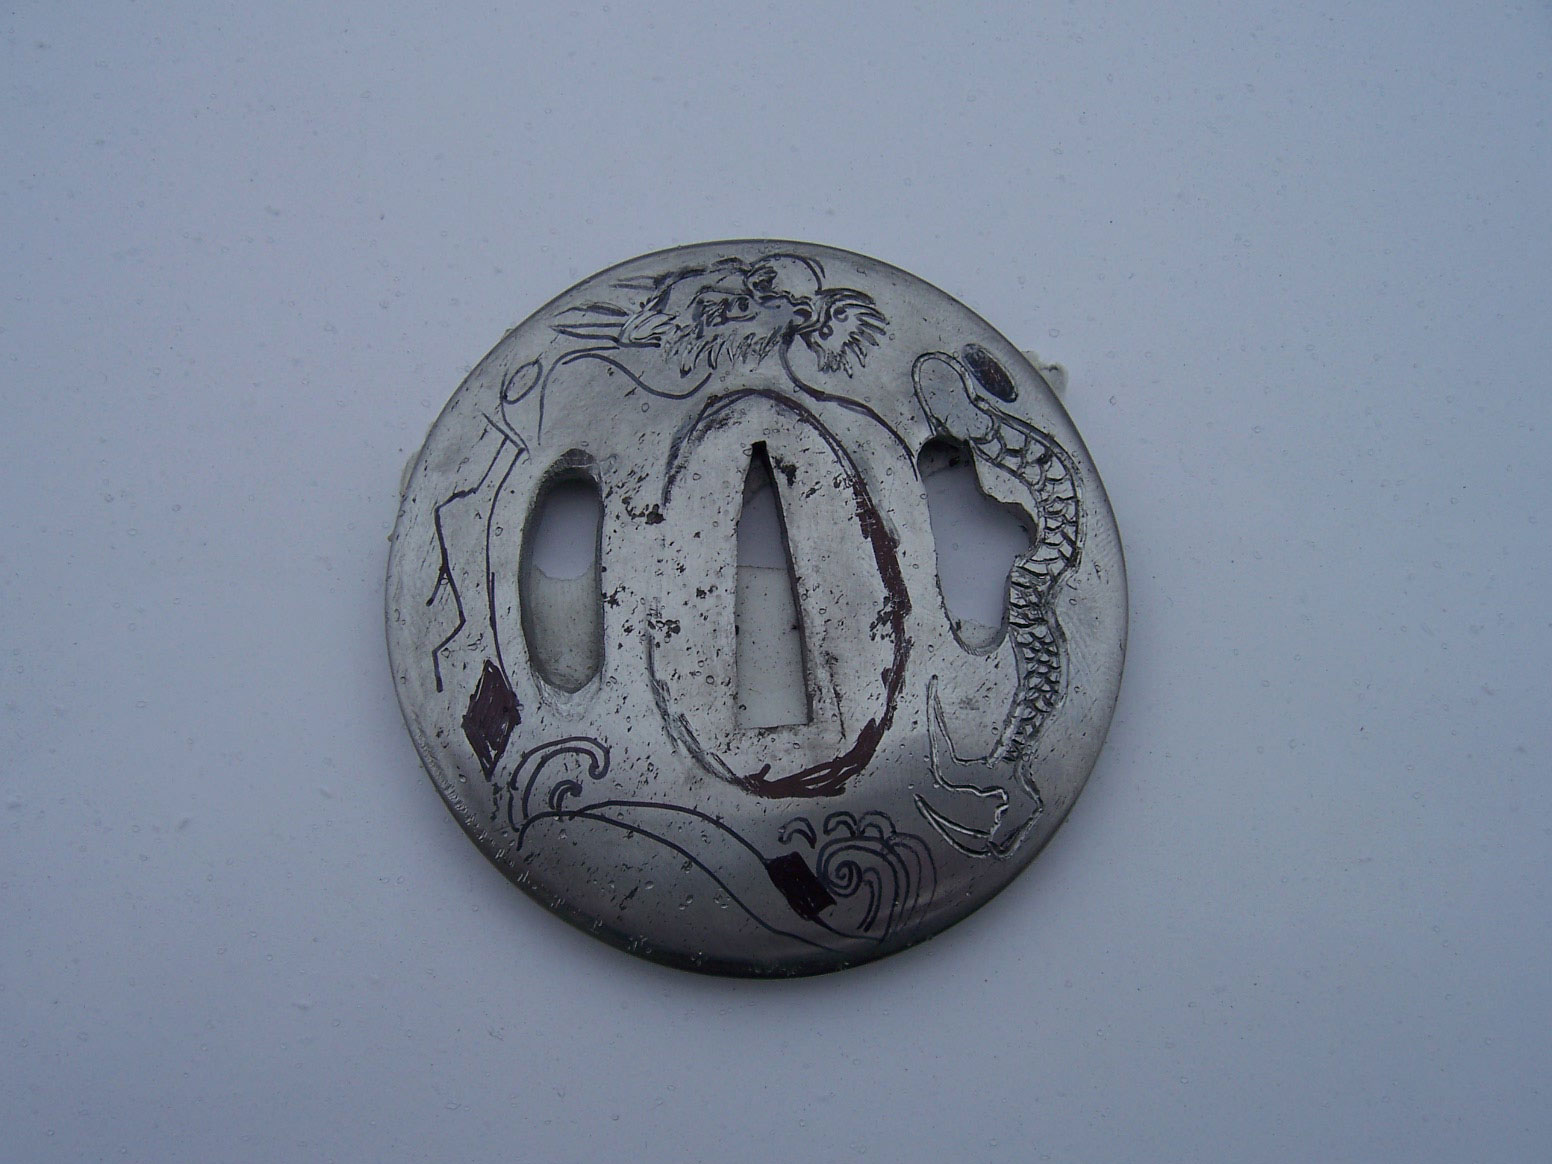
Photo 7: Carve the other side of the tsuba.
Wally Hayes tsuba
Photo 8: Blue the tsuba with cold gun blue.
Wally Hayes tsuba
Photo 9: Polished, waxed and finished, the tsuba is ready for mounting.

Keep Learning About Making Swords 

Learn swordmaking

What’s the Best Kind of Knife Grind?

Is There a Perfect Blade Grind?

Who knows when the first argument over the best blade grind started? Most likely it was a conversation between two flintknappers sitting around a cave—and the battle of which grind is the best rages on to this day. The modern tactical and bushcraft movements have brought heated debates on which grind is the best. The grind of a blade is where a key battle is won, and blade geometry varies widely. But is there a so-called best blade grind and, if so, which one is it?

Curved or Flat?

walter brend custom knives
Before becoming a renowned custom knifemaker, Walter Brend was a meat cutter, the skills of which gave him keen insight into the art of the slice. The man some call the best grinder ever shows his stuff here. (Rodney Hiers image)

According to Wikipedia, blade geometry refers to the “physical properties of a sword blade: cross-section (or grind) and taper.”

You can forget the “sword” qualifier—blade geometry applies to any blade. The three most common blade grinds in use today are hollow, flat and convex, with other grinds of note are the chisel, asymmetrical, Scandi and compound. There are others.

Before becoming a renowned custom knifemaker, Walter Brend was a meat cutter, the skills of which gave him keen insight into the art of the slice.

“What works for me is the hollow grind,” Brend says. “The hollow-ground blade is not a flat surface, it is concaved, so as you cut an object it immediately starts a separation. The bottom edge should flow from the point to the back of the blade with a recurved blade edge.”

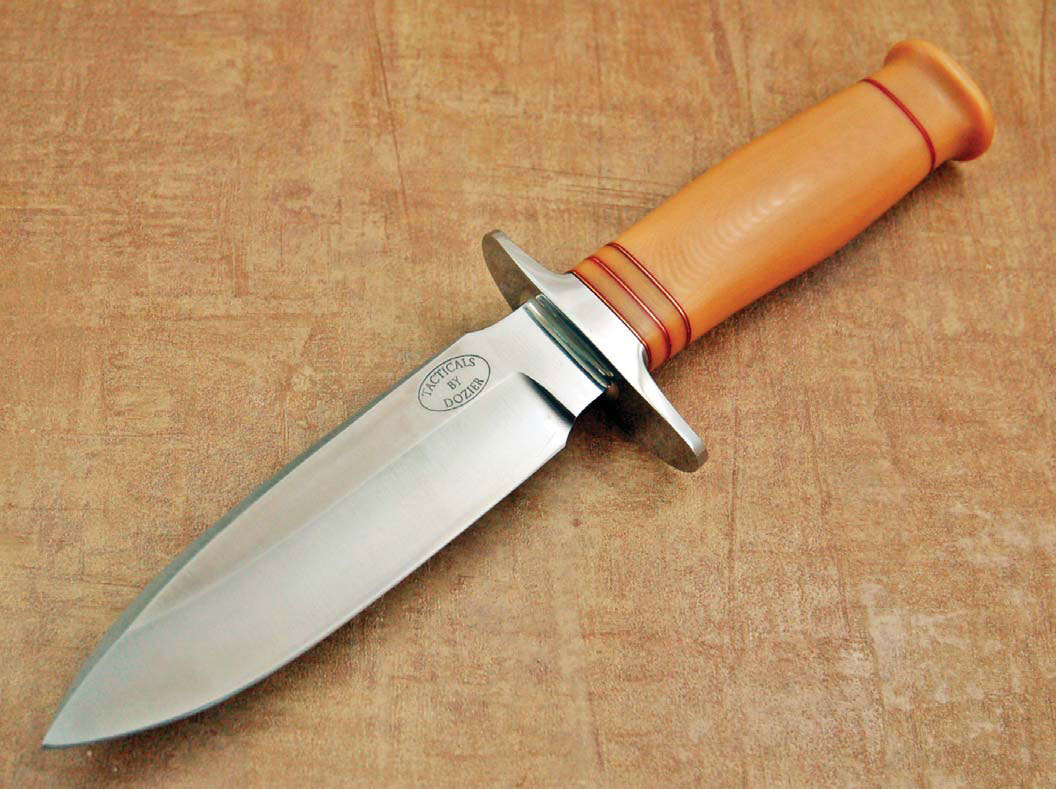
Knifemaker Bob Dozier, well known for making hard-use knives, prefers the hollow grind as well.

“Since I make mostly hunting knives, I prefer the drop-point blade style. Since Bob Loveless popularized the drop point, it’s been the most popular shape for hunting knives for many decades now. Also, for a hunting knife, the hollow grind is the best as it stays thin at the edge much longer.”

hollow grind blade
Like Walter Brend, Bob Dozier prefers the hollow grind. “For a hunting knife, the hollow grind is the best as it stays thin at the edge much longer,” Dozier opines. Bob’s fixed blade features a nice, clean hollow grind. (Kerry Peal images)

However, that’s not to say Dozier is adverse to other grinds.

“The flat grind is the best for the kitchen as it does not wander when making thin slices,” he opines. “A convex grind is great for splitting firewood.”

Award-winning American Bladesmith Society master smith Jim Crowell won the 1st Annual BLADE Show World Championship Cutting Competition in 2003 and was inducted into the ABS Hall of Fame in 2016.

“My opinion for the best blade geometry is a full flat grind with a convex edge,” Crowell begins. “This grind will give the smoothest transition from the full thickness of the spine to the cutting edge—anything else is something less.”

Crowell is also very familiar with the Bill Moran appleseed or convex grind, which is based on the Japanese hamaguri or “clamshell” grind.

“Bill Moran did like full convex blade geometry,” Crowell notes. “He ground on a round wheel and meticulously shaped the whole blade to have a convex cross section. I have cut with several of Bill’s knives and they were very sharp and had great geometry.

“The full convex grind performs in an exemplary manner, but I cannot discern any advantage in performance over a full flat grind with a convex edge. You do not just slap a convex edge on a blade. There are a myriad of variables: how thick was the edge when you started the roll? How high or low did you roll it? A short and abrupt roll may shave but will not cut well at all.”

Bob Dozier custom knifemaker
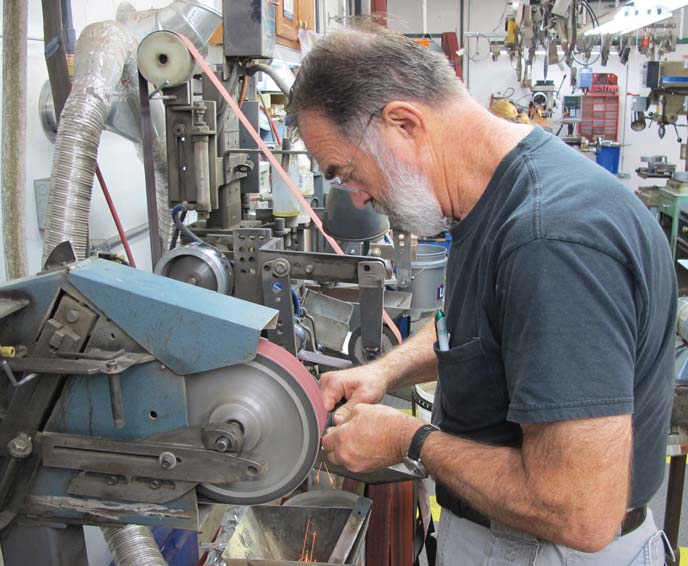
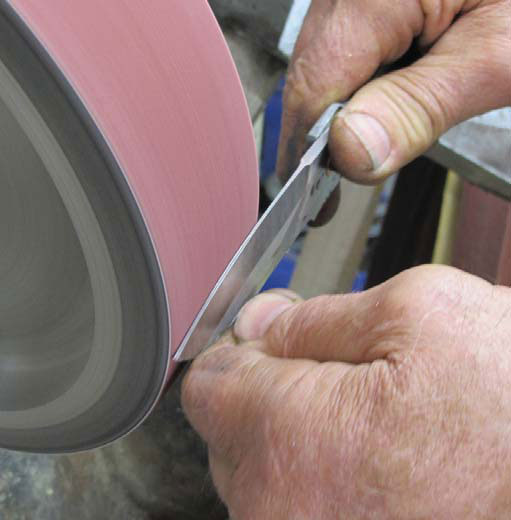
“The flat grind is the best for the kitchen as it does not wander when making thin slices,” opines Bob Dozier, here busy at his shop grinder. (Pat Covert image)

Degrees of Difficulty

Curious as to the degree of difficulty of applying the various grinds, BLADE® asked Brend, Dozier and Crowell which they thought are the most difficult to execute. They provided varied opinions.

“I think whichever one you do the most is easiest, and the one you do the least is hardest,” Crowell notes. “Once upon a time I used to hollow grind a lot, but then I started to cut a lot and it became apparent to me a flat grind would cut better overall for my use. I gradually phased out hollow grinding and now find it difficult as compared to flat grinding.”

Dozier adds pointedly, “I don’t find any of them hard. I think it depends on how you learn to grind at first. A lot of the makers today learned from someone else and stick with the grind they learned.”

Brend ranked the grinds in order of difficulty.

“Hollow-ground knives, in my opinion, are the hardest to grind,” he begins. “You have to control the blade on a wheel to form a perfect symmetrical line. In my opinion you should keep the point thick, and, at the same time, make your edges sharp and thin.

“Flat ground is next after hollow. In my opinion a true flat-ground blade should be finished by hand because the grinding belt will not allow a true flat surface. Convex is the easiest because you have no set lines or pattern when grinding.”

Order of Importance

best blade grinds
At the grinder here, Bob Dozier says blade geometry is more crucial
in terms of a blade’s cutting performance than the type of steel or
how it is heat treated. “The most important is blade geometry,” he
notes. “The type of steel and how it is heat treated has nothing to do
with how it cuts, only how long it cuts.” (Pat Covert image)

Is blade geometry the most important aspect of a blade’s cutting effectiveness, or is the type of steel or proper heat treating most crucial?

“The most important is blade geometry,” Dozier says. “The type of steel and how it is heat treated has nothing to do with how it cuts, only how long it cuts.”

Crowell differs.

“Heat treat, geometry and steel, in that order,” he opines. “If the heat treat is wrong, the rest will be of little consequence. Proper geometry is next in importance. The steel, although important, is not the determining factor. Of course, you need to have a ‘good’ steel, but it is not the steel that makes the difference. Just because you may have the latest, greatest steel does not mean you will have a superior knife. You have to do it all correctly and in the right order.”

Brend ranks the three differently.

“I think the type of steel is the most important. With proper heat treating you can vary from two-to-four points [on the Rockwell hardness scale] and still cut with the knife because of the type of steel,” he says. “Heat treating is second. With most steels you can be within two points and still cut with the blade. All heat treaters are not the same because of the equipment or their method. Geometry would be the last because if you use the proper steel, you should be able to make any blade work well.”

Flunking Geometry

custom knife mistakes
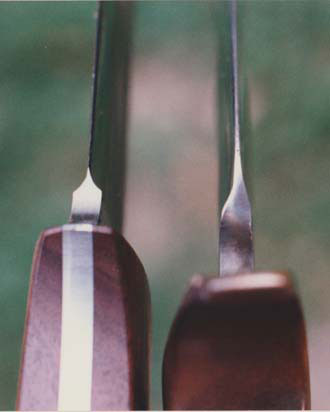
Uneven grind/plunge lines (right) as seen from the bottom of the blade are one of the more obvious and common things to look for in a bad grind. By contrast, the plunge lines at left are nice and even.

Finally, what makes a bad blade grind?

“What I look for are the grind lines,” Brend explains. “Are the sharp edges of lines rolled? Also, at the back of the blade—where the [grind] line starts—is the steel uneven? I see some hollow grinds where the edges are too thin. If you hit a hard object the blade will chip.”

Opines Dozier: “A poor grind is shown with uneven grind lines, crooked cutting edges or a non-uniform cutting edge.”

“Poor grinding is evidenced by several telltale signs,” Crowell interjects. “Uneven grind/plunge lines as one would look from the bottom of the blade. This is one of the more obvious and common things to look for. Also, the finish on the bottom of the ricasso and choil area is often neglected. You can hold a blade horizontal and look down the flat of the bevel and it should be smooth as glass with no ripples or distortions.”

Jim also notes that on symmetrical patterns such as daggers, look for mirrored-image grinds on both sides of the blade.

One interesting takeaway: The perfect grind may just be determined by how you plan to use your knife—or perhaps you may need two or more knives to cover all the bases.


Keep Learning About Knifemaking

how to make knives

BLADE’S SPECIAL EDC ISSUE

A bevy of EDC knives graces the cover of our special EDC issue: the CRKT CEO, V Nives Killabite, Hogue Knives First Response Trauma Tool, TOPS Knives Mini Tanimboca Puukko and Gerber Knife Key Note.

CRKT’s CEO is a slender Richard Rogers design with the go-to lock of many EDC folders: a linerlock. For a small EDC in damascus blade steel with a miniature tactical feel, the V Nives Killabite fills the bill. The Mini Tanimboca Puukko is a neck knife that doubles as a small bushcraft model thanks in part to its flat-back Scandi-ground blade. The Hogue Knives First Response Trauma Tool is perhaps the most utilitarian in terms of EDC: a rescue knife. And finally, the Outdoor Edge MiniBlaze is a keychain knife—the type of EDC you don’t usually need to worry about remembering to take along with you because it’s with your keys.

The images of all of the cover knives are courtesy of the participating companies. To subscribe to BLADE Magazine for just $19.99 a year, click here. 

Three Blades with an East Asian Design Flair

Three blades with an Eastern design flair are zesty cutters

For many decades Asian knives, tools and swords languished in the cutlery industry, remembered most for blades brought back by U.S. service personnel who fought in the Pacific during World War II. Times have certainly changed, thanks in no small part to a highly accomplished custom knifemaker named Bob Lum.

Of Asian descent, Lum introduced the custom knife world to his “American” version of the Japanese tanto and leaf-shaped blades circa 1980. Through the balance of the ’80s, and later in the ’90s, Lum’s tanto design was rabidly embraced by a budding modern tactical knife crowd. The tanto has been a mainstay ever since. Other Asian blade styles, such as the bolo and kukri, have been embraced as well. My team and I look at three modern takes on the “Asian Equation” here and put these intriguing cutters through the paces.

CHAMP CHOPPER: Spyderco Lum Darn Dao

source: knifecenter.com

Designed by Lum before he passed away way too early in 2007, the Spyderco Lum Darn Dao is a full-tang Chinese dao-style knife. Overall length: 16.27 inches. The 10.63-inch blade is CPM 154 stainless steel with a flared tip and a swedge grind terminating at the clip on the spine. The 5.64-inch handle has a flared base and the black G-10 scales are ample, fully sculpted and highly polished. A handcrafted dark brown leather sheath with a thumb-break retention loop comes standard. Weight (minus the sheath): 17.89 ounces. MSRP: $649.95. This is a limited edition of one production run only.

The first thing we noticed about the Lum Darn Dao is that it’s not as cumbersome as it initially looks, and then we realized it’s just shy of 18 ounces, which is not that unwieldy as large knives go. The handle is an exercise in comfort—well sculpted all the way around.

The Lum Darn Dao has a deep V-grind, making it an excellent slicer. Sisal rope was a piece of cake. Full grinds like that of the Darn Dao slice and chop well, as the edge doesn’t encounter the hump of a ricasso when it goes about its work.

One inch seemed to be the Darn Dao’s magic number. Employing a basic hammer grip, we used the blade to cut through 1-inch sisal rope like it was butter. When we challenged it on an old phone book (remember those?) with diagonal full-force chops, it repeatedly sunk in an inch deep. For long-term use we’d opt for a rougher finish or texture on the G-10 grip, but all in all the Darn Dao chopped like a champ. 

Specs: SPYDERCO LUM DARN DAO
Blade length: 10.63 inches
Blade steel: CPM 154 stainless
Handle length: 5.64 inches
Handle material: Sculpted G-10
Sheath: Leather belt carry
Weight: 17.89 ounces
Overall length: 16.27 inches
Country of origin: Taiwan
MSRP: $649.95

SHORT, WIDE HYBRID: SOG’s Kiku XR Blackout

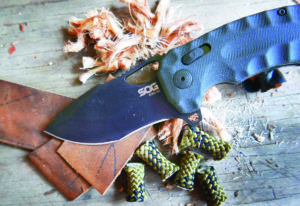
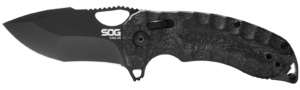
SOG’s Kiku XR Blackout is a mid-size folder 7.375 inches open and 4.3 inches closed. Designed by custom knifemaker Kiku Matsuda of Japan, the 3-inch black-coated blade of CTS-XHP stainless steel is a hybrid of the tanto style with some interesting twists. The main grind is recurved and there is a swedge grind on the spine that ends in a harpoon dip. The blade opens via a kidney-shaped hole in the blade or by an optional gimped flipper. The black handle has sculpted G-10 scales over black stainless steel liners, and SOG’s XR pull-down slide release unlocks the blade. On the rear is a blade-tip-up pocket clip. Weight: 5.19 ounces. MSRP: $189.95.


SOG’s Kiku XR Blackout has a hybrid version of the American tanto blade. The recurved portion of the main grind does a great job trapping leather and rope, and the tip finishes the job as it is pulled through.

The Kiku XR Blackout’s blade is shorter and wider than the traditional tanto pattern. We tested it first on 1.5-inch-wide harness leather, executing straight cuts and pull-throughs. The modified edge cut very well, though we almost ran out of blade while pulling upward through the leather strip.

Rope was much easier. The recurve of the blade trapped the rope, and the secondary grind from the dividing line—or yokoke—to the tip finished the job. It should be noted not all tantos have a yokoke; some simply sweep through upward to the tip. The cuts on 3/8-inch rappelling rope were clean as a whistle, while the edge tended to shred thicker 1-inch sisal. The handle was plenty comfortable and added to our cutting pleasure.

SPECS: SOG KIKU XR BLACKOUT
Blade length: 3 inches
Blade steel: CTS XHP stainless
Blade type: Hybrid American tanto
Handle material: Sculpted G-10
Special features: Multiple blade grinds
Carry: Pocket clip, blade tip upWeight: 5.19 ounces
Closed length: 4.375 inches
Country of origin: Taiwan
MSRP: $210.95

2-HAND HOSS: The TOPS CUMA Kage

photo source: knifecenter.com

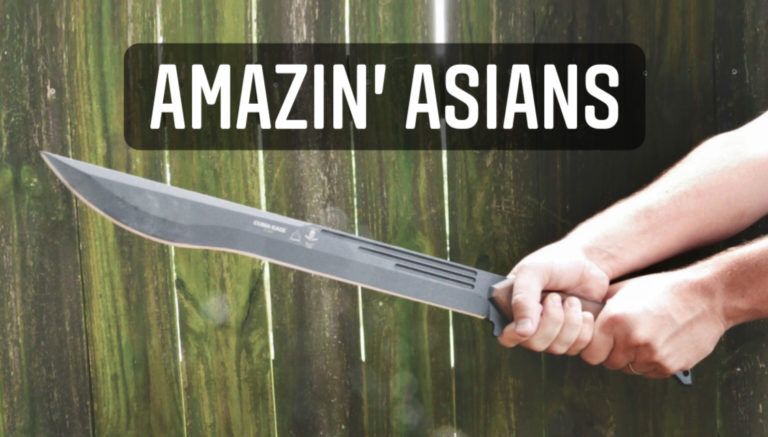
The TOPS CUMA Kage is a tour de force by martial arts guru Sijo Wayson Johnny Tsai. Overall length: 23.75 inches. The 15.5-inch blade of 1095 high carbon steel sports TOPS’ Black Traction Coating. The lengthy handle is 8.25 inches with Micarta scales sized for two-handed delivery. The blade is a hybrid straight sword pattern blended with 7 inches of kukri bulge at the tip to give it a bit of utility to go with its, ahem, badassery. It includes a full-length black Kydex sheath with a dangler/attachment ring. Weight: 31.5 ounces. MSRP: $360.

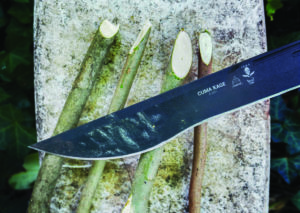
Using one hand or two, the author found the CUMA Kage cut brush equally well. However, as you might expect, you can take on much heavier tasks with it by using both hands.

To test the CUMA Kage for its utility billing, we took it outside for brush-clearing duty. We’ve always admired the kukri and have cleared an acre or two over the years with one, so this long send-up of the chopper intrigued me. We found out quickly we could use the CUMA Kage with one hand or two, which gives it a big leg up on its smaller cousin. The Micarta handle is well filled out and plenty grippy. One-handed we were able to easily whack through half-inch-thick green hardwood stalks and branches. Two-handed we sliced through stalks three-quarter of an inch with ease, and 1 inch as long as we had clearance to pull back for a full stroke. Though not the CUMA Kage’s original intent, it does have formidable utility.


Specs: TOPS CUMA KAGE
Blade length: 15.5 inches
Blade material: 1095 carbon steel
Blade finish: Black Traction Coating
Handle length: 8.25 inches
Handle material: Micarta
Special features: Kukri blade tip 
Sheath: Kydex w/leather dangler
Weight: 31.5 ounces
Overall length: 23.75 inches
Country of origin: USA
MSRP: $360

MELONIOUS ASSAULT

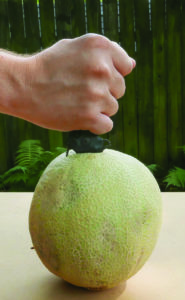
After testing the blades on a variety of fare, just for fun we took to the backyard to let them each have a go at a cantaloupe. Leading off with a reverse grip on the SOG Kiku XR, we stabbed the forlorn melon to the hilt. As stubby a version of the tanto as the Kiku XR’s blade may be, the cantaloupe’s pithy skin gave into the knife’s wishes quite easily.

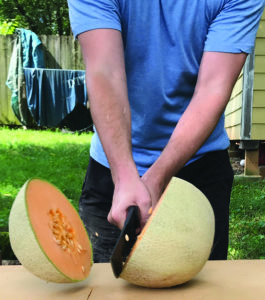
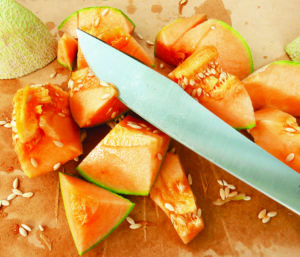
Next up the TOPS CUMA Kage tried the task of halving the cantaloupe in one fell swoop, which we captured in burst mode on my neighbor’s IPhone. Mission accomplished. Finally, we used the Lum Darn Dao to “prepare the meal” by using the blade in quick, rapid-fire chops. The sword’s deep V-grind—not unlike that of a chef’s knife—performed admirably.

Like an oversized chef’s knife, the Lum Darn Dao deftly whacked the cantaloupe into chunks with speed and style.

BEASTS of the EAST

While we often think of knives and swords of an Asian design in the context of combat and martial arts, it’s easy to forget that many Eastern blades were used for everyday utility as well. The tanto was an everyday carry by the Samurai class in Japan, and men and women alike carried a smaller version, the kaiken, aka kwaiken. The chisel grind was not typical on tantos as we see on some of them today, but on knives for culinary purposes. The Japanese kiridashi, which is rapidly gaining a toehold in the cutlery world, was also chisel ground and used for wood carving and marking.

The wicked Indian/Nepalese Kukri was employed in combat, but is primarily a tool for clearing land and is used widely for bush whacking today. Even the Indonesian karambit was considered a working knife by its users. If nothing else, the distinctiveness of Asian cutlery design has added richly to our knowledge base of cutlery and given us a plethora of modern-day knives to explore.

Advertisement

Must Read Articles

Read this before you make a knife

Knifemaking 101 – Read This Before You Make a Knife

  by Wayne Goddard My experience has taught me that there's nothing like digging in and getting started. I've often said the hardest part of the...
how to forge damascus steel

How to Forge Damascus

Advertisement
Advertisement