Cyrus Vance, Jr., Allegedly Turned Blind Eye to Weinstein Accusations
Cyrus Vance, Jr. (Image via manhattanda.org)
The Manhattan district attorney notorious for his “gravity knife” prosecutions, Cyrus Vance, Jr., is now being investigated for apparently turning a blind eye to a 2015 sexual assault allegation against disgraced Hollywood mogul Harvey Weinstein.
Gov. Andrew M. Cuomo directed the state attorney general on Monday to review how the Manhattan district attorney, Cyrus R. Vance Jr., handled a 2015 sexual assault allegation against the movie mogul Harvey Weinstein.
Mr. Vance decided not to prosecute Mr. Weinstein even though his accuser, an Italian model, had provided police officers with a recording of Mr. Weinstein apologizing when she asked him why he had groped her breasts the day before.
Mr. Vance said at the time that there was insufficient evidence, a defense he repeated last year after an outpouring of accusations against Mr. Weinstein reopened scrutiny of the decision, and also cast light on Mr. Vance’s acceptance of campaign donations from Mr. Weinstein’s lawyers.
Noel decided he didn’t want to go to college just yet. He also knew he couldn’t move down to San Francisco and pay rent on both an apartment and a steel-working shop. “I decided I could make my shop inside a trailer,” he says. “Then I wouldn’t have to pay rent, and I could go anywhere and make knives.”
These days he drives up and down the state: to Malibu and Santa Barbara for craft shows, staying afterward to surf, or up to the Sierra, where he can ski in his off hours. Sometimes he sets up his outdoor workshop by the side of the road, opening up the trailer to turn on the propane forge and set up his belt grinder, which runs on generator power.
One wonders, though, what retirement will look like when the getting is this good at 19. Read the full article here.
Video: Make a Knife From an Artillery Shell
The videos explaining how to make knives out of [crazy thing] sure are entertaining, and they reveal where a mastery of knifemaking basics can take you. Here’s one featuring an 88mm artillery shell.
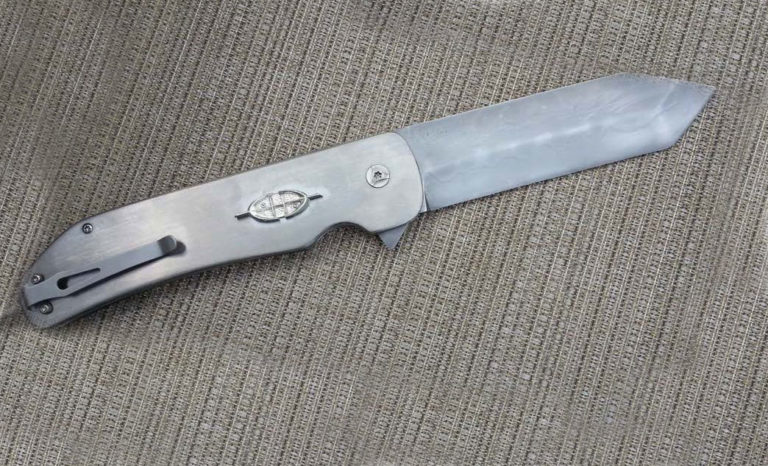
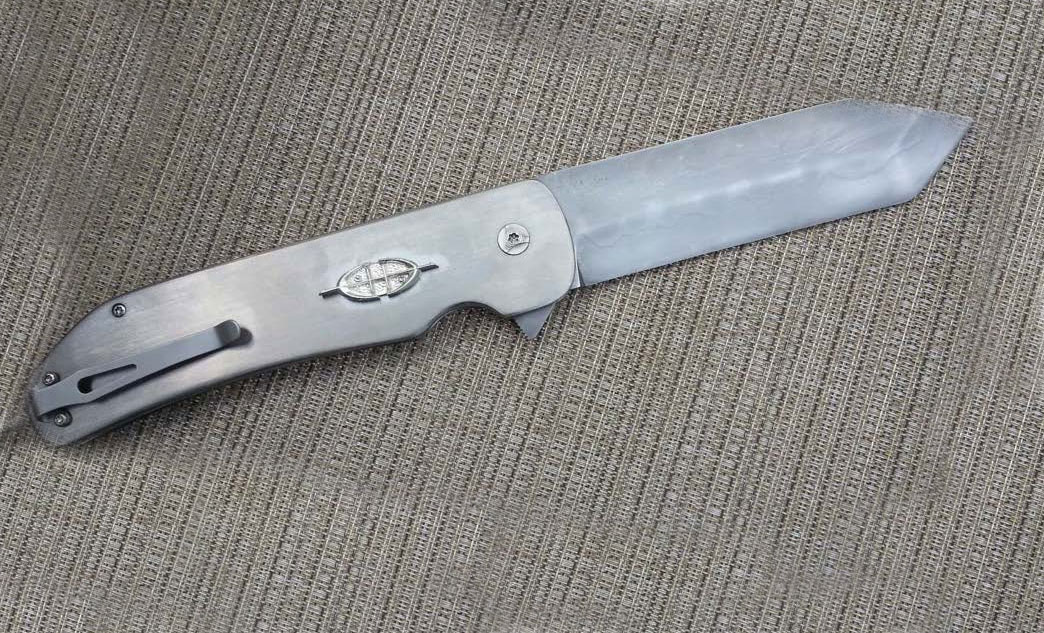
The author’s finished flipper folder—sanded, polished and ready to go!
Folder making has advanced so much in the past few years. Now, flipper folders are the hot new ticket.
Following is an overview of the steps in making a modern flipper by hand.
Draw It Up
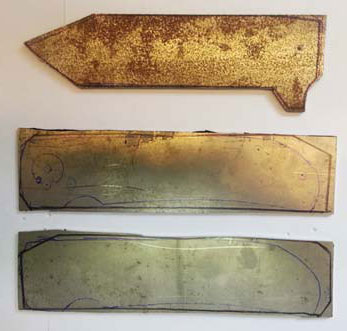
The parts are all cut out. The holes in one handle side (center) are center punched and ready to drill.Design the knife parts on clear plastic so you can see where to locate everything.
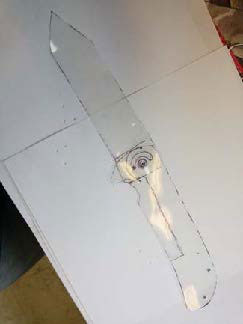
To begin, draw designs on paper and transfer them to clear plastic. Cut out the designs of the blade and handle from the clear plastic. Overlap the tang of the blade on the handle and insert a needle through both pieces where the pivot pin will be.
From there, fold the blade onto the handle and adjust the design as needed.
Next, trace around the plastic handle on a titanium sheet. I use titanium in a 1/8-inch size for the top part of the handle and .070 inch for the two bottom pieces. Trace the blade and cut it out.
Know the Drill
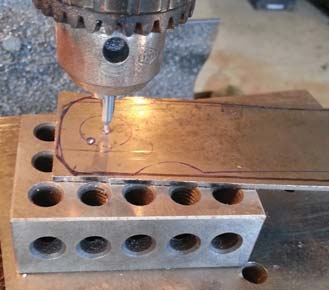
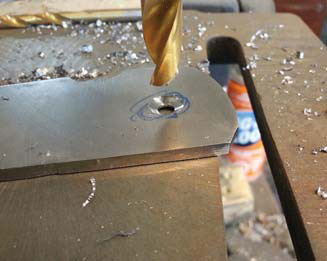
Counter sink all the holes a small amount before drilling them with the 1/16-inch drill bit.
Making folders is mostly about drilling holes. Drill out one plate of titanium with 1/16-inch holes. Place another plate of titanium underneath the drilled-out plate and clamp the two together. Turn it over and drill through the second plate.
Starting with the pivot hole, place a ½x1/16-inch hardened dowel pin in it so the two plates won’t move. Next, drill the end of the handle and put a pin in it.
Continue drilling, clamping and adding pins where your stand-offs go. Each time you drill a hole, take the plates apart and de-burr. A hand drill with a four-flute counter-sink is handy for de-burring.
Start drilling all the holes with a 1/16-inch drill bit.
This flipper will have an internal stop pin, so don’t drill all the way through the top plate. However, do drill through the bottom plate—the .070-inch one. From here, affix the plates with 1/16-inch dowel pins. Clamp, remove the pivot pin, and drill and ream to 3/16 inch for the pivot pin. De-burr and reassemble. Drill and ream a 1/8-inch stop pin.
CAUTION: Do not go all the way through the top 1/8-inch plate! Countersink the outside plates for the 2-56 screw heads. I use a #20 drill bit for this.
Pivot, Washers & Pins
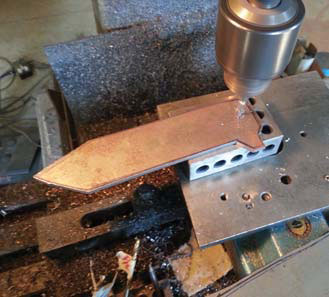
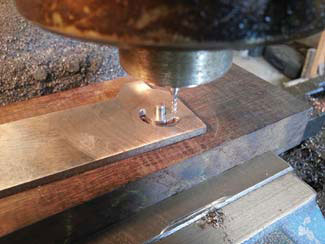
Mill the slot for the stop pin.
Now it’s time to countersink the two pivot screws. Different types of spacers and stand-offs can be used on a folder. For this flipper I used ones with shoulders from Knifekits.com. Normally I use custom-made stand-offs from Sheffield Knifemakers Supply. The shouldered step-down stand-offs prevent any unwanted movement in the blade.
I open up the holes for the stand-offs to fit in with a 1/8-inch reamer. Actually, I use a reamer .001 inch larger, so it is .126 inch.
The cool new thing with folders is pivot washers with ball bearings. There are many different types from which to choose. Michael Burch recommended washers from Jantz Supply to me at BLADE Show.
Countersink the pivot screws.
You have to sink the washers down into the scales a bit. I use a 3/8-inch, four-fluted end mill to do this step. First, I index a 3/16-inch end mill into a hole on a plate of steel held in a mill vise. I lock down my table and take out the 3/16-inch end mill and put in the 3/8-inch one using a dial indicator to show how far down I am drilling.
Most tactical folders are going pretty thick with washers .020-to-.040-inch on each side of the blade. I sink the washers down so they and the blade are the same thickness as the stand-offs. You want the space between the blade and washer to be equal to the space between the stand-off s or spacer material. Drill and ream a 3/16-inch pivot hole in the blade. Mill a half-moon slot for the 1/8-inch stop pin.
Many makers put the pin in the handle at about the 7 o’clock position when open. Grind the pivot and stop pins down to the proper length. (Author’s note: Grind the pivot pin so it is not exposed past the top of the countersunk hole of the pivot screw. Grind the stop pin so it floats between the two scales.) Grind the 2-56 screws down so they don’t touch each other when they’re screwed into the stand-offs.
Profile the blade and grind the tang at a 7-degree angle. I use a 7-degree block of Micarta® held up against my disc grinder for a guide.
Lock & Detent
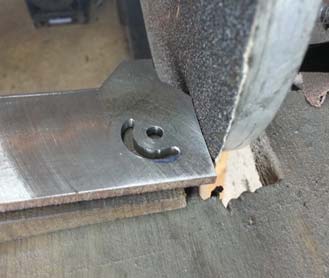
Grind the tang to fit the lock.
Now it’s time to cut the lock. Place the blade on the bottom liner with the pivot and stop pins in place. Open the blade and scribe a line with an X-acto™ Knife behind the tang onto the liner. Draw a line 3 inches long with a marker down the scale. Clamp in the mill, and, using a slitting saw, cut the 3-inch length. Use a band saw to cut the short face, which will be the lock. Using a cut-off -wheel attachment in a Dremel® Tool, clean up the end of the lock.
On a locking-liner or flipper folder, the lock is made by bending a tab of the titanium liner over so it engages with the end of the tang of the blade. The end of this tab must be coated with carbide. The machine that does this is a little hand-held micro welder and is called a carburizer. Simply run the rod onto the end of the titanium lock and it welds a coating of carbide onto the titanium. This produces a smoother action on the folder.
You can also flame harden the lock by heating it until it turns orange. In order to let the lockbar bend, grind in a .020-inch dent with a ¾-inch wheel at the other end of the lock.
It’s time to drill holes in the lock and blade for the 1/16-inch detent ball. Center punch a hole in the middle of the lock. Drill through with a #54 drill bit.
Close the folder and clamp it closed. Drill through the same hole as the liner into the blade about .060-inch deep. The #54 drill bit is .053 inch. You can also use a .054- or .055-inch drill bit depending on how you want to tune your folder. Grind, heat treat and polish the blade. Press the 1/16-inch ball bearing into the lock. The height left remaining of the ball bearing should equal the thickness of the washer.
Bend the lock over to about the middle of the folder. Now grind the tang at 7 degrees on a disc grinder until the lock starts to grab. You can assemble the folder, hold it up to the light and push the lock away from the knife to see how much more you have to grind the tang. Go slow and grind just a little before checking the lock. Drill and tap the scale for the pocket clip.