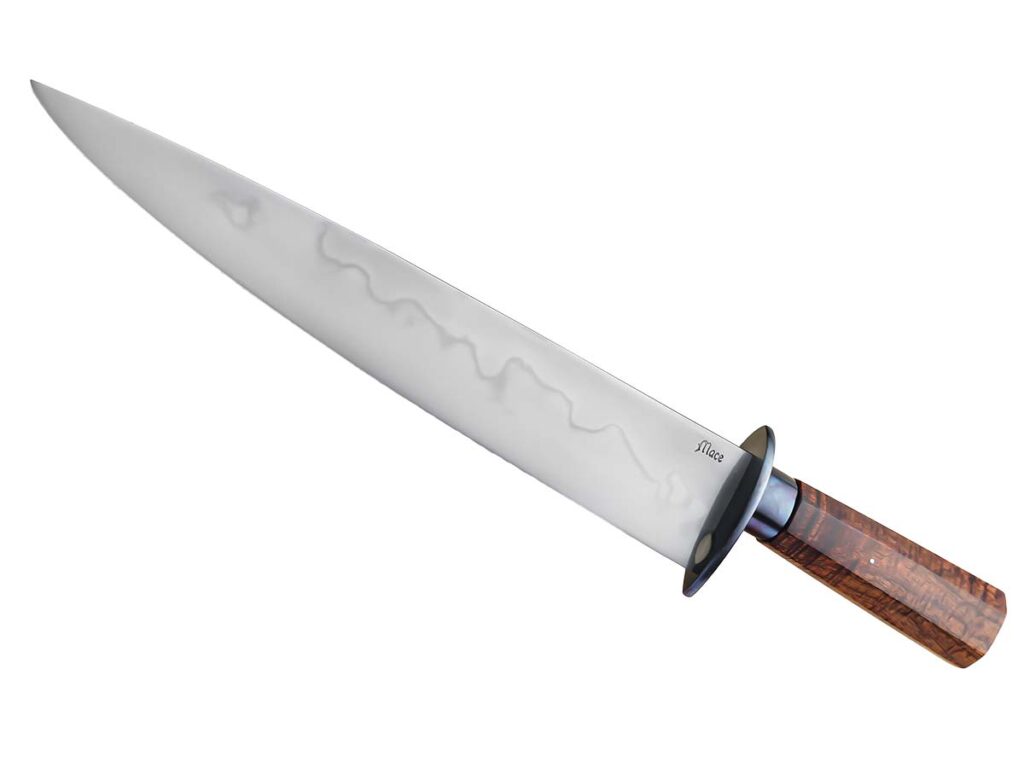


Dagger Design: Fundamentals Of Dagger Construction

From maintaining symmetry to adding fullers, we break down the intricate process of making a dagger design into a physical knife.

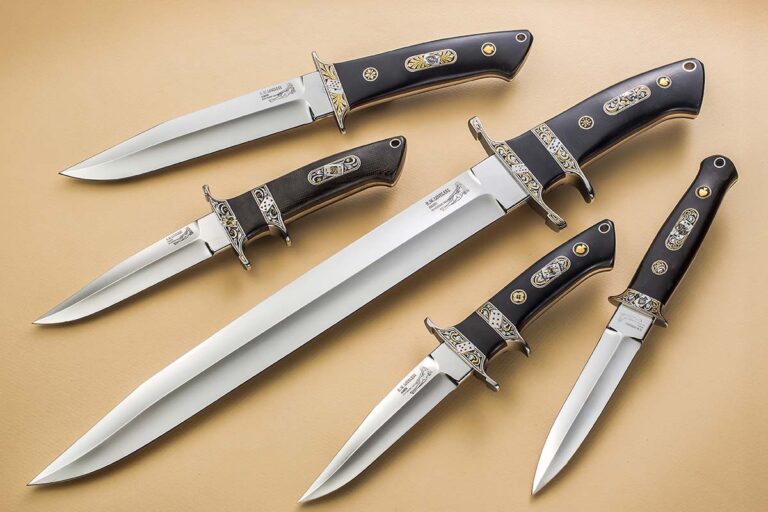
A dagger is not a kitchen knife in disguise. It is a purpose-built instrument of thrust and that purpose demands precision at every stage of construction. Small errors that might pass unnoticed in a hunter or utility knife compound on the exacting canvas of the dagger. A centerline that begins drifting by a fraction at the ricasso becomes an off-center tip, an uncentered bevel a blade that twists, the result a thrust off target. The difference between success and failure is geometry, and nowhere does geometry matter more than in the making of a dagger.

The process begins with detailed design and planning. The execution begins with precise layout. The central axis is the spine on which the whole piece will rest, and without it symmetry is impossible—the whole blade will stand or fall on getting this right. There are some tricks that will help ensure success.

Dagger Half Template

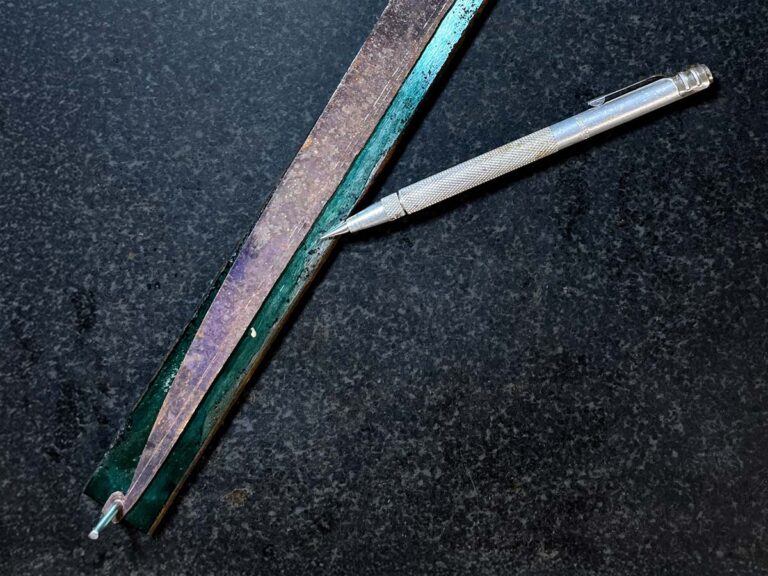
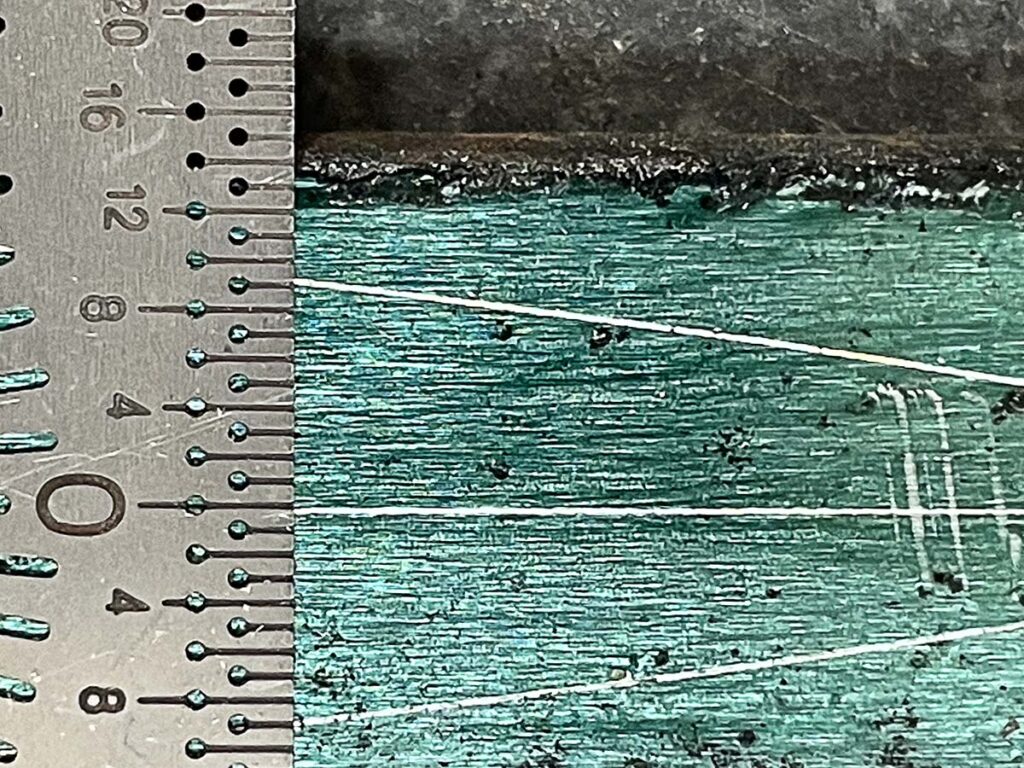
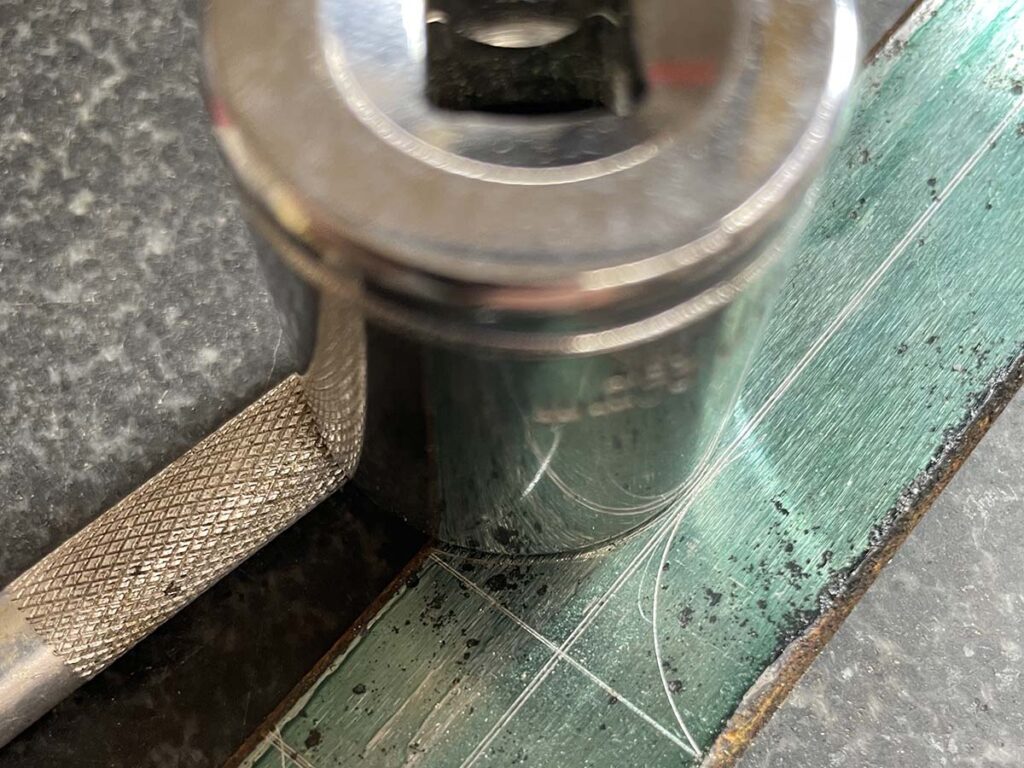
The Line That Rules Them All. A cleanly scribed centerline on both edge and flats sets the maker up for successful layout. A centering ruler can be a useful tool to check this.

Once you have determined the blade profile, preferably in some physical form like a drawing, make a template so it can be accurately transferred to steel. Here’s the thing, though: you only need half. A template representing only half of the blade profile will allow you to use it for each edge, ensuring perfect symmetry. Include the tang on your profile, not just the blade.

If you’re careful, your half template can be held on your blade stock aligned on a scribed center line and scribed on each side. If you’re less careful, oversize your blade stock and template so you can drill holes for alignment pins in the end of each that is outside the final profile. Using these holes to align the half template for marking each edge is the most precise way to lay out a symmetrical profile. If the stock is oversized, you’ll grind off the alignment holes when grinding the profile.

Planning Plunge Lines

Once you’ve accurately laid the profile out on the blade stock, take the time to scribe in the planned plunge lines on the blade flats and the edge. Sweeping, curved plunges are more visually appealing and careful layout will help ensure that your vision becomes reality. These lines are not decorative. They are the stops, targets if you will, that prevent the grind from slowly creeping toward the ricasso with each grinding pass.

Grinding the Plunges. Gradual, sweeping plunges are much more appealing to the eye than straight ones. Draw them in and grind to the drawing. This is more easily done on a wheel than with a flat platen but can be accomplished either way.

When it comes to grinding these sweeping plunges, hollow grinding on a wheel is easier than flat grinding on a platen—it’s easier to grind a curve with a curve—but by all means use a flat platen if that’s what you have. If you’re already grinding on a wheel, a 1-inch-wide wheel with a 1-inch belt will be an easier path to success than the standard 2-inch wheel and belt.

Sweeping plunges also will result in a thicker edge toward the ricasso. This is fine—you shouldn’t try to sharpen this part as doing so most likely will ruin all your careful design work. Will the unsharpened part of the edge impair the stabbing function? Perhaps, but only a little. Though it pains a serious knife person to admit it, most handmade modern daggers are for show. In most societies stabbing others is frowned on, and if you’re going to all this effort, choosing to focus on aesthetics is a good bet. However, if your dagger will be deployed in combat, ignore the aesthetics, grind sharper plunges and take the edge all the way to the ricasso.

Dagger Grinding And Stock Removal

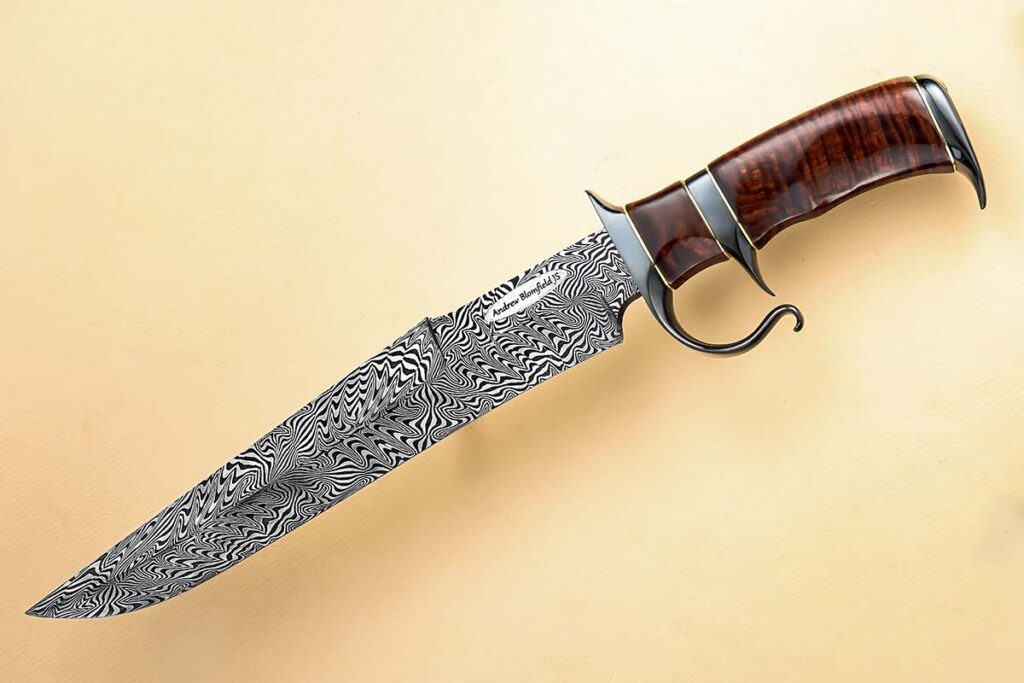
Grinding and stock removal are the way to go for daggers. This is admittedly a hot take but in a game where winning is determined by symmetry, forging introduces unnecessary variables and distorts the base stock, making accurate layout more complicated—not impossible, just not as easy. There is little to gain by forging unless the steel itself or the situation requires it, or if you simply like doing it that way. If you want a damascus pattern to taper toward the tip, or if you’re making a dagger for American Bladesmith Society testing, by all means forge. It’s an impressive skill set. If you want to make the best dagger possible with an eye toward efficiency, and thereby your profit margins, grind it. Stock removal is the more predictable path, and predictability is the soul of symmetry. Every forged blade is a stock removal blade before it’s completed; don’t get hung up on this unless you have reason to.

Delicacy Of The Dagger Tip

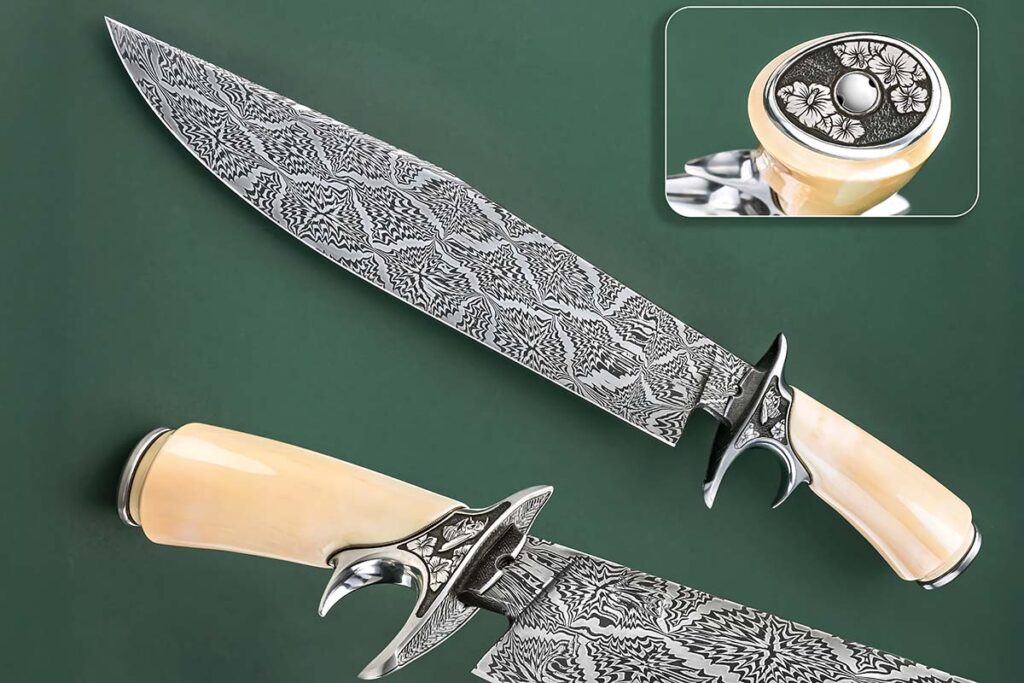
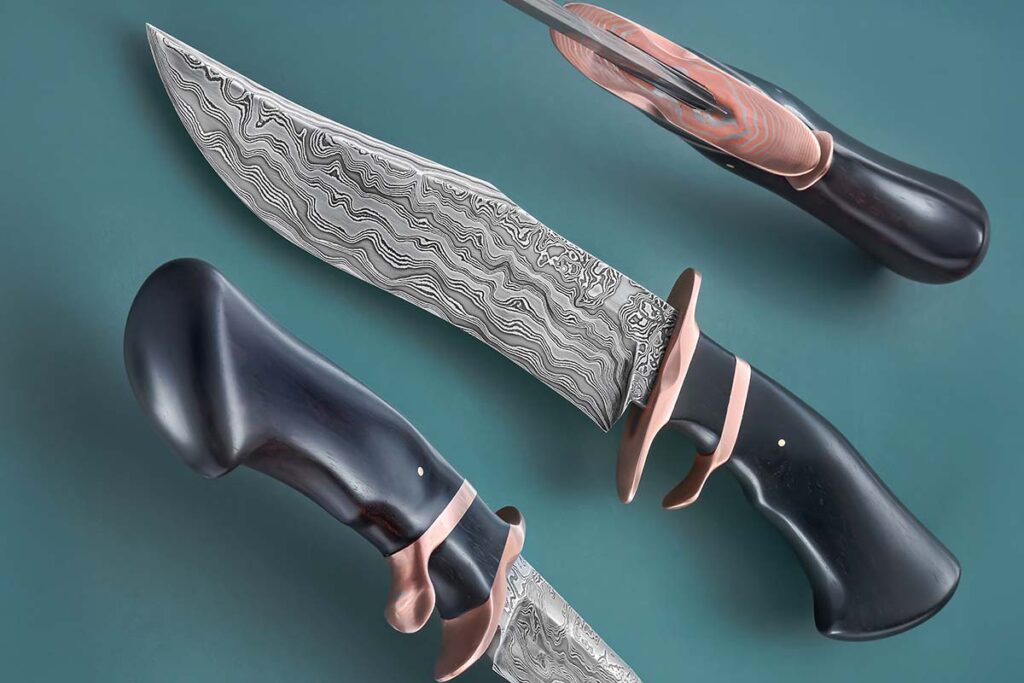
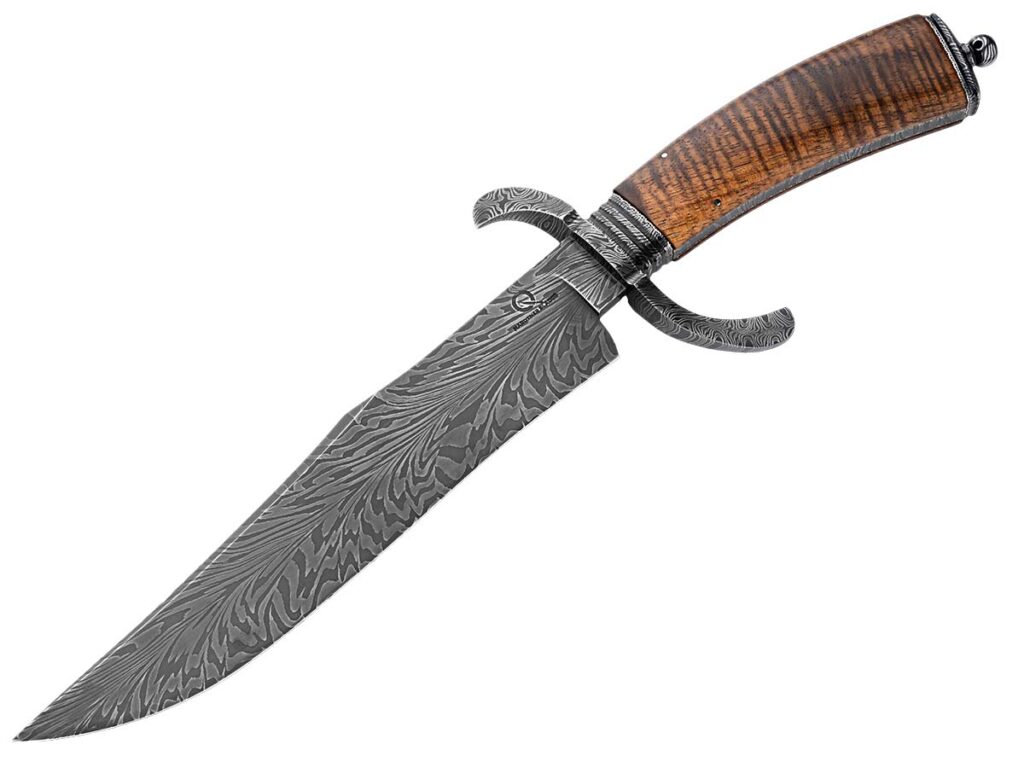
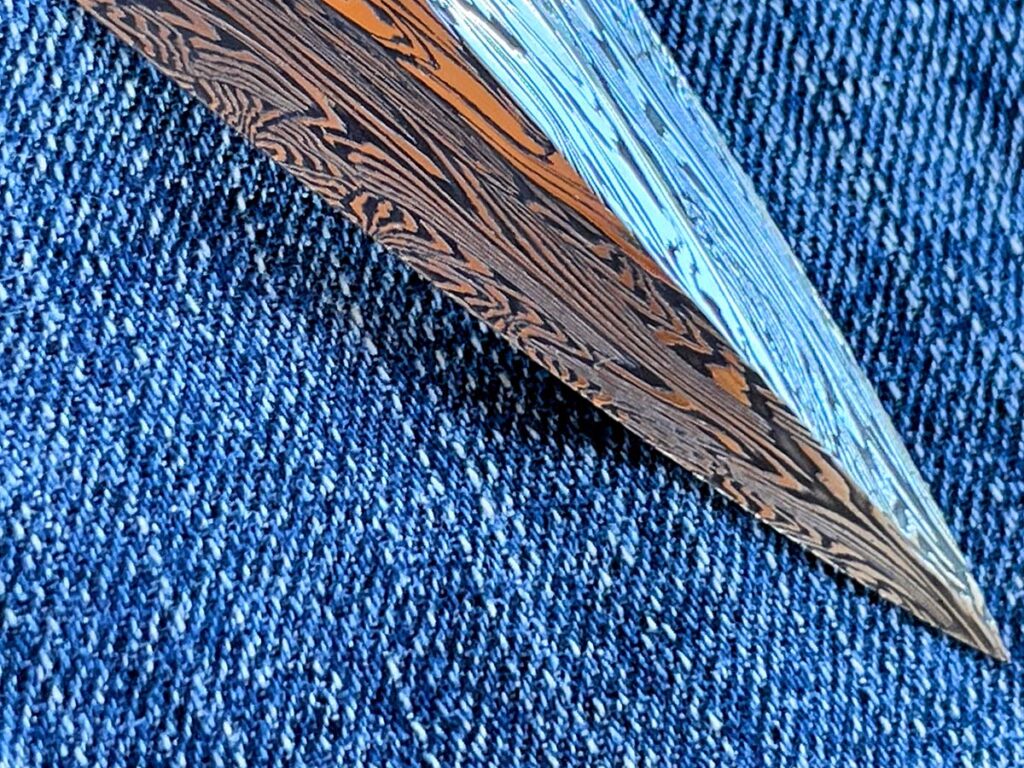
Forged for Continuity. An intricately patterned damascus dagger by Gregory Verizhnikov shows why sometimes forging is worth it—forging through the tip preserves the pattern’s flow.

Where the mass of the ricasso anchors the entire weapon and provides strength at the critical juncture of guard and tang, the tip, by contrast, demands delicacy. Once your profile is carefully ground to shape and you turn to grinding the bevels, grind the tip first. More specifically, grind it at a steeper angle than you plan for the main bevels, and try not to cross the centerline even at that obtuse degree, except at the very end. After that, leave it alone.

Grind the main bevels like you normally would, paying perhaps more attention than usual to your scribed lines, and try to avoid that last inch toward the tip until everything else is pretty much done. This seems a bit odd at first, but consider that the final inch must maintain its thickness in order to be strong enough to pierce effectively without deformation or fracture. If you do it right, you’ll end up with a bevel at the transition. Some makers polish the transition so it remains crisp, while others blend it smooth while polishing. Either way, it should be deliberate. Neglect this and the point will be too thin.

When To Add Fullers

Lay Out Everything. Scribe curved plunge lines on the flats and edge mark exactly where each bevel begins and ends.

Fullers, if they are to be included, should be cut early while the blank still has parallel flats. Attempting them later invites misalignment, or at the least inserts a potentially unnecessary level of difficulty. Better machinists than this writer/dagger enthusiast will likely have little difficulty either way, but life has enough complications of its own without inviting them into play.

Dagger Balance

Balance matters as much as steel. A well-made dagger should balance at or just ahead of the guard, a neutral point where the hand feels neither burdened nor abandoned. This can be tested with nothing more elaborate than a rod beneath the mostly assembled knife, shifting it until it rests level. It’s really just as easy to adjust weight distribution by feel, removing or adding weight to the component parts until it feels right. Don’t forget to consider the added weight of your epoxy. When balance is right, the blade becomes an extension of the wrist, alive and responsive.

Tang & Spacers

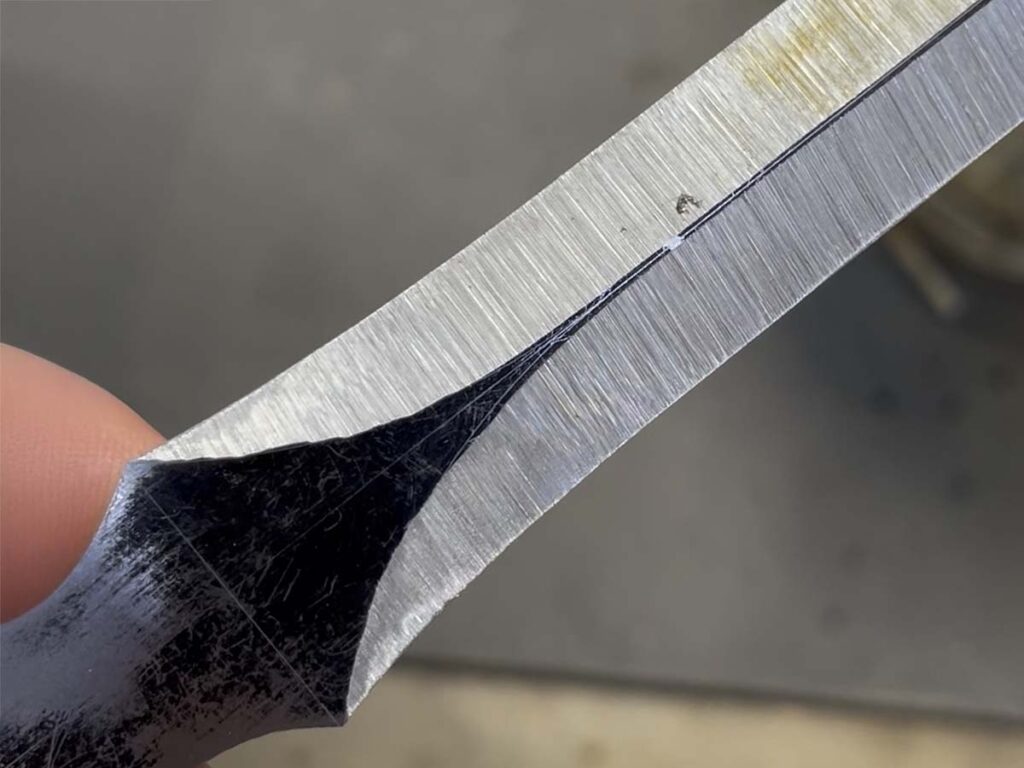
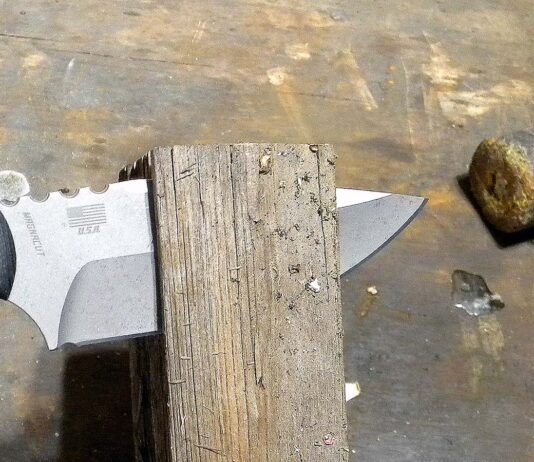
How Not to Do It. This dagger blade poorly ground by the author clearly demonstrates that the easy way out usually leads back in. Off-center bevels and an off-center tip are predictable results of poor initial layout.

Even the tang deserves forethought. When profiling the blade blank, leaving the tang longer than necessary provides room for correction and fitting, and a threaded end can serve as both a work-holding aid during construction and a permanent anchor if a pommel or nut will close the assembly.

Spacers, fitted between guard and handle and again between handle and pommel, make alignment easier and allow pins to register each component precisely during glue-up. They’re also relatively easy targets for weight adjustment when working on overall balance. These details are seldom glamorous but are what let the final assembly come together without struggle.

Embellishments

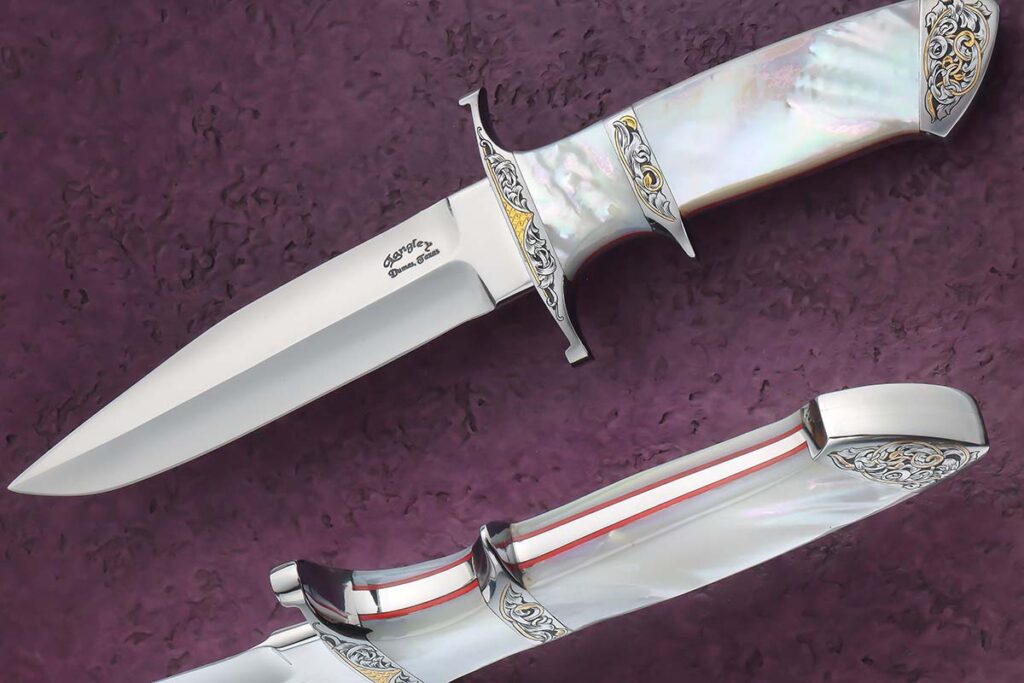
What results from this attention is not decoration but readiness. The embellishments will come later… the fluted handles and twisted wires and all the flourishes that mark the master’s hand. But none of that matters if the design is poor, the execution haphazard, the details unconsidered.

More On Daggers:

Affordable Chef’s Knives: Options That Are A Cut Above The Rest

Consider four large kitchen knives, all under $80 each.

As you get older and entertain bigger gatherings, do you find yourself wanting to improve your culinary chops?

A little more blade may be just what you need to sharpen your prep time so you can spend more time enjoying your food than getting it to the table. Larger and more focused kitchen tools can indeed improve your efficiency and your proficiency as a gourmet chef as well.

The focus here is on large and/or specialized kitchen knives, specifically the different types and what they can do to make your job easier and your cooking better, each for under $80. Large cooking knives vary widely and we’re going to show you four variations. Keep in mind, most kitchen knives aren’t just for cutting meat but are for preparing fruit, vegetables and other items such as breading or crusts, too.

Utica Meat Dad Chef’s Knife

The Utica Meat Dad Chef’s Knife is for large cuts of meat, fruits and vegetables. It took half-inch medallions off a plump pork tenderloin for the sauté pan.

Meat Dad Chef’s Knife Specs
Blade length: 7.54”
Blade steel: 440C stainless
Blade finish: Food Safe Black PVD
Handle material: Orange G-10
Weight: 17”
Overall length: 12.5”
Country of origin: USA
MSRP: $74.99

The Utica Meat Dad Chef’s Knife is a whopper with a blade belly 2.25 inches deep for carving the big stuff when needed and everyday slicing and dicing as well. The beefy orange G-10 handle helps maintain control on the wieldy blade for it all.

Though the test’s two chef’s knives—the Fox Knives Meat Slicer being the other—have meat in their names, they facilitate a much wider variety of meal prep tasks, including the slicing, dicing and mincing of a wide range of vegetables and other fare.

The Meat Dad is large enough to tackle a watermelon in a straight cut.

The Utica is large for a chef’s knife so we tested it on some heathy chores, such as cutting a nice, plump pork tenderloin into fat medallions for a tasty sauté. We also tried the Meat Dad out on a watermelon and, thanks to the stout blade, sliced it straight as an arrow from top to bottom. Sometimes you just need a large knife and the Utica tackles those requirements quite well.

Fox Meat Slicer Knife

Like many typical chef’s knives, the Fox Meat Slicer is capable of many functions. Wrote the author: “I used the knife for slicing small brown portobello mushrooms to add to an omelet. Note the sharp, crisp cuts—a sign the mushrooms were not prepared by an ordinary kitchen knife.”

Meat Slicer Specs
Blade length: 7.8”
Blade steel: UNI X59CrMoV15 stainless
Blade finish: Fine satin
Handle material: Black PP synthetic
Weight: 3.75 ozs.
Overall length: 12.4”
Country of origin: Italy
MSRP: $36.94

All chef’s knives are relatively long but not all have blades that can be tiring to use. The Fox Meat Slicer Knife is a much trimmer, more svelte example. A large Italian cutlery company with an impressive presence in the USA, Fox offers a strong group of knives in its Due Cigni Coltellerie line.

One of the group is the Meat Slicer, a long chef’s knife with a slim profile sporting an extended, slender drop-point blade only .12-inch thick. It comes with a gently curved handle that has just enough drop at the base to protect your fingers during use.

The Meat Slicer is more adept at less cumbersome tasks of both the meat and vegetable variety. We first used it on a couple of smoked sausage links, cutting roughly 3/16-inch slices down the length of each for an omelet. The knife performed quickly and with ease.

The Fox Meat Slicer is excellent for most meals that don’t require cutting thick slabs of meat or large fruit and vegetables. It made quick work prepping smoked sausage.

To add a little flavor, we turned to some portobello mushrooms. Taking a handful, I trimmed the stems off and sliced them up one by one in a jiffy. The German steel performed very well and the handle was the most comfortable of the test lot.

A.G. Russell 6-inch Boning Knife

The A.G. Russell relieved the chicken breast of its hard-shell-bone understructure pronto. “Fowl such as chickens retain their juices and flavor much better when cooked on the bone,” the author noted. “Here the chicken breast is removed, sliced and ready to eat.”

Boning Knife Specs
Blade length: 6”
Blade steel: Molybdenum-vanadium stainless
Handle material: Fiberglass-reinforced polypropylene
Bolsters: Stainless steel
Weight: 3.8 ozs.
Overall length: 10.6”
Country of origin: Italy
MSRP: $42.95

The A.G. Russell 6-inch Boning Knife just might be your go-to counter slicer for a myriad of kitchen duties. While its name is designated for separating meat from bones, the A.G. Russell can perform a myriad of duties such as trimming, slicing and dicing both meat and veggies. Some even clean their afternoon catch with it as it is closely related to a fish knife. The blade is super thin and the piece is very lightweight.

The A.G. Russell got the most tedious work out of the foursome due to the nature of the beast. Fortunately, chickens go through extensive steps of processing before average folk ever set eyes on them. Whether fried, barbecued or roasted, the best way to keep a chicken breast moist is with the skin, breast meat and bone structure cooked together.

After cooking the bird, use the sharp cutting tip to cut the area around the breast skin so it can be removed with the meat. Next, peel the skin back and slowly work the blade between meat and bone structure and slowly use the fingers of your other hand to peel the entire breast off with the skin on. Slice and eat!

The A.G. Russell Boning Knife has a thin, sharp blade very much akin to a fish knife and can be used for other types of work around the kitchen. The author used the razor-sharp blade to cut off the tails of shrimp for a cocktail.

The Boning Knife, like the others, is handy in other ways as well. You can slice small veggies and fruits, trim fat and do all sorts of clean-up chores to make food more presentable.

Ontario Old Hickory 76 7-inch Cleaver

Cutting thick carrots across the grain can be tough on many kitchen knives but was easy for the Ontario Old Hickory 76 Cleaver.

Old Hickory 76 Cleaver Specs
Blade length: 7.5”
Blade material: 1075 carbon steel
Blade grind: Flat bevel
Blade finish: Brushed
Handle material: Wood
Weight: 10 ozs.
Overall length: 12”
Country of origin: USA
MSRP: $30.50

We’ve saved the big gun for last: the Ontario Old Hickory 76 7-inch Cleaver. There’s something to be said for the simple, matter-of-fact Old Hickory edged tools. Maybe it’s the “If it ain’t broke, don’t fix it” attitude—and I like it! The blade has a horizontal pattern pressed into it, a hole for hanging in the upper lead edge, and an Ontario Knife Co., Tru Edge, Made In U.S.A., sword logo stamp in the top center. The blade climbs upward toward the tip at its spine and the cutting edge has a gentle curve to it.

When you need a heavy hand and finesse is no object, the cleaver will get the job done. We used it for cutting some tough-as-nails carrots with no problem. The same went for hard sausage. There’s no sense in dulling a sharp knife blade on hard, tough foods when a cleaver can cut them with haste and look for its next challenge.

Chubs of hard summer sausage are what the Old Hickory 76 lives for.

Old Hickory blades are the kind of “git ’er done” kitchen knives and tools that take your tough challenges on their back and never cry uncle. My family grew up with Old Hickory blades and I recommend keeping them around the kitchen when tough times call for tough tools.

Final Cut

There you have it—four different ways to make your kitchen more useful without breaking the bank. If you’re ready to expand your culinary universe, look no further than these useful, able kitchen helpers.

More Kitchen Knives:

Mike Bradshaw’s Large Hunter Review: Large And In Charge

Mike Bradshaw’s Large Hunter smokes the author’s test regimen.

I came across Mike Bradshaw’s knives thanks to a recommendation by a knifemaker friend, R.W. Fred. The knifemaking community always helps other knifemakers—call it the “Brotherhood of the Blade.” After visiting his social media account for a quick look, I messaged Mike and he sent me his Large Hunter to test.

Bradshaw’s Large Hunter Specs

Knife: Large Hunter
Maker: Mike Bradshaw
Blade length: 4.5”
Blade steel: CPM MagnaCut stainless
Rockwell hardness: 63.5 HRC
Blade @the widest: 1.375”
Blade @the thickest: .13”
Blade grind: Hollow on a 12” wheel
Scales: OD green G-carta by GL Hanson
Fittings: Nickel silver
Overall length: 9.125”
Sheath: Black Kydex
Maker’s price for a similar knife: $200

Light Cutting Tasks

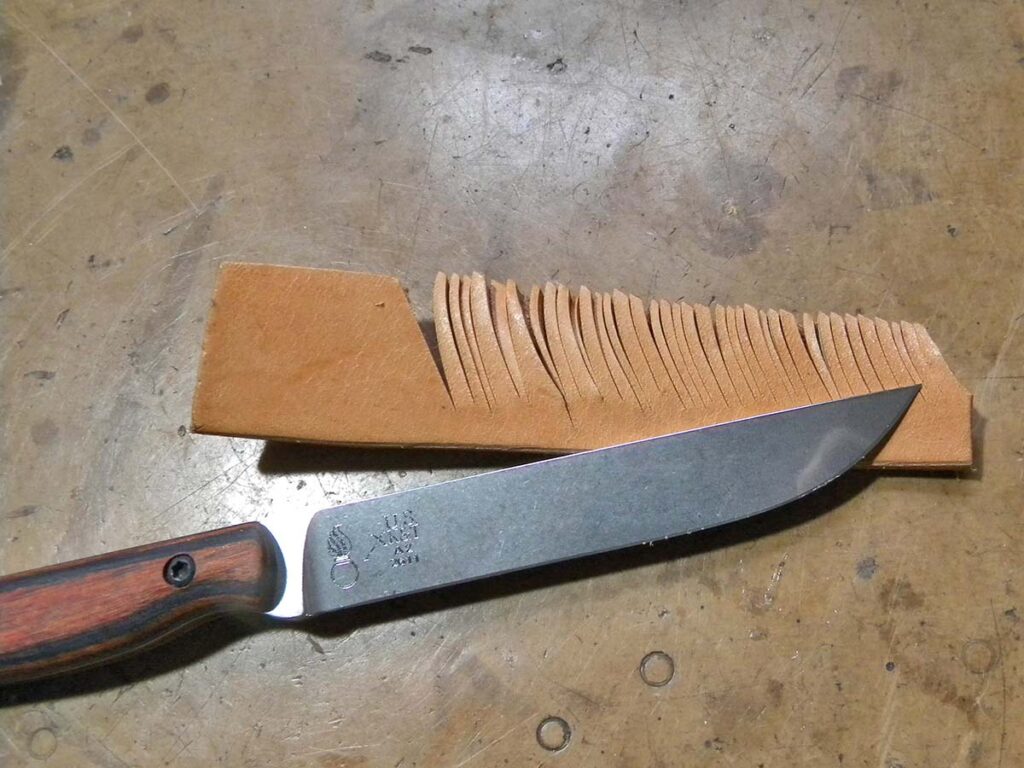
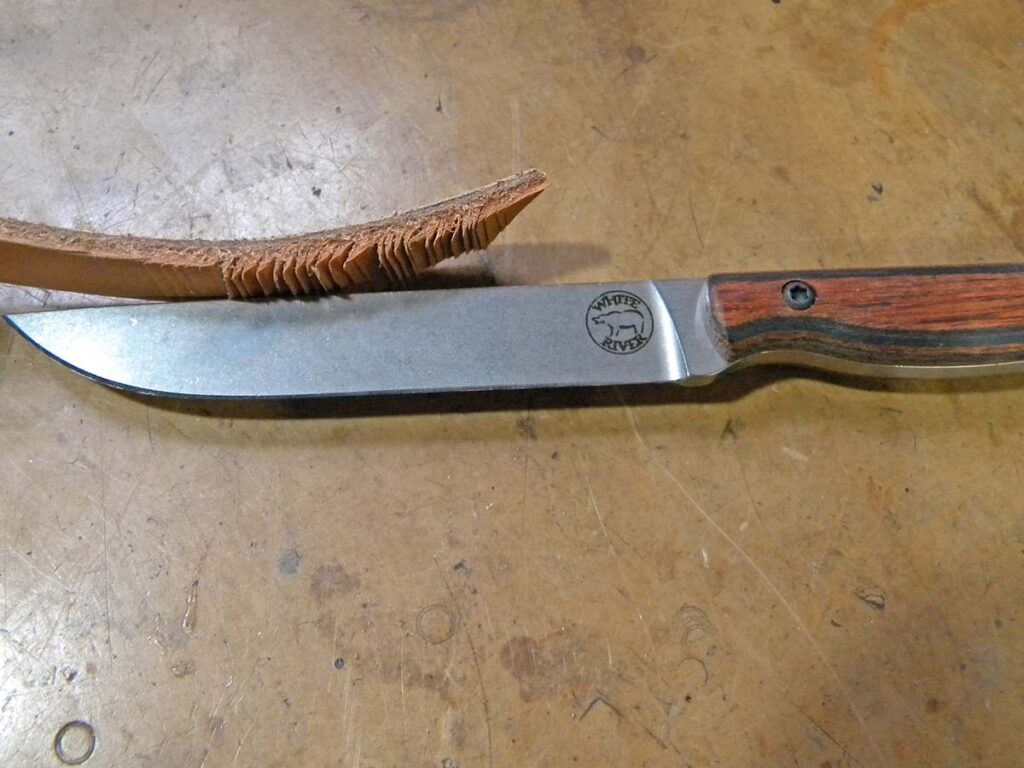
The author indicated the Large Hunter produced some of the thinnest slices he has ever made skiving 8-ounce leather.

Up first: the paper slice to check the original edge. This is the best way to show slicing in the still-image format of publications. The Large Hunter zipped through drafting paper in a jiffy, making a nice zipping sound on each cut. The edges of the slices were smooth with no tears. I had a hard time keeping my fingers out of the way, nicking one fingernail in the process.

Skiving 8-ounce leather was next on the agenda, and the Large Hunter produced some of the thinnest slices I have ever cut. It crunched the leather very smoothly in even slices that were controllable. The hardest part was moving my fingers out of the way fast enough. In addition to skiving the leather, I also sliced it. Again, the cuts were straight with no tearing.

Medium-Duty Cutting Tasks

Mike Bradshaw’s knife crunched its way to 200 clean cuts in half-inch sisal rope.

It was time to whittle a firestick from seasoned cedar. The Large Hunter came through in flying colors, producing perfect curlicues with clean cuts. It was easy to control cutting depth but the handle was a tad sharp in the choil area. The unwanted sharp spot showed up again when I applied more pressure for deep cuts. A little touch up with sandpaper would fix the problem.

Batonning the Large Hunter through a cedar block was next. Four whacks and the cedar was split. I split it four times then split those four pieces four more times for kindling. The knife batonned great, with good balance between blade and handle. There was no damage to the edge.

Heavy Cutting Tasks

After being whacked into the antler 30 times, the edge emerged (far left) with no chips or rolling—a sign of excellent heat treatment.

From there, half-inch sisal rope was on the slicing block. The Large Hunter crunched its way to 200 clean cuts pronto. This knife is extremely sharp and holds an edge perfectly. The handle had a few hot spots that could be corrected fast with a piece of 220-grit sandpaper. If you’re wearing gloves, it’s no problem.

To push the edge further, I gave it 30 hard whacks into a whitetail deer antler. All that did was scatter antler chips all over my workbench—it didn’t do a thing to the edge. Excellent heat treatment, Mike!

As a final gauge of the edge, it was back to the paper slice to see if the edge picked up any damage or dulled at all. Nope, still sharp and smooth cutting. Great job, Mike.

Final Cut

Soften the edges of the handle more to relieve the hot spots. Easy fix. The Large Hunter can tackle a lot more than field processing big game. It has a super sharp edge for slicing and a bite for the larger chores.

Check Out More Outdoor Knives:

Fighters: The Sexiest, High-End Custom Fighter Knives

The ultimate lineup of custom fighter knives—from integral designs and sub-hilts to exotic materials like copper damascus and mammoth tooth.

Fighters are some of the sexiest knives going. With many, even their curves have curves. Those less curvy make up for it with straight-line designs that look born to perform. If sex really does sell, fighters are the capitalists of cut.


Randy Caston

Randy Caston

Randy Caston’s fighter features a 9 5/8-inch blade of 1084 carbon and 15N20 nickel-alloy steels. Scales: blackwood. The guard is mild steel. Overall length: 14.75 inche.(SharpByCoop image)


Adam Deville

Adam Deville

A nickel damascus with a Dragon Skin core forged by Adam Deville sporting a snakelike fuller completes the 10.5-inch recurve blade of Jordon Berthelot’s integral fighter. The scales are marbled carbon fiber. Overall length: 16.5 inches. (SharpByCoop image)


Dennis Friedly

Dennis Friedly

Dennis Friedly outfits his fighter-art knife in a 7.75-inch blade of hollow-ground CPM 154 stainless. The scales are mammoth tooth and the guard is 416 stainless. The engraving is by Ray Cover Jr. Overall length: 13 inches.(SharpByCoop image)


Patrick Harp

Patrick Harp

A 6-inch recurve blade in a full-flat-ground crushed W’s and copper damascus forged by Baker Forge & Tool top off a sub-hilt fighter by Patrick Harp of P. Harp Designs. The handle is basswood burl and the guard and sub hilt are wrought iron. Overall length: 11 inches. (SharpByCoop image)


Peyton Ramm

Peyton Ramm

ABS journeyman smith Peyton Ramm opts for a 6 1/8-inch blade of a Transition damascus of 1084 carbon and 15N20 nickel alloy steels for his fighter. Handle frame: damascus. Scales: mammoth ivory. Guard: crushed W’s damascus. Fittings: same as guard but w/24k gold and silver inlays. Overall length: 10.75 inches. (Jocelyn Frasier image)


Steven Ramos

Steven Ramos

Peregrine by Steven Ramos offers up a 6-inch blade of hollow-ground RWL-34 stainless steel in a green canvas Micarta® handle with red fiber spacers. Bolster: 416 stainless steel. Overall length: 10.5 inches. (SharpByCoop image)


Dan Tompkins

Baker Forge & Tool

A 5.75-inch blade in convex-ground Riptide Ultra Coppermascus by Baker Forge & Tool and a black Richlite guard and handle comprise the double-edge fighter by Dan Tompkins of Evolution Cutlery. The copper spacers are also by Baker. Overall length: 11 inches.(SharpByCoop image)

More Knife Reviews:

EDC Under the Radar: Meet the Cold Steel Mini Wasp Tactical Dagger

Discover the Cold Steel Mini Wasp Stinger. Get full cutting power in a compact, discreet EDC fixed blade forged from premium 52100 steel for ultimate reliability.

When you think of Cold Steel, you’re probably thinking about the gear trusted by professionals and enthusiasts who rely on their tools daily. They’re seriously recognized as a leader in the outdoor knife and tool industry, always pushing boundaries with performance and craftsmanship. But let’s talk about an EDC essential that packs a serious punch while keeping a low profile: the Drop Forged Mini Wasp Stinger.

Compact Carry, Full Power

This isn’t your average pocket knife; it’s a masterful blend of compact design and unrelenting strength. The whole idea here is to give you full-sized precision and cutting power in a discreet package that “flies under the radar.” Seriously, weighing in at a mere 7.6 oz. and with a sleek 10.25-inch overall length, this fixed blade dagger is portable enough to ride unnoticed until you need it.

So, what makes it so tough?

Cold Steel Mini Wasp

It’s drop-forged from premium 52100 high carbon steel. This material ensures the 4-inch dagger-style blade delivers both exceptional durability and razor-sharp performance. Plus, with a robust 6mm thickness, this thing is engineered to tackle even the toughest tasks without breaking a sweat.

Precision and Confidence in Your Hand

Beyond the blade, the design is all about control. The handle features Micarta handle scales that ensure a secure, comfortable grip and, most importantly, a slip-resistant one in any conditions. That’s a huge boost of confidence for all tasks.

To keep you ready for action, the Mini Wasp Stinger comes complete with a Secure-Ex® Sheath for safe, easy storage and quick access.

This tactical dagger is truly engineered for those who demand both precision and reliability. If you’re looking for an ideal companion for discreet carry without sacrificing an ounce of power, the Mini Wasp Stinger might just be the EDC that belongs in your collection.

Knife Reviews:

Hunting Knives: Field Fixed Blades Made For Grunt Work

Hunting knives should be workhorses and these options are ready to shoulder the load as you take to the field.

Fixed-blade hunting knives are the workhorses of your hunting gear. They handle a lot of the grunt work associated with cutting, including field dressing game after the take-down to various cutting tasks while hunting or in camp. As a result, it is important to choose a hunter that not only has the features and the materials you want but one that fits your budget as well.

Hogue Knives Extrak

Despite the thin nature of the Extrak’s handle, slightly expanded front and rear sections help form a guard of sorts to avoid gripping difficulties.


With its slender form, the Hogue Knives Extrak takes a minimalist approach to fixed hunters. Hogue President Jim Bruhns designed it to be lightweight and agile. Available in two sizes, the Extrak and its bigger brother, the Extrak XL, both tackle heavy field-dress work while offering comfortable carry minus the bulk of many fixed hunters.

The modified clip-point blade is 3.3 inches of high-performance CPM MagnaCut stainless steel in a stonewashed finish. The peel-ply orange G-10 scales are textured enough so the material is a bit grabby. The orange fits right in with the hunter theme. Despite the handle’s thin nature, slightly expanded front and rear sections help form a guard of sorts to avoid gripping difficulties. Overall length: 7.375 inches.

Thanks to the thin blade stock and full, flat primary grind, think of this knife as a scalpel. Scalpels have lean handles but the blades are thin enough to cut easily with very little applied force. Same thing with the Extrak. The blade bites into meat so easily that the slender handle doesn’t matter.

At first I was a bit apprehensive that the thin grip would affect the knife’s use. The more I cut with the Extrak, the more I saw that the thin blade is where the work takes place. It slices so cleanly and efficiently that you need not apply pressure on the handle to make the cut. After a while, the lean grip doesn’t matter because you are too busy admiring the knife for its extreme cutting power and efficiency. From sausages, steaks and veggies to cardboard and opening mail, the Extrak dispatches all with aplomb. It’s a great candidate for your next restaurant outing. It is a very low-profile design that won’t attract unwanted attention in public, even with its bright orange handle.

The Hogue Extrak might be a lightweight and thin fixed blade but don’t let that fool you. Cutting performance wise, this knife punches above its class. The thin blade cuts like a scalpel.

The Extrak also makes a great utility knife. However, shy away from rough use and any sort of cutting where you simultaneously twist the blade. MagnaCut is a tough steel but as thin as the knife is, you can damage the edge or break the tip if you use it too hard. It is a precise cutting tool. I rate the knife high on the list for an EDC fixed blade as well.

Due to the knife’s minimalist design, it might be possible to custom fabricate a Kydex neck sheath for it to wear under a shirt for more discreet carry. Don’t try it with the supplied slip cover as there isn’t enough tension to hold the blade securely for such neck carry. The molded ABS plastic sheath features an UltiClip fastener. The setup enables you to carry the knife clipped to the top of a pants pocket, much as you would a tactical folder. The knife rides securely in this manner, with the entire handle sticking out for easy deployment. The sheath is simple but works and is of pretty good quality. Country of origin: USA. MSRP: $199.95.

Spartan Blades Harsey Nessmuk

The skinner-like blade of the Spartan Harsey Nessmuk excels at slicing tasks.

The Spartan Blades Harsey Nessmuk is the largest knife of the test group. The classic Nessmuk design with its distinctive bulbous tip has proven to be a very effective outdoor knife that excels at many tasks, from field dressing to camp utility chores. The skinner-esque blade is a highly effective slicer. Do an internet search for George Washington Sears and the Nessmuk blade style. The history of how the design came about is a rather interesting read and gives some insight as to why the blade is shaped as it is.

In the Spartan entry, the Nessmuk blade is paired with the handle design of BLADE Magazine Cutlery Hall-of-Fame® member Bill Harsey. The Creswell, Oregon, knifemaker is widely known for his tough fixed-blade designs for the Special Forces and his work with Cutlery Hall of Famers Col. Rex Applegate and Al Mar. The Nessmuk is yet another Harsey design for Spartan that includes the pair’s tactical and other outdoor collaborations. It is part of Spartan’s Silver Line, aka Professional Line, a mid-priced/made-in-the-USA (KA-BAR factory in upstate New York) series that is less expensive than the company’s flagship Gold Line.

The Nessmuk blade is 5⅛ inches of flat-ground 1095 CRO-VAN carbon steel with a Rockwell hardness of 56-58 HRC. The 1095 offers a great balance of edge retention and ease of sharpening without the need of a complicated sharpener. At .1875-inch at the thickest and with a corrosion-resistant/low-glare black powder coat, the blade is well-equipped for high-performance outdoor work.

As the author noted, one of the hallmarks of a true Bill Harsey design is the handle. “His handle designs are among the best in the industry,” the author observed. “They are contoured to fit your hand like a glove, without any hot spots.” Handle features also prevent forward or backward sliding of the hand, while the 3D texturing adds enough grip to be secure but not aggressive.

The rugged, molded thermoplastic sheath has a fabric-fastener loop to attach to a wide range of belt sizes. A thumb-retention lock holds the knife in place and three slits vent water, making it ideal for wet environments.

The handle is Grivory, an impact and fluid-resistant material that can be molded with various contours and chamfers that aid in attaining a comfortable, secure grip. The durable/usable handle feels as if it were molded to your hand and has no hot spots. At 10.8 ounces and 10 inches overall, the Spartan Harsey Nessmuk is big yet lightweight enough to tackle most any hunting knife chore you throw its way. MSRP: $225.

Fallkniven F1L3GMM Next Generation

The convex-ground blade of the Fallkniven powers easily through most any medium. According to the author, “it is one of the sharpest cutting edges out there.”

The Fallkniven F1L3GMM Next Generation fixed blade was designed as a pilot survival knife but is also a knockout crossover fixed hunter. The blade boasts a laser etching of the JAS 39 Gripen Next Generation Swedish fighter jet, but don’t let that fool you. The Fallkniven entry actually has a hunting knife pedigree.

As the company website notes, the work of BLADE Magazine Cutlery Hall-of-Fame® member Bob Loveless was the inspiration for the F1L3GMM. You can almost see it in the knife’s lines. The 3.9-inch drop-point blade has plenty of belly to facilitate slicing chores. The maroon Micarta® handle is very elegant and sports the right contours to accommodate your hand, and is very comfortable to hold with no worry of hot spots. The nickel-silver guard fits the tang seamlessly and is a great anchor point to prevent your hand from sliding forward. The handle fastens to the tang with a pair of Corby bolts, and a gold medallion with three crowns decorates the grip’s center. At 8.2 inches overall, the F1L3GMM is sized just right for a hunter. The sewn black leather belt sheath sports quality construction, and the “F1”-stamped flap closure with button snap conceals the entire knife.

The Fallkniven entry is a hard-use beast. The blade slices very cleanly and expediently. If you’ve never used a knife with a full convex edge, you are definitely in for a treat. Fallkniven is known for convex edges that are both sharp and quite durable, not to mention easier to maintain due to the geometry. The convex edge bites in deep and hard, and you can use it a tad rough as well without fear of the edge chipping out. It is also very well suited for general use around camp or the kitchen. The blade is fairly thick but, due to the convex edge, dives into whatever is being cut and propels the rest of the blade through. Just because it’s thick doesn’t mean it cannot slice effectively. This is a knife of heirloom quality that also has plenty of horsepower for getting real work done.

Maroon Micarta® is the handle material of choice for the Fallkniven F1L3GMM fixed hunter. It is pinned to the tang using Corby rivets.

The handle is comfortable, rounded and contoured in the right places and devoid of hot spots during extended use. I have always been a big fan of Micarta® for both folder and fixed-blade handles. It’s pretty much the ultimate user material given its light weight, dimensional stability and imperviousness to most known liquids. Plus, it comes in a wide array of colors, and the maroon adds a nice splash of color without being overly flashy. You don’t see too many maroon-handled knives, so this one is a breath of fresh air.

Yes, it is on the pricey side for a production hunter but in return you get a very well-built cutter executed with the best materials. I don’t think you can find a better knife for the money. If you love European engineering and manufacturing, this is the hunter for you. Country of origin: Sweden. MSRP: $499.99.

Hunting Knives:

Best Skinner Knives: A Guide to Top-Rated Hunting Blades

Find the perfect hunting knife with our guide to the best skinners on the market. We review top models from respected makers.

A skinner is a knife purpose-built for the delicate but necessary job of skinning game animals. Its singular mission: separate hide from muscle without causing a mess that makes a taxidermist weep.

Skinning knives serve specific purposes. Primarily, they glide beneath the hide with minimal resistance. This feature allows for a smoother cutting experience, making it easier to separate the skin from the meat.

Skinners also aim to minimize accidental punctures to the underlying meat or organs. This is crucial for preserving the quality of the meat and ensuring that it remains uncontaminated during the skinning process. Finally, skinners offer the control necessary for making fine cuts around joints, facial features and paws. This level of precision is essential for skilled processing, allowing for clean and efficient work.

Good Skinners and Bad

A good skinner slices smoothly without requiring brute force, retaining the cutting edge throughout the job. It cleans easily, especially around the scales, and feels intuitive in your hand, almost as if the knife knows your intentions before you do. Moreover, it keeps the hide intact, avoiding headaches caused by unwanted holes.

A bad skinner features an overly aggressive tip that punctures organs at the slightest touch, slippery scales that become a liability when blood is involved, and poor edge retention that necessitates awkward sharpening breaks. It may possess a clunky balance that makes it feel more like a garden tool than a precision instrument and hard-to-clean crevices that turn into breeding grounds for bacteria.

In short, an effective skinner collaborates with, rather than works against, you; it’s about finesse, not sheer strength, resembling a scalpel instead of a medieval cleaver.

Classic Design Skinners

Classic skinners are all about specific design features as opposed to gimmicks. They typically have a blade with a wide belly and sweeping curve for long, confident strokes that excel at slicing through hide. Most use a drop point or semi-rounded tip to prevent accidental stabbing when dealing with gut sacks.

A flat or convex grind offers a good balance between sharpness and strength, while hollow grinds, though sometimes sharper, can be fragile. Blade lengths usually range from 3 to 4 inches for maneuverability in tight areas like hooves or facial contours. Ergonomics is also crucial, with grippy materials like Micarta® or textured rubber preferred to prevent slippage.

Montana Knife Co. Packout Skinner

The author indicated the Packout Skinner would make Nessmuk proud. With a MagnaCut stainless steel blade and textured G-10 handle, it sliced through Teriyaki chicken like a champ.

Pros

  • Top-Tier Steel
  • Compact and Maneuverable
  • Ergonomic Grip

Cons

  • Expensive

Packout Skinner Specs
Blade Length: 3”
Blade @Thickest: .11”
Blade Steel: MagnaCut stainless
Blade Finish: Stonewash
Scales: G-10
Weight: 2.98 ozs.
Overall Length: 7”
Sheath: Kydex
Country of Origin: U.S.A.
MSRP: $300

The Montana Knife Co. (MKC) Packout Skinner is a compact powerhouse built for precision in the field. It packs a generous belly into a tight footprint—ideal for long, clean skinning strokes. The blade offers top-tier edge retention, corrosion resistance and toughness that thrives in backcountry conditions. Full-tang construction is paired with a milled handle shaped for a secure, glove-friendly grip that stays comfortable through extended use. The ergonomic palm swell and thoughtful finger ramp give you control whether you’re slicing hide or fleshing out detail work.

A custom-molded sheath complements the package, providing secure retention and versatile carry options: horizontal, vertical or pack-mounted. This knife doesn’t just show up, it works hard—just like the hunters it is built for.

A simple knife test I use is rustic meat cooking and slicing. In my eyes, and according to George Washington Sears, aka Nessmuk, an outdoor knife should be able to skin, butcher and slice. The Packout Skinner would make him proud. It does it all. I had a small summer barbecue with Teriyaki chicken and the skinner sliced it like a champ.

The sheath came in scout carry mode, so that’s how I used it. It carried comfortably. However, bending forward processing meat and camp must-haves made me remove it for a few minutes. On the plus side, it was easy to remove and attach without having to take it off my belt.

W.R. Case & Sons Laramy Miller Sasquatch Skinner

The Sasquatch easily feathered wood that took a spark from a stout ferro rod. The edge was sharp and the spine has a good 90-degree angle for fire starting.

Pros

  • Excellent Edge Retention and Durability
  • Hidden Utility
  • Ergonomic Handle

Cons

  • Heavy

Sasquatch Skinner Specs
Blade Length: 3.94”
Blade @Thickest: .125”
Blade Material: 1095 carbon steel
Blade Finish: Caswell™
Scales: Natural Micarta®
Weight: 8.38 ozs.
Overall Length: 8.75”
Sheath: Brown leather
Country of Origin: U.S.A.
MSRP: $196.99

The W.R. Case & Sons Laramy Miller Sasquatch Skinner is a rugged fixed blade fashioned for serious field work. It strikes a balance between reach and control, perfect for skinning game or tackling camp chores. The blade has excellent edge retention and a stealthy, corrosion-resistant surface.

The smooth handle offers a secure, scratch-resistant grip with a soft feel that stays comfortable through prolonged use. The full-tang construction adds durability, while the ergonomic shape keeps your hand locked in when things get messy.

A fitted sheath completes the package, offering classic protection and easy belt carry. This knife is built to perform and last.

The rugged Sasquatch Skinner feels like a survival knife meant for hard use and skinning. The first thing I did was make a fire. I feathered a dry birch stick and was impressed with the skinner’s edge geometry. I made curls that were thin enough to take a spark via my Uberleben ferro rod and the blade spine. I didn’t read any info on the spine having a 90-degree angle. However, it’s a hidden gem! The second half of the spine—middle to tip—is where it’s sharp.

I employed the Sasquatch to split poplar and maple via a baton with no worries. I found the handle a bit thin for gripping during specific crafts. Maybe that’s why it’s a skinner, not a survival knife.

The edge was sharp and stayed that way. I like the absence of gimping as I don’t use it. However, most knife folks would disagree, especially with a skinner. The knife seemed like a ramped-up skinner, slightly on the heavy side, but then think of survivalist/mountain man Laramy Miller—they don’t call him Sasquatch for nothing!

The sheath carries traditionally on the belt at a medium height. It’s not too much of a rib jabber, nor does it carry too low.

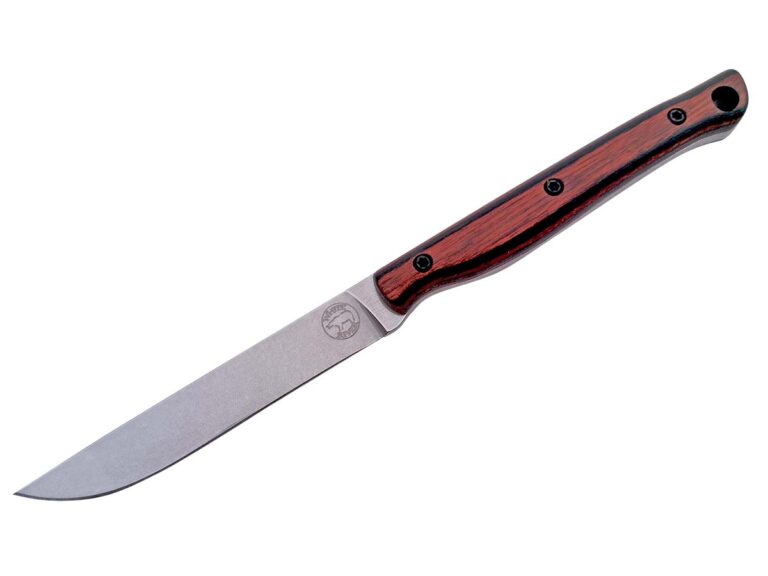
White River Knife & Tool Model 1 Skinner

The grip on the Model 1 was secure and the spine’s forward gimping proved useful. After an hour of skinning and deboning, the author had no complaints. The thin grind made cutting effortless and the taper is outstanding.

Pros

  • Premium Materials
  • Lightweight and Compact
  • Controlable

Cons

  • Lower Blade Hardness

Model 1 Skinner Specs
Blade Length: 3”
Blade @Thickest: .13”
Blade Steel: CPM S35VN stainless
Rockwell Hardness: 58-60 HRC
Finish: Stonewash
Scales: Textured orange G-10
Weight: 3.5 ozs.
Overall Length: 7”
Sheath: Kydex
Country of Origin: U.S.A.
MSRP: $160

The White River Knife & Tool Model 1 Skinner is a target-constructed field knife that blends compact control with premium materials perfectly sized for precision work without sacrificing reach. The blade has excellent edge retention and corrosion resistance for repeated use in harsh conditions. The textured handle provides a secure, ergonomic grip—wet or gloved—while the large choil and gimping enhance control during delicate skinning tasks. A custom-molded sheath ensures safe carry and quick access, whether belt-mounted or pack-ready. Lightweight and razor sharp, the Model 1 is a reliable companion for hunters who demand performance without bulk.

While there wasn’t a running wild game season in my area of the Northeast when I wrote these words, I stuck with simplicity. One bird always in season is chicken. I buy skin-on, bone-in and prefer to do the preparation. The Model 1 makes for an excellent, nimble butcher knife. I used the little gem to debone split-chicken breasts and skinned them with ease. The grip was never in question and the forward spine gimping proved helpful. I used it for about one hour, skinning and deboning with no complaints. The thin grind glided through the meat with ease and the taper is excellent.

TOPS Knives Backwoods Skinner

In ulu mode with the Backwoods Skinner, the author sliced raw carrots effortlessly. The edge geometry works for food and game prepping.

Pros

  • Versatile and Multi-Purpose
  • Unique and Secure Gut Hook
  • Excellent Ergonomics

Cons

  • Gut Hook Deployment

Backwoods Skinner Specs
Designer: Joshua Swanagon
Blade Length: 3”
Blade @Thickest: .16”
Blade Material: 1095 carbon steel
Blade Finish: Coyote tan coating
Scales: Green canvas Micarta®
Weight: 5.4 ozs.
Overall Length: 6.75”
Sheath: Black leather
Country of Origin: U.S.A.
MSRP: $270

The TOPS Knives Backwoods Skinner is a compact ulu-inspired knife built for precision and endurance. The deep-bellied blade is perfect for slicing through hide and tackling bushcraft tasks without flinching.

The gut hook nestled in the handle is excellent for hunting season. I used it as a cord cutter. The sharp hook is a standard fixture for search-and-rescue personnel to slice cord and rope and to free people from entanglements. Remove the grenade pin and carefully take out the gut hook. Reverse the hook and install it in the proper hole for security. Make sure to put the sheath on to prevent cuts. My gut hook took some working in with another object until it fit. I suggest using leather gloves to avoid cuts from the hook.

The handle features an ovulated grip and deep choil, offering fatigue-free control and a confident hold even in messy conditions. Hidden in the pommel is a clever gut hook, deployable when needed and safely tucked away when not. A sheath combining classic style with belt-loop-carry convenience augment the package. Designed by survival authority Joshua Swanagon, the knife is ready for big game, small game and everything in between.

I remember a video with designer Joshua Swanagon talking about the ulu-shaped blade. I saw the ulu pattern immediately when I first saw the knife. Luckily for me, carrots were in season. I used the Backwoods Skinner as I would an ulu, slicing and dicing. Carrots are more difficult to cut due to their hardness. A dull or too thickly beveled blade will wedge and split the vegetable. However, there was none of that. I used my forefinger on the drop portion of the blade tip as intended for controlled slices. I also used it like a regular kitchen knife, choking up in a chef’s pinch grip. Both worked perfectly fine and were comfortable.

Check Out More Outdoor Knives:

Advertisement

Must Read Articles

Read this before you make a knife

Knifemaking 101 – Read This Before You Make a Knife

  by Wayne Goddard My experience has taught me that there's nothing like digging in and getting started. I've often said the hardest part of the...
how to forge damascus steel

How to Forge Damascus

Advertisement
Advertisement