Knife collecting is an extremely rewarding experience for knife enthusiasts. There truly is a knife for everyone. Many increase or hold their value throughout the years, making collecting knives something to pass on to the next generation of knife collectors.
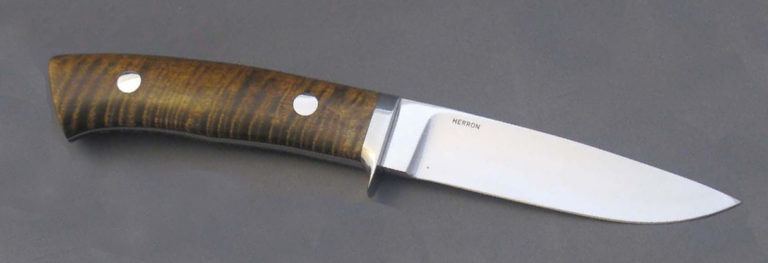
The tapered-tang Model 6 was one of George Herron’s best-known knives and was named in a poll as one of the 20 best knives ever made. The 4-inch blade is ATS-34 stainless steel and the handle is curly maple. Overall length: 9 inches. Herron made this one in his Aiken, South Carolina, shop. (Jay Mealing image)
Without a doubt, he was one of the best custom knifemakers to ever pursue the art. He gave information, expertise and precious time freely to those who wanted to learn. He was a crack shot, spitting in death’s eye during the Korean War and walking out of literal hell to fight another day.
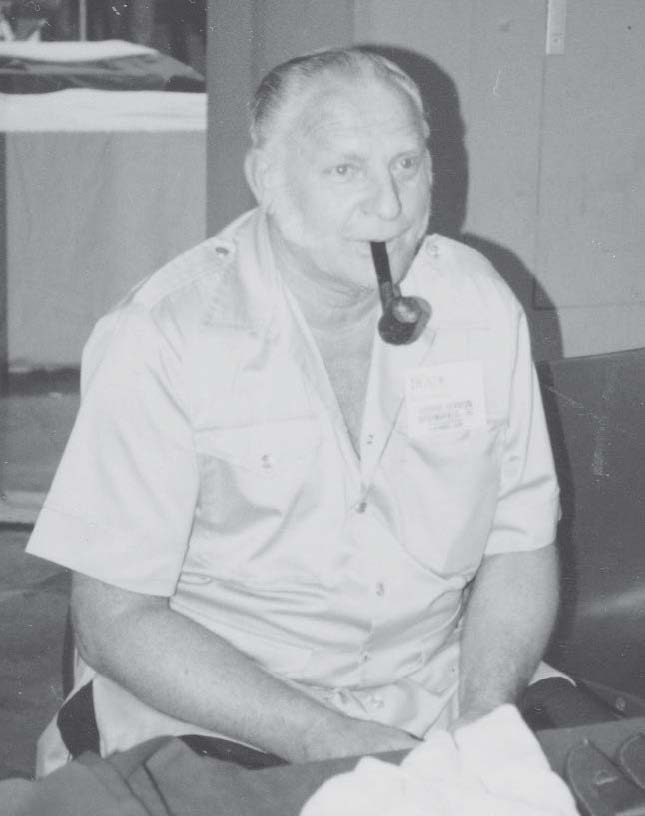
Mr. Herron hardly went anywhere without his trusty pipe.
“George Herron wasn’t just a great custom knifemaker,” began Bobby Branton, a custom maker who knew Herron and collected his knives for many years, “he was a great human being and a great person. You didn’t have to make knives for him to have an interest in you.”
Branton met George and his wonderful wife, affectionately known by the many who know her as “Miss Barbara,” when he was “bitten by the knife bug” and wanted to buy a few of the great maker’s knives.
“I started out as a collector and wanted to buy some John Nelson Cooper knives from a lady in a shop and found out from her that there were a number of South Carolina makers out there,” he recalled.
In his early days as a knifemaker, Branton bought the leading books on the topic by Sid Latham and David Boye. He noticed photos of some of Herron’s knives in Latham’s book and traveled to Herron’s home in Aiken and later Springfield, South Carolina.
“I called ahead of time and asked if I could stop by,” Bobby said. “I bought two knives with all the money I had. We looked around the shop and he was getting ready to go to a show. We went inside and he pulled a big deerskin off the table like a matador, and his inventory was sitting there.”
After Bobby made his first knife, he returned to Herron’s home to get a review of the effort.
“He said, ‘That’s nice, but if you’re going to make a knife, make a knife,’” Branton smiled. “He gave me tips and mentored me.”
A Custom Knifemaker Who Gave Back
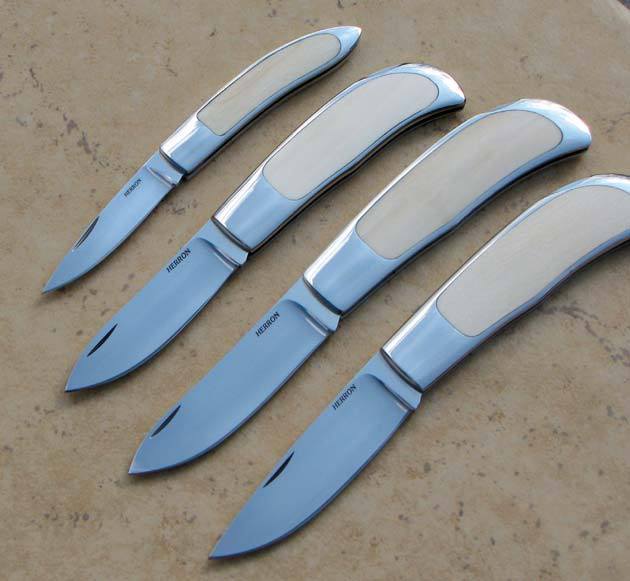
George Herron made many folders and varied his styles quite a bit over the years, including bolstered lockbacks, interframe lockbacks, slip-joint gent’s knives and others. The top knife is a slip-joint gent’s knife and the bottom three are interframe lockbacks. The scales are ivory. (Jay Mealing image)
George did the same for many would be custom makers who came calling. Custom maker Wayne Hendrix worked for him in the 1980s and learned to make custom knives from the master.
“He was a heck of a teacher,” Wayne said. “I tell you right now, if I went out there and picked a maker to work for, I couldn’t have picked a better one in terms of making working knives. His designs were simple and his knives were functional. He was a very intelligent man and he had common sense to go along with it. You don’t necessarily see someone with both that often.”
At the time he started working in the shop, Wayne indicated George was considered one of the world’s top five custom makers. Herron built a reputation of outstanding quality for a fair price, and part of his legacy is that his knives were affordably priced. He sold them by the thousands.
Wayne grew close to George, not just in the knife shop but in other aspects of life as well.
“I hunted with him and painted the inside of his house after they moved to Springfield,” he smiled. “It was super cold that winter, and he had an enclosed two-car garage where we set up his shop. We were a lot alike but he was a lot smarter than I am, and I consider him to be my second daddy. I couldn’t have picked a better maker to apprentice under, and I’m still riding George Herron’s coattails.”
The Secret To The Legacy
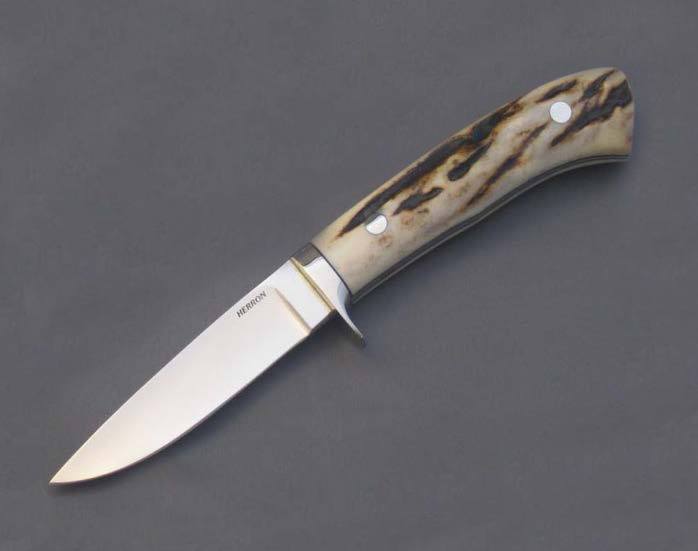
Named after Col. John Bigbie, the Bigbie skinner was another George Herron favorite. The 3.5-inch blade of ATS-34 stainless had a tapered tang and a stag handle. Overall length: 8 inches. This one was made in Herron’s Springfield, South Carolina, shop. (Jay Mealing image)
In an era when knifemakers looked to pricing of individual units as a barometer of their profitability, George was different. He never forgot that working people needed affordable knives.
“One time a committee of Guild members came to his table,” Cutlery Hall-Of-Famer and past BLADE publisher and editor Bruce Voyles remembered, “and they told him that he was selling his knives too cheap. He said, with a few words that I can’t repeat, that he would make and sell knives the way he wanted and they could do the same. Now, George sold most of his knives for $150 to $300, and most of those have doubled or tripled in value. None of the guys on that committee could say that their knives have done that.”
Voyles lighted up describing Herron as “a man’s man, gracious, courteous, or mean as he needed to be in a given situation.”
Perhaps the best tribute anyone could provide to the life and legacy of the great George Herron was Voyles’ effort to be at the only place on Earth he wanted to be when his friend passed away.
“We were in New Orleans at Mardi Gras,” Bruce commented. “On Fat Tuesday morning the telephone rang, and it was Bobby Branton telling me that Mr. George was gone. We loaded up and went home right then so we could attend the funeral in South Carolina. There are very few people I would have done that for.”
Such an effort proves one thing for sure. George Herron, larger than life, remains with those who knew him in undiminished spirit.
Meet Your Knifemaking Heroes At BLADE Show 2019
The world’s largest knife show takes place this June in Atlanta. Learn more here.
Taking great photographs of knives is no easy task—unless you’re a professional, in which case you can stop reading. Essentially, you’re taking a highly detailed shot of something that fills the entire frame, not something small like a bee in the center of a background of blurred petals, but a long, thin item that needs to be in focus from point to butt. But there’s so much more. Every line must be fully revealed and a depth established to convey thickness or thinness. I know close to zero about the mechanics of the art. There are plenty of videos and online courses out there that’ll give you the science of the “study of light.” They can speak to you of aperture, ISO and shutter speed in infinite combinations. All I know is a good photo when I see one, and how I have tried to improve my own photography. Here are the 6 things BLADE looks for in a knife photo. It’ll be up to you to make it happen. Why? Because there are “5 Ways To Get Your Knives Featured In BLADE” and you want to be ready.
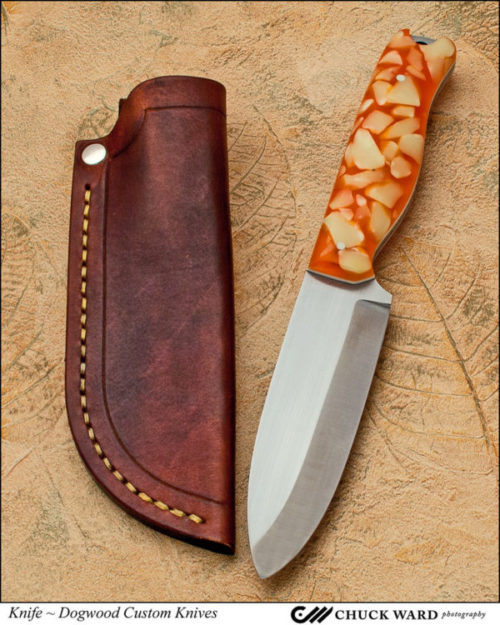
Dan Eastland of Dogwood Custom Knives used professional photographer Chuck Ward to take this exquisite image of his Hawkins knife. Chuck will be the official photographer at the 2017 BLADE Show. Contact www.dogwoodcustomknives.com for more about this outdoorsman’s knife.
Hire A Professional
Knife manufacturers, like good real estate agents, know that great photos will close a sale. They understand that the investment in a professional photographer pays off. When BLADE asks for a photo of their latest release, for example, some even allow high-resolution downloads right from the consumer website without having to go through a media relations person. That can be a time-saver at deadline. I’ve even experienced a large company resubmitting photos with even better ones. There’s nothing that says a one-man-show can’t learn from that level of perfectionism. It’s the same effort you put into crafting your knives.
Hiring a professional photographer will cost you some money, and it’s worth every penny. But like all professionals, some are more versed in what we’re trying to accomplish than others. A portraitist, wedding photographer or photojournalist may or may not be able to give you the results you’re looking for. You want to make sure you chose someone who can show you a portfolio of knives, guns, tools or similar items that looks…well…perfect.
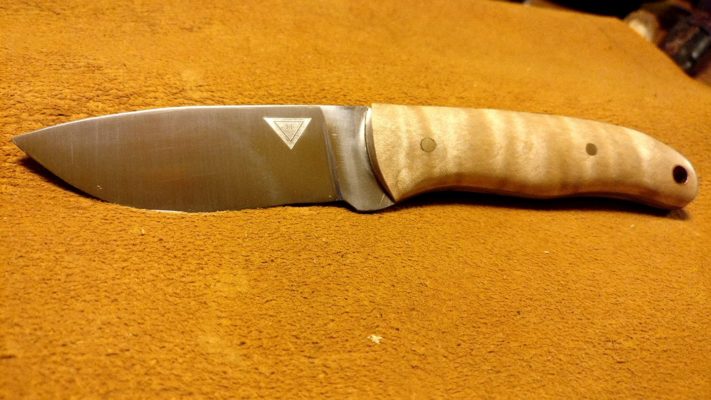
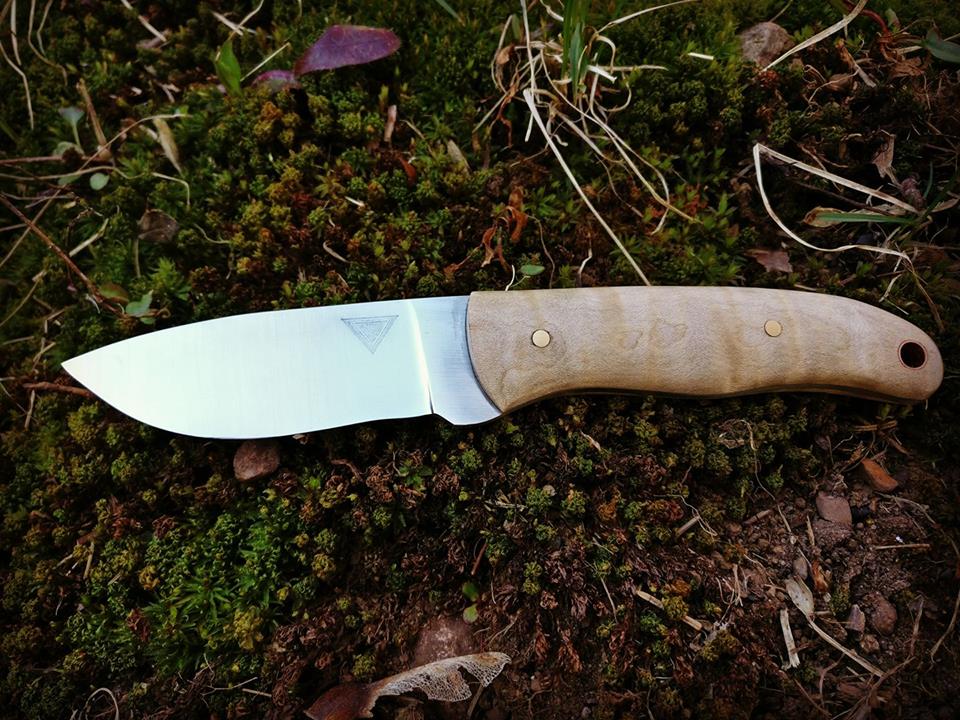
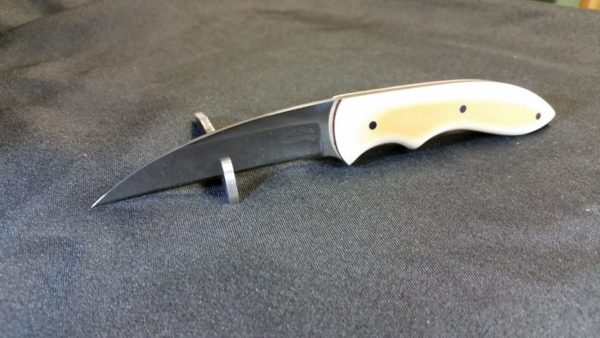
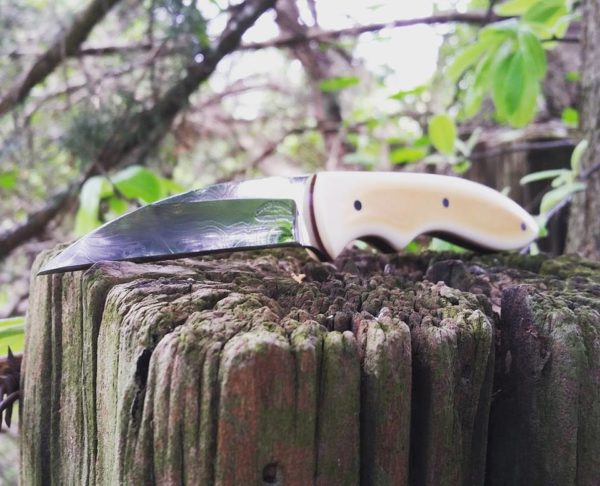
The handle on Tim Tracey’s everyday performer doesn’t stand out as much as it could against the similarly colored background. The caramel color ends up saturating everything in the photo. Also, although the focus on the blade is crisp, the topline on the handle is a touch soft.Tim Tracey took his knife outside and got not only a good image of the blade and handle, but good contrast and a better depiction of the piece’s fullness. The recurved blade is made of 1095 steel and sports exhibition grade curly maple scales. Makers list price: $220. Contact [email protected], Timtraceyknives.com on Facebook or @TimmTracey on Instagram.
You will want two kinds of photos. Photos for your website and social media will create an emotion, an atmosphere. Instagram is full of examples of survival, bushcrafting and hunting knives being photographed outdoors and tactical knives being shot in gritty workshops or light-painted in darkness. Makers create everyday carry still lifes with folders, wallets and watches. Typical? Sure, but each one tells a story that has been told a thousand times before in a slightly different way. Nobody reads just one novel, and nobody looks at just one knife photo. They are all beautiful in their own way. The other kind of photos you will need are those of just the knife itself on a simple background, what is often referred to as glamour or beauty shot.
The question you have to ask yourself is: Are you willing to put as much study and effort into your photography as you are your knifemaking? Answer honestly. There’s no shame in shelling out cash for stunning work. Fill your website with those choice images and have them on hand for BLADE, and then you can practice your own photography skills for social media. Even on social media, though, take the time to post only your best images. Plenty of knife-related Facebook Groups out there are looking for banner photography and have to reject knifes they’d like to showcase because the image is, say, out of focus.
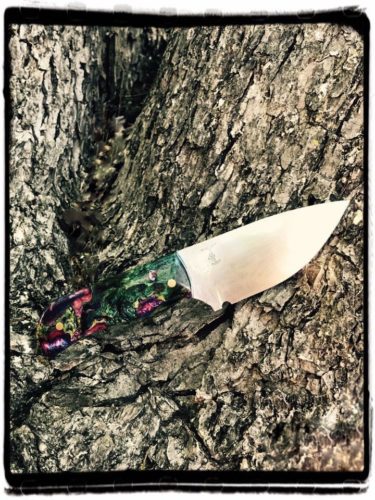
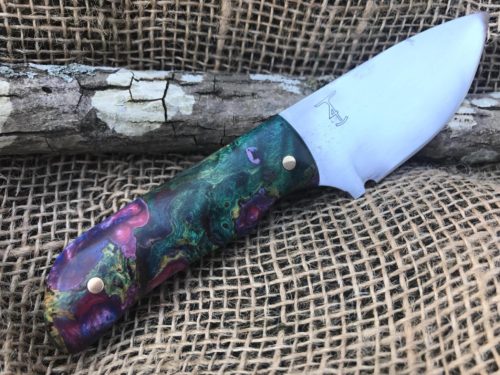
Although this image clearly shows the blade on this skinner by Bobby Toerck, the multicolored handle gets lost in the textured bark.In this image, the handle on Bobby Toerck’s drop-point skinner is nicely contrasted against the still-textured, but now single-colored burlap. And the 80CrV2 blade still looks terrific. The handle is triple-dyed box elder burl by Terry Dunn. Maker’s list price: $175 with Kydex sheath. Contact T4 Custom Knives on Facebook or call 903-812-1173.
Do-It-Yourself
Let’s say you can’t justify the expenditure at this point in your knifemaking journey. Or, more likely, by the very nature of your interest in crafting, you’re determined to take quality photos of your knives yourself. You think, How hard can it be? Very. It can be very challenging to produce the kind of photos needed for a glossy magazine.
“Real” Camera Vs. Camera Phone
You can take the cost of a few sessions with a photographer and buy yourself a decent camera, for starters. Keep in mind, however, that lenses that come with a camera are usually not very good. Be prepared to buy a decent mid-range lens at a minimum.
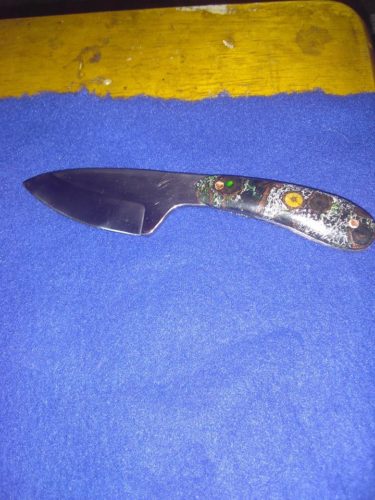
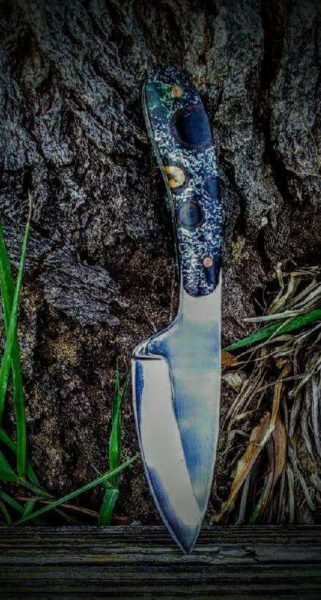
In this vertical image of a horizontal knife, the butt is cut off. There is also glare on the handle and the blade looks dull. Will Thompson decided to get some help for the reshoot.Even though Will Thompson’s handle has to work to stand out against the tree bark, it succeeds. The pattern is now discernible and the blade looks great. This drop-point finger skinner is made of 1095 steel and the Plantstone (stabilized pine branches with aluminum flakes) scales are from Robert Belcher. Maker’s list price: $75. Contact [email protected] or on Facebook at Dusty’s Cutlery.
Then again, there are some excellent photos being taken with newer camera phones. Do NOT attempt this with an older model. You will only frustrate us both because they do not allow for high enough resolution of the images. Be sure if you submit a photo from your phone that you email it at its largest size. If there are settings on your phone that need to be changed to allow for taking photos at higher resolution, then you’ll need to set those accordingly. Those settings will apply only to photos you take going forward; you cannot retroactively apply them to photos already taken. Whether you use your phone or a “real” camera, the same fundamentals of photography apply.
Tip: If you smoke or if you have your phone in your shop, there could be resin or dust on your lens. You’ll want to clean that—gently—before you begin.
Be sure to take great photos of all your work before they are sold, and to back them up, either in the cloud, through an online backup service or on a thumb-drive.
6 Things BLADE Looks For In A Knife Photo
Focus
The entire knife must be in focus, from point to butt. Are there some artsy shots of crystal clear blades and blurred handles or vice versa? Sure, but that’s not what we’re looking for in print. Online, we’re more open to considering some of those shots, provided we have some conventional full-focus shots to accompany the story as well.
If you are taking what we call a “using” shot where you’re photographing the knife in use for an online story or if we are working on a story together for print, be aware of where your camera is focusing. I have seen crystal clear shots of a leaves on the ground while the knife and the hand it’s in are both blurry. Focus is probably the single most important aspect of a good photo.
Contrast
Be aware of the color of your background. A grey knife on gray pavement, a black knife on a blackened tree stump, camouflage your knife. It’s like a silver or gray car against gray pavement on a gray winter day—you can’t see it. No contrast. This applies to multicolored handles against multicolored backgrounds as well.
In this image of Andrew Griggs’ knife, the blade looks dull and the focus on the handle is somewhat soft. Also, if this image were being used for a BLADE Magazine section that required a cutaway, the prop would be in the way of the blade.Andrew Griggs got outside to reshoot his knife. Now you can see the pattern-welded steel! The Southern Comfort gentleman’s fixed blade has a Vintage Paper Micarta handle. Maker’s list price: $300 with leather sheath. Contact Griggs Knives on Facebook.
Composition
For two of BLADE’s sections, “What’s New” and “Knifemaker Showcase,” only cutaway images of the knife are used. (See the “5 Ways To Get Your Knives Featured In BLADE.”) This means that you don’t need to worry about the background at all. In fact, white paper is fine, but watch for any shadows. It’s fine to have a slight shadow, provided the lines of the knife are clearly visible. If the edge or spine of your knife bleeds into the shadow to the point where you can’t tell where the knife starts and the shadow ends, that’ll need to be reshot. Our designers need to able to see those lines.
Mood images are fine for both a feature in print and for online stories. Feel free to get as creative as you want, but ensure that the knife is the main attraction. Photographing knives is one of those times when the rule of thirds really isn’t applicable. The knife is the main attraction and we’re not going for proportional sharing with a background. If the image you’re submitting for consideration is for a section of the magazine that uses cutaways and there’s moss or grass, fabric or fur encroaching on the blade itself, that’ll impede the designers in their work.
Make sure no part of the knife is cut off, and don’t crowd the point or butt. If you place the knife in a stand and that stand encroaches on the knife, it can’t be used for a cutaway, but it could possibly still be used for an online story or in print.
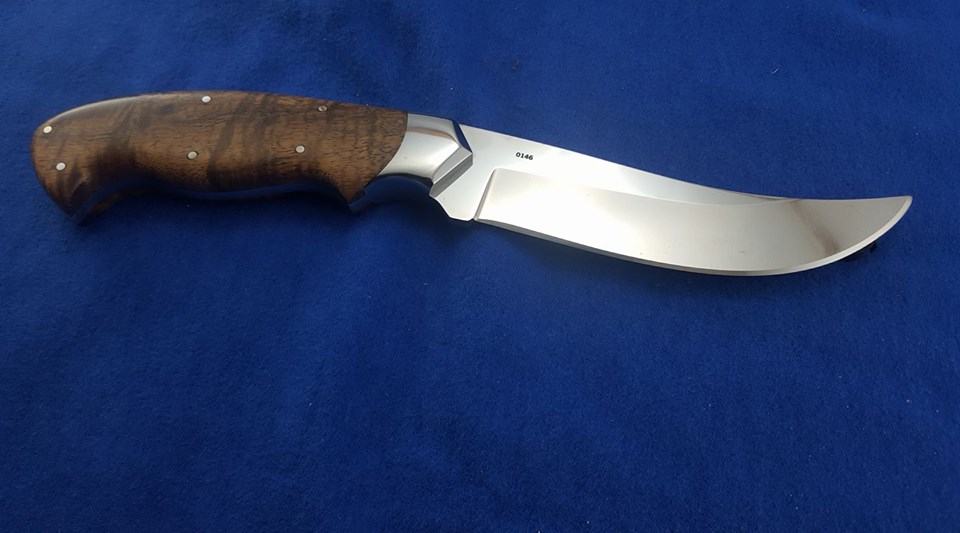
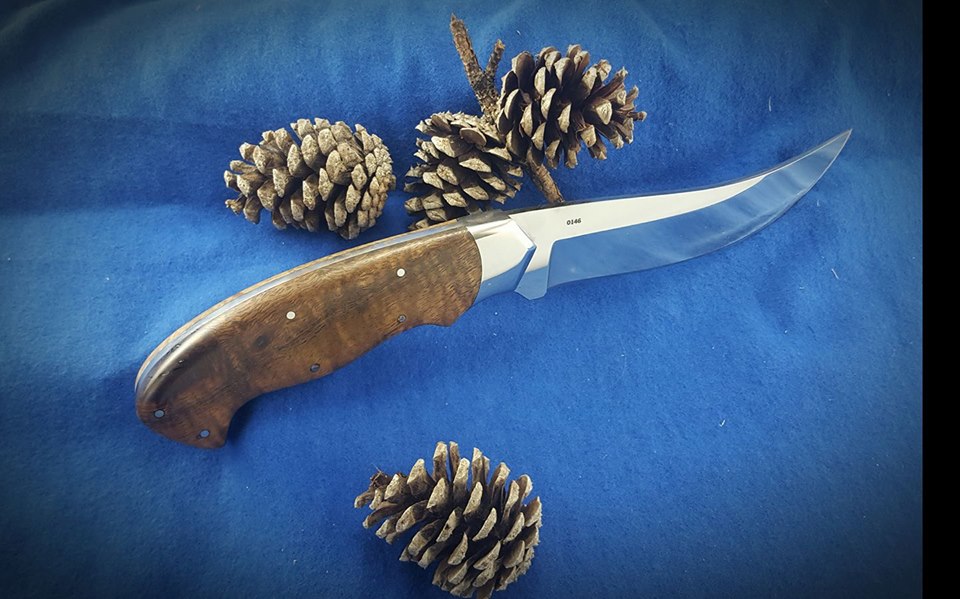
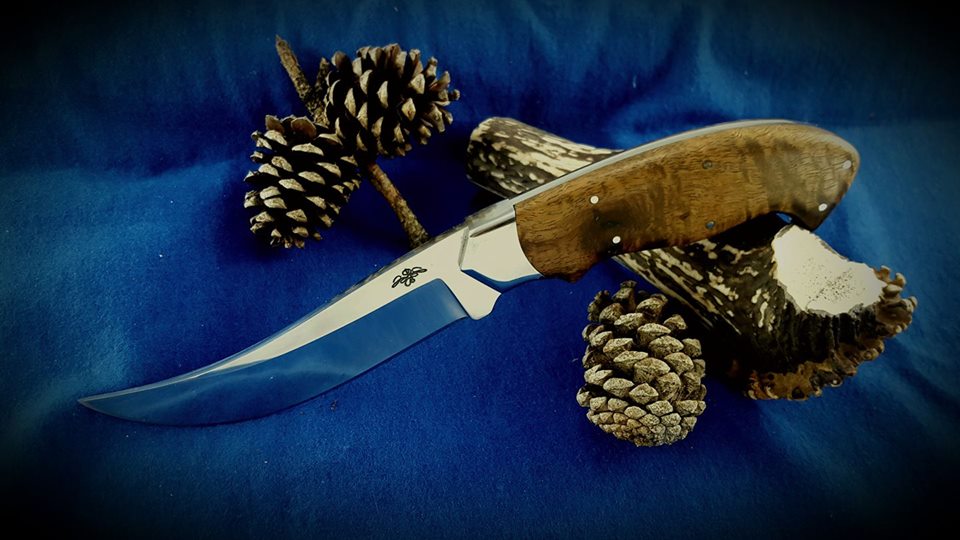
Devin Bliss has taken a very good photograph here. However, there is shadow at the handle, which would make it challenging for the designers to see where to make the cutaway image for inclusion in say, BLADE’s “What’s New” or “Knifemaker Showcase” sections.In Devin Bliss’s second attempt, the handle is more visible, but looks less rich in the harsher lighting. The inclusion of the pinecones makes a nice vignette without encroaching on any line of the knife, so it could still be used for a cutaway or as is. As a side note: Artists will tell you that the eye finds odd numbers more pleasing. I did not tell Devin that. I simply told him the truth: He had surpassed my level of being able to offer suggestions for improvement. He contacted another knifemaker for guidance.At this point, knifemaker Devin Bliss has reached a level of photography that serves his knives well. What did he do? “I changed the direction, propped up the handle onto the antler, moved the lighting around and used a foil reflector to get…a bit more light on the handle and a white reflector to mask off some glare on the blade and bolster.” This modified pronghorn is made of CTS-XHP steel with a curly koa handle. Maker’s list price $300 with stamped leather sheath. Contact [email protected], 903-736-3052 or on Facebook at DB Custom Knives.
Depth and Angles
In layman’s terms, you need to ensure your knives don’t look flat. You’re trying to capture something that’s three-dimensional in a two-dimensional medium. This is where some knives can look disproportionate because you’re focusing on the handle and the blade is in the fuzzy background, so to speak. A shallow depth of field is fine as long as your knife is standing out crisply from point to butt.
Finding the right angle will also help prevent your knife from looking flat. Prop up your knife somehow. Even just leaning it against a pebble allows you to move and capture the thickness or thinness of the piece. Laying it on your hand can work as long as your flesh doesn’t obstruct any of the knife’s lines.
Tip: Take dozens of photos from many different angles and distances and pick the best one of the bunch. If you don’t nail it, don’t compromise, don’t settle, get back there and take dozens more. Pros will take hundreds of impressions to deliver 30. Seriously. Take more shots. No, more. Get a ladder and shoot down, circle your quarry and shoot multiple shots from each hour of the clock, and get down and shoot at eye level. Shoot at morning, noon and night, but mostly late afternoon, to see how different types of sunlight affect your knife images. It’s what the pros did when they were starting out. Now, after years of experience, they can judge the sun’s angle and know how to get what they need.
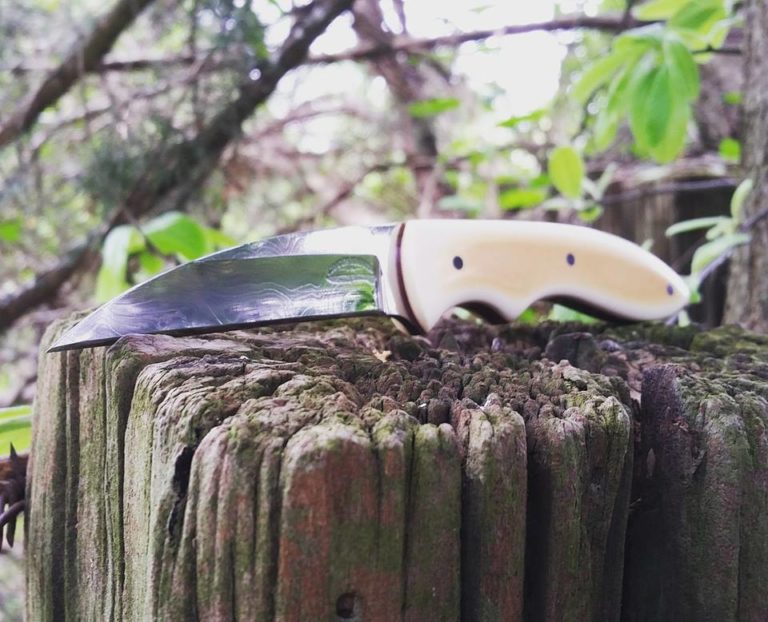
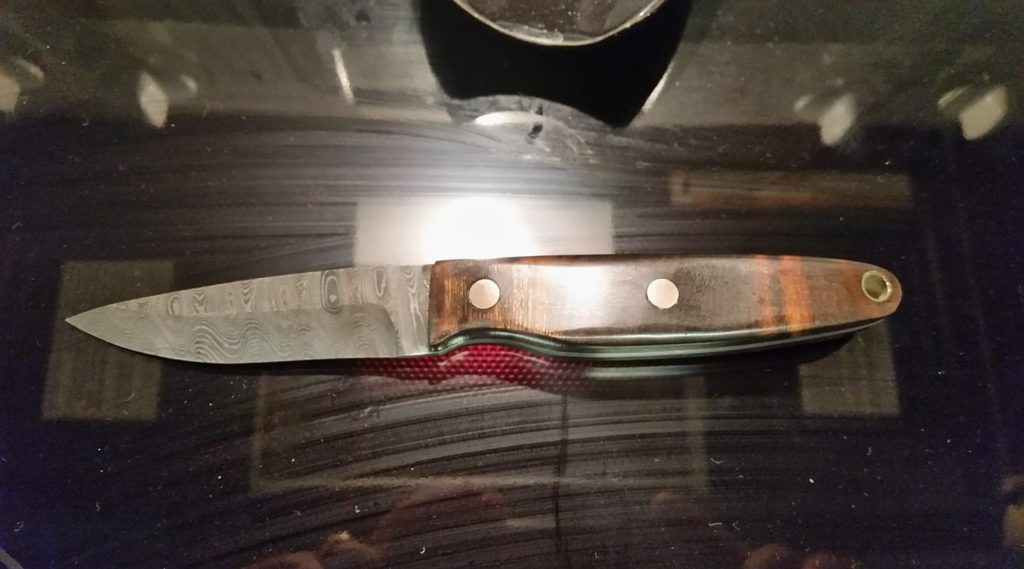
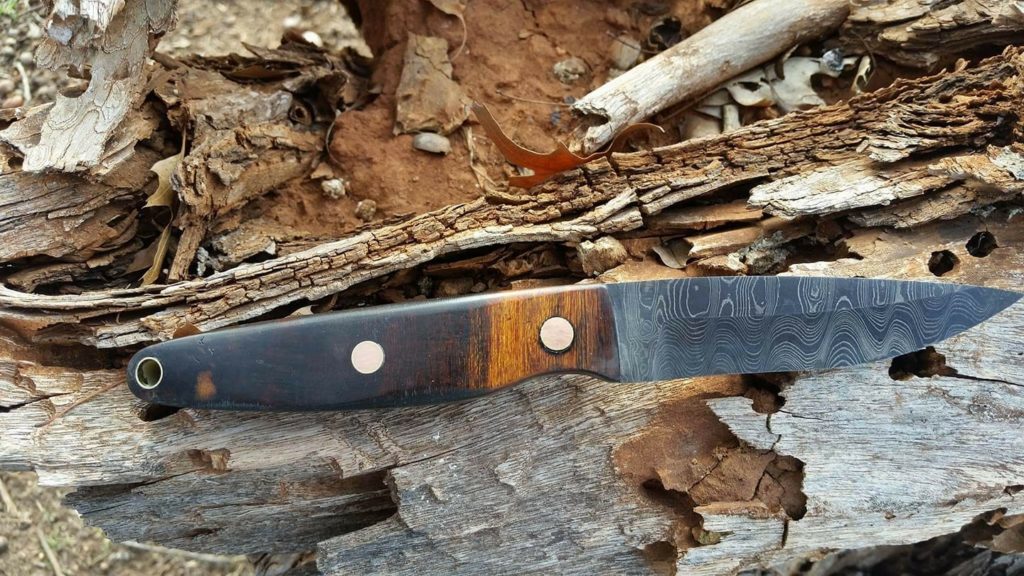
Charles Hawkins has a hard time taking a bad photo, but he pulled out all the stops on this one. That is a stovetop background, complete with streaks and a red glow. The glare on the handle deadens the handle and the pattern in the steel also appears dull. Note the photographer’s hands reflected on the cooktop. Analyze the entire photograph closely.Charles Hawkins took his knife outdoors, and now the focus is as sharp as can be. The background adds interest while still allowing for plenty of contrast. The 3.5-inch blade is made of pattern-welded steel from Alabama Damascus Steel. The handle is ironwood. Maker’s list price: $300. Contact www.hawkcustomknives.com.
Lighting
Natural light is easiest for the amateur to master. A cloudy day is good to reduce blade glare but sometimes it will dull colors. Try a sunny day, but shoot in the shade. Avoid glare on either the handle or the blade whether you’re shooting indoors or out. You also don’t want dappled light coming through the leaves of a tree to interfere with the hamon, for example, so try to find a solid overhang. You also don’t want reflection to make your blade look different than it is in reality.
Indoor lighting is infinitely more challenging. Low light, fluorescent light, light-painting in a dark room—they all have the potential to become “noisy,” grainy, soft. I will leave it to the articles and videos you’re going to pour over to explain why, but trust me, it’s not easy. Sometimes, in light-painting for example, the pins might absorb all the light and they take over the picture. Or the handle’s too dark, or the handle’s visible, but the blade looks dull. Changing the countless variables on this project will help you get the right shot out of your many attempts. It can help to take notes so you know what you’ve tried and whether or not it worked.
Avoid using the flash inside your camera. It will only give you an overlit image that makes your work look flat. An external flash, shot off a wall or ceiling or even a white T-shirt, or an extra light diffused with a white paper bag, may help, but now your knifemaking shop has turned into a spaceship and you’re behind in your orders.
Specs
Images need to be 300 dpi for print with the photo at least 8 inches on the longest side, preferably 10. The image size should be at the very least 600 KB. It’s not that we’ll run it that large, but we need to have the option to do so, especially if we’re doing a cutaway and the knife doesn’t fill the frame.
We prefer .jpg format, and that you attach the image file rather than dragging it into the email. Sometimes that can make a difference in resolution quality, though it admittedly shouldn’t. Also, for similar reasons, submit originals and not versions scraped from Facebook or other social media platform, even for online stories.
Remember, it’s all about the knife here at BLADE. Oh, and makers and manufacturers, too. But without a fantastic photo of a knife as a starting point, how are we ever going to get to know you better?
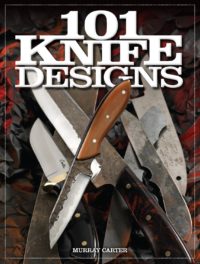
“101 Knife Designs” is not only filled with great comparisons of blade designs and design theory, but offers terrific examples of exceptional knife photography by Hiro Soga.
Knifemakers of all skill levels will enjoy comparing knife designs in this book by Murray Carter. The photographs by Hiro Soga are exquisite! There is even a discussion on the theory of knife design to help you better understand your craft. Save 35 percent off the cover cost of $29.99 for a total of $19.99.
Al’s knives were exquisitely tactile—they just felt good in your hand. Their performance set a new standard for factory made knives. His folders were handsome, graceful front locks that balanced beautifully and were incredibly strong considering their light construction. They were made for knife users and in many ways were the first tactical folders. (Editor’s note: On page 102 of the February 2003 BLADE®, one of those tasked with rating the top 10 tactical folders of the previous decade said Mar was the grandfather of the tactical folder craze.) I was an early adopter of Al’s knives, as were many in the covert community who relied on knives professionally. As the saying went, “Al Mar knives were unseen in all the best places.”
Al passed away in 1992 while still a relatively young man. His company, Al Mar Knives (AMK), continues to offer his original designs—in my view still unsurpassed today—and new designs true to the spirit of the originals.
Shawn Carlson and I reviewed four folders from the company’s current production. Shawn is a former professional butcher and lifelong outdoorsman. We used the knives to cut rope, cardboard and denim, whittle wood, baton through heavy logs, make a hobo stove, reduce a large pork shoulder to chops and roasts, and otherwise employed all the knives for general daily tasks. We used the knives as they came from their boxes and did not sharpen them during a week of continuous work.
EAGLE ULTRALIGHT TALON
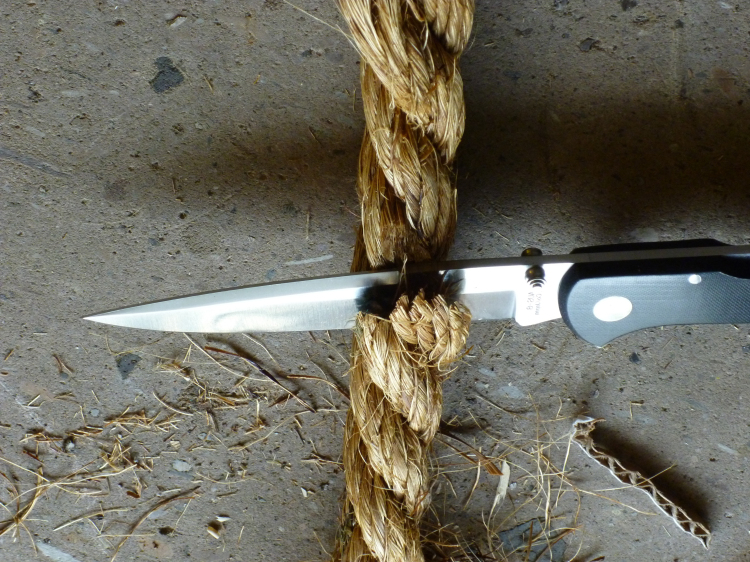
The Eagle Ultralight Talon (pictured cutting rope above) is a lineal descendant of the original Eagle. The latter folder prompted me to contact Al, which led to long discussions on the changing role of folders in the modern world, and the need in the covert community for a folder that was a “wolf in gentleman’s clothing.” The Eagles were my go-to folders for over two decades and never let me down.
The Eagle Ultralight Talon incorporates such design features as a pocket clip and thumb studs. Its Micarta® scales and bolster-less design combine to make it light as the proverbial feather. The blade geometry varies from the flat grind of the original but surrenders nothing in performance.
The Talon sliced through the thickly muscled pork shoulder like a light saber, and crunched through 1-inch hemp with an easy push cut. It slashed through an old pair of jeans as if the heavy denim were cheesecloth. We whittled fuzz sticks, split kindling and sharpened a couple of ash limbs to make fish spears. The fine point and agile blade proved a capable tool for work on wood. Slim, elegant, comfortable in the hand, the Eagle Talon is a gentleman’s knife that does wolf’s work. The primary recommendation I can offer is to continue production.
SHRIKE
The Shrike was Shawn’s first choice for preparing chops for the grill. “This blade shape begs to cut meat,” he stressed. “The angle and curve of the edge and the slightly curved handle lends itself to deep breaking and slashing cuts, and offers nearly zero resistance through the large muscle structure of the pork shoulder. The Shrike was more than capable at splitting kindling, cutting rope and whittling tasks, but this blade geometry and edge curve excels at meat cutting.”
The handle is textured Micarta for a sure grip with slippery hands, and in extended work is slightly more comfortable than the Talon’s thin grip. A modern design by ABS master smith Kirk Rexroat, the Shrike includes a heavy-duty locking liner, flat grind, thumb studs, pocket clip and open construction. I was very impressed with how well the Shrike performed overall, and how well it incorporated a totally new design into a venerable lineup. Its striking barracuda profile presents a handsome and imposing appearance when the knife is open.
MINI SERE 2000
The Mini SERE 2000 is a smaller version of the classic SERE. In the early ’80s, Al worked with Col. James “Nick” Rowe to create the first purpose-designed survival, escape, rescue and evasion folder, the SERE. Col. Rowe was and is famous in the SF community, a hero who survived five years of captivity in Vietnam and escaped his captors. Years later he became commanding officer of the SERE training school. When he met Al, Col. Rowe defined a need for a new kind of knife, smaller and more portable than a fixed blade but stronger than any other folder. The SERE became that knife.
The Mini SERE 2000 incorporates a locking liner, thumb studs, a textured, digi-camo Micarta handle and a pocket clip. Its smaller dimensions and lighter weight make it more convenient to carry than the original SERE, while giving up little in performance.
Like the Talon and Shrike, it sliced through the large pork shoulder muscle like it was designed especially for the job. Punching holes and slicing through a light steel can to make a hobo stove was easy with the SERE. Sporting a strong, sure grip and a stiff, razor-sharp blade and point, it made short work of wood, including being batonned through a 6-inch log. There was a trade-off in that the 3-inch blade limited us to edge cuts. To make contact with the baton on the other side of the split log, we had to adjust our technique—pivoting the blade by rocking the handle up and down—until we had enough room to use the baton again.
The SERE handled every task with relative aplomb. I would prefer the SERE over the other four knives we reviewed if I needed to build a temporary shelter or use it for other SERE functions. The SERE’s handle was the most comfortable of all the knives in the review, and one of the most comfortable I have used anywhere.
However, the hand guard got in the way during batonning and doing sheer cuts, an important task for any survival knife. The guard looks attractive but has no useful function. If it were my daily carry knife, I would file the guard off. The SERE is a strong, capable performer with a reserve of strength greater than the others in the lineup, a worthy descendant of the original SERE.
SLB
The SLB (Stout Little Backup) is a handy folder that is lightweight and miniscule. A handsome design, it has a short, stubby blade, smooth black Micarta handle, a locking liner, thumb studs and spring clip. We did not try batonning this little guy. We cut rope and denim, whittled small wood and sliced cardboard. We also used it to cut through the pork shoulder, which it did easily.
The only drawback was due to the short blade. Cutting through the pork shoulder and the loin required more cuts than the longer blades. Other than this obvious limitation, the SLB stands with its teammates.
FINAL THOUGHTS
The only change I would recommend for the entire lineup would be the design of the thumb studs. They protrude too far. They could be replaced with angled milled ones that are shorter and fatter, thus providing equally secure blade opening and eliminating the one design feature that, especially in the case of the Eagle, detracts from the folders’ otherwise sleek lines.
After a week’s hard use, all the knives’ blades retained a working edge, and fit was as tight as when they came from the box. Al Mar set a standard for design and execution that raised the bar for the industry. The current offerings of Al Mar Knives maintain that standard.—by James Morgan Ayres
Specialties: Utility/tactical folders and fixed blades, kitchen knives and more
Blade Steels: AUS-8, VG-10, VG-10 cobalt and CPM-S30V (sporting knives); laminated VG-2 and VG-10 cobalt center with 16 layers per side of 420J (kitchen knives)
Blade Finishes: Ceramic black coating available on some models
Handle Materials: Brown canvas, black, black linen and white Micarta®, G-10, stainless steel, Prylon, black Pakkawood, abalone, black-lip and white mother-of-pearl, cocobolo, honey jigged bone and stag
Lock Mechanisms: Front locks and locking liners
Pocket Clips: Reversible models available on some models
Learn how to spot flaws in Damascus steel blades, like delamination and inclusions, with expert tips from master bladesmiths.
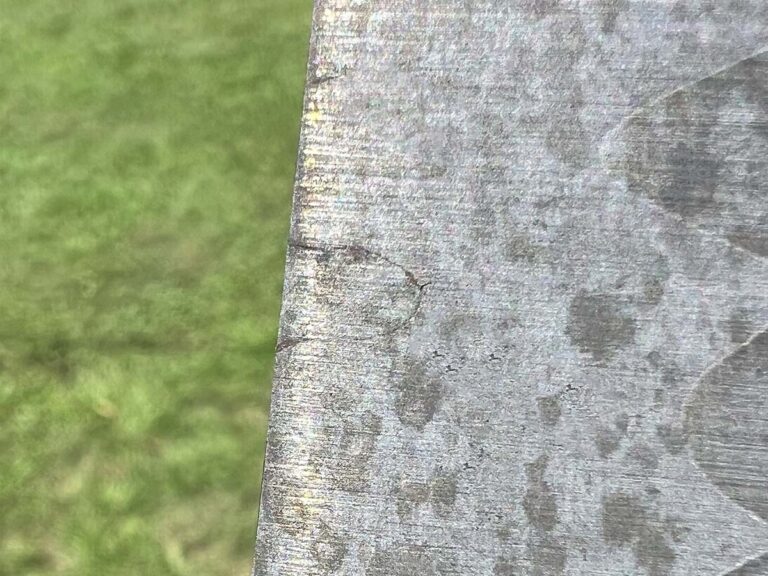
They may be small and insignificant or obvious and glaring, but the skill that is involved in forging damascus steel and then fashioning blades and furniture that adorn custom knives like no other component naturally produces the potential for flaws in the steel itself.
Ironically, the structure of damascus steel, the allure of its beauty and texture, images and etched artistry, is brought together with the potential for a flaw. The production of billets that contain welded elements of 1080 carbon- and 15N20 nickel-alloy steels or other variations involves the marriage of metals. And like any union there is the possibility of a fault. The flaws may be serious or inconsequential. For the buyer, the ability to spot an imperfection and make a value judgment is highly beneficial in the ownership experience.
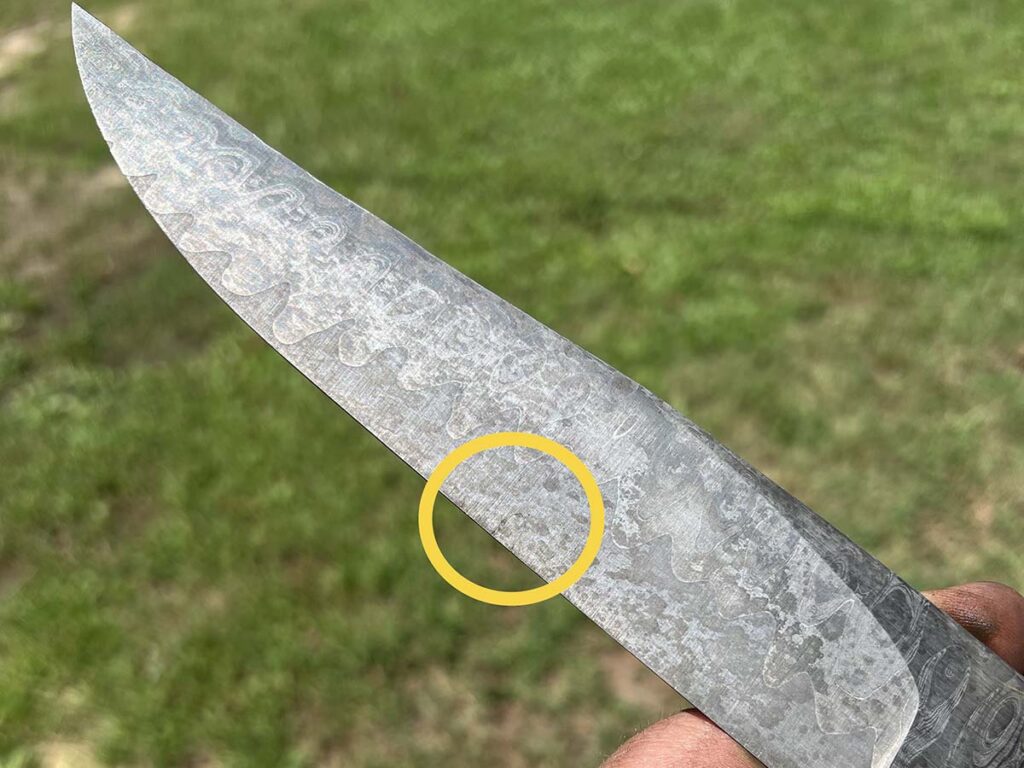
“I would say the most common flaw in a damascus blade is delamination,” ABS master smith Lin Rhea opined. “This shouldn’t be in a knife that is offered for sale. It’s usually evident as a hairline void in the layering and could occur anywhere on a blade. But I see them mostly in the deepest part of the blade as they are revealed in the bevel grinds. I believe this could be prevented by being sure the billet is up to proper welding heat before extracting it from the forge for the first weld in the particular stage of pattern development.”
In a similar perspective, ABS master smith Bill Burke sees imperfections as “a closed shut or incomplete weld that can be found anywhere on the blade. It can be seen as a dark or silvery line in lightly etched damascus or becomes a deep crevasse on heavily etched damascus—and it is caused by the smith not letting a billet soak at heat long enough before welding, or by manipulating a weld that has not been fully set and then working this tear back into the pattern.”
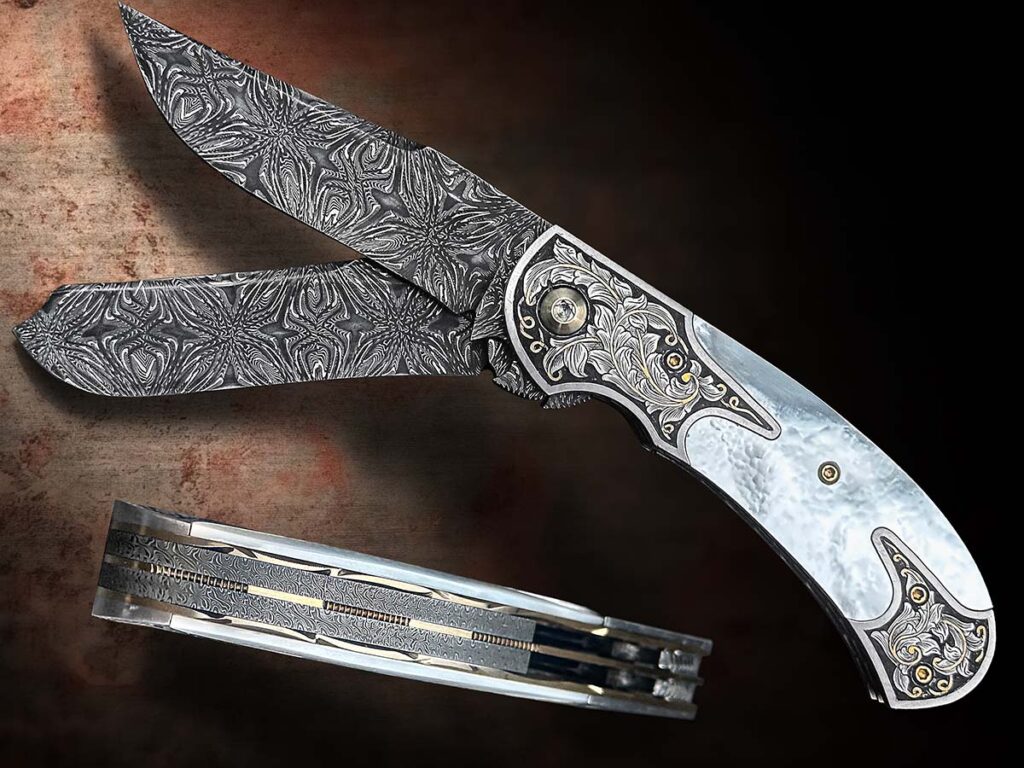
Fortunately for knife enthusiasts, most quality damascus knives are free of flaws, such as Eliot Maldonado’s saddlehorn trapper in Blackbird damascus by Chris Zimmerman. (Jocelyn Frasier image)
ABS master smith Steve Randall agrees and sees these types of imperfections and other potential flaws as well.
“The most common flaw on a damascus blade is the cold shut or an area where the pieces did not weld,” he observed. “It is not so much where it occurs on the blade such as the tip, edge or spine, but where the two different steels meet in the pattern. It’s the two steels that didn’t weld together that creates the flaw, and sometimes they aren’t noticed until [the maker starts] grinding into the blade.
“I would say another common flaw for damascus, mosaic specifically, would be shadow lines from the tiling process,” Steve continued. “Structurally they don’t change the steel, but they can detract from the mosaic visually.”
Both Rhea and Burke have encountered other flaws related to the fusion of the two steels in damascus.
“Less common is an inclusion of some kind,” Burke explained. “Twenty years ago flux inclusions were fairly common. Now one sees inclusions of weld filler material, though, overall, inclusions are less common now than 20 years ago. Inclusions are always found in between the elements that make up the pattern in a bar of damascus.”
Lin added, “I’ve also seen where the maker has left a bit of welding rod material within the damascus blade. This appears as a cloudy gray area and is pretty distinct in appearance from the hardened damascus. In the event wrought iron or mild steel is mixed with high carbon and the layering is of a relatively low number count, this could be part of the intended pattern, so it might be acceptable.”
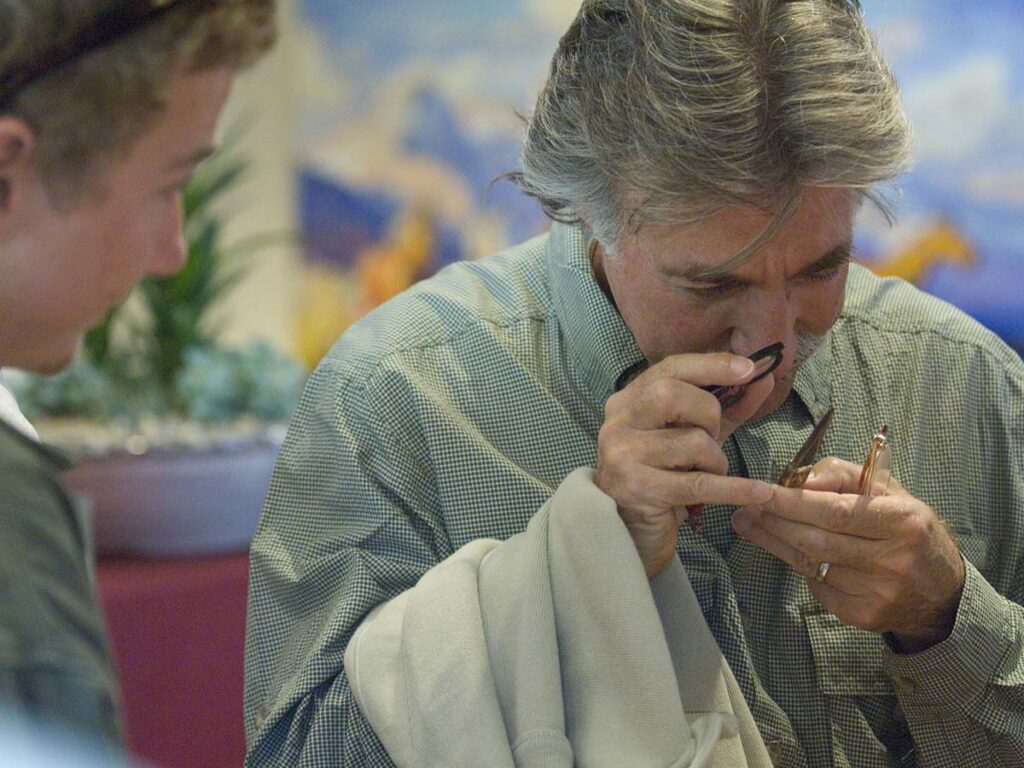
“If you’re at a show and feel you want to look at the blade under a magnifier, then you should ask the maker if he minds,” Bill Burke noted. “If he says ‘no’ or gets upset, then thank him and walk away.” (Eric Eggly/PointSeven image)
According to ABS master smith/BLADE Magazine Cutlery Hall-of-Fame® member Steve Schwarzer, the particular combination of steels might raise the prospects for a flaw to develop, especially when the skills of the maker are evolving. He commented.
“The worst flaws are the delaminations and inclusions,” he said. “These might come from poor welding practices and the choice of alloys involved. Some welds are much easier to make than others and a higher level of skill may be required. Most of it is visual—bad welds are bad welds and don’t have the necessary molecular bond.”
For a potential buyer the ability to spot a flaw is an attribute that pays off when dollars are exchanged for the finished product. Although a flaw may have no impact on the structural integrity of the damascus steel itself, the degree of impairment—if any—ultimately lies with the potential buyer who assesses the level of discrepancy. Approaching a maker’s table, discussing the damascus, and taking a closer look at the blade will sometimes generate relevant conversation and exchange of information. Flaws can show up anywhere in damascus construction, so visual inspection comes with the territory.
Schwarzer advises buyers to check the knife thoroughly.
“Using magnification helps. If the blade doesn’t look right, it probably isn’t. A flaw may show up as a bright spot in a dark area, and some skilled people can reweld their billets. I do that regularly and especially when I do guards and stuff, taking a light hammer and welding heat to fix it, but not everything can be repaired. Sometimes there is no way to repair it, and that is one reason why I hardly ever sell damascus steel—[and if I do] only to skilled professionals.”
Visual Signs
When a buyer’s interest is piqued, the next steps involve courtesy and cordial exchange with the knifemaker.
“Flaws in damascus can range from very hard to see to blaring and obvious,” Burke remarked. “An experienced eye in good light and magnification are the best ways I know to detect them. Some can be felt, but feeling the blade and running your fingers up and down and across it are not reliable and can cause rust and tarnish. If you’re at a show and feel you want to look at the blade under a magnifier, then you should ask the maker if he minds. If he says ‘no’ or gets upset, then thank him and walk away.”
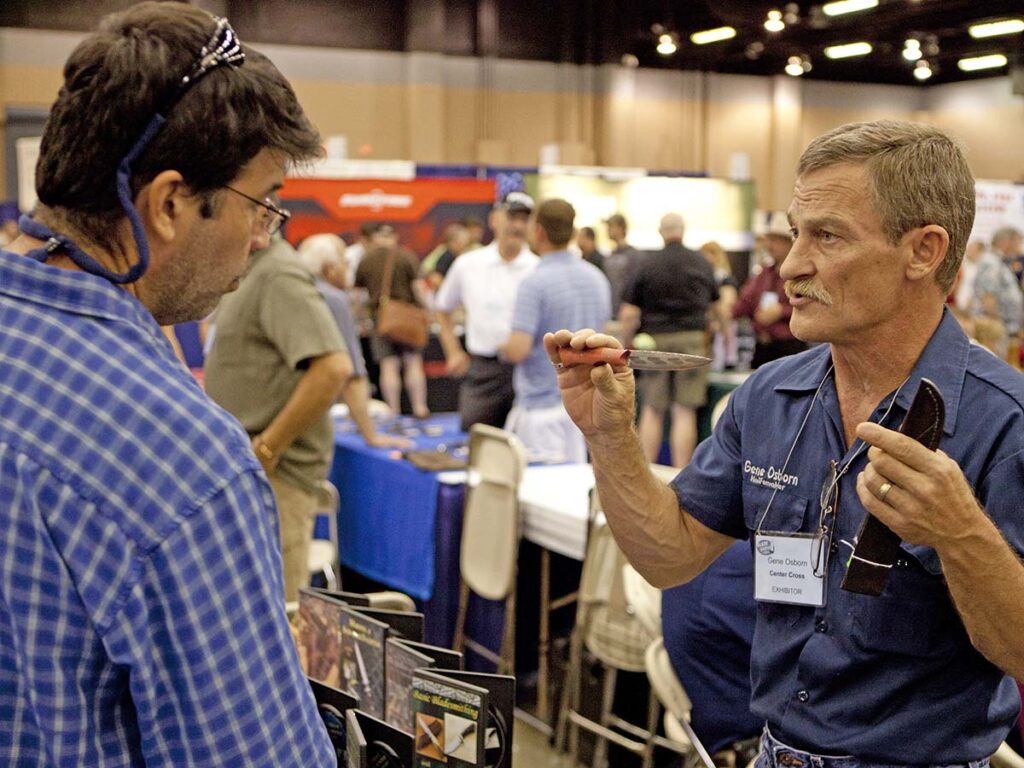
Steve Randall said most makers would not intentionally sell a knife knowing it had a flaw or without first pointing it out to the buyer. Gene Osborn (right) discusses a damascus knife with a customer at a past BLADE Show. (Eric Eggly/PointSeven image)
Randall concurs with that point of view.
“Bright light sure helps,” he observed. “It is difficult to find small flaws once a damascus blade has been etched. Running your fingers over the blade won’t tell you anything, and if you’re at a show I advise not doing it. Using a magnifying glass at the maker’s table could be awkward, and I would suggest respectfully asking before doing it.”
Historically, skilled makers and smiths have assessed their own work and identified flaws, correcting them or chalking up a flawed blade to the hazards of the craft. When ABS master smith Mike Quesenberry considers the flaw in context, he is frank in his response.
“The smith sees the weld lines with flaws before the steel is etched. To me that is something the smith has to deal with. I don’t have any problem scrapping a blade if [a flaw] shows up in the process. The hand sanding and grinding are where the time is really invested, and makers should be honest with their work. If you see a flaw, scrap it,” he stressed. “The best way to fix a flaw is to throw that blade away and start over again.”
Schwarzer smiles when he relates the style of an ancient practice.
“Japanese smiths worked out a way to hide a flaw if it didn’t mechanically affect the viability of the blade. They would do a nice little gold inlay. That was done in Persia, too, and a lot of other places. They would put artwork over something that was unseemly. If you have $300 in a blade and there is no mechanical problem, then that is a way to make it go away. It’s been said that the difference between a journeyman and a master smith is the size of the screw-up you can fix.”
Rhea acknowledges the human side of the situation. There may be a temptation to continue working on a knife with a flaw in the damascus, but then comes the realization on the part of the maker that causes him to refrain from that option. “When a buyer sees any odd discoloration in the form of surface treatment, color or texture, ask questions and give the maker the opportunity to explain or rethink his position,” he noted.
Resolving Situations
Bladesmiths and custom makers are genuinely committed to excellence. However, at times there may be a situation involving a flaw. When a purchaser detects something that may or may not be an imperfection, talking with the maker can resolve the situation to mutual satisfaction.
A welding flaw might pass a cursory glance, which is why you should always inspect any damascus blade you plan to buy closely.
“If you buy a blade and then find a flaw, you should contact the maker and ask them about it,” Burke advised. “If it is something you cannot live with, ask for a refund or allow the maker to replace the flawed knife. In most cases, the maker is going to be unaware of the flaw. If the maker is aware of the flaw or refuses to do anything for you, then you either have to keep it and say, ‘Oh well’ or sell it to someone else with full disclosure of the flaw.”
“When I have a buyer who experiences issues of any kind, I would prefer that they contact me and give me the opportunity to evaluate, discuss and make it right,” Randall noted. “I’m sure most makers would not intentionally sell a knife knowing it had a flaw or without first pointing it out to the buyer.”
Rhea sees the interested parties taking the high road in almost every case. “Most makers will honestly make a sale with good intent and in good faith,” he reasoned. “If there’s a problem just contact the maker and let him or her explain or make it right. Ultimately his reputation is on the line and he deserves the chance to make it an overall pleasant experience.
“When it comes to flaws and issues,” Lin concluded, “we all have them and we handle them in our own ways. To the degree we act to prevent problems for the buyer we also prevent problems for ourselves as makers, as well as enhance our reputation. Leaving flaws in damascus will reflect on our honesty and our attitude toward the buyer. This is something to think about very seriously. So, will there be problems? Yes, but we should go to great effort to prevent them rather than having to correct things that might be perceived as an oversight. In the end, we are human and will want to use common courtesy and humility in our dealings.”
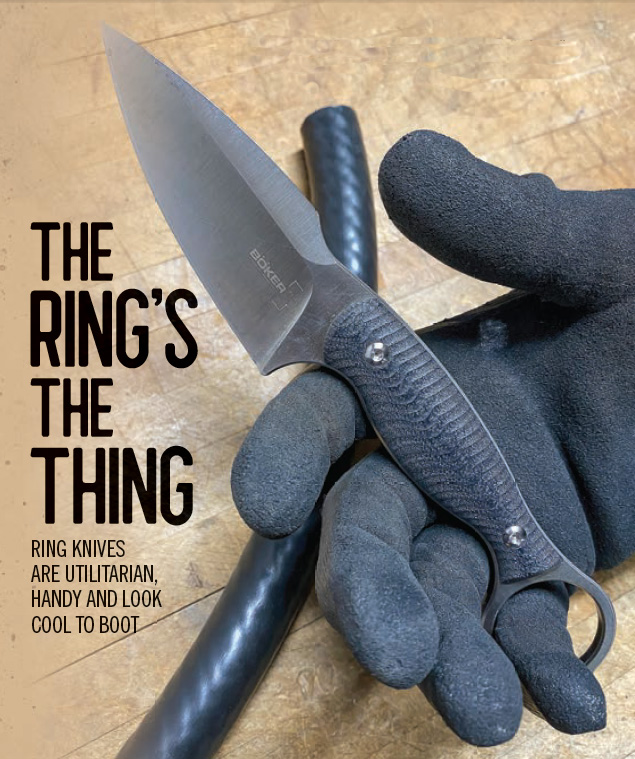
When you think of a knife with a ring in the handle butt, a karambit probably comes to mind. Fact is, there are other knives with such a feature. In fact, some have rings at the middle and also even at the front of the handle.
Unlike karambits, in which the ring is used for quickly spinning the knife in between different grips as well as affecting the grips themselves, non-karambit versions of such knives employ the ring in utilitarian ways that are less flashy.
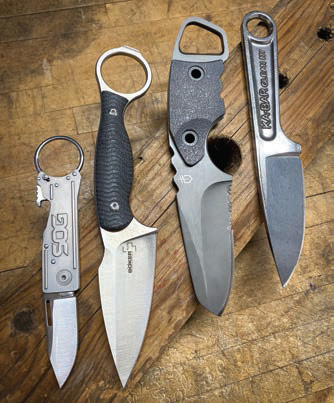
The latest ring knives from left, with manufacturer’s suggested retail prices in parentheses: SOG Keytron ($23.95), Boker Plus Accomplice ($119.95), Gerber Epic ($42) and KA-BAR Wrench Knife ($54.74). (Marty Stanfield Photography)
Examples include assisting in providing a more secure purchase on the handle, dangling the knife from a pinky to allow for full use of the hand while keeping the knife handy, attaching the knife to a keyring, or simply hanging the knife on a tool rack or elsewhere.
If your approach involves frequent intermittent knife use, interspersing it with employing your hand to grip, hold or pull the material you’re cutting or some other method all your own, then adding a ring knife to your collection might be beneficial.
Robert “Bob” Loveless is regarded as one of the most influential custom knifemakers of the modern era. Here are the 15 knives that show why.
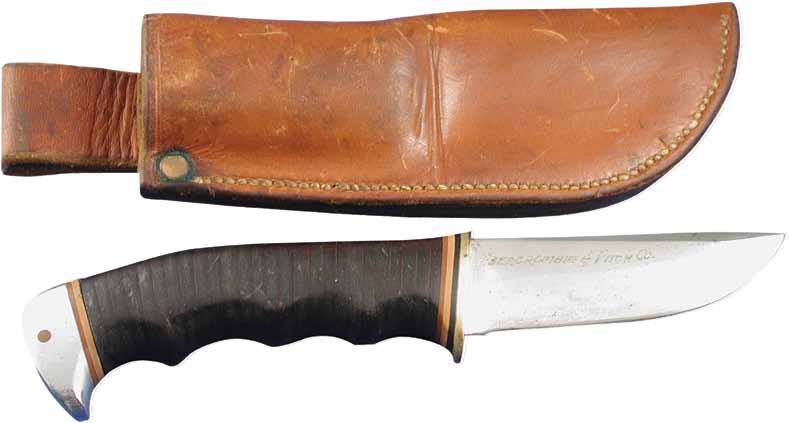
1) R.W. Loveless and Abercrombie & Fitch: A Match Made In Heaven
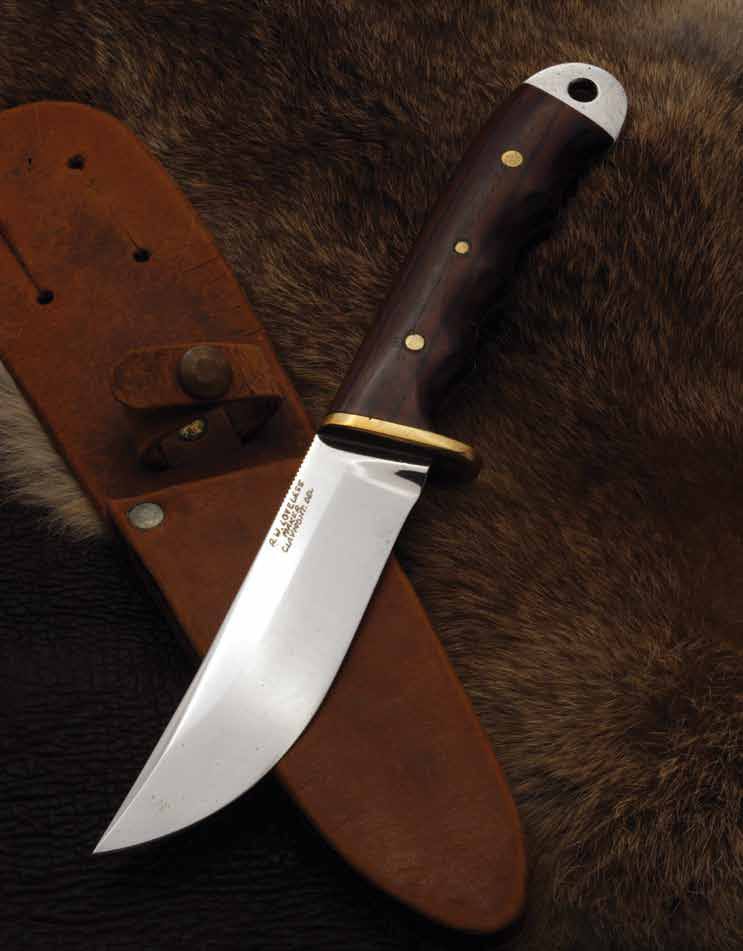
This is one of Loveless’ first knives made for Abercrombie & Fitch during the early 1950s. The photo is courtesy of John Denton.
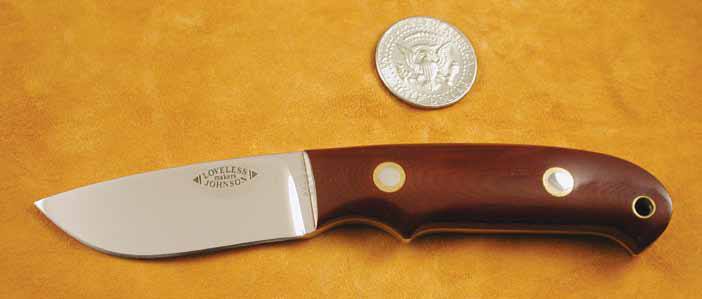
2) Loveless-Johnson Collab
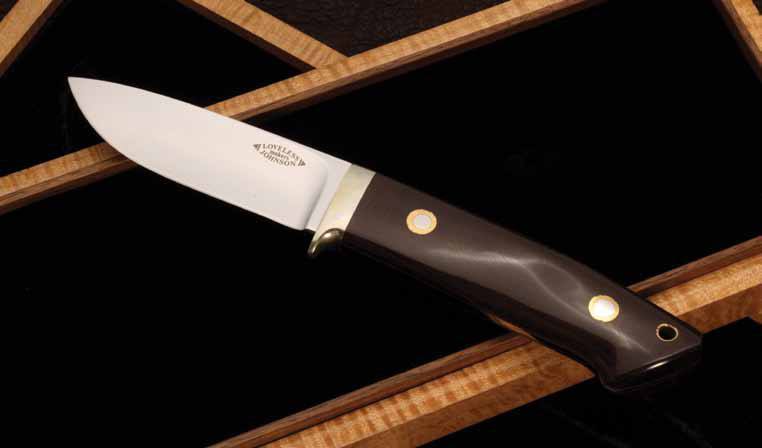
Steve Johnson, who worked as a junior partner with Loveless, says Bob made a huge difference in his life. Pictured is one of the few knives marked “Loveless Johnson” reportedly still in existence. The image is courtesy of John Denton and the John Denton collection.
3) The Most Beautiful Knife Bob Ever Made?
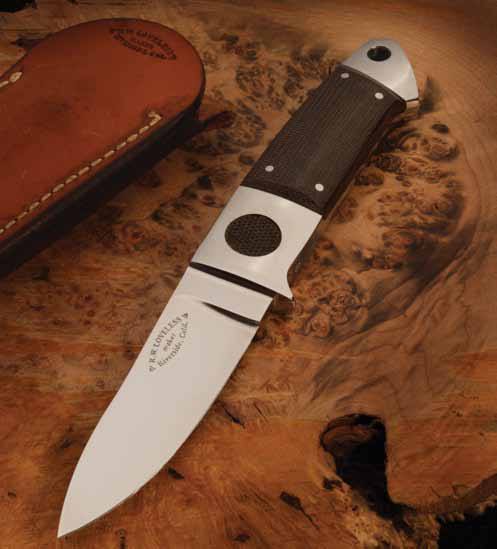
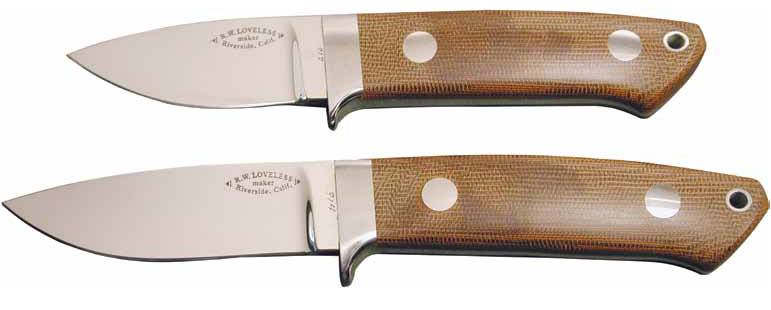
If Bob Loveless reportedly said that this integral semi-skinner, with its dark-green canvas-Micarta handle, is “the most beautiful knife I ever made,” then who can argue? The knife was crafted about 1987 and features a drop-point blade. It is from the John Denton collection, and the photo is by Hiro Soga.
4) The Loveless Dagger
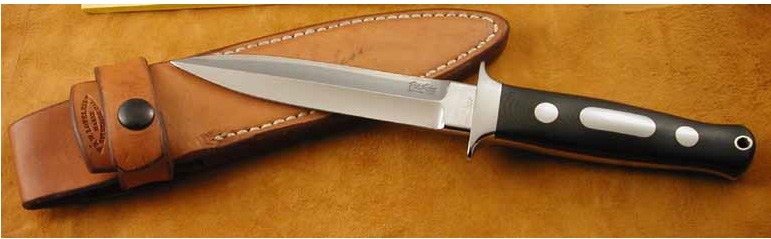
The dagger looks so good, you want to pick it up, and feels so good you don’t want to put it down. The dagger in a full, tapered tang, Micarta handle and double guard looks and feels good. It is from the John Denton Collection.
5) Loveless-Merritt Collab
The combined skills of Jim Merritt and Bob Loveless are simply without peer. This pair is a prime example of the combined efforts of Bob Loveless and Jim Merritt. The knife photo is by Durwood Hollis.
6) The Crooked Skinner
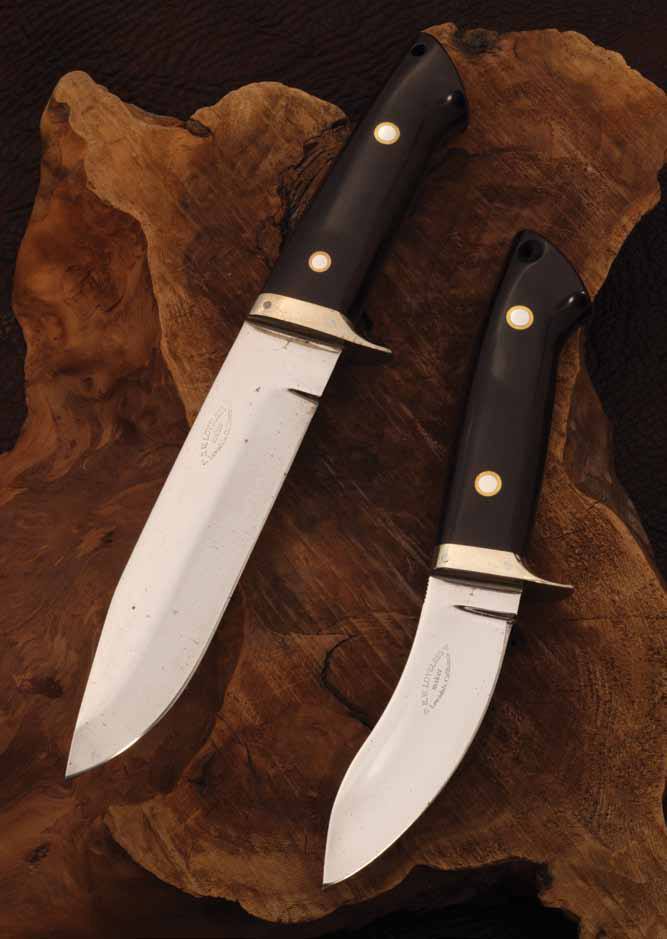
The Bob Loveless Lawndale-made crooked skinner at right in the Hiro Soga photo features a 4.5-inch skinner blade, a nickel-silver guard and ebony handle. The camp knife is wrought from 1/4-inch stainless steel stock with a 6.5-inch clip-point blade, full tang and ebony handle. The knives are in the John Denton collection.
7) Big Bear Classic
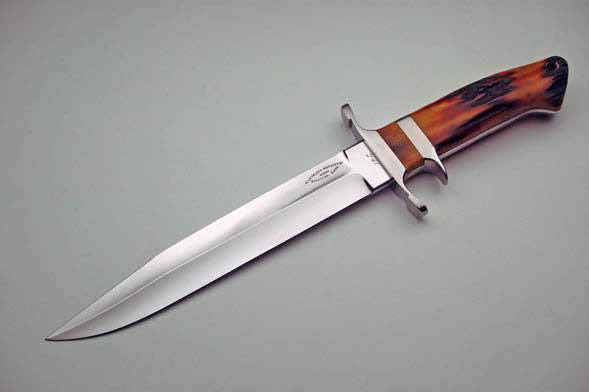
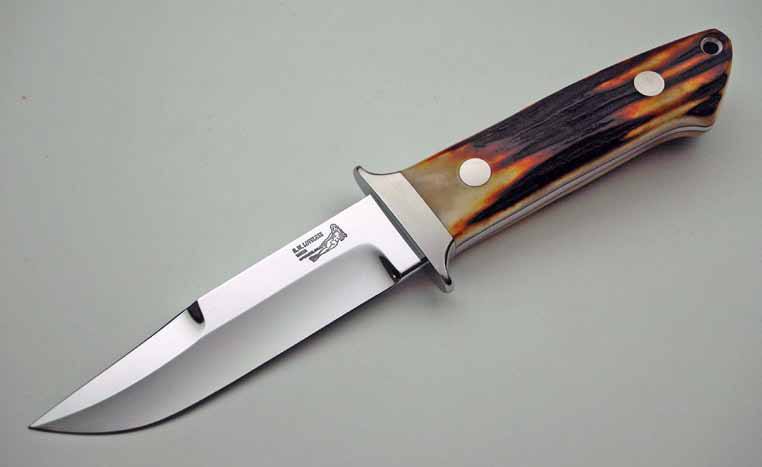
This particular Loveless Big Bear Classic fighter boasts an amber-stag handle, which makes it one of the few made, and no Loveless bolts. Its approximate value? $35,000. That’s a lot of bear bones. Image and information via Dave Ellis.
8) New York Special
This is perhaps the rarest and hardest-to-find of Loveless pieces—the original New York Special with a snap in the sheath. According to Dave Ellis of Exquisite Knives, originally told, there were seven. This is the long-lost 8th! Image via Ellis.
9) The Pearl Gent
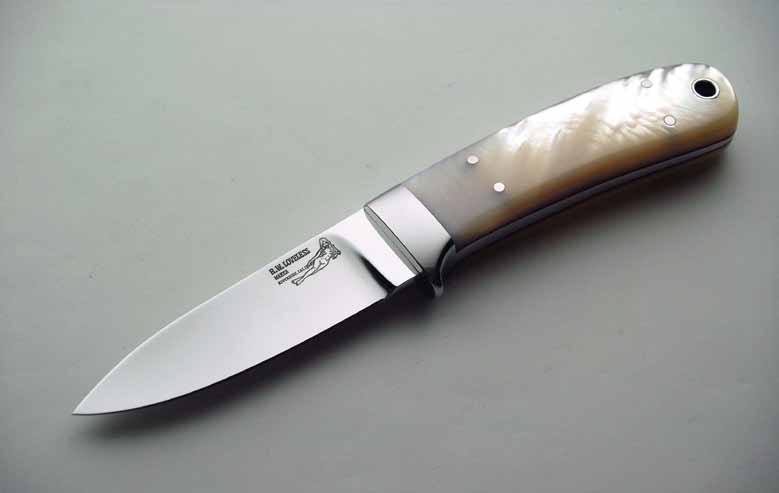
Loveless preferred Micarta handles. This “gent’s” model is one of the very few knives made with pearl. Image via Dave Ellis.
10) The Iconic Drop-Point Hunter
A prime example of a drop-point hunter, made in 1973 when Steve Johnson worked with Bob Loveless, it features hidden-tang construction, a single guard and a maroon-Micarta handle. How sweet it is! From the John Denton collection, this piece was photographed by Hiro Soga.
11) Loveless-Parke: Part Drop Point/Part Skinner
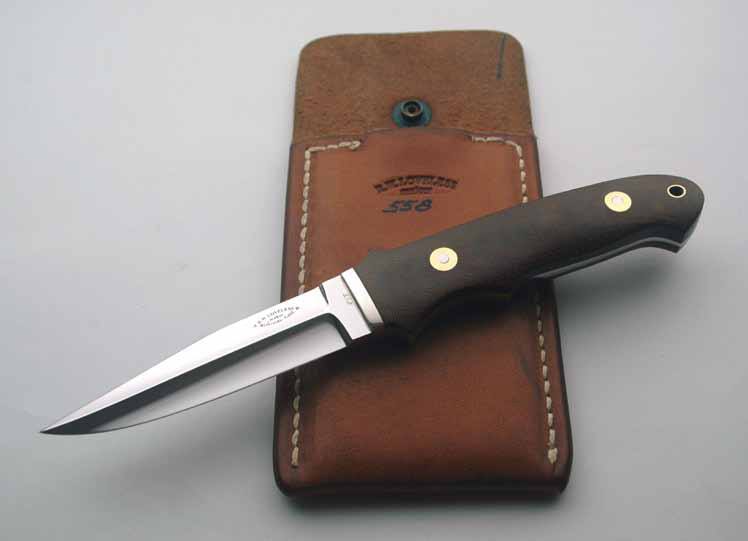
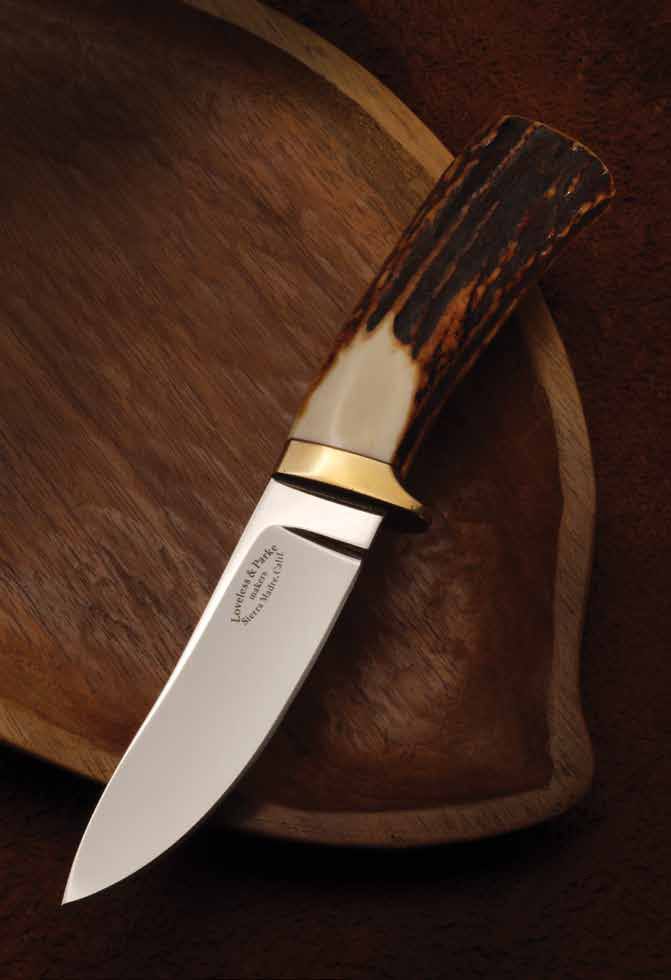
Only 36 knives bearing the Loveless-Parke logo were ever produced (Parke was an investor in Loveless’s knifemaking business for a short period of time.) This knife, made in 1967, is an example of that effort. The image is courtesy of John Denton and the John Denton collection.
12) The Delaware Knife
This is an early (1950s) hunter made by R.W. “Bob” Loveless when he lived in Claymont, Delaware. Interestingly, there are thumb notches on the back of the blade, just ahead of the guard. This is an extremely uncommon feature on a Loveless knife. Photo via Hiro Soga.
13) The Delaware Maid
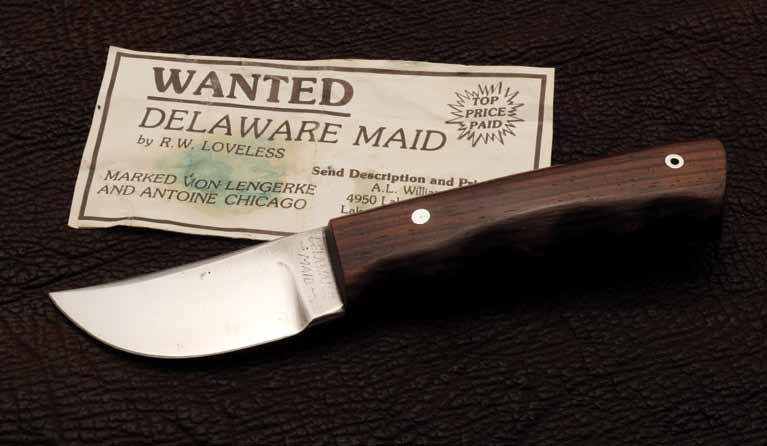
An ultra-rare (only three of seven survive) Loveless “Delaware Maid” hunter with the VL&A (Von Lengerke and Antoine) logo, this knife has a trailing-point blade and a slender double-pinned hardwood handle. The photo is by Hiro Soga.
14) $13,000 Chute Knife
Originally designed for a Spec Ops parachutist working in jungle climates, the “chute” knife was fashioned to cut the lines of a parachute should the operative become entangled in them, a tree or other obstruction. This amber-stag handle model is valued at $13,000. Photo via Dave Ellis.
15) The Iconic Schrade Semi-Skinner
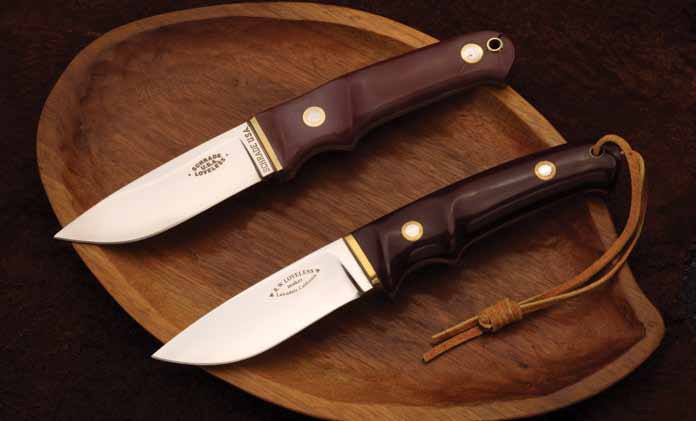
The knife Bob Loveless built for Schrade features a stainless steel blade and synthetic molded handle with no guard. The top piece is the Schrade knife, and the bottom is the Loveless semi-skinner prototype from which the Schrade knife was developed. Note the finger-grooved handle, a feature seldom seen on a Loveless knife. The photo is by Hiro Soga.