
5 Military Knives for Memorial Day

Editor’s note: The following originally ran in the August 2015 issue of BLADE magazine. All images are from their respective manufacturers unless otherwise noted. 

Memorial Day (taking place in 2018 on Monday, May 28) holds a revered place in the hearts and minds of Americans, and knife manufacturers recognize the heritage of freedom that fits well with such a commemoration. Knives have equipped American fighting men and women since the first call for national defense more than 200 years ago, and these modern knives convey a sense of pride and honor for our time.

Buck 245 MWG
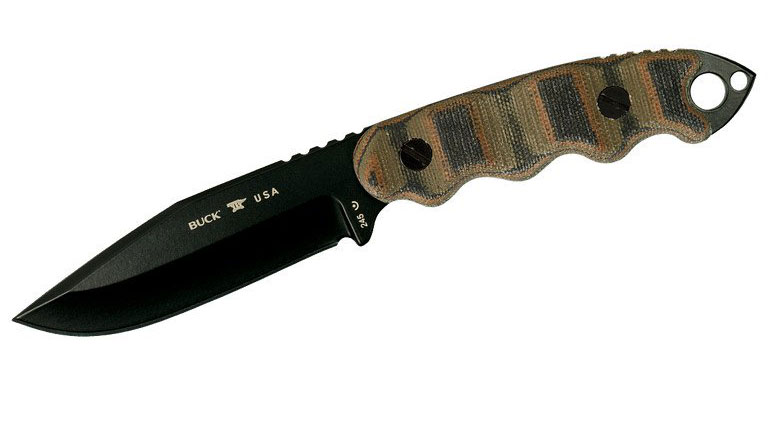
Buck 245 mwg

Buck Knives introduced the 245 MWG at the 2015 SHOT Show to honor the memory of Matthew J. Leathers, a highly decorated U.S. Navy SEAL who lost his life at sea in 2013. Matt was a member of Basic Under water Demolition/SEAL Training class 245, and the knife’s name says it all—245 to honor the class and MWG referring to the simple yet powerful phrase that was the young SEAL’s nickname: “Matt Would Go.”

The 245 MWG represents a partnership between Buck and Matt’s father, Tim Leathers. “During his nine years with the U.S. Navy SEALS, Matthew used many knives, but none that held up to his standards,” explained Stephanie Young, Buck marketing and communications manager. “He decided the only way to find a knife that met his criteria was to build it himself. Matt designed the knife that became a favorite among his fellow SEALS.”

The result of the Buck collaboration with Matt Leathers through his father is a sleek fixed-blade utility/fighting knife with a 5160 spring steel blade and tough Micarta® handle. Other features include the TEK-LOK® belt clip and a Kydex® sheath designed with a low-infrared signature.

A portion of the proceeds from sales goes to MattWouldGo LLC and in turn to the Navy SEAL Foundation.

“We are honored to bring this knife to the market for the Leathers family and happy to give something back to those who protect us,” Young commented.

Two Camillus Fixed Blades
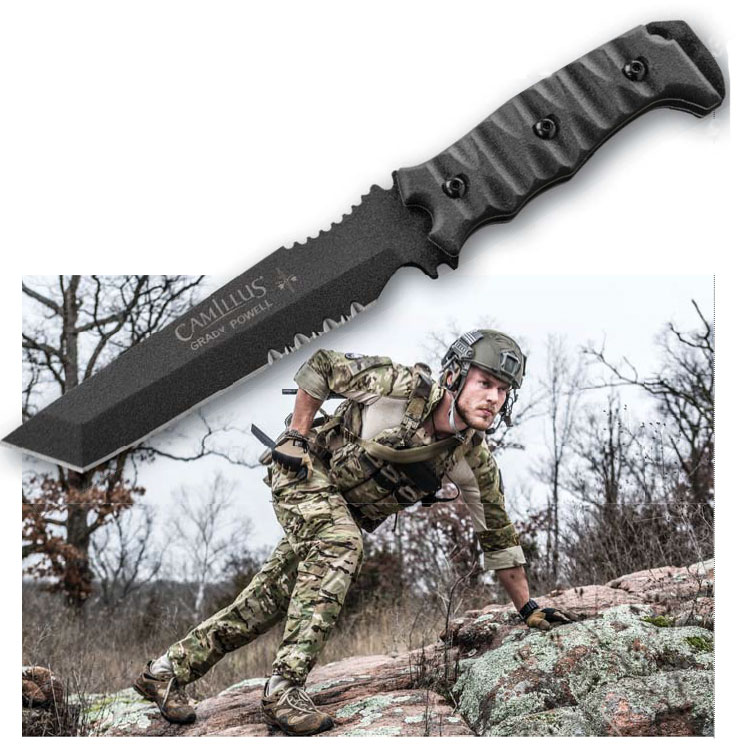
Camillus Powell
Featured on the National Geographic Channel’s “Ultimate Survival Alaska,” retired Green Beret Grady Powell
(above) designed the Camillus Grady Powell fixed-blade tanto. Powell trains military, law enforcement and civilians in survival training.

A pair of Camillus fixed blades made to the exacting specifications of retired U.S. Army Green Beret and current military, law enforcement and survival trainer Grady Powell, and of Jared Ogden, a combat-decorated retired Navy SEAL and surface warfare officer, both of whom are featured on the National Geographic Channel TV show Ultimate Survival Alaska, makes great Memorial Day remembrance knives.

“These knives accommodate everything a SEAL or Green Beret would do in their duties,” explained Rick Constantine, Camillus marketing manager. “Both of these men had input on the design of these knives. They are true-life heroes, and that’s why we went after them. We all said we wanted to build knives that anyone would be proud to carry on active duty or elsewhere.”

Both knives feature 1095 high carbon steel blades and custom molded sheaths. Constantine said Powell wanted a knife useful in hand-to-hand situations, while Ogden stressed cutting ability and grip strength—particularly in water.

The Powell model features a half-serrated 4.87-inch blade with a G-10 handle that sports Micarta accents, and a 10.5-inch overall length.

Ogden’s knife includes a 4.75-inch blade with gut hook, a G-10 handle, a 10-inch overall length, and versatility that allows the user to fashion it into a survival spear.
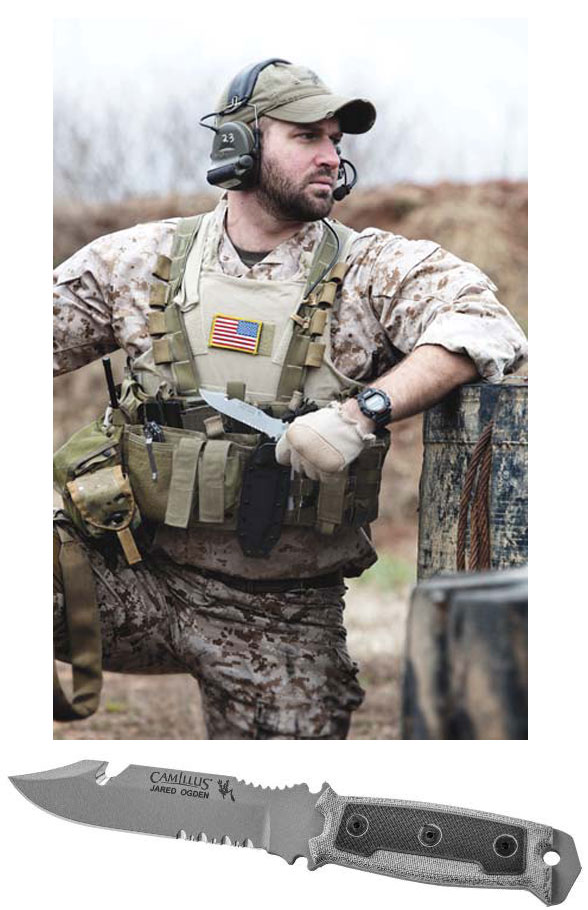
Camillus SEAL knife
Ogden (above) served as both a Navy SEAL and a surface warfare officer. His military awards include the Combat Action Ribbon and the Bronze Star with “V” for Valor. He is featured on the National Geographic Channel’s “Ultimate Survival Alaska.”

Each knife is serial numbered.

“We have worked with a number of personalities through the years,” Constantine remarked, “but none have been better or more knowledgeable than these guys.”

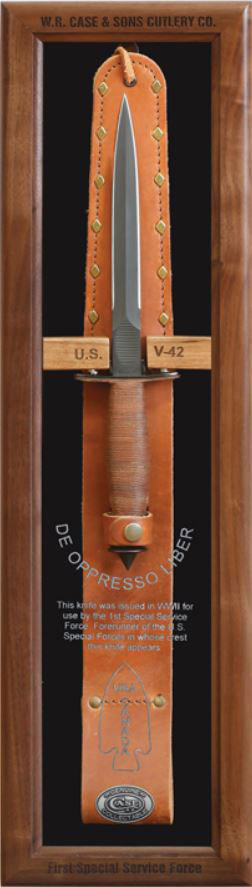
Case FSSF V-42
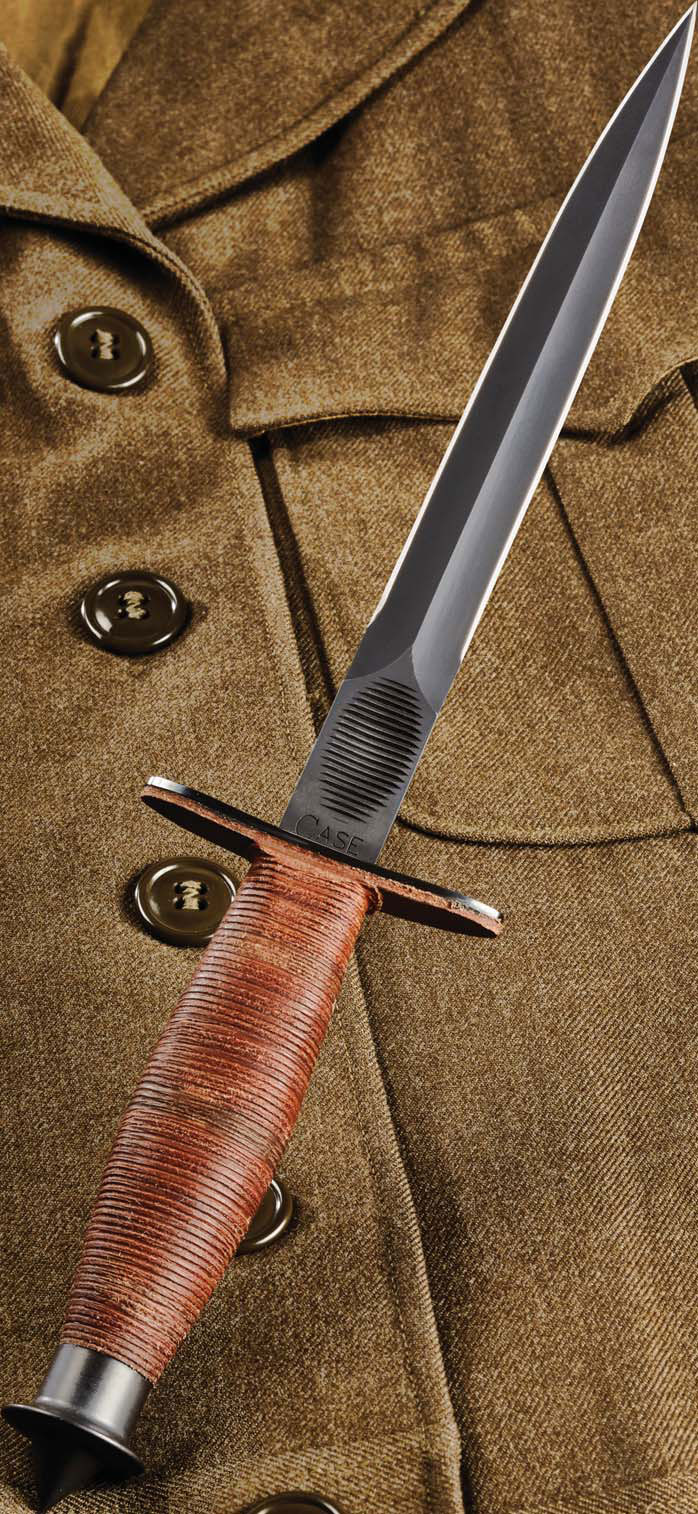
Case V-42 Devil's Brigade knife
The Case V-42 reproduction is based on the company’s original museum piece. (Kris Kandler image)
Case V-42
The V-42 in its display case.

When members of the First Special Service Force Association approached Case about a revival of the legendary V-42 stiletto, the company jumped at the chance.

Special Forces Association Montana Chapter 28 and a large number of knife enthusiasts supported the idea, and the new Case V-42 is true in detail to its heritage. Commissioned by U.S. Army Colonel Robert T. Frederick in 1942, the V-42 was issued to troops of the joint U.S.-Canadian First Special Service Force (FSSF), popularly known as the Devil’s Brigade. These soldiers served with distinction in World War II, and the V-42 was with them all the way. Case evaluated its own original museum V-42 and reproduced that fighting gem with painstaking accuracy.

Though the V-42 has been reintroduced a couple of times in the past, Case officials indicate this rendition is more accurate than ever.

“We really have a greater appreciation for what goes into making this knife,” said Case representative Fred Feightner. “We actually had it X-rayed to see how the handle was put together. We examined the knife from the inside out, and this was done on a much more detailed basis than previous re-releases of the V-42. The project took about five years to complete.”

The V-42’s blade of Case chrome vanadium steel—essentially, 1095 high-carbon steel with added chromium and vanadium—is double concave ground to reproduce the distinctive centerline along its length. The stacked-leather-washer handle is constructed with specialty gimping, and the famed V-42 “thumbprint” is embedded in the ricasso of the 12.5-inch, 7-ounce knife for proper blade orientation/indexing and grip strength. The leather sheath is complete with steel teeth reinforcing the sleeve and brass rivet covers.

“We’re extremely proud and honored to present a reproduction knife that is symbolic of our military elite and the American freedom they fought, and fight every day, to protect,” noted John Sullivan, Case marketing director. “Case knives and the American military share a long and distinguished history dating as far back as World War I, so we’ve taken great measure to ensure that the V-42 reproduction model meets the highest standards and is deemed authentic by the same brave Forcemen who carried the original into battle so many years ago.”

SOG SEAL Strike
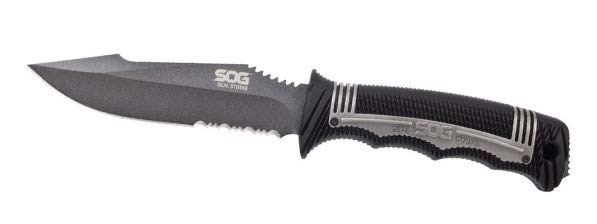
SOG Seal knife
The SOG SEAL Strike model SS1002-CP sports a 4.9-inch partially serrated blade of powder-coated AUS-8 stainless steel. The handle is glass-reinforced nylon with a stainless steel overwrap. Weight: 5.6 ounces. Overall length: 9.6 inches.

The new SEAL Strike from SOG Specialty Knives & Tools includes a 4.9-inch partially serrated AUS-8 stainless steel blade with cryogenic heat treatment, and a handle of glass-reinforced nylon.

“The biggest differentiator for the SEAL Strike is the sheath,” SOG’s Chris Cashbaugh explained. “It has several features that enhance the functions of the knife. You can use the line cutter to cut cord or webbing without having to expose the blade. The carbide sharpener is in the side of the sheath and can be used to touch up the blade while out in the field. The ferrocerium rod can help start a fire in an emergency situation.”
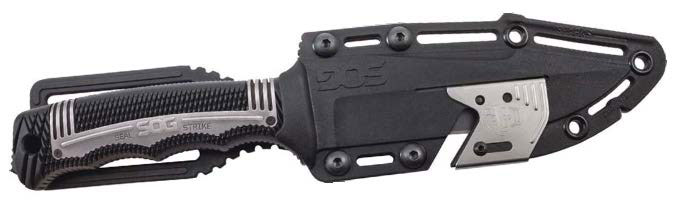
SOG Seal Strike sheath
Boasting the SOG logo etched in steel, the deluxe molded MOLLE-compatible sheath for the SOG SEAL Strike SS1002-CP includes a cutout for cutting line with the knife sheathed, a sharpening notch on the low side toward the tip, and a ferrocerium fire-starting rod.

The SEAL Strike fits the Memorial Day theme well since its design relates to the longtime SOG collaboration with the military and the ultimate goal of producing a knife that fills the bill for troops on deployment or anyone in the field.

4 Paring Knives for Mom

Editor’s note: All images courtesy of the participating companies.

Go-To Knives

Look up paring—as in paring knife—in the Merriam-Webster dictionary and ol’ Mr. Webster says it’s “the act of cutting away an edge or surface.”

This raises a question.

If the paring knife was originally designed as a peeling knife, does it still matter? Or is it relegated to the back of the flatware drawer, consigned to a future of rust and dust?

Chef Timothy Hollingsworth, who wears the double hat of chef and owner at the California restaurants with the respective names of Otium and Barrel and Ashes, said the scrappy paring knife—with a blade less than 4 inches designed for food prep—still holds its own against $5 peelers and glinting chef’s knives. Not only is a paring knife designed to peel, it can be called on to prepare pearl onions, scrape mushrooms and cut intricate designs to give food extra pizzazz.

“For the home cook,” Hollingsworth said, “paring knives are great because you’re able to hold the vegetables or fruit in your hand while cutting, whether that’s cutting potatoes into smaller chunks, or peeling an apple and cutting it into bite-sized pieces.”

Mother’s Day is around the corner, a time that seeks to honor the women whose varied accomplishment include making many a home-cooked meal, often with paring knife in hand. From contemporary to traditional, here are four designs that represent the latest in one of Mom’s go-to tools.

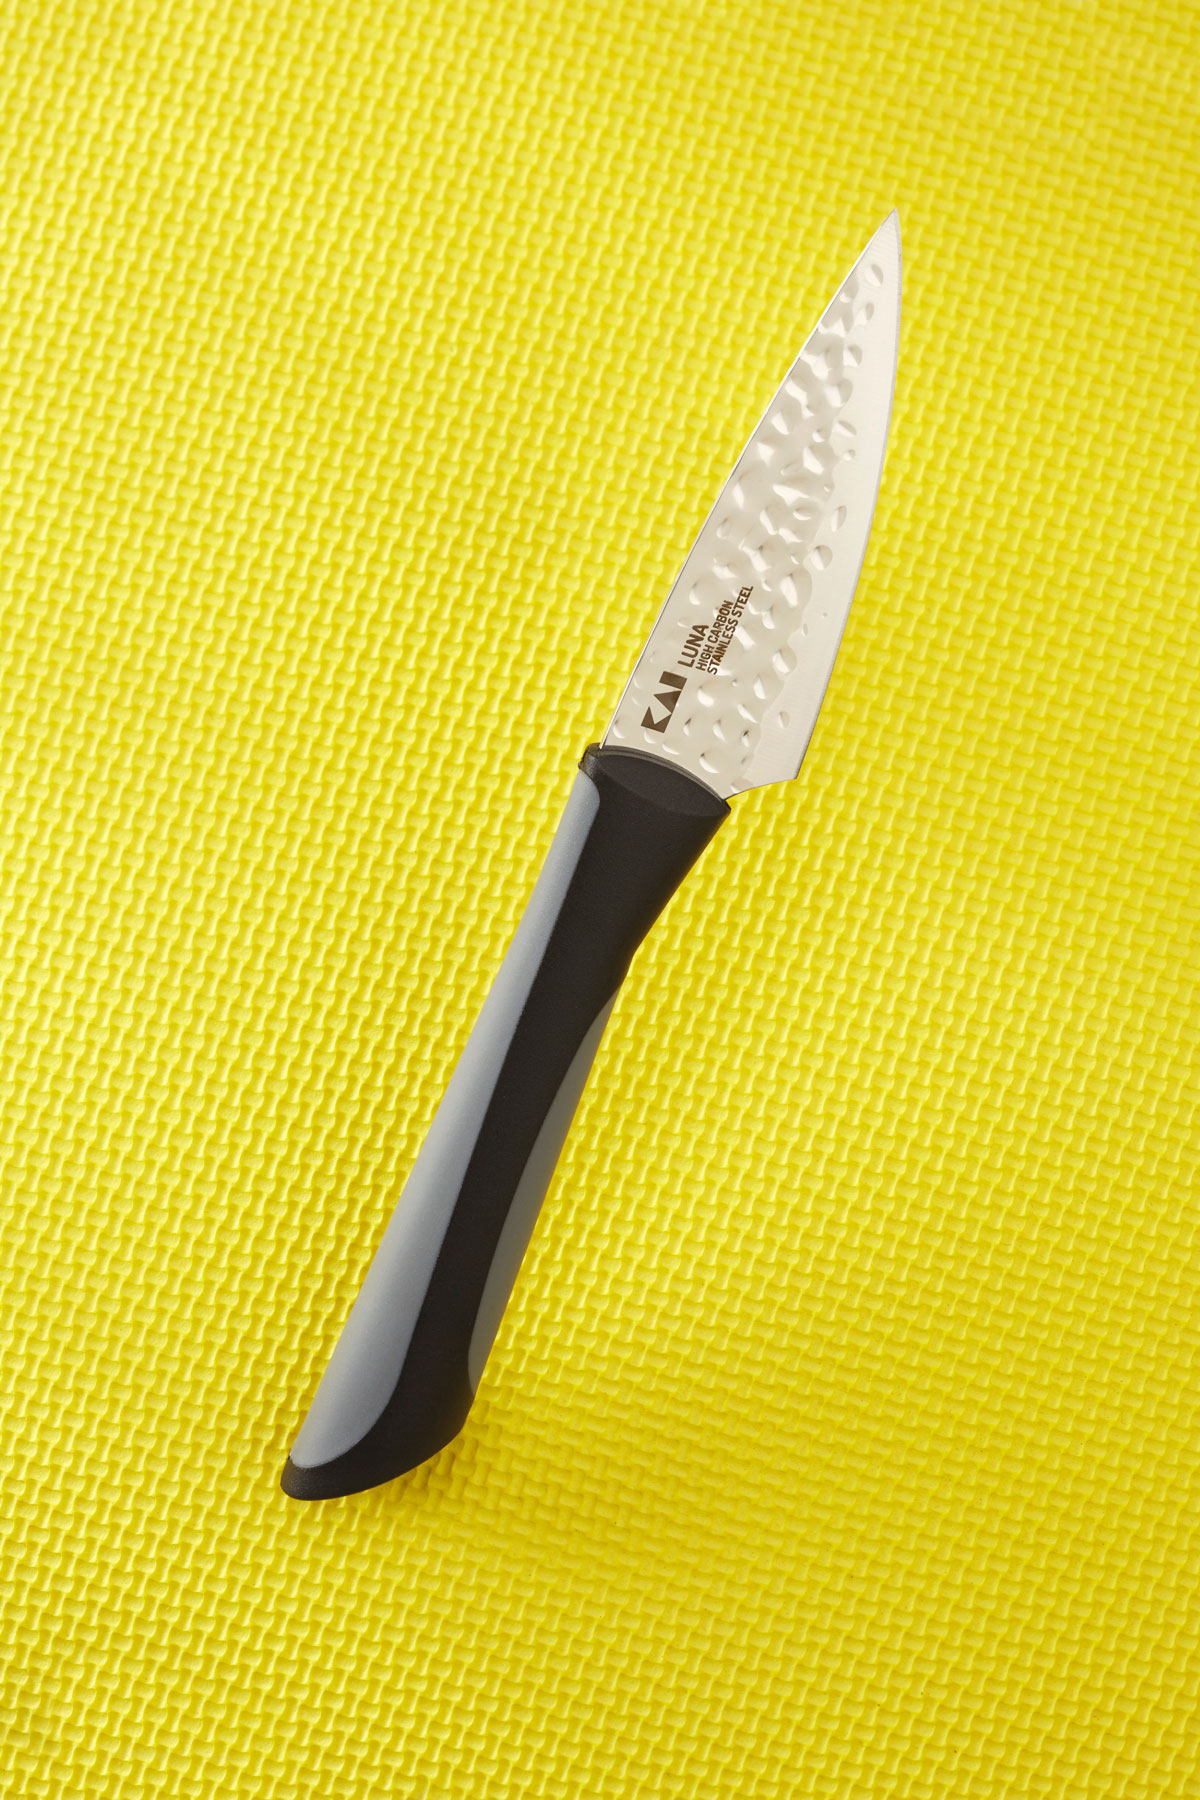
Kai Luna Paring Knife

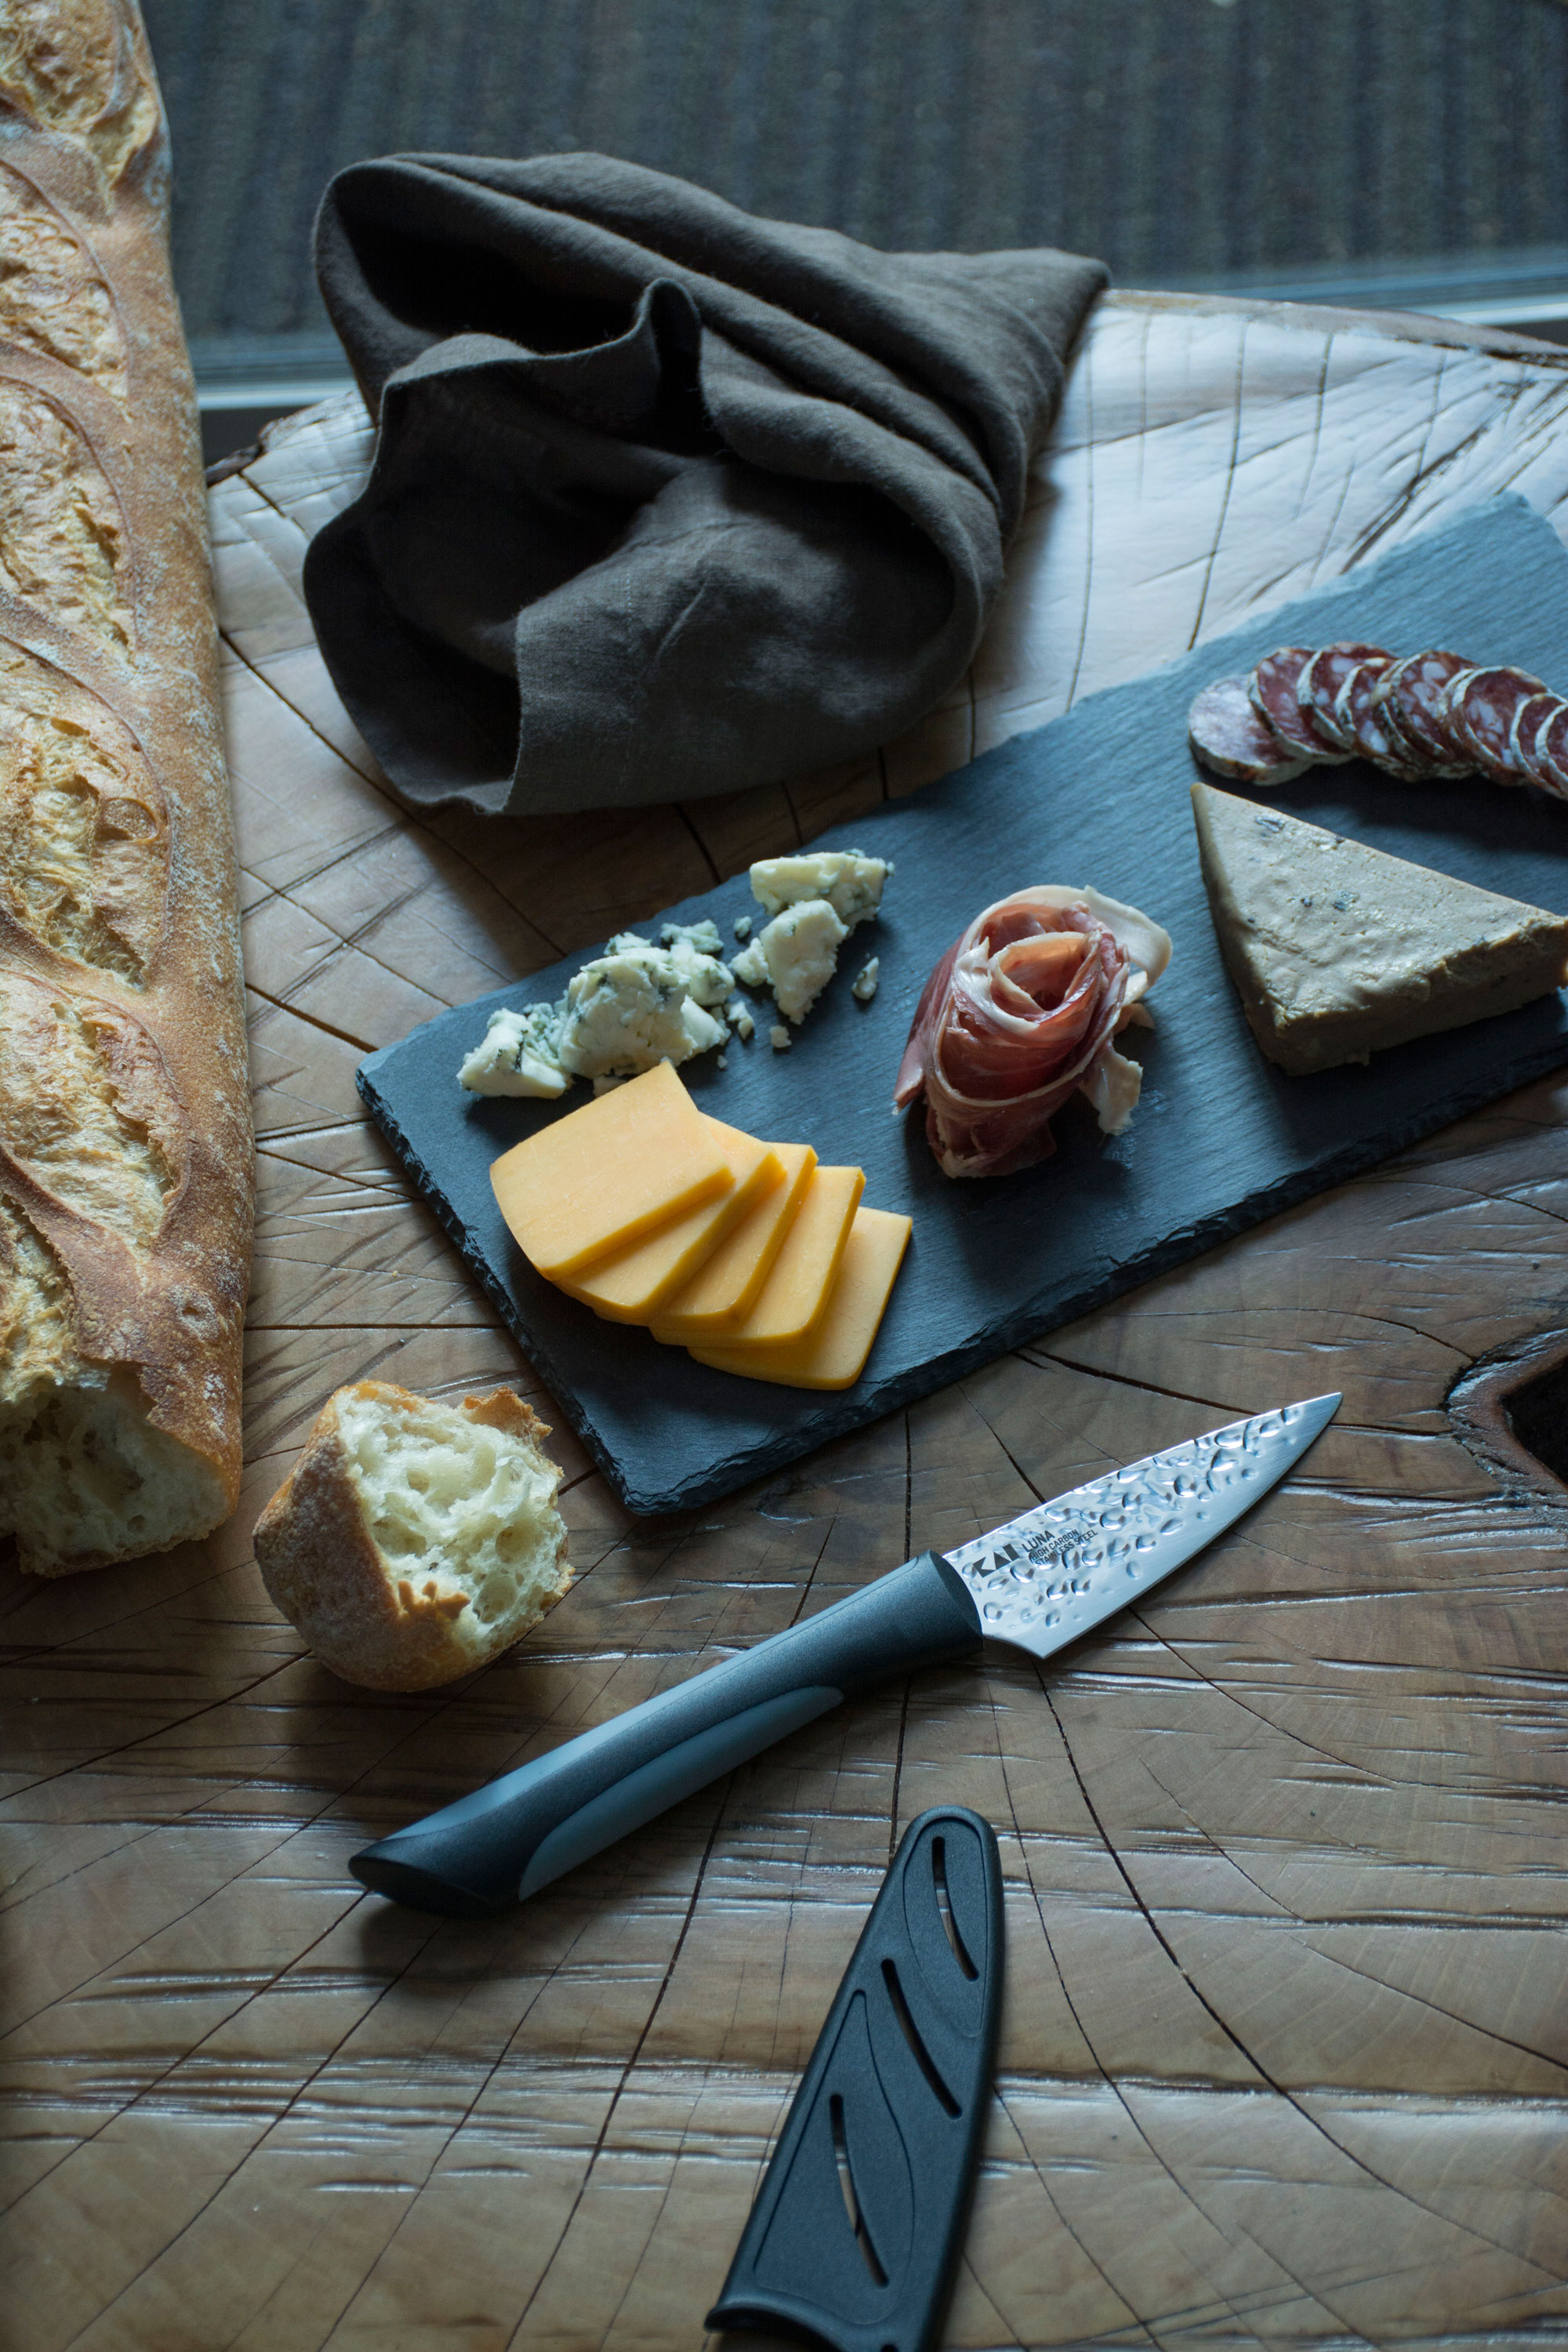
Kai Luna paring knife

Kai Luna paring knife

It was about 10 years ago that Scott Zahm, director of sales for the housewares division of Kai USA Ltd., and other of his compatriots at Kai noticed people used paring knives as small utility blades, chopping a handful of parsley on a cutting board, for example.

“Many home cooks prefer a smaller knife that’s less intimidating and easier to control,” he said. Kai took to the drawing board with its Pure Komachi 2 and the resulting blade shape was wider than a traditional paring knife, with a deeper belly. The shape helped users navigate a cutting board with more agility.

This issue’s cover knife (page 7), the newer Luna Paring Knife, features the same profile. “We made the Kai Luna series for the adventurous cook on a budget,” Zahm said. The knife features a tsuchime, or hammered finish, and the edge is honed to a 16-degree angle on each side.

“All of the knives in the Luna series offer the performance good cooks demand at a price that even aspiring cooks can afford,” Zahm said. “With Luna’s tsuchime finish and contemporary styling, it’s an exciting and eye-catching addition to any kitchen.”

With a modified blade shape, does the paring knife usurp a chef’s knife in utility? Not really, Zahm said. Chef’s and paring knives work with each other, handling different-sized cutting jobs. Both are essential in the cook’s workspace.

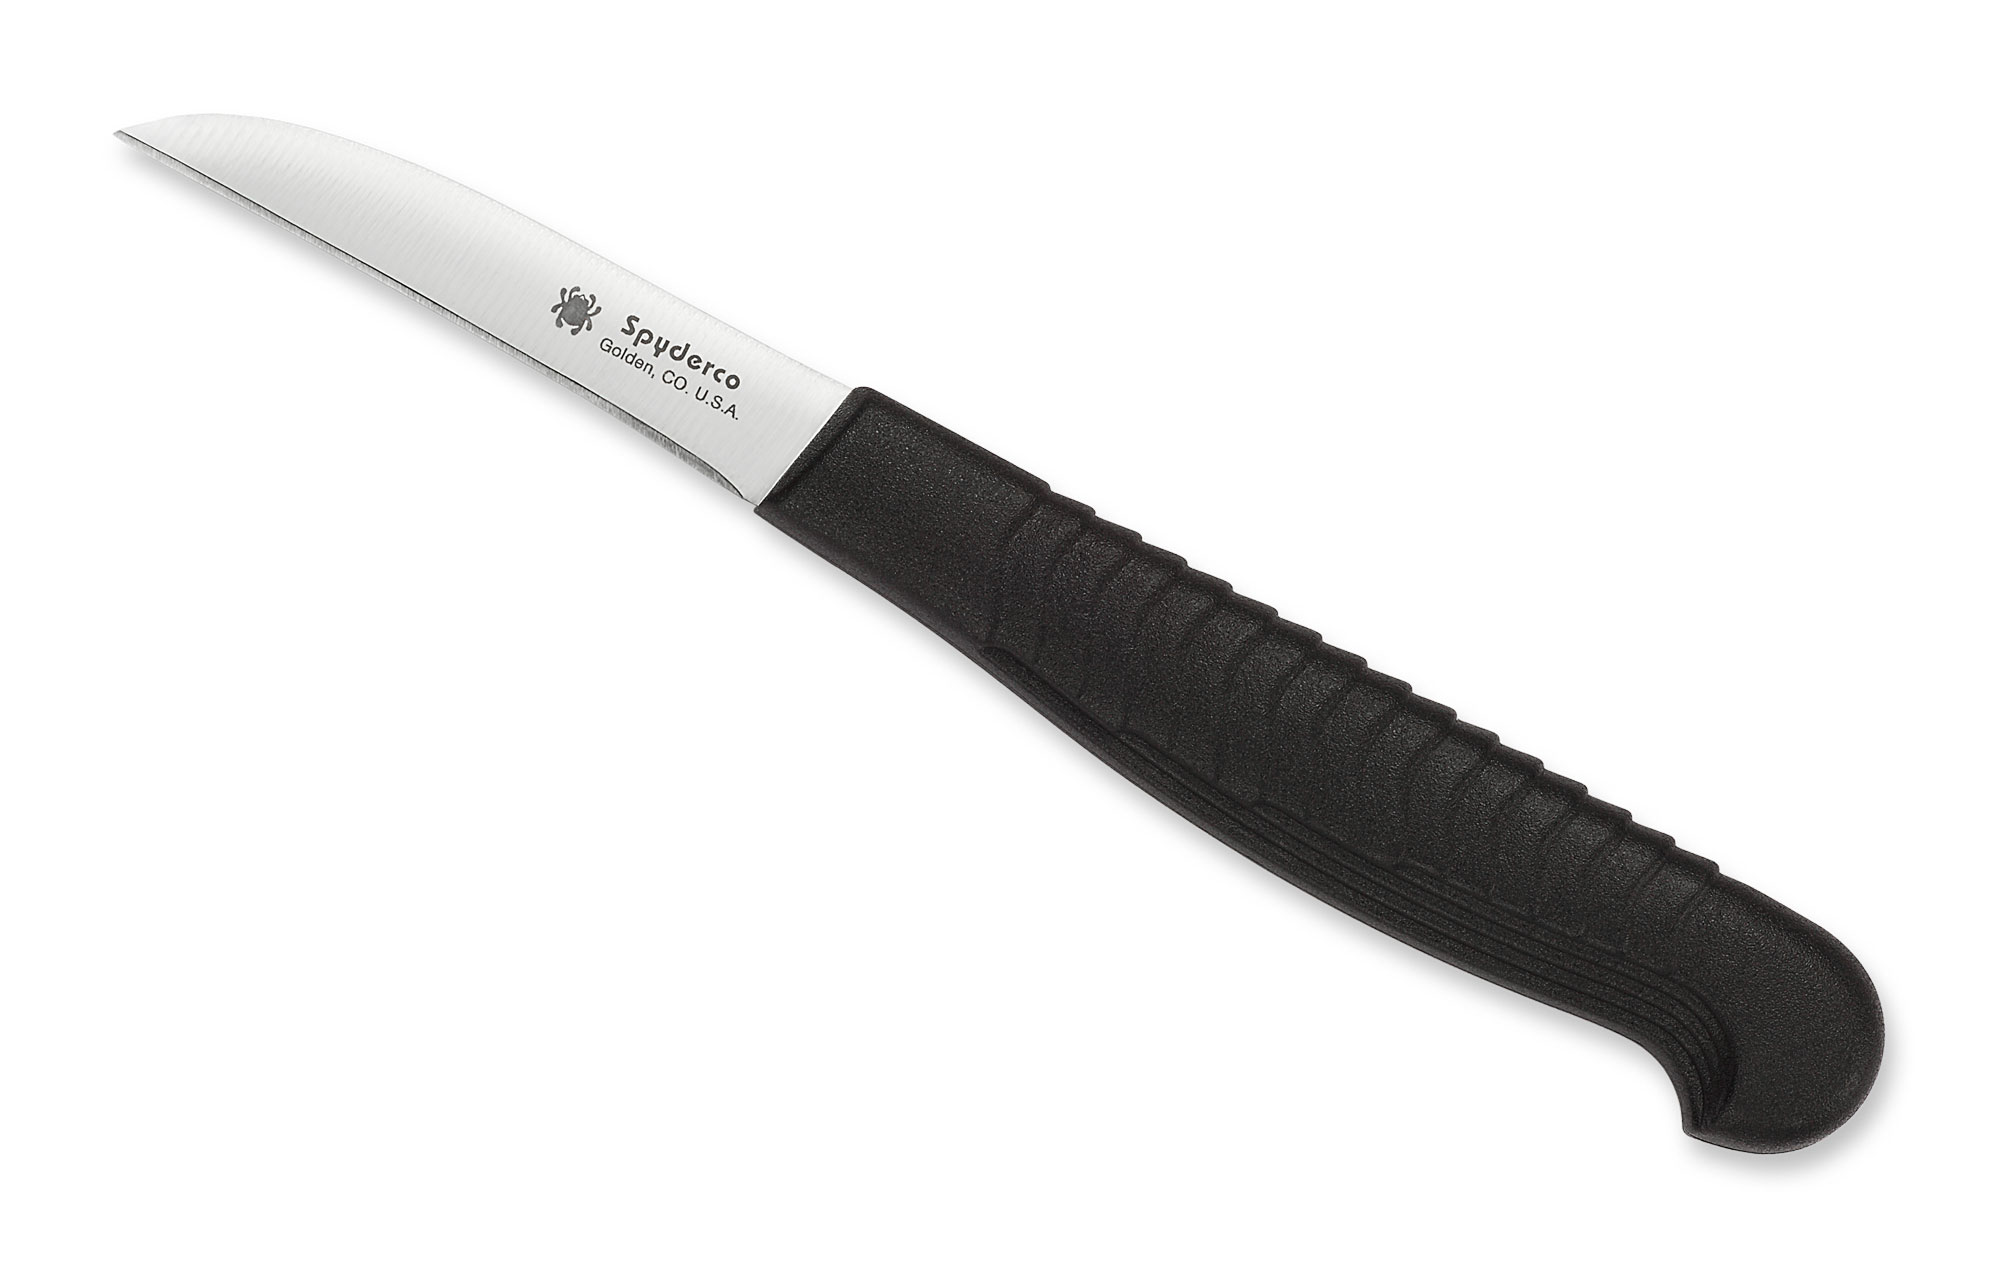
Spyderco K09 Mini Paring Knife

Spyderco paring knife

Spyderco “thought small” when it redesigned the K09 Mini Paring Knife. The company still offers utility knives 4 and 6 inches long. However, Spyderco’s Joyce Laituri compared the K09 to a scalpel, giving users options from peeling fruit to removing small bones from meat.

“I use mine every year at Halloween to start the pumpkin carving process,” Laituri said. “We draw the face on a pumpkin and the K09 goes through gourd like a laser. It is easily controlled letting you create intricate and even lacy designs.”

Three years ago, Spyderco reintroduced the K09 with a new handle material. The Japanese-made knife features a polypropylene grip with ridges to enhance purchase with wet hands.

The K09’s 2.25-inch blade of MBS-26 stainless steel is thinly ground. The result is a blade that keeps its edge and has a slight spring to it, Laituri observed. When it comes to how often people should reach for a paring knife, Laituri said it depends on the cook. She often uses Spyderco’s 6-inch serrated utility knife. Her husband, on the other hand, barbecues and rarely uses a paring knife.

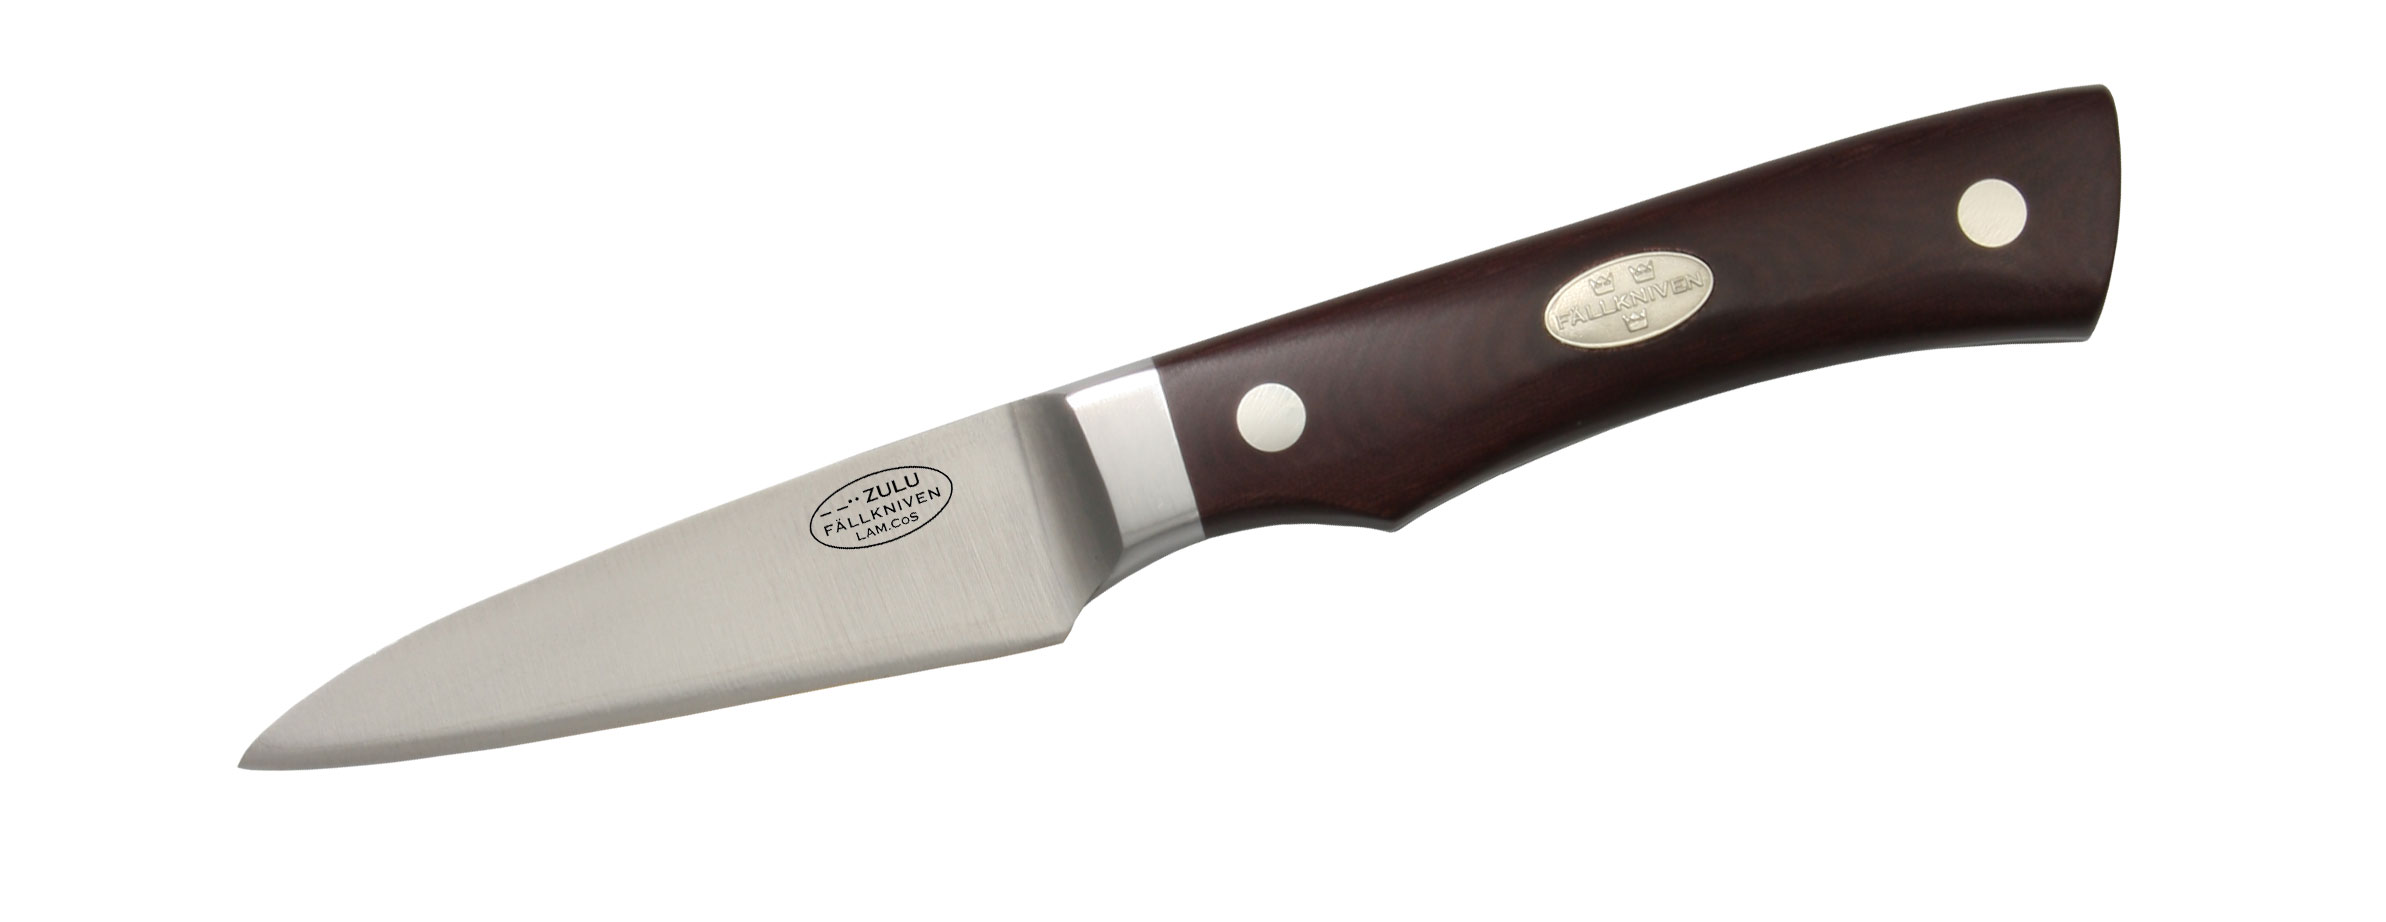
Fällkniven CMT Zulu

Fällkniven paring knife

“I believe the paring knife is one of the most used knives in the kitchen and also the knife with the lowest reputation,” said Peter Hjortberger, founder of Fällkniven AB. “Usually a paring knife is made for being cheap, a knife you don’t need to care much about, just a [semi] sharp edge for daily tasks.”

Fällkniven went in the opposite direction, making the 3-inch blade of the CMT Zulu of laminated COS steel, the core consisting of a stainless steel that contains a high percentage of cobalt. Hjortberger called it “technically, a very advanced steel.”

“So, instead of searching for the cheapest steel, we go for the best steel, understanding that this knife will last a hundred years or more,” Hjortberger said. “To me, this is climate smart to make high-quality knives which will last during several generations instead of uttering out crap.”

The knife is full tang and handled with Micarta. The CMT Zulu features an old-world design ground with a convex edge common on knives before the Industrial Revolution. It is made in Japan with Swedish materials and quality control.

Often, the paring knife is the most-reached-for kitchen tool, not just for cooking but also for common household chores. Paring knives are non-frightening, Hjortberger said, and women might like the more manageable design.

Case Paring Knife

Case paring knife

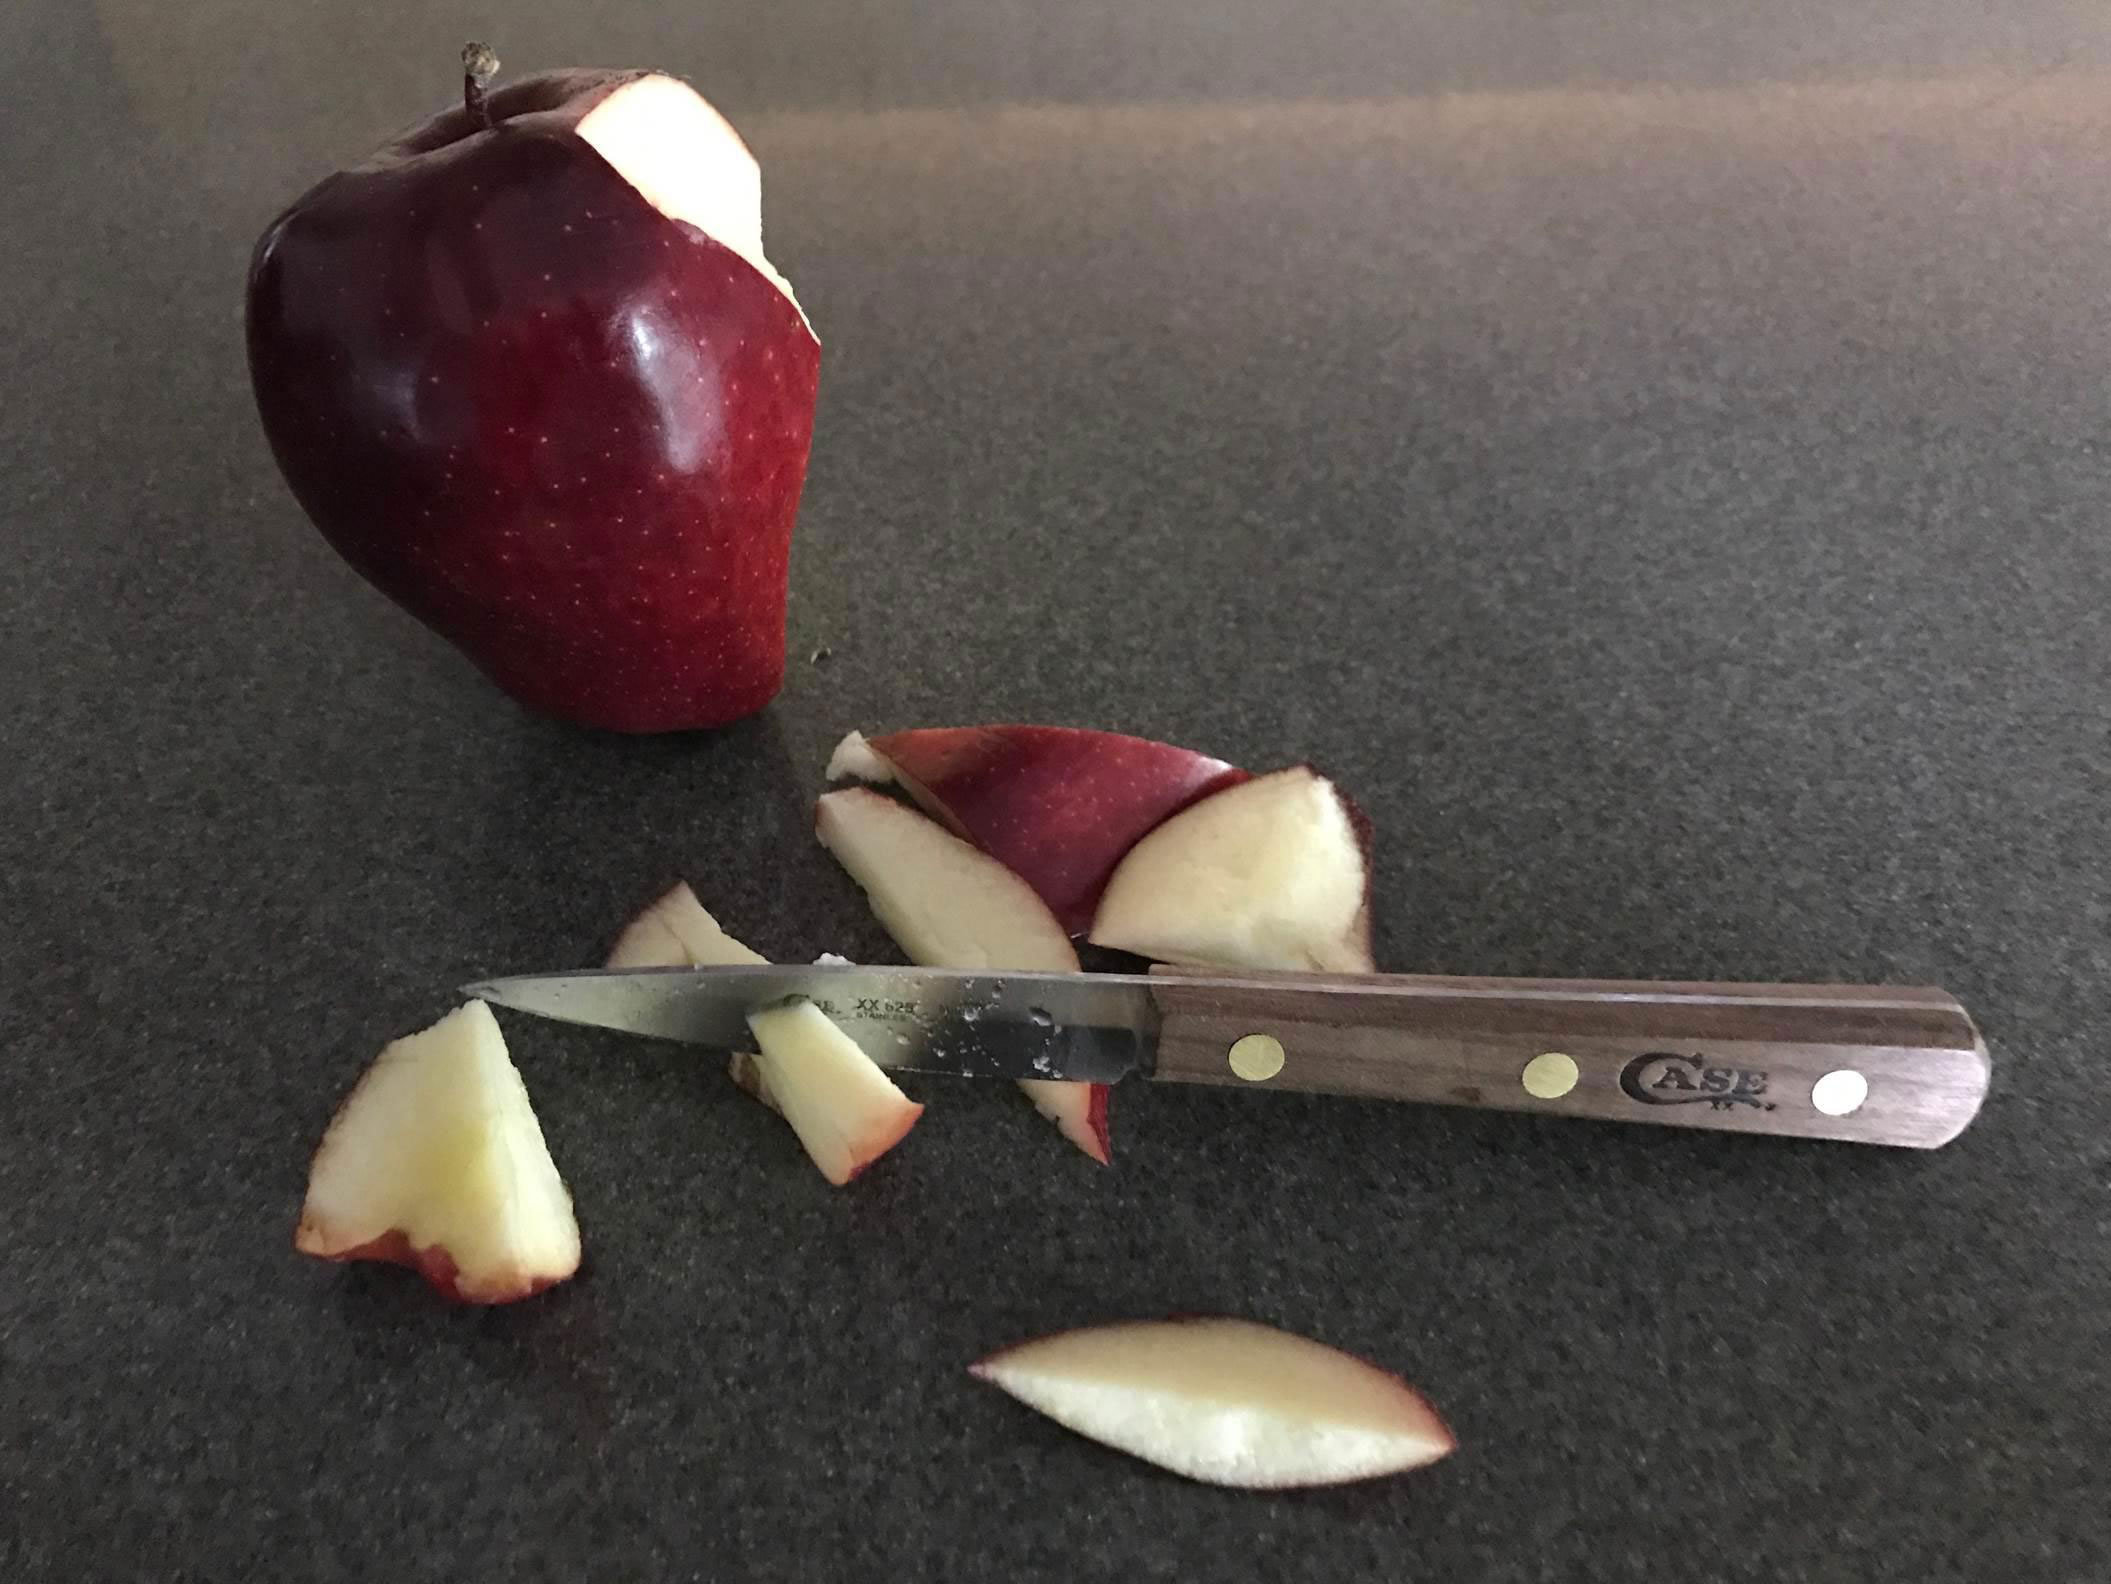
According to Case’s Fred Feightner, paring knives have homes in restaurants offering nearly every type of cuisine. In 2012, Case resurrected its paring knife offering, giving home cooks the option of a handle of black synthetic or walnut. With the walnut handles, brass rivets gleam from the wood. Case offers four paring knives in its Household Cutlery collection.

“We knew people would want their household set to be complemented by a paring knife or two,” Feightner opined. “Case paring knives have been a part of the American kitchen’s tool set for many years.”

Case manufactures paring knives with either a clip-point blade, where the clip drops to the gently curving edge, and the spear-point, where the spine and edge meet in an acute tip. Both are made from Case Tru-Sharp™ surgical steel, the company’s equivalent of 420HC stainless.

Paring Knife Maintenance Tips

After use, a few moments of care can extend the life of a paring knife. While convenient for pots and pans, etc., the dishwasher is notorious for destroying knives.

“Dishwashers are never kind to household knives,” Feightner said, “because the blade edges can be dulled by the movement of the knives during cleaning, and the detergents made for automatic dishwashers will tend to stain and pit the blades. Our wooden-handled knives have natural oils and pigments within them that can be compromised by the high temperatures employed by the dishwasher. As a result, fading and splitting of the wooden handles can occur.

“We recommend hand washing, using a mild-strength detergent, followed by a prompt water rinsing and hand drying with a clean towel. Cleaning products that include chlorine and/or bleach in them can cause the stainless-steel blades to discolor and pit.”

Knives stored loosely in a drawer can rattle against each other, chipping edges and posing cutting hazards to anyone rummaging for a blade. Once their knives are clean, professional chefs store them in a knife bag, roll or case. At home, a knife block, a magnetic strip or in a drawer as long as they are in sheaths, work equally as well to preserve the life of kitchen knives. After all, from feats of culinary artistry to cutting string, the paring knife will rest in kitchens for decades to come.

Mom, or Anyone, Will Like This, too

The official knife of BLADE Show 2018 is this special edition CRKT Caligo.

  • Only 150 made
  • Serialized number
  • BLADE Show logo on blade
  • Designer TJ Schwarz’s signature on the blade

Get this instant collectible now for only $49.99 at ShopBlade.com.

Who Did Movie Knives Better? “First Blood” vs. “The Hunted”

Here’s a look at a movie knife classic, First Blood, and a movie that tried to rip off Rambo. Spoiler alert: ripping off Rambo is never a good idea.

Knife Use in First Blood: Rambo-esque, but Not Ridiculous

After I saw First Blood, the first Rambo movie, some buddies and I started to look at it with a critical, knife-centric eye.

Nothing that Rambo does in the movie is impossible. Some of the feats require a very well-trained man who’s in excellent physical condition, not to mention one who’s stubborn as hell. The feats also require a great deal of luck.

I’ve always been critical of fight sequences where the hero beats up 10-15 opponents all at one time. You can see the bad guys hanging back, each waiting his turn. That doesn’t happen in real life.

However, in First Blood, each person Rambo fights is physically isolated, so Rambo can take each one on one-on-one. It could work that way. The movie was very well thought out choreographically.

At one point Rambo leaps from a cliff and falls through a pine tree, breaking tree limbs on the way down, and survives. Tricky and tough—and yet possible. I once fell out of a pine tree, breaking pine limbs on the way down, and wasn’t hurt at all except for my 18-year-old ego. It was about a 20-foot drop, not anywhere near what Rambo fell, but long enough to convince me that it was possible to survive it.

Rambo’s use of the knife in First Blood is excellent. He knows what he’s doing. One of the first things he does is use the knife to make a spear, which is a good idea because a spear is a better hunting tool and a much better weapon than a knife. For one thing, a spear has reach and speed over a knife alone.

First Blood is an exciting movie. If you haven’t seen it, rent it. It’s worth it.

Knife Use in The Hunted: Ridiculous

Several of my friends saw The Hunted and told me that it was the MOAB (Mother Of All Bombs). However, having seen The Musketeer, I didn’t believe them. While The Hunted isn’t the MOAB, I would put it in the 2,000-pound category.

The Hunted isn’t a remake of First Blood but copies it—and does a lousy job at that.

The movie opens with a hellish scene in Kosovo, with Serbs killing Albanians right and left, especially women and children. I think the viewer is supposed to get the impression that all the Kosovo violence has driven the villain, Aaron Hallam— played by Benicio Del Toro—crazy.

I realized that I was in a fantasy movie very quickly. Tommy Lee Jones, who portrays L.T. Bonham, is running through a forest that’s deep in snow when he sees a wolf caught in a snare. He catches the injured animal, frees it from the snare and then dresses its paw. The animal doesn’t bite Bonham or, for that matter, make any threatening moves whatsoever. Heck, my wife rescued a four-week-old puppy a few months ago and was bitten!

the hunted movie knife
(image via imdb.com)

The plot is that Hallam is a real killing machine whom Bonham has trained. The main action takes place in the dense rain forest of Oregon—sound familiar?—and starts with a scene of two deer hunters. The hunters are equipped with bolt-action rifles sporting monstrous telescopic sights. Stupid is such a harsh word, so let me just say that it makes no sense to use telescopic sights in underbrush so thick you can’t see 10 yards in front of you!

Anyway, Hallam threatens the hunters, telling them they have no reverence for life, and they have to match their guns against his knife. Needless to say, he kills the hunters, and subsequent photos show that he chopped them up like butchered deer. Meanwhile, it turns out that he also has killed a couple more hunters. Since the movie never offers any other reason for Hallam’s behavior, I guess he must have joined a radical arm of PETA (People for the Ethical Treatment of Animals).

Bonham is an amazing tracker and expert knife fighter who’s called in to capture the killer. He starts out after Hallam and, of course, doesn’t take a weapon. Hallam immediately finds Bonham, they have a brief fight and the chase begins.

I can’t begin to tell you how incredibly stupid this movie is. For one, in one scene a thrown knife goes all the way through a tree trunk that looks to be about 3 inches in diameter! Bonham knaps a flint blade to use as a weapon, never thinking to simply buy a knife instead.

One of the most startling scenes is when Hallam breaks off chunks of leaf spring. He starts a small fire and then forges a knife using the chunks of leaf spring for steel, and another chunk as a hammer. After he rough forges the blade, he hardens it and then files it! I have no idea where he gets the file, let alone how an open fire that size develops the heat necessary to forge steel.

In certain segments, The Hunted is a direct steal of First Blood, right down to Bonham repeating a quote from the Stallone movie about how many body bags will be filled in the quest to nab Hallam.

The knife fighting and the scenes showing the training aren’t so much stupid as just silly. Some guy stands still as someone pretends to cut his throat, chest, stomach, brachial artery, and then moves down to cut both femoral arteries! I mean, what’s the point? How many times does your opponent need to bleed out? It’s like blowing up a rabbit with a stick of dynamite—the furry little critter can only die so much!

The final fight sequence between the two principals is very poorly choreographed. It bears no resemblance to a real fight. For those who have read my reviews about movie knives before, you know that I feel a fight must follow the flow of the film. In other words, it need not necessarily be a “real” fight but one that must be consistent with the plot. In that respect, the final fight does follow the plot—both are total and complete nonsense.

Don’t waste your time or your money on The Hunted. This time I did the suffering for you.


First Look: Kershaw Lucha Carbon Fiber

0

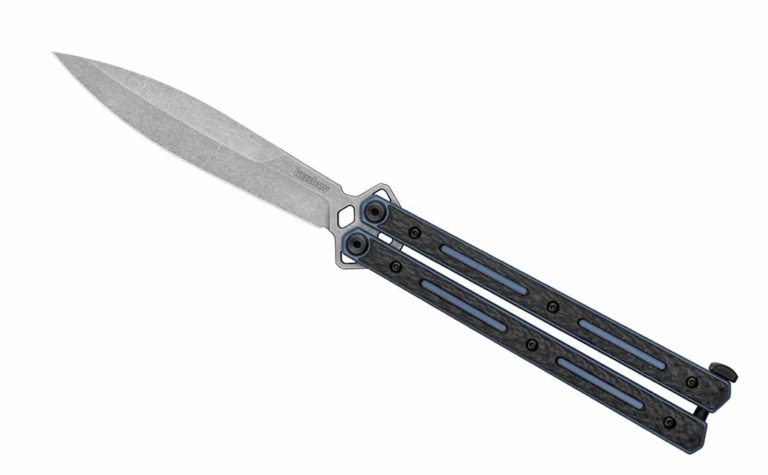
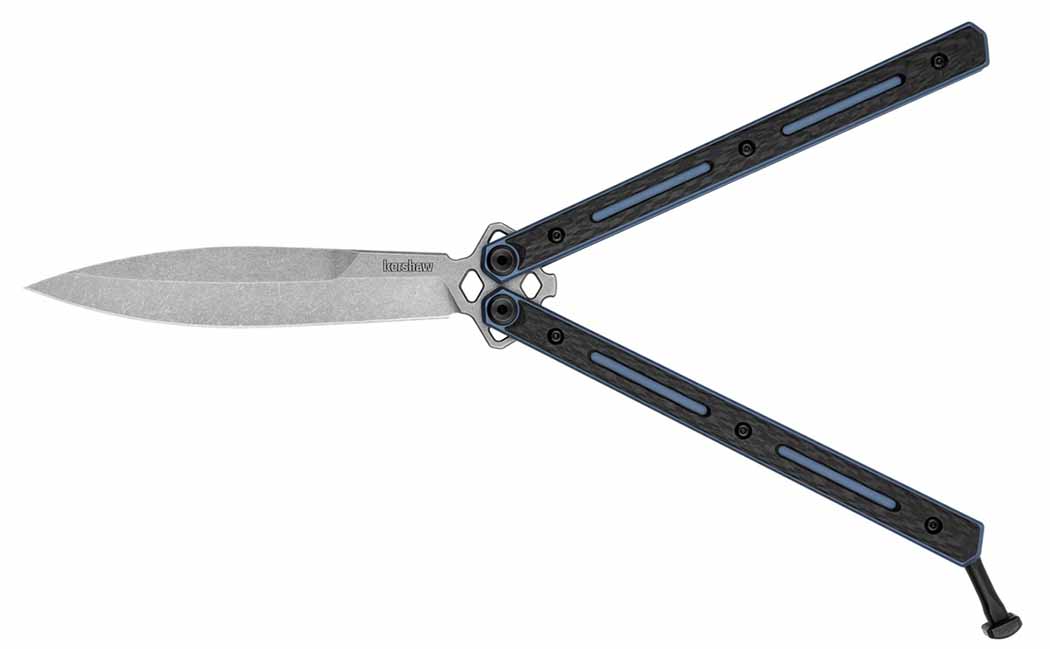
Kershaw steps up its balisong game with the introduction of the lightweight Lucha Carbon Fiber.

The original Kershaw Lucha made waves when it was released 2 years ago, and it’s only gotten better with a new twist on the design. Shake hands with the Kershaw Lucha – Carbon Fiber. Embracing cutting-edge materials, the Oregan company has cooked up a  more nimble variation, one perfect in the role of a unique EDC option or a top-end balisong competition blade.

As its name suggests, Carbon Fiber is the belle of the ball in next-generation Lucha, with Kershaw applying it to the handle. Adding rigidity to the system, the company opted for a titanium skeleton, but offset the use of metal with weight-saving cutouts in the carbon-fiber exterior. The efforts paid off, the knife is a full ounce lighter than the original Lucha at a very svelt 4.9 ounces. Worth mentioning, the mix of carbon fiber and blue finished titanium gives the knife a dynamic look.

Kershaw didn’t skimp on the other aspects of the Lucha Carbon Fiber. Dual KVT ball bearings make the knife’s action silk smooth and quick as lightning, making opening and manipulating the knife effortless and smooth. A wicked spear-point blade, constructed of corrosion-resistant CPM 20CV stainless steel, facilities faster opening and proves useful for both cutting and perforating tasks. And a Kershaw’s “Working” finish maintains the aesthetic integrity of the blade, hiding scratches and gulls better other finishes.

While not the most expensive option on the market, the Lucha Carbon Fiber tilts to the expensive end of the balisong spectrum—$500 (expect around $300 retail). Yet, it’s difficult to argue the USA-made knife certainly offers plenty for the price.

Initial Impression

Describing the Lucha Carbon Fiber in one word is simple: streamlined. Building on the successful original, the new Carbon Fiber appears a more refined version in every way. From its single-edge spear point to its almost lighter-than-air titanium and carbon fiber handle, it should bring everything balisong fans appreciate to the next level.

Carbon Fiber Specs
Blade Length: 4.6 inches
Blade Material: CPM 20CV
Blade Finish/Coating: Working Finish
Blade Thickness: .155 inches
Closed length: 5.8 inches
Handle material: Titanium, carbon fiber overlay
Handle finish/coating: Blue anodized
Handle thickness: .56 inches
Overall length: 10.25 inches
Weight: 4.9 ounces

How To Make An Atlatl

1

We’ll take a momentary break from knives to talk about how to make this ancient and useful hunting tool—the atlatl.

Over 20 years ago I attended a primitive skills event in Michigan where the Michigan Atlatl Association was having its annual competition. I was amazed at how accurate the people could be using an atlatl, not to mention how much energy they could generate throwing one. However, I don’t want to get too far ahead of myself. For starters I want to explain why I’m discussing atlatls in the first place.

One of the key points to remember during a survival situation is efficiency, because efficiency saves calories and resources. I know, many have heard of making a survival bow, but the time and resources used to make an atlatl are way less. An atlatl is simple: a throwing stick that allows you to increase your power when throwing a dart.

Imagine you were a pitcher in the major leagues and you could increase the length of your arm by half. The advantage you would create would be amazing. Similarly, not only is an atlatl easy and fast to make, it also increases your ability to throw a projectile farther and faster. Don’t get me wrong; I am not against bows by any means, but in the time it takes just to make a string for a bow, you can make an atlatl and a fist full of darts. In the end, if I were in a survival situation and needed something to hunt with, I would start with an atlatl.

How To Make An Atlatl

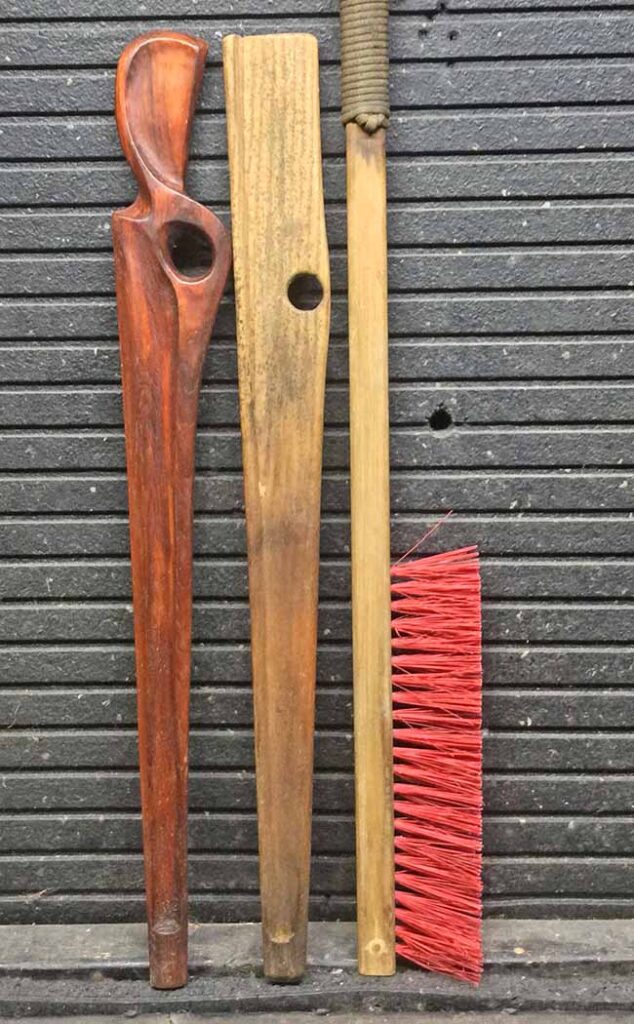
Handcrafted atlatls
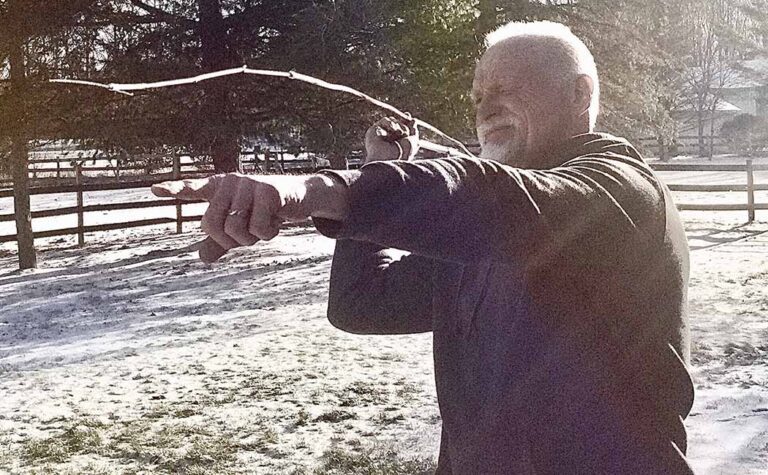
At left are two single-finger throwers. At right is a snowbrush Chris Oberg used as a thrower to win the Michigan Atlatl Association championship. A hammer-style grip works well with the snowbrush thrower as the scraper end acts as a stop.

As mentioned, the atlatl is simply a stick used to increase your throwing advantage. To start, the simplest version is a branch with a secondary branch sprouting off the main shaft.

Take a branch and cut it to the length of you forearm, being sure to leave the secondary branch near the end. Now all you need do is cut the secondary branch to a small point, or leave a pocket. Which method you use will affect how you make your darts. With the point configuration, you must put a bit of a dimple in the end of the dart so it can rest on the point of the thrower arm. Another method is to form a pocket by attaching other materials. These days most survival kits and a lot of EDC kits include duct tape. Simply cut yourself a stick, again the length of you forearm. At one end of the stick form a pocket with a piece of duct tape to cradle the back end of your dart.

There are a couple of methods to hold the atlatl. The first and easiest without having to do any more work on the atlatl itself is the hammer grip. To apply a hammer grip, grab the end of the thrower with the bottom three fingers of your throwing hand. Take your other hand and place the dart on the holder. Then rest the thrower in the palm of your hand and, with your thumb and index finger, grab the shaft of the dart, suspending it off the thrower.

A second method makes your thrower in the basketmaker’s* style. To do this you will need a bit of cord (a shoelace will work) or anything you can use to form two loops on the side of the atlatl shaft. At the end of your thrower, tie a knot that creates two loops on the handle. Insert your index finger in one loop and your middle finger in the other. Having the two loops makes it easier for you to retain the thrower throughout as it is now attached to your throwing hand. A thrower is that easy to make.

Making Spears And Darts

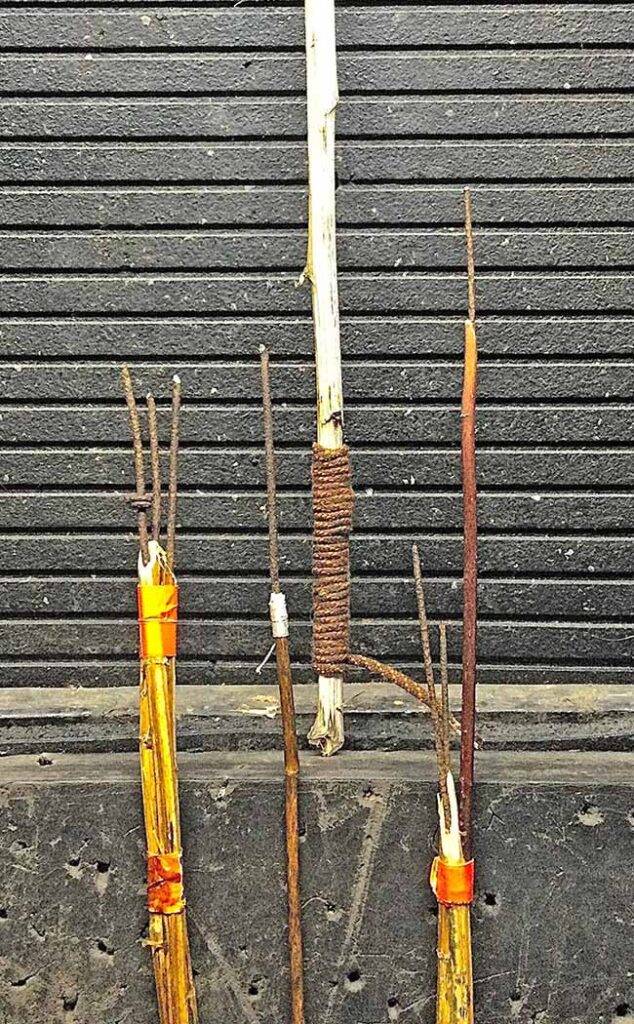
variety of darts
A thrower and a variety of darts illustrate the basic concepts of harvesting and utilizing various materials, including lashing smaller pieces together to make a dart.

An atlatl dart is simply a large arrow. If you can wrap your head around that, you start to see potential dart material everywhere—perhaps a piece of a broken fishing rod, the extra pole in your tent bag, a leg from a folding chair—the possibilities are pretty much endless. The mark of humanity is that there is plenty of garbage most everywhere, so remember to capitalize on any resource you run across.

For natural resources you can turn to plants and bushes that grow almost straight shaft shoots. Some examples in North America are those from mullein, rosewood cane, ragweed and dogwood. In places like Asia, bamboo is a natural selection. Since plant shafts grow in a tapered fashion, be sure to put the heavier end of your dart at the tip. Having the heavier end at the rear will cause the momentum of the heavier back to lift the tip, as the heavier end will want to pass the front.

For length, look for the dart to be at least twice that of the thrower or longer. The longer and lighter the dart, the more energy you can produce. Note: The heavier the dart, the strong the thrower must be.
Start by stripping the shafts and straightening them. During the initial straightening you can bend the shafts or create friction on the concaved side, which will release the tension in the material. As time passes you might do the occasional straightening over a campfire, as the heat helps.

Now that you have the shafts straight you need to carve a small dimple in the back of each one to rest on the point of the thrower. If you are using materials that have nodes along the shaft like bamboo and mullein, be sure to carve the pocket just before a node to avoid splitting the shaft of the dart.

Now for creating drag. Just like with an arrow, to keep a dart flying straight it helps to have drag. Consequently, fletch the dart by splitting leaves and lashing them to the shaft. A more expedient way is to make fletching out of duct tape. You don’t necessarily need fletching but for throwing longer distances it helps.

For making the tip, simply sharpen the point or as mentioned earlier get creative and find something to use that has been left behind—a soda can cut and folded to form tips, for example. How does the saying go? Recycle, reduce and reuse.

What’s An Atlatl Good For?

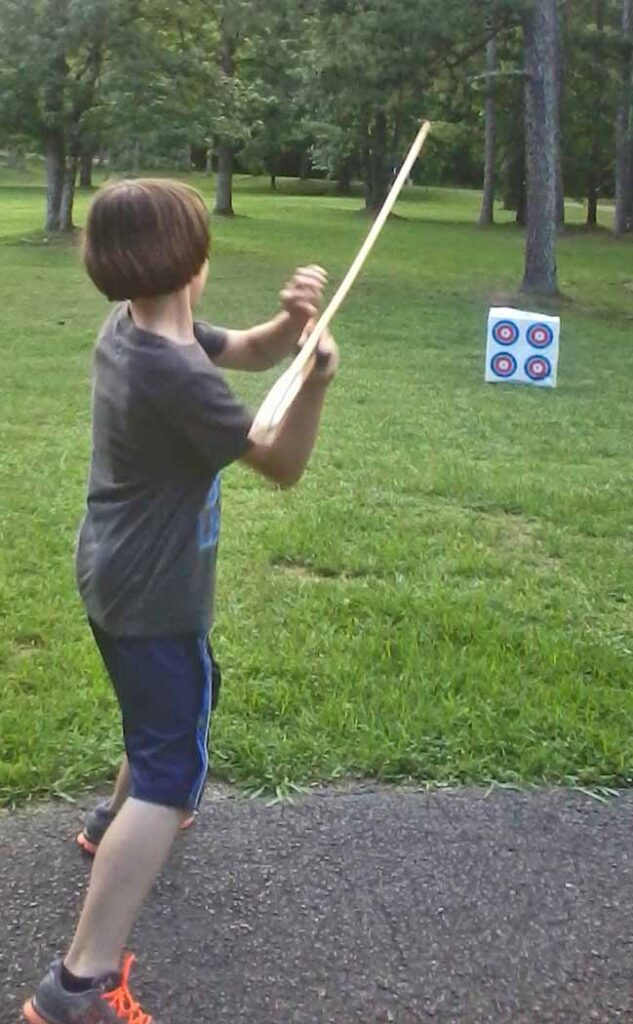
Thrower's take aim with atlatl and dart
Carter Gammill takes aim. In terms of accurate throwing, the hardest part is getting your timing down as to when to release the dart. Setting up a target for practice provides an added element of challenge.

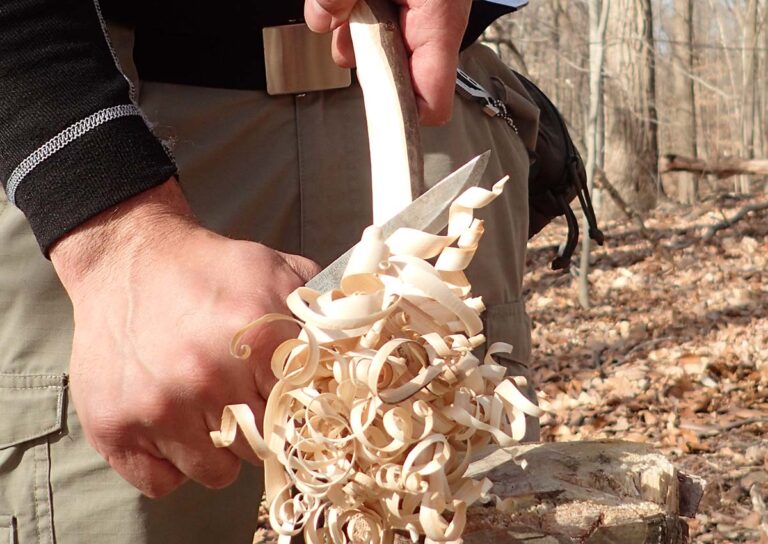
Atlatls have been in use for thousands of years as hunting tools. There are still Inuit tribes that use them to hunt narwhal to this day. It is expedient, uses little resources and best of all you can carve one with your favorite knife in no time. You will want to try making one first to get the idea. After that you will be surprised how you start to see so many things that can be made into an atlatl. The hardest part is getting your timing down as to when to release the dart when you throw it. Most importantly, knowing how to make and use an atlatl puts yet another worthwhile tool in your kit.

*The Basketmaker culture of the pre-Ancestral Puebloans began about 1500 BC and continued until about 750 AD with the dawn of the Pueblo Era in what is now the American Southwest. They used the atlatl for hunting and as a combat weapon. The culture was named Basketmaker for the large numbers of baskets found at local archaeological sites dated circa 800 BC to 200 AD.

Read More About Wilderness Tools:

Bushcraft Tips and Tricks

0

Elevate your survival skills with these bushcraft tips!

A good bushcraft knife is characterized by its manageable size and weight, allowing for comfortable handling and easy resharpening.

Typically, a knife designed for bushcraft and carving tasks lacks spine gimping for the thumb. The cutting edge should have a continuous curvature that extends the entire length of the blade. A general-purpose bushcraft knife should have a blade that matches the width of your palm, with the tip aligned closely to the handle’s centerline. The handle and blade spines should remain on the same line.

The handle should feature an oval cross-section made from such materials as wood, Micarta® or plastic. It should not include finger cutouts that limit your grip, as such restrictions can lead to blisters. The handle length should fit comfortably in your palm. While Scandinavian blade grinds are standard for bushcraft knives, other blade grinds are also acceptable.

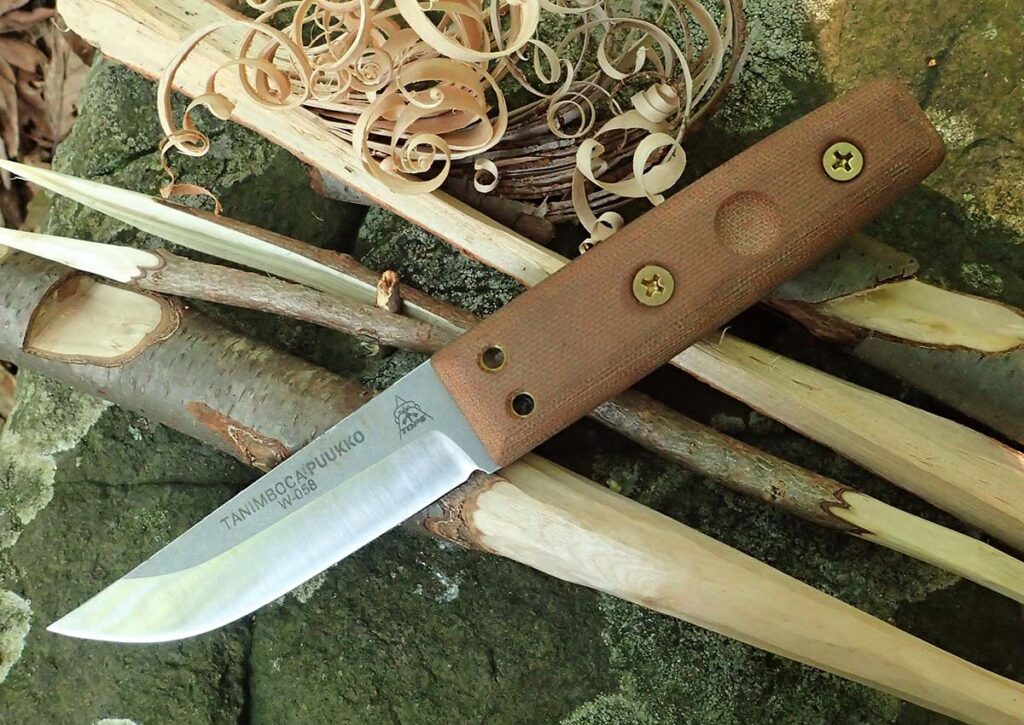
The Tanimboca Puukko from TOPS Knives made stakes, pot holders, fuzz sticks, bush forks, skewers, roasting sticks and traps. According to the author, it’s the perfect size for a bushcraft knife. Note the bow drill divot/socket on the handle for fire starting.

To quote Mors Kochanski, Canadian bushcraft and wilderness survival instructor and author of Bushcraft: Outdoor Skills and Wilderness Survival, “The knife is the smallest and most portable of all the cutting tools. Light and unobtrusive, the knife is readily available for hundreds of everyday tasks in bush living.”

Knife Safety

Always start with a safety briefing when working with tools, especially those that can cause serious injury. Books and teachings have provided several tips and procedures for knife use and safety. One key concept is the blood circle.

Stretch out your arm with the knife in hand and ensure you can make a complete circle without hitting anyone or anything, including tarps, backpacks, tents and water containers. The blood or death triangle is crucial when sitting and carving. Never use your leg as a backstop or cutting board. When removing large amounts of wood, cut to the side of your body on your dominant knife-hand side or lean forward, resting your forearms and elbows on your knees, keeping your work project and knife out of your blood triangle. Remember the blood circle. Some cuts, like a pull-cut, allow you to cut toward yourself in a controlled, slow manner, but generally cut away from yourself.

Bushcraft Grips And Cuts

Use an icepick grip to split small pieces of wood for a one-stick fire. Strike the knife and wood against a hard surface together, then twist slightly to split the wood.
  • Forehand (Fist) Grip: The forehand grip is the most basic and natural way to hold objects securely. This grip is ideal for power cutting, allowing you to roughly remove a significant amount of material to shape the wood. To use this grip, curl all your fingers around the handle, creating a fist. Avoid placing your thumb on the knife’s spine, an everyday habit. Hold the wood off to the side, with the blade tip pointing slightly upward, and slice from the base of the blade to the tip. Lock your wrist and elbow and use your shoulder to push down as if punching through the floor. The motion resembles shrugging your shoulder. Alternatively, you can adapt this technique by pulling the wood back against the knife using your work hand.
    Pro Tip: This is not a jarring-of-the-elbow motion.
  • Thumb-Assisted Push Cut: This is commonly called a scissor grip cut. When viewed from above, the arrangement of the wood and the knife resembles the operation of scissors. It involves a thumb-assisted push cut, where the non-dominant hand’s thumb helps cut. The blade and wood pivot together like scissors, while the thumb on the non-knife hand presses the back of the knife into the wood. This technique features a short-cutting reach, applies soft-to-medium force, and offers a high degree of control. It is a more refined and detailed version of the chest-lever grip with a thumb-assisted push cut.
  • Chest-Lever Grip: The chest-lever grip is a powerful and controlled cutting technique commonly used in bushcrafting, characterized by a typical palm-up grip. To execute this cut, engage your lat muscles and leverage your body for power. Start by turning the knife blade outward to your right (if you’re right-handed) with your palm facing up. Grip the knife firmly, placing your thumb on the handle or side of the blade while your other hand holds the workpiece. Once the blade contacts the area you want to cut, rotate your shoulders forward and pull your hands apart as your shoulders open up, leveraging against your torso. Keep your hands connected to your ribs throughout the process. This technique and the forehand grip allow you to make powerful cuts for removing significant amounts of wood.
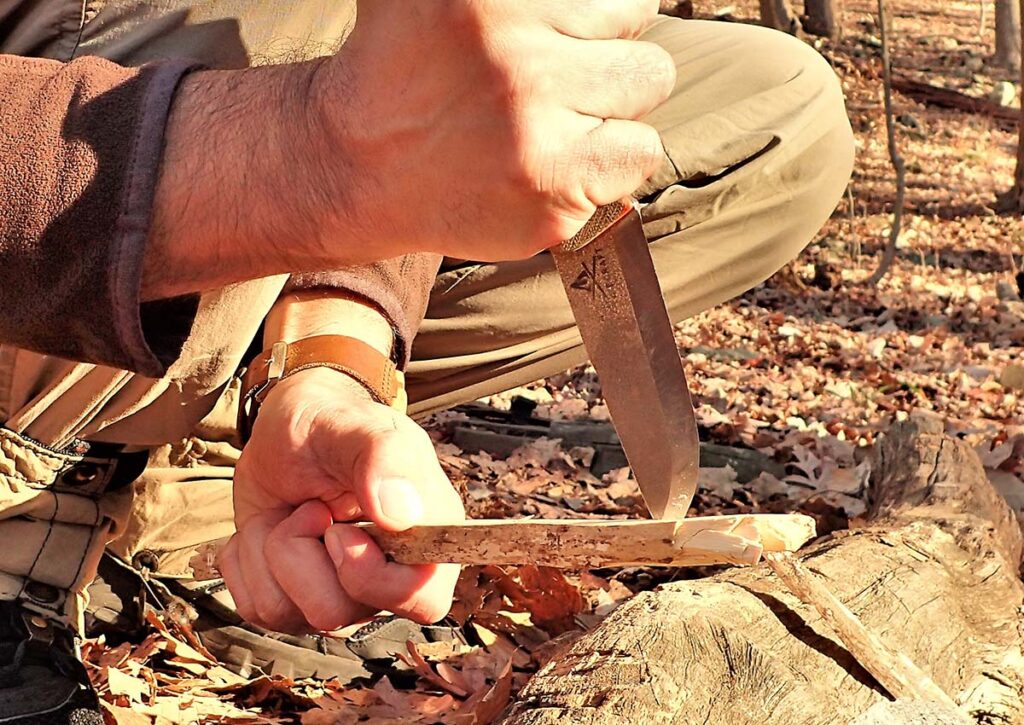
  • Peel Grip: Also known as a draw grip, apple peeling grip or paring grip, the peel grip facilitates more detailed, finishing cuts rather than powerful ones. Use it to finish the ends of a spoon handle, shape the top of the spoon bowl, chamfer a tent stake or trim wood to achieve a flat surface. To execute the peel grip, hold the knife in a reverse position with the blade facing you. Place your fingers on the back of the knife handle, positioning your thumb on the back end of the workpiece while your other hand clasps the work. Keep your knife-hand thumb out of the blade’s path as you close your hand into a loose fist, allowing for a slow, controlled cut. Author’s note: This grip is helpful for precise carving and finishing the edges of items.

Bushcraft Techniques

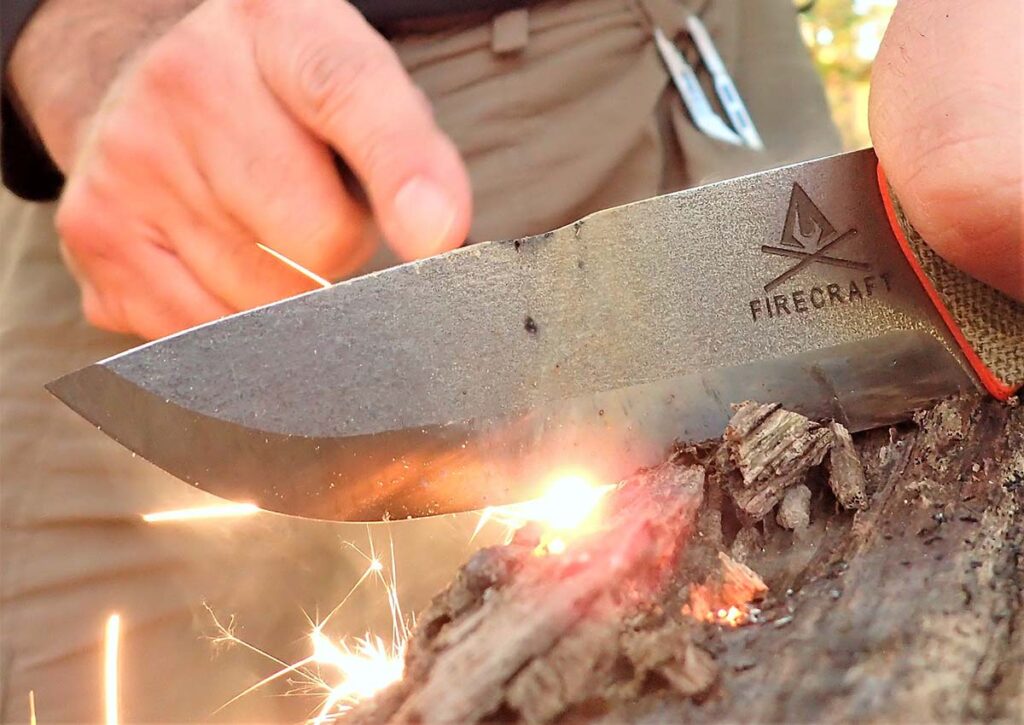
The author strikes the supplied ferro rod against the fire notch to ignite the tinder.

After addressing the basic grips, it’s time to learn a few helpful knife techniques commonly employed in bushcraft. Practice them at a comfortable pace and avoid rushing.

  • Bushcraft Batonning: A knife alone often lacks the weight needed for effective chopping. However, striking the blade’s spine with a heavy object can produce strong cuts. A sturdy, comfortably held stick serves as a baton to help cut down and limb small trees, making various cutting tasks much more straightforward. You can quickly cut through branches and small saplings using a knife and a baton. Bushcraft batonning describes using a baton for controlled cross-grain cuts, creating V-notches and splitting wood no wider than your wrist. Using a baton for limbing branches generally proves faster and safer than using an axe.
  • Beaver Chew: To cut a green or dry branch to the desired size, use the beaver chew technique, which leaves a somewhat rounded end for pounding into the ground. Make a series of cuts (nicks) around the stick. Thicker sticks require more time, so repeat this process several times, cutting deeper with each pass. Once the cut is halfway or two-thirds through the stick, you can break it off and trim the end.
  • Tension Cutting Saplings: To take down small green trees up to wrist size in thickness, first apply tension by bending the tree while holding it firmly with one hand. Start your cut at a 45-degree angle at the bend point, where the stress is most significant. There’s no need for a sawing motion; instead, use a gentle rocking back and forth with the blade to slice through the fibers under tension. Be careful during the crucial last part of the cut, as you need to restrain the tree from falling prematurely, which would require extra work to finish the cut. If done correctly, this process should take no more than 10 seconds.

To section long saplings, step on the top to hold it and bend it over your thigh or hip. Cut the bend to ensure avoid cutting yourself during the follow-through.

Pro Feather Sticks

Creating tinder by shaving very thin pieces and kindling from deadwood is known as making a feather or fuzz stick. You can use various techniques but here’s the most basic approach.

Start with a forehand grip and resist the urge to place your thumb on the spine of your knife. Using gimping or a gimping grip applies uneven pressure, which often causes feathers to detach from the stick. When you reduce green wood for carving projects, think ahead and keep the shavings for fire making, regardless of their thickness. Thinly shaved greenwood dries quickly. Try to make them as thin as possible or save larger shavings to use as kindling. Emphasizing multi-use and maximizing the utility of everything you work on and cut truly embodies bushcrafting!

Try Stick It!

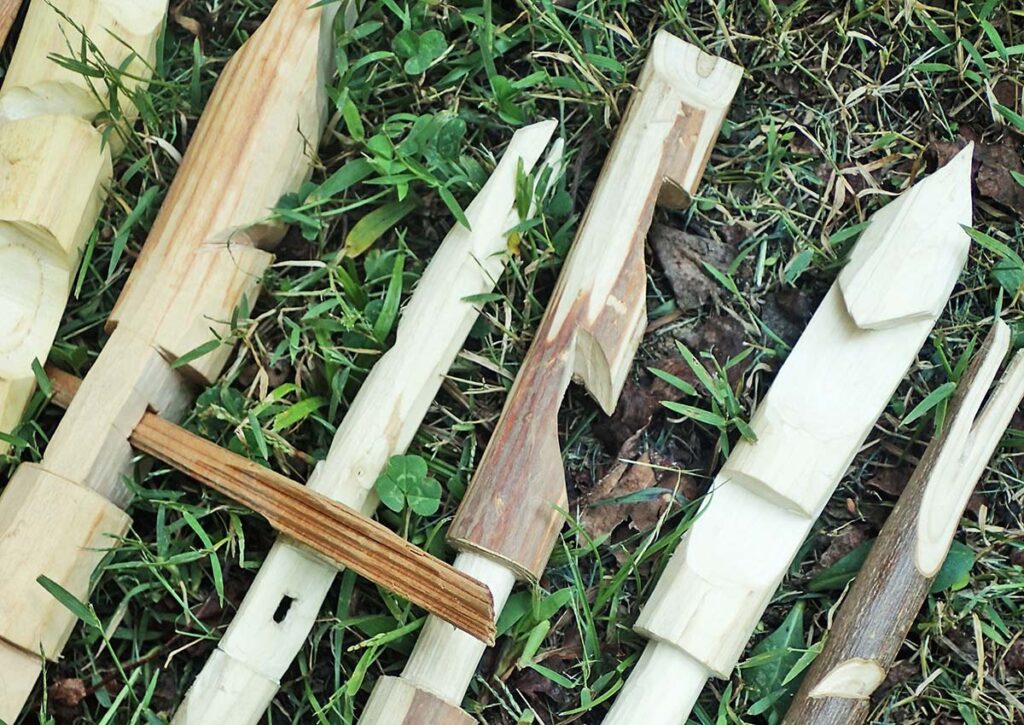
The author carved various try sticks with essential notches and additional features.

The Try Stick, made famous by wilderness educator, survival instructor and author Mors Kochanski, is a tool designed for practicing and showcasing knife skills in wood carving. While some notches are functional and often used to create items such as tent pegs, pot hangers and digging sticks, many notches on a Try Stick are more decorative and less commonly utilized. You can incorporate around 17 different types of notches on a Try Stick, but including as many as possible is typical. There’s no required number of notches to create; a Try Stick focuses on knife handling and safe practice.

Try Stick Notch types include:

  1. Round Notch
  2. Pot Hook
  3. Saddle Notch
  4. Square Notch
  5. Mitred Lapped Notch
  6. Jogged and Wedge Splice
  7. Dovetail Pin and Socket
  8. Dovetail Notch
  9. “V” Notch
  10. Spear Notch
  11. Knife Tip Mortice
  12. Diameter Reduction
  13. Knife Edge
  14. Split
  15. Bow Notch
  16. Latch Notch
  17. Bark Stripping
  18. Whistle Project

Check Out More Outdoor Knives:

Review: Bare Bones Buffalo Skinner

Bob Dozier’s Bare Bones Buffalo Skinner is sharp—and comfy, too!

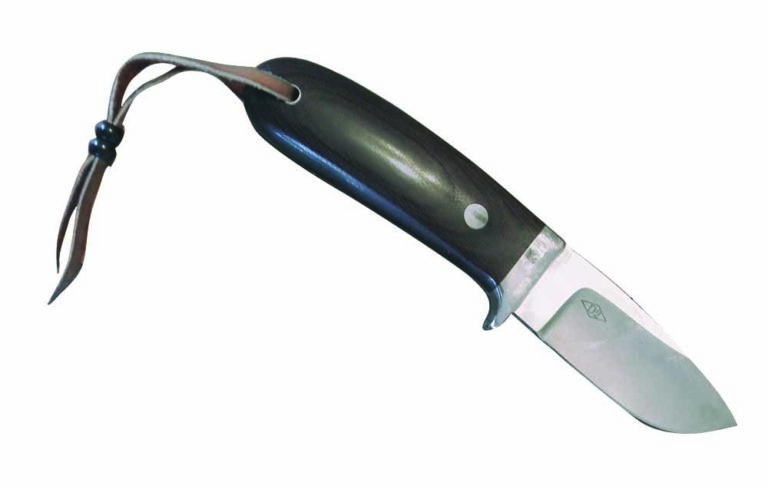
There’s nothing quite like holding a great-feeling knife that makes you want to cut something. Bob Dozier has been making custom knives to be used for over half a century and understands the importance of two major things: comfortable handles and sharp blades. They still have to cut and perform to be carried daily.

Let’s start cutting with the Bare Bones Buffalo Skinner.

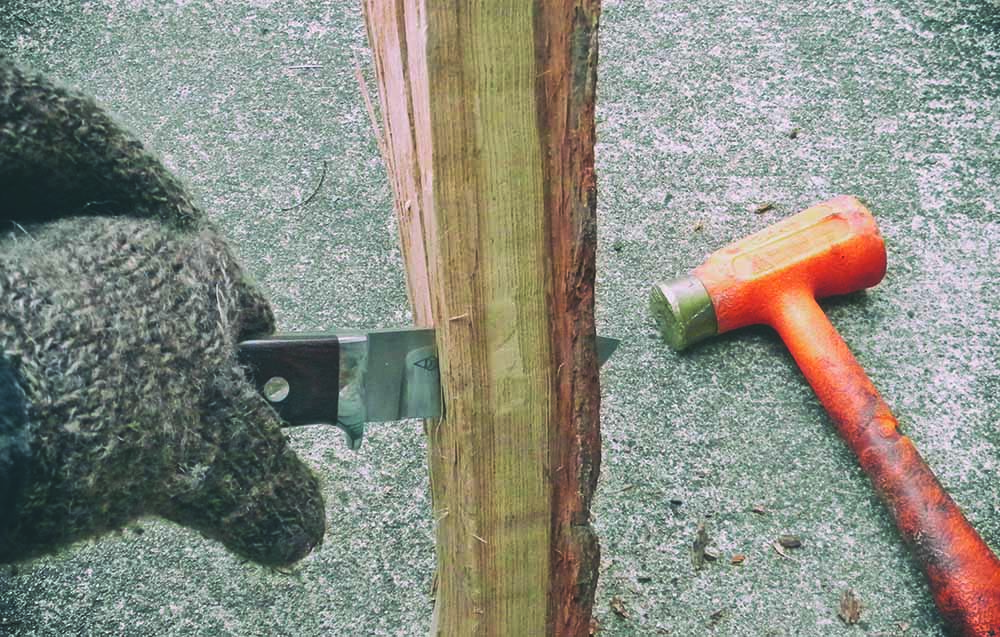
Using a dead-blow hammer, the author batonned the skinner into and through thin kindling. The knife proved a solid splitter. No damage occurred to the edge.

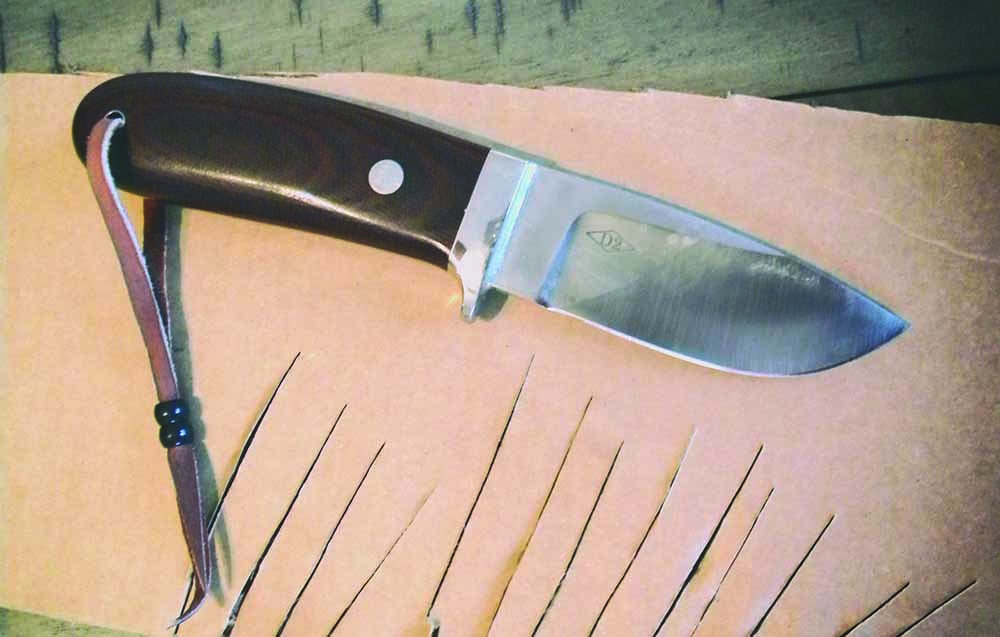
The quickest check to see if the knife has a sharp edge is to slice paper. You probably know by now that I use 20-pound bond copy paper for the job. The Bare Bones aggressively sliced into the paper using the knife’s own weight. The skinner is very controllable in use. The high hollow grind slid through the paper.

Moving on to single-walled cardboard for slicing, the aggressiveness continued. You could hear every cut made—the Bare Bones is a very loud slicer. I didn’t have any hang-ups during the test, just full, noisy cuts. The handle shape made controlling the cuts easy.

The knife performed aggressively in slicing single-walled cardboard. The handle shape made controlling cuts easy.

Next up: 8-ounce leather. This is where the Bare Bones was sweet. It zipped through the leather like it was cutting the 20-pound bond paper—just louder. It was super aggressive in slicing the medium, with hardly any resistance. I would love trying the Bare Bones on field dressing whitetail deer. Maybe come fall …

OLD-SCHOOL KINDLE

On to harder material. It was February, and I like to keep a supply of kindling and fire sticks to light a blaze faster. The Bare Bones made tight curlicues in the old pine. The wide blade and high grind worked out great for curling the wood. The handle shape excelled at controlling depth of cut. The single guard protected my fingers from getting splinters. Dozier’s knife embodies top-notch work.

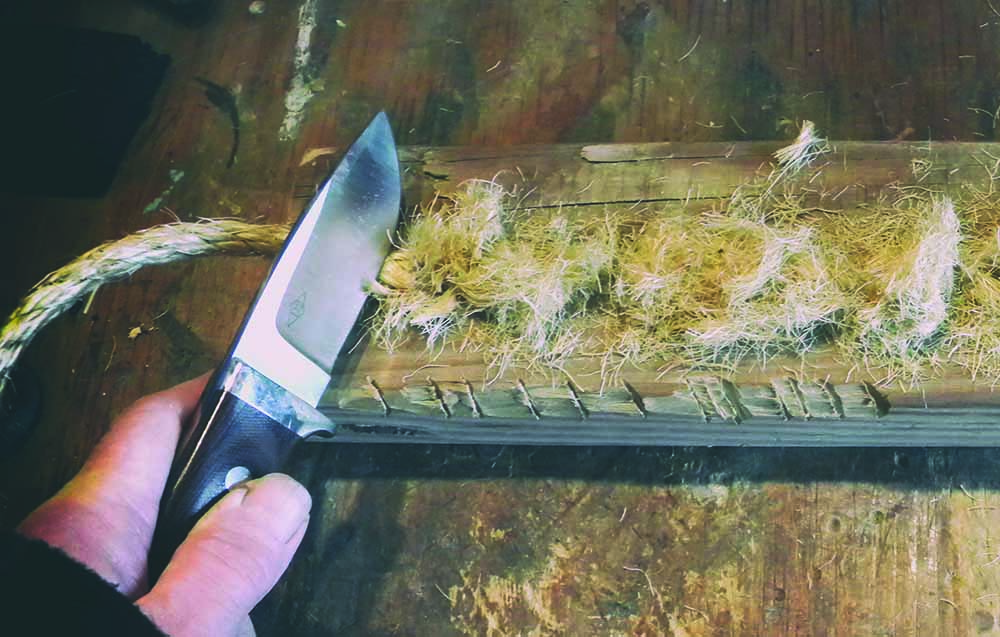
The Bare Bones crunched to 225 cuts. The author stopped at 225, as he didn’t want to risk slicing a finger.

It was time to make some thin kindling. Using a dead-blow hammer, I batonned the skinner into and through the wood. The knife’s solid overall construction prevented vibrations to my hand. The skinner proved a solid splitter. No damage occurred to the edge.

I had to warm up my fingers for the rope cutting. With no heat in my garage and the temperature at 17 degrees, I separated the test into 25 cuts per warm up. The Bare Bones crunched to 225 cuts. As I used the push method, it kept cutting. I stopped at 225, as I didn’t want to risk slicing a finger.

CHANGES

I might add some grooves to enhance grip.

OVERALL

This knife is a beast in the cutting arena. The comfortable handle made control easy. This knife is excellently made and perfect for the outdoors or hunting.

Bare bones Buffalo Skinner
Maker: Bob Dozier
Cutting edge length: 3.25”
Blade material: D2 tool steel
Blade grind: High hollow
Blade thickness (at the thickest): .25″
Scales: Brown canvas Micarta®
Guard: 416 stainless steel
Extras: Tapered tang; thong
Weight: 8 ozs. (123/8 ozs. w/sheath)
Overall length: 8”
Sheath: 8-ounce leather, pouch style
Maker’s list price: $477

Advertisement

Must Read Articles

Read this before you make a knife

Knifemaking 101 – Read This Before You Make a Knife

  by Wayne Goddard My experience has taught me that there's nothing like digging in and getting started. I've often said the hardest part of the...
how to forge damascus steel

How to Forge Damascus

Advertisement
Advertisement