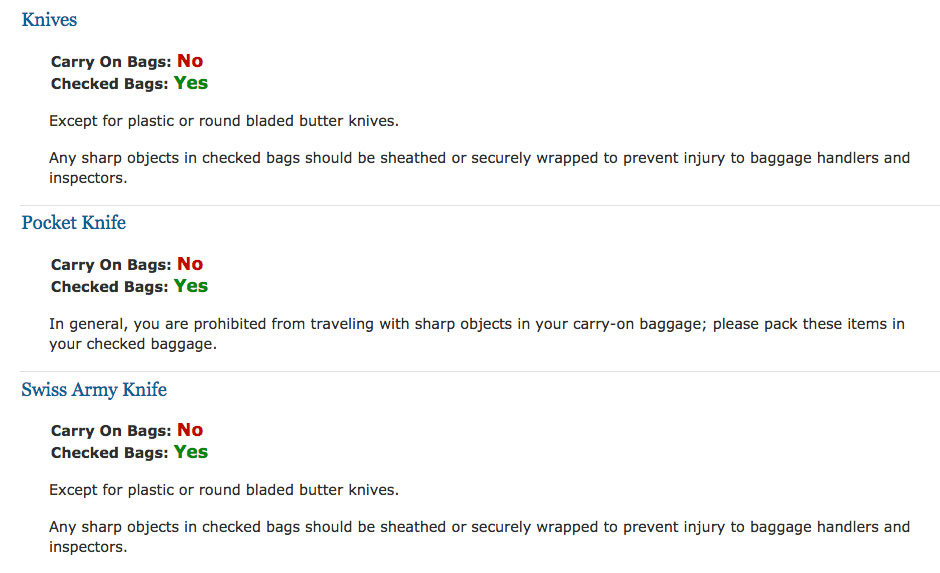
What knives does the TSA allow on airplanes? Here’s the list. Keep in mind that checked luggage is still subject to search, so don’t pack anything you’d miss if you lost it.
That said, there are still other considerations even if you decide to bring knives in your luggage.
Put Inexpensive Knives in Your Checked Baggage
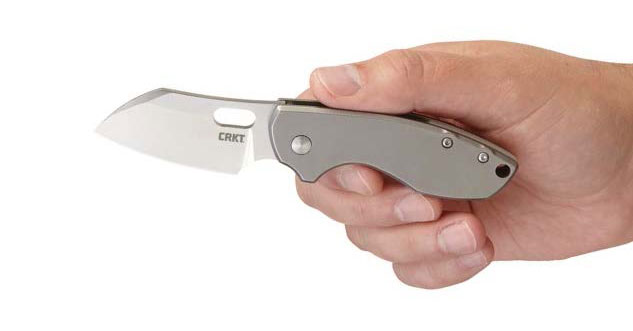
For vacationing knife enthusiasts, Plaza Cutlery’s Dan Delavan suggests a Spyderco, Kershaw or CRKT knife in the $30 to $70 range. An example of the latter is the CRKT Pilar with a 2.4-inch blade of 8Cr13MoV stainless and a closed length of 3.5 inches. MSRP: $39.99.
The kinds of people who walk into Dan and Pam Delavan’s Plaza Cutlery retail knife store in Costa Mesa, California, go for all kinds of knives, from classic folders to KA-BARs. But when they walk through Plaza Cutlery’s doors to buy a knife for vacation, most buy inexpensive models to slip into their checked baggage—inexpensive in case the knives get lost, stolen or confiscated.
“When they fly, that’s when the knife changes,” Delavan said.
He shows them budget models by Spyderco, CRKT and Kershaw, knives ranging from about $30 to $75. If customers are into Spyderco knives they might buy one from the Byrd line, folders from Spyderco with cost-friendly materials. If the customers like higher-end models, they might buy a Benchmade.
“It’s all relative to what you can afford,” Delavan said.
Plaza Cutlery is in South Coast Plaza, a mall that bills itself as “a luxury shopping experience”—a vacation destination in and of itself. Nearby Disneyland is an international draw. Hollywood and its attractions are close, too.
When Delavan heads to Disneyland with Pam and the grandchildren, he often carries the Victorinox Swiss Army Classic, which can slip on a keychain. He said it’s small enough that the park allows him to carry it. Of course, always research the knife laws of the areas you will be visiting. For most places in the USA, a small, non-locking knife should be OK, “but you’ve got to check” to be sure, Delavan noted.
What Knife is Legal Everywhere? Best Bet: Small, Non-Locking Knife that Opens with Two Hands
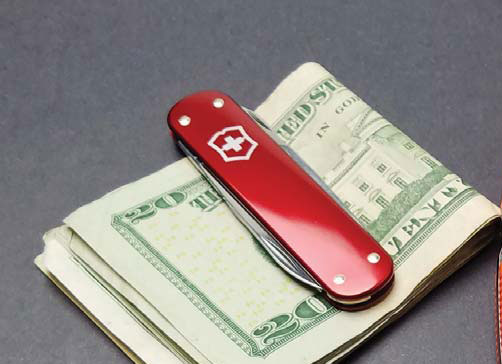
While there are no guarantees that a knife will be legal everywhere, your best bet is with a small, non-locking knife that opens with two hands. This Victorinox Money Clip is a great example.
Joe Tarbell’s retail store, JT’s Knife Shop, sits in a small building in Port Jervis, New York. The family-owned business began as an army surplus store near the Delaware River, which, during the summer, fills with kayakers and rafters.
“People ask me about knife laws quite often and it’s a pretty complicated subject,” he said. “Knife laws can be very vague and misunderstood. I have even had police tell me a lot of it is up to the discretion of the officer. I tell people to research the best they can and check out AKTI [American Knife & Tool Institute]. I can’t tell you how many people think that the law states that a blade can’t be larger than the palm of your hand, which is ridiculous.”
If a customer is traveling overseas, he suggests a small, non-locking knife such as a multi-tool or an Opinel.
What Happens If TSA Confiscates Your Knife?
You’ll likely have to buy it back, if you can find it. Start with GovDeals.com, where government-seized property is often sold.
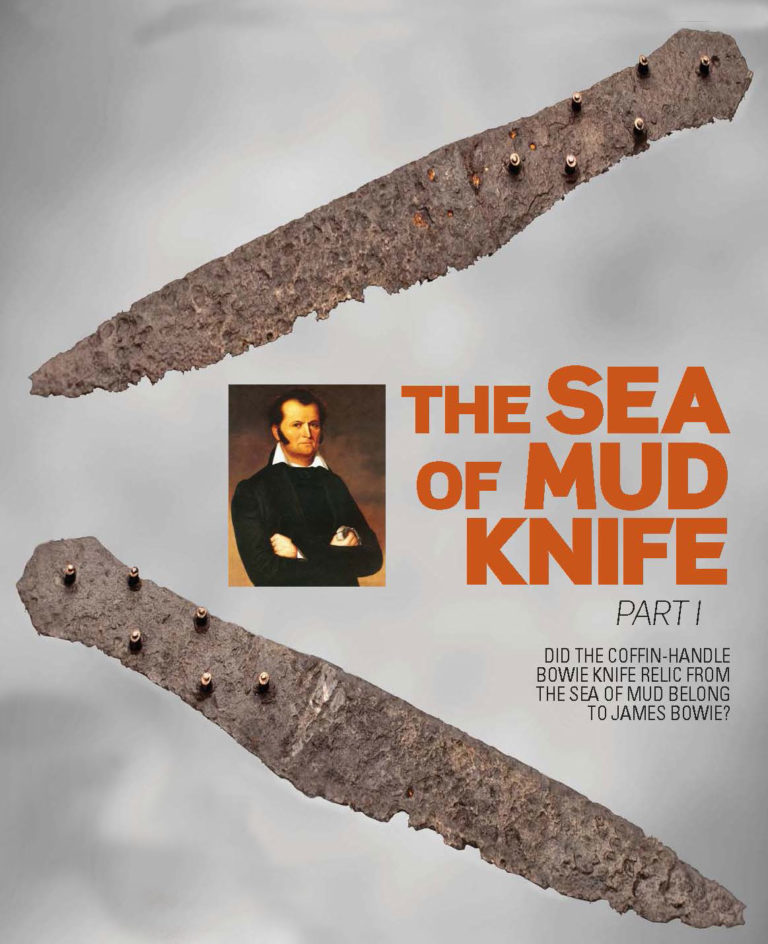
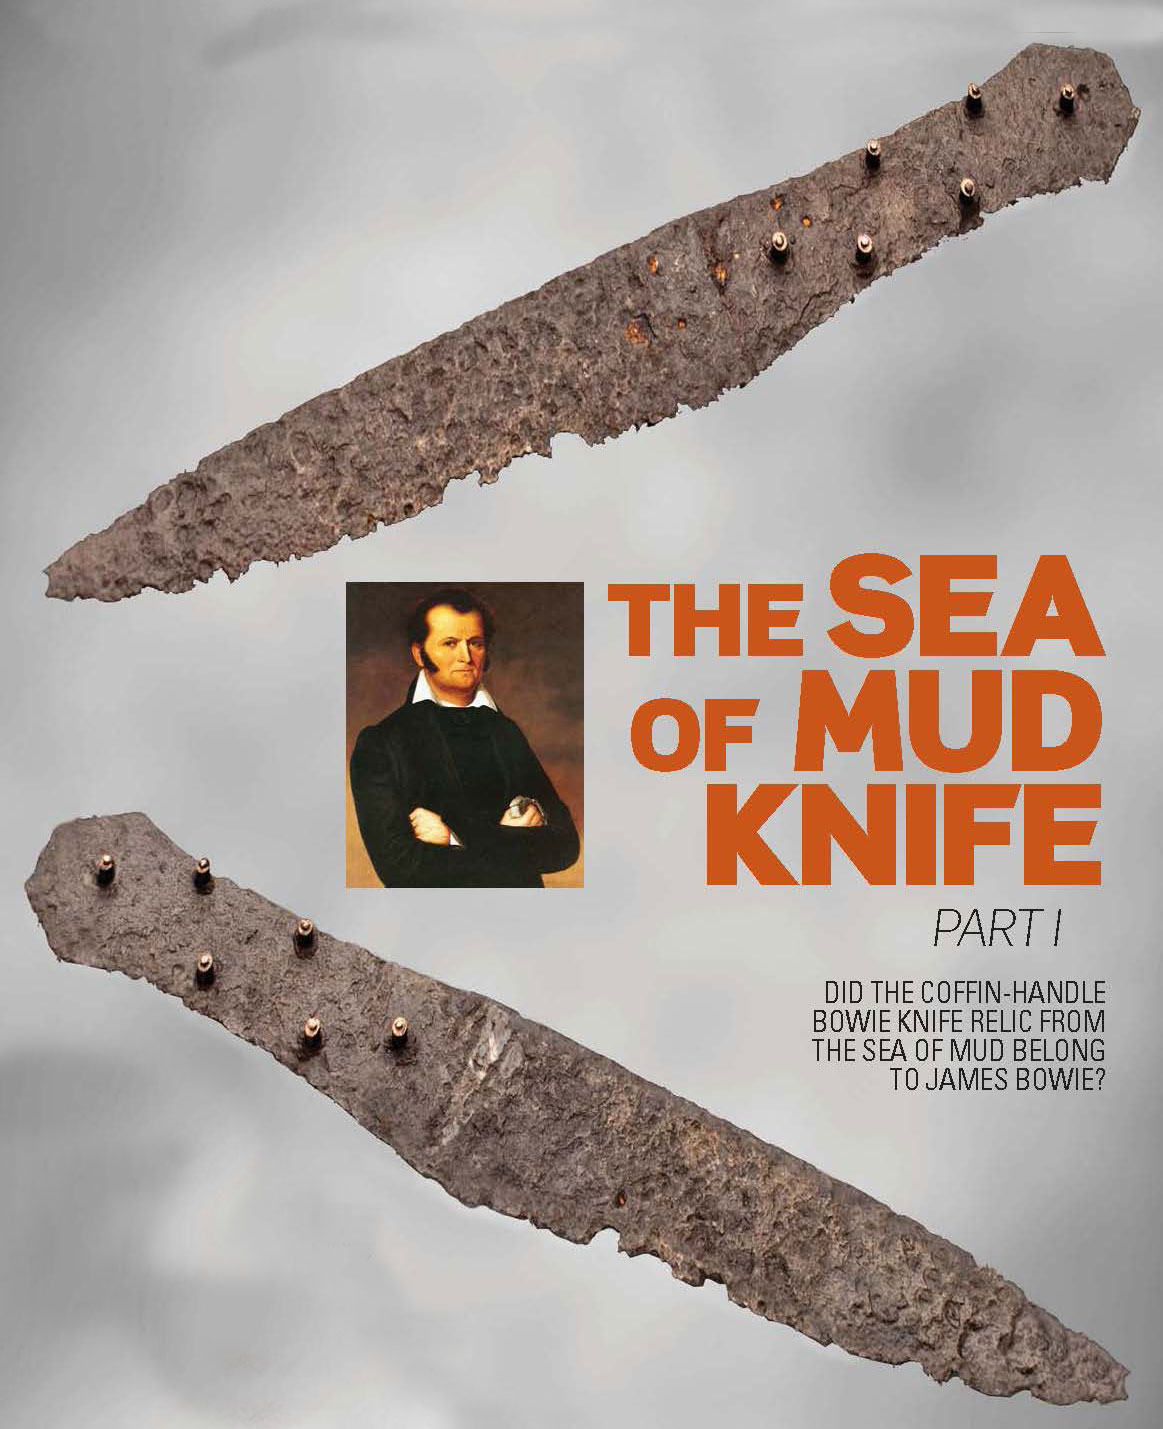
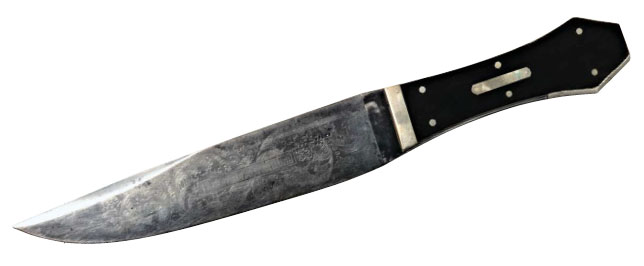
Did the corroded coffin-handle bowie knife relic found by Dr. Gregg J. Dimmick in the Sea of Mud belong to James Bowie? Note the absence of a guard, one of the design traits of James Black. At press time the relic was in storage at Texas A&M University along with other items found in the Sea of Mud. (relic image courtesy of the Cushing Memorial Library and Archives, Texas A&M University Libraries)
Made during Cutlery Hall-Of-Famer James Bowie’s lifetime, the relic may have been used in the defense of the Alamo, which fell on March 6, 1836. I had not seen the relic but ABS master smith Greg Neely had sent me a picture he had taken a few years earlier. Below the relic was a placard with the following inscription: BOWIE KNIFE.
The relic is iron and has brass connectors in the handle. There are two small strips of decorated silver on the blade near the handle on both sides. A very small amount of the silver can still be seen. The relic had been cleaned by electrolysis. The relic is interesting due to its similarity to Bowie No. 1, the coffin-handle bowie attributed to James Black of Washington, Arkansas.
Identification
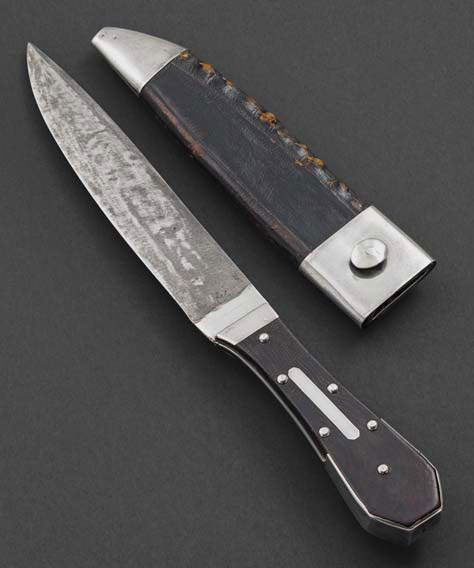
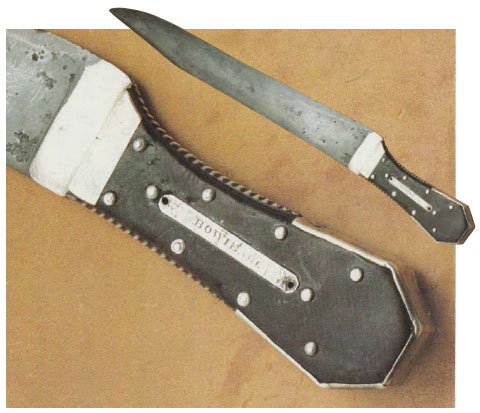
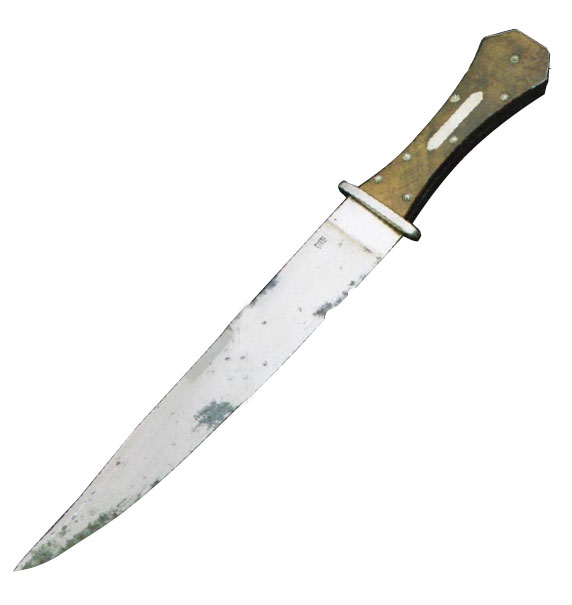
The Carrigan coffin-handle bowie knife James L. Batson indicates was made by James Black more closely resembles the relic than either the Marks & Rees or Crown Alpha knives. The Carrigan is on display in the Historic Arkansas Museum in Little Rock, Arkansas. (Courtesy Historic Arkansas Museum, Little Rock, AR)The knife known as Bowie No. 1 does not have the same pin pattern as the relic but has many of the same characteristics of the Carrigan bowie. Bowie No. 1 has a bigger handle and much longer blade. Overall length: 18.5 inches. (image from The Antique Bowie Knife Book)
I had learned early on that you cannot identify or verify an authentic bowie knife unless you hold it and see it—in this case, eyeball to rusty metal. From Greg’s picture I could not be sure how big the relic was. However, from the shape of the blade and coffin handle, along with the pin pattern and the studs in the handle and the silver overlays on the blade in front of the handle, I suspected that it was made by Black circa 1831-1838, in Washington, Hempstead County, Arkansas Territory.
From my bowie knife research, I have concluded that Black originated the coffin-handle style that became one of the most popular of bowie knives. A Black knife did not have a guard. Makers in America and Sheffield, England, incorporated guards into the design.
Crown Alpha of Sheffield, England, also made coffin-handle bowies with silver overlays on the ricasso, this one for Gravely & Wreaks of New York.Marks & Rees of Cincinnati, Ohio, made coffin-handle bowies with silver overlays on the ricasso. Marks & Rees was the first to advertise bowies for sale.
Two of those that made coffin-handle bowies with the silver overlays on the ricasso area were Marks & Rees of Cincinnati, Ohio, and Crown Alpha of Sheffield for Gravely & Wreaks in New York. Marks & Rees was the first to advertise bowie knives for sale, and the Crown Alpha Bowie had Arkansas Toothpick elaborately etched on the blade.
As you can see in the fourth image up, the small Carrigan knife made by Black more closely resembles the relic than the Marks & Rees (above) or the Crown Alpha knives (above Marks & Rees). Also, you can see that Bowie No. 1 (third image up) does not have the same pin pattern as the relic but has many of the same characteristics of the Carrigan. Bowie No. 1 has a bigger handle and much longer blade (13.5 inches).
“I Could Tell He Made It”
B.R. and I arrived at the Alamo gift shop after paying homage to the fallen by visiting the Alamo Chapel. Boy, was the Sea of Mud exhibit crowded! We had to stand in line.
There was the relic and I could tell Black made it. I could tell from the studs that at one time had secured wood scales to the full tang. To my knowledge, Black was the only person to use this technique. The blade lengths of the relic and seven known silver-mounted Black-made, coffin-handle bowies are about 6 inches, with handle lengths of about 4 inches. The placement of the six pins looks as if Black used the same pattern to drill the holes in the tang of each knife.
The relic had been on or in the ground for at least 160 years, but where were the top-and-bottom silver tang wraps? Where were the two silver wraps around the front of the wood scales? Where were the two silver escutcheon plates? Where was the silver pommel wrap, and where were the twelve domed silver washers that secured the scales to the tang? And where were the walnut scales?
If the relic had been dropped by accident or lost, some of the silver mountings should have been part of the artifact, since silver is a noble metal and difficult to corrode. The wood may have deteriorated or rotted away, taking some of the attached silver mounts with it.
Lost to Time
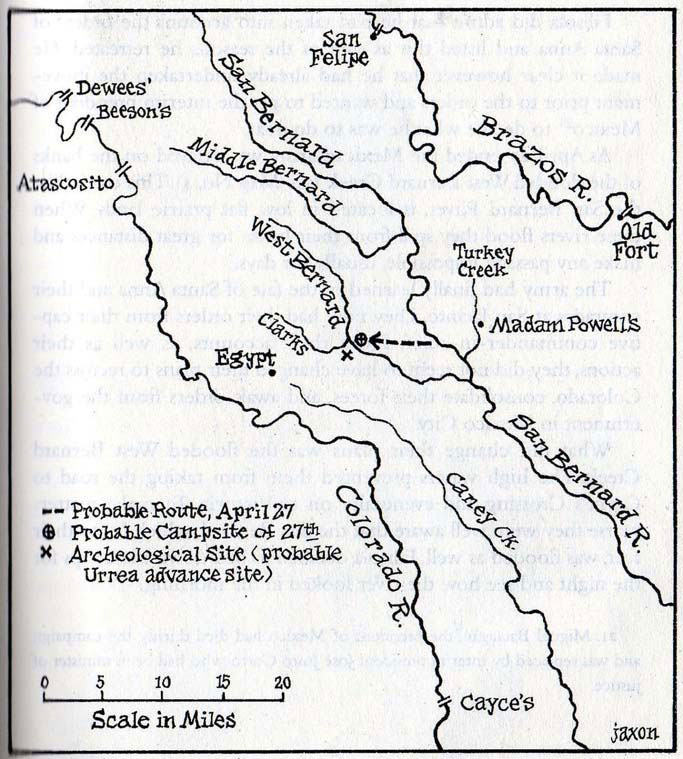
The coffin-handle bowie knife relic was found on the west side of the West Bernard River below the mouth of Clarks Creek in Wharton County, not far from Hungerford, Texas. Mexican Gen. José de Urrea’s division crossed the West Bernard River from west to east on April 20, 1836, the day before the Battle of San Jacinto and a month-and-a-half after the fall of the Alamo.
I contacted Dr. Dimmick and asked if he found any evidence of silver or wood in the soil adjacent to the artifact. He said nothing was found in the proximity of the relic but that a brass pommel cap was found at the same site, though not near the relic.
The relic could have been lost and over time lost the silver mountings. Or, a Mexican soldier or camp follower who needed money and valued the relic only for the silver he or she could remove from it may have retrieved the relic, and the relic was not lost but discarded after the silver fittings and wooden scales were removed. Silver could not be removed from the blade. It was soldered with tin.
A Mexican officer with some wealth may have kept the knife, especially if it had a coin-silver-mounted sheath.
The coffin-handle bowie knife relic was found on the west side of the West Bernard River below the mouth of Clarks Creek in Wharton County, not far from Hungerford, Texas. The West Bernard River was crossed from west to east by Mexican Gen. José de Urrea’s division on April 20, 1836, the day before the Battle of San Jacinto.
According to Dr. Dimmick, “Based on the distances recorded by the San Luis Battalion on April 19, it is believed that this site was not a campsite. The campsite of April 19 was probably near present-day Spanish Camp, Texas. If this is correct, it is theorized that the site discovered on the West Bernard is where Urrea and his division crossed the river during their advance. It is possible that these artifacts were discarded at the site as the units awaited their turn to cross. The artifacts from this site are consistent with the above theory.”
Gen. Urrea’s division was not at the Alamo. However, then-Col. Juan Morales and his men were, and they reinforced Urrea after the fall of the Alamo. (It was about 100 men under Morales’ direction who attacked the Low Barracks where James Bowie was killed during the Alamo battle.)
Urrea subsequently led his division along the coast from Matamoros to Goliad and Victoria. His primary opposition led by Col. James W. Fannin consisted of volunteer units from the United States.
These troops took steamboats down the Mississippi River to New Orleans and went over land or by sea to Texas. The Matamoros Expedition led by Col. Francis Johnson and Dr. James Grant consisted of the New Orleans Greys and the Mobile Greys. None of these troops had been through Washington, Arkansas, or heard of James Black.
So, was the coffin-handle bowie relic owned by a defender at the Alamo? And if so, how did it get from Washington, Arkansas, Territory to the Alamo, and from the Alamo to the West bank of the West Bernard River? Was this James Bowie’s knife?
Who knows when the first argument over the best blade grind started? Most likely it was a conversation between two flintknappers sitting around a cave—and the battle of which grind is the best rages on to this day. The modern tactical and bushcraft movements have brought heated debates on which grind is the best. The grind of a blade is where a key battle is won, and blade geometry varies widely. But is there a so-called best blade grind and, if so, which one is it?
Curved or Flat?
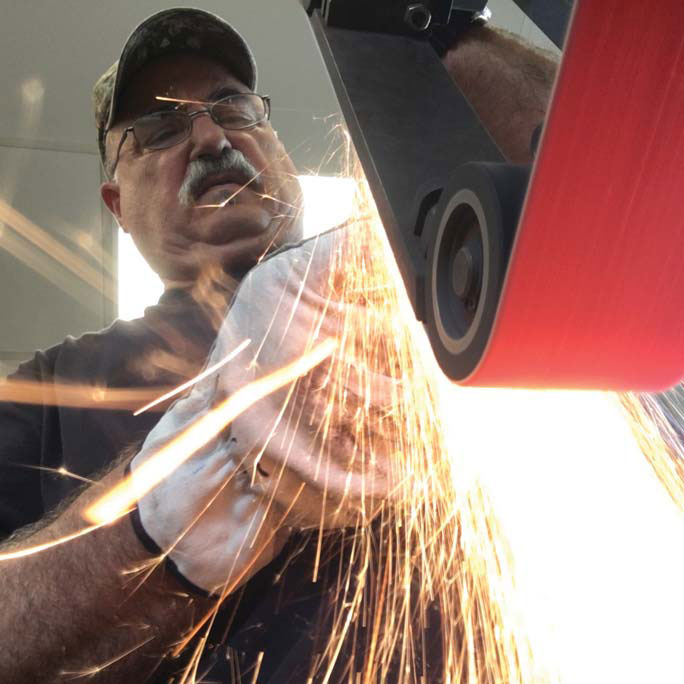
Before becoming a renowned custom knifemaker, Walter Brend was a meat cutter, the skills of which gave him keen insight into the art of the slice. The man some call the best grinder ever shows his stuff here. (Rodney Hiers image)
According to Wikipedia, blade geometry refers to the “physical properties of a sword blade: cross-section (or grind) and taper.”
You can forget the “sword” qualifier—blade geometry applies to any blade. The three most common blade grinds in use today are hollow, flat and convex, with other grinds of note are the chisel, asymmetrical, Scandi and compound. There are others.
Before becoming a renowned custom knifemaker, Walter Brend was a meat cutter, the skills of which gave him keen insight into the art of the slice.
“What works for me is the hollow grind,” Brend says. “The hollow-ground blade is not a flat surface, it is concaved, so as you cut an object it immediately starts a separation. The bottom edge should flow from the point to the back of the blade with a recurved blade edge.”
Knifemaker Bob Dozier, well known for making hard-use knives, prefers the hollow grind as well.
“Since I make mostly hunting knives, I prefer the drop-point blade style. Since Bob Loveless popularized the drop point, it’s been the most popular shape for hunting knives for many decades now. Also, for a hunting knife, the hollow grind is the best as it stays thin at the edge much longer.”
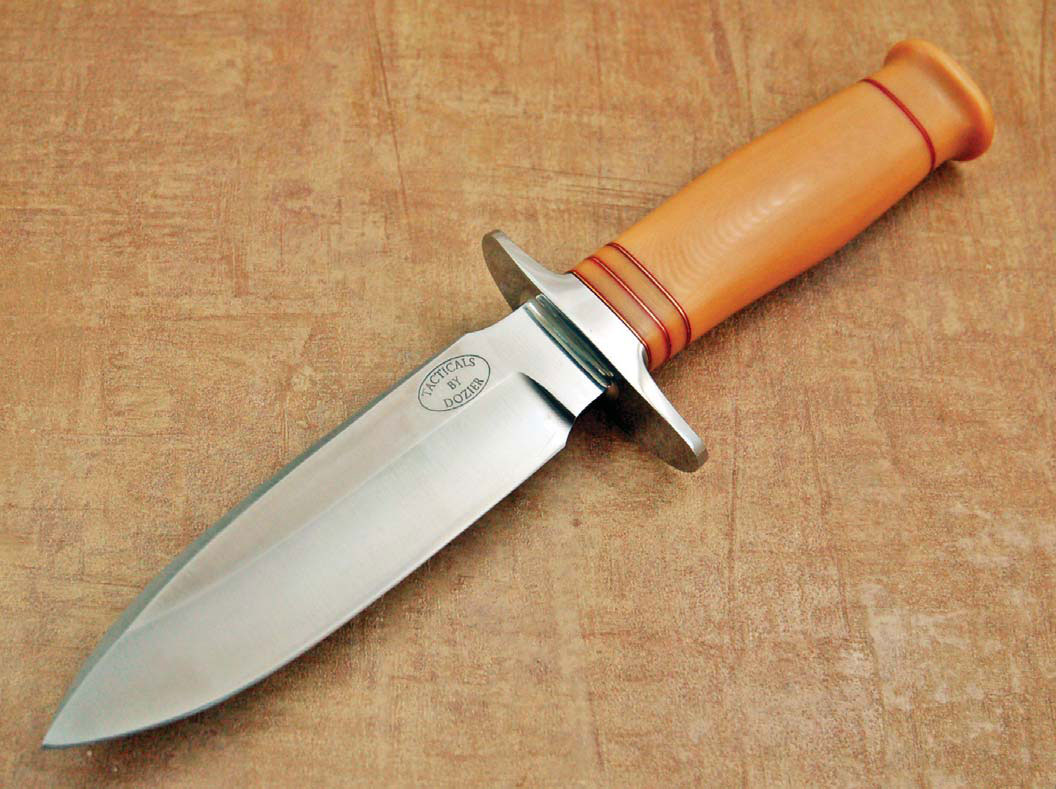
Like Walter Brend, Bob Dozier prefers the hollow grind. “For a hunting knife, the hollow grind is the best as it stays thin at the edge much longer,” Dozier opines. Bob’s fixed blade features a nice, clean hollow grind. (Kerry Peal images)
However, that’s not to say Dozier is adverse to other grinds.
“The flat grind is the best for the kitchen as it does not wander when making thin slices,” he opines. “A convex grind is great for splitting firewood.”
Award-winning American Bladesmith Society master smith Jim Crowell won the 1st Annual BLADE Show World Championship Cutting Competition in 2003 and was inducted into the ABS Hall of Fame in 2016.
“My opinion for the best blade geometry is a full flat grind with a convex edge,” Crowell begins. “This grind will give the smoothest transition from the full thickness of the spine to the cutting edge—anything else is something less.”
Crowell is also very familiar with the Bill Moran appleseed or convex grind, which is based on the Japanese hamaguri or “clamshell” grind.
“Bill Moran did like full convex blade geometry,” Crowell notes. “He ground on a round wheel and meticulously shaped the whole blade to have a convex cross section. I have cut with several of Bill’s knives and they were very sharp and had great geometry.
“The full convex grind performs in an exemplary manner, but I cannot discern any advantage in performance over a full flat grind with a convex edge. You do not just slap a convex edge on a blade. There are a myriad of variables: how thick was the edge when you started the roll? How high or low did you roll it? A short and abrupt roll may shave but will not cut well at all.”
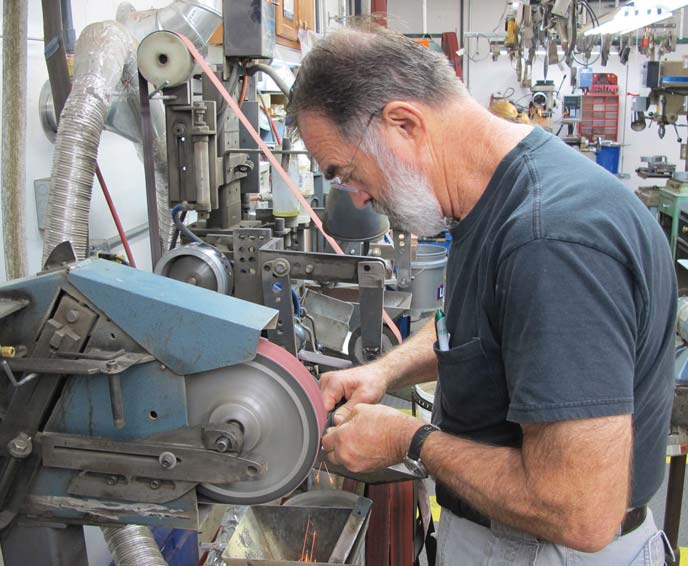
“The flat grind is the best for the kitchen as it does not wander when making thin slices,” opines Bob Dozier, here busy at his shop grinder. (Pat Covert image)
Degrees of Difficulty
Curious as to the degree of difficulty of applying the various grinds, BLADE® asked Brend, Dozier and Crowell which they thought are the most difficult to execute. They provided varied opinions.
“I think whichever one you do the most is easiest, and the one you do the least is hardest,” Crowell notes. “Once upon a time I used to hollow grind a lot, but then I started to cut a lot and it became apparent to me a flat grind would cut better overall for my use. I gradually phased out hollow grinding and now find it difficult as compared to flat grinding.”
Dozier adds pointedly, “I don’t find any of them hard. I think it depends on how you learn to grind at first. A lot of the makers today learned from someone else and stick with the grind they learned.”
Brend ranked the grinds in order of difficulty.
“Hollow-ground knives, in my opinion, are the hardest to grind,” he begins. “You have to control the blade on a wheel to form a perfect symmetrical line. In my opinion you should keep the point thick, and, at the same time, make your edges sharp and thin.
“Flat ground is next after hollow. In my opinion a true flat-ground blade should be finished by hand because the grinding belt will not allow a true flat surface. Convex is the easiest because you have no set lines or pattern when grinding.”
Order of Importance
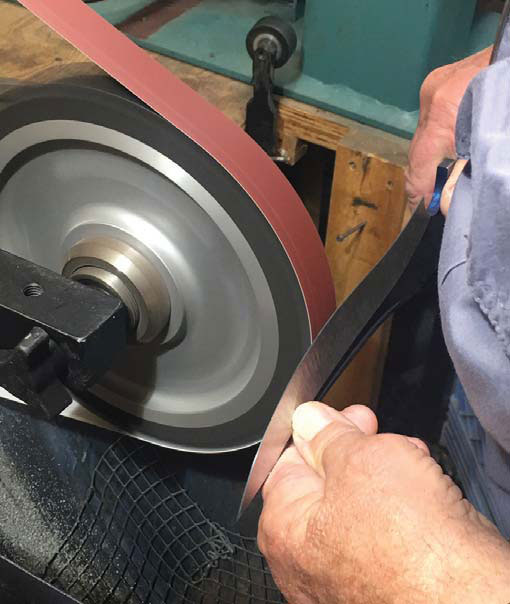
At the grinder here, Bob Dozier says blade geometry is more crucial in terms of a blade’s cutting performance than the type of steel or how it is heat treated. “The most important is blade geometry,” he notes. “The type of steel and how it is heat treated has nothing to do with how it cuts, only how long it cuts.” (Pat Covert image)
Is blade geometry the most important aspect of a blade’s cutting effectiveness, or is the type of steel or proper heat treating most crucial?
“The most important is blade geometry,” Dozier says. “The type of steel and how it is heat treated has nothing to do with how it cuts, only how long it cuts.”
Crowell differs.
“Heat treat, geometry and steel, in that order,” he opines. “If the heat treat is wrong, the rest will be of little consequence. Proper geometry is next in importance. The steel, although important, is not the determining factor. Of course, you need to have a ‘good’ steel, but it is not the steel that makes the difference. Just because you may have the latest, greatest steel does not mean you will have a superior knife. You have to do it all correctly and in the right order.”
Brend ranks the three differently.
“I think the type of steel is the most important. With proper heat treating you can vary from two-to-four points [on the Rockwell hardness scale] and still cut with the knife because of the type of steel,” he says. “Heat treating is second. With most steels you can be within two points and still cut with the blade. All heat treaters are not the same because of the equipment or their method. Geometry would be the last because if you use the proper steel, you should be able to make any blade work well.”
Flunking Geometry
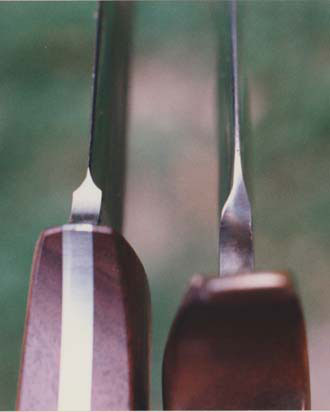
Uneven grind/plunge lines (right) as seen from the bottom of the blade are one of the more obvious and common things to look for in a bad grind. By contrast, the plunge lines at left are nice and even.
Finally, what makes a bad blade grind?
“What I look for are the grind lines,” Brend explains. “Are the sharp edges of lines rolled? Also, at the back of the blade—where the [grind] line starts—is the steel uneven? I see some hollow grinds where the edges are too thin. If you hit a hard object the blade will chip.”
Opines Dozier: “A poor grind is shown with uneven grind lines, crooked cutting edges or a non-uniform cutting edge.”
“Poor grinding is evidenced by several telltale signs,” Crowell interjects. “Uneven grind/plunge lines as one would look from the bottom of the blade. This is one of the more obvious and common things to look for. Also, the finish on the bottom of the ricasso and choil area is often neglected. You can hold a blade horizontal and look down the flat of the bevel and it should be smooth as glass with no ripples or distortions.”
Jim also notes that on symmetrical patterns such as daggers, look for mirrored-image grinds on both sides of the blade.
One interesting takeaway: The perfect grind may just be determined by how you plan to use your knife—or perhaps you may need two or more knives to cover all the bases.
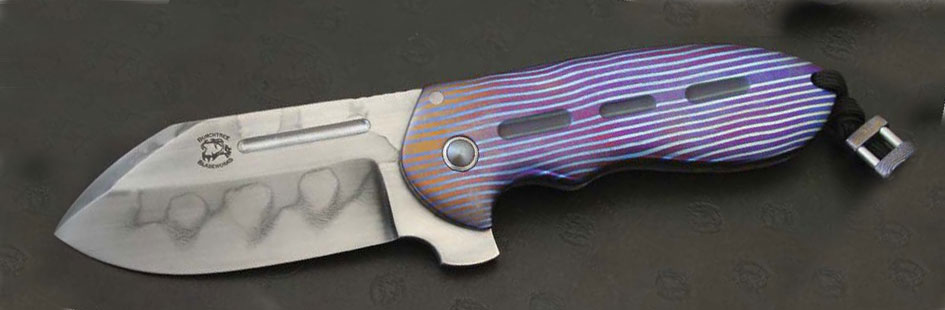
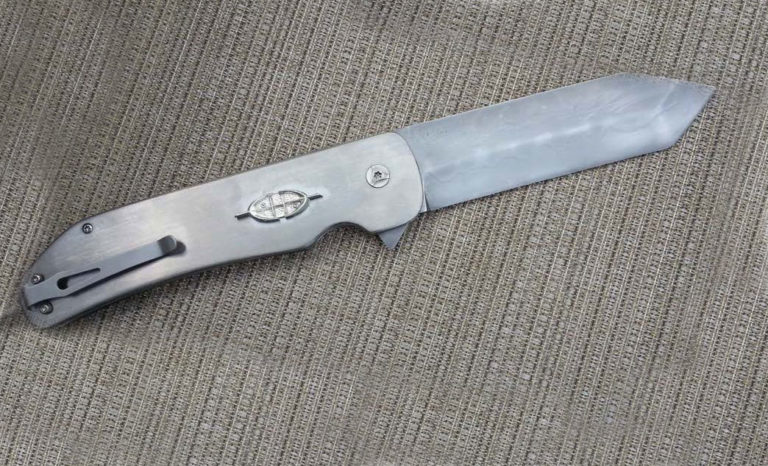
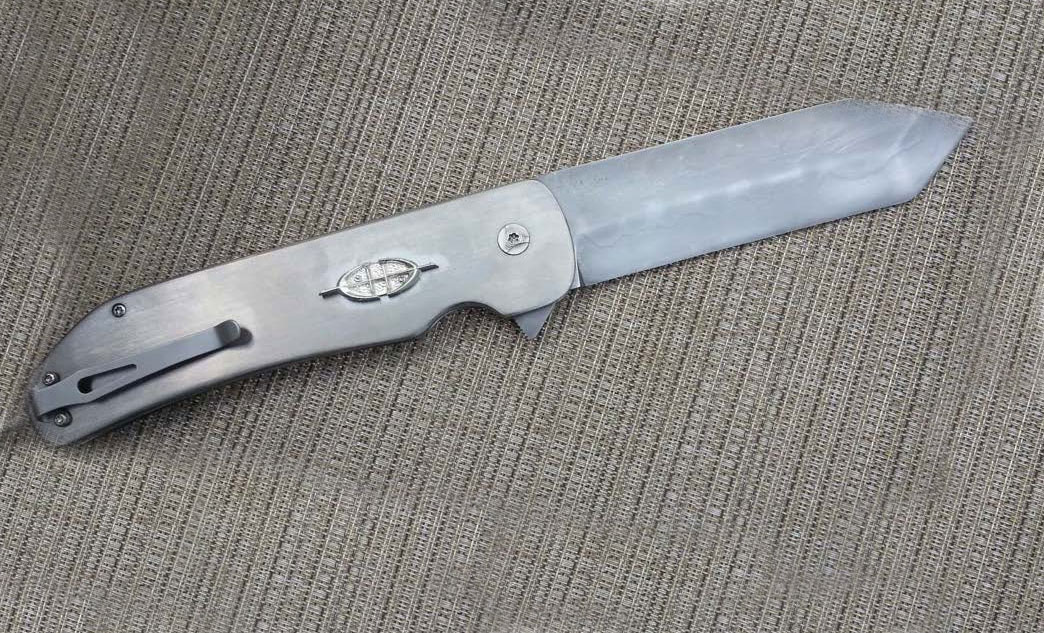
Michael Burch employed Chad Nichols’ “Stripes” MokuTi for his integral folder. The blade is 1095 carbon steel with hamon and a nail nick. Burch said the Stripes MokuTi works well on larger knives. (photos courtesy of Michael Burch)
In the northern Mississippi town of Blue Springs, in a rural area between Tupelo and the Tennessee border, a company called Chad Nichols Damascus is forging steel that is taking knives to a new level. The company’s owner and namesake, Chad is an easygoing Southerner who created a damascus product called MokuTi that boasts a stunning combination of shapes and colors.
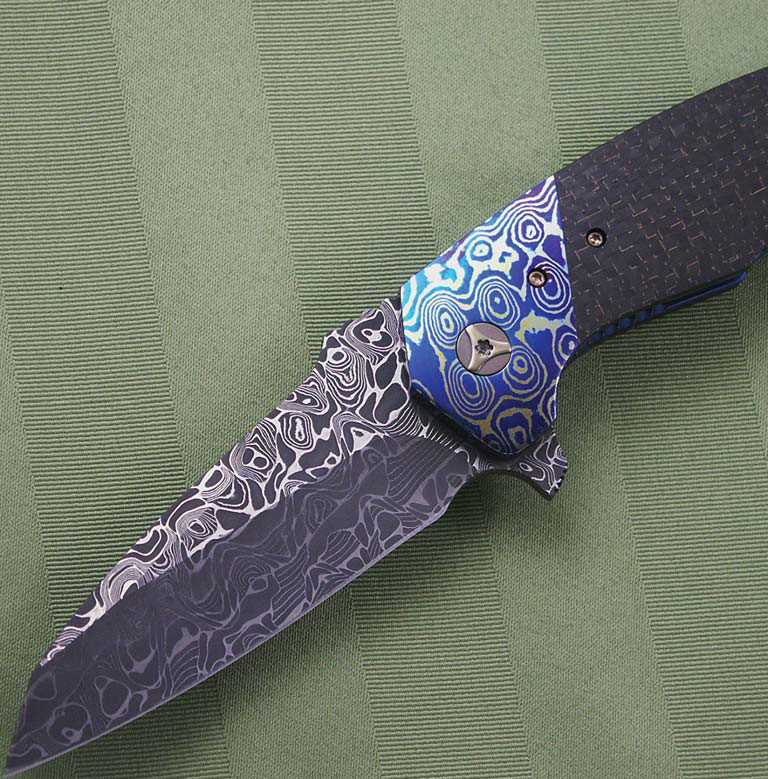
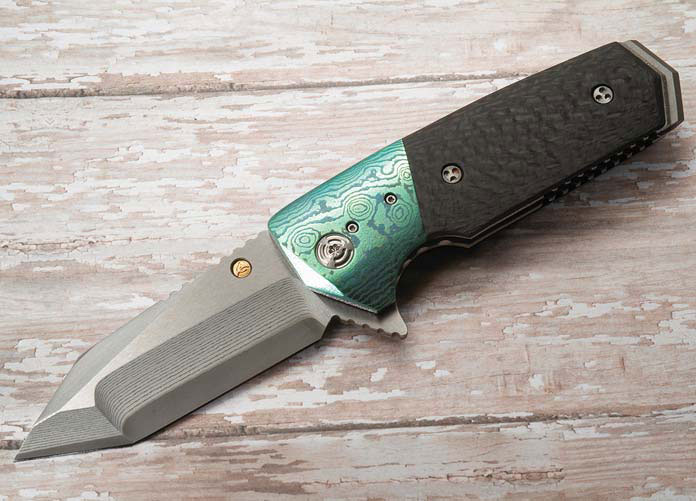
The name explains it perfectly. It is mokume that includes titanium laminates. MokuTi adds an exceptional visual boost to a knife, with swirled or mosaic tones of blue, gold, orange, silver and pink, depending on the composition of the materials used.
In his affable manner, Chad assured that Chad Nichols Damascus did not invent the colorful titanium laminate; the company just came up with a new way to achieve it—which, he noted, was not an easy task.
“We haven’t invented the wheel or anything,” Nichols said of MokuTi. “I don’t have to be the first one doing anything. I just want to be the last one doing it. We run this like a business, not an ego trip.”
Years in the Making
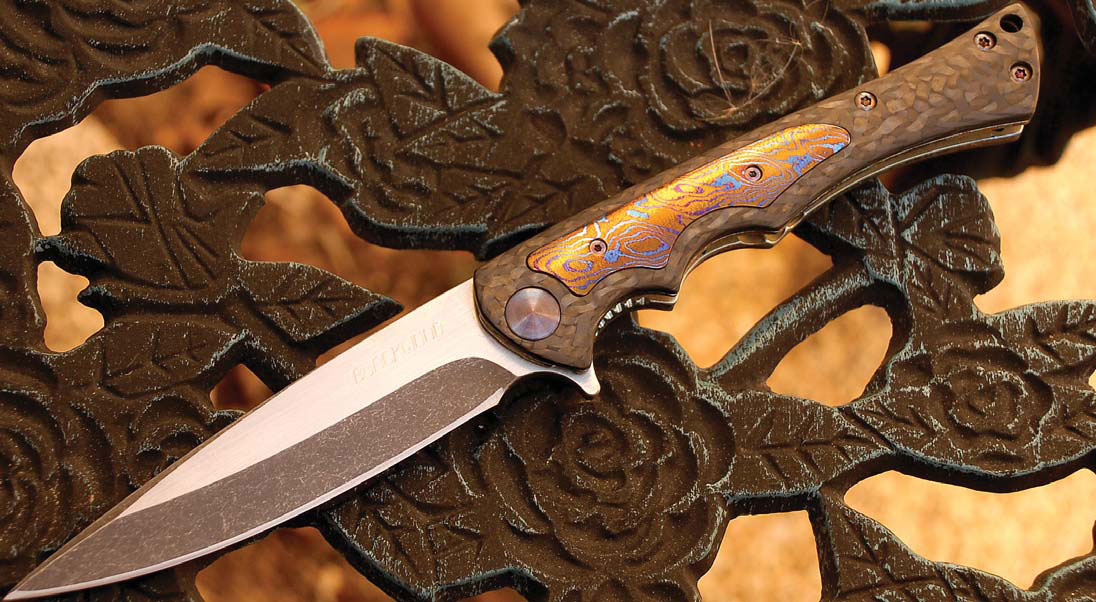
MokuTi is a great way to accent a knife with color. Neil Blackwood does it here for the handle inlay and clip of his Henchman flipper folder. The 4-inch blade is CPM S30V with a two-tone finish. His list price for a similar knife: $1,200. (photo courtesy of Neil Blackwood)
It would figure that something that looks as good as MokuTi would be difficult to produce. Nichols said it took several years to figure out.
“That’s not blowing it out of proportion,” he laughed. “I messed with it for a while, then I just put it away because I kept failing.”
He remembered getting tunnel vision trying to figure out why it was not working.
“You keep doing it and it’s insane,” he said, “because if it didn’t work the first three times and you didn’t do anything different, it’s not going to work the fourth time.”
Through trial and error he was finally able to figure out how to bond titanium with the other metals, but he is understandably tight-lipped about his proprietary secrets.
“I’m not going to tell you how we do it,” he admitted, “but there’s things we do that might seem minute to some people. However, we found those things to be critical.”
He explained a myriad of variables when bonding the layers in presses and rolling mills, including oxygen, heat and surface texture.
“Without getting into too much detail as far as bonding the layers, I’ll just say it’s tricky and it doesn’t always work,” Nichols allowed. “If I don’t make MokuTi for a month or two, I kind of count on the first two tries being crap.”
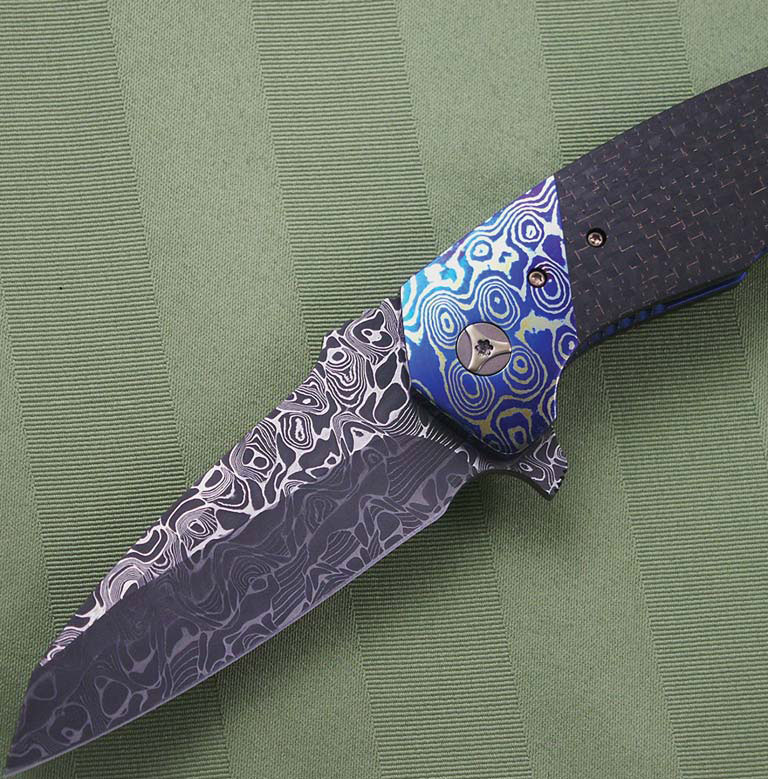
Peter Carey outfitted his Tension flipper folder with “Crosswalk” MokuTi bolsters and a blade and clip of Nichols’ “Whiplash” stainless damascus. The handle is lightning-strike carbon fiber. Carey’s list price for a similar model: $1,200. (photo courtesy of Peter Carey)
The experimental journey to fruition brought Nichols’ shop down some rocky roads.
“We recently made some MokuTi and threw zirconium in there,” he noted. “We love bonding titanium to other metals, but you just can’t do anything with [titanium and zirconium]. They just won’t bond because I guess the ductility is too different and the metals move at different rates during forging. It was a disaster, so we quit trying.”
It is all part of the ride, he said, and you cannot be scared to “just throw something in there” and see what happens.
Meteorology Matters
Another variable that affects producing MokuTi successfully is the atmosphere. While forging carbon damascus is fairly predictable, Nichols said forging MokuTi is much more complex.
“When you get into stainless and even Mokume, with the copper and brass with the nickel silver in it, and especially with the MokuTi, it gets complicated,” he continued. “What people don’t understand about forging, especially down where I live, is that with humidity of 100 percent is going to get hotter than if it’s 50 percent the next day.”
A Sixth Sense for MokuTi Damascus
Nichols searched for the words to explain his approach. Maybe it is a feeling, maybe it is a sixth sense, and maybe it is just exposure and experience.
“I hate saying this but you just get in tune with what’s going on. It’s like using the word ‘organic.’ I hate it when I have to use that word, but sometimes there’s no other word to describe it,” he lamented. “We made a new pattern a couple weeks ago called ‘Boomerang’ and some guy goes, ‘What’s it like?’ and, between groans, I said, ‘It’s very organic looking.’”
Put a Tie on that Knife
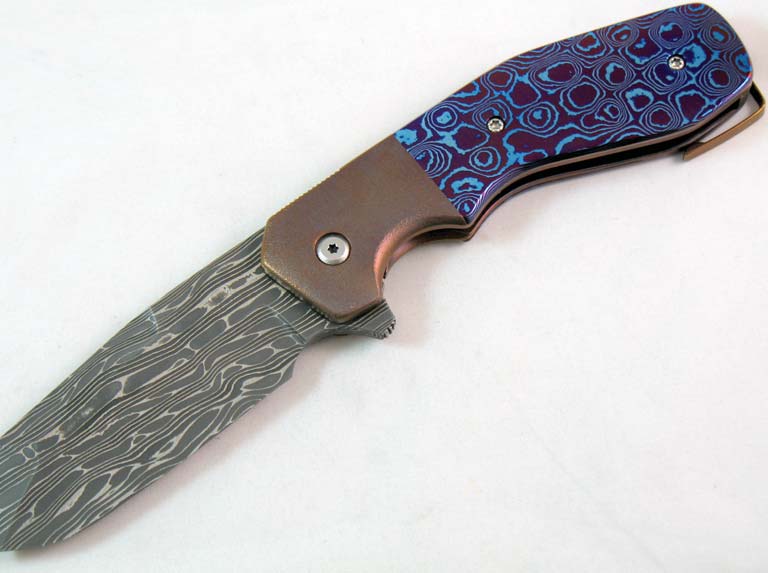
The MokuTi handle of Jon Graham’s GL Razel SS3 Bolsterlock is joined by a blade of Chad Nichols’ Iguana stainless damascus and Graham’s “Tailclip” pocket clip. Closed length: 5 inches. Graham’s list price for a similar piece: $1,400. (photo courtesy of Jon Graham)
“I’ve used MokuTi on a variety of styles,” said Michael Burch, Missouri knifemaker and owner of Burchtree Blades. “It’s like putting a tie on a knife—it just adds some class.”
Adding MokuTi as an accent is a common way to integrate the material into a knife without breaking the bank. Still, it is not cheap. The more of it the maker adds to the knife, the more it adds to the sale price.
“I charge twice as much for MokuTi bolsters as I would titanium bolsters due to the extra finishing time with polishing and heat coloring,” explained knifemaker Peter Carey. “I use MokuTi on all my folders because it’s strong and has an exotic look.”
Carey said he also uses it as an accent material on his knives, such as for bolsters, pocket clips, back spacers, thumb studs and pivot rings. He said accenting with MokuTi injects some color and flash without overwhelming the knife. A good example of employing MokuTi is as a pivot collar on a stonewashed framelock, Burch added.
The Mini Tank flipper by Allen Elishewitz has MokuTi bolsters and carbon fiber scales. The blade is Takefu Special Steel’s laminated stainless with a VG-10 core. (photo courtesy of Allen Elishewitz)
“It makes for great contrast and can really dress up a user folder,” he observed. “It’s costly but if customers saw what went into making it, it would seem cheap.”
“It appears that everyone likes the material and it usually ends up on my higher-end knives,” Carey said. “Some of my customers ask for it as full scales or for a framelock, so I use it that way also.”
As Carey noted, MokuTi comes from Nichols Damascus as a billet that must be worked to shape and then colored.
“[Chad] usually colors it so you can see the pattern, but that gets ground off when you work it,” Carey said, explaining that it is a surface color that does not go all the way though the material. “When you get it to final shape and finish, you have to heat color or anodize it to the colors you want.”
“The other cool thing about MokuTi is dealing with Chad,” he maintained. “He’s a great guy, a friend, hard working and you can’t beat his customer service.”
The author’s finished flipper folder—sanded, polished and ready to go!
Folder making has advanced so much in the past few years. Now, flipper folders are the hot new ticket.
Following is an overview of the steps in making a modern flipper by hand.
Draw It Up
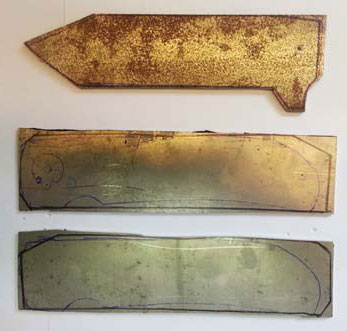
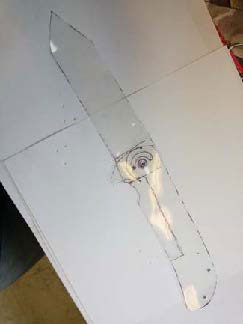
The parts are all cut out. The holes in one handle side (center) are center punched and ready to drill.Design the knife parts on clear plastic so you can see where to locate everything.
To begin, draw designs on paper and transfer them to clear plastic. Cut out the designs of the blade and handle from the clear plastic. Overlap the tang of the blade on the handle and insert a needle through both pieces where the pivot pin will be.
From there, fold the blade onto the handle and adjust the design as needed.
Next, trace around the plastic handle on a titanium sheet. I use titanium in a 1/8-inch size for the top part of the handle and .070 inch for the two bottom pieces. Trace the blade and cut it out.
Know the Drill
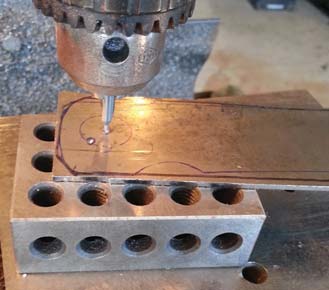
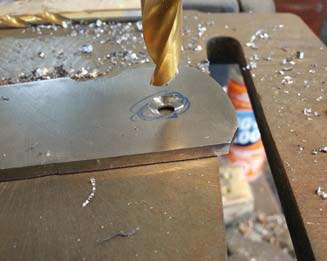
Counter sink all the holes a small amount before drilling them with the 1/16-inch drill bit.
Making folders is mostly about drilling holes. Drill out one plate of titanium with 1/16-inch holes. Place another plate of titanium underneath the drilled-out plate and clamp the two together. Turn it over and drill through the second plate.
Starting with the pivot hole, place a ½x1/16-inch hardened dowel pin in it so the two plates won’t move. Next, drill the end of the handle and put a pin in it.
Continue drilling, clamping and adding pins where your stand-offs go. Each time you drill a hole, take the plates apart and de-burr. A hand drill with a four-flute counter-sink is handy for de-burring.
Start drilling all the holes with a 1/16-inch drill bit.
This flipper will have an internal stop pin, so don’t drill all the way through the top plate. However, do drill through the bottom plate—the .070-inch one. From here, affix the plates with 1/16-inch dowel pins. Clamp, remove the pivot pin, and drill and ream to 3/16 inch for the pivot pin. De-burr and reassemble. Drill and ream a 1/8-inch stop pin.
CAUTION: Do not go all the way through the top 1/8-inch plate! Countersink the outside plates for the 2-56 screw heads. I use a #20 drill bit for this.
Pivot, Washers & Pins
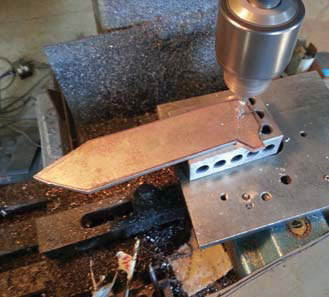
Mill the slot for the stop pin.
Now it’s time to countersink the two pivot screws. Different types of spacers and stand-offs can be used on a folder. For this flipper I used ones with shoulders from Knifekits.com. Normally I use custom-made stand-offs from Sheffield Knifemakers Supply. The shouldered step-down stand-offs prevent any unwanted movement in the blade.
I open up the holes for the stand-offs to fit in with a 1/8-inch reamer. Actually, I use a reamer .001 inch larger, so it is .126 inch.
The cool new thing with folders is pivot washers with ball bearings. There are many different types from which to choose. Michael Burch recommended washers from Jantz Supply to me at BLADE Show.
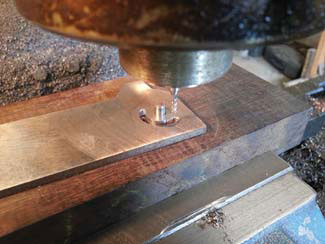
Countersink the pivot screws.
You have to sink the washers down into the scales a bit. I use a 3/8-inch, four-fluted end mill to do this step. First, I index a 3/16-inch end mill into a hole on a plate of steel held in a mill vise. I lock down my table and take out the 3/16-inch end mill and put in the 3/8-inch one using a dial indicator to show how far down I am drilling.
Most tactical folders are going pretty thick with washers .020-to-.040-inch on each side of the blade. I sink the washers down so they and the blade are the same thickness as the stand-offs. You want the space between the blade and washer to be equal to the space between the stand-off s or spacer material. Drill and ream a 3/16-inch pivot hole in the blade. Mill a half-moon slot for the 1/8-inch stop pin.
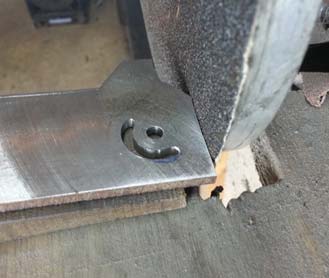
Many makers put the pin in the handle at about the 7 o’clock position when open. Grind the pivot and stop pins down to the proper length. (Author’s note: Grind the pivot pin so it is not exposed past the top of the countersunk hole of the pivot screw. Grind the stop pin so it floats between the two scales.) Grind the 2-56 screws down so they don’t touch each other when they’re screwed into the stand-offs.
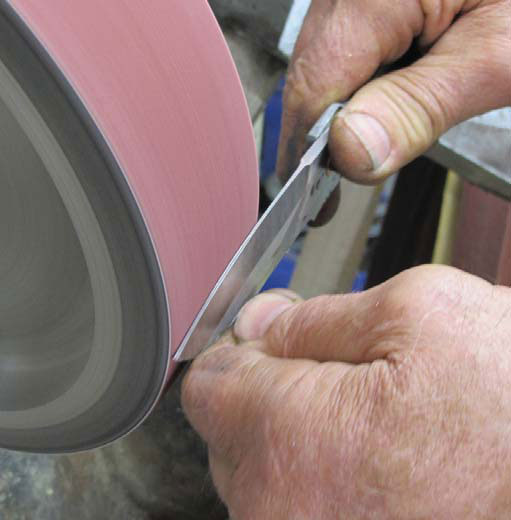
Profile the blade and grind the tang at a 7-degree angle. I use a 7-degree block of Micarta® held up against my disc grinder for a guide.
Lock & Detent
Grind the tang to fit the lock.
Now it’s time to cut the lock. Place the blade on the bottom liner with the pivot and stop pins in place. Open the blade and scribe a line with an X-acto™ Knife behind the tang onto the liner. Draw a line 3 inches long with a marker down the scale. Clamp in the mill, and, using a slitting saw, cut the 3-inch length. Use a band saw to cut the short face, which will be the lock. Using a cut-off -wheel attachment in a Dremel® Tool, clean up the end of the lock.
On a locking-liner or flipper folder, the lock is made by bending a tab of the titanium liner over so it engages with the end of the tang of the blade. The end of this tab must be coated with carbide. The machine that does this is a little hand-held micro welder and is called a carburizer. Simply run the rod onto the end of the titanium lock and it welds a coating of carbide onto the titanium. This produces a smoother action on the folder.
You can also flame harden the lock by heating it until it turns orange. In order to let the lockbar bend, grind in a .020-inch dent with a ¾-inch wheel at the other end of the lock.
It’s time to drill holes in the lock and blade for the 1/16-inch detent ball. Center punch a hole in the middle of the lock. Drill through with a #54 drill bit.
Close the folder and clamp it closed. Drill through the same hole as the liner into the blade about .060-inch deep. The #54 drill bit is .053 inch. You can also use a .054- or .055-inch drill bit depending on how you want to tune your folder. Grind, heat treat and polish the blade. Press the 1/16-inch ball bearing into the lock. The height left remaining of the ball bearing should equal the thickness of the washer.
Bend the lock over to about the middle of the folder. Now grind the tang at 7 degrees on a disc grinder until the lock starts to grab. You can assemble the folder, hold it up to the light and push the lock away from the knife to see how much more you have to grind the tang. Go slow and grind just a little before checking the lock. Drill and tap the scale for the pocket clip.
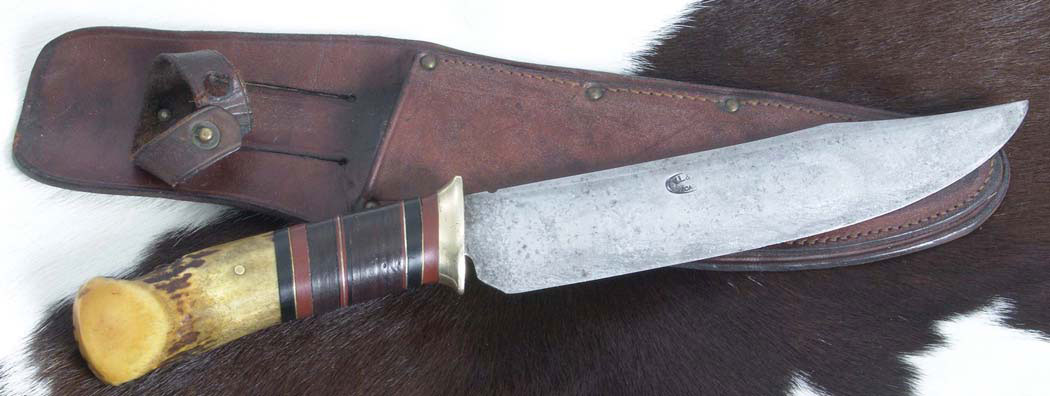
According to Dr. Jim Lucie, Scagel made sheaths for most of his knives and axes, though there were exceptions, such as when he supplied knives to some retailers. His sheaths ranged from simple but functional to ornately embossed. (Mike Carter image)
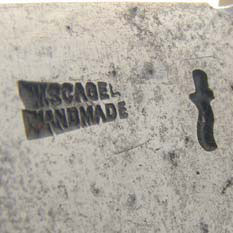
Scagel stamped many of his blades “W. SCAGEL” over “HANDMADE” and with the image of a kris knife. (Mike Carter image)
Scagel’s influence resonates across the decades as knives and knifemakers have taken their cue from his mastery of the curve and the spacer, his interpretation of the lines, fit and finish of a knife that stands the test of time, setting a standard for others to follow. Born in 1873, Scagel lived to the age of 90, and during his lifetime proved himself a master metalworker. His wrought iron adorned the windows of banks and other buildings in the city of Grand Rapids, and he participated in bridge building as well. His first knives were made in lumber camps in the Great Lakes area of the USA and Canada, with the earliest examples dating to around 1910.
Th rough the years Scagel made his imprint as a custom knifemaker, selling his wares through Abercrombie & Fitch during the 1920s, raising the profile of the custom knife with his recognizable style of stag and spacer handles. His friends at Brunswick Corp. kept him supplied with scrap pieces of Bakelite (the first manmade plastic and first true synthetic), wood, ivory and fiber from the manufacture of pool tables and bowling balls for use as spacers. He made bowies, hunters, fighters, folders and hatchets that have become coveted collectibles fetching high prices at auctions and private sales. His kitchen knives were second to none, and his paired carving sets were expensive masterpieces.
Meanwhile, those who appreciated a tough working knife that had a distinctive look gravitated toward custom knifemaking. Among them was legendary Cutlery Hall-Of-Famer Bo Randall, who became a protégé of Scagel. In turn, Randall influenced the likes of Cutlery Hall-Of-Famer Bob Loveless and so many others—and the legacy continues to grow.
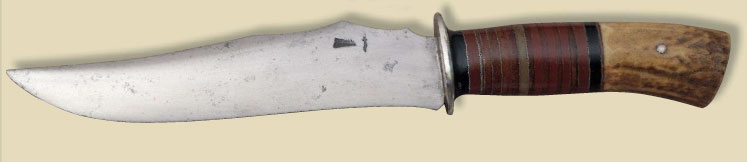
William Wales Scagel’s personal hunting knife features a silver-mounted guard and a silver cap at the end of the stag. His signature is on the obverse side of the blade. (image from the 1996 Pictorial Calendar of William W. Scagel Knives; knife from the Dr. James Lucie Collection)
Scagel, the Man
Dr. Jim Lucie, Scagel’s longtime friend and personal physician, remembers a matter-of-fact kind of guy.
“He was sometimes quite opinionated,” recalled Dr. Lucie, who achieved status as an ABS journeyman smith in his own right. “He shunned publicity and did not like the public eye, and he was critical of some types of people. He was an atheist by choice and didn’t mind stirring the pot about something. If he liked you, and I spent many delightful hours with him, he would go to hell and back for you. If he didn’t, you only got one chance to take advantage of him.”
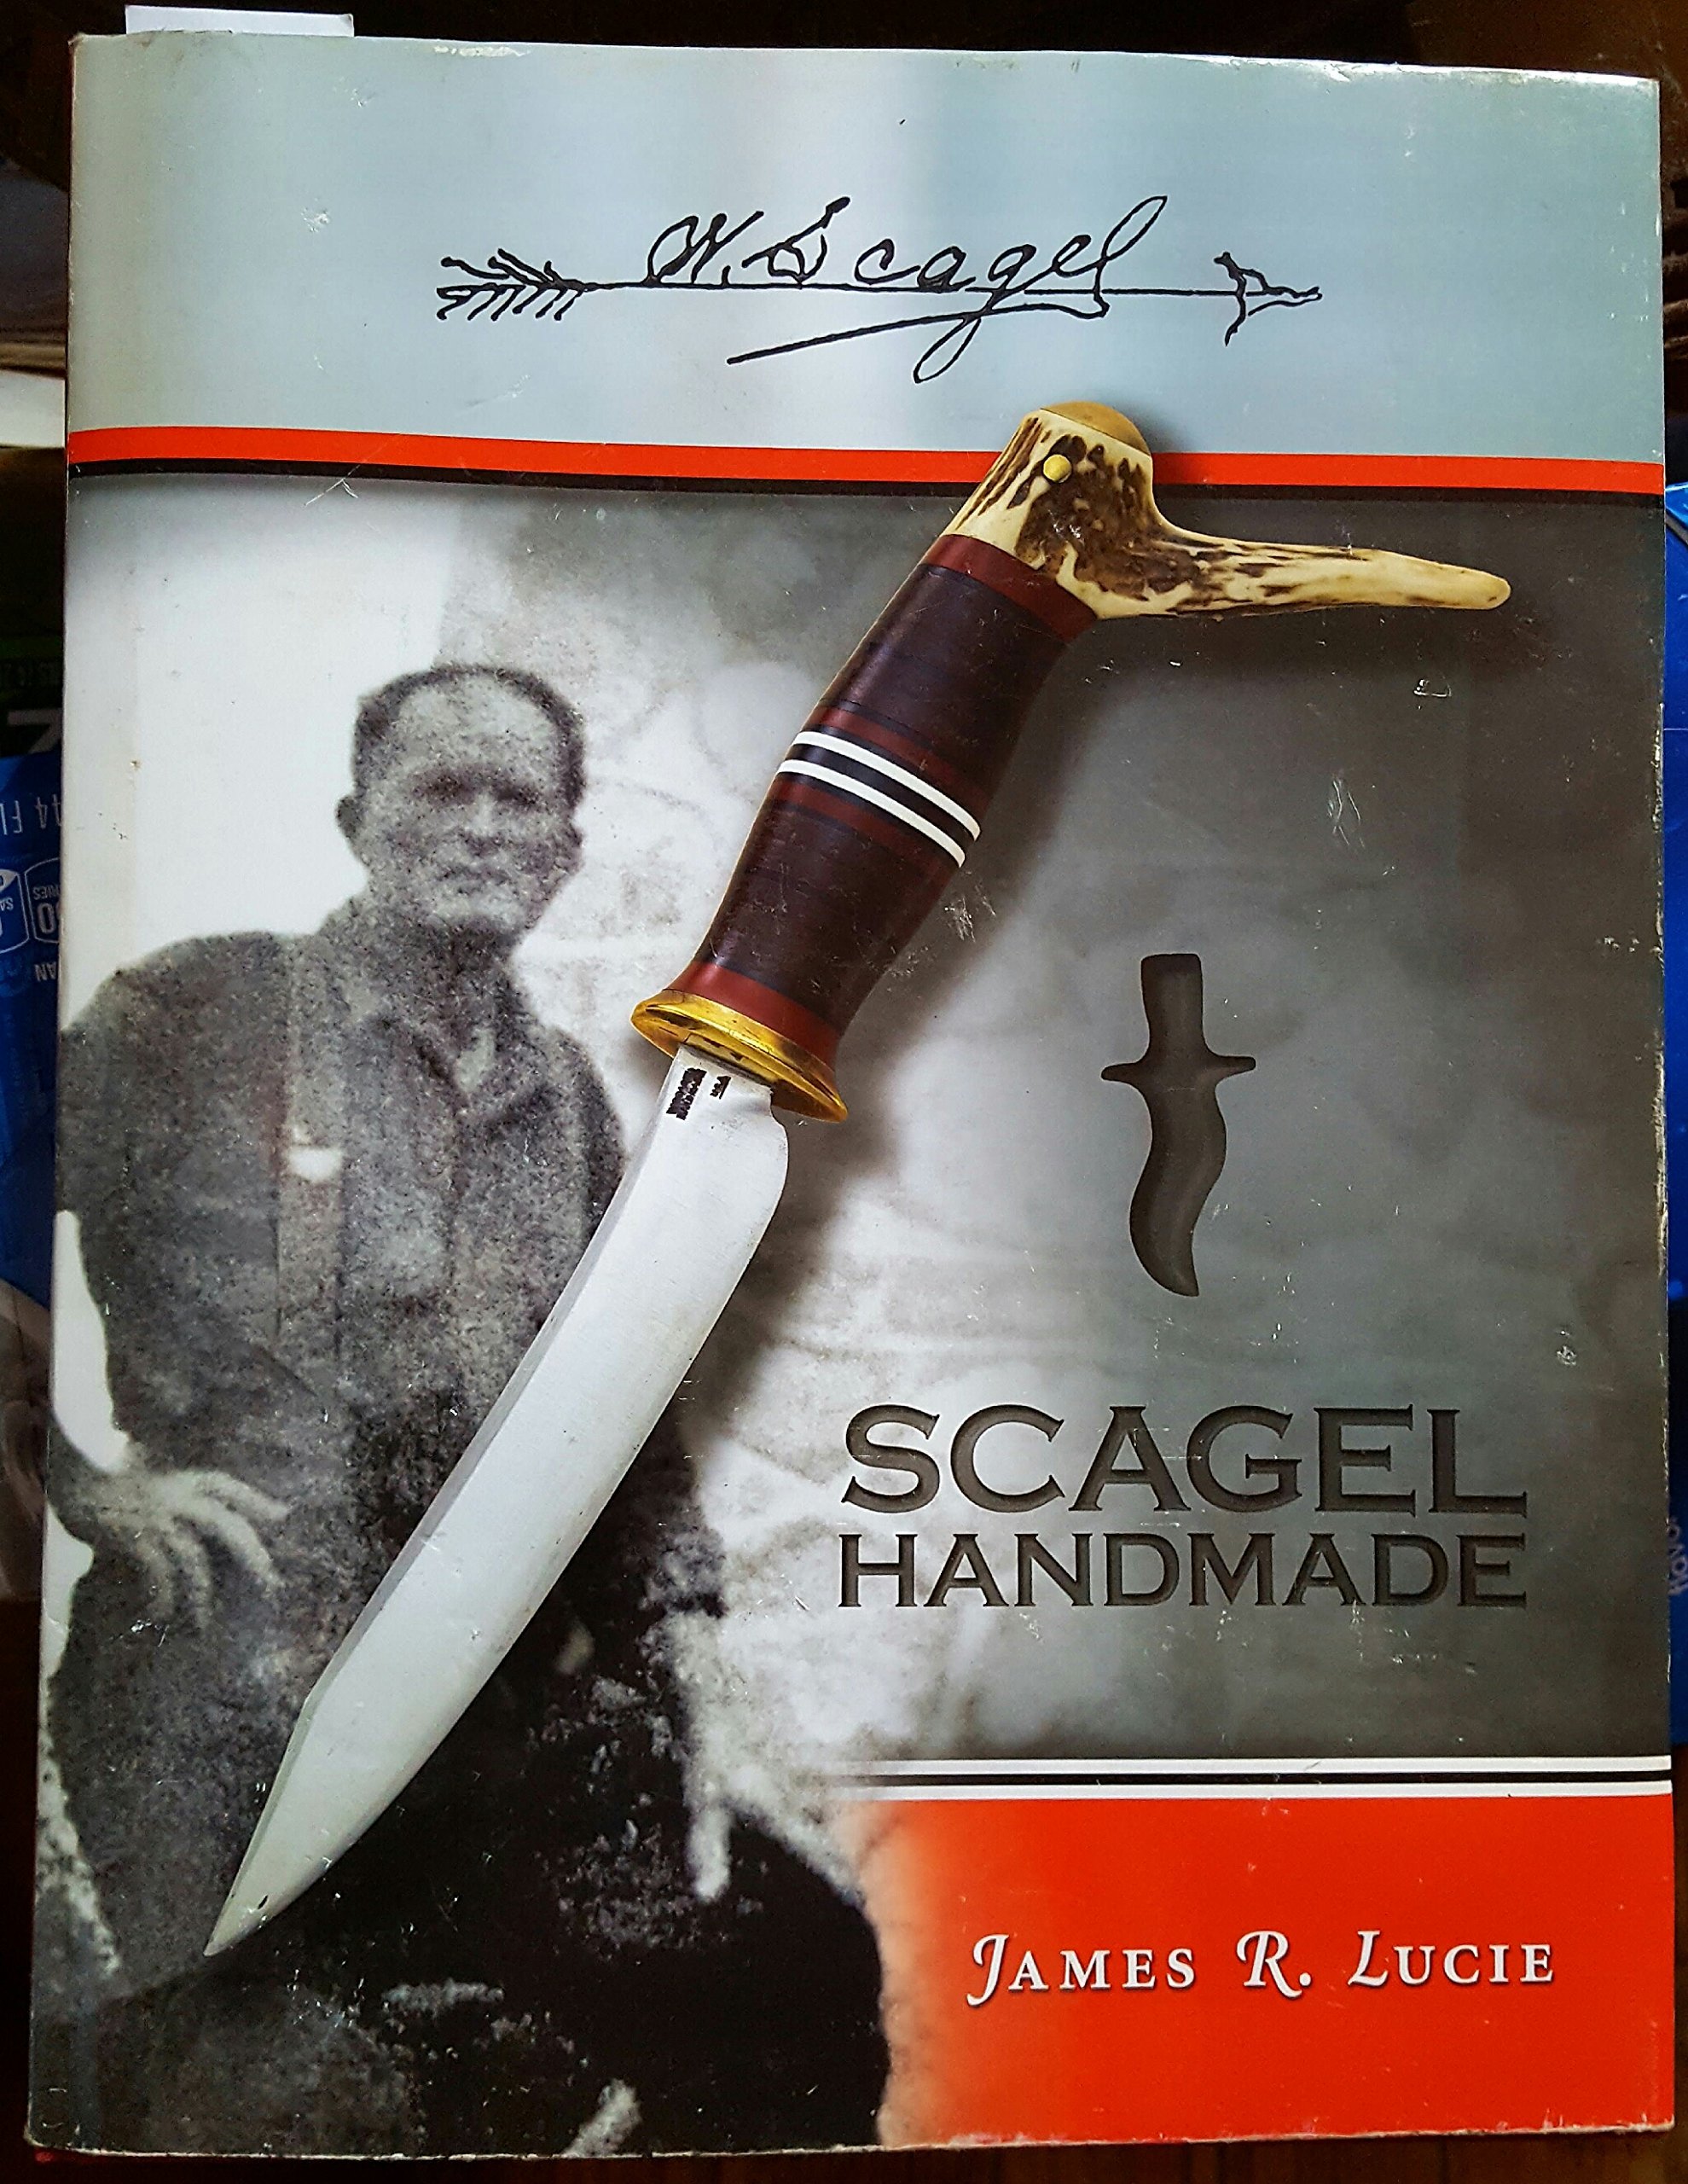
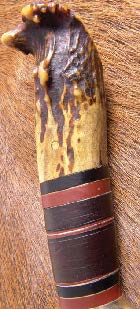
Published in 2010, Scagel Handmade by James R. Lucie is the quintessential book on Scagel. Famous for being reclusive, Scagel had few pictures taken of himself. The fuzzy one on the cover of Lucie’s book is one of the only known pictures of the famous knifemaker.As Lora Schwarzer noted, alternating brass and leather spacers with deer antler at the other end comprised Scagel’s signature stacked handle. (Mike Carter image)
The author of the quintessential book on the subject, Scagel Handmade, published in 2010, Dr. Lucie calls Scagel a “genius with metal work. He was a pioneer. He got Bo Randall started, and the first knives Bo made were around 1937-38, I believe. Scagel’s knives have been copied more than anybody else, more than even the Bob Loveless drop point.”
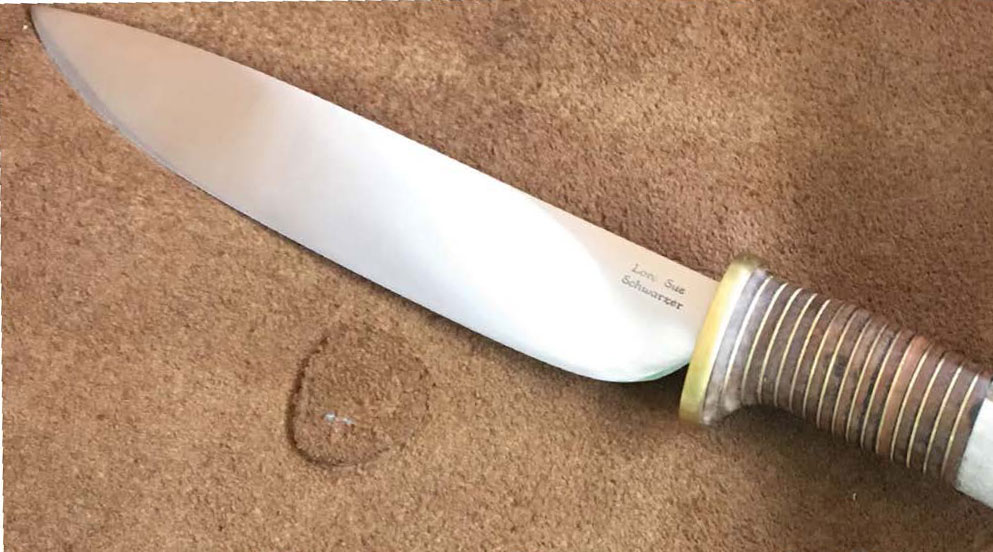
Scagel’s work has often been imitated, sometimes with dubious results. At other times, however, the style has been replicated with precision. ABS journeyman smith Lora Schwarzer worked in a hospital with Dr. Lucie, who introduced her to Scagel knives.
“Dr. Lucie helped me get started, and I wanted to do Scagel-style knives,” Lora remarked. “They are pretty and easy to hold. They feel good in your hand, and none of them are the same, basically. He might have done a few sets that match, but that was not the norm. The spacers are different and the antlers are different, and they are pretty with their curves and colors.”
Schwarzer started forging in 1996 and has made many Scagel repros since then. Her current work includes a couple with 1084 tool steel blades, brass guards, and leather, fiber, brass, copper and bronze spacers. Her favorite Scagel knife is an unmarked piece.
“If someone brought him a piece of steel,” she explained, “and asked him to make a knife for them, he would do it but not mark it because he didn’t know what kind of steel it was or where it came from. I got this one from Dr. Lucie, who got it from the person Bill originally made it for. Its handle is alternating brass and leather spacers with deer antler at the other end. That was his signature stacked handle.”
One of the great stories Lora likes to tell about Scagel involves a lady who regularly visited the local grocery store. In those days it was common to wrap purchases in brown paper and tie them with string. The lady struggled to break the string, so Scagel made her a miniature knife, which Lora has seen and is pictured in Dr. Lucie’s book, to cut the strings.
“Another thing I know is that Bill Scagel had a kind heart,” she added. “During the polio epidemic in the 1950s, he built braces for people without charging them.”
ABS journeyman smith Lora Schwarzer’s Scagel repro is a work in progress and includes a blade of 1084 carbon steel, brass guard, and brass and leather spacers. She stated she needs to “drill and put in the pin and final finish the handle.” Overall length: 12 inches. (Schwarzer image)
Scagel Knives
Gordon White of Cuthbert, Georgia, has been collecting Scagel knives for about 30 years. Gordon sees the historic significance of Scagel’s body of work as a big reason for his lasting interest.
“Well, the knives are just so unusual and different,” he said, “and he is the father of handmade knives and the first person in the 20th century to start making a custom handmade knife. He forged everything he made, and the unique fact that he made his own machinery and equipment and did everything by hand tells me that there has really been nothing like Scagel before or since.”
According to White, one of Scagel’s most innovative tools was used to place the spacers on the knife handle and then press them together, followed by the stag or brass butt that was then pinned in place. Scagel hatchets in mint condition are difficult to find because they were meant for use, and those who bought them put them to work steadily.
Louis Chow owns three World War II Scagel daggers. Two are forged carbon steel with full-tang handles slabbed in wood. The construction of the guards is unusual with a wrap-around opening to fit onto the tang. “It’s just another aspect of Scagel’s work,” Chow said, “something different.” (Louis Chow image)
Unlike other custom makers who can point to a mentor or individual who helped launch their careers, collector Louis Chow says Scagel stands alone.
“He was unique, you could say, because in my opinion I don’t think Scagel was too much influenced by anyone else in the beginning. Still, there were great knives being made before Scagel. For some reason, he was somewhat of a hermit and didn’t research what other guys were starting to do. Of course, those famous makers had the power tools necessary to make precision knives. Scagel used whatever he had on hand, a small generator and grinder. He didn’t have anything to go by as a sample, no publications to refer to. So, he basically did what he thought a hunter or bowie knife would look like.”
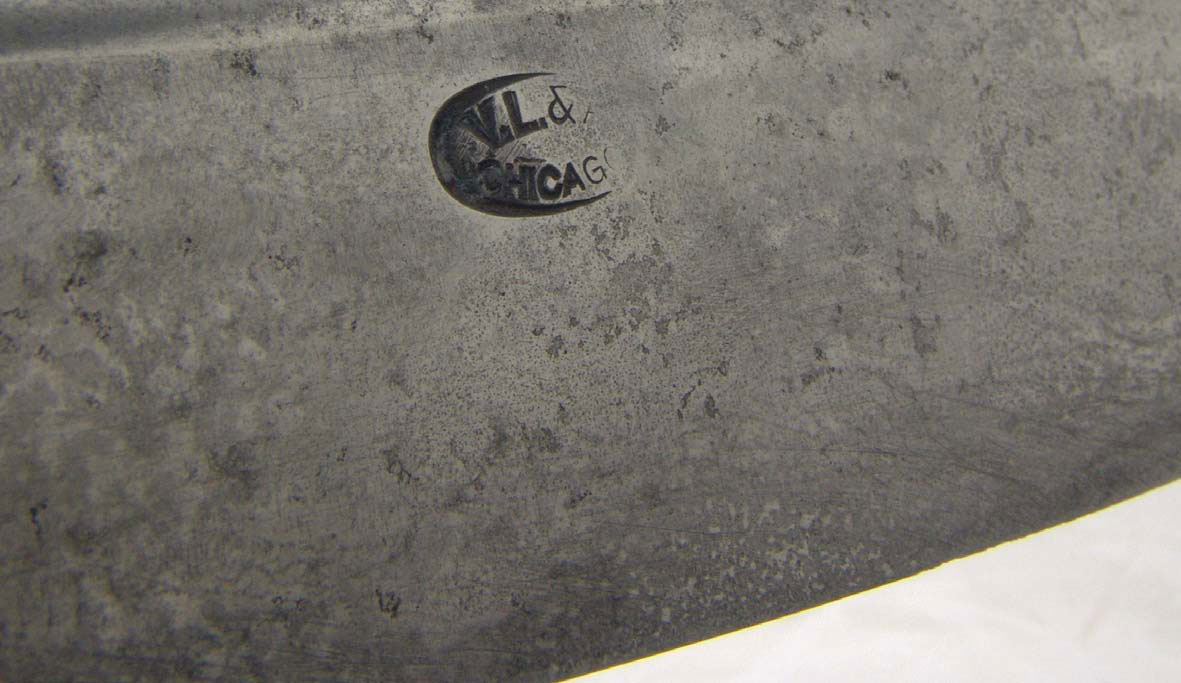
In addition to making knives beginning circa 1920 for retail giant Abercrombie & Fitch of New York, Scagel also made knives for retailers Von Lengerke & Detmold of New York and Von Lengerke & Antoine of Chicago. The blade stamp above is on a knife he made for the latter. (Mike Carter image)
Chow is primarily a Loveless collector, and he acknowledges that the reasons for collecting a particular custom maker are varied. He agrees with White that the history of Scagel is a big factor.
“If I look back at how Loveless got started, as far back as you can go, Scagel is the granddaddy of the industry and influenced everyone else,” Chow explained. “For me, he is the source of what influenced Loveless. My preference is Scagel’s simple daggers that he made during World War II, his contribution to the war effort and the foundation of the current custom knife industry.”
Chow owns three Scagel daggers from the World War II era and a small pocket hatchet that was popularized in the 1950s. The daggers are forged carbon steel with full tang handles slabbed in wood. The construction of the guards is unusual with a wrap-around opening to fit onto the tang.
“Two of the three daggers are made like that,” Chow said. “It’s just another aspect of Scagel’s work, something different.”
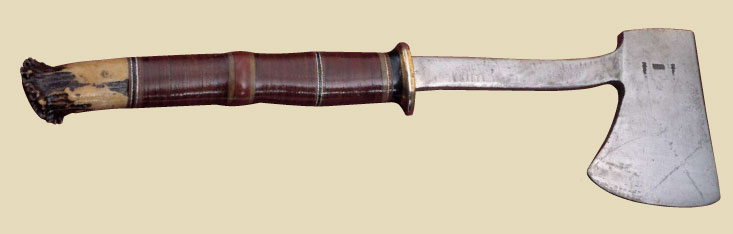
As Dr. Lucie notes in his book, Scagel’s axes are interesting and considered rare. There are two varieties: 1) general camp axes medium to large in size and quite hefty and 2) the hiking or military backpack axe, which is smaller and more petite. The one above is an example of the former. (image from the 1996 Pictorial Calendar of William W. Scagel Knives; axe from the Dr. James Lucie Collection)
Values of Scagel Knives
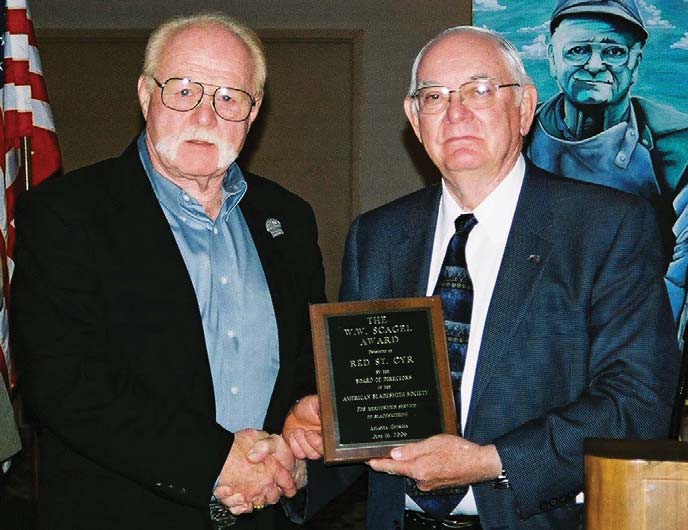
The American Bladesmith Society presents the annual William Wales Scagel Award to an ABS smith for longtime service in promotion of the forged blade. ABS master smith Red St. Cyr (left) received the award from BLADE Magazine Cutlery Hall-Of-Fame member B.R. Hughes (right) in 2006. The portrait in the background is of Cutlery Hall-Of-Famer Bill Moran.
Scagel knives remain popular among collectors, and White considers the prices paid at the 2011 auction of Dr. Lucie’s collection as evidence of the demand.
“That auction is a good meter to go by,” he remarked. “The hunters were averaging from $12,000 to the mid-$20,000 range depending on appearance, and condition has a lot to do with it. Some of them look better than others, and a high-quality sheath with good looks adds to the value. Dr. Lucie had some fighters in his collection, and they probably averaged $28,000 apiece. One fighter brought $41,400.”
Schwarzer sees continuing appeal in Scagel knives simply because there is nothing else quite like them.
“They are different, and I have been at shows and seen people really get excited about them,” she commented. “Some people like them and some don’t, maybe like pizza with thick crust or thin. It is a matter of personal preference, but Scagel knives certainly have staying power.”
Staying power, pioneer power, legendary power: They are each part of the Scagel legacy, one that is like no other in the history of custom knives.
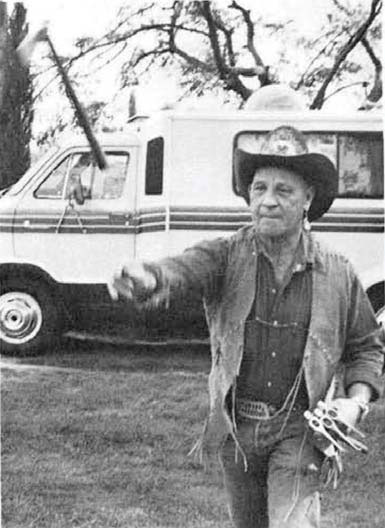
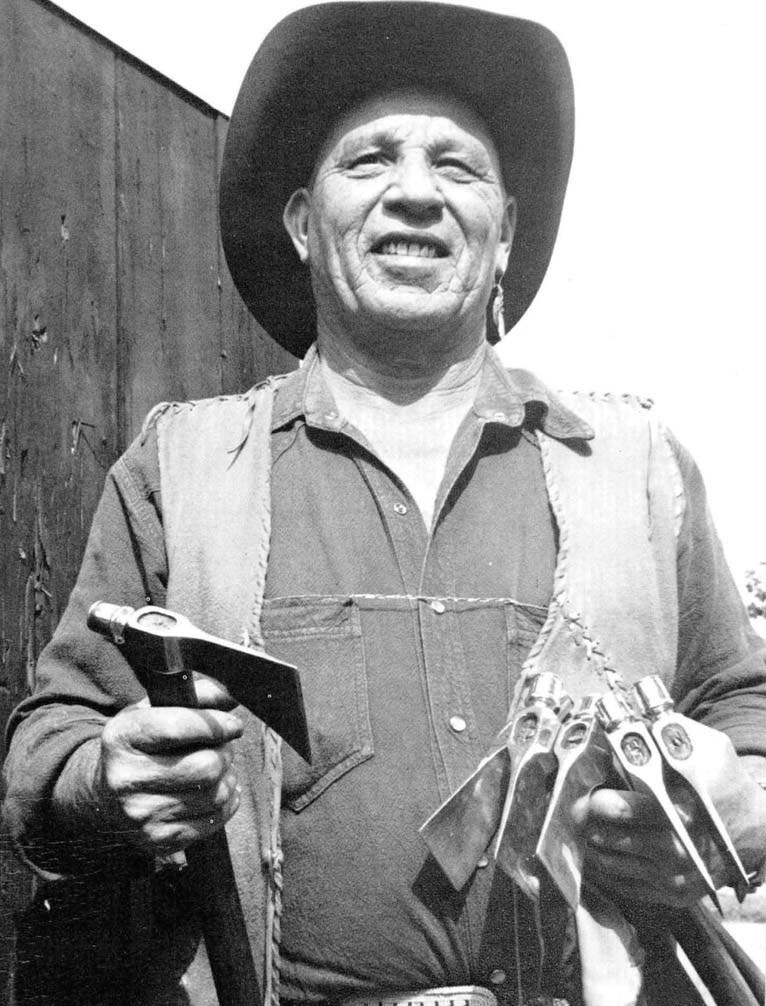
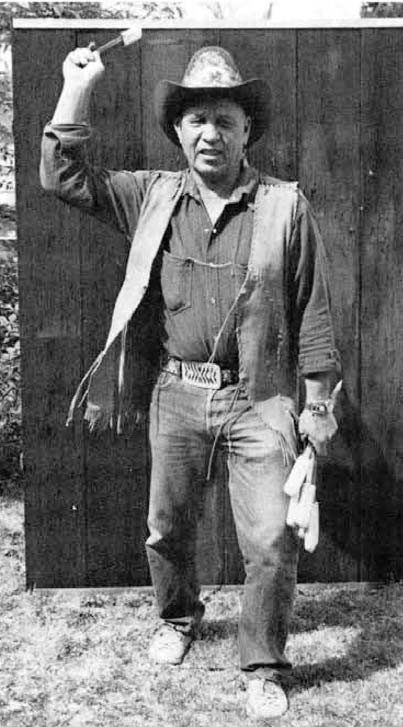
George E. “Skeeter” Vaughan (Grey Otter) was a sergeant in the Army’s U.S. Moccasin Rangers during World War II when he eliminated a German sentry with a prodigious knife throw on a snowy night in 1944.
George E. “Skeeter” Vaughan holds the distinction of making the most fantastic knife throw in recorded history—and considering the circumstances surrounding his legendary feat, he most likely will maintain his grasp on that honor for a long time to come.
An American Cherokee Indian whose given name was “Grey Otter,” Vaughan was a member of an elite Army unit called the U.S. Moccasin Rangers, all 15 members of which were American Indians especially gifted with excellent night sight. At the age of 19 he enlisted in the U.S. Cavalry in 1942, and later landed with his unit on Omaha Beach two days after D-Day in June 1944. Two weeks later the Moccasin Rangers were formed.
On a snowy November night in 1944, Skeeter and five other members of the Moccasin Rangers were given the assignment of knocking out a German bunker with pillbox on the Siegfried Line to make way for an American advance. Belly down in the snow behind the bunker concealed on the brow of a hill in a small stand of timber about 35 yards away, Vaughan and his men were faced with the problem of how to neutralize the emplacement.
Skeeter contracted trench foot during the war and doctors recommended his feet be amputated. He went AWOL from the service hospital and returned to his old unit, asking to be put on active duty rather than lose his feet. His request was granted. He was wounded five times and decorated profusely. He was the only member of the Moccasin Rangers to survive the war. He passed away in 1989.
Outside the bunker was a German sentry with his back to the hill where Vaughan and his men were positioned. The sentry had to be eliminated—and eliminated silently so he could not warn the other German soldiers. There was too much open ground for one of the Rangers to cross it and silence the sentry, and a gunshot would alert the enemy.
A sergeant and commander of the patrol, Vaughan was asked by one of his men if he could take out the sentry by throwing his bayonet/knife. As a boy, Vaughan had lived on Indian reservations and was taught all about weapons by his grandfather, old Limping Bear, a Cherokee born in the Smoky Mountains of Tennessee. Skeeter’s training included throwing knives and tomahawks, and he had put that training to use prior to the war hurling hawks and 16-inch knives made from old bayonets in performances at rodeos and in “Doc Willetson’s Big Medicine Show” that toured the West.
However, that training was about to undergo a test like no other.
As adept as he was at throwing knives, Skeeter was believed to be the world’s best at throwing hawks. His model of preference was a pipe hawk.
Skeeter crawled from the timber as far as he dared and stood, hoping he would not be spotted. The sentry’s back was still toward him. Skeeter threw the knife with a high trajectory, aiming about three feet above the sentry’s head. The knife turned silently over and over in its long, downhill pinwheel flight. The sentry dropped without a peep face down in the snow.
Considering the distance thrown—later measured at 87 feet—it was probably the longest successful throw in battle in the annals of knife throwing.
Later in life, Skeeter found acting roles in Happy Days, Gunsmoke,The Six Million Dollar Man, Magnum, P.I. and Revolution, per IMDB. He died in 1989.
Video Re-enactment
To get a better feel for what happened on that snowy day in 1944, here’s a re-enactment. Remember that Skeeter only had one chance to get it right.