Knifemaking

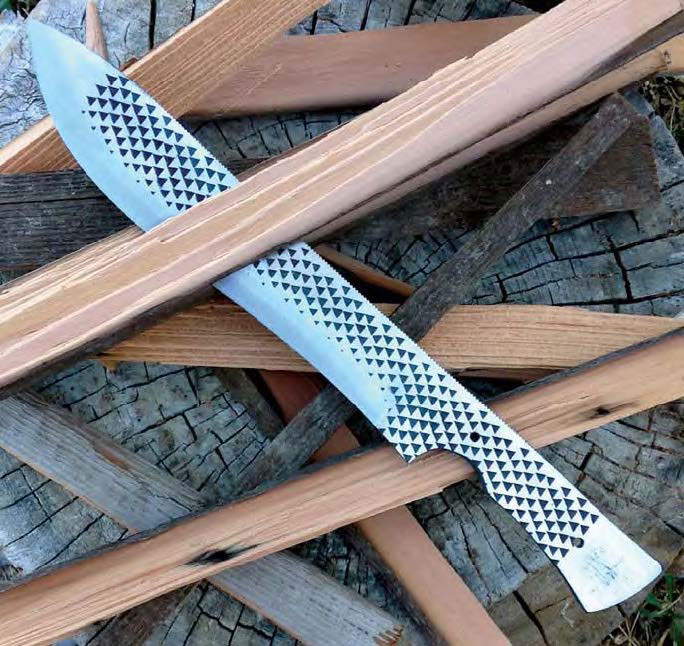
Knifemaking is the building of a knife, which includes the blade, handle and other accouterments. Blades are made by either removing metal from a steel blank via a grinder – known as stock removal – and the forging to shape of hot steel into a blade in the process known as bladesmithing. Other parts, including bolsters, guards, pommels, etc., are needed to complete the finished knife.

Featured Knives – – Knife Collecting – – Tactical Knives – – Survival Knives

Ball Bearing Lock Secures 2 Pieces Into 1

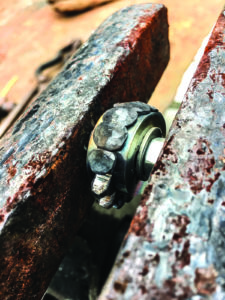
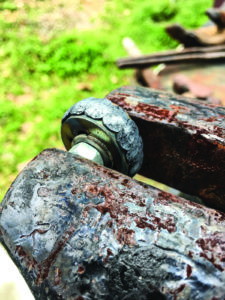
From left, the ball bearing slides into the channel formed by the blade and the handle as the Spyderco Polliwog is closed. The ball bearing self-adjusts when the knife is opened and/or closed. (David Jung photo)

     The idea of a ball bearing used as a knife lock may seem like a contradiction. Ball bearings are designed to keep things in motion, not freeze them in place. However, it is the shape of the ball bearing that gives the Spyderco Ball Bearing Lock some of its greatest strengths.

     Since variations on knife shapes and handle materials are harder to patent, that leaves lock designs. Borrowing such a design involves paying a royalty. Devising your own lock negates paying the royalty but involves many hours of research, design and testing.

     The Ball Bearing Lock began on paper, progressed to plastic models and then to the metal prototype stage. Throughout the process, the lock’s patentability was considered—though holding a patent does not mean the patent holder is free and clear. Competitors love to pore over a design to look for loopholes to exploit. Defending a patented design is crucial to its economic success. In the end, Spyderco CEO Sal Glesser, a Blade Magazine Cutlery Hall-Of-Fame© member, said he felt his Ball Bearing Lock was different enough to warrant a patent, and the design would be difficult to copy.

     The Ball Bearing Lock and the evolutionary caged Ball Bearing Lock comprise Spyderco’s attempt to develop a robust lock that meets martial blade craft (MBC) standards without being too bulky or hard to open or close. The hardened ball bearing, which is the main element, is allowed to rotate freely throughout its travel. Because it will always be in a different position, wear and tear is greatly reduced. Another benefit is the lock continually self-adjusts with each use. Because of its design, it can be operated on either side of the handle. An additional benefit is the lock is hard to accidentally disengage, which adds to its safety.

     One look at the Ball Bearing Lock reveals the creative thought process required in its creation. “The design objective,” Glesser noted, “was to have a fairly simple, very strong, very reliable folding knife lock.”

How It Works

When the knife is closed, the ball bearing sits in a slightly curved channel. The channel provides the track for the ball bearing, which is pushed toward the blade due to pressure from a small shaft surrounded by a coil spring. Opposite the slightly curved ramp is the other side of the channel, which is formed by the knife blade.

     As the blade pivots, the ball bearing pushes past the resistance of the closed position detent and follows a circular path until the knife approaches the open position. When the knife is nearly open, the blade channel drops away, allowing the ball bearing to push out into the channel formed at the top of the blade. Throughout the travel, the ball bearing rolls unobstructed with the outward spring pressure, providing the resistance to allow the blade to swing freely. In the open position, the pressure to close is surmounted by the ball bearing locking in place, on top by the liner and below by the blade. When the user removes the outward spring pressure by pulling back on the ball bearing, the blade can be pivoted to the closed position. The hardened ball bearing is unyielding under normal use. In the case of the newer models, a cage of a durable proprietary polymer blend surrounds and centers a smaller ball bearing. The lock action is the same.

The Knives

The Ball Bearing Lock debuted in 2002 on Spyderco’s World Trade Center (WTC) Knife, a non-profit fundraiser for victims of 9/11. On the WTC knife and the follow-up D’Allara knife, Spyderco used FRN (fiberglass-reinforced nylon) handles. The FRN made for a fairly thick, though comfortable, knife. Subsequent knives with the Ball Bearing Lock, including the Polliwog, Phoenix and Dodo, used such “flat” handle materials as stainless steel and G-10, which addressed the thickness concerns.

     The first-generation version had a large, hardened ball bearing. Some seemed concerned it took two fingers to easily slide the ball bearing back in its channel. Eric Glesser, Sal’s son, designed the newer version, which addressed the concern by making the ball bearing smaller and enclosing it in the cage that has more grip and a much thinner profile.

     The original Ball Bearing Lock was visibly different than any other lock, and some of the first models using it did not look traditional. Eric’s Polliwog design allows the ball-bearing channel to be open when the knife is closed, making it appear the ball bearing could slip out. Eric’s Dodo design features an ergonomic handle. It is scheduled to return in Spyderco’s carbon fiber and orange G-10 “Sprint Run” versions. The Phoenix, designed by knifemaker Howard Viele, also used the larger Ball Bearing Lock.

     The P’Kal has the caged Ball Bearing Lock, The knife is based on an edged martial arts technique from the Philippines, which involves an “ice-pick” grip with corresponding downward pulling thrusts. Lock strength is crucial in knives used in the martial arts, so the P’Kal needs the MBC-rated lock.

     The knife that has received the most attention of the caged series is the Manix 2. The original Manix knives featured a massive, heavy-duty design. By moving to the caged version of the Ball Bearing Lock, Spyderco changed the Manix in a positive way for everyday carry.

Use & Maintenance

The Ball Bearing Lock takes some getting used to if you are accustomed to LinerLocks™ or traditional lockbacks. Opening is the same as with other Spyderco knives via the blade hole. The difference is in closing. While it is possible to unlock the blade using one side of the lock, the best way is to pull the lock cage back with the thumb and index finger until it releases. Once the lock disengages, the blade can be pivoted closed. “People either like it or they don’t,” Sal observed. “They like the smooth action. They like the strong lock-up. We wanted it functional and easy to open, but I guess ‘not too easy’ would be one way of saying it.”

     Among the advantages of having an exposed lock is ease of cleaning. “We usually just rinse them out and add a drop of oil here and there,” Sal said. “We’ve never had an issue with the spring. These coil springs go a long time, so really there is not much maintenance, other than occasional oil.”

     The Ball Bearing Lock is one of many locks on the market. Others that share similar characteristics include the Bolt Action Lock designed by Cutlery Hall-Of-Famer Blackie Collins, and the Axis lock designed by Bill McHenry and Jason Williams and found on several Benchmade folders.

     “I think all locks compete and have advantages and disadvantages, so I don’t know that one would be better than another,” Sal opined. “Most locks will either slide or rotate; I guess [the Ball Bearing Lock] would be considered sliding, although it is more rolling than sliding that is the action of the lock.”

     Hence, the Ball Bearing Lock takes the contradictory rolling motion of a ball bearing and the sliding of a piston into a channel to lock two pieces of metal into one. It is a contradiction that works.—by David Jung


For more information on the Ball Bearing Lock and the Spyderco knives that have it, contact Spyderco, attn: J. Laituri, 820 Spyderco Way, Golden, CO 80403 800.525.7770 www.spyderco.com, [email protected].


To read similar stories and all about the latest knives, knife trends, knifemakers and much more, subscribe to BLADE®Magazine. For information on how to subscribe, click on http://www.shopblade.com/product/blade-magazine-one-year-subscription-us/?r+ssfb171211#BL1SU

Midweek Maker Military-Style: Chris Rowley

Chris Rowley owns Nomad Customs in Rainier, Washington.
In the second of BLADE’s Midweek Makers series we continue with our armed forces active-duty members and veterans. This week: Midweek Makers Military-Style: Chris Rowley of Nomad Customs.

Chris Rowley was a farrier for 12 years or more before he joined the Army at age 34. During his seven years of service he deployed six times to Afghanistan with 2nd Battalion, 75 Ranger Regiment, winding up his service this year as a weapons squad leader with the rank of staff sergeant.

He always loved blacksmithing and found time after work and on weekends to keep his hand in it by making knives. “Pretty soon half of 2nd battalion had one of my knives,” he said.

When Chris entered blacksmithing competitions, his horseshoes were hammer-finished, essentially going from the forge to horse. He tries to carry those shaping skills over to his knives, completing as much work in the forge as possible. Although not applicable with all steels or designs, many of his knives maintain a richly textured hammered finish.

Chris lives with his wife in Rainier, Washington.

  • Best-selling knife patterns: small everyday carry knives and 4- to 10-inch bowie-fighters
  • Favorite blade steels: 1084, 1075 and 15N20 for ease in forge-welding and the contrast with 1084 and 15N20; also W2
  • Blade grinds: hollow and flat
  • How he tests his knives: cardboard and random materials for everyday carry knives; chopping kindling and prepping game for camp-oriented knives
  • Favorite handle materials: resin-and-burl-wood combinations by Voodoo Resins and J Hue Customs. “Both finish really well,” he added.
  • Price range: $275 and up
  • Forums he participate in: BladeForums.com
Chris Rowley of Nomad Customs was a farrier for 12 years before joining the U.S. Army.
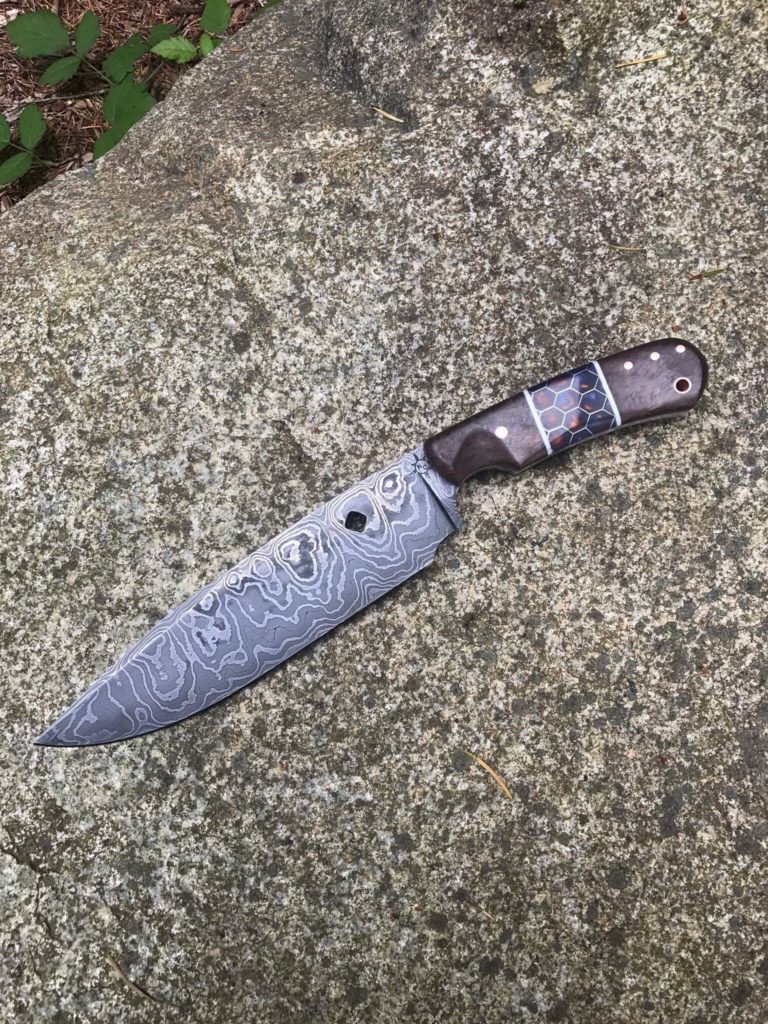
The diamond hole you see in Nomad Custom knives is representative of the U.S. Army unit in which knifemaker Chris Rowley served, 2nd Battalion, 75th Ranger Regiment.

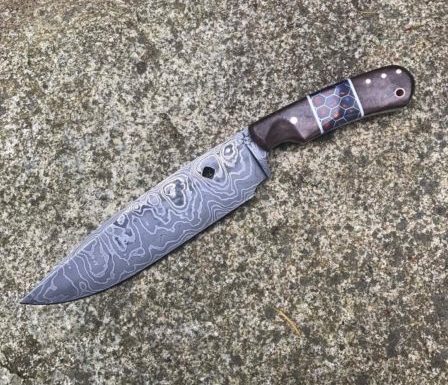
This knife has a 9-inch flat-ground forge-welded blade of 1084 and 15N20 steels. The handle is made of redwood burl with Voodoo Resins spacers and G10 liners. His maker’s mark is a diamond cutout to represent the Ranger Battalion emblem. Maker’s list price: $500 with sheath.

Watch Chris Rowley Cut Out His Maker’s Mark

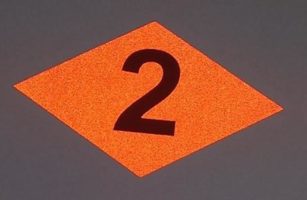
The diamond-shaped insignia is used to represent the battalion within the Ranger Regiment. Often in comments, you will see it typed as < 2 > for 2nd Battalion, for example.

The Scroll Factory sells all kinds of U.S. Army Ranger apparel and accessories.
This sticker, offered by Scroll Factory, shows what the 2nd Battalion, 75th Ranger Regiment diamond looks like that bladesmith Chris Rowley of Nomad Custom Knives & Tools cuts out of his blades as his maker’s mark.


Contact Chris Rowley, [email protected], on Facebook at Nomad Customs and Nomad Custom Knives & Tools and on Instagram @nomadcustoms03.

Subscribe To BLADE For More Stories Like This

A U.S. subscription to BLADE magazine, 13 issues, is $21.98.
An annual U.S. subscription to BLADE is $21.98. You can get your 13 issues sent to Canada for $39.98 and internationally for $49.98. Or go green and get your issues sent digitally for $17.98.

A one year’s subscription to BLADE will ensure you’re the first to read all six Knifemaker Showcase stories. You’ll also get the latest knife news, knifemaking how-tos, knife reviews, plus knife history and articles that tap into the knowledge of both the legends and the up-and-comers. Don’t miss out. Subscribe.

Midweek Maker Forged-Style: Tyrell Johnson

Tyrell Johnson has always been interested in knives and firearms, and two-plus years ago he decided to take a knifemaking class at Montgomery Community College in North Carolina.  “As my wife can attest, I’ve had many hobbies in my life, but knifemaking immediately struck a chord with me,” he commented.  “I knew right away that this was what I was meant to do, and I’ve been making knives ever since. I eat, drink and sleep knives.” Travis Daniels, of TED Knives, has been a helpful mentor to him. Tyrell does both stock removal and forging, and especially enjoys forging brut de forges.

Tyrell Johnson of Tyrell Johnson Knives has enjoyed numerous hobbies, but none have captured his imagination like knifemaking.
Tyrell Johnson is a relative newcomer to knifemaking, but he loves both forging and stock removal. His 5-year plan is to retire and devote himself full-time to knifemaking.

Tyrell currently works full time as a waste treatment plant operator, but in five years he expect to retire and focus fully on knifemaking.

• Best-selling knife patterns: drop-point hunters, kitchen and filet knives

• Preferred blade steels: W2, 1084, 1095. “I love carbon steel. It has a great history and the keeness of the edge is hard to beat,” Tyrell noted.

• Blade grinds: hollow for slicing, flat for durability

• How he tests his knives: cutting paper, shaving hair, chopping wood

• Favorite handle materials: Micarta, exotic woods, burl wood, resins—“I love working with the scales produced by J Hue Customs by Tim Kipps,” Tyrell added.

• Price range: $150-$350

• Knife shows he attends: BLADE Show

• Member of: North Carolina Custom Knifemakers Guild, American Bladesmith Society

Tyrell hand-makes all his sheaths from premium 8-ounce leather or Kydex.

Tyrell Johnson is a newcomer to the art of knifemaking, but he's committed.
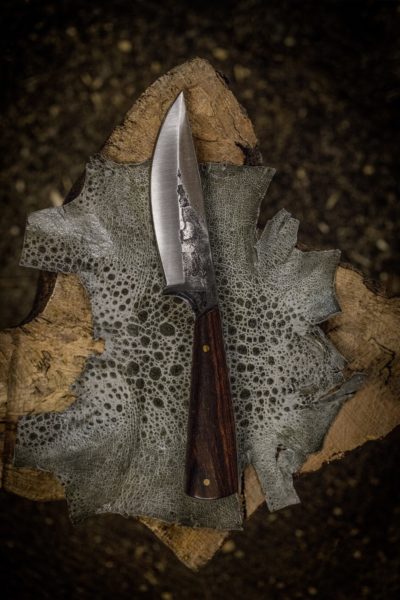
This brut de forge has a 4.25-inch hollow-ground blade forged out of 1084 carbon steel. The scales are fashioned from desert ironwood. The overall length is 8.5 inches. Maker’s list price: $275 with leather sheath.
Contacts listed at the bottom of this article.
Lisa Johnson has watched her husband, Tyrell Johnson, go through many hobbies, but he loves knifemaking and is sticking with it.
Tyrell Johnson and his wife, Lisa, sneak away for some trout fishing.
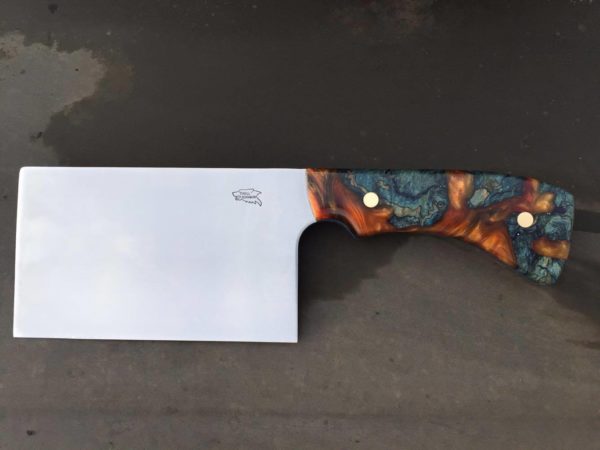
Tyrell Johnson Knives' cleaver has a 6-by-3-inch blade made out of 1095 steel.
Tyrell Johnson’s cleaver has a 6-inch edge on a 3-inch wide 1095 carbon steel blade. The resin-breech wood scales were made by J. Hue Customs. The cleaver is 10.5 inches overall. Maker’s list price: $225-$250. Contacts listed at the bottom of this article.
Tyrell Johnson of Tyrell Johnson knives makes his own san mai steel.
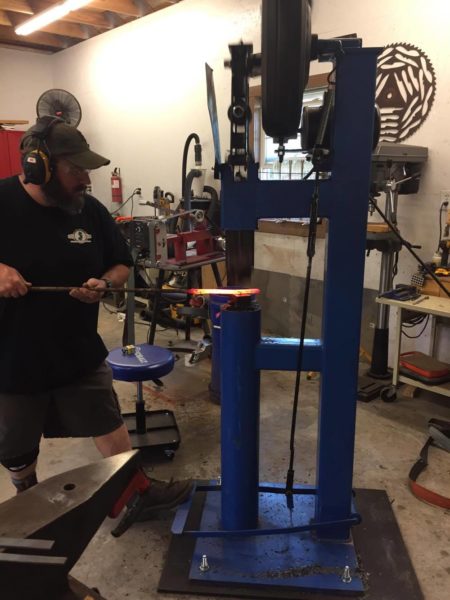
Tyrell made some san mai steel, sandwiching 1084 with mild steel. He wanted to try out his new tire hammer.
Tyrell Johnson makes his own pattern-welded steel.
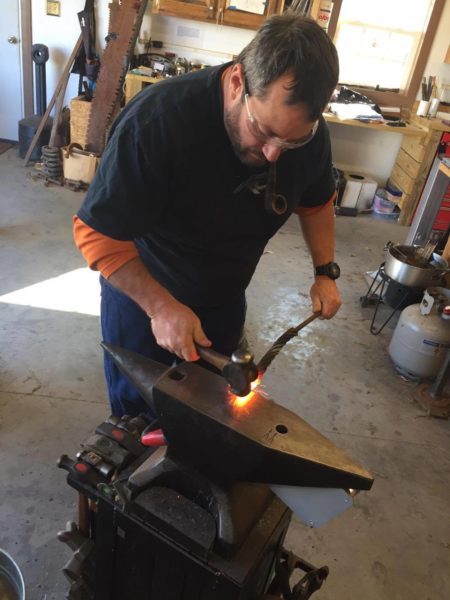
Tyrell Johnson forge-welds some cable-pattern steel in his North Carolina shop.

Tyrell made a combat knife for the North Carolina Custom Knifemakers Guild’s cutting competition last spring. The knife could not be longer than 15.5 inches overall with a maximum blade length of 10 inches. At least one visible pin had to pass through the handle, a tang was required and the knife had to have a lanyard hole with wrist lanyard and be accompanied by a sheath and zippered pouch.

Tyrell Johnson made this knife for a cutting competition.
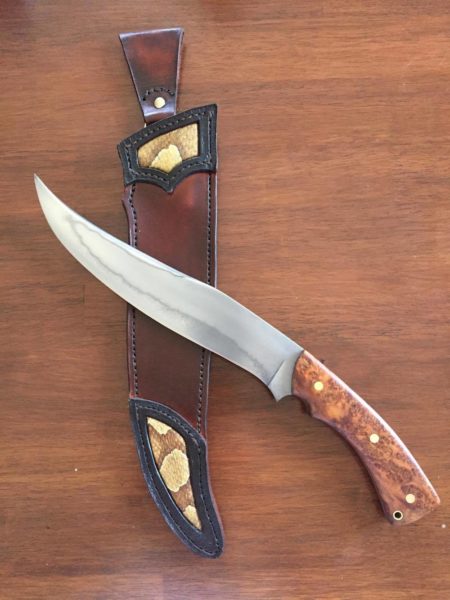
This Tyrell Johnson Knives’ Fighter was made using 1084 steel. The knife was 15 inches overall with a 9.75-inch blade. Tyrell used ambrosia maple burl for the handle. The sheath was 8-ounce premium leather with eastern North Carolina copperhead skin inset. “I personally harvested and processed” the snakeskin, Tyrell explained. Travis Daniels taught Tyrell how to make his own sheaths.

Contact Tyrell Johnson, 252-341-4791, [email protected], on Facebook at Tyrell Johnson and on Instagram @Tyrell_Johnson_Knives


A Digital Subscription to BLADE Is The Answer

Save $4 off the print price of a annual subscription to BLADE Magazine with a digital subscription.
You can read your digital issues of BLADE Magazine anywhere you have your phone, tablet or computer, and there’s no need to find storage for all your old issues.

If piling-up issues of magazines seems like a waste to you… If you feel like you don’t have time to read a magazine… If you like the stories we offer in BLADE, but want a more economical option, then a digital subscription is the answer. An annual subscription to BLADE is $17.98, $4 off the print price.

Intermediate Forging: Blending the Old with the New

0
BY LIN RHEA ABS MASTER SMITH
Blending the old with the new sometimes can yield notable results.
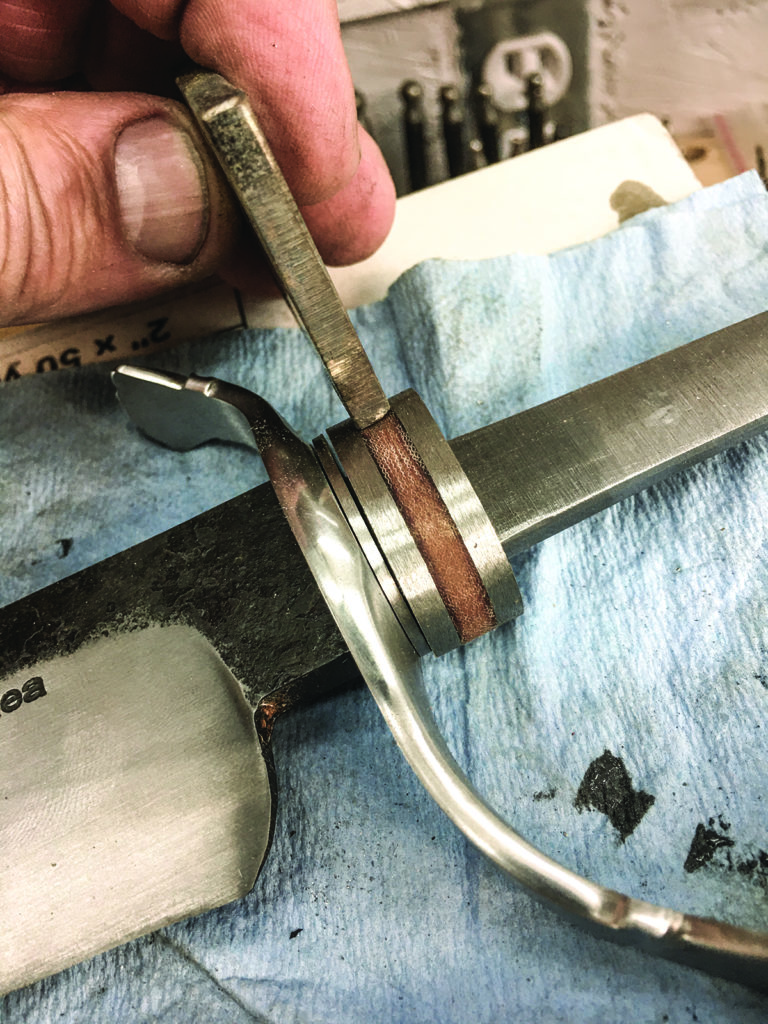
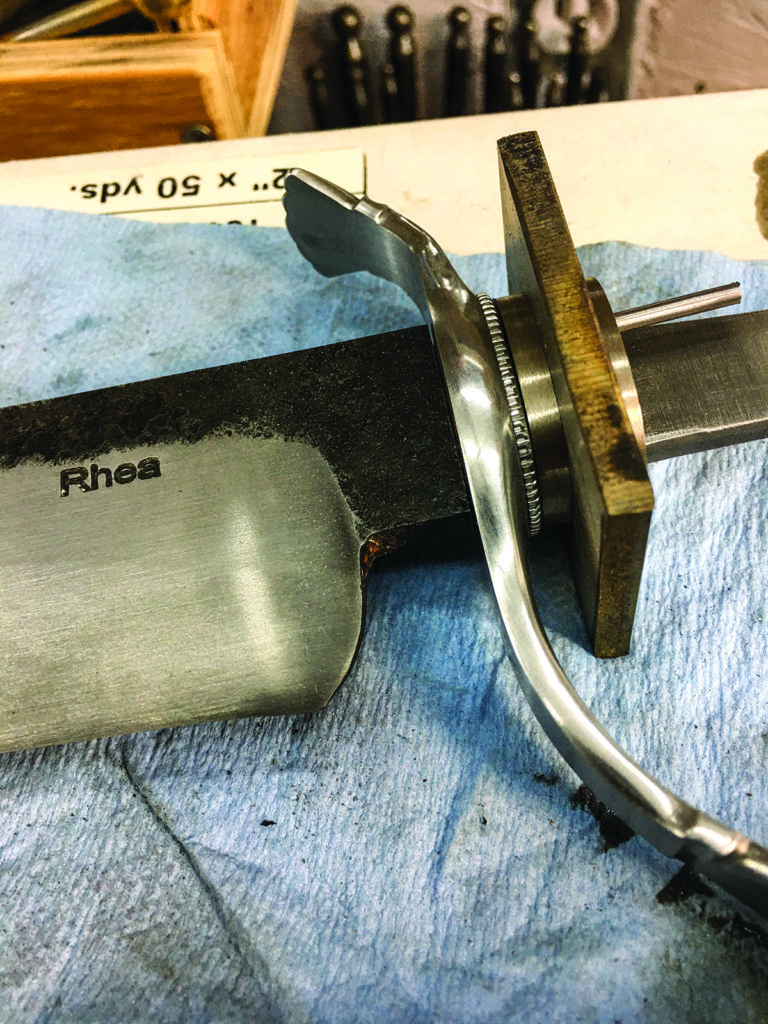
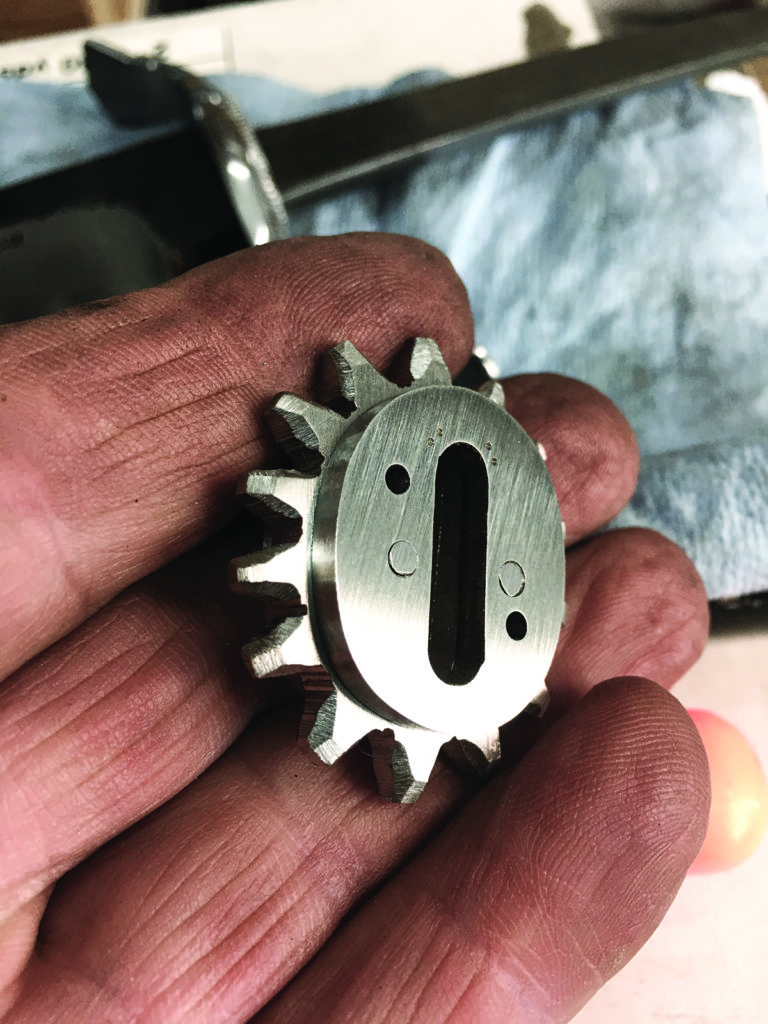
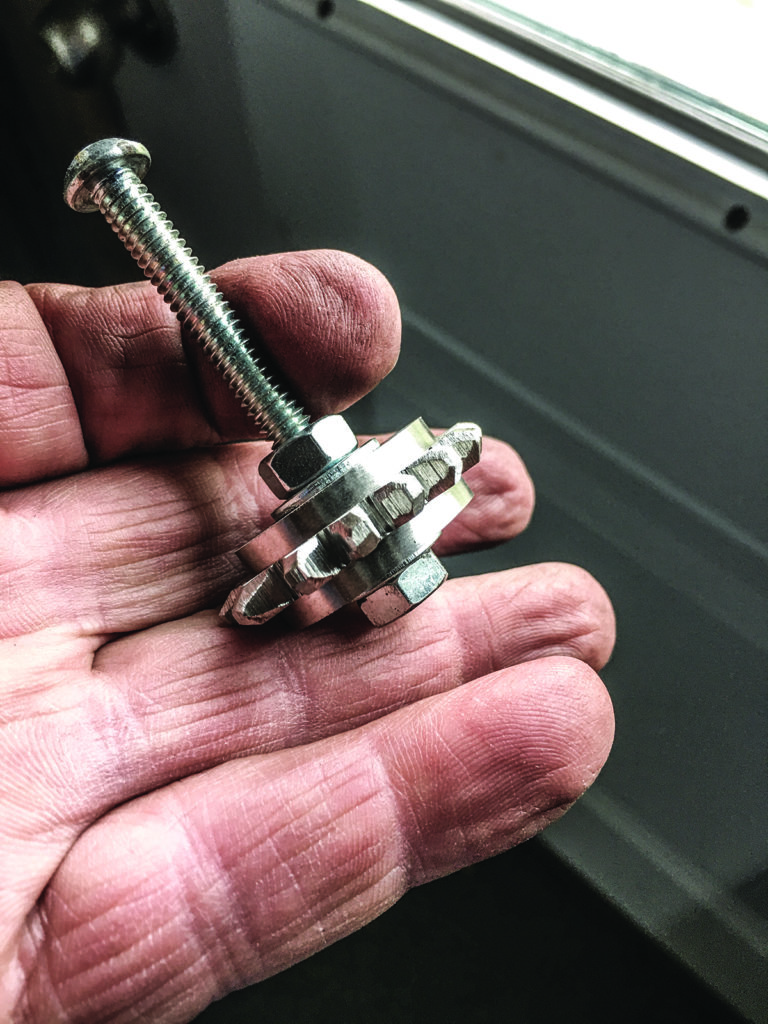
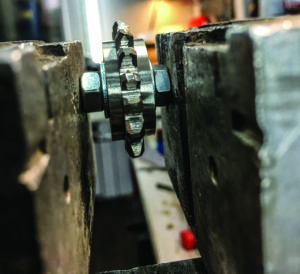
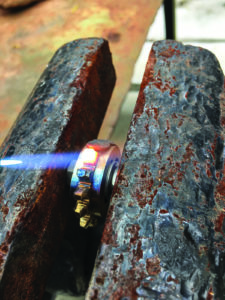
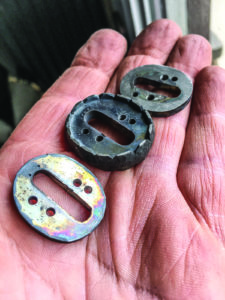
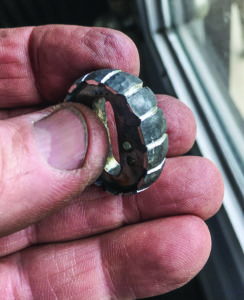
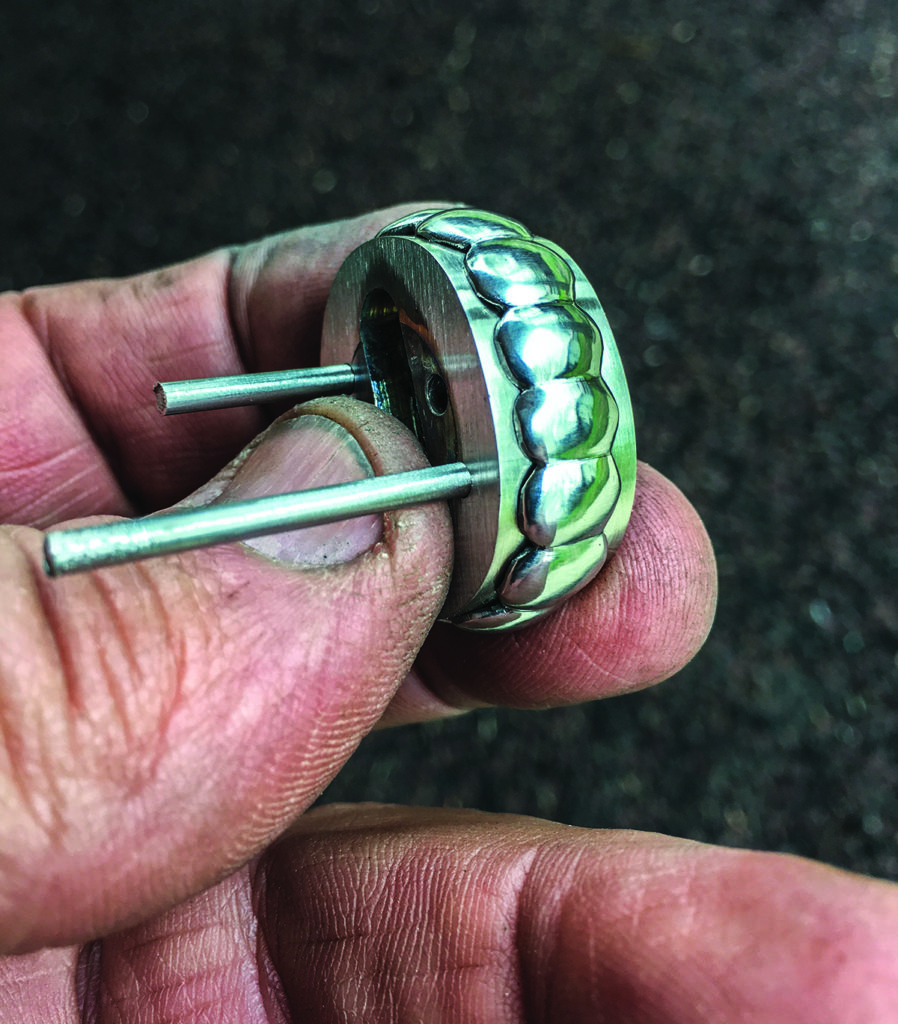
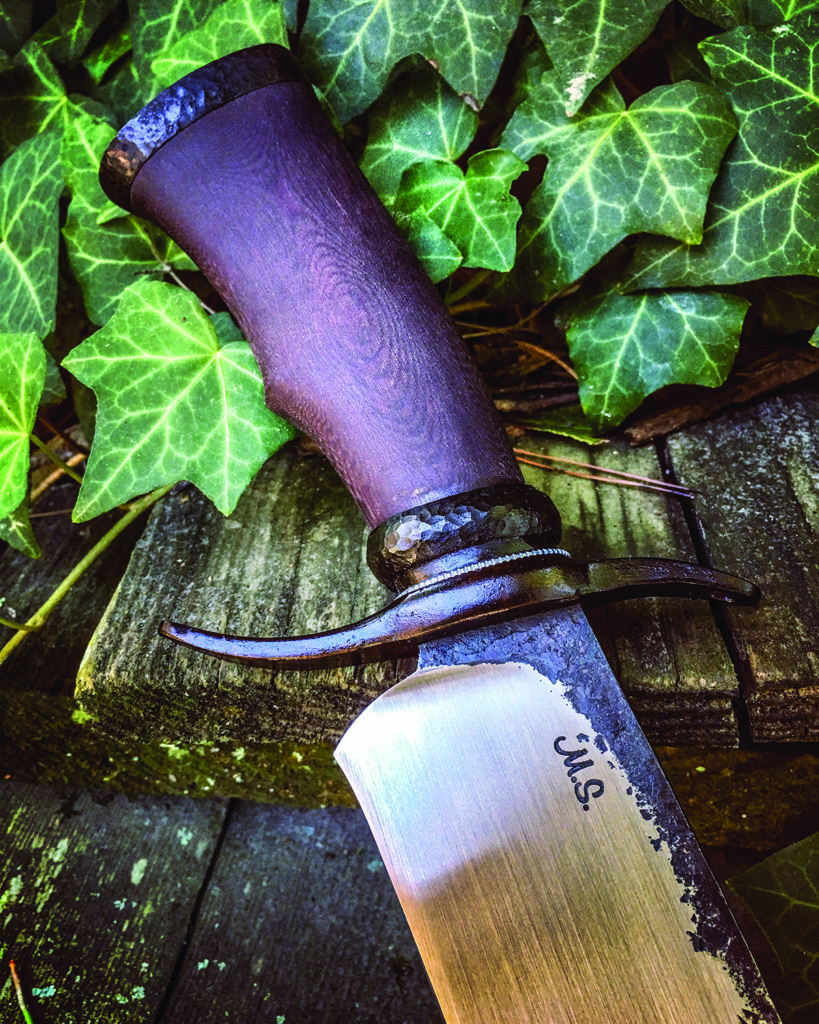
It’s been said there’s nothing new under the sun. I might add that new ideas in knifemaking are rare. I do not claim the technique I am about to share is new because that could start the story off on the wrong foot. On the other hand, I will say I have not seen it done in the context of making knife parts. Comparisons can be drawn to particular cultural techniques, and I encourage that in the name of inspiration. Speaking of, that will be the purpose of this discussion—inspiration. I have been fortunate to have had several sources of inspiration, not the least of which is my time and training in historic blacksmithing. One of the guiding principles of the early blacksmith was practicality. You will end up being the judge as to whether or not this technique is practical or not for your purposes. I will try to show how blending the old with the new sometimes can yield unique results that can be beautiful as well as inspiring.  I call the technique intermediate forging. I chose the name to imply it involves a mixture of old and new techniques within the same process in order to accomplish the task. It can involve forging—the old—as well as the new via the use of modern tools such as grinders, saws, etc. The particular order of the use of the techniques is at your discretion as well. In other words, you may forge, then saw/grind, then forge more before, perhaps, grinding again and finishing or polishing.  Intermediate forging can be used on blades or integral parts of blades. This may be where it is easiest to see and accept the possibility of enlisting the technique. I’m sure you may have seen the need to return to the forge to refine or make corrections in order to improve or actually save a project. It’s often viewed as a concession or acknowledgment of defeat if you must return to the forge for corrections. I now present to you the possibility of pushing aside the puristic view and actually using the intermediate forging technique as part of some projects, and opening up new combinations of techniques for new looks. The HANDLE SPACERS One way in particular I have made changes in the look of my knives by intermediate forging is on the handle spacers. The accompanying photos and descriptions pertain to how I set up and mix the techniques of old and new to arrive at a unique process with almost endless possibilities. I show the progression of one project along with a finished photo, and then some other examples of variations of the technique. I use stainless steel for the spacer, though mild steel or other forgeable materials would work as well. I start with three layers, leaving the middle layer proud by a chosen margin according to my plan. Note: I often “lean” the guard and spacer forward. This creates the need to provide a fake middle spacer that will be discarded after the outside spacers have their inclination established. I then insert the actual middle spacer and leave it proud for the subsequent steps. 
The author used his intermediate forging process to make the handle spacer for his S-guard bowie. (Whetstone Studio image)
YOU be THE JUDGE As noted, you must be the judge as to whether intermediate forging is for you. I’ve found that the results are worth the extra effort it takes to accomplish my intent. Also, while steps in this process are examples of workmanship of risk*, the risk is usually limited to an individual part of and not the whole knife. I’ve also found that risk itself adds intrigue to the project, and intrigue attracts the curious. Of course, as with a movie, risk and intrigue are good when the ending can be written with a predictable result. Hence, intermediate forging also needs to have predictable results. I can say that it certainly has for me. *Workmanship of risk refers to a principle found in the book, The Nature and Art of Workmanship, by David Pye. For more information, contact Lin Rhea, Dept. BL11, 413 Grant 291020, Prattsville, AR 72129 870-942-6419 [email protected], rheaknives.com.

A Revolution in Slip-Joint Construction

Unlike the traditional pocketknife in which the backspring rises and falls when the blade is opened and closed, the backbar of Tom Ferry’s model equipped with the Everflush Spring (top) remains flush when the blade is opened and closed. Ferry (above) works on a model with the mechanism in his shop.

The Everflush Spring takes the traditional pocketknife folding mechanism to the next level

By Lorien Arnold

As the traditional slip joint experiences a rebirth in favor among knife enthusiasts, there is increasing room for innovation in the knife’s classic, time-tested construction method.

    Enter Tom Ferry and Mike Vagnino.

    Innovators and educators, they have forged their paths in steel. Developing techniques and learning new skills, while at the same time teaching others, the two have collaborated on a concept that incorporates a generations-old method for assembling a slip joint, while bringing it into new worlds of materials and technology.

    “[An] idea evolved from the desire to engrave the backbar of slip-joint folders,” Ferry began. “The reason this was all but impossible before was that slip-joint backbars or [back]springs are heat treated, making them difficult to engrave, and, due to timing issues, [the engraving] was not easily done prior to heat treatment.

     “I had been bouncing the idea around trying to come up with a solution. One night while opening an automatic knife I noticed the internal kicker spring, which in many ways is similar in placement to a slip-joint spring. After doing some preliminary drawings, I contacted Mike for his input and assistance in developing the mechanism further. By sharing and combining forces, we cut the development time in half and have created a great working mechanism.

    “In total there have been at least five variations of the spring,” Ferry continued, “and Mike has taken the development further by creating the first multi-blade slip joint with the [new] mechanism. Mike coined the name the Everflush Spring because the backbar is always flush with the top of the handle.”

     You will notice the knives with the new spring in the accompanying photographs do not always correspond in form to the classic interpretation of the slip joint. Sporting titanium liners, bolsters and backbars, carbon fiber handles and high-alloy stainless blades, materials more common in the tactical category can be used to constitute the knives. To that end, the Everflush Spring allows for a completely solid handle configuration.

    The standard slip joint, whose backbar is a spring and must be free to move, can develop play on either side of the spring. The Everflush Spring design can incorporate pivot bearings for an action that is smooth with a crisp half stop. “The Everflush Spring is unlike common slip joints where the blade causes the spring to rise and drop as you rotate the blade from the open to closed position,” Ferry observed. “This innovation allows the opportunity for engraving of the backbar as well as eliminating the timing of the blade to the handle, as all the timing is internal.

    “[By] splitting the backbar in half, thus creating a lower spring upon which the blade rides and an upper tang stop which stays flush with the handle, the backbar does not need heat treatment. This allows a wider range of material choices and embellishing options.”

    Being intrinsic with the backbar, the lower spring diminishes the pressure exerted upon the pin, which traditionally would be used as the spring pivot. This allows the use of more exotic or fragile handle materials without fear of them cracking at the pin. In addition, the mechanism provides the potential for assembling a slip joint using threaded fasteners that allow for easy cleaning and pivot-tension adjustments.

    “The major disadvantage is that this design will not easily fit or adapt to many traditional designs,” such as folding patterns with three or more blades, Ferry noted. “The internal spring takes up more room and thereby creates issues with designing a knife for it.” Conversely, it challenges makers to devise new designs, which is always good for the knife industry.

Tango Foxtrot Knives

Ferry responded to the changing market with the creation of Tango Foxtrot Knives LLC, which he characterizes as his “new venture into the realm of semi-production knives” of his design.

    “The first knife from Tango Foxtrot is a tactical slip joint with the new mechanism, but I will also be introducing other models and types of knives in the future,” he said. “Tango Foxtrot Knives was conceived years ago but the timing never seemed to be right for me to proceed with the venture.

    “As with any new design or product, you can never be sure how it will be received by the buying public. Mike and I unveiled the Everflush Spring at the 2011 BLADE Show (www.bladeshow.com) and it was very apparent the design was a success, with both of us selling out of those knives prior to the end of the show’s first day. With the confidence of having innovated a great product, I decided to launch Tango Foxtrot Knives. The company’s first release was the prototype version of the T-1 folder at the 2011 USN Show, and again the design went over well.

“I am currently in production of the T-1 slip joint with the Everflush Spring,” Ferry maintained, “as well as designing other models of fixed blades and folders to develop a line of semi-production knives of my design. The components for the knives will be made out of shop, but all final assembly and fit and finish will be done in my shop. Most will be everyday user knives, but there will also be the occasional dressed-up model featuring my hand engraving.”

Another Level

The knife business tends to reward those who contribute to it. Moreover, there is always a connection to the past, as every maker builds upon the innovations, techniques and styles of those who came before. It is a rare cutler who introduces something completely new. It is an even rarer one who can take an innovation and bring it to the next level. There is always another level and, through Ferry and Vagnino’s innovation, the cutlery industry may be getting a peek at the next one.

    For more information on the Everflush mechanism, contact Tom Ferry at [email protected] or www.tomferryknives.com , or Mike Vagnino at [email protected] or www.mvknives.com.

For more on the latest knives, knife legislation, knifemaking instruction, knife trends, knifemakers, what knives to buy and where and much more, subscribe to BLADE Magazine, the World’s No. 1 Knife Publication. For subscription information click on http://www.shopblade.com/product/blade-magazine-one-year-subscripti…?r+ssfb031712#BL1SU.

Ask BLADE®: Japanese-Style Heat Treatment

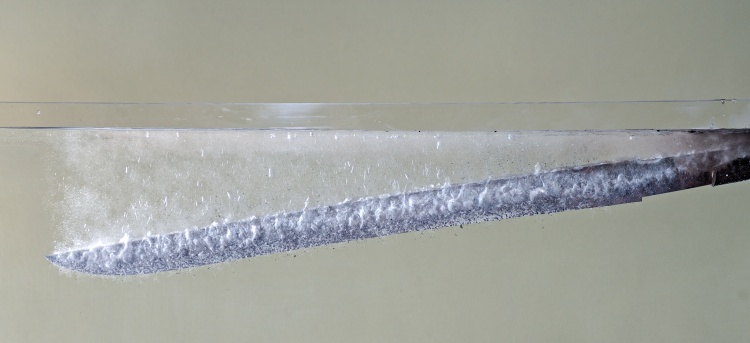
A tanto is plunged into the water during the hadaka-yaki process—yaki-ire, or heat treating, with no clay coating on the blade. (Yoshikazu Yoshihara photo)

Reader questions BLADE® story description of Japanese-style heat treatment

By BLADE staff


    Question: Regarding part three of the “HAMON!” series, page 46, in the November BLADE®: Bladesmithing articles written by observation sometimes lack accuracy. To heat treat tool steel you anneal first, then harden and then temper to change hardness into toughness. That temperature is usually 400°F to 435°F and it is called tempering for about 30 minutes.—Bob Rupert, Pittsburgh, Pennsylvania


    Answer: The author of the series, Leon Kapp, was kind enough to provide the following comments on Mr. Rupert’s letter:

    I described the process exactly as Yoshindo Yoshihara and other swordsmiths in Japan do it (and as I have done it myself). The process is at least 1,200 to 1,400 years old in Japan. It was developed and used for tamahagane—a raw steel made of Japanese iron-bearing sand that requires extensive refinement—and works beautifully for that steel. However, I think a main difference between tamahagane and modern steels is that tamahagane contains only small traces of anything except iron and carbon. Manganese or other elements in the steel might require changes in this process. If done right, the Japanese process hardens the blade all the way through the hamon, and not just near the surface.

    In fact, since all my experience is with Yoshindo and Japanese swords, I am very surprised and do not understand the technical reasons for the complex hardening methods I read about in BLADE or hear about from modern U.S. makers. It appears that Japanese-style yaki-ire (heat treatment) is a relatively simple process, but it does take years of experience to get it right.

    After yaki-ire, the blade is annealed by heating it in the forge, again as described in the story (that is, yaki-modoshi). If that is not done, the blade will be very brittle and even very difficult to polish.

    I think this is a reasonable answer to Mr. Rupert: The article is a detailed description of the process exactly as used in Japanese swords. The process and the steel are both very old and traditional in Japan, and it is done exactly as described—but the yaki-ire process was developed specifically for tamahagane steel.
Anthony Dicristofano (page 12, September BLADE®) has experimented with yaki-ire (Japanese style) for both tamahagane steels and for modern knife steels and told me he can see the differences. (Anthony works with Yoshindo in our backyard forge often during Yoshindo’s visits.) I think an important point to take from this is there are many ways to obtain great results with variations in materials and techniques.

    Oh, and one more point: There is another goal in Japanese and Western hardening. The Japanese method is designed to specifically harden only the edge region. As far as I know, the Western approach usually seems designed to harden or heat treat the entire blade. If yaki-ire were used to harden the entire blade, Yoshindo says the thin Japanese blades would crack or shatter immediately in use.

    Question: How much forging is enough? Is there a point of no return, or even a negative return? I typically start with 1-inch-diameter O1 drill rod for my knives, which I first must reduce to a flat piece of steel in the basic knife shape I want. This takes three-to-four heats to accomplish, and sometimes more depending on the size of the finished knife. Once the basic shape is attained, I then start working in the bevels.

    Is the reduction from 1-inch round to a quarter-inch flat going to give me all the benefits from forging that can be gained? Is the bevel forging simply gratuitous at that point? It occurs to me there must be a point in the process when additional heating and forging causes enough carbon loss to start degrading the steel rather than improving it. (Joshua States, a letter via e-mail)


    Answer (graciously provided by BLADE® field editor Ed Fowler): Starting with a 1-inch round bar should get you up into the 80-point rate of reduction range, depending on the size of the blade. This rate of reduction can definitely get you into the high-endurance performance realm, providing the steel you are using is of decent quality and you do not exceed a temperature of 1,725°F while forging. Forging at low temperatures equals fine grain and no measurable loss of carbon below the surface of the blade—about .002 inch, which is scale that comes off anyway. Forge the blades a little oversized and leave the edge of the blade about the thickness of a nickel for the heat treat (hardening and tempering).

    In our work at my Willow Bow Ranch, we have forged and tested to destruction many 5160 blades from 1-inch round bars (John Deere Load Control Shafts), and can get within 10 percent of the high performance of the blades forged from larger round bars.

    The more forging heats under 1,725°F, the better the performance potential of the steel. I take my bars to only 1,625°F to provide a margin of safety to prevent grain growth. Most of the benefits of forging will come from the round bar to quarter-inch flat bar. Merely forging the bevels only adds another two or three points if you are practicing reduction by forging. You are better off leaving the blades thick to protect the best edge, which will lay under the surface of the “as-forged blade.”

    When I start grinding, I take about the thickness of a dime off the edge of the hardened and tempered blade. The edge surface goes through a lot of thermal cycles and sometimes the best edge lies under the surface.

    As far as I know there is no “point of no return,” but the potential benefits between an 80-point rate of reduction and 99-point rate of reduction are not as significant as a difference between a 10-point rate of reduction and a 30-point rate of reduction. In other words, there is a decreasing rate of benefit, but always a benefit. Picture an ant crossing a table. The first trip he goes only halfway, second trip he goes half the remaining distance and the third trip he goes only half the remaining distance. How long will it take him to get to the end of the table?

    The answer is never. He will always be half the remaining distance to travel to the end, but the length of his trips becomes less each time.

     Send your question to “Ask BLADE,” c/o BLADE, 700 E. State St., Iola, WI 54990, or e-mail [email protected]. We will not print your name if you request it. If your question concerns the value of a knife, please understand it will be almost impossible for us to determine a value from a picture or e-mail image without being able to examine the knife from all angles in person.

    For more on the latest knives, knife legislation, knifemaking instruction, knife trends, knifemakers, what knives to buy and where and much more, subscribe to BLADE Magazine, the World’s No. 1 Knife Publication. For subscription information click on http://www.shopblade.com/product/blade-magazine-one-year-subscripti…?r+ssfb041912#BL1SU.


Strange Blade Brews

Darrel Ralph outfits his assisted-opening DDR Gun Hammer 3-D Alpha in a 3.95-inch blade of stainless damascus with a Stellite 6K core by Chad Nichols. The frame is Nichols 3-D-carved Moku-Ti titanium damascus. Ralph’s list price: $3,500. (knife photo courtesy of Darrel Ralph)

Some of today’s alternative blade materials may change the way you look at knives

By Pat Covert

TO MOST KNIFE ENTHUSIASTS, THE WORD STEELis so closely associated with blades it would be hard to describe a knife without it. After all, since its earliest known production about 4,000 years ago, in one form or another steel has ruled the roost not only in cutlery but so many other things that pervade our lives.

Simply put, steel is everywhere. Unfortunately, most versions of it rust.

Progressive thinking in the knife arena has led to a boom in the technological aspects of blades, which includes those of materials that do not rust or rust very little in comparison to stainless steel. (Stainless steel resists corrosion but is not impervious to it.) In the process, cobalt-based alloys such as Stellite®, Talonite and Cobalt Dendritic have received attention. Other materials such as laminates using titanium and carbon fiber, as well as ceramics, also have been used to good effect.

Frost on a Windowpane

Not a common metal, most of the world’s cobalt is mined in the Republic of the Congo. Today, most cobalt is used in corrosion-resistant “super alloys,” which are particularly suited for gas turbine and jet aircraft engines.

David Boye has been making knives for over 40 years. He offers fixed blades and folders for use around saltwater and other rust-inducing environments. He has used dendritic material exclusively since 1980 because he says he prefers its strength, cutting performance, ease of sharpening, and ability to cast roughly to shape.

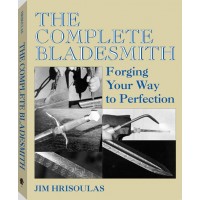
(Editor’s Note: For a better understanding of forging various metals into blades, check out The Complete Bladesmith: Forging Your Way to Perfection, pictured at left.)

“Dendritic is the kind of pattern [damask] which naturally forms when a carbon alloy cools after smeltering,” Boye explains. “It looks like frost on a windowpane.”

According to many knifemakers, the finer the blade’s grain structure, the better it cuts. Boye supports the opposite view.

“These relatively large, rooted and fully bonded carbides produce microscopic teeth along the cutting edge, and this is what actually does the cutting,” he notes. The combined attributes of extreme cutting performance, no rusting in seawater and being non-magnetic so it does not affect a compass or electronics make the material ideal for the ocean environment. “We have used dendritic cobalt for over 15 years and have received virtually zero chips, broken blades or complaints,” Boye says, “and many customers have raved to me about the blade performance.”

He states that the material’s downside is each knife design requires a set of porcelain molds which are challenging and/or expensive to make, the mold created for each individual blade has to be discarded after only one use, the casting alloy is costly, and the waiting time for blades from the foundry can be lengthy.

Damascus Hybrid

Chad Nichols is a large supplier of damascus to the cutlery industry and has pioneered a new blend of patterned steel using cobalt 6K, commonly known as Stellite, and stainless steel—particularly AEB-L and 304. “The interesting thing about the 6K cored steel is that the cobalt alloy itself does not have to be heat treated to retain edge-hold abilities,” he observes. “The only reason the material needs to be heat treated is for corrosion resistance [for the stainless steels in the damascus] and for etching purposes.”

Nichols outlined several attributes of the hybrid damascus, “The addition of the cobalt-based alloy increases its durability and oxidation resistance,” he states. “The cutting performance of the 6K damascus is great. It’s a workhorse of a steel for cutting and can retain a razor edge even under the most vigorous conditions.” As for the disadvantages of the material, there are two. “The blade material is expensive. You already have a relatively high cost for the damascus and then you add the 6K which, pound for pound, costs more than the handmade damascus,” Nichols says, adding, “It’s not a lot of fun to make, either!”

“Won’t Crack Under Flex”

The book on modern laminate blades using metal bonded to synthetics was co-authored by knifemaker Warren Thomas (also, see page 114, August 2011 BLADE®). He indicates he began making laminate blades in 1991 using stainless steel and carbon fiber. Shortly thereafter he substituted titanium for steel, creating a lightweight, zero-magnetic knife. Thomas says he uses a “trade-secret” chemical bond that positively adheres the two materials.

“My laminates have half the weight of a steel blade, absolute zero corrosion, won’t crack under flex, and don’t micro-fracture under heavy stress along the cutting edge like steel blades do,” he explains. “To improve the performance of the blade, I weld tungsten carbide along the cutting surface to enhance the edge retention. This gives it a toothy edge that improves the cutting performance.

“There is no chance of corrosion using carbon fiber and titanium. Both materials are impervious to common destructive forces like sea salts, body sweat, and other elements that wreak havoc on steel,” he notes. “Steel knives have a very hard time cutting some synthetics, such as Kevlar™. My knives actually cut these materials quite well due to their ability to saw through them.”

Laminated blades do have their disadvantages. “In very rare circumstances, the blade can delaminate. I’ve had this happen approximately a dozen times in 20 years and have always corrected the problem for the customer,” he says. “Due to the direct cost of the state-of-the-art materials involved and the time spent fabricating the laminates, there is a higher cost for my blade over steel. However, you get what you pay for.”

That’s Edge Retention!

Ceramic blades are made by taking zirconium oxide—also known as zirconia—powder, compacting it under intense pressure, and heating it in blanks at high temperatures in the 1,400° Celsius range. The blades are much more common among kitchen knives, and for good reason. For straightforward slicing and dicing they are extremely effective, but for lateral blade movement with torque, such as for prying, they tend to snap or shatter.

Boker Knives has never shied away from thinking outside the box, and its ceramic knife line not only includes kitchen knives but tactical and everyday carries as well. “If used as intended, ceramic blades will outperform steel,” Boker USA CEO Dan Weidner says. “In an independent lab test performed comparing ceramic to steel, technicians measured the amount of pressure required to cut through a standard piece of cardboard. After 1200 cuts the pressure required to cut using the ceramic blade was the same as the first cut, while the identical task using a steel blade showed decline after 400 cuts.” Now that’sedge retention!

Ceramic blades also have other benefits over stainless steel, including corrosion resistance. “This is one of the prime advantages of ceramic,” Weidner opines. “It cannot rust, which is why it’s used so often in maritime and military saltwater environments.”

There is also good news on the economic front. “Initially the cost of ceramics was on the high side, but now there are sufficient manufacturers producing the material to put the price point in the same range as good, quality steel,” Weidner says. Moreover, ceramic blades are non-magnetic.

Is One For You?

The strange brews in blade technology are not for everyone, but they offer a wide range of features, including either no rust or a huge reduction of same, zero magnetism, weight reduction and enhanced edge holding. Granted, there are downsides in some instances, though apparently not enough to discourage enough buyers of the blade brews outlined herein.

Is there an alternative blade in your future?

For more on alternative blade materials such as Spyderco’s H1, Strider Knives’ Nitinol, and Bohler-Uddeholm’s Vanax 35 and 75, see page 68 of the April 2011 BLADE®.


Also be sure to check out BLADE’s Guide to Making Knives.


For more on the latest knives, knife legislation, knifemaking instruction, knife trends, knifemakers, what knives to buy and where and much more, subscribe to BLADE Magazine, the World’s No. 1 Knife Publication. Subscribe to BLADE magazine.

Advertisement

Must Read Articles

Read this before you make a knife

Knifemaking 101 – Read This Before You Make a Knife

  by Wayne Goddard My experience has taught me that there's nothing like digging in and getting started. I've often said the hardest part of the...
how to forge damascus steel

How to Forge Damascus

Advertisement
Advertisement