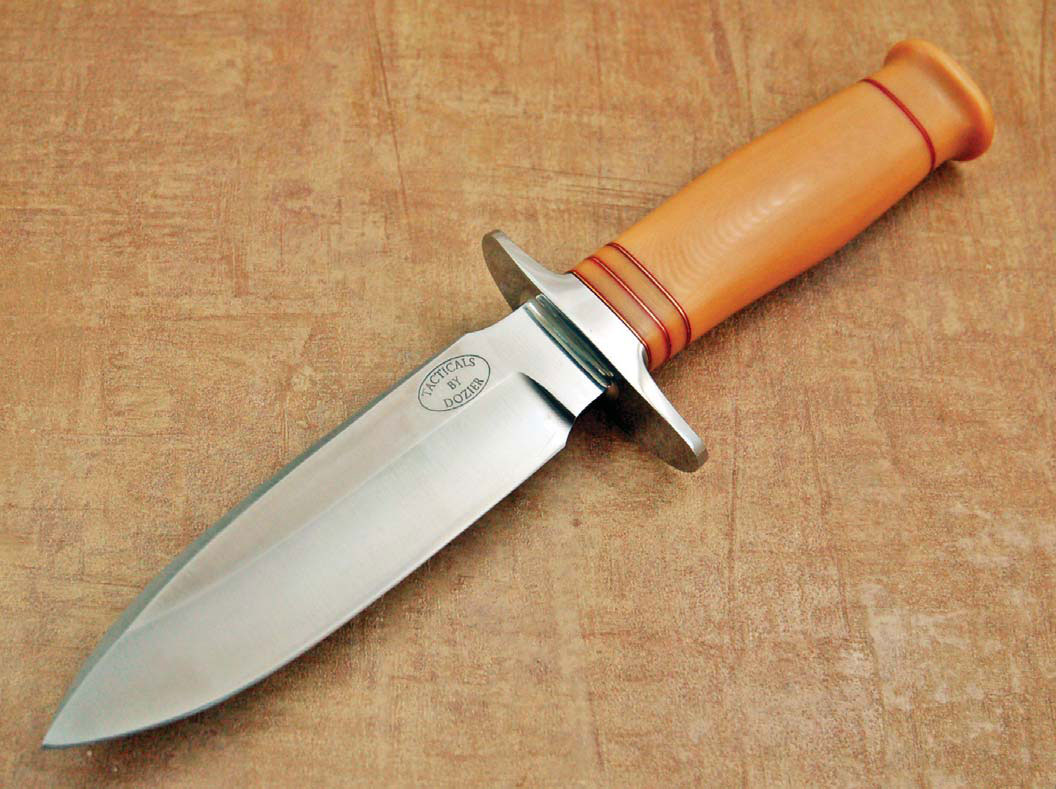
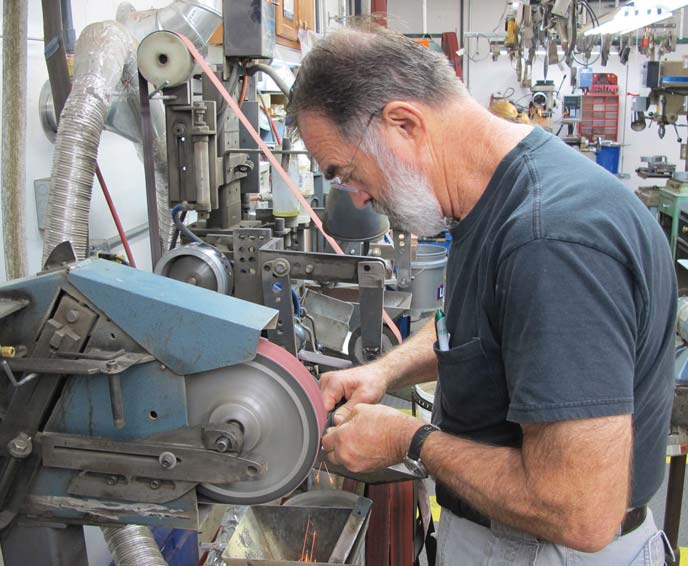
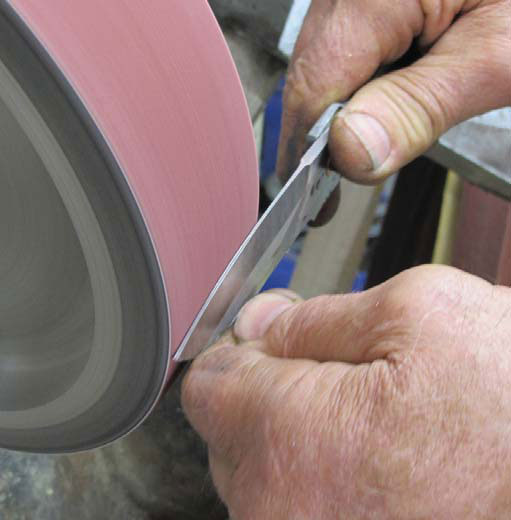
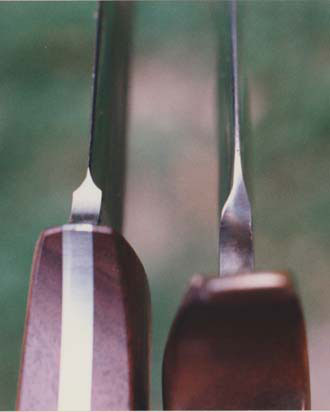
Knifemaking is the building of a knife, which includes the blade, handle and other accouterments. Blades are made by either removing metal from a steel blank via a grinder – known as stock removal – and the forging to shape of hot steel into a blade in the process known as bladesmithing. Other parts, including bolsters, guards, pommels, etc., are needed to complete the finished knife.
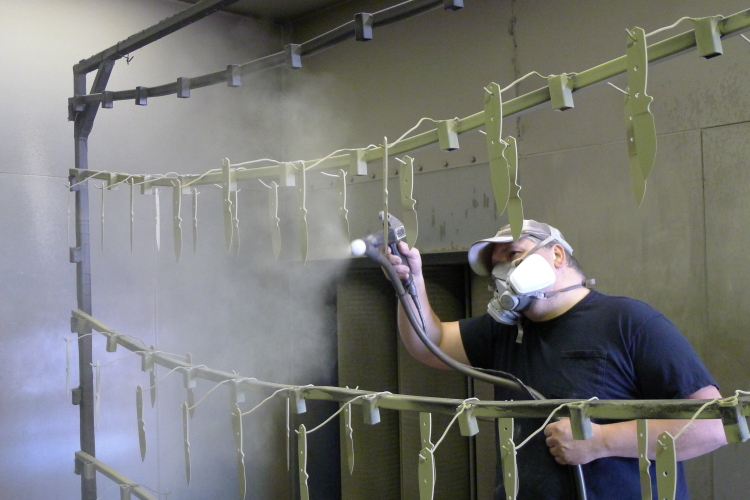
ESEE knives receive the Textured Powder Coat at Rowen Mfg. (Rowen Mfg. photo)
A coated blade offers protection, non-glare and striking looks. For those who serve in the military, preserve the peace through law enforcement or knife enthusiasts in general, blades are coated black, Flat Dark Earth, tan or what have you for a variety of reasons, and are permanent fixtures in their complement of working gear. The look and feel are appealing, and the ease of maintenance is an attractive attribute.
Buying a coated blade makes a statement and serves a practical purpose. Knife manufacturers recognize the demand for such blades and see their contributions to the available selection as filling a necessary niche.
According to Paul Tsujimoto, senior engineer at KA-BAR Knives, powder coating was developed in the mid-to-late 1960s. “Powder coating is applied using the electrostatic principle,” he said. “The parts to be coated are given a negative charge and the powder coat is given a positive charge and sprayed on. The dry coated parts are then baked in an oven or furnace, where the powder melts and fuses into a hard, protective finish.”
For ESEE Knives, Rowen Mfg. applies Textured Powder Coat to blades of 1095 carbon steel through an electrostatic spray process that causes powder particles to adhere to the steel. Then the coated steel goes through four stages to complete the process: melt, flow, gel and cure.
“The powder is applied with an electrostatic spray gun. Before the powder is sent to the gun, it is fluidized to separate the individual grains of powder and improve the electrostatic charge that can be applied to the powder so that the powder flows more easily to the gun. Because the powder particles are electrostatically charged, the powder wraps around the back of the part as it passes by toward the air off-take system,” ESEE’s Jeff Randall explained. “To obtain the final solid, tough, abrasion-resistant coating, the powder-coated items are placed in an oven and heated to temperatures that range from 160 to 210 degrees Celsius, depending on the powder—400 degrees in our case.”
President and co-owner of Spartan Blades, Curtis Iovito said his company’s coating of knife blades is called Physical Vapor Deposition (PVD). “The process is characterized by the creation of a material vapor that can be reacted with different gases to form a thin film coating,” he noted. “We use a method called arc deposition. This process is carried out under high vacuum conditions. One of the nice properties of PVD coating is that it applies uniformly so that you don’t get build-up on corners and edges like some coatings.” IonBond coats Spartan’s blades.
The commercial name Spartan Blades has given its PVD coating is SpartaCoat. Iovito and business partner Mark Carey became familiar with PVD coating while working on the development of a new rifle with Special Forces applications.
“While in the Army, we had been looking for a durable coating in [a Flat Dark Earth color] for a new weapons system we were developing,” Iovito remarked. “Fortunately, we were aware that the development of a true Flat Dark Earth Pantone had been done using zirconium carbon nitride. We believe that we were the first company to use a true Flat Dark Earth PVD coating on knives. This coating is often referred to as diamond-like coating, or DLC, in the gun and knife industry because of its resistance to wear.”
Black Traction Coating is the proprietary name of the finish TOPS Knives uses on its blades through the services of James Bowen. “We use an epoxy hybrid base with polyester in it,” company President Mike Fuller said. “It is electrostatically applied in its dry powder form, and it goes on the blade between three and five thousandths-inch thickness. The knives are then put into an oven and baked at a little over 400 degrees Fahrenheit for about 17 minutes, depending on the thickness of the material. It’s not an ultra-smooth finish like some coatings have, and it enables the user to hold the blade for close work if necessary.”
Carbon andStainless
While the processes are similar from manufacturer to manufacturer, each has its own variation on the coating theme. KA-BAR coats both carbon and stainless steels, while ESEE uses 1095 carbon steel exclusively as a blade material. Spartan Blades uses CPM-S30V and S35VN, and 154CM stainless steels.
“At our clients’ request, we use Black Traction Coating on all our products, 1095, 5160 and all the stainless steels as well,” TOPS’ Fuller noted. “One of the reasons we use it on 440C or 154CM stainless is that it preserves the visual integrity of the blade as well as being easier to clean. It doesn’t add appreciably to the cost of the knife, but the benefit from our perspective is that the chance for oxidation is nil where the covering takes place. However, in areas like the final edge of the knife where there is no covering, the blade still needs to be oiled like any other good tool.”
Spartan officials acknowledge that the coating of their stainless steels follows the surface blasting of the blades in order to eliminate glare. However, when a knife blade is blasted, a surface is created that is less corrosion resistant. Therefore, the PVD/SpartaCoat helps resist corrosion and maintain the flat finish.
Tsujimoto identifies four primary reasons for coating knife blades: corrosion protection, anti-reflection, enhancing cutting lubricity, and any combination of the first three. “KA-BAR is no exception,” he said. “Because we use a lot of carbon steel that is very prone to corrosion, we utilize blade coatings a great deal. Stainless is coated for both anti-reflection and corrosion. Remember, stainless steel means that it will stain less than carbon steel. Stainless is not totally stain proof.” Iovito agreed.
“Knives generally are coated to provide anti-glare surfaces and provide wear resistance, as well as to add additional corrosion resistance, not to mention that it makes for a great looking finish,” Iovito noted. “This finish should not be confused with other spray or paint finishes. While these other finishes are OK, PVD coating cannot chip or rub off because it’s bonded to the steel at a molecular level.”
Of course, the coating in and of itself is only as good as its ability to stay on the blade. Durability may relate to the composition of the coating itself, and to the degree of abuse and wear a particular knife is expected to weather. Recoating of blades is either rare or not offered by many manufacturers, and the premise is simple. The coating is made to last.
SpartaCoat is applied at a thickness of 3-to-5 microns, and its final hardness registers 70-to-90 HRC on the Rockwell scale. Spartan has recoated some blades in the past, primarily because the owner requested a change of color or to have something etched on the blade. Iovito said only a couple have been recoated for any other reason through the years.
Snowmobiles & Indian Chiefs
The coating of blades has a practical, aesthetic and utilitarian appeal. It adds an element of safety, stealth, survival and style to a blade, while demonstrating a good value every day in the field. Two of Fuller’s experiences are telling.
“Some time ago we were working with a snowmobile manufacturer,” Fuller commented. “The manufacturer used the coating material as an undercoating on its snowmobiles. That says something about the toughness of our Black Traction Coating. It’s extremely durable with a bit of flexibility, and the mixture we make has passed military 24-hour saltwater spray tests and chemical emergent tests with flying colors.
“Years ago, a survival expert took one of our knives to the Peruvian Amazon and left it with a chief down there. These people use their knives every day and sharpen them on river stones.” The survival expert went back three or four years later, Fuller added, and found the chief, who still had the knife—and the coating on the blade was intact.—By Mike Haskew
To read similar stories and all about the latest knives, knife trends, knifemakers and much more, subscribe to BLADE® Magazine.
Given the right steels, cryo treatments can enhance overall performance as well as aesthetics
By Mike Haskew, BLADE® field editor
Whether called cryogenic quenching or the probably more correct cryogenic treating of the steel, the process of freeze treating to help make a steel the best performer it can be is nothing new. Since the U.S. military became involved in cryogenically quenching steels during World War II and required it in the manufacture of various defense-related products, several methods have been evaluated with the same goal in mind: optimizing the amount of martensitic iron in the structure of the steel while minimizing the residual amount of austenitic iron. In turn, the qualities most sought in a knife blade are enhanced, particularly edge holding.
“There are different ways that cryogenic treating is performed,” explained Scott Devanna, vice president of marketing and product development for Carpenter Steel, “but all methods are designed to accomplish the same goal, although the methods sometimes attain differing degrees of transformation from austenite to martensite. Cryogenic treatment is not a different type of quenching method but is an additional treatment normally used after quenching. It’s used after the quench in an effort to achieve more complete transformation of austenite to martensite [martensite being the hardest of the transformation products of austenite].
“Most tool steels actually develop their hardened structure, or martensite, during the quench,” he continued. “For various reasons, however, in some cases transformation to martensite may not be complete even at room temperature. In such cases, some of the high-temperature microstructure, or austenite, may be retained after normal heat treating.”
A2 and D2, as well as other high-alloyed tool and specialty steels, may contain as much as 20 percent austenite after normal heat treating. Cooling the steel to cryogenic temperatures furthers the conversion to martensite. However, the process is specialized and requires close attention to actual temperature, levels of exposure, and the time intervals involved in raising and lowering the temperatures of the steel itself.
“The newly formed martensite is similar to the original as-quenched structure and must be tempered,” Devanna warned. “Cryogenic treatments should always be followed by tempering. Often the cryogenic treatment is actually performed between normally scheduled multiple tempers. Technically, cryogenic treatments are most effective as an integral part of the original quench, but due to the high risk of cracking, it’s recommended that tempering or a snap temper be performed before any cryogenic treatments.”
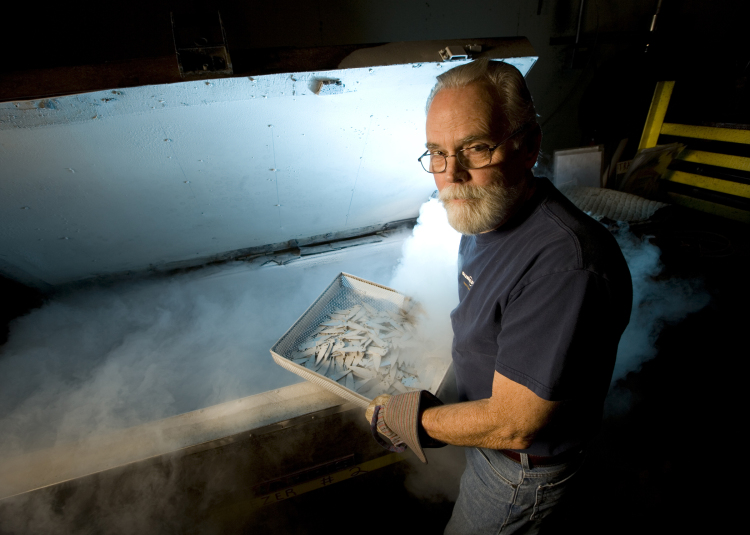
The cryogenic quench itself is performed primarily in two ways: shallow and deep treatments. In the shallow treatment, the blade steel is brought to approximately -112°F for five hours, while in the deep treatment it is reduced to roughly -321°F for about 35 hours. This is most often accomplished through immersion in liquid nitrogen.
“The term quench tends to imply that there’s a rapid change in temperature,” noted Spencer Frazer of SOG Specialty Knives & Tools. “In the case of cryogenic treatment, the quench term is quite misleading. Due to the severity of the temperature involved, quenching the material would cause it to crack or fracture. For that reason, cryogenic treatment is performed using computer-controlled temperature changes. At SOG, we use a version of deep cryogenic treatment, and some adjustments were made to the standard method to best suit the knife steels SOG uses. We consider it a supplementary process that helps improve the wear resistance of the blade steel.”
“I figured if the military wanted it done, then it would be good for knives,” Bos said. “Originally, it was there to get rid of austenite in martensitic steel. Austenite makes steel brittle, and under a microscope you can see what looks like little clumps of carbon. The cryogenic process is like putting stuff in a blender with clumps and pretty soon everything is mixed in a fine solution. Once you do the cryo on a steel, then the austenite dissipates and you are left with a fine grain structure.”
Bos does a snap temper on high-carbon tool steel and then the cryogenic process at -280°F for about eight hours, and then brings the steel slowly back up to room temperature before a second temper. While cryogenic quenching is not a necessity on high-carbon steels*, its effects are more profound on higher-alloy-content steels, which do not completely transition from austenite to martensite at room temperature.
“Once the steel gets past -100°F it’s in a state where you aren’t hurting it, but you can’t leave it in there too long,” Bos added. “Some guys go right from the quench into the cryo, but the blade could crack or break, and I don’t do that because I can’t take a chance with my customers’ blades.”
Both factory and custom knifemakers take advantage of cryogenic quenching, and the process may be performed on a single blade or hundreds at a time. Bos’s career has spanned decades of heat treating blades for Buck and for a vast number of custom makers, including some of the most famous of all time. He may do a single blade or put a large quantity in a basket for immersion at one time, and control the rate of cooling and return to room temperature precisely.
According to Bos, creating the optimal transformation of austenite to martensite is an integral part of the heat-treating process. To obtain the maximum formation of martensite, two or more complete tempering cycles are necessary following the sub-zero cryogenic quench. He stressed that the blades always should be allowed to cool to room temperature between tempering sessions.
Deep-Treatment Believer
For many custom makers, the benefits of cryogenic quenching are proven in the knife’s overall performance. Bob Beaty is a firm believer in the deep treatment below -300°F. A knifemaker since 1994, he does, however, note that simple steels do not seem to exhibit enhanced performance as a result of the procedure.
“I do both forging and stock removal,” Beaty remarked, “and basically you find most of the benefit in the more complex stainless steels. I believe the knife stays sharper longer, and I’ve tested that a lot and am still testing it. Once a month I’ll cut rope, cardboard and leather. I always get a big difference, probably a 40-to-50-percent difference in edge-holding capability, as the cryogenic quench refines the grain of the steel.”
Though he admits there are skeptics, Beaty says the enhancements of the cryogenic quench are real. In fact, he says he has experienced fewer incidences of edge chipping and an easier time getting a mirror finish on a blade after the cryogenic treatment.
For the custom maker, outsourcing cryogenic treating remains the most efficient method of getting the job done. “I recommend it for those makers using complex steels, and I’m only charged a small amount for the blades I send for cryo treating,” Beaty noted. “One of the downsides of liquid nitrogen is it evaporates, and that would make the process more expensive for me. Not only would I have to buy the nitrogen, but also the tank and other equipment, including an oven. It really does not add much to the overall cost of the knife. Of course, if you wanted to, you could cryo treat something in a thermos bottle. Just don’t put the lid on it, don’t put your hand in it, and don’t do it in your wife’s kitchen!”
A Difference Maker
The choice of steel apparently drives the benefit of the cryogenic quench. From a knife buyer’s standpoint, a cryogenically treated blade could make the difference in performance and easily justify any minimal added expense.
*According to Paul Bos, high-carbon steel usually is any steel containing anywhere from .6 to 2 percent carbon.
For more on the latest knives, knife legislation, knifemaking instruction, knife trends, knifemakers, what knives to buy and where and much more, subscribe to BLADE Magazine, the World’s No. 1 Knife Publication. For subscription information click on http://www.shopblade.com/product/blade-magazine-one-year-subscripti…?r+ssfb040312#BL1SU.
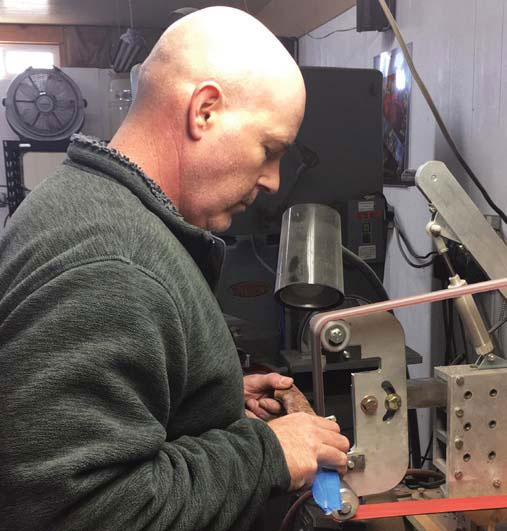
In CPM-154 stainless, John Bartlow said he found a steel that allowed for a flawless finish. At the grinder here in his shop, Bartlow uses the steel on his utility fixed blade equipped with his trademark line cutter in the ricasso. (SharpByCoop knife image)A veteran of 30 years in the Knifemakers’ Guild, John Bartlow started out using 440C stainless steel for his knives, moved to ATS-34 and today has graduated to CPM-154. Raphael Durand uses the latter steel on his stag lockback. (SharpByCoop image)
Based in Sheridan, Wyoming, by way of Tennessee, 30-year Knifemakers’ Guild member John Bartlow uses CPM-154 for his bird and trout and hunting knives. When Bartlow first started making knives, he was also a hunting outfitter.
As a result, he gutted and skinned a lot of animals on a weekly basis. Having many of his guides use his knives, he got a lot of feedback over the years about design and function.
“I started out with 440C stainless steel a million years ago,” Bartlow remembered. “I quit that nearly 20 years ago and jumped to ATS-34 stainless and used it for years and years.”
He said that about a decade ago he started to become frustrated with the quality of the ATS he was getting. There weren’t major structural problems like chipping or breaking, but there were very subtle issues Bartlow observed under 10-to-12-power magnification.
“My customers never noticed it but it bugged me,” he continued. “I was trying to get some finishes in that stuff —and I was buying through normal channels from several suppliers—but when I would go to finish it, once in a while I’d get this little area that looked like it had pits in it, or it kind of had a little ‘road rash’ that I could not get rid of.”
He approached other makers about it at the time and they said they’d seen the same thing. That motivated him to jump ship to CPM-154, he said, which is very much a sister steel to ATS-34 and 154CM.
“They are closely related on the family tree of steel,” he said. In CPM-154, he found a material that allowed for a flawless finish. With the powder metallurgy process and the accompanying uniform distribution of carbides, it eliminated the “road rash” issue.
Here grinding a blade in his shop, David Sharp said CPM-154 exhibits excellent edge retention, sharpenability and corrosion resistance.
“A large percentage of my knives have a very fine finish, polished or over-1200-grit hand satin,” the maker based in Hesperia, California, remarked. “CPM-154 is very fine, so when it’s finished to a high level you don’t see the steel’s grain.”
He added that CPM-154 is not quite as abrasion resistant as other of the relatively newer steels, so obtaining a fine finish is a bit quicker. He said that though steels are an oft-discussed topic online, he very seldom has customers request a steel type or brand, which could be seen as a testament that his choice of CPM-154 is a good one.
“I have not noticed a downside,” Sharp continued. “The upside is the finish and that it is, in my opinion, a balanced steel. For the majority of users it exhibits excellent edge retention, sharpenability and corrosion resistance.”
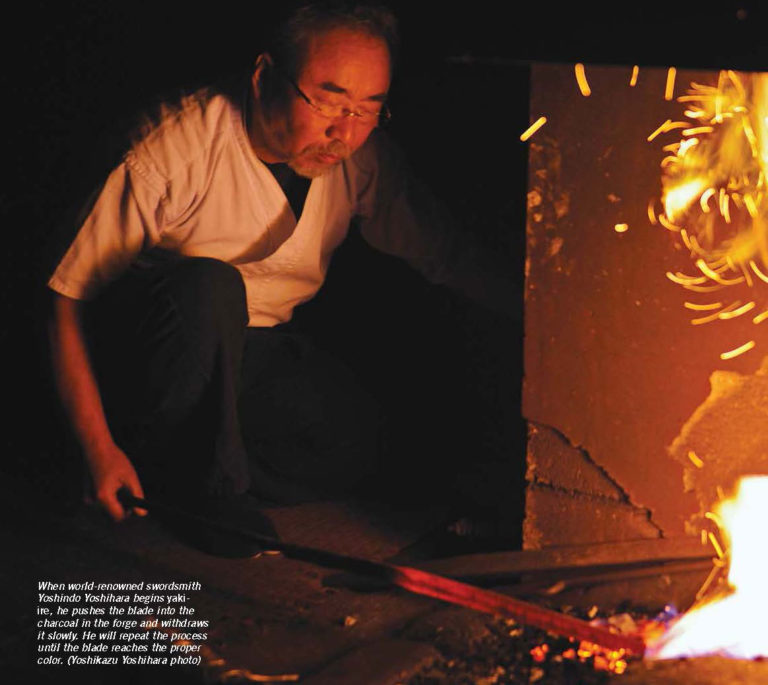
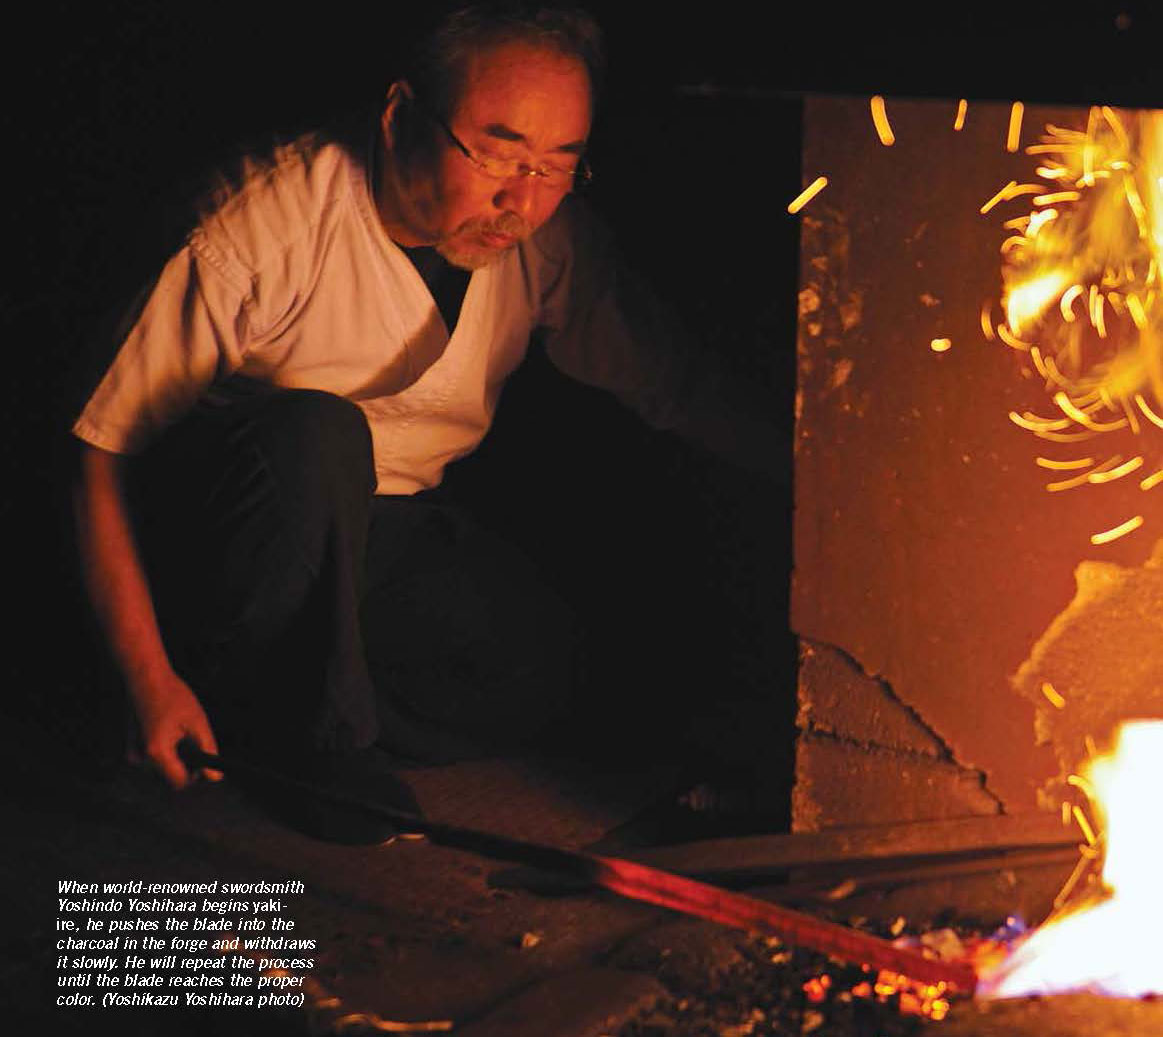
When world-renowned swordsmith Yoshindo Yoshihara begins yakiire, he pushes the blade into the charcoal in the forge and withdraws it slowly. He will repeat the process until the blade reaches the proper color. (Yoshikazu Yoshihara photo)Done in the moroha style, this tanto blade has a double edge with a hamon on both edges. Each hamon is composed of small but long gunome waves, and the two hamon mirror each other. There is a very clear, well-defined boundary (habuchi) defining the entire hamon. (Aram Compeau photo)
A hamon is made using completely traditional methods. The description provided here is intended to explain the method and details as used by world-renowned Japanese swordsmith Yoshindo Yoshihara, though there are variations in the details of the technique as used by other swordsmiths.
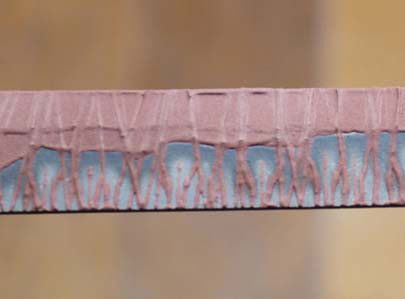
Basically, the swordsmith coats the edge region where the hamon will be with a thin clay layer. He then coats the upper part of the blade with a thicker clay layer above where the hamon will be. A series of clay strips (ashi) are placed across the entire width of the blade from the top surface down to the edge, and the clay ashi determine where the ashi—the extensions that run perpendicular to the sword’s lengthwise direction—will form in the hamon. The boundary line between the two clay types, along with the ashi, will completely define the resulting hamon.
However, the final results also will depend on the steel, the temperature the blade is heated to during the yaki-ire process—which the smith judges by eye—the clay pattern on the blade, and the swordsmith’s skill and experience.
Making Hamon: The Steel
A closer view of the hamon area and ridge at the top of the clay-coated portion.
Japanese swordsmiths use steel called tama-hagane. It is the traditional Japanese steel used for swords and tools since iron and steelmaking was introduced to Japan. A very important property of tama-hagane is its composition. It is almost pure iron and carbon, with very little traces of any other element.
The tama-hagane is forged out and folded over on itself an average of 12 times, though the exact number of times it is folded and worked depends on its carbon content and how it behaves during the forging process. The finished material usually will have a visible grain pattern on its surface—if it is polished properly— and a carbon content of about .6 to .7 percent, which is considered optimal for a traditional Japanese sword.
These properties are important considerations in making a hamon. The traditional method used to make the hamon was developed while working with this type of steel, and, thus, the steel composition is an essential element in making a traditional Japanese-style hamon.
During the early part of the 20th century, the Japanese military establishment wanted all officers to carry a traditional Japanese blade. However, it was impossible to make a sufficient number of swords using fully traditional methods. Consequently, many swords were made for military personnel using non-traditional methods. The primary labor-saving consideration was the use of modern—that is, early 20th-century—steel. Generally, the steel was salvaged from railroad tracks thus, the steel composition is an essential element in making a traditional Japanese-style hamon.
During the early part of the 20th century, the Japanese military establishment wanted all officers to carry a traditional Japanese blade. However, it was impossible to make a sufficient number of swords using fully traditional methods. Consequently, many swords were made for military personnel using non-traditional methods. The primary labor-saving consideration was the use of modern—that is, early 20th-century—steel. Generally, the steel was salvaged from railroad tracks and other structures, and most of it had been fabricated in the late-19th and early 20th centuries.
The steel was forged to shape and then a hamon was formed using traditional methods. Though traditional methods were used to make the hamon for the military swords, and hamon are clearly present, they usually do not appear to be quite the same as hamon made on swords formed from tama-hagane. The hamon are often not as bright as on traditional swords, and there are not many hataraki, or complex details, visible in such hamon. It is probably because the composition of the steel used in the “modern” blades is not the same as the composition of tamahagane.
This means that forming a traditional, complex-appearing hamon in modern steels may not be as simple as just carefully applying traditional procedures.
The Japanese method of making a hamon was developed over a 500-year period specifically to use with Japanese tama-hagane steel.
Tsuchioki: Applying The Clay
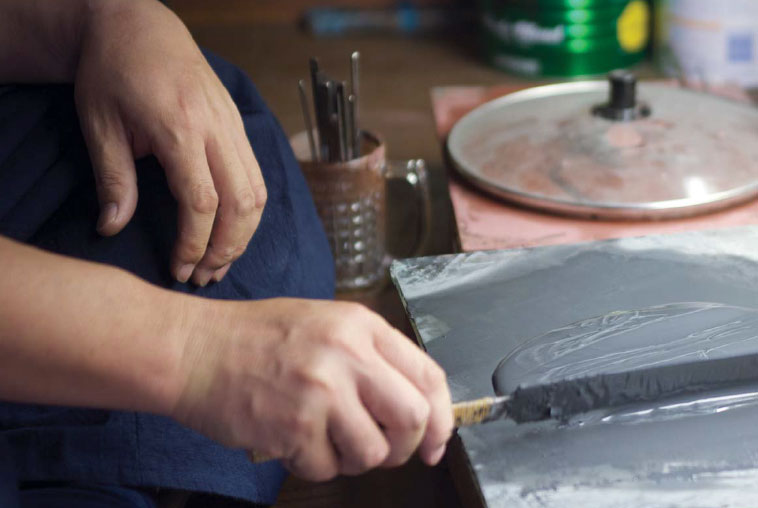
Yoshikazu (applies the black clay to the edge where the hamon will be. The clay is applied and then scraped off, leaving a very thin, minimal layer on the hamon area. Note the ridge at the top of the clay layer. This will be the boundary of the hamon.
After forging, the blade is filed to shape, and the edge is left about .16 to .2 inch thick. If the blade has a sharp edge, it will likely crack during the yaki-ire process. If the edge is too thick during yaki-ire, the final pattern visible on the sharpened edge could be different from what was visible on the outside of the much wider edge during yaki-ire.
When the blade is ready to have the hamon made, it is cleaned again by polishing with the coarsest polishing stones, usually about 200 grit. Rough scratches from a coarse stone make it easier for the clay to adhere to the sword. After this polishing step, there is no contact between bare skin or fingers and the blade’s surface, because oil from bare skin can prevent clay from adhering strongly to the blade. From this stage until after yaki-ire, only the tang of the blade is handled.
The process of placing a thermal clay layer on the blade to form the hamon is called tsuchioki.
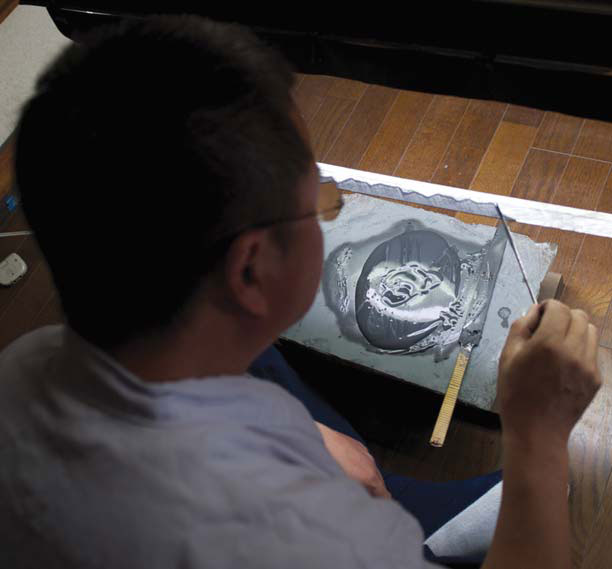
A black clay formula is used to coat the edge of the sword. Yoshikazu Yoshihara adds water and mixes the clay until it has an even and smooth consistency. A red clay mixture is used for the upper part of the blade to form the ashi.
Several types of clay can be used. Yoshindo generally uses two types. To cover the edge region, he uses a black clay. It is composed of approximately equal part ground charcoal, clay and ground stone (omura-to or omura stone, a rough limestone used to shape new swords). The clay is spread over the hamon area and then scraped off to leave a thin, uniform layer. The hamon actually cools faster if covered with the clay than if left uncoated. This is because of the fine ground stone in the clay. The fine stone particles produce a rough surface and greatly increase the surface area and cooling rate over the hamon region.
Yoshindo uses a second clay to cover the upper part of the blade above the hamon which is not to be hardened, and also to form the clay ashi to define and form the hamon pattern’s details. The second clay contains ground charcoal, clay and kanahada—finely ground red iron oxide—and this clay has more effective thermal properties. Kanahada is the fine red iron scale that forms on iron or steel surfaces after the metal has been heated to a red or brighter color and allowed to cool. The scale is collected and ground into a fine red powder.
The quantities of the ingredients are approximately equal.
However, many swordsmiths use their own proprietary formulas and may use other ingredients, too. Yoshindo says the clay component is very important—he uses clay made for ceramic work—and the most vital consideration is that the clay must adhere very tightly to the sword.
Before the thermal clay preparations are used, the clay mixtures are worked slowly with water and a spatula until they form a thick, uniform paste. They are applied with a spatula to the blade. The technique requires some practice. Spreading the black clay over the hamon area is relatively straightforward. The second step is to spread the red clay over the upper part of the blade where the hamon will stop.
Yoshikazu begins to apply the red clay from the back edge (mune) of the sword down to the black clay boundary. He places the clay on the sword with a spatula, and then pushes it down to the ridge formed by the black clay.
Usually, a ridge is formed with the black clay at the top of the hamon area. The ridge is also the limit of the area where the red clay will be placed. The ridge is reinforced with the red clay and marks the contour that will form the top of the hamon. More red clay is then spread on the upper part of the blade and pushed down toward the hamon to the ridge formed earlier with the black clay.
Once the black and red clays are in position, the ashi are placed on the blade.
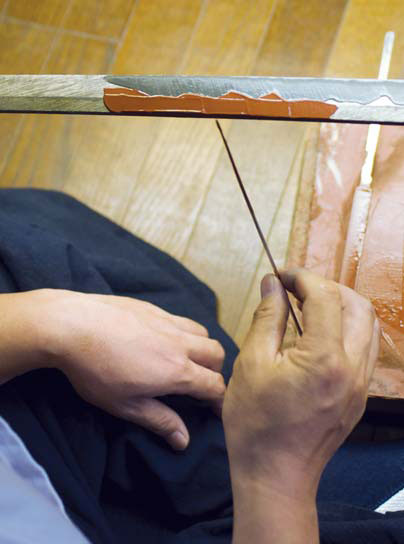
Yoshindo uses the edge of a spatula for the procedure. The edge of the spatula is placed into the clay, and then the spatula edge is rolled across the width of the blade from the edge to the back (mune) in one stroke. The ashi can be perpendicular to the blade’s lengthwise axis. This will result in visible ashi in the final hamon that will be perpendicular to the hamon boundary.
The ashi can be very thin or thick and will contribute to the final appearance of the hamon. If the ashi are placed close together, the final result can be regular loops or waves, or gunome. To form choji-shaped loops (where the top of the loop is wider than the bottom), the alternate ashi are slanted in different directions across the hamon.
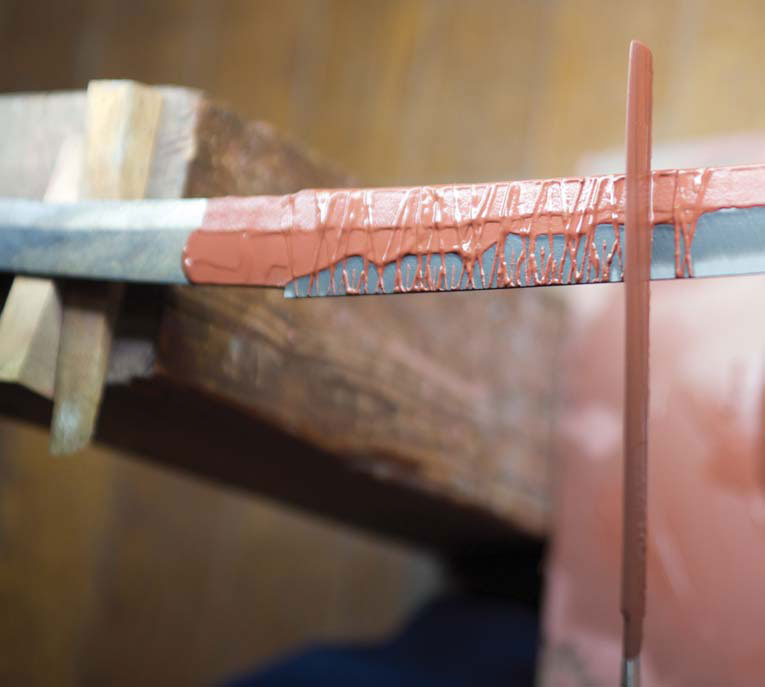
To form the fine details of the hamon, clay strips or ashi are added to the full width of the blade from the edge to the back. A spatula is dipped into the clay and then the edge of the spatula is rolled across the full width of the blade. Smaller ashi will then be added to the bottom part of the hamon, too. This pattern will help to define the choji “waves.”The complex pattern of ashi will form a choji hamon. Note the larger amount of open spaces at the top part of the hamon area.
Even when a correct clay pattern is placed on the blade, the blade’s temperature at quenching is very important. If the blade is heated to the correct temperature and the ashi are designed to produce a choji hamon, the results should be satisfactory.
However, a set of ashi intended to produce a choji hamon could result in a gunome hamon if the temperature is too high. This means many factors must be correct to obtain the desired results, including the steel composition, the clay composition and placement, and the temperature of the sword when quenched.
After the clay coating is finished, it is allowed to dry. When it is partially dry, the light gray areas near the edge can provide a preview of how the hamon likely will appear. Here, light gray choji “waves” are clearly visible in the partial dry clay coating.
Yaki-Ire: Heating and Quenching to Form the Hamon
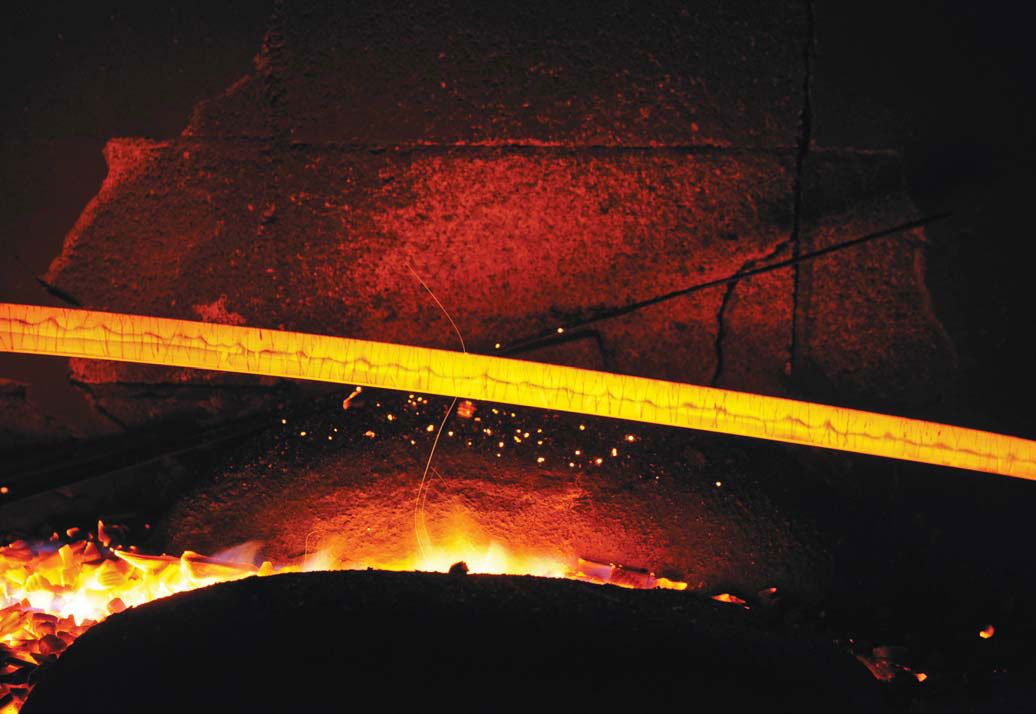
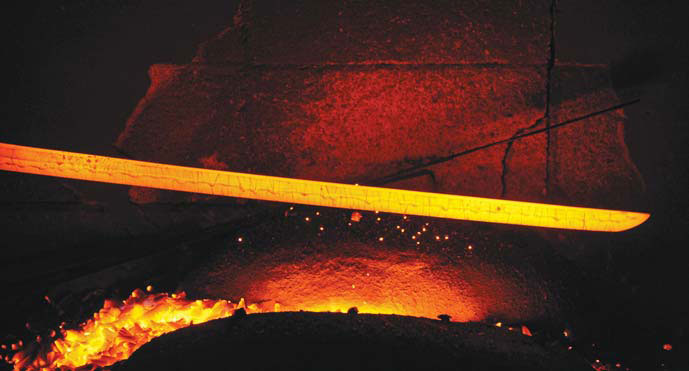
The blade is repeatedly pushed through the charcoal in the forge until it becomes a bright orange or almost yellow color. The hamon boundary between the black and red clays and the ashi is visible. (Yoshikazu Yoshihara photo)The blade is pushed through the forge with the edge down, and it will be heated until the edge is somewhat brighter than the back. The colors must be consistent over the entire blade and the point area to achieve a uniform, well-defined hamon. (Yoshikazu Yoshihara photo)
Heating and then quenching the blade in water in a process called yaki-ire forms the hamon. When the clay is dry and the blade is ready for yaki-ire, the blade is heated slowly in the forge. The charcoal used at this step is cut into very small, fine pieces, each about the size of a sugar cube. The charcoal must be of the pine variety.
Pine charcoal is very light and less dense than oak or hardwood charcoal. When cut into small-sized pieces, it can produce a very hot fire and rapidly heat the blade.
Another important detail is that the small, soft charcoal pieces will not damage or scrape off the blade’s clay coating while the blade is continuously pushed through the fi re in the forge to heat it.
World-famous Japanese swordsmith Yoshindo Yoshihara begins the yaki-ire process by pushing the blade into the forge slowly with the edge up, and then slowly pulls it out.
When the blade reaches a bright orange to yellow color, it is rotated and pushed into the forge with the edge down. Yoshindo will continue until the edge is visibly hotter and brighter than the body of the blade.
Click for a larger view.
When the blade is ready, the edge will be brighter and hotter than the body, the clay boundary on the blade defining the hamon will be visible, the blade will be uniformly heated along its entire length, and the temperature (as judged by the color) will be correct. At this point, Yoshindo will pull the blade out of the forge and plunge it into a tank of water.
After the blade is removed from the water, it is inspected to be sure the clay coating has remained intact, and that the blade has experienced no severe flexing or bending. The final step is to anneal the blade because it will be too hard and brittle after the yaki-ire step.
The annealing step is called yaki modoshi. Yoshindo pushes the blade through the forge until it reaches a temperature of about 170° Celsius (338°F). Yoshindo can judge this from when the clay becomes dry and from other visual clues.
After yaki modoshi, the clay is removed and the blade is cleaned up rapidly with a grinding wheel under a water jet to prevent the blade from overheating.
The hamon easily can be seen at this stage after pouring a solution of 5 percent nitric acid over the blade. If the blade passes this inspection, the polishing process will begin.
Blade Stresses
Click for a larger view.
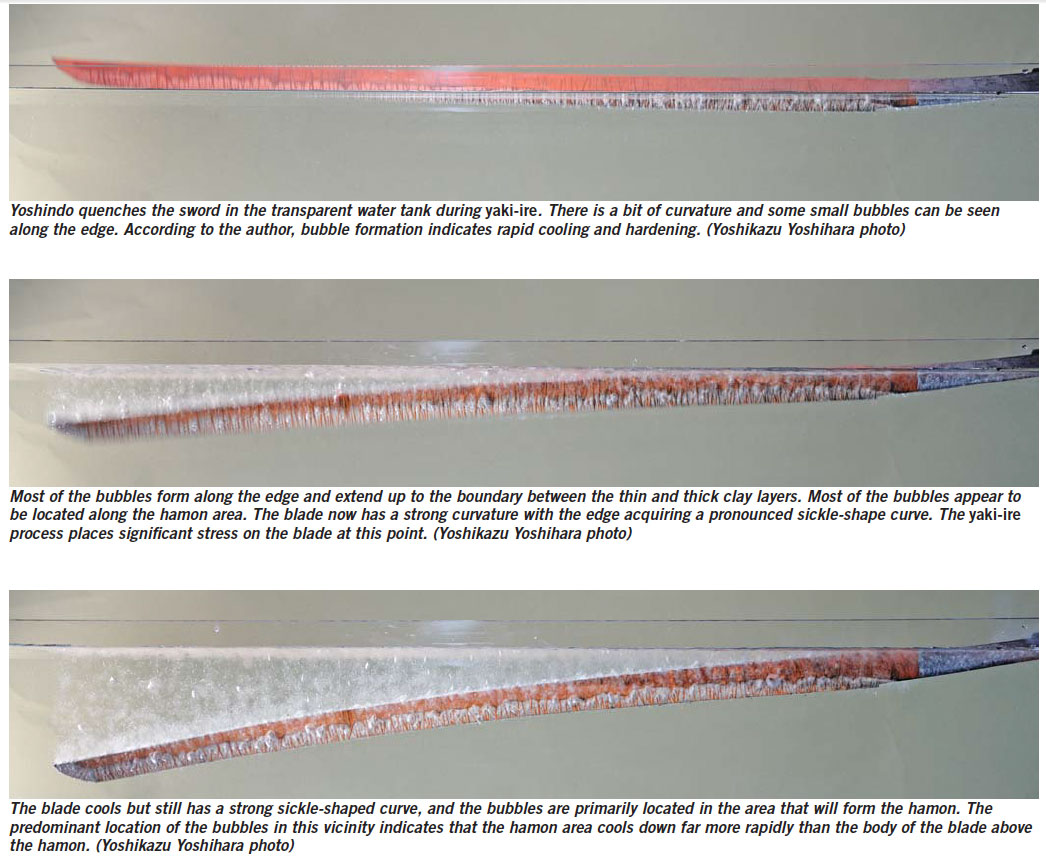
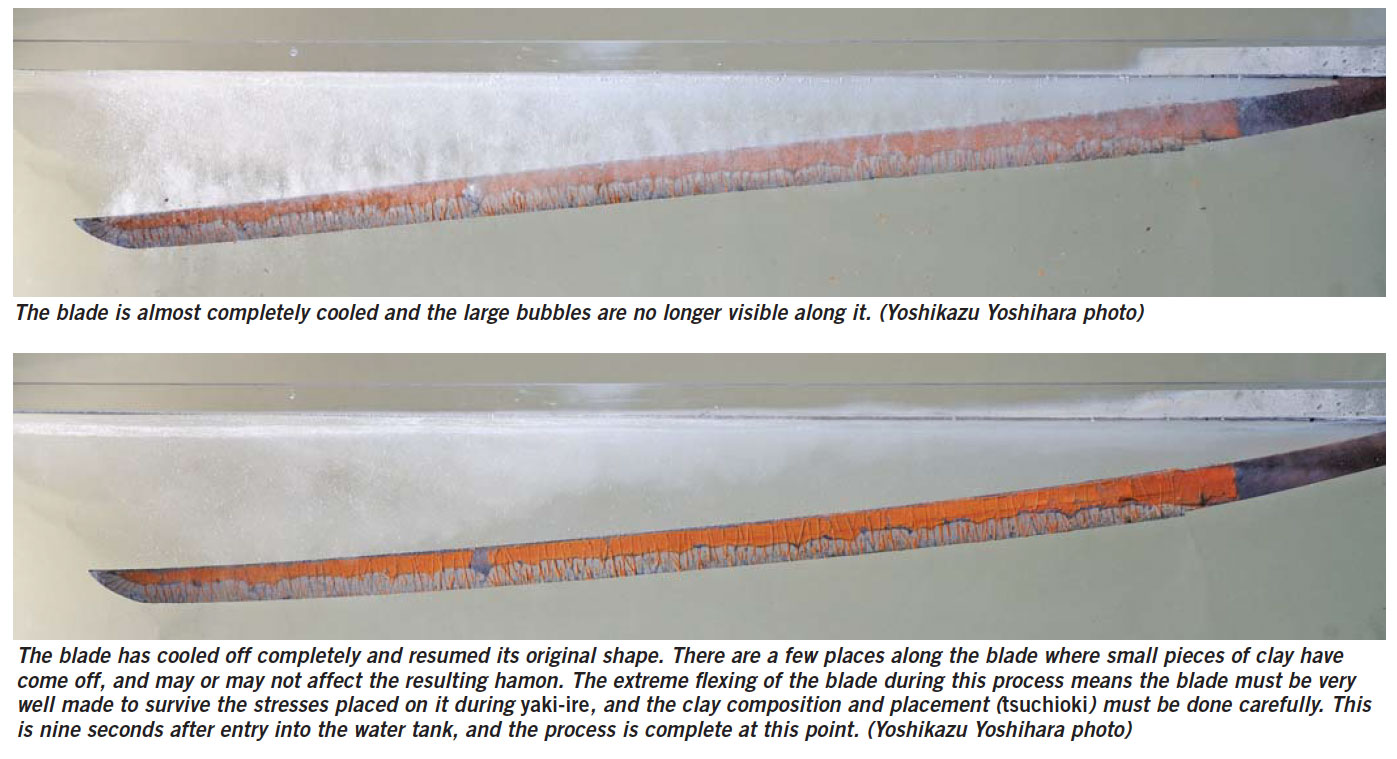
The accompanying photos taken of a transparent water tank built by Yoshindo and his son Yoshikazu shows how the blade behaves during yaki-ire.
When the blade enters the water, it is nearly straight. Shortly thereafter, the blade curves towards the edge. As the blade cools, it reverses the curvature and curves toward the back surface. Thus, a blade flexes twice during the quenching process: first strongly toward the edge, and then strongly toward the back.
At the end of the quenching process it may be nearly straight or have some degree of curvature toward the back surface. The degree of curvature remaining after yaki-ire may be fairly uniform or variable and almost random. The final curvature is produced by hammering and local heating to produce the precise curvature the swordsmith wants.
Hadaka-Yaki: Making a Hamon Without Clay
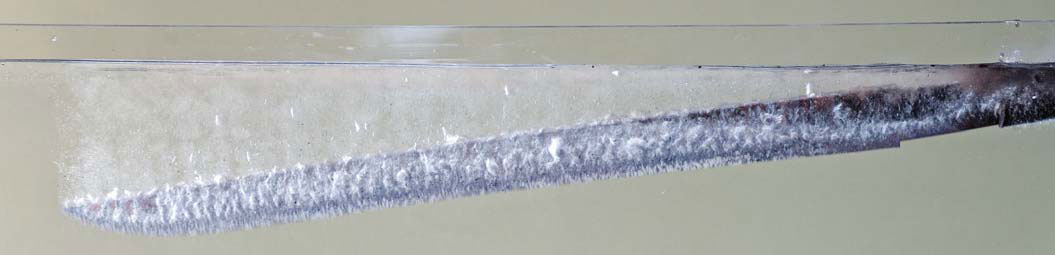
A hira zukuri tanto is plunged into the water during the hadaka yaki process—yaki-ire with no clay coating on the blade. The blade has curved down so that the edge has a concave contour. Bubbles, including many large ones, cover the sides of the blade. (Yoshikazu Yoshihara photo)
A hamon can be formed without using a clay layer, and one of the most famous schools of swordmaking, the Ichimonji School in Bizen circa the 13th century, used this method. The blade is prepared in the same way as described above, but no clay is placed on it. The blade is heated in the forge as before, first with the edge up, then with the edge down. When the edge is visibly hotter than the blade’s body, it is plunged into a tank of water.
The edge should be approximately 800°-850°C (1,472°-1,562°F), and the body of the blade should be approximately 750°C (1,382°F) or lower.
If the blade is prepared properly and heated correctly, an interesting hamon will form. This type of hamon can have abundant ashi and a gunome or choji hamon with plentiful hataraki.
However, the swordsmith will have no control over the final hamon form, and the hamon will vary with each hadaka-yaki attempt. Using a thermal clay coating allows an experienced swordsmith almost complete control over the final hamon, so most swordsmiths use clay today, though some swordsmiths do use hadaka-yaki to form the hamon.
An accompanying photo shows hadaka-yaki (with no clay on the blade). The blade is a large hira zukuri tanto, so the extent of flexing is not as great as that seen with the katana or long sword. However, the pattern of cooling along the blade and bubble formation and distribution are clearly different for hadaka-yaki than for traditional yaki-ire. Far more bubbles form all over the sides of the blade with hadaka-yaki.
For yaki-ire, bubble formation is concentrated along the edge of the blade. Since bubble formation indicates rapid cooling and hardening, the cooling patterns and hamon will be different with the two methods.
Evaluating a Hamon
A hamon must meet certain criteria to be considered good or functional on a Japanese sword blade. There must be no nioi-gire or gaps in the nioi line defining the hamon. The nioi should form an even, wide and clear belt along the length of the sword. The hamon boundary (the habuchi), whatever its shape and style, should be clear and strong everywhere along the blade. There should be some hataraki or ashi, and a clear, recognizable pattern. The hamon on the point should be well formed and clearly visible. The hamon should form a good composition with and complement the blade so that the entire presentation forms an aesthetic whole.
It takes a considerable amount of experience and effort to make a properly formed and aesthetically complementary hamon on a Japanese sword blade.
It often takes years of experience before a young Japanese swordsmith can consistently make good hamon.
Who knows when the first argument over the best blade grind started? Most likely it was a conversation between two flintknappers sitting around a cave—and the battle of which grind is the best rages on to this day. The modern tactical and bushcraft movements have brought heated debates on which grind is the best. The grind of a blade is where a key battle is won, and blade geometry varies widely. But is there a so-called best blade grind and, if so, which one is it?
Curved or Flat?
Before becoming a renowned custom knifemaker, Walter Brend was a meat cutter, the skills of which gave him keen insight into the art of the slice. The man some call the best grinder ever shows his stuff here. (Rodney Hiers image)
According to Wikipedia, blade geometry refers to the “physical properties of a sword blade: cross-section (or grind) and taper.”
You can forget the “sword” qualifier—blade geometry applies to any blade. The three most common blade grinds in use today are hollow, flat and convex, with other grinds of note are the chisel, asymmetrical, Scandi and compound. There are others.
Before becoming a renowned custom knifemaker, Walter Brend was a meat cutter, the skills of which gave him keen insight into the art of the slice.
“What works for me is the hollow grind,” Brend says. “The hollow-ground blade is not a flat surface, it is concaved, so as you cut an object it immediately starts a separation. The bottom edge should flow from the point to the back of the blade with a recurved blade edge.”
Knifemaker Bob Dozier, well known for making hard-use knives, prefers the hollow grind as well.
“Since I make mostly hunting knives, I prefer the drop-point blade style. Since Bob Loveless popularized the drop point, it’s been the most popular shape for hunting knives for many decades now. Also, for a hunting knife, the hollow grind is the best as it stays thin at the edge much longer.”
Like Walter Brend, Bob Dozier prefers the hollow grind. “For a hunting knife, the hollow grind is the best as it stays thin at the edge much longer,” Dozier opines. Bob’s fixed blade features a nice, clean hollow grind. (Kerry Peal images)
However, that’s not to say Dozier is adverse to other grinds.
“The flat grind is the best for the kitchen as it does not wander when making thin slices,” he opines. “A convex grind is great for splitting firewood.”
Award-winning American Bladesmith Society master smith Jim Crowell won the 1st Annual BLADE Show World Championship Cutting Competition in 2003 and was inducted into the ABS Hall of Fame in 2016.
“My opinion for the best blade geometry is a full flat grind with a convex edge,” Crowell begins. “This grind will give the smoothest transition from the full thickness of the spine to the cutting edge—anything else is something less.”
Crowell is also very familiar with the Bill Moran appleseed or convex grind, which is based on the Japanese hamaguri or “clamshell” grind.
“Bill Moran did like full convex blade geometry,” Crowell notes. “He ground on a round wheel and meticulously shaped the whole blade to have a convex cross section. I have cut with several of Bill’s knives and they were very sharp and had great geometry.
“The full convex grind performs in an exemplary manner, but I cannot discern any advantage in performance over a full flat grind with a convex edge. You do not just slap a convex edge on a blade. There are a myriad of variables: how thick was the edge when you started the roll? How high or low did you roll it? A short and abrupt roll may shave but will not cut well at all.”
“The flat grind is the best for the kitchen as it does not wander when making thin slices,” opines Bob Dozier, here busy at his shop grinder. (Pat Covert image)
Degrees of Difficulty
Curious as to the degree of difficulty of applying the various grinds, BLADE® asked Brend, Dozier and Crowell which they thought are the most difficult to execute. They provided varied opinions.
“I think whichever one you do the most is easiest, and the one you do the least is hardest,” Crowell notes. “Once upon a time I used to hollow grind a lot, but then I started to cut a lot and it became apparent to me a flat grind would cut better overall for my use. I gradually phased out hollow grinding and now find it difficult as compared to flat grinding.”
Dozier adds pointedly, “I don’t find any of them hard. I think it depends on how you learn to grind at first. A lot of the makers today learned from someone else and stick with the grind they learned.”
Brend ranked the grinds in order of difficulty.
“Hollow-ground knives, in my opinion, are the hardest to grind,” he begins. “You have to control the blade on a wheel to form a perfect symmetrical line. In my opinion you should keep the point thick, and, at the same time, make your edges sharp and thin.
“Flat ground is next after hollow. In my opinion a true flat-ground blade should be finished by hand because the grinding belt will not allow a true flat surface. Convex is the easiest because you have no set lines or pattern when grinding.”
Order of Importance
At the grinder here, Bob Dozier says blade geometry is more crucial in terms of a blade’s cutting performance than the type of steel or how it is heat treated. “The most important is blade geometry,” he notes. “The type of steel and how it is heat treated has nothing to do with how it cuts, only how long it cuts.” (Pat Covert image)
Is blade geometry the most important aspect of a blade’s cutting effectiveness, or is the type of steel or proper heat treating most crucial?
“The most important is blade geometry,” Dozier says. “The type of steel and how it is heat treated has nothing to do with how it cuts, only how long it cuts.”
Crowell differs.
“Heat treat, geometry and steel, in that order,” he opines. “If the heat treat is wrong, the rest will be of little consequence. Proper geometry is next in importance. The steel, although important, is not the determining factor. Of course, you need to have a ‘good’ steel, but it is not the steel that makes the difference. Just because you may have the latest, greatest steel does not mean you will have a superior knife. You have to do it all correctly and in the right order.”
Brend ranks the three differently.
“I think the type of steel is the most important. With proper heat treating you can vary from two-to-four points [on the Rockwell hardness scale] and still cut with the knife because of the type of steel,” he says. “Heat treating is second. With most steels you can be within two points and still cut with the blade. All heat treaters are not the same because of the equipment or their method. Geometry would be the last because if you use the proper steel, you should be able to make any blade work well.”
Flunking Geometry
Uneven grind/plunge lines (right) as seen from the bottom of the blade are one of the more obvious and common things to look for in a bad grind. By contrast, the plunge lines at left are nice and even.
Finally, what makes a bad blade grind?
“What I look for are the grind lines,” Brend explains. “Are the sharp edges of lines rolled? Also, at the back of the blade—where the [grind] line starts—is the steel uneven? I see some hollow grinds where the edges are too thin. If you hit a hard object the blade will chip.”
Opines Dozier: “A poor grind is shown with uneven grind lines, crooked cutting edges or a non-uniform cutting edge.”
“Poor grinding is evidenced by several telltale signs,” Crowell interjects. “Uneven grind/plunge lines as one would look from the bottom of the blade. This is one of the more obvious and common things to look for. Also, the finish on the bottom of the ricasso and choil area is often neglected. You can hold a blade horizontal and look down the flat of the bevel and it should be smooth as glass with no ripples or distortions.”
Jim also notes that on symmetrical patterns such as daggers, look for mirrored-image grinds on both sides of the blade.
One interesting takeaway: The perfect grind may just be determined by how you plan to use your knife—or perhaps you may need two or more knives to cover all the bases.
Michael Burch employed Chad Nichols’ “Stripes” MokuTi for his integral folder. The blade is 1095 carbon steel with hamon and a nail nick. Burch said the Stripes MokuTi works well on larger knives. (photos courtesy of Michael Burch)
In the northern Mississippi town of Blue Springs, in a rural area between Tupelo and the Tennessee border, a company called Chad Nichols Damascus is forging steel that is taking knives to a new level. The company’s owner and namesake, Chad is an easygoing Southerner who created a damascus product called MokuTi that boasts a stunning combination of shapes and colors.
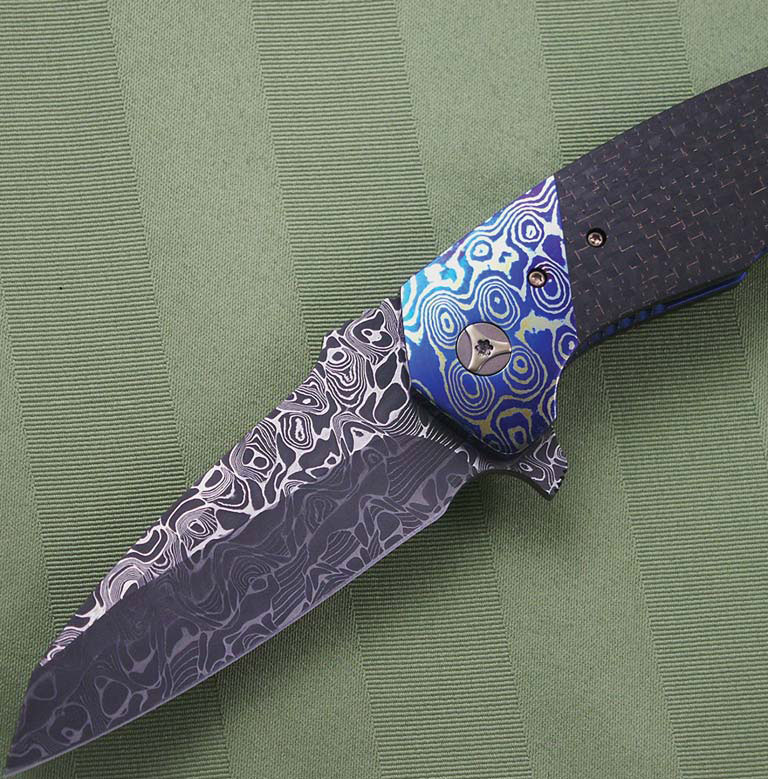
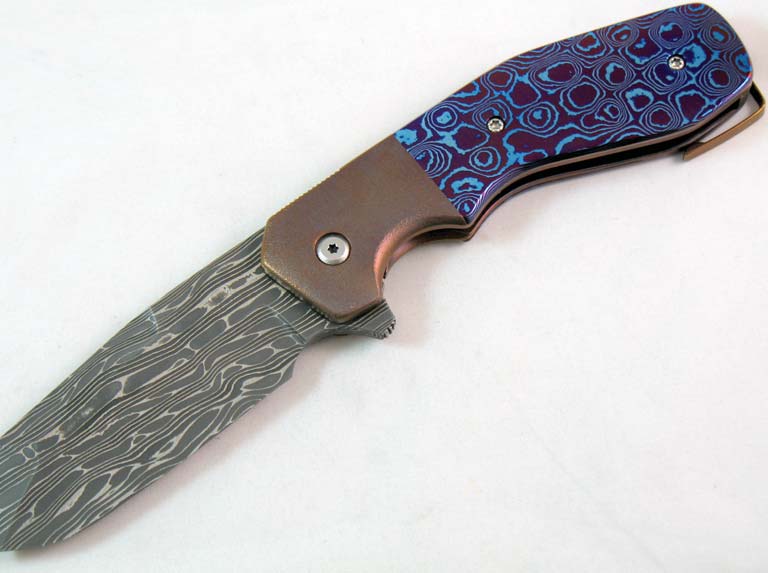
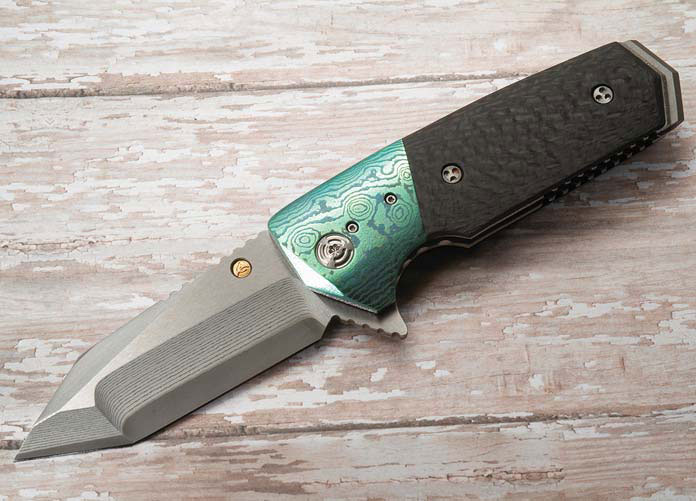
The name explains it perfectly. It is mokume that includes titanium laminates. MokuTi adds an exceptional visual boost to a knife, with swirled or mosaic tones of blue, gold, orange, silver and pink, depending on the composition of the materials used.
In his affable manner, Chad assured that Chad Nichols Damascus did not invent the colorful titanium laminate; the company just came up with a new way to achieve it—which, he noted, was not an easy task.
“We haven’t invented the wheel or anything,” Nichols said of MokuTi. “I don’t have to be the first one doing anything. I just want to be the last one doing it. We run this like a business, not an ego trip.”
Years in the Making
MokuTi is a great way to accent a knife with color. Neil Blackwood does it here for the handle inlay and clip of his Henchman flipper folder. The 4-inch blade is CPM S30V with a two-tone finish. His list price for a similar knife: $1,200. (photo courtesy of Neil Blackwood)
It would figure that something that looks as good as MokuTi would be difficult to produce. Nichols said it took several years to figure out.
“That’s not blowing it out of proportion,” he laughed. “I messed with it for a while, then I just put it away because I kept failing.”
He remembered getting tunnel vision trying to figure out why it was not working.
“You keep doing it and it’s insane,” he said, “because if it didn’t work the first three times and you didn’t do anything different, it’s not going to work the fourth time.”
Through trial and error he was finally able to figure out how to bond titanium with the other metals, but he is understandably tight-lipped about his proprietary secrets.
“I’m not going to tell you how we do it,” he admitted, “but there’s things we do that might seem minute to some people. However, we found those things to be critical.”
He explained a myriad of variables when bonding the layers in presses and rolling mills, including oxygen, heat and surface texture.
“Without getting into too much detail as far as bonding the layers, I’ll just say it’s tricky and it doesn’t always work,” Nichols allowed. “If I don’t make MokuTi for a month or two, I kind of count on the first two tries being crap.”
Peter Carey outfitted his Tension flipper folder with “Crosswalk” MokuTi bolsters and a blade and clip of Nichols’ “Whiplash” stainless damascus. The handle is lightning-strike carbon fiber. Carey’s list price for a similar model: $1,200. (photo courtesy of Peter Carey)
The experimental journey to fruition brought Nichols’ shop down some rocky roads.
“We recently made some MokuTi and threw zirconium in there,” he noted. “We love bonding titanium to other metals, but you just can’t do anything with [titanium and zirconium]. They just won’t bond because I guess the ductility is too different and the metals move at different rates during forging. It was a disaster, so we quit trying.”
It is all part of the ride, he said, and you cannot be scared to “just throw something in there” and see what happens.
Meteorology Matters
Another variable that affects producing MokuTi successfully is the atmosphere. While forging carbon damascus is fairly predictable, Nichols said forging MokuTi is much more complex.
“When you get into stainless and even Mokume, with the copper and brass with the nickel silver in it, and especially with the MokuTi, it gets complicated,” he continued. “What people don’t understand about forging, especially down where I live, is that with humidity of 100 percent is going to get hotter than if it’s 50 percent the next day.”
A Sixth Sense for MokuTi Damascus
Nichols searched for the words to explain his approach. Maybe it is a feeling, maybe it is a sixth sense, and maybe it is just exposure and experience.
“I hate saying this but you just get in tune with what’s going on. It’s like using the word ‘organic.’ I hate it when I have to use that word, but sometimes there’s no other word to describe it,” he lamented. “We made a new pattern a couple weeks ago called ‘Boomerang’ and some guy goes, ‘What’s it like?’ and, between groans, I said, ‘It’s very organic looking.’”
Put a Tie on that Knife
The MokuTi handle of Jon Graham’s GL Razel SS3 Bolsterlock is joined by a blade of Chad Nichols’ Iguana stainless damascus and Graham’s “Tailclip” pocket clip. Closed length: 5 inches. Graham’s list price for a similar piece: $1,400. (photo courtesy of Jon Graham)
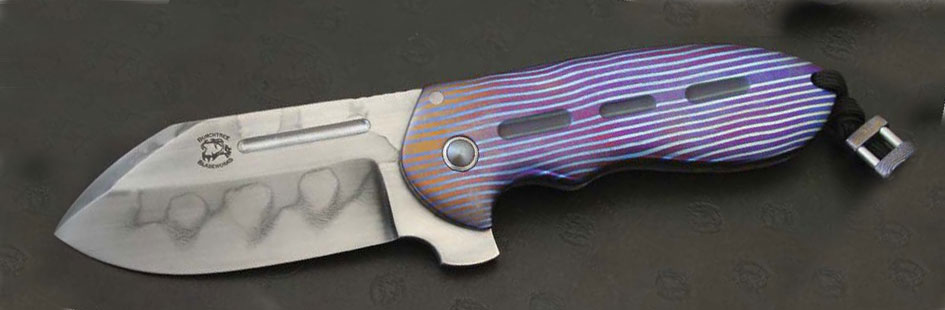
“I’ve used MokuTi on a variety of styles,” said Michael Burch, Missouri knifemaker and owner of Burchtree Blades. “It’s like putting a tie on a knife—it just adds some class.”
Adding MokuTi as an accent is a common way to integrate the material into a knife without breaking the bank. Still, it is not cheap. The more of it the maker adds to the knife, the more it adds to the sale price.
“I charge twice as much for MokuTi bolsters as I would titanium bolsters due to the extra finishing time with polishing and heat coloring,” explained knifemaker Peter Carey. “I use MokuTi on all my folders because it’s strong and has an exotic look.”
Carey said he also uses it as an accent material on his knives, such as for bolsters, pocket clips, back spacers, thumb studs and pivot rings. He said accenting with MokuTi injects some color and flash without overwhelming the knife. A good example of employing MokuTi is as a pivot collar on a stonewashed framelock, Burch added.
The Mini Tank flipper by Allen Elishewitz has MokuTi bolsters and carbon fiber scales. The blade is Takefu Special Steel’s laminated stainless with a VG-10 core. (photo courtesy of Allen Elishewitz)
“It makes for great contrast and can really dress up a user folder,” he observed. “It’s costly but if customers saw what went into making it, it would seem cheap.”
“It appears that everyone likes the material and it usually ends up on my higher-end knives,” Carey said. “Some of my customers ask for it as full scales or for a framelock, so I use it that way also.”
As Carey noted, MokuTi comes from Nichols Damascus as a billet that must be worked to shape and then colored.
“[Chad] usually colors it so you can see the pattern, but that gets ground off when you work it,” Carey said, explaining that it is a surface color that does not go all the way though the material. “When you get it to final shape and finish, you have to heat color or anodize it to the colors you want.”
“The other cool thing about MokuTi is dealing with Chad,” he maintained. “He’s a great guy, a friend, hard working and you can’t beat his customer service.”
Knife kits have helped launch more than a few of the careers of today’s custom knifemakers, and have been well-documented in BLADE® (www.blademag.com) and elsewhere. The competition among knife kit companies continues to be keen and, largely as a result, the variety and quality of the kits has never been better.
The top kits provide most of the components of the folder or sheath knife, including blade, handle materials, pins, springs, bolsters, even glue for the final phase of the construction project. Many knifemaking suppliers offer kits with skill levels ranging from basic to advanced, and shop tool requirements, affordable prices, and even instructions to guide you from start to finish. Blade steels vary from carbon to stainless and damascus options, while handle materials run the gamut from G-10 and other synthetics to various woods, stag or horn.
“We do our own cryogenic blade treating, and that’s an advantage for our kits,” related Lance Reid, manager of Texas Knifemakers Supply. “We have a lot of kits available, and they’re very popular right now because they allow you to express your own artistic ability and influences. LinerLock™, lockback, slip joint and trapper kits are all selling well, and the tools needed for them are generally a belt sander, drill press, buffer and ball-pein hammer.”
The Judge’s Favorite hunter kit (pictured above) is one of the hottest at Texas Knifemakers Supply (TKS). Retailing for $36.45, the kit includes a 4-inch blade of cryogenically treated 6A stainless steel, a Dymondwood™ handle in a choice of more than 30 colors, and 30-minute epoxy to set the knife for use. The Sam Houston Skinner kit has an MSRP of $30.45 and comes complete with a 3 5/8-inch blade of 6A stainless with a slightly dropped point, Dymondwood handle, brass pins, and epoxy.
TKS offers beginner, medium and advanced kits. Beginner kits include premade guards and bolsters, and requirements are simple assembly, grinding and shaping. Medium-skill kits involve the shaping of the guard and bolster, while advanced assembly requires the maker to fabricate the guard and bolster.
BEGINNER TO ADVANCED
Jantz Supply’s latest knife-kit entry is a new line of handles for its U.S.-made pattern blades. The preshaped and contoured handles crafted from G-10, Micarta® and Dymondwood include a variety of textures, and enable enthusiasts at all levels to choose their favorite handle material, color and texture, along with the guards and screws. “Our pattern blades are manufactured from tool steels, including D-2, and stainless steels such as CPM-S30V, 154CM and 440C,” Ken Jantz noted.
By offering fixed-blade kits, Jantz affords beginners an opportunity to learn the basics of knifemaking without the hassle of moving parts and the requirements of close-tolerance fittings. Kit components require only basic tools such as rasps, files and hammers, and the final knife can be completed with hand sanding and finishing.
“Beginners like the kit concept because it provides them with a strong foundation and process for creating a solid, high-quality knife they can be proud of when finished,” Jantz said. “Advanced [enthusiasts] like the ability to customize basic knife kits, showing off their personal creativity and ability to take something standard to an entirely different level. In the hands of someone who knows what they are doing, a kit knife can be truly special.”
Jantz provides beginners and advanced enthusiasts alike many customizable components, unusual materials and opportunities for personal inspiration in the creation and personalization of their fixed kit blades.
When asked about his company’s most recent improvements in folder kits, Jantz stated the availability of the thrust ball bearing in 440C stainless designed by custom maker Gustavo T. Cecchini of GTC Knives brings a new level of quality customization options to knife kits. The bearings are built to provide motion with minimal friction and a smoother action.
PERIOD ORIENTED
“Our knife kits are oriented toward the long hunter and pre-1840 style, and we have only fixed-blade kits,” advised Rex Reddick of Texas-based Crazy Crow Trading Post. “We sell a lot of knifemaking supplies and have been importing blades from Solingen, Germany, since about 1980.
“Our Rocky Mountain Drop Point in either carbon or stainless steel comes with black walnut handle scales and brass rods for rivets,” Rex continued. “It sells for $17.95 and $19.95, depending on the blade steel.”
Other kits of choice from Crazy Crow include the Green River series, which features seven different combinations ranging in manufacturer’s suggested retail prices (MSRPs) of $14.95 to $20. The bowie kit retails for $56 and includes a 6-inch carbon steel Solingen blade and curly maple handle material. Patch knife kits for muzzleloader enthusiasts retail for $14.95.
“We are putting bone scales in some of the kits now,” Reddick said, “and the kits are new this year and also available with curly maple or walnut. The kits are pretty simple. Basically, you drill the scales and glue them with epoxy and hammer the rivets in, drilling the countersink. You need basic tools to put them together, something like a coping saw to saw out the blade blanks. The handle scales come in rectangular form, so a rasp might be needed to file them down if you want to put some taper on the edges.”
DRIVING KIT SALES
At Knifekits.com, the designs of Darrel Ralph are driving kit sales, and the company’s hottest folder going is the SS 2.0 Super Squirt (MSRP: $39.95). “This manual button-lock folder can be built as a standard manual release or converted to automatic by simple modification,” explained Steven Andrews, Knifekits.com general manager. “These are very popular for kit builders who like small folders or who reside in automatic-legal areas, especially those who are engaged in jobs that permit or require automatic carry.”
The AUS8 Super Squirt blade is 2 inches long and available in a black or satin finish. Handle scales are black G-10 or carbon fiber but are not included in the kit. They are premilled and require a simple finish option with basic handwork. The hottest fixed-blade kit from Knifekits.com is the Clip Point Skinner (MSRP: $17.95) available with a stainless or brass guard. The hollow-ground, satin-finished blade is AUS8 stainless. Handle material is not included.
“Both knives are skill level 1-to-2 for basic construction,” Andrews added. “We would not hesitate to recommend these kits to entry-level builders as well as advanced builders. The fit, finish and precision on these models are unsurpassed in their genre. For the basic build on the SS 2.0 folder kit, the No. 6 and No. 8 Torx wrench tools and medium or fine sandpaper are the only tools required. For a basic build on the fixed blade, a peining hammer, a drill bit for creating the handle recess, and sanding materials are sufficient. Epoxy is also recommended for secure, gap-free handle mounting.”—by Mike Haskew
Editor’s note: In the case of Knifekits.com’s Super Squirt, which can be converted to an automatic by simple modification, be sure to check the laws in your area concerning automatic knives.
For more on the latest knives, knife legislation, knifemaking instruction, knife trends, knifemakers, what knives to buy and where and much more, subscribe to BLADE® Magazine, the World’s No. 1 Knife Publication. Click on http://www.shopblade.com/blade-magazine-one-year-subscription-us/?r+ssfb070412 for more information.