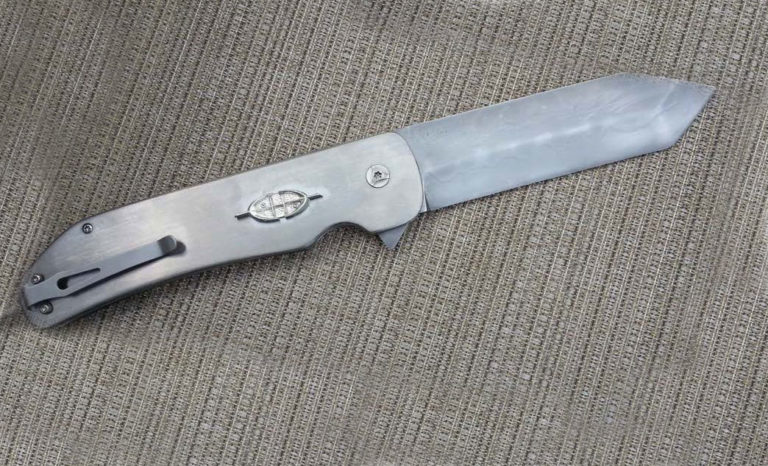
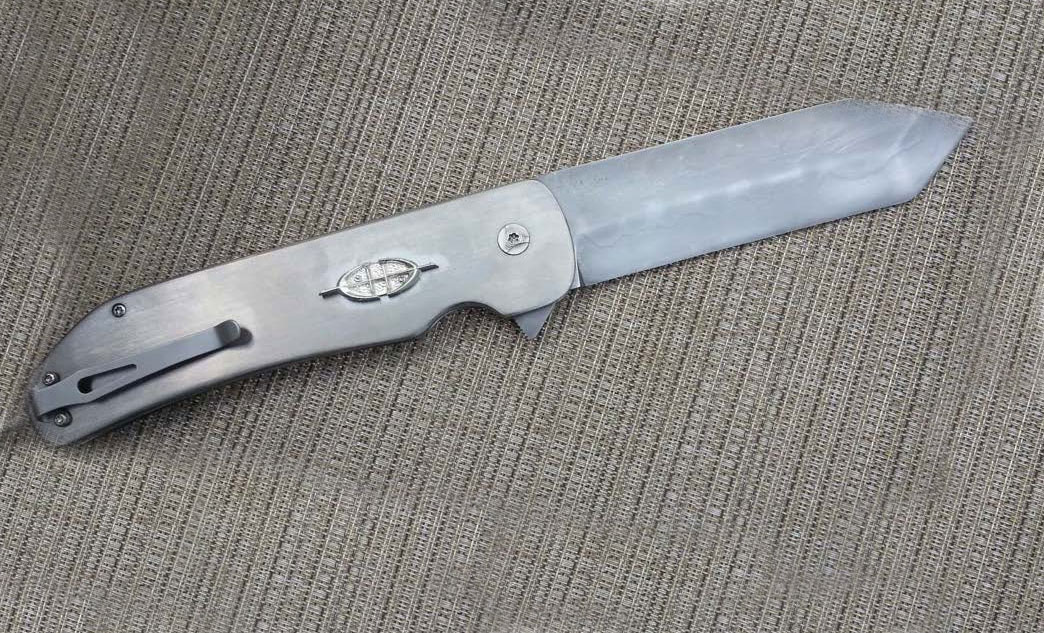
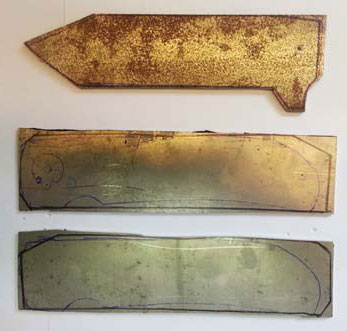
Knifemaking is the building of a knife, which includes the blade, handle and other accouterments. Blades are made by either removing metal from a steel blank via a grinder – known as stock removal – and the forging to shape of hot steel into a blade in the process known as bladesmithing. Other parts, including bolsters, guards, pommels, etc., are needed to complete the finished knife.
What is your preferd method of stabilizing wood for handle’s & or sheaths?
Dallas Dreger:
2 methods I use,,,After completeing the knife and the handle is sanded to the point that I am stisfied,,,I sink it into a can of mixed boiled linseed oil and turpintine,,,50/50 mix for a few day. Thes after removing,,polish off the till dry,,,wait another day for it to dry and you will find there is a light coat of oil again that is sticky,,polish this off and a light buff wiht a clean rag and it sould be stbilized for a long time. This doesnt make a real shiney finish but it does harden a fair ammount and still has a natural wood feel to it. This is the meathod I like for everyday working knnives. 2 when the knife is allmost finished and rthe handle is sanded to a 220 grit,,sink into a jar or can of minwax wood hardener for a few days. ,,remove and wipe clean. A day later you can sand to a 400 grit or higher. This will take more of a shine when you polish on a buffing wheel but not as good as a vacume stabilized handles. I like the first method best but this does make a little bit harder handle if thats what you are looking for. I dont care for vacume stablized handle slabs s I have had a few in teh past cack or chip on me but I do realize some folks like that mirror shine to the complete knife. For a hard use working knife use the first method,,,for a lighter duty knife where a light shine is desired,,,use method 2 and for teh high shine,,,send your handle material way to become professionly stabalized. unless you make a proper stabilizing setup
My preferred method is using minwax wood hardner.On plain slabs(this will darken the wood,about as much as putting a bit of spit on the wood)I will put slabs in the wood hardener.A shallow dish works fine. I then use a foodsaver to vacume solution into the wood. I like to leave the wood under vacume for a couple of hours then, revacume the whole shabang once more & leave overnight. After removing the vacume bag the next day,The wood hardner will dry in about 2 hours. I like to give it 24 hours to dry to be on the safe side.The food saver will not have enough vacume pressure to do wood blocks,only handle slabs. I will on thicker sections (wood blocks)|work the wood to about the almost finished size then run it through the vacume of the foodsaver. then after all is done I will give a last rubbed coat of the hardner before final sanding & buffing. I have also used this process with Watco danish oil with good success.
This thread is from a previous version of blademag.com.
Here’s a question from a BLADE reader:
I’ve been having trouble getting a mirror finish on my blades, whether it be carbon or stainless. I can get them mostly polished, but it seems I always have sanding scratches after hand sanding that won’t buff out. I change direction with each grit sanding to 2,000 grit, and everything looks fine but when I finish buffing, the center always seems to be cloudy looking.
PatrickKnives:
Try to buff a couple of times early in the sanding, this will make the scratches not removed by the previous grit easier to see. If your last grit was 400 at a diagonal you would not expect to see any scratches parallel with the blade. You can also mix up your angle so you can determine the grit of the scratches. If I am getting clouds I clean my wheel and apply fresh compound and finish the buff with a lighter touch.
David F Pitt:
Isand my blades wearing a magnafocaser and floresent light.I change directions with each grit.I will finish at 800grit I polish with matchless white,green chromeK&G Green and finish with matchlees pink . You can check out my knives at http://bearpawcustoms.blademakers.com DAVE
I use 3 lights,so that I get a little light from different directions. It helps me see the scratches better. At first I will cover the blade with a black felt tip pen. Some times I do this twice,just to make sure that I got all the scratches at that grit. I use the felt tip on say 120 grt,then on 220 grt. It helps with the “big” scratches. I then go to the next grit say 320 & I sand in 2 different directions. Then I slowly move on to the next grits. Buffing will help as per PatrickKnives.I then do what David Pitt reccomends Buffing with white,K&G Green, then finish with noscratch pink.
Jeffery E. Wagner:
I would also recommend you finish with pink. It is available through, Jantz Supply.
Editor’s note: “Micarta” has become the Kleenex of knife handles. It’s used so generically that it’s easy to lose sight of the fact that the word refers to something specific.
That’s why BLADE is bringing you this quick rundown of Micarta® from Kevin Brainard, a business development manager and 45-year veteran of Norplex, the company that owns Micarta® (the real deal). You may have caught the company at BLADE Show, where it runs the UltreX booth.
The goal of this piece is for knifemakers and knife collectors to become more aware of what is and isn’t actually Micarta®.
Hint: If it didn’t come from Norplex, it’s not genuine Micarta®!
by Kevin Brainard
1 – Micarta® is a Registered Trademark of Norplex/Micarta
We own several registrations for our Micarta® mark around the world, including U.S. Trademark Registration Nos. 0096374 (issued in 1914), 0320374 (issued in 1934), and 0324365 (issued in 1935), covering our high-quality industrial laminates.
These laminates have been offered by Norplex-Micarta and our predecessors since at least as early as 1912. As a result of the significant sales, promotion, and widespread use of Micarta® brand laminates, our mark is widely recognized around the world as a designation of the source of our products, which are used in a variety of applications ranging from electrical insulation to gun and knife handles.
In addition to our common law rights in the Micarta® mark, our incontestable federal trademark registrations constitute conclusive evidence of the validity of the mark, the registration thereof, and of our ownership and exclusive right to use Micarta® in connection with these products.
2 – Micarta® is Made in the USA
Available in several different colors, combinations, and surface treatments, UltreX™
paper and cotton phenolic materials use the original production methods of Westinghouse,
updated with today’s process and environmental controls.
And unlike some of the other “micarta” available in the market, UltreX™ Micarta® is produced in the USA in Postville, Iowa.
3 – G-10 is Not Micarta®
The Spyderco Persistence sports G-10 handles.
Micarta® is made with a cloth or paper substrate and coated with phenolic or melamine resin. G-10 is woven fiberglass and coated with epoxy resin.
The processes to make both materials are very similar in the fact that both are consolidated under heat and pressure to make the final laminate. There is a chemical reaction that is called polymerization that bonds the layers together into a high-pressure thermoset laminate.
According to the trademarks, G-10 is not Micarta®.
4 – “Micarta” Refers to a Specific Product
Like so many other trade names, Micarta® name is used like Kleenex is for facial tissue. Instead of calling it a “thermoset laminate” it is easier to call it Micarta®. This is true in the knife scales, handles and gun grip markets. We have similar issues with the Micarta® name in our other markets.
5 – Micarta® Goes Back to 1912
It was originally designed to be used as electrical insulation back in 1912 by George Westinghouse using a phenolic resin developed by Leo Baekeland called Bakelite.
Editor’s note: This article is the conclusion toMake a Bowie Knife in 10 Steps. Read that one first if you’re interested in making a complete knife from start to finish.
1) Choose the Material
For handle material, I chose olive drab G-10 with a simple red liner for a little flair. The choice for your handle material is up to you.
While the material used, the rasp, is classic and traditional, the handle material will be more modern. I’ve chosen olive drab G-10 with a simple red liner for a little flair. Any material you like would be fine. It’s your knife and the handle is the easiest place to express your personal taste.
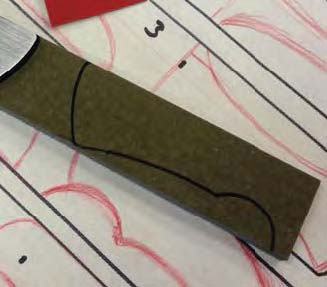
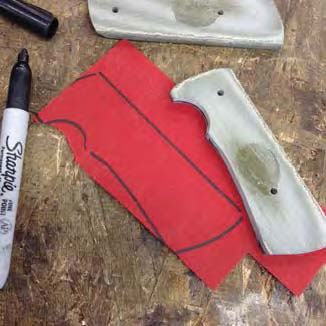
2) Lay Out the Scales
Trace the handle profile. I use a black magic marker since the G-10 won’t absorb the ink.
Now that we have our materials it’s time to start laying out our scales. Trace the handle profile. I use a black magic marker since the G-10 won’t absorb the ink.
If you use a natural or unstabilized material, a pencil might be a better choice to avoid staining or permanent marks.
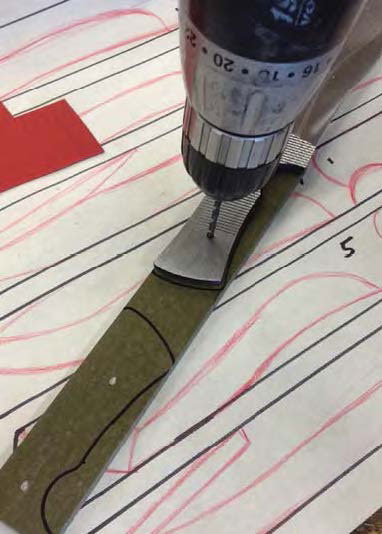
3) Mark the Holes
To help ensure your holes will line up, make a light mark with a hand drill and finish in a drill press to help ensure the holes are square and true.
Mark the holes you need to drill on one side of the pair of scales. To help ensure your holes will line up, make a light mark with a hand drill and finish in a drill press to help ensure the holes are square and true.
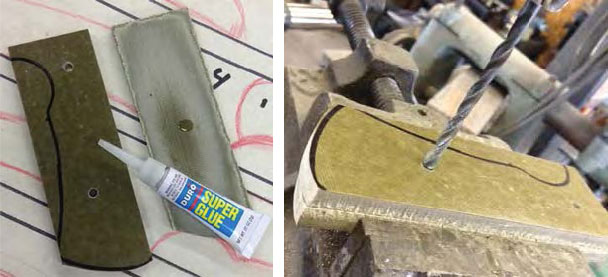
4) Sand, Drill and Glue
A simple light sanding will flatten the scales and rough up the surface for a better bond. Drill the holes in one scale, place a drop of Super Glue® on the flattened inside surface, and glue the two scales together.
One important thing to remember when doing anything is to never assume. While the handle scales look flat they in fact are not. A simple light sanding will flatten them and rough up the surface for a better bond.
Using the drill press I drill the holes in one scale, place a drop of Super Glue® on the flattened inside surface, and glue the two scales together. This ensures the scales will stay perfectly matched up as you drill your holes and do the rough shaping.
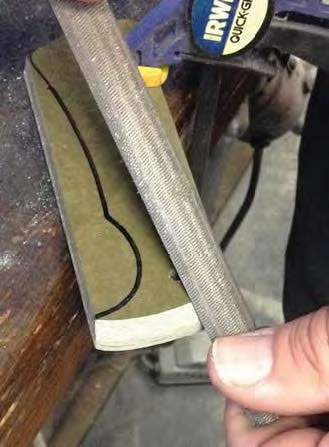
5) Profile the Scales
Profile the front of the scales while they are attached by the light glue bond.
Another important step is to profile the front of the scales while they are attached by the light glue bond. First, it is very difficult to clean up the front once it is attached to the blade without scuffing and scratching the blade. Second, it ensures that the faces of the scales will match up just like the holes do.
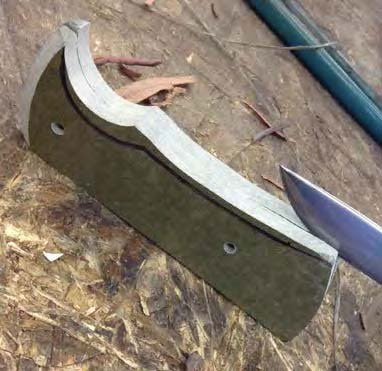
6) Pop them Apart
Place the edge of a blade on the seam between the scales. A light tap will pop them apart easily and you are ready to add any spacer material if so desired.
Once the holes are drilled and the rough shaping is complete, simply place the edge of your everyday carry blade on the seam between the scales. A light tap will pop them apart easily and you are ready to add any spacer material if so desired.
7) Trace, Cut and Glue
Trace the handle shape onto the spacer material, cut to rough shape and then glue to the inside of the scales.
Trace the handle shape onto the spacer material, cut to rough shape and then glue to the inside of the scales. Super Glue or epoxy is fine for this. Different materials will need different bonding agents. I use Super Glue here because the materials are very non-absorbent. If you choose antler or unstabilized wood, an epoxy is probably a better choice.
Once the material dries, clean up the edges and drill through to match the existing pin holes. A hand drill is fine for this as the holes in the scales will guide the bit.
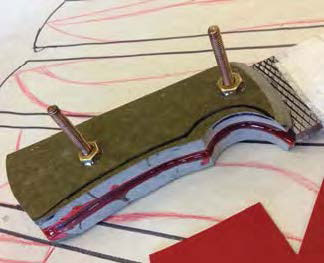
8) Assembly
Now you’re ready for assembly. For pins the author uses two simple brass bolts. Use the pins themselves to clamp the scales in place by simply adding a nut and snugging it down after applying epoxy.
Now you’re ready for assembly. I’m going semi traditional and keeping the build simple. For pins I use two simple brass bolts. The advantage is I can use the pins themselves to clamp the scales in place by simple adding a nut and snugging it down after applying epoxy.
Also, the threads on the bolt help add an extra mechanical bond to the handle assembly.
Once you’ve checked the fit of the parts, give them a good spray with brake cleaner to be sure they are free of dirt and oil and to ensure a clean bonding surface.
9) Get the Pins Flush
Clean off the head of the bolt and then extra length of bolt body on the nut side, and your pins will be flush.
After the epoxy dries, take your angle grinder or whatever you have been using—a file or hacksaw will do as well—and clean off the head of the bolt and the extra length of bolt body on the nut side, and your pins will be flush. When doing this be sure to work slowly! Brass heats up very quickly and that can compromise the bond of the adhesive if you’re using power tools.
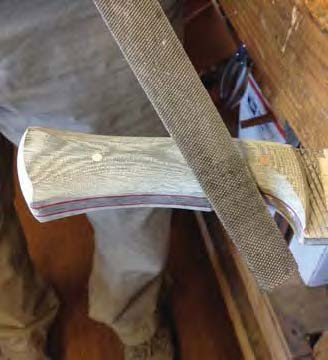
10) Clean and Shape
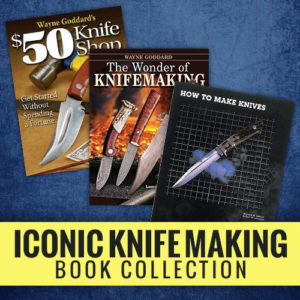
Jump into the rich tradition of knifemaking with this collection of essential books from BLADE. You’ll save a bundle with this bundle!
You’re almost to the finish line. All that’s left is to clean up your handle and shape it to fit your hand. When you do this, again, take your time.
Once you remove any material, you can’t put it back. Go slowly and check the fit often till it fits like a glove, an extension of your hand.
Do some cutting and chopping with the knife—this will let you know what, where and how much material you need to remove.
Work through your sandpaper grits to whatever final finish you desire and voila! Your personal vision of knife perfection is in your hand.
I hope you enjoyed this journey of steel as much as I have. Now get out there and put that knife to work!
Nitinol, also referred to as “Ni-Ti-Nol,” was first discovered back in 1959 by scientists William Buehler and Frederic Wang at the Naval Ordnance Laboratory. The Ni-Ti-Nol acronym stands for “Nickel-Titanium-Naval Ordnance Laboratory.”
Beuhler and Wang were searching for a super-elastic alloy for missile nose cones that would be pliable at extreme heat, yet return to its original shape after cooling. Their efforts were a success, but because the incredibly tough alloy was so difficult to process and machine, it wasn’t used until much later.
Knifemaking Discovers Nitinol a Half-Century Later
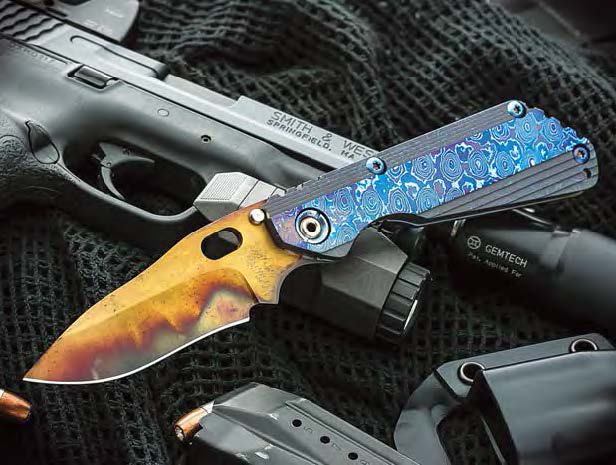
Duane Dwyer of Strider Knives was the main force behind SM-100 (HIPTiNite), and his signed custom Strider MT2 showcases a brilliantly heat-treated SM-100 blade mated to machined carbon fiber handle scales. (Brady Miller image)
Custom knifemaker Duane Dwyer of Strider Knives became interested in Nitinol back in 2005 while searching for a super hard metal alloy that would not rust. He approached metallurgist and friend Scott Devanna, vice president of technology at SB Specialty Metals, and inquired about the possibility of producing Nitinol using the particle metallurgy process, which had never been done.
Shortly afterwards Devanna introduced Dwyer to Eric Bono, a metallurgist and knifemaker who also had an interest in the alloy, and the three men began to explore the possibilities of incorporating the alloy into knives.
Nitinol Becomes SM-100 (HIPTiNite)
Duane Dwyer of Strider Knives was the main force behind SM-100 (HIPTiNite), and his signed custom Strider MT2 showcases a brilliantly heat-treated SM-100 blade mated to machined carbon fiber handle scales. (Brady Miller image)
With his metallurgical knowledge and experience, Bono developed a working, powdered metal version of the alloy in 2006, which the partners dubbed “SM-100.” It took several more years to refine the alloy and processes, and in 2009, Bono and business partner Fred Yolton formed a company, Summit Metals LLC, to produce SM-100.
Since that time, SM-100 (60 percent nickel and 40 percent titanium), which the company markets under the name “HIPTiNite,” has garnered interest not only in the knife industry, but also by NASA and the Formula 1 racing industry.
Properties of SM-100
The SM-100 brand of Nitinol, like its forerunner, is extremely tough. While a typical sanding belt can be used to grind several typical, mono-steel knife blades, it requires several belts, in many cases six or more, for the same process using the SM-100 alloy.
Made and sold in small quantities, the cost of SM-100 isn’t cheap. Add to that the cost of belts and additional time to shape and grind the material, and the cost per knife skyrockets.
On the positive side, SM-100 is noncorrosive, and while stainless steel will rust, Devanna says you can throw an SM-100 knife into saltwater for 50 years without the material corroding.
An Explosion of Coloring
Bono discovered during his development of SM-100 that it can be heat colored into an exquisite rainbow of colors. Due to the titanium content, SM-100 oxidizes into a blaze of bright hues just like other alloys incorporating titanium, but the process of achieving the color effects is quite different.
Bono confides that the magic happens during the heat-treating process, in which he allows small pockets of air to leak onto the surface of the knife. Prior to heat treating, the blades are wrapped in foil and small holes are punched into the wrapping.
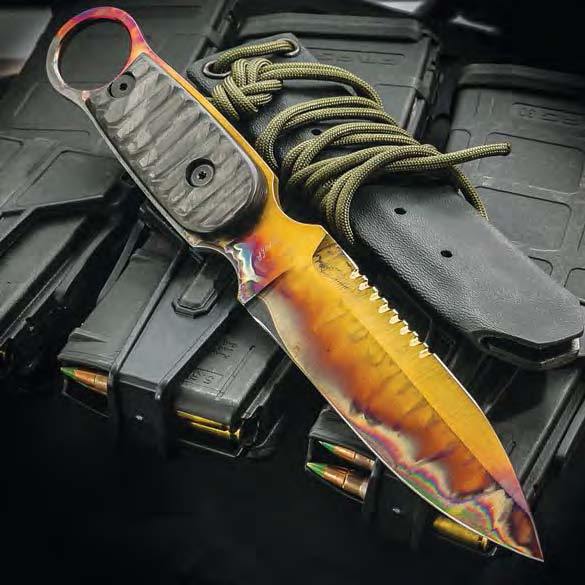
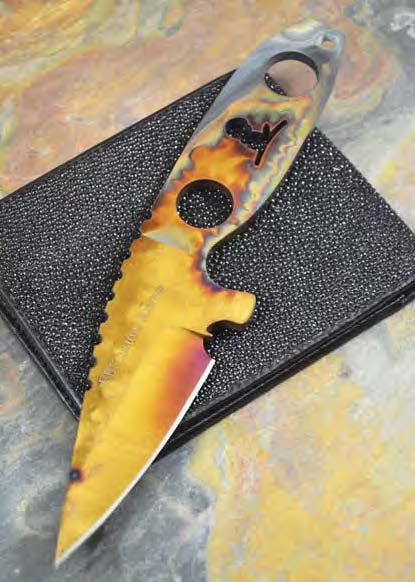
When heat treated, different colors occur depending on the oxygen content of certain areas of the blade material as the surface oxidizes. The end result is the explosion of color on the SM-100 blades.
The price for bright, eye-popping colors doesn’t come cheap, but then new innovations rarely do.
The author’s finished flipper folder—sanded, polished and ready to go!
Folder making has advanced so much in the past few years. Now, flipper folders are the hot new ticket.
Following is an overview of the steps in making a modern flipper by hand.
Draw It Up
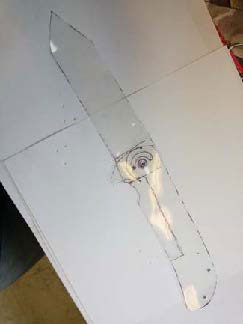
The parts are all cut out. The holes in one handle side (center) are center punched and ready to drill.Design the knife parts on clear plastic so you can see where to locate everything.
To begin, draw designs on paper and transfer them to clear plastic. Cut out the designs of the blade and handle from the clear plastic. Overlap the tang of the blade on the handle and insert a needle through both pieces where the pivot pin will be.
From there, fold the blade onto the handle and adjust the design as needed.
Next, trace around the plastic handle on a titanium sheet. I use titanium in a 1/8-inch size for the top part of the handle and .070 inch for the two bottom pieces. Trace the blade and cut it out.
Know the Drill
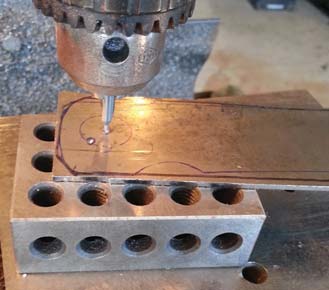
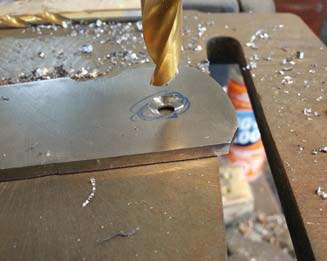
Counter sink all the holes a small amount before drilling them with the 1/16-inch drill bit.
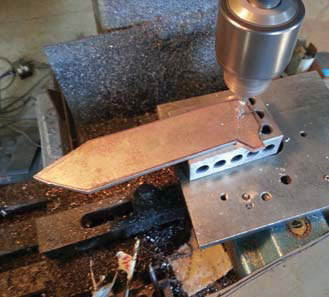
Making folders is mostly about drilling holes. Drill out one plate of titanium with 1/16-inch holes. Place another plate of titanium underneath the drilled-out plate and clamp the two together. Turn it over and drill through the second plate.
Starting with the pivot hole, place a ½x1/16-inch hardened dowel pin in it so the two plates won’t move. Next, drill the end of the handle and put a pin in it.
Continue drilling, clamping and adding pins where your stand-offs go. Each time you drill a hole, take the plates apart and de-burr. A hand drill with a four-flute counter-sink is handy for de-burring.
Start drilling all the holes with a 1/16-inch drill bit.
This flipper will have an internal stop pin, so don’t drill all the way through the top plate. However, do drill through the bottom plate—the .070-inch one. From here, affix the plates with 1/16-inch dowel pins. Clamp, remove the pivot pin, and drill and ream to 3/16 inch for the pivot pin. De-burr and reassemble. Drill and ream a 1/8-inch stop pin.
CAUTION: Do not go all the way through the top 1/8-inch plate! Countersink the outside plates for the 2-56 screw heads. I use a #20 drill bit for this.
Pivot, Washers & Pins
Mill the slot for the stop pin.
Now it’s time to countersink the two pivot screws. Different types of spacers and stand-offs can be used on a folder. For this flipper I used ones with shoulders from Knifekits.com. Normally I use custom-made stand-offs from Sheffield Knifemakers Supply. The shouldered step-down stand-offs prevent any unwanted movement in the blade.
I open up the holes for the stand-offs to fit in with a 1/8-inch reamer. Actually, I use a reamer .001 inch larger, so it is .126 inch.
The cool new thing with folders is pivot washers with ball bearings. There are many different types from which to choose. Michael Burch recommended washers from Jantz Supply to me at BLADE Show.
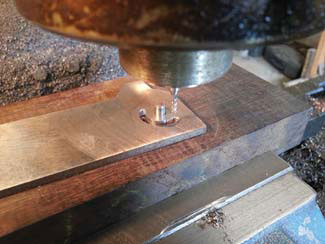
Countersink the pivot screws.
You have to sink the washers down into the scales a bit. I use a 3/8-inch, four-fluted end mill to do this step. First, I index a 3/16-inch end mill into a hole on a plate of steel held in a mill vise. I lock down my table and take out the 3/16-inch end mill and put in the 3/8-inch one using a dial indicator to show how far down I am drilling.
Most tactical folders are going pretty thick with washers .020-to-.040-inch on each side of the blade. I sink the washers down so they and the blade are the same thickness as the stand-offs. You want the space between the blade and washer to be equal to the space between the stand-off s or spacer material. Drill and ream a 3/16-inch pivot hole in the blade. Mill a half-moon slot for the 1/8-inch stop pin.
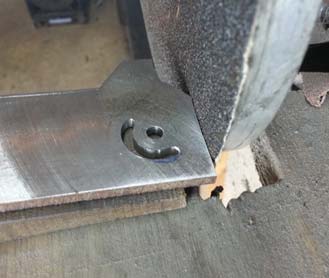
Many makers put the pin in the handle at about the 7 o’clock position when open. Grind the pivot and stop pins down to the proper length. (Author’s note: Grind the pivot pin so it is not exposed past the top of the countersunk hole of the pivot screw. Grind the stop pin so it floats between the two scales.) Grind the 2-56 screws down so they don’t touch each other when they’re screwed into the stand-offs.
Profile the blade and grind the tang at a 7-degree angle. I use a 7-degree block of Micarta® held up against my disc grinder for a guide.
Lock & Detent
Grind the tang to fit the lock.
Now it’s time to cut the lock. Place the blade on the bottom liner with the pivot and stop pins in place. Open the blade and scribe a line with an X-acto™ Knife behind the tang onto the liner. Draw a line 3 inches long with a marker down the scale. Clamp in the mill, and, using a slitting saw, cut the 3-inch length. Use a band saw to cut the short face, which will be the lock. Using a cut-off -wheel attachment in a Dremel® Tool, clean up the end of the lock.
On a locking-liner or flipper folder, the lock is made by bending a tab of the titanium liner over so it engages with the end of the tang of the blade. The end of this tab must be coated with carbide. The machine that does this is a little hand-held micro welder and is called a carburizer. Simply run the rod onto the end of the titanium lock and it welds a coating of carbide onto the titanium. This produces a smoother action on the folder.
You can also flame harden the lock by heating it until it turns orange. In order to let the lockbar bend, grind in a .020-inch dent with a ¾-inch wheel at the other end of the lock.
It’s time to drill holes in the lock and blade for the 1/16-inch detent ball. Center punch a hole in the middle of the lock. Drill through with a #54 drill bit.
Close the folder and clamp it closed. Drill through the same hole as the liner into the blade about .060-inch deep. The #54 drill bit is .053 inch. You can also use a .054- or .055-inch drill bit depending on how you want to tune your folder. Grind, heat treat and polish the blade. Press the 1/16-inch ball bearing into the lock. The height left remaining of the ball bearing should equal the thickness of the washer.
Bend the lock over to about the middle of the folder. Now grind the tang at 7 degrees on a disc grinder until the lock starts to grab. You can assemble the folder, hold it up to the light and push the lock away from the knife to see how much more you have to grind the tang. Go slow and grind just a little before checking the lock. Drill and tap the scale for the pocket clip.
There are a few things to be careful of when making a knife of hidden-tang construction.
The Blade and Tang Both Need to be Straight
First, make sure that your tang and blade are straight. If the tang is tapered, it must be evenly tapered on both sides. The centerline of the tang must be straight to the centerline of the blade.
If the tang is warped a little to the right or left of the blade, or unevenly tapered, then you are not yet ready to fit either the guard or the handle. Go back to the forge or grinder and make your corrections to get things straight right from the start.
A limited amount of “fudging” can be done while gluing the handle to compensate for a tang that is not 100 percent straight and center. To repeat, in my opinion, it is best to correct things right from the start.
Fitting the Guard
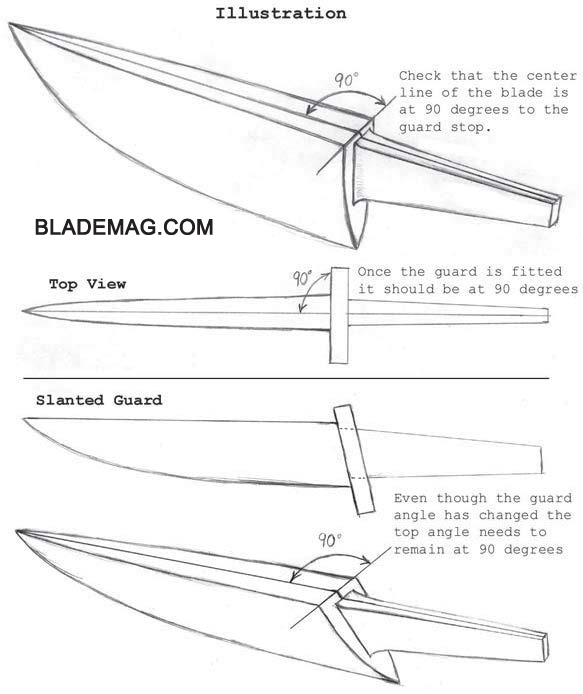
After making sure your tang is not going off to the left or right, go ahead and fit your guard. Take your time! The guard must be at 90 degrees from the center-line of the blade and tang, even if you are making a knife with a slanted guard.
Attaching the Handle
Now you can start fitting your handle. Fit the handle to both the guard and the tang as you normally do. If you do this, the handle will be straight to the blade.
Most often I will not cut the handle material in half when making a hidden-tang knife. I will usually use a solid block of wood or a piece of stag.
First, I drill a couple of starter holes in the end where the tang will be inserted. The thickness of the drill bit will depend on the thickness of the tang. I then file the hole out to fit the tang.
It is more important to fit the handle material to the properly fitted guard than it is to fit it tightly to the tang. This does not mean that the fit should be sloppy, just that it is not necessary to make it that tight. Besides, you need to leave some room in between the tang and handle for the glue to be effective and have a strong bond.
With either of these methods, if the blade and tang are straight and the guard is at 90 degrees to the centerline of the blade and tang, then the handle will have to follow.