

Knifemaking

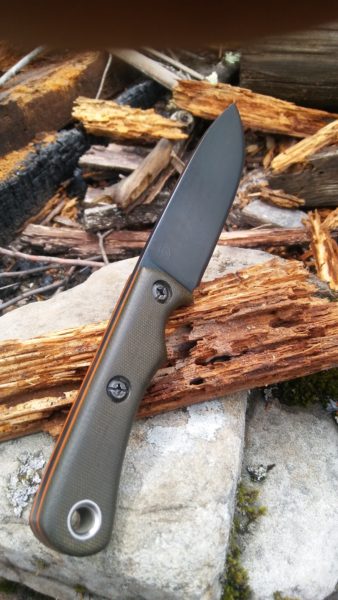
Knifemaking is the building of a knife, which includes the blade, handle and other accouterments. Blades are made by either removing metal from a steel blank via a grinder – known as stock removal – and the forging to shape of hot steel into a blade in the process known as bladesmithing. Other parts, including bolsters, guards, pommels, etc., are needed to complete the finished knife.

Featured Knives – – Knife Collecting – – Tactical Knives – – Survival Knives

How to Forge Damascus

2

Today there seems to be a damascus maker on every corner, and the opportunity to learn to forge damascus is available to almost anyone. In 2005, the American Bladesmith Society slated seven damascus classes at the Bill Moran School of Bladesmithing. The Sierra Forge and Fire School held several classes, one taught by yours truly. There are numerous “hammer-ins” around the country and most have forging damascus on the agenda.
how to forge damascus steel
Learn more here.

Be warned that forging damascus is addictive. I once heard Daryl Meier, who I consider the greatest modern maker of damascus steel, say, “Making damascus steel is a disease for which there is no cure.”

In my own shop, I try to keep things simple. By eliminating as many variables as possible, I am successful at making good forge welds. I have developed a routine that I go through with each forge weld, and by not altering what I know works, I’m confident that my welds are going to turn out good.

First in the process of forging damascus is the selection of materials to forge. This is an area that I feel strongly about and I recommend 1084 and 15N20 as the steels to combine when forging damascus. Devin Thomas suggested these materials to me almost 10 years ago and I feel they have been instrumental in my success. First, 1084 is simple steel with .84 percent carbon and .9 percent manganese. The manganese defines it as deep-hardening steel and turns it darker after etching, allowing for more contrast with the lighter 15N20.

As for 15N20, it is basically 1075 with 2-to-3 percent nickel, which results in extra toughness and gives it the quality of resisting etching, resulting in a silver layer almost as bright as pure nickel. This combination of materials welds easily and can be manipulated extensively. Blades made of 1084 and 15N20, if heat-treated properly, cut extremely well and are tougher than nails.

As with my philosophy on knifemaking, I like my forge to be simple—one burner with a small blower to provide air. The forge must be capable of reaching 2,300 degrees Fahrenheit, which is no problem with a properly regulated propane forge.

I use ceramic fiber insulation in my welding forge, which is coated with refractory cement to help resist flux and also to protect the ceramic fiber from damage. Cast-able refractories work well for insulation also. They take longer to heat up, but hold the heat well and shorten the re-heating time of the billet during the forging process. There are many good forge designs out there and my advice is to find one you like and buy or copy it.

For about 12 years I have been using a hydraulic press to make damascus. The hydraulic press has several advantages over a power hammer. For the beginner, the press is much easier to control, and dies can be made for the press that encapsulate the entire billet, making the forge weld much easier. For those with less than understanding neighbors, the press is quieter than a power hammer.

The ability to change dies quickly can be handy at times. The press I currently use was made by Jeff Carlisle of Great Falls, Mont. I have employed a good number of presses over the years and have not found one that I like better. Dr. Jim Batson sells plans for a press similar to the one that Carlisle markets. If you decide to purchase or build a press, I would recommend that it be at least 20 tons and have a good quick-change die set up.

Power hammers embody the traditional blade smith tool and have been used to make tons of damascus. I have used hammers ranging in weight from 25 pounds to 500 pounds at hammer-ins and friends’ shops over the years. Hammers are more fun to run than a press once you get the hang of them. They also distort the patterns or figures in steel billets less often if the operators have good control of them. Bars can be drawn down more quickly with hammers than with presses, and power hammers tend to knock forge scale off rather than forge it into the billets as presses will do.

Whether you choose a press or a power hammer, remember these machines can be dangerous. Combine all the mechanical power with steel that is 2,300 degrees and serious injuries can occur. Always think safety first when operating a press or power hammer.

In preparing a billet for the first forge weld, I stack alternating layers of 1084 and 15N20 to get the desired number of layers in the billet. This may be as little as three or as many as 25 layers for the initial weld. The layer count is tailored to get the desired effect in the finished blade.

I always keep the thicker of the two materials on the top and bottom of the billet, which helps to hold the heat and aids in decreasing warp as the billet comes up to welding temperature. The 1084 comes with light mill scale, which I do not clean off, and 15N20, as I buy it, has no scale and is used as-is.

After the initial forge weld, the billet is reheated and drawn out into a rectangular bar. The size of this bar is dependent on how many layers are desired in the finished billet and the finished size. The bar is then ground clean of forge scale on the surfaces that will be welded during the second sequence. The bar can be hot-cut and folded onto itself during the drawing out process to double the layer count. I have had better success with the grinding and cutting process, but use whichever works for you.

how to forge damascus steel
Don’t stop reading. Learn more – and see pictures of this process – in this download from BLADE.

The second weld will progress just like the first, and the number of layers will dictate whether a third, or more, welding sequences are necessary.

These forge welds can be accomplished by using two different methods, namely welding with flux, referred to as a wet weld, and welding without flux, which is a dry weld.

The steps to be followed for a wet weld are:

1 Start with a 19-layer billet consisting of 10 layers of 1/4-inch-by-1-1/2 inch-by-6-inch 1080, and nine layers of 1/2-inch-by-1-1/2-inch-by-6-inch 15N20, which are stacked in alternating layers with the thickest material on the top and bottom of the stack;

2 Clamp and weld one end and then weld a handle on that end. Weld one corner at the end opposite the handle;

3  Place the billet into a forge that is preheated to 2,300 degrees and soak until the billet is dull red. At this time apply anhydrous borax as flux;

4 Allow the billet to reach welding temperature, which is indicated when the flux is bubbling rapidly. Rotate the billet to make sure it is heating evenly;

5 Weld the billet using a press or hammer. If using a press, use dies that are longer and wider than the billet to weld in one squeeze. If using a hammer, weld from the handle end outward to allow the flux to escape;

6 Use a wire brush to remove the flux and scale. Reheat the billet and forge into a rectangular bar, reheating as many times as necessary to reach the desired length and width;

7 Allow the billet to cool and grind any scale off of the billet. Cut the billet into as many pieces as required to reach the desired number of layers; and

8 Repeat the welding process and draw the billet out to the desired dimensions. The process may have to be repeated again to get the required number of layers.

By creating an inert, oxygen-free atmosphere, forge welding can be accomplished without flux, known as a dry weld. This will usually result in a cleaner and stronger weld. This oxygen-free atmosphere can be created several different ways:

1 Make a sheet metal box that the billet is placed into, and then weld the box closed. Spray a small amount of WD-40 inside the box, or place a small piece of combustible material inside, to burn off any oxygen inside the box;

2 Weld all exposed seams of the billet to seal oxygen out; and

3 Use square tubing of an appropriate size to contain the billet.

Forge weld as described in the wet welding sequence, omitting the flux. After the billet is drawn to the proper dimensions, the box or tubing must be ground off of the steel. If it becomes necessary to cut and restack the billet, there are three options. It can be put into a box, the seams can be welded to do another dry weld, or flux can be used to do a wet weld.

The desired visual effect and the pattern will be factors in the number of layers in the finished bar. I prefer a predominantly black-looking damascus, so I like the 1084 layers to be approximately twice as thick as the 15N20 layers. Because of its nickel content, the 15N20 layers do not compress as much as the 1084.

As the layer count increases, the initial difference between .25-inch 1084 layers and .075 15N20 layers becomes much smaller. This initial size difference seems to balance out to the effect that I like at 200-300 layers. Some experimentation with different thicknesses will teach the beginner how best to achieve the desired effect.

The damascus pattern applied to the blade will also be a factor to be considered in the layer count. In my view, random patterns seem to look best with at  least 200 layers. Twist patterns do no need as many layers, as twisting the bar tightens them. Fifty to a-hundred-and-fifty layers work well to achieve a twist pattern. For a ladder or raindrop pattern, 200 to 300 layers are ideal and, with a good etch, will give a holographic effect to the blade.

These are by no means the only methods for creating damascus patterns. It is my hope that you will take this information and come up with your own ideas. These methods are meant to be building blocks, and by combining them or modifying them, you may come up with something truly unique.

Once a blade or bar of Damascus has been forged, it must be prepared for heat-treating. The first step is three thermal cycles to relieve stresses imparted while forging the damascus. The thermal cycles consist of heating the bar to non-magnetic and allowing it to cool for several minutes.

This is repeated two more times, and after the third heating, the bar can be allowed to cool to room temperature, which is a normalizing step. This process greatly reduces the possibility of the blade warping during the hardening process.

The blade or bar of damascus is then ready to anneal. It is again heated to non-magnetic and placed in vermiculite to slow the cooling process. After approximately six hours, the steel is annealed and can then be drilled and ground easily.

After drilling any holes needed and grinding to a 120-grit finish, the blade is ready to harden. If the forging was uneven and required grinding one side of the blade more than the other, I recommend several more thermal cycles before hardening.

The hardening process for bars forged of a combination of 1084 and 15N20 goes as follows: heat the blade to 1,500 degrees in high temperature salt; hold for two to three minutes; quench in preheated (120-degree) oil; and the allow the blade to cool until it can be handled comfortably bare handed.

This should result in a Rockwell hardness of 62-64 Rc. Two tempering cycles of one hour each at 400-425 degrees should produce a blade with a Rockwell hardness of approximately 58 Rc. If high temperature salts are unavailable, the blade can be heated to nonmagnetic and quenched with similar results.

This same heat-treating recipe will work for other combinations of simple steels. The tempering cycles should be at a lower temperature (350 degrees) and raised 25 degrees incrementally until the desired hardness is obtained.

The hardened and tempered blade must then be finish-ground and hand sanded so that it can be etched to reveal the damascus pattern.

I grind my blades to a 320-grit finish and begin hand sanding with 400-grit wet and dry paper. The sanding is done perpendicular to the 320-grit belt marks until they are gone. Then 600-grit wet and dry paper is used to remove the 400-grit scratches.
Dropout Knifemaker Is A Master Of Marketing

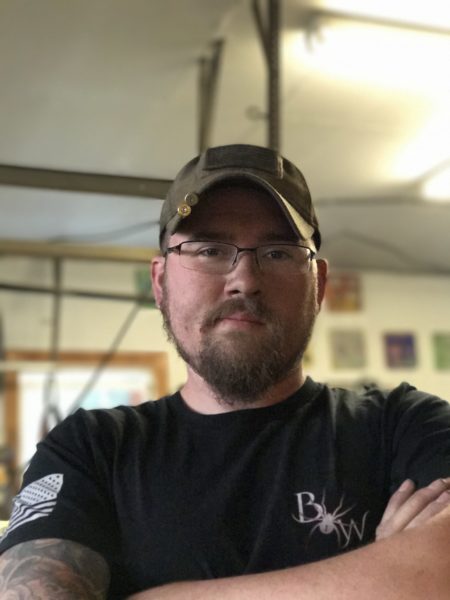
Brent Vaccaro owns Black Widow Knifeworks & Tactical Gear
Brent Vaccaro of Black Widow Knifeworks & Tactical Gear left high school in his junior year. He already knew carpentry inside and out. But it was when he turned to knifemaking that he found a way to identify himself that had eluded him during his other business attempts. This dropout knifemaker is a master at marketing.

Brent Vaccaro of Black Widow Knifeworks & Tactical Gear attended high school in New Jersey where he was born and raised. He excelled in woodworking, banging out projects that those two years ahead of him struggled through. His teacher helped him, Brent said, but perhaps most by giving him the freedom to do his own thing. Brent grew up building houses. His family lived in the middle of an open subdivision field and every day after school Brent would work on the other eight houses that needed to be constructed. In his junior year, bullying got too much. He left school and became a carpenter. Over the course of 15 years he worked in construction, running his own business and working for others. He also started a tactical gear company, and he dabbled in beard accessories during the height of facial hair resurgence. He never could quite establish an identity for himself in any of his three businesses, he admitted, but when he started making knives, everything came together. Now, no matter how different Brent’s knives are from each other, when you see a Black Widow knife, you recognize it immediately. The dropout knifemaker is a master of marketing.

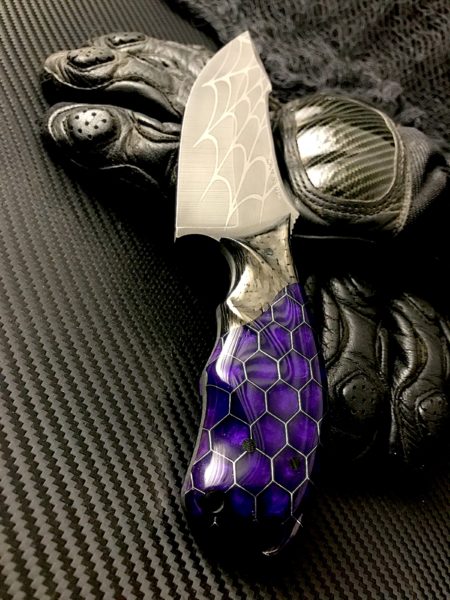
The H.E.R.L. is a knife designed by Brent Vaccaro of Black Widow Knifeworks & Tactical Gear.
Model: H.E.R.L
Blade Length: 4.25 inches
Blade Steel: CPM-S30V
Blade Finish: acid wash with spider web etch
Scales: Voodoo Resin’s Purple Haze with KS Carbon bolster
Overall Length: 8″ inches
Maker’s list price: $250-$350 shipped with Kydex sheath and Tec-Lok
Contact: Message Brent Vaccaro on Facebook at Black Widow Knifeworks & Tactical Gear. (Additional contacts at end of article.)

Around the time that Brent was struggling with being in school, when he was 16, his father gave him a pocketknife. It was a now-discontinued Kershaw model. “I still have it. I loved that knife,” Brent said. But he never had the money to collect knives, and some days he gets a mock scolding from his wife, Megan for forgetting to carry a blade on him. He was getting disillusioned with the diminishing level of artistry within carpentry, the lack of appreciation from the customers and the sense that the industry was solely focused on money. Although the skill sets are similar in woodworking and metalworking, it took some time to transition. Now Brent loves metalworking. It’s not months or years to finish a project with barely a handshake and never a thank you. It’s the instant gratification of seeing a knife come to completion over a course of days, sending it out and having the customer write him that they have no words for how impressed they are with his knife.

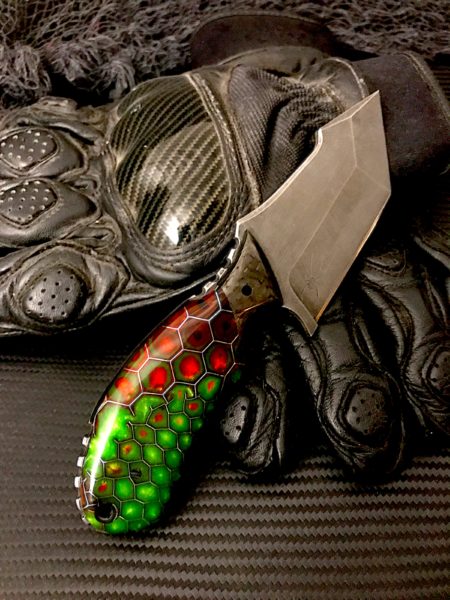
The BW Tac Tanto has a 3.5-inch blade of CPM S30V steel.
Model: BW Tac Tanto
Blade Steel: CPM S30V
Blade length: 3.5 inches
Blade Finish: dark acid wash and stonewash finish with aggressive gimping
Scales: Voodoo Resins’ Bloody Hulk with KS Carbon Fiber bolsters.
Overall length: 7 inches
Maker’s list price: $230-$330 shipped with Kydex sheath and Tec-Lok
Contact: Message Brent Vaccaro on Facebook at Black Widow Knifeworks & Tactical Gear. (Additional contacts at end of article.)

And therein lies his mastery. Brent is fulfilled by that appreciation for his craft, and he knows exactly how to represent his knives to the world in the best possible light—literally—without ever crossing into exaggeration. It means a lot to him that he has created an identity for himself that is true to him, celebratory of his knifemaking and honoring to the client. “It’s an extension of self,” Brent said, adding that he wants his knives to be passed on as a part of his and his client’s heritage. You only have to look at a photo of a Black Widow knife to get the “feel” for the candied richness of the colors, the smoothness of the handle and the badassery of the blade itself.

“I don’t keep them,” Brent said. So each night he takes the time to shoot exceptional photos of each piece, a running catalog of his work, for him to remember by and for the client to share. He takes 10 to 15 photos of every knife and picks the best ones. And that’s because he’s found a system that works for him. At first, you’ll need to shoot far more to find the right lighting and angles. “You have to take the time to do it. It’s part of marketing,” he said.

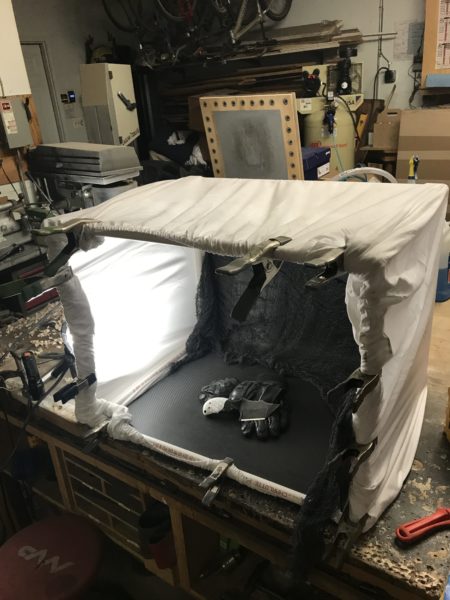
A lightbox is essential to taking great images of your knives.
If you want to take great photos of your knives, upgrade your cell phone, make yourself a lightbox, buy some handheld lights and take the time to learn how to make your knives look, not OK, but fantastic.

Building A Lightbox That Works

Brent invested $50 in his lightbox. At The Home Depot he bought 1-inch PVC and eight 90-degree T connections. With those he made his two squares for the box ends. He also got alligator clips. At Walmart he bought a king-sized white sheet and clipped it taught to the PVC frame. The whole thing is collapsible so that he can move it out of the way when he’s working. And, of course, the white sheet is no longer white.

The Backdrop

Normally, light boxes are made with white construction paper on the floor that bends up the back. Not Brent’s. He does a lot of Kydex. He was heating up a 2-by-4-foot sheet of carbon fiber one day and as it bent, it occurred to him to use it in the lightbox. He had to buy more Kydex, but he likes the look of it. That was probably anther $50, but wouldn’t be necessary for everyone since every knifemaker’s style is different. Brent strives to build tough knives that military and law enforcement can respect, while still appealing to the civilian population with his Candy-Crush-like handles. He mostly uses Matt Peterson’s Voodoo Resins scales, but he’s also using some of J Hue Customs’.

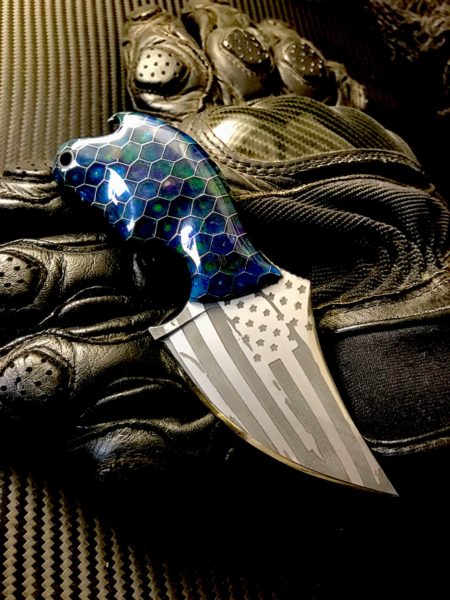
This Black Widow neck knife comes with American flag etching on both sides.
Model: Recluse Neck Knife
Blade Steel: CPM-D2
Blade Length: 3.25 inches
Blade Finish: acid wash with American flag etch on both sides
Scales: Voodoo Resins’ Chameleon
Overall length: 5.5 inches.
Maker’s list price: Price range: $165-$200 with Kydex neck sheath
Contact: Message Brent Vaccaro at Black Widow Knifeworks & Tactical Gear

Lights! Camera! Action—No Really, Move Around!

For lights he purchased round Utilitech LEDs that he can hold while he shoots. “The light is never stationary,” he explained. He waits until complete darkness because he has two windows in his shop and he wants total control of the lighting. Because the LEDs are very white lights, bluish even, he adds a 60-watt lightbulb to add a yellow hue to balance out the lighting. He moves around with his iPhone 7 Plus (“There is a difference with the Plus,” he notes.) and his light and gets exactly the angle and lighting he wants. Not only are the knives well lit, especially for mood-inducing vignettes, for which the majority of a knifemaker’s photos will be used, especially online, but they are in crystal clear focus. Brent does not use the focus feature on the phone. That will only cause the camera to focus on one point on the knife, when the objective is to show the entire knife in full focus, even if you have the point or butt stylistically in the background. He also does not use the flash, which only washes out colors and overexposes the image.


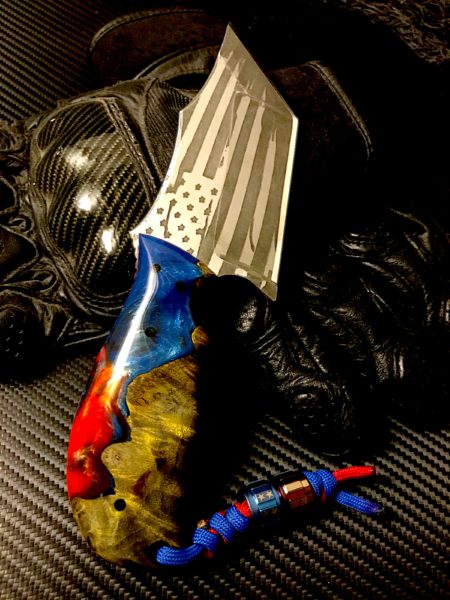
The Carnage by Black Widow Knifeworks & Tactical Gear sports patriotic resin with maple burl hybrid scales.
Model: The Carnage
Blade length: 4 inches
Blade Steel: CPM S30V
Blade Finish: acid/stonewashed with American flag etch on both sides
Scales: J Hue Customs’ hybrid red, white and blue resin with maple burl
Overall length: 8 inches
Maker’s list price: $320-$500 shipped with Kydex sheath and Tec-Lok
Contact: Message Brent Vaccaro on Facebook at Black Widow Knifeworks & Tactical Gear (Additional contacts at end of article.)

Props Never Steal The Scene

Brent uses all kinds of props in his still-lifes. Because he also produces tactical gear, like custom Kydex sheaths, you will often see pistols, ammunition and other gear as accessories in his pictures. Chain, motorcycle gloves, even Halloween webbing have been used in Black Widow images. His artistic eye is always at work, not only in the making of the knives, but in his ability to let the knives do the talking. They are always center stage. They are the first things you see in the picture and the props are there only to compliment the knives, never upstage them.

Editing

Brent uses two apps to edit his images: PicLab and Aviary. He bumps up the saturation until the image represents what you see in person. It’s important not to overdue saturation because then your customers will be disappointed that your knife doesn’t live up to how it was displayed online, all back-lit by the computer screen. It’s equally important, though, that the knife not appear duller than it is in real life.

Creating An Image

Brent is one of those men who is smart, learns quickly and follows directions. He is also a good man, turning away from an industry that couldn’t fulfill his creativity and abraded his integrity. He has been rewarded with great success. “I’m outgrowing my shop,” he said. Brent knows he’ll have to return to carpentry to build himself more space. He can’t believe it sometimes when he thinks how far he’s come in his year of knifemaking. Metal work comes easier to him. “I don’t get nearly as angry as I used to get doing carpentry,” he said. He’d be thinking artistically and make a little strip of wood for something and it would break. Sometimes he’ll find a scratch in a knife handle and he’ll have to go back and grind it out and re-sand—normally, he goes all the way from 150 to 2000 grit—but it’s not nearly as frustrating as woodworking had been.

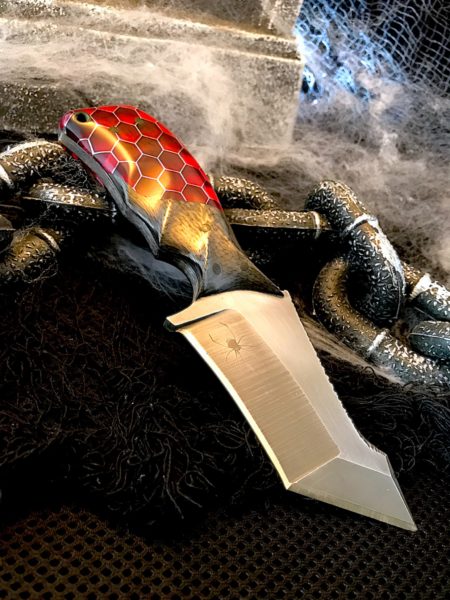
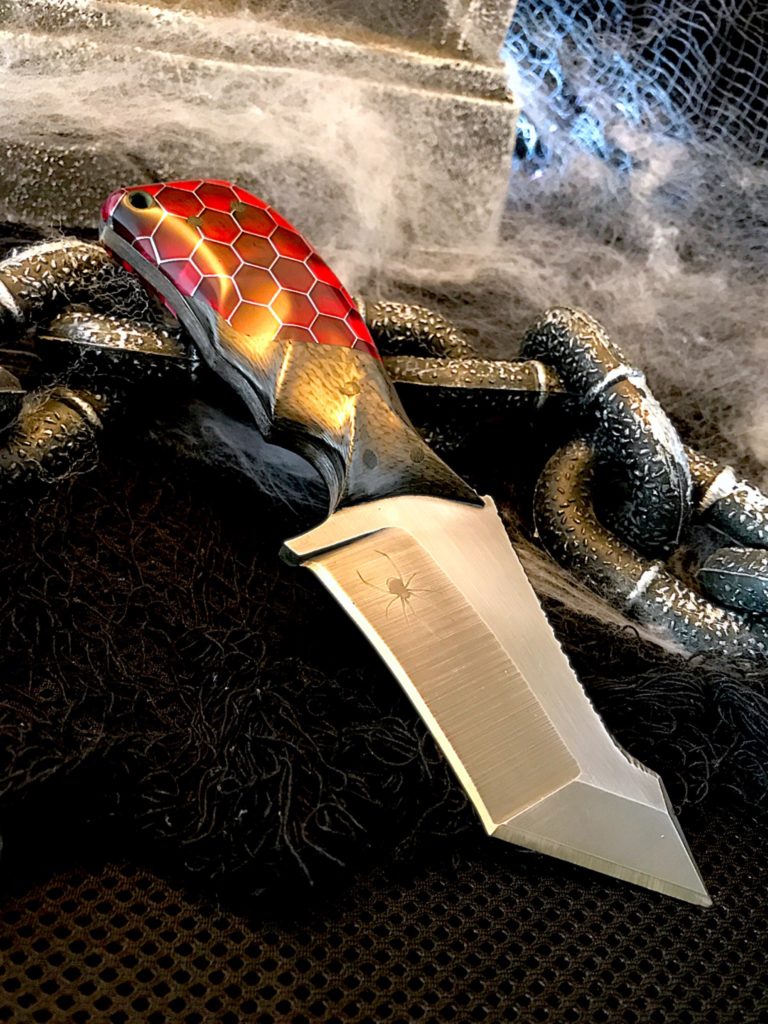
The Recurve Patella uses Voodoo Resin scales in Honeycomb Red.
Model: The Patella Recurve
Blade length: 4 inches
Blade Steel: CPM S30V
Blade Finish: acid wash
Scales: Voodoo Resins’ Red Honeycomb with KS Carbon bolsters
Overall length: 7.75 inches
Maker’s list price: $380-$500 with Kydex sheath and Tec-Lok
Contact: Message Brent Vaccaro on Facebook at Black Widow Knifeworks & Tactical Gear. (Additional contacts at bottom of article.)

Brent takes great pride when someone in the industry tells him they recognize his work right off. He has been an apt student of life. The years of entrepreneurship that didn’t work, prepared him for the one that would work. But no matter how much marketing you apply to your knifemaking, the knife must still cut. It must still hold up to wear and perform as expected upon arrival and for generations to come. Time will tell, but sometimes dues get paid behind the scenes and a meteoric rise is well-earned.

Meanwhile, Brent will have to break away for the birth of his first child, a son, Blake—due any day—and at some point, he’ll need to expand his shop, but he never closes his books for long. He doesn’t think it reflects well to just drop a knife. He refuses to do it. He respects reliability in the people he does business with, so he holds himself to that standard for his customers. Just get in touch, but be aware if you do, you’ll get caught up in the Black Widow web.

Contact: Brent E. Vaccaro by email at [email protected] or Message him on Facebook at Black Widow Knifeworks & Tactical Gear. He also has a website at www.blackwidowtac.com. If you need to call, Message first, otherwise he might not hear you over the machines, 908-328-2049.

It’s All In The Grind

"Knife Grinding Secrets" is by maker and instructor R.J. Martin.
Mastering this one skill will improve your craft immensely. For less than $5, you can add an essential to your knifemaking library.

Author R.J. Martin instructs on flat and double hollow grinds. He discusses chisel grinds, tip shaping, the two-hand pass and lots more in “Knife Grinding Secrets.” Most importantly the finesse of grinding will be covered so that you can master the skill. Downloadable version availabe for $4.99.


Kwajalein: American Public School Where Knifemaking Is Part Of The Curriculum

0

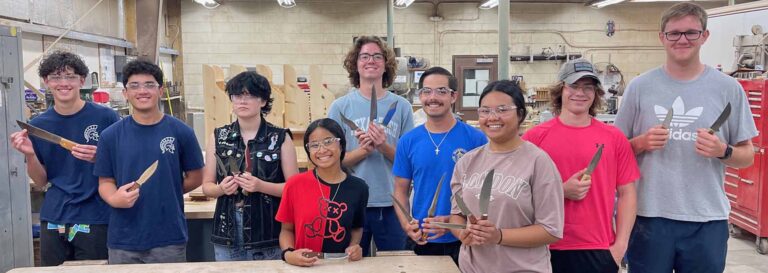
A South Pacific tradition, Dr. Douglas Hepler instructs a knifemaking course at Kwajalein Junior-Senior High.

Kwajalein Junior-Senior High may be the only American high school that has knifemaking as an official part of the school curriculum—and it just celebrated its latest graduating class of knifemakers.

The school is on the U.S Army Kwajalein Atoll, Ronald Reagan Ballistic Missile Test Center, in the Republic of the Marshall Islands in the South Pacific Ocean. Kwajalein Island is the site of a titanic three-day battle that cost almost 400 American and over 4,000 Japanese lives during World War II. Today, though, instead of artillery fire and other explosions on the idyllic coral atoll, the sound of belt grinders and buffers can be heard.

Taught by Dr. Douglas Hepler, a retired Navy chief petty officer, students in grades nine through 12 shape blades from 1080 carbon or 440C stainless steel. According to Doug, “The kids do everything: layout; cutting out and grinding the profiles; drilling the rivet holes; stamping desired logos; grinding the edges; heat treating and plate-quenching; doing the oven temper and freezer cryo-treatment at home; the final polish; adding and completing the handles; and sharpening. They do it all. 

Douglas Halper
Douglas Halper

“We have Burr King and Grizzly belt grinders, Baldor buffers and a Paragon oven. We use local woods—coconut palm, kamani, hao, noni, etc.—for handles. We also use whalebone whenever we find a dead carcass washed up on the beach. We buy all our rivets, steel, 2×72 grinding belts and polishing items from Jantz Supply, and have for years. I buy all my personal knifemaking supplies from them as well. You can’t beat the price and top-notch service. They are a great company.”

Concluded Doug: “I am very proud of my students. They have taken what I can teach them and have become better cutlers than I will ever be—and I think that’s awesome.”

More On Knifemaking Classes:

Making Video Game Knives: Far Cry 4

1

Trend Watch: Video Game Knives

A hot movie knife can still take on a life of its own, but the shift toward video games in entertainment is changing the relationship between knife enthusiasts and screen time. Global video game revenue was estimated at $108.9 billion in 2017. That’s more than the movie and music industries combined.

With numbers like that, it’s no wonder that some of the newest, and youngest, collectors to commission custom knives draw inspiration from popular video games. 

Here’s one example.

Making The Far Cry 4 Video Game Knife

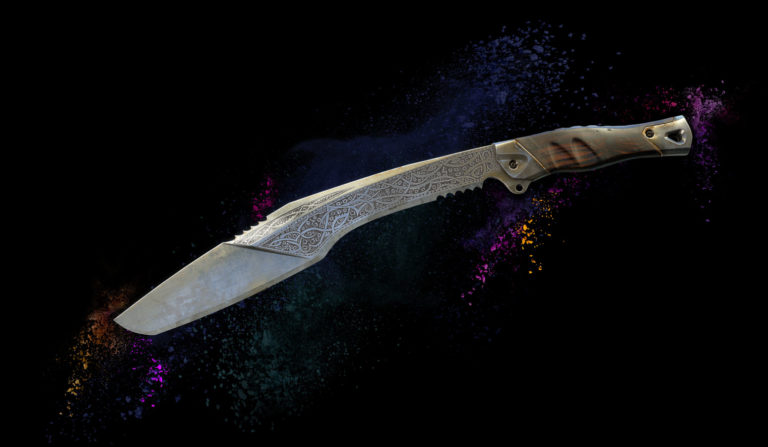
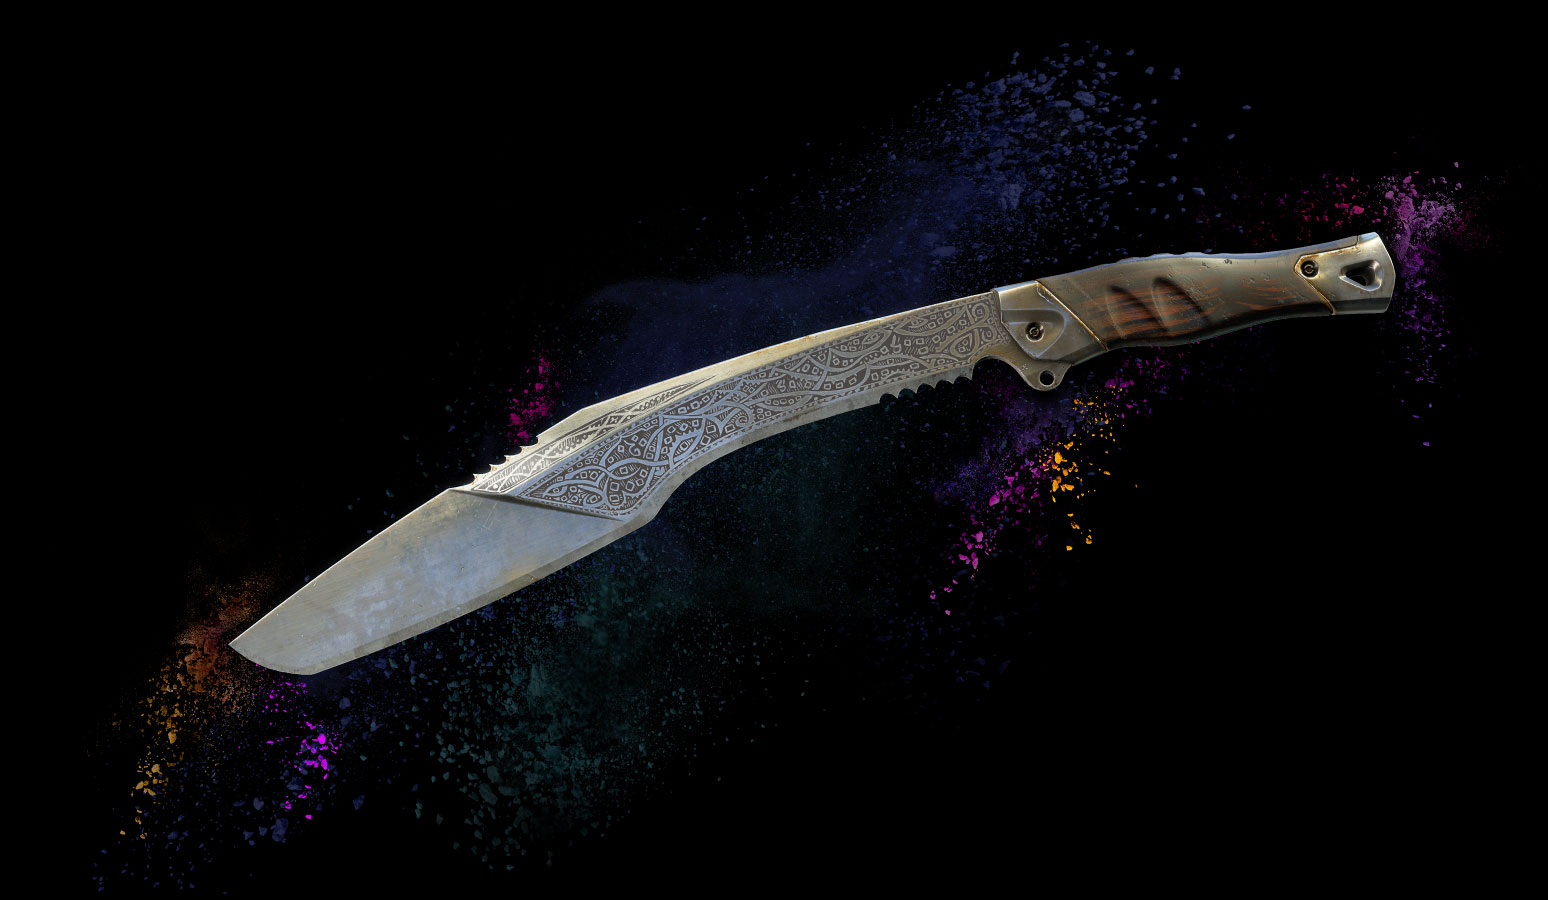
video game Far Cry 4 knife
The knife featured in the “Far Cry 4” video game. (image via farcry.wikia.com)

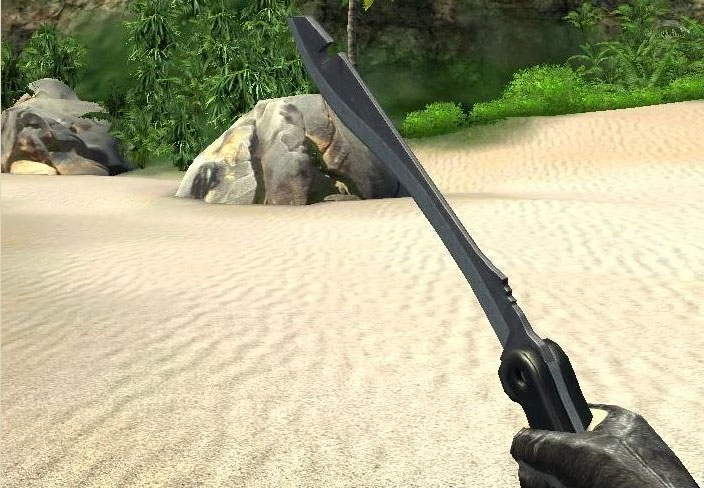
Video game knives far cry 4 kukri
The knife in “Far Cry 4” is wielded from a first person point of view. (image via farcry.wikia.com)

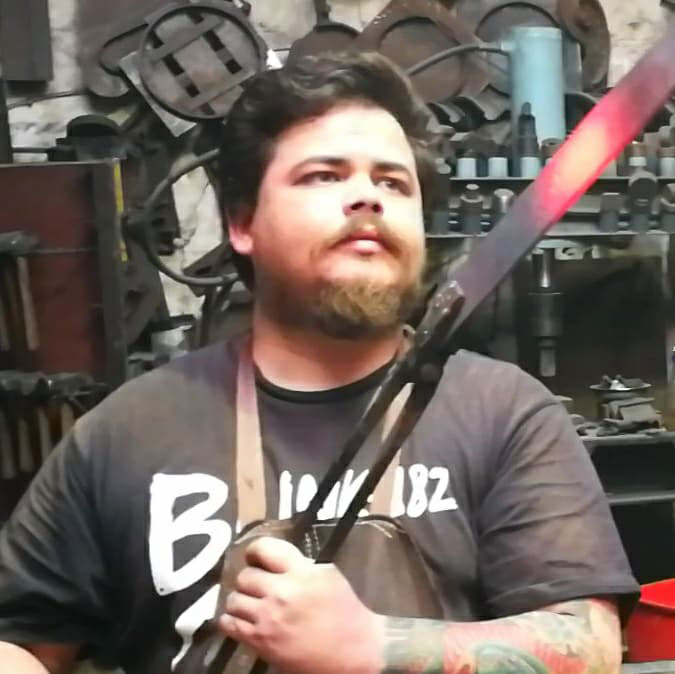
Far Cry 4 knifemaker
Tim Flack, a knifemaker from Capetown, South Africa, received a commission for a knife featured in the video game, “Far Cry 4.” (image via Facebook)

Tim Flack, of Flack Handmade in Capetown, South Africa, recently received a request to recreate the knife featured in Far Cry 4, an action-adventure video game. The knife is inspired by the real-world kukri, although the iconic bend in the middle of the blade isn’t as pronounced. 

This presented a challenge for Flack. Unlike movie knives, which follow physical specs, there wasn’t a template to work from. The knife only exists in the video game, although the Extrema Ratio KH is often cited as the inspiration.

Flack filled this gray area with his own creativity.

“I gave it a more practical look and feel,” Flack said in an e-mail.

It helped that the collector commissioning the knife acknowledged there was wiggle room.

“[The client] wanted the blade to look aged and battle used,” Flack said. “This was a challenge, as it’s been drilled into me that fit and finish is everything. So using fine belts I put nicks into the blade after heat treat, and then left it in a 10-percent ferric chloride solution for 20 minutes.”

The rest of the build followed along the same lines.

“The [stink ebony] handle was also, after the bolsters an pommel were peened on, left in ferric for five minutes and then neutralized in soapy water and bicarbonate of soda,” Flack said. “The handle was then saturated in sure glue and buffed, and then scuffed and sanded to age it.

“The ‘engraving’ was cut from vinyl and then transferred onto the blade with a nine-volt battery and some salt water on a Q-tip.”

It took three grinds to finish the O1 blade’s edge: a full flat that turned into a hollow, and a convex on the tip. The overall length of the completed knife came in at 370mm (14.56 inches).

Worth the Challenge

Flack acknowledged that the knife was a challenge to create, but that it was worth it in the end for both maker and collector.

“I’m really happy with how it came out,” he said.

Collecting Video Game Knives

far cry video game weaponsThe collectibility of video game knife reproductions should follow the path already set by movie knives. These are display pieces that appeal to built-in audiences. They should retain value so long as the game is popular.

How that translates into returns decades down the road is yet to be seen, since video game sequels are regular. Far Cry 5 is slated for release in March.

However, there’s no doubt that this segment of knife collecting is here to stay.

Stay On Top of Knifemaking Trends

Stay sharp with a subscription to BLADE magazine.

Edged-Weapon Expert Talks Knife Fighting

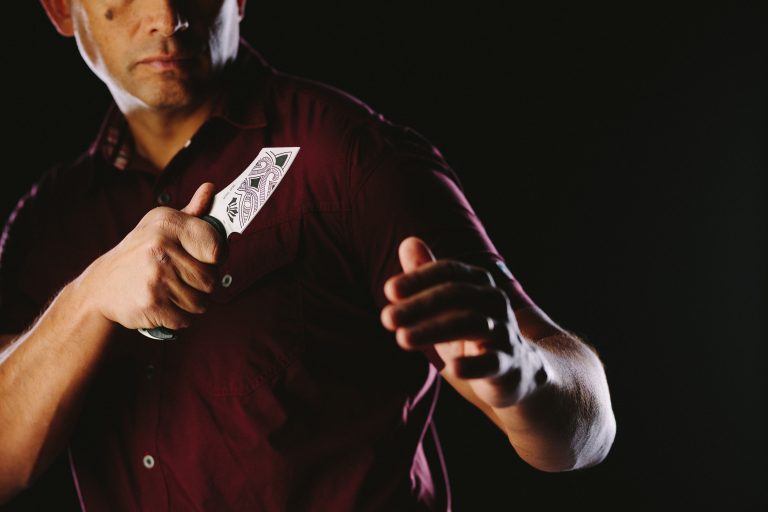
Jared Wihongi helped design his signature line of knives with Browning.
Browning’s line of Jared Wihongi Signature knives is as fierce as its SWAT operator namesake.

Jared Wihongi is a native New Zealander who began training in martial arts at an early age. As a young man he had the chance to live in the Philippines and study an edged-weapon style of fighting called Pekiti Tirsia Kali. Jared has spent 14 years as a law-enforcement special weapons and tactics operator. He also instructs other SWAT team members as well as elite military operatives in edge-weapon skills. He has advised Browning on its Black Label tactical family of knives and now has his own signature line, strikingly designed with Maori-inspired blade etchings. Be sure to subscribe to BLADE magazine to read about the Jared Wihongi Signature line of combat knives in the August issue, on sale May 16, 2017. To learn more about Jared Wihongi’s upbringing and training, read “Browning Launches Wihongi Line of Maori-Inspired Knives.”

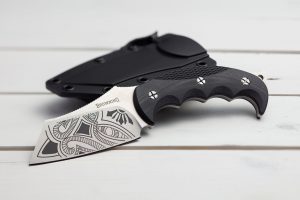
Browning now features the Jared Wihongi signature line of knives.
The Jared Wihongi Signature Fixed has a canoe-shaped handle that is ergonomically correct in both a forward and overhand grip. The etchings are borrowed from Maori tattoo patterns.

To meet Jared Wihongi and hear him discuss his style and philosophy of knife fighting, here are some well-done videos by Funker Tactical. In the first, Jared discusses how the foot movements used in Filipino knife fighting can aid in an empty-hand or firearm scenario. In the second, Jared addresses how the skills developed through the practice of Pekiti Tirsia Kali are relevant to the reality on today’s street or battlefield. And in the last video, Jared talks about why you should train wearing what you wear in your work or your everyday life. Law enforcement and military especially need to practice wearing their equipment so they understand how their range of motion, breathing and other functions are affected by the added weight.

How Gunfighters Can Use Knifefighting Tactics 

Filipino Martial Arts Isn’t Just About The ‘Art’

Training Considerations When Wearing Gear

Make Folders Part Of Your Self-Defense Plan

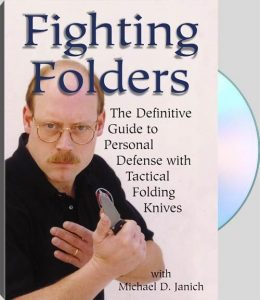
'Fighting Folders' is cheaper than a class and can be watched repeatedly from the comfort of your living room.
In “Fighting Folders” Michael D. Janich instructs viewers on the myths surrounding folding knives and how to employ them in a self-defense situation.

Micheal D. Janich covers how to use empty-hand skills, quick one-hand deployment techniques and knife-fighting tactics so you can lean on your folder as part of your self-defense kit. This DVD is well worth the $39.95 when you consider you can watch it repeatedly in the comfort of your home, practicing its demonstrated skills until you’re ready to take your training to the next level.

Tips For Making A Hidden-Tang Knife

0

There are a few things to be careful of when making a knife of hidden-tang construction.

The Blade and Tang Both Need to be Straight

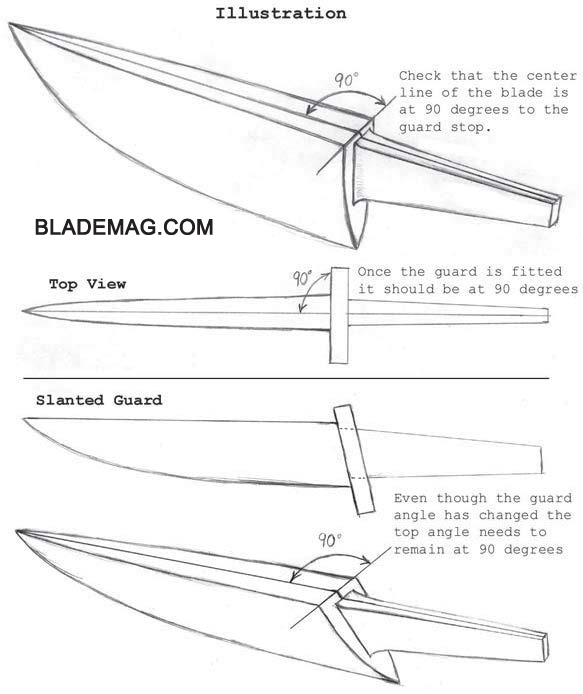
First, make sure that your tang and blade are straight. If the tang is tapered, it must be evenly tapered on both sides. The centerline of the tang must be straight to the centerline of the blade.

If the tang is warped a little to the right or left of the blade, or unevenly tapered, then you are not yet ready to fit either the guard or the handle. Go back to the forge or grinder and make your corrections to get things straight right from the start.

A limited amount of “fudging” can be done while gluing the handle to compensate for a tang that is not 100 percent straight and center. To repeat, in my opinion, it is best to correct things right from the start.

Fitting the Guard

After making sure your tang is not going off to the left or right, go ahead and fit your guard. Take your time! The guard must be at 90 degrees from the center-line of the blade and tang, even if you are making a knife with a slanted guard.

Attaching the Handle

Now you can start fitting your handle. Fit the handle to both the guard and the tang as you normally do. If you do this, the handle will be straight to the blade.

Most often I will not cut the handle material in half when making a hidden-tang knife. I will usually use a solid block of wood or a piece of stag.

First, I drill a couple of starter holes in the end where the tang will be inserted. The thickness of the drill bit will depend on the thickness of the tang. I then file the hole out to fit the tang.

It is more important to fit the handle material to the properly fitted guard than it is to fit it tightly to the tang. This does not mean that the fit should be sloppy, just that it is not necessary to make it that tight. Besides, you need to leave some room in between the tang and handle for the glue to be effective and have a strong bond.

With either of these methods, if the blade and tang are straight and the guard is at 90 degrees to the centerline of the blade and tang, then the handle will have to follow.

Try Knifebuilding:

Cool Customs: Barret Chrisman Takes The Ol’ Bullet Hi-Tech

Barret Chrisman puts a modern spin on a vintage Remington design.

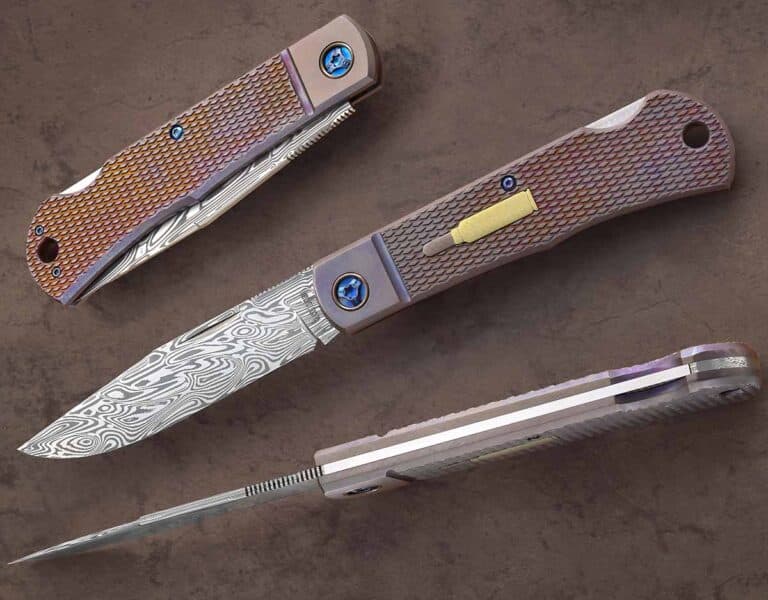
Barret Chrisman’s contemporary take on the classic Remington 1306 Bullet lockback combines tradition and hi-tech in one handsome custom pocketknife.

Barret outfitted his repro with all cutting-edge materials, including a blade of Loki pattern damascus by Damasteel, a handle of checkered titanium that resembles jigging and a titanium bullet shield. “I’ve seen people jig titanium before but I wanted to try checkering, so I made up a custom pantograph template and tried it out,” he said. He anodized the handle a purplish bronze.

Barret Chrisman
Barret Chrisman

“It’s a modern take on an old school knife everybody likes,” Barret noted, “and I’ll probably be doing the same kind of thing in the future.”

Remington 1306 Bullet Modern Reproduction Specs
Maker: Barret Chrisman
Blade length: 4”
Blade material: Loki pattern damascus by Damasteel
Blade grind: Full flat
Handle frame: Titanium
Handle scales: Checkered titanium w/inlaid titanium bullet shield
Lock: Lockback
Closed length: 47/8”
Maker’s price for a similar knife: $1,500

Check Out More Cool Custom Knives:

Advertisement

Must Read Articles

Read this before you make a knife

Knifemaking 101 – Read This Before You Make a Knife

  by Wayne Goddard My experience has taught me that there's nothing like digging in and getting started. I've often said the hardest part of the...
how to forge damascus steel

How to Forge Damascus

Advertisement
Advertisement