Knifemaking is the building of a knife, which includes the blade, handle and other accouterments. Blades are made by either removing metal from a steel blank via a grinder – known as stock removal – and the forging to shape of hot steel into a blade in the process known as bladesmithing. Other parts, including bolsters, guards, pommels, etc., are needed to complete the finished knife.
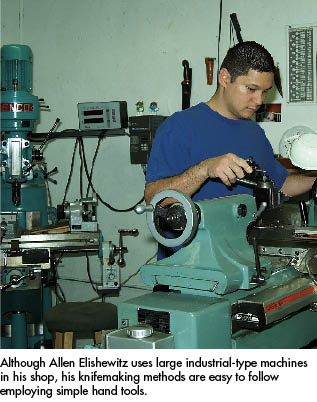
There are many methods to build a knife and there is no wrong way to do it. You can use anything from simple hand tools to industrial machines. The method I have chosen for readers to follow allows for a high-tech folder to be fashioned with either simple or large industrial-type machines, the latter of which are like the ones I own.
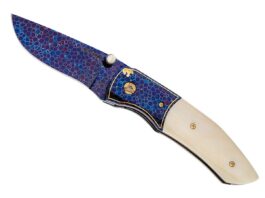
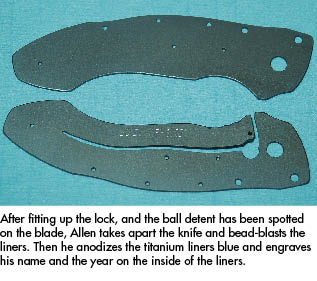
The fancy locking-liner folder that has resulted from this step-by-step instructional is completely handmade. The reason I choose to build all my knives in such a manner is because it gives me, the knifemaker, more flexibility in my production method. It also allows the knife to take on more of an individual and unique appearance.
Keep in mind that, due to space limitations, there are quite a few small steps that I have excluded. I will do my best to mention them but I will concentrate on the most important aspects of making a high-tech locking-liner folder.
For this project, the knife has titanium bolsters, a carbon fiber handle and a damascus blade. The locking-liner folder integrates a classical handle/bolster combination that, to build it, entails an intermediate level of difficulty. What makes the folder more complicated to build than other plain-handle knives is the introduction of the bolsters. The bolsters add just one more aspect to handle construction, and the alignment of the bolsters and handle material must be constantly maintained during the knife assembly.
Avoiding safety complications in a knifemaker’s shop is essential. BLADE® polled some key players in the knife supply industry to see if there are any trends in motion in the area of shop safety. While everyone can agree that common sense is a good thing, and that certain stand-by items as fire extinguishers and safety glasses will always be among knife shop essentials, there has been somewhat of an evolution in this area.
Respirators for Knifemakers
“I think the biggest advance is really progress in bringing safety awareness to the knifemaking community,” observed Shanna Kemp, marketing manager at Jantz Supply. “For example, we see a marked increase in the use of respirators as makers come to understand that breathing in even small amounts of wood dust might not seem like a big deal, but over time it can really affect your lungs.”
She added that some woods, such as ebony, release small amounts of arsenic, so an increase in awareness of the dangers of particulates and resins is a good trend.
Dealing with Dust in the Knife Shop
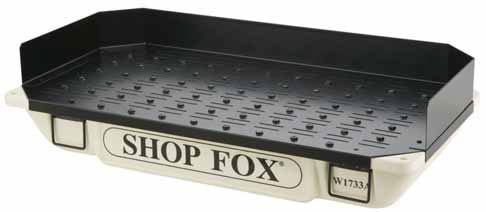
A new addition to the line of Jantz safety products is the Benchtop Downdraft Sanding Table. The 20 x 40-inch dust collection system is about 6 inches tall and connects to the maker’s vacuum system to help capture dust.
A new addition to the line of Jantz safety products is the Benchtop Downdraft Sanding Table. The 20 x 40-inch dust-collection system is about 6 inches tall and connects to the maker’s vacuum system to help capture dust.
“I feel like everyone is more conscious of their health these days than they used to be,” agreed Shannon Edgington of Knife and Gun Finishing Supplies. She said that while there isn’t anything new or cutting edge in her inventory, she definitely agreed that particulate concerns have become more of an issue.
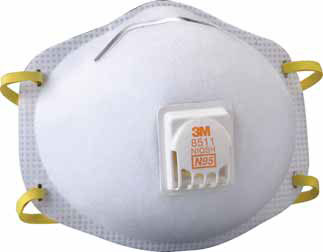
One budget solution K&G offers is the 3M N95 Respirator for Vapors that features the Cool Flow Exhalation Valve that reduces heat build-up inside the respirator.
Respirators That Don’t Need Replacing Often
The 3M Particulate Respirator N95 8511 is approved for at least 95 percent filtration efficiency against certain non-oil-based particles. Braided headbands in a two-strap design with dual point attachment help provide a secure seal. An adjustable M-noseclip reduces potential for eyewear fogging.
As buyers jump from budget-friendly dust masks to the newer, more effective respirators, they don’t have to be replaced as often.
“The technology has definitely come along so that people don’t have to replace as much,” she said. “It’s not like the old paper respirators that people are constantly replacing, which don’t filter out that much anyway.”
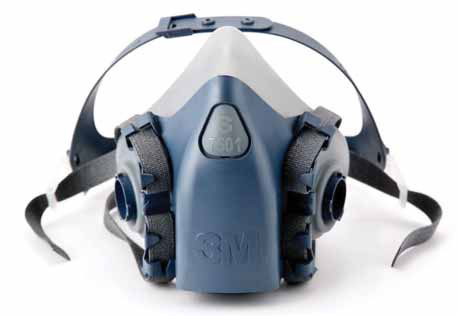
K&G and Jantz both offer the 3M 7500 Series Half-Face Respirator Mask, which features a better seal around the nose and mouth, and replaceable filter canisters for a better level of protection.
Best Respirators for Beards
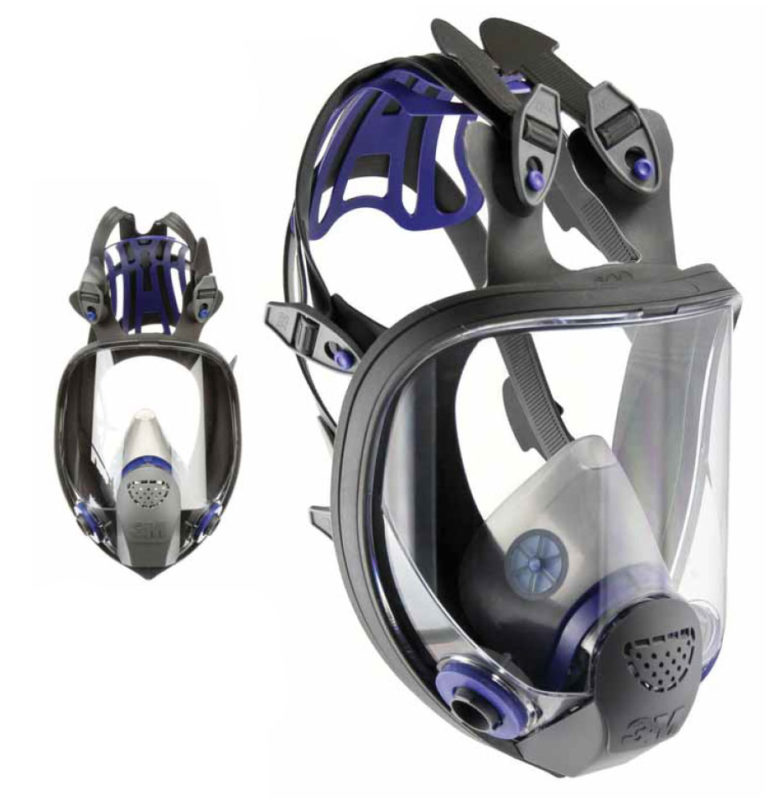
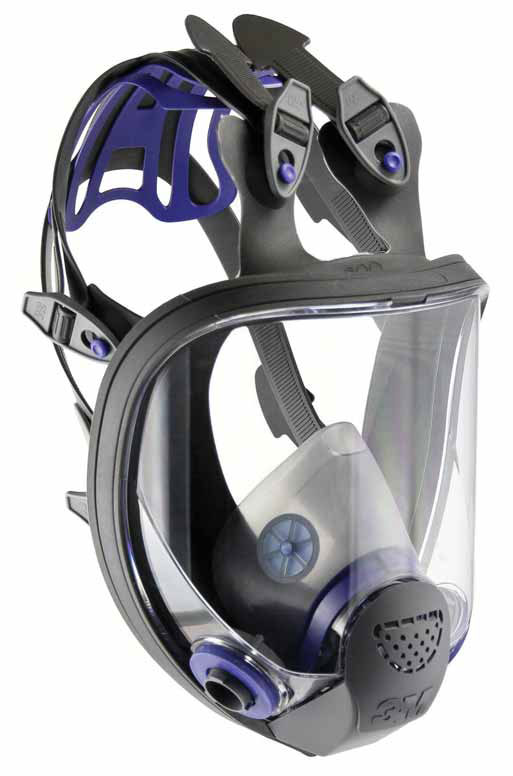
According to Jeff Mutz of Tru-Grit, the 3M Ultimate FX Full Facepiece Respirator works very well for knifemakers with facial hair. He said a lot of bearded makers have trouble getting a good, tight fit with a regular dust mask, or even the half-face respirator. The 3M Ultimate FX isn’t foolproof but it keeps out a lot more particles than the others, he noted.
In the area of high-end respirators, Jeff Mutz, product consultant at Tru-Grit, has high praise for one particular model that he said solves a couple of problems for contemporary knifemakers. For starters, he noted that the concept of “form follows function” even applies to current personal fashion trends.
“One thing I was impressed with,” Mutz said of the 3M Ultimate FX Full Facepiece Respirator, “is that it works a lot better for guys with facial hair, which is a big thing these days. I’ve seen more and more guys using the full-face respirator, so it’s apparently becoming a popular thing.”
He recalled that a lot of guys who visit his shop have longer and/or larger beards, and he noticed they have trouble getting a good, tight fit with a regular dust mask, or even the half-face respirator. The 3M Ultimate FX isn’t fool proof for those who choose to wear beards, he admitted, but the full face piece keeps out a lot more particles than the others.
“Of course, they say to create a seal you’ve got to shave off the beard, but a lot of guys aren’t willing to do that,” Mutz laughed. “So this is the next best thing.”
He recalled a conversation with Scott Sharpe, owner of Tru-Grit, about the younger generation, which seems more conscientious about safety. Scott said that when younger guys walk into his shop while he’s grinding, often they will pull their shirts up over their noses out of concern for what could end up in their lungs.
Field of View and Safety Glasses
K&G and Jantz both offer the 3M 7500 Series Half-Face Respirator, which features a better seal around the nose and mouth and replaceable filter canisters for a better level of protection.
Another good thing about the 3M Ultimate FX Full Facepiece Respirator is a better field of view. Mutz said when he wears a half-face respirator and safety glasses, the glasses interfere with the nose piece because they are not designed to work well together.
“I’ve noticed that the best way to solve that is to tuck the safety glasses under the half-face respirator, which is worse because you’re inhaling even more dust,” he explained. “With the full face, you get a large field of view and you don’t have to worry about the safety glasses interfering.”
Hand Protection Tape
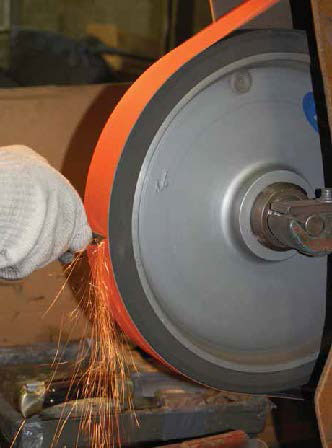
Jeff Mutz recommends that if you wear hand protection, especially gloves, choose Kevlar rather than cloth or rawhide because the properties of the latter don’t play well with heat and moisture, which are both aspects of grinding in the shop. (Buck image)
Kemp said a lot of people may be surprised by two of Jantz’s best-selling safety supplies: two types of tape. The first is basic 3M Blue Masking Tape, which is used to cover the blade edge to avoid cuts from sharp edges. She added that a bandage wrap by Guard-Tex called Self Adhering Safety Tape is also popular in the area of hand protection. It is used to protect skin when grinding, sanding or polishing, while also not being as restrictive as full gloves.
However, in the area of hand protection Mutz warns against the inevitable trade-offs. He recommends that if you wear hand protection, especially gloves, choose Kevlar rather than cloth or rawhide because the properties of the latter don’t play well with heat and moisture, which are both aspects of grinding in the shop.
Mutz recalled when, years ago, he tried grinding while wearing gloves and noticed the gloves got wet when he dipped the blade into a bucket of water to cool it. The heat from the blade quickly transferred through the water into one of his hands.
“I couldn’t get my glove off quick enough,” he remembered. “I’ve rubbed my hand against a 36-grit belt before and that doesn’t feel good either. It’s kind of a double-edged sword.”
Another problem he pointed out was that makers should want to feel the steel. If it is getting warm, be aware of it and cool it off before the heat compromises the structure of the material.
Learn more about how to make knives with BLADE’s essential book.
“Especially once it’s been heat treated,” he stressed. “You don’t want to soften the steel.”
Mutz teaches knifemaking classes and discusses safety with his students. He stressed that he’s pro safety, of course, but as far as hand protection goes he’s probably not the best guy to consult.
“If you look on Tru-Grit’s website we’ve got this thing called Alligator Skin, which is a protective tape. Then you’ve got the finger guards that are made out of canvas. I’m not going to tell my students not to wear them, but these are the things you’ve got to look out for,” he concluded.
Safety in the Knife Shop is Serious Business
Safety is and should be a concern for those who spend long hours in a knife shop, and all three sources for this story agreed that common sense is the foundation, which, Edgington laughed, “over the years hasn’t always been in great supply!”
Three critical aspects of creating or choosing a quality blade are steel selection, heat treatment and geometry. This feature focuses on the first of these, and the first any aspiring knifemaker or enthusiast will be tasked with—choosing the right blade steel for you and your knives.
To the casual observer, the steel selection process wouldn’t seem like such a big deal, but as in-depth as this article is, it barely scratches the surface of the topic.
Not all steels are created equal. Each varies as much as knife style and is designed for a specific application. So, matching the correct steel to the specific blade, intended use, and maker or user can be critical in creating a quality tool. Choosing the best alloy for your purpose can mean the difference between achieving the highest performance by effortlessly allowing the steel to do what it does best and struggling to pound a square peg into a round hole by forcing it to do something it was never designed to accomplish.
From my observations after a lifetime of providing metallurgical consulting services for various industrial clients and countless knifemakers, the latter rarely select steel with the same analytical vigor as the former. Rather than independent research to match steel chemistry to a process and product, knifemakers often choose whatever alloy everybody else is using.
American Bladesmith Society Journeyman Smith John Schultz chose well with 1075 steel for its natural toughness on his recurved chopper.
Be it a ubiquitous old favorite or the newest rage in the “steel of the month club,” no single alloy is the best fit for every knife, use or maker. On the other hand, the one area where knifemakers often exceed my industrial clients is letting frugality make the choice. The number of knifemakers who have told me they use a specific type of steel because of their access to a cheap or free supply is unfortunate.
The trouble with these approaches is needlessly steepening the learning curve for many a new maker or knife user. I can’t count the number of times I have heard a frustrated knifemaker state that an alloy they have tried is a bad steel. But there is no such thing as bad steel. Industry wouldn’t bother wasting time, effort or money on steel that wasn’t optimum for its intended purpose. There are poor application choices and bad heat treatments. Any fault lies with the knifemakers or bladesmiths and not the steel.
A36 is an excellent steel choice for use in buildings and bridges, but it is a bad reflection on knifemakers if they insist on making a blade with it. The steel properties of A36 are not conducive to knife blades. Alloys like 1095 or O-1 can make good hunting knife blades, but if the steels are heat treated like 5160, they won’t measure up in edge performance. I can’t tell you how often I’ve bitten my tongue when shown a blade fashioned from steel with barely enough carbon for adequate strength or an abrasion-resistant edge.
If knifemakers have to deviate from standard heat treatment practices with unorthodox extra steps, it is most likely the result of a steel choice that does not match their application or methods. You can under-soak or over-temper a 1% carbon steel sword or use an alloy better suited for such a blade. You can add several steps to heat-treating richly alloyed steel in your forge or choose a steel that readily responds to that heat source.
Intended Knife Use
Rather than using hard and soft layers for damascus, the author, Kevin Cashen, has always combined toughness with abrasion resistance, as in this O1/L6 skinner.
The problem is that we often proceed from the wrong direction. Whatever the reason, many knifemakers have already settled on their steel before determining what knife they will fashion, but how can you make the right choice in a material before you even know its intended use?
A better model for success is letting the primary tasks a knife is meant to perform determine needs and goals. Develop a plan to achieve those goals by designing a hand tool that will perform a specific task or even multiple tasks, keeping in mind that the intended uses of a single knife can be much more varied than people think. With the desired tasks for the edged tool in mind, choose the material based on the desired properties inherent to each steel’s specific chemistry. Equally important is recognizing the limits of a maker’s abilities to work with a given chemistry.
To explain how to choose the correct steel for you and your knives, the myriad of blade designs is distilled down to two primary categories. The first group—fine-cutting knives—is designed to perform keen slicing or aggressive slashing. They are most often used in a draw-type cut that is optimized like a saw at the microscopic level. Think of scalpels, skinning and hunting knives, and many kitchen knives. Their edges are thin, flat or hollow ground for cutting various soft, fibrous materials.
This group has a subcategory of blades, including some kitchen knives and razors, that will be identical in many design features and desired properties, but they are used more in a push cut. Regardless, impact toughness is not nearly as crucial as abrasion resistance for knives like this.
The effects of carbon content in a simple steel can be seen on the Iron-Carbon phase diagram.
In contrast, the second group—choppers—is used in straight-on, push-type motions, cleaving, or cutting that often involves impact. These knives cut more like a chisel than a blade drawn into a cut like a saw. Camp knives, some bowies, and many swords fall into this category. They benefit from polished, beefier, convex edge grinds that don’t require abrasion resistance as much as impact toughness.
By definition, a knife is a cutting tool. If we should ever find ourselves detracting from a blade’s ability to cut in any part of our plan or execution thereof, we may need to consider whether making a knife or another tool is the better option.
Thus, all the properties discussed herein are relevant to cutting. A fundamental condition for a blade to slice through material is that it must be stronger than the cutting medium. There is tremendous load pressure at the microscopic level, where the cut is initiated. So, almost by definition, strength must be a top priority in any knife edge.
For this article, strength is the ability to resist deformation under load. Opposing this prized quality of strength is ductility, or the ability to easily deform without edge or blade failure. Knifemakers heat treat steel to replace ductility with strength. For millennia, it was the job of the blade maker to find the most acceptable compromise between strength and ductility for their blades to cut while avoiding brittle failure.
Steel Strength
The graph shows the total hardness from proper solution in steels soaked for 1 minute and 10 minutes, respectively, illustrating the effects alloying can have on heating requirements.
There are many types of strength in steel. Examples are compressive strength and tensile strength. These and shear strength are not as apparent in general knife use, so knifemakers more easily conceptualize them as hardness.
The other quality prized in a blade is toughness, which should be viewed as the steel’s ability to withstand shock from sudden loads rather than bending in a ductile manner under gradual load. These are two entirely different behaviors, with one being more relevant to a blade used in chopping. Rather than the Faustian bargain of trading strength for ductility, the Holy Grail of blade making is maintaining high strength with impact toughness. In chopping-type blades, impact toughness is almost as valuable as strength.
The next property to consider in a knife blade is abrasion resistance. Microscopically, the knife edge is subjected to tremendous wear, even when cutting seemingly soft materials. It is this wear that results in the tool dulling when used. Abrasion resistance is the steel’s ability to withstand such friction effects. While this property does increase with overall hardness, steel’s unique makeup gives it abrasion resistance above and beyond hardness and even independently from it. Within the steel, there might also be carbide particles with a hardness that far exceeds the overall Rockwell measurement numbers of the blade. Fine cutting and slicing blades benefit more from abrasion resistance than impact toughness.
Although the possible steel choices for modern knifemakers are endless, for simplicity’s sake, this discussion is limited to non-stainless alloys commonly used by forgers and grinders alike. Although many knifemakers have become dependent on AISI (American Iron and Steel Institute) or SAE (Society of Automotive Engineers) steel names, such titles as 1084, W-2 or 80CrV2 lack specificity and meaning compared to studying the individual steel’s chemistry in determining its potential properties.
The more alloying helps us in gentler quenches, the more attention must be paid to proper heating, making some steels a better match for a forge and others a digital oven.
I strongly encourage knifemakers to study the chemistry of any potential steel choices to decide which one to use and how to work it. A supplier that provides the chemistry for your steel understands this and is well worth doing business with rather than a source that omits the alloy’s makeup.
Carbon content is the first consideration within a steel’s chemistry and perhaps the most important. Carbon is the main element responsible for strength in steel. The more carbon a steel has, the greater strength can be achieved in hardening. However, this is only true to a certain point; maximum hardness in carbon steel is achieved at around .80% carbon, and beyond this, not much more is gained in that area. Putting more carbon than .80% into the solution during the hardening process can harm a bladesmith’s goals. However, carbon beyond this optimum level will add abrasion resistance if allowed to stay in carbide form.
This sweet spot in carbon levels around .80% is known as the eutectoid. It is the most efficient use of carbon in steel, with no leftover iron (ferrite) or any leftover carbide (cementite). Steels with less than .80% carbon content are inherently tougher and less brittle, while steels with more can have much greater abrasion resistance with a tendency to be less tough. This is important to consider when choosing steel for your intended blade purpose. Does a machete need abrasion resistance? Does a skinning knife need to be tough? Choosing 1075 for one or 1095 for the other could make all the difference in having a steel that will work for you or against you in creating that blade.
In centuries past, bladesmiths had no choice but to compromise between strength and ductility when working with simple iron-carbon material. But then, starting in the early 19th century, alloying changed everything. Finally, with the intentional addition of other elements to steel, bladesmiths could have their cake and eat it, too.
Steel Alloys
Combining it in one chart helps select the correct steel based on knife use and a knifemaker’s heat-treating equipment.
A sword in the 13th century that had to be kept in the low hardness ranges could now be just as tough at much higher hardness levels. Fine slicing cutters could have an abrasion-resistant carbide boost far exceeding simple cementite abilities. But with these gains in performance came greater demands for more precise controls in heat treating, atmosphere, and more refined blade quenches. Today, even the most basic carbon steels have enough alloys to radically differentiate them from the old steel. Anybody who thought they would water quench 1084, just like traditional tamahagane steel, can attest to this fact.
For this reason, another critical factor must be considered in proper steel selection beyond the type of knife being made. It is why the premise of this article is choosing the right steel for you and your knife. Our modern steel alchemists may have created the perfect high-tech steel for a knifemaker’s application. But if they’re learning the ropes, or all they own is a humble forge, it could still be a terrible choice for their knife.
If your shop is equipped with a digitally controlled oven, all the many modern alloy options are available if you learn the rules each steel choice requires. The same chemistry that makes one steel harden in almost any oil or air makes it much more finicky when heated before being quenched. An alloy steel may have the potential to outperform a simple carbon steel, but not if you lack the equipment necessary to unlock that potential.
Figure 1 shows the as-quenched hardness results of a series of tests involving simple heating versus a standard 10-minute soak on commonly used steels. Here, the effect of increased alloying is plain to see when looking at each steel’s time and temperature requirements, which many open-flame heat sources or forges may struggle to meet. Unless armed with an excellent understanding of the metallurgy, a smith desiring to stick with more traditional tools would be better served by more traditional steels. Simple carbon steels such as “W” or 10XX series are like what forges were initially made for and will allow the traditional smith to produce a fine blade effortlessly.
Knowing what each of the additional alloying elements brings to the table is valuable in knowing what to seek in steel. If you’re looking for impact toughness, consider chemistries that include nickel or silicon. These additions affect the iron’s atomic lattice, which acts like a shock absorber. For a knife needing abrasion resistance, a boost from the more powerful carbide formers can give you longer wear than simple cementite, with two of the most common examples being vanadium (above .25% of overall elements) or tungsten. Chromium will also help in this area to a lesser extent.
If you wish to achieve a fully hardened blade with minimal effort, manganese over 1% or relatively modest additions of chromium are just the ticket for leaving behind your stressful days of the water quench. And, of course, for applications where simple carbon steels would rust too quickly, chromium over 11% will also help resist corrosion. The chart in Figure 2 brings together all these considerations. On a final note, it must be conceded that a skilled bladesmith with a solid knowledge of heat treatment could push several of these alloys into adjacent categories. Still, here, we’ve focused on the path of least resistance.
By capitalizing on the characteristics of an alloy’s chemistry, a maker can spend less time getting it to behave in the desired manner and more time maximizing its performance.
The shape of the blade, or profile, must be precisely ground. Grinding is the operation of using files or other abrasives to mechanically shape the steel into a functional blade.
Grinding can be divided into two categories: grinding the blade profile and grinding the blade’s edges (secondary and primary).
Let’s talk about the profile. Grinding a forged blade’s profile can be done with a variety of tools. Heating the blade via friction is not a big concern because this grinding is done prior to heat treating (annealing, quenching and tempering). As you may know, the blade needs to be shaped after a pattern or template. At this stage that template is scribed onto the billet of steel that is to become your knife.
Place the pattern so that it most appropriately covers the billet in relation to the thickness and tang. Be careful on full-tang knife billets to orient the template the correct way. I once made the mistake of switching the tang end of the billet for the blade end and wound up with a blade with way too much taper.
Once the template is in place, secure it with a pair of locking pliers or strong clamps. Any sharp-pointed tool that is harder than the annealed steel will scribe (scratch) lines onto the billet. Trace around the template completely. Examine it before you remove the clamp(s) to make sure you can see the scribe lines clearly. Examine it again, checking it against this list:
* Are the lines clear and not making little “train tracks?”
* Is the blade/tang junction exactly where it should be?
* Is the blade where it should be?
* If you have made a mistake scribing the lines, you can lightly grind the surface and scribe again, but you will now be committed to grinding and polishing the flats of your finished blade.
Also remember that, on a laminated billet, if you grind steel from one side you really ought to grind the same amount from the other side as well, or the steel core will no longer line up in the middle. For blades
that are meant to have a forge finish or a hammer-forged finish, these options will no longer be possible, so take great care when scribing lines on a billet.
There are several methods for removing the excess steel from the billet to produce the perfect profile.
* Steel shears
* Cut-off wheel
* Band saw
* Drill press and hack saw
* Belt sander
* Bench grinder
* Kaiten toishi
As the smith is cutting out or grinding the blade profile, the scribed lines, which should be clearly visible, are the guide. As soon as you are so close to the lines that you are actually touching them in places, it is necessary to employ another “micro observation” technique to be in full control of the profile.
In a good source of natural light, hold the blade at eye height with the flats of the blade horizontal. Instead of focusing your attention on the flats, look closely at the outer edges of the blade. If you hold the blade with the point towards your eye, the spine of the blade should look compressed into a few millimeters.
Compressed like this, every high or low spot on your scribed line will be evident. Similarly, every line on the outer profile of the blade should be examined this way. In the pattern or template you used, every line should be well defined and with a purpose. Ask yourself if the lines you are now looking at were meant to be perfectly straight, curved or pointed. Pinpoint trouble areas, then attempt to grind in a way to affect only those areas and re-examine.
At this stage, the blade should be at 97 percent of its final profile. The other 3 percent will be removed in the final polishing stages.
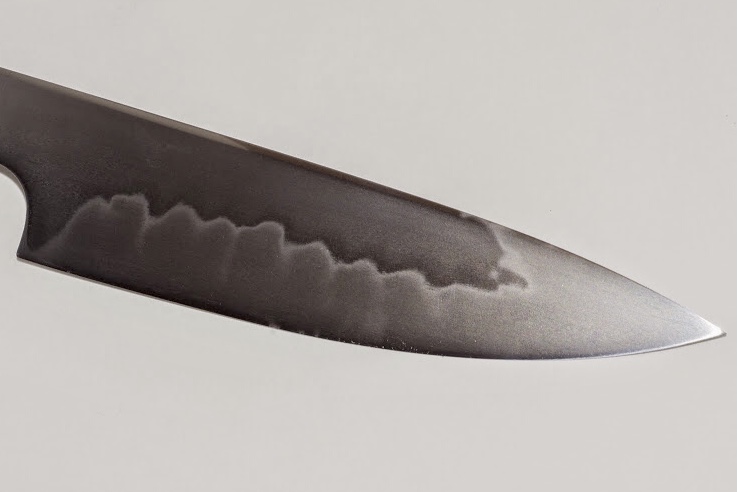
To those who appreciate the tempered steel of a Japanese sword, the hamon is visual evidence of the maker’s effort to produce the finest blade work. In the West, the hamon appears in much the same fashion on Western knives, a blending of culture and craft. Where East meets West on the steel blade, there is the hamon, the graceful temper line.
“From a practical point of view, the hamon is a visible indication of a differentially heat-treated blade,” explained knifemaker Stuart Branson. “In many cases, it’s advantageous to have a harder edge supported by a softer spine in a knife. In this way, you gain the benefits of the good edge retention afforded by the harder edge with the durability of the softer spine region of the blade. In the long and graceful form of the Japanese sword this might seem obvious, but the same is true for Western blades, particularly those hard-use knives or the very popular larger chopping knives.”
According to veteran maker Gary House, the aesthetic effect of the hamon is behind its surge in demand among Western collectors, clearly defining the transition zone between hard edge and soft back.
“The popularity of the hamon on non-Japanese blades today, I believe, is the visual effect of the temper line,” he commented. “The movement and variations of the hamon are very attractive and visually appealing compared to a straight temper line.”
More and more, discriminating knife customers are looking for the hamon on the blades of some of the best-known, iconic Western-style knives.
“‘You will put a little something in the blade, won’t you?’ is a common request these days,” commented Mike Craddock, who started making knives in the 1970s, took a 40-year hiatus, and has come back strong recently. “It doesn’t necessarily make the knife better, but it does look good. I consider it the spirit of the steel.”
Certainly, the hammered and heat-treated steel is expected to be sturdy. However, the quest for the hamon is a classic case of discovering what lies beneath.
“For me, it is the mystery of the hamon,” related bladesmith Erik Fritz. “What shape is it going to take? How much work is it going to entail to bring it out so it can be seen? I think what makes it so special is that each hamon is so different and unique.”
PRODUCING THE HAMON
The hamon is there, lying within the reach of the knifemaker who is willing to take the time to thoroughly rub the steel to enhance the elusive line. For some makers, that effort is standard procedure. To them, a blade without this unmistakable flair of the Orient just comes up short. A hamon on Western knives bridges cultures and demonstrates a willingness on the maker’s part to invest the time and energy required.
“Like many, I have always been enamored of the Japanese sword,” Branson said. “The hamon is integral to its design and construction, and although it isn’t necessary that it be brought out to that degree, polishing these swords has been elevated to an art.”
Branson says he attempts to achieve several goals in the production of the hamon. First, he wants to emulate the beauty of the Japanese blade. In the attempt, he learns to see the intricacies of the pattern, theory of design, and the dedication of the artists that have gone before him.
“Producing a hamon is not just adding clay to a blade and hoping for the best,” he reasoned. “It is understanding the steel being used, the temperatures and times needed to achieve your aim, and the amount and pattern of the clay to produce the hamon you are after, the delicate process of heating the blade properly before the quench and, in the case of water quenching Japanese-style blades, the terror and elation of a successful water quench—the violent transformation of the steel into two forms above and below the hamon line, and the resulting curvature induced. One can understand how the swordsmiths approached their craft with a religious reverence.”
WATER VS. OIL QUENCH
Producing the hamon involves a process of coating the blade with clay and then quenching it in either oil or water. The water quench is more rapid and therefore potentially more catastrophic should a crack or complete break occur.
“I use clay and white crushed stone,” House noted. “A paste of satanite also works well. The clay insulates the blade from heat and will be a thin layer as it comes down toward the edge of the blade.”
Most makers who frequently produce a hamon opt for such tool steels as W1 and W2, and carbon steels such as 1050, 1075, 1084 and 1095. “Simple carbon steels are conducive to the very fast quenching requirements of a clay-coated quench,” Fritz remarked. “This allows the insulating clay to retard the hardening of the coated areas of the blade. High-alloy steels that allow thorough hardening of the blade are not conducive to the creation of a very active hamon. What you get with the high-alloy steels is more of a straight line.
“With W2 I prefer the water quench,” Erik continued. “With 1084 and 1095 I use Parks 50 quenching oil. Any hamon requires an insulating layer of clay to be applied to the spine. The biggest difference in hamon activity is in the quenching medium, such as water or oil. In my experience and opinion, greater hamon activity is achieved through a water quench. If you are going the safe route and using oil, there is less chance of a catastrophic blade failure.”
Branson said he sees fundamental differences in the hamons produced and the effects of the water or oil quench on the steel itself. On Japanese-style blades, the water quench introduces sori, or curvature to the blade. As the water quenches the steel, the uncoated steel cools quickly while the coated spine retains heat, staying expanded longer and causing the blade to curve downward. As the spine cools, the hardened edge begins to curve upward. Quenching oils are typically made for industrial use and to prevent deformation of the steel as much as possible. Consequently, the blade tends to curve downward and remain so.
When quenching a blade in water, Stuart added, “The hamon tends to be more cloudlike, more diffuse, and to my mind a little more mysterious and poetic. The oil hamon, however, is more literal, more willing to follow the clay pattern and is more defined on its boundaries. However, the ashi, the wispy lines that come off the main patterns, can be very delicate and defined. Control of this can make for a very exciting hamon.”
The investment of both materials and a significant amount of time impact the cost of a blade complete with a hamon. However, for the maker willing to commit the time and the potential buyer, a genuine value is readily apparent.
“You do have extra work in claying the blade,” Craddock said, “and then there are literally hours of hand rubbing to get the aesthetics right. The steel does what it wants to, but there is a process that you go through. The steel offers it if you are willing to go out and get it. To me, the time involved in the hamon, and about 90 percent of the steel blades I make have them, adds about 10 percent to the cost of the knife—but from the standpoint of hours it should probably be double.”
LANGUAGE OF THE BLADE
The hamon brings beauty and satisfaction to the maker and the buyer. Further, it is taking its place among the desired aesthetic effects of Western knives, proving that the world is indeed much smaller when the same language is spoken—in this case, the language of the blade.—BY MIKE HASKEW
What To Look For in a Hamon
Discriminating knife buyers looking for a quality hamon should bear a few things in mind. A hamon can be wavy, undulating or any number of shapes. Whatever the shape, it must be well formed, clear and unbroken. What’s more, according to Don Fogg, it must be possible to describe in an understandable manner using a traditional vocabulary.
Erik Fritz advises that a professionally done hamon will exhibit a sharp demarcation between the hard and soft areas. Watch out for a hamon line that dips too close to the cutting edge. Stuart Branson agrees that if the hamon comes close to or reaches the edge of the blade, then a section of the edge is not hardened properly. Levels of refinement in the hamon involve subjective preferences as they relate to clarity and detail.—BY MIKE HASKEW
How To Obtain a Hamon
For more on producing a hamon, see “How To Clay Temper and Obtain a Beautiful Hamon” by ABS master smith Don Fogg in the book, Spirit of the Sword. To order a copy call 1-855-278-0406 or visit www.shopblade.com and click on “Books & References.”
CAPTION FOR PICTURE AT TOP
For his stag “Ferncliff” model, Lin Rhea employs a wavy, cloud-like hamon on the 9-inch W2 tool steel blade. Overall length: 14 inches. (Chuck Ward photo)
For the latest knives, knife trends, knifemakers, what knives to buy and where, knife legislation, knifemaking instruction, and much more, subscribe to BLADE® Magazine, the World’s No. 1 Knife Publication.
It’s not too early to pre-order the KNIVES 2016 book, which hits bookstores, newsstands and online in late August/early September. And staying true to form, KNIVES 2016 showcases nearly 800 of the newest, finest handmade, custom knives in the world in “Trends” and “State Of The Art” categories, as well as in-depth, truly fascinating feature articles on a variety of knife subjects, a “Factory Trends” section and, of course, the coveted Custom Knifemakers Directory.
The Custom Knifemakers Directory lists the names of 2,000-plus handmade knifemakers, their complete contact information, including addresses, phone numbers , emails and websites, their specialties, patterns, technical information, remarks, tang stamps and price ranges.
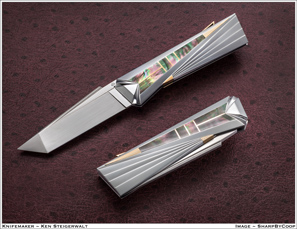
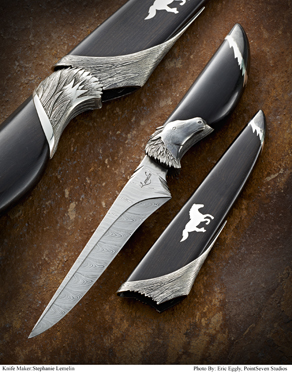
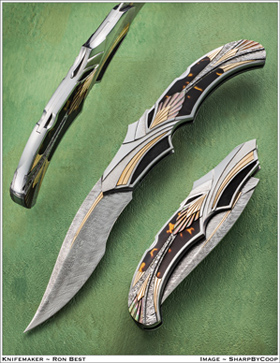
Within the “State Of The Art” section is a chapter titled “Sculpted Bods” that really speaks for itself, and here are a few of the incredible knives that parade their sculpted bods before an appreciative audience.
Are you up to the challenge of frame handle construction?
Frame handle construction for knives has been around for centuries. Historical examples of many Eastern styles like the kard, khyber and yataghan often feature ornamented frame handles. Nineteenth-century knives attributed to James Black and some of the early American bowies also had frame handle construction. Though it’s been around a long time, the frame handle remains a viable modern construction method for today’s custom knifemakers.
There are many ways to crack the nut/skin the cat on frame handle construction. This article will walk through the frame handle process and point out particular problems and potential solutions for those who wish to pursue building a frame handled knife.
3 REASONS WHY
Frame handle construction is best defined as using a wrap-around “frame” to conceal the tang of a hidden tang knife. The first question many people ask regarding a frame handle construction is, “Why would you want to do it that way?”
My first thought goes back to the earlier days of the internet when forums were at their peak, and fine makers like ABS master smith Bruce Bump took the time to document “work in progress” (WIP) threads. Bruce had a fine frame handle WIP on the KnifeDogs.com forum in 2013, and the consensus at the time was that you build a frame handle for quite a few reasons, though the first one is “because you can!”
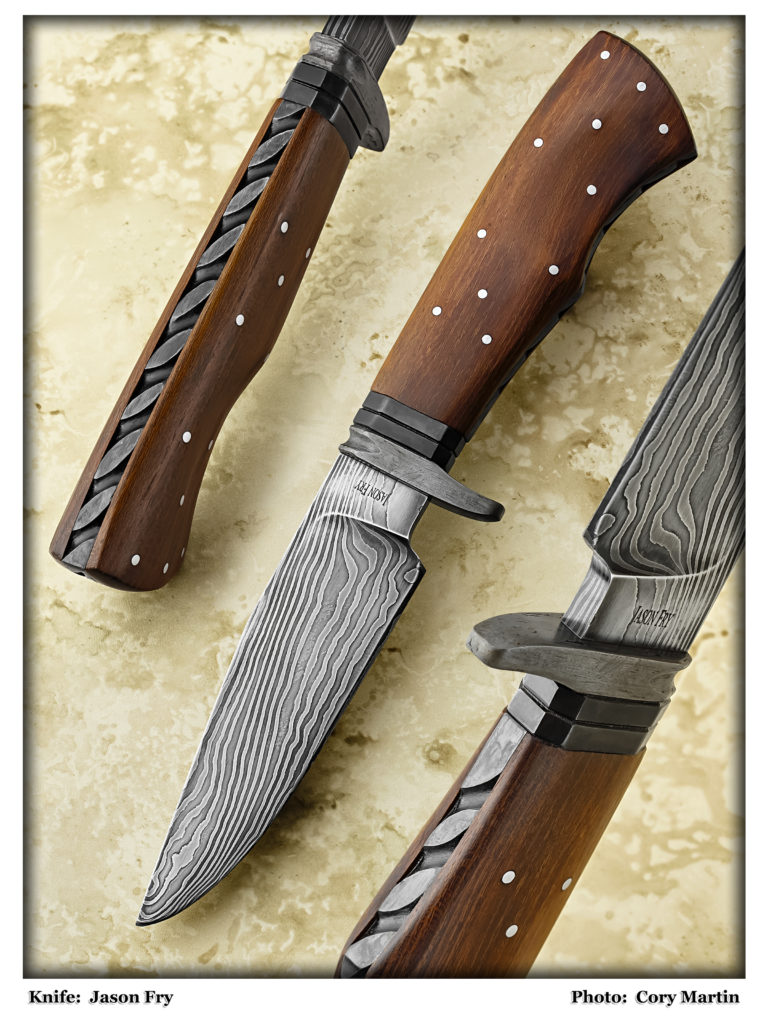
The author used frame handle construction for his hunter in a blade of 33-layer damascus, a wrought iron guard and scales taken from a fence post made in 1912 from bois d’arc wood, aka osage orange. The spacers are World War II practice bomb material. (Cory Martin knife image)
A frame handle is a much more complex build process than your standard full- or stick-tang knife. However, in addition to the show of skill by the maker, frame handle construction has a few distinct advantages that make the complexity worth the effort:
A frame handle allows for the look of a full tang, but with the guard-fitting techniques of a stick tang. For a forged stick-tang-knife design that needs a guard, a frame handle allows the use of full-tang-style handle construction;
A frame handle is a good way to use scales or slabs on a stick-tang knife. If you have a good set of stag or mammoth slabs, or if you have stabilized wood slabs that might be too fragile for through-tang construction, the frame handle allows you to use the materials on a stick-tang knife; and;
The use of a frame handle gives the maker another area to embellish the knife. Some frames are great for engraving, while others may highlight a damascus pattern. Either way, the frame makes the embellishment stand out in ways that are harder to accomplish on a full-tang knife.
HOW to DO IT
At a basic level, the frame of a frame handle is a piece of material, usually metal, that wraps around a stick tang and mimics the look of a full-tang knife. This presents some challenges that have resulted in a few different creative solutions.
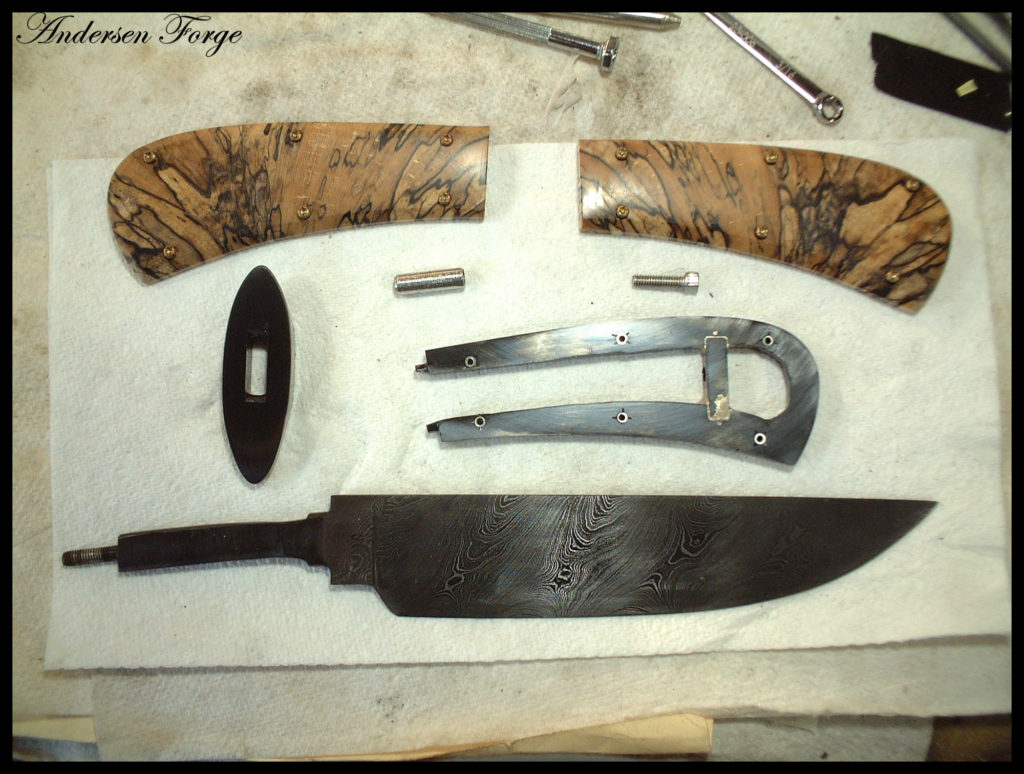
An exploded view shows an ABS journeyman smith Karl Andersen frame handle construction knife before assembly. (Karl Andersen image)
Challenge 1: The tang must fit inside the frame. Some makers insist on precision so there are no gaps and the fit is tight. Others concede that the handle will be held together with mechanical fasteners and sealed with epoxy, so a precise fit between the frame and the tang is not necessary.
Challenge 2: All parts of the handle must be securely fastened together. I sat through a class with ABS master smith Mike Williams in which he admonished the students, “Don’t trust in the magic of chemistry” by putting your faith only in the strength of glue. Likewise, veteran bladesmith Jerry Fisk challenges makers to think ahead to what their knives might be like in 100 or 1,000 years, and recommends a mechanical connection that won’t fail over time.
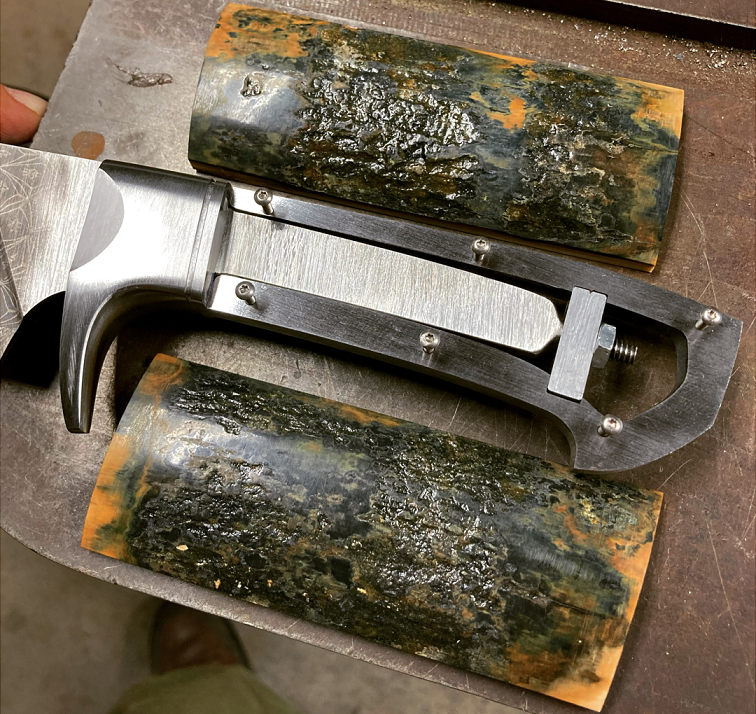
One way to address this challenge is to use pins. If you pin the scales to the frame, pin the completed handle assembly to the tang and follow up with glue, there’s no opportunity for failure. Some choose to make all the pins visible as an artistic element, while others take advantage of hidden pins for all but the one through the tang. Another way is to use a threaded fastener. Bladesmith Salem Straub recently illustrated the technique on a frame handle WIP on his Instagram feed. Salem used a threaded fastener in an internal slot in the frame to mechanically lock all the parts together tightly (Image 1). The handle material is relieved on the inside to accommodate the fastener.
Another way to use a threaded connection is to thread the end of the tang and use a fastener on the handle butt. An advantage of this approach is that the fastener itself can become part of the embellishment.
Challenge 3 is the complex fit-up between all of the knife’s elements. Frame handle construction naturally doesn’t excuse a poor guard fit, but it also provides other places for gaps and misalignment. Once again, there are several potential solutions to alignment problems.
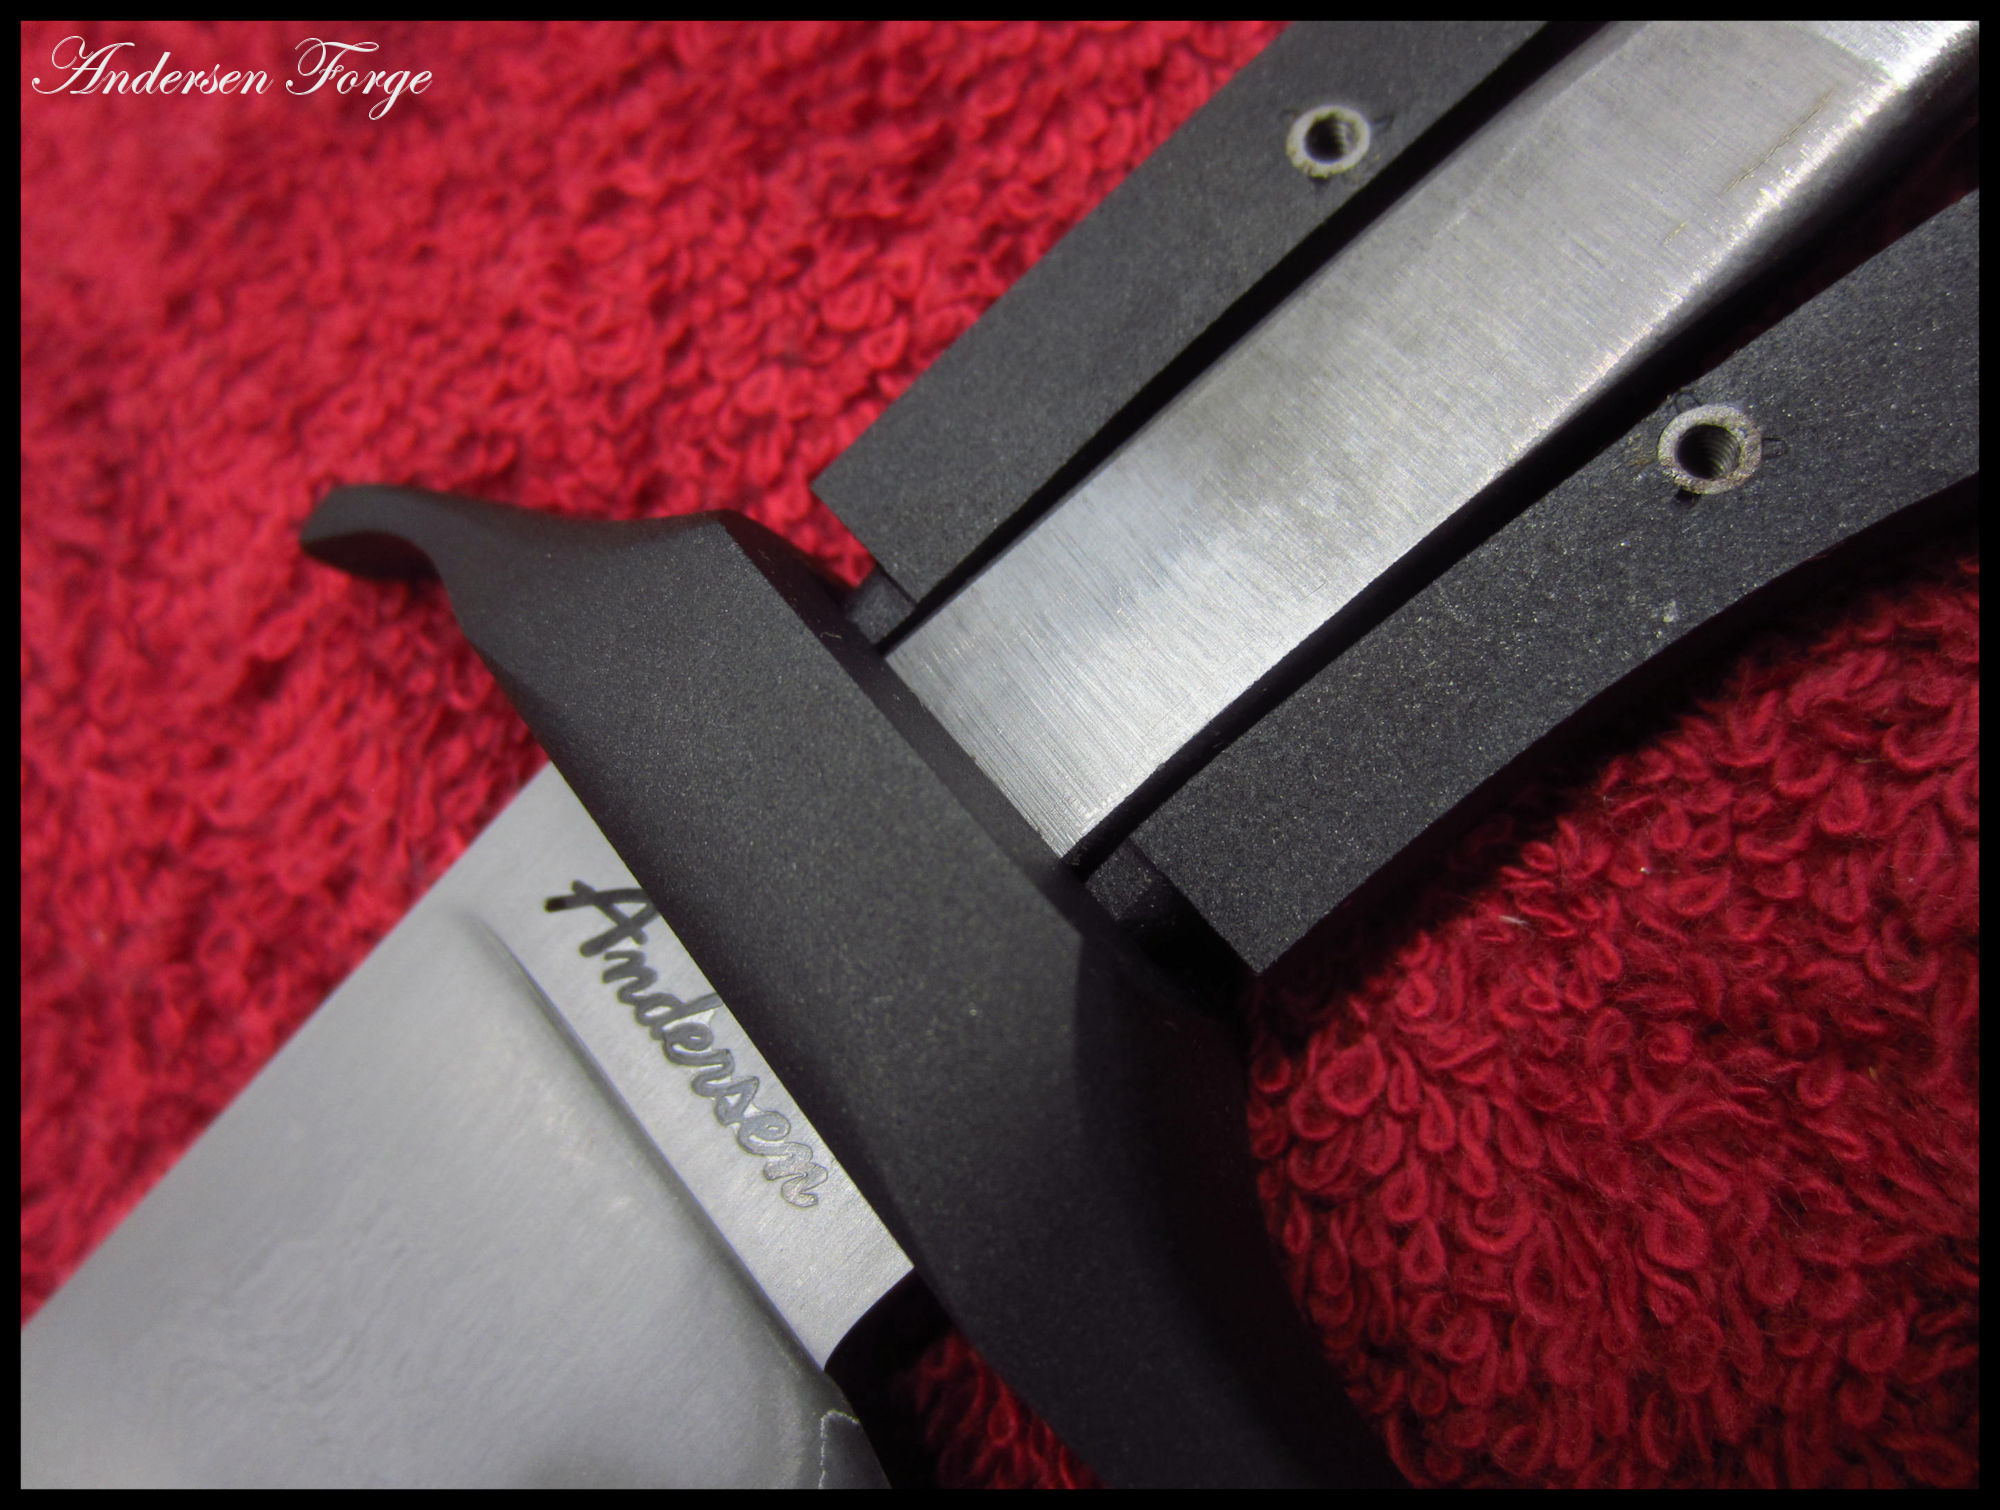
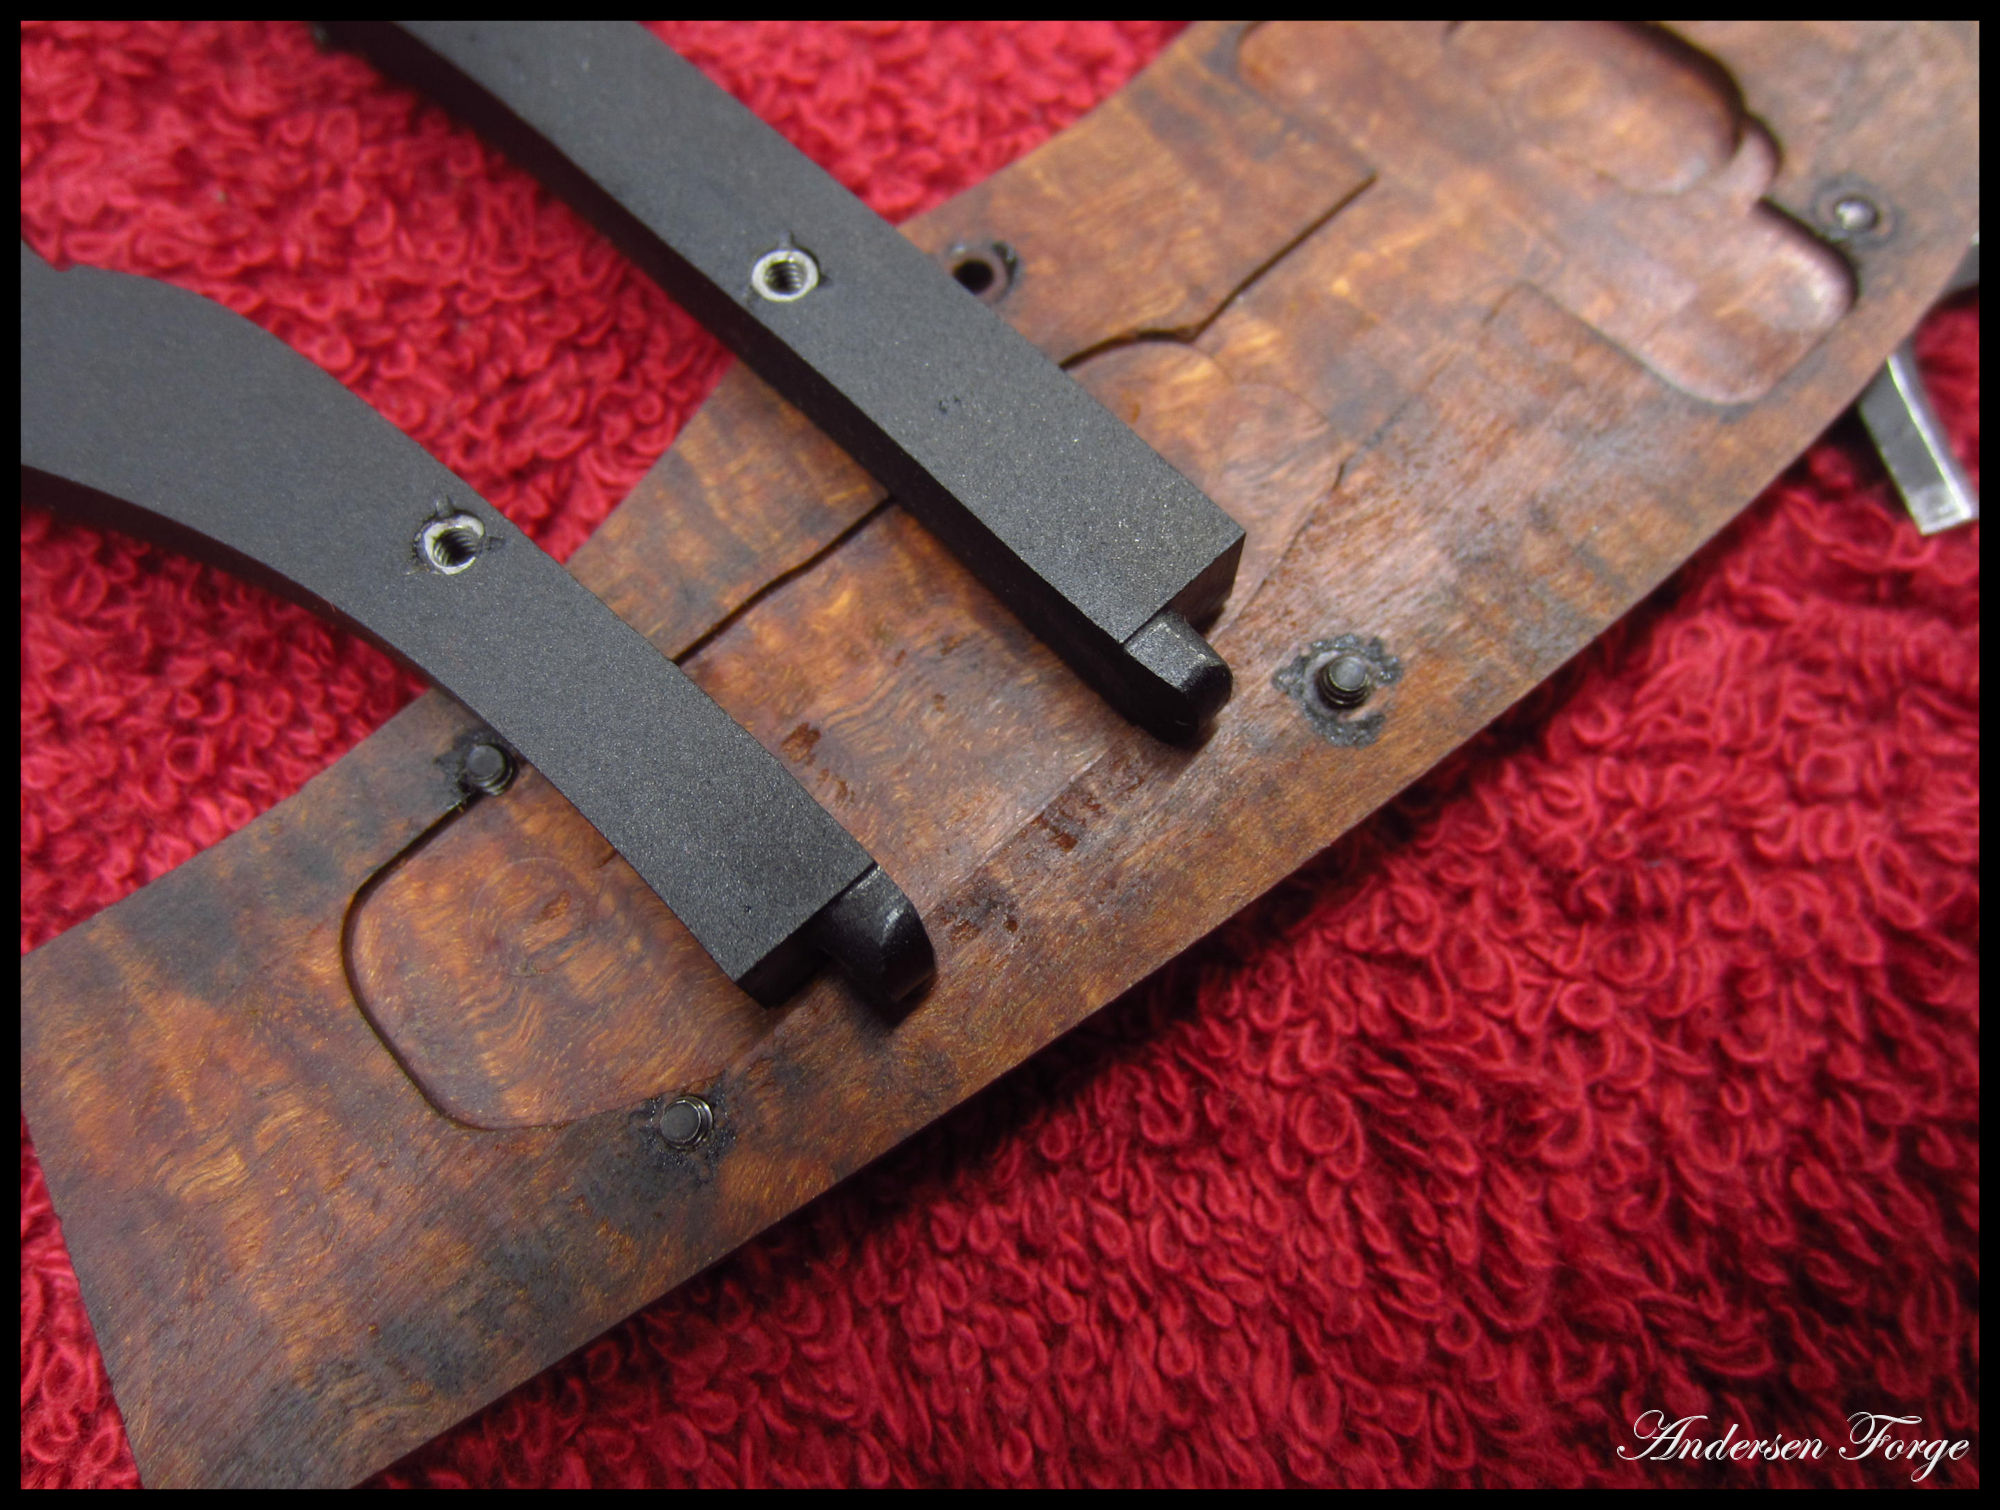
One is the use of alignment pins to make sure everything is secure. Pins on the end of the frame go through any spacers and into holes in the back of the guard so that each part indexes the same during assembly. Some makers, including Bruce Bump in the aforementioned epic WIP, advocate for leaving metal tabs on the end of the frame and fitting the tabs into similar holes on the back of the guard (Images 2 and 3). In both cases, there’s a mechanical connection that prevents the guard, spacers and frame from rotating out of alignment around the center axis of the handle. Either way, when you build a frame handle, the construction will require you to assemble and disassemble the knife repeatedly, so you’ll need some mechanical way to keep things lined up.
1 of 2
Above: Some makers advocate for leaving metal tabs on the end of the frame and fitting the tabs into similar holes on the back of the guard. In both cases, there’s a mechanical connection that prevents the guard, spacers and frame from rotating out of alignment around the center axis of the handle. (Karl Andersen images)
Another fit-up challenge is the overall requirement for clean-fitting joints with no gaps. It sounds simpler than it is, but two surfaces that are dead flat will join together without a gap. The challenge of a multi-piece frame handle with a guard and a few spacers is that you are creating a multitude of surface joints, and every single surface must be dead flat. At a minimum, you’ll have a joint between the guard and frame, and also between the frame sides and the handle material. Any bump or wiggle on any surface and you’ll have a gap in the final product. Flatness comes in degrees. You can get a fairly flat surface on a platen, flatter on a disk, and still flatter on a surface plate or surface grinder. You have to make the joints as flat as you can with the tools you have available if you want a gap-free fit.
I tend to prefer the look of a tapered tang on a full-tang knife, so I’ve started tapering the frame of my frame handles as well. Others stick with a full thickness frame, where the thickness closely matches that of the blade at the ricasso. Some add spacers between the tang and handle material, while others choose to go with the frame and handle slabs only.
Another fit challenge is presented by the frame itself. In order to adequately finish the visible surface of the frame, whether by simple polishing, bluing or etching, or by engraving, the frame must be 100 percent at final-grit finish prior to final glue up. Many makers learned to make a full-tang knife by finishing the front edge of the scales, gluing the knife together, shaping the scales down to the exposed tang, and then polishing the handle and the tang at the same time. That method will not work for a frame handle that needs to be blued or etched. Personally, I tend to use dummy pins to fit the entire handle assembly together, then grind the scales down to the frame. In his recent Instagram example, Salem Straub used small screws to hold the handle material to the frame.
With regard to the relationship between the handle material and the frame itself, whichever method you choose, it is important that the fit be maintained consistently all the way around the frame. (Jason Fry image)
With regard to the relationship between the handle material and the frame itself, some choose to leave the material slightly proud of the frame for a “museum” or “heirloom” fit. Others prefer the material to fit flush to the tang. Less commonly, some makers round the frame and leave it slightly proud of the material. Whichever you choose, it is important that the fit be maintained consistently all the way around the frame, from the joint at the guard on the top all the way down to the joint at the guard on the bottom.
Once the profile is set, I polish the handle and the frame together down to final grit, and then apply any surface finish to the frame itself. Once all parts are 100 percent complete, they can be glued together as a final step.
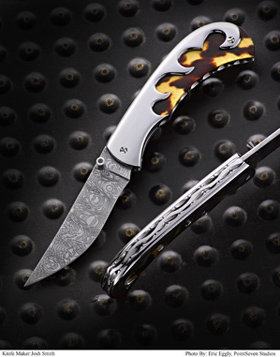
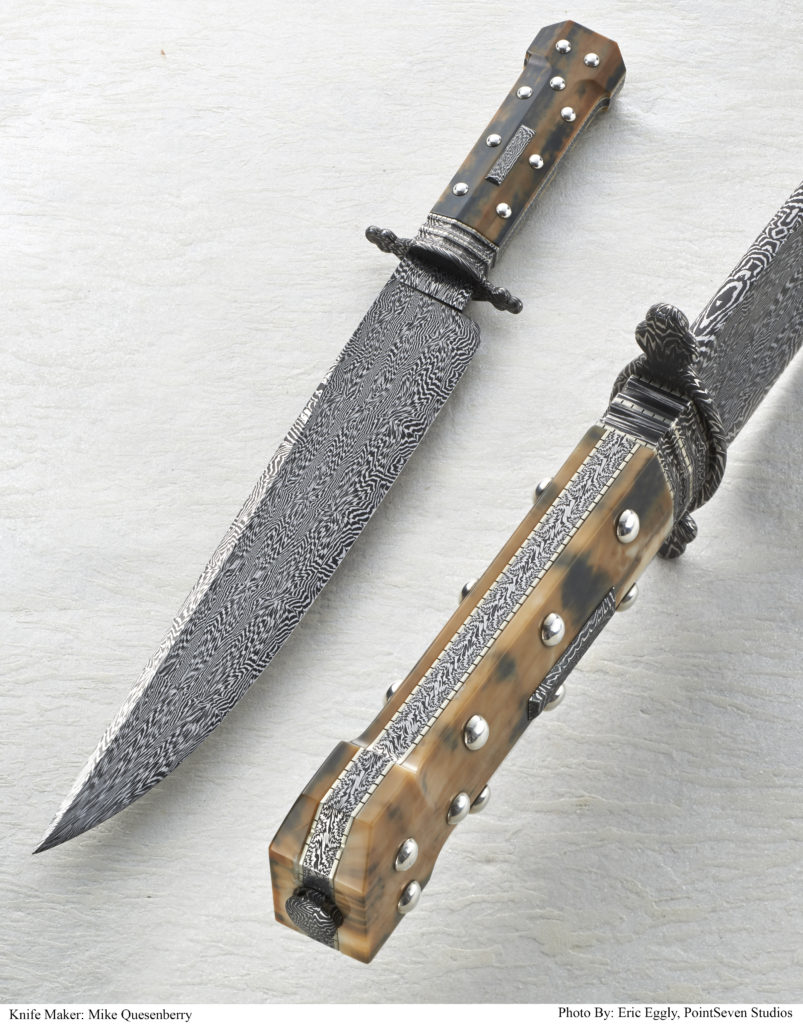
ABS master smith Mike Quesenberry used frame-handle construction on his dog-bone bowie. (Eric Eggly/PointSeven image)
WHEN to DO it
So when should you try making a frame handle? In my mind, if you can make clean full- and stick-tang knives, you could be up to the challenge. If you have slabs of exceptional handle material that deserve more than a simple full-tang knife, a frame handle is a way to step up and put the materials on full display. If you have a knife in mind where the frame and guard need to be blued, damascus or engraved, a frame handle is the way to go.
A frame handle knife has its advantages, but the complexity of the construction presents plenty of challenges. As a skilled maker, you may choose to rise to the challenge of a frame handle just to show that you can.
For more information on frame handle construction contact the author at [email protected].