

Knifemaking

Knifemaking is the building of a knife, which includes the blade, handle and other accouterments. Blades are made by either removing metal from a steel blank via a grinder – known as stock removal – and the forging to shape of hot steel into a blade in the process known as bladesmithing. Other parts, including bolsters, guards, pommels, etc., are needed to complete the finished knife.

Featured Knives – – Knife Collecting – – Tactical Knives – – Survival Knives

Robertson’s Maker Market Matrix: An Explainer

The author’s system is designed to help you accurately price custom knives.

After I wrote a recent BLADE® article on custom knife pricing, editor Steve Shackleford suggested I write a follow-up on the system I use to price custom knives—Robertson’s Maker Market Matrix or RM3. I wrote it to provide a basic guide for each collector or maker on how to do their own pricing. You can find many examples of weighted score tables with a quick Internet search.

A collection or business is a very individual thing. The research required to create a successful Matrix for either one depends on the individual doing it. Let’s dive in.

Market Position

A maker’s position in a market is not always apparent. While in graduate school, I wrote a paper on the impact of pricing and how it can apply to products. As a custom knife dealer, I was looking for a business advantage. I applied the findings in my paper to my business.

I opened my copy of KNIVES ’92 and, using a weighted score table, started to compare makers I found in the book’s index. Initially, I placed the knives in recognized categories, for example, hunters, fighters, bowies, tactical folders, etc. I wanted to compare similar knives/apples to apples. Each category had several hundred entrants.

My goal was to create a top-third, middle-third and bottom-third strata. This is where the weighted aspect of the table comes in. I developed essential criteria, such as quality of work, demand in the primary market, demand in the aftermarket, materials used, delivery time, awards and other gauges. Once I established the criteria, I gave each criterion an importance weight.   
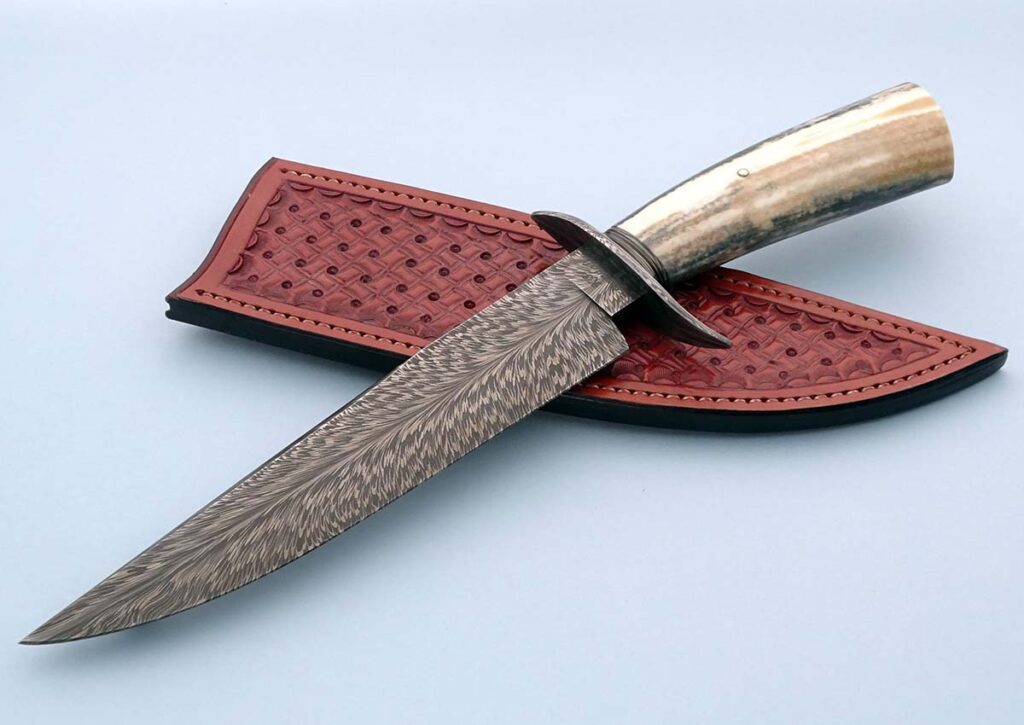

Custom Randall-Orig-Forged-Dam-Fighter-lg

Maker: Steve Randall  
Model: Feather Damascus Fighter  
Blade Length: 8”
Overall Length: 14”
Blade Steel: Feather Pattern Damascus 
Guard Material: Feather Pattern Damascus  
Handle Material: Ancient Walrus Ivory  
Author’s Comments: “Steve is the quintessential ABS master smith. He is versatile, inquisitive, loves a challenge and always strives for perfection in every aspect of his knifemaking.” (Robertson’s Custom Cutlery image)


After the Matrix determined the maker’s position in the strata, the ultimate goal of the RM3 took shape in determining which makers’ prices accurately reflected their position in a particular market sector. My research showed that hundreds of makers’ prices were above their position in the market. In other words, many of these makers who were in the second strata were asking first-strata prices. The same was true for third-strata makers asking second-strata prices. The main reason for this is that the makers asked their knifemaking friends to price their knives.

Knifemakers are not knife buyers and, as such, generally do not have a real sense of what knives should sell for. This is especially true if they don’t know their market position. Additionally, asking your competitors/fellow makers to price your knives is not a recommended business strategy.

Among other things, one aspect of the RM3 I was surprised to find is that it identified makers who offered value pricing. At first glance, many people mistakenly think this means the least expensive price. Instead, given the maker’s position in the market, a value price provides the buyer value regardless of the price tag. The makers who came to my attention were those pricing their knives commensurate with the pricing in lower strata, e.g., a first-strata maker asking for a second-strata price.

Blade Game

When knife shows or knife sales are slow, the blame game begins. The reasons for the slowdowns usually center around the show promoter not doing the job. The economy is a favorite reason, along with the weather, lighting and position in the room. A maker once told me his sales were slow because he was facing a wall. Note that we were in a square room; everyone was facing a wall. What seldom, if ever, is brought up as a reason for slow sales is the maker’s prices.
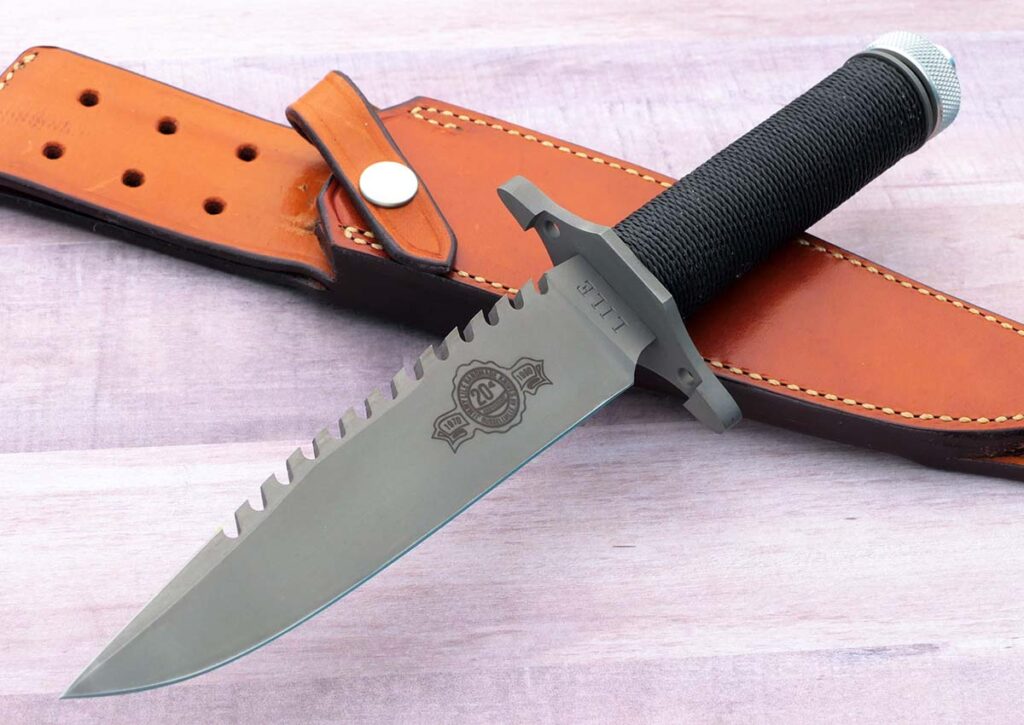

Custom Lile-20-Anniv-Sly-II-Tactical-Fighter-Blade

Maker: Jimmy Lile 
Model: 20th Anniversary SLY II Fighter 
Blade Length: 6”
Overall Length: 10.5”
Blade Steel: 440C stainless
Blade Finish: Bead blast 
Guard Material: Stainless steel 
Handle Material: Aluminum tube w/cord wrapping 
Author’s comments: “A BLADE Magazine Cutlery Hall-of-Fame® member, Jimmy did more to introduce the knife world to the tactical fixed blade than any other custom knifemaker. This young infantry lieutenant saw a Rambo movie and it changed my world.” (Robertson’s Custom Cutlery image)


Very few people will tell makers their prices are too high, as makers can be touchy about their pricing. At the same time, few makers ask collectors or buyers what they think of their knives. This interaction is a prime opportunity for a maker to work on his or her Matrix. Further, this is an opportunity to educate the collector on why the maker’s knives are priced the way they are, and to give the collector a chance to work on his or her Matrix.

I cannot overstate how vital this flow of information is for both the maker and the collector. For the past 30+ years, at every show I have attended I have heard, “Les, come and look at my knives and tell me what you think.” I have the utmost respect for the makers who ask me to do that. It can be daunting for a maker to ask someone to critique the maker’s knives and prices. A quick “good job” may be nice for the maker’s ego, but a critical examination of the work and pricing will ultimately improve the maker’s knives and bottom line. 

Hype Cycle

The Hype Cycle occurs when a custom knife market sector takes center stage. In 1988, interframe folders were all the rage—many sold for over $10,000 each. In 2001, I bought one of the same knives for $600 at an auction. The original sale price was $14,000. What happened? Answer: the Hype Cycle. The hype drove up the prices, and when the hype went away, the prices crashed. The Hype Cycle is a Matrix killer as prices become skewed to the point that they are unsustainable. 

Whether you’re a collector or a maker, the Matrix can benefit you. Identifying the maker’s position in the market aids in an appropriate price, thus increasing sales for the maker. At the same time, it gives the collector a chance to sell or trade a knife at a fair price in the aftermarket, as it is in the aftermarket where collectors pay to go to school. 

Custom knife markets are small cycles inside of larger cycles. New criteria will always enter a Matrix. Consequently, both makers and collectors must be sensitive to the ever-changing markets. Retirements, new materials, awards, bad reviews and other factors can all impact pricing.

R&T

Reading this, some may think the RM3 is a quick and easy solution for pricing knives. I assure you, it is not. The amount of research and time you put into your Matrix will directly affect your ability as a collector or as a maker to identify the maker’s position in his or her market. It also will give valuable insight as to whether the maker is offering value pricing. Makers will gain useful knowledge on how to price their knives correctly for their position in the market, helping them eliminate the blame game.
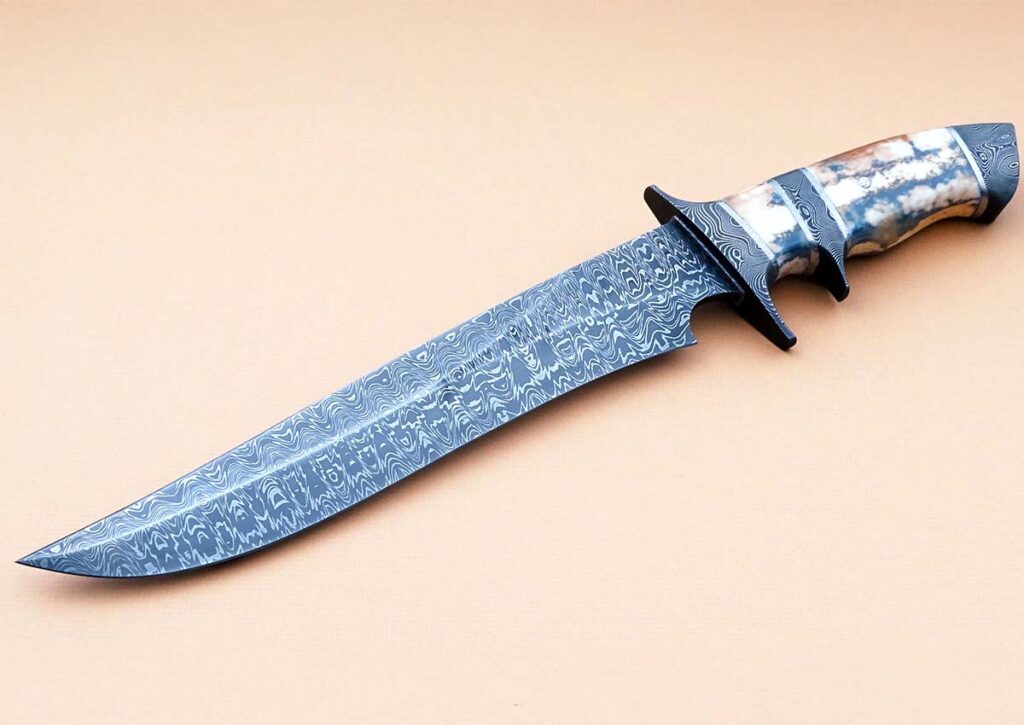

Custom Broadwell-Damascus-SubHilt-Ivory-Blade-Article

Maker: David Broadwell   
Model: MLR Sub-Hilt Fighter 
Blade Length: 8”
Overall Length: 14”
Blade Steel: Wolf’s Tooth Pattern Damascus Guard, Sub-Hilt and Pommel Material: Wolf’s Tooth Pattern Damascus
Handle Material: Ancient Walrus Ivory  
Author’s Comments: “Dave has been making some of the finest sub-hilt fighters for over 40 years. His knives are the epitome of the 4 F’s; Fit, Finish, Form and Function.” (Robertson’s Custom Cutlery image)


More On the Robertson Matrix

How do you give what you call an “importance weight” to each criterion in a Matrix? What makes specific criteria more important than others?
ROBERTSON: One criterion that has moved up my list and now carries more weight is customer service. We deal in so much poor customer service in our everyday lives. We don’t need this in our hobby. I am still amazed at the number of clients who tell me they have emailed or called a maker, often several times, with no response. Everyone is busy but it takes literally 60 seconds to respond to an email acknowledging receipt and indicating a response will be forthcoming asap. Those makers who don’t respond in a timely manner are telling you it is about them and not you. If they are making it difficult for you to give them your money, don’t. 

What makes the ratings for your criteria change?
ROBERTSON: Actually, it is the ratings of knife organizations that have caused me to change the weight the ratings carry in my criteria. When I first started in custom knives, to be a Knifemakers’ Guild voting member carried a lot of weight in the knifemaking community. Today the Guild is more of a club, though still a good idea that provides insight and help for makers. For me, at least, if a maker tells me he or she is a Guild voting member, that mostly tells me the maker is serious and has shown improvement in his or her knifemaking skills over the years, but it does not carry the weight in my criteria it once did.

How often do you update the ratings, and why?
ROBERTSON: The custom knife market is never static and is always evolving.  This evolution demands that weight associated with each criterion evolve as well. The weight I associate with a particular maker changes with the maker’s ability to incorporate the changes the collectors want, be it materials or design elements.

How often do you change the criteria themselves, and why?
LES ROBERTSON: I’m generally one-to-two years ahead of where a market sector that interests me is going. Given this extended lead time, I often have to account for new information and tweaking of the weight within a particular criterion or the criterion itself. Perhaps the most difficult aspect of this is to not put too much weight into a criterion due to my personal biases. In other words, just because a particular style of knife is my favorite does not mean the majority of other collectors feel the same way. I try to take my feelings out of the equation and I am not always successful. The Matrix is not an exact science.
More On Knife Collecting:

Pull Of The Push Dagger

Master smiths explore the symmetry, skill and survivalist roots of a classic.

It’s part adventure with a bit of notoriety and a dash of creativity. For the modern custom knifemaker, several styles are brought to life with history in mind. And the push dagger is one of them.

Maybe seldom seen, but always intriguing, push daggers trace their lineage to a bygone era when self-defense at the card table or on the street meant quick deployment from a vest pocket. For sure, that perspective spurs some custom makers to insert the push dagger into their repertoire while the stylized and subtle blend of blade and handle combine for a unique test of shop skill.

“They’re a backup tool,” explained ABS master smith and BLADE Magazine Cutlery Hall-of-Fame® member Steve Schwarzer. “They were typically carried in the 1700s and 1800s along with a one-shot pistol. After that shot, the push dagger was the next position. It’s been around for a long time as an extension of your arm with a blade, and it is hard to take away from somebody that is skilled in its use.”

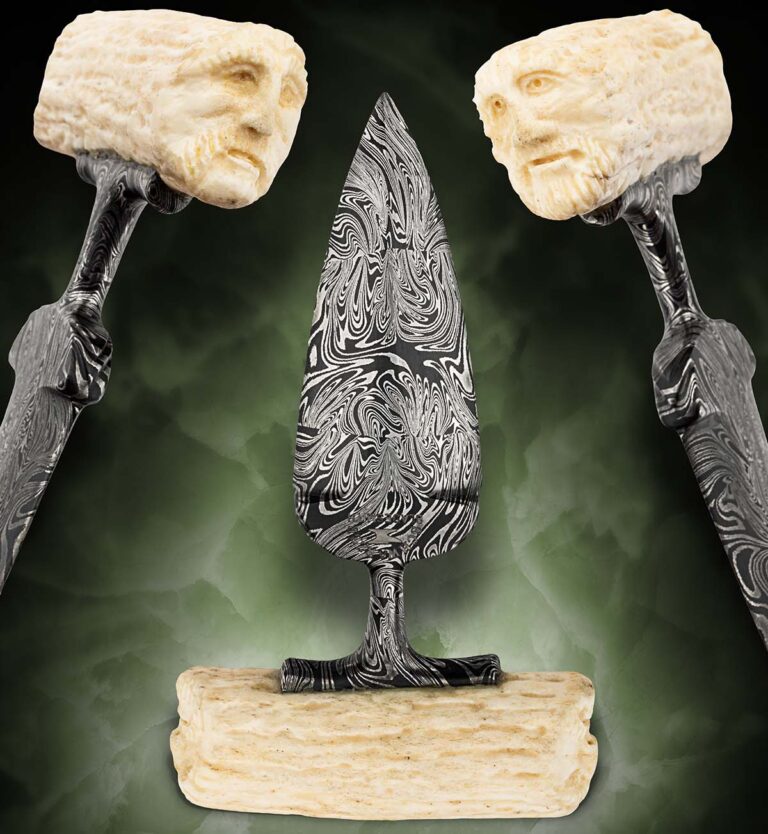
Schwarzer’s featured push dagger with stag handle and evocative faces carved on both ends is 5¾ inches long with a 3¾-inch blade of mosaic damascus steel. He has actually made two push daggers in this style and designed another for Benchmade about 20 years ago. “For me, they’re fun, and that’s why I like to make them,” he commented. “I’ve always had a fascination about them and adapted my martial arts background to training with them. The design traditionally is with a very short blade, and in martial arts, it has to do with the alignment of the hand and arm bones, along with the shape of the blade, which is double-edged traditionally. Everything in nature is curved for an effective cutting surface.”

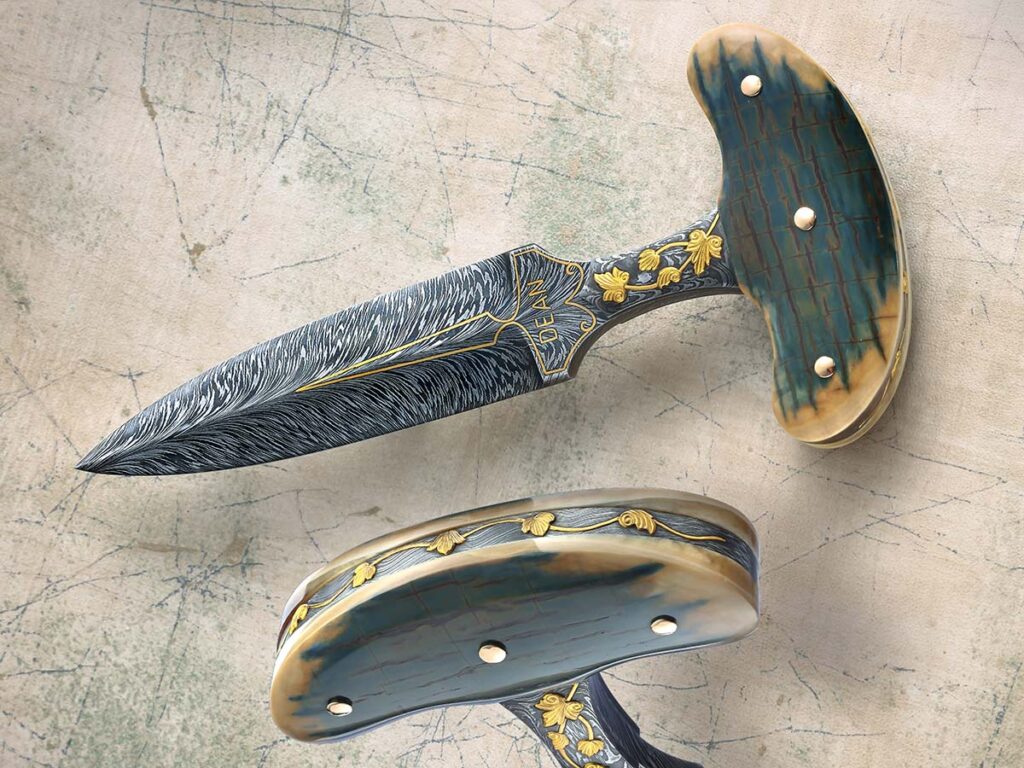
Harvey Dean Tejas

Why a push dagger? Harvy Dean (inset) puts it succinctly, “They’re just cool.” That certainly holds true for his Tajas push dagger, with an elegant feather damascus blade, 24k gold raised vine work and a fossilized walrus tusk handle. At 16 1/2 inchces in length, Dean gave himself plenty of knife to decorate. (SharpByCoop image)

Legendary master smith and Hall of Famer Harvey Dean enjoys the historical aspect as well. “They’re just cool,” he offered. “A lot of people made them back years ago, and there was the idea of concealing them in the vest. Some were made with nickel-silver scabbards and called lapel knives because they were pinned under the vest or coat lapel.”

Dean’s pictured Tejas push dagger is a departure from standard sizing, with an overall length of 16¼ inches, with an 11-inch ladder pattern damascus blade and handle of fossilized walrus ivory. But then, everything is bigger in Texas.

“I’ve always liked [master smith] Larry Fuegen’s push daggers, and his work has had a lot of influence on mine,” Harvey said. “You really make them like any other knife, and I usually do around two or three a year. I like to use ivory and damascus and a stag handle is next up. I don’t do many plain ones, and most of mine are with two-piece handles. As far as marketing is concerned, you’ve got to have that special person who likes them–but they do usually sell quick.”

Hawks Nest Custom Push Talon

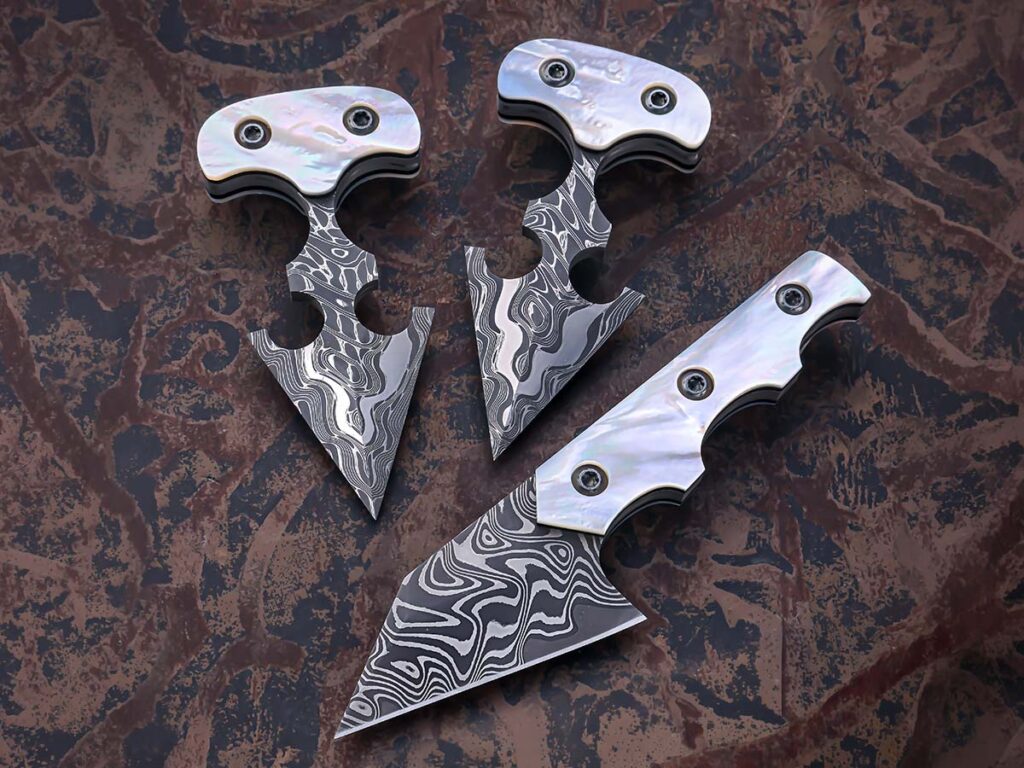
Matt Hunter (inset) has always had a thing for concealed carry knives, but admits his mother-of-pearl handled push daggers were his first crack at the style of knife. Angular and wickedly attractive, the Nichols Slither Armor Core stainless damascus daggers were designed as a matching set with his HawkWing knife, also pictured. (SharpByCoop image)

Damascus blade, mother-of-pearl handle and variations on the push dagger theme highlight Matt Hunter’s work at Hawks Nest Customs. He is a huge fan of concealed carry knives and started down the road with a boot dagger, neck knife and then his Push Talon.

“I think any dagger is challenging due to the symmetrical grinds that are required,” he noted. “You’ve really got to nail each and every one of them or the entire build needs to be scrapped. These push daggers are made with Nichols Slither Armor Core stainless damascus and mother-of-pearl on Westinghouse black canvas Micarta liners.
“Believe it or not, these were my first push daggers,” Matt added. “These were originally made for a customer to match the HawkWing, which is also in this photo. I told him I was planning on doing a pair of matching push daggers, and he asked if we could do the mother of pearl to match his knife. So, I obliged.”

Zack Jonas Totem

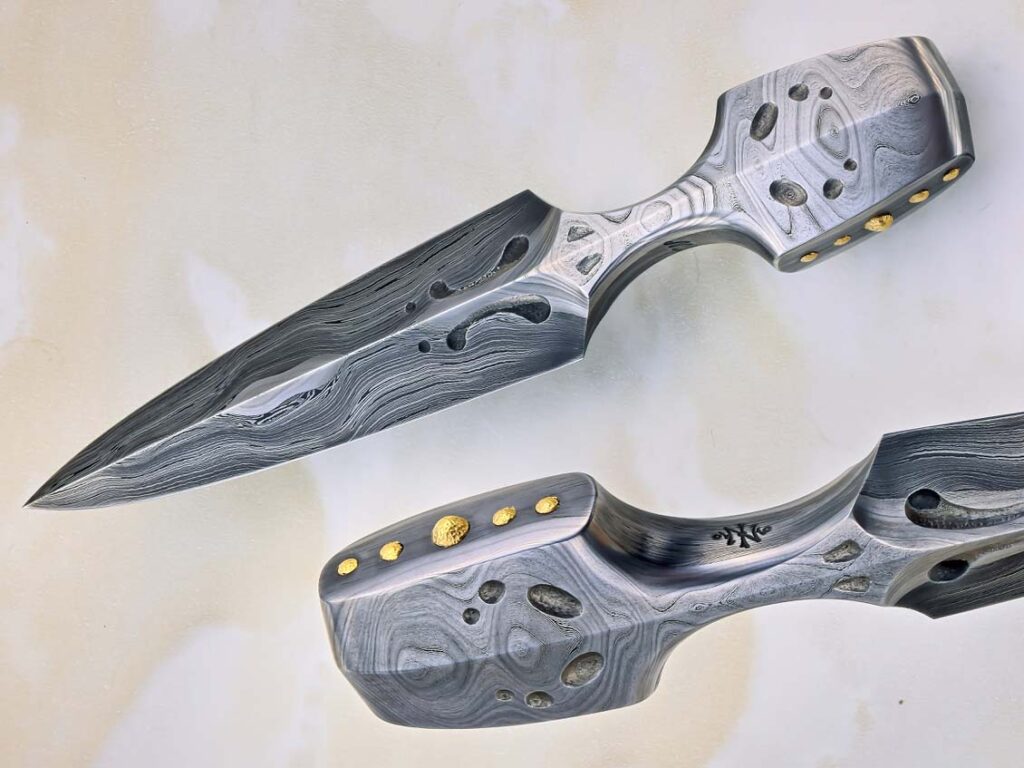
A study in starkness, Zack Jonas’ Totem push dagger grabs the eye with its clean lines and depth of damascus. That’s a san mai steel with laddered W’s and faces in a 1,000-layer laminate with pure nickel. Adding to its Spartan charm are its gold handle accents. (SharpByCoop image)

The Zack Jonas push dagger featured is his Totem model with a blade length of 4 inches and an overall length of 6½ inches. Its gold handle accents complement a san mai steel with laddered W’s and faces in a 1,000-layer laminate with pure nickel.

“The push dagger is one of the few knives that is actually designed to be folded into a tightly closed fist,” the master smith explained. “That means you have to make sure the handle comfortably conforms to the shape of the human hand in that unusual position. A push dagger is not a particularly functional tool outside the very limited frame of hand-to-hand combat; if you don’t have a secure grip when you need it, you’ve got a real problem.

“There are few makers that come to mind as design influences,” Jonas concluded. “[Master smith] J.D. Smith’s early influence on my career is never far from my hand or eye. I also think of Peter Johnsson’s work as I’m designing. He has never done a push dagger that I’m aware of, but I like to try and channel the way he conducts tension through his lines. Peter and [master smith] Kevin Cashen both come to mind when I think of the functionality in any dagger.”

Andrew Meers Rose Of Sharon

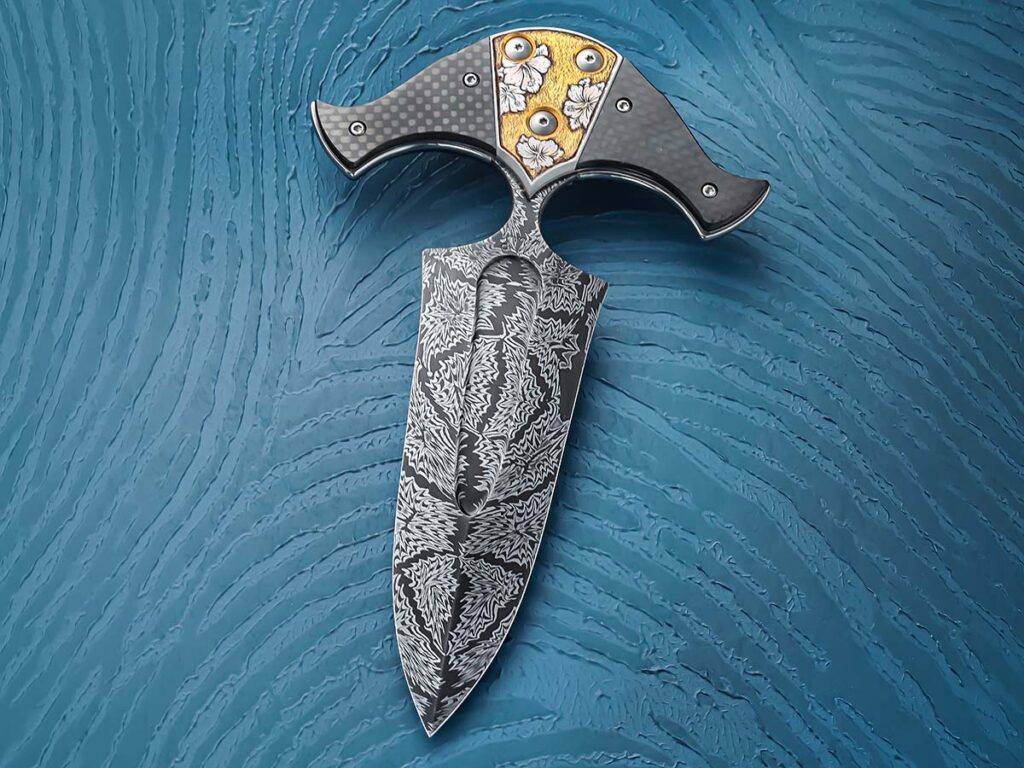
A bold mix of materials, Andrew Meers utilizes carbon fiber, stainless steel,  gold and a splintered mosaic damascus to bring-together this 9-inch push dagger. The centerpiece of the knife is its elegant Rose of Sharron engraving with the gold backing. (SharpByCoop image)

Andrew Meers included a push dagger in his ABS master smith set, which was complete with forged trout iron texture engraved with pangolins. “Push daggers have a place in my childhood memory,” he related. “I remember seeing one at a museum and being fascinated. In retrospect, I think having mostly seen conventionally handled pieces in media and collections, the manner in which the hand engages the handle is what is attractive to me.”

Meers’ featured push dagger is his first with a carbon fiber handle and a groove in the blade. Its 7-inch damascus blade is framed in stainless steel, and the engraving depicts the Rose of Sharon with a gold-plated relief background. The entire push dagger is 9 inches long. Andrew produced his first push dagger in 2014 and has made several since. His longest measured between 23 and 24 inches.

Jean Potvin Romanesque

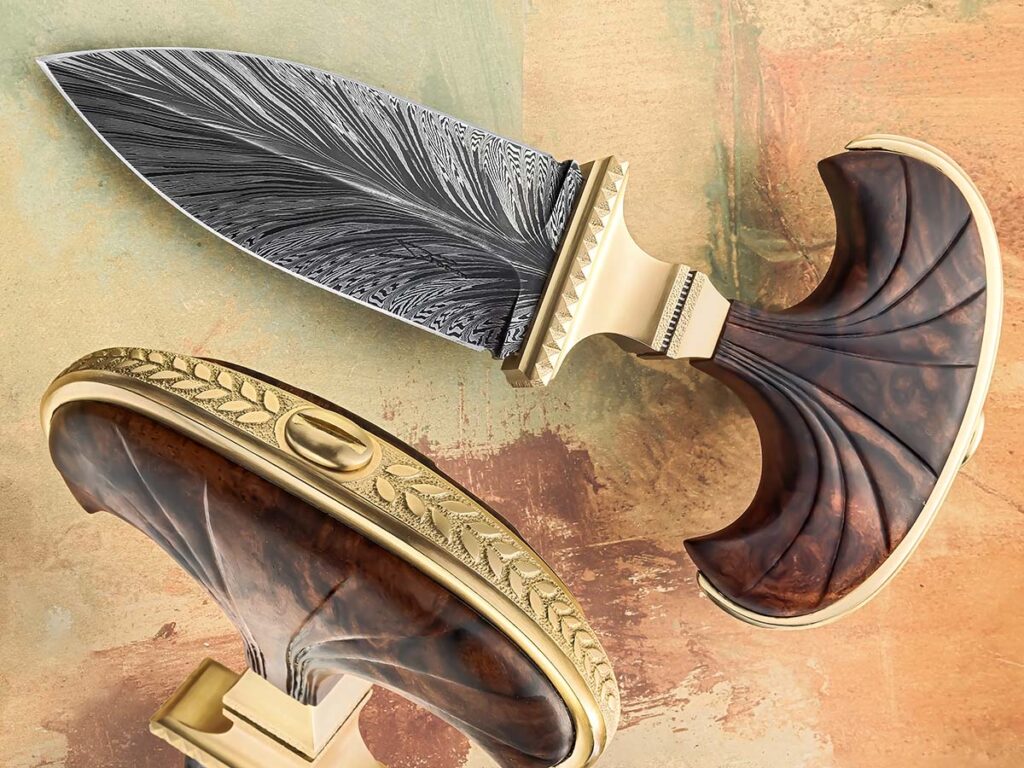
Since push daggers are illegal in Jean Pierre Potvin’s homeland of Canada, he had to come up with a clever trick to get his his Romanesque push dagger past airport security and to a buyer at a show in Las Vegas. His solution, remove the illicit handle and replace it with a toilet plunger handle. (SharpbyCoop image)

“This push dagger is Roman in style,” remarked Jean Pierre Potvin. “It came about quite by chance. I rarely design in advance when I create. I prefer to let my imagination run free and follow new ideas that present themselves during the making process. During the making, I saw that it had a somewhat Roman style, and I continued in that direction with this result.”

Potvin’s push dagger measures 8 inches overall with a 4½-inch blade of damascus in 15N20 and 1084 carbon steel. The handle is fashioned from stabilized walnut burl and brass furniture. He had previously made only one push dagger. That was in 2022, and it was much smaller. “I had a buyer at the Nashville knife show,” he remembered, “and I had packed it in my luggage to take there. But when I got to the Montreal airport, it was confiscated by airport security.”

Since push daggers are illegal in Canada, that experience inspired Jean Pierre to remove the actual handle and replace it with a toilet plunger handle the next time he traveled with a push dagger. He made it to Las Vegas that second time and reattached the original handle after arrival. “It’s really funny because it’s the same dagger, but having a cross handle makes it illegal,” he smiled. “Sometimes you have to use tricks to get what you want.”

Somehow, the push dagger and its adventurous history seem to fit right in with Potvin’s novel experience.

Check Out More Cool Customs:

Dietmar Pohl Celebrates 30 Years In The Knife Industry

0

From passion to icon: celebrating 30 years of Dietmar Pohl’s knife mastery.

Dietmar Pohl is a name well-known in knife circles. More so than his groundbreaking designs, the founder of Pohl Force knives might also be known for his professionalism. On Nov. 18, the designer celebrated 30 years in the industry. 

With over 100 knife designs, three books translated into multiple languages, and a reputation for innovation, Pohl has established himself as a leading figure in the world of blades.  

While Pohl might be best known for his knives, such as the Magnum Colection Knife and the Böker Speedlock switchblade, he has held many roles in the industry.  

Dietmar Pohl talking with military man

Pohl started his career as marketing director, design and production manager in Solingen, Germany.  Combining contemporary design with cutting-edge materials, he quickly made his mark by creating knives that balanced performance and aesthetics.  

However, his interest in edged tools started well before then. His imagination was captured at 11 years old when his older brother—10 years his senior—returned from the Bundeswehr paratroopers and showed him his paratrooper knife. 

While Pohl has no military or law enforcement background, he’s built his expertise through hands-on training and close collaboration with professionals in elite units like Germany’s GSG9, SEK, and U.S. Marine Force Recon.  

Practical experiences, such as SWAT training in Virginia and knife combat sessions with Marine Force Recon at Camp Pendleton, have deepened his understanding of tactical requirements.  

Dietmar Pohl with sylvester stallone

Pohl’s influence extends beyond design. His books are respected resources for enthusiasts, and his work is frequently featured in trade publications. Among his standout achievements is the MK9 Heartstopper, created for Sylvester Stallone’s final Rambo movie, Last Blood. Dubbed The Knife Guy by the film crew, this project solidified his global reputation.  

Read Knife Reviews:

How to Create Damascus Patterns

1

How to Make Basic Patterns

The layer counts are only a starting point and you may find that you prefer more or less. In specialized damascus patterns, such as radials or jellyrolls, far fewer layers are needed. It is also possible to forge weld sections of high- and low-layer bars into one billet and get a high contrast through patterning.

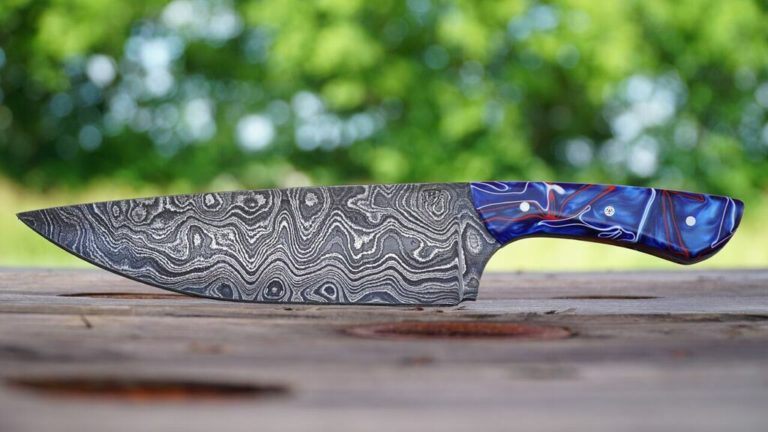
Patterning of the flat laminated billet can be accomplished in many ways. Random pattern needs little explanation. The layers remain relatively flat and some distortion usually occurs during the forging. The distortion causes the flat layers to bend and results in a flowing, organic look to the material, especially when the edge bevels of the blade are finish-ground.

Twist patterns are similarly self-explanatory. A bar of the desired number of layers is forged into a square and the corners are forged down slightly. The bar is heated until it is close to welding temperature, and then twisted. The twisting can be gradual or tight for varied effects. The center of each twist gives a star effect. Twisted blades should be left a little thicker than other patterns as grinding deeper makes the star effect greater and the overall look is more pleasing.

how to forge damascus steel
Keep reading in this download from BLADE.

Ladder patterns are accomplished by pressing or grinding grooves across a damascus bar. If the pattern is pressed into the blade, it should be approximately double the thickness required in the finished bar. The grooves are pressed in with dies made of round rods, and stop blocks can be used to insure the proper thickness of the finished bar.

After the grooves are pressed into the bar, it is ground flat, removing all the high spots. The bar is forged to the desired blade shape and the ladder pattern becomes visible. If the ladder designs are ground or milled into the bar, they should be approximately one-third the thickness of the bar. After the grooves are ground, the blade is forged to shape with all the grooves forged out of the bar, resulting in a distinct ladder pattern. Whether pressed or ground, the ladders should be staggered from side to side.

Creating the raindrop or pool-and-eye pattern is essentially the same process as forge welding a ladder pattern, except that dimples are pressed or drilled into the damascus bar instead of grooves. The resulting pattern will look like bull’s-eyes or raindrops on a pond.

These are the most basic damascus patterns and the same patterning techniques, and several others, are employed for more advanced patterns. Before moving on to more advanced patterns and techniques, the damascus steel maker should become adept at the forge welding process.

How to Make the “W’s” Pattern

More advanced patterns include the “W’s” design, and mosaic damascus. With the “W’s” pattern, the initial billet is stacked just like a flat-layered billet, and welded. Then, during the drawing process, the billet is rotated 90 degrees and forged into a rectangular bar with vertical layers. This bar is then ground free of scale, cut into pieces and restacked.

When the second weld sequence is complete, the layers remain vertical. This bar is then cut again and restacked for the third weld sequence. If the ends of these pieces are etched, they will reveal vertical layers that are distorted and starting to form the “W’s.” The third weld sequence will distort the layers even more and make the “W’s” much more dramatic. Any layer count works well on this pattern, and any of the patterning techniques, including twists, ladders, raindrops and even accordions, help to further expose the pattern.

The next level of advanced pattern welding is the making of mosaic damascus. The patterns in mosaic damascus are visible on the ends of the bars, yet what truly comprises mosaic damascus has never been clearly defined. At the BLADE Show in 1999, I questioned some of the best damascus makers on hand as to their opinion on this topic and each one had a different definition for mosaic damascus. Since there seems to be no clear definition we will refer to all end-grain patterns as mosaics.

How to Make Basket Weaves, Spider Webs and Radial W’s

The basket weave or parquet is a relatively simple mosaic-damascus pattern and makes for a good first mosaic project. To begin, forge weld a low, 5-to-9-layered billet and draw it out into a 1-inch square bar. Cut this bar into four pieces and stack them into a 2-inch-by-2-inch square, with the horizontal layers in two opposing corners, and the vertical layers in the other corners.
Forge weld the stack and draw the bar out, keeping the bar square by forging evenly on all sides. Several series of cutting and re-welding as described above will give a nice basket-weave pattern, a design that works well for background filler in complicated mosaic projects.

The spider web or grid is another simple mosaic pattern. It is started with squares of solid steel, such as 1050 or 1095. Cut four squares of the steel and stack them into a square billet. Add shims of contrasting steel, such as 15N20 or pure nickel, and then forge weld and draw the billet down into a 1-inch-square bar. Cut the bar into four pieces, stack, and re-weld until the desired size grid is achieved. The grid may be intentionally distorted by forging on a bias to create a spider web-like effect to the pattern.

Another mosaic-damascus pattern is the radial. The radial design is started with a low-layered billet of flat laminates. The bar is cut with a die, which compresses the center layers. The halves are then cut into four pieces, stacked into a square and then forge welded back together. This gives the effect of the layers radiating out from the center of the square.

The radial technique applied to a “W’s” pattern bar accomplishes a spectacular design. As with all of the patterning techniques, you can try them with any billet that you like. You never know when you will come up with a great new pattern.

Four-Way and Nine-Way Forging

how to forge damascus steel
Want photos? Find them in this download.

For the best effect in the finished blade, it is often necessary to incorporate more than one radial or one jellyroll in the pattern. A bar can be cut into four pieces, stacked into a square billet of two rows of two pieces, and forge welded. This is referred to as a “four-way.” The bar can also be cut into nine pieces and stacked into three rows of three pieces, or a “nine-way.”

These four- or nine-way billets may be repeated several times to accomplish the desired effect. The size of the blade to be made will dictate the number of the original elements in the finished bar. For large fixed-blade knives, I like at least 16 of the original elements, and two four-ways will accomplish that number.

For small fixed blades or folders, I use 36 or 64 of the original elements in the bar. To achieve 36 elements requires a nine-way and a four-way, while a billet of 64 elements is accomplished with three four-ways. These numbers are only recommendations, as personal preference will dictate how each blade smith uses the material.

Single patterns or several different patterns can be combined in four-way or nine-way combinations, resulting in extremely interesting patterns with high contrast. There is no end to the possibilities for creating patterns with these combinations.

After combining and forge welding the desired number of elements, there are several ways to expose the pattern that is on the end of the bar. Twisting the bar and then forging to shape will expose the pattern along the edges of the blade. As with any twisted bar, the edge should be left fairly thick so that more grinding is required because the pattern is better near the center.

To expose the pattern, the bar can also be forged into a rectangular shape and ladder patterned either by pressing the ladders into the bar or grinding them in. And although I have never used it, the raindrop patterning technique should also bring the pattern to the surface of a rectangular bar just as well as the ladder pattern method.

The Accordian Method

The accordion method is my favorite way of exposing an end grain or mosaic pattern. I like the appearance of movement and flow that is created by the accordion technique. There are several different methods that can be used to open a bar like an accordion, and I use one suggested to me by Don Fogg.

The damascus bar is forged to final dimensions and annealed. The bar is then cut on a band saw, removing triangles of material from alternating sides of the bar. After all of the cutting is done, the sharp corners are rounded off on a grinder. The bar is then ready to flatten. While flattening the accordion, the bar should be worked at a welding heat. If the bar tears at the bottom of the cuts, apply flux and gently weld them closed. I can usually flatten the whole bar in one heat. The bar is then forged to final dimension.

The cut-out-triangles accordion method has worked so well for me that I do not use other accordion methods. This method is more labor-intensive, but at this stage, the damascus bar is valuable to me and I do not mind a little extra work to help maximize the material that I obtain from the bar.

The Loaf Method

Another popular method of exposing end grain patterns is the loaf method. The loaf method is accomplished by forge welding several blocks together side by side and then slicing blades off of the loaf. It is helpful to surround the blocks with sacrificial material like damascus or plain carbon steel. The seams can be welded shut and the billet dry welded. Having the blocks fit together nicely will simplify the weld. The loaf method works well for patterns or figures where no distortion is desired.

Cutting tiles off the bar, dovetailing them, then forge welding them together is one more way to expose patterning and produce blade material. This is a difficult forge weld and I do not recommend it for the beginner. The tiles are usually tack welded to a sacrificial plate, which is ground off after the forge weld. This method also does not distort the original pattern.

The Plug Method

The final method of exposing end grain patterns to be addressed is the plug weld. The original bar can be turned or forged into a round bar and plugs are then cut off. A hole is drilled into a blade and the plug is fit into the hole. A good, tight fit is desirable, and the plug should be slightly thicker than the blade.

The blade and plug combination are heated to a welding heat and welded in one press or hammer sequence. Several plugs can be welded into one blade if desired. This is another method that does not produce distortion.

There are times when distortion can be used to enhance a pattern or even create a new pattern. By forging a square bar on a 90-degree bias, the pattern in the bar will be distorted. The distortion continues as the bar is forged on the bias until it is square again. This can then be used as is, or incorporated into a four-way or a nine-way.

How to Make the “Persian Ribbon”

A pattern that is not so spectacular can be brought to life by using distortion to your advantage. The squares in a four-way will be triangles after a 90-degree bias forging, and can then be oriented on the next four-way to create diamonds in the pattern.

This is the technique used to create the pattern I call “Persian Ribbon.” Four blocks are stacked in a square with borders of contrasting material between the blocks. These are then forge welded and turned on a bias, with the borders now creating an “X” across the bar. The bar is then opened up using the accordion method and the Persian Ribbon pattern is created by the “X.”

Creating Custom Images

Beyond damascus patterning is the topic of creating figures within the damascus steel. Placing pictures in damascus has now become commonplace, as I have seen bird-hunting scenes and the outlines of mammoths, shamrocks, dragons and countless other objects in blades. The use of powdered steels has made creating these figures and pictures much simpler.

Prior to the use of powdered steel, an EDM (Electrical Discharge Machining) machine could be used to cut a figure from two blocks of contrasting steel, and the male parts were interchanged. Forge welding resulted in two bars with the same figure, one dark and one light. This method was very expensive, and although intricate details could be cut, distortion was still a problem with uneven forging.

When using powdered steel, one block can be cut on the EDM machine and the figure is then removed and the hole filled with contrasting powdered steel. The male part can be placed in a square tube with one end capped, filled with a contrasting powdered steel and forge welded. This yields two bars with the same figure for half the cost of the EDM work.

A second method for making figures or pictures in steel is to cut plate material and stack the plates. The plates can be cut by laser or water jet less expensively than with an EDM. The plates are stacked in a square tube, and the cut-out figure is filled with contrasting powdered steel, and forge welded. I suggest that the first weld be on the ends of the stack to weld the plates to each other and prevent the powder from sifting between them.

The billet is then forged out into a square bar with the figure on the end. This method provides great detail for a fraction of the cost of the EDM, and materials are more readily available.
Figures can also be made by forming pure nickel sheet around cut-out molds. I have cut out wooden figures of birds, fish, shamrocks and many other figures to form the nickel around. This is obviously inexpensive and requires no outside work like using the EDM or laser cutting does. The nickel form is placed in a square tube and powdered steel is used to fill the tube. Special shapes may also be forged and placed in these billets, using whatever it takes to get the desired effect.

When using powdered steels, you must compact the powder as much as possible before sealing the tube. Vibrating the tube works well to help the powder settle and become as dense as possible. These billets feel soft during the initial forge welding, but after the billet has been reduced by about one-third, it will begin to feel solid.

Certain powders move at different rates while being forged, so experience is critical in forging billets with little distortion. Start with something simple and pay attention to how things move inside the billet and it will not be long until the results will be predictable.

Powdered steel has not been used in damascus steel for long. Steve Schwarzer pioneered its use in the early 1990s, and in 1999, I acquired some powdered steel from Devin Thomas and Ed Schempp, making several knives with powdered steel damascus for the BLADE Show that summer. Since then, its use has become widespread and the impact on the Damascus steel world has been tremendous. In my opinion, we have only scratched the surface and the possibilities for its use are limitless.

Conclusion

If the damascus bug has not bitten you at this stage, you must be immune. If you are infected, I welcome you to a wonderful world.

The information shared here has been gathered through personal experience and sharing with some of the world’s greatest blade smiths. I can never fully express my appreciation to Fogg, Schwarzer, Thomas, Schempp, Daryl Meier, Hank Knickmeyer, Al Dippold, Rob Hudson, and the three other original members of the “Montana Mafia,” Shane Taylor, Barry Gallagher and Wade Colter. Each one has contributed tremendously to my success as a blade smith, and without them I am sure I would not be writing this article.

Out of respect to the above-mentioned blade smiths, I ask you to take this information and build upon it. Share what you learn and give credit to those who help you along the way.

Make It Crude: How Gil Hibben Created the Rambo IV Knife

0

Who made the knife that was in Rambo IV?

Editor’s Note: This article originally appeared in the February 2008 issue of BLADE magazine, which you can download here.

Over a quarter century after John Rambo burst onto the big screen and changed cutlery history forever, it is near time for the character created by author David Morrell to cut a worldwide cinematic swath with his indomitable knife once again.

As BLADE® was going to press, the fourth installment of the Rambo movie series, Rambo (aka Rambo IV) a Lionsgate film, was due to be released at movie theaters on Jan. 25, 2008. Sylvester Stallone wrote the screenplay, directs and stars in the movie that finds Rambo living a secluded life working as a snake catcher in Thailand some 26 years after Rambo first appeared in First Blood.

Rambo Knives: A Brief History

Knife used in last Rambo movie
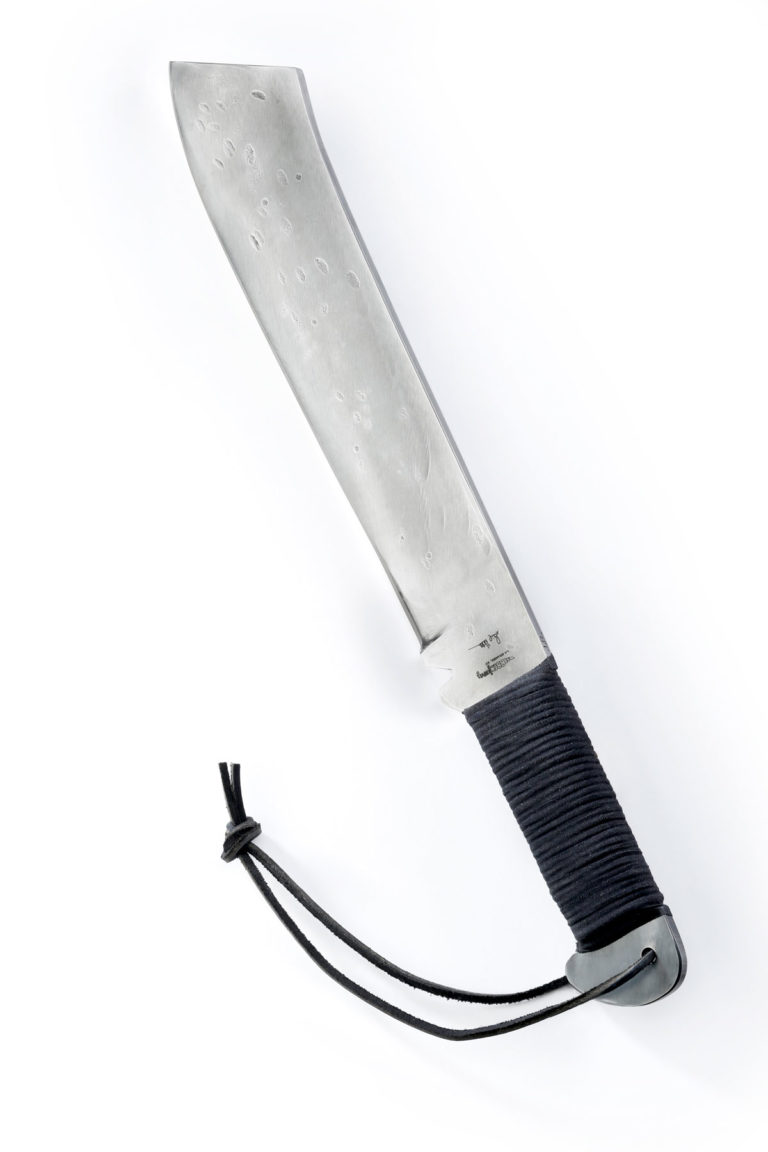
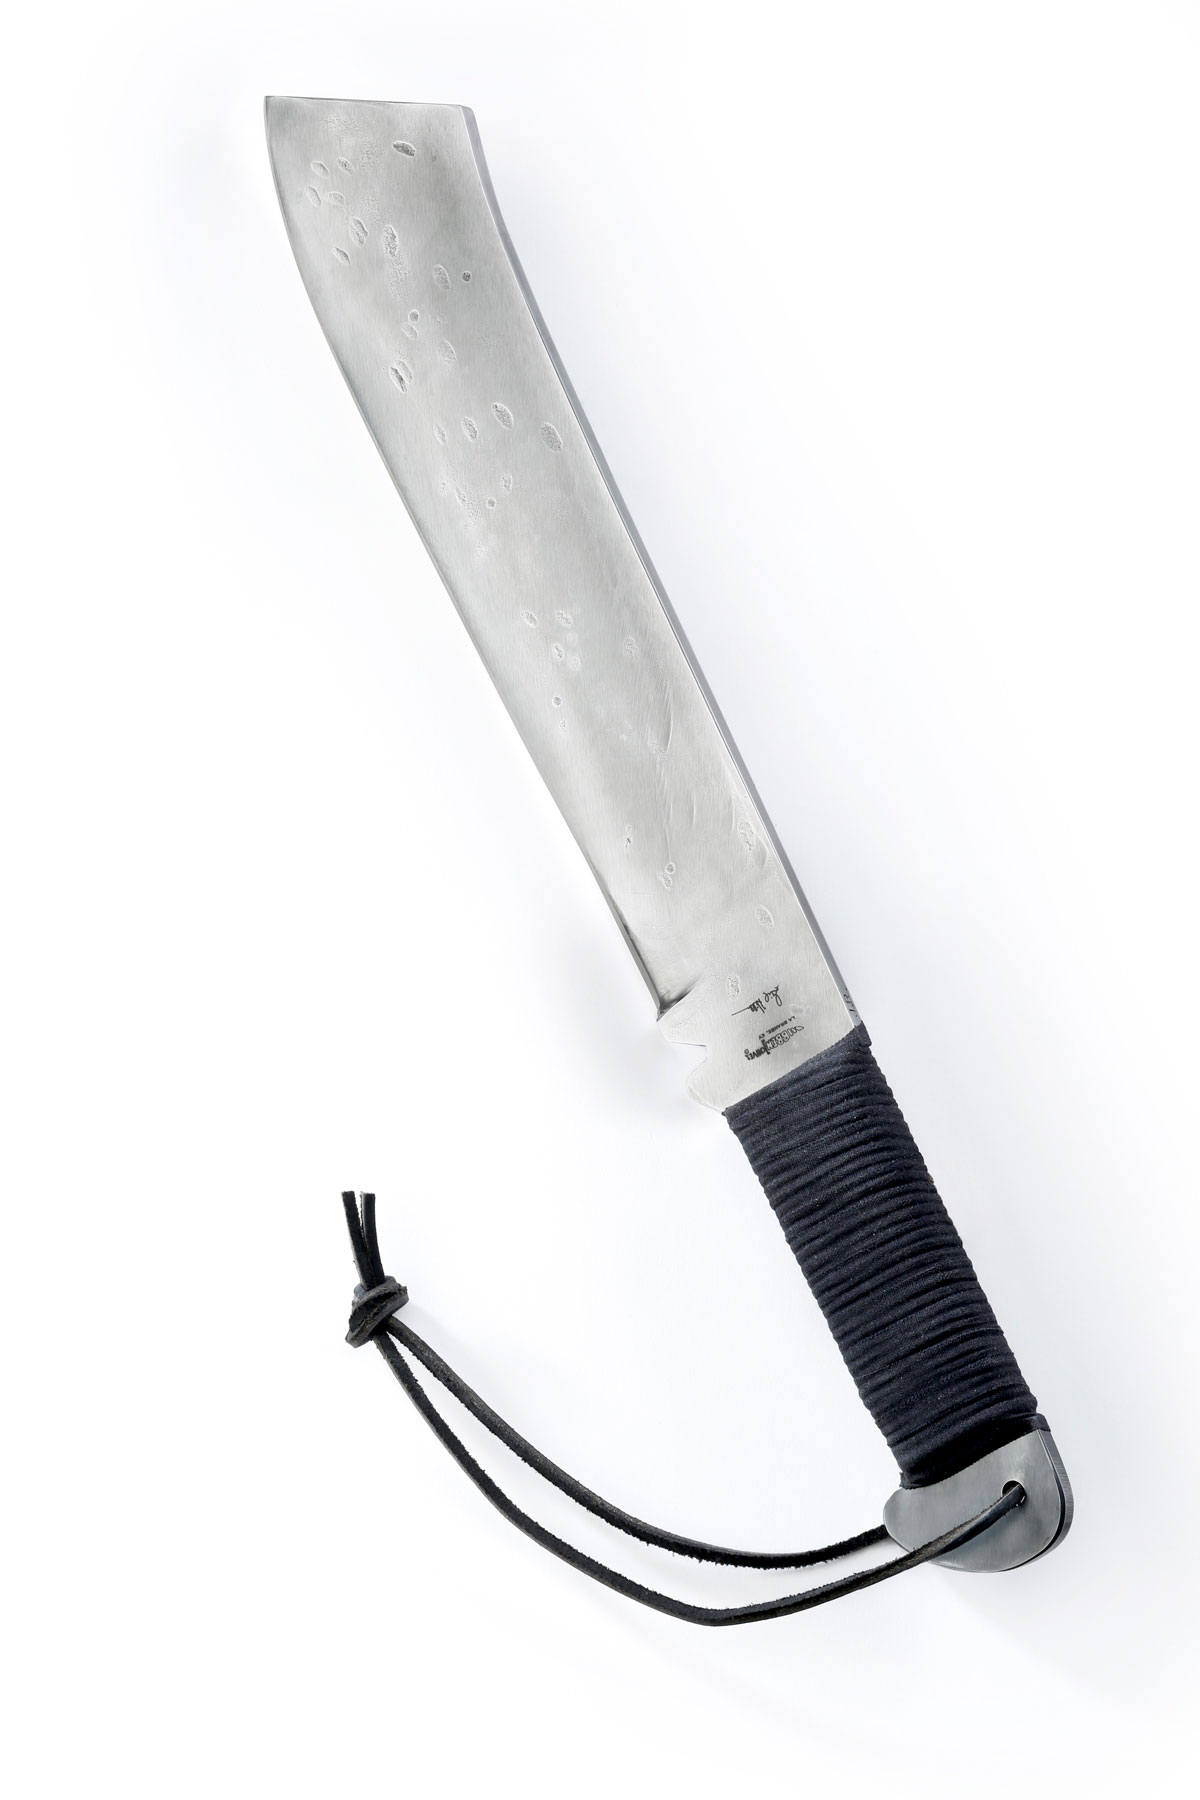
An isolated shot of the “J.R.,” the knife designed by Gil Hibben for the fourth Rambo film.

The Rambo blades have certainly made their mark in the world of knives. For the first two Rambo movies, First Blood (1982) and Rambo: First Blood Part II (1985), the legendary “Arkansas Knifesmith,” Blade Magazine Cutlery Hall-Of-Famer© Jimmy Lile, created the knives.

For Rambo III (1987), Stallone called on Cutlery Hall-Of-Fame knifemaker Gil Hibben to create the knife.

A Series of False Starts

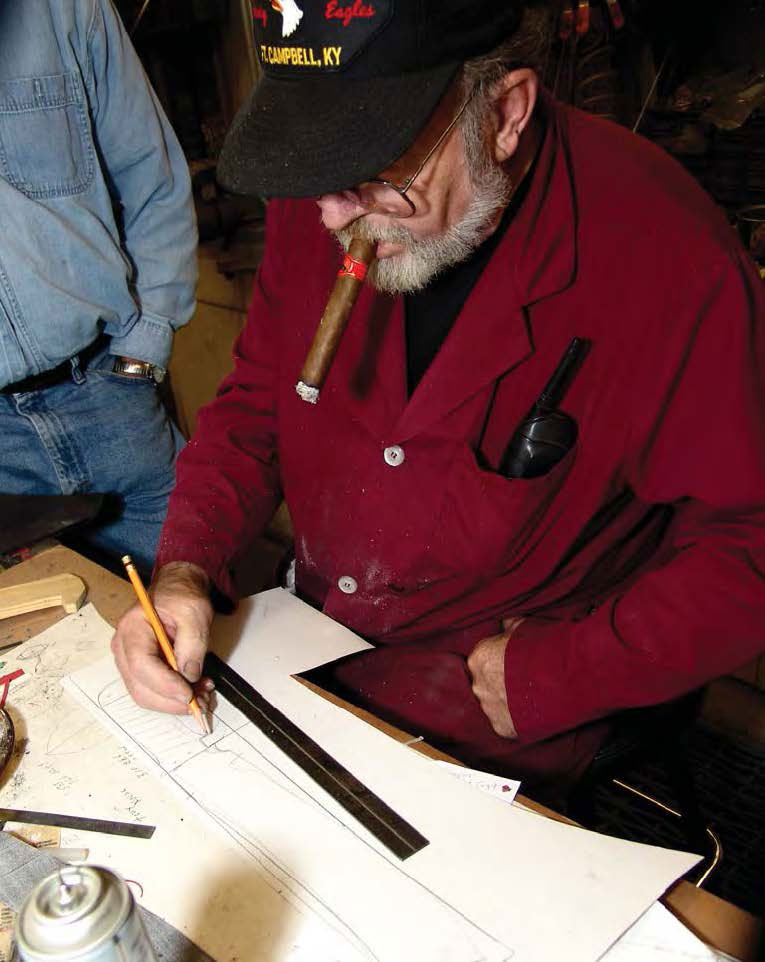
For Rambo, Stallone once again called Hibben to help create a new knife for the movie. Stallone had a basic idea of what he needed and the knife was written into the script as an integral part of the movie. Hibben made at least five prototype versions of the piece before finally arriving at the design that will be used in the film.

In October 2006, Hibben began designing the knife. At first, the blade exhibited characteristics of the Rambo III model.

rambo 4 knife
Hibben designs the knife in his shop in LaGrange, Kentucky. (photo by the author)

“My first one had a slot in the blade [as in the Rambo III knife] but in a machete or old Chinese sword design,” Hibben recalled. He also made a modified version in which he removed the top lug of the guard.

Stallone reportedly liked the blade design but said it was “too perfect.” He wanted something much more crude looking, as if it had been pounded out quickly from the limited resources Rambo has at his disposal in the movie.

It was back to the drawing board for Hibben.

“The blade size was originally 10 inches and Sly faxed me some pictures of some of the knives he’d seen from the cutting competitions,” the Cutlery Hall-Of-Famer explained. “He liked that style, so I made one up. It evolved from a 10-inch blade to a 12-inch one. It evolved from several sizes and shapes until I got what he liked.”

To make it authentic, Hibben forged the next few prototypes from pieces of a truck leaf spring. Since there was agreement on the basic blade design, next came the question of the handle and finish of the knife.

Hibben thought about what materials might be available to the character in the movie. He considered leather, wood, paracord, tape and even seat-belt webbing for use on the handle. The second prototype had a wooden grip wrapped in green paracord and an enclosed sheath. Hibben also made a third prototype with a leather-wrapped handle.

Again, the studio said it needed something more crude looking.

There’s Crude, and then There’s CRUDE

Sylvester Stallone knife collector
Sylvester Stallone, seen here playing John Rambo in the fourth movie in the franchise, holds Hibben’s final version. (photo by Karen Ballard from Rambo®, a Lionsgate film)

Prototype number four was a very simple design with a cord-wrapped handle. Hibben made one with green cord and one with black cord. It was close to being right, but the finish was still too slick to have been quickly forged as it is in the script.

Finally, Hibben decided that, considering John Rambo’s skills and experience and the materials that the title character would have available, the knife would have a cord-wrapped handle, perhaps covered with tape for additional grip. The blade would be marked with depressions from the hammer blows from being forged quickly without time or resources to put a fine finish on the blade.

“So I took it out of the heat treat and beat the heck out of it,” Hibben recalled. “I really made it look like Sly made it.”

Following the Rambo knife tradition, it would be a large, heavy blade with a thick spine. Assuming that Rambo would not have time or materials to make a new sheath but would still have the sheath from his previous knife, he opts to cut the end of the old Rambo III sheath to accommodate the larger blade and broader tip of the new knife. This is the knife and sheath in Rambo.

Rambo IV Knife Specs

Knife used in fourth Rambo movie
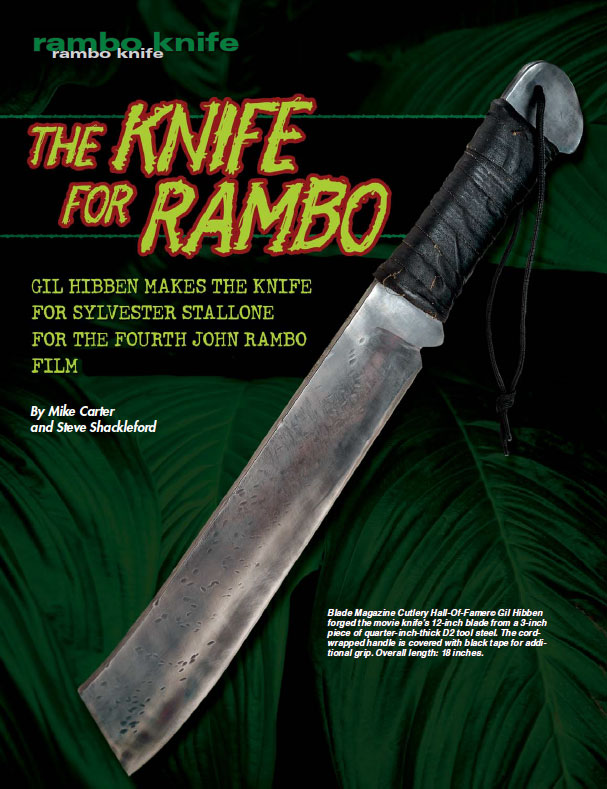
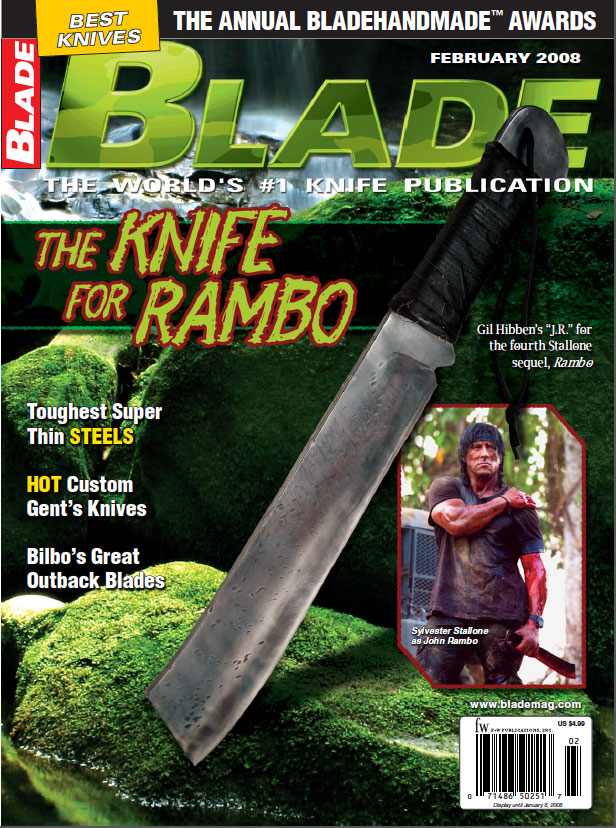
The final version, the “J.R.,” appeared on the cover of the February 2008 issue of BLADE. Click to download the issue.

The 12-inch blade is forged from a 3-inch piece of quarter-inch-thick D2 tool steel. As you might imagine, such a knife is somewhat heavy—2 pounds worth—so Hibben made some lightweight aluminum versions for Stallone to use when need be for safety’s sake during filming.

Since the movie was shot in the corrosion-inducing environs of the jungle, Hibben said he put Renaissance Wax on the non-stainless D2 to protect the blade from rust.

“There was a lot of rain there,” he noted. “Luckily they got out before the monsoons hit.”

The cord-wrapped handle is covered with black tape for additional grip. Eighteen inches overall, the knife comes in the modified Rambo III sheath.

Collector Pricing Reference

At press time (in 2008), Hibben was offering a handmade version of the knife in all the original materials—though with nicer sheaths—for $1,250. It is called the “J.R.” There will be 100 in all, with 25 of them already having been sold.

Video: Homemade Hydraulic Press for Knifemaking

1

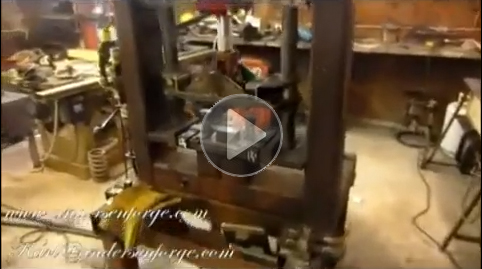
In this video from the American Bladesmith Society (ABS), journeyman smith Karl B. Andersen reviews his homemade hydraulic press. Andersen uses the innovative device to make damascus steel for his blades.

Andersen said he receives questions about what went into his homemade hydraulic press. It’s no wonder. This is one cool piece of knifemaking machinery. While Andersen has made his own modifications, the core design is from the mind of Michael Kanter from Wisconsin. From the video:

“It just doesn’t look like the other presses going…It’s very unique in its structure. Everything is contained within a picture frame. The tubular frame is made up of real high tensile steel.”

Despite being built like tank, Andersen points out that the pressure is all contained inside the homemade hydraulic press. Note the part where the arrow on a postage scale underneath the press doesn’t budge while the machine is running.

What about you? Ever consider building your own homemade hydraulic press? Leave a comment below.

Tips for making damascus knivesSpeaking of damascus, you don’t necessary need a homemade hydraulic press to make those eye-catching blades. Check out this download from BLADE on how to make damascus knives.

Why Get Knives Photographed?

376074_387172178064483_645036687_n

Knifemakers have a hard enough time making a living doing what they love without added expenses. So what are the benefits of paying a professional photographer to photograph their knives for them?

The reasons to have knives photographed are many. As managing editor of BLADE Magazine, I can tell you that often when knifemakers send me images of their newest models for possible publication, the self- or friend-taken digital images are low resolution, fuzzy, with busy backgrounds or too low quality for a high-gloss, color magazine. The images might look good on a website, computer screen or printed, but once reproduced on quality magazine paper, in four color, they lose their crispness and look fuzzy.

Here are some other reasons to have your knives photographed by a pro from photographer Jim Cooper of SharpByCoop.com.

The benefit of a professional image will promote you in a number of ways: 

  • Large clear print for your portfolio
  • Crisp website image for email or display 
  • Large digital file for printing
  • Posted and viewed by thousands on Bladeforums, CKCA forum, and our SBC Facebook page
  • All files are sent to USA and International editors of knife magazines
  • Guaranteed: Your knives are always available to view and search on our extensive website
  • A professional image shows you take pride in your work


Advertisement

Must Read Articles

Read this before you make a knife

Knifemaking 101 – Read This Before You Make a Knife

  by Wayne Goddard My experience has taught me that there's nothing like digging in and getting started. I've often said the hardest part of the...
how to forge damascus steel

How to Forge Damascus

Advertisement
Advertisement