Knifemaking

Knifemaking is the building of a knife, which includes the blade, handle and other accouterments. Blades are made by either removing metal from a steel blank via a grinder – known as stock removal – and the forging to shape of hot steel into a blade in the process known as bladesmithing. Other parts, including bolsters, guards, pommels, etc., are needed to complete the finished knife.

Featured Knives – – Knife Collecting – – Tactical Knives – – Survival Knives

Huber Foxworth Bowie: The Men Behind The Blade

The men behind the Huber Foxworth Bowie are as captivating as the knife itself.

This is the story of a knife named in honor of an incredibly special man. In this highly populated world not many people get their name attached to anything. I do, however, know for a fact that Craig Fox Huber was very proud of the idea that people would be wanting the knife that bore his name for decades to come. He told me so in person. He lived a life that so many would aspire to but very few would have the moxie to follow through on. He was the real deal.

So, how did Craig impact a knifemaker to the point of naming a knife the Huber Foxworth Bowie? Here’s what my father, BLADE Magazine Cutlery Hall-Of-Fame® member Dan Dennehy, wrote about Craig in his 1970 Dan-D Knives Brochure:

Many self-styled “experts” have stopped by my shop from time to time to suggest to me how I should design the “perfect” knife … Not long ago a trim bearded crewcut type found his way to my shop, and we started talking knives. [Circa the late 1960s] I took an immediate liking to this handsome, rather cocky gent and was pleasantly surprised to learn that he spoke about knives with a rather rare understanding of design and more than just a rudimentary knowledge of metallurgy that I found uncommon even among some men whose names would be familiar to you as supposed “experts.” He not only talked good theory and design, but he spoke with considerable authority on how a fighting knife should be used.
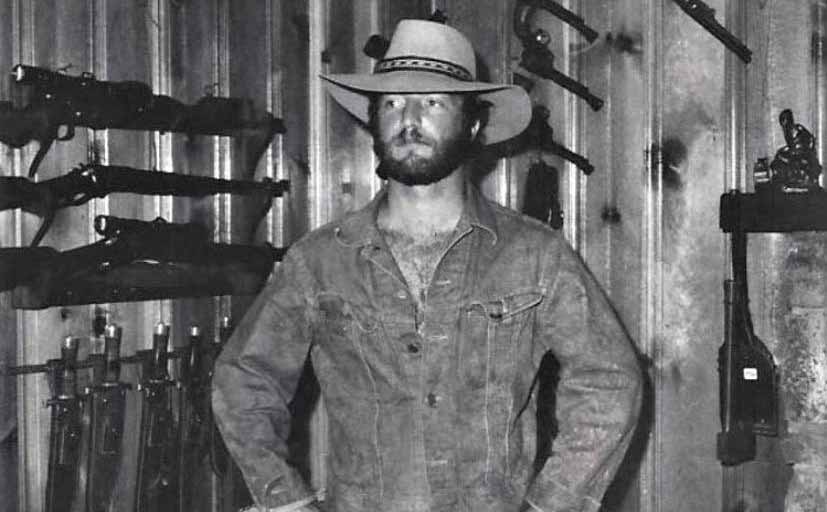
Craig Huber
That’s Craig Fox Huber inset circa 1970 at the Fox Den’s second location in Mountain Home, Arkansas.

During our conversation I learned that he had earned three Purple Hearts while serving with a Marine Recon Unit in Viet Nam, and enough other “breast hardware” that when he spoke, I listened with both ears, and rather attentively.

Those who knew Dan might realize that these comments mean he really respected the “cocky gent.” And Craig respected Dan. Their long friendship stayed the course until the end. I also had a lot of respect for Craig and his vast knowledge of knives and other things.
I met him in the early ’70s at The Fox’s Den, his gun shop located in the small ranch community of Kirkland, Arizona. Dan took me there to meet Craig when I was about 13. I shook hands with a man wearing a drop-loop gun belt with rounds in every loop and a .45 Long Colt pistol in the holster. I was in awe. I also got to see some of the knives he carried and to learn why he carried them.

About a year later my family bought a small ranch in the area. I visited the gun shop at every chance. Dan would take me to Craig’s home occasionally. I was equally impressed at his collections. The next summer I worked for Craig, helping with his horses and other stuff around his place. They were good times and I must say that it was from his influence that I went to see the United States Marine Corps recruiter a few years later.

Craig Huber: Christian Patriot

Craig’s son Hunter can tell you better than anyone about his father. Of Craig he wrote:

Dad was a lot of things. He was a soldier, a gunfighter, inventor, storyteller, adventurer, hunter, fisherman, survivalist, outfitter, collector, gunsmith, writer, and the list goes on. He was a patriot and a Christian. He lived his life to the absolute fullest and would fight for everything he believed in and loved.
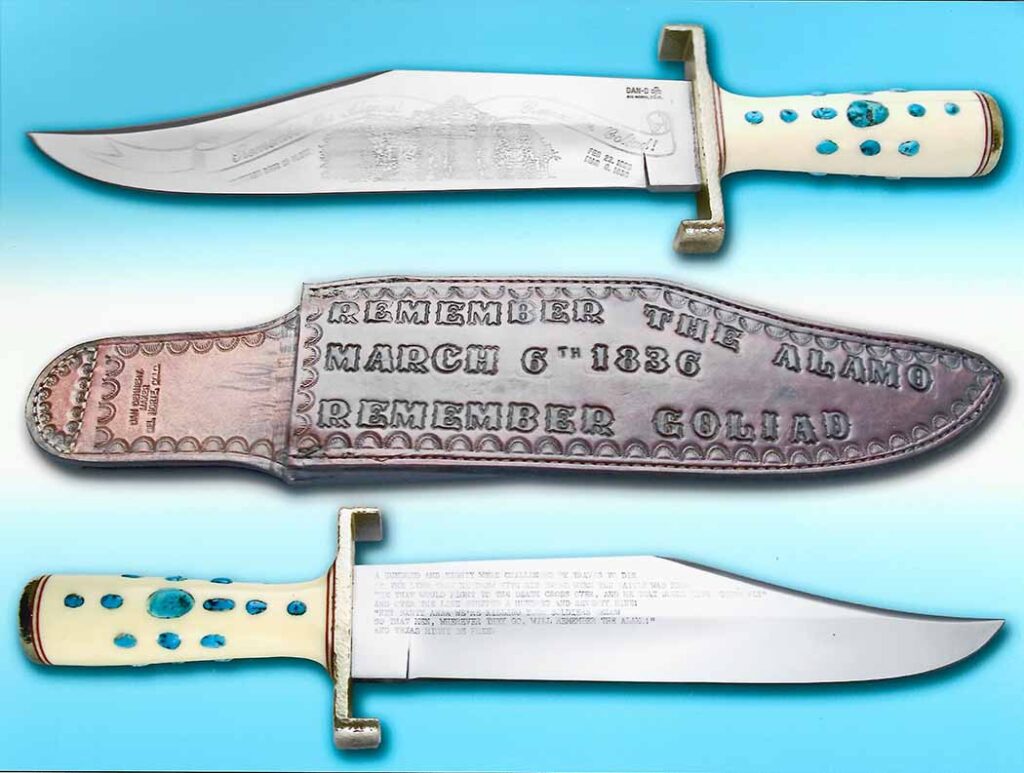
Two sides of bowie knife
In his vast collection of Dan Dennehy knives, Craig’s favorites were the Dan-D Alamo Bowie and the Huber Foxworth Bowie. The Alamo Bowie has a 12-inch hollow-ground blade a quarter-inch thick and 2 inches wide. The blade’s non-mark side is etched with an eight-line poem that commemorates Col. Travis’s call for “defenders to step forward.” The handle is walrus ivory inlaid with 18 turquoise cabs. Overall length: 16.5 inches. The custom sheath is cowhide. (Bob Glassman image)

Despite having the option to go work for his father’s rapidly growing company in York, Pennsylvania, that was obviously of no interest to Dad so he went into the military. Even though he had trouble with authority and rules, he thrived in the Marines.

After the military his life got really interesting. His resume speaks for itself but here is a summary: police officer; sheriff; private investigator; horse wrangler; hunting guide, Ozark Mountains; fishing guide, French River, Canada; gun shop owner, Fox’s Den (Kirkland, Arizona, and Mountain Home, Arkansas); salesman, Camillus Knives and Levis; personal protection, bodyguard for Saudi Royal Family; professional hunter, South Africa; writer, Whitetail Times magazine and several personal protection books; gunsmith; gun dealer; private security, consulting and training; fugitive recovery; and much more. This is a very general overview and it took him to some very interesting places and dangerous spots, and he met some really interesting people along the way.

So here is what Dad loved. He loved his country and God. He loved our mom. He loved me and my sister. He loved adventure. And he loved guns and knives. Dad was an encyclopedia of firearms, handloading and ballistics. He had a real passion for Rugers, Ruger M77s in any and every caliber they make, but especially 7×57 and Ruger single action pistols. He was also a 1911 fanatic. I don’t remember a single occasion in my life where I ever saw Dad without a 1911 on his side or in a shoulder holster.

And he loved knives. Man did he love knives. I don’t know exactly where in his life this interest started, but he was as passionate about knives as guns, and maybe more. And this is coming from a guy whose gun collection is over 500. He loved all knives and always carried at least two at a time. He had a real appreciation for a good blade and considered knives the most valuable tool an outdoorsman or soldier could have.
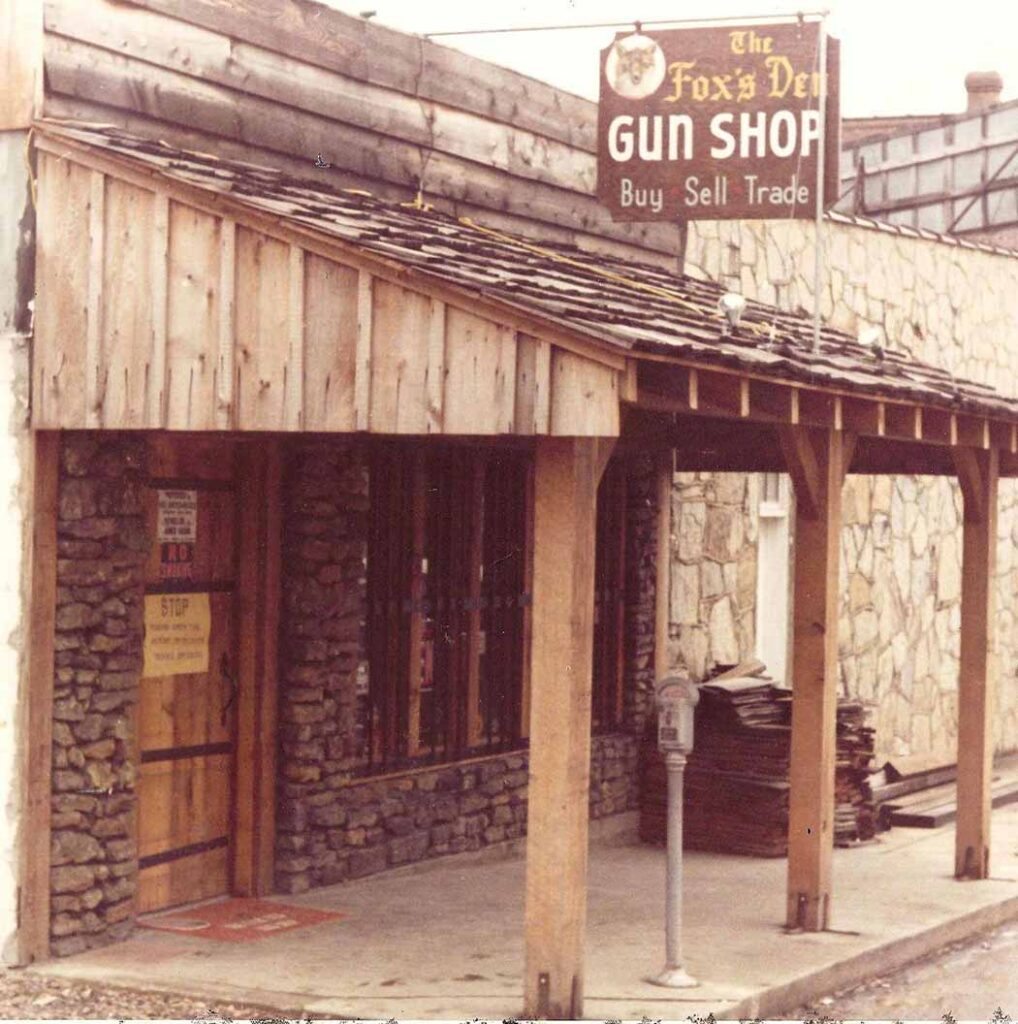
Fox's Den Gun Shop
Here’s the second iteration of The Fox’s Den Gun Shop as it appeared in Mountain Home, Arkansas. Note the sidewalk parking meter.

As you would expect, just like factory rifles with factory ammo were not suitable for Dad’s standards, neither were factory knives. As a result he started reaching out to custom knifemakers and collaborating. He formed relationships with Bo Randall, Jimmy Lile, Art Wiman, Clyde Fischer, Blackie Collins, Harold Corby and George Herron, and most notably Dan D. Dad spoke of Dan D. with a manner of respect and admiration that he did not offer up lightly to many. A shared respect and appreciation for the art and skill behind making the ultimate tool, something that was practical and efficient, beautiful and deadly. Dad’s collection of Dan D. knives is vast but his two most prized are the Alamo Bowie and the Huber Foxworth Bowie.

Dad was the toughest man I’ve ever known. A real fighter, rock solid, set in his ways and unshakeable. No matter, if you had a problem, my Dad would be your first call and the man you wanted in your corner. Dad had a lot of fans and a lot of enemies. He had many acquaintances and peers and only a small handful of good friends. He always said if you get through life and only have a few good friends, real true friends, then consider yourself lucky. Dan D. was a true friend of Dad’s.
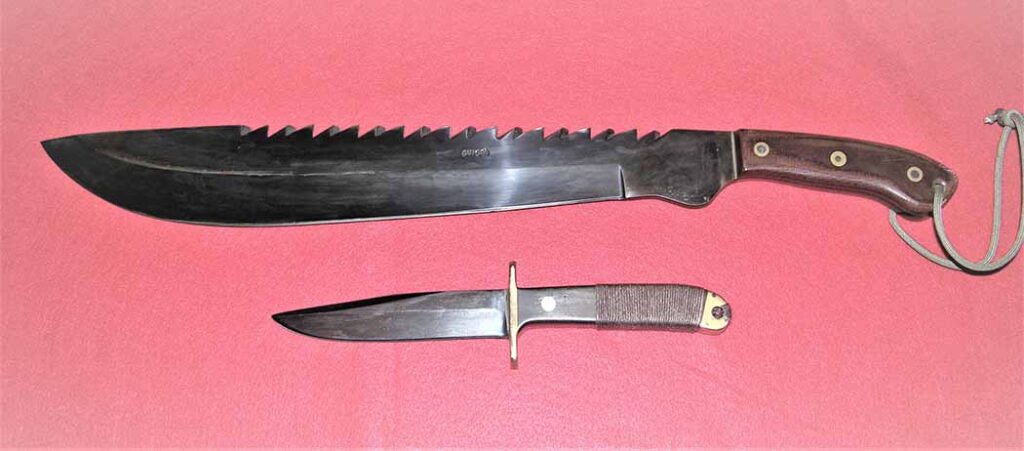
Machete and knife
Two of Craig’s favorite Dan-D users included a survival machete and a Woodsman model. Craig designed both, with Dan-D making the former and helping Craig make the latter in the Dan-D shop. Craig carried the Woodsman more than any other knife for over 40 years.

Craig was one of those rare characters you meet along the road of life and always remember. Later he told me stories of discussions with Cutlery Hall-Of-Famer Bo Randall and knife designs for different purposes. Another story was how he talked to Cutlery Hall-Of-Famer Bob Loveless about the simplicity of balancing a knife using his personal theory of the tapered tang. He visited with his friend Cutlery Hall-Of-Famer Jimmy Lile long before the Rambo knife was created. John Horrigan told me about their hunting trip in Africa. Since Craig was a licensed guide the trip was arranged in exchange for a knife identical to the one John presented to President George W. Bush.

Huber Foxworth Bowie

But back to the Huber Foxworth Bowie. The brochure description continues:

This knife is a pure and simple Bowie style but with the handle dropped slightly which seems to give it a much better “pointing” ability and maneuverability not found in most common Bowie styles. [Craig] had a prototype of this knife made for him by a Philippine Negrito instructor while he was attending the armed forces Jungle Survival School in the Philippines. Pound for pound these little Negritos are about as slick and fierce a knife fighter as will be found anywhere.
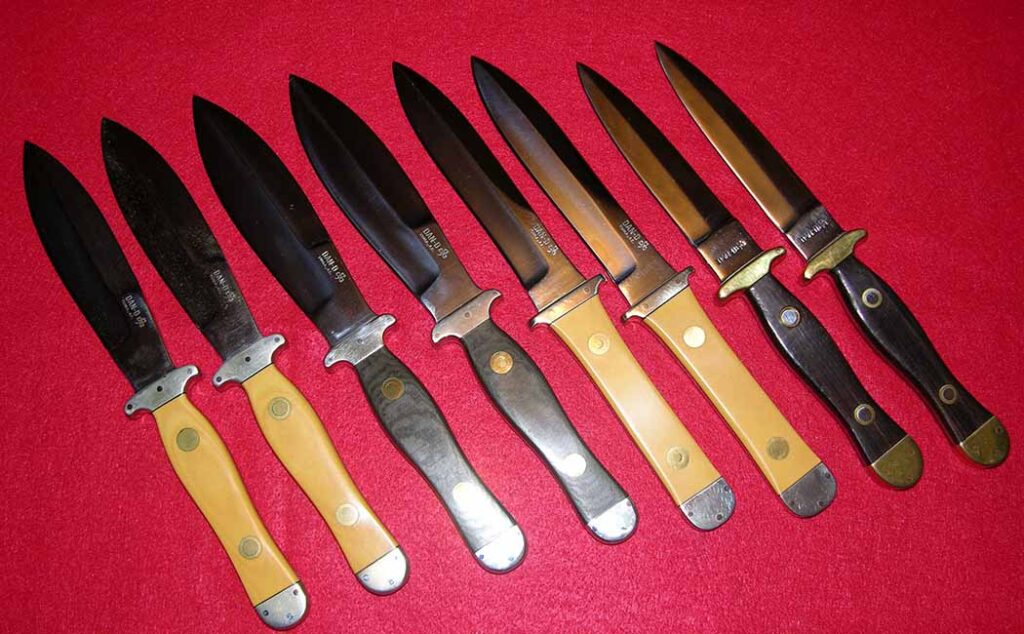
Knives
In a 2011 email to the author Craig wrote, “This [image] shows all four pair of boot knives your Dad did for me, including two pairs of my Model III. All have been carried extensively over the past 40 years, and two of the knives have saved my life.”
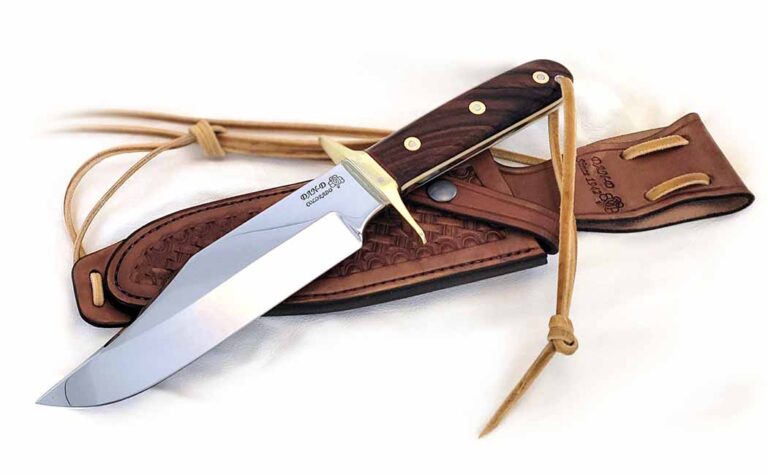
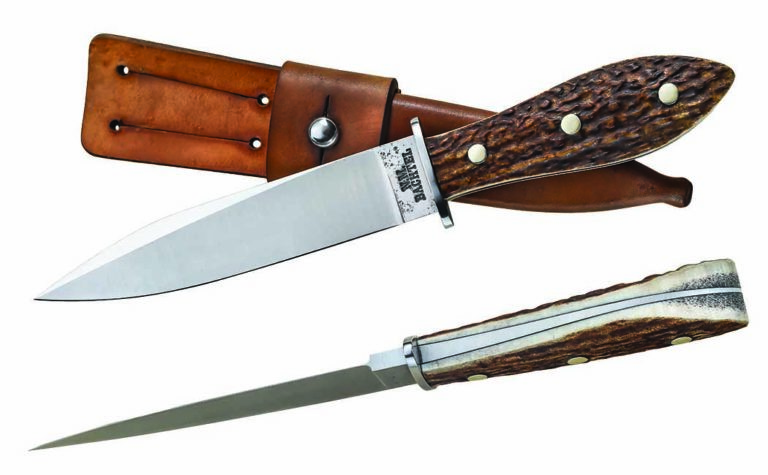
The blade is 8 inches long, 1.75 inches wide and in quarter-inch stock of 154 CPM stainless steel heat treated by Cutlery Hall-Of-Famer Paul Bos. It has a double guard and a 4.75-inch handle. According to the brochure, “This is a knife you could bet your life on.”

A couple of years ago, Hunter contacted me and told me of his father’s passing. Craig lived 76 years his way and made his mark in the world. His passion for God, his country and living life to the fullest extent had been accomplished. Hunter went on to explain that out of all the knives they cannot find the one that meant more to Craig than the Huber Foxworth Bowie.
Check Out More Cool Custom Knives:

Bachtel’s Bowie With A Pedigreed Background

A study of Michael Price’s work, Nick Bachtel’s reproduction gentleman bowie has the looks to wow.

Bladesmith Nick Bachtel has parlayed his fascination with the knives of 19th-century great Michael Price into a faithful reproduction of a Price-style gentleman’s bowie.

Nick studied every Price knife and other like ones of the genre he could find online and elsewhere to help arrive at the way the 19th-century cutler constructed the gentleman’s bowie. However, it was when he saw a picture of a Price knife in BLADE Magazine Cutlery Hall-Of-Fame® member Bernard Levine’s book, Knifemakers Of Old San Francisco, that “a light went off.”

Nick noticed that the handle had three pins so the knife had to have a full tang, not a hidden tang as he had previously thought, so he forged the knife, heat treated it, fit up the guard and forged the tang wider.

“I call it a captured-guard full tang,” the 24-year-old said of the method that apparently originated among bladesmiths in Ireland, Price’s native country. “It’s such a weird, unique, almost comical way of making a knife—and difficult to do as well,” Nick observed, “but boy, did Price make it!”

Nick Bachtel calls the construction he used to make his reproduction of a Michael Price Gentleman’s Bowie “captured-guard full tang.” For the style to work, it must be forged, Nick stressed. He said another way to do it would be in a frame handle construction and a tapered tang, though a Price aficionado would be able to tell the difference. (SharpByCoop knife images)
Nick Bachtel (inset) calls the construction he used to make his reproduction of a Michael Price Gentleman’s Bowie “captured-guard full tang.” For the style to work, it must be forged, Nick stressed. He said another way to do it would be in a frame handle construction and a tapered tang, though a Price aficionado would be able to tell the difference. (SharpByCoop knife images)

The icing on the cake for Nick was ABS journeyman smith Jordan LaMothe’s story, “How to Make the Price Guard” in the December 2019 BLADE®. As Nick noted, “The Price style is the pinnacle of the traditional forged blade.” What better style is there for a young, up-and-coming bladesmith to explore?

For more information contact N.M. Bachtel Forging Co., attn: Bachtelforgingcompany.com.

Gentleman Bowie Spec Check
Knife name: Michael Price
Style: Gentleman’s Bowie
Maker: Nick Bachtel
Blade length: 5 7/8 inch
Blade material: 52100 carbon steel
Handle: Elk antler and nickel silver
Overall length: 10¾ inch
Sheath: Traditional center-seam vegetable-tanned cowhide w/frog stud
Maker’s List Price For A Similar Knife: $1,100(includes sheath)

More Knife Collecting And Custom Knives

Tim Britton’s Badger: Old Keen Kutter Pattern Reborn

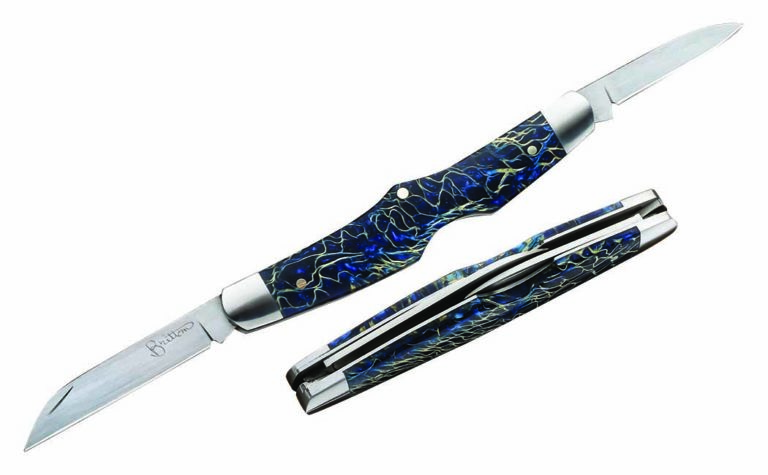
A sensational slip joint, Tim Britton’s Badger revives the Keen Kutter pattern with a ton of flare.

When ABS master smith Bruce Bump showed an old Keen Kutter penknife pattern to veteran knifemaker Tim Britton, Tim fell in love with it and immediately set to making his own iteration.

The blades are BG-42 stainless steel that, as Tim noted, has high ductility and holds an edge forever. He flat ground them on his “ancient” 18-inch, 200-pound Porter Cable disc sander. However, it’s the handle that really stands out. Consisting of stabilized diseased ash burl from Whistle in the Woods, the material looks synthetic but isn’t.

Tim Britton , 80, has been making knives since 1971 and has focused a lot in recent years on slip joints, with the Badger being the latest. He’s got about six antique pocketknife designs on his to-do list for this year, including a peanut and a copperhead. (knife image courtesy of Tim Britton)

“The light stuff in it looks like explosions,” Tim said. “I’ve never seen anything like it.” The projection on the spine fits right in between the user’s index and middle fingers and the groove on the underside cradles the latter for a comfortable, secure grip.

Calling it the Badger, Tim said he made 10 of them and had four or five at BLADE Show 2022.

Badger Spec Check
Knife Name: Badger
Maker: Tim Britton
Blade Steel: BG-42 stainless
Blade Grinds: Flat
Handle Material: Stabilized diseased ash burl from Whistle in the Woods
Closed Length: 3.5 inches
Maker’s Price For A Similar Knife: $375

More Knife Collecting And Custom Knives

A Day At The New England Bladesmithing Symposium

Knifemakers From Around North America Came To Auburn, Maine For The 2022 New England Bladesmithing Symposium

The 12th annual New England Bladesmithing Symposium brought nearly 100 knifemakers and enthusiasts together for the first hammer-in since 2019.

The event ran from July 15-17 in Auburn, Maine at the New England School of Metalwork and featured classes and workshops galore. Throughout the weekend there was something to scratch any itch you may have had about knives.

Master Smith Lin Rhea presented a tutorial on how to make his dynamic X-Rhea knife. There were workshops on everything from how to build out your knifemaking business to forging recurves. 

It was a brutally hot Saturday in the Pine Tree State, yet it didn’t dampen spirits, particularly for the main event– the Battle of the Bladesmiths. The 2-hour competition to pushed four makers to their limits, and drew the largest crowds and interest.

Learning From The Best

The classroom at the NESM is covered wall to wall with tools and other metalwork made by past students just like this.

During the afternoon I was able to drop into a few of the classes. The one I got the most out of was led by Master Smith Christoph Deringer. 

Derringer class about the anatomy of the knife was a joy, particularly the care he gave answering questions. His wry sense of humor even out, like when he called flux a crutch pertaining to forge welds. In that particular case, he suggested simply listening to the metal and letting it guide you when you forge weld, no flux is needed.

He taught everyone a neat trick for adding patina to a blade, as well. The crux, you hang the knife above a piece of heated copper. Heating the copper causes it to emit gasses that rise up and patina the blade to an almost bronze color.

A Successful Weekend

It was a big weekend for the school, gathering makers from the Northeast, Eastern Canada, and even as far west as California. For NESM director Dereck Glaser, it was a successful weekend, particularly given the COVID-related lapse in the symposium the past few years.

“The school, in general, draws from around New England,” Glaser said. “I’m excited to see more Canadians here, to be honest. We can’t forget we have a whole other country on our border. I can’t be pulling students out of the Atlantic Ocean so Canada’s a really good option.”

It’s important for anyone with even a passing interest in knifemaking to visit their local school and learn. Not only can you save yourself toil and trouble, but supporting the broader community of makers helps it survive and thrive even in the lean times.

Journeyman smith Mace Vitale runs a workshop on handle shaping.

“It saves exponentially the number of years,” Glaser said. “Indebting yourself to a week and about $600 could potentially save you 3-5 years of trial and error on your own. The amount of compressed skill and support you get in 4-5 days of a course, answering those questions that’ll take 3-5 years to figure out on your own.”

Glaser said that even with the uncertain economy, he believes the future of the school and knifemaking is bright because the passion is boundless.

“The fiscal issues we’re having is making it rough. It’s 90+ percent an enthusiast kind of hobby and craft for most people,” Glaser said. “Where inflation and cost of living’s gone, everyone’s seeing a toll in the crafts. We’re even seeing it in the welding, which is an employment-based skill. But on a whole, I  think the energy is still there. The love for it is greater than ever. A lot of people did a lot of things to better themselves in it through the pandemic, so I think coming out on the other end I think people are kind of stronger.”

The Passion For Knives

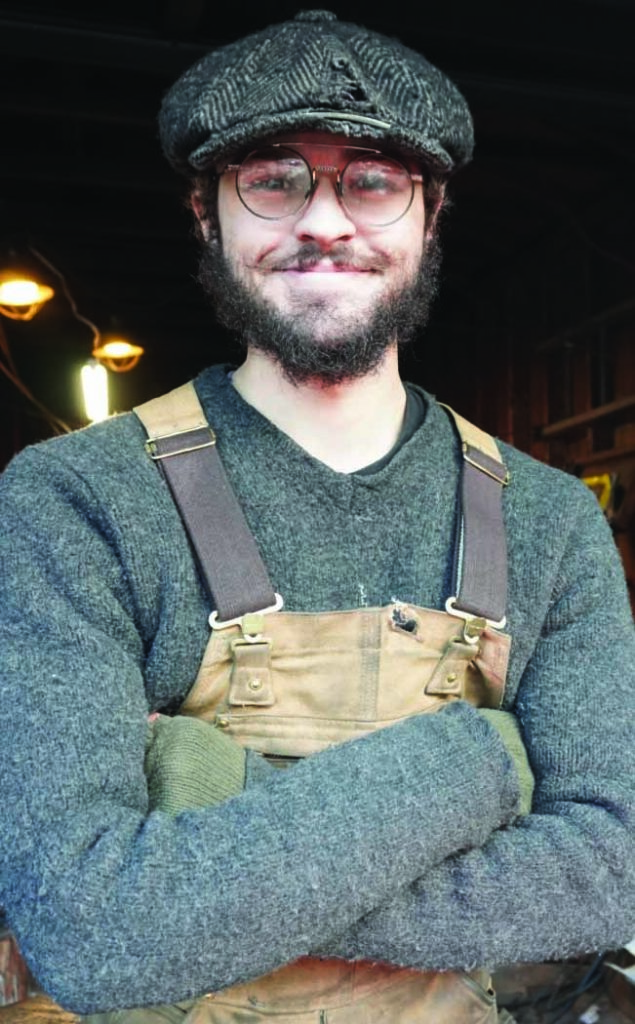
A nice bit of camraderie. Two of the battle contestants Leo Potter (in the hat) and Jeremy Yelle share a fun moment ahead of the contest.

As informative and enlightening as the classes were the attendee’s conversations. Everyone was excited, whether it was to learn from a particular smith, show off a piece they made, or for the battle at night, everyone was open and welcoming.

A Previous winner of the Battle of the Bladesmiths, Emiliano Carrillo (owner of Sun and Stars Forge), was particularly poetic in what he said about the process of making his own steel.

“When I started the smelt earlier in the day the sand runs through my fingers, and by the time the day’s done it’s a lump of material that can be turned into something,” the owner of Massachusetts-based Sun and Stars Forge said. “It goes from being this throwaway material to something that’s actually useful. I think that’s crazy. It really is alchemy to me. It’s addictive. You do it and it works and you do it again and again and it breaks your heart, and then you have some successes.”

The day ended with the battle. Four young smiths were tasked with turning a one-foot bar of 1084 into a complete knife in just two hours. You can read all about the contest here.

In total, the symposium was absolutely worth the trip and should be on your checklist if you’re a serious maker in the Northeast U.S. or Eastern Canada.

To learn more about the New England School of Metalwork, click here.

Read More

Hunting Knife Sheaths: The Constant Companion

The Correct Sheath Is Pivotal To The Complete Hunting Knife Package. A Good Sheath Can Keep Your Knives Safe And Sharp For Decades.

The Correct Sheath Is Pivotal To The Complete Hunting Knife Package. A Good Sheath Can Keep Your Knives Safe And Sharp For Decades.

For the hunter in the field, a dependable and durable hunting knife is indispensable equipment, and it follows that the sheath that holds the knife must be equally up to the task.

Secure carry, protection for the blade and handle, easy access, and the ability to stand up to the elements and hard use are essential. While there is a variety of sheaths available and each one contributes something to the equation, the sheathmakers themselves have come to eye-opening conclusions as to the making and deployment of the correct sheath for the hunting knife. Personal preference is still a prime mover, but the basics make the difference between cooperation and catastrophe in the field.

“The best style for a hunting knife sheath is whatever the hunter wants,” explained veteran sheathmaker Paul Long. “Personal preference is very important. However, the knife that would best be described as a hunter would be best suited in a deep seat pouch with a loop that would carry relatively high on the belt. In most cases the deep pouch would preclude the need for a retention strap. For a double-guard hunter, a drop-loop belt sheath would probably be best with a snap strap for secure retention.”

Depending on the style of the knife, the guard often dictates the best pouch configuration. “I favor the pouch-type sheath, and the hunting knife generally has a single guard as opposed to a double guard,” related sheathmaker Paul Lebatard, who also has found success with his custom knives through the years. “I make a lot of doubles, too. You would have to make a snap-type sheath with a keeper strap, but on hunting knives with single guards the pouch type is always best.”

Three different styles of pouch sheaths by Kenny Rowe, from left: regular pouch, plain leather; strap pouch, floral hand carved; and full flap pouch, full coverage gator. (Kenny Rowe image)

A sheathmaker for over 50 years, Chris Kravitt zeroes in on the personal preference perspective. “First and foremost, it’s a matter of the configuration of the knife, and then if more than one style will work it becomes a matter of personal preference,” he observed. “My preference is to go with the pouch because it is easier to draw and resheathe the knife without worrying about straps.”

At the same time, Kravitt acknowledges varying hunting knife construction and its influence in sheath form and function. “If a knife has a double guard, it isn’t going to work on a pouch sheath, and if you have a knife with an integral handle, possibly,” he said. “Certain things don’t lend themselves to the traditional style, like when the blade is the widest part of the knife or there is no bolster or ricasso extending beyond the edge.”

Kenny Rowe, owner of Rowe’s Leather in Hope, Arkansas, adds another option on the hunting knife sheath. “Ninety percent of these sheaths would be the pouch type because they cover most of the knife, and with the guard you can make a welt where the knife has some resistance coming in and out,” he noted. “Some sheaths will have a lid that has a snap on it, and that is as secure as you can get with the flap snapping over the front of the sheath.”

The consensus with the pouch sheath makes sense for all the reasons that the hunter encounters in the field. For its toughness and the ability to shape and mold the sheath as desired during the construction process, cowhide reigns supreme among sheath materials. Most sheathmakers use 7-to-9-ounce* vegetable-tanned cowhide.

Style Of Sheaths

The use of exotics such as ostrich, stingray, alligator, crocodile or other hides is a continuing option, though for the most part they are used as accents, often in the form of inlays, rather than adding any performance-related component to the sheath.

“Exotics are very useful in sheathmaking but primarily for aesthetics,” Long explained. “Elephant and shark are two that are tough enough to withstand very hard use and are usually built as an overlay on a vegetable-tanned base sheath. I work with various snakes, lizards, ostrich and many others.”

Ultimately, Chris Kravitt—here working on a sheath in his shop—stands by the individual perspective. “First and foremost,” he begins, “it’s a matter of the configuration of the knife, and then if more than one style will work it becomes a matter of personal preference.” (Chris Kravitt image)

As Kravitt noted, “The basic sheath is going to be cowhide 99 percent of the time, but for overlays and inlays my favorite is stingray, which is near bulletproof but more expensive and harder to work with—but great stuff. Ostrich leg or shin is very nice, and Malaysian horned frog has a very nice texture to it. Snakeskin is not very durable, but it’s fine when the knife and sheath are for show since it won’t hold up with regular use.”

Tooling and carving also provide style points and may be pleasing to the eye. However, neither actually contributes to the performance of the sheath in field use. “I occasionally do some tooling with stamps, but carving is a talent I don’t have,” Lebatard remarked. “Still, on almost every sheath I’ll put something in keeping with the theme of the knife, like a small deer. Someone might place an order and specify that they just want a bare, plain sheath, or they may want just their initials on it. That’s a good thing about leather. When it is wet it can be molded and stamped, and when it dries it will hold that impression.”

Tanning And Steel

Vegetable tanning is essential when the blade meets the sheath leather for an extended period. In contrast to chrome-tanned leather, a vegetable-tanned leather is not known to corrode or stain a blade left in the sheath for any length of time. That old admonition to store the knife itself separately from the sheath will then get a longer look.

“A lot of people say not to store knives in the sheaths, but as long as the sheath is made of good vegetable-tanned leather, I’ve never had a problem,” Lebatard noted. “I made a knife for a friend a few years ago and he didn’t want a sheath. He was going to get someone else to make the sheath for him. Several years later, he brought the knife to me and he had had it in a chrome-tanned leather sheath. It was nearly rusted through. The chrome-tanned leather is very corrosive.”

Kravitt has had similar experiences. “I hear so many people say not to store knives in leather sheaths, but I have kept knives in sheaths for years and never had a problem,” he recalled. “My sheaths are all vegetable tanned as opposed to chrome tanned. Chrome-tanned leather may have salts and other things in it.”

Drainage And Inserts

Waterproofing is another essential element, and in the construction itself there are questions surrounding drainage holes and inserts as well.

Most sheathmakers shy away from inserts since contact with the blade may dull the edge. After all, the welt and/or strap should suffice for a snug fit. Inserts in and of themselves may be judged to provide some measure of redundancy, but contribute little to the overall stability of the lockup or in protecting the knife itself. Long says, “Even the best inserts, being rigid, will do more harm to a blade than top grain leather.”

The different decorations Kenny Rowe offers with his sheaths include, from left: smooth; border tooled; basket weave; acorn and oak leaf hand carving; exotic skin overlay (gator); exotic skin inlay (beaver tail); and exotic skin full coverage (ostrich leg). (Kenny Rowe image)

At first glance it might appear that a drainage hole is a good idea to help maintain cleanliness and prevent the buildup of moisture or debris within the sheath. Not so fast!

“I do not ordinarily put a drain hole in my sheaths,” Long asserted. “Nor do I do any waterproofing of the interior of the sheath. Rather, I depend on the normal intelligence of my client to not go swimming with their sheath, and to at least try to clean the blood and guts off the blade before reinsertion.” 

Rowe agrees. “I don’t see any sense in it,” he commented. “I can count on one hand the number of sheaths I’ve made with drain holes in them, and I’ve been making sheaths for 35 years at least. The only time I would expect someone to have their sheath in really wet conditions would be if they accidentally rolled into a deep river or their boat sank. I wouldn’t expect someone to haul off into neck deep water with their hunting gear on. For debris, it’s easy enough to take a wire with a little hook in the end and just rake the sheath out, or blow it out with air, or stand it upside down and shake it or tap it on a table.”

Kravitt, on the other hand, will utilize a drain hole and an insert from time to time. Often, the insert itself is fashioned from leather to avoid additional friction against the knife edge. The employment of the drain hole is in direct response to the future use of the gear in the field.

“If I know the sheath will be used in harsher conditions, I think it should have a drain hole,” he remarked, “not just for draining moisture, but also removing debris—especially when the user has spent a lot of time in the woods.”

Sheathmakers do tend to rely on the owner of the product and of the hunting knife to exercise responsibility in the field. “Explain to the client, if they are a novice, about the ‘care and feeding of a leather sheath,’” Long smiled.

How To Care For A Hunting Sheath

The well-crafted sheath is the constant companion of the hunting knife, either in the field or a collector’s cabinet, and the best measure of the sheath’s contribution is its role in that partnership. For the sheath to function properly, owners must remember the fundamentals of hunting knife care. Keep both the knife and sheath clean. Wipe away moisture and other fluids. Maintain the surfaces as needed. Don’t put the knife away wet and expect the sheath to do more than expected.

Adhering to best practices will ensure long life for both the hunting knife and its all-important sheath.

*According to the Montana Leather Co. website (montanaleather.com), leather thickness is typically measured in ounces. For instance, an ounce of leather is equal to 1/64 inch. As a result, 7-to-9 ounce leather will be in the 1/8 inch range, give or take a few millimeters.

Read More

Stropping: What It Is And How It’s Accomplished

0

What is the purpose of stropping? Is it the same as sharpening a knife? We’ll answer those questions and more as we explore how to put the finishing touches on a blade.

Forged Knifemaking
This article is an excerpt from Forged: Making A Knife With Traditional Blacksmith Skills available at ShopBlade.com.

Burr is a term used to describe the turned-over edge of a freshly sharpened blade. The burr can be seen as an ultra-thin, wire-like structure at the edge. When sharpening you are bringing one edge surface closer to the other edge surface with alternating and even strokes, left-right-right-left against an abrasive such as a sharpening stone or metal grade sandpaper or strop. By alternating sides you simultaneosly remove surface material from both of the sides forming that burr. Sharpen back-and-forth, one side and then the other, and the burr appears.

What Sharpening Does To A Blade

At first the two opposite sides are divided by the blade’s edge thickness and there is no burr. This is seen as that paper thin shiny line from tip to choil. As one side is brought closer to its opposite side (i.e. sharpened), one side or the other will eventually meet the other and the thin shiny line will disappear.

At that point there isn’t enough mass to support the edge against the hard-abrasive surface, and the super-thin edge rolls/curves over in the opposite direction, forming the burr. The burr can be seen with the unaided eye and felt with your thumb. The objective at this point is to switch and sharpen the edge from the other direction with a yet finer grit abrasive. This maneuver makes an even smaller and thinner burr on the opposite edge. After you sharpen several times like this in opposite directions, with finer and finer grit paper, the burr will be reduced microscopically and be difficult to see or feel but will still be there. This final use of fine grits of abrasive is considered, and is called, a hone.

What Stropping Does

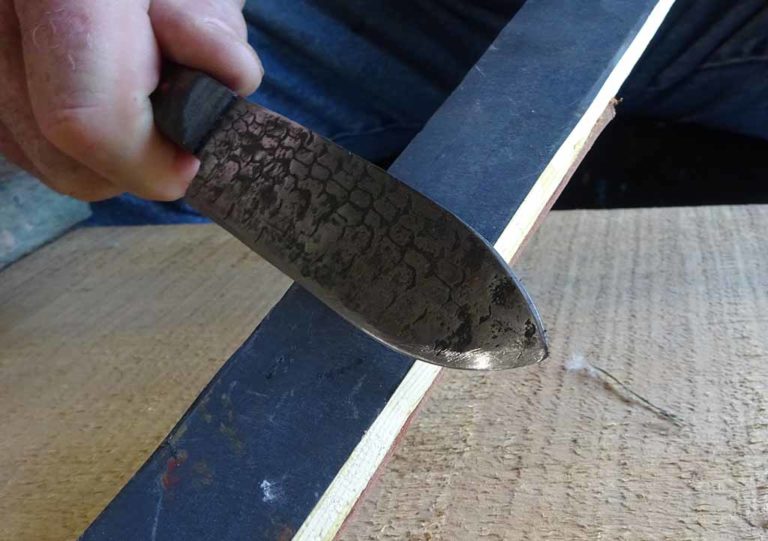
At this point switch from a superfine hone-grit paper (1500 plus grit) to a leather strap, belt, or section of a belt, called a strop. The fine sandpaper hones, and the leather strops. Strop with the same back and forth motion, strop the blade’s edge against the leather. This action bends the now unseen burr back and forth against the leather and the burr finally breaks free. The edge thickness is now just paper thin or less. So “paper thin” doesn’t sound like the edge would bear up during use, being this thin, right on the very pinnacle of the blade’s edge—but it does.

With removal of the burr the edge acquires maximum sharpness and can be re-honed repeatedly without subjecting the blade to recurring sharpening cycles with lower grit sandpaper. This maintains the thin-and-sharp element of your blade.

Choosing A Strop

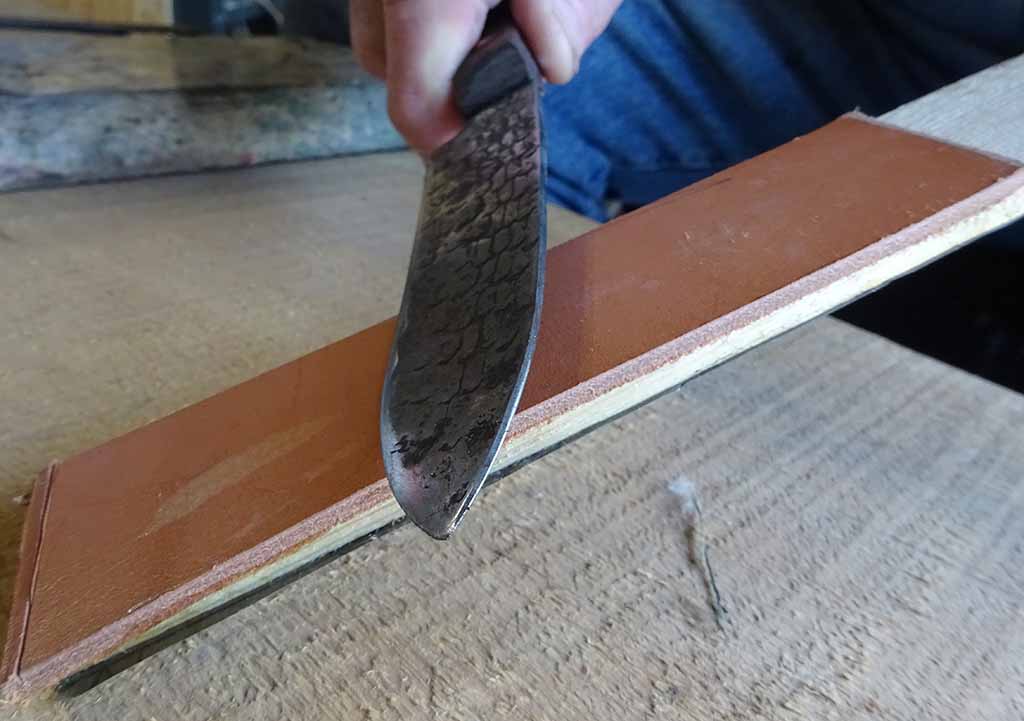
Make your strop from a strip of leather belt (10-inches long) glued to a bit of yardstick or lath material. Glue a strip of 800-1500 grit wet-n-dry sandpaper to the other side for a hone.

The same exact motion is used on the leather side of the strop stick. When the smith is “into” the motion it is similar to a continuous figure-8 movement. Most of the time the leather is enough to restore the blade’s edge without using the sandpaper side of the stick.

How To Strop

Stropping is a low-angle slap and slide motion. The leather actually sharpens the microstructure of the blade’s edge. It 1) bends the burr back to a sharp edge or 2) bends it back and forth till it breaks, like bending a wire coat hanger back-and-forth, revealing a new raw edge. Visualize a barber in an old-west, cowboy movie slappin’-n-slidin’ his straight razor on a big leather strop. Slap-n-slide your Frontier blade on the 800 to 1500 grit black W/D sandpaper 10 to 15 times then on the leather the same number of swipes. When your edge dulls you can often just strop with the leather, forgoing the hone altogether, in the restoration of a keen cutting edge.

After stropping, if your knife edge isn’t near razor sharp, go back to your wet-n-dry-sharpening action with the higher numbered sandpaper grits (400, 600, 800) then strop again.

Testing The Edge

Feel the edge with your thumb, perpendicular to the edge. Never run your thumb or fingers vertically up or down the blade. It will cut. With time you’ll be able to tell in an instant various level of sharpness with just your thumb. With time you will feel the burr and know the angle of any blade with just a touch of your thumb.

Another sharpness indicator is the use of an old leather belt or scrap of leather. Almost any “sharp” knife can cut a sheet of paper but stiff leather is the true challenge. First, use a knife of known sharpness. Cut a bit from the leather. Note the force needed to peel off a few pieces of leather. Use the same piece of leather on subsequent blade edges you sharpen in the future. By comparison, the quality of those blades’ sharpness can be gauged.

This article is an excerpt from Forged: Making A Knife With Traditional Blacksmith Skills available at ShopBlade.com.

Get More Knife Sharpening Info:

Why The X-Rhea Knife?

1

The X-Rhea Is The Result Of Having A Curious Mind And The Ability To Explore Possibilities.

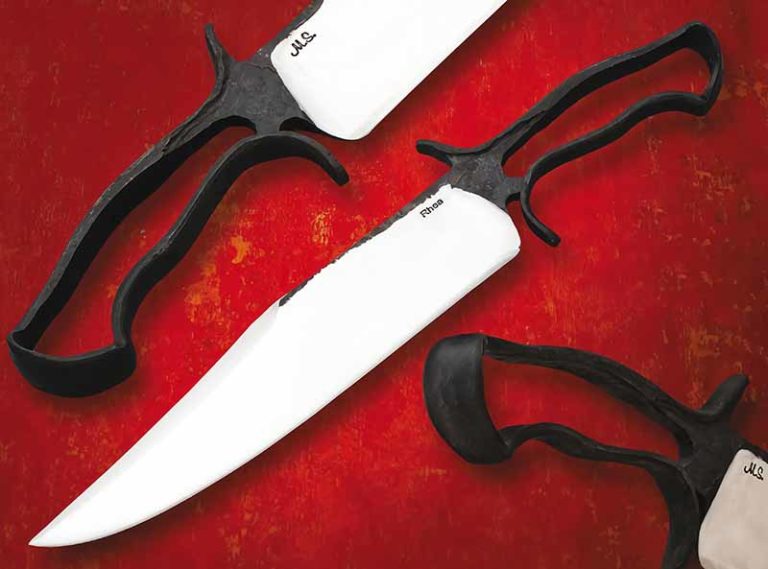
Why did I come up with the X-Rhea knife design? I’ve asked myself this several times and only recently have I been able to supply a reasonable answer. Th e X-Rhea started as a personal challenge. I wanted to make a knife, handle and all, from one piece of steel. Th at’s it: no scales, no added glues, pins, extra space fillers, inlays—nothing. Moreover, I wanted it to look good and be comfortable and as structurally sound as any good knife should be, without being overly heavy.

This challenge nagged at me. If I limited myself to steel and fire as my basic resources, could I forge a knife from one piece of steel, a knife that left no doubt about its viability? Could it look good, feel good and perform well? I also wanted a handle design versatile enough to fit different sizes and types of knives.

“A full tang knife is stronger than a hidden tang knife” is something I’ve heard many times. That statement oversimplifies the matter; which is better? I’ve heard some say, “At least with a full tang, if the scales fall off you still have a knife.” While I don’t agree with either statement, it indicates in some people’s minds a full tang blade alone qualifies as “a knife,” even without scales. And what qualifies as a knife, as well as what part strength plays, might differ from person to person.

In my visits with renowned historic blacksmith Peter Ross, my eyes were opened to the multi-dimensional vision the historic blacksmith needed in order to execute the complex forgings of everyday objects of the colonial era. The ability to understand how something is shaped, combined with the hand skills to actually shape it, are two separate things. The combination of those two qualities in one individual is rare. Peter showed me how to change the way I think about shaping steel. My mind raced with possibilities every time I worked with him. He taught me how to take a project from concept to reality.

Just as steel is shaped by the blows of a hammer, my thoughts were shaped to the challenge at hand. I felt I was in a unique set of circumstances that directed me to mix my forging with the mostly forgot ten techniques of historic blacksmithing. My years of training helped provide some ability to execute my ideas and theories. Theories? OK, it’s my “theory” that about 90 percent of tactile, meaningful contact between the hand and a knife handle is concentrated on the top and the bottom. Think pliers, wrenches, etc. The mind seems to understand the vacancy of the remaining areas between the top and bottom. Also, the hand “soaks up” and “fills in” to meet these vacancies to a degree. If I could add contouring and sculpting to the essential top and bottom, could the hand and mind fill in the rest? Can a knife with no scales be an option?

The Answer To X-Rhea

Finding the answer took significant effort and a lot of time. I worked out a forging sequence for my X-Rhea hunting knives that satisfied me, but I kept thinking it would be great to forge a bowie with top and bottom lugs. It took years to work out the stages of the process. While the accompanying photographs attest to my relative success, it leaves a lot unsaid about the adjustments I had to make in my thinking. I used the blacksmithing principle of eliminating things that hinder the process, and re-emphasizing and adjusting things that assist it. I also considered efficiency in timing, appropriate temperature, or other techniques** that are most practical.

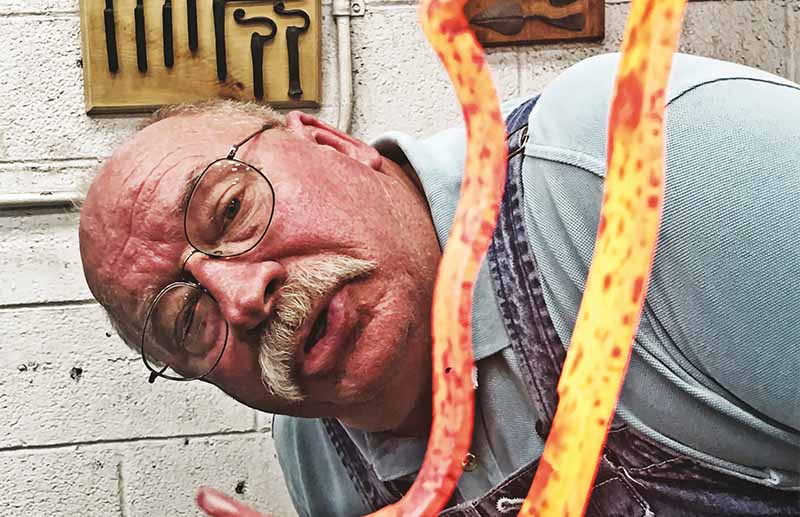
The author up close and personal with an X-Rhea Knife forged red hot.

While modern tooling could speed up some of the steps in my process, modern thinking and modern expectations would not. Aft er all, this process was being developed around the early 19th-century blacksmith tools: a coal forge, blacksmith leg vise, and the use of handheld hammers. This uncluttered my thinking and required me to face the same challenges as the early blacksmith. Elevating one’s skills with basic tools, improving understanding of the materials, and bearing full responsibility for the outcome was my expectation. While this might seem restrictive and limiting, the improved skill level and the readjusting of my views had a freeing effect. I am not as dependent on modern tools, which enables me to be more creative. The willingness to adjust one’s thinking was, and remains, an invaluable aid to the blacksmith.

Material Limits

When forging a complex shape, a smith must consider the limitations of the material, sometimes working near its limits but never exceeding them. Wisdom calls for choosing material suited for the extreme changes of geometry in the knife. Steels that are prone to air hardening must have special consideration or be avoided. Like some historic objects, the X-Rhea Knife is forged from one piece of steel, in this case, entirely high carbon steel. Those qualities and characteristics must be allowed for and considered.

Making an X-Rhea is a multi-step process. It must be pre-formed, with all needed parts and adjustments made before final shaping and peening the handle. Recognizing and maintaining a high standard of precision in the pre-form details is absolutely necessary to a satisfactory final result.

Even after I successfully made one of these knives, I found that part of the challenge was yet to come—acceptance. I showed up at a cutting competition with one of my X-Rhea bowies and sure got some stares. The safety judges looked it over as if it were a new species of animal. “Is it strong? Will it hurt your hand?” they asked. As I recall I placed well in the competition using it, but the initial reaction was still mixed.

Will it hurt your hand? I previously mentioned the handle contouring and sculpting. This is a standard part of the forging and filing process, as it is with any knife handle. Depending on the maker’s forging skill, it may require some filing in-between forging steps. Each step has some amount of adjustability to allow for correction, while leading to a beautiful profile and comfortable grip. It can be surprising to those who handle the knife just how good it feels, considering the remarkable difference in construction and the “open” appearance.

X-Rhea Strength

Is it strong? This is where the application of common blacksmith tool-making skills and logic are applied. Sufficiency was the guide for an early blacksmith. Making a piece overly strong for its intended use might sound impressive, but in use it becomes clear that this strength adds unneeded and undesirable weight for the intended use, and does not account for other desirable characteristics such as flex and toughness. I view heavy,
unwieldy blades generally as a mark of a novice. Unless the intended purpose calls for excessive strength, sufficiency should also, be the guide not only for blades but for knives overall.

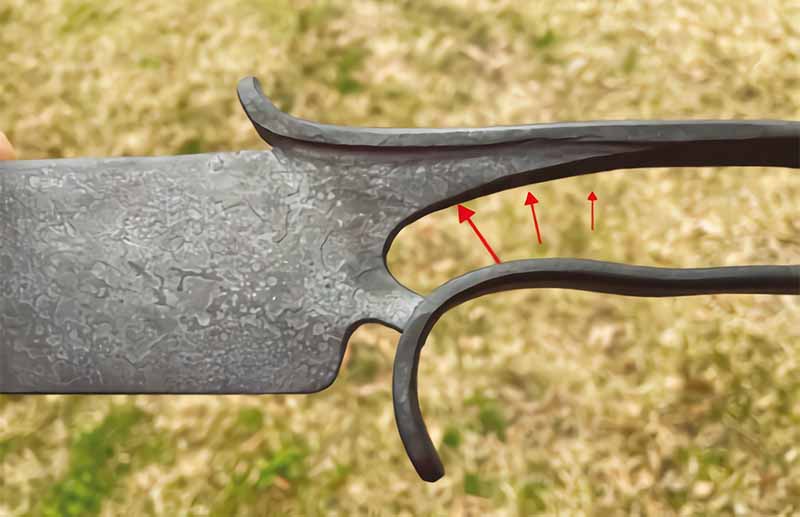
For those inclined to overthink a matter, look at the “T” cross section of the blade-to-handle transition. It eff ectively converts the stress loads in the needed directions.

Today when I see a thickly built knife, instead of looking at it and saying to myself “This thing sure is strong!” I ask, “Why does it need to be so heavy?” For the X-Rhea handle, I try to use sufficiency as my guide. Where it can structurally be lightened, I do that by forging and filing, leaving it sufficiently strong but not overly heavy. This distribution of strength serves to provide literal balance to the knife exactly as any conventional knife, regardless of construction. Either should have balance when properly built to a purpose and have sufficient strength to perform its purpose. That fact, while amazing to me at first, is testimony to the principle of sufficiency. In other words, the X-Rhea should compare well in balance and weight as well as function to any well-made conventional knife for the same application.

For those inclined to overthink a matter, look at the “T” cross-section of the blade-to-handle transition. It effectively converts the stress loads in the needed directions. Viewed from the profile, the slight rotation of the ricasso as an “X” instead of a vertical “cross” assists in adding strength with less material (weight) to the connection. The upper leg of the ricasso’s “X” tapers back to brace the upper part of the handle, which bears the majority of the workload. The handle then tapers in thickness slightly as it goes back to the forged integral pommel and proceeds to the handle tenon where it is peened. To further lighten the knife, the handle band is sculpted gently to taste. Taste? I try not to get so engrossed in the math and mechanics that I lose the necessity of making the knife look good. Like a scroll forged by a blacksmith, the application of math and mechanics are the basis for all aspects of proportion and form. To keep it simple, I want to make it graceful, not blocky, getting the absolute most out of a minimum of material volume.

The X-Rhea Process

In my situation, I set a challenge for myself and it led to the X-Rhea. For me, the process is as important as the knife itself. I made a lot of individual knives, some better than others, but what I was actually concentrating on was developing a forging process, so the one-piece forged knives could be repeated via a repeatable process with predetermined features, checkpoints and adjustability built-in along the way. To emphasize adjustability, whether by forging, grinding or filing, is key. It enables the smith to reach predetermined checkpoints before proceeding with the rest of the process. When following a well-designed process, the outcome will be consistent and meet a standard as would the product of a well-designed and adjusted machine.

While we are far from machines that guarantee specific outcomes, diligent attention to the execution of each heated and hammered step and making needed adjustments, when appropriate, will carry the project along. As aptly pointed out in David Pye’s book, The Nature and Art of Workmanship, “The quality of the result is continually at risk during the process.” Overcoming the risk by careful determination, as well as time spent in practice, is its own challenge and entirely rests upon the craftsperson.

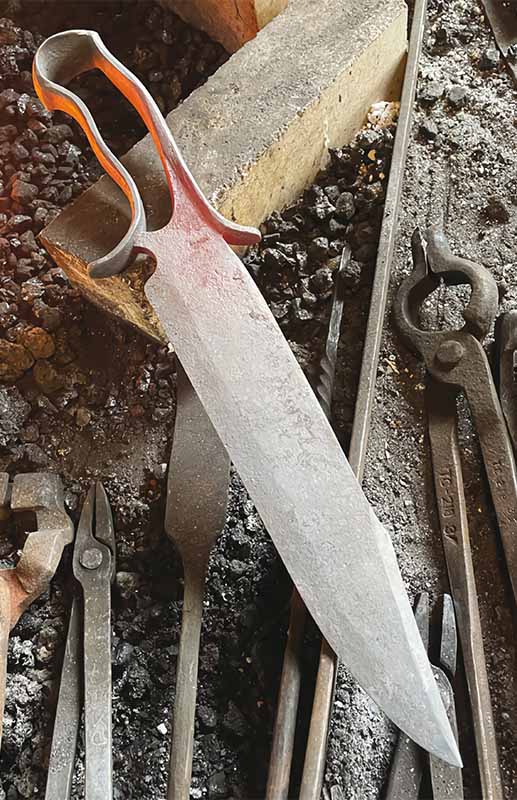
Like some historic objects, the X-Rhea Knife is forged from one piece of steel, in this case, entirely high carbon steel.

I believe it is noble to preserve cultural objects, and it’s also my belief that preserving the processes used to make those objects is equally important. The hand of the individual craftspeople, following already established processes, can be seen in the objects of the past. A society or culture can lose appreciation for the craftsman’s touch. Pye stated, “The danger is not that the workmanship of risk will die out altogether but rather that, from want of theory, and thence lack of standards, its possibilities will be neglected and inferior forms of it will be taken for granted and accepted.” It would be a shame to neglect the possibilities or take for granted why we craft things the way we do.

I also believe there is room remaining to explore new designs and theories in today’s knifemaking. We can find new ideas and inspiration from places we don’t expect. With the ever-changing laws and shortages of materials such as stag and ivory, we may be wise to consider creating a market based on a process we develop using otherwise unexpected, but available, materials and techniques. This requires time and risk. Are we willing to apply time and effort to follow through with a concept without certainty that there will be a payoff? Is the payoff worth it in monetary or cultural dividends? One can really never know the answers to such questions, and those possibilities were not a serious factor in my efforts.

The X-Rhea is the result of having a curious mind and the ability to explore possibilities. It was an idea, turned into a challenge, turned into reality. The simple sequence is available to everyone. Its cultural value is a matter of opinion, but the process of the X-Rhea Knife shows that new and interesting ideas can be pursued in knifemaking.

Also Read:

Advertisement

Must Read Articles

Read this before you make a knife

Knifemaking 101 – Read This Before You Make a Knife

  by Wayne Goddard My experience has taught me that there's nothing like digging in and getting started. I've often said the hardest part of the...
how to forge damascus steel

How to Forge Damascus

Advertisement
Advertisement