Knifemaking is the building of a knife, which includes the blade, handle and other accouterments. Blades are made by either removing metal from a steel blank via a grinder – known as stock removal – and the forging to shape of hot steel into a blade in the process known as bladesmithing. Other parts, including bolsters, guards, pommels, etc., are needed to complete the finished knife.
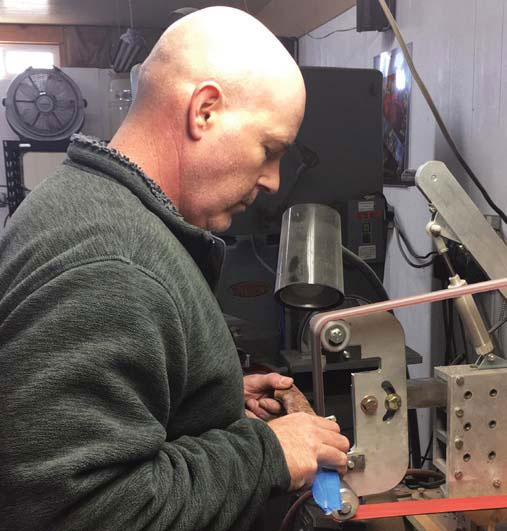
In CPM-154 stainless, John Bartlow said he found a steel that allowed for a flawless finish. At the grinder here in his shop, Bartlow uses the steel on his utility fixed blade equipped with his trademark line cutter in the ricasso. (SharpByCoop knife image)A veteran of 30 years in the Knifemakers’ Guild, John Bartlow started out using 440C stainless steel for his knives, moved to ATS-34 and today has graduated to CPM-154. Raphael Durand uses the latter steel on his stag lockback. (SharpByCoop image)
Based in Sheridan, Wyoming, by way of Tennessee, 30-year Knifemakers’ Guild member John Bartlow uses CPM-154 for his bird and trout and hunting knives. When Bartlow first started making knives, he was also a hunting outfitter.
As a result, he gutted and skinned a lot of animals on a weekly basis. Having many of his guides use his knives, he got a lot of feedback over the years about design and function.
“I started out with 440C stainless steel a million years ago,” Bartlow remembered. “I quit that nearly 20 years ago and jumped to ATS-34 stainless and used it for years and years.”
He said that about a decade ago he started to become frustrated with the quality of the ATS he was getting. There weren’t major structural problems like chipping or breaking, but there were very subtle issues Bartlow observed under 10-to-12-power magnification.
“My customers never noticed it but it bugged me,” he continued. “I was trying to get some finishes in that stuff —and I was buying through normal channels from several suppliers—but when I would go to finish it, once in a while I’d get this little area that looked like it had pits in it, or it kind of had a little ‘road rash’ that I could not get rid of.”
He approached other makers about it at the time and they said they’d seen the same thing. That motivated him to jump ship to CPM-154, he said, which is very much a sister steel to ATS-34 and 154CM.
“They are closely related on the family tree of steel,” he said. In CPM-154, he found a material that allowed for a flawless finish. With the powder metallurgy process and the accompanying uniform distribution of carbides, it eliminated the “road rash” issue.
Here grinding a blade in his shop, David Sharp said CPM-154 exhibits excellent edge retention, sharpenability and corrosion resistance.
“A large percentage of my knives have a very fine finish, polished or over-1200-grit hand satin,” the maker based in Hesperia, California, remarked. “CPM-154 is very fine, so when it’s finished to a high level you don’t see the steel’s grain.”
He added that CPM-154 is not quite as abrasion resistant as other of the relatively newer steels, so obtaining a fine finish is a bit quicker. He said that though steels are an oft-discussed topic online, he very seldom has customers request a steel type or brand, which could be seen as a testament that his choice of CPM-154 is a good one.
“I have not noticed a downside,” Sharp continued. “The upside is the finish and that it is, in my opinion, a balanced steel. For the majority of users it exhibits excellent edge retention, sharpenability and corrosion resistance.”
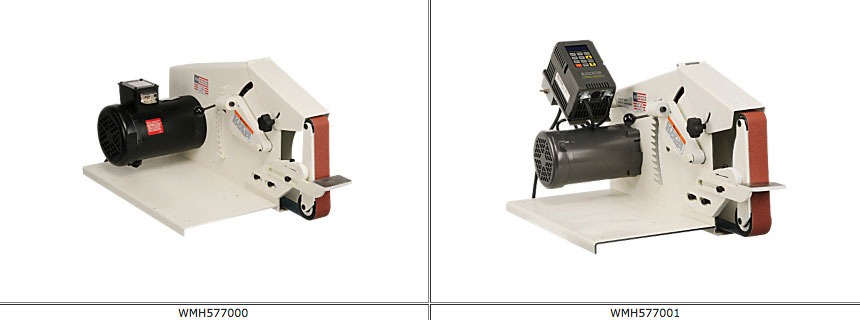
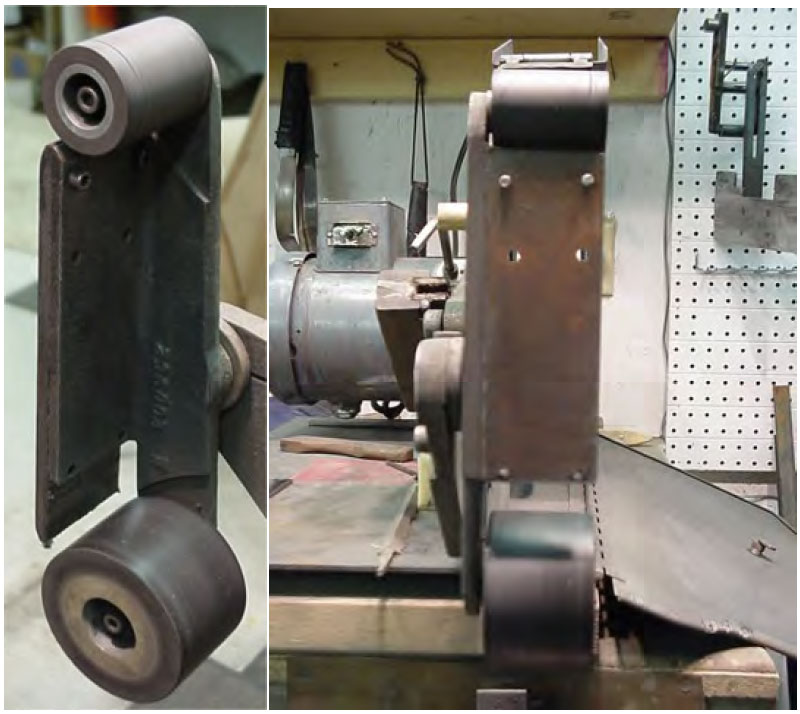
Two variations of the Wilton Square Wheel Grinder. (Images courtesy of Southern-Tool.com)
The variety and types of belt grinders available today is tremendous. Without a doubt each individual has his/her favorite machine. Although all are very good, we always wish that we could make them do more, or modify them to better fit how we each do things in our shop(s).
I have used every grinder out there at one time or another, and have chosen the Wilton Square Wheel as my favorite. The most attractive feature for me is the ease and speed of changing attachments.
As it comes from the factory or dealer, there are a few draw backs that can be irritating to a knifemaker. Below are a few modifications I have made to increase versatility and production in my shop.
Specs
The machine is set up to run either 110VAC or 220VAC. As delivered it is set up to run at 110VAC, I highly recommend setting it up to run on 220VAC. There is a world of difference in the power and smoothness of the machine from 110 to 220. (My machine had change over instructions located inside the switch housing.)
Slow Down
(All images by the author unless otherwise noted.)
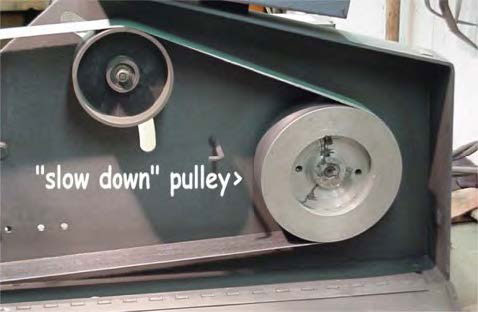
If you did not purchase a variable speed machine, get a “slow down” drive pulley. As it comes from the factory, the Wilton Square Wheel has a 10″ drive pulley that runs the machine at 4600 SFPM (surface feet per minute) Before they were offered commercially, I had one made at a local machine shop. Mine is 7″ dia, and slowed the belt speed down to 2950 SFPM.
By slowing the machine down, it may seem at first that your progress is very slow, but your grinds will come out much nicer, and you’ll get a lot more mileage out of your belts.
Flat Platen Attachment
Next we turn to modification of the flat platen attachment. As it come from the factory, and with the way the platen attachment is cast, there is simply not enough room or tracking adjustment to allow one to create plunge cuts on the left side of the platen (as you are facing the machine).
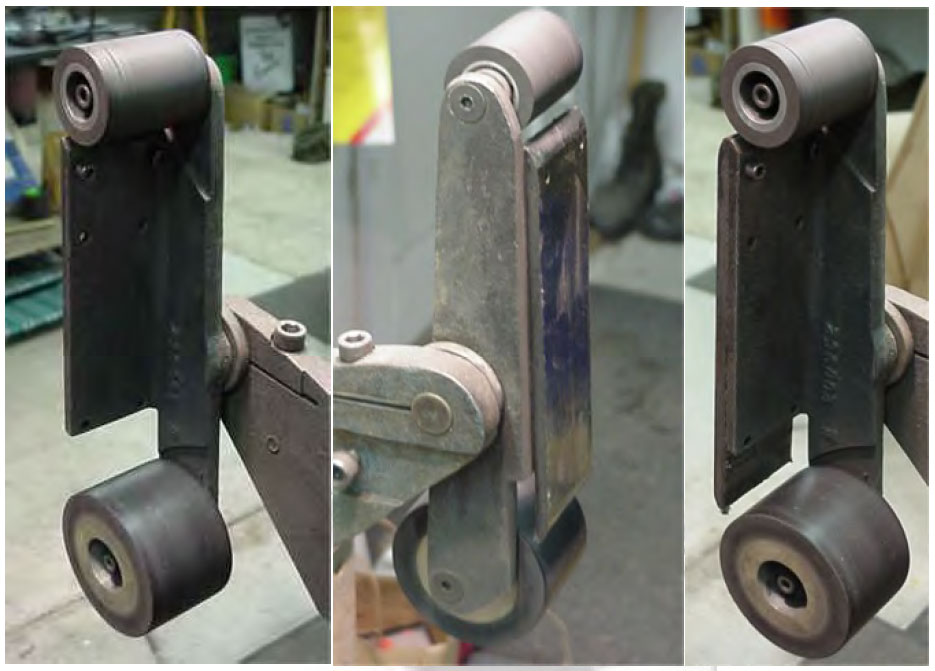
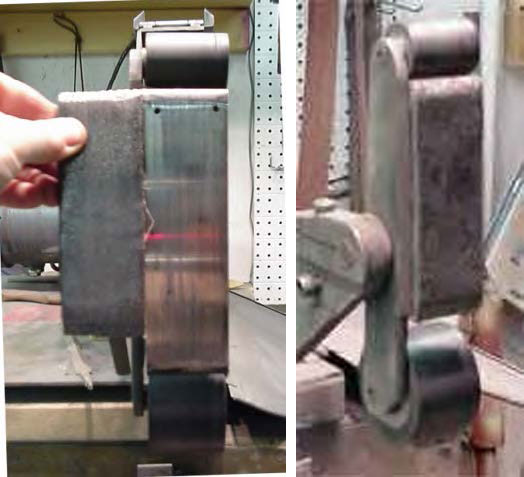
It took me a while to work this one out, but the solution is a simple fix. I created a platen that bolts onto the existing platen. These “add on” platens are nothing more than a piece of 1/4″x 2″x whatever length you want (up to the original 8″) that the belt “rides” over. This will give you plenty of room for plunge cuts. In the photos below you can see how I drilled two holes in the casting, and use two socket head bolts (10-24 thread) to secure the “add on” platen.
The easy way to do this is to remove the contact wheels and use a set of vise grips to drill the holes for threading, and then enlarge the holes in the casting to accept the socket head bolts.
Modify Platen Lengths
For those who were paying close attention to the photos above, the platen may have seemed shorter than it should be. This brings us to one of the best improvements. Remove 2″ at the bottom of the factory platen casting. This gives an area that is ideal for convex grinding.
Platens can be made in different lengths, for various applications. The above photo on the left shows two different platen sizes, the large for flat grinding, and in the right photo, the shorter platen is in place for convex grinding. Below is a close up view of the setup I use for convex grinding. It’s easy to get carried away and use too much pressure, so nice and easy is the key. You can control the amount of convex with a combination of belt tension, and the amount of pressure you apply to your work piece.
Using the Short Platen
I seldom use the 8″ wheel, with the exception of profiling blades. The long flat platen, I use for flattening, and tapering, the shorter platen is used for convex grinding.
If you have made modifications, and are willing to share your ideas, let me know in the comments.
NOTE: Since first writing this article, I have trashed the idea of using Graphite canvas for a platen backing. This material wears too quickly, causing uneven grinds and just general mayhem. I now use “pyro-ceram” or tempered glass on all my platens. The platen MUST be flat, and the glue used to attach the glass able to withstand heat (I use AccraGlass) but it will improve you grinding 10 fold.
Keep Learning About Knife Grinding with This Download
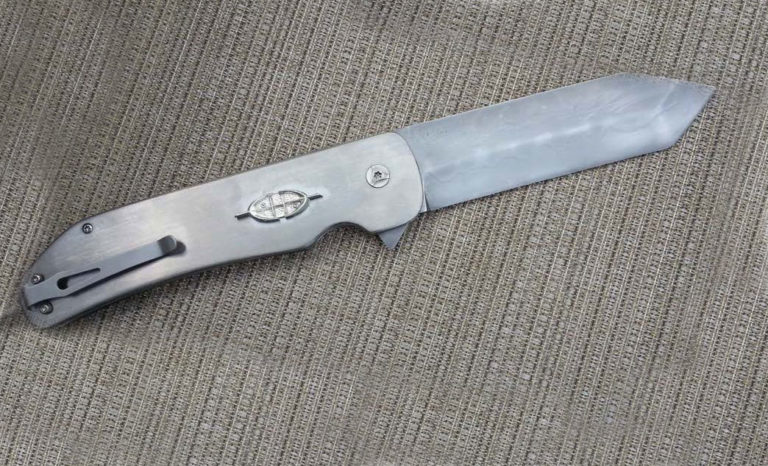
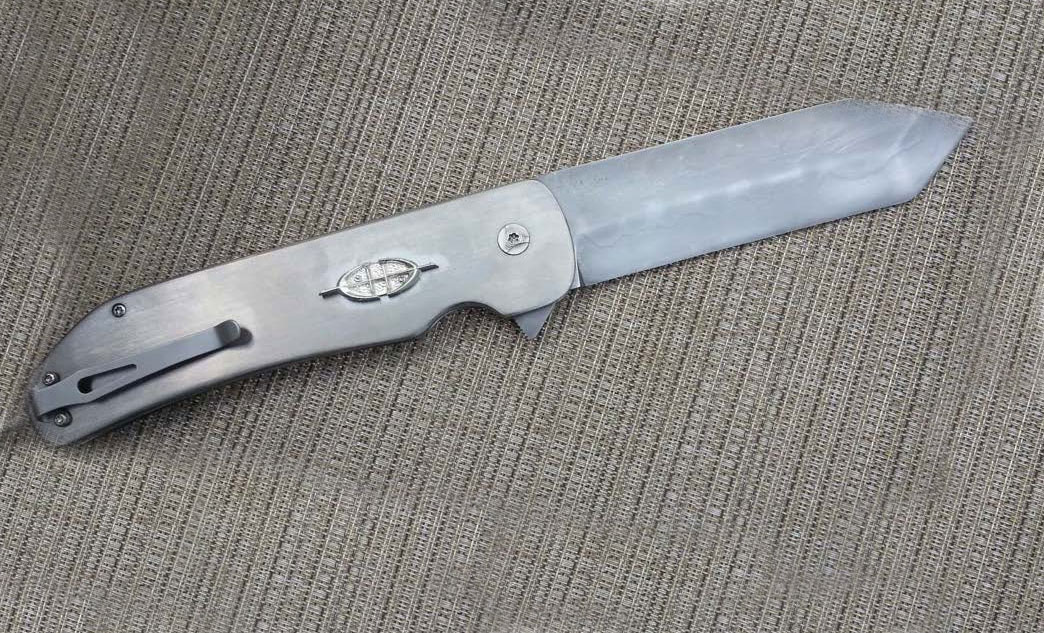
The author’s finished flipper folder—sanded, polished and ready to go!
Folder making has advanced so much in the past few years. Now, flipper folders are the hot new ticket.
Following is an overview of the steps in making a modern flipper by hand.
Draw It Up
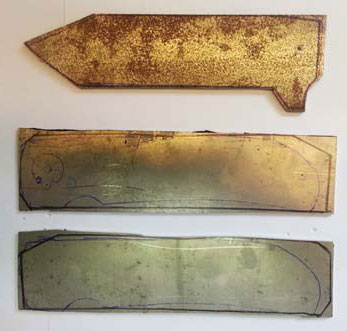
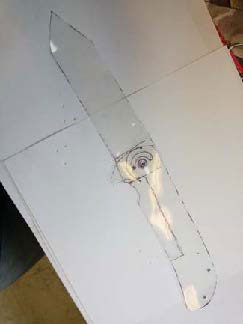
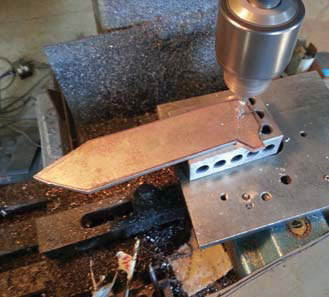
The parts are all cut out. The holes in one handle side (center) are center punched and ready to drill.Design the knife parts on clear plastic so you can see where to locate everything.
To begin, draw designs on paper and transfer them to clear plastic. Cut out the designs of the blade and handle from the clear plastic. Overlap the tang of the blade on the handle and insert a needle through both pieces where the pivot pin will be.
From there, fold the blade onto the handle and adjust the design as needed.
Next, trace around the plastic handle on a titanium sheet. I use titanium in a 1/8-inch size for the top part of the handle and .070 inch for the two bottom pieces. Trace the blade and cut it out.
Know the Drill
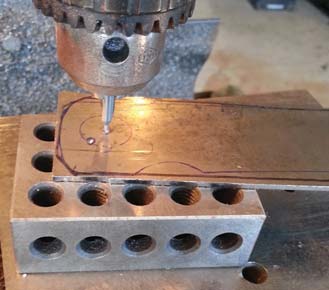
Counter sink all the holes a small amount before drilling them with the 1/16-inch drill bit.
Making folders is mostly about drilling holes. Drill out one plate of titanium with 1/16-inch holes. Place another plate of titanium underneath the drilled-out plate and clamp the two together. Turn it over and drill through the second plate.
Starting with the pivot hole, place a ½x1/16-inch hardened dowel pin in it so the two plates won’t move. Next, drill the end of the handle and put a pin in it.
Continue drilling, clamping and adding pins where your stand-offs go. Each time you drill a hole, take the plates apart and de-burr. A hand drill with a four-flute counter-sink is handy for de-burring.
Start drilling all the holes with a 1/16-inch drill bit.
This flipper will have an internal stop pin, so don’t drill all the way through the top plate. However, do drill through the bottom plate—the .070-inch one. From here, affix the plates with 1/16-inch dowel pins. Clamp, remove the pivot pin, and drill and ream to 3/16 inch for the pivot pin. De-burr and reassemble. Drill and ream a 1/8-inch stop pin.
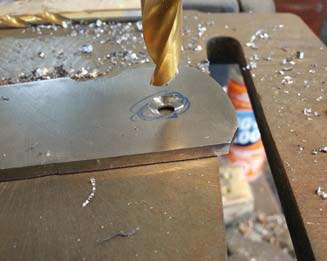
CAUTION: Do not go all the way through the top 1/8-inch plate! Countersink the outside plates for the 2-56 screw heads. I use a #20 drill bit for this.
Pivot, Washers & Pins
Mill the slot for the stop pin.
Now it’s time to countersink the two pivot screws. Different types of spacers and stand-offs can be used on a folder. For this flipper I used ones with shoulders from Knifekits.com. Normally I use custom-made stand-offs from Sheffield Knifemakers Supply. The shouldered step-down stand-offs prevent any unwanted movement in the blade.
I open up the holes for the stand-offs to fit in with a 1/8-inch reamer. Actually, I use a reamer .001 inch larger, so it is .126 inch.
The cool new thing with folders is pivot washers with ball bearings. There are many different types from which to choose. Michael Burch recommended washers from Jantz Supply to me at BLADE Show.
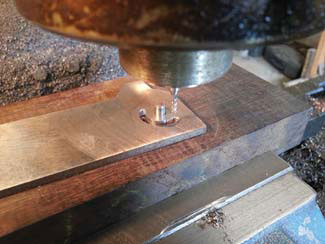
Countersink the pivot screws.
You have to sink the washers down into the scales a bit. I use a 3/8-inch, four-fluted end mill to do this step. First, I index a 3/16-inch end mill into a hole on a plate of steel held in a mill vise. I lock down my table and take out the 3/16-inch end mill and put in the 3/8-inch one using a dial indicator to show how far down I am drilling.
Most tactical folders are going pretty thick with washers .020-to-.040-inch on each side of the blade. I sink the washers down so they and the blade are the same thickness as the stand-offs. You want the space between the blade and washer to be equal to the space between the stand-off s or spacer material. Drill and ream a 3/16-inch pivot hole in the blade. Mill a half-moon slot for the 1/8-inch stop pin.
Many makers put the pin in the handle at about the 7 o’clock position when open. Grind the pivot and stop pins down to the proper length. (Author’s note: Grind the pivot pin so it is not exposed past the top of the countersunk hole of the pivot screw. Grind the stop pin so it floats between the two scales.) Grind the 2-56 screws down so they don’t touch each other when they’re screwed into the stand-offs.
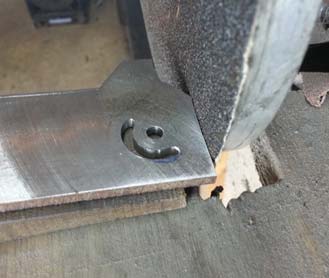
Profile the blade and grind the tang at a 7-degree angle. I use a 7-degree block of Micarta® held up against my disc grinder for a guide.
Lock & Detent
Grind the tang to fit the lock.
Now it’s time to cut the lock. Place the blade on the bottom liner with the pivot and stop pins in place. Open the blade and scribe a line with an X-acto™ Knife behind the tang onto the liner. Draw a line 3 inches long with a marker down the scale. Clamp in the mill, and, using a slitting saw, cut the 3-inch length. Use a band saw to cut the short face, which will be the lock. Using a cut-off -wheel attachment in a Dremel® Tool, clean up the end of the lock.
On a locking-liner or flipper folder, the lock is made by bending a tab of the titanium liner over so it engages with the end of the tang of the blade. The end of this tab must be coated with carbide. The machine that does this is a little hand-held micro welder and is called a carburizer. Simply run the rod onto the end of the titanium lock and it welds a coating of carbide onto the titanium. This produces a smoother action on the folder.
You can also flame harden the lock by heating it until it turns orange. In order to let the lockbar bend, grind in a .020-inch dent with a ¾-inch wheel at the other end of the lock.
It’s time to drill holes in the lock and blade for the 1/16-inch detent ball. Center punch a hole in the middle of the lock. Drill through with a #54 drill bit.
Close the folder and clamp it closed. Drill through the same hole as the liner into the blade about .060-inch deep. The #54 drill bit is .053 inch. You can also use a .054- or .055-inch drill bit depending on how you want to tune your folder. Grind, heat treat and polish the blade. Press the 1/16-inch ball bearing into the lock. The height left remaining of the ball bearing should equal the thickness of the washer.
Bend the lock over to about the middle of the folder. Now grind the tang at 7 degrees on a disc grinder until the lock starts to grab. You can assemble the folder, hold it up to the light and push the lock away from the knife to see how much more you have to grind the tang. Go slow and grind just a little before checking the lock. Drill and tap the scale for the pocket clip.