Kershaw’s New Parley Is A Unique EDC Knife That Is Fun To Use And Built To Last. The Cleaver Blade Makes It Stand Out From The Crowd.
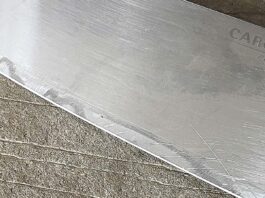
Kershaw has once again made a fantastic folding knife that is beautiful, functional, and exciting. The new Parley features Kershaw’s non-locking, slipjoint design and a cleaver-style blade made of 7Cr17MoV stainless with a satin polish. It opens with a nail nick and features a lanyard hole for excellent portability.
Kershaw Parley in the closed position
While the polished black Micarta handle is smooth to hold and feels good in the hand, the star of the show is the blade. The 3.1-inch cleaver is inspired by the hulking kitchen meat cleaver. It can handle kitchen tasks but is far more nimble than its bigger brothers.
As a folder, the cleaver blade works great handling small tasks outside and anything in and around the house. The plain edge cuts true and gracefully and is easy to sharpen and maintain. With an MSRP of just $39.99, it’s a bargain that should absolutely be snatched up.
Editor’s Note: This article was written by Mike Ableson.
Whether A Stone, A Rod, Or An Electronic Device, There Are Many Quality Knife Sharpeners Out There. Here are five of the best.
There are all sorts of knife sharpeners out there. Some can fit in your pocket. Some are full-on appliances. Some are literal stones. No matter the type of sharpener you use, it’s important to make sure you get the best bang for your buck.
That’s why we’ve scoured the world of sharpeners to show you a variety of the five best out there today. Whether you’re looking for something quick and easy to give your knives a once over or a sharpener the pros use, there’s a knife sharpener out there for you.
Chef’s Choice Model Trizor 15XV 3-Stage Professional Electric Knife Sharpener, Platinum
Chef’s Choice Model Trizor 15XV 3-Stage Professional Electric Knife Sharpener, Platinum
The first one on this list could be called the Cadillac of home knife sharpeners. Named the best knife sharpener by numerous organizations including America’s Test Kitchen, the Trizor 15XV by Chef’s Choice is a beast of an electric knife sharpener.
It utilizes three separate stages to sharpen, hone, and polish your knives. It sharpens using proprietary diamond abrasives and then stropping discs to polish. It even adjusts between 15 and 20 degrees so you can sharpen multiple types of knives.
Yes, this is made for chefs and their kitchen knives but it’ll sharpen your EDC knives just as well. It’ll even sharpen serrated knives too! While it can’t sharpen ceramic knives or larger outdoor blades like axes, it does pretty much handles any other edge in your home or workshop.
It is pricey with an MSRP of $179.99, but if you want to sharpen like the pros you won’t find a better option on the market today.
Sharp Pebble Premium Whetstone 2 Side 1000/6000 Waterstone
Sharp Pebble 1000/6000 waterstone
I love sharpening my knives freehand. I find it meditative, fun, and refreshing. As more and more people look to whetstones as a way to sharpen their knives, there’s a glut of products on the market.
This is the type of stone I’ve used for the last several years, and it’s an excellent entry point into whetstones. Sharp Pebble has made a quality stone out of aluminum oxide that can sharpen and polish your straight-edge knives.
Starting with the coarse 1000-grit side, and finishing with the fine 6000-grit side, you can give your knives the love and care they need to stay sharp and cut at their best.
Another reason I like this stone is its accessories. It comes with a bamboo base to keep the stone secure as you sharpen. And it comes with an angle guide if you’re not confident in being able to keep the angle steady as you grind away.
While I love using my whetstone, it can be a bit confusing to jump into at first. Luckily, popular Youtube Ethan Chlebowski goes over the most common mistakes people make while using a stone and how to avoid them.
At an MSRP of $40.99, Sharp Pebble has made an affordable stone and a great entry point for those interested.
WorkSharp Guided Field Sharpener
WorkSharp Guided Field Sharpener
Need a sharpener while hunting or camping? The team at WorkSharp has you covered with their Guided Field Sharpener (GFS). Smaller than your cell phone, the GFS is packed with features any outdoorsman can appreciate.
The sharpener comes with two stones of 320 and 600-grit diamond and a 20-degree angle guide so each pass counts. It also comes with two finishing options, a ceramic honing rod and a leather strop, to polish your blade. You can even remove the diamond sharpening plates to reveal a small storage compartment with a built-in broadhead wrench.
And did we mention it can sharpen straight-edge blades, serrated knives, and even fish hooks? It really can do it all outside for you. It even has a lanyard hole so you can carry it without worry about losing it on the trail.
At an MSRP of $34.95, you get so much for the price and the peace of mind that comes with buying something sturdy from WorkSharp.
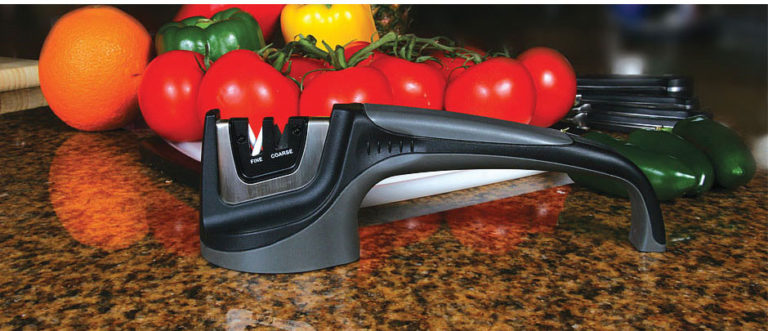
KitchenIQ Edge Grip 2-Stage Knife Sharpener
KitchenIQ Edge Grip 2-Stage Knife Sharpener
If you’re looking for a sharpener on a budget, this little countertop sharpener packs a big punch.
Available at numerous retailers, this sharpener from KitchenIQ is priced between $10-12 and will get your knives back to a sharp edge.
It uses two angled slots, one coarse (carbide) and one fine (ceramic), for you to pull your knife through. You hold it down with one hand and pull your knife through with the other. Pulling it through 5-10 times a side should be enough to reset the edge and polish it back to new.
Your sharpening time is seconds. If you’re looking for a sharpener that’s easy to use, doesn’t take much time, and gets your knives back to fighting fit, this is the sharpener for you.
Wusthof 9-Inch Honing Steel
Wusthof 9-Inch Honing Steel
The last piece on this list isn’t a sharpener, per se. Honing steels, or honing rods, are used to fix the small, microscopic imperfections that affect a knife over time. Using a honing steel will help get the edge back to where it was before but without removing material, as occurrences when sharpening.
A good honing steel should be used a few times a week while sharpening should be done a few times a year, and you can’t go wrong with this steel from Wusthof. From a company with more than two centuries of experience making knives, the honing steel is made from stainless and will help restore the edge of your kitchen knives.
With a low MSRP of just $25, you can’t go wrong with a steel from one of the most trusted knife brands in the world.
The Correct Sheath Is Pivotal To The Complete Hunting Knife Package. A Good Sheath Can Keep Your Knives Safe And Sharp For Decades.
The Correct Sheath Is Pivotal To The Complete Hunting Knife Package. A Good Sheath Can Keep Your Knives Safe And Sharp For Decades.
For the hunter in the field, a dependable and durable hunting knife is indispensable equipment, and it follows that the sheath that holds the knife must be equally up to the task.
Secure carry, protection for the blade and handle, easy access, and the ability to stand up to the elements and hard use are essential. While there is a variety of sheaths available and each one contributes something to the equation, the sheathmakers themselves have come to eye-opening conclusions as to the making and deployment of the correct sheath for the hunting knife. Personal preference is still a prime mover, but the basics make the difference between cooperation and catastrophe in the field.
“The best style for a hunting knife sheath is whatever the hunter wants,” explained veteran sheathmaker Paul Long. “Personal preference is very important. However, the knife that would best be described as a hunter would be best suited in a deep seat pouch with a loop that would carry relatively high on the belt. In most cases the deep pouch would preclude the need for a retention strap. For a double-guard hunter, a drop-loop belt sheath would probably be best with a snap strap for secure retention.”
Depending on the style of the knife, the guard often dictates the best pouch configuration. “I favor the pouch-type sheath, and the hunting knife generally has a single guard as opposed to a double guard,” related sheathmaker Paul Lebatard, who also has found success with his custom knives through the years. “I make a lot of doubles, too. You would have to make a snap-type sheath with a keeper strap, but on hunting knives with single guards the pouch type is always best.”
Three different styles of pouch sheaths by Kenny Rowe, from left: regular pouch, plain leather; strap pouch, floral hand carved; and full flap pouch, full coverage gator. (Kenny Rowe image)
A sheathmaker for over 50 years, Chris Kravitt zeroes in on the personal preference perspective. “First and foremost, it’s a matter of the configuration of the knife, and then if more than one style will work it becomes a matter of personal preference,” he observed. “My preference is to go with the pouch because it is easier to draw and resheathe the knife without worrying about straps.”
At the same time, Kravitt acknowledges varying hunting knife construction and its influence in sheath form and function. “If a knife has a double guard, it isn’t going to work on a pouch sheath, and if you have a knife with an integral handle, possibly,” he said. “Certain things don’t lend themselves to the traditional style, like when the blade is the widest part of the knife or there is no bolster or ricasso extending beyond the edge.”
Kenny Rowe, owner of Rowe’s Leather in Hope, Arkansas, adds another option on the hunting knife sheath. “Ninety percent of these sheaths would be the pouch type because they cover most of the knife, and with the guard you can make a welt where the knife has some resistance coming in and out,” he noted. “Some sheaths will have a lid that has a snap on it, and that is as secure as you can get with the flap snapping over the front of the sheath.”
The consensus with the pouch sheath makes sense for all the reasons that the hunter encounters in the field. For its toughness and the ability to shape and mold the sheath as desired during the construction process, cowhide reigns supreme among sheath materials. Most sheathmakers use 7-to-9-ounce* vegetable-tanned cowhide.
Style Of Sheaths
The use of exotics such as ostrich, stingray, alligator, crocodile or other hides is a continuing option, though for the most part they are used as accents, often in the form of inlays, rather than adding any performance-related component to the sheath.
“Exotics are very useful in sheathmaking but primarily for aesthetics,” Long explained. “Elephant and shark are two that are tough enough to withstand very hard use and are usually built as an overlay on a vegetable-tanned base sheath. I work with various snakes, lizards, ostrich and many others.”
Ultimately, Chris Kravitt—here working on a sheath in his shop—stands by the individual perspective. “First and foremost,” he begins, “it’s a matter of the configuration of the knife, and then if more than one style will work it becomes a matter of personal preference.” (Chris Kravitt image)
As Kravitt noted, “The basic sheath is going to be cowhide 99 percent of the time, but for overlays and inlays my favorite is stingray, which is near bulletproof but more expensive and harder to work with—but great stuff. Ostrich leg or shin is very nice, and Malaysian horned frog has a very nice texture to it. Snakeskin is not very durable, but it’s fine when the knife and sheath are for show since it won’t hold up with regular use.”
Tooling and carving also provide style points and may be pleasing to the eye. However, neither actually contributes to the performance of the sheath in field use. “I occasionally do some tooling with stamps, but carving is a talent I don’t have,” Lebatard remarked. “Still, on almost every sheath I’ll put something in keeping with the theme of the knife, like a small deer. Someone might place an order and specify that they just want a bare, plain sheath, or they may want just their initials on it. That’s a good thing about leather. When it is wet it can be molded and stamped, and when it dries it will hold that impression.”
Tanning And Steel
Vegetable tanning is essential when the blade meets the sheath leather for an extended period. In contrast to chrome-tanned leather, a vegetable-tanned leather is not known to corrode or stain a blade left in the sheath for any length of time. That old admonition to store the knife itself separately from the sheath will then get a longer look.
“A lot of people say not to store knives in the sheaths, but as long as the sheath is made of good vegetable-tanned leather, I’ve never had a problem,” Lebatard noted. “I made a knife for a friend a few years ago and he didn’t want a sheath. He was going to get someone else to make the sheath for him. Several years later, he brought the knife to me and he had had it in a chrome-tanned leather sheath. It was nearly rusted through. The chrome-tanned leather is very corrosive.”
Kravitt has had similar experiences. “I hear so many people say not to store knives in leather sheaths, but I have kept knives in sheaths for years and never had a problem,” he recalled. “My sheaths are all vegetable tanned as opposed to chrome tanned. Chrome-tanned leather may have salts and other things in it.”
Drainage And Inserts
Waterproofing is another essential element, and in the construction itself there are questions surrounding drainage holes and inserts as well.
Most sheathmakers shy away from inserts since contact with the blade may dull the edge. After all, the welt and/or strap should suffice for a snug fit. Inserts in and of themselves may be judged to provide some measure of redundancy, but contribute little to the overall stability of the lockup or in protecting the knife itself. Long says, “Even the best inserts, being rigid, will do more harm to a blade than top grain leather.”
The different decorations Kenny Rowe offers with his sheaths include, from left: smooth; border tooled; basket weave; acorn and oak leaf hand carving; exotic skin overlay (gator); exotic skin inlay (beaver tail); and exotic skin full coverage (ostrich leg). (Kenny Rowe image)
At first glance it might appear that a drainage hole is a good idea to help maintain cleanliness and prevent the buildup of moisture or debris within the sheath. Not so fast!
“I do not ordinarily put a drain hole in my sheaths,” Long asserted. “Nor do I do any waterproofing of the interior of the sheath. Rather, I depend on the normal intelligence of my client to not go swimming with their sheath, and to at least try to clean the blood and guts off the blade before reinsertion.”
Rowe agrees. “I don’t see any sense in it,” he commented. “I can count on one hand the number of sheaths I’ve made with drain holes in them, and I’ve been making sheaths for 35 years at least. The only time I would expect someone to have their sheath in really wet conditions would be if they accidentally rolled into a deep river or their boat sank. I wouldn’t expect someone to haul off into neck deep water with their hunting gear on. For debris, it’s easy enough to take a wire with a little hook in the end and just rake the sheath out, or blow it out with air, or stand it upside down and shake it or tap it on a table.”
Kravitt, on the other hand, will utilize a drain hole and an insert from time to time. Often, the insert itself is fashioned from leather to avoid additional friction against the knife edge. The employment of the drain hole is in direct response to the future use of the gear in the field.
“If I know the sheath will be used in harsher conditions, I think it should have a drain hole,” he remarked, “not just for draining moisture, but also removing debris—especially when the user has spent a lot of time in the woods.”
Sheathmakers do tend to rely on the owner of the product and of the hunting knife to exercise responsibility in the field. “Explain to the client, if they are a novice, about the ‘care and feeding of a leather sheath,’” Long smiled.
How To Care For A Hunting Sheath
The well-crafted sheath is the constant companion of the hunting knife, either in the field or a collector’s cabinet, and the best measure of the sheath’s contribution is its role in that partnership. For the sheath to function properly, owners must remember the fundamentals of hunting knife care. Keep both the knife and sheath clean. Wipe away moisture and other fluids. Maintain the surfaces as needed. Don’t put the knife away wet and expect the sheath to do more than expected.
Adhering to best practices will ensure long life for both the hunting knife and its all-important sheath.
*According to the Montana Leather Co. website (montanaleather.com), leather thickness is typically measured in ounces. For instance, an ounce of leather is equal to 1/64 inch. As a result, 7-to-9 ounce leather will be in the 1/8 inch range, give or take a few millimeters.
Whether It’s An Inexpensive Model Or One The Chefs Use, There’s An Electric Knife Sharpener Out There For You.
There is no one-size-fits-all for electric knife sharpeners. Some specialize in sharpening certain steels or styles of knives. Some have multiple stages, and others are a basic, affordable option for a less discerning home cook. And some are made for pocket knives rather than kitchen knives.
No matter your desire and needs, there is a sharpener out there for you. We’ve scoured the crowded marketplace to pick out five electric knife sharpeners we think will check the important boxes for you today and for years to come.
Chef’s Choice Model Trizor 15XV 3-Stage Professional Electric Knife Sharpener, Platinum
Chef’s Choice Model Trizor 15XV 3-Stage Professional Electric Knife Sharpener, Platinum
Our list starts with what is, arguably, the baddest sharpener on the block. Highly-rated, and with a price to match, this sharpener from Chef’s Choice is called professional for a reason. With three different stages (sharpening, honing, and polishing), the device truly can do it all and revive your knives.
The sharpener is engineered to the point of ridiculousness. The sharpening stage features proprietary diamond abrasives, and the polishing stage features patented stropping disks to give your knives a pristine finish. It can even convert a traditional 20-degree edge to a finer 15-degree edge.
If there is a knock on the machine, it’s it isn’t rated to sharpen ceramic knives or scissors. Everything from a chef’s knife to pocket knives and yes, even serrated knives, can be brought back to life using the Trizor 15XV.
In a test of nine different electric knife sharpeners, the 15XV was named the best by America’s Test Kitchen. You can take a look at their methodology and how they determined the winner below.
The hefty MSRP of $179.99 is eye-popping to start, but there is no other sharpener like this on the market today.
Presto EverSharp
Presto EverSharp
Maybe a three-stage, pro-level sharpener isn’t what you need, and you’d prefer something a bit more affordable. I’m right there with you. That’s where the Presto EverSharp comes in.
The EverSharp uses Sapphirite sharpening wheels — a synthetic material almost as hard as diamond — to sharpen your blades to a razor’s edge. The EverSharp comes with two stages, one for sharpening and the other for honing & polishing. Each stage features internal guides so your knife always is at the perfect angle every time you pull it through. There’s two slots on each stage, one for each side of the blade.
It’s so easy to use you could probably do it with your eyes closed (but please keep them open so you don’t slice off a finger). The one drawback of the sharpener is it can’t sharpen serrated blades.
Durable and affordable with an MSRP of $47.99, the EverSharp provides great bang for your buck.
Wüsthof Easy Edge
Wüsthof Easy Edge Electric Knife Sharpener
From one of the legendary makers of kitchen knives, Wüsthof’s electric sharpener is robust and easy to use.
Unlike the previous sharpeners on this list, the Easy Edge is a belt-drive sharpener. No stones or grinding wheels in this one. The machine can sharpen, hone, and shape your straight-edge knives. It does this by varying the speed of its sharpening belt.
While the device can’t sharpen serrated blades it can sharpen Asian-style knives, which typically are ground to a different angle than traditional German-style knives.
Made of professional quality materials, and coming in with an MSRP of $160, the Easy Edge is worth the price and can replace your whetstones, honing steels, and many other pieces of knife maintenance equipment.
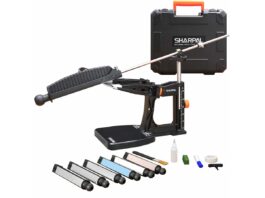
WorkSharp Combo Knife Sharpener
WorkSharp Combo Knife Sharpener
Unlike the other sharpeners on this list, which are made for kitchen knives, this sharpener from WorkSharp is made for pocket and EDC knives.
Like the Wusthof sharpener, this one uses an abrasive belt to sharpen your knives and uses internal guides to guarantee that your knives are at the perfect angle every time.
There’s also a ceramic honing rod built directly into the machine to help you polish and finish your flat-edge knives. The rod is also perfect for sharpening knives with small or large serrations.
It’s also relatively small. Some of these sharpeners are a bit bulky; WorkSharp has made a nimble sharpener that won’t take up much space on your workbench. You’ll love using this every day, and it’ll make your knives like new. At an MSRP of $59.95, it’s worth the price for the type of product it is.
Smith Essentials Compact Electric Knife Sharpener
Smith Essentials Compact Electric Knife Sharpener
If you’re looking for an electric knife sharpener on a budget, or simply don’t need the heft of professional machines, Smith has you covered. Their compact sharpener features both electric and manual elements for the low MSRP of $29.99.
The electric part of the machine features a synthetic sharpening wheel and built-in guides to keep your knives at the best angle. The ceramic rods on the manual side are there to hone and finish your blades.
It can only be used on straight-edge Euro/American style knives though so you would need some other sharpening implement if you have serrated knives at home. However, for a sharpener under $30, you may not be able find much more out there today.
The Knife Sharpener Is An Excellent Tool To Have In Your Kitchen. No Matter The Model, They Are Easy To Use And Can Help Revive Your Knives.
I cook daily. I enjoy it. It decompresses me, and I’m able to provide my wife and me with a lovely meal to end our day together. Nothing makes cooking harder than a dull knife.
Beyond increasing the difficulty of easy tasks, dull knives are incredibly unsafe and can cause serious injuries in the kitchen. Knowing how to use a kitchen sharpener can keep your knives like new and, best of all, take just a few minutes to use.
How To Use A Pull Through Knife Sharpener
Pull-Through kitchen knife sharpeners come in a variety of prices ranging from $10 all the way up to $100. Regardless of how expensive your sharpener is, they all work in similar ways by removing a small amount of material to renew a knife’s edge.
To show you how to sharpen your knives in numbered easy steps, I pulled out my small sharpener–a Goodcook–I picked up at my local supermarket.
Step 1: Safely Secure The Sharpener To The Surface
My trusty knife sharpener
Yes, it seems straightforward, but always remember to safely secure your knife sharpener to the surface you plan to use. I did this on my dining room table, but a counter or stovetop works just as well.
Some higher-end models may come with a vise, but the majority, like mine, are secured by firmly holding the end of it down onto the surface. The underside of my sharpener came with a channel in it so you could secure it against the edge of a table. This is meant to keep the knife away from you when you pull it through the sharpening stones.
Channel underneath the sharpener for edge use.
Step 2: Pull Your Knife Through The Coarse Side Of The Sharpener
Your sharpener will, at a minimum, have a coarse and fine setting. Start by pulling your blade through the coarse side first. This will remove more material from the edge and get rid of any bigger burrs or imperfections in the knife.
Put light pressure on the knife and gently pull it through. I chose to do three passes, but you can do however many you like. The little bump at the end of each pull is the knife tapping into the base of the sharpener.
Step 3: Do The Same On The Fine Side Of The Sharpener
The fine side is good for refining the edge of the blade and bringing it back to a razor’s edge. You’ll notice that it sounds different as you pull the knife through. I also pulled my paring knife through it three times.
And in three easy steps, in less than two minutes, you’ve sharpened a knife. I try to hone my knives multiple times a week and sharpen them monthly or every other month. By investing just a few minutes at a time into caring for your knives, you’ll extend their life and keep them cutting like new for years to come.
How To Use A Whetstone To Sharpen A Knife
Another, more traditional way of sharpening knives, is with a whetstone. These stones allow you to precisely control what part of your knife is being sharpened and how much material gets removed from your blade. Below are the steps to follow to successfully sharpen your knives on a whetstone.
Step 1: Gather Your Supplies
This means getting your stone, a moderately deep container like a baking dish, deep bowl, or a bucket to soak the stone in water, your knives, a towel to dry them off, and a spoon or small cup to scoop water onto the stone.
Step 2: Soak The Stone
When you place your stone into your container it should be fully submerged under water. You’ll see bubbles start to come up. That’s air getting forced out of the stone. Let it soak for 10-15 minutes or until the bubbles disappear. That’s the sign that your stone is ready to use.
Step 3: Secure Your Stone
Most stones come with a holder. Always use that if available. If there is no holder, a towel wrapped around the base of the stone will work. You always want the stone secured. At best, it could scratch your tabletop if it slides, and at worst you could slice yourself from a knife coming off a sliding stone.
Step 4: Sharpen On The Course Side
The majority of whetstones you can buy online or in stores today will have two sides, one coarse and one fine. The lower the grit number, the more coarse. This means that more material will come off with each pass of the knife.
It’s best to start sharpening your knives on that side. Get your blade to an angle between 20-25 degrees and pass it back and forth against the stone 10-15 times on each side of the blade.
If a dry spot starts appearing on your stone, use your spoon or small cup to pour a little bit of extra water onto the spot to re-wet it.
Step 5: Sharpen On The Fine Side
Now that you’ve removed most of the egregious burrs and nicks from the edge turn your stone over and sharpen the blade against the fine side. This will finish and polish the edge back to razor quality and have your knife like new again.
Again, you’ll stroke the blade 10-15 times at 20-25 degrees, then check the blade for sharpness.
Popular Youtuber, and New York Times bestselling author, Joshua Weissman gives a simple but in-depth tutorial on how to use a whetstone to revive your knives and bring back a razor edge.
How To Use An Electric Sharpener
A more intense version of the handheld kitchen knife sharpener is the electric sharpener. More pricey than a handheld device, electric sharpeners use different types of grinding stones powered by a motor to grind away material and sharpen your knives.
Some models have a single slot where the user will need to toggle between fine and coarse grit stones. Others have multiple stages and multiple stones allowing for more precise sharpening. Regardless of the type of electric sharpener, they operate similarly.
Step 1: Place The Sharpener On A Solid Surface
Always make sure your sharpener is on a table or countertop. Never hold it in your hand while pulling your knives through. That’s a quick way to wind up on your local news for all the wrong reasons.
Step 2: Read Your Sharpener’s Directions
With so many varieties of sharpeners it’s important to know how to correctly use yours, and, just as importantly, what type of knives can be sharpened.
Some can handle serrated knives while others are just good for flat knives. Know this because pulling the wrong type of knife through the sharpener can damage the blade.
Step 3: Sharpen Your Knives As Desired
You gently place your knife into the slot and pull it through at a leisurely pace. Do this 10-15 times for each stage of the sharpener and your knives should be like new.
To get an idea of how easy it truly is to use an electric knife sharpener, the folks at Linkyo show you how to use one of their models. It’s not even two minutes so you can’t afford to miss it.
Editor’s Note: This article was written by Mike Ableson.
Editor’s Note: This article was written by Mike Ableson.
The Lorenzi Foundation and Museum showcases one of the finest collections of rare and historical knives in the world.
One of the most extensive collections of ultra-rare modern custom and historical knives, cutting implements and many other items connected with the cutler’s art is displayed magnificently in a new museum in Milan, Italy.
A labor of love by Aldo and Edda Lorenzi, the museum is under the auspices of the aptly named Aldo and Edda Lorenzi Foundation (established July, 2020). The museum showcases the Lorenzi Collection consisting of about 2,000 pieces in all, catalogued and accompanied by specific information: era, origin, artisan (if known), function, material, construction and more.
Aldo & Edda Lorenzi
It gathers cutting utensils and related items dating from the Etruscan period (approximately 900-27 B.C.) to today. It is complemented by a series of specialized publications, testimony to the incessant research that was necessary to bring the operation of the Lorenzis’ internationally recognized G. Lorenzi retail knife store in Milan to exceptional levels, and to which Mr. and Mrs. Lorenzi devoted their efforts and creativity for many years. It is all housed in a state-of-the-art edifice containing many of the displays and other historical examples of the cutler’s art from the original G. Lorenzi shop and elsewhere.
The Foundation’s premises include a library where visitors and specialists may view the bibliographic materials. A special fit-out of the space enables visitors to relive the shop’s atmosphere. Thanks to an attentive recovery, a number of the original furnishings have been reinstalled on site. This includes an exterior window from G. Lorenzi, one of six “eyes” that communicated with window shoppers in one of Milan’s most exclusive retail store districts, and the display counters on which, over the years, over 18,000 types of sales items were placed. The space also features oak display cases in which the items were shown, as well as the copper-paneled room that featured the small entrance door opening onto the larger shop.
Historic Excellence
The collected items demonstrate, by starting from an artisanal craft as ancient and humble as that of the knife grinder, how it is possible to evolve and then achieve historic excellence. As further informational support, there are over 700 books, about 1,000 magazines and 150 prints, which for the most part depict traveling knife grinders. In fact, Aldo’s father, Giovanni Lorenzi, started his career as a professional knife grinder. Giovanni
Edda Lorenzi examines and arranges some of the many cutlery items from the Lorenzi Collection. (Lorenzi image)
founded Coltelleria G. Lorenzi—a small shop at the time—at the address of via Montenapoleone 9, Milan, a shop later operated by his sons Aldo, the sole administrator, and Franco. (Regrettably, Franco passed away a few years ago.)
In the course of over 60 years, the Lorenzis collected and kept the pieces which best represented their profession until the closure of G. Lorenzi in 2014. Their selection of the most recent items from their collection was made possible thanks to the close, precious relationship with the artisans—many Europeans, a number of Americans and Japanese—whom Aldo and Edda visited periodically at their shops. It was in such shops that the artisans created their unique pieces, full-fledged artworks that stand the test of time and which enabled G. Lorenzi to become renowned and appreciated at the international level.
Custom Gems
Included in the collection are 150 custom knives by American makers, knives that are particularly near and dear to Mr. and Mrs. Lorenzi. Having collected such knives since the mid-1970s, the Lorenzis traveled the USA, not only visiting the makers in their shops but also attending most every major knife show, meeting just about every maker worth his or her steel along the way.
Among the Lorenzis’ honors are The Knifemakers’ Guild’s Nate Posner Award (1995); the BLADE Magazine Industry Achievement Award (2014); the American Bladesmith Society Special Achievement Award (2014); and the Gold Star Award of Recognition from the William Moran Jr. Museum and Foundation (2014). Three of the Lorenzis’ favorites among their favorite custom knives in their collection are:
The number one of an art piece by W.W. “Bud” Cronk, the maker some consider the father of the modern art knife. Aldo ordered a copy of the knife for one of the Lorenzis’ best customers, but Cronk passed away before he could finish it. It would’ve been a coup for the Lorenzis if they could have gotten the copy too, as Cronk never made duplicates of his work. The copy was used later as the model for the logo of the W.W. Cronk Award, a private honor Don Henderson sponsored for 25 years for the Guild Show’s best art knife
A Bob Loveless/Barry Wood folder Loveless gave to Aldo when the Lorenzis visited the Loveless shop in 1977. Unaware at the time that U.S. knifemakers’ shops were not retail knife stores, the Lorenzis knocked on the Loveless shop door unannounced. Loveless answered the door and, unsure at first what to make of the couple from Italy, soon hit it
Loveless/Wood Folder
off with Aldo—so much so that he gave the Lorenzis the Loveless/Wood folder. Before the Lorenzis left, they asked Loveless why he had trusted them so much at first sight that he gave them a knife (at the time, Aldo and Edda had no idea what Loveless knives were worth). “He replied that we ‘had our history written on our foreheads,’ a phrase that we have never forgotten!” Edda wrote. “These are the kinds of bonds that have made us love American knives and knifemakers even more!”
A Multilock folder by Ray Appleton. Edda recounted a memorable trip the Lorenzis shared with Appleton from Georgia to Chicago, including visits to an Atlanta racing museum and Kentucky’s Mammoth Cave in the process, the latter where the 6-foot-8-inch Appleton bumped his noggin on a cave overhead. Recounted Edda: “Since Aldo wanted to stop at every cutler shop he knew along the way, Ray generously offered to make the phone calls for him to warn the shops of our arrival. ‘I’m Aldo Lorenzi’s secretary, Hot Pants,’ he announced himself on the telephone, making us laugh a lot!”
These are but three of the many American custom knives and their stories among the scads of other custom and assorted knives and cutting implements in the museum. Meanwhile, a 300-to-400 page catalog of museum items is due for completion by early 2022 at the latest.
If you ever get Milan way, a visit to the Aldo and Edda Lorenzi Foundation and Museum is a bucket-list must.
Learn the latest about knifemaking techniques and other trending sharp subjects during the 9th Annual BLADE University 2022 Friday and Saturday of the BLADE Show.
Sponsored by Work Sharp, BLADE University has the most extensive schedule of knife, knifemaking and other instruction held at any knife show. New classes for 2022 include How To Forge a Sub-Hilt Knife with ABS master smith Steve Randall; Post-heat-Treat Grinding with custom knifemaker RJ Martin; How To Start a Knife Company with Diane Carver and Kimi Jensen of Brighten Blades; Keys to Outstanding Hamons with ABS master smith Brion Tomberlin; and more.
For the full list of classes, see the accompanying schedule. For enrollment and other information visit show.com/show-info/classes, or the Registration Counter in the show lobby.
8 a.m.-9:30 a.m.: Fundamentals of Grinding, The Courtyard. Award-winning knifemakers Tom Krein and Lucas Burnley take you through the process. 10 a.m.-11 a.m.: Exploring the History of Synthetics, Room 107. The Hawks Nest Customs team explores some of the types of synthetic materials used on knives. 10:30 a.m.-11:30 a.m.: Cryo-Quenching Steel: What It Does and Is It For Your Blades? Room 104. Steel authority and author Larrin Thomas explains the subject in detail. 1 p.m.-2 p.m.: How To Forge a Sub-Hilt Knife, Room 107. Steve Randall outlines his process for forging and building his hidden-tang sub-hilt model. 1:30-2:30 p.m.: Bladesmithing: A Teacher’s Angle, Room 103. ABS master smith Murray Carter delineates how he operated the Muteki bladesmith apprenticeship program for 10 years and provides advice on starting a larger knife manufacturing business. 3 p.m.-4 p.m.: Keys to Outstanding Hamons, Room 107. ABS master smith Brion Tomberlin will school you on most everything you need to know on the subject. 3:30 p.m.-4:30 p.m.: Hands-On Knife Sharpening Workshop, Room 113. Bring your own knife or a borrowed one and learn the progression of shaping a bevel, sharpening and edge maintenance from the team at Work Sharp. 4:30 p.m.-5:30 p.m.: Knives With History, Room 107. Knifemaker Jason Fry discusses different ways to incorporate historical material into knives.
SATURDAY, JUNE 4
8:30 a.m.-9:30 a.m.: Decorative Filework, Room 113. Knifemaker Kyle Daily of KHDaily Knives shows you his preferred files and step-by-step how he creates his five most popular patterns. 8:30 a.m.-9:30 a.m.: Post-Heat-Treat Grinding, The Courtyard. RJ Martin demonstrates techniques for grinding premium stainless steels after they have been heat treated. 9:30 a.m.-10:30 a.m.: How to Make A Coffin Knife Handle, Room 104. ABS journeyman smith Mace Vitale explains how he constructs the handles and shows you as well. 9:45 a.m.-10:45 a.m.: How To Start a Knife Company, Room 107. Diane Carver and Kimi Jensen of Brighten Blades recently started their new knife concern and share how you can start one, too. 11 a.m.-12 p.m.: Women’s Bladesmith/Knifemaker Panel, Room 113. Join ABS master smith Veronique Laurent of Belgium, Grace Horne of Sheffield, England, ABS journeyman smith Lora Schwarzer and Abie Lyons as they outline how to succeed as a woman in a male-dominated industry. 2 p.m.-3 p.m.: How to Texture Titanium Knife Handles, Room 104. Shane Magnussen of Scorpion 6 explains the grinder, appropriate machine setup, varieties of abrasive belts and more for the texturing method. 2:15 p.m.-3:15 p.m.: Hands-On Knife Sharpening Workshop, Room 113. For a redo of the class by the same name (see the description under Friday at 3:30 p.m.-4:30 p.m.), here’s your chance in Work Sharp’s encore presentation. 2:30 p.m.-3:30 p.m.: Exotic and Advanced Knife Techniques Used in Bushcraft, Room 107. Joe Flowers, knife designer and jungle guide, demonstrates and gives a presentation on outdoor-based knife skills from around the world. 4 p.m.-5 p.m.: Linerlock/Framelock Design & Construction Geometry, Room 104. David Carver of Carver Knife Co. teaches basic design, steps to build and the processes needed in detail, as well as flow, lock geometry and completion.