Knifemaking is the building of a knife, which includes the blade, handle and other accouterments. Blades are made by either removing metal from a steel blank via a grinder – known as stock removal – and the forging to shape of hot steel into a blade in the process known as bladesmithing. Other parts, including bolsters, guards, pommels, etc., are needed to complete the finished knife.
Allan Reid of Allan Reid Cut Throat Custom Knives is a part-time knifemaker who is a nurse by trade. He served in the U.S. Army. as a combat medic, obtaining the rank of sergeant.
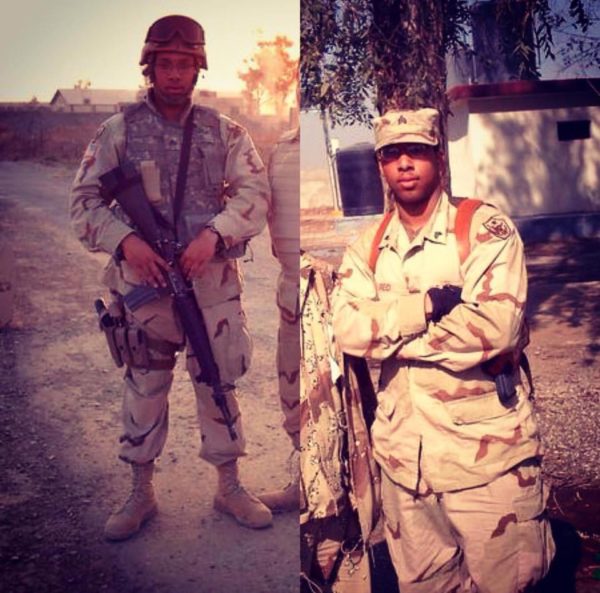
Allan Reid of ARctc Knives, which stands for Allan Reid of Cut Throat Custom Knives, is a part-time maker who currently works as a nurse. He served for six years as a U.S. Army combat medic, achieving the rank of sergeant. In 2005-2006 he deployed on Operation Iraqi Freedom. Most recently, he earned his registered nursing credentials.
Allan Reid of ARctc Knives parlayed his combat medic training into a nursing career. He has completed his schooling and is awaiting his state board certification.
Allan has been fascinated with blades and martial arts since childhood. “I was exposed to several custom knives while on deployment, which spurred my interest in knifemaking,” he noted. He learned about stock-removal methods by reading and asking questions on knife forums. He is now learning to forge blades under the mentorship of close friends James Helm and Tobin Nieto.
Allan is the father of four with another on the way. He and his family live in San Antonio, Texas.
Best-selling knife patterns: tactical, utility and bushcraft; Alpha-1, Nessmuk and Mini-muk models
Favorite blade steels: high-carbon and tool for edge retention; 1084 for ease of heat-treat and durability. “I also utilize 5160 spring steel for my larger blades, and often incorporate O1 and 1095.”
Blade grinds: full flat or saber
How he tests his knives: If Allan knows the intended use, those mediums will be cut, however, almost all of his blades are tested on 2-by-4s.
Favorite handle materials: G10 and Micarta for toughness, durability, color selection and low maintenance
Price range: $145-$400
Knife shows he attends: Texas shows, BLADE Show 2018
Forums he participates in: BladeForums.com when time allows
As a former soldier, knifemaker Allan Reid of ARctc Knives is a fan of easy-to-maintain and cost-effective handle materials.
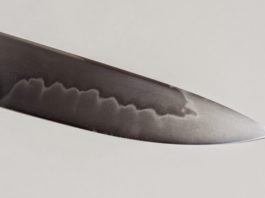
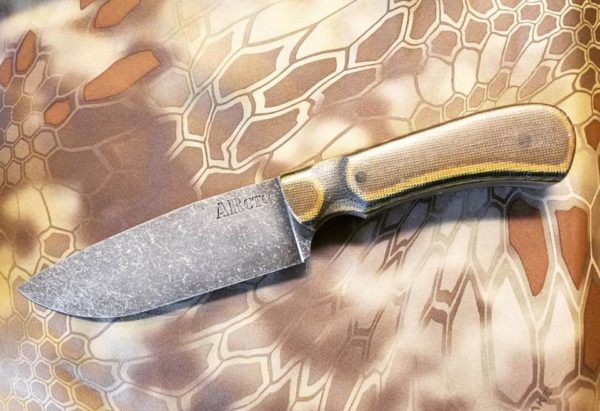
The Alpha-1 above has a 5-inch blade made out of 1084 steel with a full flat grind and acid stonewashed finish. The scales are Camo Micarta fitted with Black Micarta pins. Overall length is 9 ¼ inches. Maker’s list price: $165.
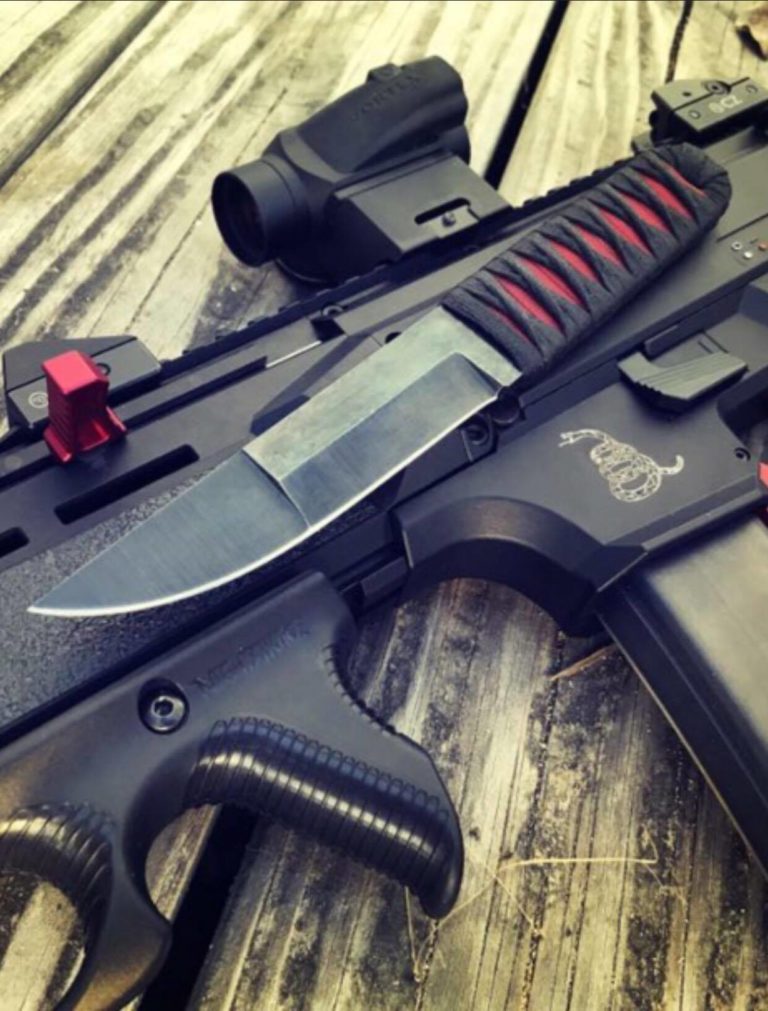
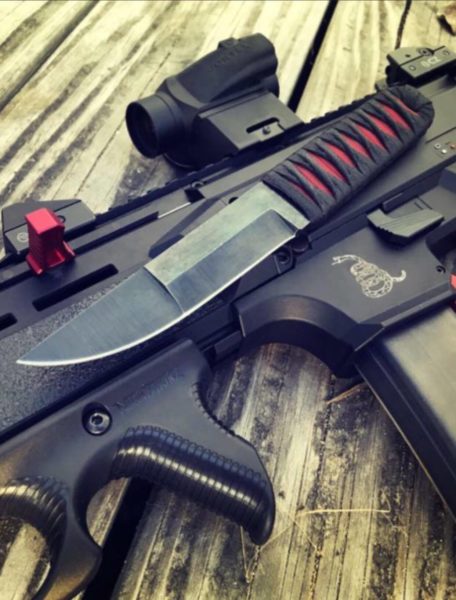
The ARctc Knives kwaiken-design knife has a 4.5-inch combination-ground blade made out of O1 tool steel. It’s 9 inches overall. The handle features an epoxy-sealed red paracord base under a black Japanese lace wrap. Maker’s list price: $180 with Kydex sheath and belt attachment.
Contact Allan Reid at [email protected], on Facebook at Allan Reid and on Instagram @arctc_knives.
Get hunting knives designed by Alaska hunting guide/award-winning maker Russ Kommer or build your own via a Gene Osborn video at ShopBlade.com.
The CRKT Kommer 2-Shot Skinner is a smaller semi-skinner designed for the biggest game. The 3.15-inch blade is 12C27 Sandvik stainless and the handle is orange G-10. The accompanying horizontal sheath also has two pockets to handle ammo from .243 up to .338. ShopBlade’s price: $104, a savings of $26 over the regular cost.
For a limited-edition Kommer skinner built in Russ’s Fargo, North Dakota, shop, check out GATCO’s 20th Anniversary Kommer model. The 3 9/16-inch blade is ATS-34 and the handle is black ash burl. ShopBlade’s price: $600, a savings of $150 over the regular cost.
If you’d rather build your own hunter, Gene Osborn’s “Kit Knife Video 2 Hidden Tang Hunter” takes you through the process from start to finish. ShopBlade’s price: $25.
Inattentive operators are more dangerous than the machines themselves
BY JOE SZILASKI BLADE® FIELD EDITOR
“I am a newbie to knifemaking with a limited budget for machines and tools. My main concern is the horror stories I have heard concerning the accidents some makers have experienced working with their machinery. I would like to know what you think are the most dangerous machines in the shop.” -John, Pennsylvania
This is one of the most frequently asked questions I have from students attending my knifemaking classes. If I were to categorize all the tools in my shop, I am not sure which tool would be the winner of “most dangerous.” Whether a power tool or not, they are all dangerous, some more than others. Therefore, I have a lot of respect for even the simplest of knifemaking tools.
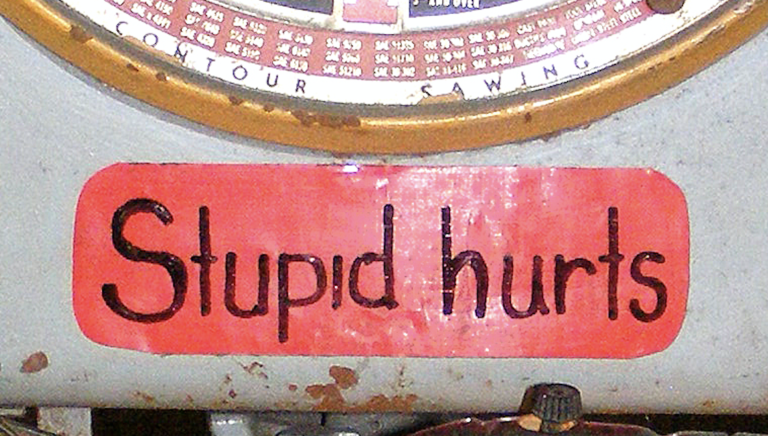
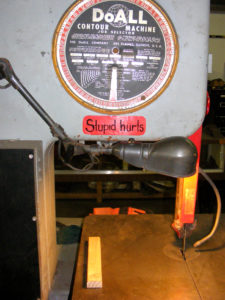
I have a sign in my shop styled like a big bandage that reads “Stupid Hurts,” and that is about the size of it. Stupidity is the cause of many accidents. Accidents happen but are often preventable.
1: GRINDER
I would like to mention a few tools found in most every maker’s shop. Let’s start with the grinder. My grinders are equipped with 2×72-inch belts and are very safe until you exert extra pressure to remove excess material faster. In a good scenario you will burn your finger from friction heat; worse, you slip and grind your knuckles, what you would call really bare knuckles, or give yourself a manicure by grinding right into your nails. Of course, the belt can snap and hit you in the forehead, reminding you to not apply too much pressure when grinding.
I teach my students to grind their knives freehand, no gloves and without the use of a tool rest. The blade can get caught between the rest and the contact wheel. This could get your fingers where they do not belong, snap your belt, or throw the blade out of your hand. I am glad I learned to grind this way and so have all of my students.
2: DRILL PRESS
The drill press looks quite innocent but most drill bits are very brittle. If you put more pressure on your drill bit than it can take, it could break or explode into small pieces and make you look like you had a fight with a porcupine. Or, the bit can snag the material you are drilling and snatch it out of your hand. Before you are able to move your hand away, the snagged material will smack you at least 10 times.
3: BAND SAW
The band saw can be an intimidating creature. I put it into the meat-eater category along with T-Rex and a pool of piranhas. To avoid all those teeth, use push sticks. Again, use just enough pressure to cut the material—nothing more, nothing less.
4: BUFFER
As most makers will tell you, the buffer is certainly one of the most dangerous tools in the shop. It may sound funny but my ex-partner wore a homemade plywood apron for when he was buffing.
Avoid putting your buffer on a workbench against a wall. I made this mistake in my old shop. I had a 1-horsepower buffer. One day the soft buffing wheel caught a guard I was working on and grabbed the knife out of my hand. The knife hit the table, ricocheted into the cinder block wall, and went right through the thin section of cinder block. I would hate to think what would happen if the blade had hit me with that much force.
Many years ago, Gil Hibben was buffing a blade when the buffer grabbed the knife and hurled it blade first into one of his main arteries. Miraculously, a friend was nearby and got Gil to the hospital before he bled to death. (Carter photo)
I replaced the buffer with a small quarter-horsepower model I could practically stop with my hand. I compensated for the lack of horsepower by sanding my knives with a higher-grit paper to make it easier for the small buffer to get the polish I wanted.
Now that I have a big dream of a shop with plenty of room for all the tools, I have that big buffer on a pedestal and away from anything that a blade can ricochet off. The buffer may still throw the blade toward my leg or foot causing a very nasty injury, but it is less likely to come toward my body.
5: POWER HAMMER
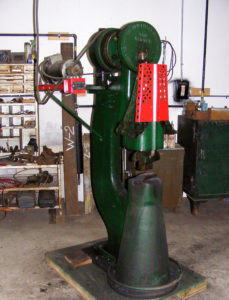
Since I forge most of my blades, about 20 years ago I bought a 50-pound Little Giant power hammer to make my life easier. This piece of equipment can be one hell of a potato masher, and then some.
Early on I developed one good habit. Whenever I stepped away from any power tool, I shut it down. That habit paid off one day. I had just shut my power hammer off when I lost my footing. My reflexes kicked in and I grabbed something to regain my balance. That is when I realized my left hand had grabbed the anvil of the power hammer, and my foot was on the pedal that would have activated the hammer. If the hammer had been turned on, my hand would now make a good stop sign at a school crossing. After that I installed an on/off switch directly on the machine and close by so I do not have to step away from the machine to shut it off. I also got the surgery on my foot I had been avoiding so now I do not lose my footing so easily.
Whenever the author steps away from any power tool—including his power hammer—he shuts it down to help avoid potential accidents. (Lori Szilaski photo)
Recently a friend of mine had a similar situation—tripping and accidentally grabbing the anvil of his air hammer. Unfortunately, his hammer was turned on. Fortunately, the doctors were able to save his three fingers that were crushed.
Tools are made to help us, not hurt us. It is true tools do not have feelings and do not care what they cut, smash or maim. You do not have to be afraid of your tools but, like I mentioned earlier, you certainly have to respect them.
In my opinion, people who do not know how to operate the tools properly are much more dangerous to themselves and others than the tools themselves. Knowing how to use your power equipment is most important in order to avoid the horror stories we have all heard about. All power tools come with lengthy warning labels. There is a good reason for these besides the manufacturer covering their you-know-whats from lawsuits. Such accidents have happened before and it is up to you to avoid having the same ones in the future.
Long ago I worked in an art foundry that made bronze sculptures. One young lady was using a hydraulic roller she was not qualified to use. Her gloves were way too big for her and the roller caught the tip of her glove and pulled in her whole hand. She has had quite a few surgeries to reattach and rebuild what the doctors could. She was lucky the maintenance guy was passing by and hit the reverse switch. He may have saved her life, as the machine was big enough to pull her in completely.
CREATE A SAFE ENVIRONMENT
Create a safe environment for your shop. Be sure to not overcrowd it. Keep things off the floor you can trip on, especially in the area around your power tools. And always maintain your tools—it is a pleasure to work on well-maintained equipment. Finally, wear proper fitting clothes and safety gear when appropriate.
Remember the basics. Do not rush or use power tools when you are too tired. Never be overconfident around power tools no matter how many years you have worked with them. I have seen people crippled and killed because of this. Sorry to add to your horror story, but the bottom line is you are the one with the brain and common sense—use both.
Send your questions for Wayne Goddard or Joe Szilaski to BLADE®, POB 789, Ooltewah, TN 37363-0789 [email protected]. Include a self-addressed, stamped envelope with your name and address for a personal response from Wayne, or e-mail him at [email protected]. E-mail Joe at [email protected]. If you wish, BLADE will not print your name with your question.
While visiting Sid Suedmeier at the Little Giant shop in Nebraska City, NE he explained the differences between the Old and New style Little Giant Power Hamm…
Great knives, knifemakers, tips on knife collecting and much more are in the offing at venues across the country and abroad today and tomorrow, April 28-29.
The Solvang Custom Knife Show is in Solvang, California, today ONLY. Some of the world’s finest custom knives and knifemakers are there. For more info click on www.nordicknives.com.
The 30th Annual NCCA Extravaganza Knife Show is at the Hilton Hotel in Mystic, Connecticut, today and tomorrow.
The Wolverine Knife Collectors Show is in Novi, Michigan, today and tomorrow at the Suburban Collection Showcase.
The ABS Spring Piney Woods Hammer-In is today and tomorrow at the Texarkana College/Bill Moran School of Bladesmithing in Washington, Arkansas. For more info click on www.americanbladesmith.com.
The 13th Annual Knifemakers Show is at the German Blade Museum (Deutsches Klingenmuseum) in Solingen, Germany, today and tomorrow. For more info click on www.messer-macher-messe.de.
And finally, today is the final day of the Mason Dixon Knife Club Annual Show at the Best Western/Grand Venice Hotel in Hagerstown, Maryland.
For more on the latest knives, knife legislation, knifemaking instruction, knife trends, knifemakers, what knives to buy and where and much more, subscribe to BLADE Magazine, the World’s No. 1 Knife Publication. For subscription information click on http://www.shopblade.com/product/blade-magazine-one-year-subscripti…?r+ssfb042812#BL1SU.
Are you up to the challenge of frame handle construction?
Frame handle construction for knives has been around for centuries. Historical examples of many Eastern styles like the kard, khyber and yataghan often feature ornamented frame handles. Nineteenth-century knives attributed to James Black and some of the early American bowies also had frame handle construction. Though it’s been around a long time, the frame handle remains a viable modern construction method for today’s custom knifemakers.
There are many ways to crack the nut/skin the cat on frame handle construction. This article will walk through the frame handle process and point out particular problems and potential solutions for those who wish to pursue building a frame handled knife.
3 REASONS WHY
Frame handle construction is best defined as using a wrap-around “frame” to conceal the tang of a hidden tang knife. The first question many people ask regarding a frame handle construction is, “Why would you want to do it that way?”
My first thought goes back to the earlier days of the internet when forums were at their peak, and fine makers like ABS master smith Bruce Bump took the time to document “work in progress” (WIP) threads. Bruce had a fine frame handle WIP on the KnifeDogs.com forum in 2013, and the consensus at the time was that you build a frame handle for quite a few reasons, though the first one is “because you can!”
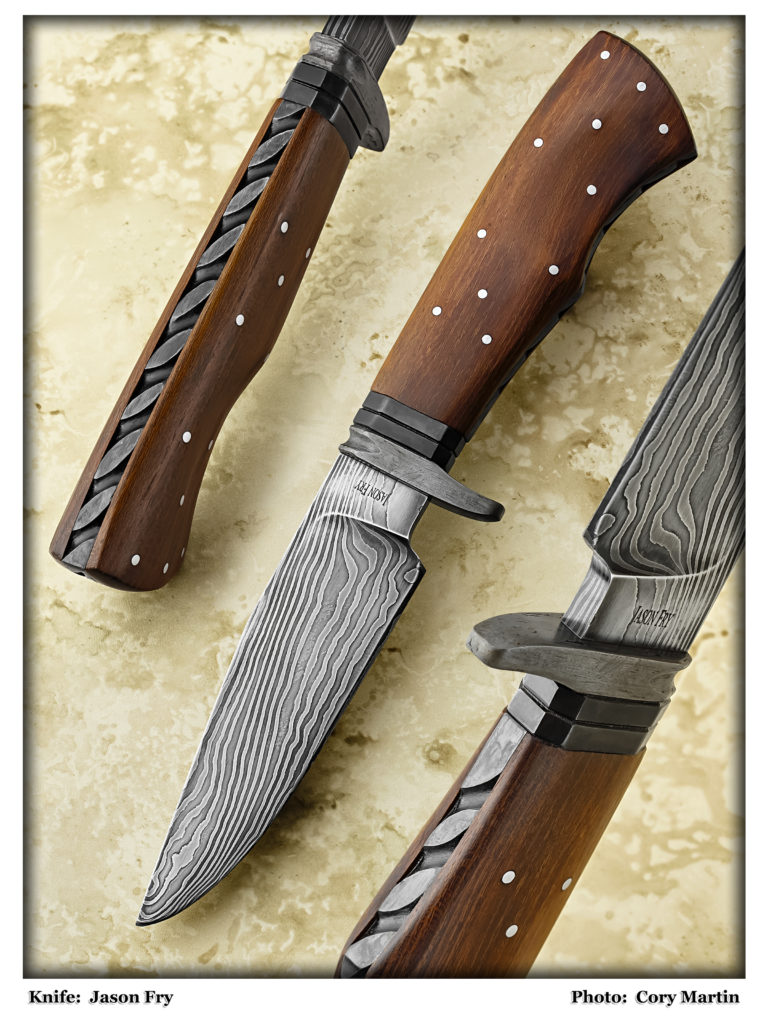
The author used frame handle construction for his hunter in a blade of 33-layer damascus, a wrought iron guard and scales taken from a fence post made in 1912 from bois d’arc wood, aka osage orange. The spacers are World War II practice bomb material. (Cory Martin knife image)
A frame handle is a much more complex build process than your standard full- or stick-tang knife. However, in addition to the show of skill by the maker, frame handle construction has a few distinct advantages that make the complexity worth the effort:
A frame handle allows for the look of a full tang, but with the guard-fitting techniques of a stick tang. For a forged stick-tang-knife design that needs a guard, a frame handle allows the use of full-tang-style handle construction;
A frame handle is a good way to use scales or slabs on a stick-tang knife. If you have a good set of stag or mammoth slabs, or if you have stabilized wood slabs that might be too fragile for through-tang construction, the frame handle allows you to use the materials on a stick-tang knife; and;
The use of a frame handle gives the maker another area to embellish the knife. Some frames are great for engraving, while others may highlight a damascus pattern. Either way, the frame makes the embellishment stand out in ways that are harder to accomplish on a full-tang knife.
HOW to DO IT
At a basic level, the frame of a frame handle is a piece of material, usually metal, that wraps around a stick tang and mimics the look of a full-tang knife. This presents some challenges that have resulted in a few different creative solutions.
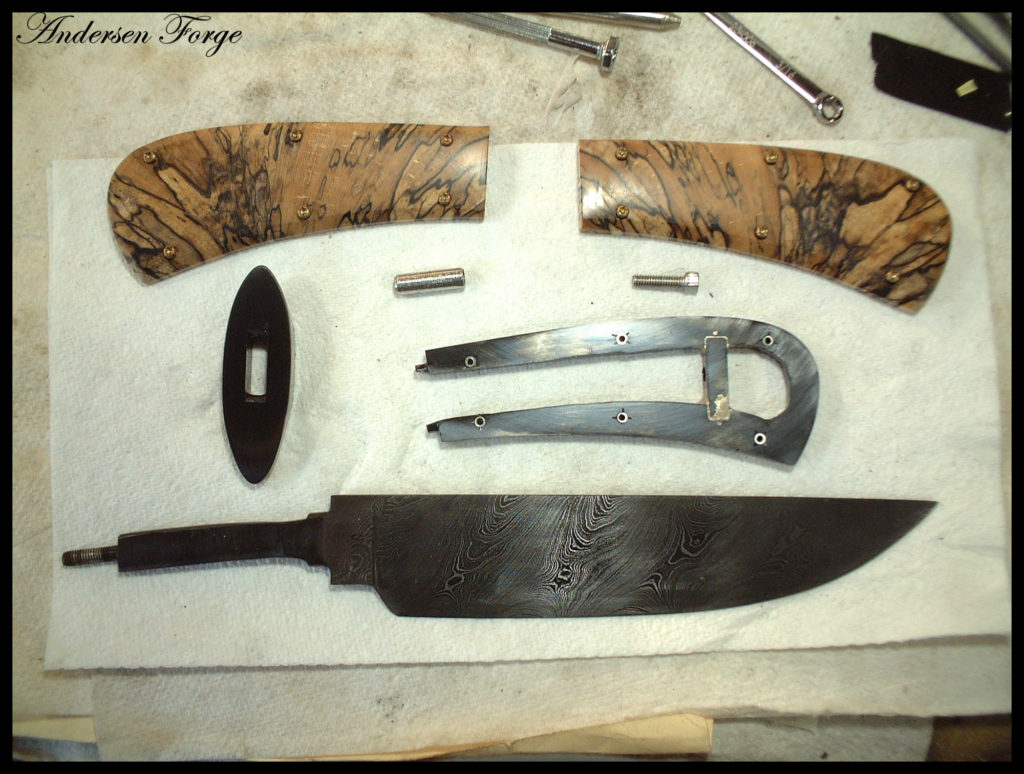
An exploded view shows an ABS journeyman smith Karl Andersen frame handle construction knife before assembly. (Karl Andersen image)
Challenge 1: The tang must fit inside the frame. Some makers insist on precision so there are no gaps and the fit is tight. Others concede that the handle will be held together with mechanical fasteners and sealed with epoxy, so a precise fit between the frame and the tang is not necessary.
Challenge 2: All parts of the handle must be securely fastened together. I sat through a class with ABS master smith Mike Williams in which he admonished the students, “Don’t trust in the magic of chemistry” by putting your faith only in the strength of glue. Likewise, veteran bladesmith Jerry Fisk challenges makers to think ahead to what their knives might be like in 100 or 1,000 years, and recommends a mechanical connection that won’t fail over time.
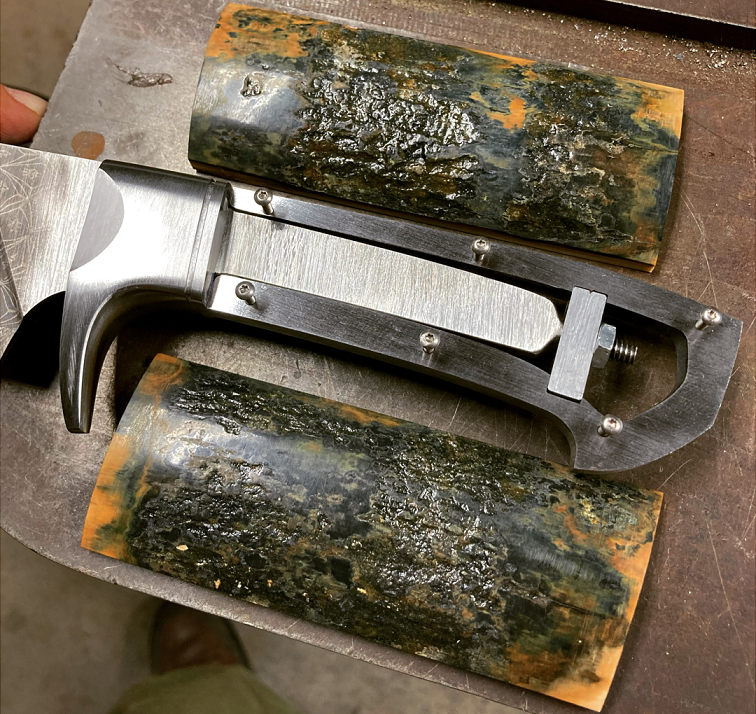
One way to address this challenge is to use pins. If you pin the scales to the frame, pin the completed handle assembly to the tang and follow up with glue, there’s no opportunity for failure. Some choose to make all the pins visible as an artistic element, while others take advantage of hidden pins for all but the one through the tang. Another way is to use a threaded fastener. Bladesmith Salem Straub recently illustrated the technique on a frame handle WIP on his Instagram feed. Salem used a threaded fastener in an internal slot in the frame to mechanically lock all the parts together tightly (Image 1). The handle material is relieved on the inside to accommodate the fastener.
Another way to use a threaded connection is to thread the end of the tang and use a fastener on the handle butt. An advantage of this approach is that the fastener itself can become part of the embellishment.
Challenge 3 is the complex fit-up between all of the knife’s elements. Frame handle construction naturally doesn’t excuse a poor guard fit, but it also provides other places for gaps and misalignment. Once again, there are several potential solutions to alignment problems.
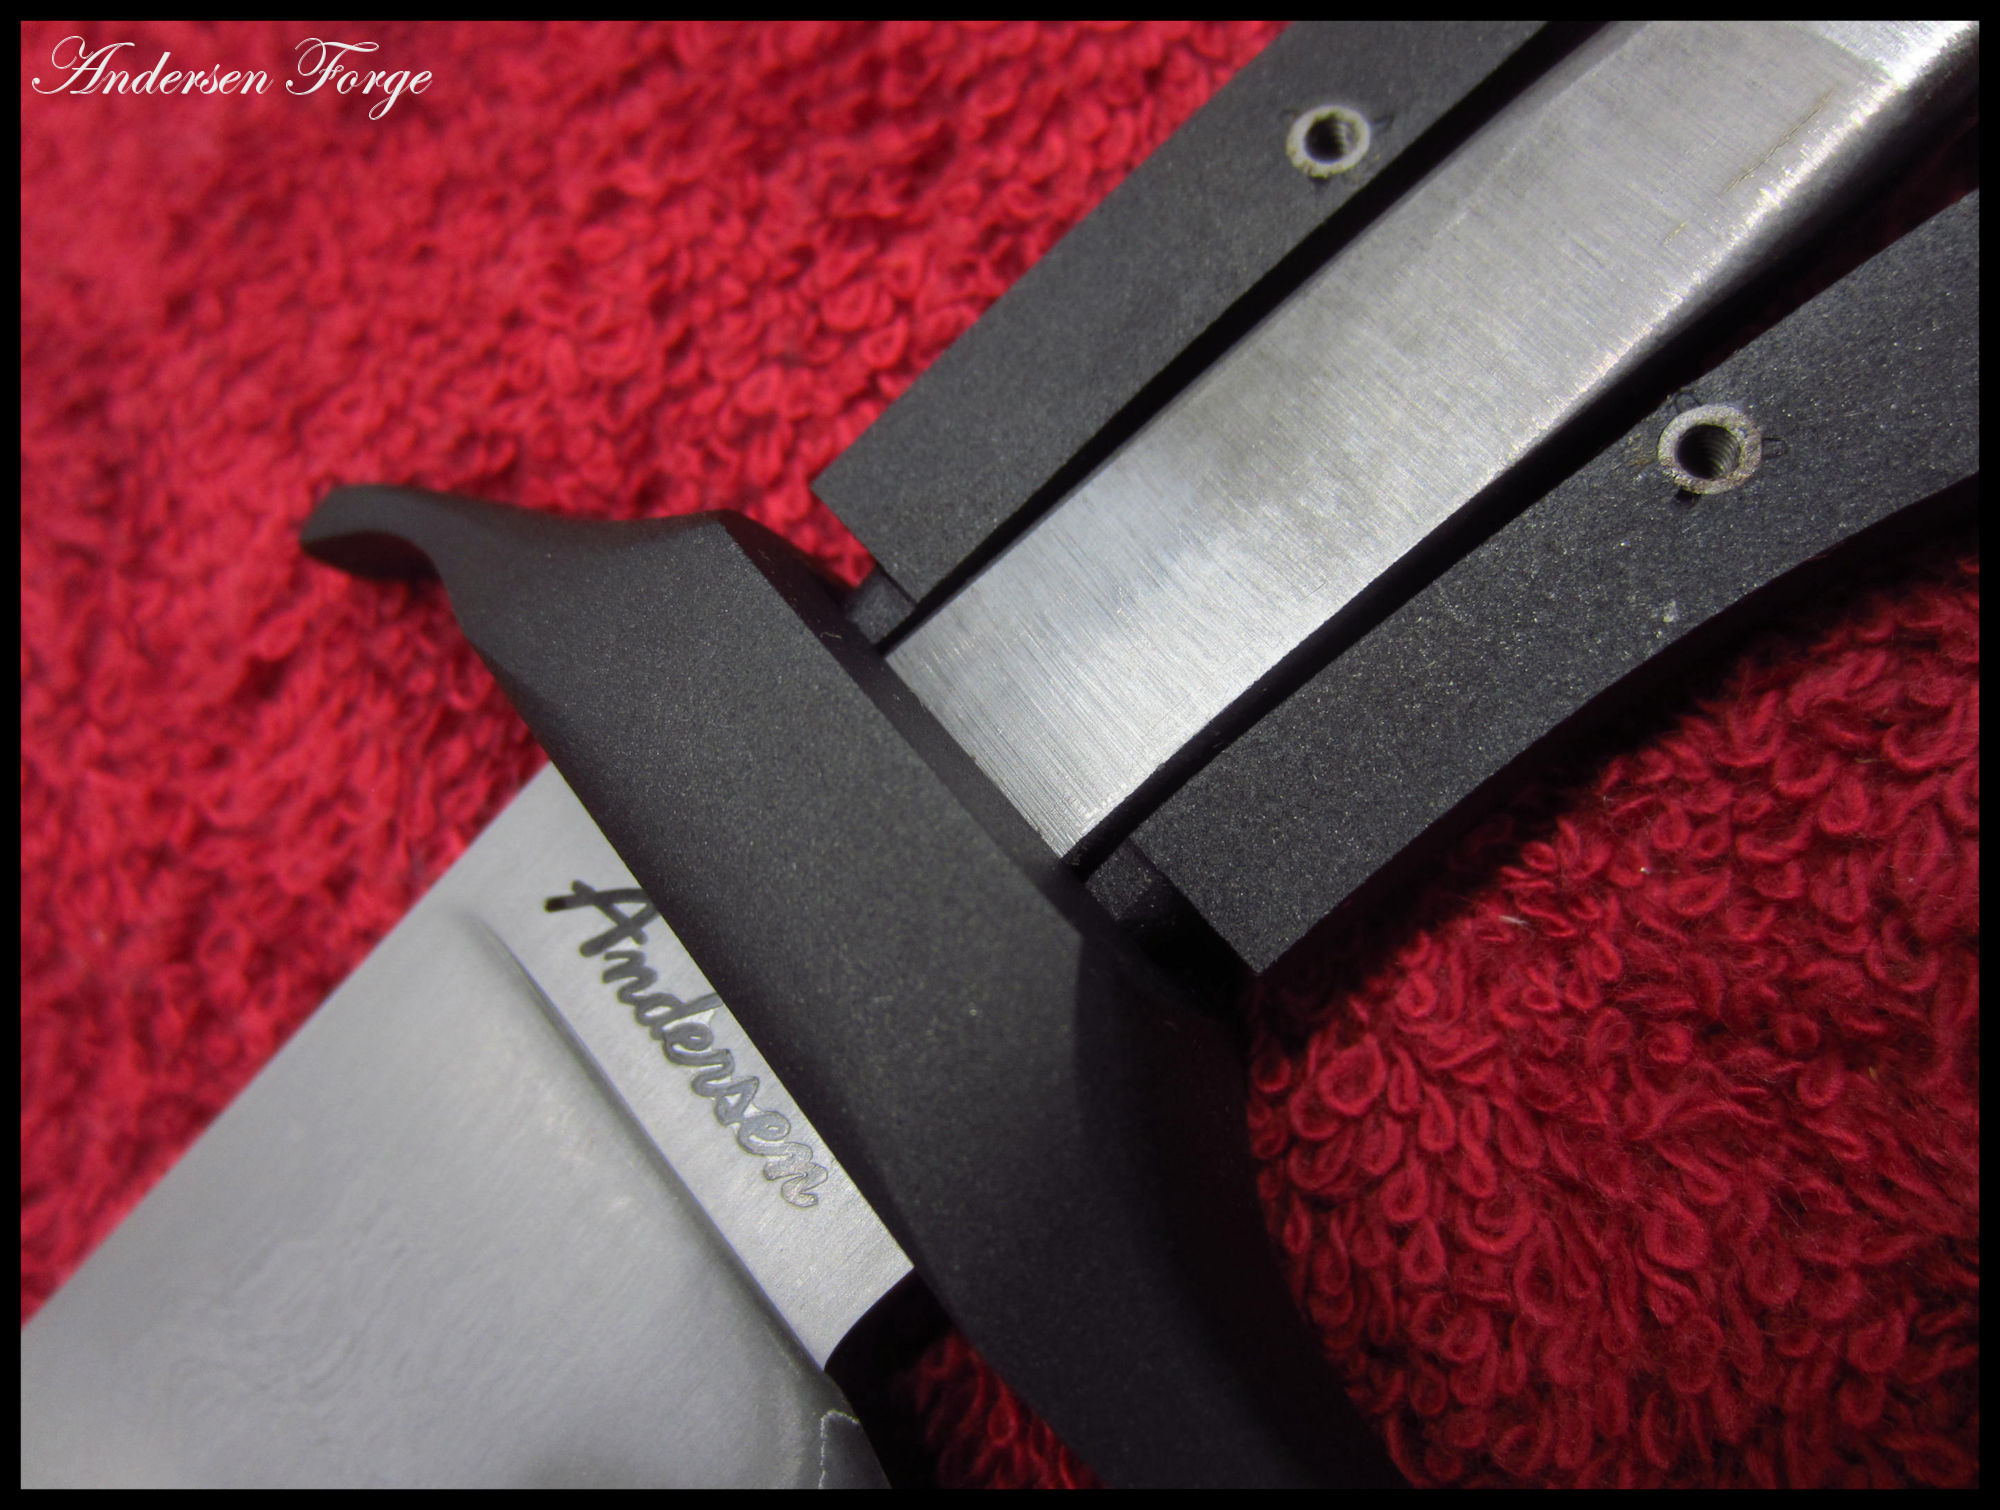
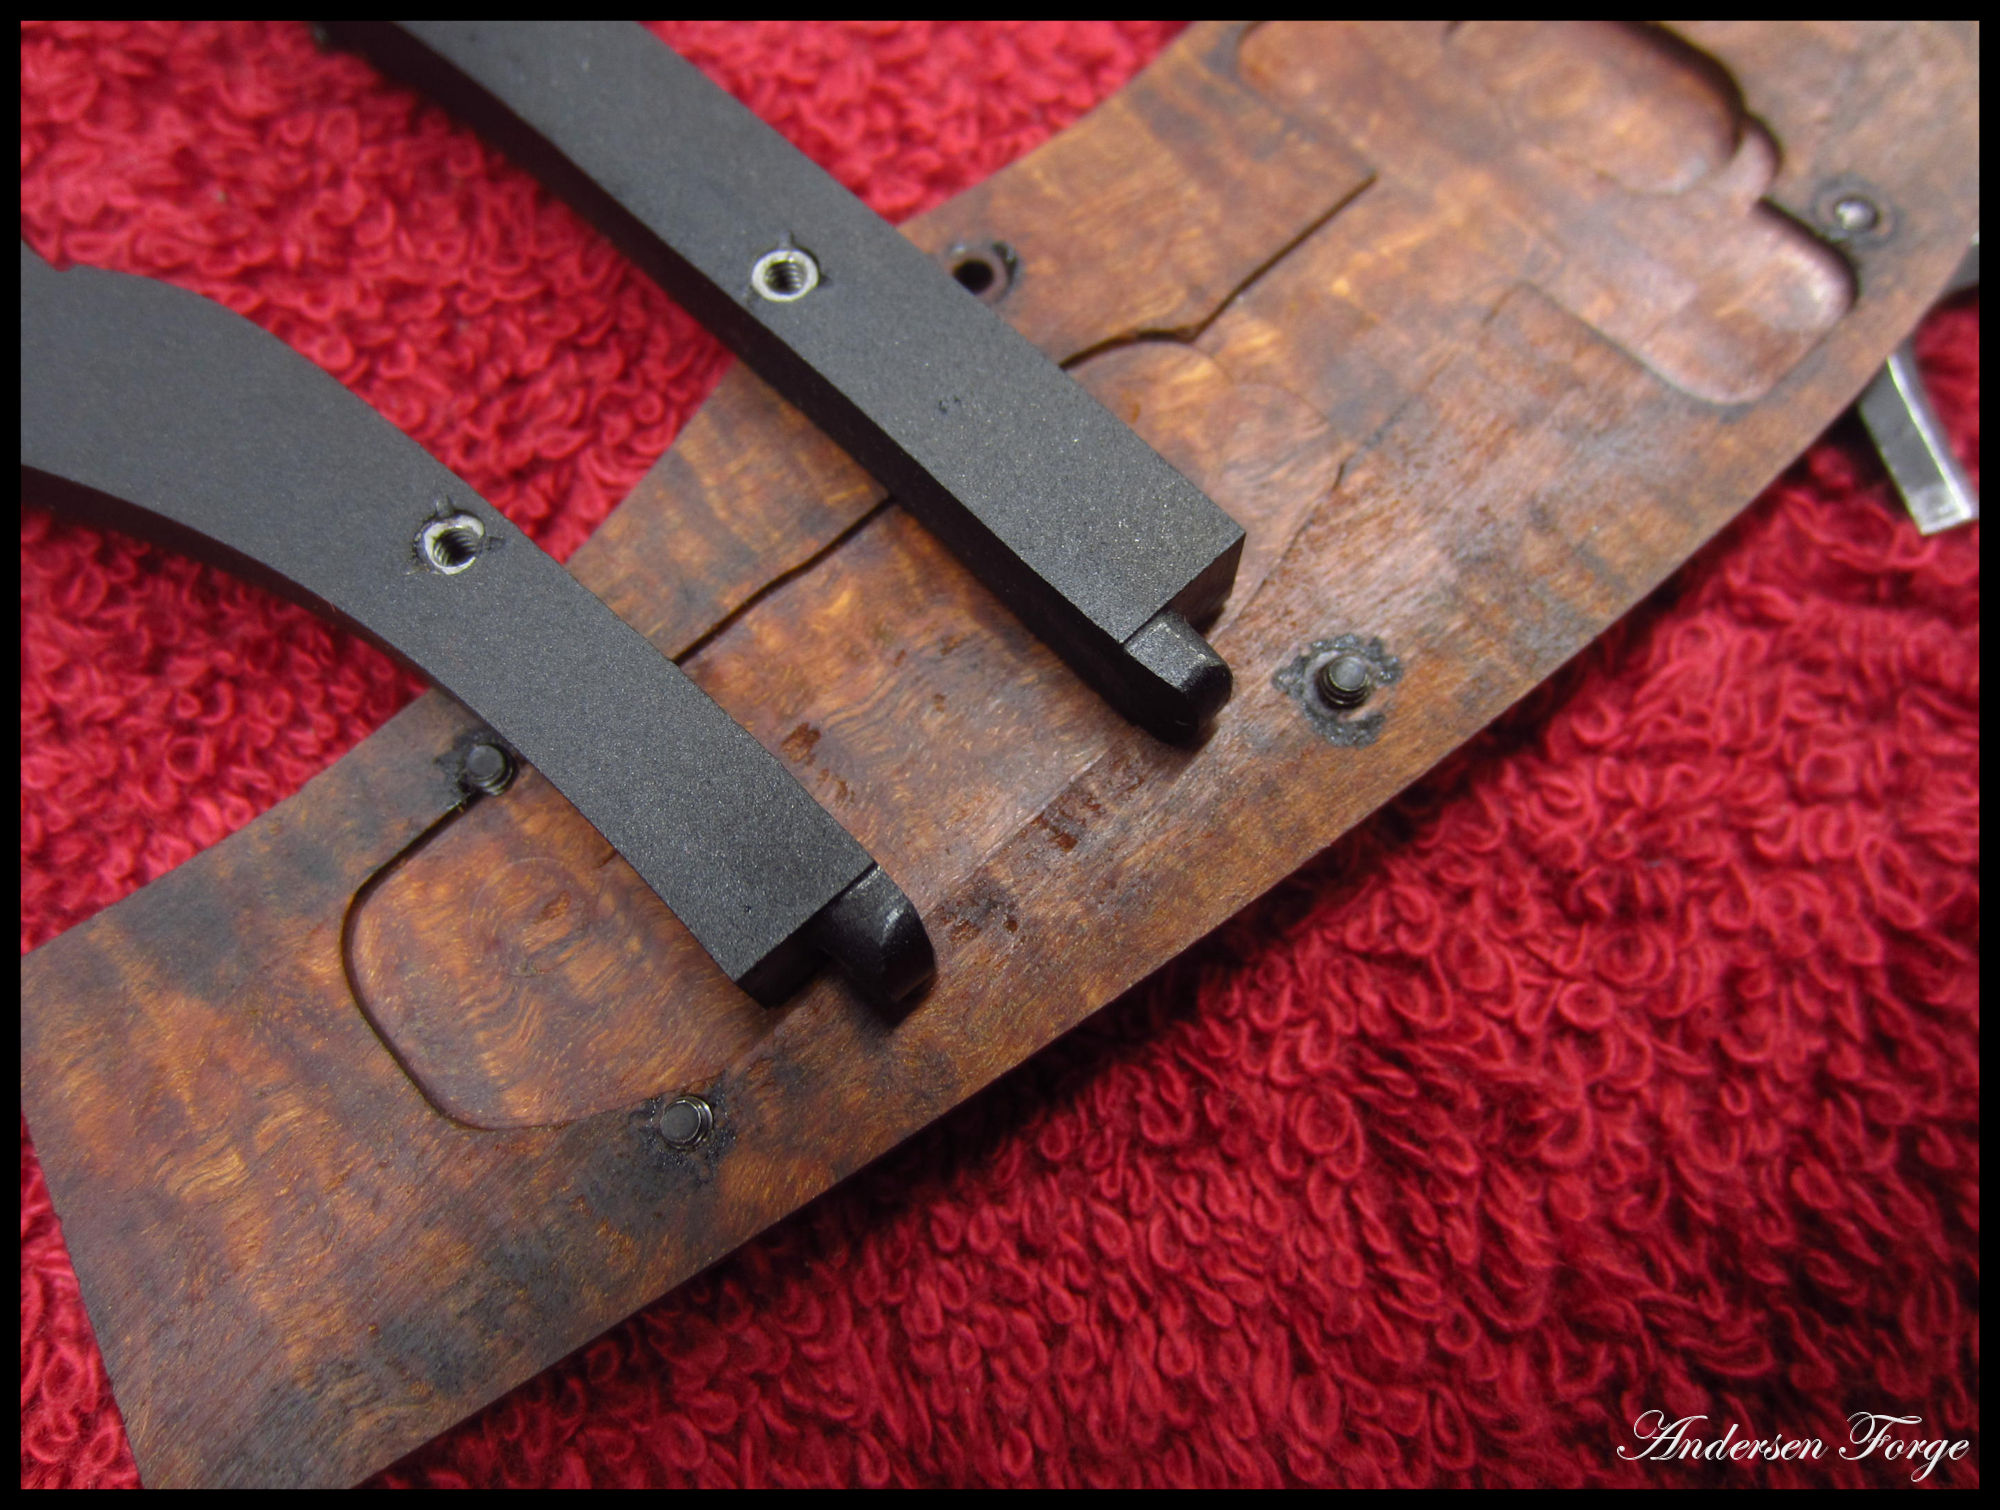
One is the use of alignment pins to make sure everything is secure. Pins on the end of the frame go through any spacers and into holes in the back of the guard so that each part indexes the same during assembly. Some makers, including Bruce Bump in the aforementioned epic WIP, advocate for leaving metal tabs on the end of the frame and fitting the tabs into similar holes on the back of the guard (Images 2 and 3). In both cases, there’s a mechanical connection that prevents the guard, spacers and frame from rotating out of alignment around the center axis of the handle. Either way, when you build a frame handle, the construction will require you to assemble and disassemble the knife repeatedly, so you’ll need some mechanical way to keep things lined up.
1 of 2
Above: Some makers advocate for leaving metal tabs on the end of the frame and fitting the tabs into similar holes on the back of the guard. In both cases, there’s a mechanical connection that prevents the guard, spacers and frame from rotating out of alignment around the center axis of the handle. (Karl Andersen images)
Another fit-up challenge is the overall requirement for clean-fitting joints with no gaps. It sounds simpler than it is, but two surfaces that are dead flat will join together without a gap. The challenge of a multi-piece frame handle with a guard and a few spacers is that you are creating a multitude of surface joints, and every single surface must be dead flat. At a minimum, you’ll have a joint between the guard and frame, and also between the frame sides and the handle material. Any bump or wiggle on any surface and you’ll have a gap in the final product. Flatness comes in degrees. You can get a fairly flat surface on a platen, flatter on a disk, and still flatter on a surface plate or surface grinder. You have to make the joints as flat as you can with the tools you have available if you want a gap-free fit.
I tend to prefer the look of a tapered tang on a full-tang knife, so I’ve started tapering the frame of my frame handles as well. Others stick with a full thickness frame, where the thickness closely matches that of the blade at the ricasso. Some add spacers between the tang and handle material, while others choose to go with the frame and handle slabs only.
Another fit challenge is presented by the frame itself. In order to adequately finish the visible surface of the frame, whether by simple polishing, bluing or etching, or by engraving, the frame must be 100 percent at final-grit finish prior to final glue up. Many makers learned to make a full-tang knife by finishing the front edge of the scales, gluing the knife together, shaping the scales down to the exposed tang, and then polishing the handle and the tang at the same time. That method will not work for a frame handle that needs to be blued or etched. Personally, I tend to use dummy pins to fit the entire handle assembly together, then grind the scales down to the frame. In his recent Instagram example, Salem Straub used small screws to hold the handle material to the frame.
With regard to the relationship between the handle material and the frame itself, whichever method you choose, it is important that the fit be maintained consistently all the way around the frame. (Jason Fry image)
With regard to the relationship between the handle material and the frame itself, some choose to leave the material slightly proud of the frame for a “museum” or “heirloom” fit. Others prefer the material to fit flush to the tang. Less commonly, some makers round the frame and leave it slightly proud of the material. Whichever you choose, it is important that the fit be maintained consistently all the way around the frame, from the joint at the guard on the top all the way down to the joint at the guard on the bottom.
Once the profile is set, I polish the handle and the frame together down to final grit, and then apply any surface finish to the frame itself. Once all parts are 100 percent complete, they can be glued together as a final step.
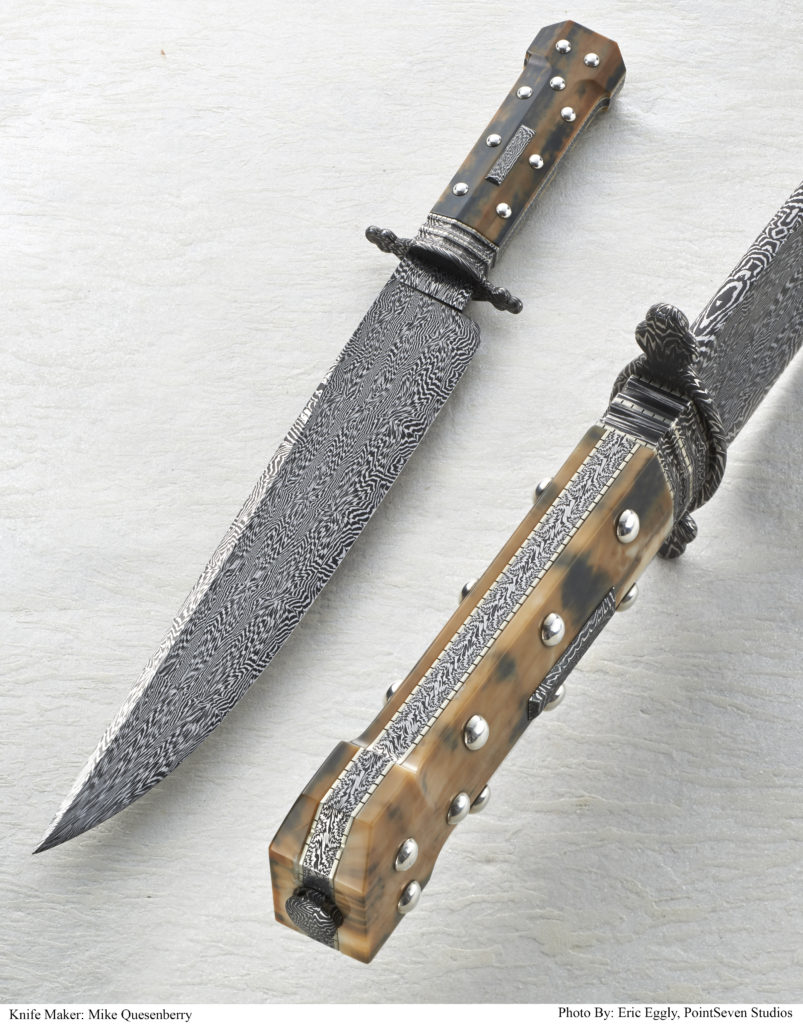
ABS master smith Mike Quesenberry used frame-handle construction on his dog-bone bowie. (Eric Eggly/PointSeven image)
WHEN to DO it
So when should you try making a frame handle? In my mind, if you can make clean full- and stick-tang knives, you could be up to the challenge. If you have slabs of exceptional handle material that deserve more than a simple full-tang knife, a frame handle is a way to step up and put the materials on full display. If you have a knife in mind where the frame and guard need to be blued, damascus or engraved, a frame handle is the way to go.
A frame handle knife has its advantages, but the complexity of the construction presents plenty of challenges. As a skilled maker, you may choose to rise to the challenge of a frame handle just to show that you can.
For more information on frame handle construction contact the author at [email protected].