Knifemaking

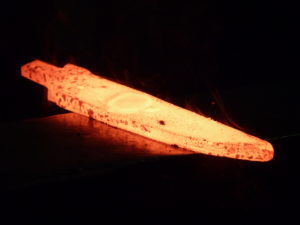
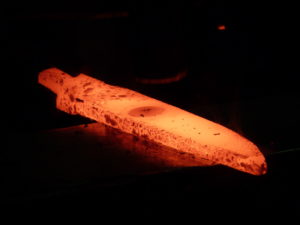
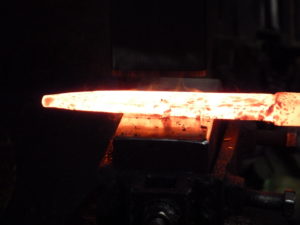
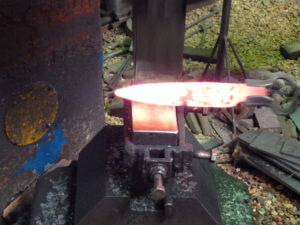
Knifemaking is the building of a knife, which includes the blade, handle and other accouterments. Blades are made by either removing metal from a steel blank via a grinder – known as stock removal – and the forging to shape of hot steel into a blade in the process known as bladesmithing. Other parts, including bolsters, guards, pommels, etc., are needed to complete the finished knife.

Featured Knives – – Knife Collecting – – Tactical Knives – – Survival Knives

Who Made the First Damascus?

The origins of damascus steel date to as early as 1500 BC.

The allure of damascus steel lies not only in its beauty and utility, but also in the mystique of its origins. Though its development began in ancient times, the word damascus has grown to encompass more than one method of steelmaking, and the earliest method is believed to date back to 1500 BC.

“Damascus steel today can mean at least three things,” explained blacksmith and steel authority Rick Furrer. “First, there’s pattern-welded steel where a bloom of steely irons is welded into a solid mass which then has a pattern. This is the oldest of damascus-steel-making technologies and one which most blacksmiths reproduce with layers of modern steel welded together.

“Second is crucible steel, where the material is fully melted in a container and then the resulting ingot is forged into a bar, which may or may not have a surface pattern. Third is overlaid or inlaid wire, gold, silver, copper or such into a base metal surface such as steel or silver to make a surface pattern. Some call this damascening or damascene.”

Those who have studied the origins of damascus tend to agree that pattern welding did happen first and that it occurred in the Far East, the Indian subcontinent, the Middle East, Indonesia and Europe. Crucible steel production is also referred to as wootz, and its beginning, for some, is easier to pinpoint.

“Some call crucible steel, or wootz, the original damascus, but pattern welding predates it by more than 1,000 years. Pattern welding was in Europe by 1100 BC in Greece and easily by 600 BC in Central Europe. It was very widely spread by 400 BC,” observed Furrer, who in 2011 participated in the filming of a Public Broadcasting System NOVA segment on the famed Viking swords from circa 800-1000 AD with the Ulfberht inscription. The extremely low slag content of the Viking blade steel may indicate a new development in steel processing in Europe, or that the Vikings were forging blades from imported crucible steel.

“The earliest examples of blades made from wootz steel date from around the first century BC,” related ABS master smith Kevin Cashen, “and the oldest examples of the material seem to come from India. While the Indians seem to have been the first to produce crucible steel, they were soon followed by other cultures in the Middle East such as the large production centers in what would now be Turkmenistan and Uzbekistan. Pattern welding is a trickier process to pinpoint, date or credit to a given culture as it is very old, and just about any people working iron would have produced welded blades on some level.”

Technological Advancements Of Demascus

As technology evolved, production methods improved and fueled the availability of high-quality blade steel. Performance and purpose have contributed to the growth of the industry and the changes in the scale of production through the centuries.

“All of these steel processes were driven by warfare and weapons technology,” noted ABS master smith Steve Schwarzer. “As soon as someone discovered a new method, everybody who wanted to survive jumped on that new method. The moment the local smith developed a method to heat steel to a totally liquid state and control the carbon, the need for wootz and pattern-welded blades fell to the wayside except for the very few who viewed it as art. When the Bessemer converter came into use [in the 1850s] and steel was produced in tonnage at any carbon level desired, there was no need to use the labor-intensive process of making one small piece of material at a time.”
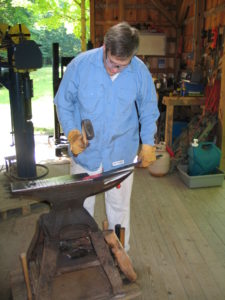
The basic tools used by early makers of pattern-welded damascus were quite similar to those used by the modern bladesmith—hammers, anvils and forges. Dan Farr hammers hot steel in his shop. (Dan Farr image)

Nonetheless, the craftsmanship and performance of forged damascus is timeless. Modern damascus makers take advantage of improved technology and know-how. The ancient producers worked with basic tools and equipment during a process of both production and discovery. The early makers of pattern-welded damascus combined bloomery steel with varying properties, says Cashen, but the basic tools were quite similar to those used by the modern bladesmith—hammers, anvils and forges.

“One difference is possibly the absence of the fluxes we use today,” Kevin added. “The simple bloomery products of that time period, when worked in a charcoal fire, would weld much more easily and not require the oxygen barriers that we have become so accustomed to today.”

The early crucible process would have involved sealing some amounts of premade iron along with certain organic/carbon-bearing materials and fluxes into a clay crucible that would have been placed in a charcoal-fired furnace, which would usually have been fired by a bellows or natural air drafts.

“The clearest difference in either method now compared to then is the fuel we have at our convenience today,” Cashen commented. “Gas-fired forges and furnaces make the tasks much more convenient than the arduous, dirty labors at ancient charcoal fires.”

Staying True To The Steel’s Roots

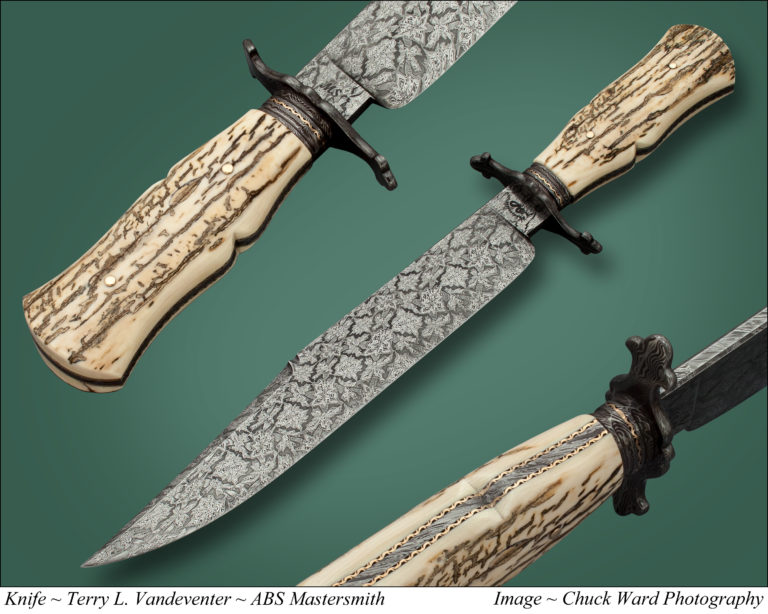
Maybe it is true that the more things change the more they stay the same, particularly as it relates to damascus steel. Surviving examples of either pattern-welded or crucible damascus are impressive in their quality. Modern bladesmiths produce damascus and mosaic damascus/canned steel that simply defies description, the beauty of the patterns speaking for themselves.
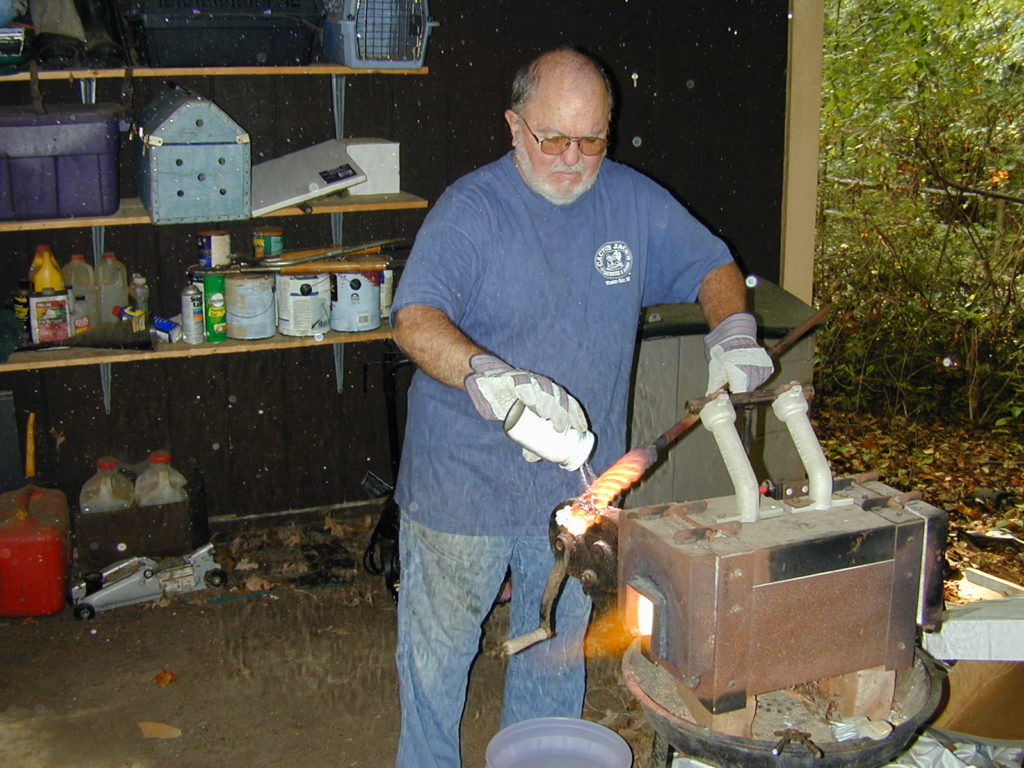
One of the differences between the way damascus is made today as opposed to centuries ago is the use of flux—applied here to a twisted billet by Tim Britton. (Britton image)

Damascus also originally occupied a transitional period in human history. As the Bronze Age waned in Europe, basic iron blades began to appear and pattern welding followed. In the East, iron blades of piled construction were made and pattern welding may have taken place concurrently with it, both being phased out as the crucible process came along. Most experts agree that Europeans were introduced to crucible damascus/wootz during the Crusades.

“With the wootz made by high-temperature smelting in a crucible and forming a cake, bulat or ingot, this ingot was then formed in a very slow, methodical process to produce a beautiful pattern of iron-carbide ferrite and cementite banding,” Schwarzer commented. “This was called watered or damascus steel. It is thought Europeans encountered this material for the first time during the Crusades near Damascus, Syria. Then, this cast material was traded all over the world.”

ABS master smith Al Pendray is well known for his work in wootz steel. Along with John D. Verhoeven, he is listed by the U.S. Patent Office as one of the inventors of “a method of making a steel article having an external surface appearance and an internal microstructure resembling that present on an antique ‘Damascus’ steel sword or blade.” Pendray contends that the earliest crucible damascus was made in Persia and quickly got the attention of Westerners who came in contact with it. “Wootz is ultra-high carbon and will take a real clean edge,” he remarked. “With all the nonmetallic stuff and impurities floating to the top in the process, it’s also a super clean steel.”

But Why Call It Damascus?

As intriguing as the steel itself, the name damascus has a mysterious origin. While the obvious link is to the ancient capital of Syria, the answer to the source of the steel’s moniker is open to speculation.

“One such story maintains that only wootz can be called damascus steel because it was wootz that the Crusaders first encountered in the Middle East, with the town of Damascus being the trading hub for its distribution, thus lending it the name,” Cashen offered. “This theory ignores the fact that there were also damask cloths [with intricate patterns formed by weaving], and that the treatments on many materials involving carving, inlay or otherwise were worked with an intricate flowing or water-like pattern called damascene. It is also worthwhile to note that an old Arab term for water is damas, a coincidence that’s hard to ignore when you consider the number of cultures that refer to patterned steel as ‘watered’ or having ‘watering.’”

Speculating about the origin of the name is intriguing, but Cashen says it is what it is. “In any case, the number of centuries that any steel with a pattern in it has been called ‘damascus’ sort of renders all of these speculative picky semantics irrelevant,” he noted. “Languages evolve, and the word means what it does today. When this is taken into consideration, any steel possessing an induced pattern could be safely referred to as damascus, with pattern welding or crucible steel being the more specific types of patterned steel.”
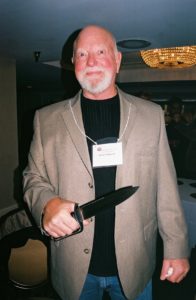
According to Master Bladesmith Steve Schwarzer, modern steels are far superior to even the best of the ancient materials because of quality control and repeatability.

Finest Blades Ever

As with many highly prized skills, individual bladesmithing and the production of high-quality damascus steel in small quantities has been eclipsed by mass production, given the availability of modern equipment and technology. However, the steel still owes its lineage to the blacksmiths of ancient times. Additionally, today’s bladesmiths keep the tradition and the skill alive like no mass production process can.

“Modern steels are far superior to even the best of these ancient materials because of quality control and repeatability,” Schwarzer mused. “What modern steels don’t have are beauty and the visual fingerprint of the steel artist’s hand. The damascus blades being made in modern times are far superior to the ancient blades because the modern smith is using these very sophisticated steels and modern scientific techniques to produce the finest blades ever made.”
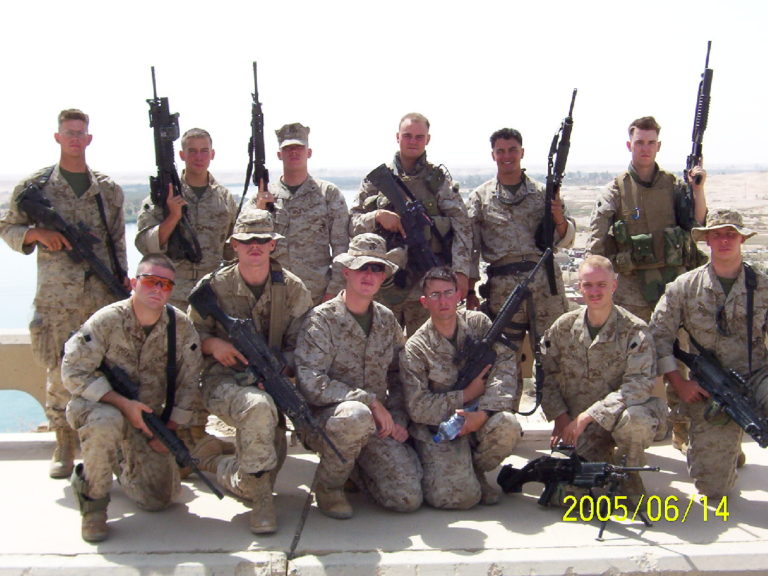
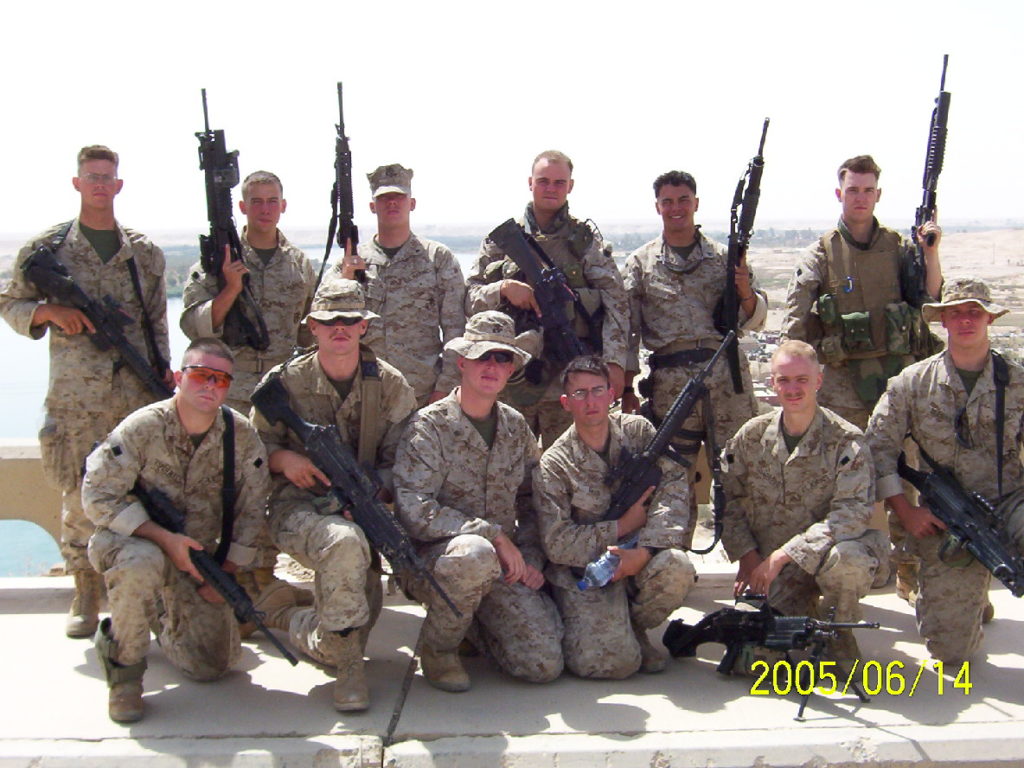
Marine Vet’s Knife Memorializes the Ultimate Sacrifice of His Iraq Comrades

1 Knife for the Lima Company 11

BY MIKE HASKEW BLADE® FIELD EDITOR

*This article originally appeared in BLADE Magazine Winter 2013

The bond of brotherhood, sacrifice, and selflessness forged by fighting men in combat is, perhaps, the strongest emotion human beings can experience. So it is with Travis Williams.

Having just turned 18, Travis enlisted in the United States Marine Corps In December 2001. He reported for duty the following August and spent the next four years in the service. While he trained, his original reserve unit had already deployed to Iraq, and he was among a few who were reassigned to Lima Company, 3rd Battalion, 25th Marines, another reserve unit, headquartered in Columbus, Ohio.

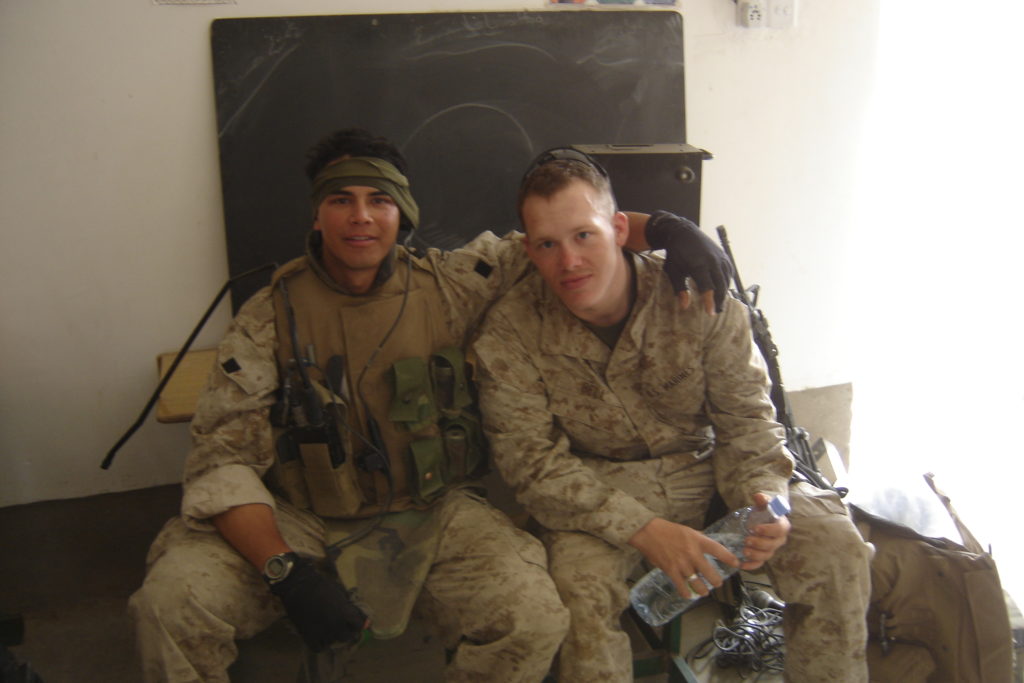
Travis Williams (second from right, back row) stands proud with his squad mere weeks before the deadly IED strike. (photo courtesy of Travis Williams)

During its deployment to Iraq, Lima Company endured days of patrols in harm’s way, intense firefights, and the ever-present danger of IEDs (Improvised Explosive Devices). With a strength of about 180 Marines, Lima Company lost 24 killed in action, and one in eight of its Marines received the Purple Heart for wounds received or death as a result of enemy action. By late 2005, Lima Company was the hardest hit unit of its size in the Marine Corps. Lima’s battalion lost 48 men killed in Iraq.


AUG. 3, 2005

Considering the tedium and tension that encompassed his time in Iraq, a single day stands out in Travis’ memory. On Aug. 3, 2005, during a patrol near the town of Barwanah, 11 Marines from his squad were killed in a massive IED explosion.

“We were going to start at 0600,” Williams recalled. “We loaded our amtracs, big transport vehicles, and about five minutes before we stepped off, a call came down from higher. For some reason the platoon commander and I got pulled out of our vehicle with 1st Squad and put in a vehicle ahead of theirs with Iraqi forces in it. We headed for town and weren’t going to take any roads in. It was about a month before we were to leave the country, and we had seen a lot of firefights and IEDs.”

After the patrol received word that the road was, in fact, clear, the catastrophic explosion erupted. “We hopped on the road, and right as we made the turn for town I was sitting down in the vehicle,” Travis continued. “Somebody has to stand up to provide security, and I saw the explosion in the glasses of the guy standing up in our vehicle.”

Williams still does not know why he and the platoon commander were ordered out of the vehicle that was hit. He was not injured. Fifteen men occupied the stricken amtrac, and he had known those Marines that were killed for more than a year. Among them was his best friend, Lance Corporal Aaron Reed of Chillicothe, Ohio.

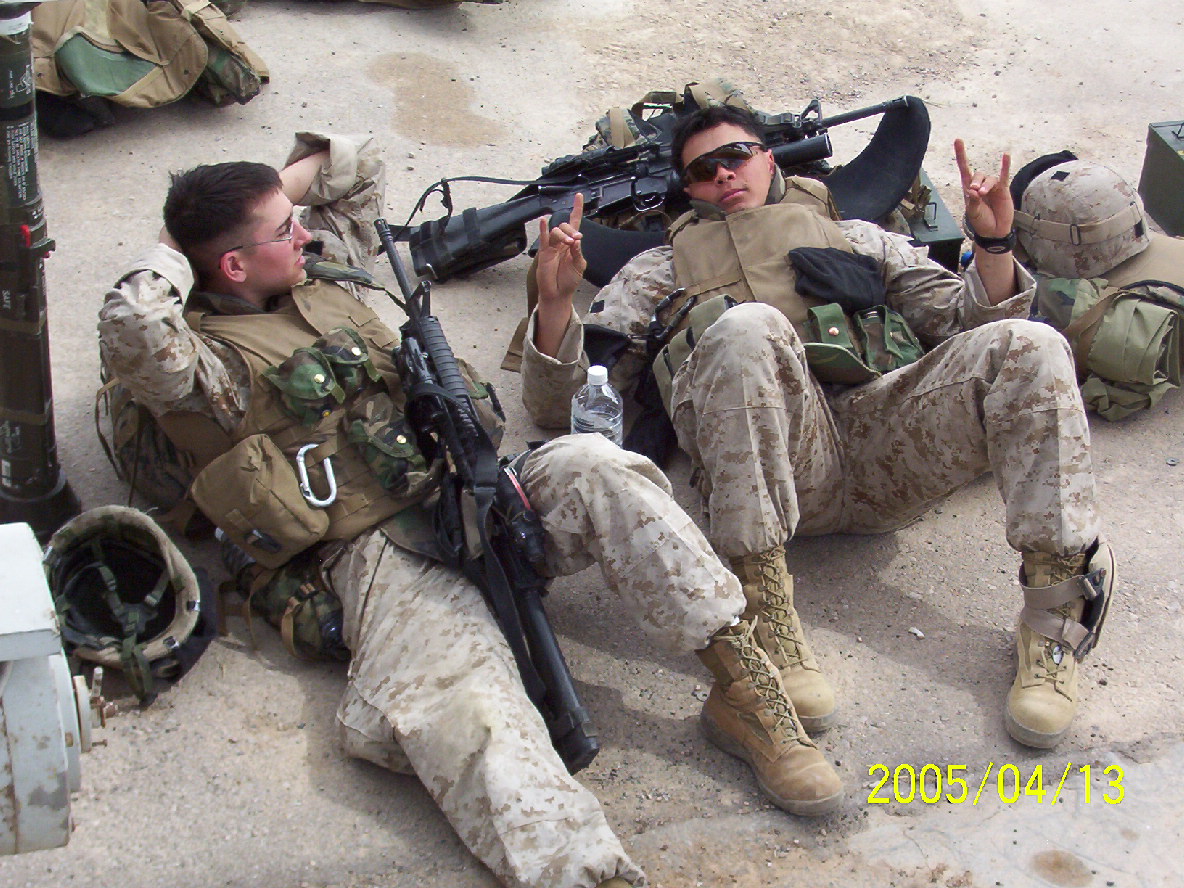
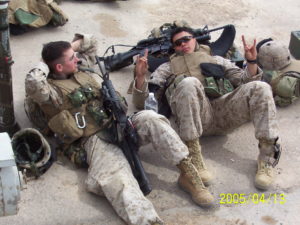
Travis and Lance Corporal Timothy M. Bell Jr., 1983-2005, enjoy some downtime. Bell, 22, was killed by the IED. His awards include the Purple Heart, Navy and Marine Corps Achievement Medal with Combat “V” for valor, and the Combat Action Ribbon. (photo courtesy of Travis Williams)

When Lance Corporal Travis Williams returned home to Missoula, Montana, in August 2006, he brought with him the memories and the scars of his wartime experience. He worked as a private investigator for about five years, and then an opportunity that he could not pass up presented itself. Always fascinated and intrigued by knives, he met custom knifemaker James Behring, Jr.

“James moved to Missoula from Michigan in 2011, and he married my friend’s sister,” Travis said. “I would hang out at the shop and watch what he was doing, and finally he told me that he was looking to hire somebody. I jumped in from there, cutting out blades from bar stock, soldering guards and finishing handles and stuff like that—until I was able to make a knife.”

GOLD STAR FAMILIES

This past February, the Wall Street Journal featured Travis in an article observing the 10th anniversary of the war in Iraq. “They wanted to know how I was doing,” he commented, “and there was a video with it and a guy followed me around the shop while we were making knives.”

A fellow Marine veteran saw the article and contacted Travis, telling him that a benefit was being organized for Gold Star Families in Ohio. These are the families of those who have lost a loved one in battle. “He asked me to make a knife for a silent auction, and the proceeds would go to support the work of an artist that was painting life-size portraits of the guys that were killed from the company,” said Williams. “It was on short notice because the event was going to be in three weeks. I cleared it with James and then contacted Roger ‘Mudbone’ Jones of Waverly, Ohio, to make sure he could make the sheath if I got the knife to him in time.”

Mudbone is an accomplished knife and sheathmaker in his own right. A friend of the Behring family who considers James Behring “like my own son,” Mudbone agreed to make the sheath. His relationship with Travis has grown as well, and he simply considers the former Marine a second son. In fact, it is Mudbone who brought this compelling story to the attention of BLADE®.

“Travis called and said he wanted to tell me about the knife and get some pointers on it and the sheath,” Mudbone remembered. “It knocked me out when he said this was for his friends, and particularly his best friend who had been killed. It turns out Aaron Reed was from my hometown, Chillicothe, Ohio. I had never met the boy, but I knew of his mother, who had been a teacher in a local school.”

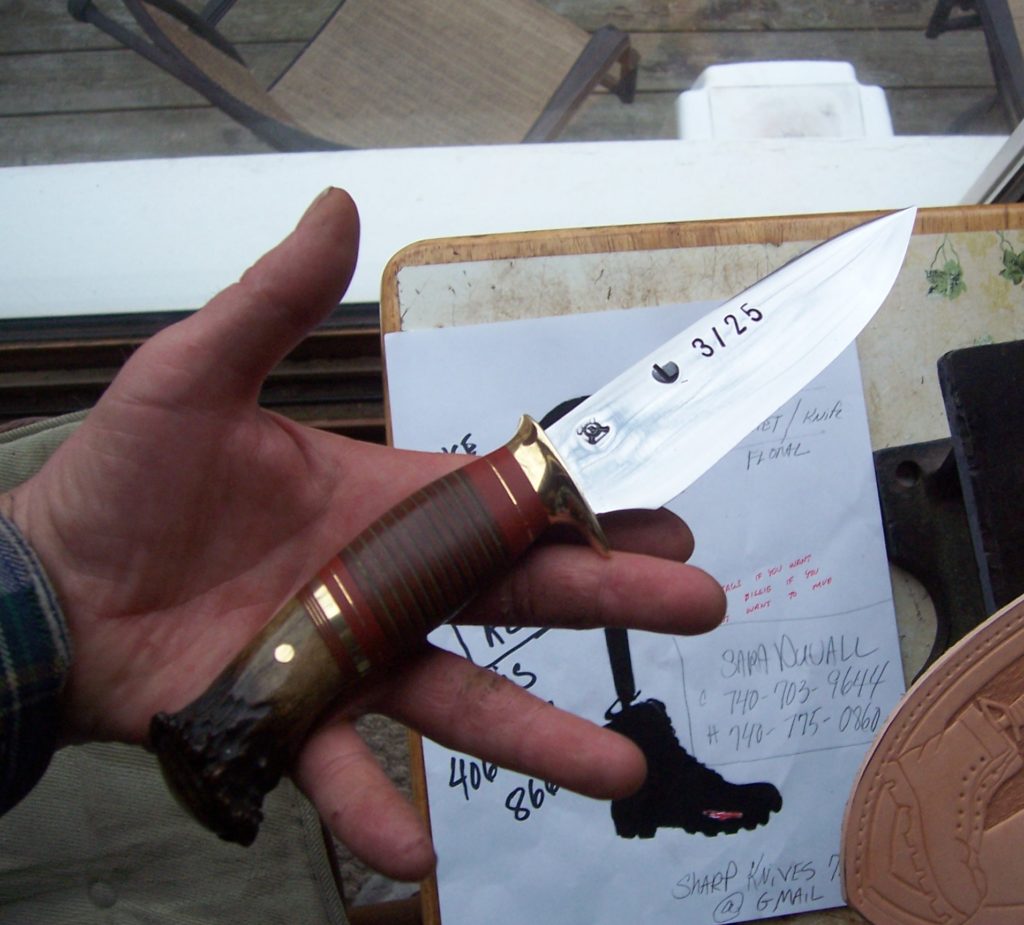
Travis set to work under the watchful eye and guidance of Behring. The finished knife includes a 6-inch drop point blade of O-1 tool steel, a thick brass guard, and a stacked-leather-washer handle with a butt of whitetail crown stag. Inserted between the leather washers is a piece of the nametape, typically worked across the top of the uniform pocket, of each of the 11 Marines killed on Aug. 3, 2005. The letter “L” for Lima Company and “3/25” for 3rd Battalion and 25th Marine Regiment are hot stamped into the blade.

Made by Travis under the watchful eye of Jim Behring, the knife has a 6-inch blade of O1 tool steel, brass guard, and a stacked-leather-washer handle with a butt of whitetail crown stag. Between the leather washers is a piece of the nametape, typically worked across the top of the uniform pocket, of each of the 11 Marines killed on Aug. 3, 2005. The letter “L” for Lima Company and “3/25” for 3rd Battalion and 25th Marine Regiment are hot stamped into the blade. (photo courtesy of Mudbone Jones)

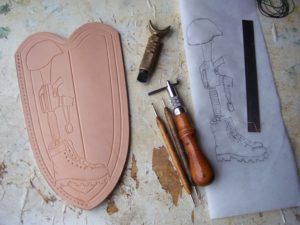
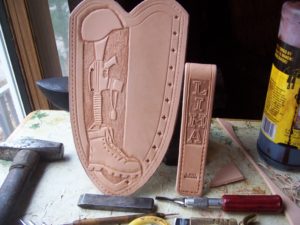
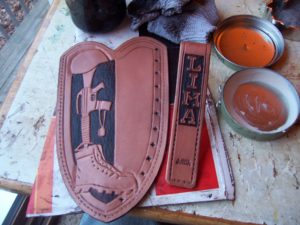
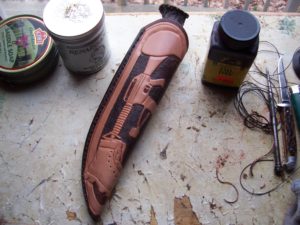
When the knife was complete, Mudbone set to work. With only a week to complete the task, he crafted a leather sheath with the iconic image of the rifle turned down into a boot and topped by a helmet. A dog tag hangs from the weapon. The word “LIMA” is also prominent.

“On the back of the sheath there are 11 four-pointed North Stars,” added Mudbone. “Craftsmen of earlier times stamped these on guns and knives so the owner could always find his way home. They finished the knife on a Saturday. I got it on Tuesday and dropped everything else to get the sheath done. Sometime around 3:30 or 4:30 a.m. the next Saturday, I pulled the last stitch and put the last wax on it.”

Above: Working from the drawing, Roger “Mudbone” Jones employed a Marine theme of helmet, weapon, dog tags and boots to make the knife’s leather sheath, including the Lima Company name. On the back of the sheath are 11 four-pointed North Stars,” added Mudbone. “Craftsmen of earlier times stamped these on guns and knives so the owner could always find his way home.” (photos courtesy of Mudbone Jones)

SOLD for $7,000

The knife sold for $7,000, but not during the silent auction. “Doc” Wentworth, a Navy corpsman who had been assigned to Lima Company, was determined to keep the Lima Knife with the portraits so beautifully painted by artist Anita Miller. The memorial event at the Ohio Statehouse in Columbus was moving and inspirational, and Wentworth succeeded through social media in raising small donations that bought the knife and will allow the memorial to remain together in its permanent home in the statehouse. An accompanying book, The Lima Company Memorial:  A Remembrance of Spirit and Choice, has also been produced.

UNBREAKABLE TIE

Learning the art of knifemaking and continuing to work with James Behring has proven therapeutic for Travis, and he is pleased with his opportunity at Behring Made Knives. While continuing to work in the shop, he attends events that help other veterans adjust to life after active duty. At some point in the future, he may begin making more knives and even taking orders. For now, he is content to continue learning.

“I like where I am with James’ company,” Williams said. “I do everything from heat treating to finishing blades and handles, and have recently gotten into making Kydex. On some of our CNC knives I’m doing the blasting, coating and sharpening of the blades. James is sitting there watching me, and someday I would like to get to the point where I am making knives on my own.”

Today, Travis finds contentment with his work and sees the future with optimism. There will, however, always be that unbreakable tie to his fellow Marines. Meanwhile, with a little help from his friends, he has created a lasting tribute to his fallen comrades.

Travis and his best friend, Lance Corporal Aaron H. Reed, take five. Reed was among those killed by the IED. His awards include the Purple Heart and Combat Action Ribbon. He was 21. (photo courtesy of Travis Williams)

For more information contact Roger “Mudbone” Jones, Dept. BL12, 320 Prussia Rd., Waverly, OH 45690 740-739-4562 [email protected], or Travis Williams, c/o James Behring, Dept. BL12, POB 17317, Missoula, MT 59808 406-926-1193 (shop) [email protected], www.behringmade.com.

How to Make a Sushi Knife

0

By Wally Hayes

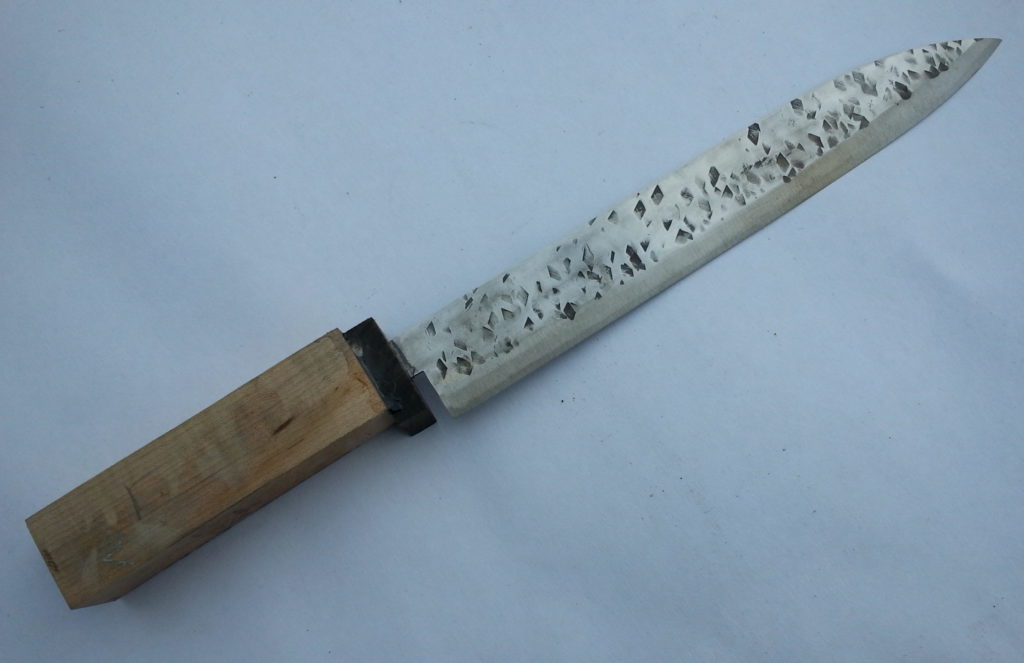
Sushi knives are light, thin, very sharp and a blast to make. Here’s how I make them from start to finish.

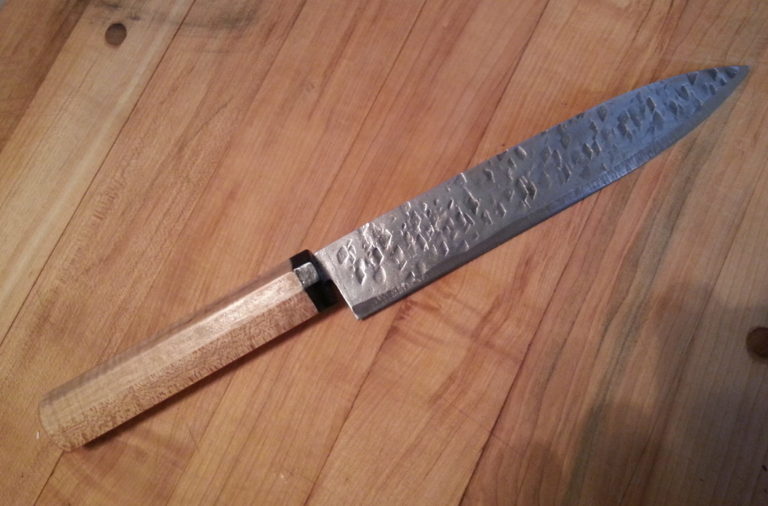
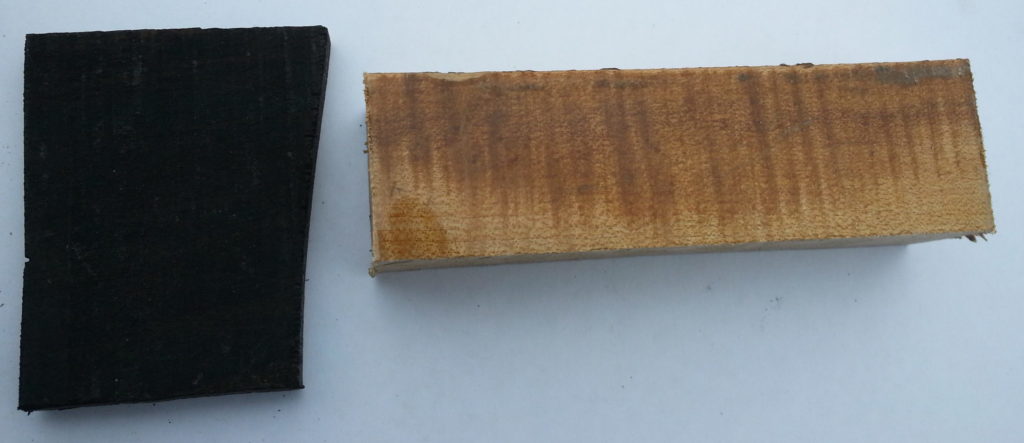
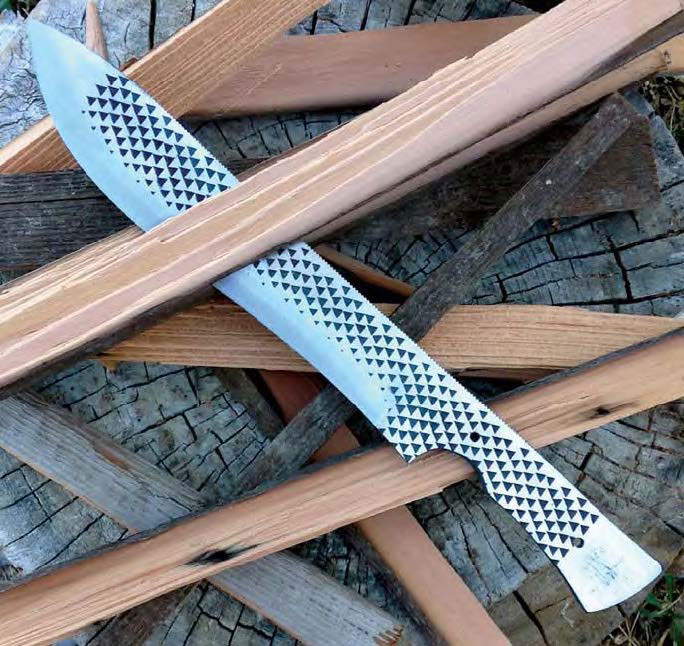
The sushi knife started out as a 90-thousandths-inch thick bar of 15N20 carbon steel and maple and ebony slabs.

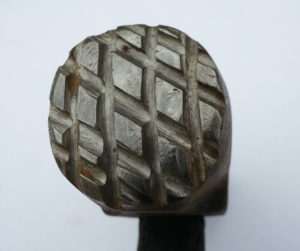
For blade material I use 90-thousandths-inch thick 15N20 carbon steel from New Jersey Steel Baron. First, I cut the blade to shape, around 7 inches long. The tang is about 4 inches. I take one of my old hammers and cut a cross hatch into the face using a side grinder with a cut-off wheel.

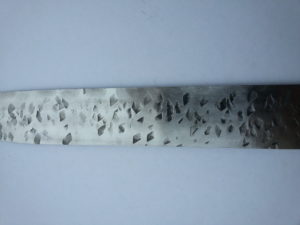
Then I heat up the blade in my forge and hammer a textured finish into the steel. This takes about five heats and is lots of fun! I put dents into both sides of the blade and then make sure it is straight. The reason for the texturing on the surface of the steel is to create air pockets so food does not stick to the blade.


If you want to push the forging experience, forge in the bevel on one side for your edge. Use a regular hammer. It will be a chisel-ground blade, so don’t hit the edge with your texturing hammer. Hammer an eighth of an inch back from the edge.


NORMALIZING

The next step is to normalize the blade. Heat it to critical temperature—a steel blade reaches critical temperature when a magnet does not stick to it—then let it air cool. After you heat the blade to critical temperature, quench it in warm Fensoil or Parker Oil, both of which are fast-quench oils made for heat treating steel. Vegetable oil also will work.

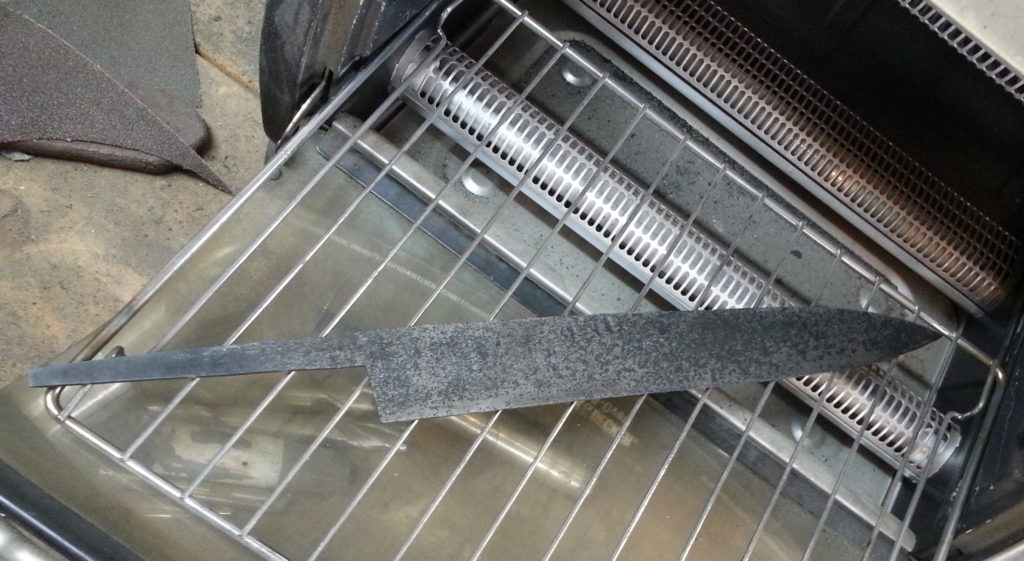
Clean the blade after it cools and place it in a toaster oven heated to 375°F for one hour. Look at the blade and see if it is straight. If it is bowed, secure it to a scrap piece of steel with a metal clamp and press the warp out, then return it all clamped up to the toaster oven. Temper it for another hour. This works really well.

After hardening, the blade it goes into the toaster oven to temper.

To remove all scale and the black from the blade, place it in a plastic container with vinegar for one day. Rinse with water and baking soda and wash the blade. Scrub it with a paper towel. From there I use a little wire-wheel brush on my drill press to brush off everything and make it all silver and bright. Next I sand the blade on a medium Scotch-Brite™ belt to round the top edges and smooth out the blade surface.

After tempering, the author places the unfinished knife in a container filled with vinegar for about a day to remove all the scale and the black from the blade.

This is the time to grind in your edge. Don’t get the blade too hot during grinding or you may remove the hardness. When the blade gets hot, dunk it in water to cool it. I chisel grind it on the right side so I can get paper-thin cuts with it.


The HANDLE

Time to make the handle. Use whatever material you like. I like cocobolo and ebony best as they are very easy to finish. I used maple and ebony for the handle of the knife for this project.

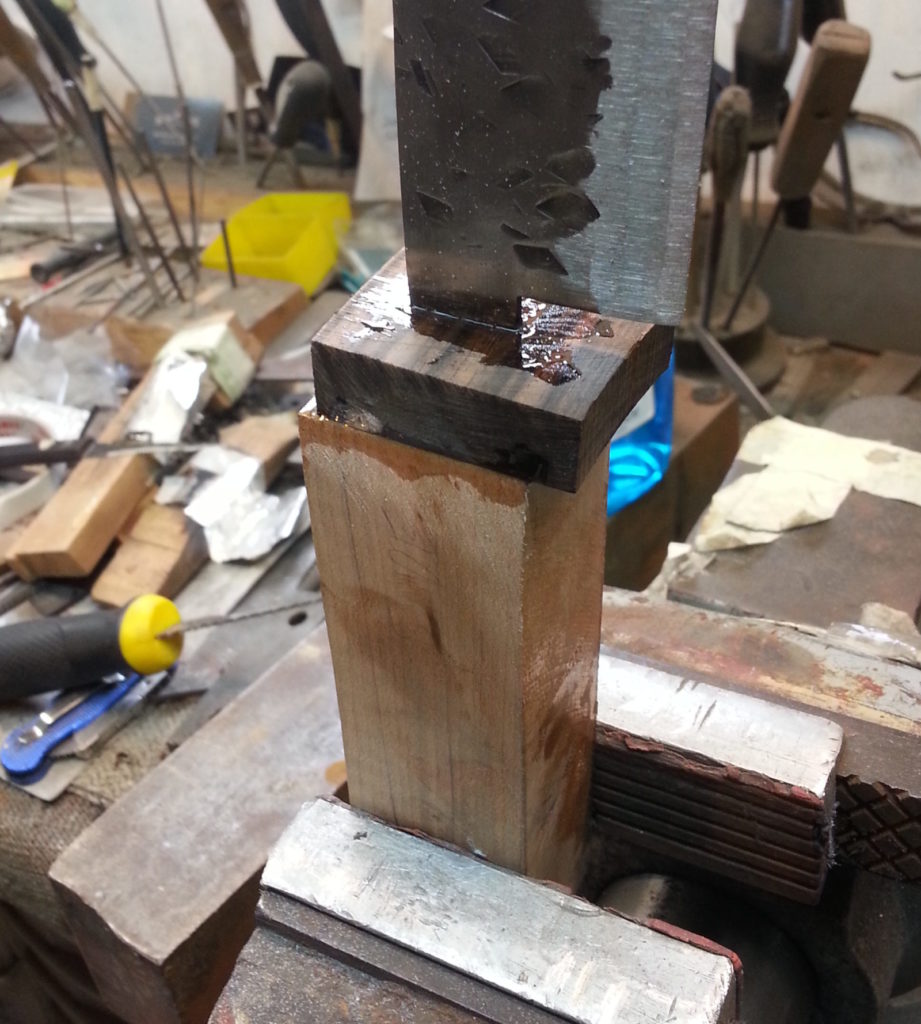
I make the handle in two parts. The front spacer is ebony about a half-inch thick. Sand the sides and ends of the blocks of wood on a disc sander. Disc sanders seem to work better than belt sanders to get a flat surface. Use a 1/16-inch drill bit to drill the front spacer and then use a small saw to open it up to fit the tang. The longer handle section can be drilled out and fitted easily. I grind down a drywall saw to fit into the hole to make a slot—this works great. Use epoxy to glue the parts together.

Glue the parts together with epoxy and let dry. The author said he uses many coats of glue for the finish.

When the glue dries, I sand the handle into an octagon shape and then hand sand it to 600 grit.

After the glue has dried, the author will sand and buff the handle. Cocobolo can be finished on a fine Scotch-Brite™ belt and then buffed and oiled.

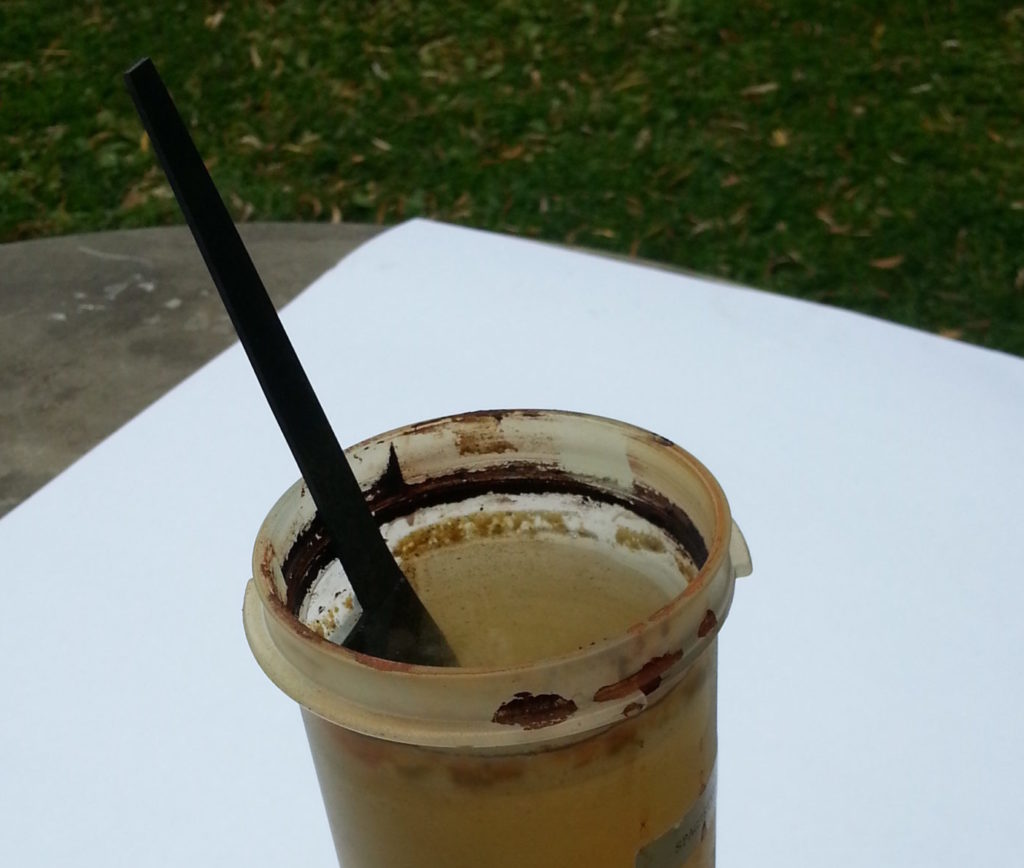
For the maple handle I used many coats of Krazy® Glue for the finish. I paint the coats on then sand and buff. Cocobolo can be finished on a fine Scotch-Brite belt and then buffed and oiled. I use a food-friendly oil like walnut oil. To sharpen the blade use a 7,000-grit Japanese water stone.

Try this project—you’ll like it. It is really a fun knife to make.

2012 ABS Expo

0

The 2012 American Bladesmith Society’s All Forged Blade EXPO is the premier show for hand forged blades. From utility blades, to the finest forged and crafted art knives, the ABS EXPO has something for everyone. The show will be held in San Antonio, Texas, January 27 – 29, 2012 the home of the Alamo.See some of the world’s finest forged knives showcased in a unique and informative format for the enjoyment of the forged blade collector/enthusiast by American Bladesmith Society Mastersmiths and Journeyman Smiths.

Dan Cassidy has set up an Expo Photo Gallery so that the makers can exhibit their knives prior to the show, so that collectors may have a sneak preview of these works of art. I have asked the table holders to make knives especially for this show and to photograph them. Please post your photos in the ABS Exposition Gallery of the ABS Forum and ABS Webmaster Dan Cassidy will be available to assist you. Also post your knife photos on other knife forums so that prospective buyers may have a sneak preview to what they will see at San Antonio.

14 inch Thomas Wells Antique Bowie Progress Report.

To see previous posting,Click:Jim Batson on ABS Expo

 BLADE                                                                                                                                           A full scale pattern was made of aluminum from a tracing of the original Bowie. The blade as it was being forged could be laid on the pattern hot as an aide to forge the blade to shape. The steel in this blade was forged from a large coil spring from a rail car. Attached Image

 (Photo 1)

The blade was ground, set up for the guard, Spanish Notch filed , heat treated and finish ground. The maximum blade thickness is .355 inches at the hilt and .250 inches at the clip. The clip was ground and hand finished on one side of the blade as was the original. Attached Image

(Photo 2)
The large tang was used to give the knife a better balance and stronger handle. The tang is tapered from guard aft and from the top down. The pin holes were drilled in the tang.

GUARD
A brass 1/2 template was fabricated to the shape of the guard which fit snuggly on the blade.
Attached Image (Photos 3a & 3b)

 
The guard was hand filed from a 1/4 inch thick piece of cupro nickel 715 , hand finished and polished. Cupro nickel 715 is 30% nickel and 70% copper and is more corrosion resistant than nickel silver which has only 18% nickel.

HANDLE CONSTRUCTION                                                                                                   Photo 4 is the end view of the handle that shows the basic handle construction.
Attached Image
Photo 5 is the handle
Attached Image
and Photo 6 is an exploded view of the handle showing all its components.
Attached Image

The handle was fabricated by wrapping the tang with Teflon tape. A piece of tin .007 inches thick was wrapped around the tang and drilled for the pin holes. Two pieces of Mastodon Tusk were shaped into a trapezoidal cross-section to fit against the tin liner. Holes were drilled in the Mastodon handle scales. The scales were shaped a little over size in the plan view. These scales were super glued with gel to the tin liner using pins to align the holes and a rubber band made of an inner tube as a clamp. The assembly was removed from the tang and a dam was made at each end of the handle with masking tape. The voids at the top and bottom of the handle above and below the tang were filled with JB Weld. The handle was ground to final shape in a rectangular cross-section with each scale being of equal thickness.
The handle is a little larger at the pommel than at the guard. I went to Microsoft Word and made a drawing of the rectangular cross-sections at the front and back of the handle. I drew an ellipse in the rectangles and printed them out.

 
Attached Image (Photo 7)
I then cut out the rectangles and pasted them on the front and back of the handle. The handle was shaped with new belts from 36 grit and 80 grit on the flat platen by holding the handle vertically against the platen. The handle was hand finished to 600 grit.
The front of the handle was taped around the handle the required distance from the end as a guide for the front ferrule. A course file was used to recess the handle .032 inches. The pommel was done the same way. A piece of cardboard .032 inches thick was used to measure the circumference of the ferrule. A rectangular of dead soft German silver .032 inch thick was sawed out a little oversize. The handle was used to form the ferrule with the solder joint at the bottom. The joint was overlapped. Both ends were sawed into with a jeweler saw while held in a vise to obtain a straight joint. The ferrule was opened wide enough to allow an eight inch mill bastard file to be used to file the ends. The file is held in the vise with the face up and both ends are filed at the same time by pulling the ends along the top and bottom faces of the file with a slight pressure. The ferrule and pommel ferrule are wired up, fluxed and hard soldered. The ferrule is suspended by the top; the solder is applied to the inside and the heat to the bottom or outside. When the solder appears on the outside, it is done.
The pommel ferrule was wired to an oversize .070 inch thick plate on one end. It was fluxed and pieces of medium hard solder were laid around the joint on the inside and heated from the outside.
The top and bottom straps were made from 1/2 inch wide by .070 inch thick German silver. The bevels were ground and hand finished on each side. The ends were hand file to fit under the front ferrule and pommel cap.
CHAIN KNUCKLE BOW
After some experimenting, I found that the original chain was called a rope chain that was twisted into a flat plane.
Attached Image (Photos 8a, b & c for construction details)
Eleven gauge (.088 inch diameter) fine silver wire was wrapped around a 3/8 inch diameter rod by hand. Thirty-six turns were made. Over 4 feet of wire was used. This coil was removed from the rod, fluxed and heated to a dull red, about 1250 degrees F., for about 30 seconds allowed to cool to a black heat and quenched in water. One loop was silver soldered with medium hard solder. The chain was constructed and soldered one loop at a time. After using about 10 loops, the chain was twisted flat to insure good solder joints, The chain was completed with 31 loops. A .093 inch internal diameter tube was constructed to make the hinge attachment to the pommel cap. The chain and tube are pictured in Photo 9 below.
Attached Image

 METAL SHEATH
Attached Image (Photo 10)

The all metal sheath was constructed of .032 inch thick German silver sheet metal. After the blade was finished a pattern was made of a piece of oak about 3/4 inches thick. The pattern was made oversize to allow for the liner which is about .040 inch thick. Also make the pattern about 3 inches longer than the blade, the edges were rounded slightly. The sides were cut out of the sheet approximately 3/8 inches wider than the pattern on top and bottom. The tip was notched to allow for the bend. The sheet metal I had was in an as rolled state which was hard. I had to anneal the edges that were to be bent.

 
To shape the sides, place the sides between the pattern and a steel backing in the vice and bend the edges over with a small hammer only hitting the edge in a bending motion. You will have to reset in the vise several times. Take thickness measurements along top and bottom of the blade. Grind the edges of the sides to the require thickness, making sure you have allowed for the metal thickness, the liner thickness and 1/2 the width of the blade. Lay the side flat on the table and measure the height with the depth gage on the back of a veneer caliper.

 Once the left and right side are made, flux the inside of each at the joint. Wire the two sides together with black wire at half inch increments. Flux the outside, use a metal spring clamp on a fire brick to present a joint in the up position to be soldered. Solder both sides with medium silver solder. I use a turbo torch and wire solder. Cut and pull the black wire off. I grind the extra solder off with about 80 grit. I use 120 grit to start the finish grinding on the sheath. It is easier to get the 120 grit scratches out than the 80 grit. You want to polish to 400 grit on a wheel. I use a 10 inch smooth 40 diameter wheel with a 3 inch drive pulley.
The sheath should be pickled to clean the inside. The tip and throat pieces were fitted, constructed and soldered with medium solder. These pieces were then soldered to the sheath body with easy easy solder. The belt loop was formed and tinned with soft 4% silver solder. It was then soldered to the sheath.

WHAT’S LEFT

1. Finish chain and pommel cap attachment with hinge. Polish chain in tumbler.

2. Layout incise carving pattern on handle and carve.

3. Assemble and finish knife.

4. Layout engraving pattern on sheath and engrave.

5. Line the sheath

James Batson, Master Smith
Chairman American Bladesmith Society, Inc.

Knife Book Of The Day I

     If you’ve ever seen Murray Carter give a sharpening display at his knife show table, shave his beard—or someone’s head—with one of his knives at a BLADE Show seminar or just talked to him in person, you know what a genuine, engaging person he is. If you haven’t seen him up close, his new book, Bladesmithing with Murray Carter, is the next best thing. In some ways, it’s better.

     The first in our Knife Books Of The Day series, Bladesmithing with Murray Carter takes you through the Carter process of making knives as only he can tell it. Design, steel selection, forge welding, lamination techniques, heat treating, grinding, finishing, handles, sharpening, sheaths–it’s all here in 160 pages of hundreds of color pictures, diagrams, knifemaking tools and equipment, how-to’s, safety tips, and much more.

     And, if you act now by clicking on http://www.shopblade.com/product/bladesmithing-with-murray-carter/?r+ssfb201211 #W1852, you can buy it for only $18.47—$9.52 off the regular price.

ABS Knife Auction – 2012 Journeyman Smith Knife of the Year

0

The 2012 ABS Journeyman Smith Knife of the Year is by Karl B. Andersen, JS. It is part of the 2012 at the ABS Knife Auction set for June 9, 2012 at the Blade…

How to Do Plug Welds on Knives

0

Plug Welds the David Lisch Way

The ABS Master Smith shows how he puts a plug weld in a damascus blade

On this and the following pages, I will show you how to do a plug weld. Firstly, this is not a new technique. That being said, I would like to think that the way I am using it here is new—or at least it is new to my knives. I’m not showing how I made the damascus pattern as it would take way too many photos. Perhaps I will show that in another story.

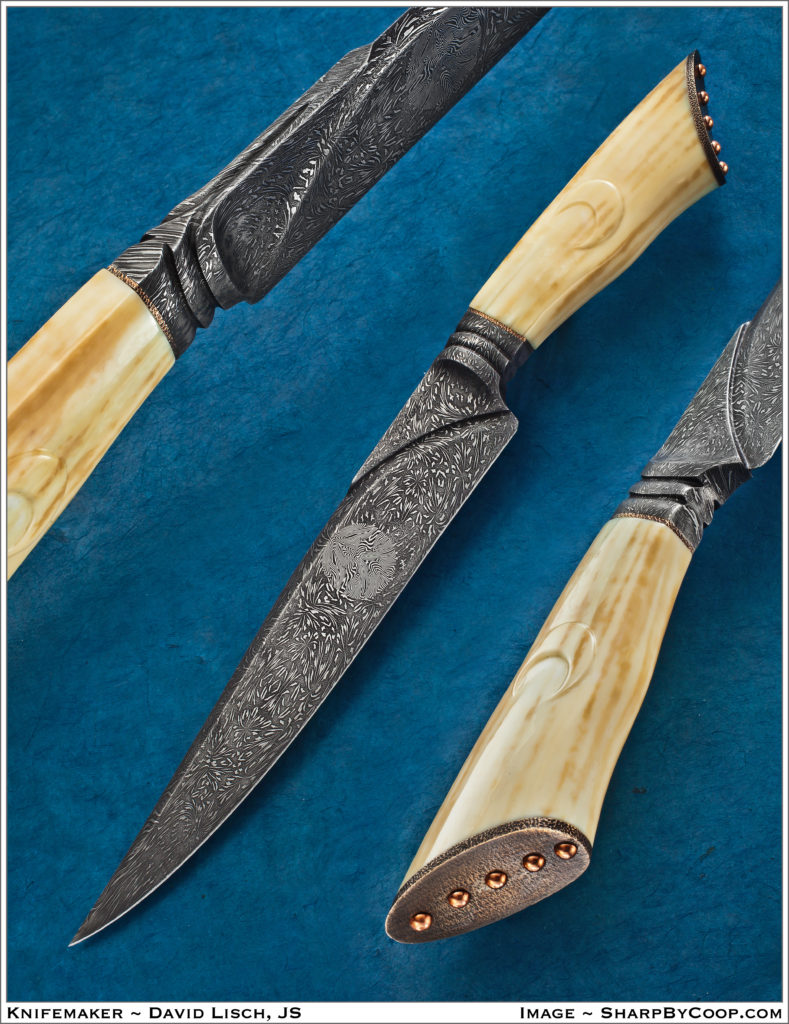
The Moon Fighter is one of two knives I have made in this style. The first one was the Sun Fighter. The Sun Fighter was the first time I made a knife using the plug weld technique. I took an order for a knife like the Sun Fighter. Since the resulting knife was slightly different, therefore I named it the Moon Fighter.

HOW DAVE DOES IT

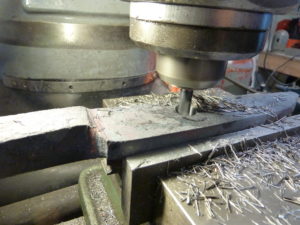
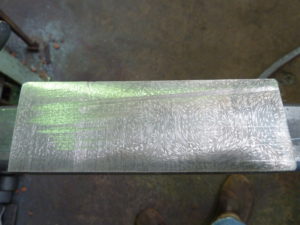
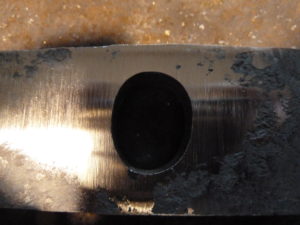
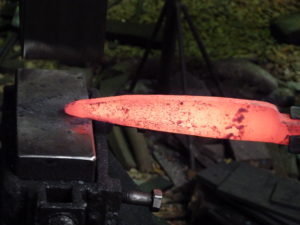
In Photo 1, I am cutting an oval hole into a forged integral blade. I forged the blade from a billet of my Star Night Damascus (Photo 2). It is important that the hole be an oval shape so it will be round once it is forged (Photo 3).

3: It is important that the hole be an oval shape so it will be round once forged.

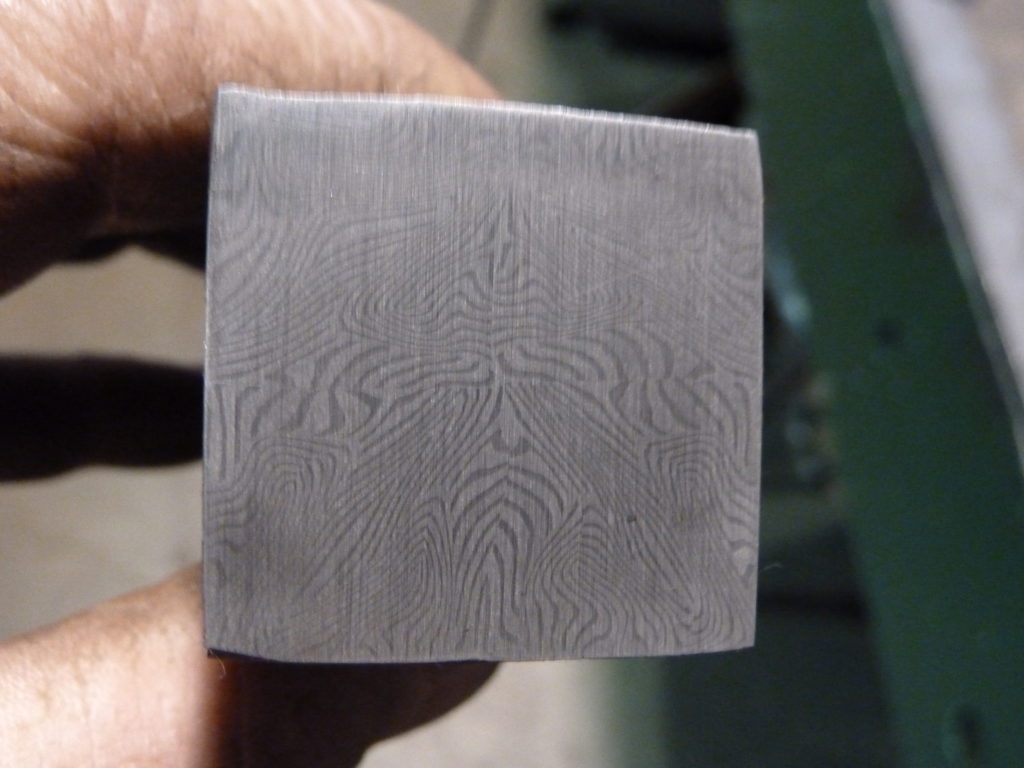
Blade thickness is just over 3/8 inch. This will give me room to forge the blade once I make the plug weld. Photo 4 shows the end of the moon billet. I will shape the square into the oval to the make the plug for the “moon.”

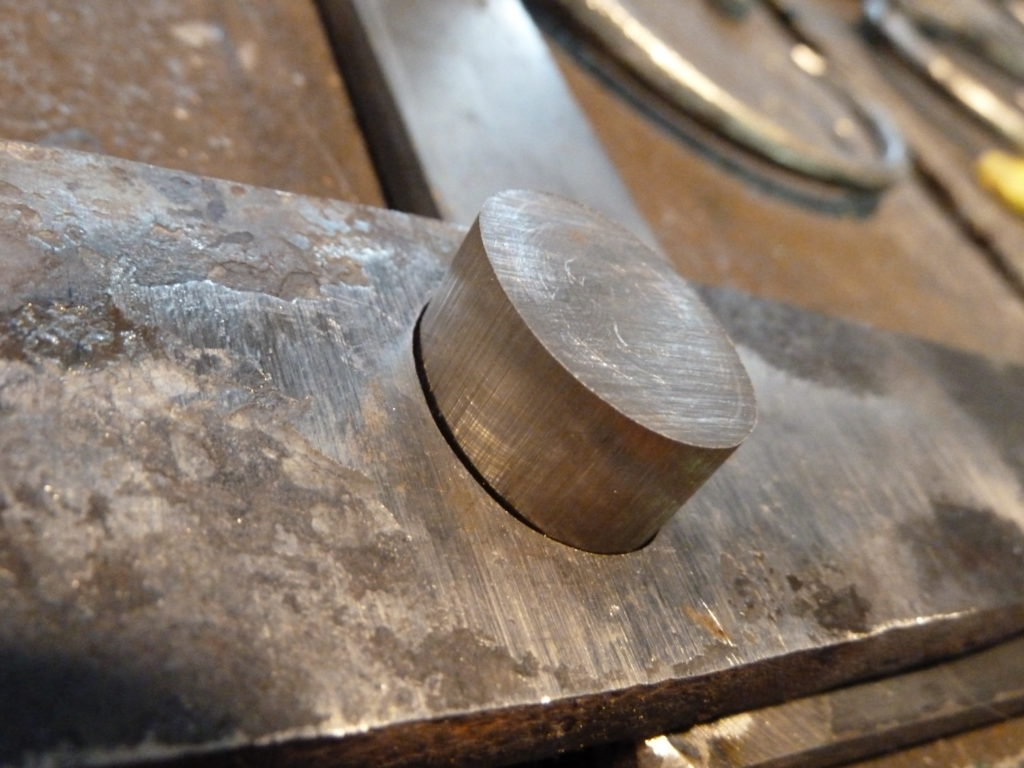
In Photo 5 you can see that the plug is ready for insertion into the hole. It is close to the right size but just a bit big. I put a slight taper on the edge of the plug so it can “find” the hole. The plug is an eighth inch thicker than the blade. This will allow the plug to expand and weld into the blade.

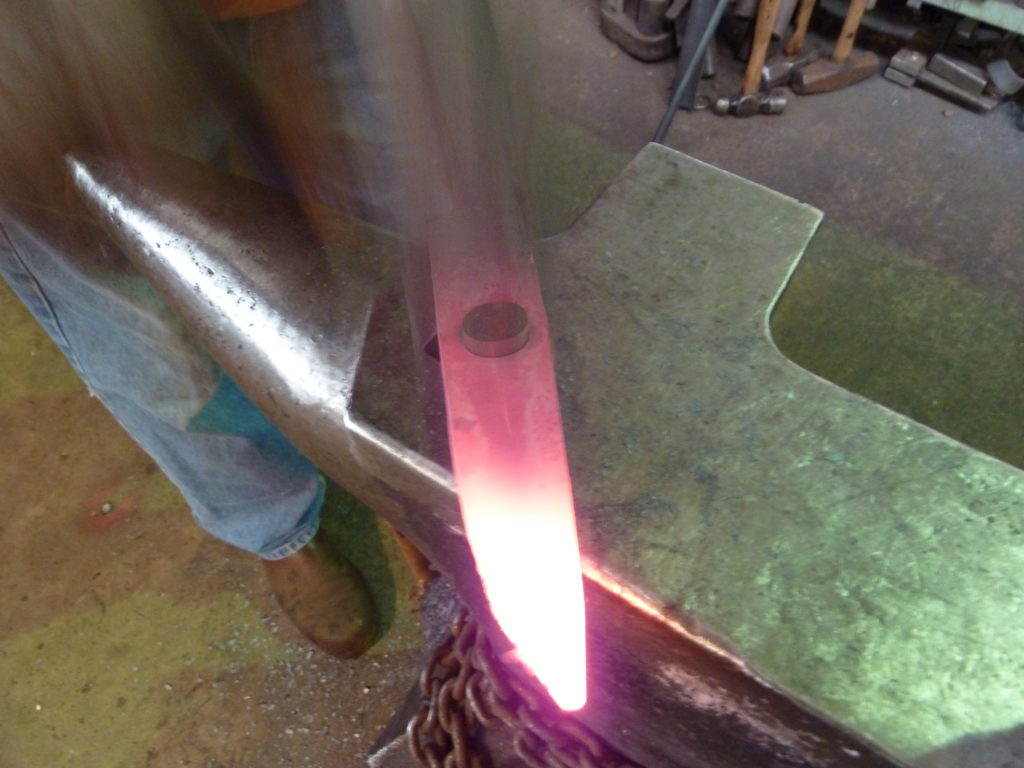
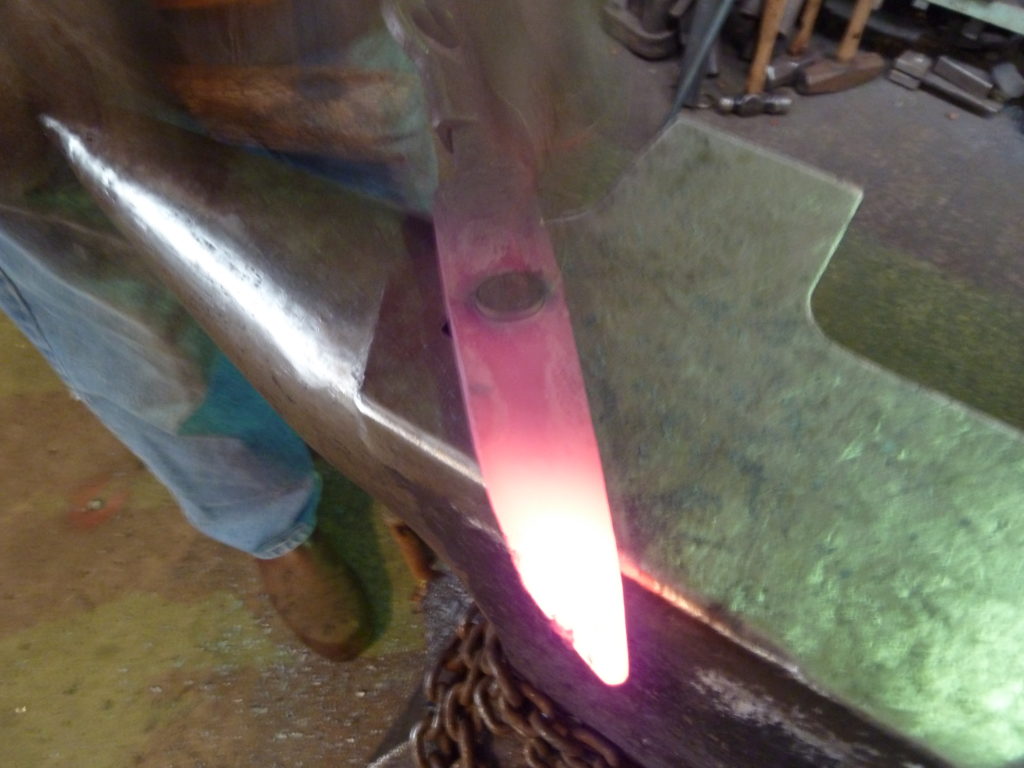
Above Photos 6 and 7: The hammer is a blur as the author pounds the plug into the hole in the hot steel.

With any process there is a learning curve. I learned that to get a really tight fit with the plug, it works best to put a dull red heat on the blade. Place the tapered plug into place and hammer it into the dull red blade (Photos 6 and 7). In Photo 8 the plug is in place. It is 1/16 inch proud on both sides of the blade. Back into the fire to a dull red and add flux.

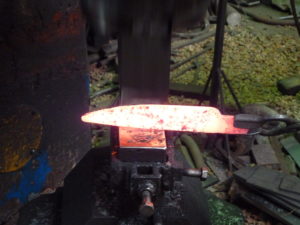
In Photo 9 I have made the first weld. The moon is still visible. In Photo 10 the moon is still a bit cooler than the blade and is getting a bit bigger. Now is the time for some heat. Photo 11 shows work at the power hammer for some drawing down of thickness and adding length to the blade. It also makes the oval moon round and very hard to see.

In Photo 12 I am forging the blade close to its final shape. In Photo 13 I am drawing out the tip, adding more length to the blade. The moon is very close to being round. After a few final taps under the power hammer (Photo 14), I will finish tuning up the profile by hand.

NO SET FORMULA

I do not have a set formula for this process. It is by gut feeling. I can see how much the steel moves when I forge it. The first time I tried it I put a round hole into the blade and wound up with an oval, so it made sense to start with an oval hole if I wanted to wind up with a round one.

With the Sun Fighter the blade was 480-layer damascus and the “sun” was a very tight W’s-pattern damascus. Once I made the initial weld, the blade was still over 3/8-inch thick at that juncture. I ground in sunrays on both sides then forged up the rays and the sun to its round shape. On the Moon Fighter I wanted the backdrop to resemble shooting stars. This took some trial and error and a lot more time than I thought it would to get a pattern I liked.

The result of the plug weld made to resemble the moon is plainly evident in the center of the damascus blade of the Moon Fighter by ABS master smith David Lisch (inset). (SharpByCoop knife photo)

NO LIMIT

There is no limit to the cool new things that can be done with damascus. I have heard folks say it has all been done before. Well, I don’t believe it. I think new and exciting things are happening in little knife shops all over the world, and the only way to keep things moving forward is to try new stuff and share the new things with everyone we can.

Please feel free to try this process. There are so many different things that can be done with it. When you come up with something new, share it so we continue to advance the art of damascus and knifemaking. Or, buy a damascus knife from your favorite maker and watch for that sparkle in his eye as he thinks to himself, “Cool, now I get to make another knife.”

Advertisement

Must Read Articles

Read this before you make a knife

Knifemaking 101 – Read This Before You Make a Knife

  by Wayne Goddard My experience has taught me that there's nothing like digging in and getting started. I've often said the hardest part of the...
how to forge damascus steel

How to Forge Damascus

Advertisement
Advertisement