Knifemaking is the building of a knife, which includes the blade, handle and other accouterments. Blades are made by either removing metal from a steel blank via a grinder – known as stock removal – and the forging to shape of hot steel into a blade in the process known as bladesmithing. Other parts, including bolsters, guards, pommels, etc., are needed to complete the finished knife.
How to keep your shop in operating order and maintain a safe and happy family life in the process
By Joe Calton
There have been tons of stories on how to be a knifemaker. Most are great and deal with subjects like taxes, suppliers, marketing, sales, bookkeeping and safety. Other great articles cover the technical side of how to make the knives you wish to sell, including stories on forging, grinding, heat treating, handles, sheaths and more.
My story will outline some things I have learned over the years as a full-time knifemaker in a home-shop setting that I think will benefit you, your knives and, most importantly, your family.
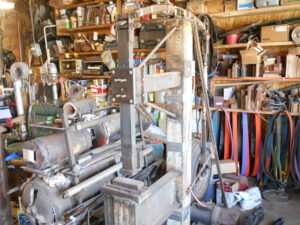
The author’s home-based shop is a two-car garage attached to the house by a single door. Sure it’s cluttered—but how much do you want to bet he knows where every tool, piece of equipment, grinding belt, spec book, etc., is?
The GREAT 8
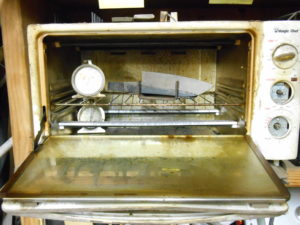
1) Buy a toaster! Your wife’s kitchen oven is not the place to be tempering knives, warming up knife sheaths for waxing them, heating Kydex® for the molding, or burning out axe heads. A $5 toaster at the flea market will do all that in your shop and is a bargain at twice the price.
Buy a toaster! Your wife’s kitchen oven is not the place to be tempering knives, warming up knife sheaths for waxing them, heating Kydex® for the molding or burning out axe heads.
2) Along with the toaster, while at the thrift shop get a selection of pots and pans, cutting boards and a small scale. Trust me, the lure of using one of your wife’s pots or pans for “just this one little project” will be too great—and that is not a road you want to travel! Forget this one and dinner may taste a little “off”—even if you were able to sneak the pan out of the kitchen and into the shop and back again.
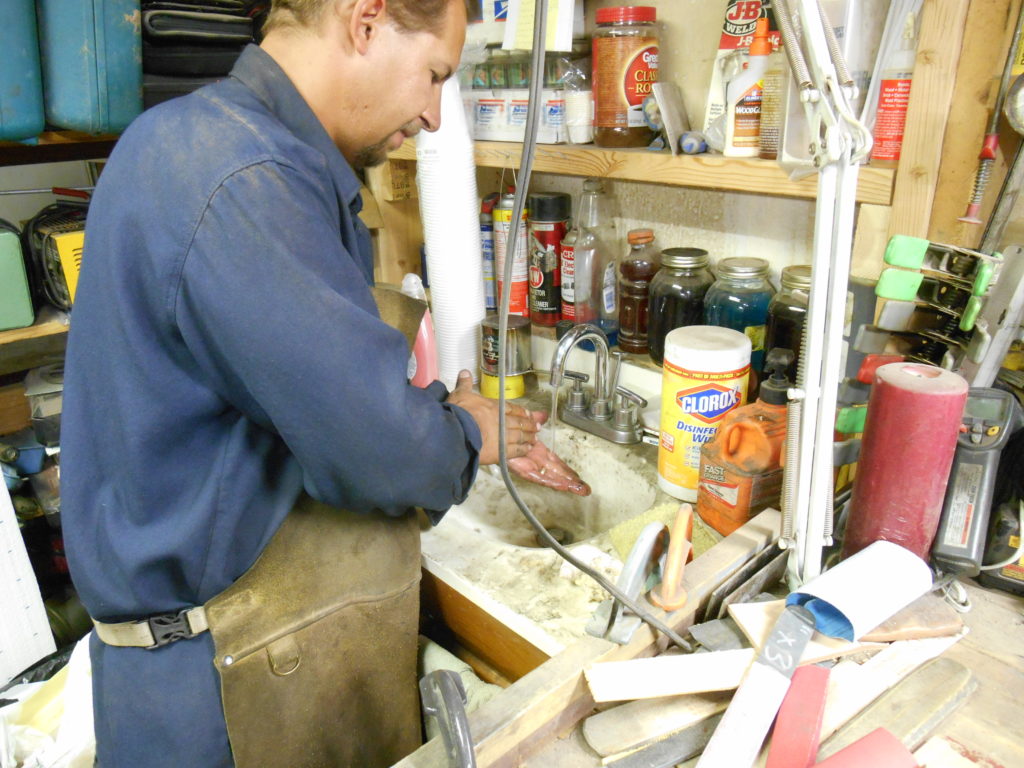
3) Install a sink in the shop. At the very least, put a five-gallon bucket of water on a stand for washing your hands before you head into the house. You may not mind grease, oil and dust prints on your clothes, but one time of leaving a smear of quenching oil on your wife’s nice clothes and your knifemaking will take a big hit. Spilling acid on a concrete floor also has far fewer ramifications than spilling it on the countertop in the kitchen. Oh—and don’t forget to wipe your feet on the way into the house.
Installing a sink will help keep things clean.
4) If who like your coffee as much as I do, get a big thermos, fill it in the morning, and take it to the shop with you. This cuts down on the trips away from the shop, as a trip inside the house to grab another cup can turn into an hour away by the time you get the cup, peek in the fridge, check for phone messages, etc.
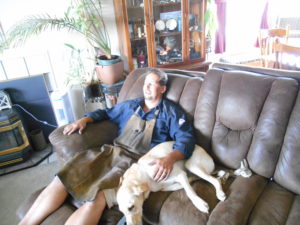
5) Know when to quit for the day. This is one lesson I’m still learning. You get wrapped up in your work and the next thing you know it’s 2 in the morning. Not only will you spend that night on the couch, but you may spend the next one there too if, as a result, you also forgot the plans you made, dinner, one or more of the kids’ school activities, etc. It’s tough to make good knives after a rough night on the couch.
When working in the shop, don’t lose track of time and work too late or else you could forget to do important family jobs—and wind up being relegated to sleeping one or more nights on the couch with Fido as a result.
6) Use some of your knife money to buy your wife flowers. Buy them on a regular basis. Put it on the calendar if you must so you will remember. Think of the flowers as supplies, like grinding belts. This is very important! Not if but when you forget one of the preceding tips, hopefully you will have gotten her flowers recently—and it just may save your bacon. For the home-based knifemaker, buying flowers for the wife is at least as important as safety glasses. You can continue to make knives with only one eye but you cannot make knives if you have been dispatched with a heavy frying pan.
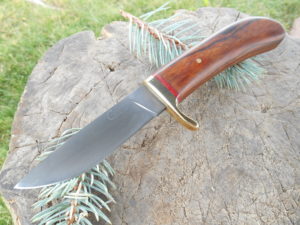
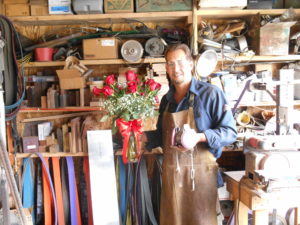
In order to have the wherewithal to make such knives as his drop-point hunter, the author keeps peace with his wife by buying bunches of roses on a regular basis.
7) Know that what happens in your shop does not stay in your shop, and act accordingly. Dust from exotic woods will make it into your home. You may not be allergic to them but your wife, kids or family pets may be. Keep an eye peeled for anything out of the ordinary when introducing new woods or materials into your shop. This also goes for smoke from quenching. Use “green” quenchants when you can, including vegetable-based oils and water. And keep the door to the rest of the house closed until you clear the air.
8) If you’re considering moving your shop away from your house, think long and hard about it. Yes, a home-based shop offers some challenges. However, it offers quite a few benefits, too. Among them: the morning commute is a thing of the past so you save fuel and time, you have a good place to fix toys and household appliances, and everyone always knows where to find you. If you are a workaholic like me, the home-based shop keeps you at home instead of at the office. Move the shop as some friends of mine have done and you may end up moving it right back.
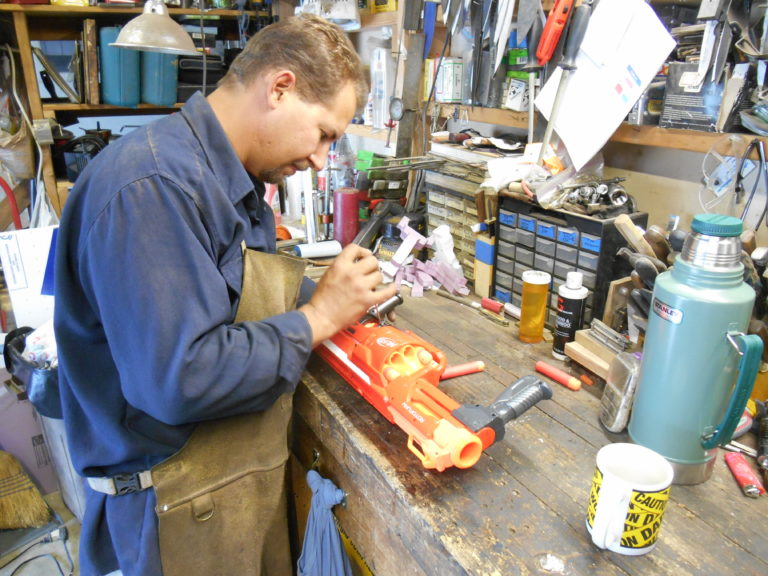
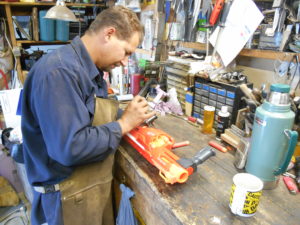
A benefit of a home-based knife shop is that you can also repair appliances, junior’s toys, etc. And don’t forget to buy a big thermos for plenty of coffee so you don’t have to make return trips to the house for that extra cup.
Also, when you take a break, throw a load of clothes in the washer and they will be ready for the dryer by your next break. Or, you can start a crock-pot meal for that evening’s dinner. By the way, there is no better test of the kitchen knives you make than to use them in making dinner a couple nights a week. This is a twofer in that not only do you get the immediate feedback from hands-on testing, but also the household benefits of cooking a couple meals a week will go far toward keeping your knifemaking in the good graces of “The Boss.”
2 BIGGEST CHALLENGES
My list of tips is not complete. It is based on my experiences in working from a home-based shop, which is a two-car garage attached to the house by a single door. You may be in a detached shop or a basement. Whatever your setup, I hope I have helped with two of the biggest challenges faced by a knifemaker in a home-based shop: keeping the shop in operating order and maintaining a happy home life in the process.
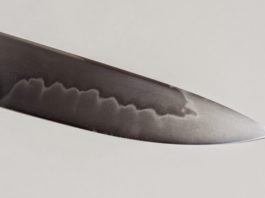
Install a sink in the shop. You may not mind grease, oil and dust prints on your clothes, but one time of leaving a smear of quenching oil on your wife’s nice clothes and your knifemaking will take a big hit. The sheath knife with blade hamon and wood handle and brass rivets is by the author.
What is the purpose of stropping? Is it the same as sharpening a knife? We’ll answer those questions and more as we explore how to put the finishing touches on a blade.
Burr is a term used to describe the turned-over edge of a freshly sharpened blade. The burr can be seen as an ultra-thin, wire-like structure at the edge. When sharpening you are bringing one edge surface closer to the other edge surface with alternating and even strokes, left-right-right-left against an abrasive such as a sharpening stone or metal grade sandpaper or strop. By alternating sides you simultaneosly remove surface material from both of the sides forming that burr. Sharpen back-and-forth, one side and then the other, and the burr appears.
What Sharpening Does To A Blade
At first the two opposite sides are divided by the blade’s edge thickness and there is no burr. This is seen as that paper thin shiny line from tip to choil. As one side is brought closer to its opposite side (i.e. sharpened), one side or the other will eventually meet the other and the thin shiny line will disappear.
At that point there isn’t enough mass to support the edge against the hard-abrasive surface, and the super-thin edge rolls/curves over in the opposite direction, forming the burr. The burr can be seen with the unaided eye and felt with your thumb. The objective at this point is to switch and sharpen the edge from the other direction with a yet finer grit abrasive. This maneuver makes an even smaller and thinner burr on the opposite edge. After you sharpen several times like this in opposite directions, with finer and finer grit paper, the burr will be reduced microscopically and be difficult to see or feel but will still be there. This final use of fine grits of abrasive is considered, and is called, a hone.
What Stropping Does
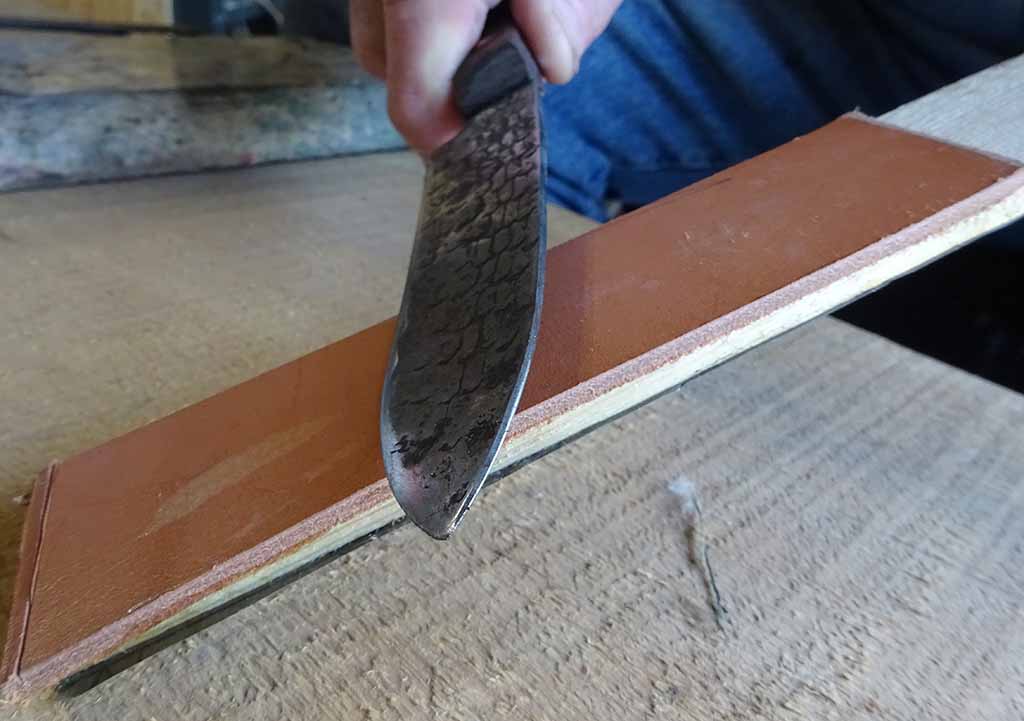
At this point switch from a superfine hone-grit paper (1500 plus grit) to a leather strap, belt, or section of a belt, called a strop. The fine sandpaper hones, and the leather strops. Strop with the same back and forth motion, strop the blade’s edge against the leather. This action bends the now unseen burr back and forth against the leather and the burr finally breaks free. The edge thickness is now just paper thin or less. So “paper thin” doesn’t sound like the edge would bear up during use, being this thin, right on the very pinnacle of the blade’s edge—but it does.
With removal of the burr the edge acquires maximum sharpness and can be re-honed repeatedly without subjecting the blade to recurring sharpening cycles with lower grit sandpaper. This maintains the thin-and-sharp element of your blade.
Choosing A Strop
Make your strop from a strip of leather belt (10-inches long) glued to a bit of yardstick or lath material. Glue a strip of 800-1500 grit wet-n-dry sandpaper to the other side for a hone.
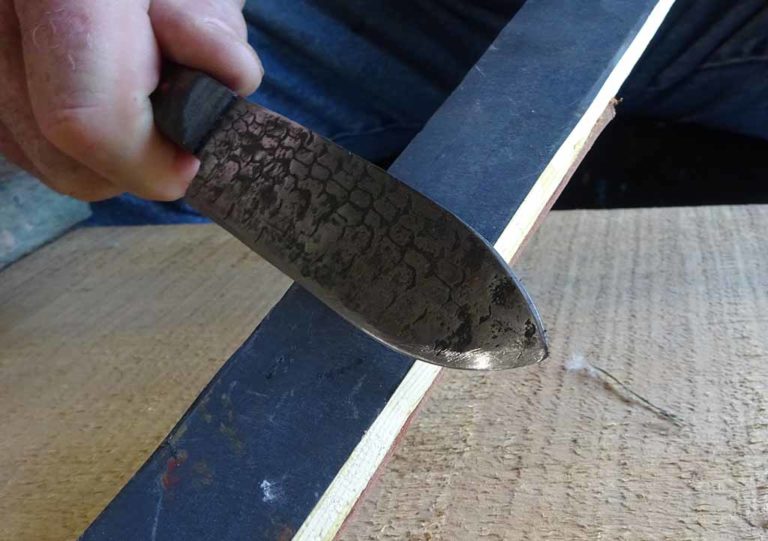
The same exact motion is used on the leather side of the strop stick. When the smith is “into” the motion it is similar to a continuous figure-8 movement. Most of the time the leather is enough to restore the blade’s edge without using the sandpaper side of the stick.
How To Strop
Stropping is a low-angle slap and slide motion. The leather actually sharpens the microstructure of the blade’s edge. It 1) bends the burr back to a sharp edge or 2) bends it back and forth till it breaks, like bending a wire coat hanger back-and-forth, revealing a new raw edge. Visualize a barber in an old-west, cowboy movie slappin’-n-slidin’ his straight razor on a big leather strop. Slap-n-slide your Frontier blade on the 800 to 1500 grit black W/D sandpaper 10 to 15 times then on the leather the same number of swipes. When your edge dulls you can often just strop with the leather, forgoing the hone altogether, in the restoration of a keen cutting edge.
After stropping, if your knife edge isn’t near razor sharp, go back to your wet-n-dry-sharpening action with the higher numbered sandpaper grits (400, 600, 800) then strop again.
Testing The Edge
Feel the edge with your thumb, perpendicular to the edge. Never run your thumb or fingers vertically up or down the blade. It will cut. With time you’ll be able to tell in an instant various level of sharpness with just your thumb. With time you will feel the burr and know the angle of any blade with just a touch of your thumb.
Another sharpness indicator is the use of an old leather belt or scrap of leather. Almost any “sharp” knife can cut a sheet of paper but stiff leather is the true challenge. First, use a knife of known sharpness. Cut a bit from the leather. Note the force needed to peel off a few pieces of leather. Use the same piece of leather on subsequent blade edges you sharpen in the future. By comparison, the quality of those blades’ sharpness can be gauged.
The bowling ball vise makes knife handle work easy and inexpensive
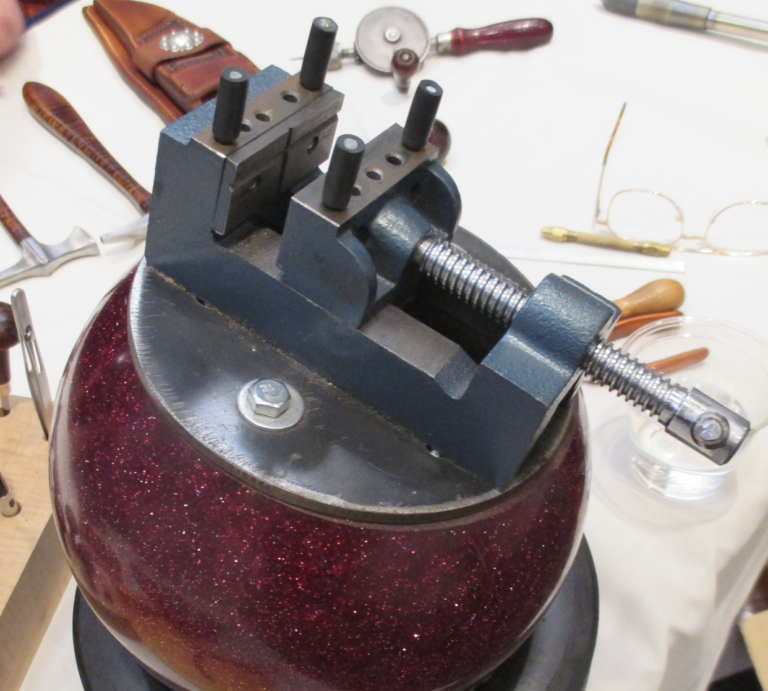
As the old adage goes, “necessity is the mother of invention,” but whoever thought of making an engraving vise out of a bowling ball deserves a medal!
The engraver’s vise, which has a rotating base so the craftsman can position his work at any angle, has been around for many years. Small versions are affordable but one big enough to accept a large knife handle can cost in the $600-to-$700 range.
Enter the bowling ball vise.
American Bladesmith Society Master Smith Don Hethcoat has made several bowling ball vises, including one for fellow ABS master smith Joe Keeslar. Both makers find the vise particularly useful for inlaying gold and silver wire into knife handles. “I learned about the vise in 1988,” Hethcoat recalls. “I wish I could take credit for creating it, but I first saw it being used by Firearm Engravers Guild member John Barraclough.”
“The first and only bowling ball vise that I ever had was a gift from Don Hethcoat many years ago,” Keeslar says. “In my Kentucky shop I use an engraving ball for my silver wire inlay work, but for my shop and demonstrations in France I use a bowling ball vise. I could not afford to buy a second engraver’s ball for my shop abroad.”
Used bowling balls are cheap, and beyond that the biggest expense to making a bowling ball vise is adding a machinist’s vise on top of the modified sphere. The cost for these items is a fraction of what an engraver’s vise costs, and the rest of the materials to complete the vise are very affordable. Indeed, they can be found around your shop, home or at your local scrap yard.
IMPROVISING WELCOME!
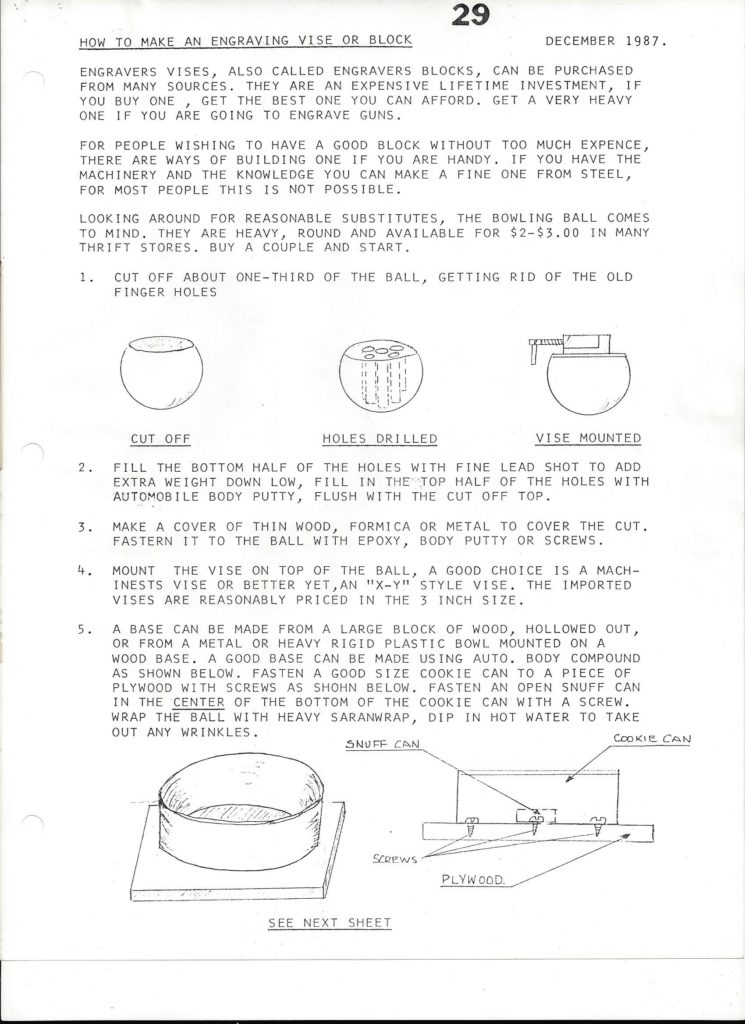
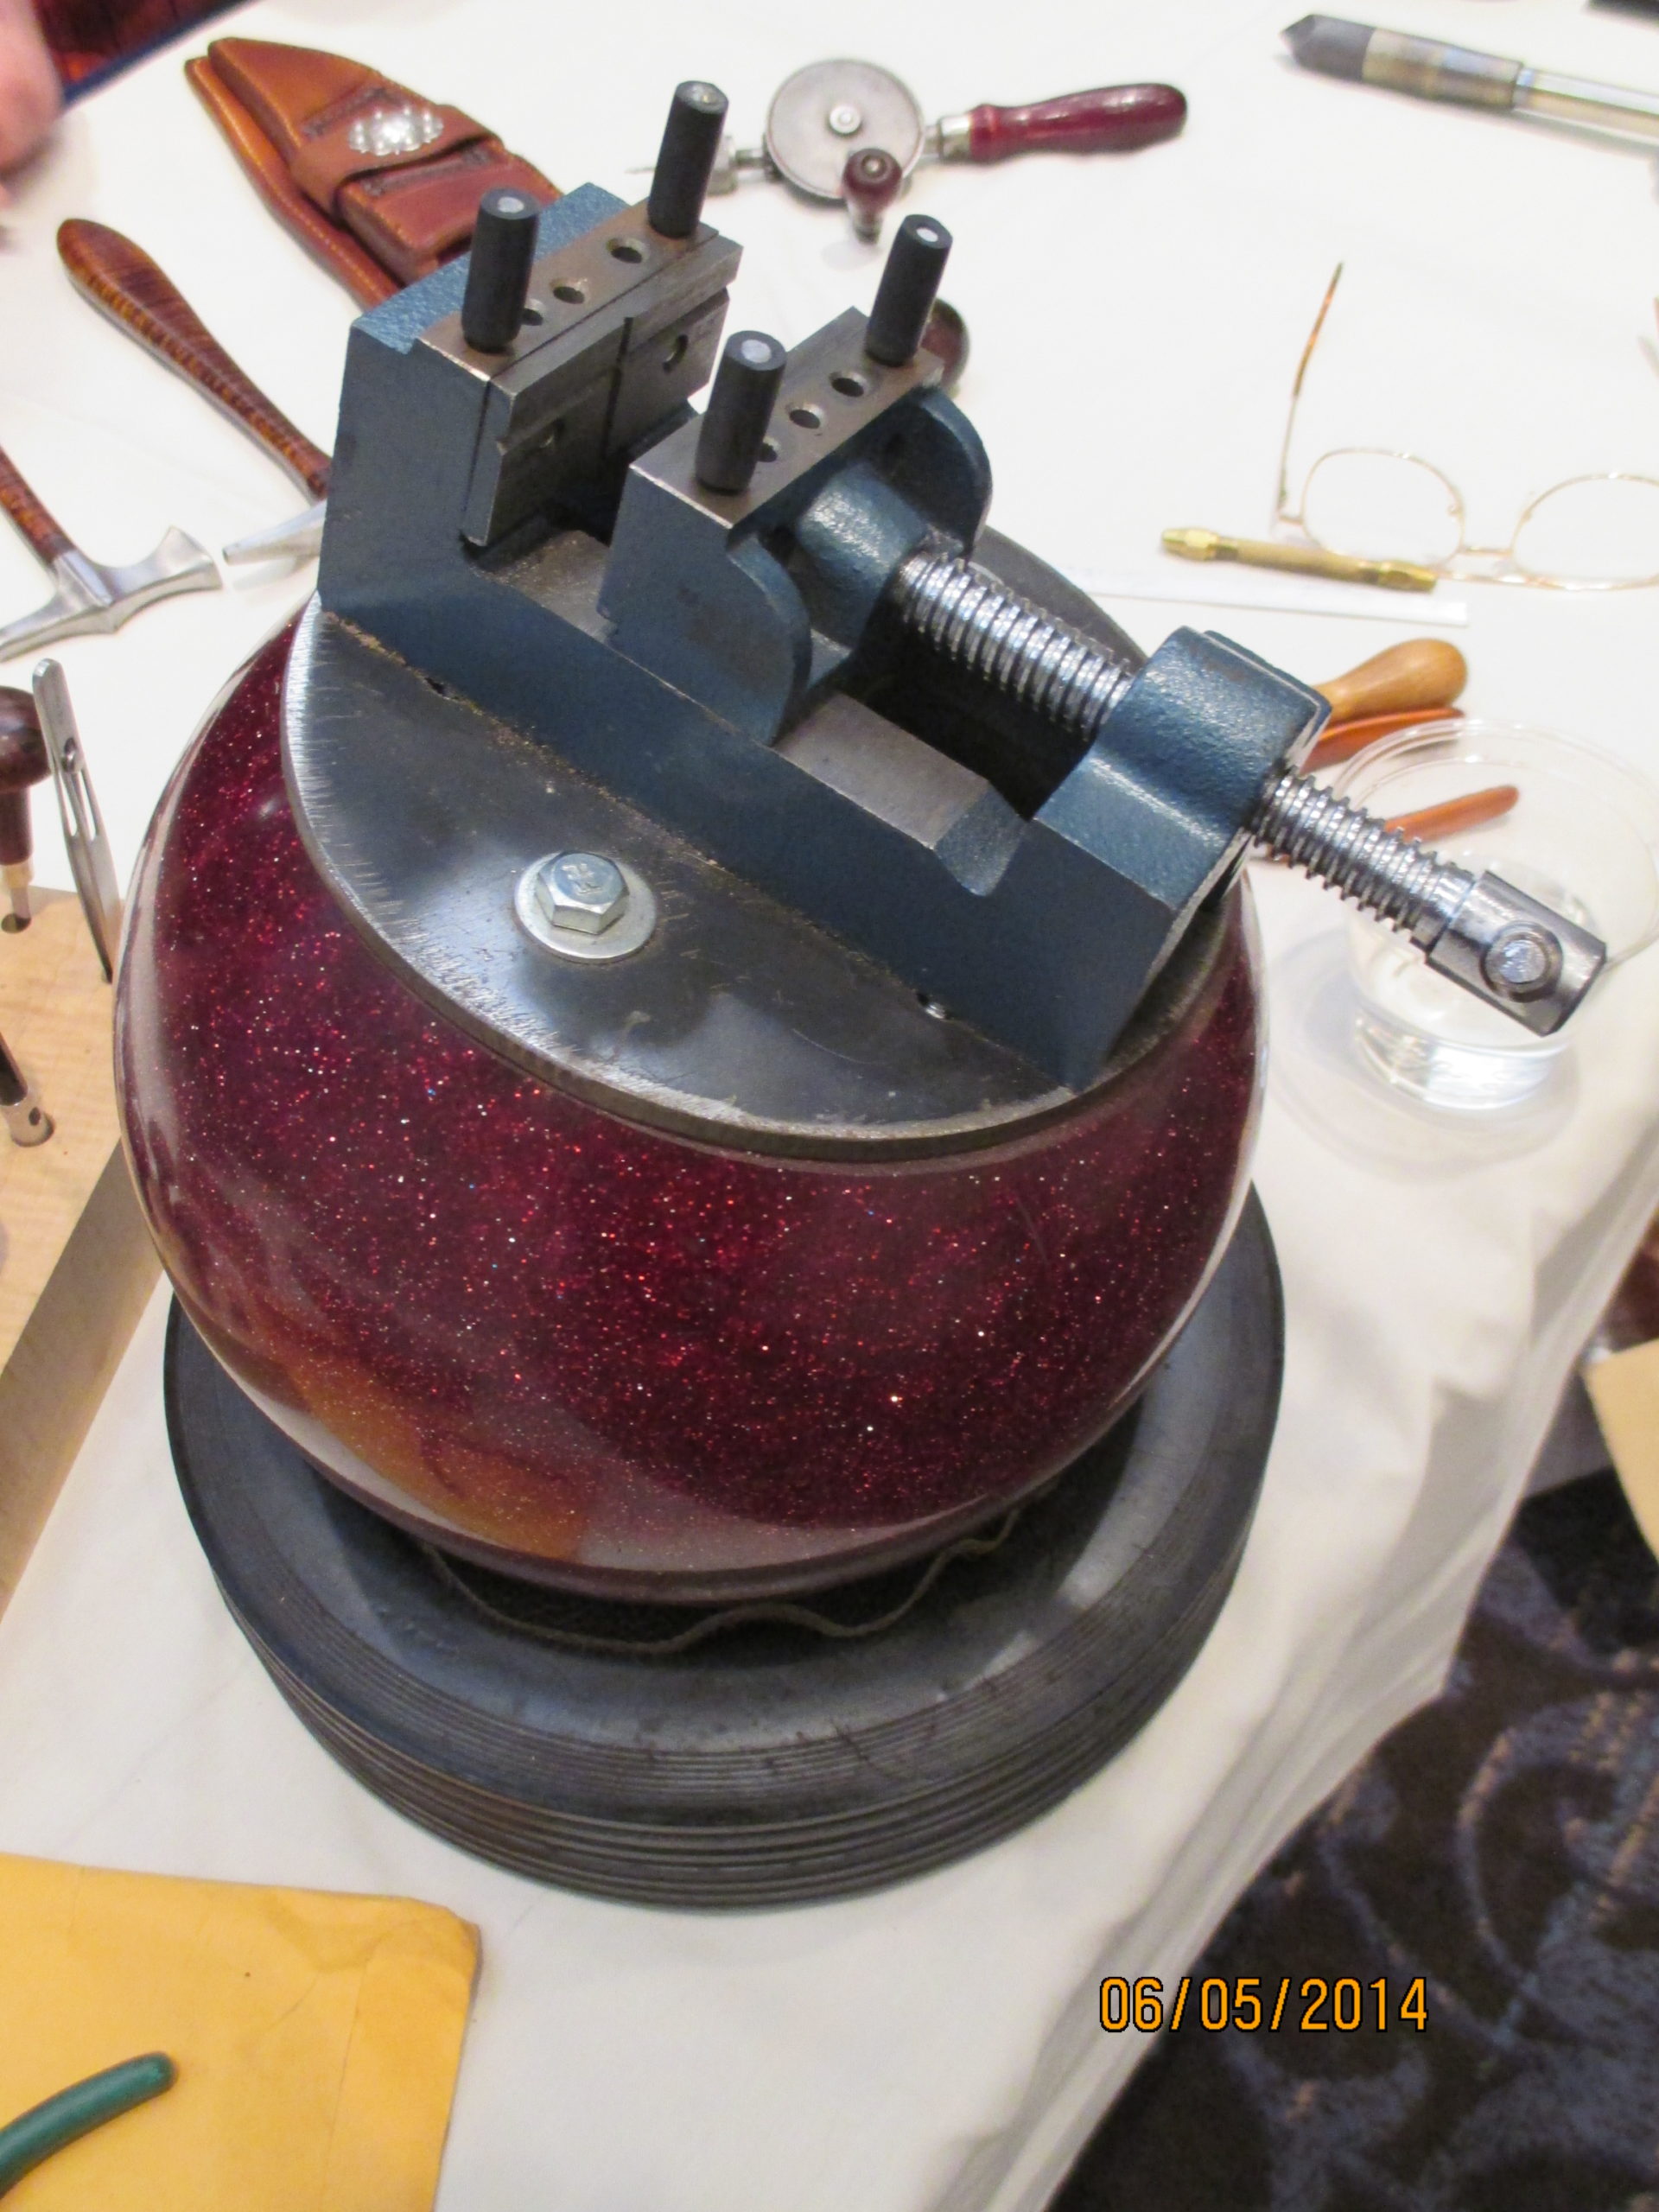
While the basics of making Hethcoat’s bowling ball vise are outlined in the below photo, there’s no reason you can’t add your own personal touches or substitutions. For instance, Don uses a piece of round pipe for the base of his vise, but Joe has a different way of skinning the cat. “My bowling ball sits in a lawn mower tire with the rim removed,” Keeslar notes. “It’s best to have a tire with rim diameter of about 6 inches. If no used tire is available, a new one can be found at a Harbor Freight store.”
There are other differences between the two makers’ vises. Hethcoat uses a bench-mount machinist’s vise mounted to the top of his modified bowling ball, while Keeslar prefers a low-profile drill-press vise commonly used for drilling and milling. Both vises work fine and your choice may be determined by factors such as your height in relation to your workbench or the configuration of the vise jaws that suit you best.
The jaws of the vise will need to be padded to keep from marring the knife handle. Here again, choose your preferred padding material. Thick leather will work as well as high-density foam—or take a look around your shop and use your imagination.
ROLL on a BUDGET
As a long-time instructor on how to make knives, Keeslar says beginning students may not have the money for expensive equipment, so he uses his bowling ball vise as an example of how they can get started without a huge investment.
“I personally use an engraver’s ball for my silver wire inlay, but the bowling ball vise is very inexpensive to make and affordable to use,” Joe observes. “When doing demos here in the U.S. [and abroad], I use the bowling ball vise to demonstrate to my students an easy way to get started in doing wire inlay. I also show them how to make the stabbing chisels and the like. So much of what is needed to produce knives is expensive and this is one activity that one can do for a small investment.”
It’s all about saving money. The extra cash you save by making a bowling ball vise can be poured into better handle materials—everything from wood to wire. This translates into a more upscale knife for your own satisfaction or, if you sell your wares, a higher price you can get from a customer. You’re a winner either way!
6 Easy Steps to Make the Bowling Ball Vise
According to ABS master smith Don Hethcoat, “Bowling balls make the perfect vise for knifemakers doing inlays and similar close work where you need both stability and flexibility. You can buy an old bowling ball at a flea market or thrift store for two or three dollars.”
In his own words, here are Don’s six steps:
1) “Saw off about one-third of the bowling ball, getting rid of the old finger holes. I used a metal band saw but you may have other means”;
2) “Drill five holes in the flat top of the ball, one at each corner of a square with one in the middle using a half-inch drill bit, then chisel out a cavity in the center of the ball”;
3) “Fill the opened cavity almost to the top with lead shot to add weight, then seal the shot to the top of the hole with automotive Bondo® filler”;
4) “Make a round cover for the flat top of the ball using metal, wood or Formica®. Mount your vise on top of this. Mine is a machinist’s vise using its mounting system”;
5) “Make a base and you’re almost done. I used a round piece of 8-inch pipe cut to 2.5 inches in depth. Fill the pipe with Bondo, cover it with Saran™ Wrap and push the bottom part of the ball into it to make an impression. Clean up the excess Bondo [or, you can use the lawn mower tired described by Joe Keeslar in the story]”;
6) “Cut a round piece of suede to fit inside the round cavity so the ball can rotate freely. That’s basically it! Feel free to modify the vise to fit your own scenario.”
1 of 5
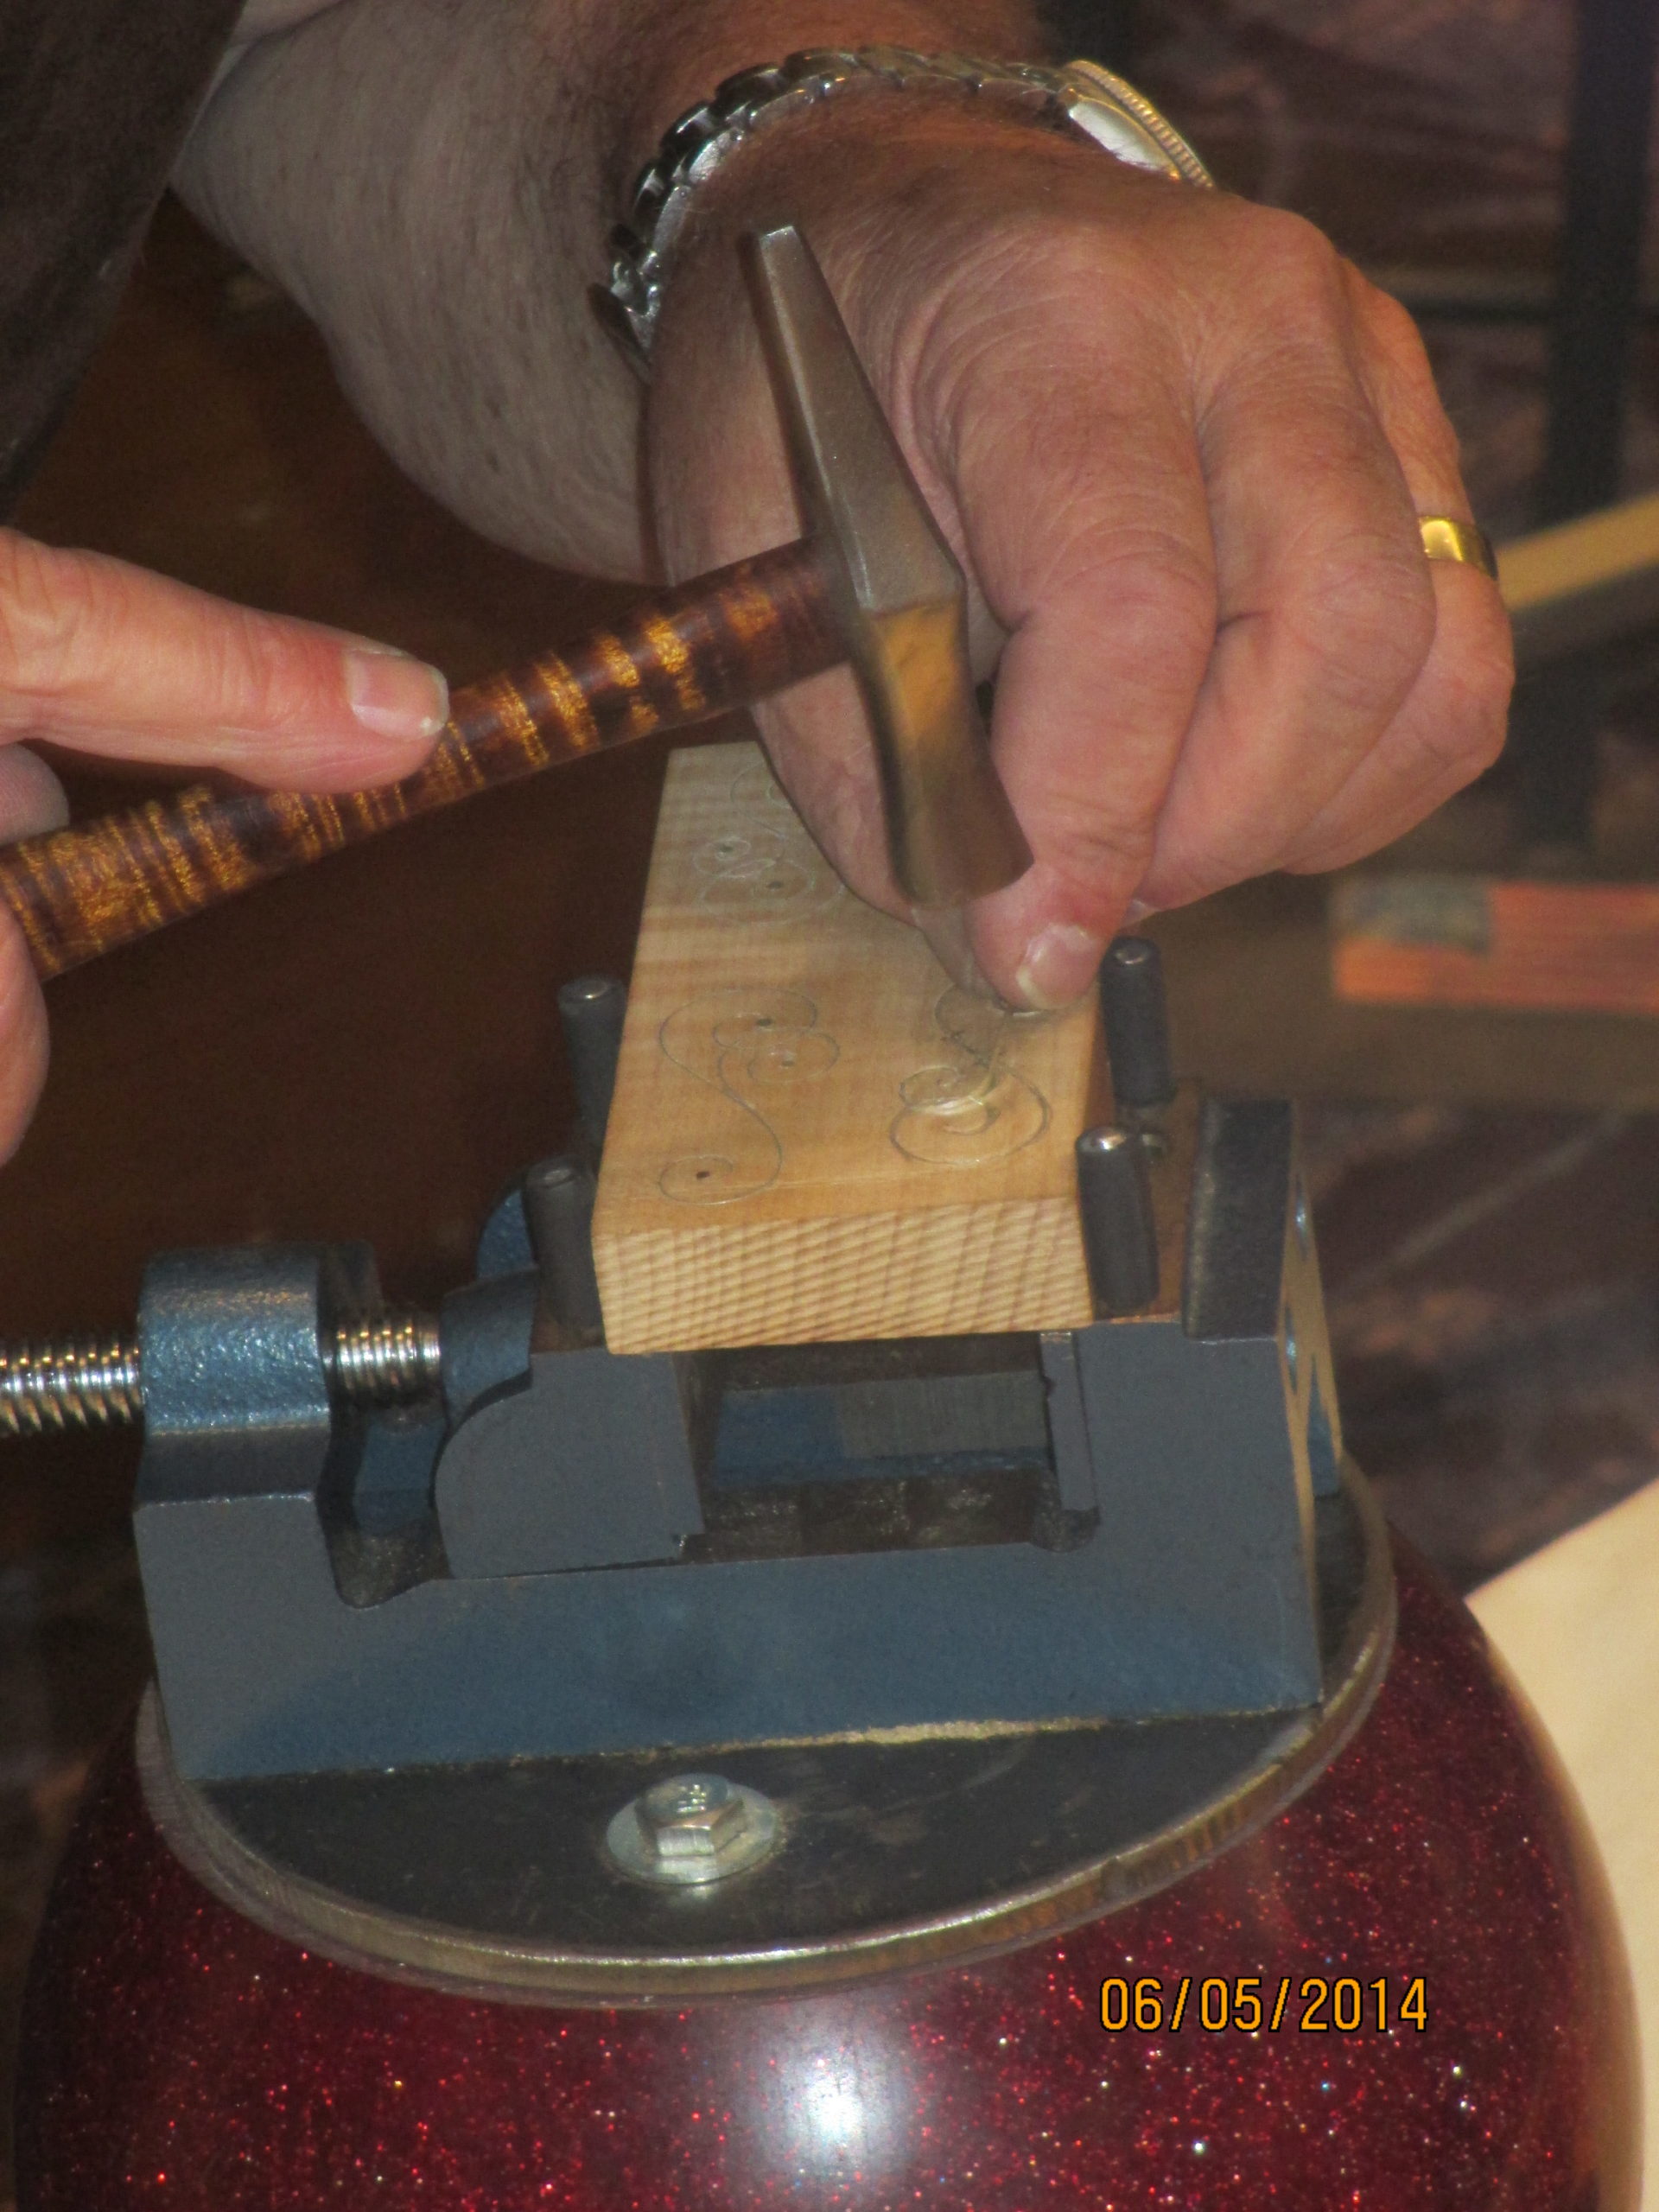
The bowling ball vise holds the wood securely as Keeslar lightly hammers the silver wire during his BLADE U. class.
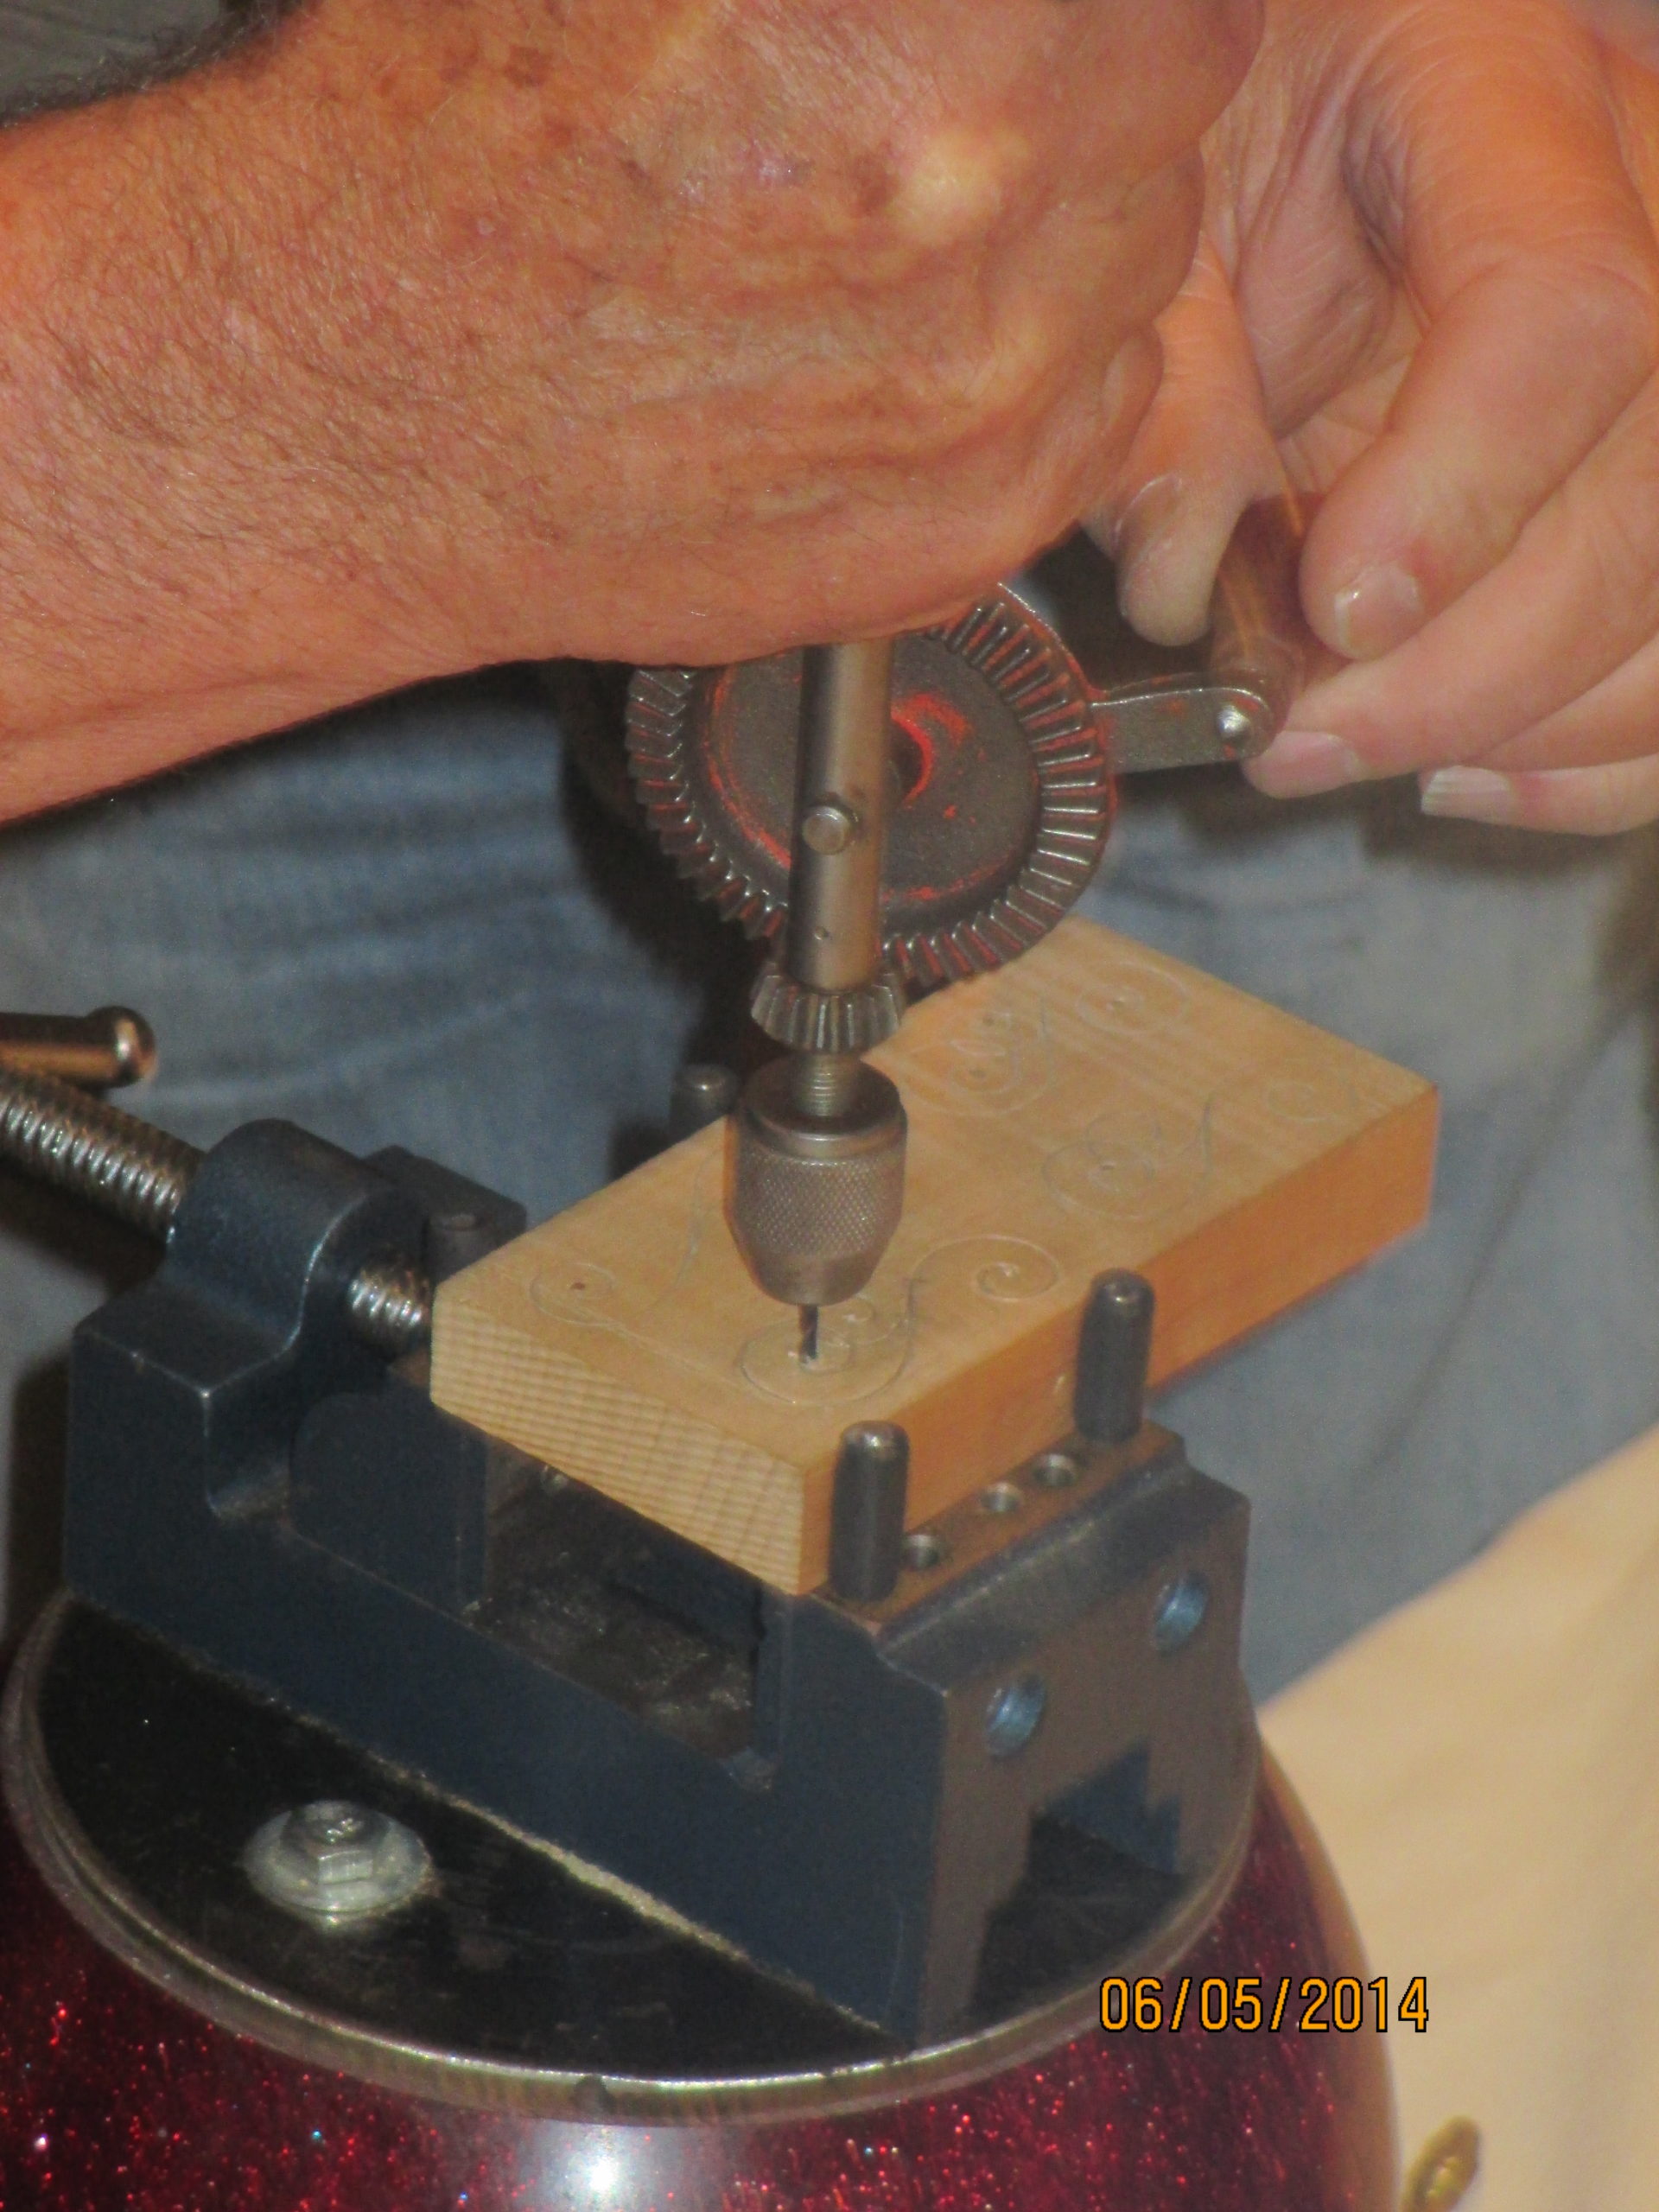
Keeslar uses a hand drill on the vise-held wood during the wire inlay process in his BLADE U. class.
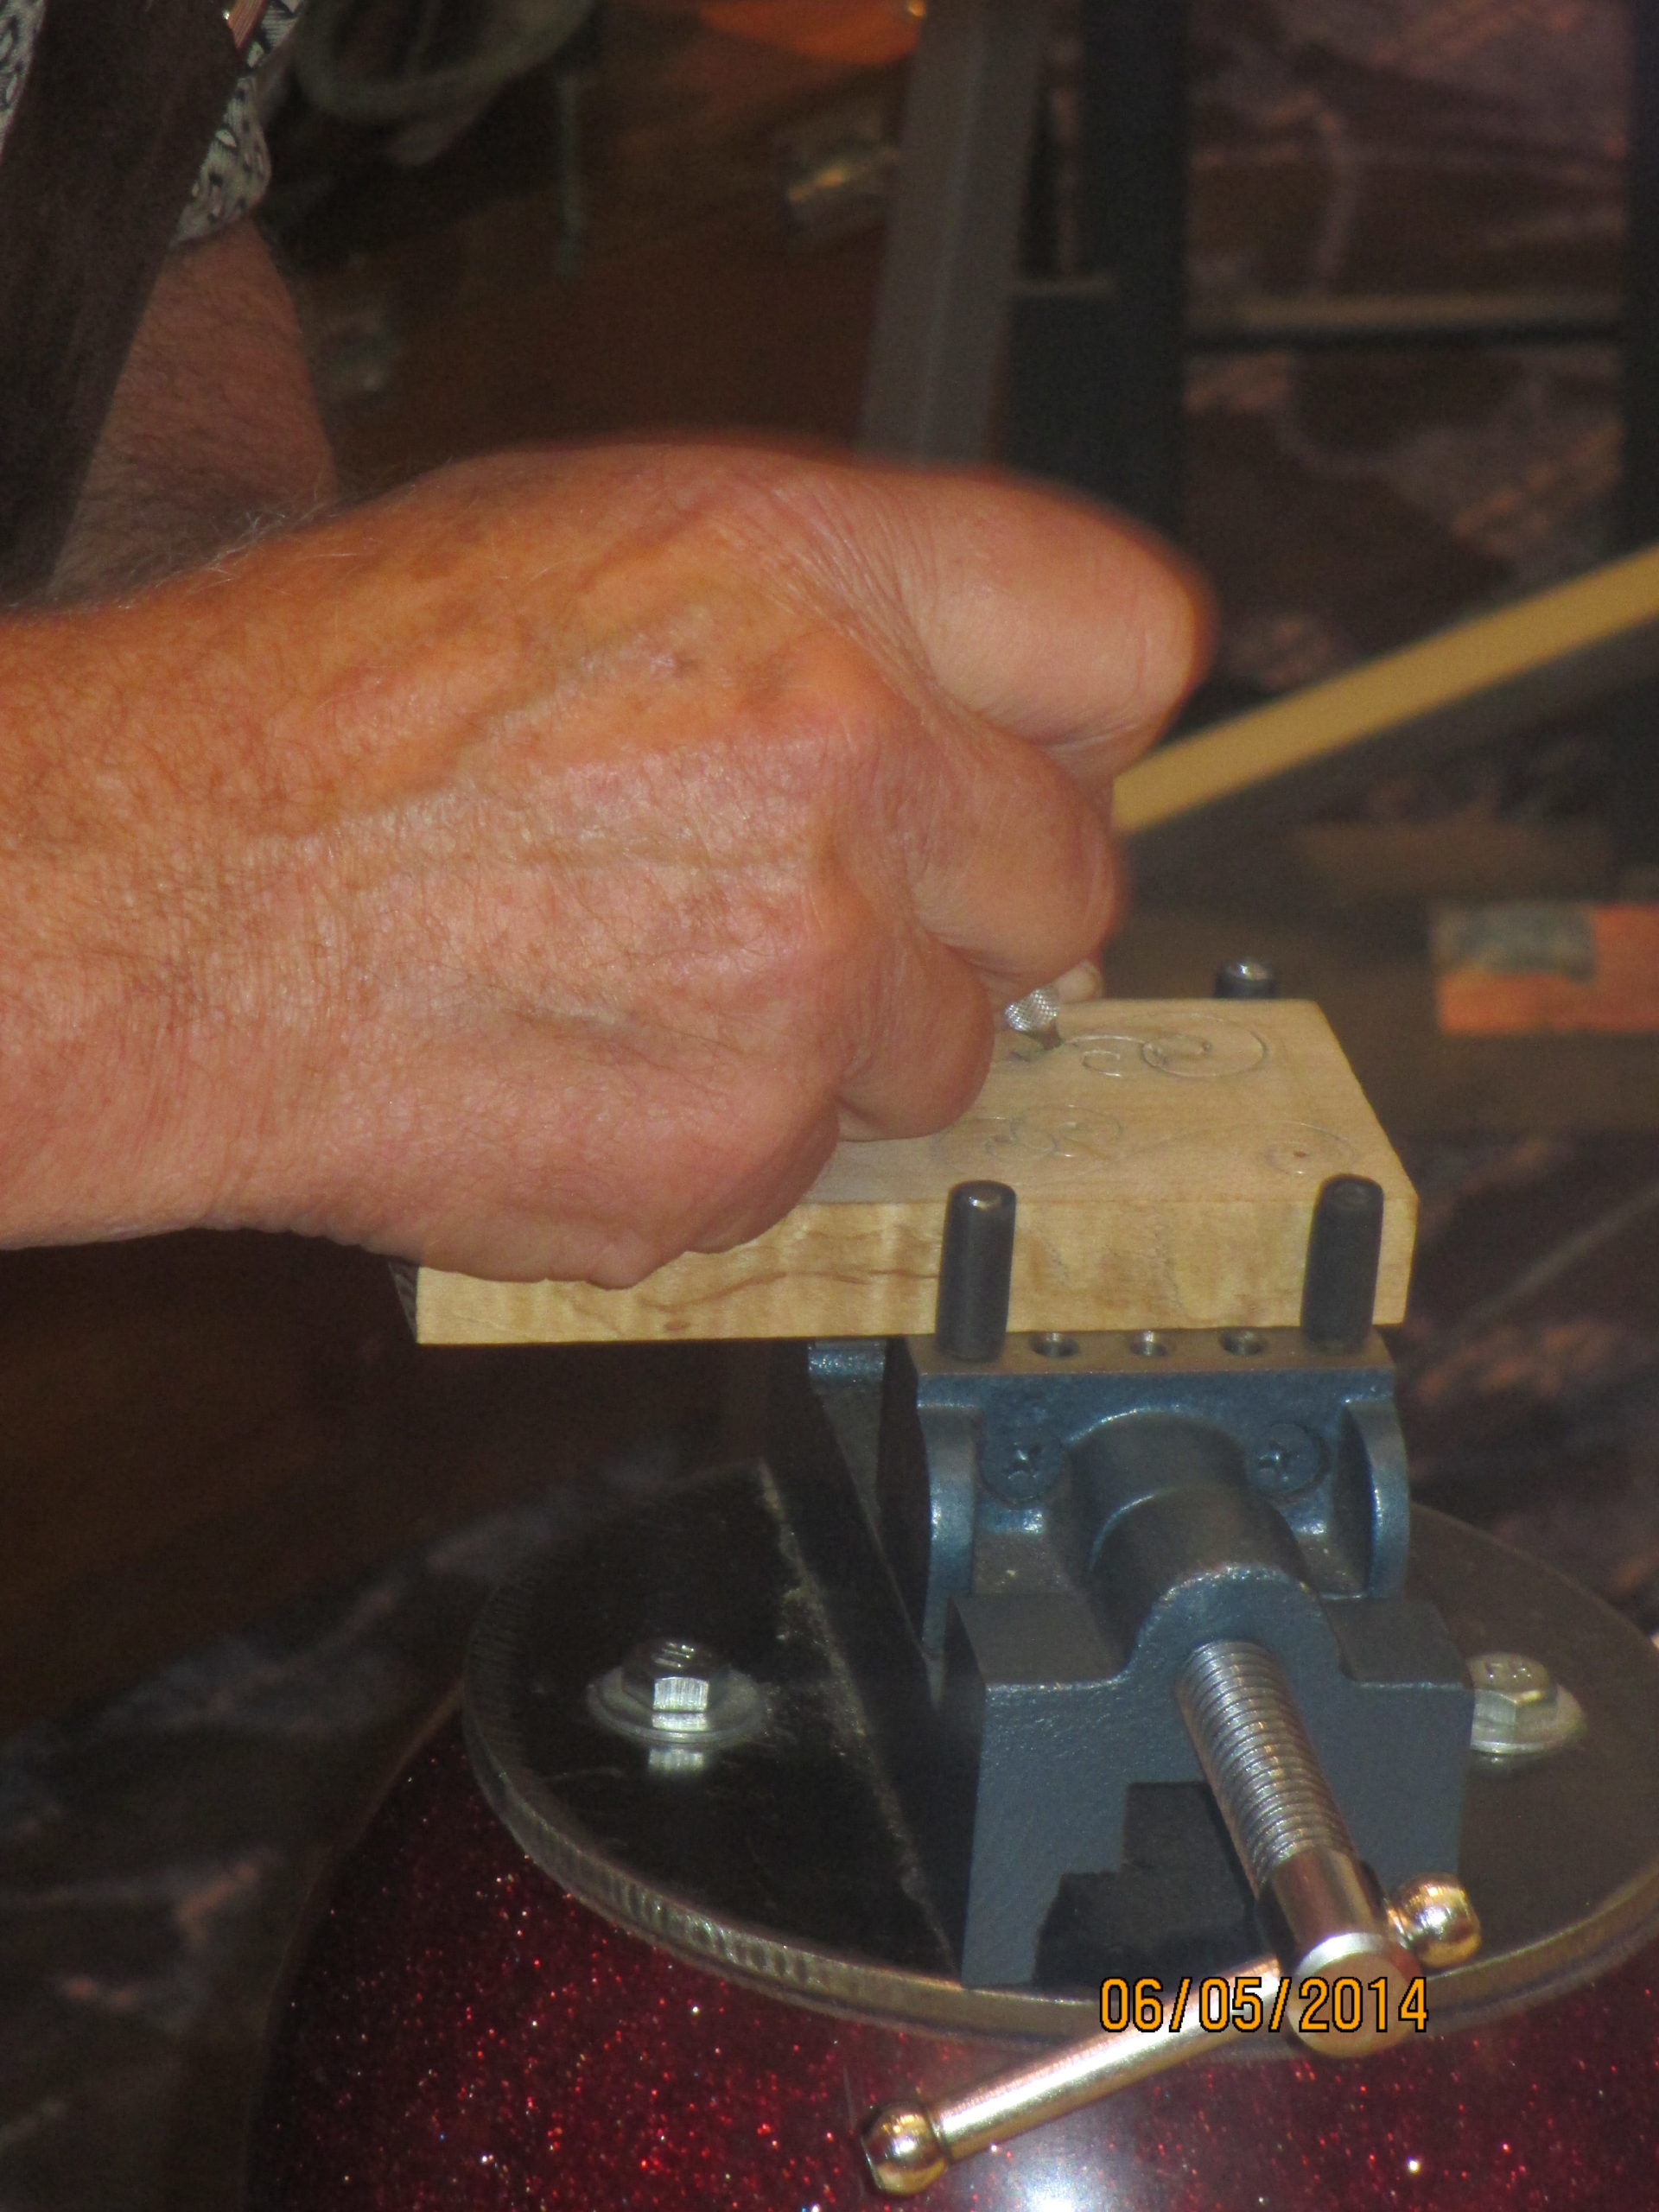
Keeslar punch presses the silver wire into the wood held in the bowling ball vise.
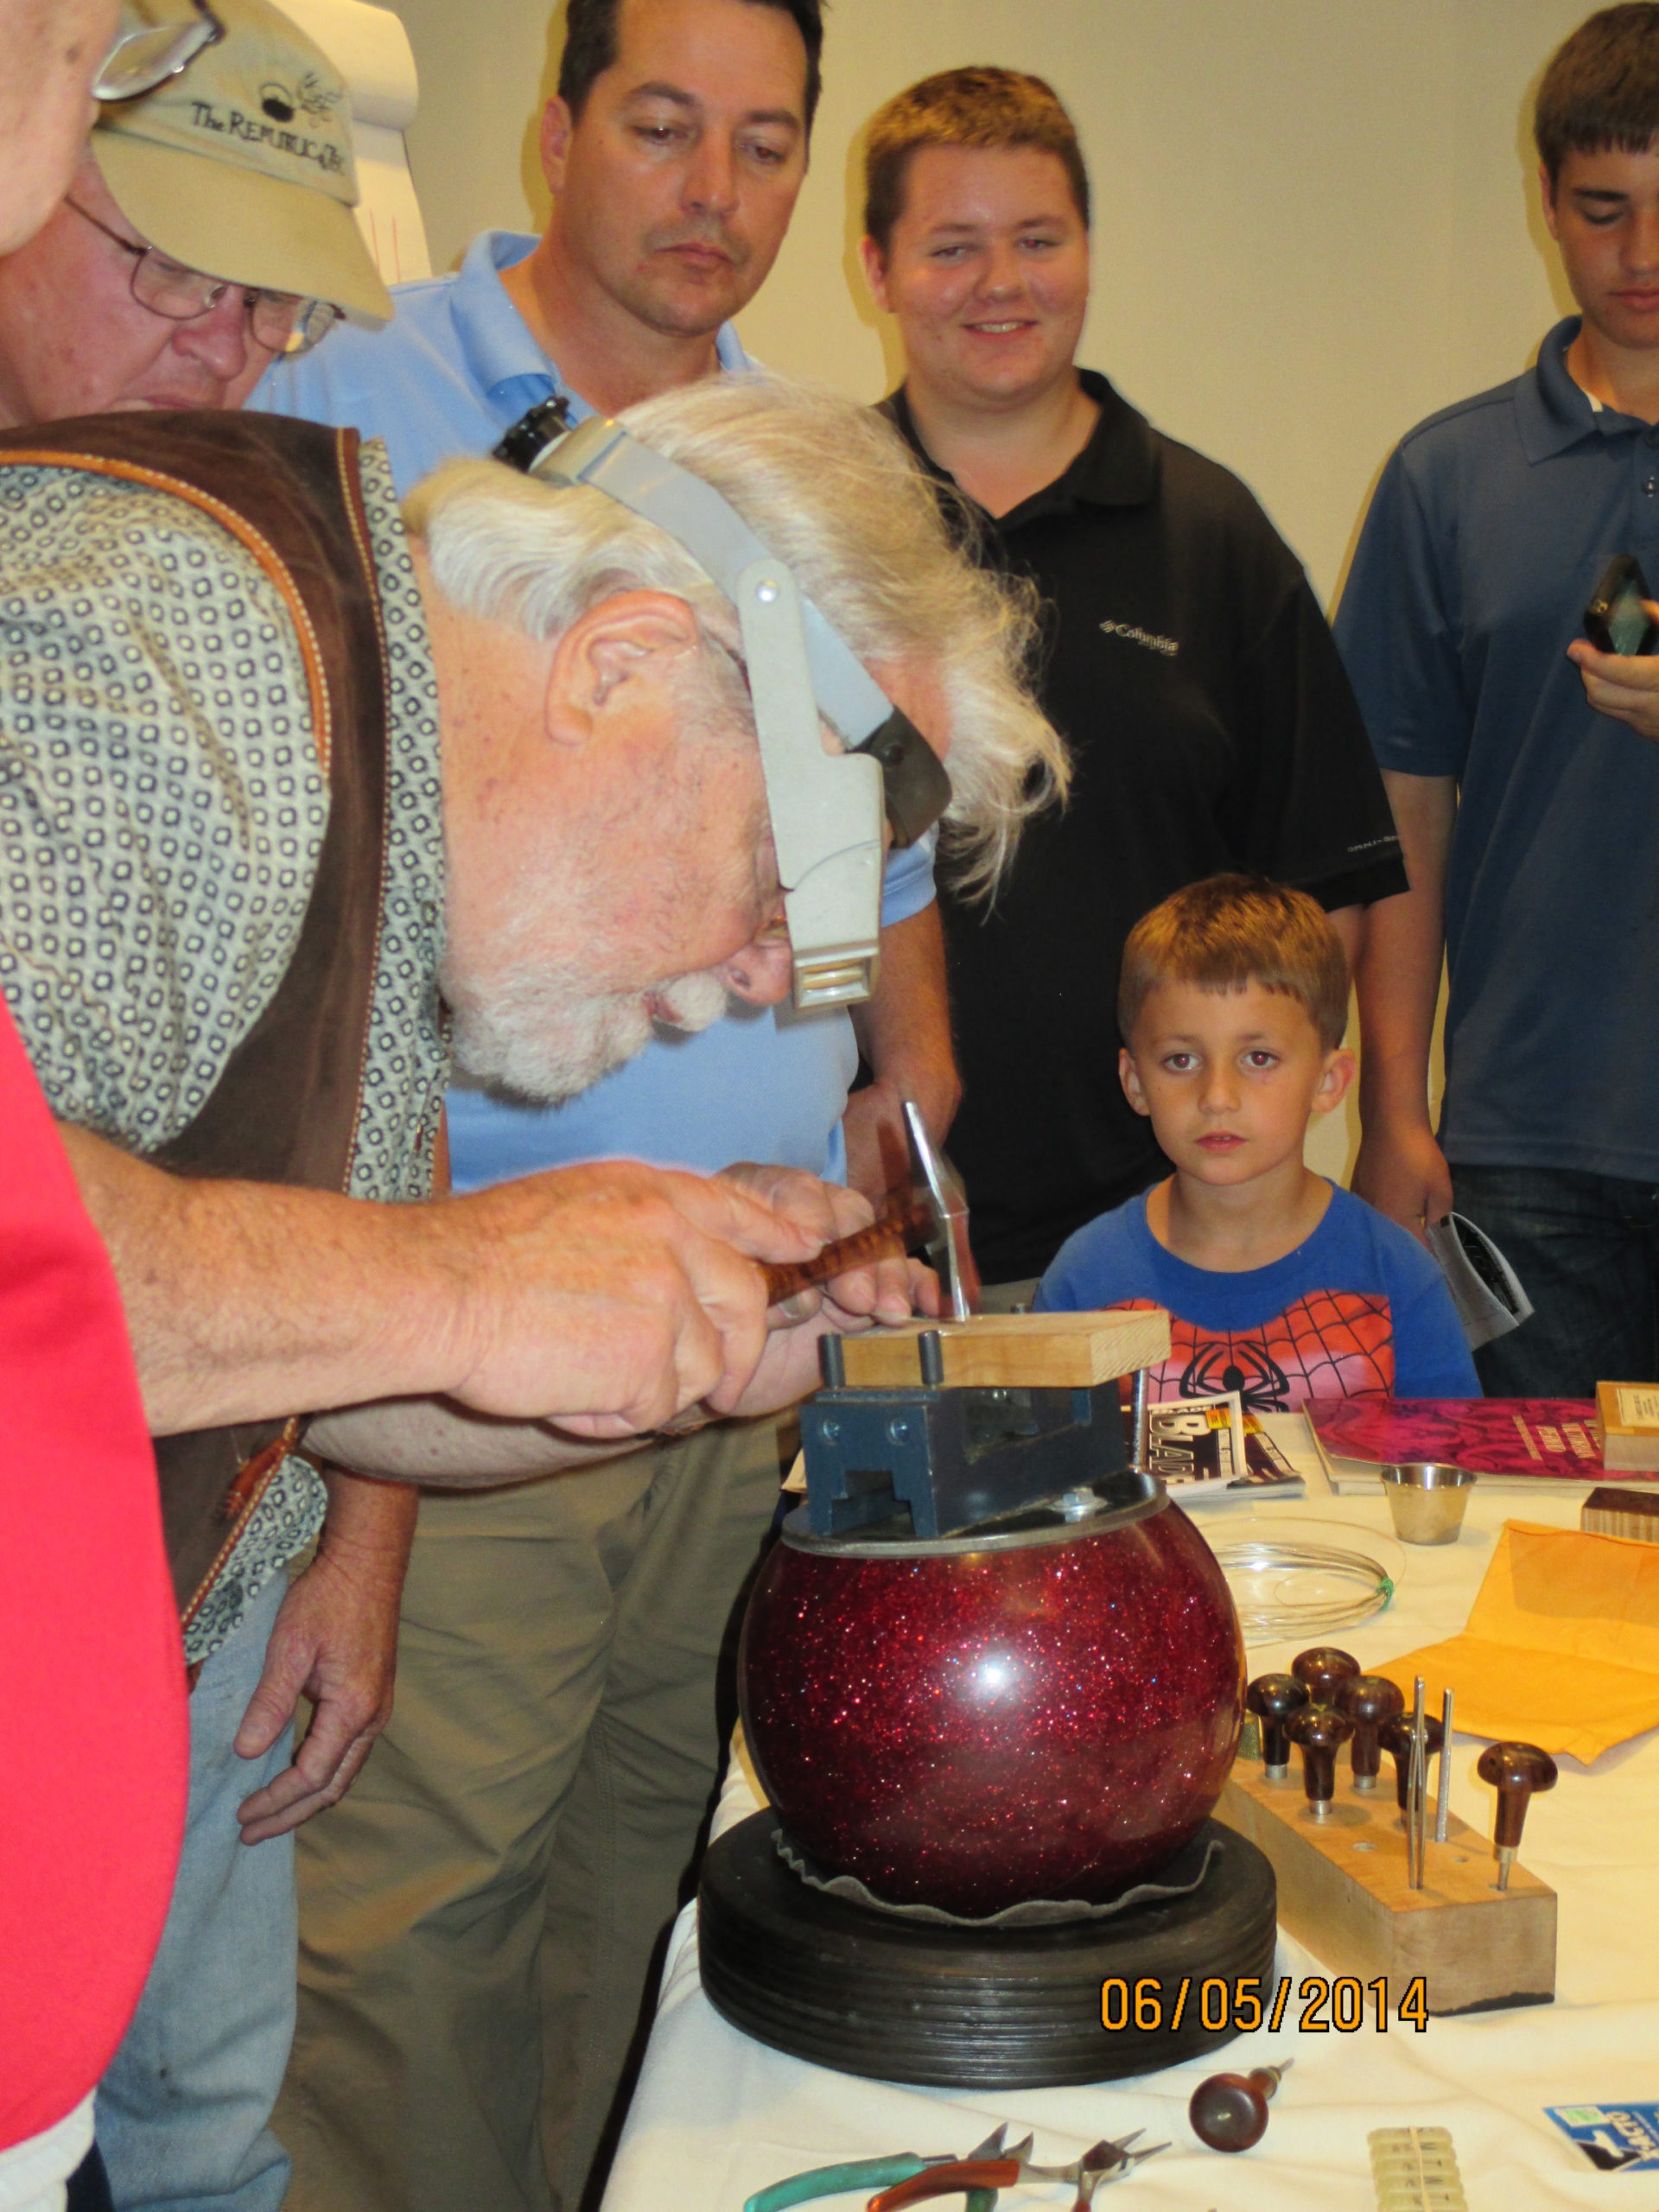
As his students look on, Joe Keeslar uses the bowling ball vise in his wire inlay class during the first BLADE University at a previous BLADE Show.
Stainless damascus knives look fantastic and resist rust in the process, but present the knifemaker with a host of challenges.
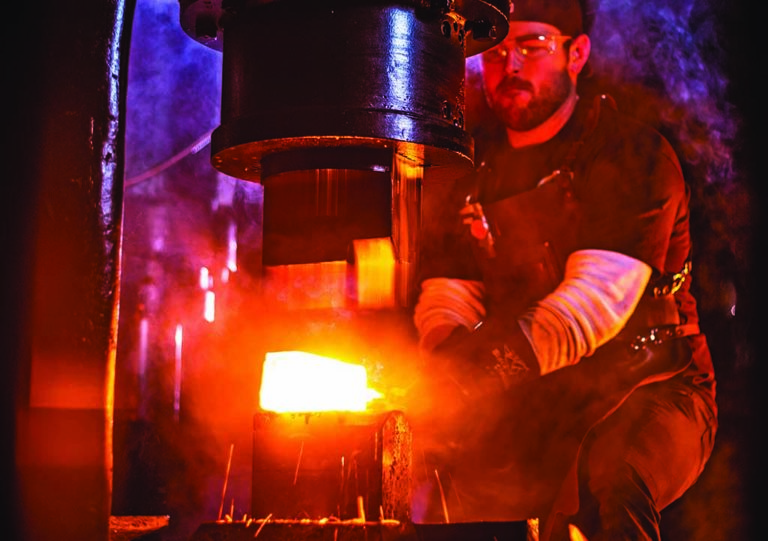
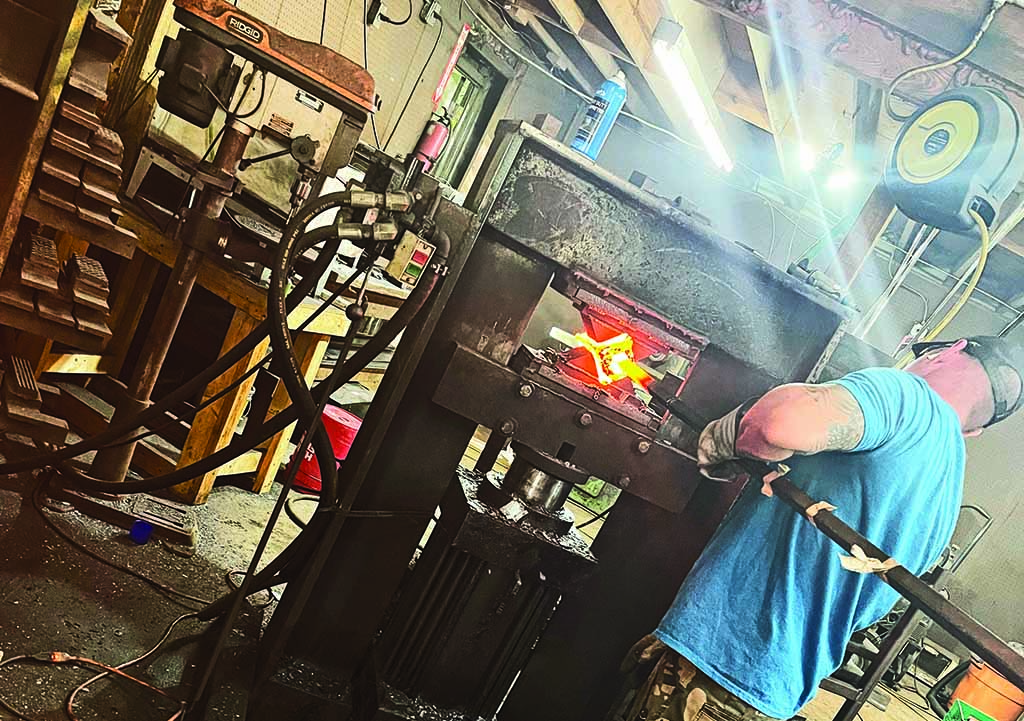
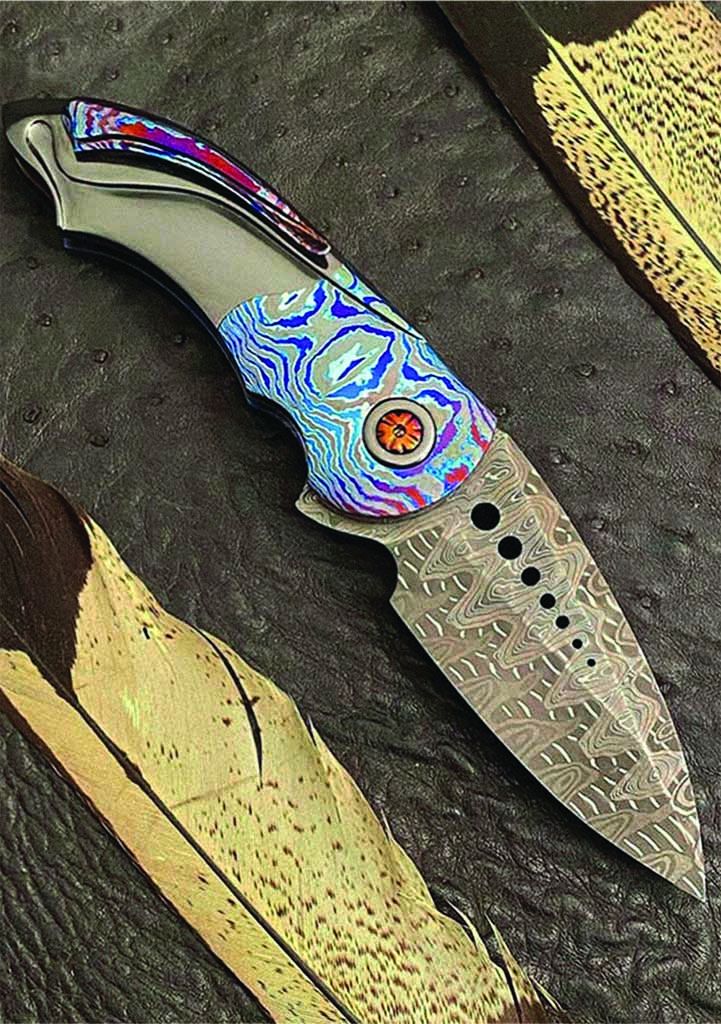
It’s not easy forging stainless steel. It’s harder still to forge damascus patterns out of it. Nonetheless, those who specialize in forging stainless damascus for sale to both factory and custom knifemakers, who spend their days before a power hammer turning out billet after billet, say the material is as hot as ever. Meanwhile, they’ve developed a couple of tricks to keep the welds sure, the patterns crisp and the innovation marching forward.
“There’s just things that I’ve been able to do now that I thought I wouldn’t have been able to do when I first started,” said Mike Norris, a smith of stainless damascus since the mid-1990s. “For instance, I actually make Turkish twist damascus in stainless.”
Norris runs a one-man operation in his Kentucky shop. In a moment when he wasn’t moving between his forge and Blanchard grinder, he explained part of the process. “When you forge carbon steel, you can use flux. You can just stack the layers up and flux ’em and stick it in a fire and make it weld like that. With stainless, you have to have a controlled atmosphere around the billet,” he explained. “Flux doesn’t work on it.”
Stainless Damascus Forging Process
If the weld in a carbon damascus billet doesn’t take, a smith may have an opportunity to get another whack at it. No so with stainless damascus. There’s one shot and if it doesn’t fuse, the billet heads to the scrap pile. Moreover, no oxygen can touch the stainless steel during the process. While other smiths build a can, fitting metal in some kind of container, fusing it shut and then launching into forging, Norris uses stainless foil.
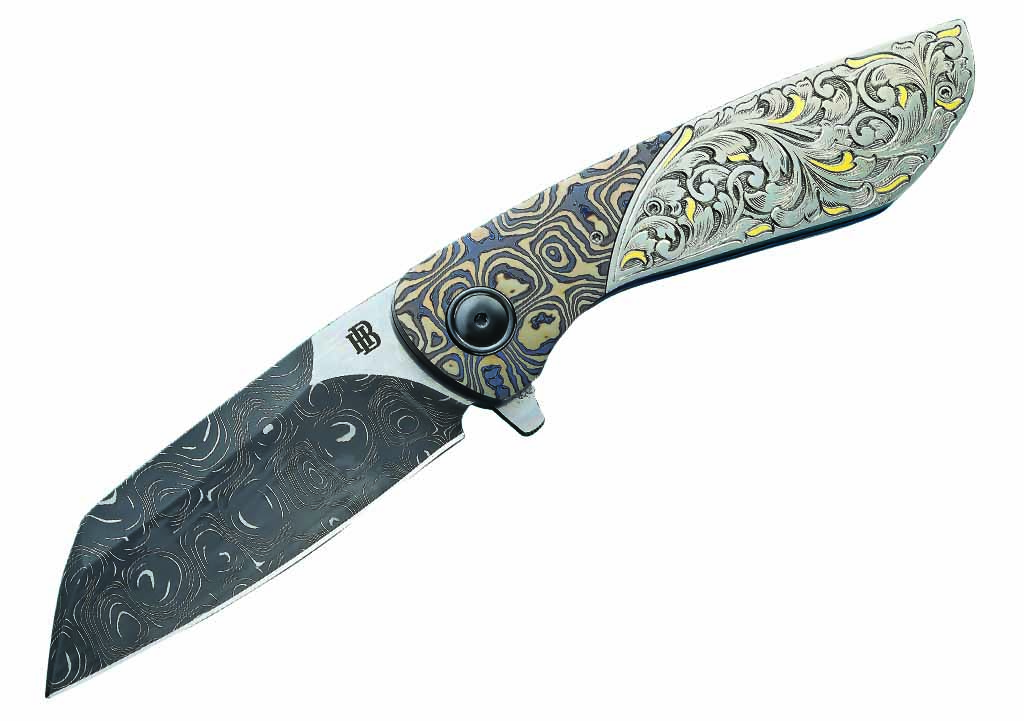
Herucus Blomerus outfits his HB 18 PHIRI folder in a blade of Intrepid stainless damascus forged by Chad Nichols Damascus. (SharpByCoop image)
Stainless damascus is as popular as ever, Norris says. His patterns most in demand are Fire Clone and Hornet’s Nest, and he typically forges them from 19C27 and 302 stainless and D2 tool steels. In the past few years, he said he’s seen many makers grind blades from san-mai, a blade material with a core of hard steel sandwiched by softer ones.
Tired of seeing a core sit off center on a finished knife, lopsided between two outer layers, Norris developed straight-core san-mai. He’ll cut a damascus billet in half, sandwich it between sides of an XHP stainless, and forge weld it all together. The result keeps the core centered and the pattern undistorted. That way when the maker takes the steel to the grinder, the core is “gonna be there every time,” he said.
All that effort helps the end-user rest easy, Norris opined. Instead of worrying about caring for a carbon blade, a stainless damascus one has the corrosion resistance and can look good doing so. One other benefit, Norris said: it can hold its contrast. The knife Norris has taken bowhunting for about two decades—made with one of his early billets of stainless damascus—looks almost as good as the day he made it. “And,” he exclaimed, “I’ve skinned a lot of deer with it!”
Experimenting With Stainless Damascus
Forging stainless damascus requires a willingness to go off map. It’s not the land of 1080 carbon steel.
Fire Clone stainless damascus by Mike Norris is the blade steel for a Jonas Iglesias folder. (Image courtesy of Mike Norris)
Chad Nichols of Chad Nichols Damascus can typically devote time to experiment in December, when business slows down somewhat and he and his shop of five have a little extra time. Plus, the summer temperatures in his Mississippi-based locale can sometimes get downright hellish.
Chad’s shop turns out a range of knife materials, including titanium damascus, Mokuti, carbon damascus and stainless damascus. Boomerang and Wave Pool have been damascus patterns popular with his customers, as have the san-mai-type billets.
According to Chad, damascus essentially breaks down into two basic patterns: raindrop and ladder. Lately, though, he’s been trying out new types of steel. He’s been forging san-mai billets with unusual core steels. Hearing recently that CPM MagnaCut, a 4V-type of steel, might be the next hot blade material, he started using it as the core.
Tempest by Brian Nadeau offers up a blade of stainless damascus in NitroV by Vegas Forge. The frame is titanium, zirconium and AKS Timascus™. (SharpByCoop image)
And just how do you go about working with a new steel?
“Guess,” Nichols blurted, laughing. “Start off with a pretty good educated guess and go from there. I mean, it still is steel, each one has a characteristic, but you just got to kind of baby step it until you figure it out. Then take notes.”
Once he’s figured a steel out, it’s smooth sailing—mostly.
“The first time, yeah, but after that, it’s just like anything else. I’ve been doing it for almost 20 years and if there’s one thing, it will take you to school,” he said. “Each one of them moves different, takes the heat different. There’s some steels you have to be super careful about not overheating them like by 20 degrees.”
Yes, sir, some like it hot.
Pattern Making
According to Jesse Harber, president of Vegas Forge, it was just seven years ago that the average consumer didn’t know what damascus was. Now, they see it on Forged in Fire and know.
Chad Nichols Damascus has been trying out new types of material combinations lately, including forging san-mai billets with unusual core steels. (Chad Nichols Damascus image)
The vast majority of Vegas Forge’s business is stainless damascus. Because it works with mosaic damascus—building patterns in a can, sealing it and applying the heat—Vegas can also put, say, a proprietary logo straight into the steel. Out of the 16 patterns Vegas Forge offers, Herringbone and Spirograph are the hot ones. They are patterns born out of some serious development.
A few years ago, “we modified from MIG welding to TIG welding, which gave the can a lot tighter seals, so there’s no holes in it,” Harber said. “And we advanced the system that we used, actually worked with some engineers out of California, a couple of good old Russian boys. That’s probably the biggest advancement we’ve made.”
The thing they try to prevent? A bad weld, something that would become all too apparent if the billet was milled and the steel started peeling apart.
The Hybrid stainless damascus pattern by Mike Norris is the blade material for a folder by Alister Bastian. (Mike Norris Damascus image)
After forging the stock down to an inch thick, “from there, we’ll use the rolling mill to roll it out. It takes a lot more time to do it that way but the pattern stays crisp,” Harber noted. “It doesn’t blend or blur the layers together from all the impact.”
Amidst all the innovation, the “crazy wizardry” of pattern development, Vegas Forge has expanded outside the knife industry. It also supplies round stock to jewelry makers for men’s rings, for instance.
As it turns out, plenty of people appreciate the ease-of-care and mesmerizing patterns from a good piece of damascus made from stainless steel.
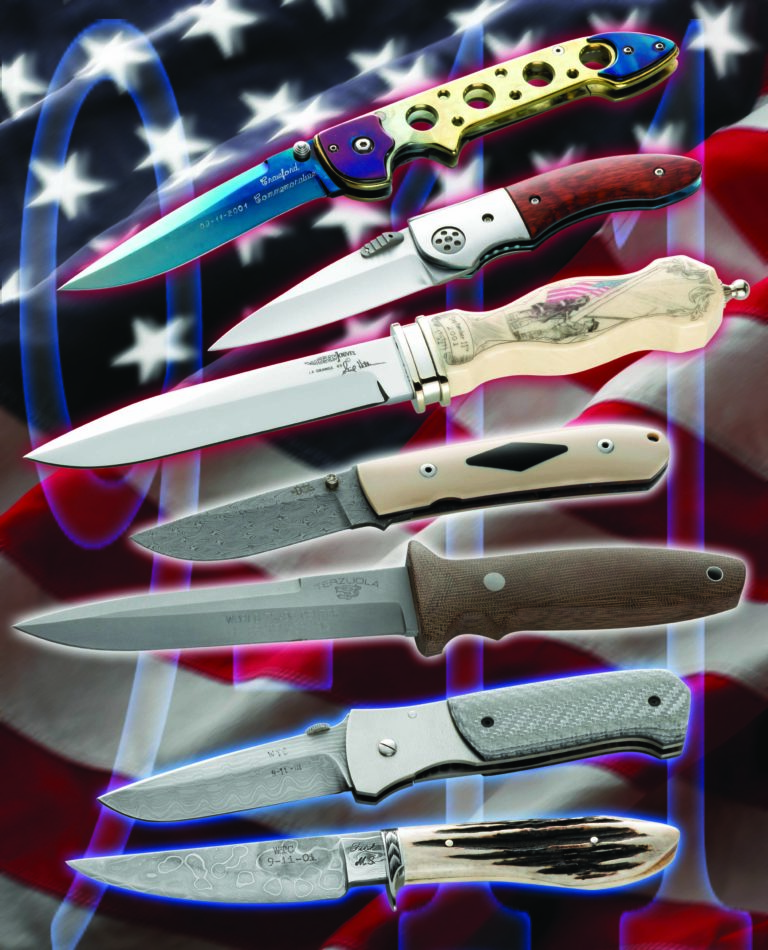
The atrocity that shocked the world continues to transform it, and knives, too. Here is a look at some of the memorials 9-11 spawned from that fateful day.
It began as an ordinary Tuesday. It ended with the world changed forever.
The atrocity of the terrorist attacks at 8:45 a.m. EDT on Sept. 11, 2001, will never be forgotten. Now, 20 years after planes crashed into the World Trade Center in New York, the Pentagon in Washington, D.C., and a field in Shanksville, Pennsylvania, retrospect brings not only memories of sadness and profound loss, but also an acknowledgment of the heroism of 9-11 and the humanity that emerged.
A measure of that humanity took the form of custom knives made from the twisted and scarred steel of the World Trade Center (WTC) buildings—forged once in the conflagration of that terrible day and then again in tribute to lives lost, and for the benefit of those who miss them and live on.
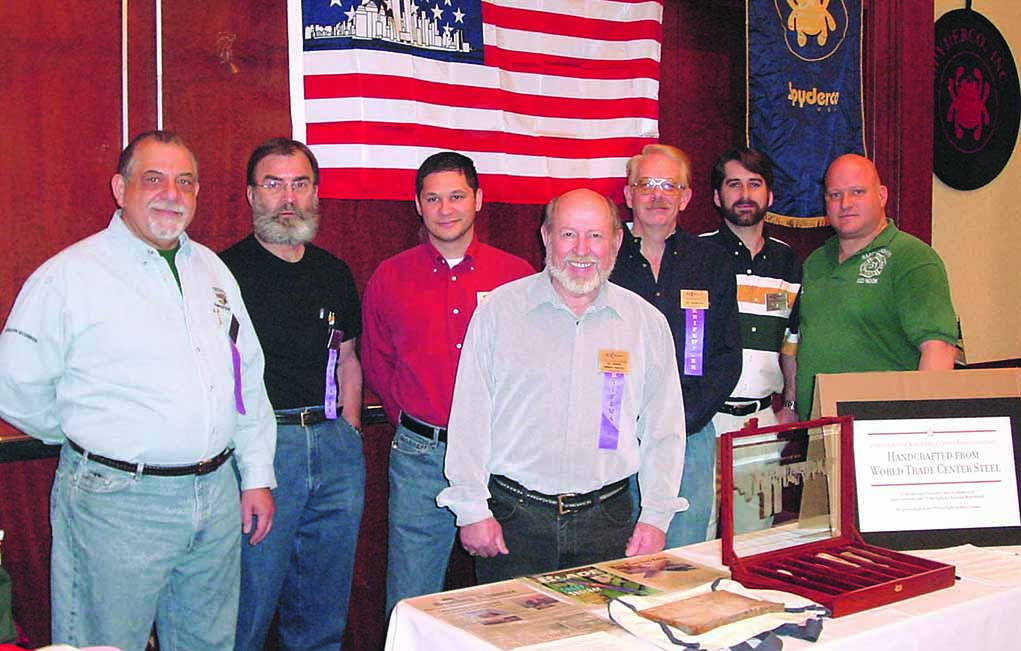
Keith Kaiser (right) was in Ladder Company 131 of the New York City Fire Department that reported to the World Trade Center on 9/11. In 2003 he enlisted several leading makers to produce knives with blades made from WTC steel. Those makers, with the exception of Mel Pardue, from left are: Bob Terzuola, Bob Dozier, Allen Elishewitz, Gil Hibben, and Pat and Wes Crawford. (Eric Eggly/PointSeven image)
Ladder Company 131 (L131) and Engine Company 279 (E279) of the New York City Fire Department (FDNY) were housed in the Red Hook section of Brooklyn on 9-11. Keith Kaiser was a member of L131. Moved later to enlist the support of several custom makers to produce knives with blades made from WTC steel, Keith remembers the horrific day vividly.
“Because of the proximity to lower Manhattan, both companies started to gear up,” he recalled. “As we were approaching the tunnel into lower Manhattan, we saw the second plane hit the south tower. The engine company went into the buildings first, and the ladder company soon followed. L131 was in the lobby of the hotel on the ground floor of the south tower when it fell. We breached a wall and got out a group of civilians before we realized what was going on. The engine company was never found.”
Five members of E279 were killed, and the FDNY lost 343 firefighters in all. Since then, according to Kaiser, nearly as many have died from 9-11-related cancer and other illnesses. His older brother, Wayne Kaiser, an electrician who worked to restore communications in the wake of the terrorist attack, recently died of illness due to extended exposure to toxic dust and debris.
Keith was seriously injured on 9-11. “Oddly enough, my getting injured probably saved my life because I was not able to dig in the pile subsequently,” he said. “I was looking for something to occupy my mind and time, and one of the men lost from my company, Christian Regenhard, was a knife collector. I thought I would try to get my hands on some steel and get knives made out of it for charity and to keep me involved.”
Early efforts to get the project started were difficult, but Kaiser persisted. Eventually, he contacted several of the biggest names in custom knives and secured their commitment to contribute to a benefit for the New York Firefighters Burn Center Foundation. Bob Terzuola, Bob Dozier, Jerry Fisk, Pat and Wes Crawford, Allen Elishewitz, and BLADE Magazine Cutlery Hall-Of-Fame® members Gil Hibben and Mel Pardue made one knife each with blades incorporating steel from the fallen twin towers (page 90, August 2003 BLADE®).
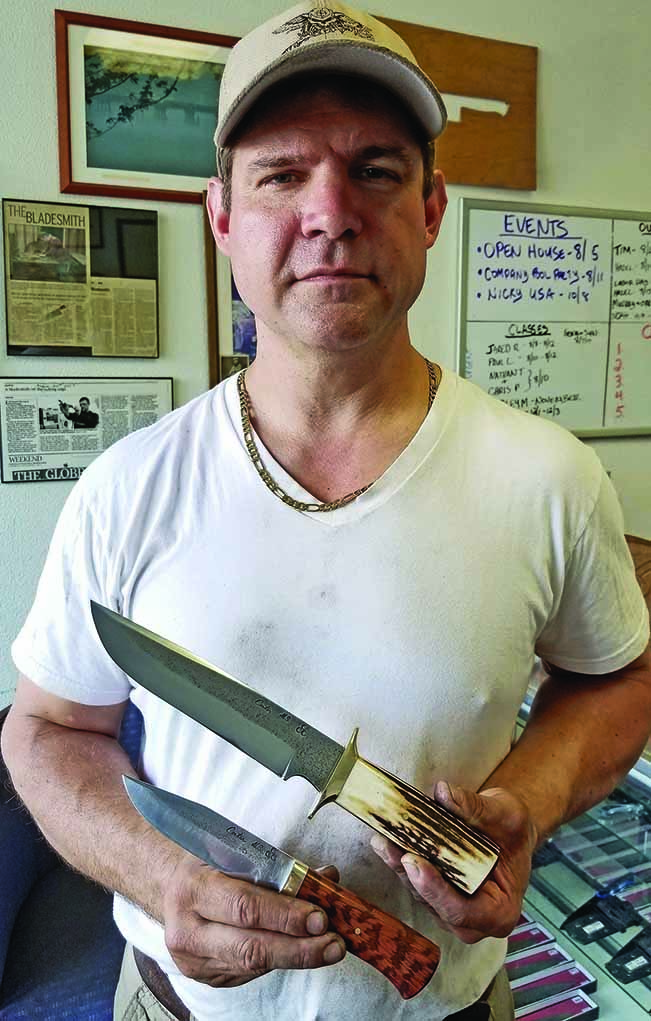
Murray Carter holds the last two knives he made of WTC steel as part of a special fundraising project that included FDNY343 (fdny343.org) and Building Homes For Heroes (buildinghomesforheroes.org). (Murray Carter image)
“It was planned with the help of Christian’s father, who was a New York City police detective,” Terzuola said. “Seven knifemakers, including myself, volunteered their time and materials. Keith presented the idea to us and offered to supply a piece of steel from the wreckage of the fallen towers to each knifemaker, from which they could make a knife of their choosing.”
The knives included signature works: a Dozier damascus folder; an Elishewitz folder; a CQB from Terzuola; a Hibben dagger with scrimshaw handle; a skeletonized folder from the Crawfords; a damascus folder from Pardue; and a damascus stag Sendero hunter from Fisk.
The task brought the added challenge of making the Trade Center steel usable for knife blades. “It was low carbon structural steel,” Dozier related, “and I asked Daryl Meier to make damascus for me. At the first show after 9-11, Keith brought some steel to me and wanted me to make a knife with it. I wouldn’t take it. A friend of mine who was a state police investigator here in Arkansas said to leave it alone because it was evidence. Then about a month later, a big cardboard box came in the mail and there was the steel. I cut it into pieces and Daryl made some ladder-pattern damascus.”
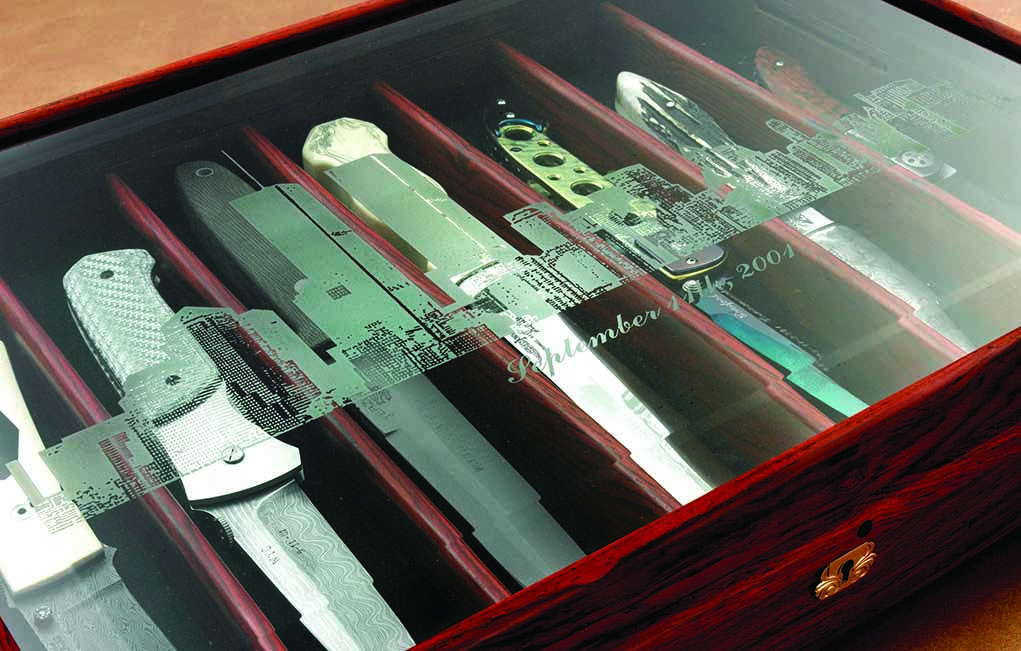
Once the knives were gathered, they became tangible remembrances. “They were placed in a beautiful cocobolo box with a beveled glass top that was etched with the World Trade Center,” Terzuola commented. “The idea then was to put them up for auction for the benefit of the burn center. Keith sent them around to various museums prior to the auction, and after several years they almost became permanent exhibits in some places.”
Keith reached out again to Terzuola, who helped arrange an auction, and the set sold in June 2020 with the proceeds benefiting the hospital. “Keith sent me the knives, and I cleaned them up and got hold of Rock Island Auction in Illinois, one of the top auction houses for knives and firearms,” Bob states. “They did a beautiful two-page spread in their catalog and after the auction sent a check directly to the burn center.”
Murry Carter Knives 9-11 Custom
Like so many others, the atrocity of 9-11 touched custom knifemaker Murray Carter significantly. He was asked to partner with FDNY343, an organization of retired New York firefighters dedicated to keeping the memory of those lost on 9-11 alive, and Building Homes for Heroes, a charitable enterprise that provides homes for those injured while serving their country and in the 9-11 attacks.
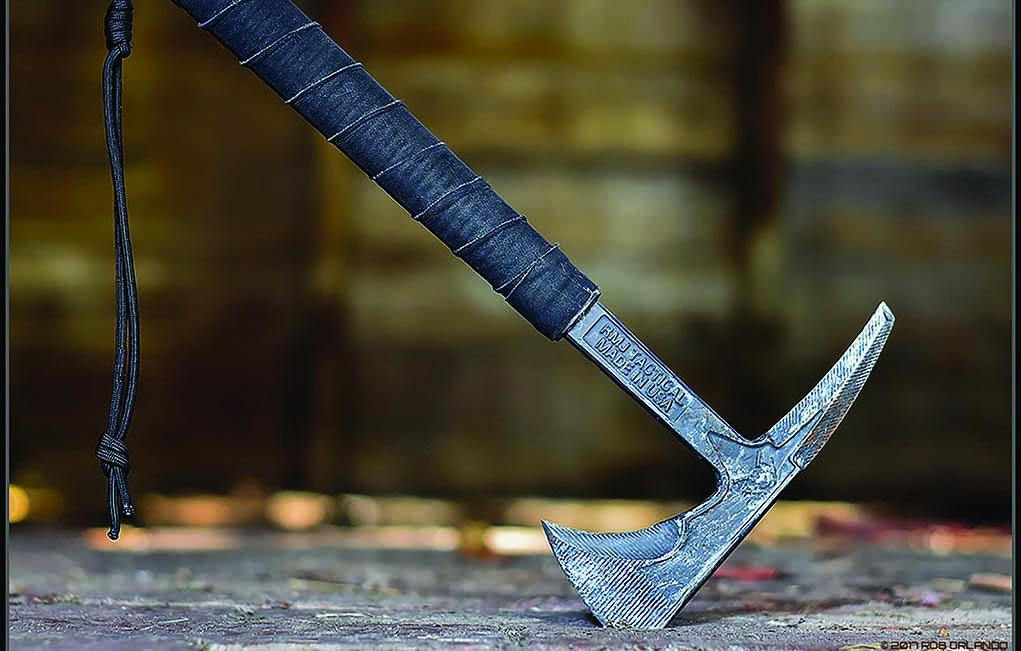
Ryan Johnson was just starting up his RMJ Tactical when 9-11 shook the world. The U.S. military was looking for something that would punch through body armor and the RMJ Eagle Talon hawk, featured on the cover of the March 2002 BLADE®, filled the bill. RMJ Tactical took off and is one of today’s leading hawk makers with such models as the Shrike.
Carter has produced several kitchen and outdoor knives, each incorporating a laminate of Trade Center steel with a 1084 carbon steel core. The motivation to produce the knives was strong, and Murray notes that the components of fire, water and stone were present both in the 9-11 incidents and the making of the knives. He reasons that fire enabled the forge, water quenched the blades and stone honed them into tools. Conversely, fire brought the towers down, water hampered rescue efforts, and lives were lost in the crush of stone.
“So, the same elements are here in the knives, and they bless people daily,” Murray explained. “When iron is red hot, that’s how we get steel, and some of the victims were burned, the elements fused in a chemical trade. The depth of the fusion was dependent on time and it was brief. So, I didn’t want to do much grinding in order to leave these elements in the surface of the steel.”
One of Carter’s kitchen knives was auctioned for $10,500 and the proceeds were given directly to Homes for Heroes. He calls the effort, concluded in the spring and autumn of 2017, an honor and one of the most humbling tasks of his long knifemaking career.
RMJ Tactical 9-11 Spike Hawk
Ryan Johnson was just starting up his Chattanooga, Tennessee-based RMJ Tactical when 9-11 shook the world. He had always been interested in tomahawks, and was making pipe and spike hawks before that desperate day. Then, things changed quickly.
“I had made a spike hawk and a gentleman saw one of them on my website,” Ryan remembered. “He was with Air Force security forces and said, ‘We’ve got some guys securing air strips, and we’re looking for something that will punch through body armor.’ He said my French-and-Indian-War-style hawk looked perfect for the job.”
The seven knives from Keith Kaiser’s 9/11 memorial project were placed in a beautiful cocobolo box with a beveled glass top etched with the World Trade Center. (Eric Eggly/PointSeven images)
The first shipment of five spike hawks had just gone out before 9-11. “The same guy called me up and he was already in the Gulf,” Ryan said. “He said to get busy making these things because they would be big.”
Like lightning, the demand for hawks soared—not only with the catalyst of 9-11, but also with the wars in Iraq and Afghanistan that followed. “I received a call from a gentleman working as an attaché to Donald Rumsfeld [Secretary of Defense] and made him a hawk. He sent me a picture back of him in his office at the Pentagon with a letter that said when the planes hit the towers, all the brass in the Pentagon were out in the hallway in front of his office passing that hawk around. A few moments later, a plane hit the Pentagon. Just before that happened, an admiral had walked by and said, ‘This war will be fought by hawks at the ends of the hands of soldiers.’”
A short time later, a story on Ryan’s hawks appeared in the Chattanooga newspaper and was picked up by the Associated Press, ultimately appearing in countless media outlets. “The article was on making hawks for the military,” Johnson recalled, “and before long Green Beret units were getting in touch with me and asking why they weren’t getting hawks. When you look back at the early days of the wars, Task Force Dagger included the first 300 special forces and others into Afghanistan. We had hawks going in with them.”
Orders kept coming, and civilian deliveries were postponed to fill the demand from the military as RMJ Tactical got started. Twenty-five Eagle Talon hawks went to Marines in the town of Najaf, Iraq, just before the battle for control of the city of Fallujah.
“I got a phone call concerning those 25 hawks,” commented Ryan, “and it was from the wife of a Marine officer. She said there was a plane leaving that night with room aboard for the shipment if we could get it ready. I called my friend Richard Carmack and knew his kids might have the time to help wrap the handles if I could provide the pizza and a movie. Now, Richard makes sure things run right here, his son Jonathan is our production manager and I’m still working in design.”
Conclusion
The atrocity of 9-11 and the lengthy conflicts that emanated from it continue to echo through the lives of every American. Remembrance is tinged with vigilance and the pledge to never forget the sacrifices of those lost.
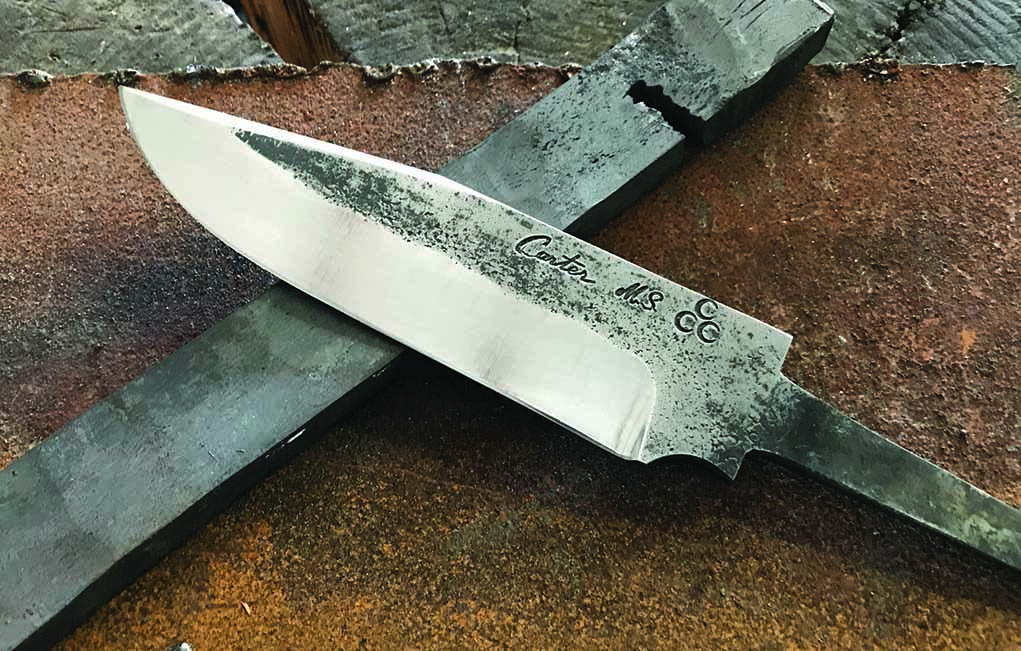
Here are the beginning (bottom level), middle (mid-level bar of steel) and end products (top level) Murray Carter used to forge weld World Trade Center iron into a usable blade with a 1084 core. The blade is water-quenched for maximum sharpness and edge retention, and the blade surface still retains the soul-infused character of the WTC steel. (Murray Carter image)
Though nothing is for sure at this time, there may yet be other knives produced with the venerated World Trade Center steel. Terzuola still has a small amount of the steel but probably not enough for another knife blade. He is considering a knife with Trade Center steel bolsters and G.L. Hansen Micarta® that includes a thin blue line in its composition. Proceeds from the sale of such a knife would go to benefit a law enforcement officers relief fund.
Custom Pocketknives Always Seem To Make Us Feel Nostalgic. These Models From Talented Custom Makers Are All Gems.
There’s something about classic custom pocketknives that tugs at the heartstrings. Once you get bitten by the bug it’s an itch you can never quite finish scratching. It becomes indelibly etched in the DNA.
Fortunately, custom knifemakers never tire of building them and every year provide new offerings and fresh looks. Meet four of those makers, each highly skilled at the craft who build exquisite knives with personalities all their own.
With its beefy bolster and no-nonsense stout handle, the barlow slip-joint pocketknife is designed for hard use. Adam Rogers gave his two-blade iteration all the right stuff for a million-dollar look.
“I see the barlow as the perfect example of a gentleman’s folder, very universal and great as an everyday carry,” the Aussie maker observes. His upscale workhorse is 3.35 inches closed with a 2.2-inch spear-point main blade and a 1.57-inch secondary pen pattern. He chose CPM 154 stainless steel to do the cutting chores and the fluted bolsters are 416 stainless. “The long pull works well with the shape of the spear blade, whilst giving easy access to open,” Adam notes.
The upscale liners are jeweled and the backsprings are CPM 154.
Why did he choose giraffe bone for the scales? “Giraffe bone is a great product to work with, easy to use with a large variety of colors available,” Adam assesses. “Paired with the fluted 416 stainless steel bolsters it gives the folder a clean, sophisticated look.” Other traditional pocketknife patterns Adam offers include the sowbelly, saddlehorn trapper—both single and twin blades—small and medium trappers, wharncliffe trapper, Lanny’s Clip and the muskrat.
Trapper By Bubba Crouch
Bubba Crouch goes the unusual materials route for his dress slip-joint trapper, including a 4-inch blade forged from old Schrade trapper blades and handle wood from the pole that held up the original telephone lines from the house to the office of famed Texas cattle baron Charles Goodnight. (SharpByCoop image)
You might say custom knifemaker Bubba Crouch doesn’t walk the straight and narrow. Instead, he infuses interesting stories and twists in his slip-joint pocketknives that make them truly remarkable. Take, for instance, his dress trapper.
“A customer gave me the wood for the handle he bought at a fundraiser auction from the estate of Mr. Charles Goodnight,” Bubba says. “The historical wood was holding up the original telephone lines from Goodnight’s house to his office.” Just so you know, Goodnight was a living legend among cattle barons in the latter half of the 1800s.
If that isn’t enough to set Crouch’s trapper apart, the 4-inch clip-point blade with the deep belly is forged by Jason Fry from old Schrade trapper blades. The integral bolsters are made to resemble the beaten copper pots Bubba’s mom acquired in New Mexico when Bubba was a child. “I’m always hunting for something unique with a historical past,” he states. “It’s really challenging trying to find these items.”
Like Tom Ploppert (read on for more on him) and many other slip-joint makers, Bubba gets no small part of his inspiration from BLADE Magazine Cutlery Hall-Of-Fame® member Tony Bose.
“I build mostly trappers in three sizes but I have also built Saddlehorn trappers from the Tony Bose design,” he says. “I’ve built a few lockbacks too but my market is mainly the trapper.”
The Lincoln Folder
Eugene Shadley’s Lincoln Folder is a reproduction of the six-blade congress pocketknife that was on President Abraham Lincoln’s person when he was assassinated. The blades are CPM 154 stainless steel and the handle is smooth white bone. Maker’s price for a similar knife: $5,000.
Custom knifemaker Eugene Shadley is royalty among slip joint aficionados, so it’s only fitting we feature his reproduction of a pocketknife owned by one of our most famous presidents.
“The Lincoln Folder is my rendition of the congress pocketknife Abraham Lincoln had in his pocket the night he was assassinated,” Shadley notes. “A customer asked me to make a copy.”
The Lincoln Folder is only 3.5 inches closed yet features six blades inside its compact frame. The liners and bolsters are 416 stainless steel with smooth white bone scales topped with a gently curved round bar shield. The blades include a large spear, large sheepsfoot, a cutoff pen, two pen blades, and a manicure blade with a nail cleaner and a file on either side.
Just how tough is it to make multi-blades, especially one with six blades? “Anytime you make a knife where blades pass each other, everything really does need to be in its place,” the award-winning maker and a past president of The Knifemakers’ Guild explains. “A lot of factory knives had a little longer and thinner blades that passed each other. Those knives tended to be more utilitarian and rubbing was the norm. We custom makers are expected to make sure blades do not rub each other.”
Wilbert Saddlehorn Trapper
The Wilbert Saddlehorn Trapper by Tom Ploppert is a lockback with a rich factory history. BLADE Magazine Cutlery Hall-Of-Fame® member Tony Bose introduced Tom to the knife many years ago. Tom’s price for a similar reproduction: $2,100. (Mitchell D. Cohen photography)
Tom Ploppert’s Wilbert Saddlehorn Trapper is a reproduction of a lockback with a rich factory history.
“Wilbert Cutlery Co. was located in Chicago and was a retail brand sold by Sears Roebuck & Co. through a contract with Napanoch Knife Co. and Empire Knife Co.,” he explains. “They were made from approximately 1908 to 1921. Tony Bose introduced me to this knife and its history many years ago and shared the pattern with me as well.”
The scales are a gnarly premium stag and the integral bolsters are 416 stainless steel. Closed length: 4.5 inches. The Wilbert’s 3.75-inch clip-point blade of CPM 154 stainless steel features a classic nail nick. “There is a lot of blade to fit into a narrow handle and bolster area,” Tom states. “It requires a lot of adjustments along the building process.”
Another notable feature is the blade’s well-defined grind. “I hollow grind all my blades with a 20-inch Burr King grinder using a 1-inch-wide wheel,” Tom notes. “I get crisp grind lines using fresh new belts. Bill Ruple [page 12] taught me early on that nothing cuts like a fresh new belt—along with years of practice.”
Bruce Barnett’s Peanut Pocketknife
Australian ABS journeyman smith Bruce Barnett likes serpentine pocketknife patterns. His peanut with its curvy handle is an example. (Rod Hoare knife image)
Australian knifemaker Bruce Barnett found the peanut pocketknife pattern to his liking and fashioned a striking example of it.
“I really like the subtle and serpentine-shaped knives, and took it upon myself to stretch it to 3.5 inches and reshape the pivot end,” he related. “Shaping up a nice, long wharncliffe for the second blade was challenging in itself, and I think this one looks pretty cool.”
Barnett’s peanut features a blade of his damascus forged from 1080 carbon and 15N20 nickel-alloy steels in a ladder pattern, mammoth ivory scales, and a 410 stainless frame and bolster. He wanted to make a working knife true to the classic peanut style and succeeded, commenting, “I realize it was generally a small two-blade that fit in your money pocket, but so does this one in today’s working man’s jeans.”
This particular knife is available for $1,350 from Bruce, and a similar piece would run roughly the same price. He uses his forged damascus in about half the knives he produces, both in traditional work and for specific custom orders. His 410 or 416 stainless frame and 154CM stainless spring materials are common, and he appreciates the understated surprises sometimes present in mammoth ivory.
“I find these materials easy to use and can trust them not to fail,” he commented, “and with mammoth ivory, it’s very stable and durable, and you never know what colors are hiding under the bark.”
After 12 years as a part-time knifemaker and working as a mining maintenance manager, Bruce began making knives full-time in 2017. His farming and mining background had always involved knives, but the catalyst for a move into making his own came from another passion.
“I was introduced to custom-made knives by Max Harvey, who donated a large bowie for me to raffle to help fund my drag racing habit running a nitro-methane-powered Harley-Davidson, which I went on to win the Australian championship on,” he remembered. “After a pretty serious accident, I gave up racing and was instantly looking for something else to do. I had never forgotten that knife. I decided I would try and make one—and here we are.”
Harvey Dean’s Texas Tornado
ABS master smith Harvey Deanmarries 24k-gold engraving and escutcheons, antique shell and Dellana Dots on the blade of Texas Tornado pattern damascus to cap off his ornate Coke bottle pattern. (SharpByCoop knife image)
The famed Case Coke bottle pocketknife took on a new twist when Harvey Dean paired the well-known handle shape with a sleek dagger blade in his Texas Tornado damascus of 1075 carbon and 15N20 nickel-alloy steels.
This beauty sports a blade of 4-3/8 inches, closed length of 5.5 inches, and lustrous scales of antique shell. Distinctive Dellana Dots accent the blade to assist in opening, while Harvey did his own engraving in 24k-gold overlay with 24k-gold escutcheons. The bolster and guard on each side are integral 416 stainless steel pinned together.
The dagger blade and Coke bottle handle are traditional, but Harvey’s variation marries them in a stunning display that literally makes the “old” something new and exciting in this custom pocketknife.
“I just thought it looked good,” Harvey commented. “I kind of modified the Coke bottle shape from the Case pattern as their bolsters are straight. Dellana is the first person I know of that instead of using a nail nick or thumb stud, put gold-raised pins in the blade so you could open it with them. I liked that when she started with it.”
Harvey made his distinctive Coke bottle dagger for the Art Knife Invitational (AKI) and said it sold for $9,600. So, with the pricing benchmarked, another similar knife would sell for around the same. In addition, however, the owner receives not only the knife made by one of the premier makers in the world today, but also a fine example of Harvey’s engraving skills.
“I don’t remember how many years ago I started engraving,” Dean mused, “but it’s been close to 10 since I went to the GRS Engraving School [grs.com]. This engraving is overlaid gold instead of inlaid, and the background is also engraved. I called [engraver and AKI coordinator] Barry Lee Hands when I was doing it and told him the pucker factor was very high. This is the first knife I’ve ever done with that much stuff on it, and one of the most ornate knives I’ve ever done. If you look closely, the leaves are actually shaded with round cuts instead of regular cuts like most shading is done to catch the light and get a lot of glittering in the look.”
Tobin Hill’s Custom Cheetah
Tobin Hill said the tough part about reproducing the old Case folding-guard Cheetah pattern is getting the guard to lock tight in the open and closed positions with no rattle or play. (SharpByCoop knife image)
Another tribute to the Case brand comes in the form of Tobin Hill’s version of the venerated Cheetah folder. His take on the Cheetah features the folding guard that made the pattern famous. Both the 3.5-inch blade and guard are CPM 154 stainless steel, while the handle is a superb amber red stag. Closed length: 4.3 inches. The spring and lock guard are also CPM 154, while the liners are 410 stainless and the bolsters are 416 stainless.
Tobin said this particular Cheetah sold at BLADE Show 2022 for $1,100, while its twin, handled in mammoth ivory, sold at $1,200. Pricing would be similar for another such piece.
“I chose to build the swing-guard Cheetah because of the uniqueness of the mechanism,” Tobin said. “I haven’t seen many other custom makers try it and I like the challenge. The tough part is getting the guards to lock up tight in the open and closed positions with no rattle or play. I’ve seen several production models over the years that did rattle.
“Case has produced several versions of the swing guard. The pattern has always been called the 11½ series. They started making them between 1896-1915. I’ve seen models stamped ‘Case Brothers,’ ‘Case Tested,’ and ‘Case XX.’ The Cheetah pattern I copied was first made in 1973. They also produced the Cheetah Cub, a three-quarter version. The blades were mainly flat ground but I’ve also seen dagger grinds, some with crescent nail nicks and some with long pulls. I hollow ground my knife and thought it would be cool to put both a crescent and long pull in.”
Tobin has made knives for about seven years now and completed his first work on April 16, 2016. While he is still a part-time knifemaker, he hopes to devote more hours to it after possibly retiring soon from his own insurance agency following 42 years in that industry. Prior to making knives, his hobby was no less challenging—restoring violins to their original condition.
Tyler Turner’s Custom Pocketknife
“I was wanting to make a slip joint that was not made by custom makers often and that had some sex appeal to it,” Tyler Turner smiled. “And the graceful curves of the toothpick fit that bill perfectly.” (SharpByCoop knife image)
When Tyler Turner took on a toothpick project, he was looking for a certain flair that he knew was otherwise hidden.
“I was wanting to make a slip joint that was not made by custom makers often and that had some sex appeal to it,” he smiled. “And the graceful curves of the toothpick fit that bill perfectly.”
His long, smooth toothpick features a 3.25-inch blade of damascus forged by Damasteel in the Fafnir pattern, with integral bolstered liners in 416 stainless steel, a CPM 154 spring, top-grade mother-of-pearl scales, and 24k-gold engraving and inlay by Jody Muller. Tyler said the handsome toothpick sold for $2,200, and another in a similar composition would command about the same price.
“The materials were chosen to accentuate one another,” he explained. “The most challenging aspect to the build was grinding the blade. My design led to a very acute angle at the tip. I always grind post-heat treatment, so a lot of care went into grinding it slow and cool so the tip did not turn color and ruin the temper.”
Tyler indicated the toothpick pattern, custom versions of which are less often seen than other patterns nowadays, originated in the early 1900s. It became popular with its easy carry and useful clip blade. And the blend of an older, traditional pattern fit in nicely with the maker’s perspective on his art.
“I would say I have a very eclectic style,” he remarked. “I invite the challenges of making a wide variety of knives so that it always pushes me to be better. Plus, it keeps people guessing!”
A resident of Hopkins, Missouri, Tyler is a part-time custom knifemaker and fourth-generation farmer. He grows amylose corn and soybeans with his father and has been making knives for about nine years now, primarily in the summer and winter. For Tyler, the family farming tradition goes hand in hand with another vocation, a foray into traditional knife patterns with the imprint of his own style.
Editor’s Note: Mike Haskew contributed to this piece.
Read More
Sharp In Reverse: 5 Reverse Tanto Blades Worth Your Time
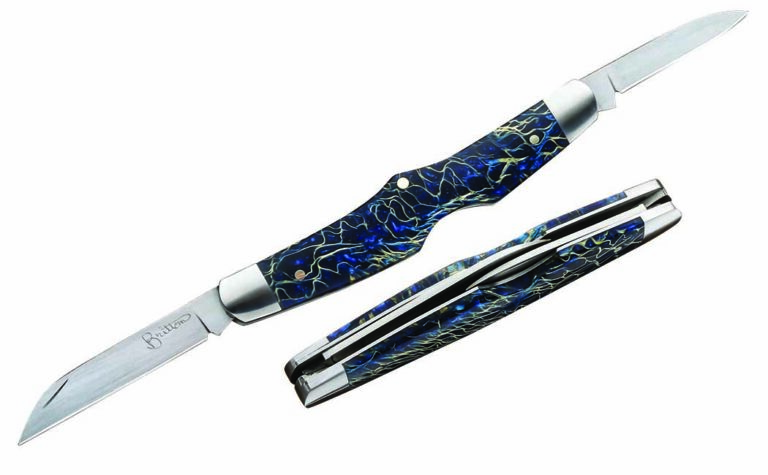
Inspired By The Keen Kutter Pen Knife, Tim Britton’s Badger Is A Refined, Modern Version Of The Classic Knife.
When ABS master smith Bruce Bump showed an old Keen Kutter penknife pattern to veteran knifemaker Tim Britton, Tim fell in love with it and immediately set to making his own iteration.
The blades of his version are BG-42 stainless steel that, as Tim noted, has high ductility and holds an edge forever. He flat ground them on his “ancient” 18-inch, 200-pound Porter Cable disc sander. However, it’s the handle that really stands out.
Consisting of stabilized diseased ash burl from Whistle in the Woods, the material looks synthetic but isn’t. “The light stuff in it looks like explosions,” Tim said. “I’ve never seen anything like it.” The projection on the spine fits right in between the user’s index and middle fingers and the groove on the underside cradles the latter for a comfortable, secure grip.
Calling it the Badger, Tim made 10 of them and showed them off to the world at BLADE Show 2022 in Atlanta.
Who Is Tim Britton
Britton has been making knives since 1971 and has spent much of his time recently creating slip joints, of which the Badger is one of his latest. While his knifemaking career started by making hunting knives for dressing game to crafting tactical knives and small folders and slip joints from his shop in Winston-Salem, North Carolina.
With more than a half century of experience, Britton has carved a place, pun intended, for himself among the top knifemakers in the country.
Badger Knife Specs Maker: Tim Britton Blade Steel: BG-42 stainless Blade Grind: Flat Handle Material: Stabilized diseased ash burl from Whistle in the Woods Closed Length: 3.5 inches Maker’s Price For A Similar Knife: $375