Knifemaking is the building of a knife, which includes the blade, handle and other accouterments. Blades are made by either removing metal from a steel blank via a grinder – known as stock removal – and the forging to shape of hot steel into a blade in the process known as bladesmithing. Other parts, including bolsters, guards, pommels, etc., are needed to complete the finished knife.
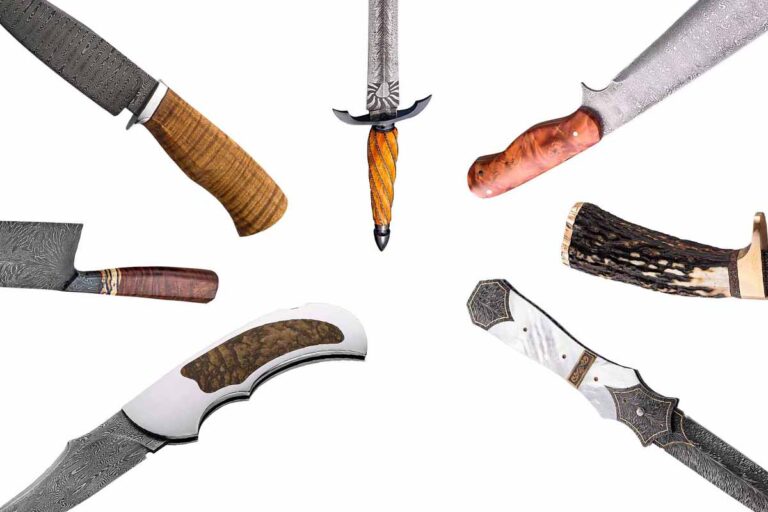
These beauties look as good to the eye as they feel in the hand.
Synthetics have made great strides in knife handles and rightfully so. They can be tough, ergonomic and attractive. But there’s something about the innate beauty and warm feel of natural handle materials that synthetics, try as they will, probably will never duplicate—not that they won’t keep trying.
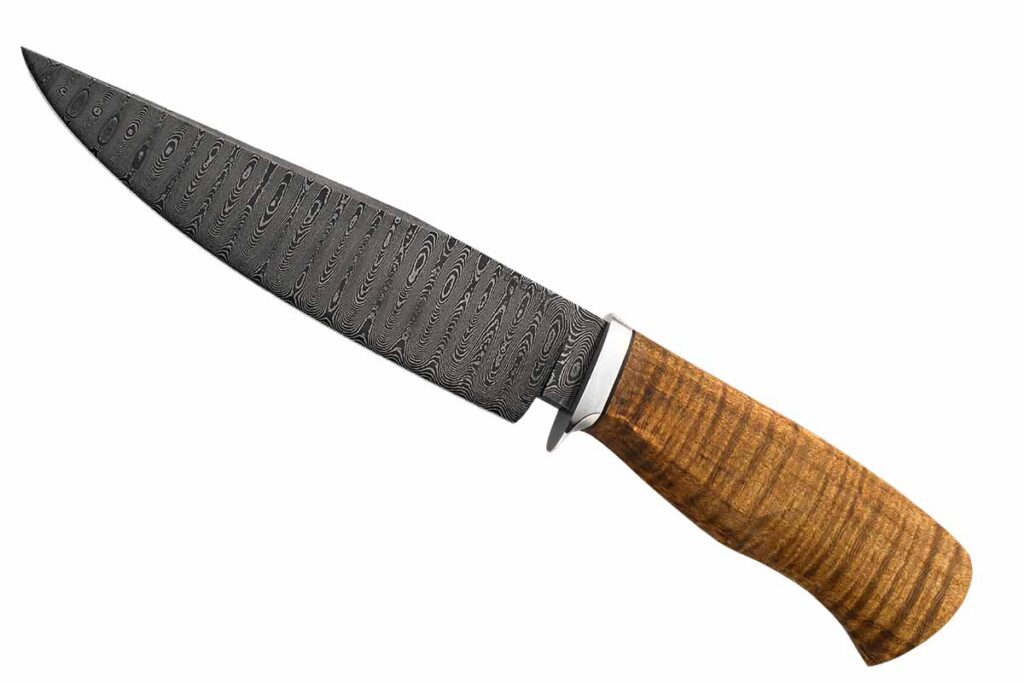
Michael Deibert: Curly Maple
A curly maple handle on the steering end of a 6-inch ladder-pattern damascus blade gives ABS journeyman smith Michael Deibert’s hunter a rich natural look. The guard is stainless steel. (Jocelyn Frasier image)
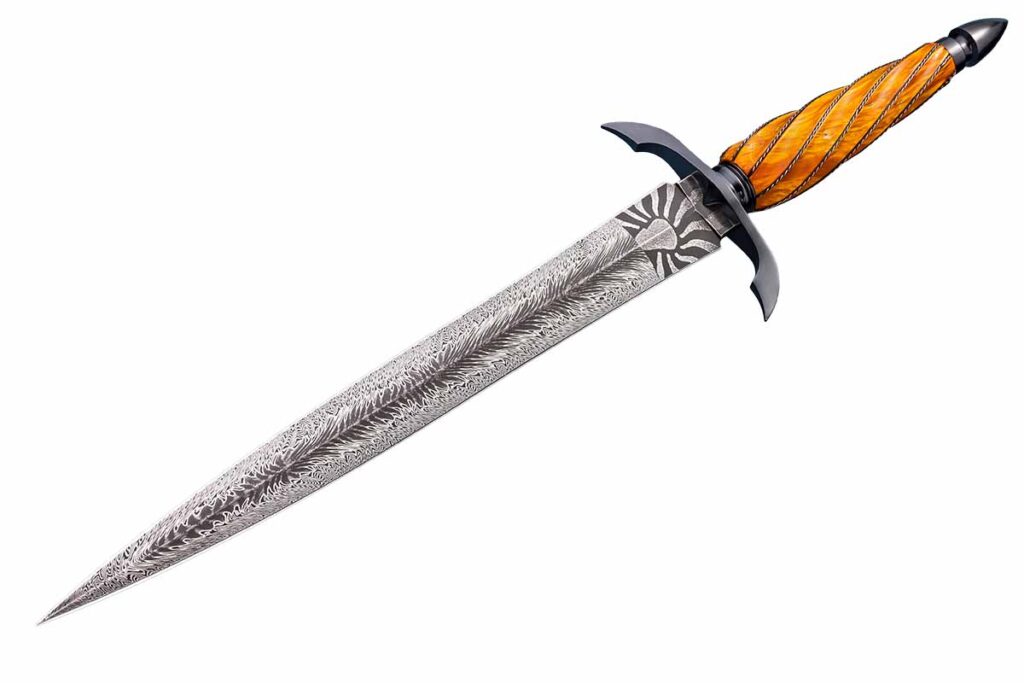
Denis Tyrell: Maple Burl
A maple burl handle fluted and wire wrapped and a 10-inch blade of spectacular Ocean Sunset damascus forged in a collaboration with Rick Hall top off Denis Tyrell’s dagger. Overall length: 16 inches. (SharpByCoop image)
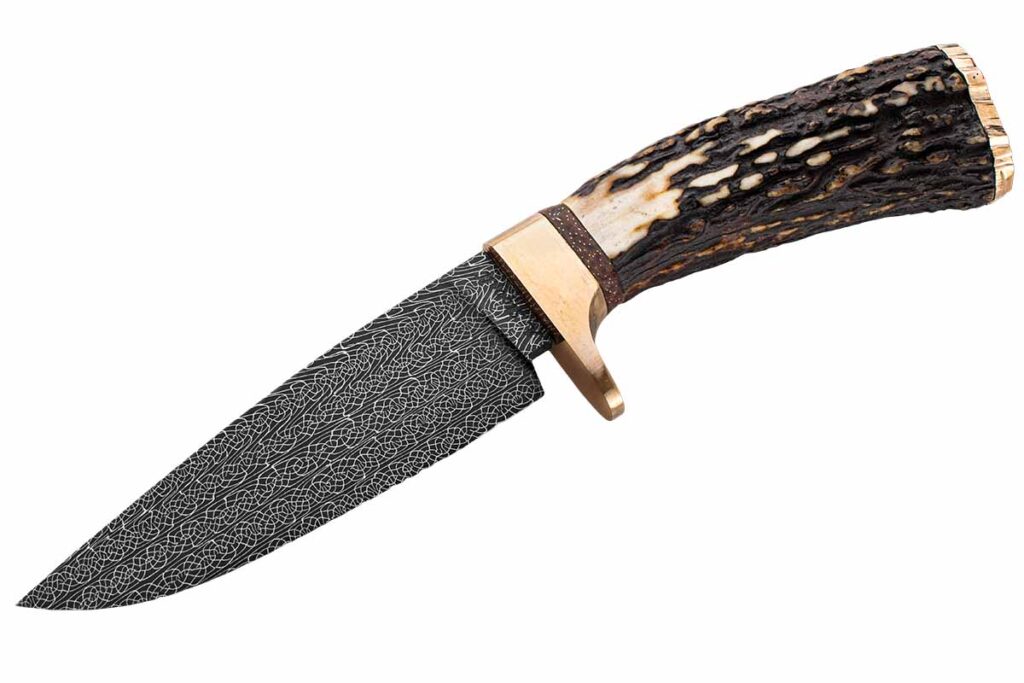
Anthony Stovall: Sambar Stag
Anthony Stovall opts for a Sambar stag handle and a bronze guard and buttcap for his hunter in a blade of Robert Eggerling damascus. Overall length: 9 inches. (Jocelyn Frasier image)
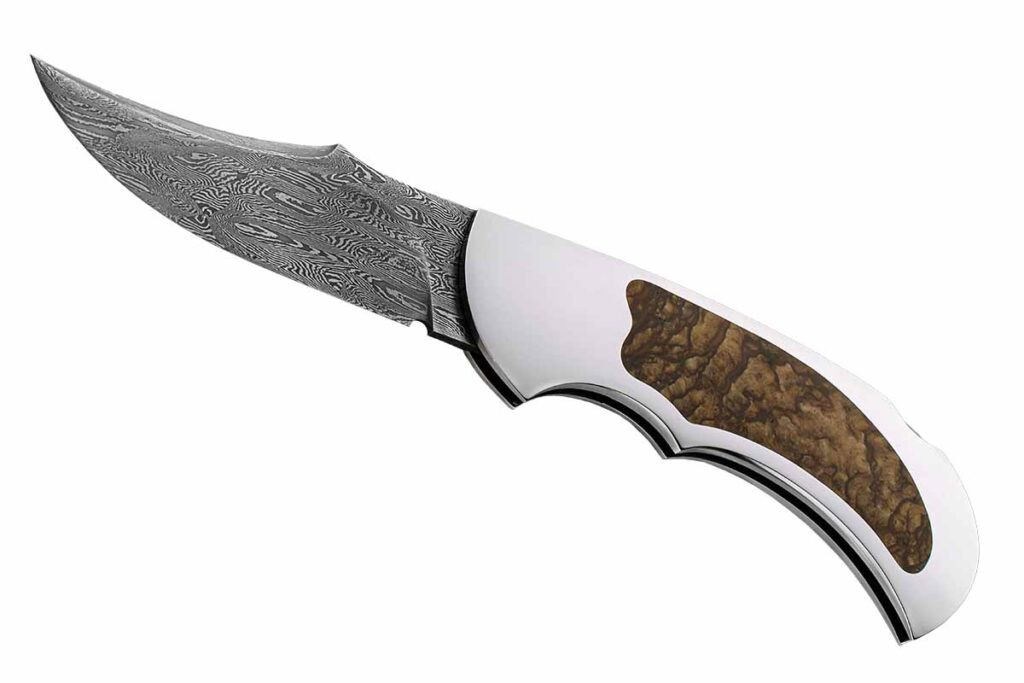
Scott Gallagher: Biggs Jasper
ABS master smith Scott Gallagher goes what for him is a different route with the Escalante, a lockback folder in a mirror-polished frame of 416 stainless steel and inlay of Biggs jasper stone. Blade and closed lengths: 3 and 4.5 inches. (Jocelyn Frasier image)
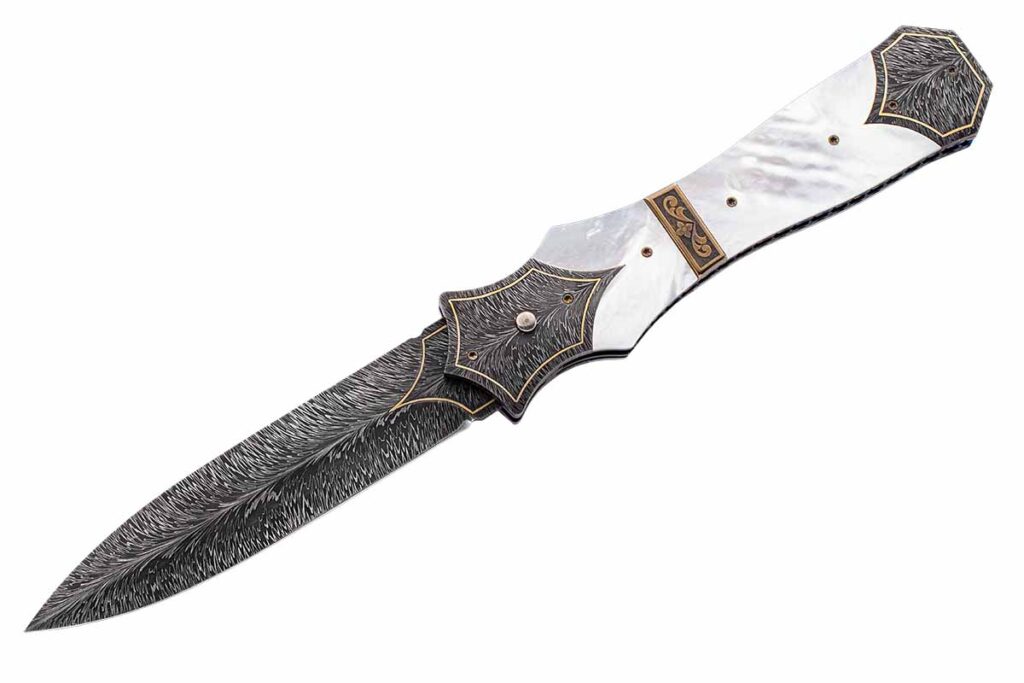
Frank Edwards: Mother-Of-Pearl
A handle of mother-of-pearl with 24k-gold borders and nitro-blued liners and a 4-inch blade of feather damascus highlight an automatic folding dagger by Frank Edwards. Closed length: 5 inches. (Jocelyn Frasier image)
Jim Perkins: Stabilized Maple
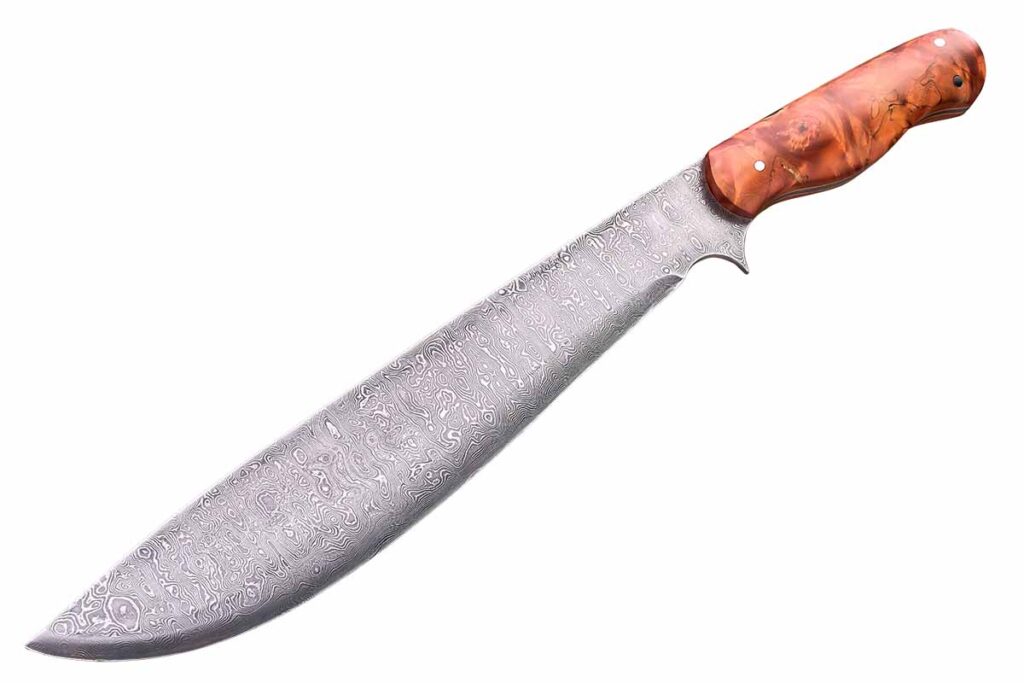
An orange stabilized maple handle and a 9-inch blade of a damascus of 272 layers of 1095 carbon and 15N20 nickel-alloy steels complete a Filipino barong by Jim Perkins based on one his wife used as a child. Overall length: 13.5 inches. Blade grind: convex. (SharpByCoop image)
Casey Vilensky: Koa Wood & Mammoth Tooth
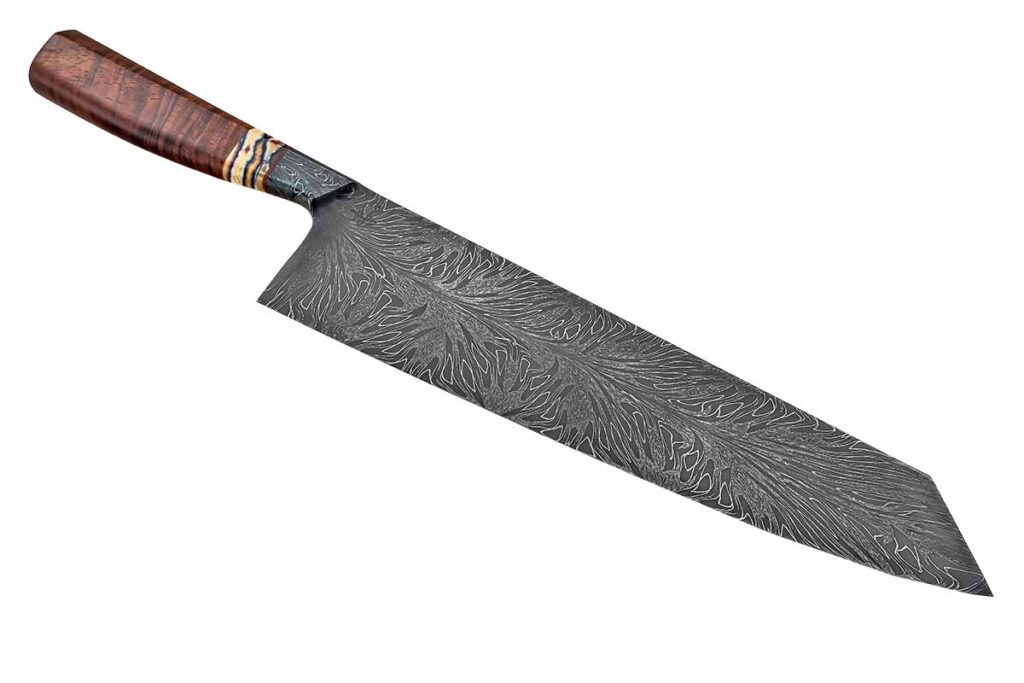
Koa wood and a mammoth tooth bolster complete the handle of Casey Vilensky’s gyuto. The 12.5-inch blade is carbon damascus. Casey’s list price for a similar knife: $4,000. (SharpByCoop image)
Jordon Berthelot marries two electric materials in one knife.
Jordon Berthelot achieves a hypnotic union of blade and handle materials in his integral hunter.
The blade is his HHH lightning damascus and the handle is cottonwood from Robswildwood.
“I used a wide variety of different bits and burrs with Foredom and Dremel tools to freehand carve the blade and handle,” he wrote.
“As my teacher Spencer Aplin always says, the most difficult part is deciding what to carve and how to give it the flow I want, which is so true,” Berthelot said. “I decided to incorporate the blade carving into the handle so it gave the whole piece a complete look, and also added some great purchase of the handle in multiple different grips.”
Berthelot Integral Hunter Specs Blade length: 4.5” Blade material: HHH lightning damascus forged from W1 tool steel/nickel rods w/4800 powder Handle material: Cottonwood from Robswildwood Overall length: 9” Maker’s price for a similar knife: $3,500
Form, function and purpose of daggers–the most stab-ready knives.
Few weapons are as simple in concept yet as demanding to design as the dagger. At first glance, it is merely a blade—sometimes short, sometimes long, usually but not always double edged—yet every aspect of its form has been refined over millennia for one purpose: stabbing. Unlike blades that balance cutting, slicing or chopping, a dagger’s geometry, materials and ergonomics allow no compromises in pursuit of its one purpose.
From early Bronze-Age thrusting knives to the stilettos of the Renaissance, every angle in any dimension maximizes straight-line penetration. Whether for combat or display, understanding this purpose is essential for anyone who wishes to design, craft or appreciate these edged weapons. Even the most ornate ceremonial dagger should appear “stab-ready” at a glance, communicating the implied threat of the utilitarian tool with a statement of status and opulence.
This modern cinquedea by Vince Evans has a blade with a broad, rigid base tapering to an unforgiving point. Fullers down the middle serve to make the blade both lighter and stiffer. Equal parts status symbol and lethal instrument, it embodies the dagger’s refusal to compromise between beauty and purpose.
Dagger Design Points
Every deadly stab starts with three critical design choices that define a dagger’s unwavering purpose. A dagger blade must have sufficient spine thickness and ricasso rigidity to resist excessive bending under thrust load; it should be tapered to an acute but robust point for minimal tip-entry resistance; and it requires flexibility balanced with rigidity so it can reach vital organs, often protected by armor, without breaking.
Early thrusting blades illustrate this principle as far back as the late Bronze Age. A broad base near the guard tapers rapidly to a narrow point, ensuring rigidity at the grip and sharpness at the tip. By the 1st century A.D., the Roman pugio perfected it. With a base often exceeding 5⁄16 inch in thickness and a central ridge tapering to a sharp apex, the pugio shed weight without losing stiffness. In practice, its point could pierce leather, flesh or weak links in chain mail, while its spine endured repeated jabs against shield bosses and bucklers.
Extreme ornament, unconventional design, and opulent materials cannot disguise lethal intent and pure stabbing functionality in Bertie Rietveld’s ornamental dagger.
Yet precision in stabbing demands more than brute strength, it requires avoiding gratuitous cutting‐oriented features in a thrusting design.
Serrations, upswept points, hooked tips, prying points and even bottle openers can be handy on a knife, depending on the task, but all of these undermine the straight-line force a dagger needs and disrupt smooth entry. If you ever find yourself in a situation where stabbing is required, by all means use whatever you’ve got—just don’t complain when your bottle-opener tip gets snagged in an assailant’s clothing. However, if you have the luxury of time and thought to design and make a dagger, strip away anything that doesn’t serve pure penetration. A dagger’s geometry remains laser-focused on stabbing effectiveness.
Lastly, a dagger must balance penetration depth with material limits. A tip too slender might break or bend against bone or metal, while a tip too blunt simply won’t enter. Ancient workers of bronze and iron didn’t have modern labs or spreadsheets, yet somehow found the Goldilocks Zone that balanced reach and resilience. A well-tempered tip is tough enough to survive bone contact without snapping, yet with correct geometry stays stiff enough to slip between armor plates. Only through precise taper and temper can a dagger achieve depth without sacrificing strength.
Even in this highly stylized dagger by Jordan Lamothe, the spine ridge provides the stiffness and rigidity required for uncompromising penetration.
Combat Daggers Vs Art Daggers
From the earliest times, daggers fell into two broad categories: weapons of combat and symbols of prestige.
The combat dagger was stripped to essentials—minimal ornamentation, maximum toughness—while the art or status dagger has always been free to bend the rules of pure function to satisfy aesthetic expression and make statements of personality and prestige. Nonetheless, even the most ornate display piece must exude “stab-readiness” at first glance, a silent promise inherited from its lethal lineage.
The complex damascus pattern and construction style of this dagger by Australia’s Jackson Rumble demonstrates that while he understands the essentials of a dagger, he’s not afraid to push the boundaries of expression without compromising either the stabbing function or his artistic vision.
Surviving examples of Roman pugios from army camps demonstrate the utilitarian design, but gilded pieces from the same era, with elaborate inlays and inscriptions, do not stray far from purpose despite the decoration. All share the same fundamental geometry: a stiff, thick base, reinforced spine and unwavering taper to a sharp, flat-ground point.
The ornamented variants—often gifted as symbols of rank or worn by the wealthy and powerful—could feature ivory grips or gilded fittings without diminishing their stabbing credibility. Regardless of personal status or the knife’s level of ornamentation, no one who saw a pugio drawn in malice would misunderstand the message or the danger. Combat heritage endows art daggers with an unmistakable threat that no amount of embellishment can conceal, though the pugios that did in Julius Caesar probably looked rather nice.
The complex damascus pattern and construction style of this dagger by Australia’s Jackson Rumble demonstrates that while he understands the essentials of a dagger, he’s not afraid to push the boundaries of expression without compromising either the stabbing function or his artistic vision.
Another example is the pesh-kabz, a Persian-born dagger later adopted and lavishly ornamented by Mughal weaponsmiths. Its single-edged blade featured a thick spine and acutely tapered point, designed to pierce heavy mail and laminated armor. As Mughal craftsmanship flourished in Agra and Delhi, artisans added damascened patterns, jeweled pommels and silk-wrapped grips. Yet even a fully jeweled pesh-kabz retained the same reinforced spine and narrow, forward-weighted geometry as its battlefield ancestors. Worn at court in gilded sheaths, these daggers exhibited status while making it clear that underneath the glamor was a blade as deadly as any used in war. Art and combat, then, remain entwined.
The junction of the handle, guard, and blade is where the true masters separate from the merely good—every element is a decision between comfort, control and ornament that fit together with no gaps. (Mike Quesenberry, Best of Show/Best Art Knife, 2011 OKCA Show)
This enduring marriage of lethality and ornamentation sets the stage for a deeper question: what separates an ordinary dagger from one that truly masters its intended purpose? The answer lies not just in history but in the details of profile, geometry, balance and structural refinement—each a mark of a dagger designed to do exactly what it must.
From historic clashes to modern conflict, these fierce custom blades prove there is still a profound amount of art in the tools of war.
Since the dawn of man, the edge of the blade has been used to hash out disputes between everything from clans and tribes all the way to nations. While not the main battle implement in today’s conflict, the martial nature of the knife remains. This particular collection of fierce customs demonstrates there is a heap of art in war.
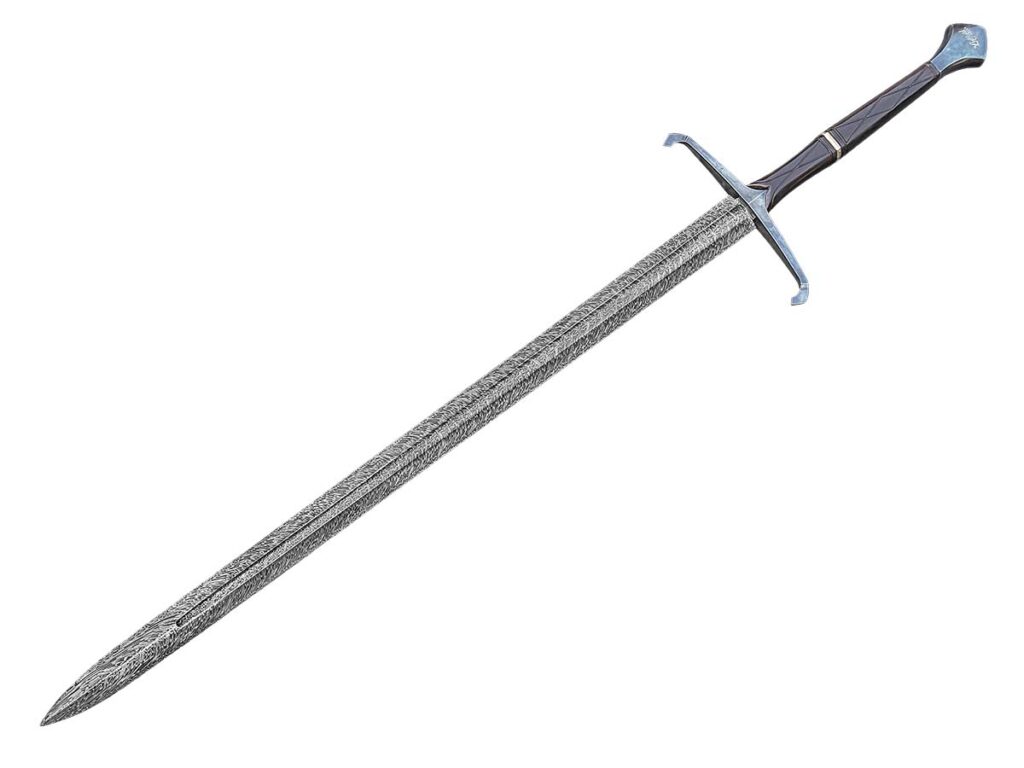
Caleb Ledford Long Sword
An electric 1084/15N20/mild steel Turkish-twist damascus defines the 31-inch blade of Caleb Ledford’s long sword. Lightening the sizable slicer’s load is a tapered fuller running on its midline. The handle is a pitch-black ebony, and the guard and pommel are cold-blued mild steel.
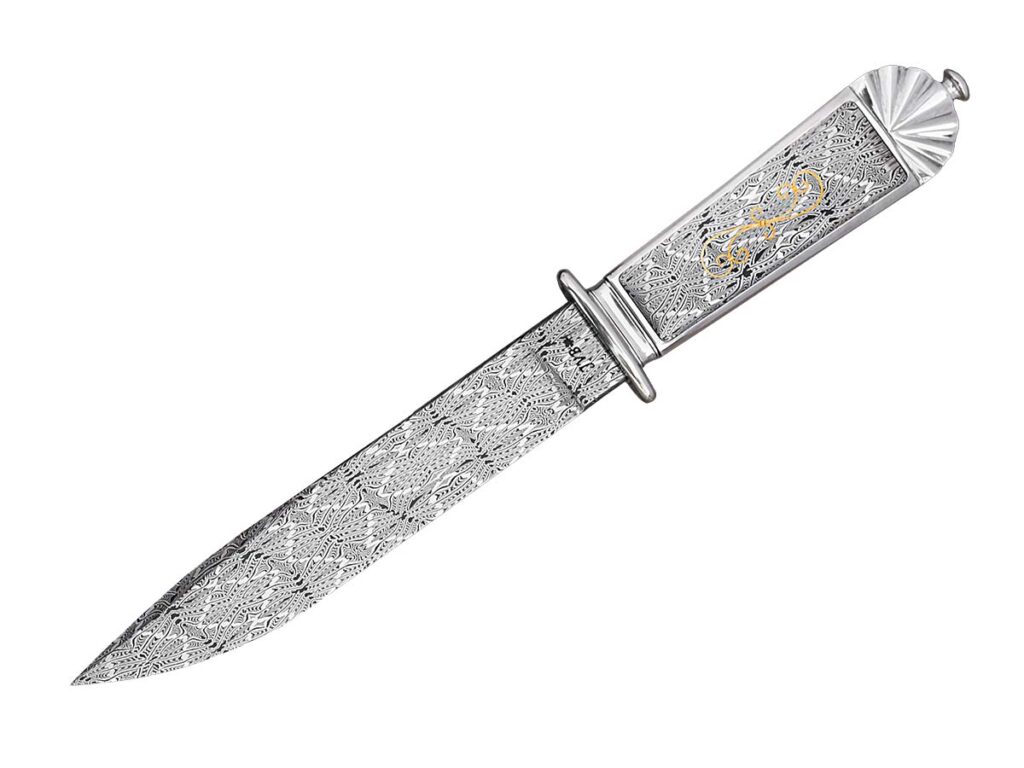
Jacco Van de Bruinhorst San Francisco Bowie
With matching blade and inserts, Jacco Van de Bruinhorst’s take on the San Francisco bowie is an elegant Barbary Coast brawler. The Canadian maker used ProCut/1084 to create what he calls a “snakeskin pattern.” If you study closely, the inserts harken back to the gold rush days with 24k gold inlay.
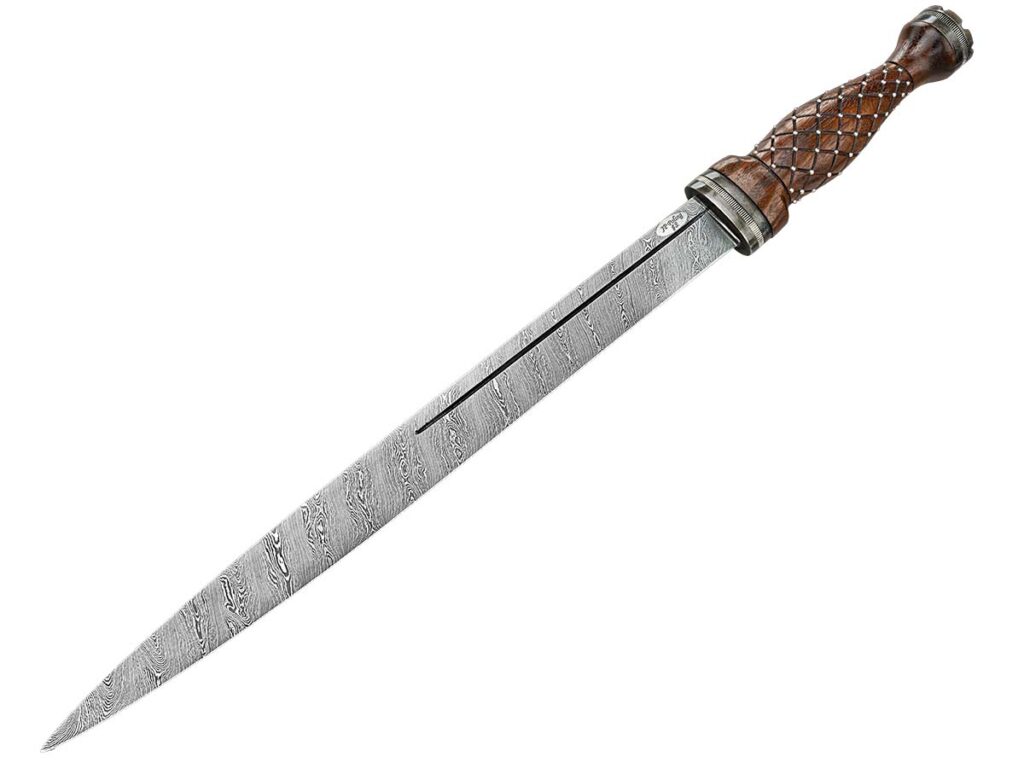
Jim Poling Dirk
Commissioned by a descendant of King James IV of Scotland, journeyman smith Jim Poling’s walnut-handled dirk appears freshly plucked from the highlands. The dagger boasts a 13-inch 1084/15N20 twist damascus blade, antiqued mild steel fittings and coin-edged nickel spacers.
Andrew Blomfield Pesh Kabz
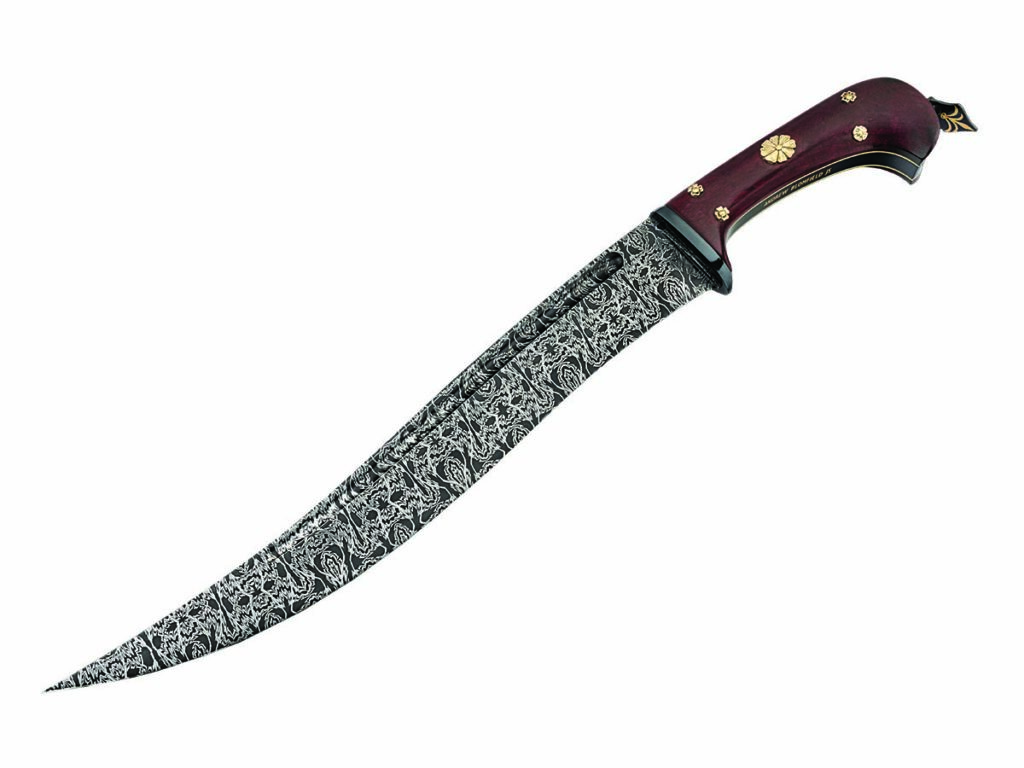
Master smith Andrew Blomfield has taken more than one stab at the pesh kabz in his career, and lands the blow with this 11.5-inch bladed example. The eye-catching mosaic blade is contrasted by the very conservative tones of the purple gidgee handle and blackened steel bolster. A traditional flourish, brass blossoms are on the handle’s pins.
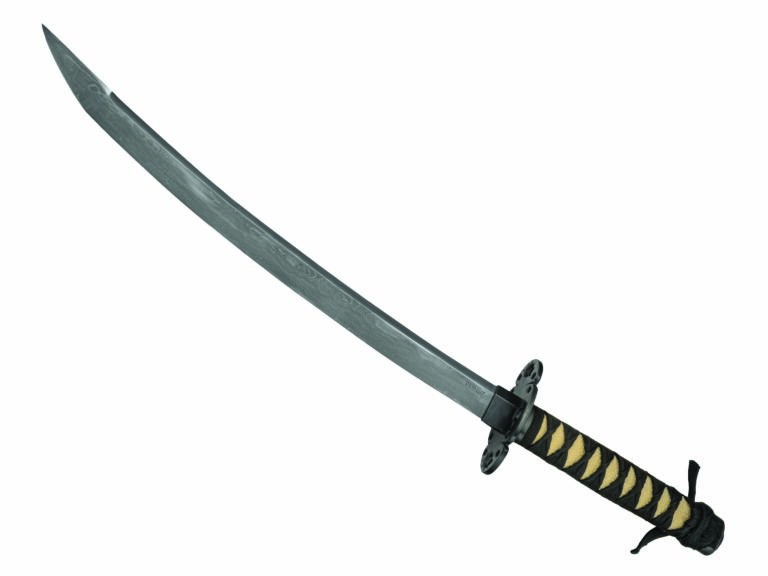
Michael Deibert Wakizashi
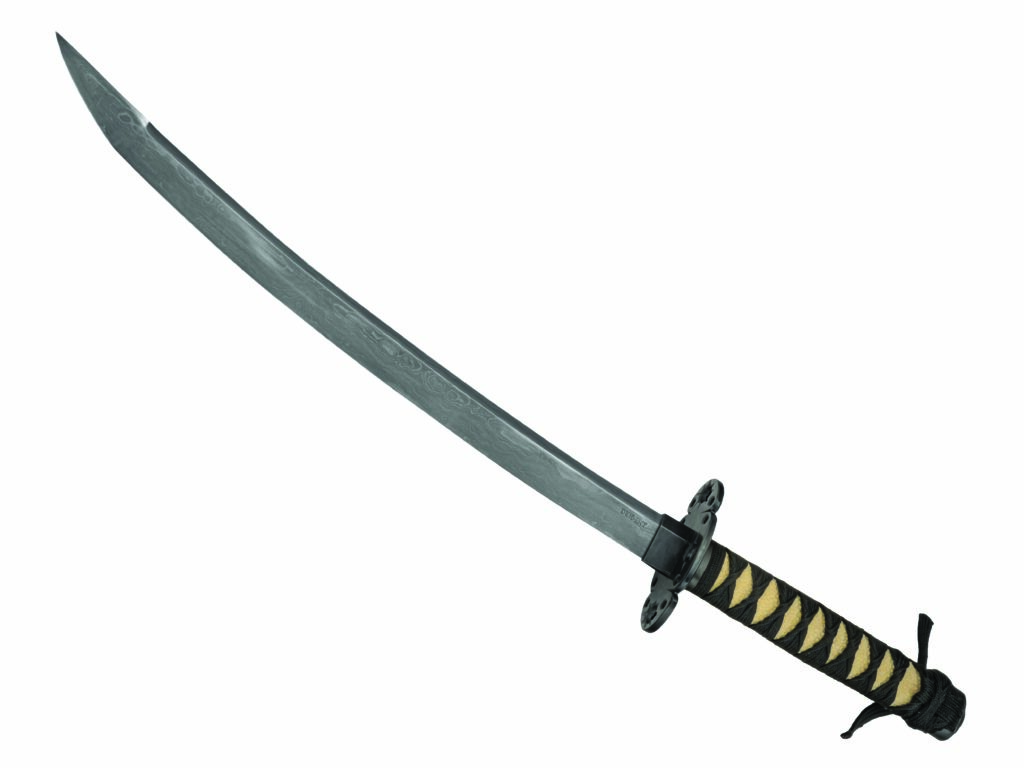
Alabama-based journeyman smith Michael Deibert brings traditional Japanese styling to life with this striking Wakizashi. The 18-inch blade features 1,100 layers of 1080/15N20 steel, paired with a wrought iron bolster. A classic stingray and an Ito-wrap handle complete the 28-inch overall build.
Nate “Tuna” Grant Pocket Fixed Blade
Nate “Tuna” Grant Pocket Fixed Blade
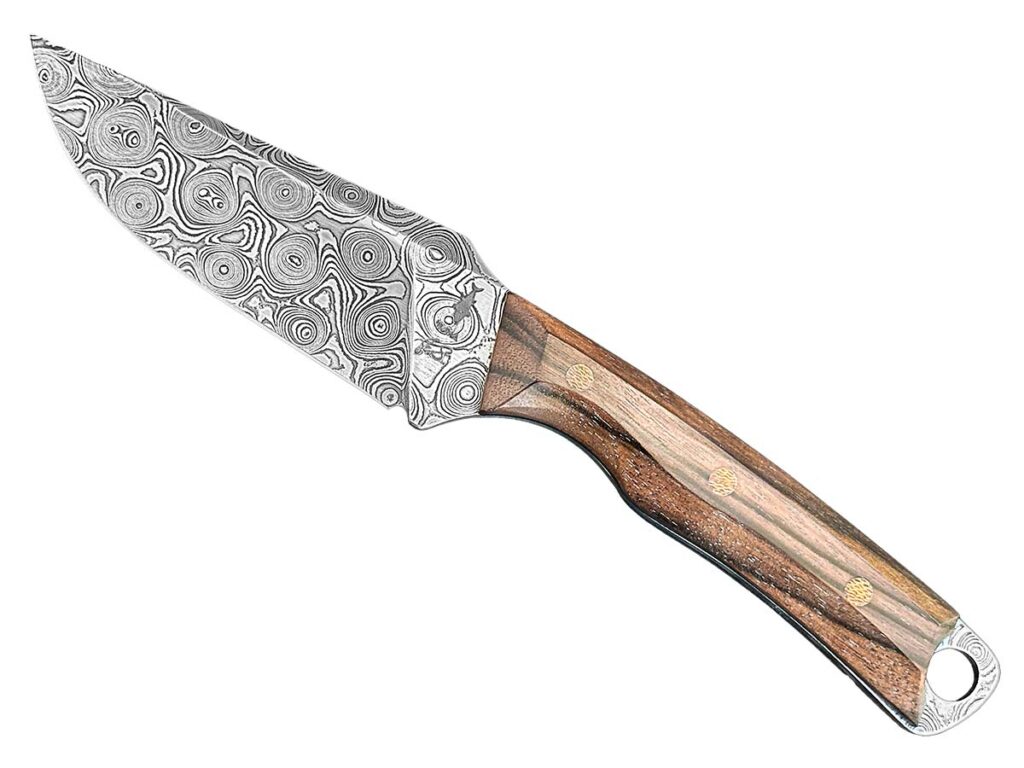
Journeyman smith Nate “Tuna” Grant delivers a compact powerhouse with the Defender. This 7.375-inch overall fixed blade features a 4-inch flat-ground blade forged from 1084/15N20 steel in a striking diamond drop pattern. The build is finished with rich Mun ebony scales.
Emmett Eitreim Dagger
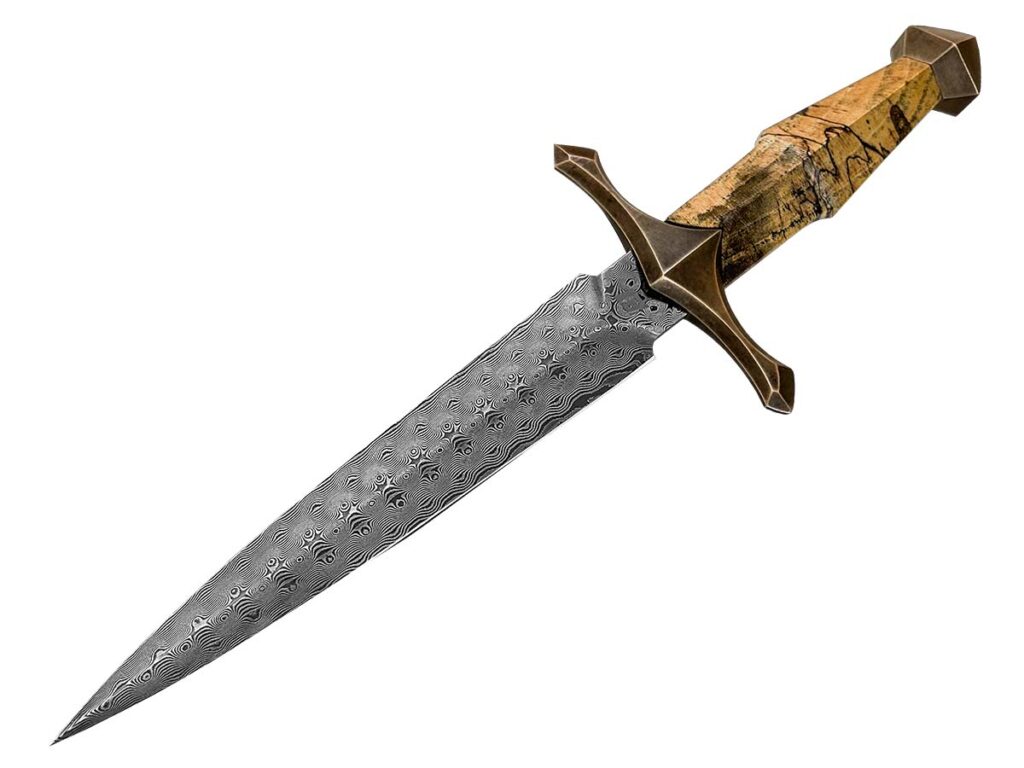
Emmett Eitreim presents a refined 12-inch overall dagger featuring a 7-inch flat-ground blade. The steel is a striking rose pattern forged from 15N20/1084, complemented by a 954 aluminum bronze guard and pommel. A stabilized spalted maple handle completes this elegant, high-contrast build.
Check Out More Cool Customs:
Cool Custom: Tony Lewis’ Tribute Knife To Steve Dunn
Cool Customs: Rocco Nawrocki’s Knife For Sergeant Bunker
Mosaic Damascus Can Be Made Numerous Ways, And These Master Smiths Are All Putting Their Own Spin On The Craft.
The many moods of mosaic damascus provide the bladesmith and custom knifemaker with an ever-changing form of artistic expression. The possibilities of a new pattern, a different look, and yet another lasting impression are endless.
For several makers, mosaic has become a signature steel in their presentations, and these imaginative artists are pushing the envelope in an already dazzling array of motifs for blades and knife fittings.
Kelly Vermeer-Vella
Kelly Vermeer-Vella said she initially called the mosaic damascus of her fighter Riptide because it looks like “calm waters, but also because the forging process is pretty brutal. So, now I call that process ‘ripping it!’” Blade and overall lengths: 7.5 and 12.5 inches. At press time the knife was available through Arizona Custom Knives for $3,800. (SharpByCoop knife image)
In her Riptide pattern, American Bladesmith Society Journeyman Smith and past Forged in Fire champion Kelly Vermeer-Vella provides a great example of the new frontiers being explored with mosaic damascus.
“It’s initially called that because it looks like calm waters,” she commented, “but also because the forging process is pretty brutal. So, now I call that process ‘ripping it!’ Sometimes I win and sometimes I make hunters!”
Kelly showcases the Riptide pattern on her 12.5-inch fighter with a 7.5-inch blade and mammoth ivory handle sporting a long, modified “S” guard.
“I really enjoy swooping forged guards that complement the curves of the blade and handle. And I love mammoth ivory, so I make a lot of frame handles,” she added. “I think the best-looking frame is in a low-layer twist, 25 layers or so.”
The Vermeer-Vella mosaic involves a commitment to hard work to produce the desired results.
“The pattern is not san-mai,” she revealed, “rather, different layer counts of stacked W’s with heavy 1075 steel on the edge. The wing effect comes from forging. I push and pull the pattern with a hand hammer and forge to shape so that the pattern flows with the edge.”
The blade material is the 1075 carbon steel, which appears as the dark areas, and 15N20 nickel alloy, which shows as the grey, shiny areas. “I etch in 3-to-1 ferric chloride and also do a coffee etch,” she added. Her power hammer is an Anyang 88 and she uses a Riverside 24-ton press.
Jack Rellstab
Jack Rellstab said he wanted the blade of his Western Chef’s Knife to “look alive.” As he noted, “My idea was with the taper in layers to give it an organic look that appears as if the elements are actually growing.” Thus, the pattern’s name of Frogs and Flowers seems most apropos. His price for a similar knife: $2,600. (SharpByCoop image)
Like Vermeer-Vella, Jack Rellstab is an ABS journeyman smith who enjoys the creative process of forging mosaic damascus. His Western Chef’s Knife brings a robust profile to life in a mosaic pattern called Flowers and Frogs.
“The pattern is one of my styles of W’s explosion,” he noted. “I started the original billet with the layers of both 1080 and 15N20 getting progressively thinner from one side of the billet to the other. After using square dies to resquare the billet for W’s, I drew it out with a taper so the W’s would get tighter towards the end. Then I did a restack and a four-way to finish it. So, the steel is 1080 for the dark portion and 15N20 for the bright.”
The handle is amboyna burl, bronze and G-10. He says the grip is designed around most Western-style kitchen knives on today’s market, though the belly/underside might be a bit shallower.
“With this mosaic pattern, I wanted the knife to look alive,” he offered. “My idea was with the taper in layers to give it an organic look that appears as if the elements are actually growing. I used a 165-pound hammer belonging to New West Knifeworks, and I also used their Anyang hydraulic press for resquaring.”
Jack began his bladesmithing journey with mosaic damascus by watching a YouTube video, and then let his imagination kick in to develop the exciting pattern that is sure to generate conversation in any kitchen.
Will Stelter
The Serpentine Multi-bar Santoku by Will Stelter sports a mosaic damascus pattern of the same name. He used 1080 and 15N20 steels for the pattern-welded twisted bars and Cruforge V for the edge. The Cruforge V etches darkly, and its wear resistance and high working hardness make it ideal for culinary knives. Blade and overall lengths: 5 7/8 and 10.75 inches. His price for a similar knife: $3,500. (SharpByCoop knife image)
The Serpentine Multi-bar Santoku by ABS Journeyman Smith Will Stelter sports a mosaic damascus pattern of the same name. The handle is ivory paper Micarta®. He used 1080 carbon and 15N20 nickel-alloy steels for the pattern-welded twisted bars and Cruforge V for the edge. The Cruforge V etches darkly, and its wear resistance and high working hardness make it ideal for culinary knives.
“I started by forging up 28 layers of W’s,” he recalled, “and then worked that billet down to a half-square twisting stock. I twisted three bars right hand and two bars left hand, lining up my twists as best I could before forge-welding them together. After they were stuck, I forge welded on a solid Cruforge V edge bar that was around 40 percent as wide as the multi-bar billet, but the same thickness. With my final stock stuck together, I then laid out and cut away several three-quarter-inch-deep grooves or divots from the profile of the rectangular 2-inch wide bar, which still left Cruforge V on the edge, and two full twisted bars at the thinnest parts of the patterned area on the spine.
“I then flattened down the billet, which took the previously straight layers and gave them the bold ‘serpentining’ that came out in the blade. I then forged my blade to shape and forge welded on some of the base W’s stock that I twisted from as bolster material. This is a very similar technique to how the classic ‘River of Fire’ pattern is done, but with a different base pattern other than the usual feather pattern.”
Will used his 1924 400-pound ram Beaudry hammer to do the majority of the forge welding and a twisting machine to twist the five bars. He learned his pattern-welding technique and the ability to visualize the way the steel moves from bladesmith Salem Straub, crediting Straub with teaching him how to design patterns “with intentionality behind them.” The pattern itself is sole authored by Stelter, who has done some serpentine multi-bar patterns prior to the subject piece. However, this was his first attempt with a monosteel-edged bar.
“The serpentining is purely aesthetic,” Will said. “It’s meant to give a bold line for the eye to dance down rather than the straight, more classic intersection of the edge bar that is normal for a composite construction. This also means that from far away you see an interesting pattern, and then when inspected up close the explosions of the twisted W’s really pop out, which gives the overall piece an interesting level of depth.”
Will considers this particular mosaic “an intermediate-level pattern, easy to try, though somewhat difficult as well. The most challenging part is building a high-quality multi-bar pattern with adequate layer density and well-matched twists. The rest of the pattern is fairly simple.”
Brent Stubblefield
Brent Stubblefield’s integral chef’s knife has an 8-inch blade of his shimmering Crossroads mosaic damascus, and a stabilized Hawaiian koa wood handle with mammoth tooth spacer. Overall length: 13 inches. His price for a similar knife: $1,500. (SharpByCoop image)
At the Join or Die Knives Forge in Richmond, Virginia, Brent Stubblefield hammered a beautiful blade in his Crossroads mosaic pattern—and did so with multiple techniques.
According to Brent, “There is the initial damascus forging, crushed W’s, twisting, four-bar-squaring welds, ferry flip tilting, edge bars, and a ‘fish mouth’ tip to make the edge bars meet. There are multiple elements that are forged on the edge or corners to manipulate the pattern, and finally the knife shape and integral bolster are forged to shape.”
The mosaic is comprised of 1084 and 15N20 steels, with the 15N20 appearing as a silver white on the blade while the 1084 blackens with a ferric chloride etch.
“The shapes in this pattern reflect a desire to incorporate all the different techniques of mosaic damascus making I have learned over the years,” he explained. “I’m always trying to find a way to create never-before-seen patterns in order to add something totally new to the American bladesmithing tradition.”
Stubblefield used an Anyang 88 power hammer and homemade 30-ton press to create the Crossroads mosaic. A Bridgeport mill was helpful in the squaring-up process and flattening pieces for rewelding. A Miller welder assisted in tacking materials up before they went into the forge, while an Evenheat kiln and Broadbeck Ironworks grinder were key tools in the process as well.
“Although I did not have any single mentor,” Brent mused, “many knifemakers have gone out of their way to share tips and tricks with me. While they didn’t teach me directly, [bladesmiths] Mareko Maumasi and Salem Straub have been very generous with sharing their processes through social media. I certainly have referenced them among others.”
Stubblefield continues to challenge himself as his career advances, and he sees no slowdown in the creative process. “This knife is very difficult to do simply because the higher number of forge welds create more opportunities for failure,” he reasoned. “Any complex damascus blade is actually just many simple techniques combined together. The hardest part for me is understanding how manipulating the pattern early in the process will affect the outcome, and visualizing the end pattern.”
Whether You Call It Copper San-Mai, Cu-Mai, Or Anything Else, Copper Damascus Is One The Trendiest Ways To Forge Knives Today.
By now most knife enthusiasts are familiar with pattern-welded steel, commonly called damascus, whose re-invention for use in knife blades is attributed to BLADE Magazine Cutlery Hall-Of-Fame® member Bill Moran.
The damascus world has since exploded with complicated mosaics, exotic-tiled canister billets, and, more recently, even some interaction between pattern welding and 3-D printing. These new techniques are mind-blowing for sure.
Copper San-Mai
A 2.75-inch go-mai blade with a wrought-iron cladding over an Aogami2 core and a copper shim layer highlights Joe Edson’s frameback straight razor. The frame is copper with a forced patina. The scales are crosscut mammoth ivory on a G-10 backer with a forged-patina-copper-wedge spacer. Closed length: 3.25 inches. (SharpByCoop image)
One of the hottest new trends in damascus is the inclusion of copper into pattern-welded billets. Commonly called copper-mai, copper san-mai or cu-mai, the technique has been brought to near perfection by Coy Baker at Baker Forge & Tool.
In 2019 at the request of a customer, Baker created his first copper damascus billet. Starting with Baker as a one-at-a-time weekend garage craftsman, the business exploded. Baker Forge & Tool now has a 3,000-square-foot shop and 10 employees, and they can’t keep up with demand.
Baker says the welding of copper in stacked configurations has been around for centuries in the form of mokumé gané, aka mokumé. While he’s the first to blow up Instagram with welded copper damascus, he is certainly not the first to attempt the cu-mai technique.
He primarily uses 80CrV2 carbon steel for the cores of his billets, and also various patterns of a damascus of 1080 carbon and 15N20 nickel-alloy steels. ABS master smiths Steve Schwarzer and Jason Knight helped him along in his early damascus-making journey.
How To Forge Copper Damascus
To forge a copper damascus billet, Baker typically uses a core of 80CrV2, a layer of 20-gauge pure copper shim stock, and a cladding of 1080/15N20 damascus.
“It’s important that the core and cladding stay in a 1-to-1-to-1 thickness ratio,” he said. “The copper doesn’t harden, and it’s critical to keep the core centered so that the cutting edge of the knife will be hardenable steel.”
He hasn’t experimented with copper alloys other than pure copper, though he has used some bronze and nickel with good results.
It’s no surprise that there are trade secrets that Baker didn’t volunteer, and I was polite enough not to ask. Copper stacked in a billet oxidizes quickly, similar to stainless, and so the welding must be done very precisely. For the welds to stick, the surfaces being welded also must be exquisitely clean, with not even a trace of oils or fingerprints.
The Different Types Of Copper Damascus
Baker did reveal that there are two basic versions of the process. In one, the layers are welded around the perimeter as in canister or stainless welding, and then the entire billet is welded at once. In this method, the temperatures are enough to liquefy the copper, and the perimeter welding keeps the liquid in.
In the other version, the billet components of core, copper and clad are stacked together and held at brazing temperature. This is Baker’s preferred method, as the copper doesn’t liquefy and so performs more consistently when it comes to thickness. Such exact brazing requires precise temperature control, as a 10-degree variation in either direction from the proper brazing temperature can produce failure.
While there are no doubt smiths who have attempted and maybe even successfully welded copper damascus by hand, Baker acknowledges that the aspiring smith is much more likely to be successful using a press or power hammer to set the weld. Precision temperature control also gives increased chances of success.
Dion Damascus
A 10.25-inch blade of NBC san-mai, black ash burl handle with an ebony bolster and a white G-10 spacer help complete Andrew Mochado’s kitchen model. Overall length: 16 inches. (Eric Eggly/PointSeven image)
While Baker is the best known and most common source for copper damascus, another variation is available from Dion Damascus. Florida knifemaker Andrew Mochado recently made a knife from a bar of Dion Damascus that included brass, copper, and nickel clad over a core of 52100 carbon steel.
“It is my take on a gyuto-style chef’s knife,” he said. It has a box elder burl handle with an ebony bolster. Mochado heat treated the blade in a gas forge. “The outside layer of the billet was nickel, so it was very difficult to get it all up to temperature,” he explained. “The nickel buckled up a bit and I thought I had a failure. I was able to successfully grind off all the buckling, and the blade was still perfectly forged together.”
Baker pointed out that the melting points of copper and nickel are above the heat-treating temperature of carbon steel. However, in a forge, the outside layers come in contact with a forge atmosphere that’s well above the desired hardening temperature, thus causing problems with the non-ferrous layers.
How The Copper Affects Knifemaking
Jordon Berthelot is a Texas maker known for kitchen knives and intricate carved and sculpted blade plunges. He’s also made dozens of blades with Baker’s cu-mai. He has been Coy’s “guinea pig” for testing new patterns for months. When Baker develops a new pattern, Jordon builds the prototype.
“I’m pleased with how the cu-mai grinds. You might expect the copper to be gummy or soft or to grind differently when you sculpt it, but it pretty much grinds the same as steel,” Berthelot observed. “You always have to pay attention to get the carving right, but the copper poses no problems.”
Makers will notice the copper being softer if they hand-sand it aggressively, but overall the copper layers are no more difficult to finish than regular steel.
When it comes to finish work, Berthelot recommends sanding to at least a clean 600 grit prior to etching. “Regular” ferric chloride doesn’t perform well, and etching copper in it will leave a copper tint on standard damascus steel blades later. Instead, Berthelot prefers a 20/20/60 mix of ferric chloride, muriatic acid and distilled water. The addition of the muriatic acid keeps the copper from looking blurry, and keeps the material out of the solution for future etching. After the etch, Berthelot buffs with “black magic” rouge so the copper will “pop” nicely.
Forged in Fire season 1 episode 2 “OG” winner Chris Farrell of Fearghal Forge in Austin, Texas, took advantage of the bold copper line in his piece of Baker Forge damascus. The copper makes a dramatic, bold statement, and so do the curves and lines of Farrell’s fancy faceted fighter.
“People see my faceted handles and think they’re kinda funny until they pick one up and realize how well it fits their hands,” Farrell said. He is fascinated by innovations in the knife industry and is always looking for his own ways to innovate. He’s experimented with forging Baker’s copper damascus bar stock: “It can be done, but you really have to be careful. It’s real easy to mess up!”
Copper Damascus Around The World
Australian maker Adam Fromholtz crafted a cake knife of copper damascus from the Japanese steel company Takefu. Takefu steel can be hard to find in the USA, but there is a reliable Australian distributor. Adam’s knife is copper, nickel and brass clad over a V-Toku-2 carbon core. Handle: Tiger myrtle. Blade and overall lengths: 9.25 and 14 inches. His list price for a similar knife: $1,800. (SharpByCoop image)
The cu-mai trend is not limited to the United States. Australian knifemaker Adam Fromholtz of Canberra crafted a cake knife of copper damascus from the Japanese steel company Takefu. Takefu steel can be a challenge to find in the USA, but there is a reliable Australian distributor.
Adam’s blade is copper, nickel and brass clad over a V-Toku-2 carbon core. Regarding the steel, Fromholtz noted that it was near impossible to forge due to the differences in ductility between the materials. Because of the softer cladding, he noted that the blade tends to gall a bit, so makers should take note of this when fitting a slotted guard on a blade of such a material. Overall, the steel is simple to finish but shows handling marks easily.
How Do Copper Damascus Knives Perform?
Is copper damascus all flash and bling or does it perform? Copper does not harden the way steel does, which makes you wonder how it impacts knife performance. First of all, copper damascus is used with a monosteel—that is, one layer of steel—or a regular carbon damascus core.
Using a steel core makes it where the copper has absolutely no impact on the blade’s cutting performance, edge stability or toughness. Baker said he knows of two makers who have used his cu-mai material to complete American Bladesmith Society-style performance tests of rope cut, 2×4 chop and 90-degree bend.
When it comes down to it, the copper layers are very thin. Considering that the final weld-up of clad/copper/core/copper/clad may be as much as 2 inches thick, and that the copper starts out roughly .03-inch thick, the overall final billet has very thin layers of copper. It’s enough for a dramatic pattern but not enough to impact knife performance in a negative way. “I made a knife with it then beat the hell out of it,” Farrell said. “So long as it’s heat treated properly, it’s good stuff.”
Availability Of Copper Damascus
The 9-inch blade of Jordon Berthelot’s chef’s knife is Baker Forge & Tool auro-mai damascus with a core of 80CrV2 carbon steel. “It has my carved ridge that adds great weight reduction and a nice ergonomic flow, and decreases the drag coefficient,” Berthelot wrote. “It also allows me to alter the pattern.” Overall length: 14 inches. Maker’s price for a similar knife: $1,700. (image courtesy of Jordon Berthelot)
If you’re a maker looking to capitalize on the copper damascus trend, get in line. Baker Forge releases approximately 70 billets a week to the public, in addition to what it produces for commercial use. The billets “drop” Saturdays on Instagram and are usually gone by the end of the day.
Most billets are 2-2.5 inches wide and come in thicknesses from ⅜ inch all the way down to 3/32 inch. Pricing currently runs up to $25 per linear inch, but as in all things post-pandemic manufacturing, the supply costs for raw materials keep increasing.
As for consumers, check knife shows, magazine stories such as this one, and Instagram and elsewhere on the Internet. Cu-mai knives are out there—you just might have to do some digging to find them.
Sourced from Geronimo country Rybar’s Prospector dagger and bolo combo prove pure gold.
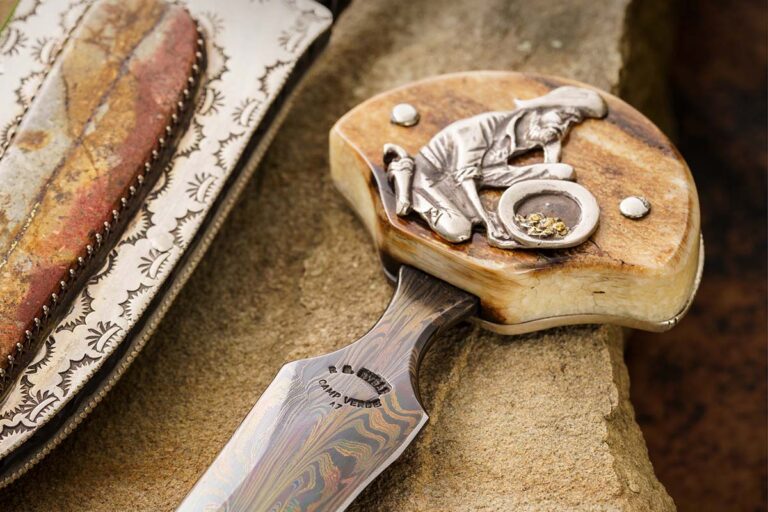
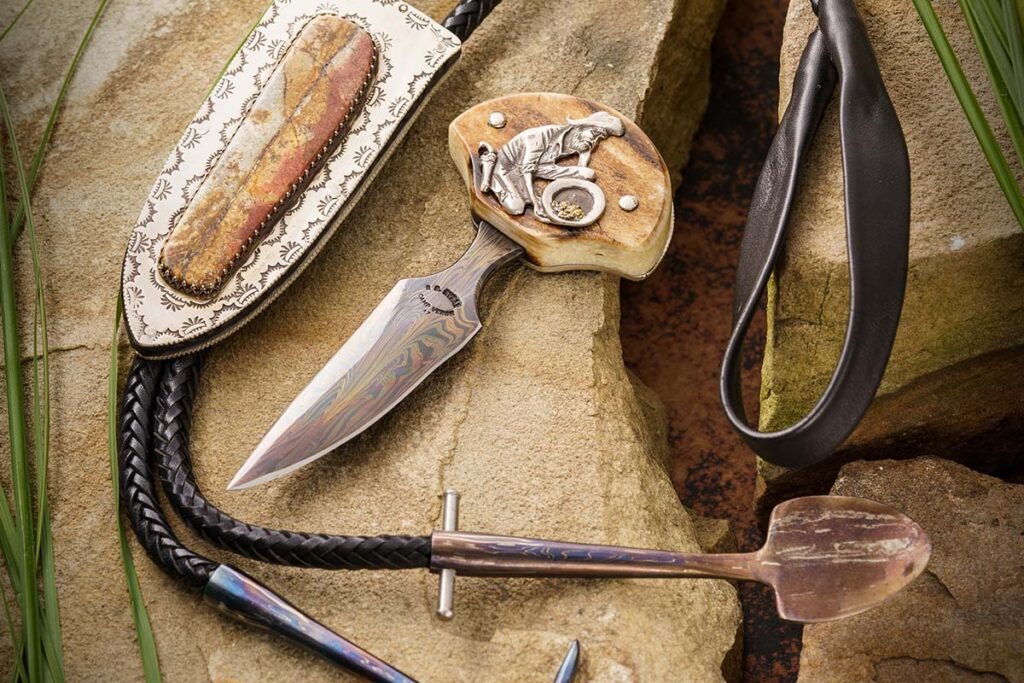
The Prospector by Ray Rybar is a push dagger/bolo combo that bespeaks not only his talent as an ABS master smith but also the array of beautiful, valuable ore in and around his home in Camp Verde, Arizona.
Ray lives in the middle of an Apache reservation where he owns three or four gold mine claims. Camp Verde was the headquarters of U.S. Army Gen. George Crook during the Army’s pursuit and eventual defeat of Geronimo and his Chiricahua Apache band in 1886. Navajos live in the area as well.
Also from near one of his claims, the rock for the inlay has a naturally occurring “stringer” of gold down the center. A local Apache weaved the beautiful leather bolo strap, and Ray forged the shovel and pick of carbon steel and heat colored them. (Eric Eggly/PointSeven images)
Ray teaches various forging and other classes. On occasion he takes his students out to forage for blade and other materials in and around his claims. There they find not only gold every so often but also iron/nickel meteorite, samples of Fe3 and Fe4 iron, ore that can be developed into copper, silver and more. He teaches his students how to convert the iron ore into high-carbon steel. He saves up the leftover steel forged by his students and also rocks he finds and slices with a slab saw for his knives and sheaths. The results can be spectacular—of which The Prospector is a most representative example.
Prospector Specs Knife name: The Prospector Maker: ABS master smith Ray Rybar Knife type: Push dagger/bolo Blade length: 4” Blade material: Damascus forged from iron ore converted to high carbon steel and also iron/nickel meteorite Handle: Ancient walrus ivory w/silver pins and backing Handle inlay: Prospector is solid silver and his tray contains real gold nuggets Sheath: Silver front and back and ebony center w/silver pins; decorated with various marks/designs made with stamps Ray cut from carbon steel and based on those used by the local Apaches and Navajos Sheath inlay: Rock containing quartz, feldspar and a stringer of gold Bolo strap: Leather weaved by a local Apache Maker’s price for a similar push dagger/bolo: $6,500