

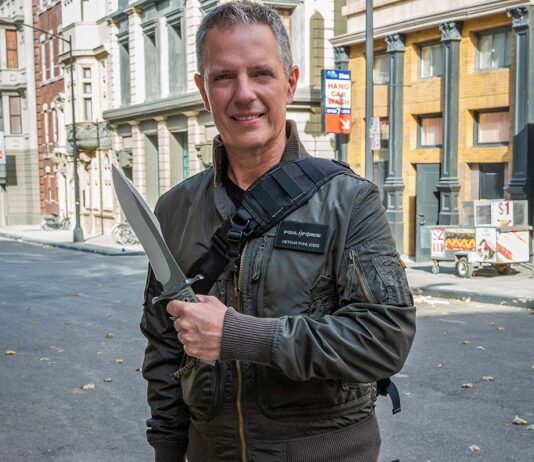


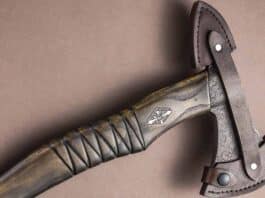
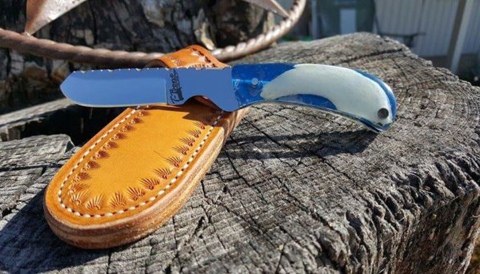
The 2012 ABS Journeyman Smith Knife of the Year is by Karl B. Andersen, JS. It is part of the 2012 at the ABS Knife Auction set for June 9, 2012 at the Blade…
New England Battle Of The Bladesmiths
Four Young, Talented Bladesmiths Battled The Clock Under The Sweltering Maine Sun To Craft A Knife In Two Hours.
It was brutally hot under the Southern Maine Sun on the campus of the New England School of Metalwork, It was made even hotter when a pair of forges were fired until they were an electric glowing orange. It was all part of the build-up to the Battle Of The Bladesmiths as part of the New England Bladesmithing Symposium.
The rules were simple: given a one-foot bar of 1084 steel, four bladesmiths had two hours to make a knife at least 7-inches long. This meant forging the blade, sculpting the guard, making the handle, and assembling it all within the allotted time.
The theme for the contest was young guns as the youngest competitor was 19 and the oldest was just 24.
“We pick people that are at an equal level of skill,” NESM director Dereck Glaser said. “We had 25 applicants, and we picked these guys based on a moderate level of skill, they’ve all been making knives around the same length of time. And I wanted to get an [similar] age range. I didn’t want big old-school guys coming in against people nobody knew.”
Who Hammered In The Battle

The foursome was from all over.
There was Leo Potter, already an accomplished smith from New Hampshire who came with pieces to proudly show off and display. Up from Martha’s Vineyard with his parents was 20-year-old Luke Nivala, and down from Quebec was Jeremy Yelle. Kemper Feuerzeig rounded out the field, and he had flown in all the way from California.
Glaser said he was excited to have the field he had and was thrilled to see the battle return for the first time since 2019 due to the COVID pandemic.
“We started doing the battle in 2010 or 2011, and shortly after, Forged in Fire caught on,” Glaser. “That’s where the show came from, this whole battle concept. The ABS was doing this at their events long before the show existed.”
In The Thick Of It
The contest started fast as everyone got their steel into the heat within the first minute. Like dancers, the smiths bounced back and forth from their stations to check on their steel. Every second was used to the fullest.
The smiths used different techniques to make their blades. Feuerzeig forged and ground his blade with authority and was ahead of everyone when he quenched just 30 minutes in. By contrast, after forging the blade to shape, Yelle put his blade in the vice to normalize so he didn’t quench until 70 minutes into the competition.
Nivala kept a steady pace throughout and didn’t let the pressure get to him, or at least kept a cool, confident face. His mother was beaming the whole time with pride in her son.

The contest was to be judged by a trio of renowned smiths, Emiliano Carrillo, Matthew Parkinson, and Lin Rhea. Other legends of the field like Mace Vitale watched on intently and tried to help guide the younger smiths when given the opportunity to do so.
It was great to see the camaraderie as day turned to night not only between the competitors but among the judges, staff, and other symposium attendees. No one wanted anyone to lose. Everyone was cheering for four successful knives.

However, bad luck hit both Potter and Yelle. The former’s first attempt at a handle didn’t work, putting him way behind on time. He tried mightily to get the handle married to the blade but it wasn’t to be.
“I made the hole way too big so when you stuck it on the knife there was a big gap,” Potter said after the contest. “You could see the gap around the guard.”
Yelle’s attempt to normalize the blade put him behind on time and he wasn’t able to get the most out of grinding.
The two youngest competitors, Nivala and Feuerzeig, were a sight to behold. Kemper’s forging and grinding was magic and Nivala’s ability to maximize every second at the grinder was great to see. Both of them made beautiful knives.
Testing The Knives’ Mettle
After the contest concluded, the knives were all put through a series of three tests. They had to poke and pop a water balloon hanging from a piece of twine, push cut through a piece of rope, and slice through a rolling paper.

Nivala and Feuerzeig’s knives performed the best although none of the knives were able to fully cut through the rolling paper. Carrillo chipped in to help cut so the competitor’s adrenaline-filled hands, didn’t play a role in the slice.
All the knives were judged on a scale of 25 points and Feuerzeig beat Nivala for the win, and the $5,000 prize by a single point. He said his strategy was to keep things straightforward so he could put all his energy into the process and not have to re-design on the fly.

“This is the first Bowie I’ve done in forever so I just wanted to do something very simple,” Feuerzeig said. “The one mistake I made on the knife was the ricasso got a bit longer than I would like. I think it’s not super elegant; in the future, I’d try to do that better. I wanted something where I wouldn’t have to think about the lines too much.”

Even though he didn’t win, Potter said that the battle taught him a lot about himself as a smith and showed him new ways he can go about making blades.
“I think it sped up a lot of my other work,” Potter said. “I figured out yeah, I can cut this. I don’t need to be so careful if I’m making the back of my guard exactly flat because I can take it to belt grinder, and I can make it as flat as I need. It’s little things where you try it and you realize it’s doing the same amount of work as when you spend 20-30 hours getting it just right. It’s really taking that time to blow through it. I like to do things big and it teaches you about the little bits. When you go and slow down you know can take some time and here you can act with reckless abandon and blow through it.”
Final Cut
You can watch Forged In Fire, but nothing prepares you to see the process up close. It’s remarkable watching four people take the same rod of steel in the same amount of time and all come to vastly different ends. The crowd loved it, the judges loved the knives, and everyone had a great time as day turned to night in the Pine Tree State.
The New England School of Metalwork in Auburn, Maine offers courses in blacksmithing, bladesmithing, and welding. You can learn more here.
Editor’s Note: This article was written by Mike Ableson.Maker Uses Daughter’s Hand To Perfect Mini Knife
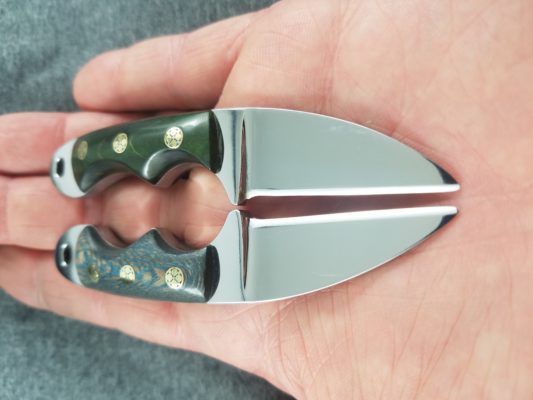
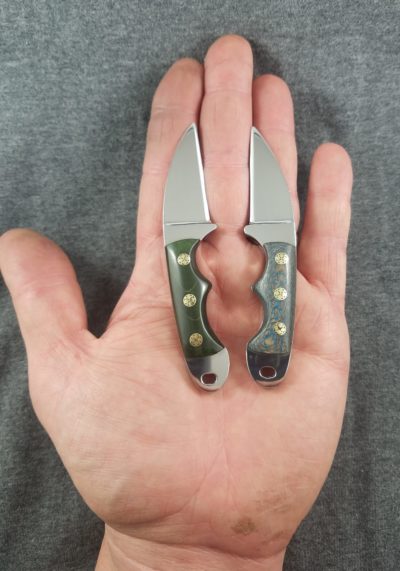
“One thing that Spencer is very good at is knowing what I’d like,” Lisa Johnson Aplin said. Lisa is the co-founder and chief operating officer of STA Custom Knives out of Brazoria, Texas. She and knifemaker Spencer Aplin were married in 1993, and together they have a son Alexx who will be 24 in a couple of months, a journalist and sometimes quality controller in his father’s shop. Lisa had no idea that a Sloan Custom Knives creation she admired had already been custom-ordered for her by her husband. Lisa suffers from osteogenesis imperfecta, or brittle bone disease, so although she does not have dwarfism and is therefore not a “little person,” she is a very little person. The one thing that Pete Sloan has plenty of access to is little people in the form of children, 9 to be exact. So, he used one daughter’s hand to perfect the mini knife fit and design.

Lisa’s favorite color is green and Spencer had been admiring a green knife he saw on Facebook that his friend Pete had made. “He asked me if I could make one for his wife,” Pete said. Pete was surprised and honored that Spencer, a maker he greatly admires for his knifemaking in general and blade-carving in particular, would ask him for a knife. Pete told Spencer that he was welcome to make the knife if he wanted, but Spencer said, no, that Pete had a good command of the Wharncliffe design and he wanted Pete to make it.

Humbled, Pete was determined to get it right. But he lived in Medina, Tennessee, and had never met Lisa. He only had Spencer’s description of her size to go on. Lisa is 2 feet, 10 inches tall. Pete’s daughter Erin was 5 at the time. So, he roughed out the 440C stainless steel blades and then with a Sharpie marked the first finger groove using Erin’s grip as a guide, grinding until it was just right for her petite hand. Spencer requested the stainless steel because the Aplins live next to salt water, and he wanted to minimize corrosion. Pete said he mostly gets requests for pattern-welded steel.
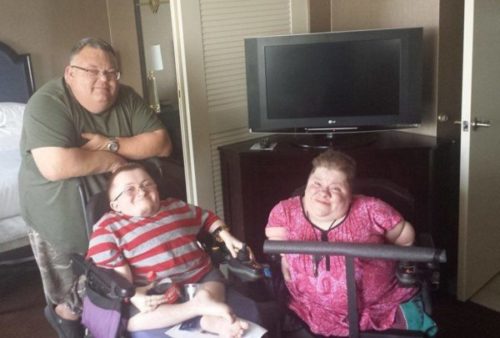
If you’ve ever seen the movie “Unbreakable” starring Bruce Willis, you know what osteogenesis imperfecta entails. Mr. Glass’ character, played by Samuel L. Jackson, has a form of the condition that allowed him to grow to full height, but his lifestyle is still hampered by debilitating bone breaks. Lisa and subsequently her son Alexx have Type III OI. A genetic mutation causing a lack of collagen, subsequently prompting connective tissue issues. The result is that bones fracture easily and those with the affliction will be short in stature with a curved spine and barrel-shaped chest. Type I is the most mild form of the condition, Type II and Type VIII the most severe and most often fatal. Types III through VI vary in symptoms and genetic causes. OI has been traced through mummies back to 1000 BC Egypt. Even though the condition has been around a long time, there is still no cure.
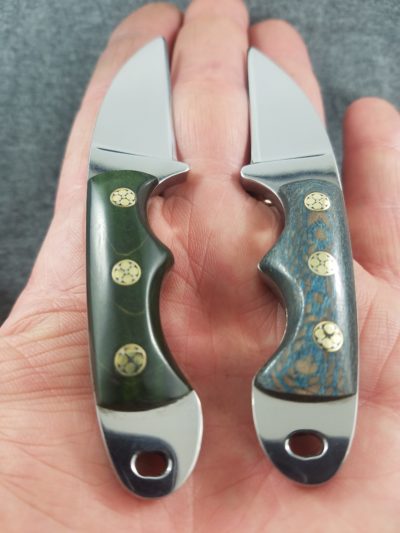
Pete used stabilized curly maple dyed green from Richard Beam at Nicholas Impregnated Woods to make the handle for Lisa’s knife and a combination blue-dyed and natural sycamore for Alexx’s. Each came with a Kydex sheath and cording to wear around the neck. At the 2015 BLADE Show, Lisa finally met Pete in person and he presented her with the knife. She loved it! “Green is my favorite color,” she said. She uses the knife all the time, opening boxes that come to the shop and for everyday uses around the house. Although it can be used for food preparation, Lisa doesn’t cook, she said laughing. Spencer does the cooking. She treasures the knife. “It’s one of my favorite’s in my collection.” She continues to be impressed with the fit and with how Pete obtained it.
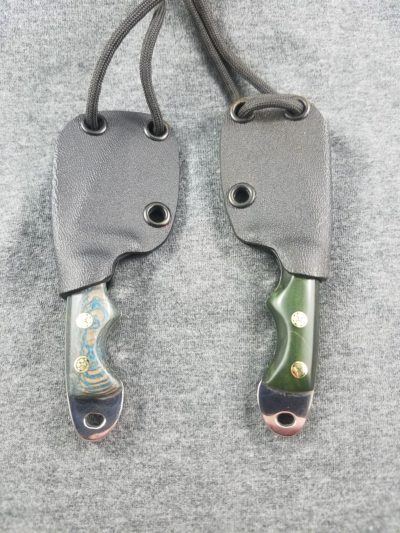
The only thing that Pete could not have accounted for was hand strength or lack thereof. Both Lisa and Alexx had a hard time drawing their knives. Spencer simply heated up the sheaths and worked the knives in them so that they released more easily without falling out. “It not something he could have known about,” Lisa said. “I think he did a great job.”
When asked how she adapts to daily activities in a full-size house at her stature and in a wheelchair, Lisa’s answer was immediate and delivered in as cheery a tone as everything else she talks about. “The great thing about being married to someone who works with his hands,” Lisa explained, “is that Spencer can make me anything I might need customized.” The Sloan Custom Knife was an unexpected surprise, but in hindsight typical of Spencer to have picked out exactly what she would have picked out for herself long beforehand.
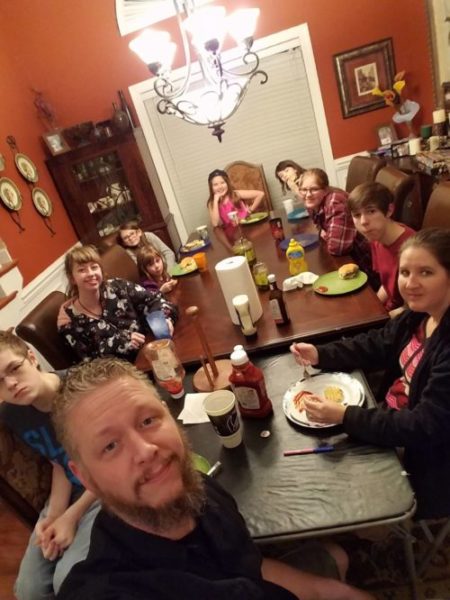
Pete visited Spencer before the 2017 BLADE Show and the two slept little working hard to finish up knives to sell. Spencer and Pete make knives with similar styles as Spencer shares his knowledge with Pete. And if Pete ever needs another hand model, he can turn to one of his and his wife, Holly’s, nine children, some biological, some adopted, some that came by other means: Becca, 19; Carson, 18; Gage, 15; Brant, 14; Makenzie, 13; Leigha, 10; Erin, 9; Madeline, 8; and Grace, 7. The couple used to be foster parents. “There a story to just about all of them,” Pete noted with a laugh.
Contact Pete Sloan at [email protected] or on Facebook at Sloan Custom Knives.
Are You Looking to Perfect Your Own Everyday Carry?
“Making the Everyday Carry Knife” by Wayne Goddard includes information on how to determine the best blade and handle length. You’ll also get tips on how to use your computer to assist you in designing your knife, plus lots more including grinding and tempering techniques and tool suggestions. At only $4.99 in digital format it’s a wealth of information at a steal.
6 Things BLADE Looks For In A Knife Photo
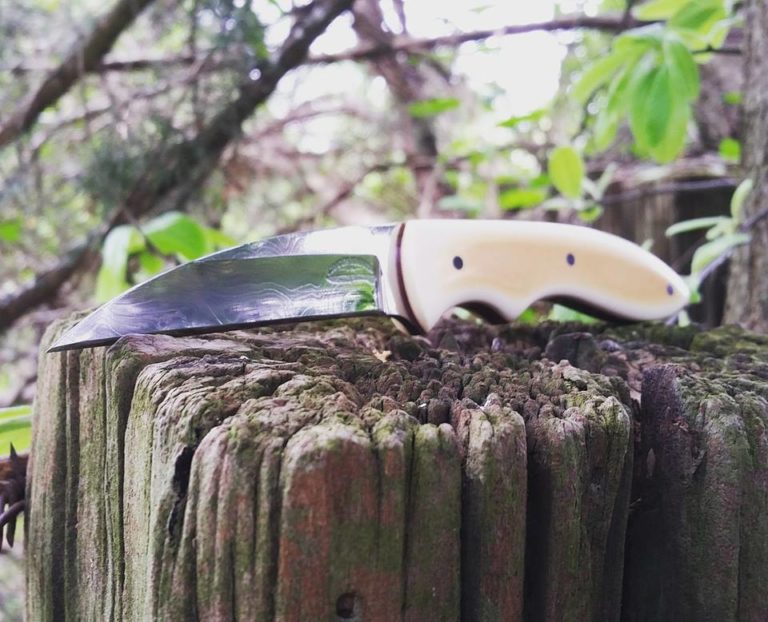
Taking great photographs of knives is no easy task—unless you’re a professional, in which case you can stop reading. Essentially, you’re taking a highly detailed shot of something that fills the entire frame, not something small like a bee in the center of a background of blurred petals, but a long, thin item that needs to be in focus from point to butt. But there’s so much more. Every line must be fully revealed and a depth established to convey thickness or thinness. I know close to zero about the mechanics of the art. There are plenty of videos and online courses out there that’ll give you the science of the “study of light.” They can speak to you of aperture, ISO and shutter speed in infinite combinations. All I know is a good photo when I see one, and how I have tried to improve my own photography. Here are the 6 things BLADE looks for in a knife photo. It’ll be up to you to make it happen. Why? Because there are “5 Ways To Get Your Knives Featured In BLADE” and you want to be ready.
Hire A Professional
Knife manufacturers, like good real estate agents, know that great photos will close a sale. They understand that the investment in a professional photographer pays off. When BLADE asks for a photo of their latest release, for example, some even allow high-resolution downloads right from the consumer website without having to go through a media relations person. That can be a time-saver at deadline. I’ve even experienced a large company resubmitting photos with even better ones. There’s nothing that says a one-man-show can’t learn from that level of perfectionism. It’s the same effort you put into crafting your knives.
Hiring a professional photographer will cost you some money, and it’s worth every penny. But like all professionals, some are more versed in what we’re trying to accomplish than others. A portraitist, wedding photographer or photojournalist may or may not be able to give you the results you’re looking for. You want to make sure you chose someone who can show you a portfolio of knives, guns, tools or similar items that looks…well…perfect.
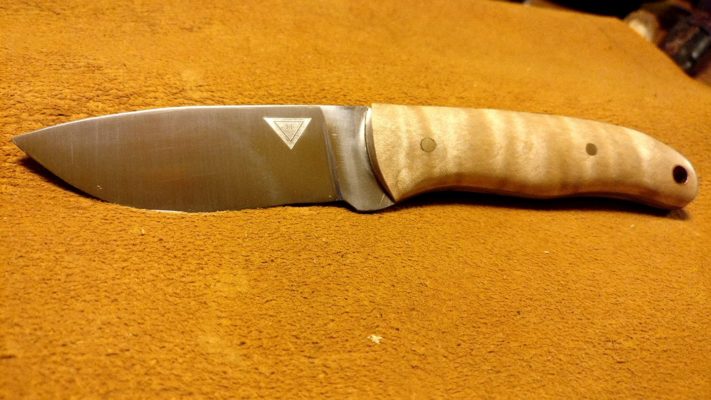
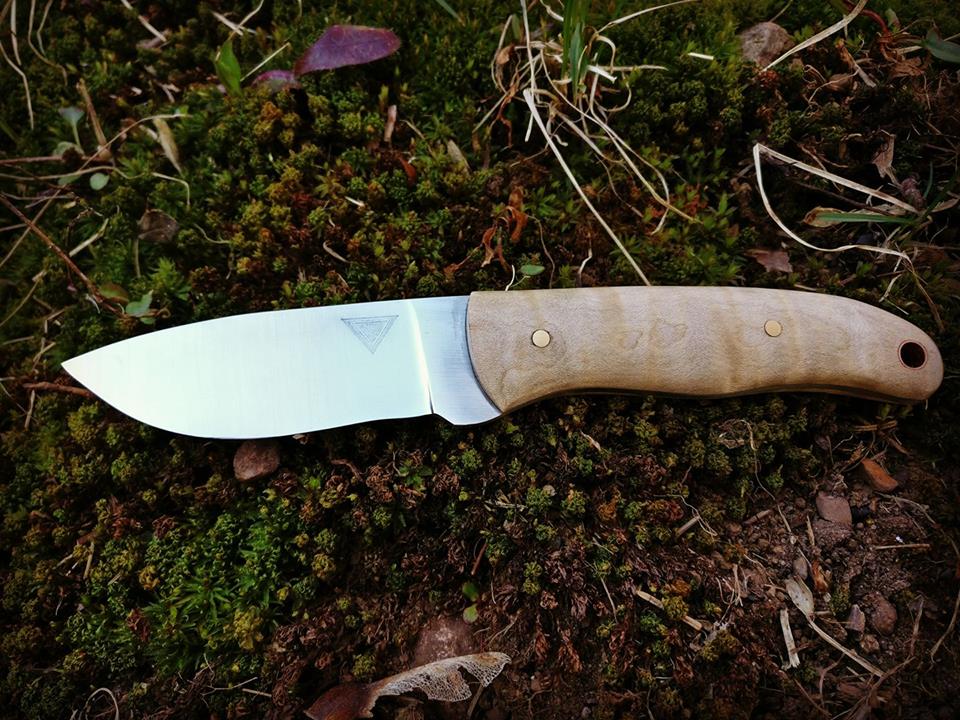
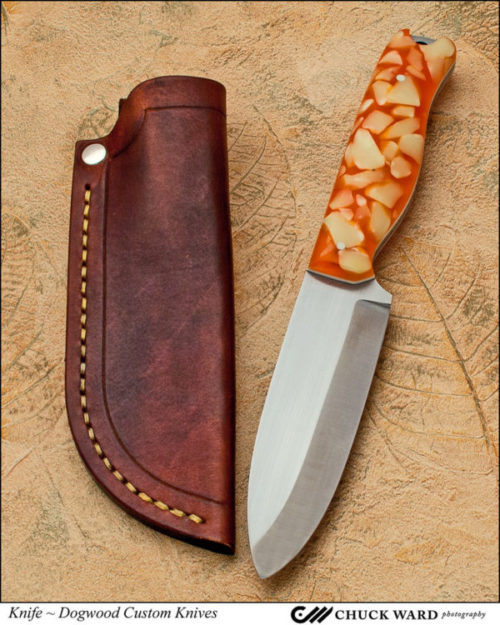
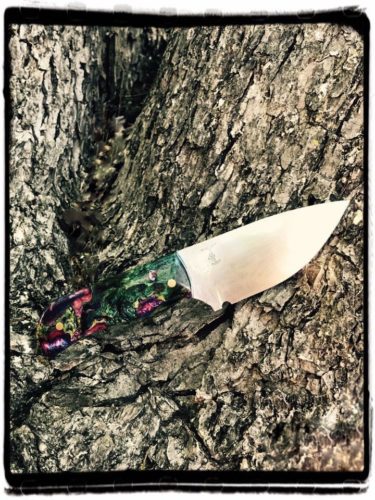
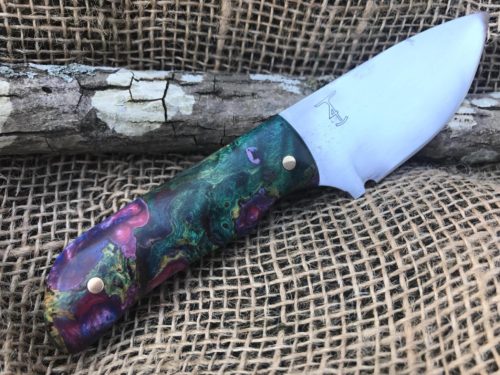
You will want two kinds of photos. Photos for your website and social media will create an emotion, an atmosphere. Instagram is full of examples of survival, bushcrafting and hunting knives being photographed outdoors and tactical knives being shot in gritty workshops or light-painted in darkness. Makers create everyday carry still lifes with folders, wallets and watches. Typical? Sure, but each one tells a story that has been told a thousand times before in a slightly different way. Nobody reads just one novel, and nobody looks at just one knife photo. They are all beautiful in their own way. The other kind of photos you will need are those of just the knife itself on a simple background, what is often referred to as glamour or beauty shot.
The question you have to ask yourself is: Are you willing to put as much study and effort into your photography as you are your knifemaking? Answer honestly. There’s no shame in shelling out cash for stunning work. Fill your website with those choice images and have them on hand for BLADE, and then you can practice your own photography skills for social media. Even on social media, though, take the time to post only your best images. Plenty of knife-related Facebook Groups out there are looking for banner photography and have to reject knifes they’d like to showcase because the image is, say, out of focus.
Do-It-Yourself
Let’s say you can’t justify the expenditure at this point in your knifemaking journey. Or, more likely, by the very nature of your interest in crafting, you’re determined to take quality photos of your knives yourself. You think, How hard can it be? Very. It can be very challenging to produce the kind of photos needed for a glossy magazine.
“Real” Camera Vs. Camera Phone
You can take the cost of a few sessions with a photographer and buy yourself a decent camera, for starters. Keep in mind, however, that lenses that come with a camera are usually not very good. Be prepared to buy a decent mid-range lens at a minimum.
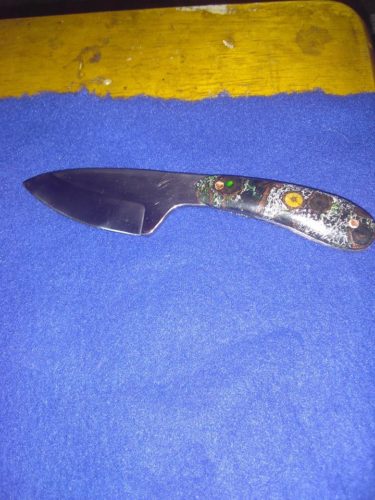
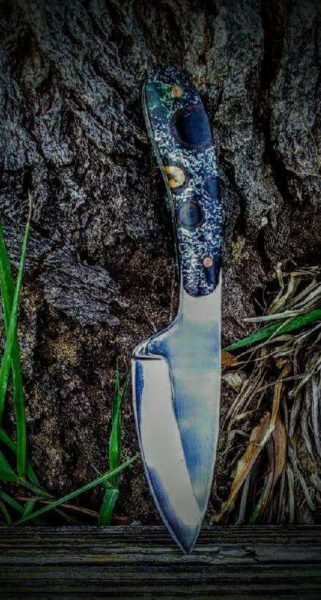
Then again, there are some excellent photos being taken with newer camera phones. Do NOT attempt this with an older model. You will only frustrate us both because they do not allow for high enough resolution of the images. Be sure if you submit a photo from your phone that you email it at its largest size. If there are settings on your phone that need to be changed to allow for taking photos at higher resolution, then you’ll need to set those accordingly. Those settings will apply only to photos you take going forward; you cannot retroactively apply them to photos already taken. Whether you use your phone or a “real” camera, the same fundamentals of photography apply.
Tip: If you smoke or if you have your phone in your shop, there could be resin or dust on your lens. You’ll want to clean that—gently—before you begin.
Be sure to take great photos of all your work before they are sold, and to back them up, either in the cloud, through an online backup service or on a thumb-drive.
6 Things BLADE Looks For In A Knife Photo
- Focus
The entire knife must be in focus, from point to butt. Are there some artsy shots of crystal clear blades and blurred handles or vice versa? Sure, but that’s not what we’re looking for in print. Online, we’re more open to considering some of those shots, provided we have some conventional full-focus shots to accompany the story as well.
If you are taking what we call a “using” shot where you’re photographing the knife in use for an online story or if we are working on a story together for print, be aware of where your camera is focusing. I have seen crystal clear shots of a leaves on the ground while the knife and the hand it’s in are both blurry. Focus is probably the single most important aspect of a good photo.
- Contrast
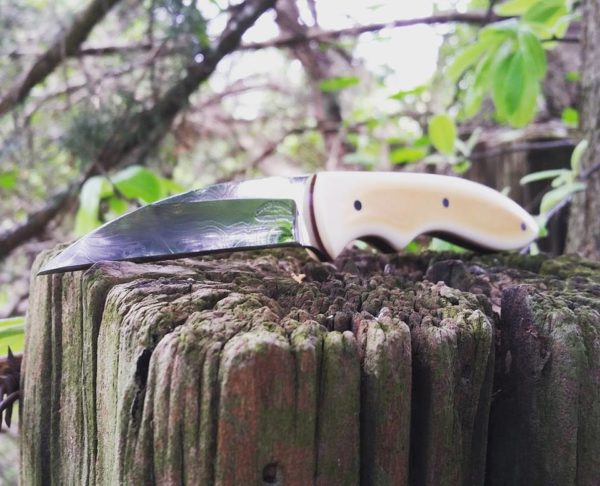
Be aware of the color of your background. A grey knife on gray pavement, a black knife on a blackened tree stump, camouflage your knife. It’s like a silver or gray car against gray pavement on a gray winter day—you can’t see it. No contrast. This applies to multicolored handles against multicolored backgrounds as well.
- Composition
For two of BLADE’s sections, “What’s New” and “Knifemaker Showcase,” only cutaway images of the knife are used. (See the “5 Ways To Get Your Knives Featured In BLADE.”) This means that you don’t need to worry about the background at all. In fact, white paper is fine, but watch for any shadows. It’s fine to have a slight shadow, provided the lines of the knife are clearly visible. If the edge or spine of your knife bleeds into the shadow to the point where you can’t tell where the knife starts and the shadow ends, that’ll need to be reshot. Our designers need to able to see those lines.
Mood images are fine for both a feature in print and for online stories. Feel free to get as creative as you want, but ensure that the knife is the main attraction. Photographing knives is one of those times when the rule of thirds really isn’t applicable. The knife is the main attraction and we’re not going for proportional sharing with a background. If the image you’re submitting for consideration is for a section of the magazine that uses cutaways and there’s moss or grass, fabric or fur encroaching on the blade itself, that’ll impede the designers in their work.
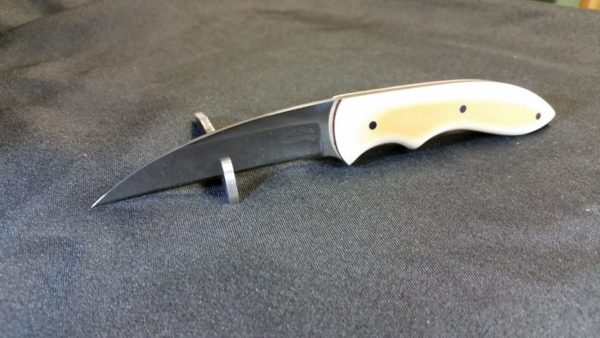
Make sure no part of the knife is cut off, and don’t crowd the point or butt. If you place the knife in a stand and that stand encroaches on the knife, it can’t be used for a cutaway, but it could possibly still be used for an online story or in print.
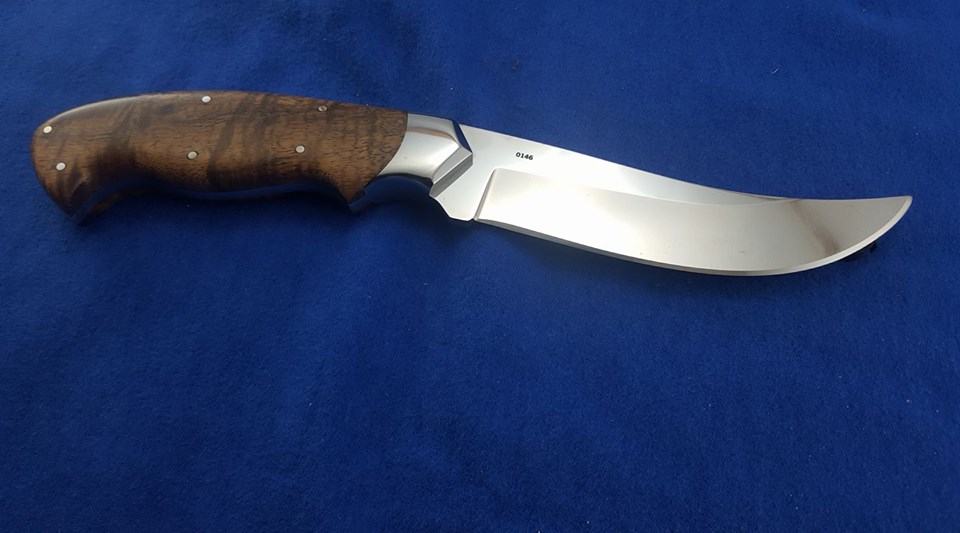
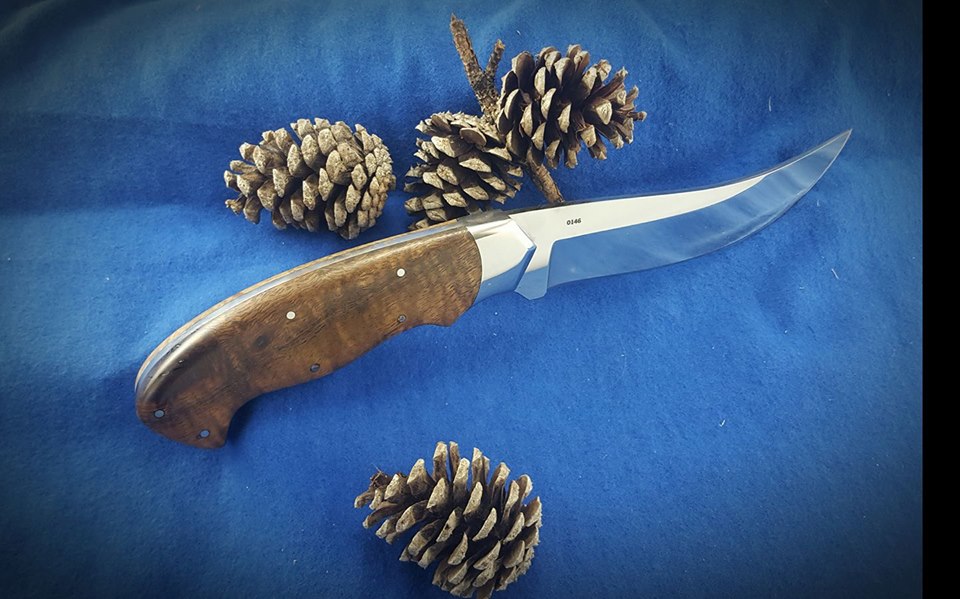
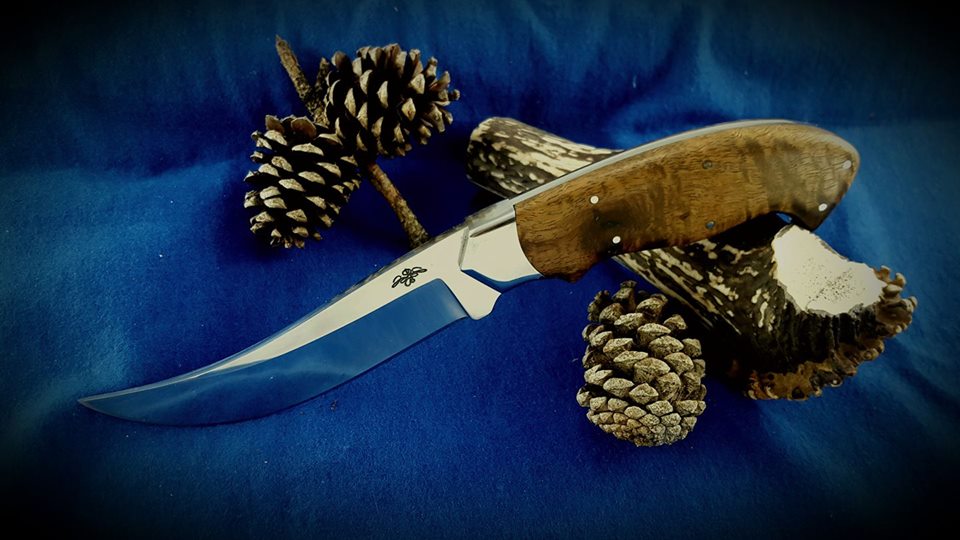
- Depth and Angles
In layman’s terms, you need to ensure your knives don’t look flat. You’re trying to capture something that’s three-dimensional in a two-dimensional medium. This is where some knives can look disproportionate because you’re focusing on the handle and the blade is in the fuzzy background, so to speak. A shallow depth of field is fine as long as your knife is standing out crisply from point to butt.
Finding the right angle will also help prevent your knife from looking flat. Prop up your knife somehow. Even just leaning it against a pebble allows you to move and capture the thickness or thinness of the piece. Laying it on your hand can work as long as your flesh doesn’t obstruct any of the knife’s lines.
Tip: Take dozens of photos from many different angles and distances and pick the best one of the bunch. If you don’t nail it, don’t compromise, don’t settle, get back there and take dozens more. Pros will take hundreds of impressions to deliver 30. Seriously. Take more shots. No, more. Get a ladder and shoot down, circle your quarry and shoot multiple shots from each hour of the clock, and get down and shoot at eye level. Shoot at morning, noon and night, but mostly late afternoon, to see how different types of sunlight affect your knife images. It’s what the pros did when they were starting out. Now, after years of experience, they can judge the sun’s angle and know how to get what they need.
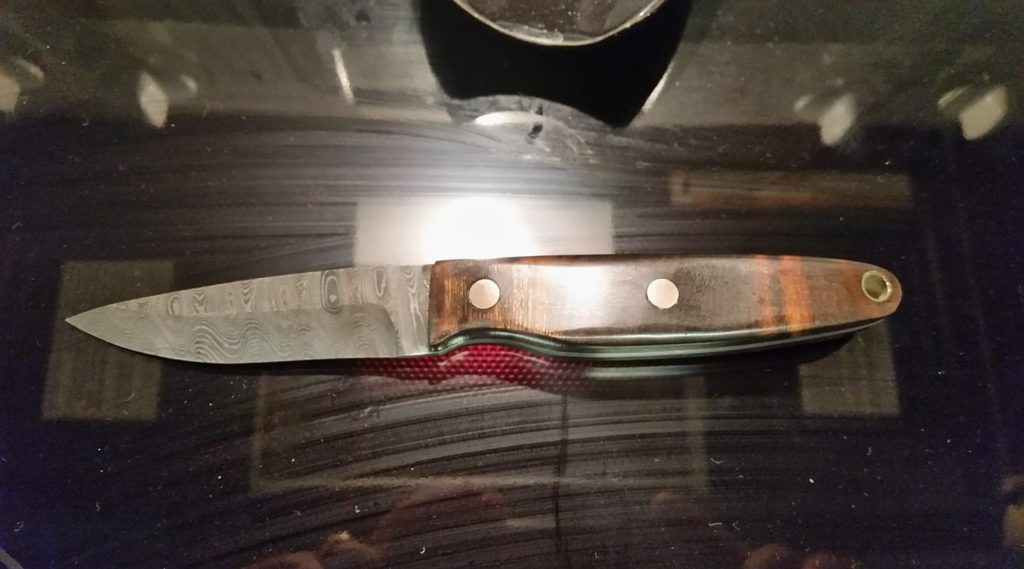
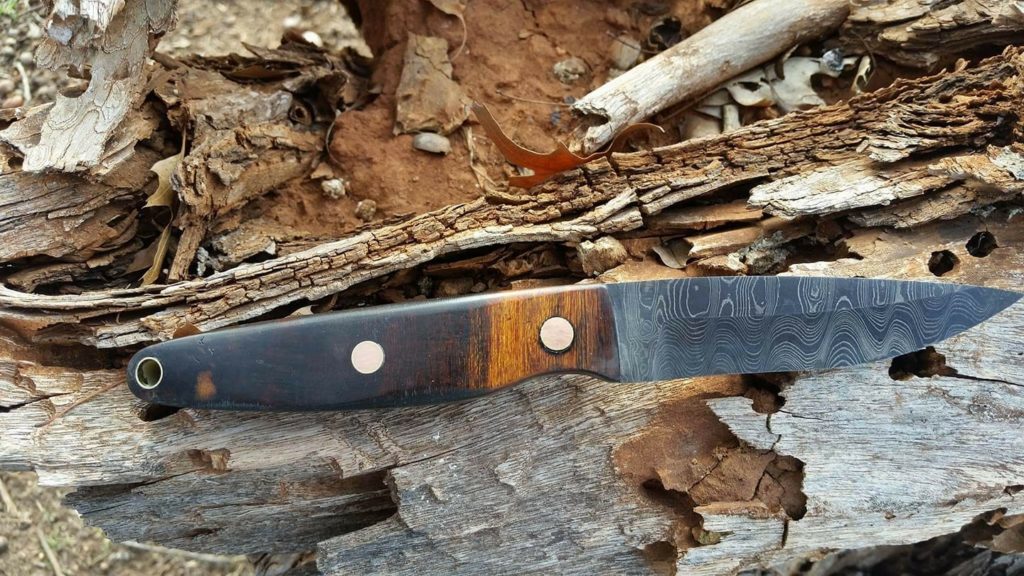
- Lighting
Natural light is easiest for the amateur to master. A cloudy day is good to reduce blade glare but sometimes it will dull colors. Try a sunny day, but shoot in the shade. Avoid glare on either the handle or the blade whether you’re shooting indoors or out. You also don’t want dappled light coming through the leaves of a tree to interfere with the hamon, for example, so try to find a solid overhang. You also don’t want reflection to make your blade look different than it is in reality.
Indoor lighting is infinitely more challenging. Low light, fluorescent light, light-painting in a dark room—they all have the potential to become “noisy,” grainy, soft. I will leave it to the articles and videos you’re going to pour over to explain why, but trust me, it’s not easy. Sometimes, in light-painting for example, the pins might absorb all the light and they take over the picture. Or the handle’s too dark, or the handle’s visible, but the blade looks dull. Changing the countless variables on this project will help you get the right shot out of your many attempts. It can help to take notes so you know what you’ve tried and whether or not it worked.
Avoid using the flash inside your camera. It will only give you an overlit image that makes your work look flat. An external flash, shot off a wall or ceiling or even a white T-shirt, or an extra light diffused with a white paper bag, may help, but now your knifemaking shop has turned into a spaceship and you’re behind in your orders.
- Specs
Images need to be 300 dpi for print with the photo at least 8 inches on the longest side, preferably 10. The image size should be at the very least 600 KB. It’s not that we’ll run it that large, but we need to have the option to do so, especially if we’re doing a cutaway and the knife doesn’t fill the frame.
We prefer .jpg format, and that you attach the image file rather than dragging it into the email. Sometimes that can make a difference in resolution quality, though it admittedly shouldn’t. Also, for similar reasons, submit originals and not versions scraped from Facebook or other social media platform, even for online stories.
Remember, it’s all about the knife here at BLADE. Oh, and makers and manufacturers, too. But without a fantastic photo of a knife as a starting point, how are we ever going to get to know you better?
Photos may be submitted for consideration in private message to “Erin at BLADE” on Facebook or via email to [email protected]. To learn more about how your photos could be published through BLADE, read “5 Ways To Get Your Knives Featured In BLADE.”
‘101 Knife Designs’ Will Inspire Even Seasoned Knifemakers
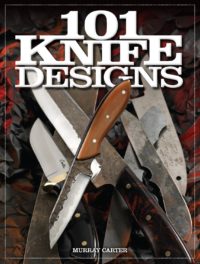
Knifemakers of all skill levels will enjoy comparing knife designs in this book by Murray Carter. The photographs by Hiro Soga are exquisite! There is even a discussion on the theory of knife design to help you better understand your craft. Save 35 percent off the cover cost of $29.99 for a total of $19.99.
How To: Dellana Dots Opening System
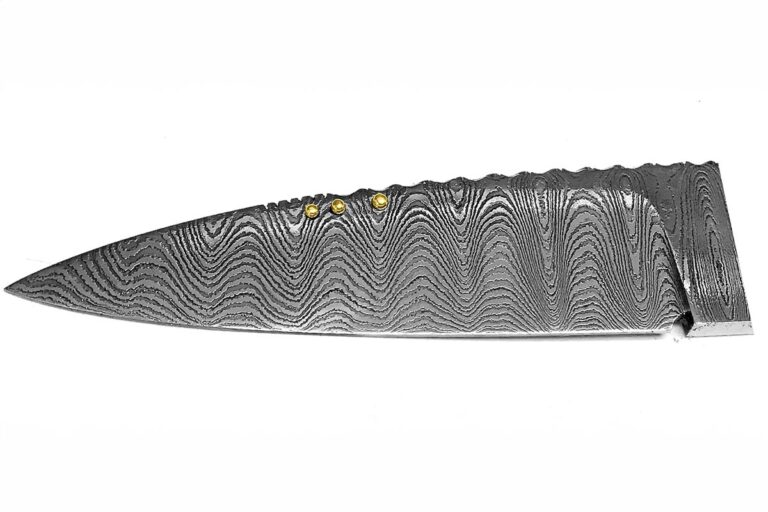
Dellana tells how she created and makes the Dellana Dots opening assist system—without a lathe.
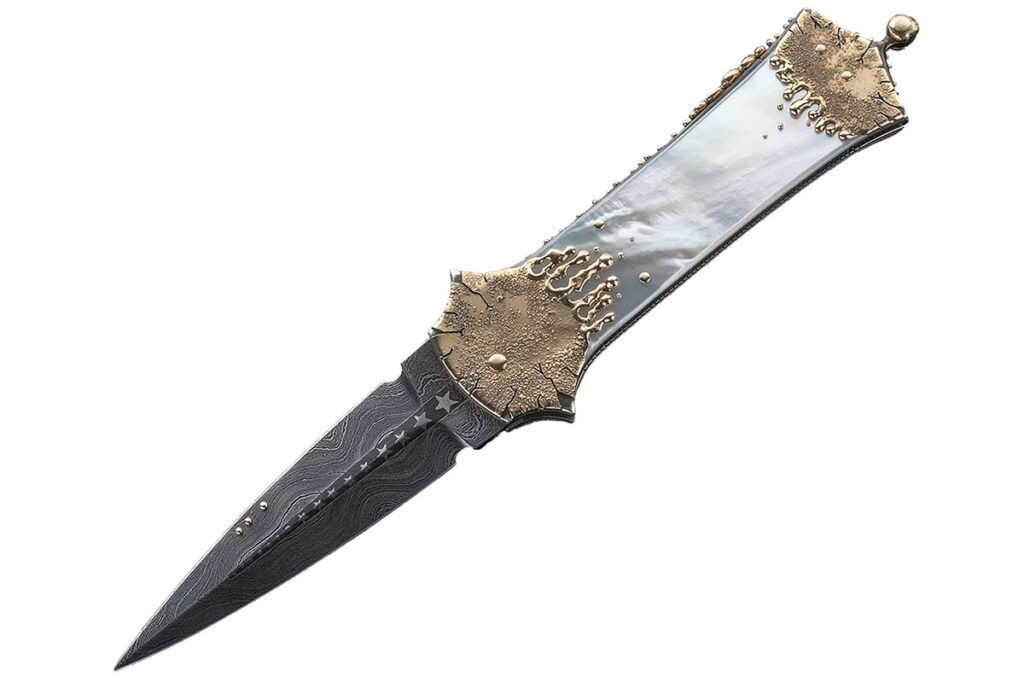
Editor’s note: Full-time knifemaker Dellana created her Dellana Dots blade-opening assist system in 1994. The system consists of one or more elements raised above the surface of the blade to provide a gripping surface when opening a folding knife. Dellana Dots can be made using different techniques depending on your skill set. They can be any shape, from round to geometric to even gem set. There can be any number or shape of the Dots. Dellana most frequently makes them as round beads. In this tutorial, she shows how she does it.
Dellana Dots were invented for the same reason many things have been invented—a desperate need to solve a problem!
In 1994 I was a very new knifemaker studying under the mentorship of the great ABS master smith, Jim Schmidt. I was working on my second lockback folding knife, one of my own design. All was going well until I realized that the blade sat too far into the knife when closed because of the thickness of the handle scales. Due to my inexperience, I had not considered the scales’ thickness. It was evident that it would be very difficult for the knife to be opened without effort and annoyance.
What to do?
The obvious solution was the commonly used nail nick, the ditch grooved into the blade for a thumbnail to try to grab ahold of. I have always disliked the functionality—who else has broken or bent back a fingernail when trying to use one?—or the look of nail nicks. One of them would definitely not be visually appealing with the rest of the design of my knife, and that was unacceptable to me. So, I used my 17 years of experience as a goldsmith to figure out an acceptable solution.
I had used raised beads on many of my jewelry designs as decorative elements and thought that a raised bead might give enough surface area for a fingernail to grip—but how was I to attach the bead to the blade’s surface? The soldering that I would normally do would not work in this situation due to the blade needing to be heat treated. I thought that drilling through the blade and riveting might work if I could leave enough of one side of the rivet high enough above the blade surface to get a good grip.
I had never seen anything like it done on a blade before and wondered if there was some unwritten rule against that sort of thing. I decided to take the knife to Jim, explain the problem and my solution, and see what he thought.

Jim was a man of few words and his silence after I explained the issue was a bit nerve wracking for me. After what seemed an interminable amount of time he said, “That’s a great idea and I’m going to steal it. But I’ll call them ‘Dellana Dots.’” And that’s exactly what he did.
And there you have the story of how the Dellana Dots came to be. They have proven to be a popular solution for many makers of folding knives ever since.
Materials & Tools
I most often use an asymmetrical three Dellana Dot system because I find that configuration visually appealing with most of my designs. Here’s how I do it.
First are the materials and tools. You’ll need:
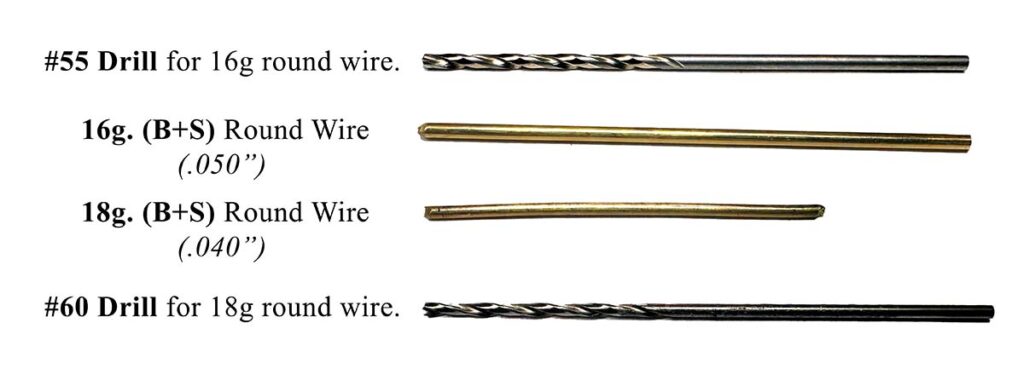
- Pin stock (B&S Gauge): 16g. (.050”) 14k yellow gold round wire and 18g. (.040”) 14k yellow gold round wire.
- Drills: #55 (16 gauge) and #60 (18 gauge).
Getting Started
Pro tip: Preparation is the key to creating anything efficiently and well. The more thorough the prep, the easier, faster and better the final process and end result will be.
Step 1: Mark and drill the holes for the Dellana Dots’ round wires before grinding the bevels (Images 2 and 3).
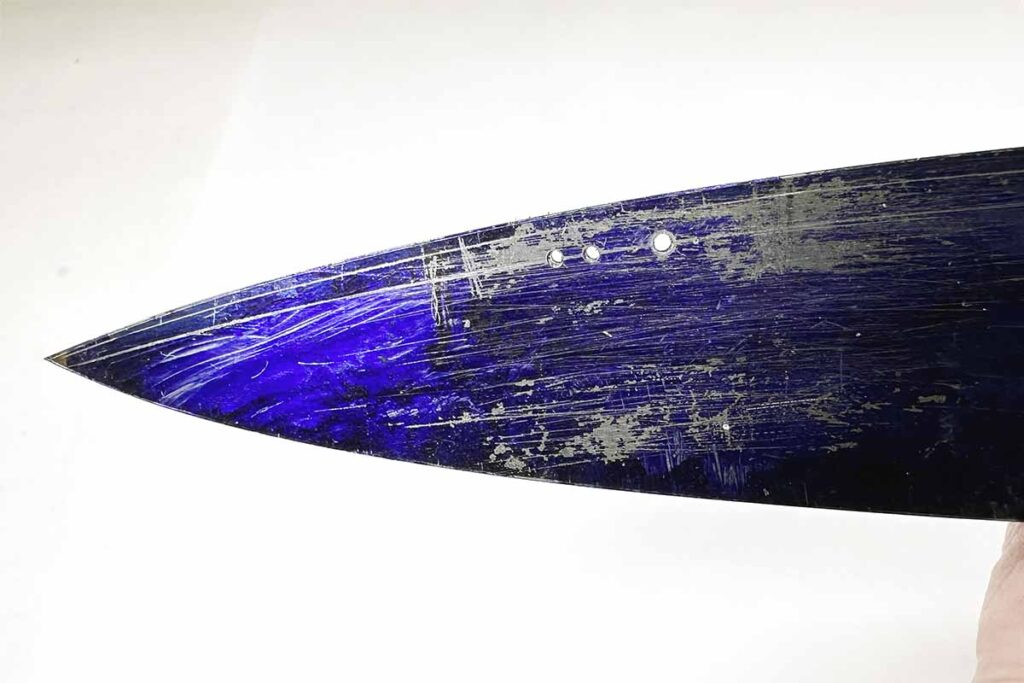
Special Note A: If you grind the blade bevels before heat treatment, countersink the holes so the spheres sit down below the surface of the blade to avoid anything catching on them.
Special Note B: If you grind the blade bevels after heat treatment, drill the holes prior to heat treating and use diamond drills (dental burrs) to countersink the holes after grinding.
I countersink the holes on the front side (where the spheres will be) deeper than on the back (riveting) side. This allows the balled end of the wire to sit below the surface of the blade bevel to keep it from snagging on anything.
Step 2: Finish the blade. Make sure the blade is fileworked, etched (if damascus), blued and polished prior to riveting the Dellana Dots in place.
Step 3: Double check that the wire fits through the drilled holes.
Step 4: Melt the ends of the wires to form spheres. I use a Smith Little Torch with propane and oxygen. This takes a bit of practice to know the correct heat and timing needed to form a smooth, round, symmetrical ball. As always, practicing first can be very helpful.
Step 5: Check the size and fit of the balled ends in the countersunk holes. Make sure that the previously drilled and countersunk holes in the blade allow the balled ends of the wires to sit down into them. This will ensure that nothing can become snagged under the spheres.
Step 6: Polish the balled ends of the wires. Doing this now will result in a better final appearance as well as save time. If you wait until after the Dellana Dots are set, it is difficult to get the dark oxide created during the melting process polished off the balled ends without affecting the blade finish. (Don’t ask me how I know this.)
Prep Blade For Riveting

- Insert the wires through the blade, ensuring the balled ends protrude on the blade’s front side.
- Cut off the wires on the back side of the blade not flush with the blade. Leave a little excess to file to the appropriate height for riveting.
- Make two sections of three layers of masking or painter’s tape big enough to cover the entire blade.
- Put one section of the tape over the front side of the blade covering the balled ends of the Dellana Dots. This will protect them during riveting and reduce clean up time.
- Mark the hole locations on the second section of tape (for the back side of the blade). Make holes through the tape with a hole punch for the wires to go through.
- Cover the back side of the blade with the tape locating the holes over the wires. This will protect the blade when filing and sanding the wires to the correct height.
Prep Dots For Riveting

Pro Tip: To get the correct height of wire for a perfect rivet head every time:
- File the wire down flush with the three layers of tape;
- Sand to 800 grit;
- Remove any burr, and;
- Peel off the third layer of tape, leaving two layers of tape on the blade. This leaves the perfect height of wire to form the rivet head while still protecting the blade during hammering and clean-up.
- Rivet The Dots
Rivet The Dots

- I use the ball side of a chasing hammer to rivet the wires;
- Place the balled heads of the tape-covered Dellana Dots (the front side of the blade) on a polished steel anvil. Hammer around the edges of each filed, sanded wire on the back side of the blade to spread, dome and secure the head of the rivet.
Polish The Rivets

- Leave the tape on the blade to minimize the polishing compound mess and cleanup time and effort;
- Polish the hammered heads of the wires, removing any sharp edges as you go. I use a small wheel with White Diamond-type compound and my Foredom hand piece to do this.
Polish The Dots
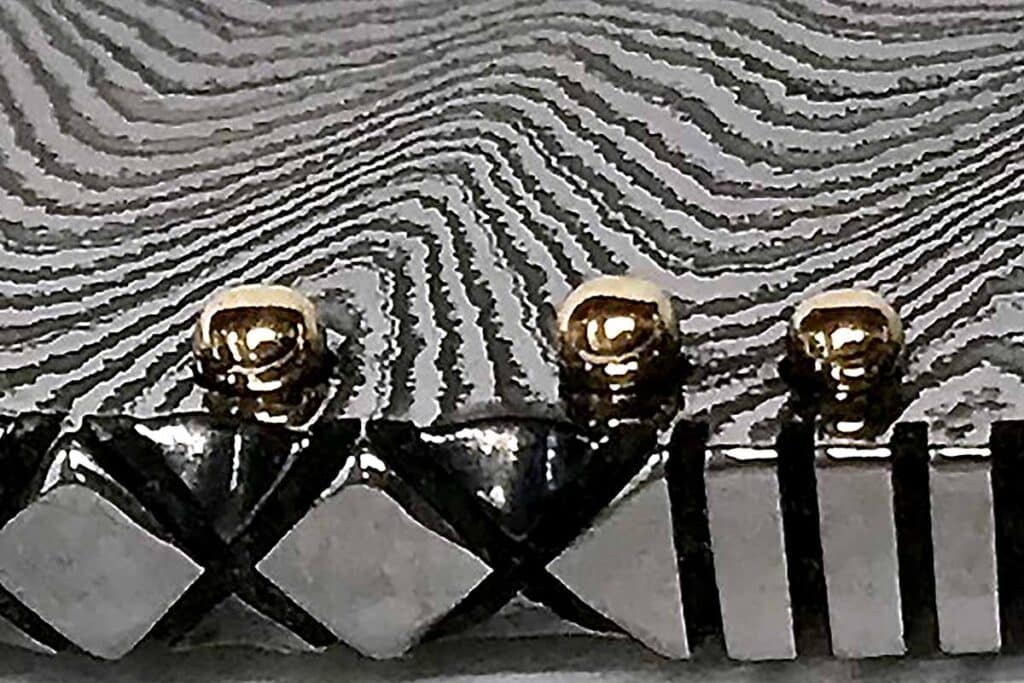
- Carefully remove the tape from both sides of the blade. Save the front-side tape until after you’ve ensured that the balled ends on the front haven’t been deformed and don’t need reshaping and re-polishing. If they do need reshaping and re-polishing, use a hole punch to cut away the tape around the balls and reapply the tape. This will minimize any polishing compound mess and save time in the long run.
Clean the polishing compound from around the rivets and, if necessary, the Dellana Dots as well.Pro Tip: I cut down a welder’s acid brush so the bristles are really short and stiff. This works perfectly for cleaning the small, hard-to-reach areas. Then: - Clean the whole blade with lacquer thinner;
- Wax the blade, and;
- The riveted side of the Dellana Dots should be very smooth and only slightly domed above the surface, with no sharp edges.
- And that’s how you make Dellana Dots without a lathe!
More On Knifemaking:
- D.I.Y. POWER HAMMER: DO YOU REALLY NEED ONE?
- STAINLESS DAMASCUS: CHALLENGES IN FORGING
- STROPPING: WHAT IT IS AND HOW IT’S ACCOMPLISHED
- DIY ENGRAVING VISE OR BLOCK
Knifemaking Business: Commission Knives, Designs And More
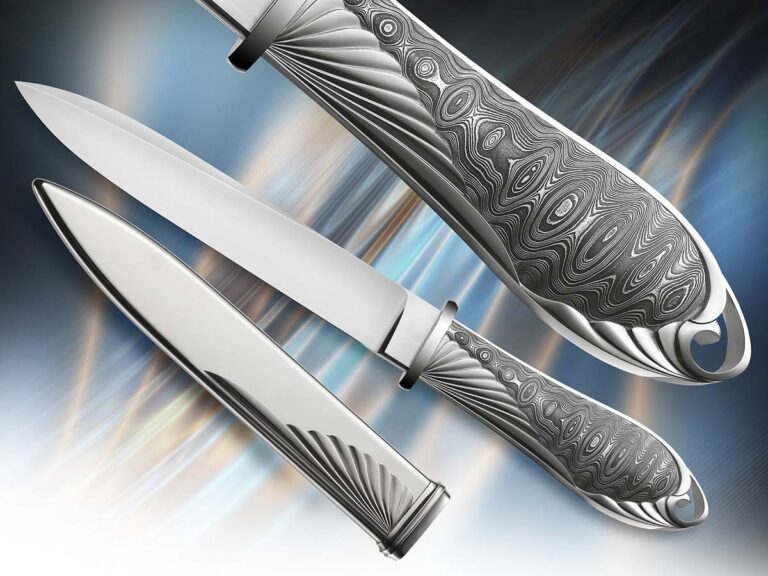
A veteran maker shares timeless advice on commissions, design, and running a successful craft business.
I rarely do commissions. It’s difficult to keep some clients from wanting to take part in the process. Their job is to tell you how much they like the piece when it is finished and gather the money to cover their overextended budgets. In your role as crafter/knifemaker, don’t let them bully you. There are no grounds for complaints if you give them what they originally approached you about.
The most difficult part of doing commissions, aka taking orders, is keeping everything on schedule. A delivery date is just that. Even if it’s a couple of years out, don’t wait until the end to go looking for materials and services. Casters work better with a heads-up beforehand and engravers may need a year to get past what they are working on. As a result, get your name on the list with others waiting for a bit of the crafters’ time to cast your pieces and for the engraver to work out a design for your project.
I run on satisfied customers. One black mark cancels out a slew of gold stars. I’ve never had a customer who wasn’t satisfied, period. I give even my smallest work the same close attention to detail as the larger and more standout ones. Every piece deserves the most attention I can give it to bring it to the right state of finish when everything is done.
I don’t spend time debating how much it costs if they are paying up front. It’s out of your hands at that point. If they insist and it does make for a tighter presentation, I have no complaints—if I’m still doing it my way.
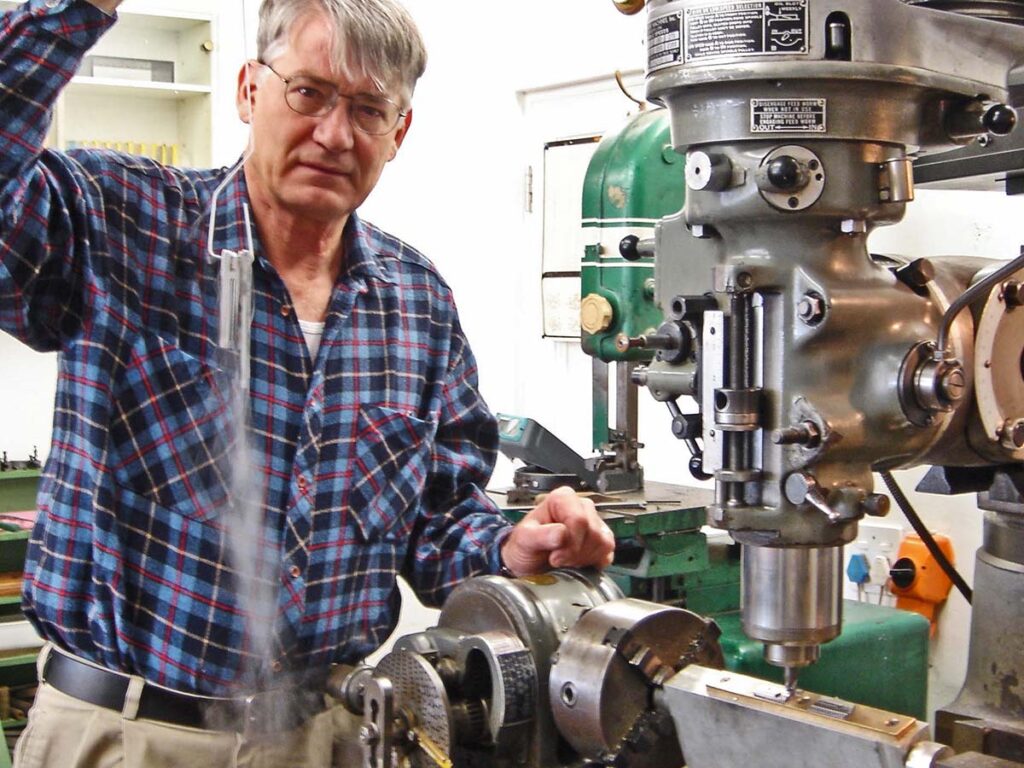
One time I had a 36-carat uncut ruby for a specific part of a presentation. The clients changed that out and added another $10,000 to the materials list. Put a pound of 24k gold in the mix, two feet of AAA lapis lazuli and another pound of silver and you have nearly a year of work making it all look like something that befits the materials. There is nothing finer than 24k gold and large ruby star sapphires set in deep blue AAA lapis lazuli.
Of course, there is the matter of it not existing until you do it. That part can be intimidating at times. Then there are the occasions when the client goes well over the beginning budget. If this happens, you must deal with the backlash from him blaming you, when all was done at his request.
Maintain Your Health
People were making wondrous things with simple ingredients 4,000 years ago, without the benefit of dental care, bifocals and electric lights and on a diet that barely sustained them most of the time. They died by 45 usually, so had only the time between when they were 9 or 10 until their eyes began to fail them by 40 or so. I have been making and selling my work for more than 50 years with all the benefits living in a civilized time can bring. I am still excited about projects, no matter the size. I still eat lots of fruits and greens and shredded wheat large biscuits.
If you want to do your best work, you must stay healthy. Like any other working mechanism, your body tissues need the time to relax and rejuvenate. For example, if you don’t give the fingers in your hand enough time off, they will give you problems later in your career. The cartilage in your joints will only take so much punishment, so give the muscle tissues in these areas time to relax a bit before moving onto your next project.
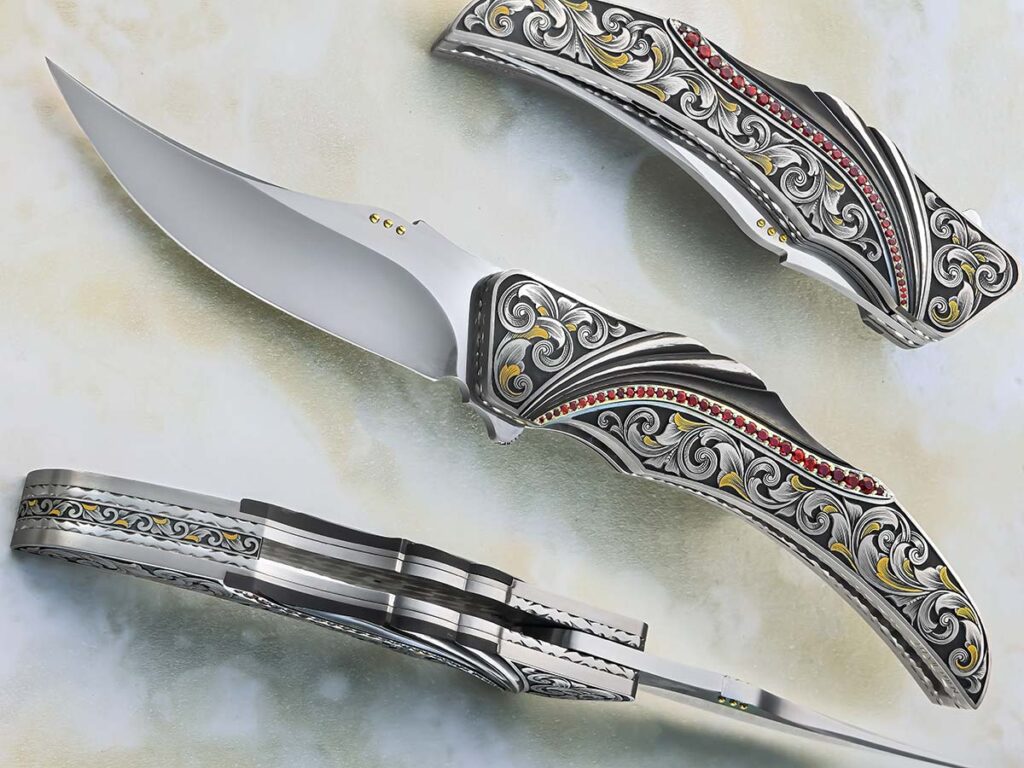
Sometimes it may take a few days for an overworked appendage to return to normal if you’ve stressed it in some way. Always protect your eyes and ears from foreign objects and stressful sounds. I finally took the large subwoofer out of my studio because it was leaving me partially deaf by the end of the day, even more so than most of my tools.
Design Process
Design is where you make your identity come to life with a few pencil marks and colored markers. You want to present a consistent image that people will remember and that you can live with in the future.
The most important thing to know when you begin making anything is what it’s supposed to look like when it’s finished. That’s where those blank sheets of paper and erasures come into play.
Make your design mistakes on paper. Don’t wait until you’re well into something before admitting to there being some mystery grey areas concerning how it’s supposed to work. Wait to start something until you have a good idea as to how to feasibly do it. The sketches are just that; they allow you to put a bunch of feasible ideas down on paper next to each other and put big X’s on the ones that don’t work with the others. It may take a few tries to get what you’re looking for down, but now you can start thinking about materials, colors, etc., and establish the theme of the drawing. This will help you decide the things needed to make it real.
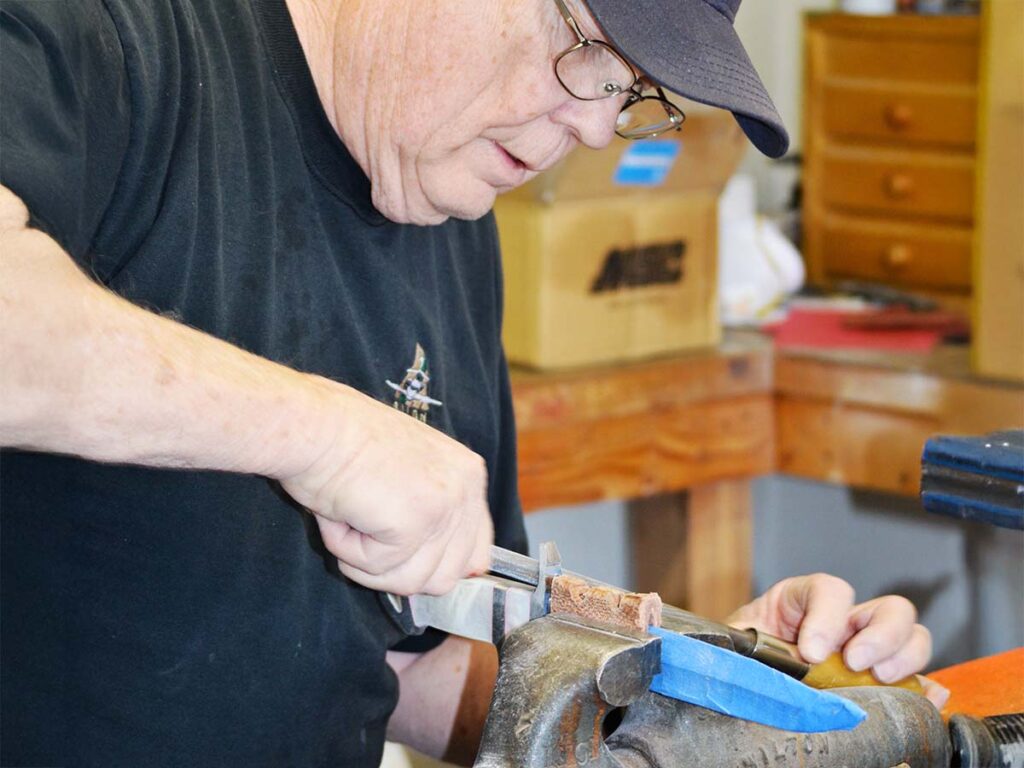
Once you’re working, don’t deviate from the drawings unless it will make it a stronger presentation. I always try and give the piece the best ideas I can to make it able to stand with the other things I have made, and give the customer the best I can do at the time. It makes for more hours but also gives a much stronger presentation.
Money Matters
All crafters have money fixed firmly in their minds. If you can just get the circumstances right, you know people will like your work and you will sell it.
As a group, crafters are undercapitalized and have no backup cash for when calamity strikes. Until you can show a profit and can pay your suppliers, you don’t have enough funds to sustain your business when the bottom falls out of your market, either locally or globally. All of today’s crafters have experienced this. I wish I had an answer—I wish someone had an answer.
Maintaining Materials
Materials are “the paint” of my work: silver for white, gold for yellow of differing shades, bronze for brown gold, jade for green, emeralds for green, Nigerian green tourmaline for green, rubies for red, carnelian for orange/red, lapis lazuli for blue, etc. Your stockpile of materials controls the variables in your work. Where would Van Gogh have been without yellow, orange and electric blues on his pallet?
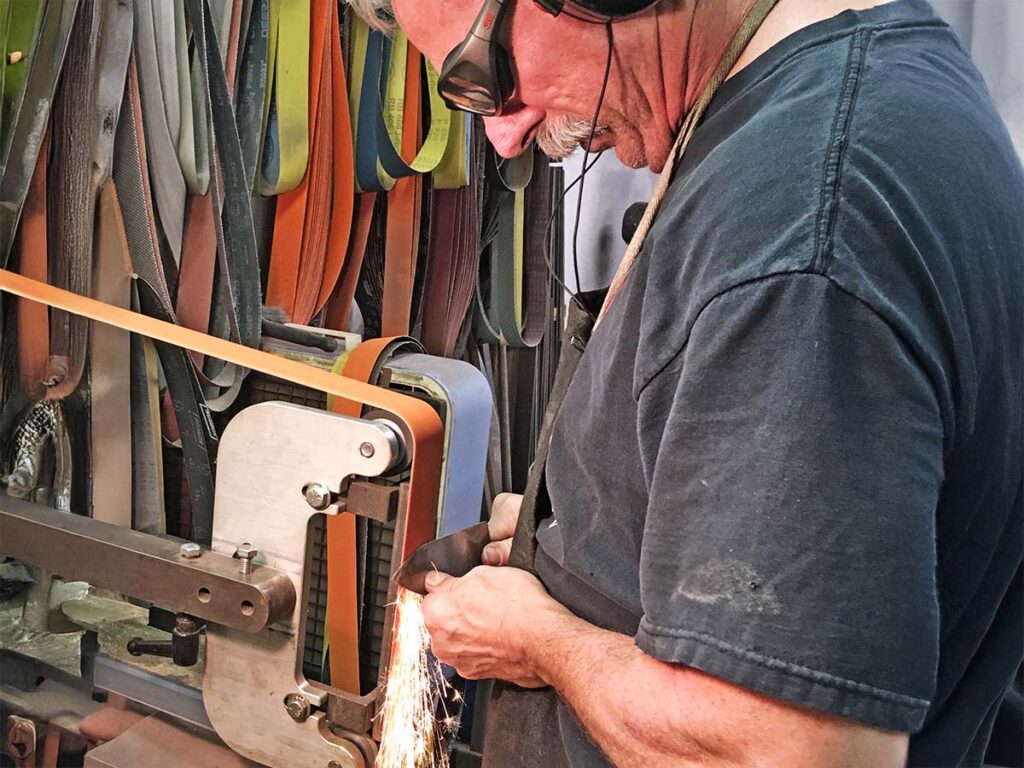
It has always been considered easier to do color photography than black and white photography. I think there is a correlation in craft. The simpler the design, the more important it is not to deviate from the original line. A fine example of this is the work of Wolfgang Loerchner; it is so clean and simple in design, with wonderful materials, and no room for any deviation in the completed piece. That’s difficult for me. His work is spotlessly fine while I spend part of my time trying to make it look like I didn’t have any difficulties in the making.
If your budget allows it, always stockpile unusual materials that are necessary in your work so there are no down times while you wait for four feet of Madagascar ebony, or a pallet of clay to be dropped at your step. If you already have it on hand, there are no delays.
Buy quality materials. You don’t want your turned goblet to twist and crack and eventually fall apart because the wood wasn’t properly dried or treated after it was done. Most natural materials will take no heat because they were created at normal earth temperatures. Too much heat and anything will crack—if not today, weeks or years later. Epoxies usually give way at anything over 150° F. Buffers will bring the temperature up to that point quickly, making the epoxy no more than a filler rather than bonding the materials together.
Knifemaking Tools
Every craft has its list of necessary items you need to do it well. When you’re buying those things think on the longevity of the tool—good tools last, cheap ones don’t. I’m still using items I purchased in the early ’70s on a regular basis. They don’t always have to be “show dog quality” in appearance if they still work well.
Conclusion
To you out there who have jumped on the craft wagon: always think things all the way through beforehand. It will make your landing much more enjoyable. I know I have given you a list of things that is larger than you want to deal with, but if you want to see your name in lights someday, you must follow the simple rules every business must have to survive or you will only make it more difficult for yourself, your career as a crafter, and, most of all, your family standing behind you.
It’s always a swim against the current for all of us.
More On Knife Marketing:
- How To: Custom Knife Sales And Marketing
- Knife Steel After Crucible Industries LLC
- Tariffs & Knife Prices In 2025
- Collaboration Knives: How Do They Come Together?
- How To: Marketing Knives On Social Media
Niagara Specialty Metals Announces Steels List

Get a gander at what’s on the slate for NSM in 2026.
According to a recent post by Niagara Specialty Metals (NSM) on BladeForums, NSM (nsm-ny.com) had several steels and materials available either now or that were “incoming” as BLADE was going to press.
The list includes: MagnaCut; CPM154; S30V; S35VN; S45VN; S90V; 3V; 4V; CruWear (aka NSM Wear); 154CM; 20CV; M4; CPM D2; D2; 440C ESR; 416; and 6-4 titanium. The new MagnaMax (page 66) should be available in 2026.
The post stated that all particle metallurgy grades are “coming in from Erasteel and Carpenter and the quality has been excellent.” All of NSM’s air-melt steels and 6-4 titanium are domestic.
The only grades off the list at press time were 15V, 110V and Rex 121. “They were Crucible exclusives,” the post noted of the three grades not on the list, “and we’re working with the mills to bring them back once production can be re-established.”
More On Steel:
- Knife Steel After Crucible Industries LLC
- Best Steel For Knives: How To Choose
- Knife Steel Trends: What To Look Forward To In 2025
- Knife Steel Alloys: A Down-And-Dirty Guide
- Damascus Steels: What To Use And When
Must Read Articles

Knifemaking 101 – Read This Before You Make a Knife
by Wayne Goddard
My experience has taught me that there's nothing like digging in and getting started. I've often said the hardest part of the...




